



If your squats turn into a quad-only survival exercise, your glutes probably need a wake-up call.
That is where glute activation exercises before workouts earn their keep. Not by frying your legs with a mini burnout, and not by making you sweat through a shirt before the bar even leaves the rack. Their job is smaller and smarter: remind the glute max to extend the hip, remind the glute medius to steady the pelvis, and make the first hard set feel less awkward.
The mistake people make is treating every warm-up drill like a test of toughness. A handful of clean reps, done with control, usually beats 40 sloppy ones. If you finish the warm-up breathing hard and your hips feel dull, you did too much. If the first squat or deadlift set feels smoother and more planted, you did enough.
A useful rule: choose one drill that wakes up hip extension, one that steadies the outside of the hip, and one that helps you feel balanced on a single leg. Keep the whole thing short. Keep it honest.
1. Glute Bridges
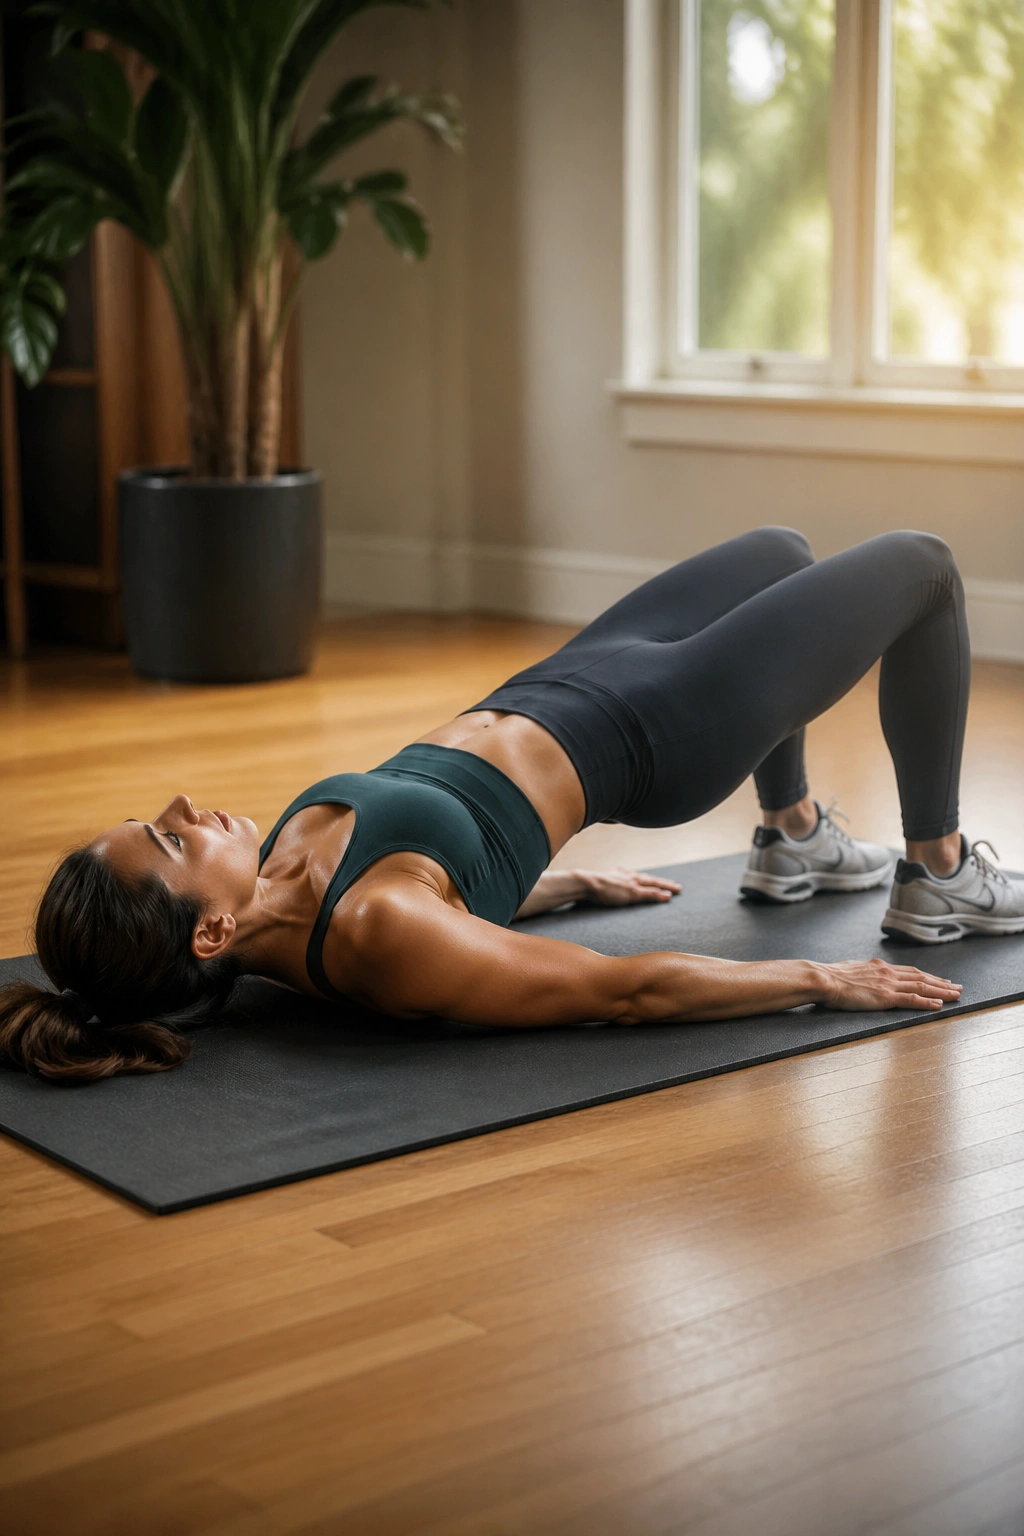
Why do glute bridges show up in so many lower-body warm-ups? Because they give you hip extension in a position that’s easy to control. You’re lying on the floor, the load is your bodyweight, and the feedback is immediate. If you feel the work in your hamstrings or lower back instead of your butt, the setup is off.
Why They Work
A good bridge teaches the glute max to do its main job: drive the hips up without turning the low back into a crank handle. That matters before squats, deadlifts, and lunges because the glutes should help move the pelvis, not just look busy while the quads do everything.
The rep should feel clean. Feet planted, ribs down, slight exhale, then lift until your body makes a straight line from shoulders to knees. No need to shove your hips to the ceiling like you’re trying to clear a hurdle.
How to Feel It in the Right Spot
- Set your feet about hip-width apart.
- Bring your heels close enough that your shins are near vertical at the top.
- Press through the heels and midfoot, not the toes.
- Exhale as you lift so your ribs don’t flare.
- Pause for 1 to 2 seconds at the top and squeeze hard.
- Lower under control instead of dropping your hips.
One small detail makes a big difference: if your hamstrings cramp, walk your feet a few inches closer to your hips. That simple change often shifts the load where it belongs. Bridges are not fancy. They just work when you stop rushing them.
For most lifters, 10 to 15 slow reps is enough. If you want a little more, add a mini band above the knees and gently press out as you rise. Don’t turn it into a circus. The point is to feel your glutes switch on, not to chase a burn for its own sake.
2. Banded Lateral Walks for Glute Activation
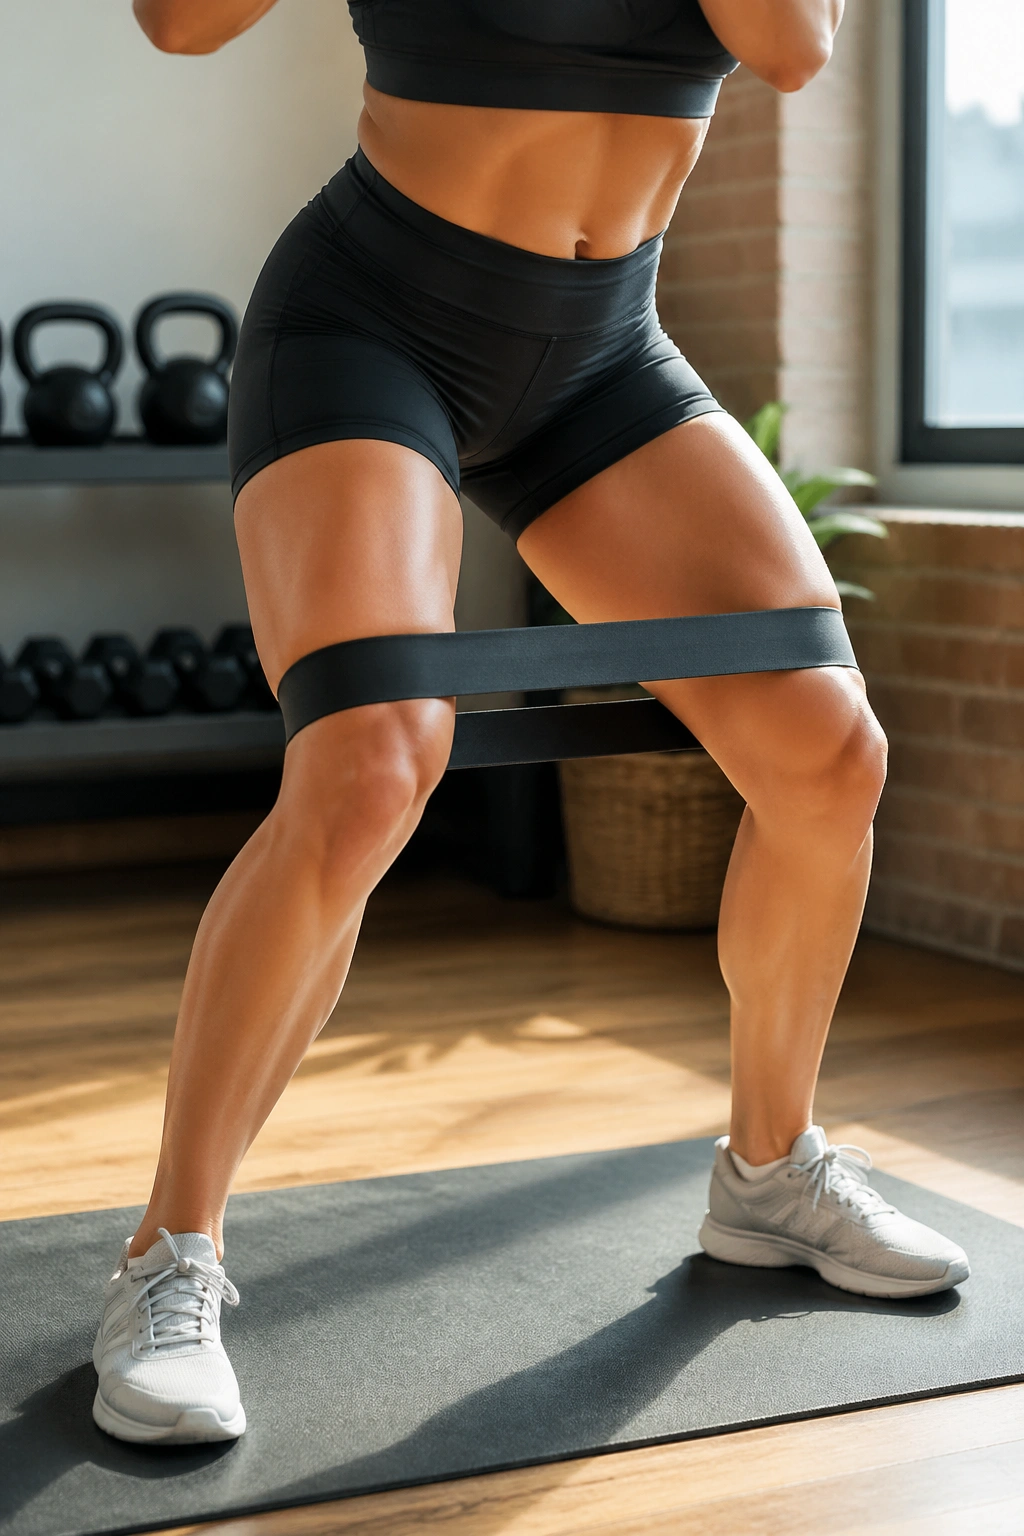
Banded lateral walks look boring. They’re not.
A light band around the thighs or ankles can wake up the glute medius fast, and that matters if your knees cave inward on squats or your hips wobble on single-leg work. The movement is small, which is part of the appeal. You’re asking the side of the hip to stay engaged while you step, brace, and resist the band pulling your legs together.
The setup is half the battle. Sink into a shallow athletic stance, keep your chest proud but not arched, and take short steps to the side. If you start swaying your torso or taking giant steps, you’ve already lost the point.
What Good Reps Feel Like
- The outside of the hips should light up first.
- Your feet should stay pointed mostly forward.
- Your knees should stay soft, not locked out.
- Your pelvis should stay level instead of rocking side to side.
- Each step should keep tension on the band.
That last part matters. Tiny steps beat dramatic ones. If the band goes slack every time you bring your feet together, you’re just walking sideways with decoration.
I like these before squats, step-ups, and any workout where knee tracking matters. Two sets of 8 to 12 steps each way is plenty. Put the band above the knees if you want an easier version. Move it to the ankles if you want more challenge and better control.
3. Clamshells
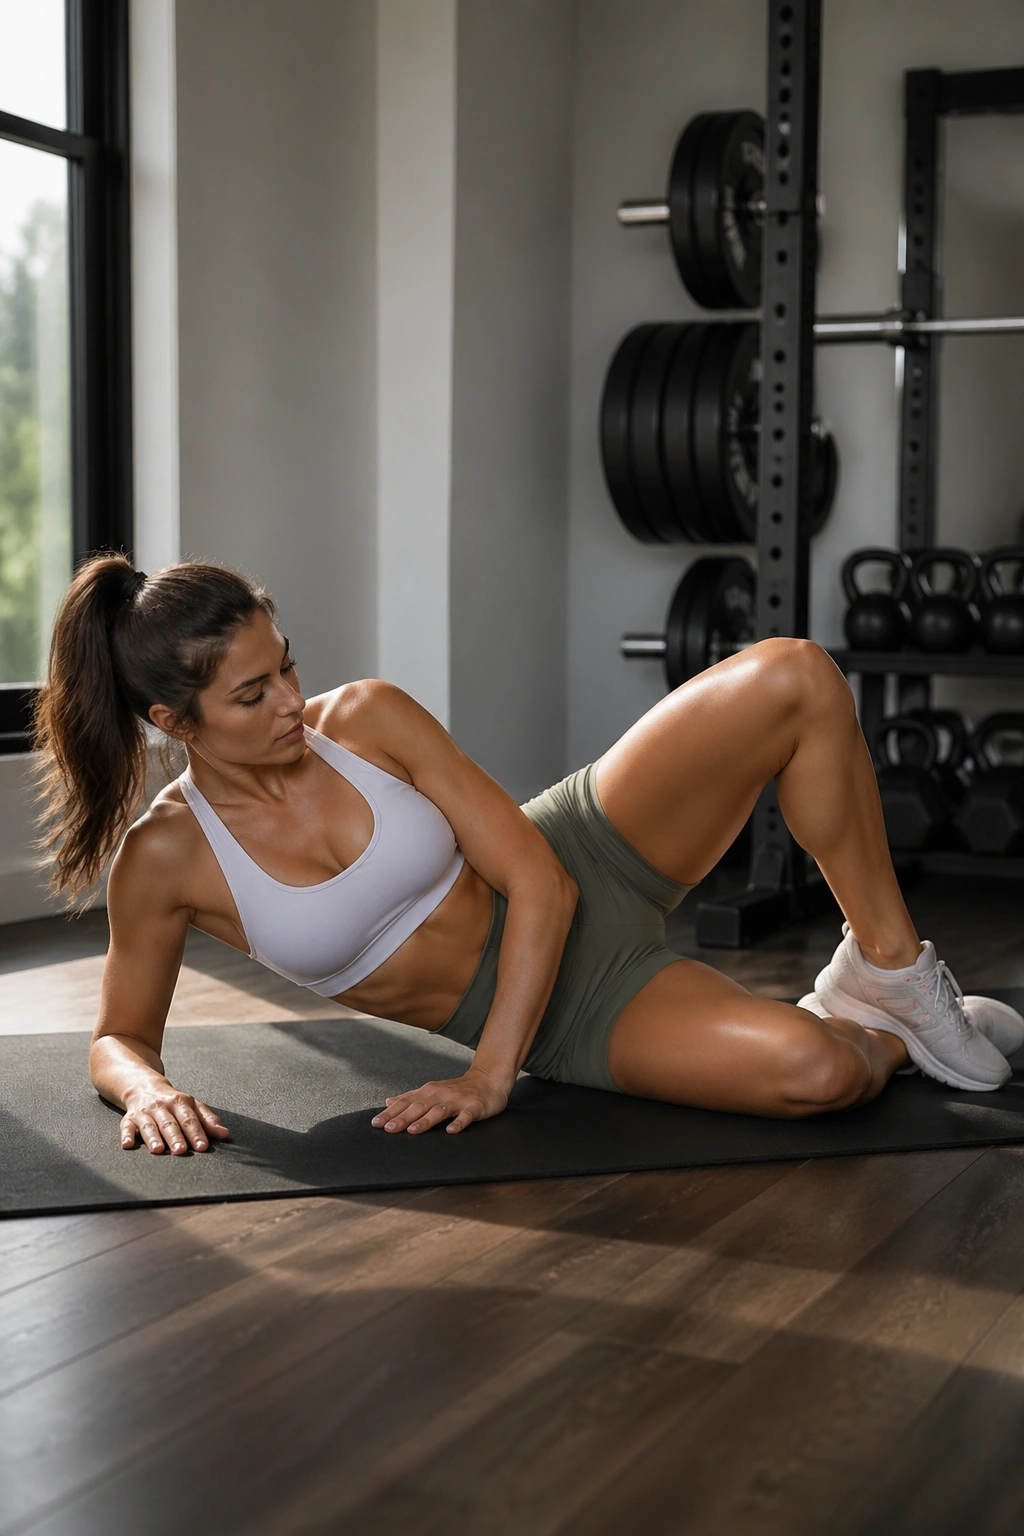
A lot of people treat clamshells like a tiny side-lying leg raise, then wonder why they feel it in the front of the hip. That’s usually a sign the pelvis rolled back and the movement got sloppy. The real work should come from the side of the hip, with the torso staying stacked and quiet.
Clamshells are a classic glute activation drill for a reason. They ask the glute medius to externally rotate the hip without much help from momentum. That makes them useful before split squats, running, lateral lunges, and anything else that needs one leg to stay steady while the other leg moves.
What to Watch For
- Keep your heels together and knees bent.
- Do not roll your top hip backward to cheat the range.
- Open only as far as you can without losing stack.
- Move slowly enough that you can feel the side hip working.
- Add a mini band above the knees only after bodyweight feels easy.
If the movement turns into a twist, the rep is junk. Shorter range, cleaner shape. That is the fix.
A Better Way to Use Them
Try 12 to 20 reps per side, with a 1- to 2-second pause at the top. If you want to make them more useful before a workout, pair them with a bridge or a short set of bodyweight squats. They’re not the flashiest drill on the floor. They’re the quiet one that keeps your hips honest.
One more thing: don’t chase a huge opening angle. People love that mistake. A small, controlled rep with a clear contraction beats a wide, wobbly one every time.
4. Frog Pumps for a Glute Activation Warm-Up
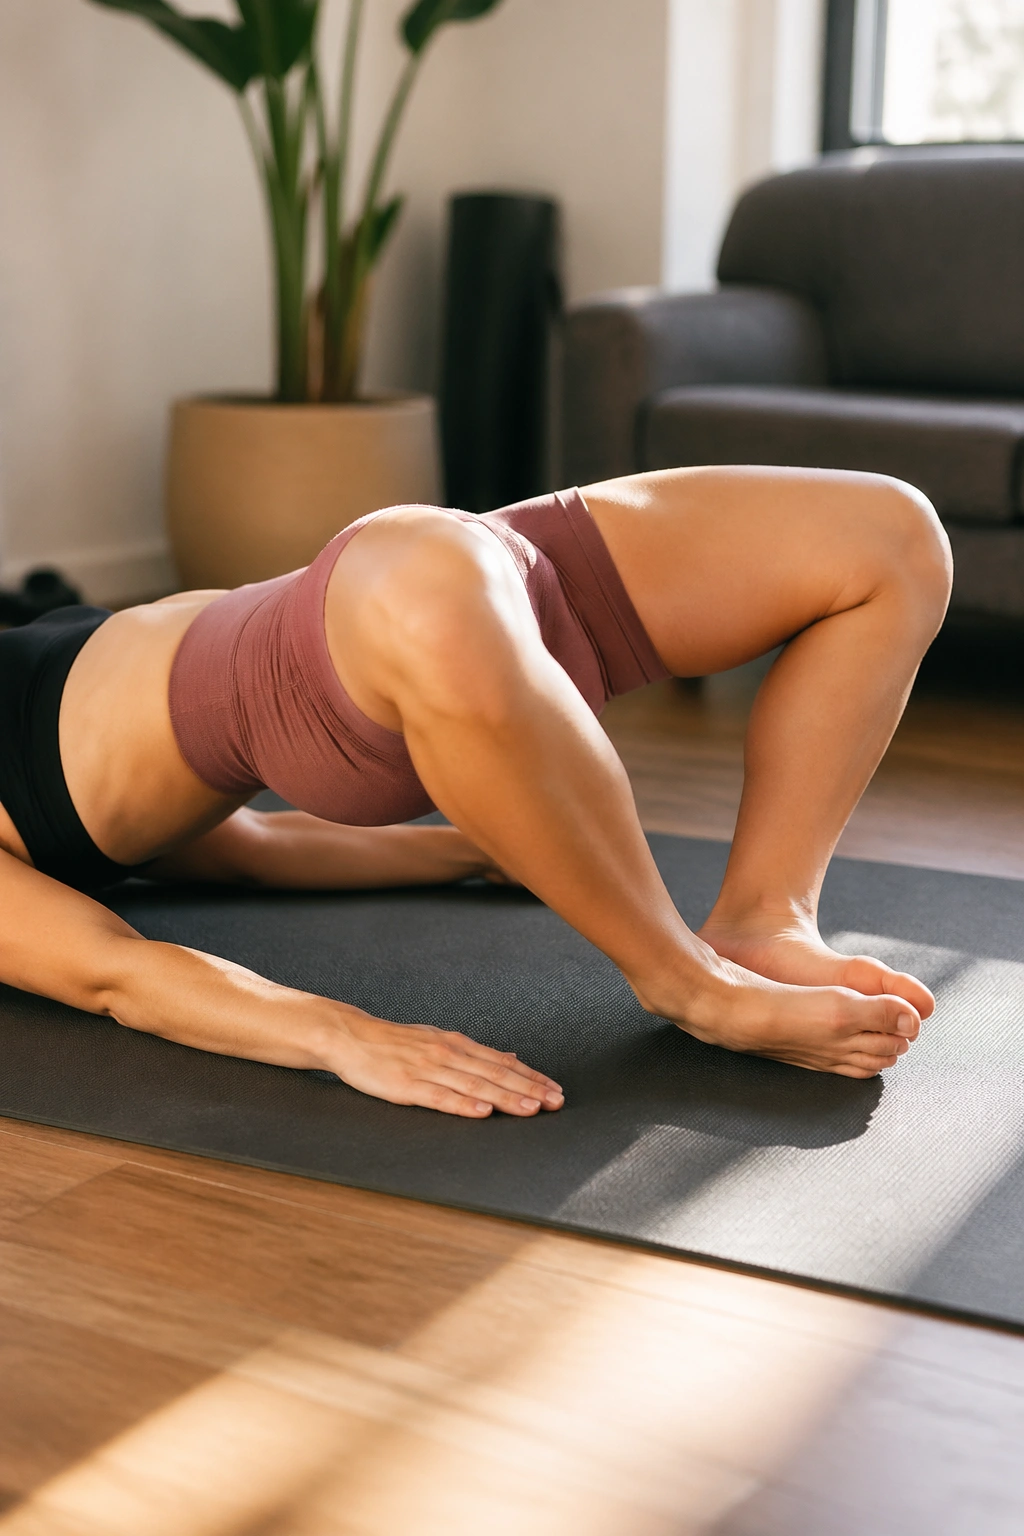
Do frog pumps deserve the goofy name? Honestly, yes.
They also deserve the slot in your warm-up. This drill puts the hips in a flexed, externally rotated position that makes the glutes easy to feel, especially if your hamstrings tend to dominate bridges or your lower back likes to steal the show. You lie on your back, bring the soles of your feet together, let the knees fall open, and pump the pelvis in short, controlled reps.
How to Set Them Up
- Lie on your back with your feet together.
- Bring your heels in close, almost under your knees.
- Let the knees drop outward naturally.
- Tuck the pelvis slightly before you start.
- Lift the hips in short pulses, then lower with control.
The movement should feel like small, repeated squeezes at the top, not a full bodybuilding hip thrust. If you arch hard through the low back, you’ve gone too far. If you barely feel the glutes, bring your heels closer to your body and shorten the range a little.
How to Use Them Before Heavy Lifts
- 20 to 30 reps is a solid starting point.
- 1 to 2 sets is usually enough.
- Add a band above the knees if bodyweight feels too easy.
- Stop before the hips start cramping or the neck gets tense.
Frog pumps are especially handy before deadlifts, hip thrusts, and glute-focused leg days. They are not for max effort. They’re for waking the glutes up fast, getting some blood moving, and finding that contract-and-release rhythm before the work gets heavy.
5. Fire Hydrants
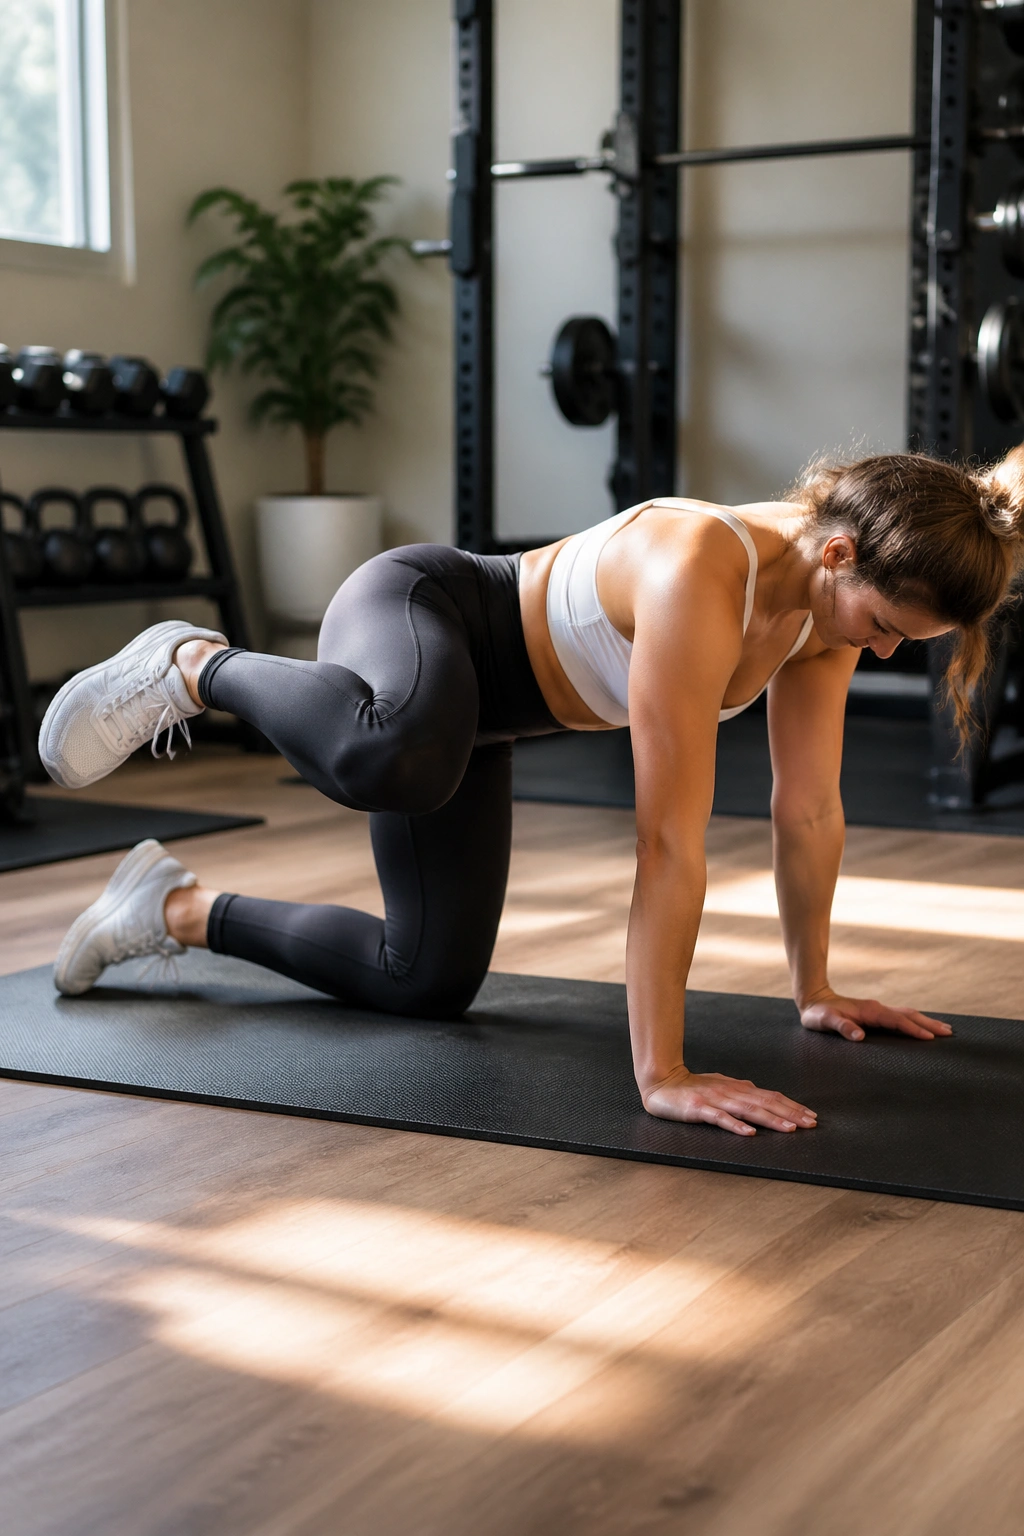
Fire hydrants are one of those drills people rush through, and that’s a shame. Done well, they teach the glute medius to move the leg away from the body while the pelvis stays mostly still. Done badly, they turn into a lower-back twist with a bent knee attached to it.
The start position is simple: hands under shoulders, knees under hips, spine neutral. From there, lift one knee out to the side without shifting your weight or hiking the hip. The range does not need to be huge. In fact, a smaller range is often better because it keeps the movement honest.
The feel should land on the outside of the hip. Not the front of the hip socket. Not the lower back. Just that side-glute area that so many people ignore until lunges start feeling messy.
Short range beats crooked range.
If you want to make fire hydrants more useful before a workout, slow the lift and pause for a beat at the top. Eight to 12 reps per side is a sensible target. You can also loop a light band above the knees, but only if you can still keep the pelvis from rolling and the shoulders from shifting around.
I like these before running, single-leg training, and deep squat days. They’re not dramatic, which is part of the point. They give you a clean shot at glute activation without tiring you out before the real session starts.
6. Bird Dogs
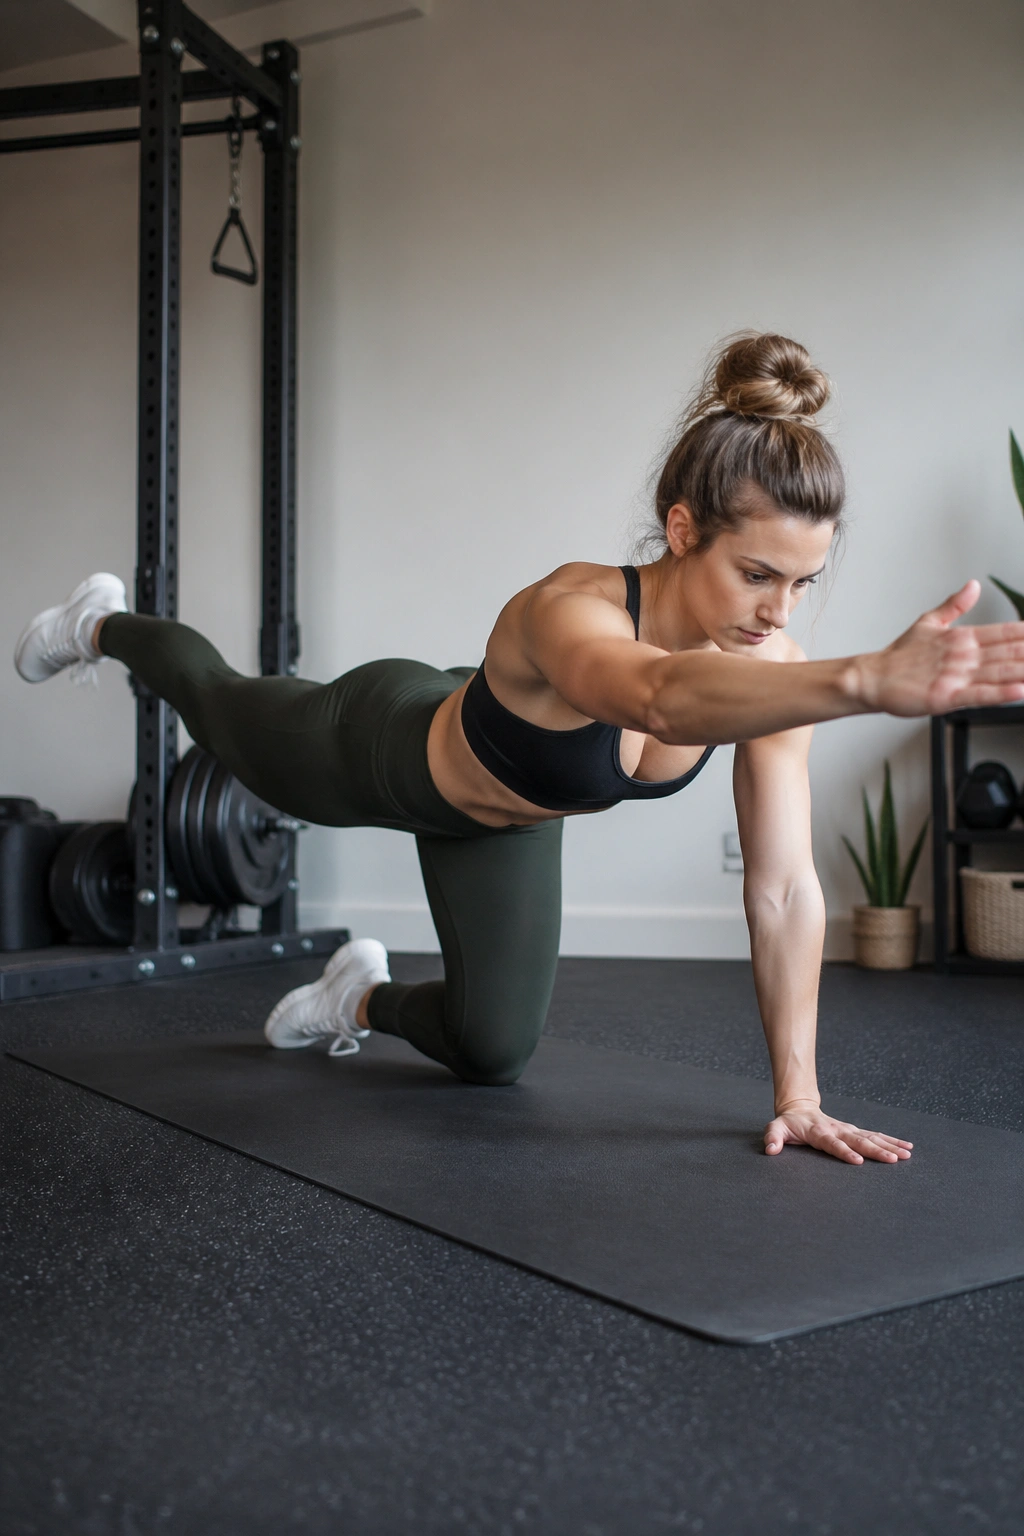
Compared with big, flashy hip drills, bird dogs are almost stubbornly quiet. That’s why they’re useful.
This move looks more like a stability exercise than a glute drill, and that’s exactly why it belongs in a smart warm-up. You reach one arm forward and the opposite leg back, then keep the hips level while the glute of the back leg does its job. There’s no swinging, no twisting, no rush to the finish. Just control.
Bird dogs shine before deadlifts, Romanian deadlifts, and any workout where your lower back tends to take over. They teach you to extend the hip while holding the torso steady, which is a helpful skill when you’re about to load a hinge pattern. If your back arches during every bridge or kickback, this one is worth your time.
Why Bird Dogs Earn Their Place
- They train hip extension and trunk control together.
- They expose side-to-side differences fast.
- They’re easy to scale down if you’re stiff or tired.
- They don’t need a band, bench, or special setup.
A clean bird dog is not a big reach. Reach the heel long, keep the ribs quiet, and hold for 2 to 3 seconds before returning. Six to 8 reps per side is enough for most warm-ups. If you can’t keep the pelvis level, shorten the range and slow down. There’s no prize for a bigger sweep if the movement turns sloppy halfway through.
7. Quadruped Kickbacks
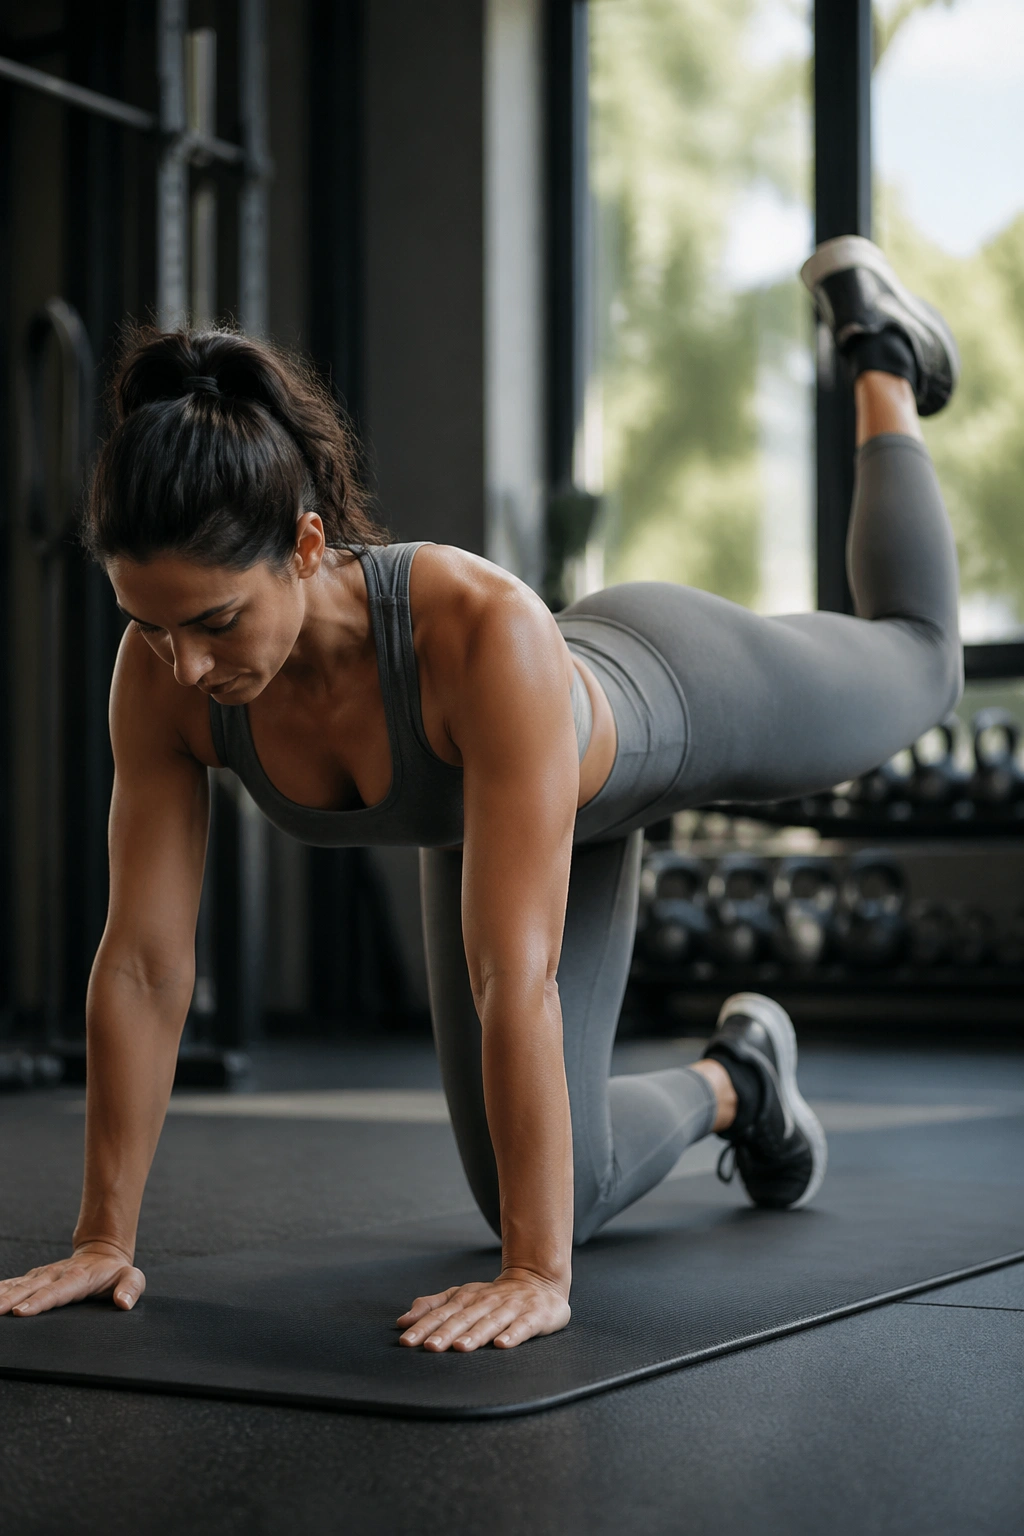
A kickback done well feels like a slow squeeze, not a swing.
That’s the whole story, really. On all fours, you bend one knee and drive the heel up and back with the glute, while the torso stays still and the low back refuses to help. It sounds simple because it is simple. The hard part is refusing to cheat with momentum.
Quadruped kickbacks are a nice bridge between isolated glute work and harder lower-body training. They’re helpful before glute bridges, step-ups, or split squats because they reinforce the feeling of extending through the hip instead of hinging everything through the spine.
Common Form Traps
- Don’t throw the leg upward.
- Don’t crane the neck to look at the moving leg.
- Don’t let the low back arch hard at the top.
- Keep the hips square to the floor.
- Stop the rep when the pelvis starts to rotate.
A good kickback usually needs a smaller range than people expect. Ten to 15 slow reps per side is enough, especially if you add a 1-second squeeze at the top. If you feel the hamstring grabbing first, soften the bend in the knee and make the lift smaller. If you feel the lower back pinch, reset and brace a little harder before the next rep.
This drill rewards patience. Move slowly, and the glute lights up. Rush it, and the whole thing turns into a cheap leg swing.
8. Banded Monster Walks
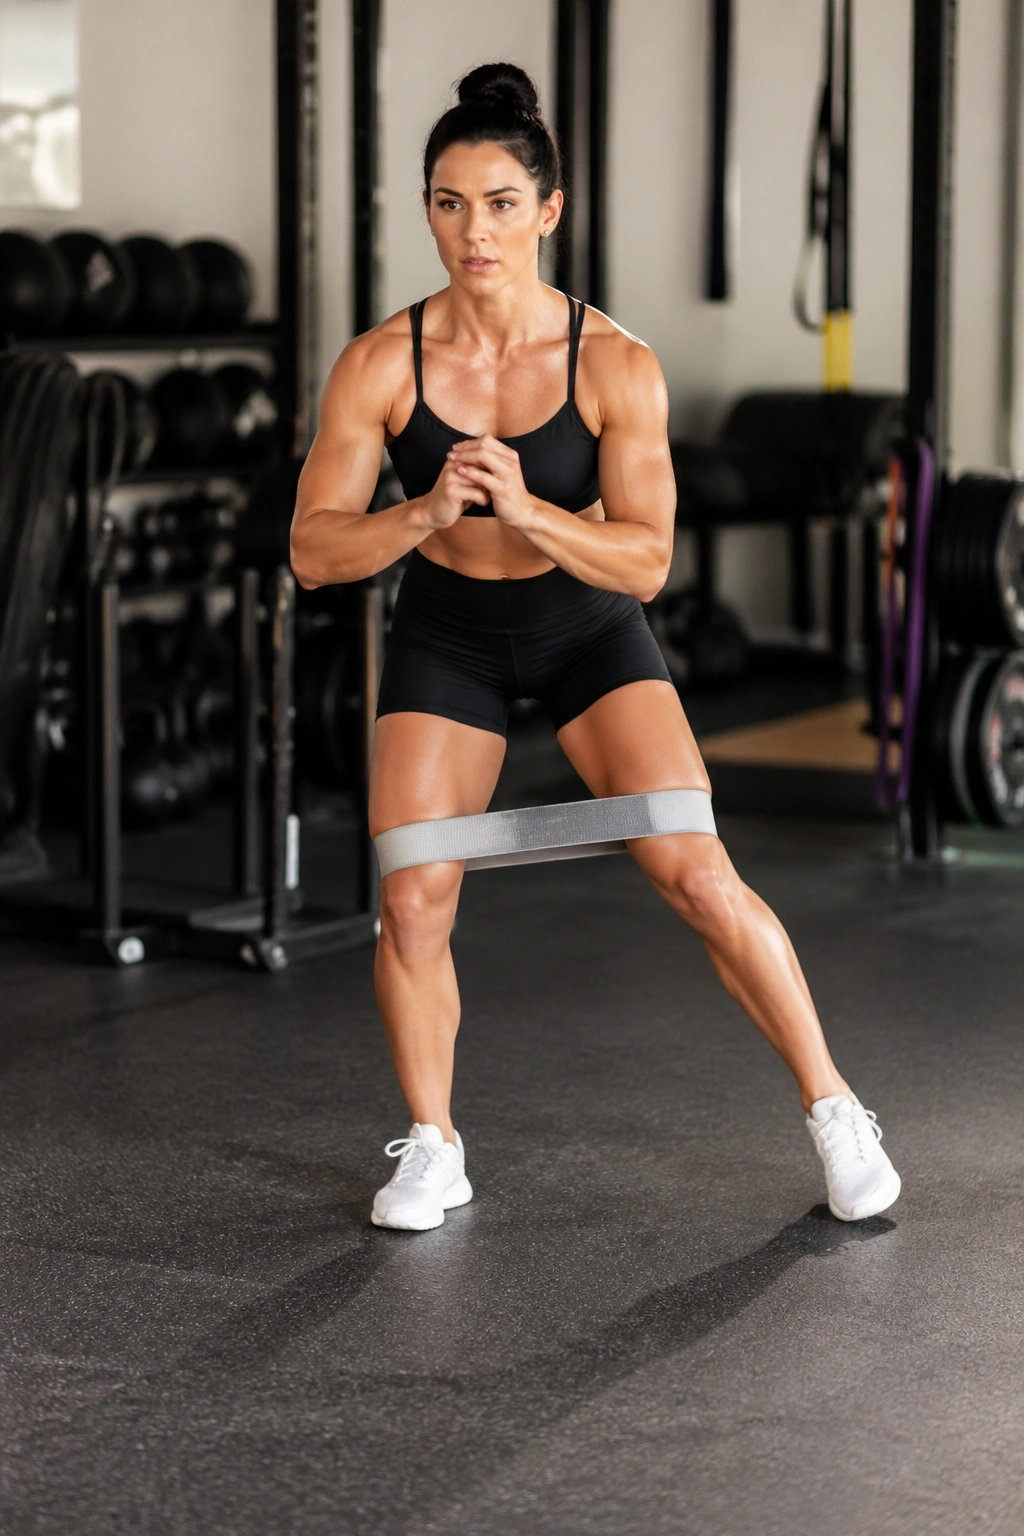
Monster walks are one of the few drills that can wake up the outside of the hips without lying on the floor.
They work because you combine lateral tension with a slight hinge and steady pressure against the band. That asks the glute medius and upper glute fibers to keep the pelvis and knees from collapsing inward while the feet keep moving. It’s a nice warm-up choice before squats, jumps, lunges, or any workout that asks for clean knee tracking.
What Makes Them Different From Lateral Walks
Lateral walks stay more side-to-side. Monster walks travel forward or backward in a diagonal pattern, which makes them feel more athletic and a little less isolated. I like lateral walks when the goal is a direct hit to the outer hip. I like monster walks when the workout ahead has more movement, more change of direction, or more load.
The stance should stay low enough to create tension, but not so low that your quads burn out first. Keep the chest tall, take controlled steps, and avoid dragging your feet together. If the band snaps your knees inward every time you step, the band is probably too heavy or your stance is too narrow.
A Simple Way to Use Them
- 8 to 10 steps forward
- 8 to 10 steps backward
- 1 to 2 rounds
- Band above the knees for easier work
- Band around the ankles for more challenge
They can feel a little awkward at first. That’s normal. The drill is asking your hips to stabilize while moving, and that is exactly why it helps before real training begins.
9. Single-Leg Glute Bridges for Glute Activation
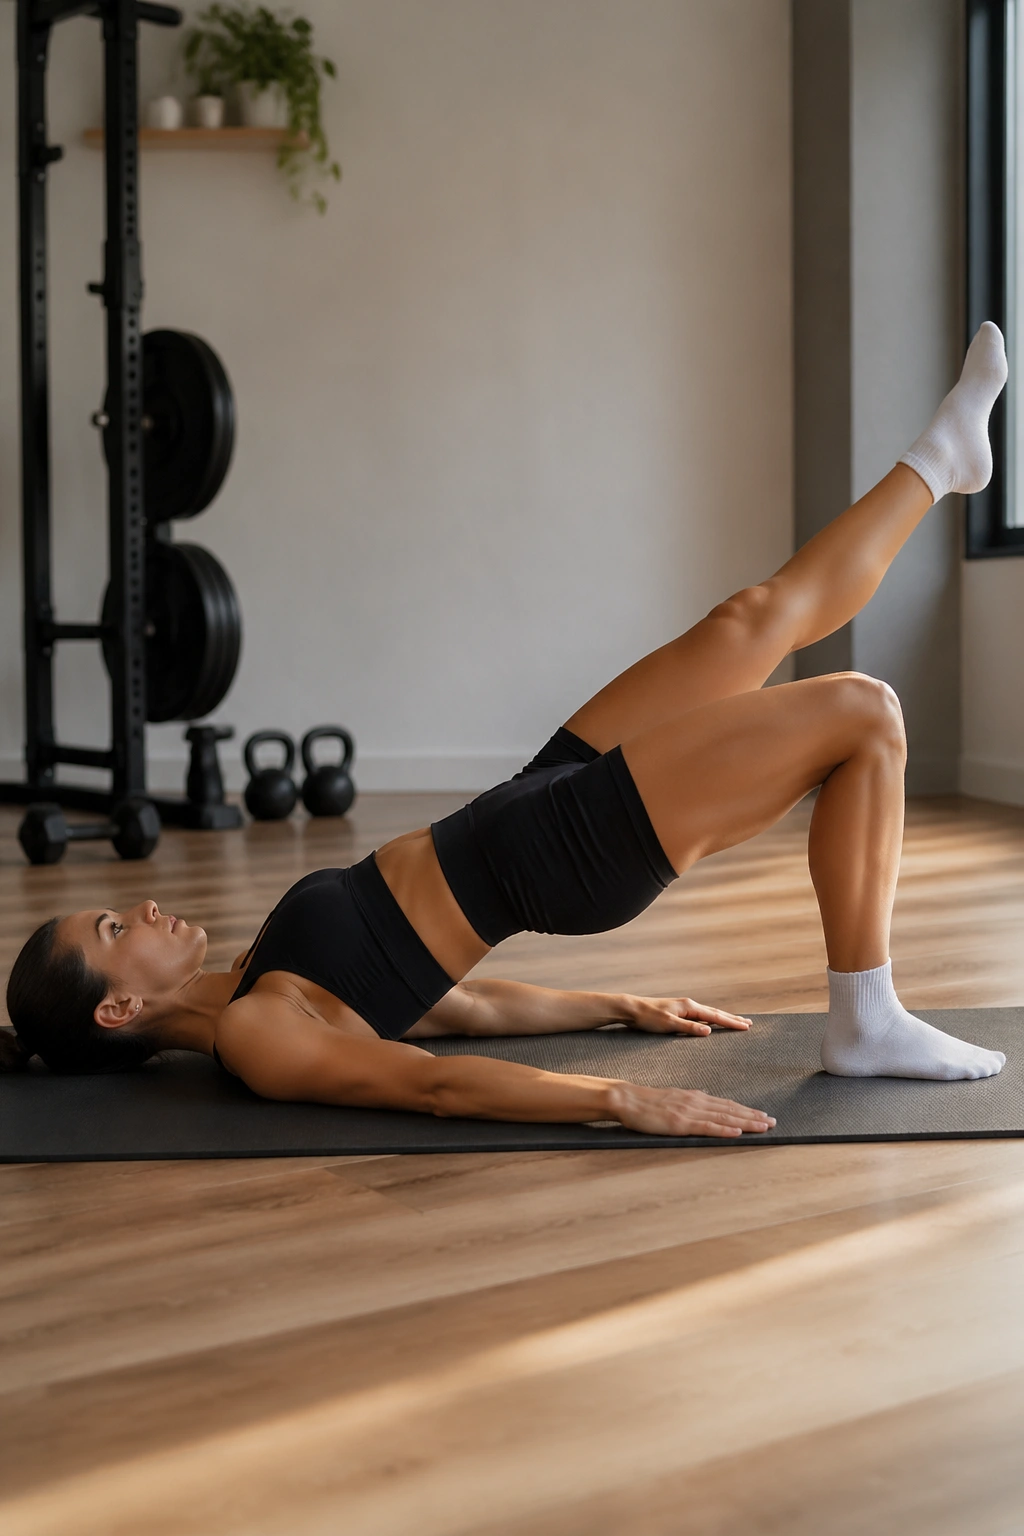
The single-leg glute bridge is the one that tells the truth.
Both sides have to show up, and there’s nowhere to hide. If one glute is slower, weaker, or more asleep than the other, you’ll feel it right away. That makes this drill useful before split squats, step-ups, running, and any lower-body session where side-to-side balance matters.
Start the same way you would for a regular bridge, then extend one leg while the other foot stays planted. Lift the hips by driving through the planted heel, and keep the pelvis level instead of letting one side sag. The rep should feel like one clean line from shoulder to knee on the working side.
Small Setup Details That Matter
- Keep the planted foot close enough that the shin stays roughly vertical at the top.
- Point the free foot or keep the leg relaxed, but do not let it pull your pelvis off-center.
- Lift only as high as you can without arching the lower back.
- Start with 6 to 10 reps per side.
- If the hamstring cramps, bring the foot a little closer and shorten the lift.
A slow hold at the top works well here too. Three seconds is enough to make the glute pay attention. If one side feels much shakier, don’t chase that with endless reps. Use the drill to notice the difference, then keep going with the workout. That information is the point.
This is also one of the better glute activation exercises before workouts when you want a clear bridge to more advanced single-leg work. It’s direct, it’s honest, and it does not care about excuses.
Final Thoughts
You do not need all nine drills before every session. That would be busywork, and busywork is the enemy of a good warm-up. Pick one move that hits hip extension, one that wakes up the side of the hip, and, if the workout calls for it, one single-leg drill that shows you where the weak side is hiding.
A good warm-up leaves you feeling more connected, not more tired. If your glutes are burning hard and your first working set feels sluggish, shorten the warm-up, use fewer reps, or choose drills with less fatigue and more control. That little adjustment usually matters more than adding another band.
The warm-up you actually repeat beats the perfect one you abandon after a week. Keep it short, keep it clean, and let the first real set tell you whether you got it right.
