



Simple leg workouts for beginners do not need a squat rack, a barbell, or a room full of machines.
They need a chair, a step, a little floor space, and enough patience to move with control. That’s the part people miss. A beginner leg day is not about crawling out of the gym with trembling knees and a heroic story. It’s about teaching your body the basics: how to squat, hinge, step, lunge, and drive through the floor without wobbling like you’re learning to walk in boots.
That matters because legs do more than look strong. They carry you, balance you, and protect your knees and hips when you walk up stairs, carry groceries, or get up off the floor. A good beginner routine should hit the quads, glutes, hamstrings, calves, and the smaller stabilizers around the hips. If one of those pieces gets ignored, the whole thing feels clumsy. And yes, that can happen even with bodyweight work.
Start with the moves below and keep the load light at first. Clean reps beat heavy, messy reps every single time.
1. Bodyweight Squat
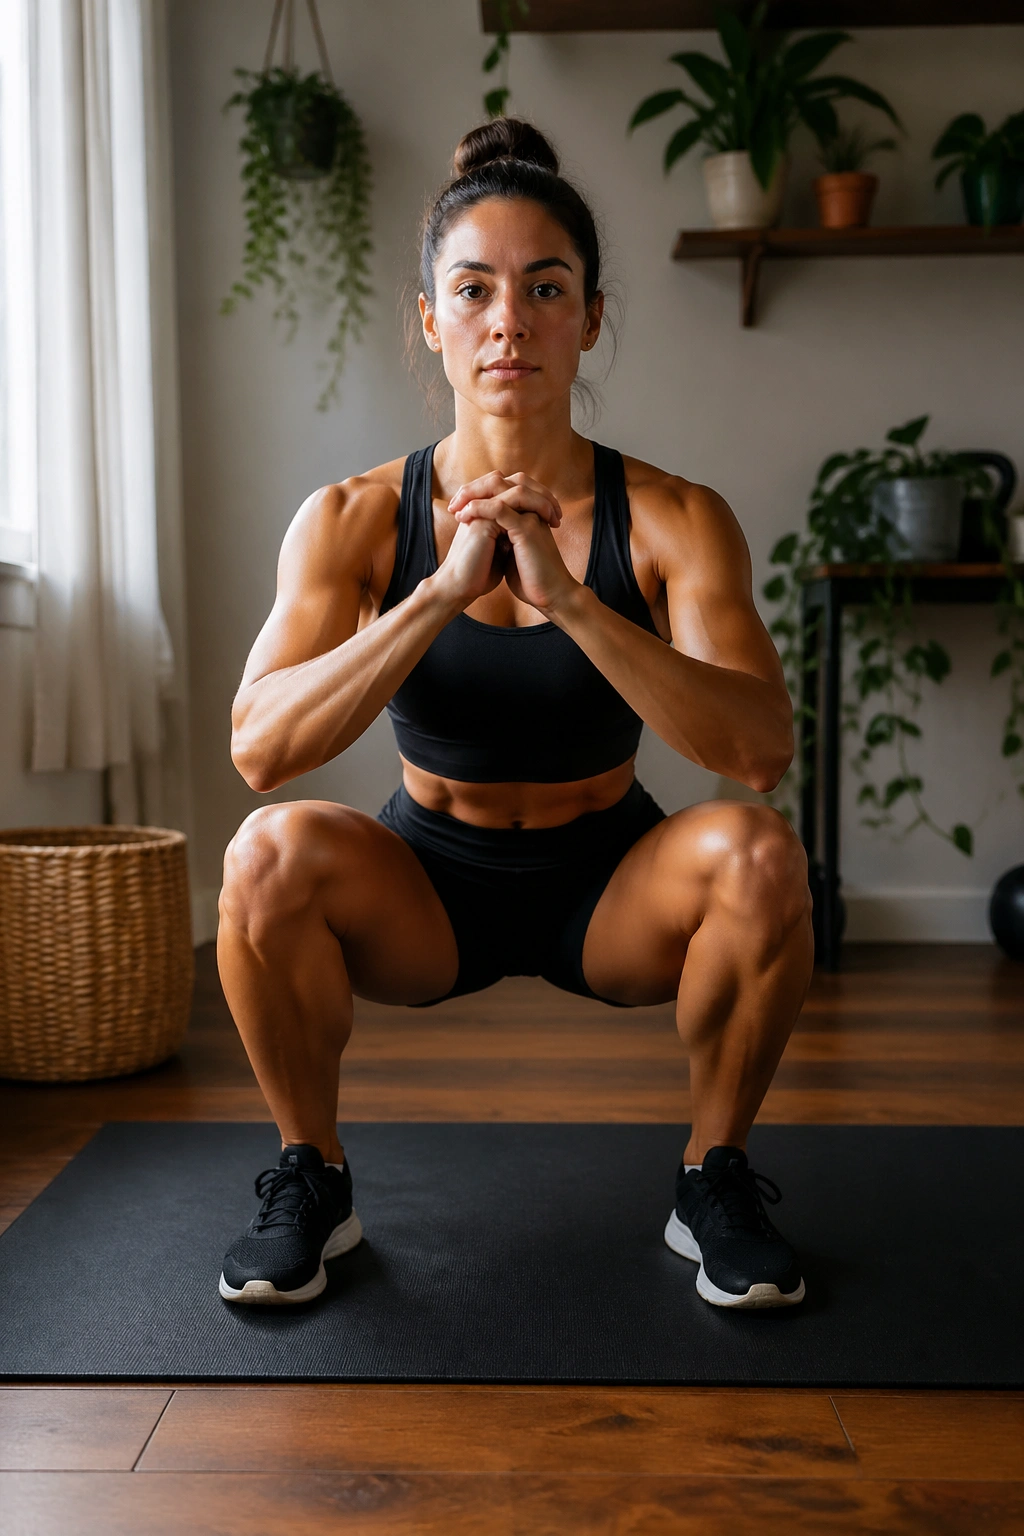
The squat earns the first spot because it teaches the shape almost every other leg exercise borrows from. Feet planted. Hips back. Chest up. Knees bend. Simple on paper, a little humbling in practice.
Why this move belongs at the top
A bodyweight squat trains the quads, glutes, and inner thighs at the same time, which is a nice payoff for one movement. It also shows you where your weak spots are. If you tip forward, your hips may be stiff. If your heels lift, your ankles probably want more room. If you can only go a few inches before your back rounds, a chair squat is a smarter place to start.
Use a chair, couch, or box if needed. Sit down lightly, tap the seat, then stand back up. That small pause helps you learn control without losing confidence. I like this version for beginners because it gives you a target. No guessing. No drama.
How to do it well
- Stand with your feet about shoulder-width apart, toes turned slightly out.
- Brace your stomach as if someone is about to tap you in the ribs.
- Lower until your thighs are close to parallel, or until the chair touches you.
- Keep your heels down and your knees tracking in the same direction as your toes.
- Press through the whole foot as you stand, not just the toes.
Tip: If your heels keep popping up, stop the squat a little higher and work on ankle mobility later. Chasing depth before control is a bad trade.
For a beginner, 2 to 3 sets of 8 to 12 reps is enough. Go slower than you think you need to. A three-second lower, a brief pause, and a smooth stand-up will feel harder than rushing through twenty sloppy reps, which is exactly the point.
2. Glute Bridge
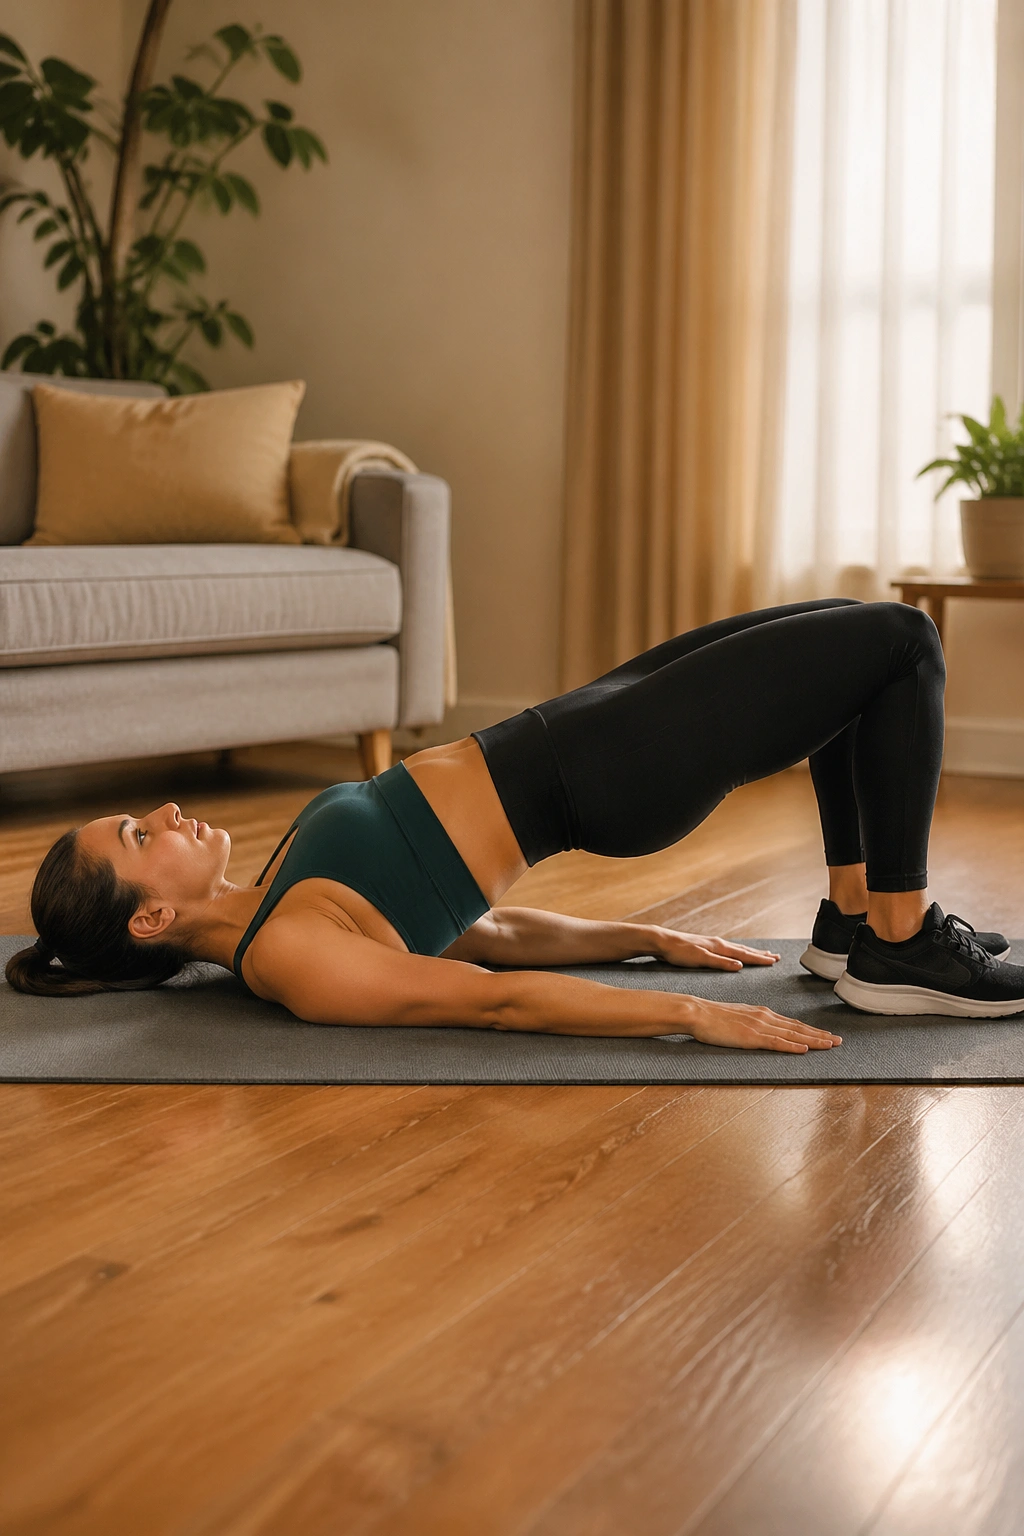
If your glutes tend to stay sleepy, the floor is the easiest place to wake them up.
A glute bridge looks almost too plain to matter. Lie down, bend your knees, lift your hips. That’s it. Yet it does a clean job of teaching hip extension, which is the action your glutes are built for. It also tends to feel friendlier on the knees and lower back than a lot of standing leg work, so beginners usually trust it faster.
Getting the squeeze right
Lie on your back with your feet flat and about hip-width apart. Your heels should be close enough that you can brush them with your fingertips. Too far away, and the hamstrings tend to take over. Too close, and the movement gets cramped.
Lift your hips until your body forms a straight line from shoulders to knees. Pause for a second at the top and squeeze your glutes hard. Not your lower back. That part matters.
A lot of people arch their ribs up and turn the bridge into a back bend. Don’t do that. Keep your ribs down, chin slightly tucked, and think about curling your tailbone toward your heels as you raise up. The movement should feel like the back of your hips is doing the work, not the low spine.
A good beginner setup
- Start with 2 to 4 sets of 10 to 15 reps.
- Hold the top position for 1 to 2 seconds.
- Use a mini-band above the knees only if your knees cave inward.
- Add a dumbbell or backpack across the hips after the bodyweight version feels easy.
Tiny move. Big value. That’s the honest read.
The bridge is also useful because it teaches you to feel the glutes before you ever add more complicated training. Once that connection is there, squats, lunges, and hinges usually feel better too.
3. Reverse Lunge
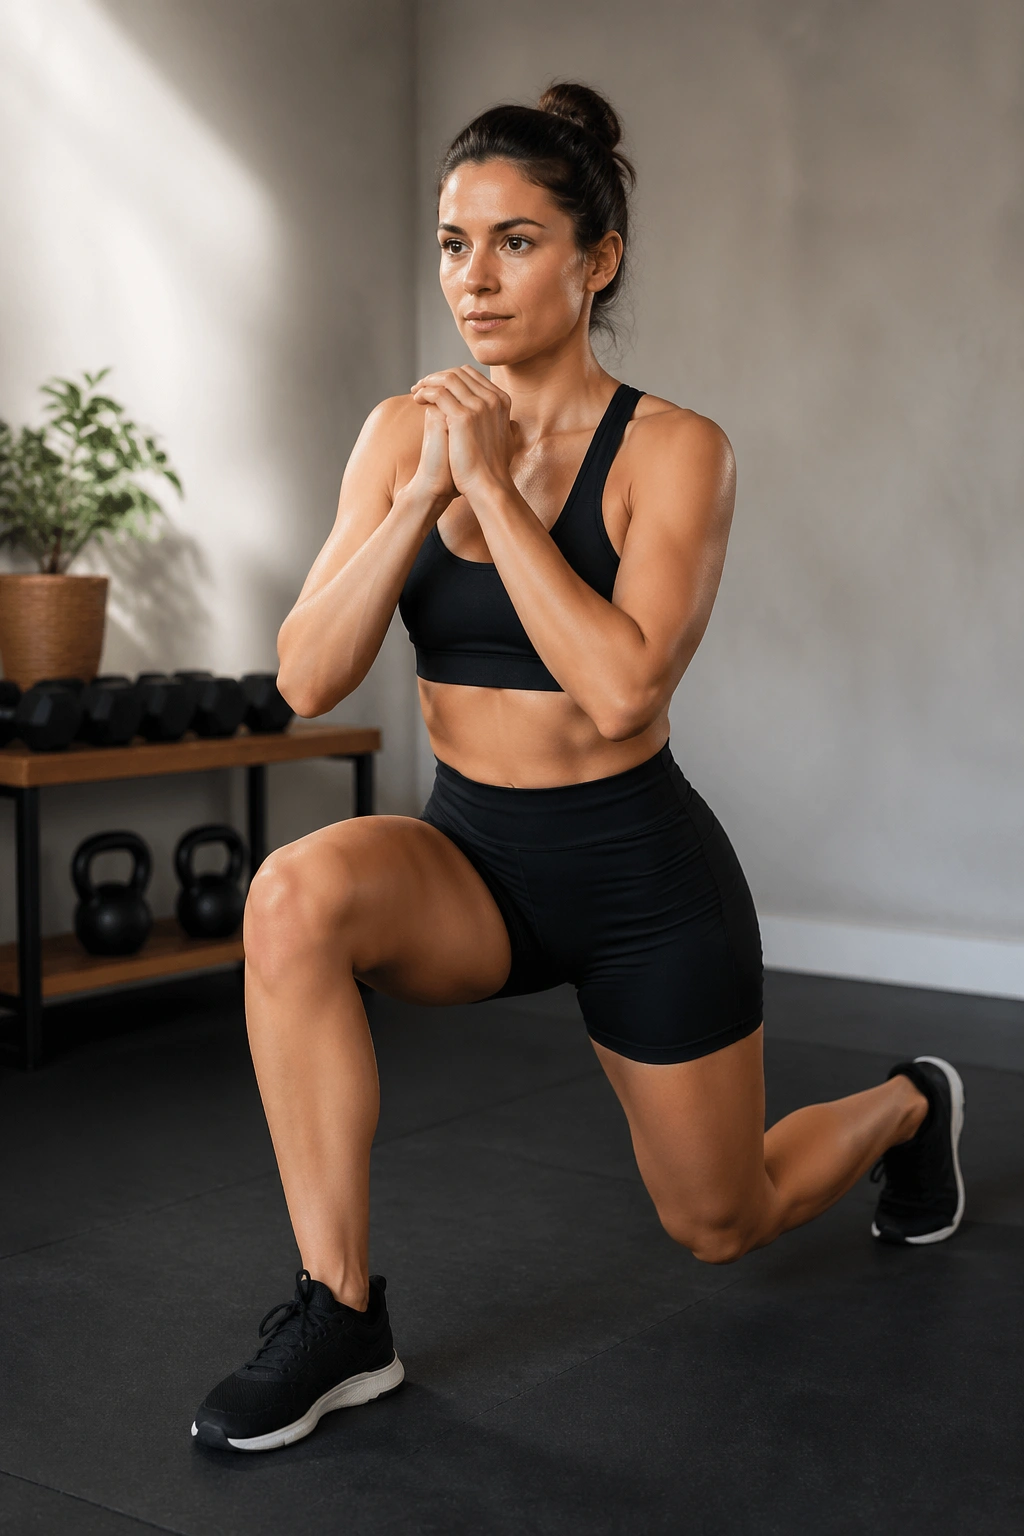
Why step backward instead of forward? Because beginners usually find the reverse lunge easier to control, and easier control means better reps.
You step back, not forward, so your front leg does most of the work while the movement stays a little calmer on the knees. That makes this a smarter starting point than the walking lunge for many people. It also teaches balance without turning the room into a collision course.
How to use it
Start tall, feet hip-width apart. Step one foot straight back, not off to the side. Lower until both knees bend and the back knee floats just above the floor. Then drive through the front heel and stand back up.
The front shin can angle forward a bit, but your front heel should stay down. If your front heel lifts, shorten the step or reduce the depth. A lot of beginners take too long a step back and then wonder why everything feels awkward. Shorter is often better.
A reverse lunge works nicely with bodyweight first, then with dumbbells held at your sides. Keep your torso tall if balance is the main challenge. A slight forward lean is fine once you’re stable, because it lets the glutes help more.
What to watch for
- Don’t push off the back foot too hard.
- Don’t let the front knee collapse inward.
- Don’t rush the descent.
- Keep your hips facing forward.
How to use it: Start with 2 sets of 6 to 8 reps per side. Rest long enough to regain balance. That might be 45 seconds. It might be 90. If your form gets sloppy, you’re resting too little.
Reverse lunges are one of those exercises that look basic until you do them carefully. Then they start to burn in the right places.
4. Step-Up
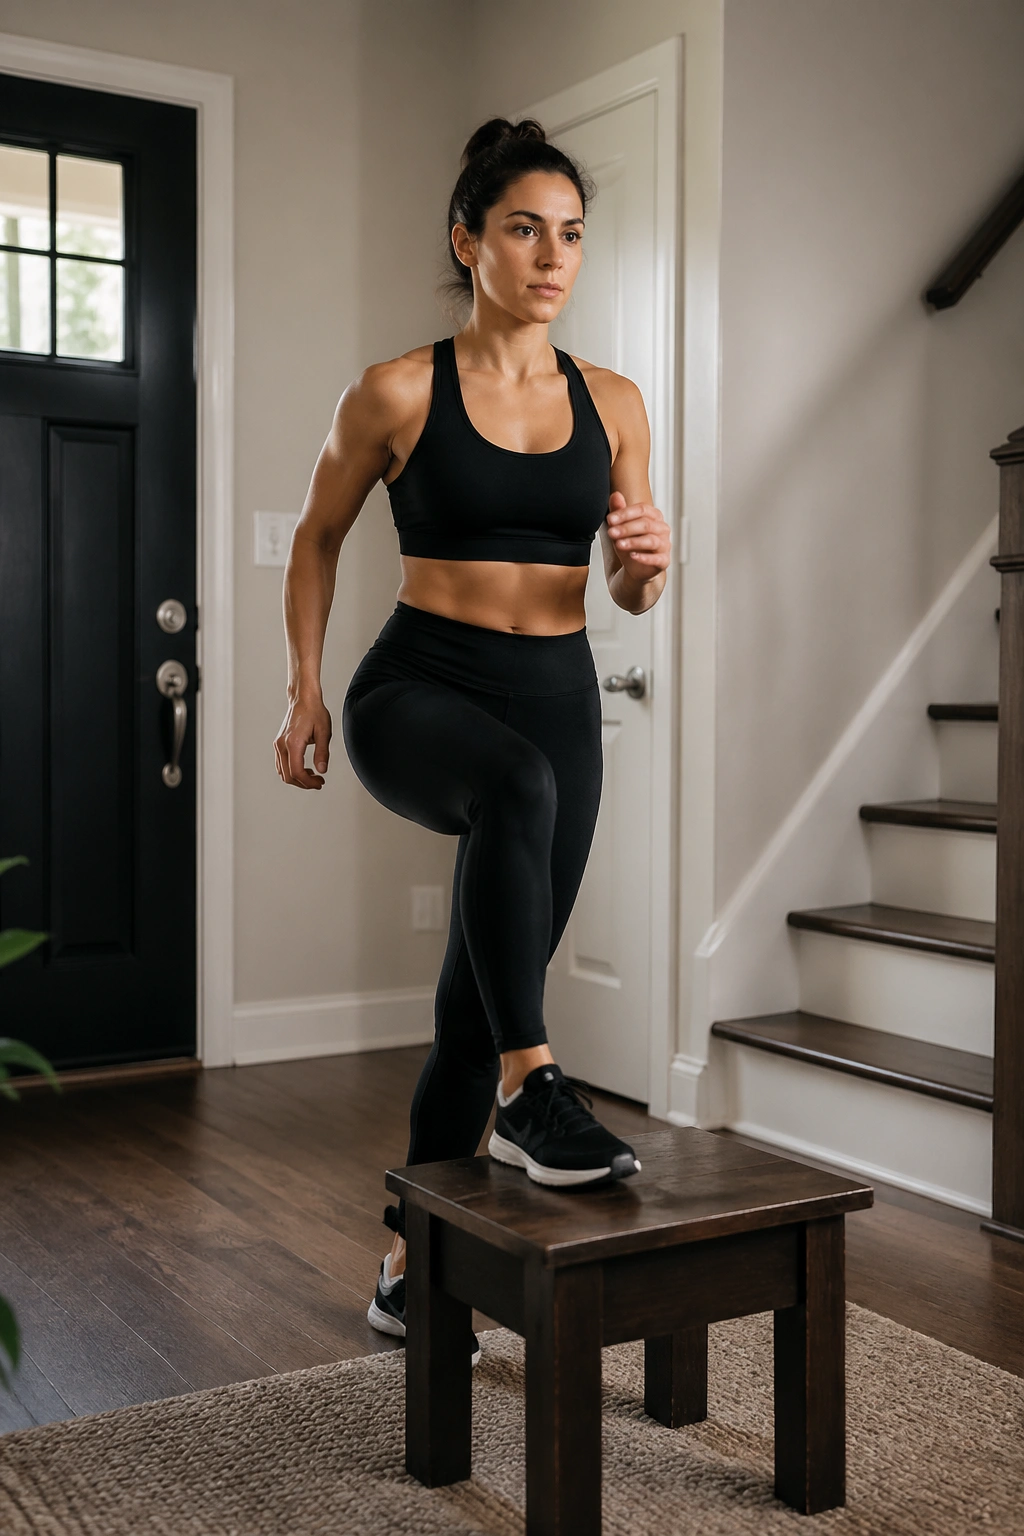
A sturdy step, a low box, or the bottom stair in your house is enough for a good leg session.
Step-ups are one of my favorite beginner leg workouts because they feel practical. You lift your own body the way life asks you to lift your body every day. They hit the quads and glutes, train balance, and force each leg to work on its own. That last part matters more than people realize.
Stand in front of a step that is no higher than your knee at first. Plant one foot fully on top. Press through that whole foot and stand up without bouncing off the back leg. Then lower yourself with control. If you kick off the floor with the trailing leg, the working leg is getting less of the work than you think.
What makes step-ups useful
The movement is one-sided, so the stronger leg cannot quietly steal the job from the weaker one. That’s a good thing. It helps smooth out side-to-side differences, and beginners often discover one leg feels a little shaky on the first few reps. Fine. That tells you something.
Hold onto a wall or railing if balance is the main issue. There’s no prize for making a simple move harder than it needs to be. Start with bodyweight, then add light dumbbells once each rep feels steady.
Quick setup cues
- Use a step height that lets your knee stay below hip level.
- Keep your working foot flat on the step.
- Drive through the heel and midfoot, not just the toes.
- Lower slowly so the down phase does some work too.
A clean set of 2 to 3 rounds of 8 reps per leg is plenty. Step-ups are one of those movements that reward calm effort. No bouncing. No racing. Just solid reps.
5. Wall Sit
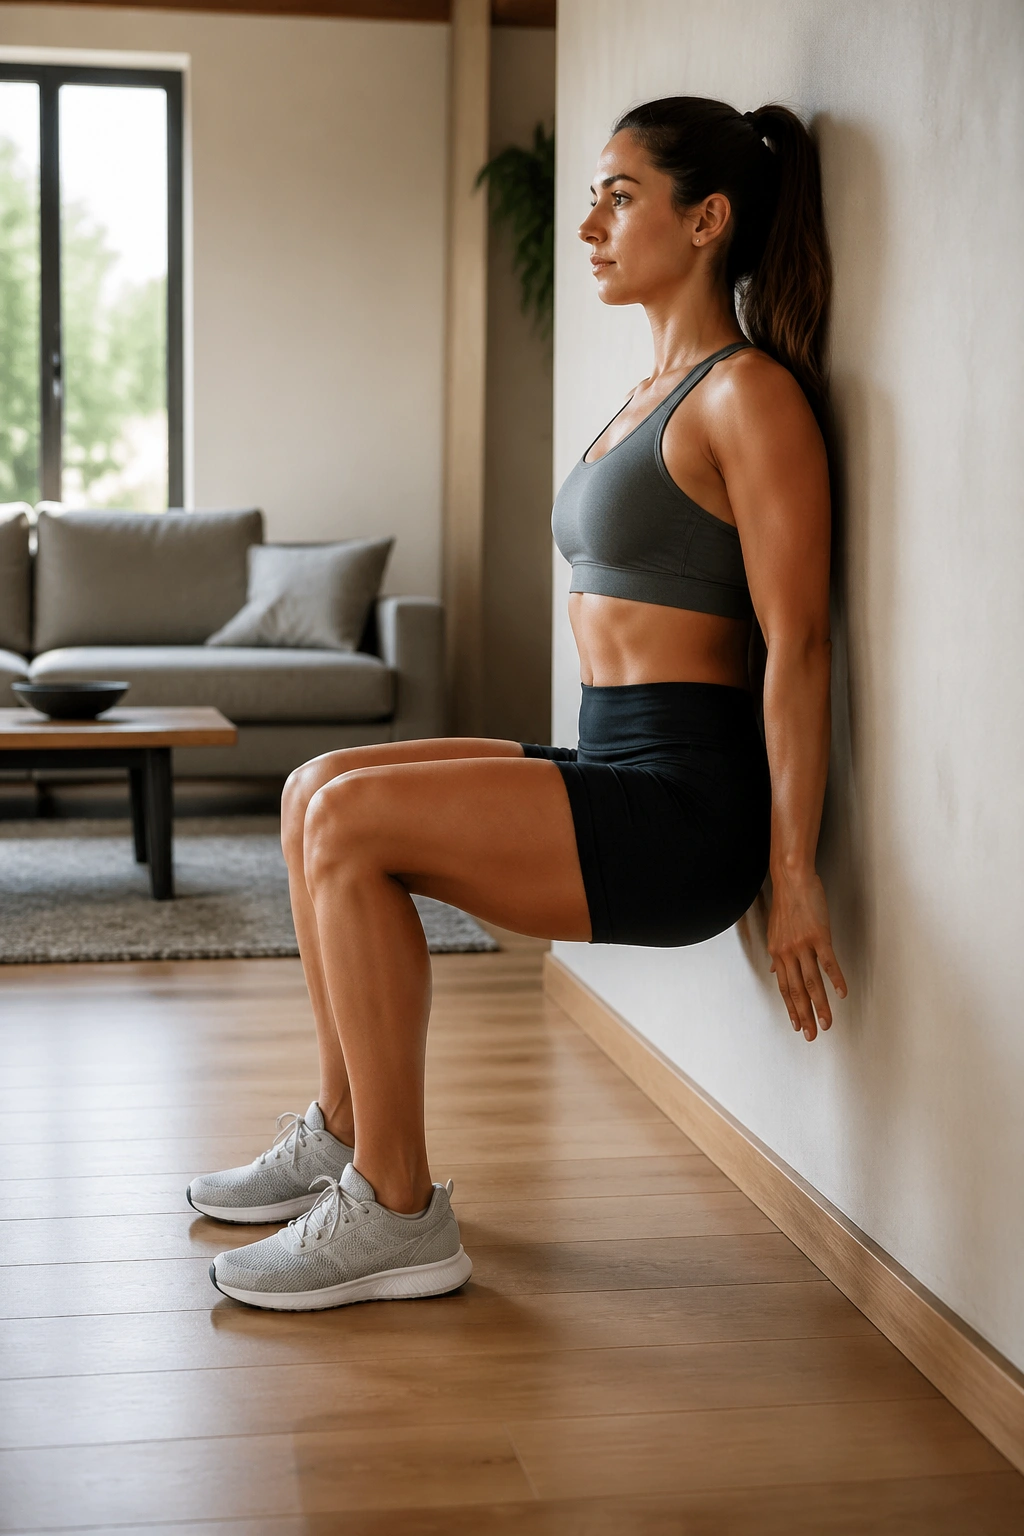
Wall sits look lazy. They are not.
They are one of the bluntest ways to light up the front of the thighs without needing a lot of equipment or a long setup. You lean against a wall, lower into a seated position, and hold. That’s an isometric hold, which means the muscles work without changing length. The burn comes on fast, and beginners usually notice it in the quads before anywhere else.
Why this boring-looking move works
The wall sit teaches leg tension. Not movement. Tension. That can be useful if you want to build endurance in the thighs or if you need a low-skill finisher after your main exercises. It also gives you a clear place to stop, which helps people who are still learning how deep they can squat with good form.
Set your feet about 1 to 2 feet away from the wall. Slide down until your knees are bent roughly at a right angle, or a little higher if that feels kinder on your knees. Your back should stay flat against the wall, and your knees should point in the same direction as your toes. If your knees shake, fine. That is part of the exercise.
Breathe on purpose. People hold their breath in wall sits and make the whole thing feel worse than it needs to. Short exhales help. So does choosing a hold time you can actually finish cleanly.
A better way to begin
Start with 3 rounds of 20 to 30 seconds. If that feels easy, push toward 45 seconds before you add more time. You can also hold a light plate, book, or dumbbell on your lap later, but only after the basic hold feels solid.
Burn counts. So does posture.
6. Sumo Squat
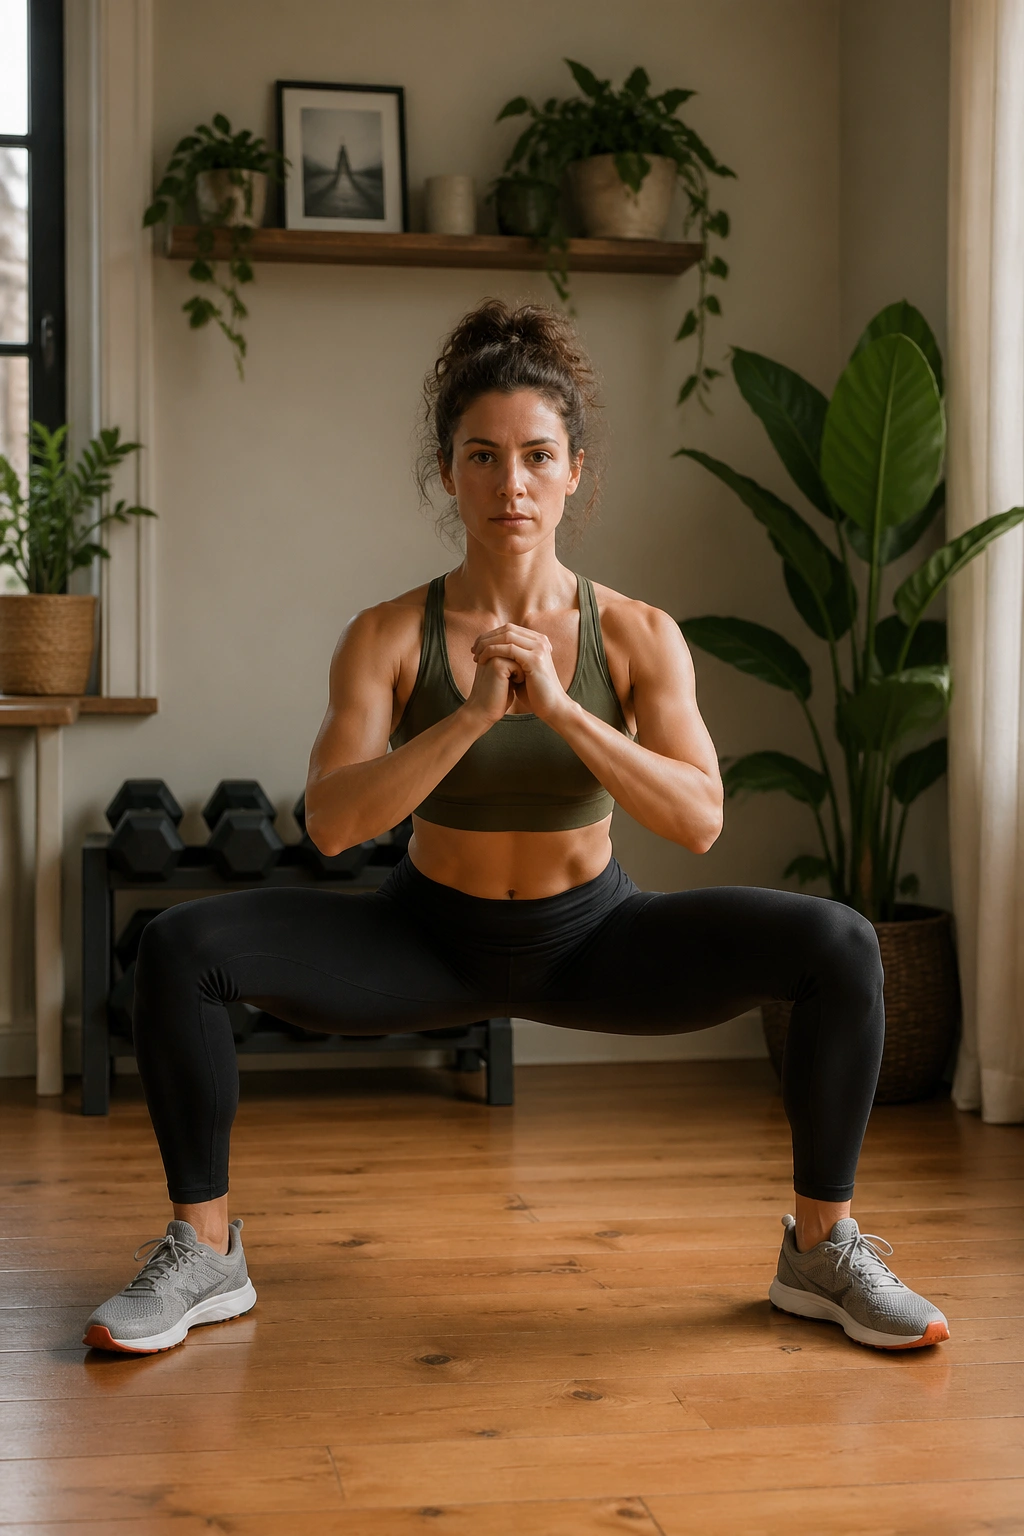
A narrow squat and a sumo squat do not feel the same in the hips. That difference is the whole point.
With a wider stance and toes turned out, the sumo squat shifts more work into the glutes and inner thighs while still hitting the quads. It can feel friendlier for some beginners because the upright torso is easier to keep than in a tight, deep squat. For others, the wide stance feels awkward at first. That’s normal. Your hips may need a few sessions to stop complaining.
What changes when your stance widens
The feet start wider than shoulder width, and the toes point out about 15 to 30 degrees. From there, you sit straight down between your legs rather than folding forward. Think “drop the hips” instead of “reach the chest to the floor.”
That small shift matters because the movement pattern changes the stress. The inner thighs have more to do. The glutes stay active. The knees still need to track over the toes, not collapse inward. If the stance is so wide that your knees feel pinched, shrink it a little. Wider is not automatically better.
How to make it work
- Keep both heels planted.
- Lower only as far as you can keep your back neutral.
- Press the floor apart slightly as you stand.
- Try a dumbbell or kettlebell held at chest height once bodyweight feels easy.
Best for: beginners who want a squat variation that feels a little more hip-driven and a little less quad-dominant.
I also like sumo squats as a simple way to bring a new feeling into a basic leg routine. Same family, different emphasis. That change keeps training from turning stale.
7. Split Squat
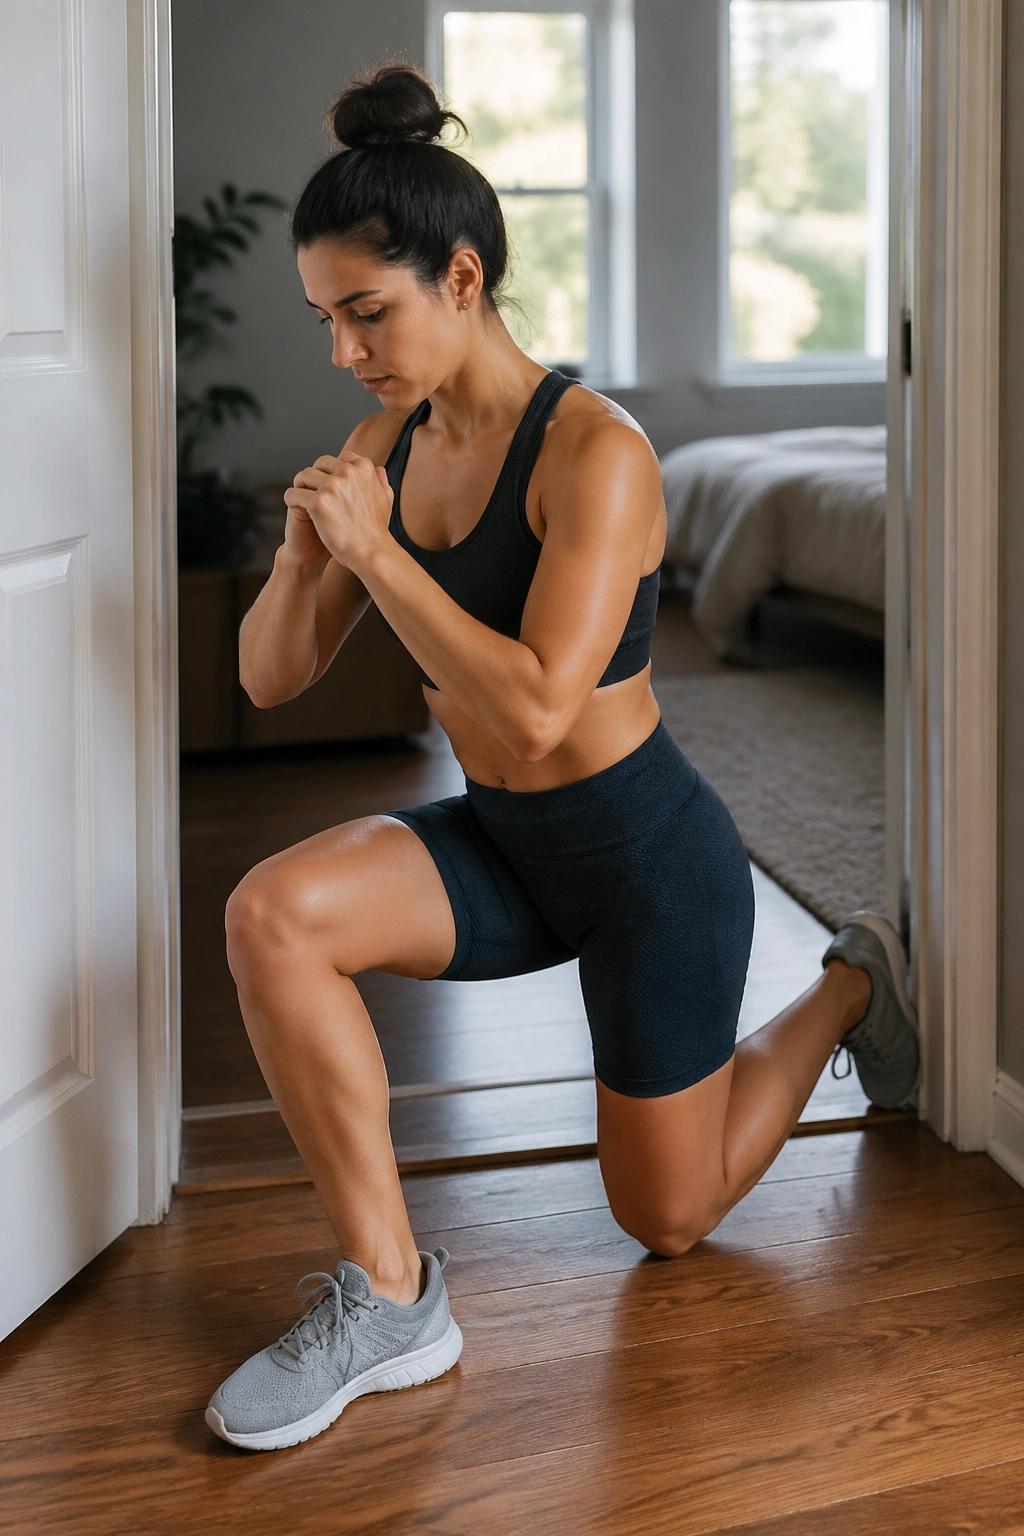
Stand in a doorway and you can do this one.
The split squat is basically a lunge where your feet stay planted in one place. That means less coordination, less wobble, and a cleaner path for beginners who want single-leg work without the moving parts of a walking lunge. It is also sneaky hard. The front leg does a lot, and the back leg mostly stays there to help with balance.
Small setup, big payoff
Set one foot forward and one foot back, with your stance long enough that both knees can bend comfortably. Drop straight down. Your torso can lean slightly forward, but your front heel should stay down and the front knee should move in line with the toes. Then push back to standing.
The back heel can stay lifted. That is normal. If it feels more stable to keep the back heel slightly off the ground, do that. A common mistake is taking the stance so short that the back knee jams awkwardly or the front knee travels too far over the toes with no room to work. Give yourself space.
What to watch for
- Keep most of your weight on the front leg.
- Lower under control instead of dropping fast.
- Use a wall, chair, or rack lightly for balance if needed.
- Stop if the front foot starts sliding.
You can begin with 2 to 3 sets of 6 to 10 reps per side. Add dumbbells later if bodyweight feels manageable. The split squat is one of the best builders of leg strength for beginners because it forces each side to do honest work. No hiding. No cheating. That can sting a little, but it pays off fast.
8. Standing Calf Raise
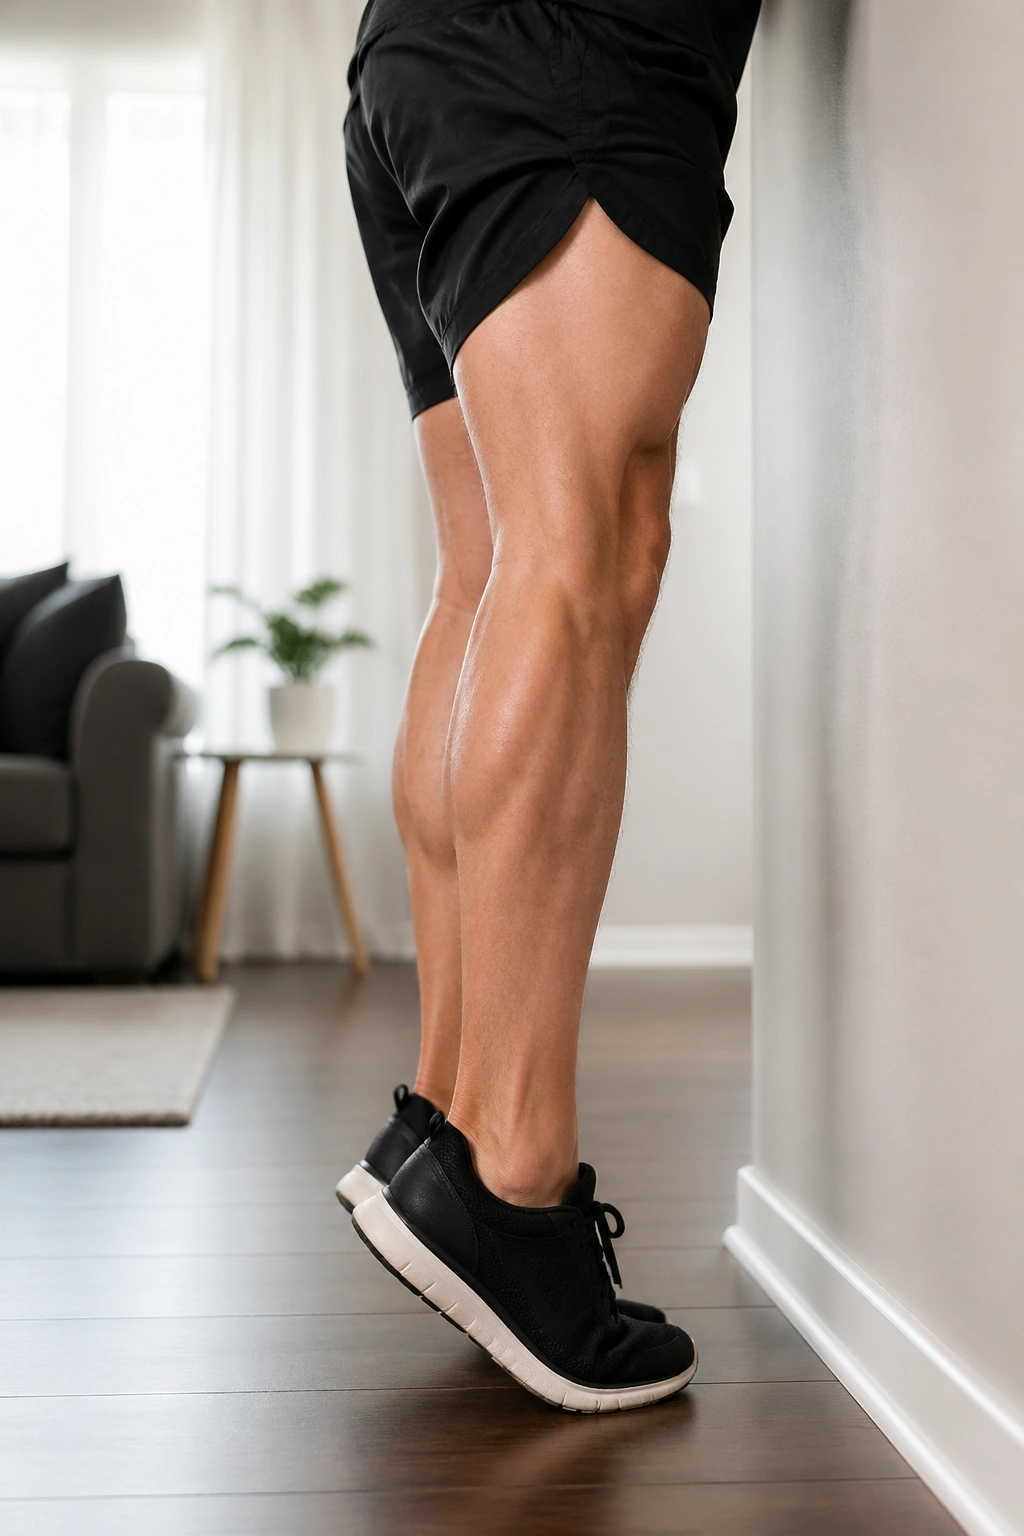
Calves get ignored because they look small. Bad idea.
They help with ankle movement, balance, walking mechanics, and the push-off phase in almost every lower-body move you do. Standing calf raises are simple, but simple does not mean pointless. If you want your lower legs to keep up with the rest of your training, they need direct work.
Why this tiny movement matters
Stand with your feet hip-width apart, hold a wall or chair if balance is shaky, and lift your heels as high as you can. Pause at the top. Lower slowly until your heels settle back down and you feel a stretch through the lower calf. That full range is the whole game here. Half reps make the exercise feel easier and give you less.
If you stand on the edge of a step, you can get a deeper stretch at the bottom. That works well later. For the first few sessions, flat ground is fine. Clean mechanics matter more than fancy setup.
Better than rushing through fifty reps
A lot of people bounce through calf raises and wonder why nothing changes. The fix is boring. Pause at the top for a second. Pause at the bottom for a second. Keep the knees straight but not locked. Move with control.
- Start with 2 to 4 sets of 12 to 20 reps.
- Try single-leg calf raises once double-leg reps feel easy.
- Slow down the lowering phase to 3 seconds if the move feels too simple.
- Add a backpack or dumbbell only after you can finish full-range reps cleanly.
Tiny muscle. Big job.
Calf work is also a good finisher because it does not usually wreck your whole session. You can tuck it at the end of a leg day and still walk home without feeling like your legs have turned into soup.
9. Dumbbell Romanian Deadlift
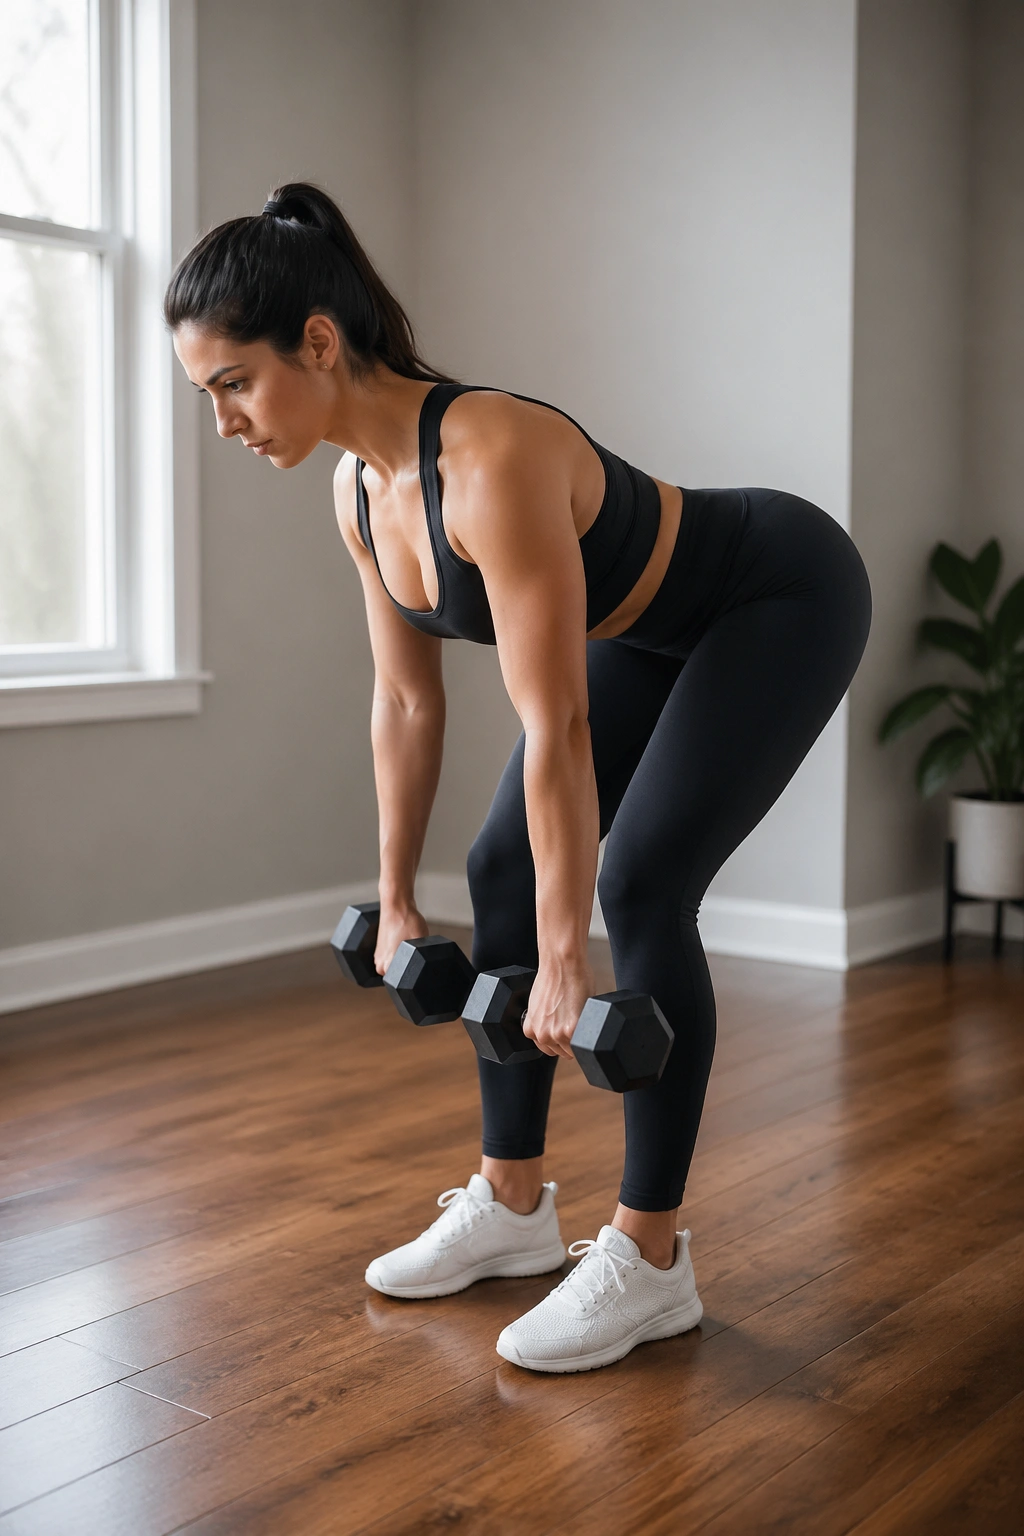
Can a beginner hip hinge without feeling it in the lower back? Yes, if the weight is light and the movement stays honest.
The Romanian deadlift, or RDL, is one of the best beginner-friendly ways to train the hamstrings and glutes. It teaches the hip hinge, which is different from a squat. Instead of dropping straight down, you push the hips back while keeping the shins mostly vertical. That’s a big deal because many leg problems start with people not knowing the difference.
How to feel the stretch in the hamstrings
Stand tall with a pair of light dumbbells, kettlebells, or even loaded water jugs held in front of your thighs. Keep a soft bend in the knees. Then send the hips back as the weight slides down your legs. Your spine stays long and neutral. Stop when you feel a solid stretch through the hamstrings, usually somewhere below the knees or around mid-shin for many beginners. Then stand back up by driving the hips forward.
The weights should stay close to your body. If they drift away, the lower back takes more load and the whole thing gets sloppy. I like telling beginners to imagine they are closing a car door with their hips. Odd image. Helpful movement.
Key cues
- Hips move back first.
- Knees stay slightly bent.
- Back stays flat, not rounded.
- Weight stays close to the legs.
- Stand tall by squeezing glutes at the top, not by leaning back.
If you do not have dumbbells, a backpack held at the chest or two grocery bags with a little weight can work for practice. Start with 2 to 3 sets of 8 to 10 reps. Slow, controlled reps are the point. This move teaches a pattern you’ll use for years.
10. Lateral Lunge
Move sideways for once. Your hips will notice.
The lateral lunge works the legs in a different direction than most beginner exercises, and that’s why I like it as a last piece in the lineup. Squats, bridges, and hinges all live mostly in the forward-and-back plane. The lateral lunge asks your inner thighs, glutes, and hip stabilizers to do more side-to-side work. That helps with balance and gives the routine a shape that feels more complete.
A side step that actually counts
Start standing tall. Take a wide step to the side, then sit your hips back over the bent leg while keeping the other leg straighter. The working foot stays flat. The non-working leg stays long. Then push through the bent leg to come back to center.
A lot of beginners make the step too small and end up doing a weird half-squat with no real lateral load. Others take such a giant step that the foot drags and the knee caves in. Stay in the middle. Enough width to feel the inner thigh stretch, not so much that you lose control.
What this move trains
- Adductors, or inner thigh muscles
- Glute medius, which helps keep the pelvis steady
- Hip mobility through a wider range of motion
- Knee control in a side-to-side pattern
If your balance is shaky, keep the non-working foot lightly on the floor instead of lifting it completely. That small adjustment helps beginners learn the pattern without toppling.
A simple beginner leg day can use four of the moves above:
- Bodyweight squat: 2 sets of 8 to 12
- Glute bridge: 2 sets of 10 to 15
- Reverse lunge: 2 sets of 6 to 8 per side
- Standing calf raise: 2 sets of 15 to 20
Rest for 45 to 90 seconds between sets. If you want a slightly tougher session, swap in step-ups or split squats on the next day. Keep the choices simple. That’s how consistency gets built.
Side-to-side work tends to get left out, then people wonder why their hips feel stiff or why one knee always seems to drift inward. This move helps fill that gap without needing much equipment or a complicated plan. And that’s a good place to end this list: with one exercise that reminds you legs are not built in a straight line.
