



Glute workouts at the gym get messy fast. One person is hip-thrusting half the rack, another is doing kickbacks with the whole stack, and somebody nearby is grinding through leg press reps with their pelvis tucked under like a folding chair. The muscle itself is not mysterious. It wants load, range, and enough control that the hips—not the lower back—do the work.
The glutes are three muscles, not one lump you “feel” or “don’t feel.” The glute max drives hip extension. The glute med and minimus help keep the pelvis steady and the knees from wobbling when you’re on one leg. That matters more than people think, because a lot of gym work hits the big hip-extending muscle and ignores the side glutes that make your movement cleaner and stronger.
The best glute training at the gym usually covers four jobs: heavy shortening work, stretched-position work, unilateral work, and some higher-rep isolation. Heavy alone is incomplete. Pump work alone is incomplete too. Put the pieces together and the session makes sense.
Burn is not the scorecard.
The eight exercises below cover that spread without turning leg day into chaos. Some are big and loadable, some look boring on paper and feel rude by the last five reps, and a couple are in here mainly because your side glutes need attention whether you like it or not.
1. Barbell Hip Thrust
If you want one exercise that lets you load the glutes hard without asking your spine to do the heavy lifting, this is the first place I’d start. The barbell hip thrust puts the highest tension right where the glutes finish the rep, which is why it shows up so often in serious glute workouts at the gym. It’s not flashy. It just works.
The setup matters more than the weight. Sit with your upper back on a bench edge, roll the bar over your hips, and plant your feet so your shins are close to vertical at the top. If your feet are too far away, the hamstrings steal the show. Too close, and you turn the whole thing into a knee-dominant grind. The sweet spot feels almost plain when you look at it. It does not feel plain when you’re under the bar.
How to Set It Up Cleanly
Keep your ribs down, chin tucked slightly, and drive through the midfoot and heel. At the top, think hard squeeze, not lean back and finish with your lower back. That little distinction matters a lot. A proper lockout looks almost boring. The pelvis finishes in a neutral or slightly tucked position, not arched into a shape that makes your low back handle the rep.
A good working range is 3 to 5 sets of 6 to 12 reps. Use a lighter load than your ego wants for the first session, hold the top for one full second, and watch whether the same foot placement still feels right on the last rep. It often doesn’t. Fine. Adjust.
What Usually Goes Wrong
- Feet set too far forward, so the hamstrings take over.
- Chin lifted, ribs flared, and the lower back doing a fake “finish.”
- Bouncing off the bench instead of controlling the bottom.
- Short reps that stop before full hip extension.
The best cue is simple: push the floor away and keep the torso quiet. If you feel the bar more in your stomach than your hips, the setup is off. If you feel the top position in your lower back first, the same thing is happening from a different angle.
I like hip thrusts as the opening lift on a glute day because they’re easy to progress. Add 5 to 10 pounds when your top position stays clean for all sets, and resist the temptation to chase ugly reps. Ugly reps are expensive.
2. Romanian Deadlift
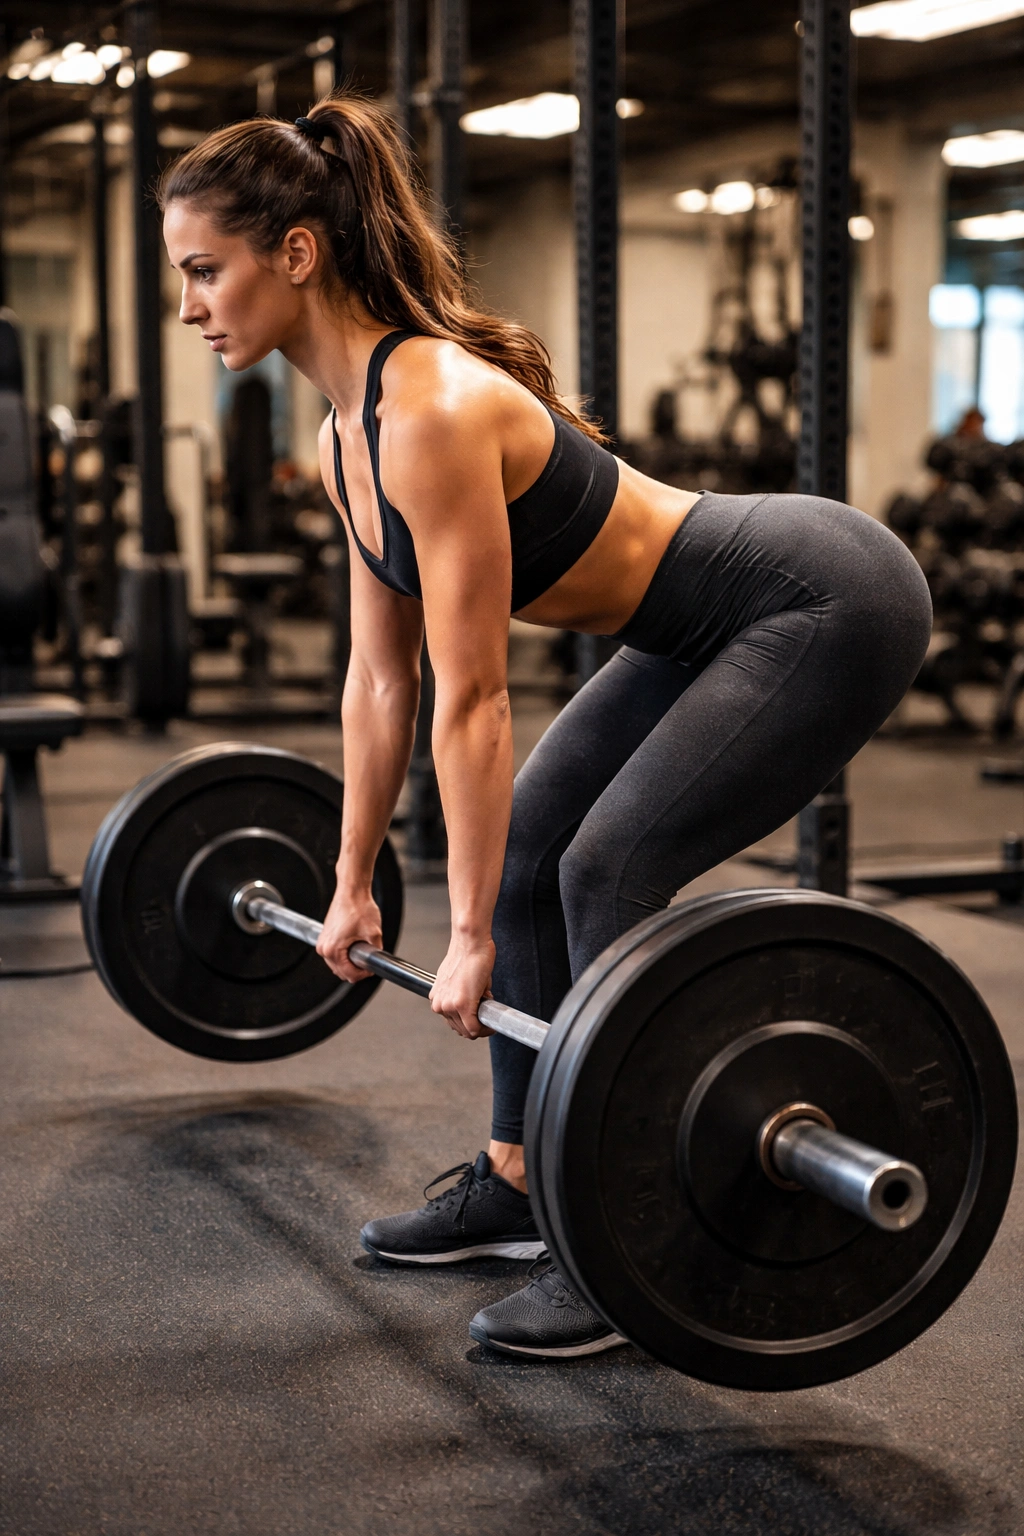
What if the glutes could be loaded hardest when they’re stretched instead of squeezed? That’s the whole appeal of the Romanian deadlift. It trains the hinge pattern, which gives the glutes and hamstrings a long, nasty stretch on the way down and a strong hip snap on the way up. It’s one of the best lower-body lifts in the gym if you care about actual strength, not just fatigue.
Bar position matters here too. Keep the bar close to your thighs, soften the knees just enough to unlock them, then send the hips back like you’re trying to close a car door with your butt. The torso will tip forward, but the spine should stay neutral and long. No diving. No rounding. If the bar drifts away from your body, the low back starts to fight the load and the movement gets sloppy fast.
Stretch First, Then Stand Tall
The useful part of an RDL happens when the hamstrings feel tight and the glutes are under tension at the bottom. That is the rep. Not the bounce, not the lift-off, not the rushed lockout. You should feel a strong stretch behind the thighs, with the weight still under control enough that you could pause for a second without shaking apart.
A smart rep range is 3 to 4 sets of 6 to 10 reps. Go slower on the way down than on the way up. A three-second eccentric is plenty. You do not need to turn it into a slow-motion movie. Lower until the bar reaches about mid-shin or slightly below the knees, depending on your hamstring length, then drive the hips forward and stand tall without leaning back at the top.
What to Watch For
If the bar ends up a few inches in front of your legs, that’s a red flag. If your knees keep bending more and more, it starts looking like a squat. If you can’t feel your glutes on the way up, the range is probably too short or the descent is too rushed.
One detail people miss: you don’t need to chase the floor. You need tension. Big difference. A controlled, medium-depth RDL with clean hip position will beat a sloppy deep one every time.
Use dumbbells if a barbell feels awkward on your hands or if you’re still learning the hinge. They’re easier to set down, easier to reset, and a little more forgiving when your grip gives out before your glutes do.
3. Bulgarian Split Squat
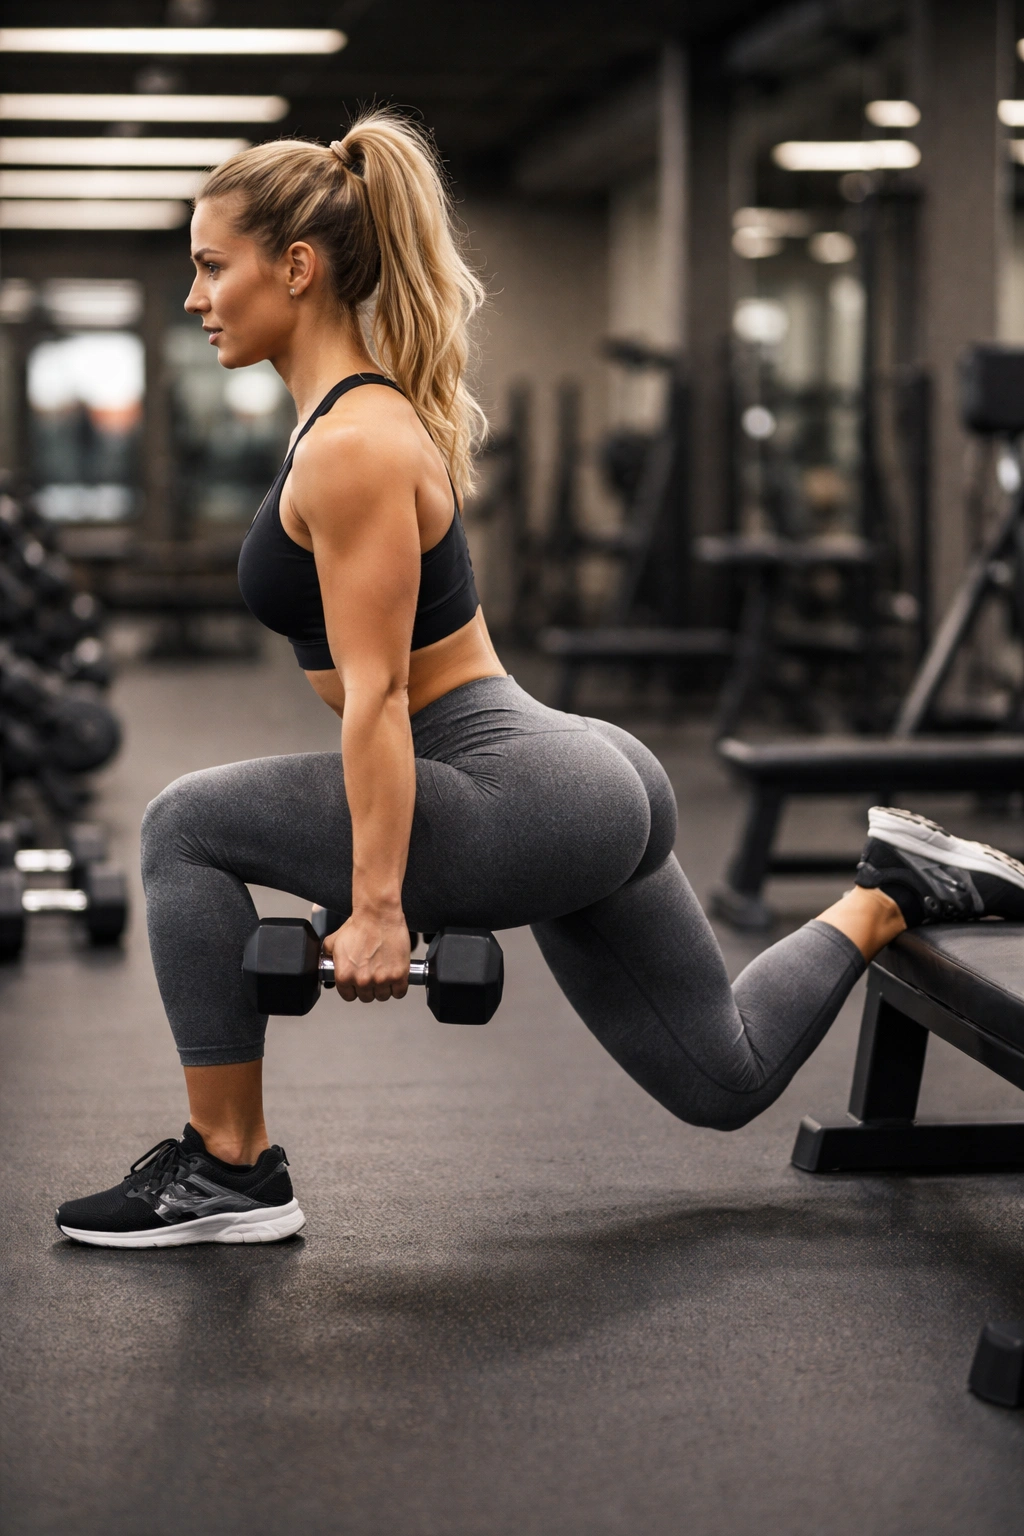
Put one foot behind you, lower under control, and the leg in front of you will start telling the truth in about three reps. The Bulgarian split squat is one of the meanest glute exercises in the gym because it asks the working leg to stabilize, drive, and stretch all at once. There’s no hiding. No side gets to steal work.
A long enough stance is the whole trick. If your front foot is too close to the bench, the front knee drifts far forward and the set turns quad-heavy. Step out a little more than you think you need. Then lean the torso forward just a bit while keeping the chest proud and the spine neutral. That small forward angle shifts the load into the hip instead of parking it all on the front knee.
How to Bias the Glutes
The front heel and midfoot should stay rooted. The back leg is only there for balance. It should never feel like a push-off leg. Descend slowly until the front thigh gets close to parallel or just below, then drive up through the front foot without bouncing out of the bottom.
A useful starting range is 3 sets of 8 to 12 reps per leg. The higher end of that range is brutal in a good way. If balance is the issue, use dumbbells held at your sides instead of a barbell on your back. It’s cleaner. It’s less fussy. And it lets the glute do the work instead of your upper back trying to survive the setup.
Common Fixes That Matter
- Take a longer stride if the front knee feels too dominant.
- Keep the shin from traveling too far forward if you want more hip load.
- Don’t tip the torso so far forward that the back rounds.
- Use a soft but controlled bottom position; don’t slam into the hole.
A lot of people avoid split squats because they’re uncomfortable. Fair. They’re also one of the fastest ways to expose left-right differences, which is useful information. If one side burns out before the other, that’s not a flaw in the exercise. That’s the exercise doing its job.
I’d rather see one hard, honest set of Bulgarian split squats than three half-hearted machine sets that never challenge the hip in a real way.
4. Cable Glute Kickback
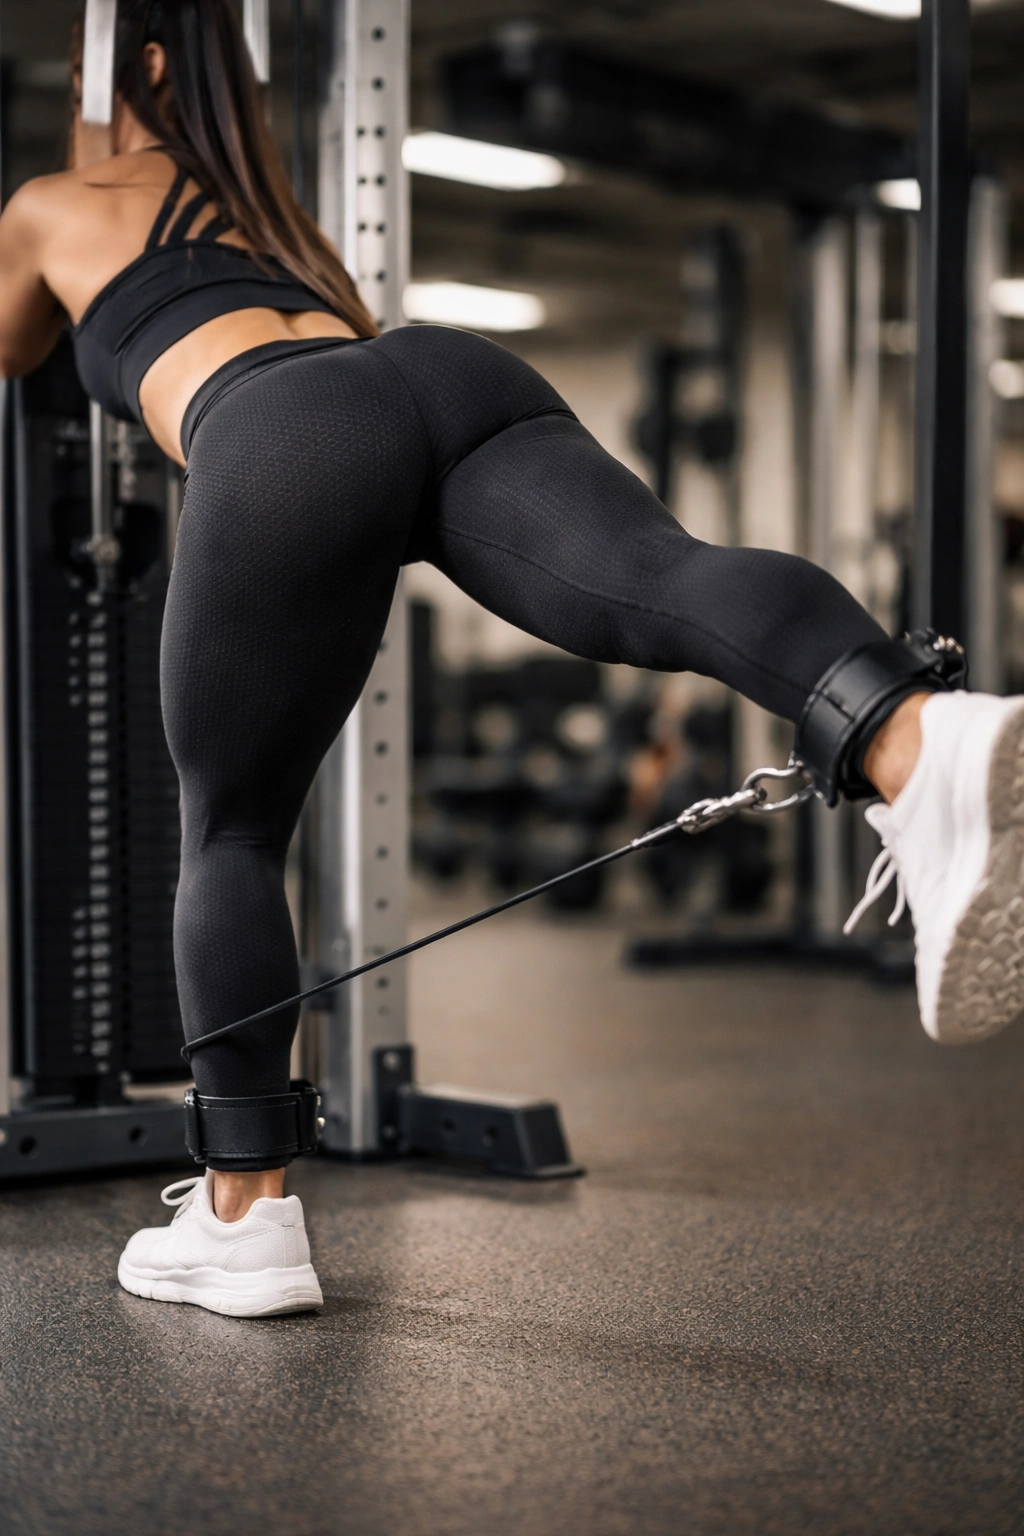
Cable kickbacks are not glamorous, and that’s exactly why they stay useful. They keep tension on the glute through a long range without asking you to balance a barbell or brace for a big spinal load. When the main lifts are done and the glutes still need work, this is one of the cleanest ways to finish the job.
The cable’s biggest advantage is the line of pull. You’re not fighting gravity in the same way you do with free weights, so the muscle gets loaded in a way that’s hard to fake with momentum. Strap the ankle cuff on, face the machine, hinge slightly at the hips, and keep the standing leg soft but steady. The pelvis should stay square. If one hip opens up every rep, the low back starts helping and the whole point gets lost.
What the Reps Should Feel Like
Kick the working leg back and slightly out, then stop before your lower back starts arching. That last part matters. The rep should end with the glute doing the work, not with the spine reaching for a little extra range. A small, strict arc beats a big, sloppy one every single time.
This is a high-rep move for most people. 12 to 20 reps for 2 to 4 sets is a good range. You want a steady burn, a short pause at the top, and a slow return that keeps tension on the cable stack. If you can swing the leg and still pretend it counts, the weight is too heavy.
Where People Miss It
- They lean way forward and turn the rep into a body swing.
- They push so far back that the lower back starts arching.
- They use a stack that’s too heavy and lose the top squeeze.
- They rush the return and let the cable yank the leg forward.
Think about direction, not height. A kickback does not need to go sky-high to be effective. It needs to be clean. If you can feel the upper glute wrapping around the pelvis and not just the back of the thigh, you’re close.
I like kickbacks after a heavy compound lift because they let you chase fatigue without paying the same stability cost. That makes them a smart second or third exercise on a glute day, especially if you want extra work without another barbell battle.
5. Smith Machine Glute Bridge
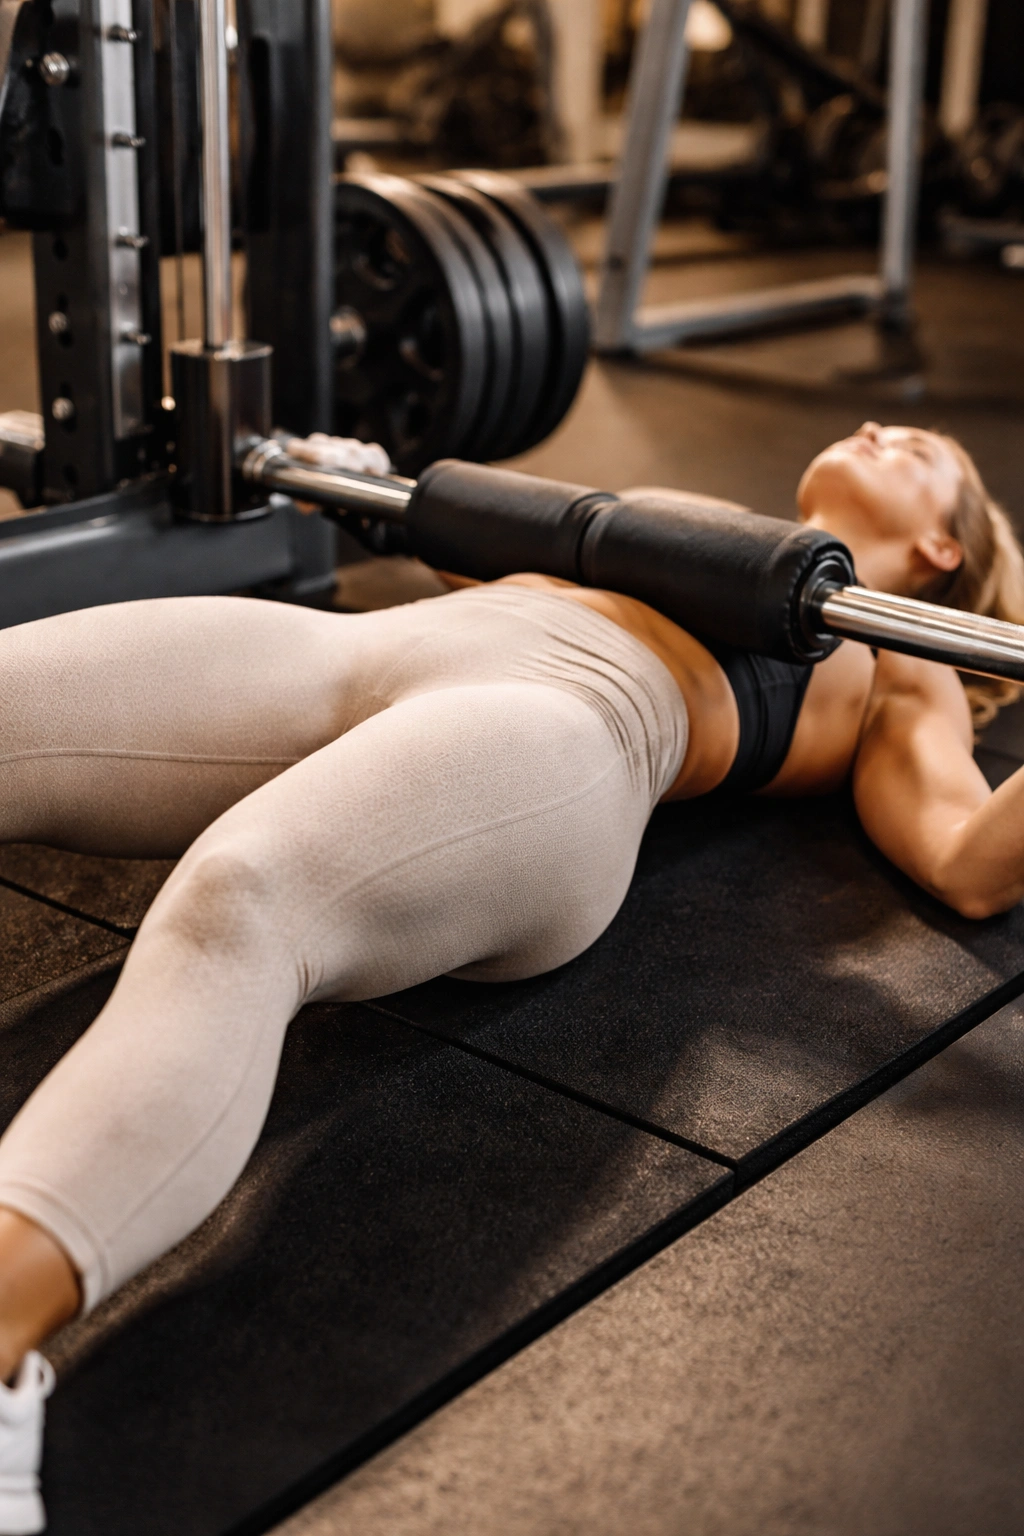
The floor version feels different the second the bar settles across your hips. A Smith machine glute bridge is a little less setup-heavy than a barbell hip thrust, and that alone makes it useful on crowded gym days or when you want a more controlled range. The shoulders stay on the floor, the back gets less bench angle, and the glutes still get hammered.
The bridge is shorter than the thrust, which changes the feel. You won’t get quite the same top-end stretch, but you do get a lot of clean tension and a very direct squeeze at the top. That’s why I like it for higher-rep work or as a heavier alternative when the bench setup for thrusts feels awkward.
Why the Floor Version Hits Differently
Because the range is shorter, the reps are easier to keep strict. That helps people who turn hip thrusts into a low-back circus. You can stay pinned to the floor, brace your ribs down, and drive the hips up without using the bench as a launch pad. The movement should feel compact and controlled.
Set the bar over the hip crease, plant your feet so the shins are close to vertical at lockout, and press through the heels while keeping the chin tucked. Do not overextend at the top. The best bridge rep ends with the glutes clenched hard and the pelvis stable, not with the rib cage flared and the spine arched like a cat stretching.
When to Use It
A good target is 3 to 4 sets of 8 to 15 reps. It pairs well with a heavier lift earlier in the session, especially if you want more volume without another big balance demand. Use a thick pad or barbell pad if the bar digs into your hips. That sounds obvious until you’ve been under a sharp steel bar for a few sets and suddenly the exercise becomes about pain management instead of glute work.
One thing I like about the Smith machine here: the path stays fixed, which makes it easier to focus on the squeeze and foot pressure. The downside is also the fixed path. If your setup is off, the machine will not save you. Still, for a lot of lifters, this is a cleaner option than trying to muscle through a wobbly free-weight bridge.
6. High-Foot Leg Press
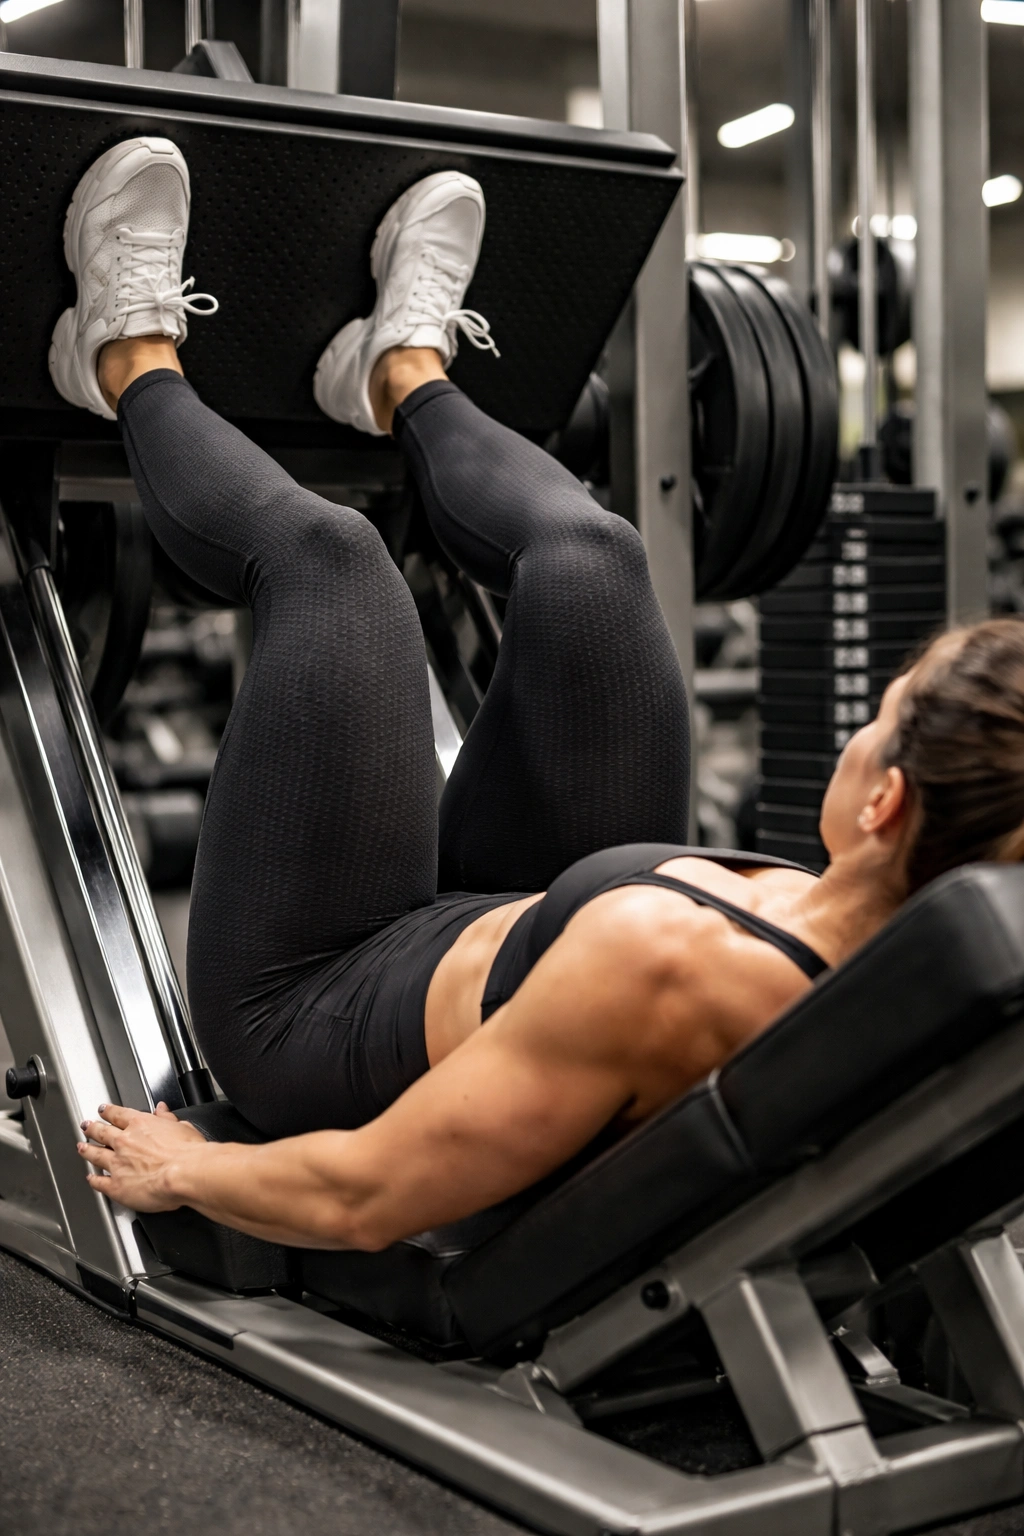
Move your feet a few inches higher on the platform and the sled starts feeling like a different machine. That’s the simple reason the leg press belongs in a glute-focused gym session. High foot placement increases hip flexion, shifts the load back toward the glutes and hamstrings, and takes some of the quad bias out of the movement.
The placement is not magic. It’s just geometry. Put your feet high enough that the heels stay flat through the descent, and keep them a little wider than shoulder width if your hips tolerate it. From there, lower the sled under control until you get a deep bend in the hips without the pelvis peeling off the seat. That last part is the line in the sand. Once the lower back rounds, the set is over.
The Details That Change Everything
A lot of people think “deeper” is always better. It isn’t. Deeper only helps if the pelvis stays planted. If your knees are near your chest and your tailbone starts tucking hard, the lower back takes a beating and the glutes stop getting the clean tension you wanted.
A solid range here is 3 sets of 10 to 15 reps. Use a slower lower, maybe two to three seconds, and press the sled back up without locking the knees out hard. Keep the knees tracking over the toes, not collapsing inward. If the machine lets you use a single-leg variation comfortably, that’s worth trying too. It exposes side-to-side differences and forces the glute to stabilize instead of just push.
What to Avoid
- Feet too low on the platform, which shifts the work into the quads.
- Letting the hips lift at the bottom.
- Short, bouncy reps that never reach a real stretch.
- Locking the knees hard at the top and resting on the joints.
This is not a place to chase ego plates. A smoother 270-pound set with clean depth will beat a shaky 400-pound set that turns your pelvis into a warning sign. Use the leg press when you want load without needing your balance or grip to be the limiting factor.
I also like it because it fills a gap that free weights sometimes miss. You get tension in a seated position, a long range of motion, and enough load to make the glutes work without the setup drama of a barbell.
7. Seated Hip Abduction Machine
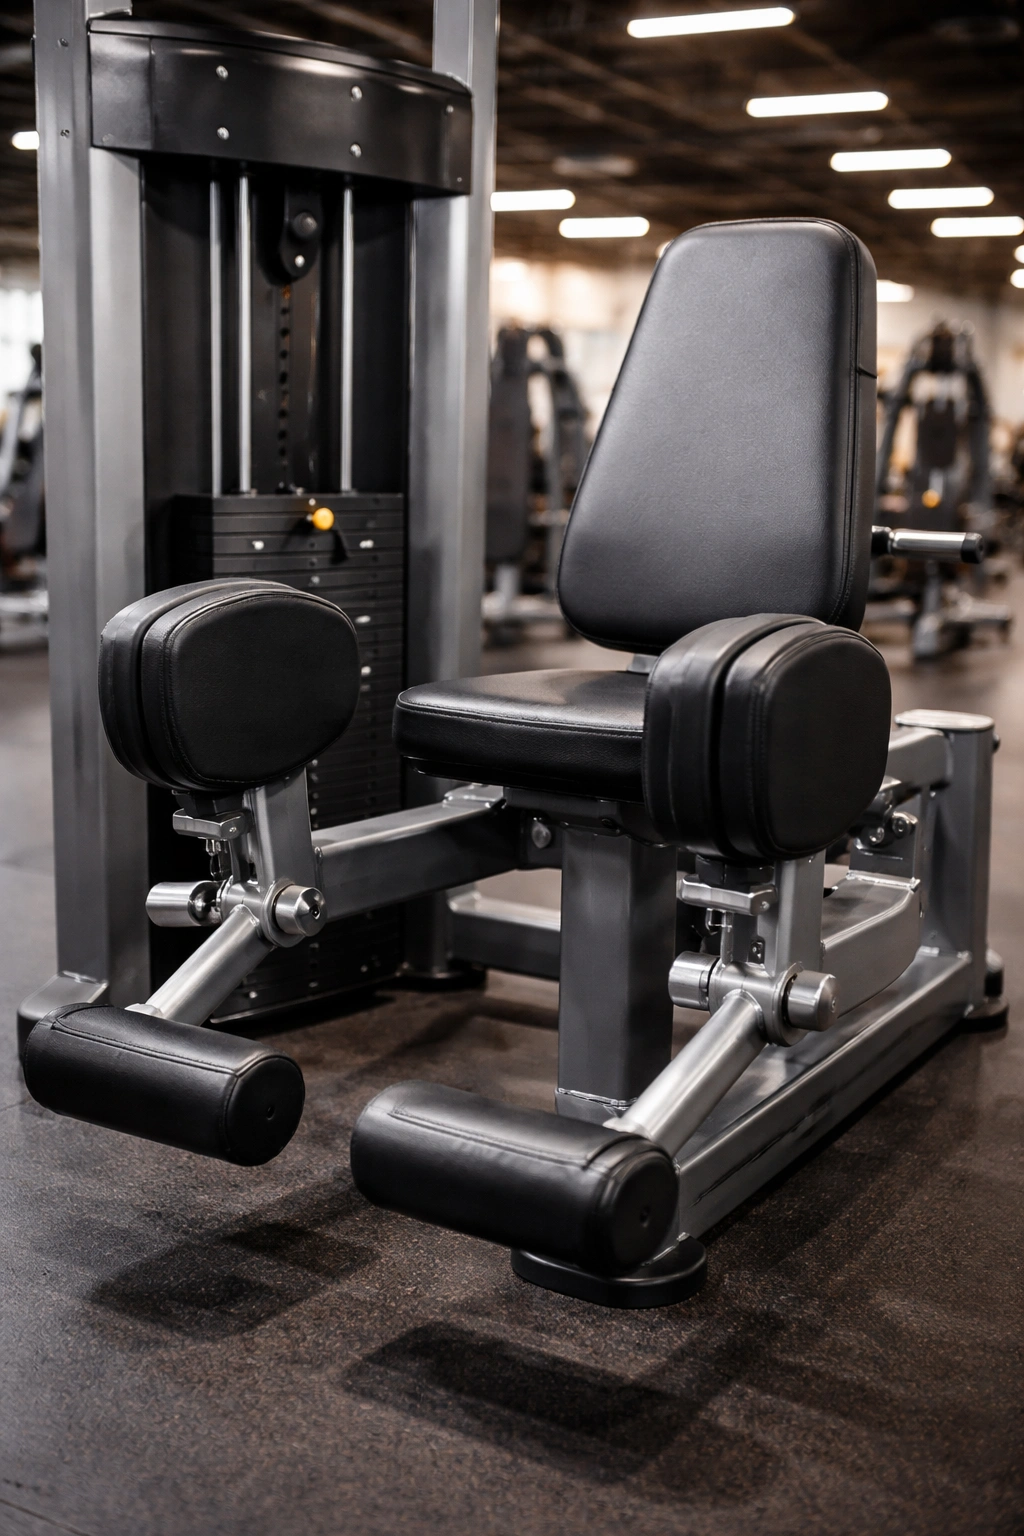
The side glutes do more than make the hips look fuller from behind. They keep your pelvis from dropping when you walk, lunge, step up, or stand on one leg. That’s why the seated hip abduction machine deserves a real spot in a glute program instead of being treated like a warm-up nobody respects.
The machine looks simple. Sit down, place your legs on the pads, and push out. That simplicity is the trap. Most people rush the reps, slam the stack, and call it done. The better version is slower and a little meaner. Lean forward slightly, keep your torso braced, and open the knees with control until you feel the outer hip light up. Then hold the open position for a second or two before returning.
Why the Side Glutes Need Their Own Work
The glute medius and minimus are small compared with the glute max, but they do a lot of quiet work. When they’re weak or undertrained, walking stairs, single-leg squats, and split squats tend to get ugly fast. The knees drift. The pelvis wobbles. The outer hip never really learns to hold position.
This is where high reps make sense. 15 to 30 reps for 3 to 4 sets is a useful range, especially if you pause at the open position and keep the return slow. You should feel a deep burn around the side of the hip, not a cramp in the front of the thigh. If the front of your hip is doing all the talking, your torso angle or seat position may be off.
The Small Fixes That Make It Better
- Sit tall, then lean slightly forward if the machine allows it.
- Don’t bounce the pads off the stack.
- Keep the range smooth instead of chasing the widest possible spread.
- Use a controlled return so the weight stack doesn’t slam.
One reason I like this machine as a finisher is that it’s honest. You can’t fake 20 slow abductions with good tension unless the side glutes are doing the job. That makes it a nice final station on a gym glute day, especially after heavy thrusts, hinges, or split squats have already done the main work.
If you want your lower body to move and look more balanced, this is not optional fluff. It’s part of the real work.
8. Walking Lunges
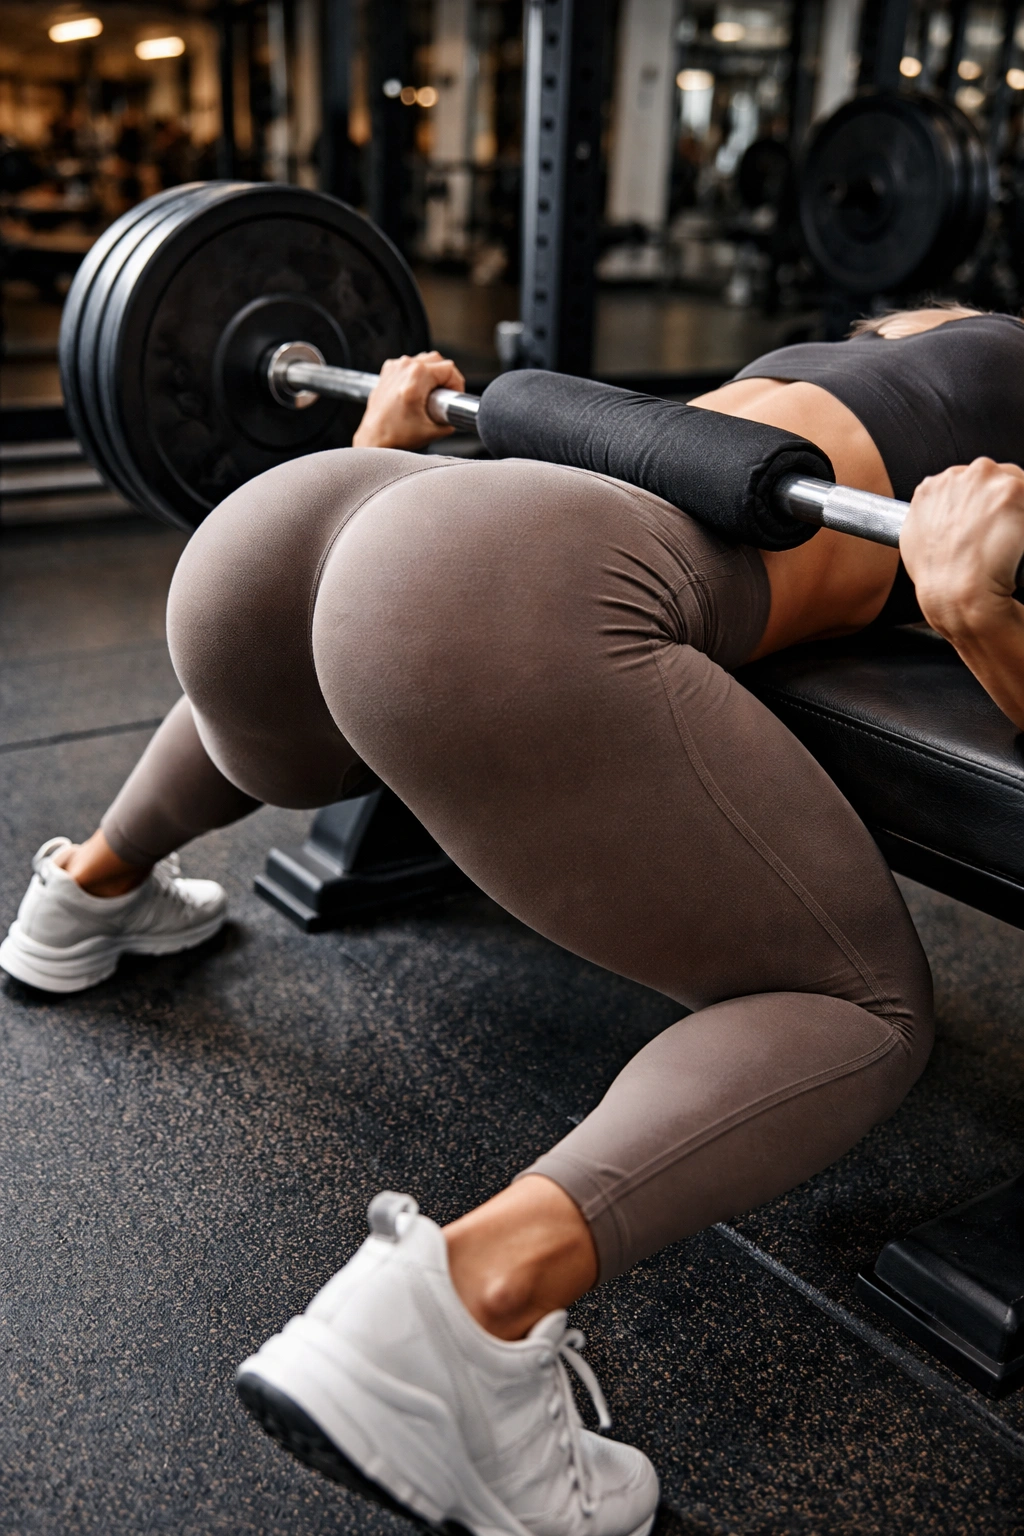
A set of walking lunges after a hard lower-body session looks manageable right up until the third or fourth step, when your stride starts telling on you. That’s why I like them so much. They combine balance, hip extension, and a deep stretch in a way that feels athletic without needing much equipment. Dumbbells, a little floor space, and some patience are enough.
The stride length controls the bias. Short strides hit the quads harder. Longer strides shift the work into the glutes because the hip has to travel farther and the front leg has to stabilize more through the bottom. Keep the torso slightly forward, chest proud, and the front heel rooted as you step through. The back knee should come close to the floor without crashing into it.
How to Keep Them Glute-Dominant
Take a long enough step that the front shin stays fairly angled instead of shooting straight forward. Then push through the front heel and midfoot as you rise into the next step. The back leg is there for balance and a little support, not a giant push-off. If you launch off the trailing foot every rep, the glutes on the lead leg lose a lot of the job.
A useful working range is 2 to 4 sets of 10 to 20 steps per leg. The lower end works better if you’re already tired from heavier lifts. The higher end is brutal if you use a full range and keep the dumbbells still. Don’t rush. Walking lunges look simple when someone is fresh and terrible when someone is trying to save energy.
When Your Knees or Balance Get Annoying
If your knees complain, slightly shorten the range but keep the torso angle and foot pressure clean. If balance is the issue, slow the step tempo and use lighter dumbbells until the pattern feels automatic. If the gym is crowded and you can’t walk far, alternating reverse lunges in place are a fine backup. Same hip demand. Less floor traffic.
- Long stride for more glute work.
- Controlled knee bend.
- Upright enough torso to stay braced, slightly forward to load the hip.
- Smooth stepping rhythm, not a rushed march.
Walking lunges close a glute session well because they force the hips to stay honest when you’re already a little tired. They also carry over nicely to actual movement. Stairs. Hills. Everyday steps. The glutes do not live in one machine, and this exercise reminds you of that in the nicest rude way possible.
If I were building one gym glute day from scratch, I’d pair one heavy lift, one stretch-biased lift, one unilateral move, and one high-rep finisher. That mix covers strength, shape, and stability without padding the session with junk volume.
