



A good beginner yoga practice at home starts on the floor, not in a perfect pose. The first win is getting your body to trust the shapes, breath by breath, without a room full of mirrors or any fancy gear. A mat helps. A folded blanket helps more than people think.
Yoga poses for beginners at home work best when you mix standing balance, gentle folds, spinal movement, and a little floor rest. Tight hamstrings, stiff shoulders, and shaky ankles are normal; they are not a sign that you’re bad at yoga. They are a sign that your body is paying attention.
Start small.
Five poses can be enough on a busy day, and ten can feel like a full practice if you move slowly and breathe with the shape instead of fighting it. The list below moves from the simplest building blocks to the poses that make a home session feel complete.
1. Mountain Pose
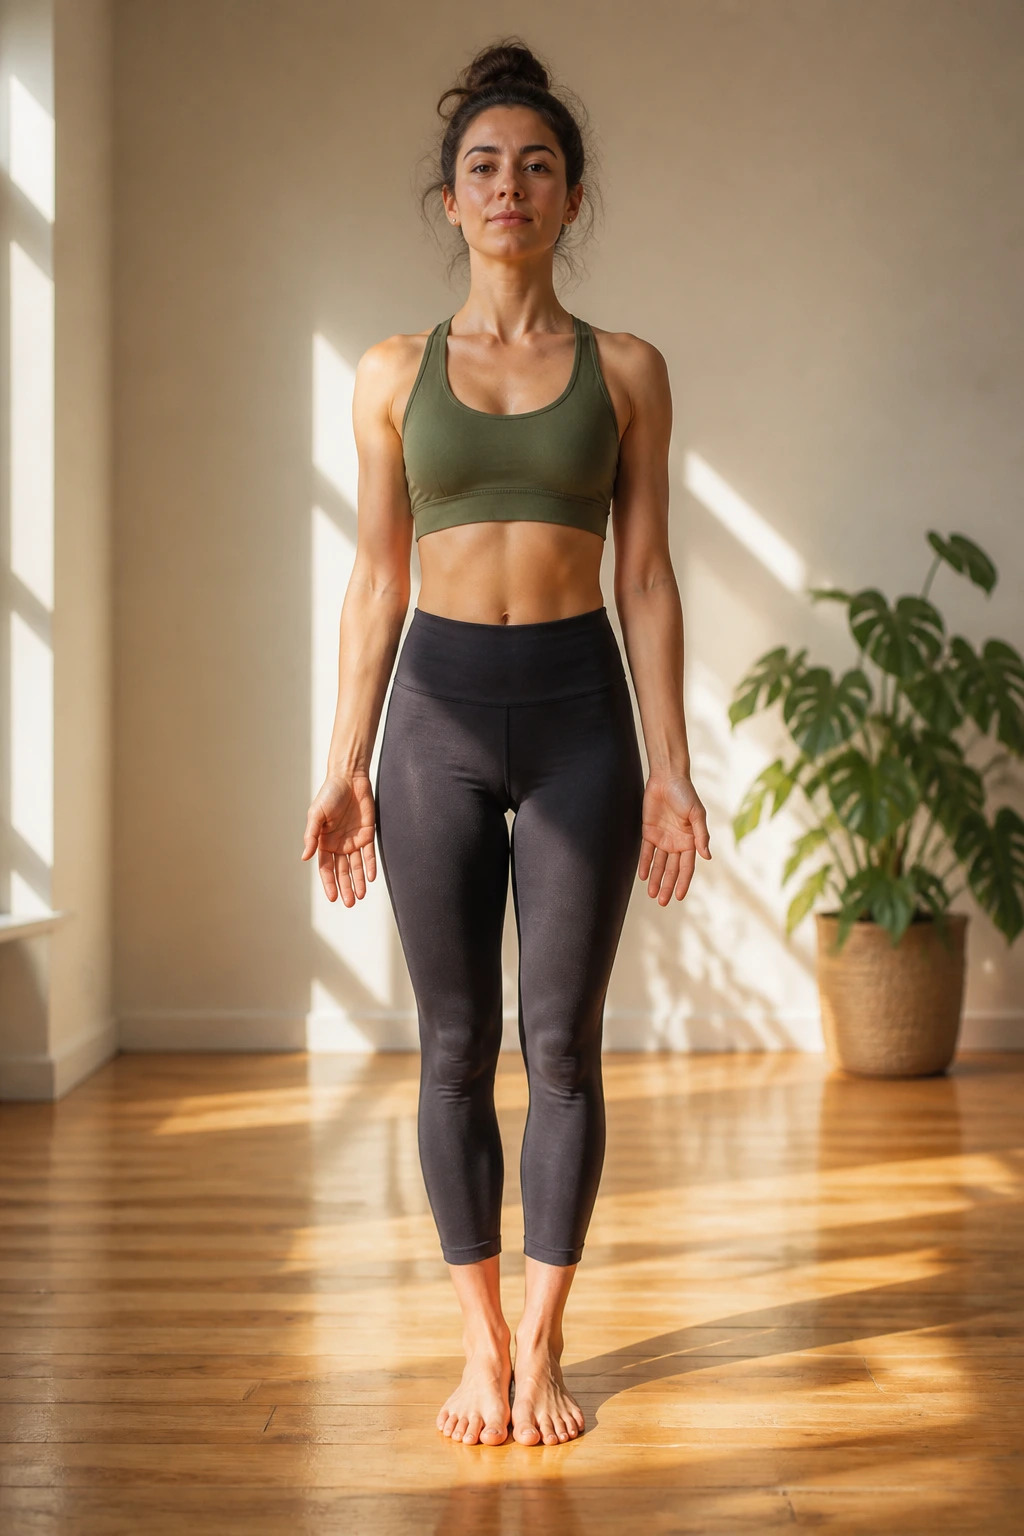
Mountain pose looks like standing still, but it teaches the whole body where to stack itself. Feet grounded, knees soft, ribs quiet, crown of the head rising. Press evenly through the feet and let the breath settle for five slow counts. Use it anytime the room starts to feel messy.
2. Child’s Pose
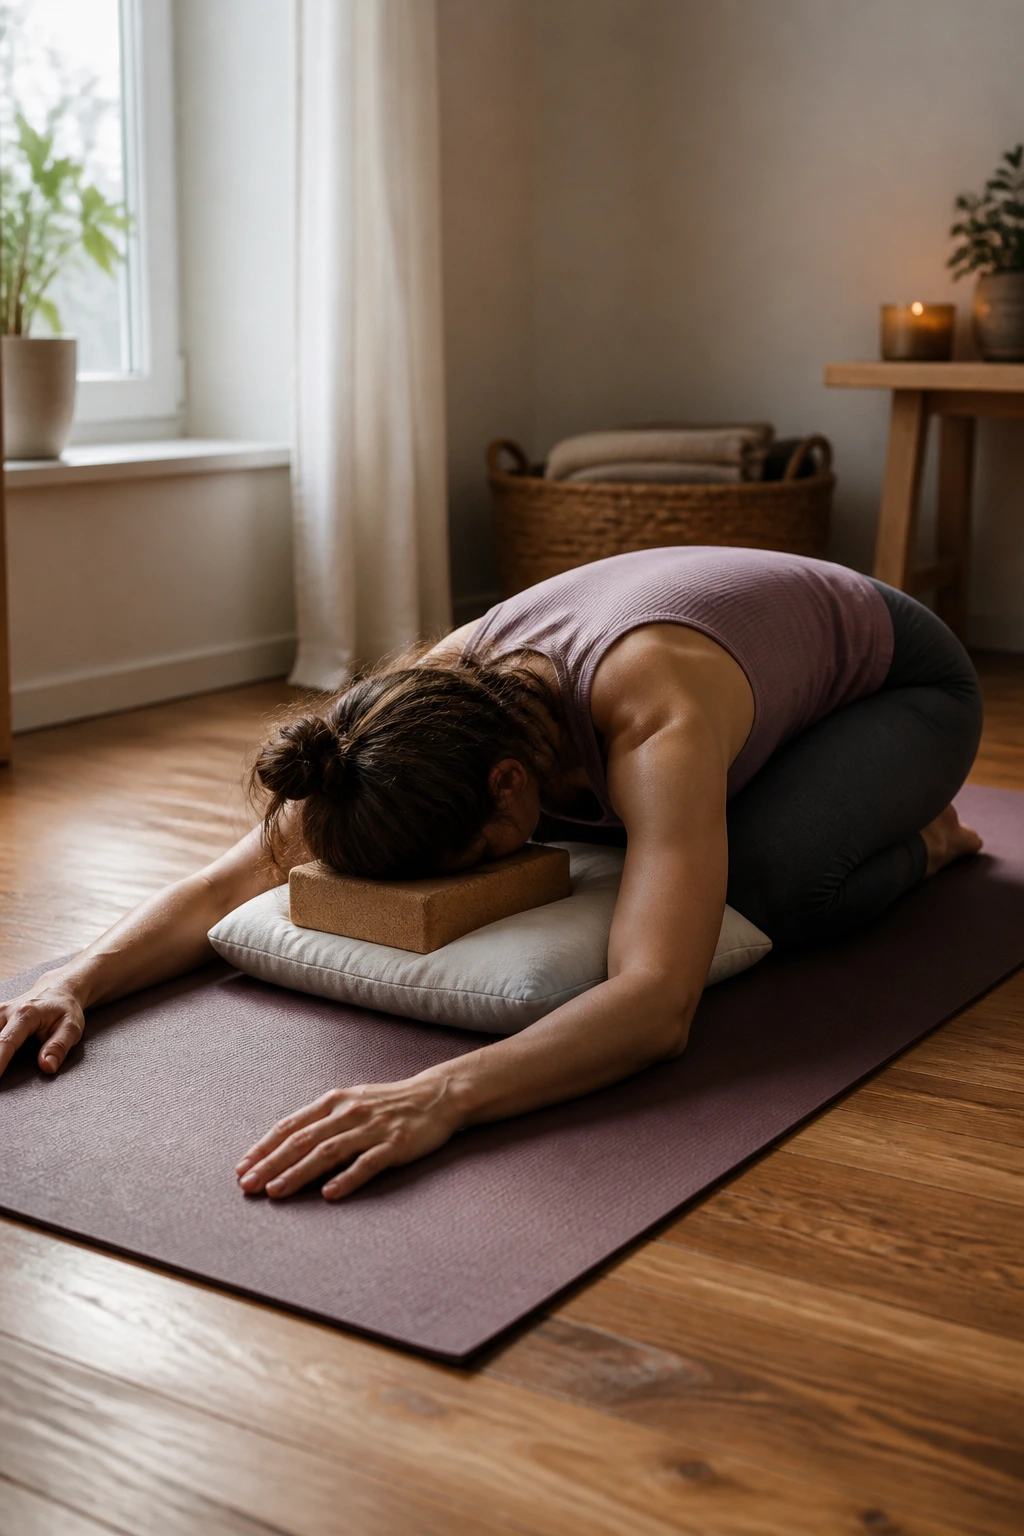
Child’s pose is the “I need a minute” pose, and that is not a bad thing. Knees can stay together or open wide, forehead on a block, arms forward or resting by your sides. A pillow under the chest makes the shape kinder for tight hips and cranky knees.
3. Cat-Cow
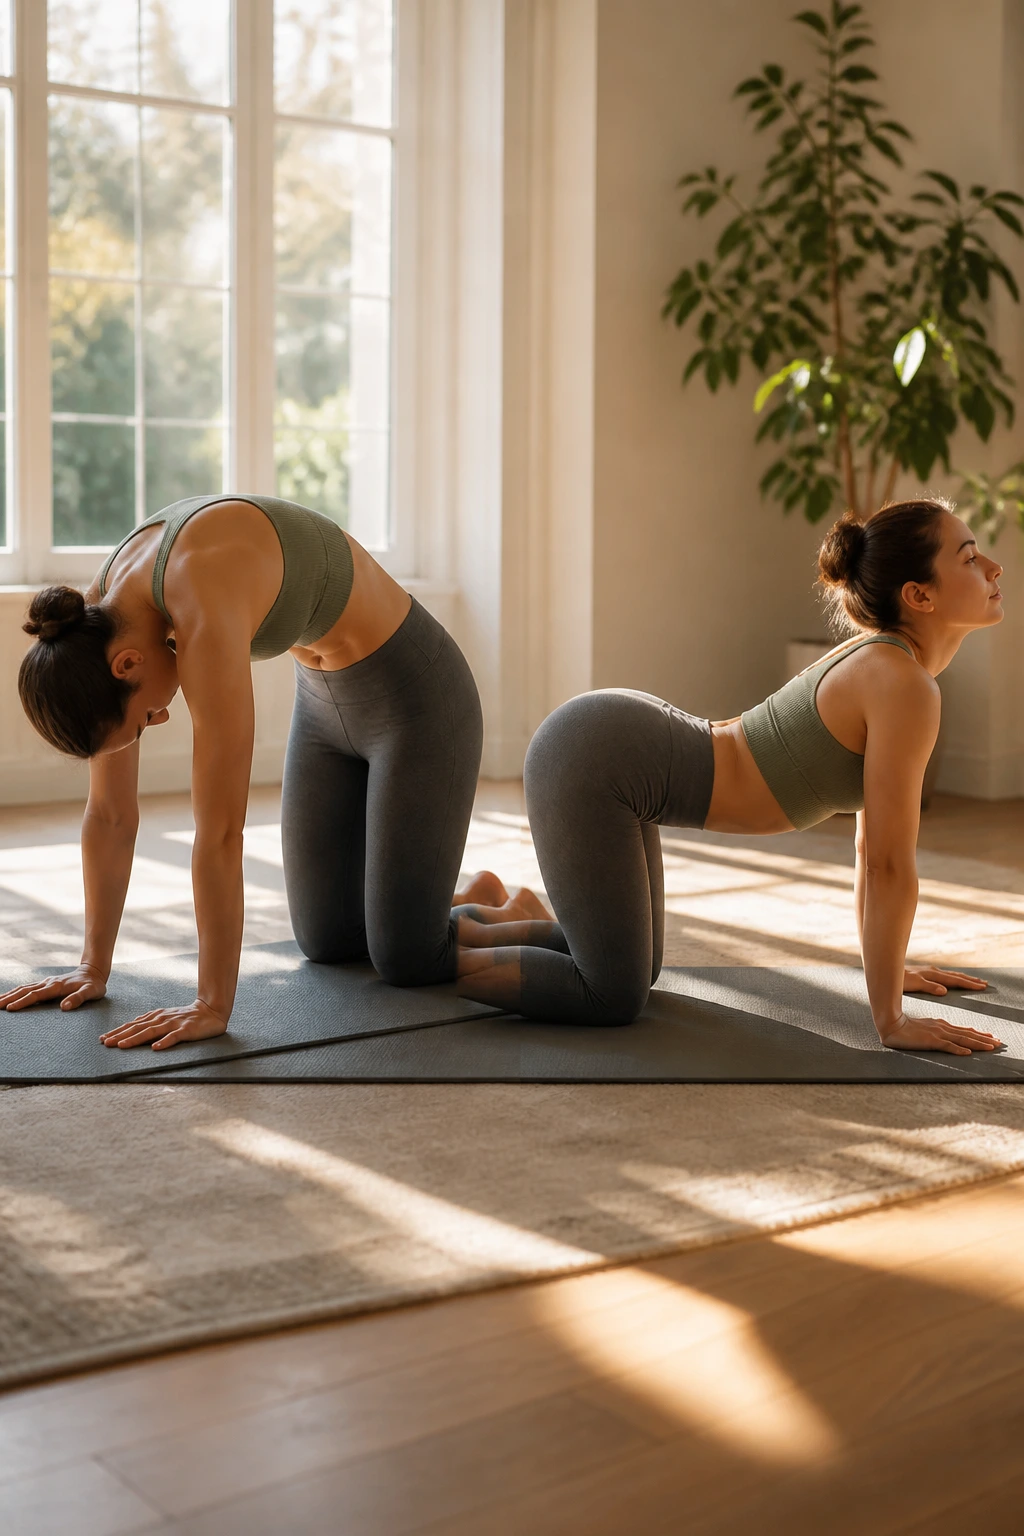
Why does cat-cow show up in nearly every home practice? Because it wakes the spine up without asking for flexibility you do not have yet. Move from a rounded back on the exhale to a gentle arch on the inhale. Keep it slow. The breath leads; the spine follows.
4. Tabletop
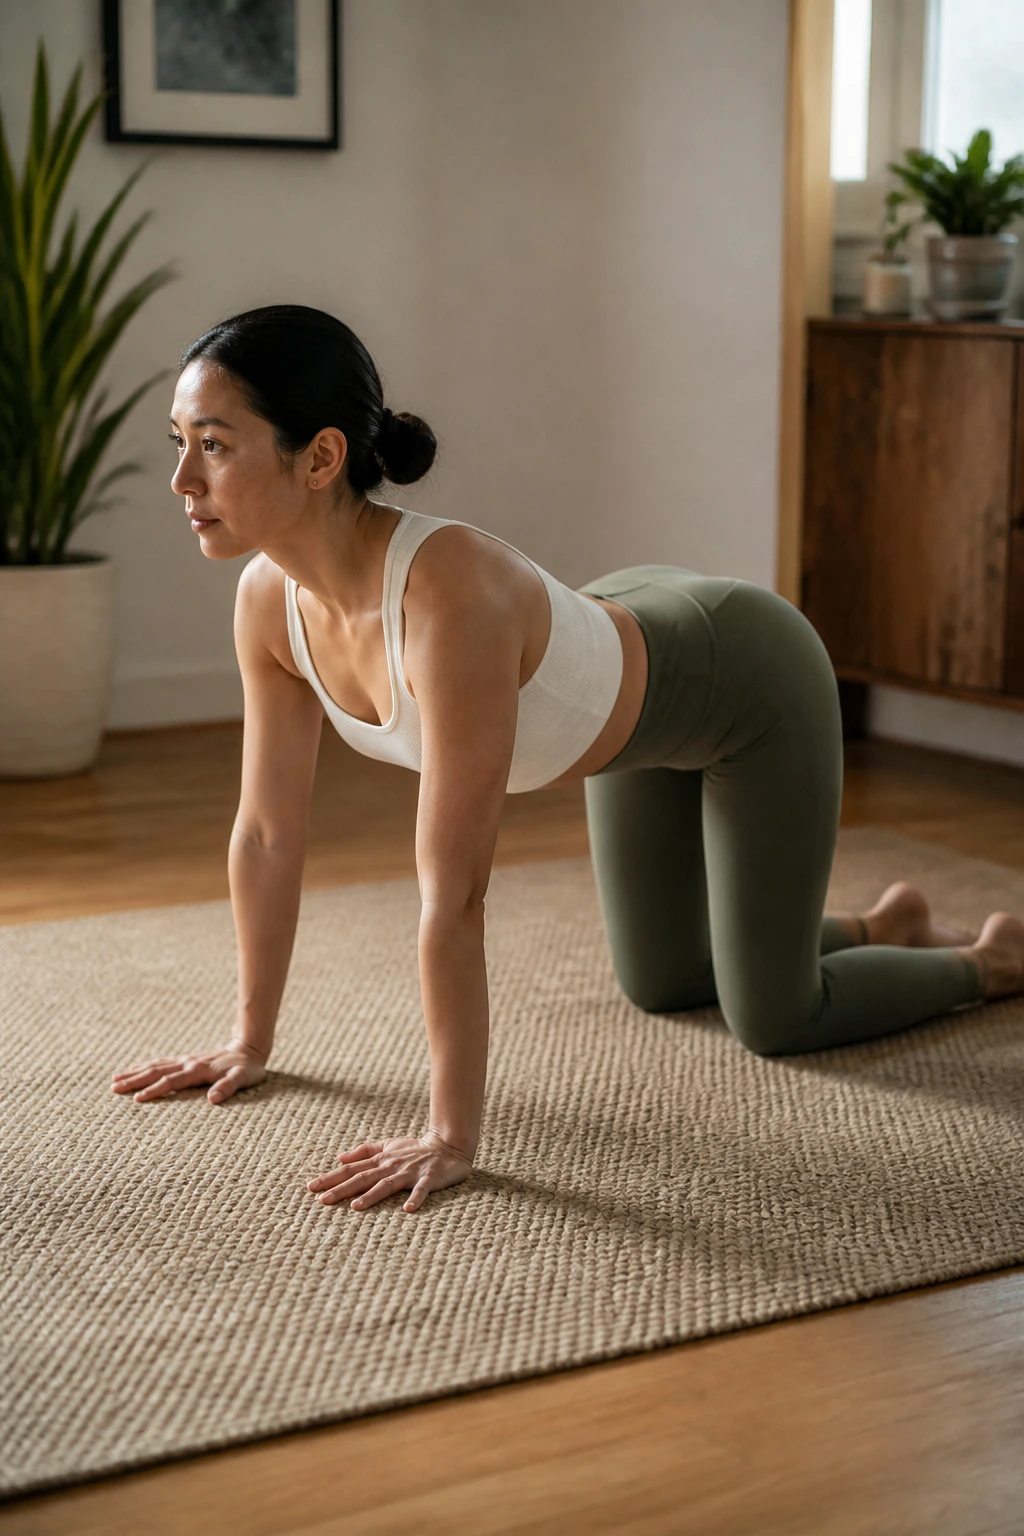
Tabletop is the quiet setup pose that makes the rest of the floor work feel stable. Hands under shoulders, knees under hips, fingers spread wide, neck long. Push the floor away without locking the elbows. It should feel like a strong waiting position, not a collapsed one.
5. Downward-Facing Dog
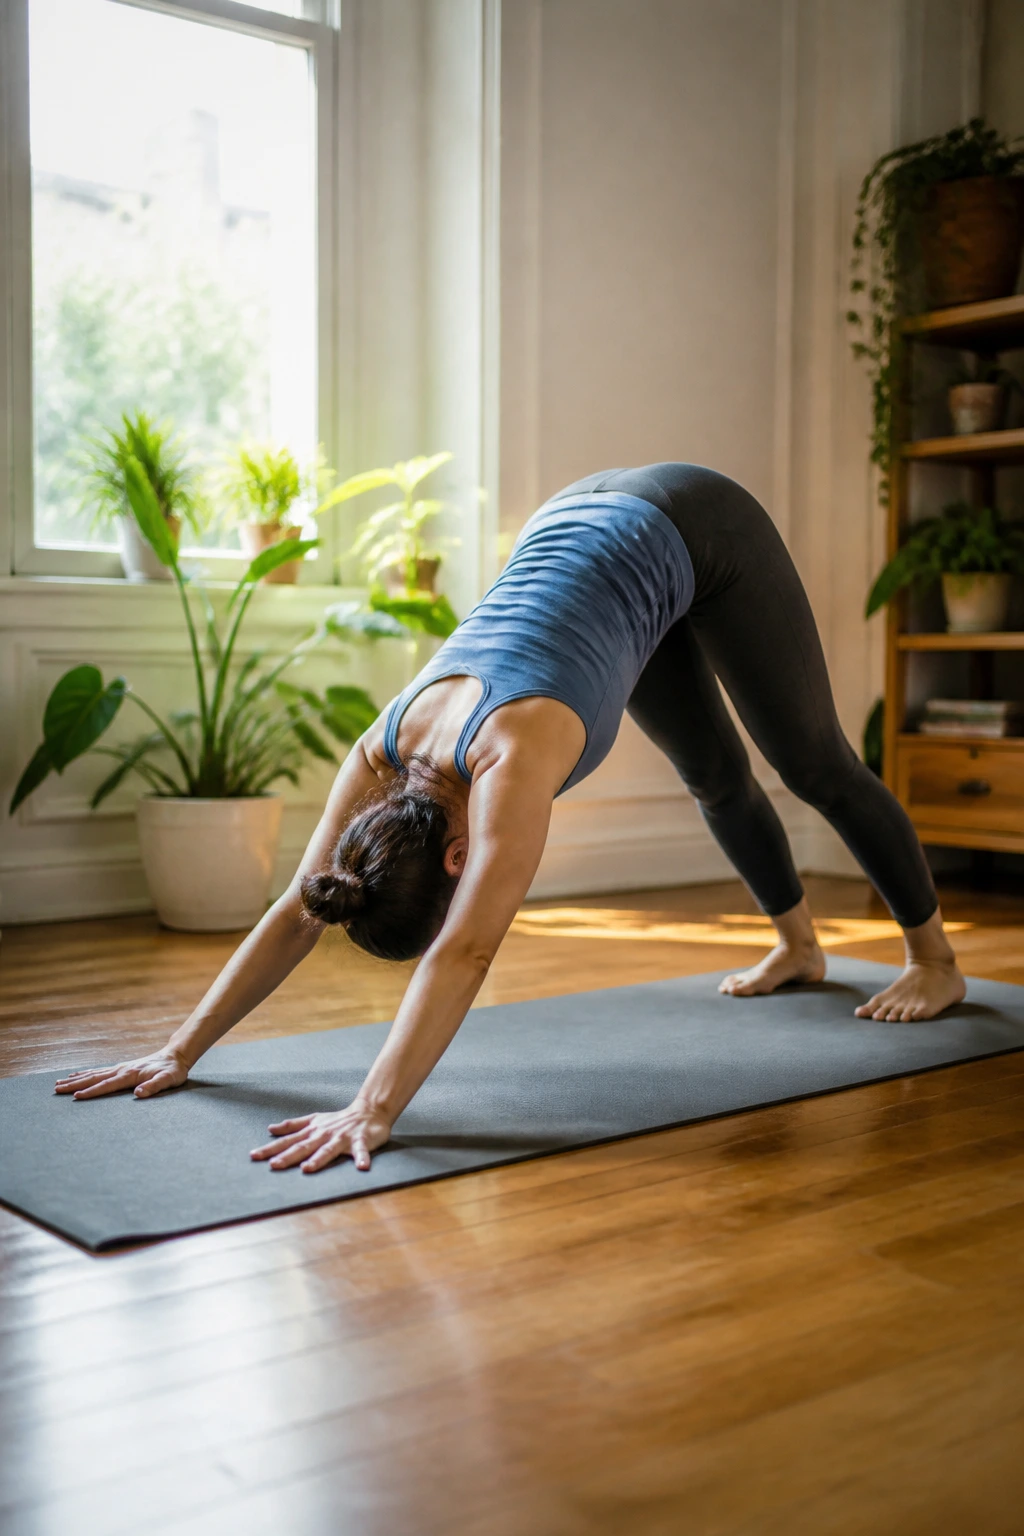
Downward dog can look intimidating, but beginners do not need straight legs or heels on the floor. Bend the knees, lift the hips, and let the spine lengthen first. Think long back, not perfect legs. If your wrists complain, come out sooner and come back later.
6. Standing Forward Fold
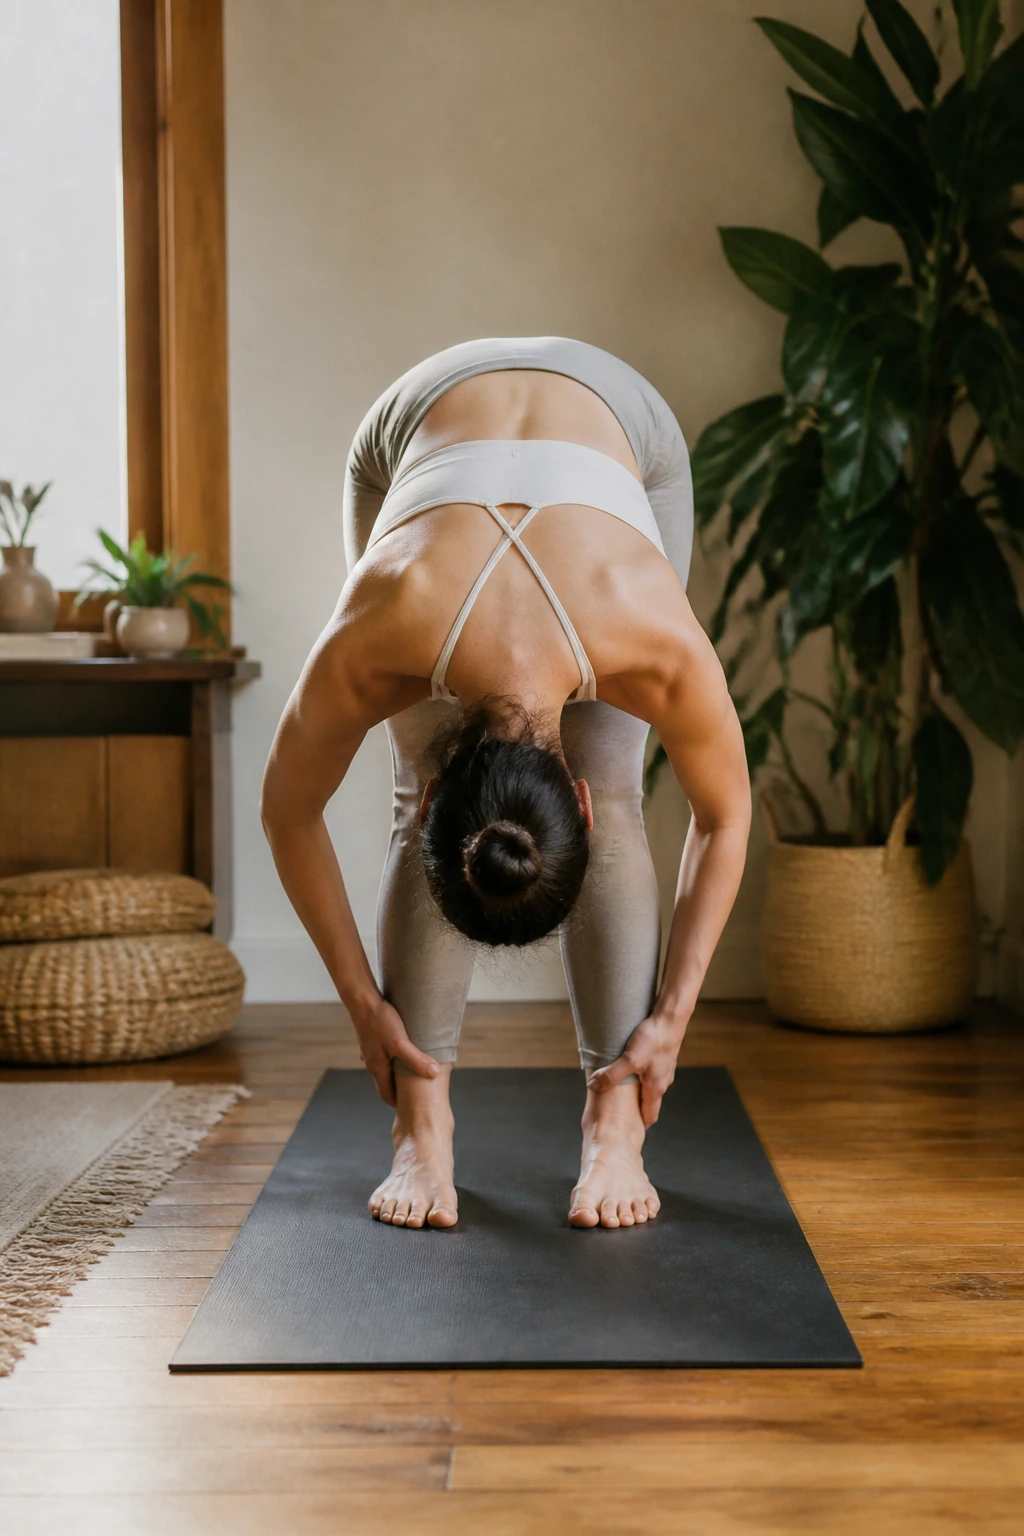
A forward fold becomes kinder the moment you stop trying to touch the floor. Keep the knees bent, let the head hang, and shift the weight toward the balls of the feet.
- Hands can rest on blocks or shins.
- A deeper bend in the knees saves the low back.
- The exhale should feel easy, not forced.
Simple. That’s the whole point.
7. Half Lift
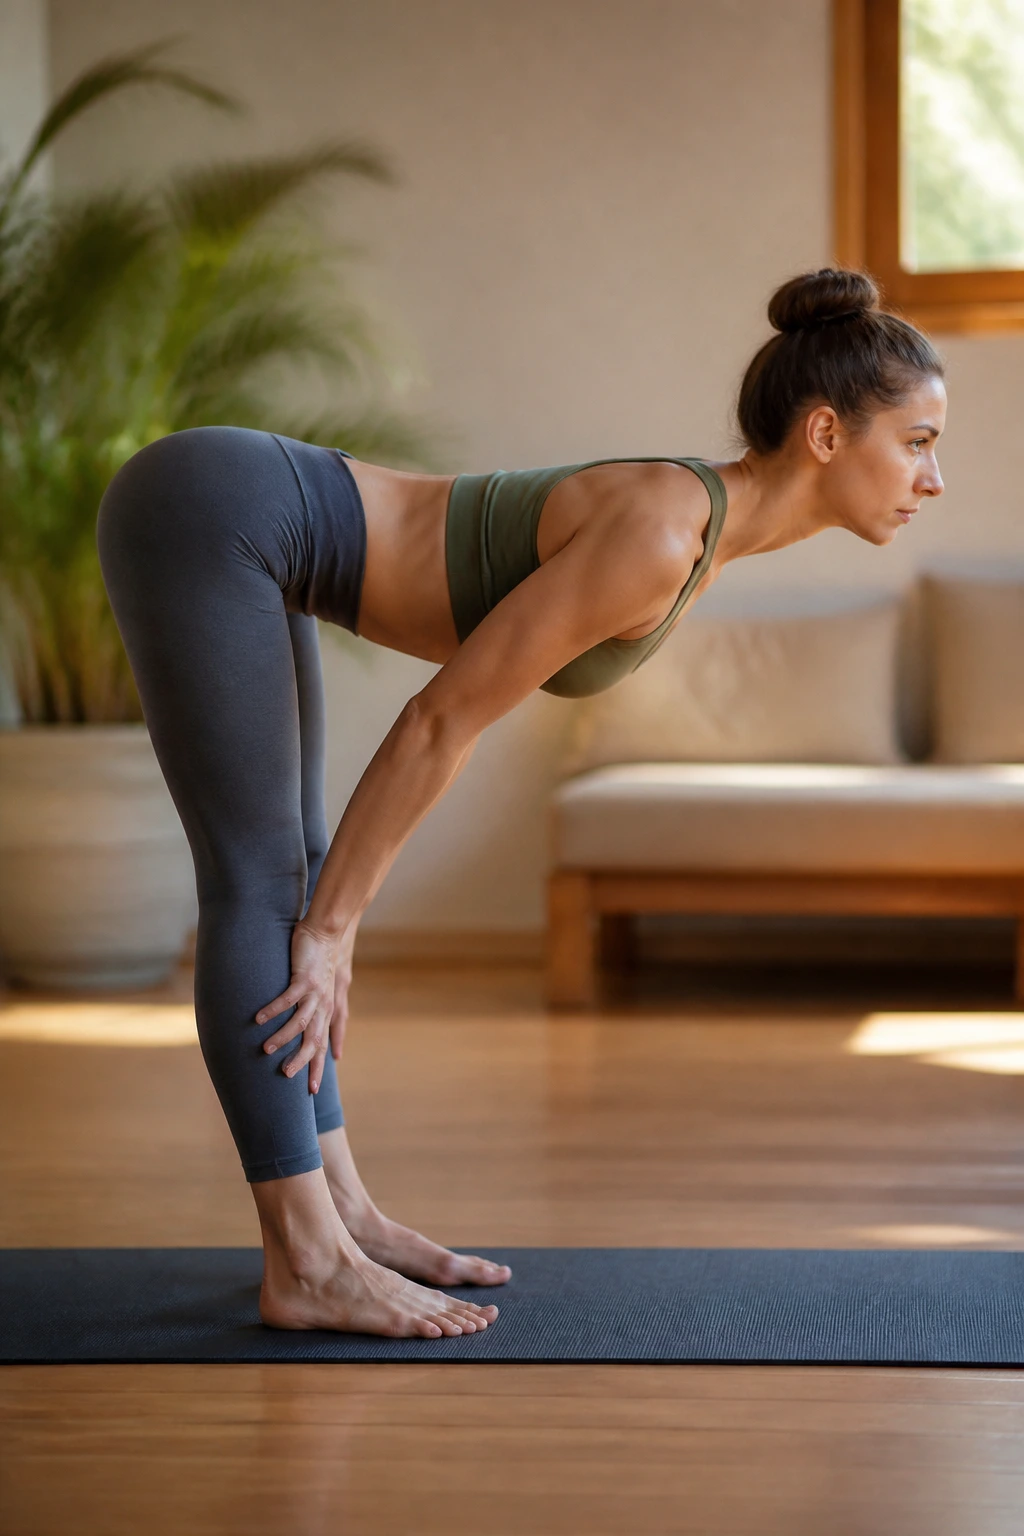
Half lift is where you learn the difference between folding and collapsing. From a forward fold, lengthen the spine until the chest is almost parallel to the floor, fingertips on shins or blocks. Keep the neck in line with the back. It’s a hinge, not a shrug.
8. Low Lunge
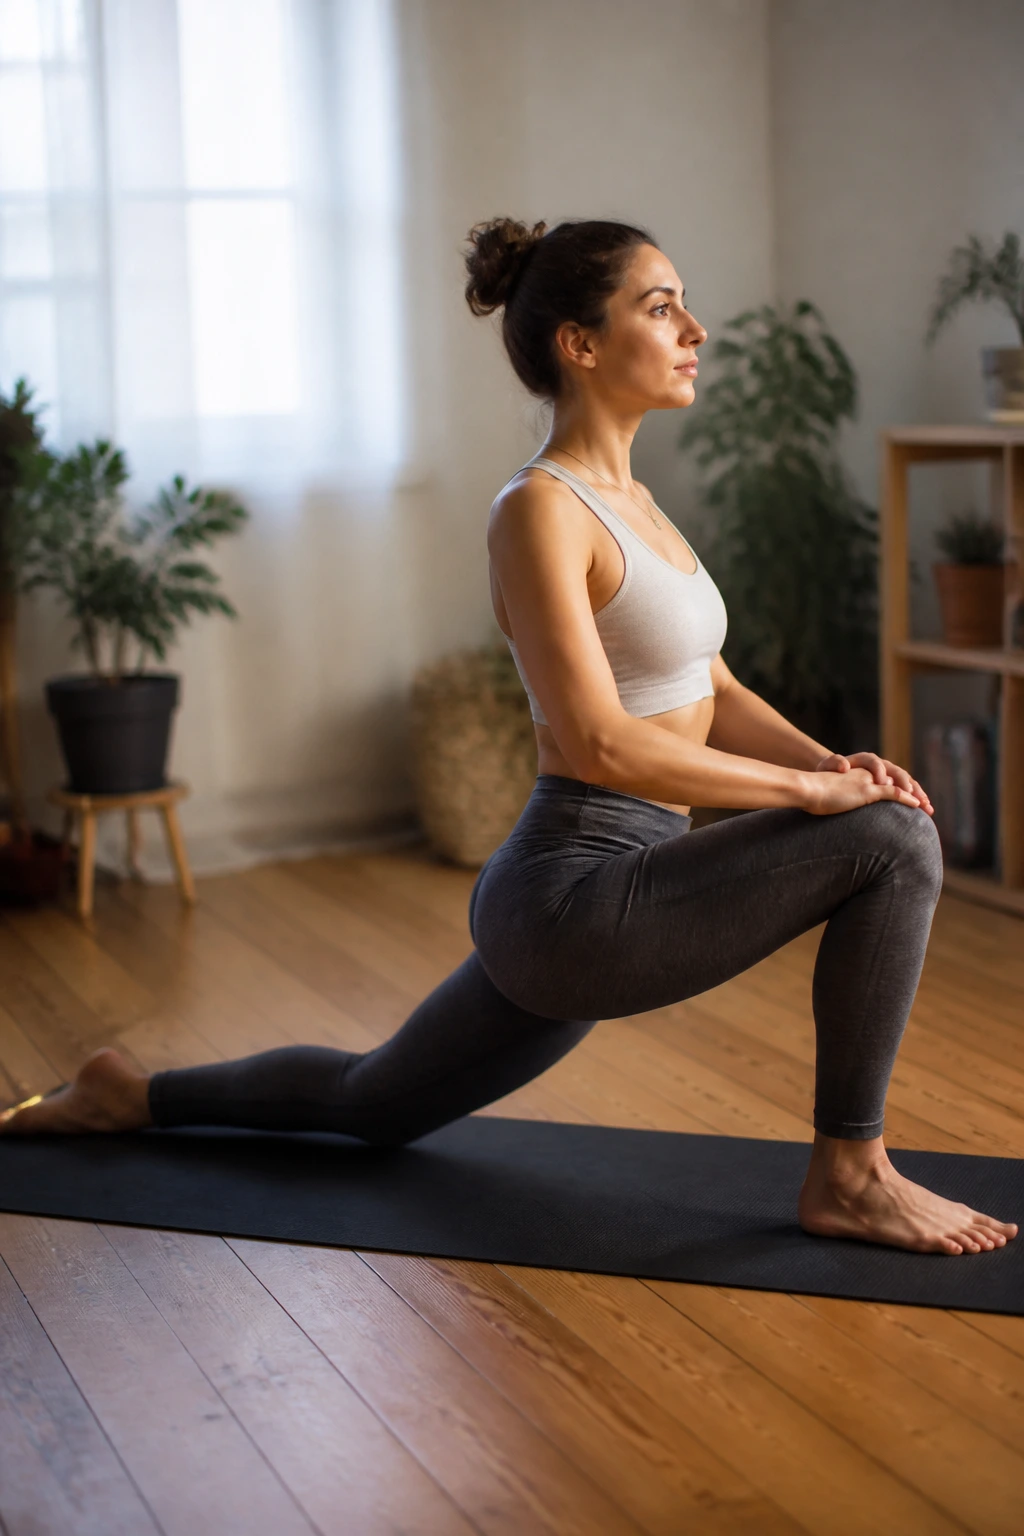
Low lunge is one of the nicest ways to open tight hip flexors after sitting all day. Back knee down, front knee stacked over the ankle, pelvis gently forward. A folded blanket under the back knee helps a lot. Keep the front foot far enough forward that the shin stays comfortable.
9. High Lunge
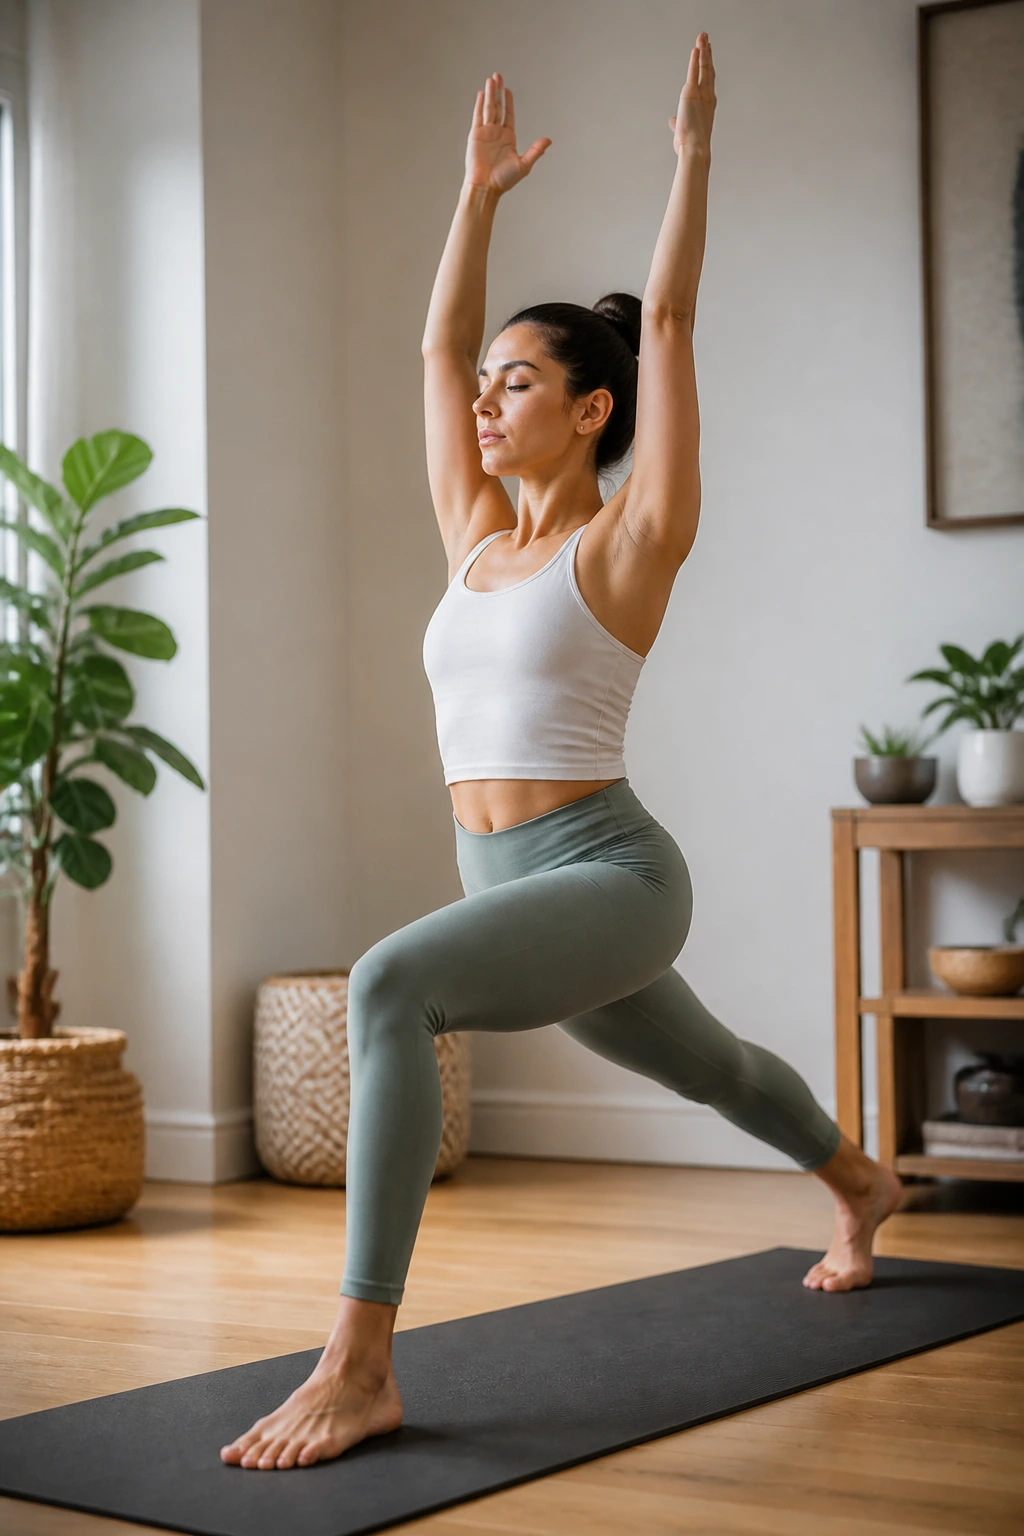
High lunge adds a little heat without getting complicated. Lift the back knee, stand tall, and keep the front knee tracking over the middle toes. The back leg does a lot of work here, so keep the stance a little shorter than you think. That makes balance easier. Much easier.
10. Crescent Lunge
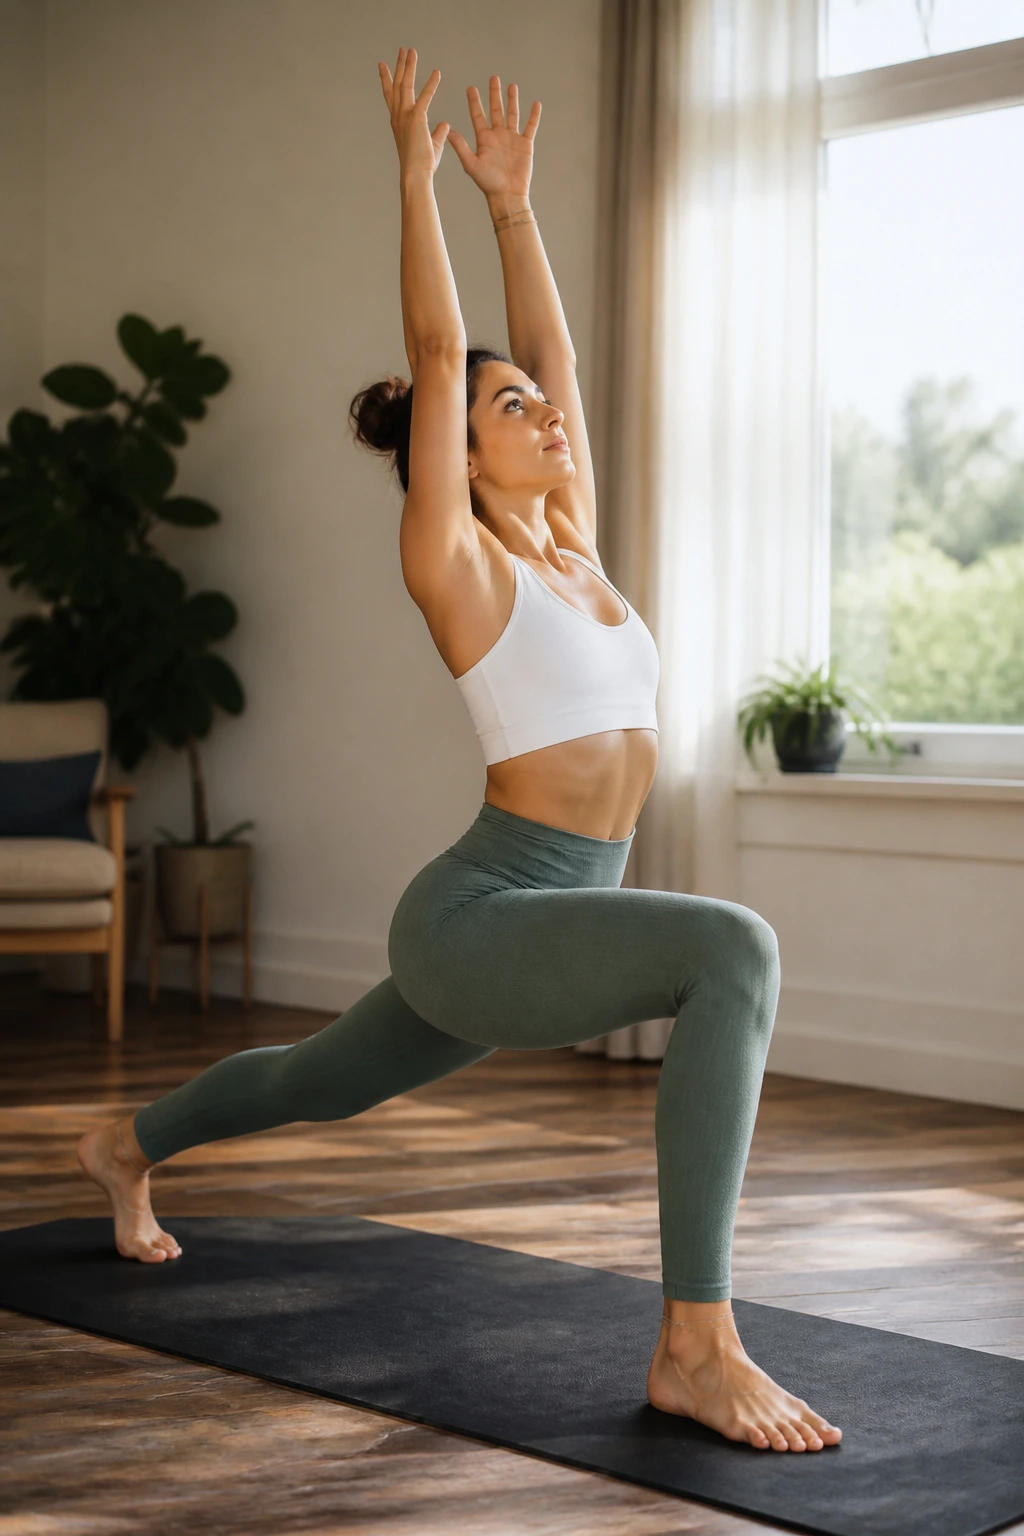
Crescent lunge is the same family as high lunge, but the shape feels longer through the body. Arms reach up, ribs stay tucked in enough to avoid a backbend, and the gaze stays soft. If you wobble, widen the feet slightly. Wobbling is part of learning this one.
11. Warrior I
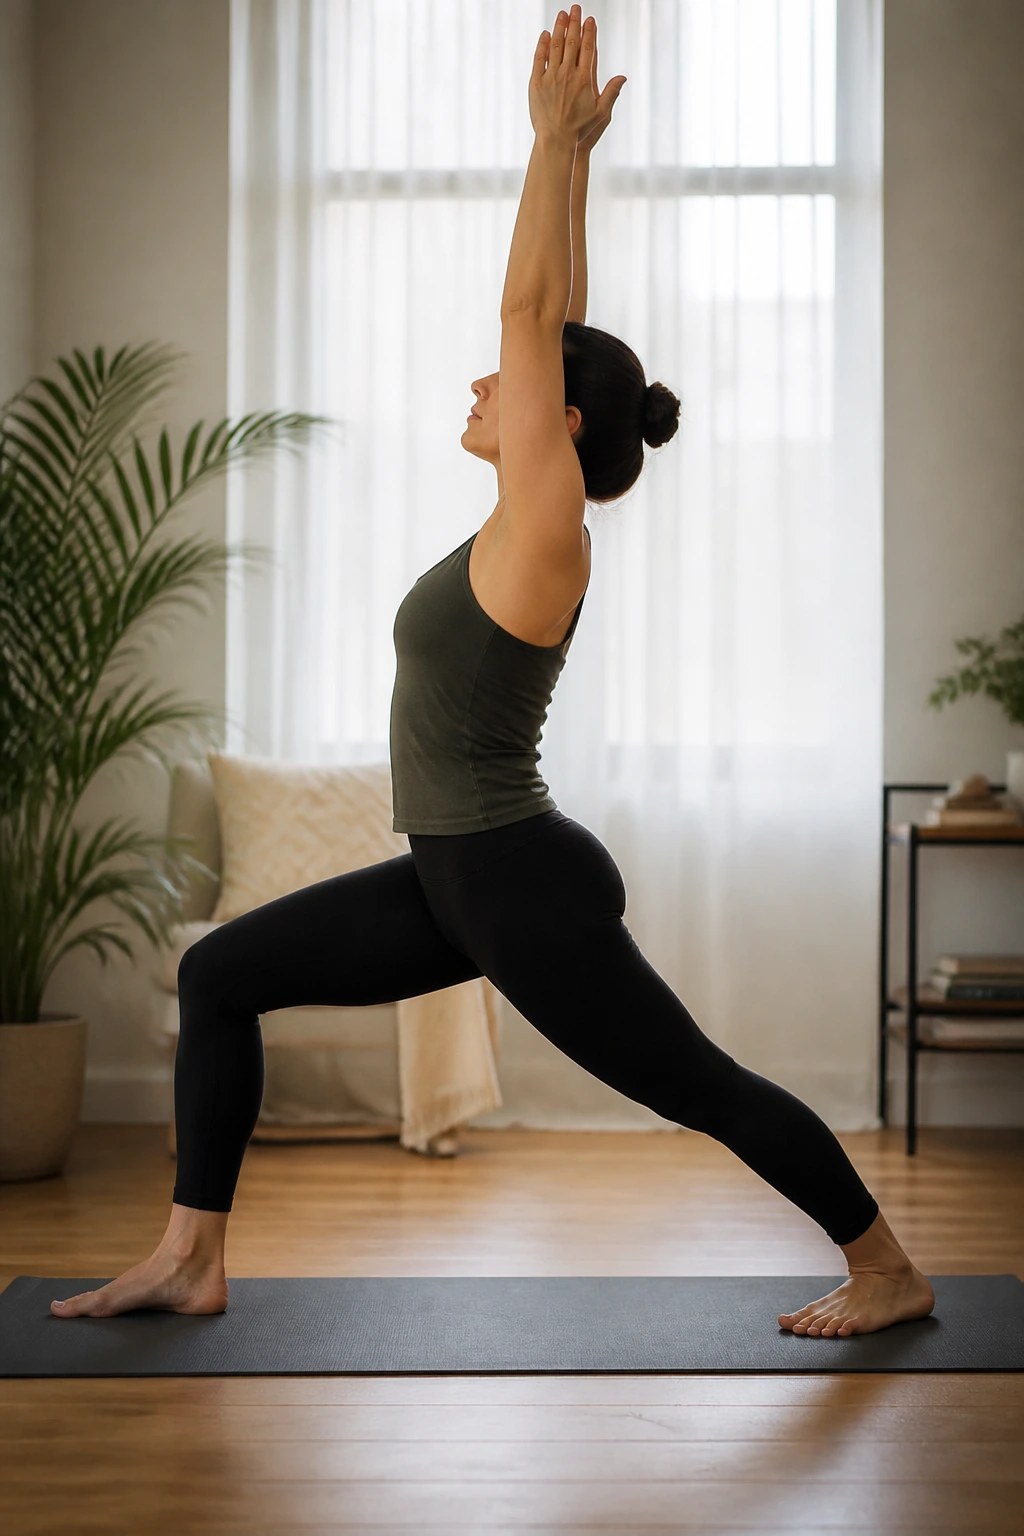
Warrior I asks for a little more intent than the lunges. The back heel roots down, the torso rises, and the arms can lift if the shoulders agree. Keep the hips mostly facing forward, but don’t twist them so hard that the low back pinches. Strong legs first. Fancy shape second.
12. Warrior II
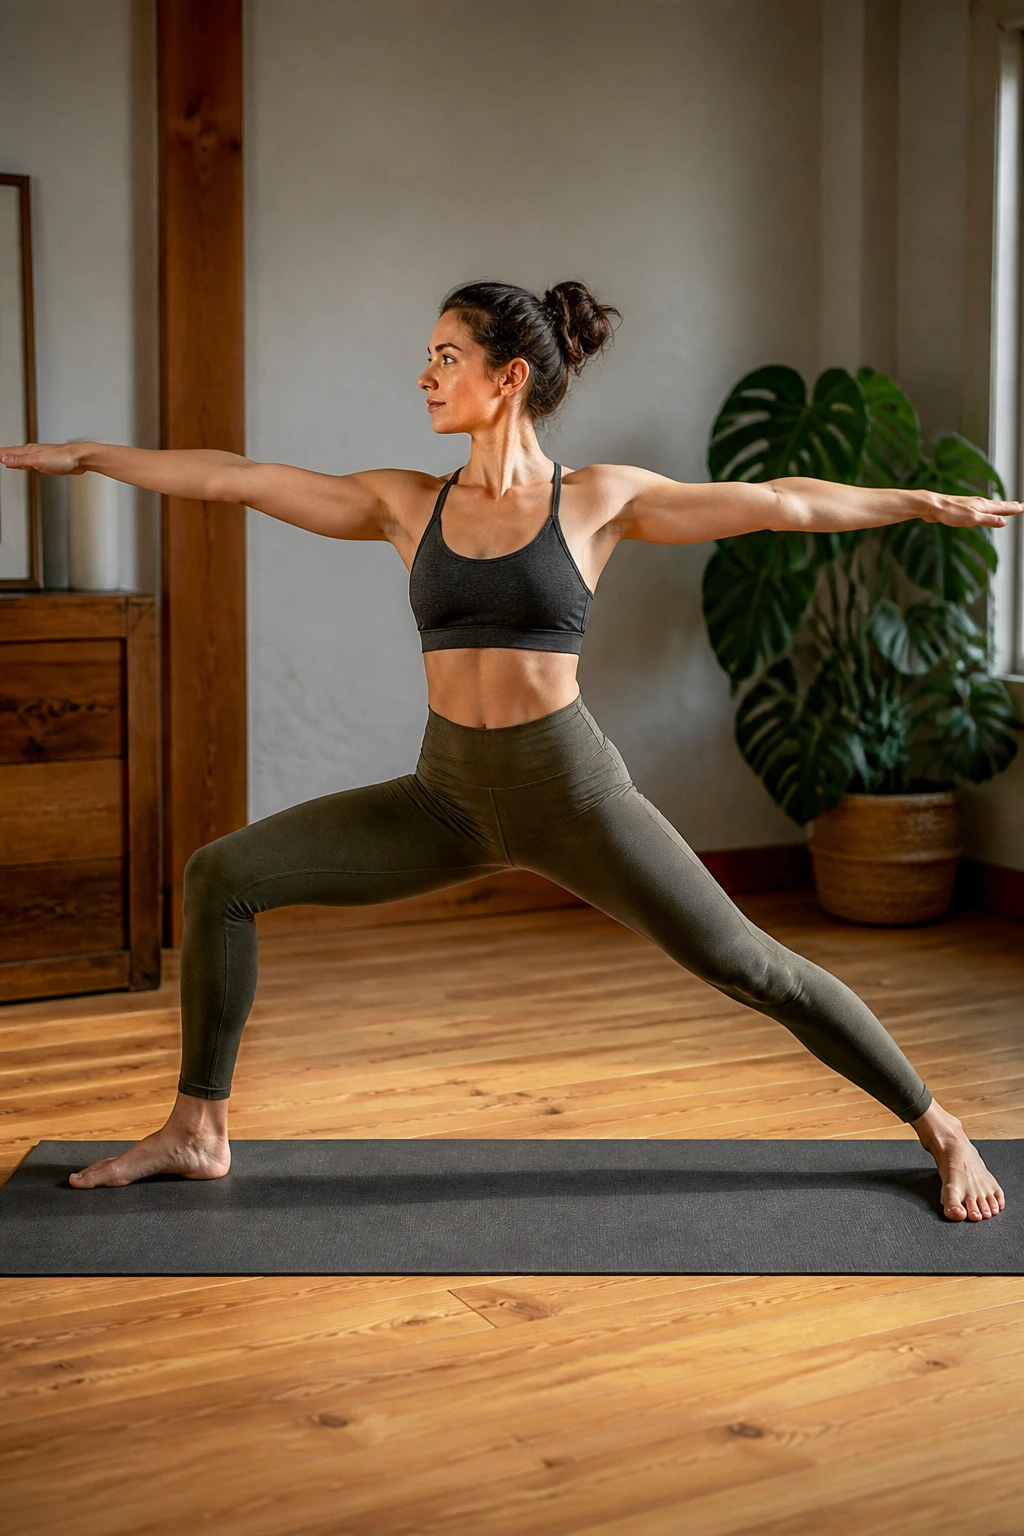
Warrior II opens the body sideways and gives beginners a very clear line to follow. Front knee bends, back leg stays long, arms reach in opposite directions, gaze over the front hand. Let the front knee track toward the second toe. That tiny detail keeps the knee happier.
13. Reverse Warrior
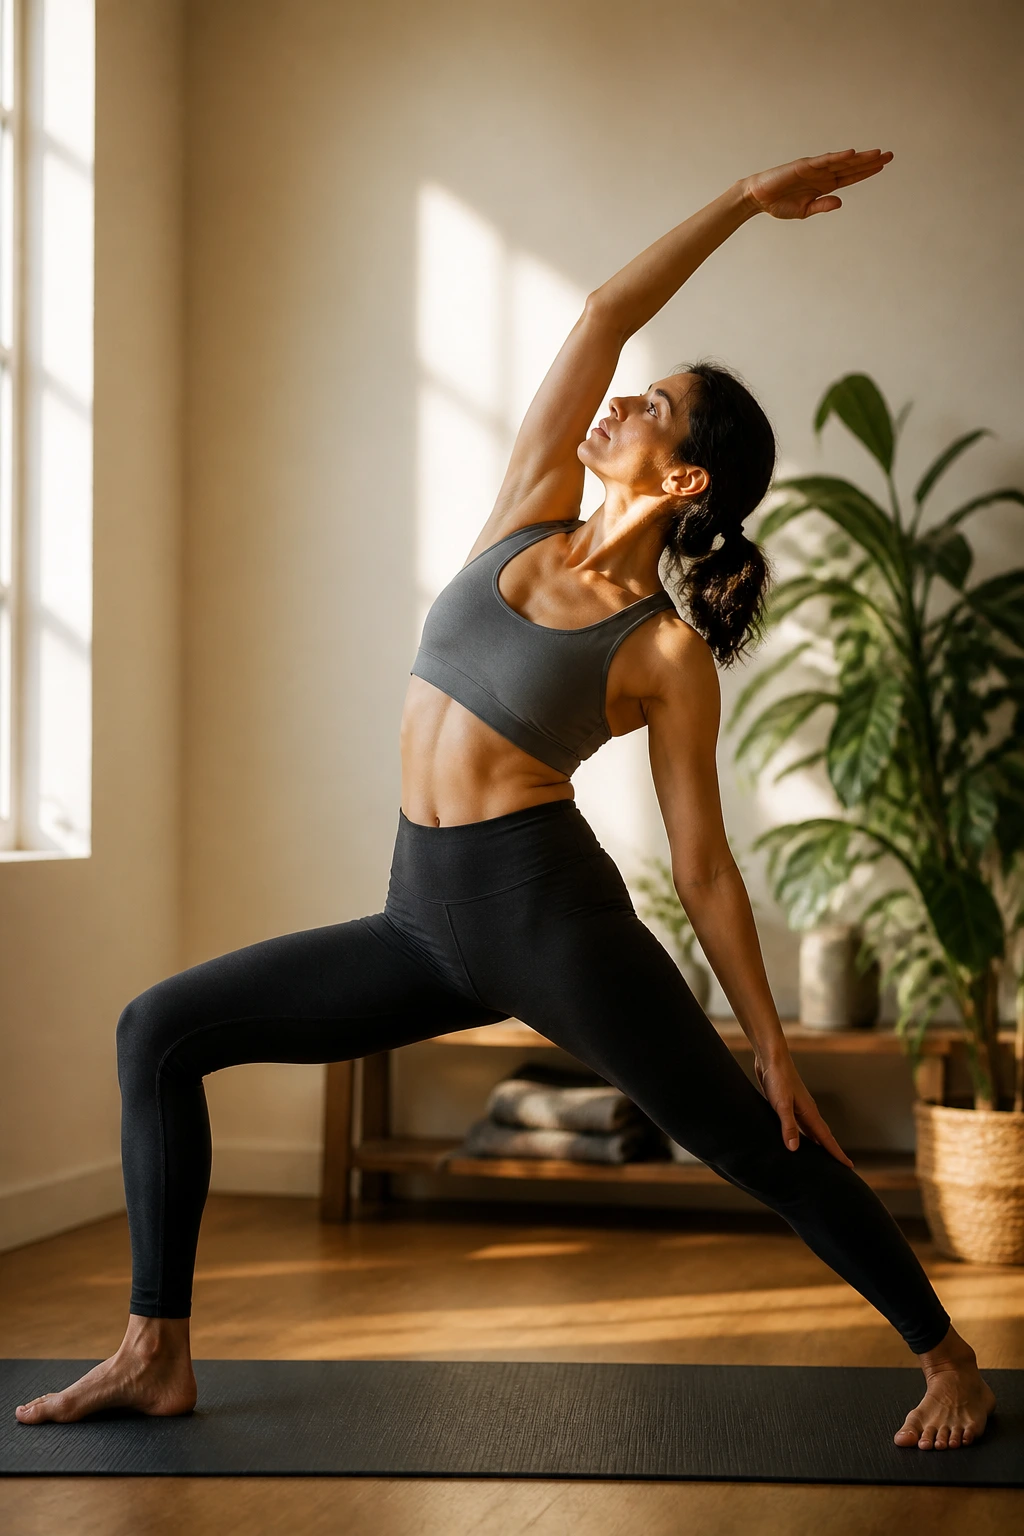
Reverse warrior is not a deep backbend, no matter how dramatic it looks. The front knee stays bent, the back hand slides down the back leg, and the top arm arcs overhead while the torso leans slightly back and up. Keep both feet grounded. The side body does most of the work.
14. Extended Side Angle
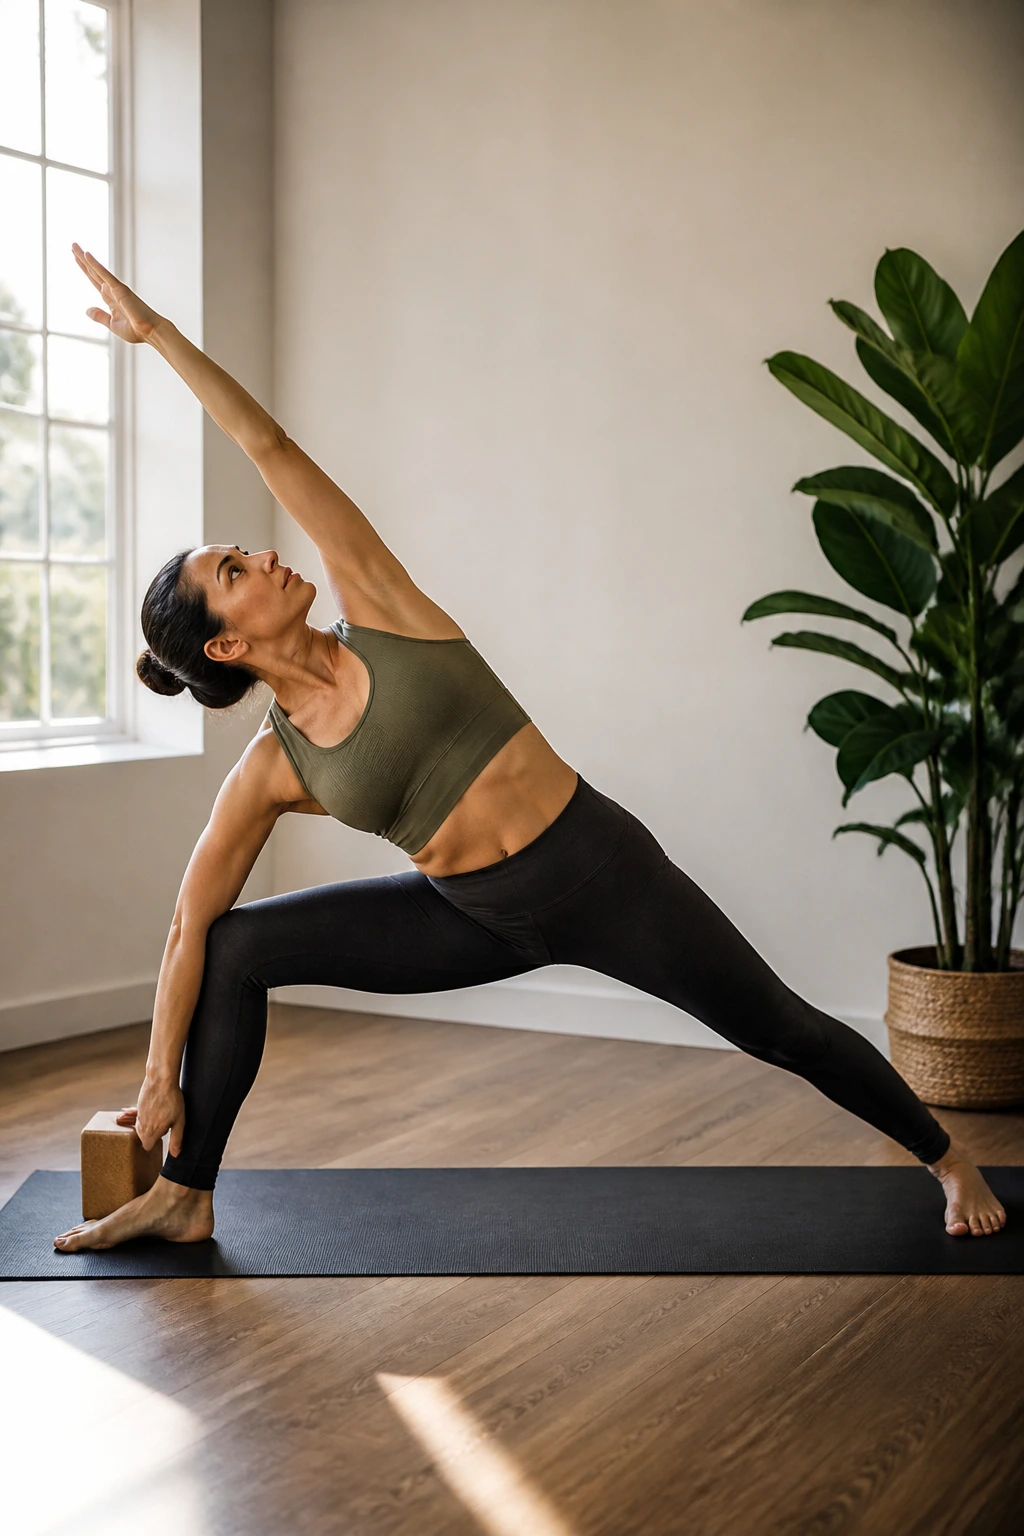
This pose stretches the side waist, opens the hips, and asks for a steady base. Forearm to thigh or hand to a block; both are fine. The biggest mistake is dumping all the weight into the front knee.
What Makes It Feel Better
- Keep the back heel active.
- Reach the top arm long, not floppy.
- Let the chest turn only as far as the breath allows.
That’s enough.
15. Triangle Pose
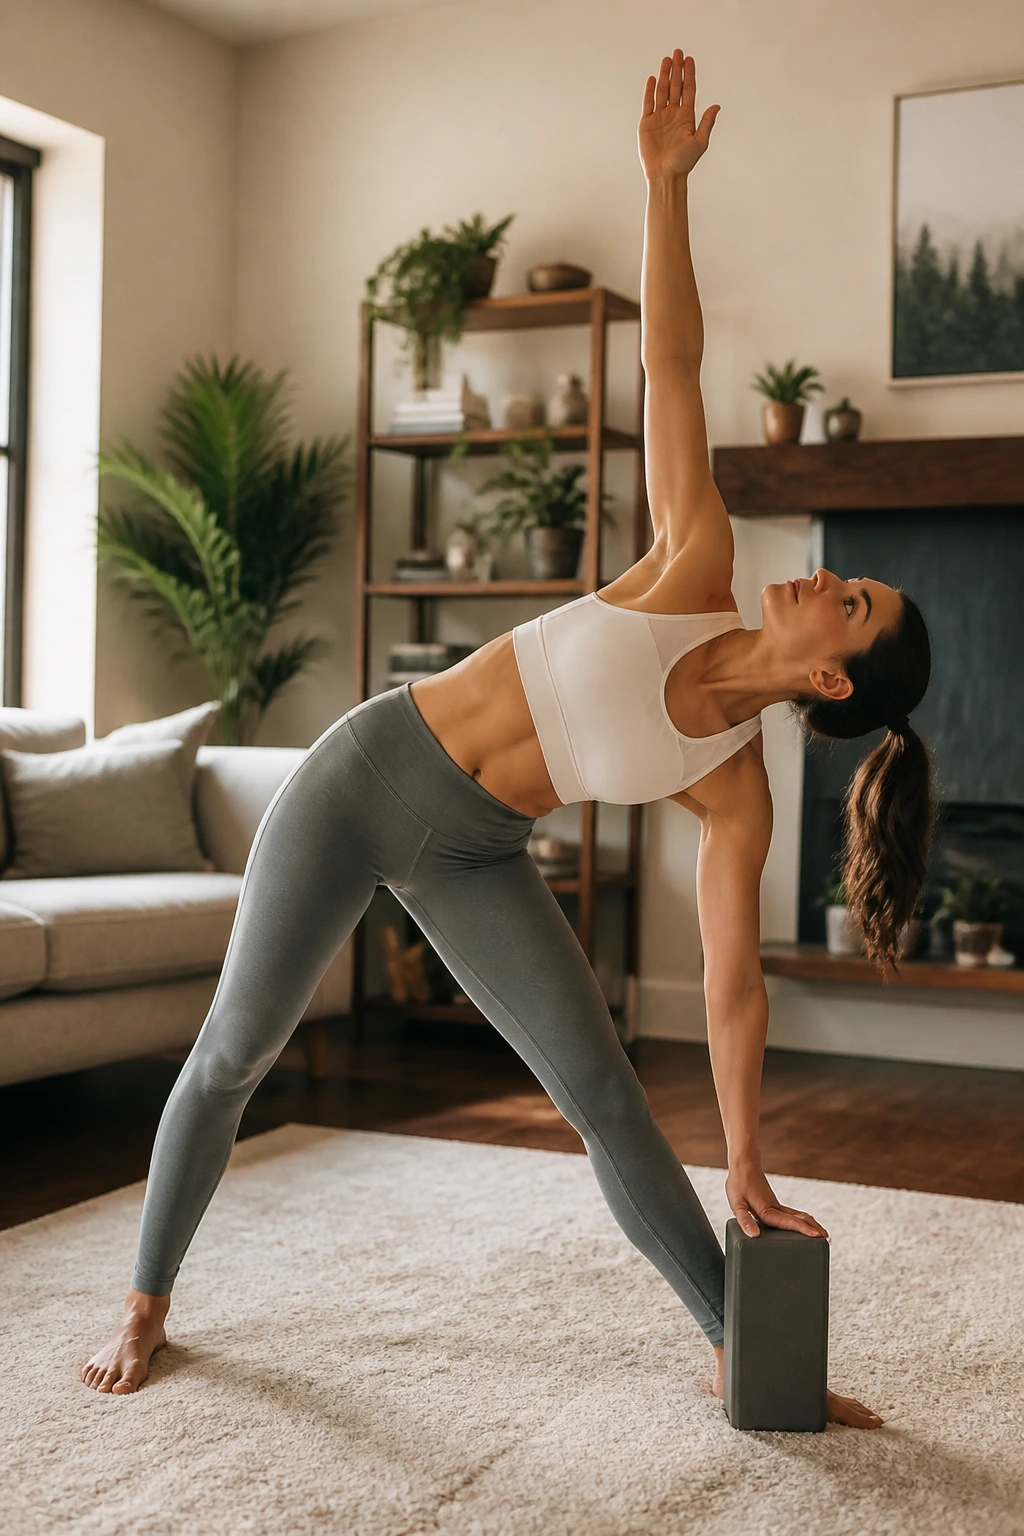
Triangle pose is one of those shapes that looks simple until you try to keep it honest. Feet wide, front leg straight or softly bent, torso hinging from the hip, hand to shin or block. Do not reach for the floor if the side body shortens. Height matters less than length.
The Hip and Rib Trick
Keep the hips from drifting forward too much, and think about opening the rib cage instead of collapsing over the front leg. A block on the inside of the shin often makes the pose cleaner. Clean, not deep. That’s the win here.
16. Tree Pose
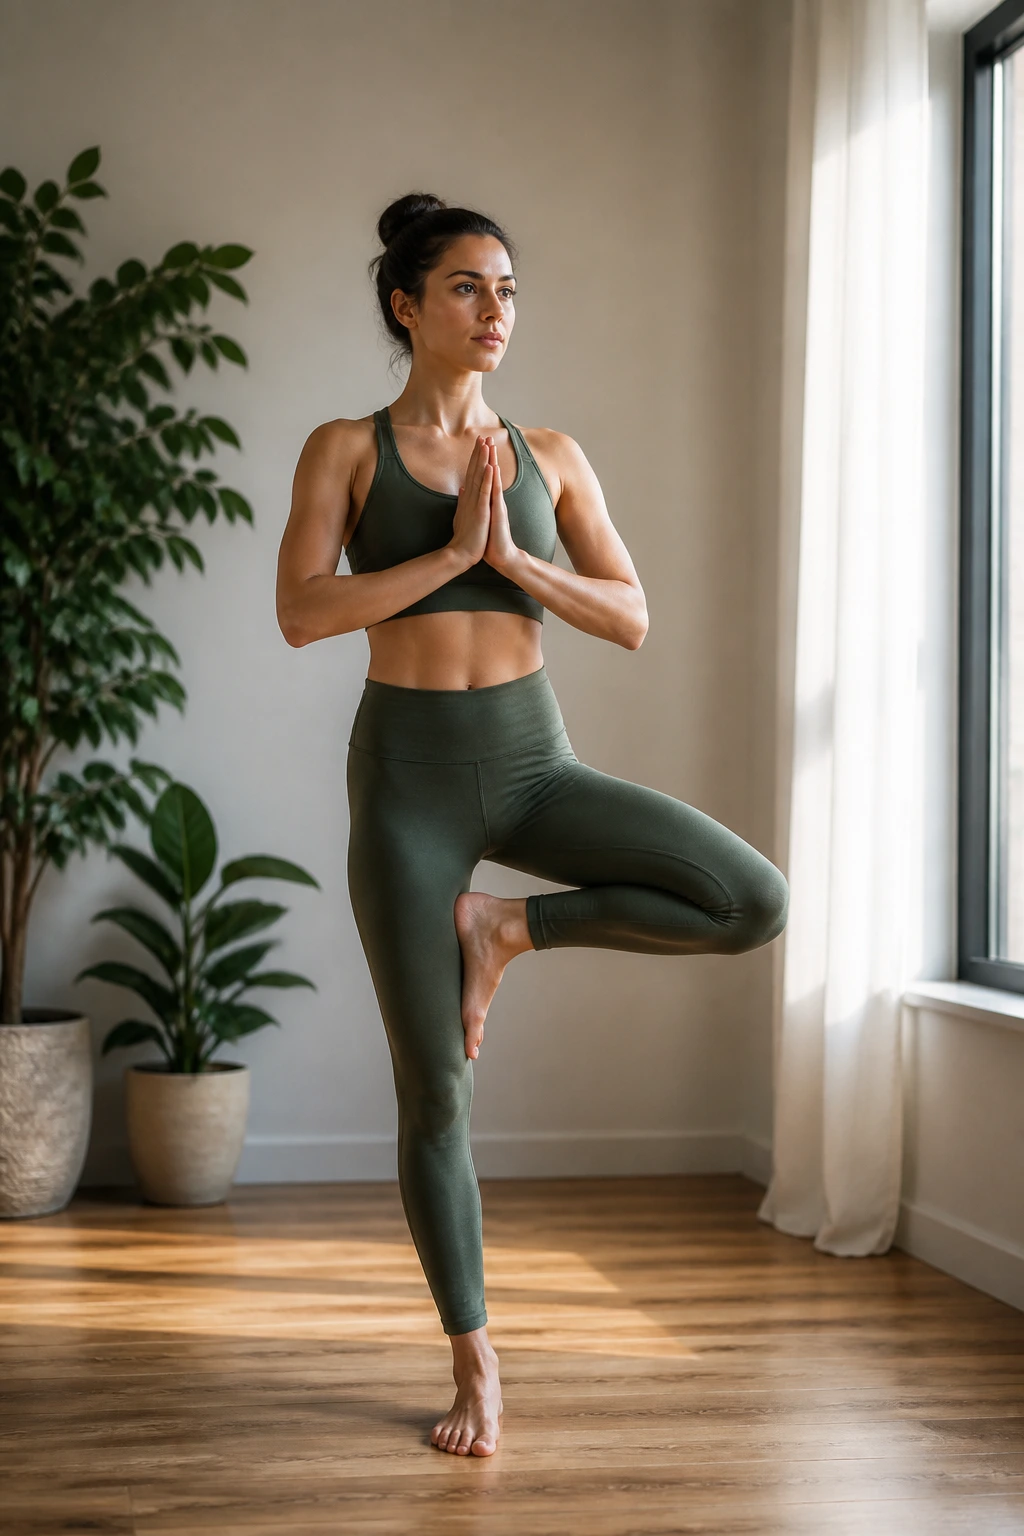
Tree pose teaches balance without making it a circus act. One foot stays rooted; the other can rest at the ankle, calf, or inner thigh. Never press the foot into the knee joint. Pick one point to stare at and breathe there. Small wobbles are normal. Big ones, too.
17. Chair Pose
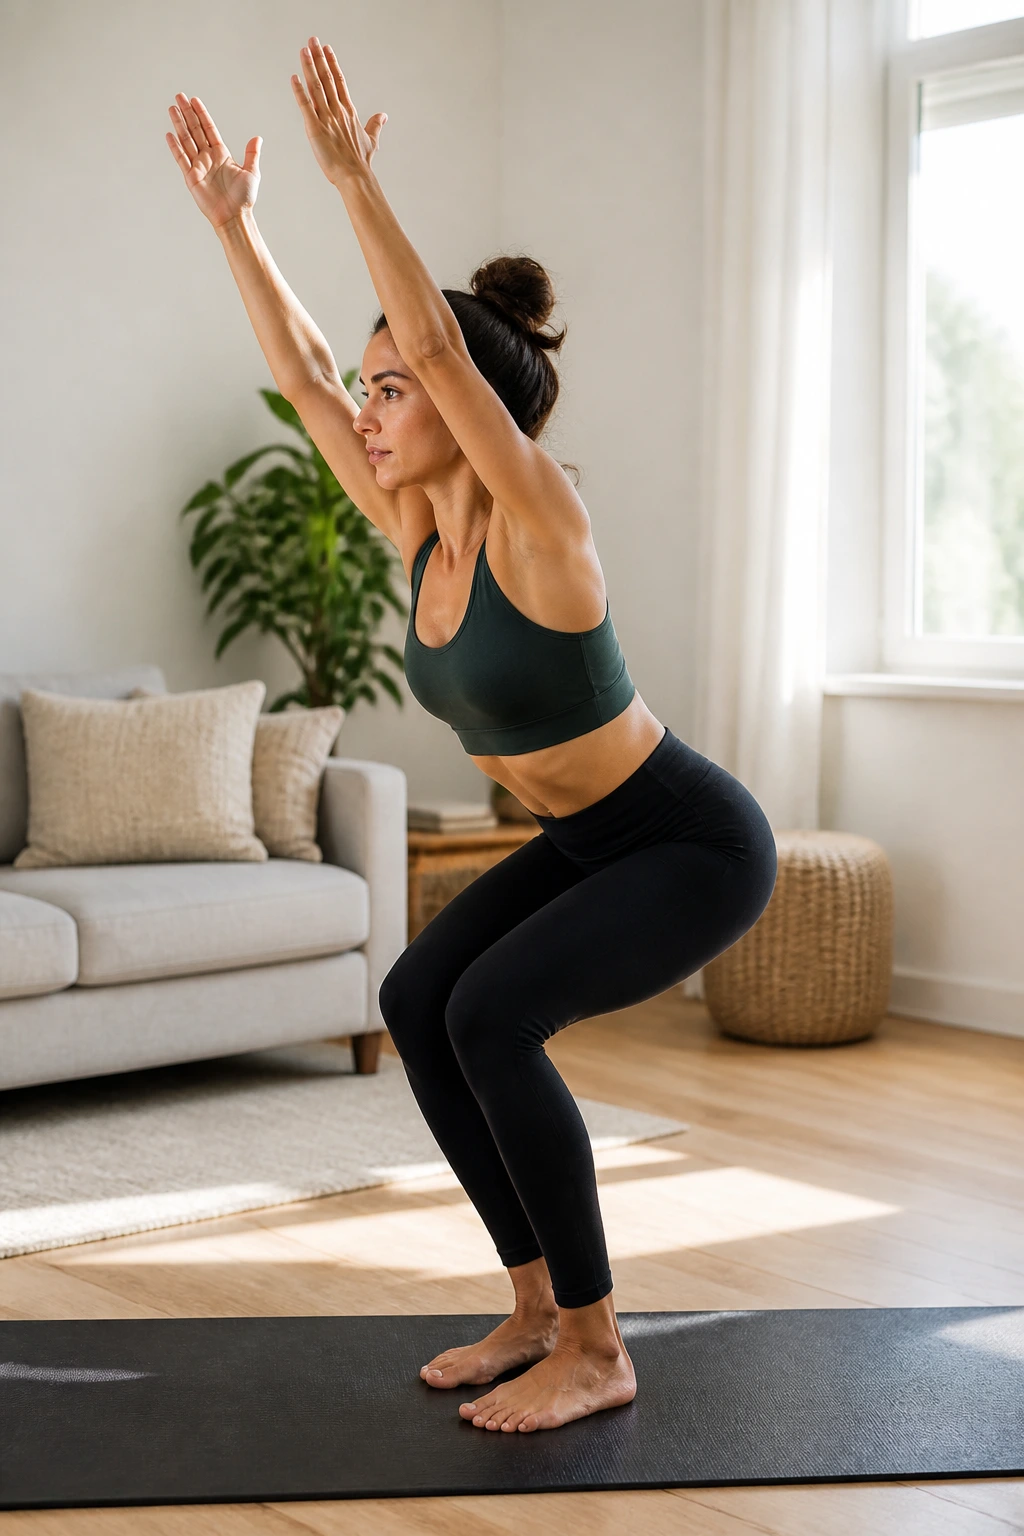
Chair pose is basically a sit-back drill with attitude. Hips move back, chest stays lifted, weight settles into the heels, and arms can reach forward or overhead. If your knees drift inward, widen the stance a little. The thighs will work. They should.
18. Garland Pose
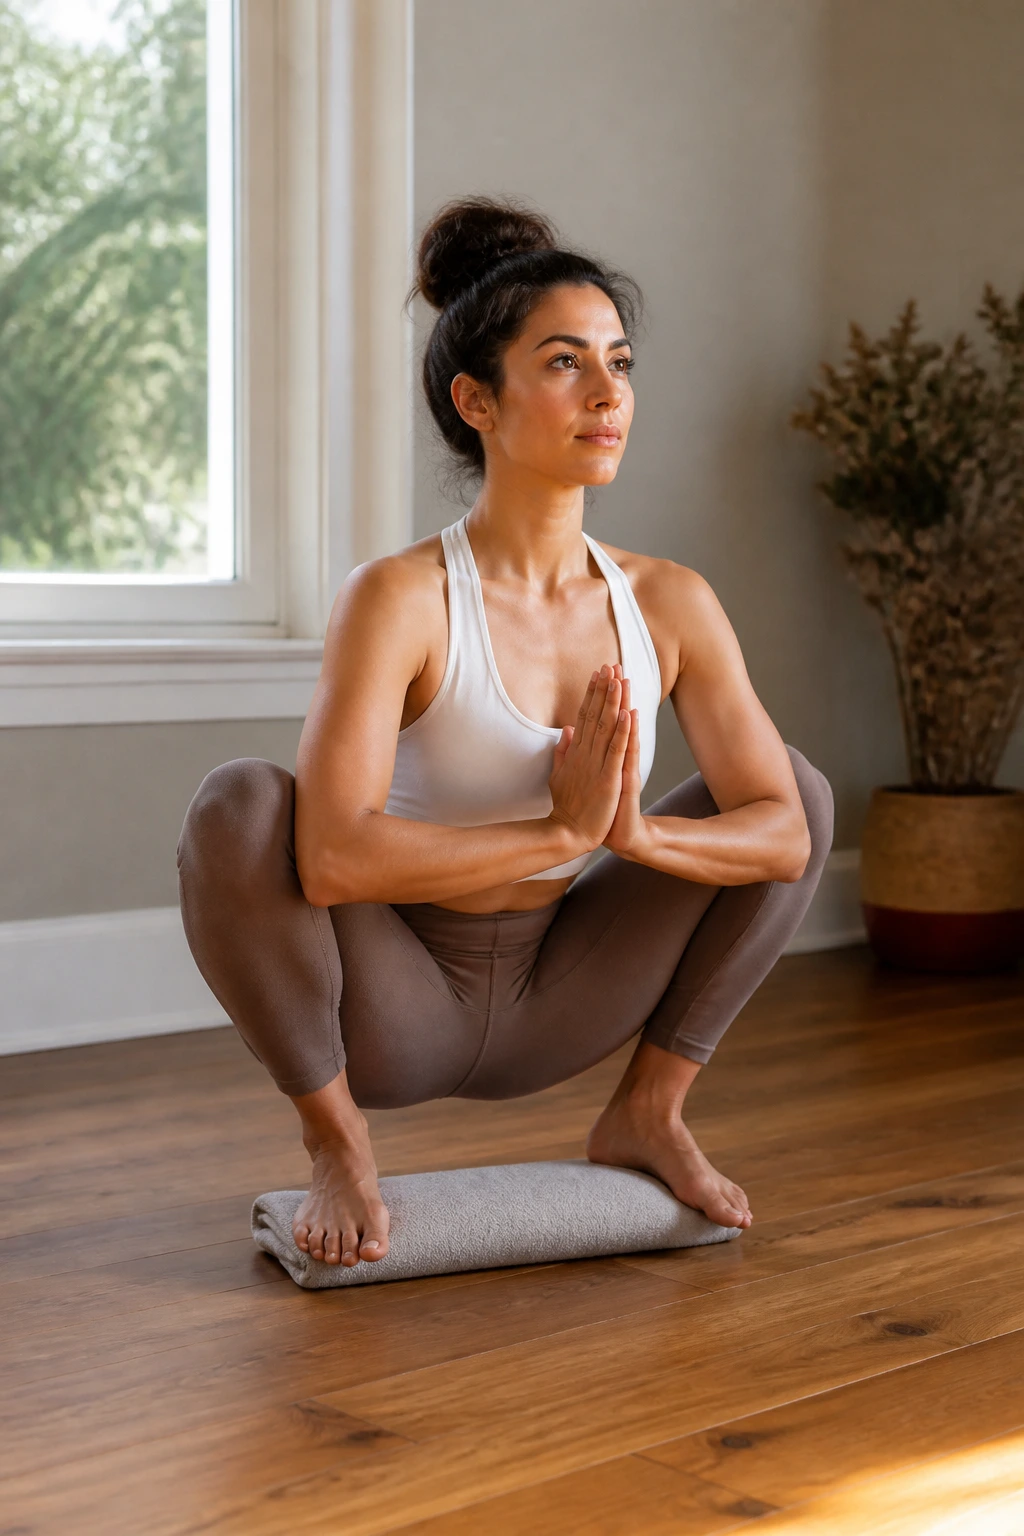
Garland pose is a deep squat that can feel surprisingly natural when you give it enough support. Heels may lift, and that’s fine. A rolled blanket under the heels, or a block under the sit bones, changes everything. Keep the spine long. This one should open, not cram.
19. Bridge Pose
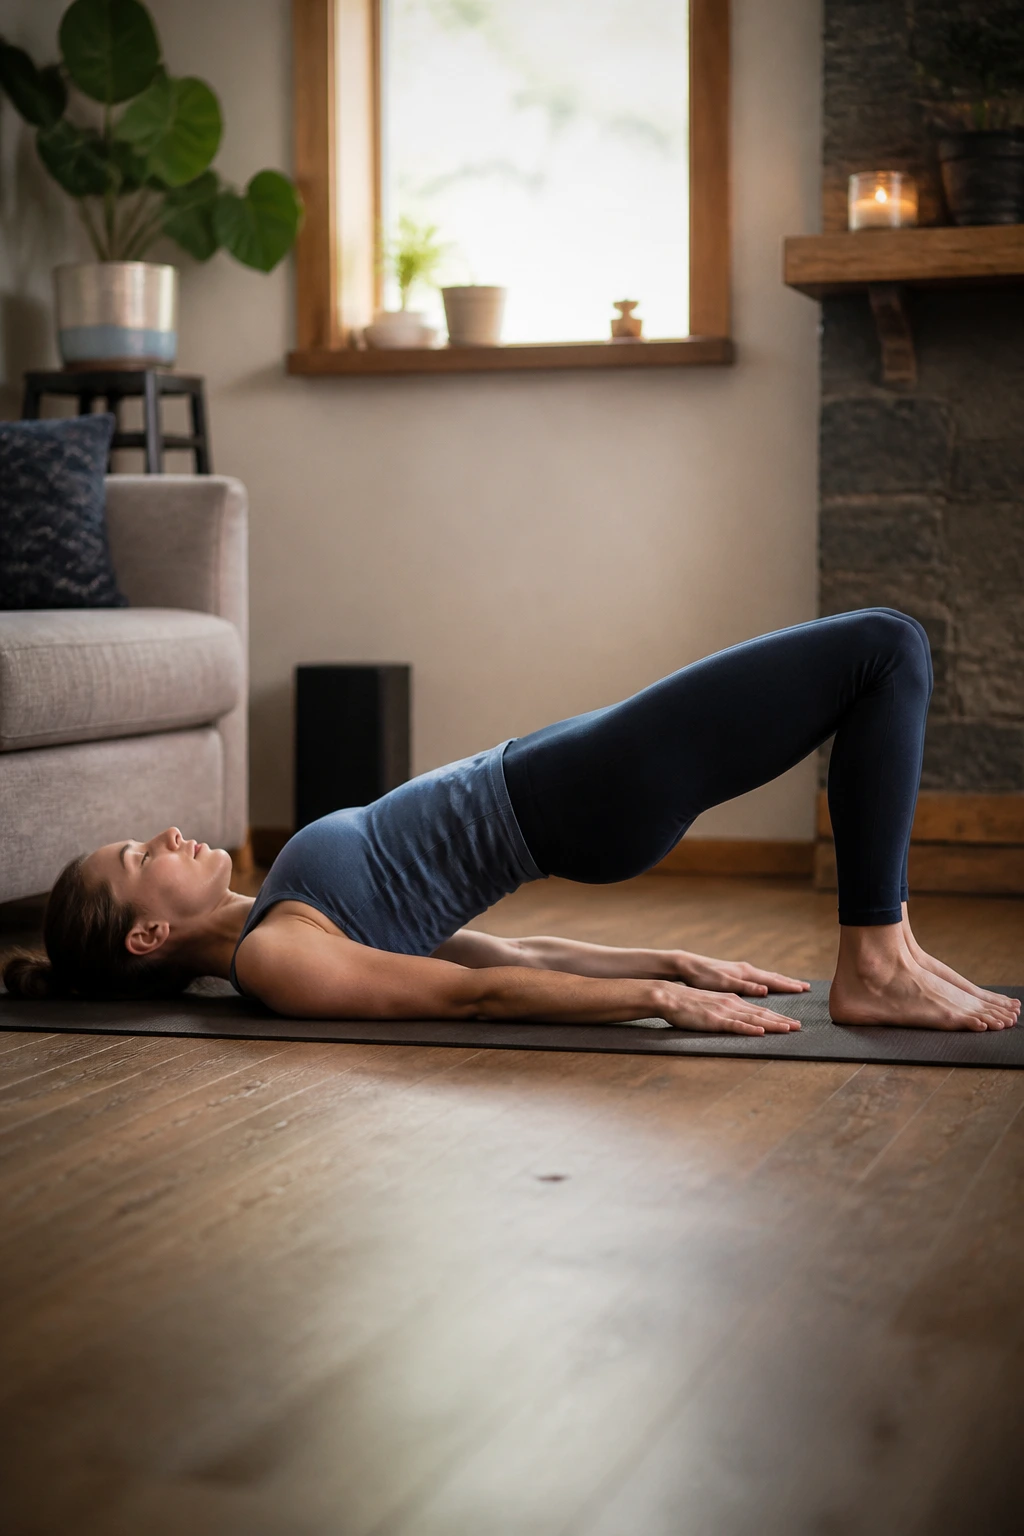
Bridge pose is a beginner backbend that works well at home because the floor supports you. Lie down, bend the knees, feet hip-width apart, then lift the hips slowly. A block under the sacrum turns it into a supported version. Squeeze the glutes lightly, not hard.
20. Sphinx Pose
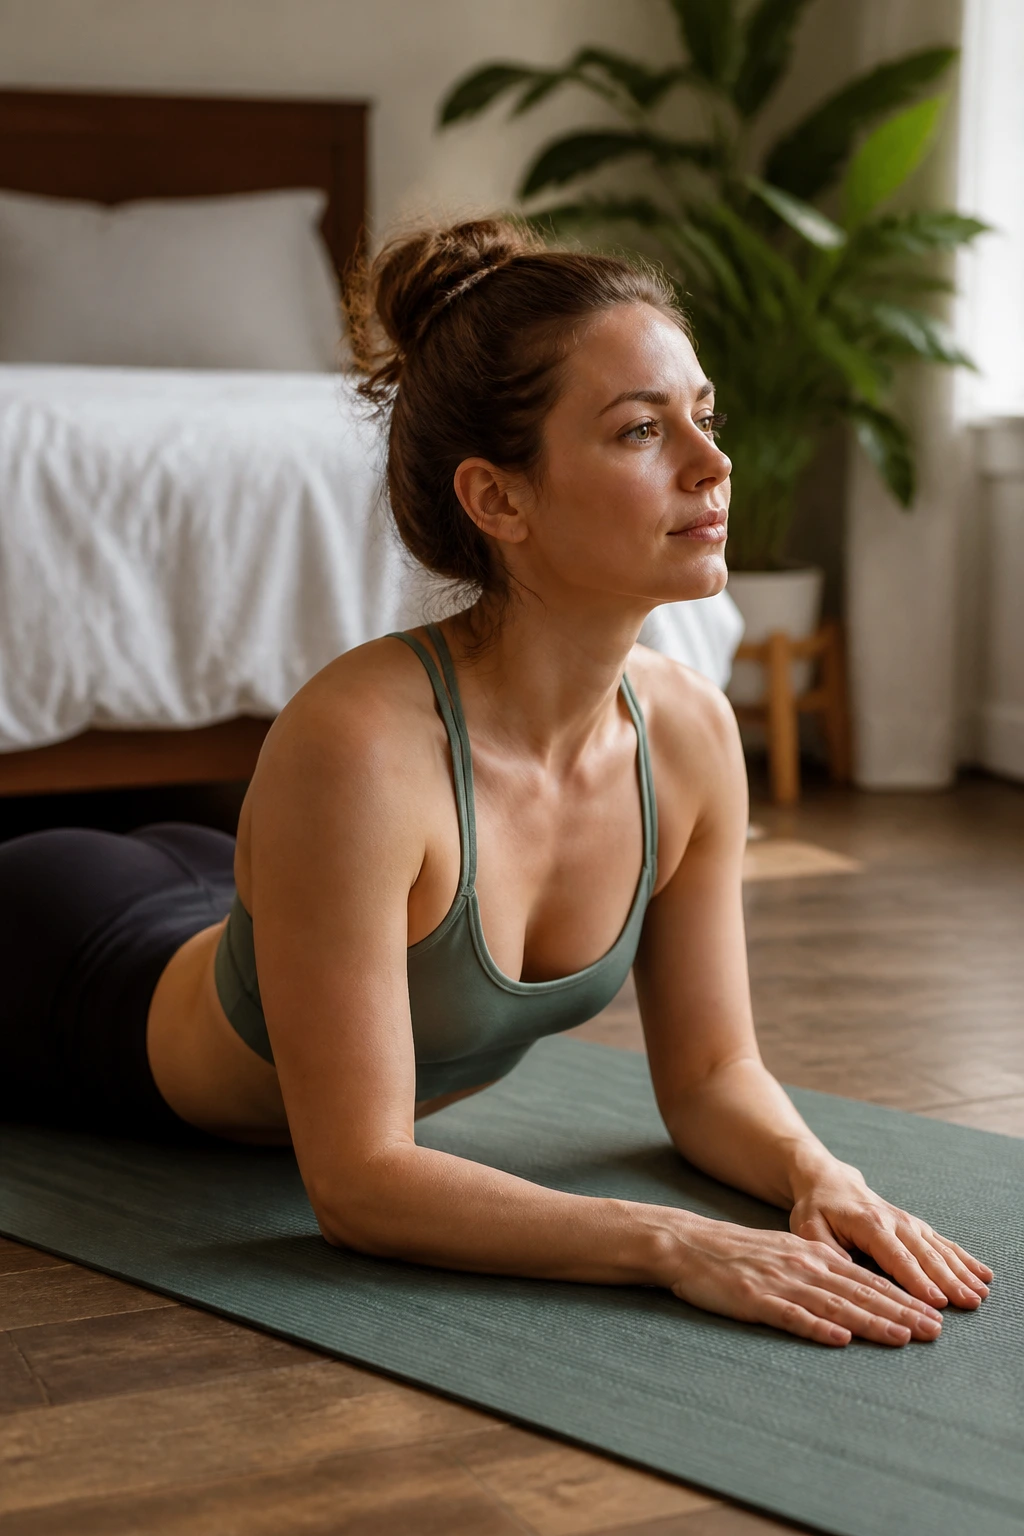
Sphinx pose is gentle, steady, and useful when the low back wants movement without drama. Forearms on the mat, elbows under shoulders, chest drifting forward. Press the forearms down and lengthen the tailbone back. If the low back tightens, come lower and keep the shape smaller.
21. Cobra Pose
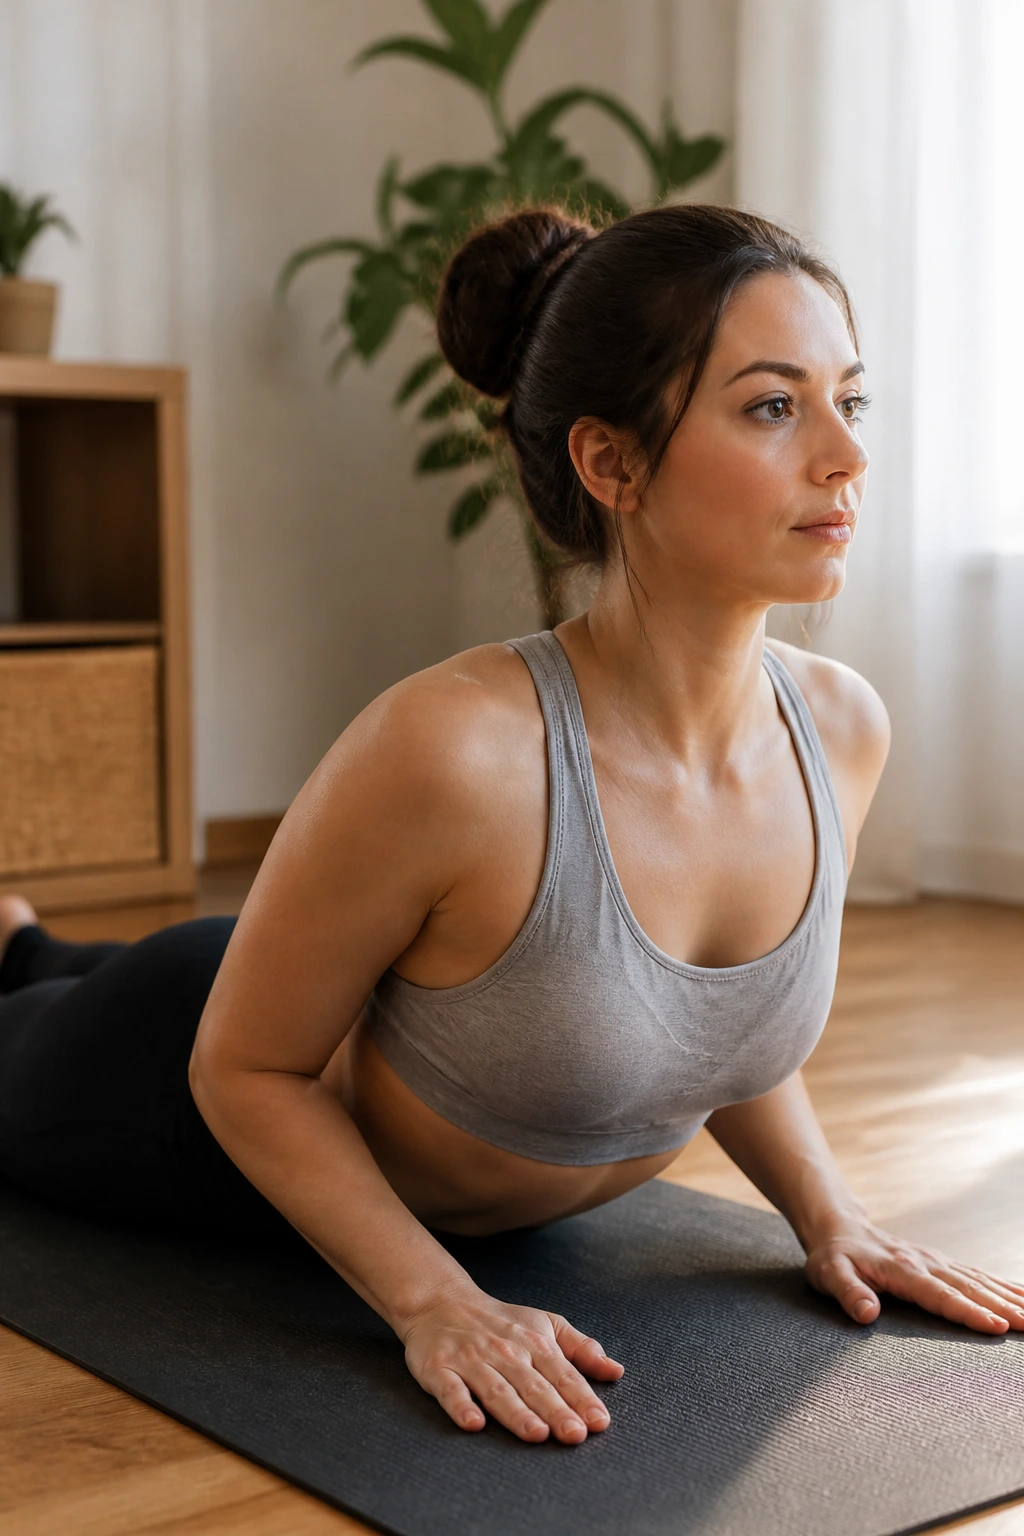
Cobra pose is a little more active than sphinx, but beginners can keep it low and safe. Hands stay under the shoulders, elbows hug in, chest lifts only as far as the lower ribs can stay on the mat. The goal is length, not height. That distinction matters.
22. Locust Pose
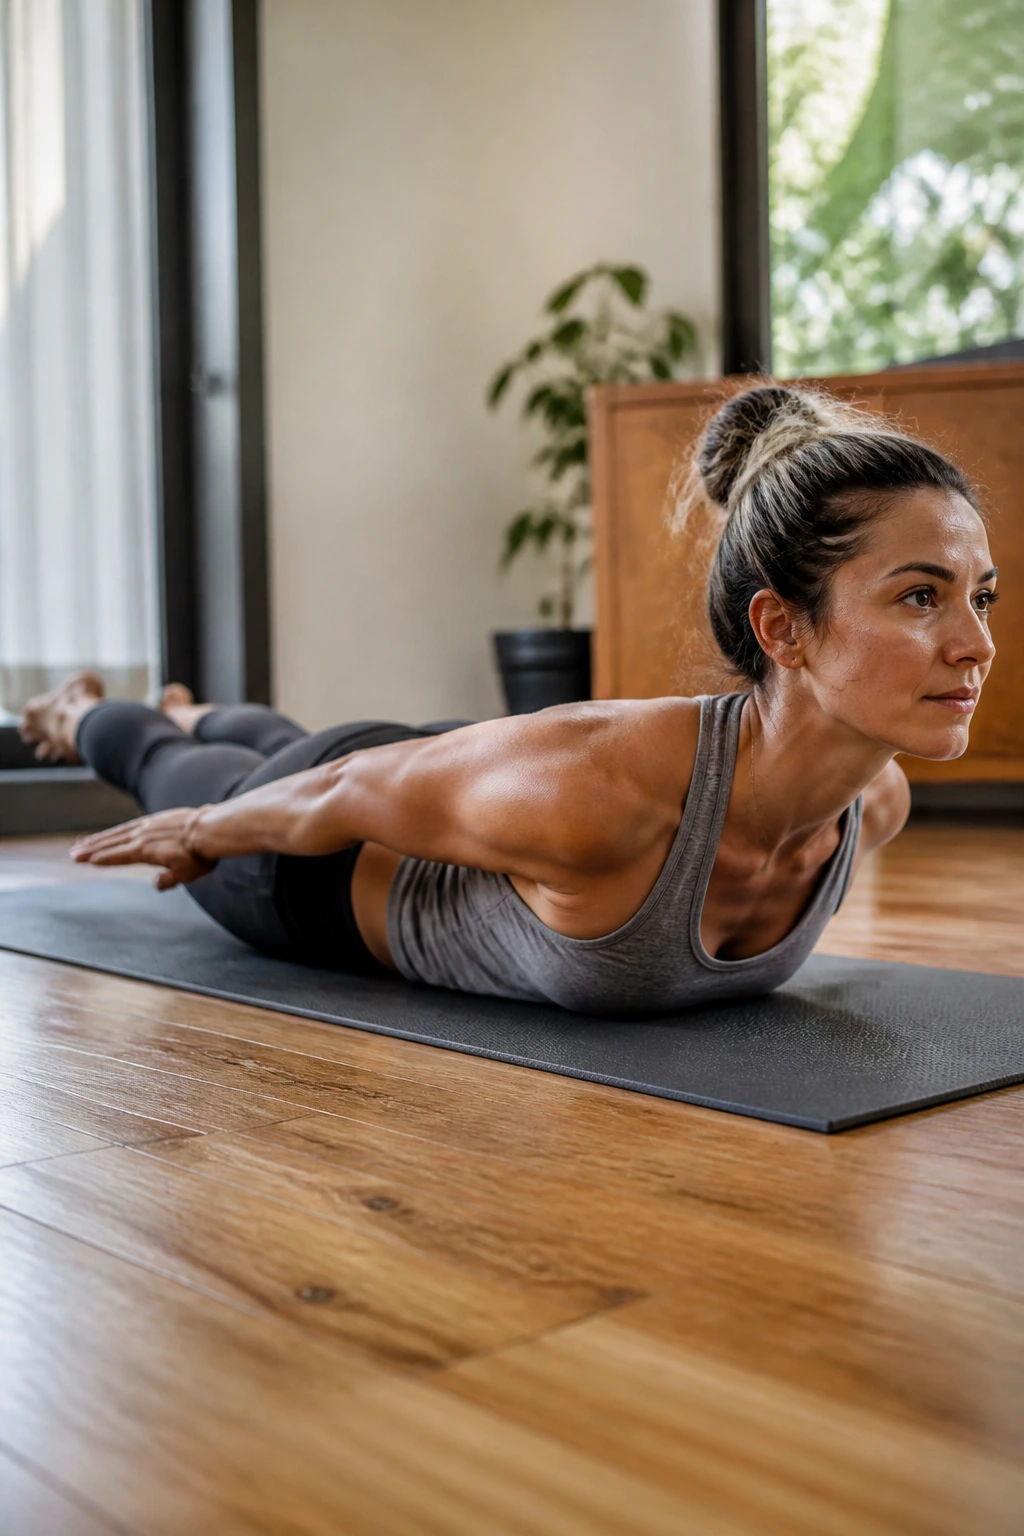
Locust pose strengthens the back body in a way that sitting all day tends to erase. Lie face down, arms by your sides, and lift the chest, legs, or both just an inch or two. Tiny lifts count. Keep the back of the neck long. Crunching up is the wrong idea.
23. Seated Forward Fold
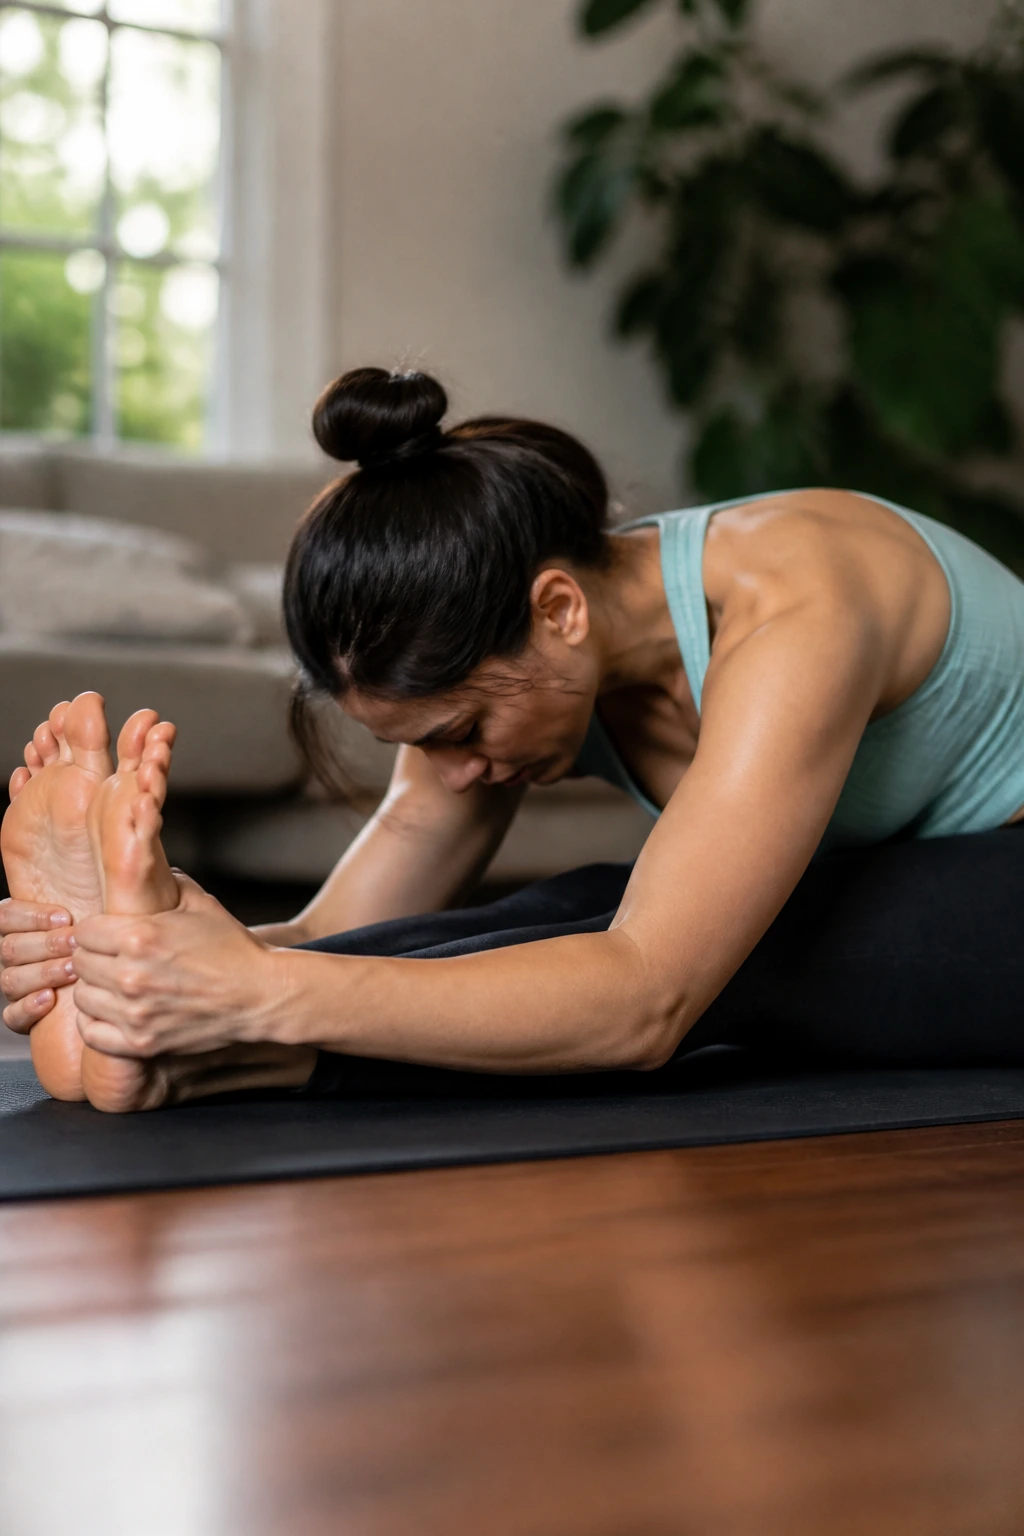
Seated forward fold is where many beginners learn patience. Sit tall first, then fold from the hips with a strap around the feet if needed. Knees can stay bent. Straight legs are optional. A long spine matters more than a deep fold. Let the exhale soften the shape.
24. Butterfly Pose
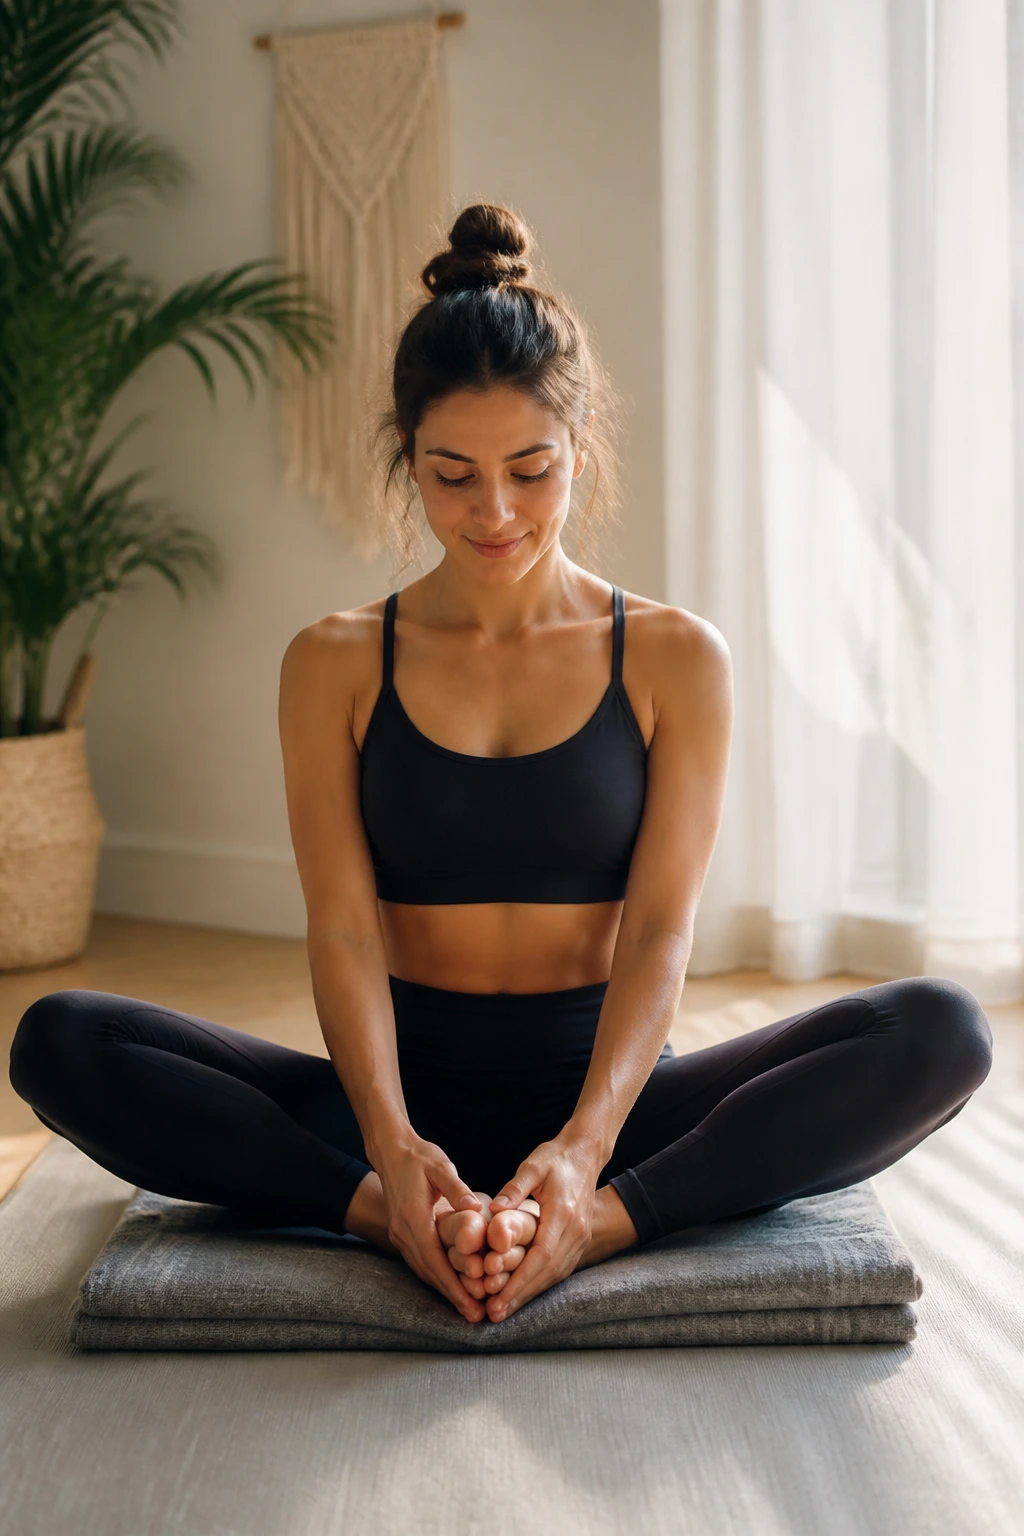
Butterfly pose is a simple hip opener that rewards patience. Sit on a folded blanket, bring the soles of the feet together, and let the knees drop on their own. Hands can hold the ankles or rest on the feet. Do not push the knees down. That’s a fast way to make it unpleasant.
25. Staff Pose
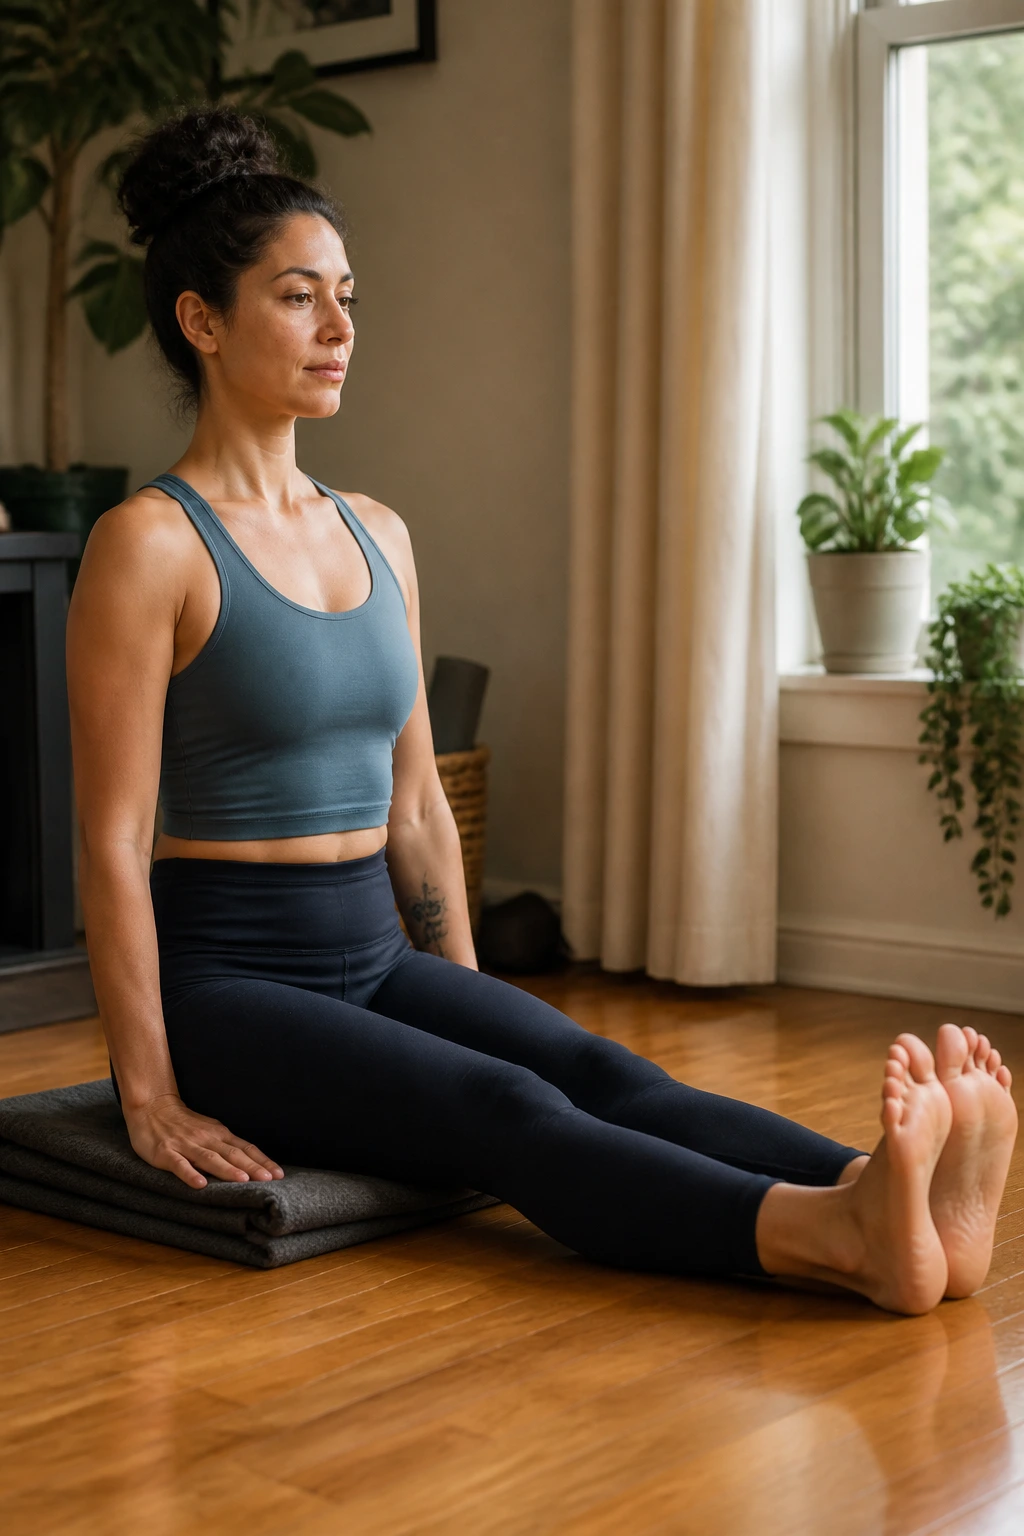
Staff pose looks plain, and that is why it helps. Legs extend forward, feet flexed, hands beside the hips, spine stacked. It’s a posture check in seated form. Sit on a blanket if the pelvis tucks under. The moment the lower back rounds, the pose loses its value.
26. Head-to-Knee Pose
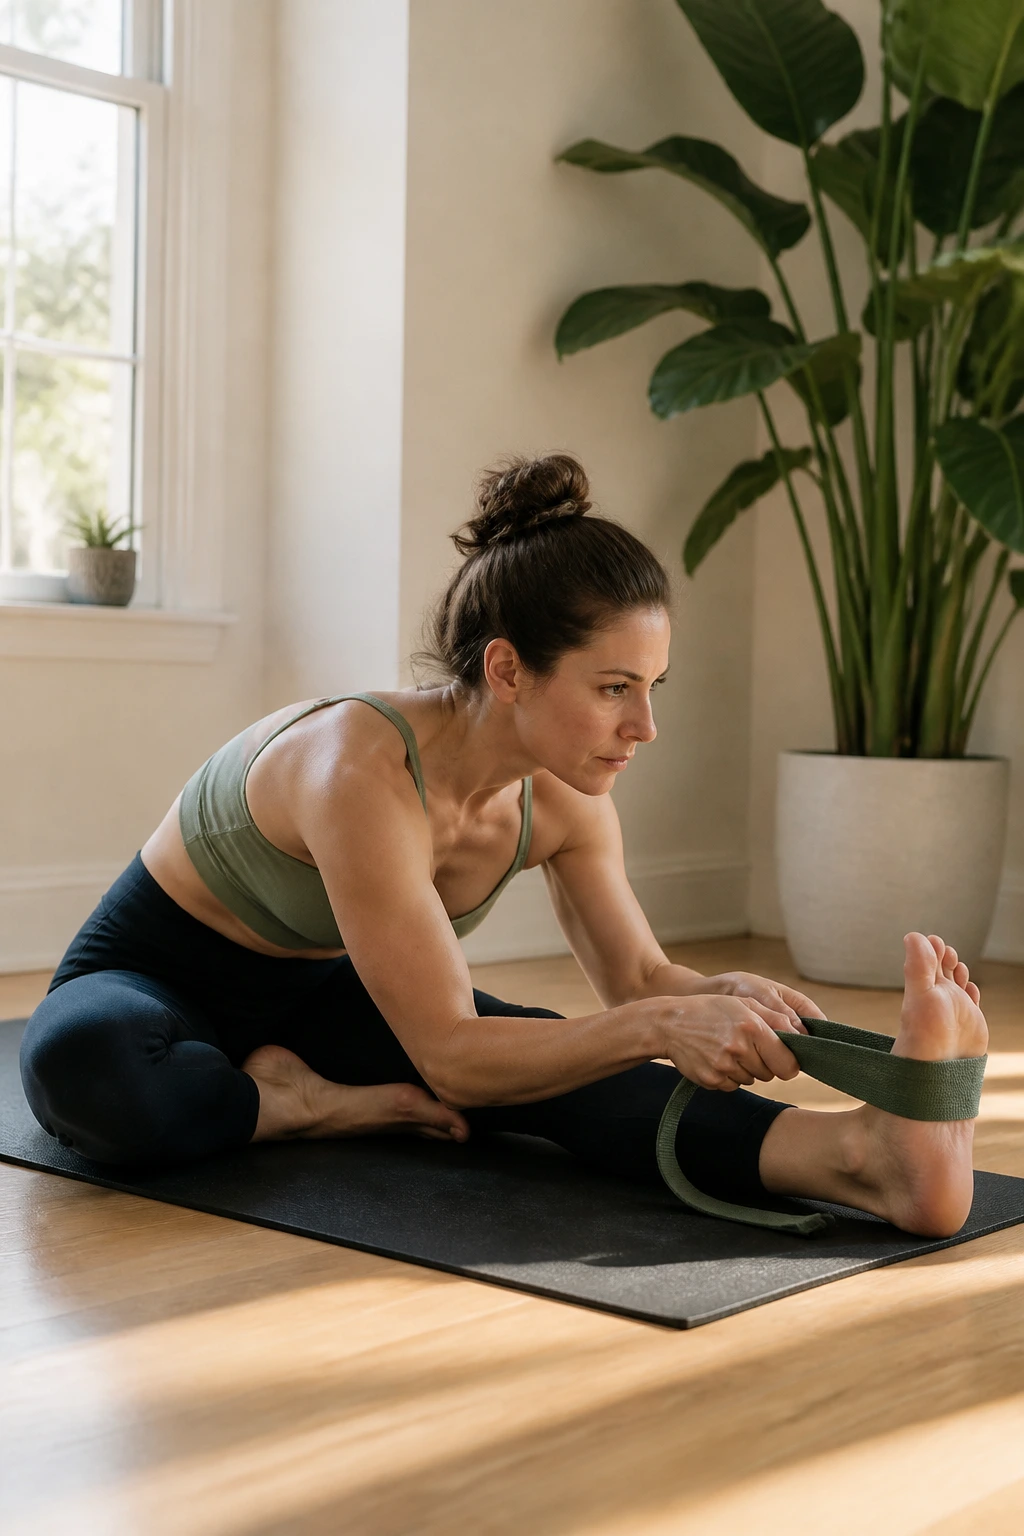
Head-to-knee pose gives you a one-sided hamstring stretch without asking for perfect flexibility. One leg stays long while the other bends in. Fold toward the straight leg and keep the chest aiming forward rather than diving down. A strap around the foot works well here. No strain, no ego.
27. Supine Twist
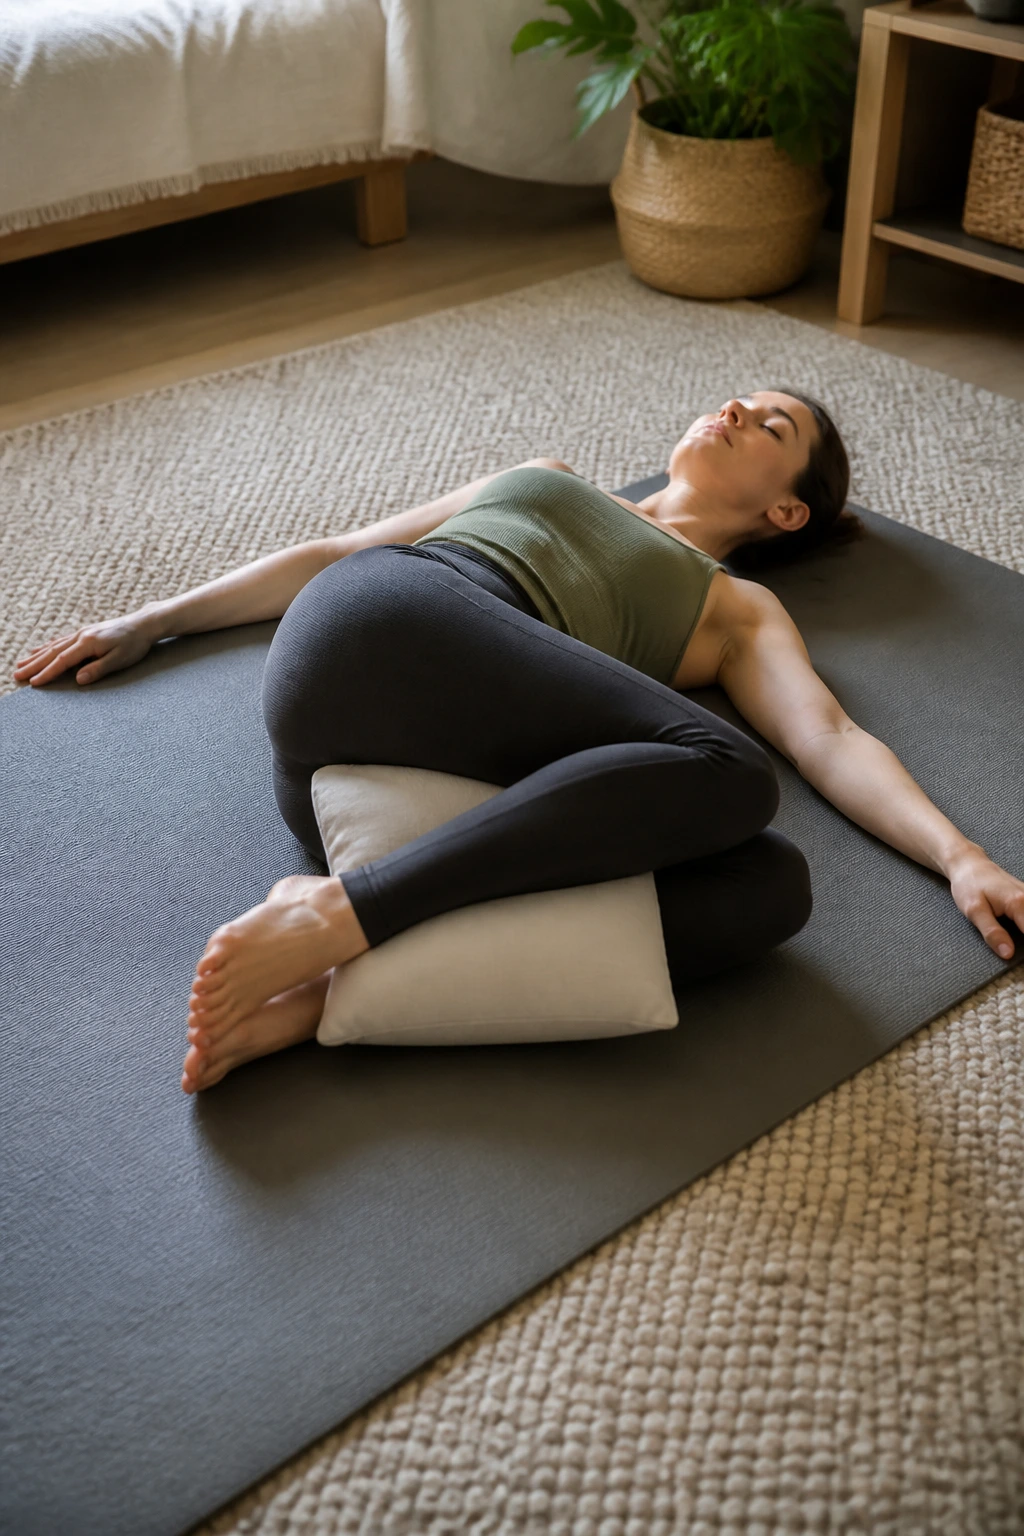
Supine twist is the kind of pose that feels like a sigh. Lie on your back, draw the knees in, then let them fall to one side while both shoulders stay heavy. A pillow between the knees can keep the lower back calm. Stay for several breaths and let gravity do the rest.
28. Happy Baby
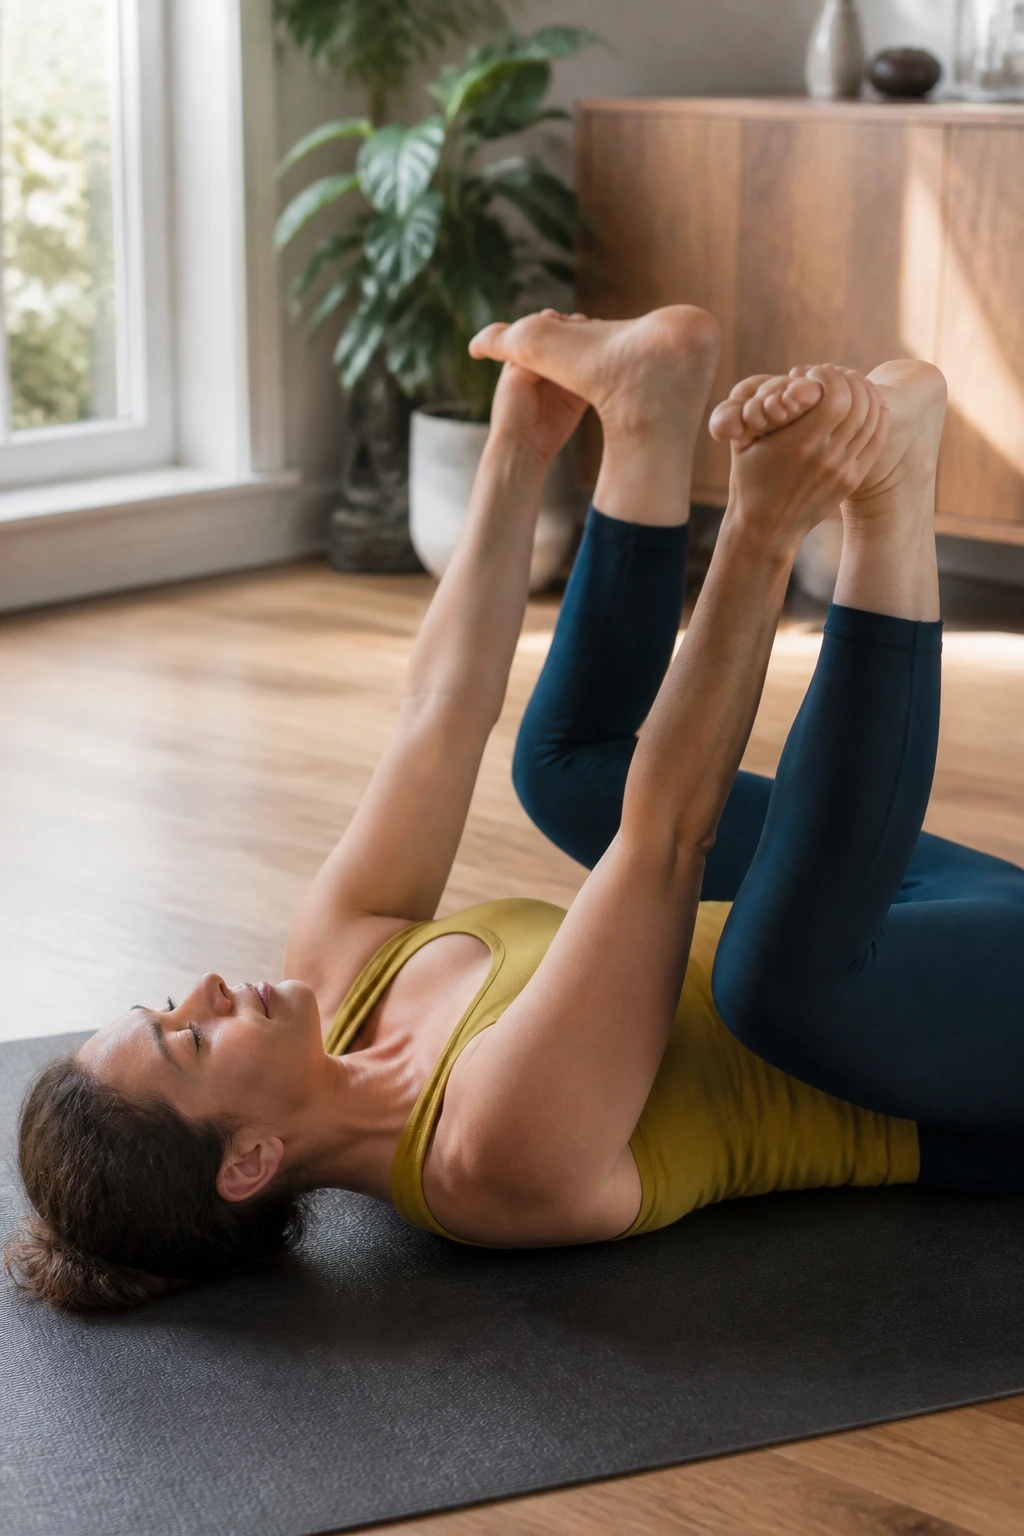
Happy baby is playful, but it also gives the hips and low back a break. Hold the outer feet or shins, knees coming toward the armpits, tailbone heavy. The neck stays relaxed. If holding the feet feels awkward, grab the backs of the thighs instead. Still counts.
29. Legs Up the Wall
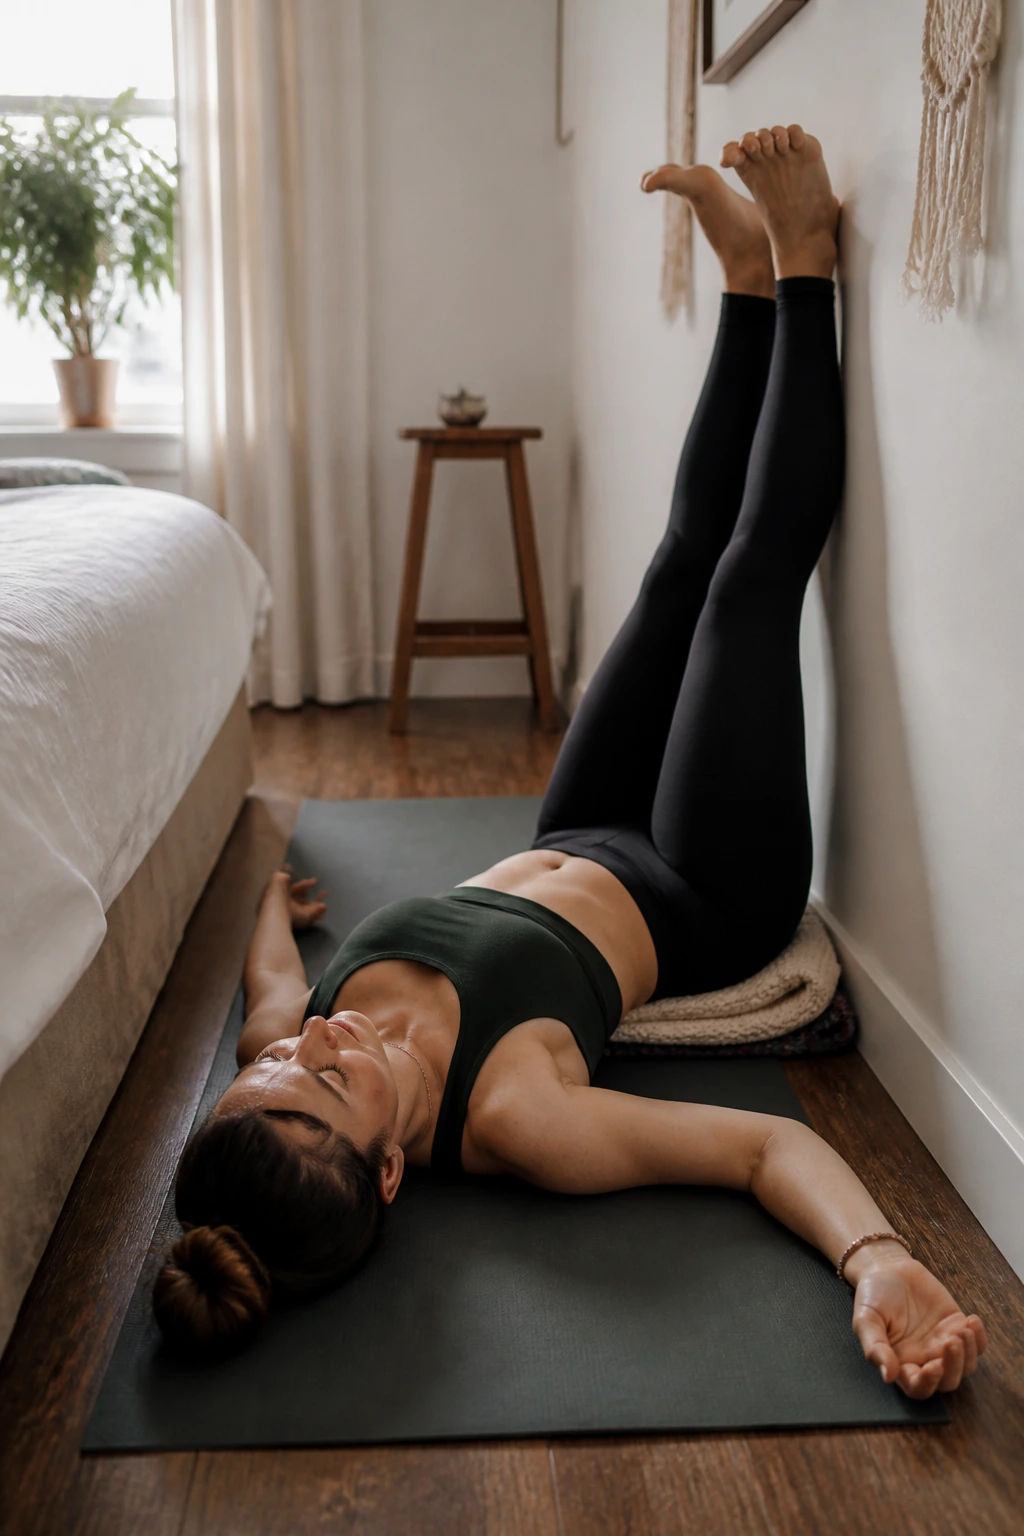
Legs up the wall is as close as yoga gets to cheating, and I mean that kindly. Scoot the hips near a wall, send the legs upward, and let the arms rest open. A folded blanket under the pelvis feels nice. Stay here for 5 to 15 minutes if your legs feel heavy.
30. Knee-to-Chest
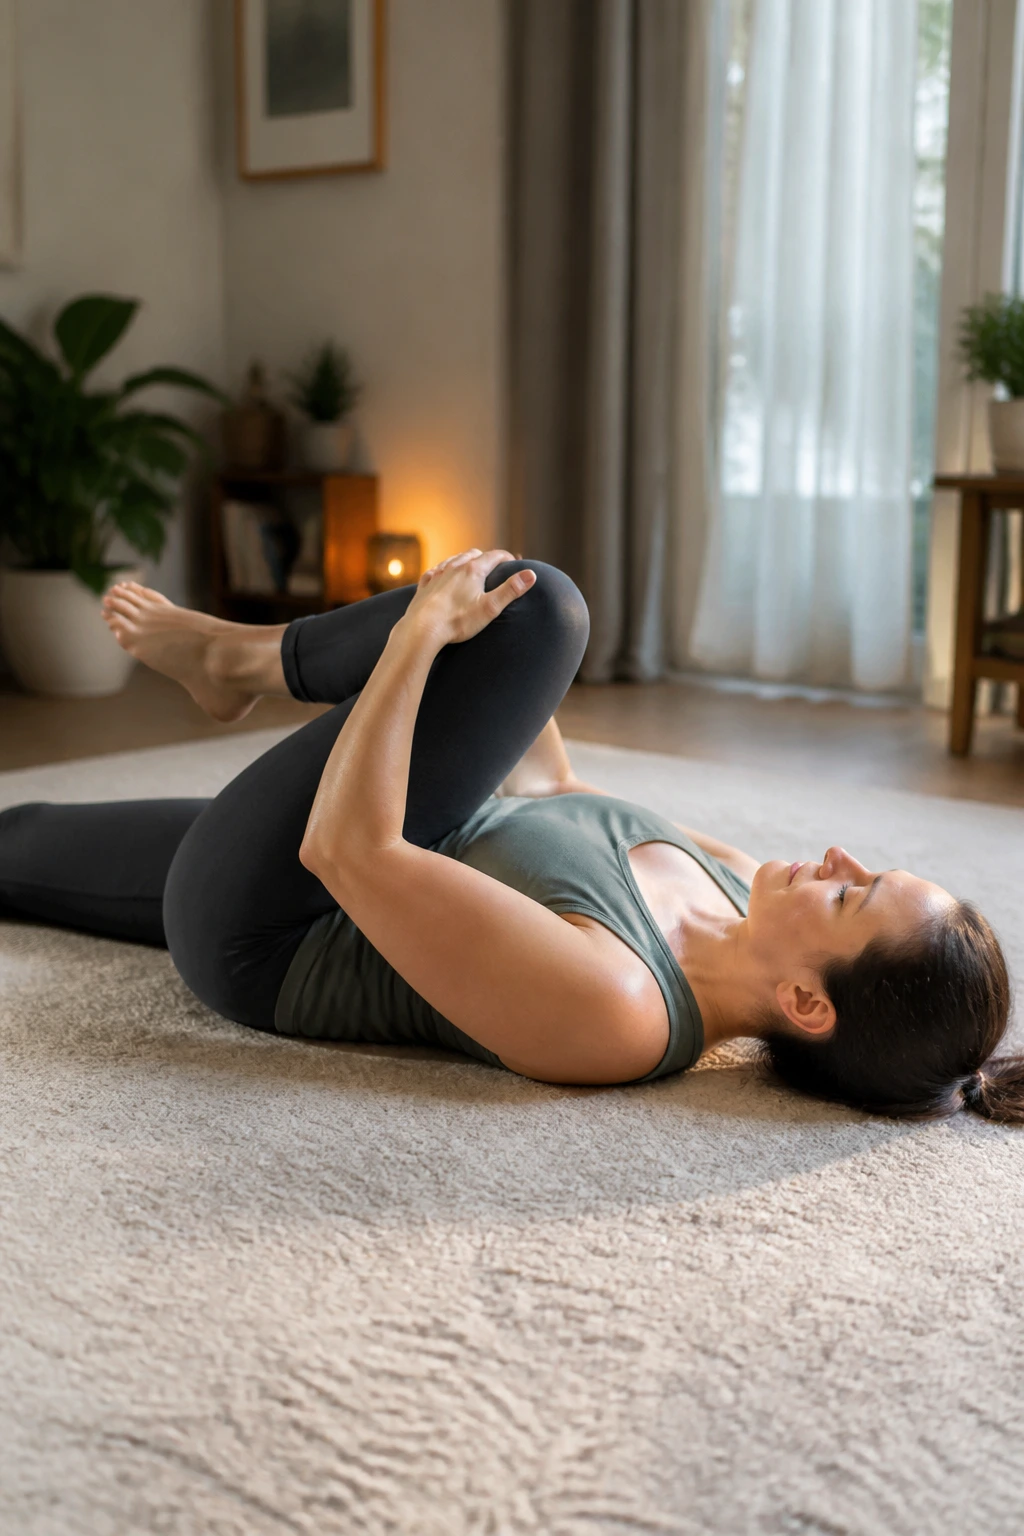
Knee-to-chest is a tiny pose with a big effect on the lower back. Pull one knee in, then the other, or keep both hugged in for a softer curl. Rock a little side to side if that feels good. Keep the shoulders down. No need to squeeze hard.
31. Plank Pose
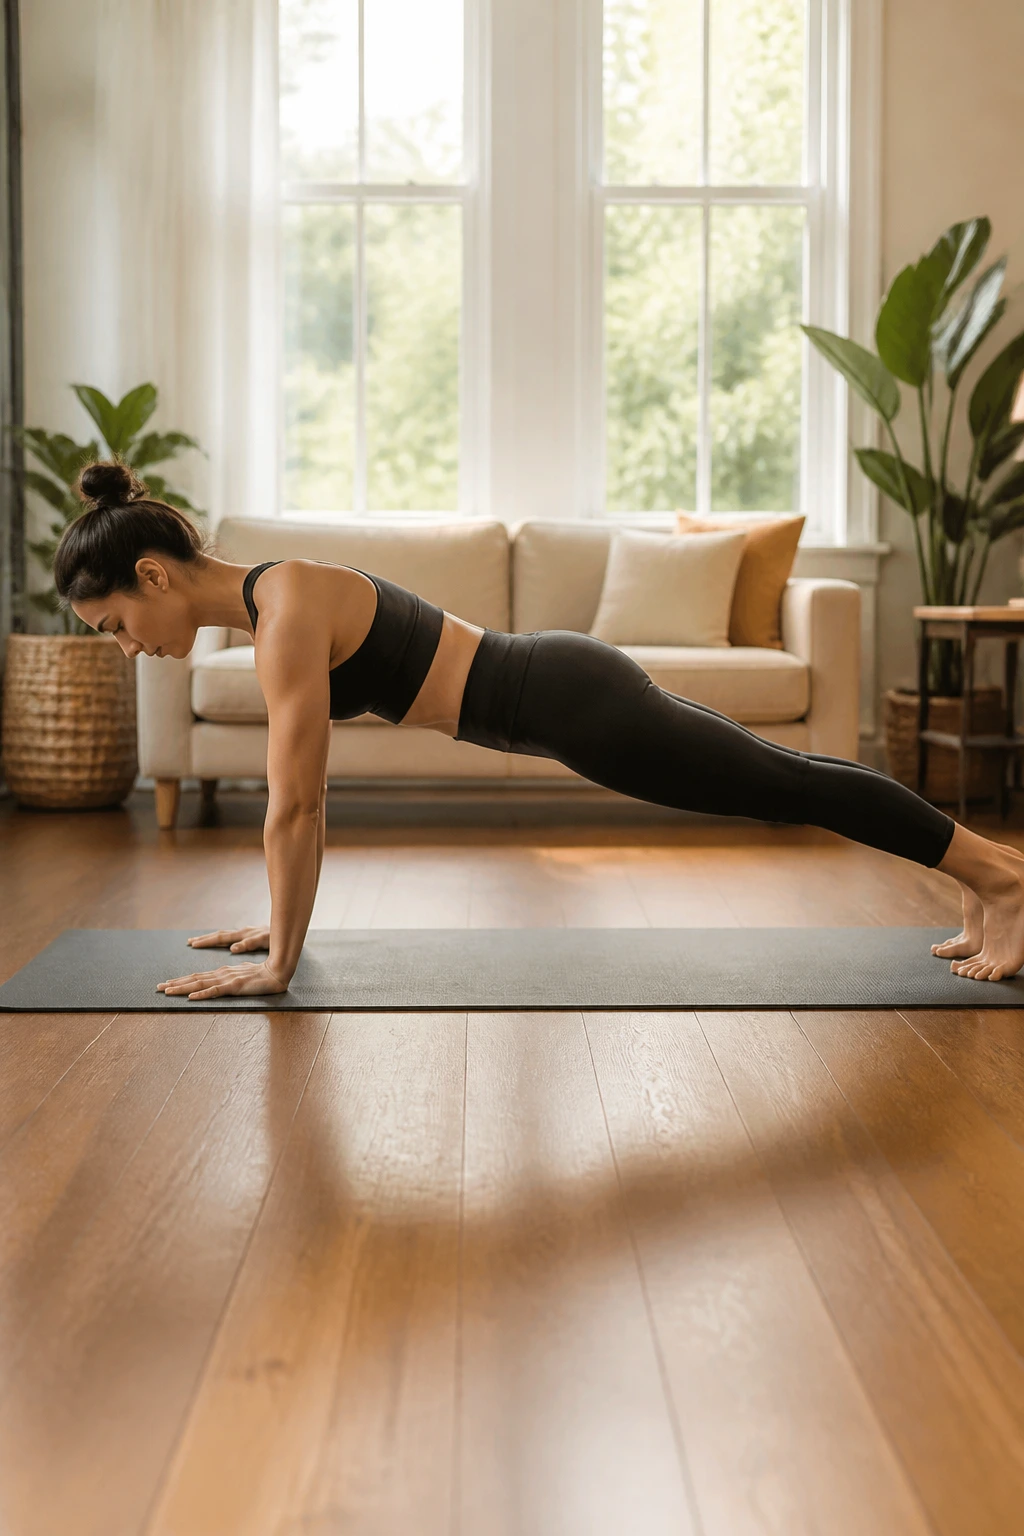
Plank pose builds heat fast, which is why beginners should treat it with respect. Hands under shoulders, legs active, belly gently braced, body in one line from head to heels. Drop the knees to the mat if the low back sags or the shoulders shake too much. Quality beats duration.
32. Side Plank With Knee Down
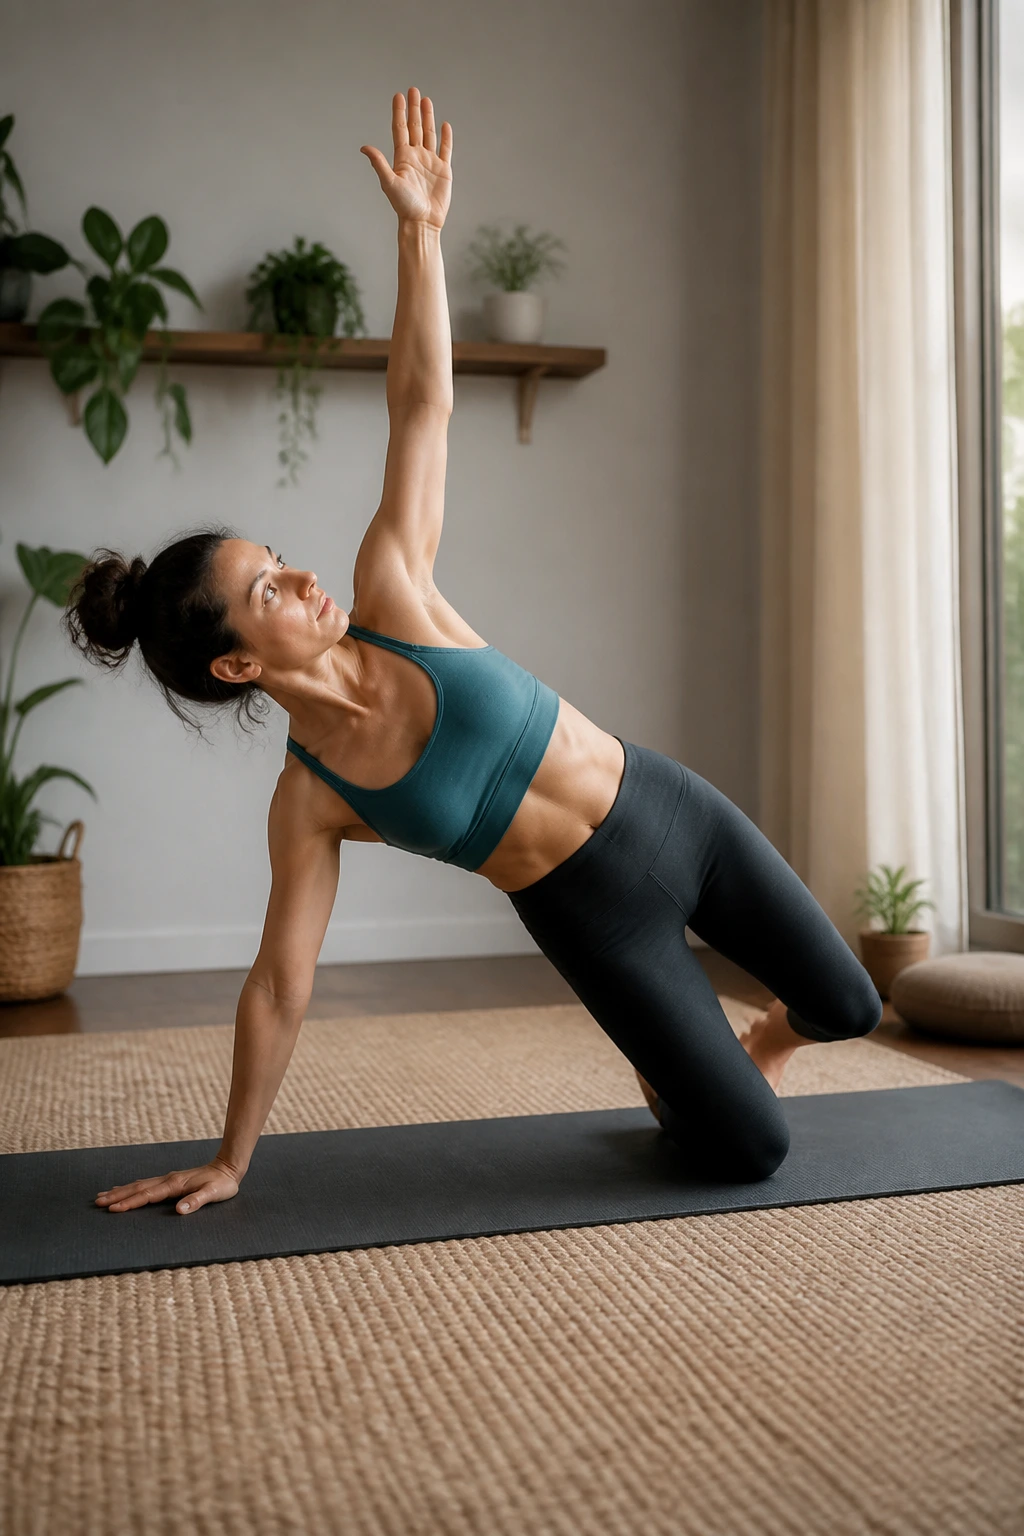
Side plank with the bottom knee on the mat gives you the shape without the full load. One hand roots down, the other arm lifts, and the top hip stacks over the bottom hip as much as it can. Keep the lifted ribs from collapsing forward. That’s where the work lives.
33. Bird Dog
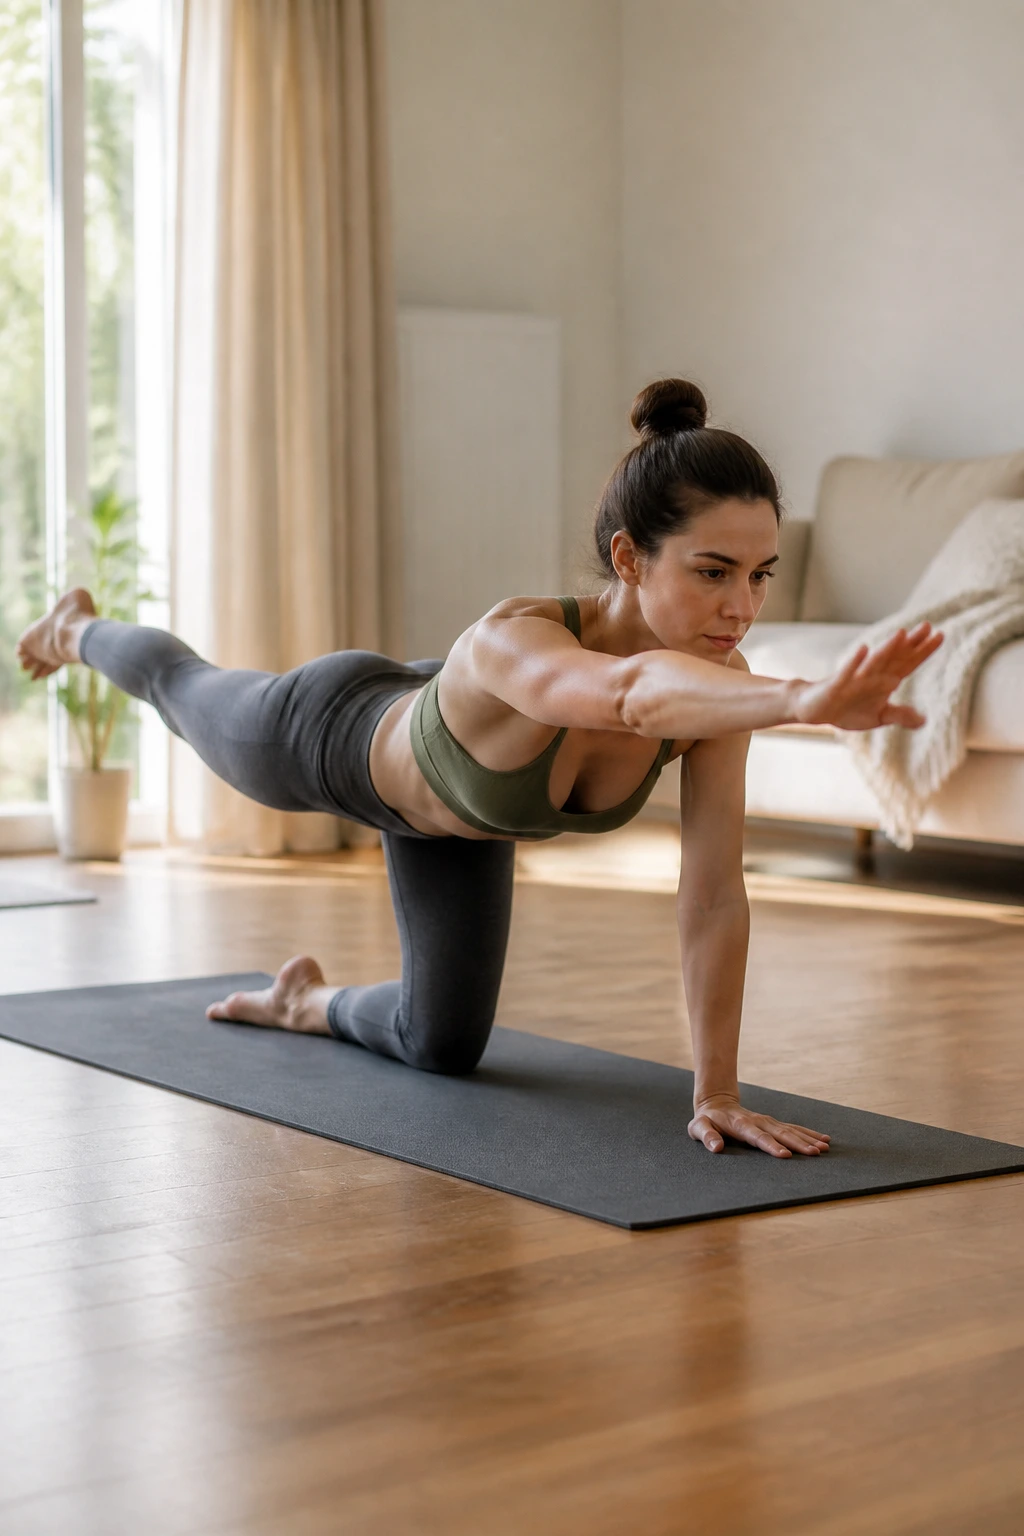
Bird dog is one of the best beginner stability drills because it teaches control without making balance dramatic. From tabletop, reach one leg back and the opposite arm forward, then pause. Hips stay square. Move slowly enough that nothing wobbles open. Slow is hard. That’s why it works.
34. Low Boat
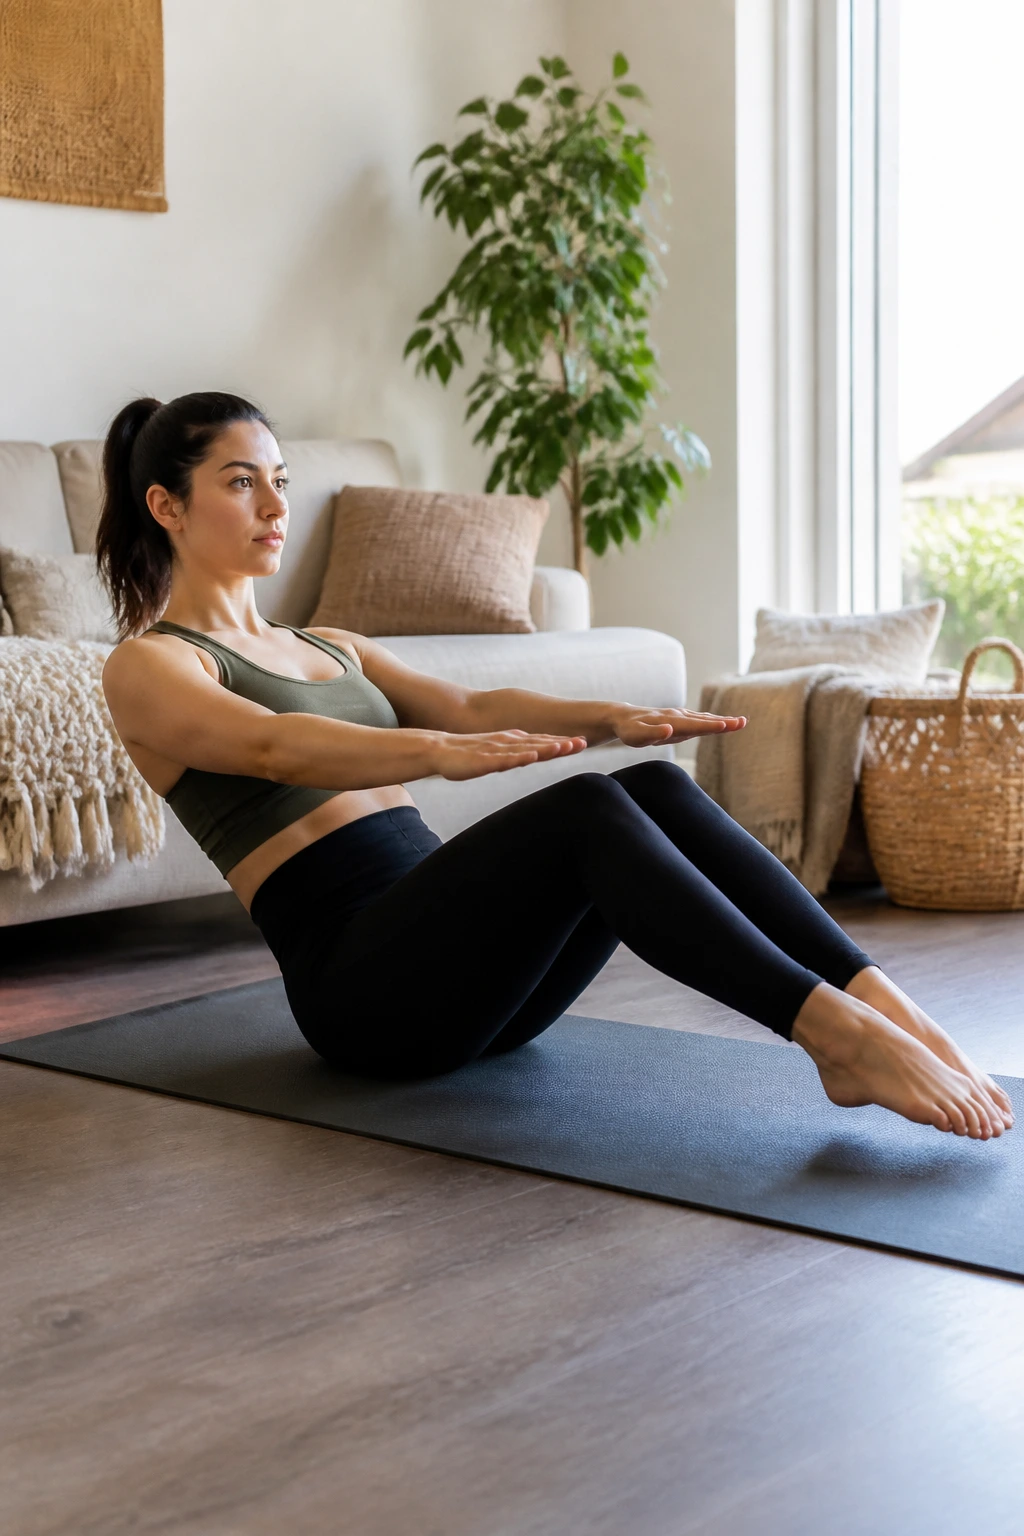
Low boat asks for abdominal work, but beginners can scale it down without shame. Sit back on the sit bones, lift the shins only partway, or keep the toes down and lean back slightly. The chest stays open. If the neck starts to grip, come out sooner.
35. Wide-Legged Forward Fold
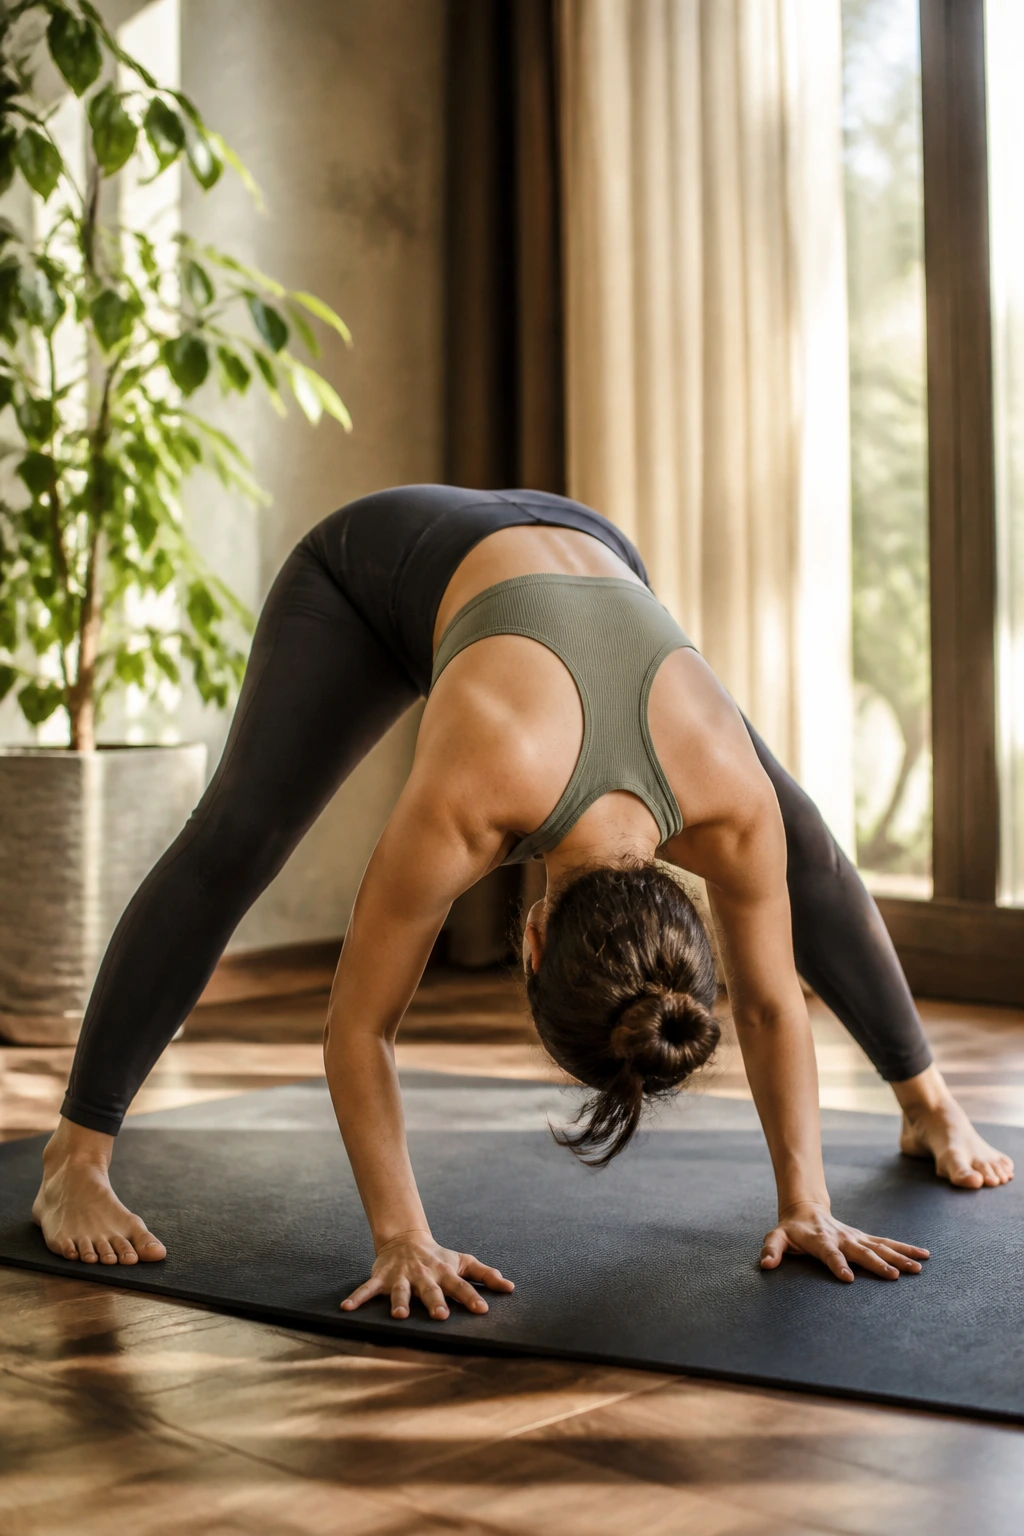
Wide-legged forward fold gives the inner thighs a break and helps the spine decompress. Feet step wide, toes slightly turned in, and the fold happens from the hips. Hands can rest on the floor or blocks. Bend the knees if the hamstrings pull too hard. Straight legs are not the prize.
36. Pyramid Pose
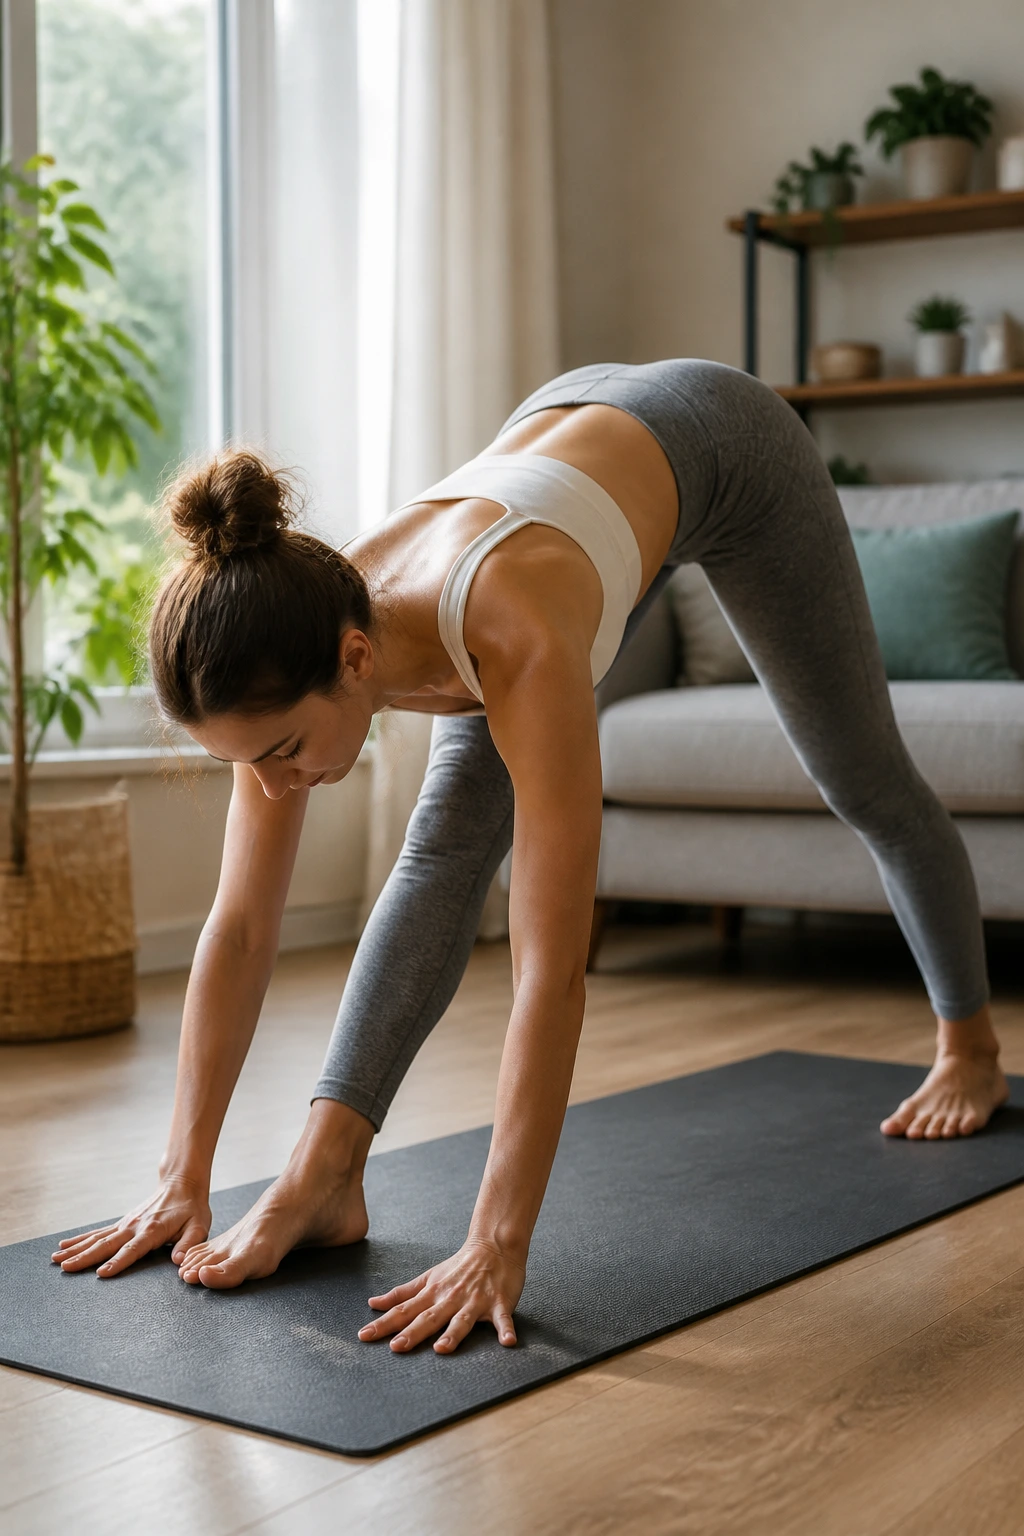
Pyramid pose is a tidy hamstring stretch that also asks for balance and a little patience. Start with a short stance, square the hips, and fold over the front leg. Keep the back heel grounded and the chest long. A block under the hands stops the whole thing from becoming a tug-of-war.
37. Half Split
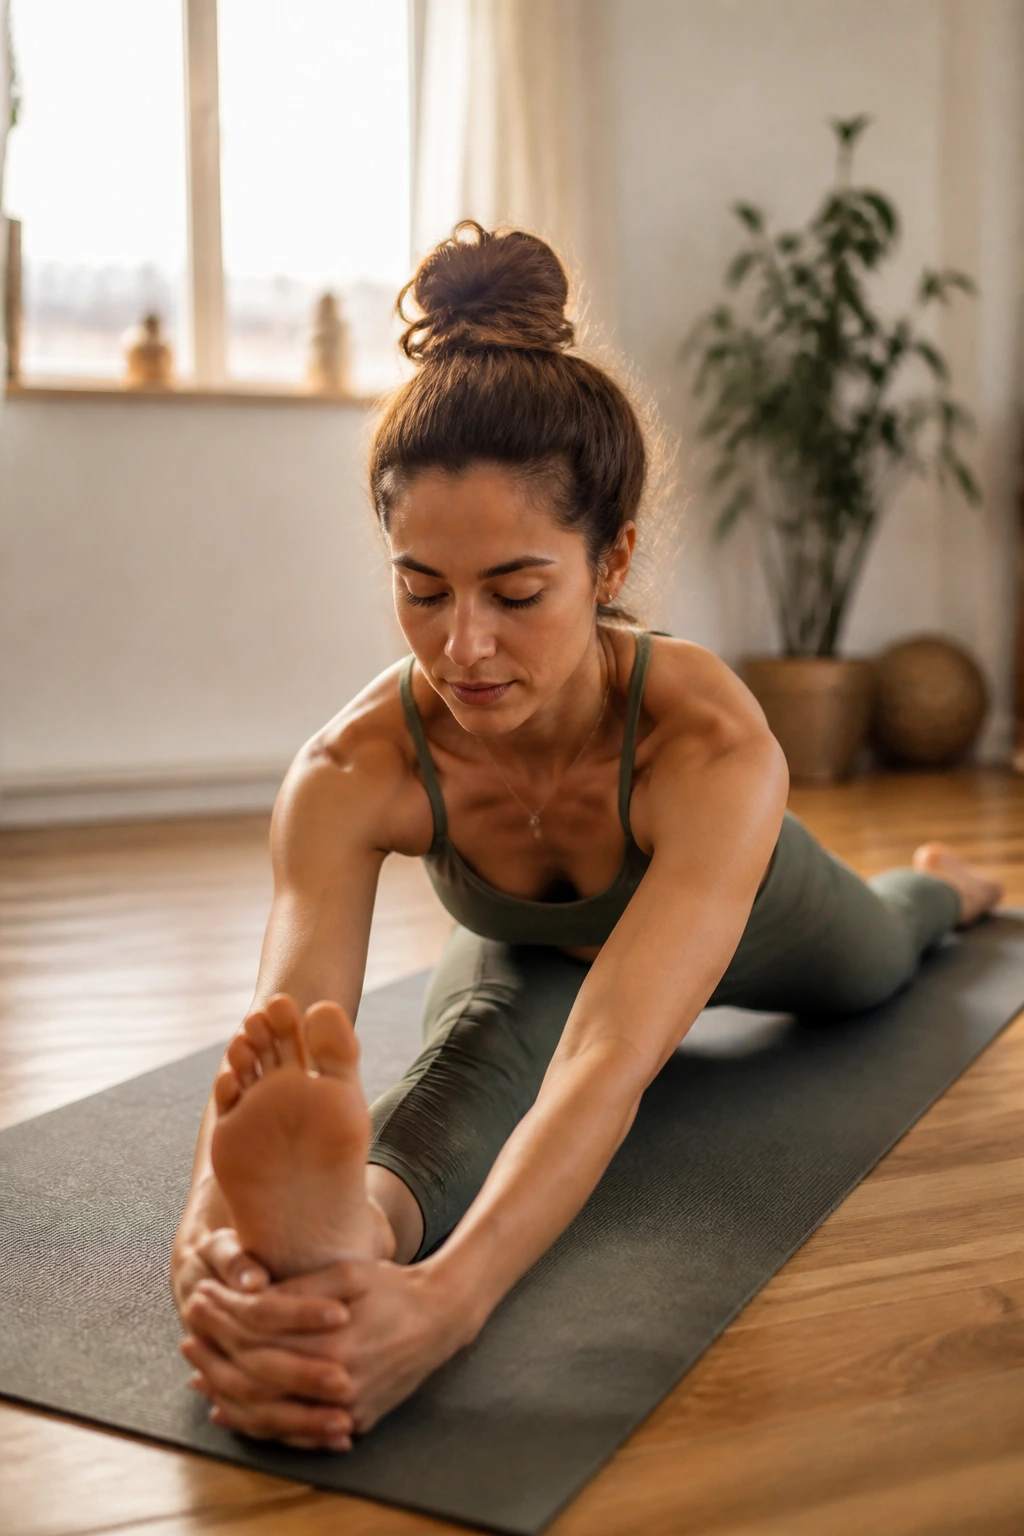
Half split is the quieter cousin of pyramid. From a low lunge, shift the hips back and straighten the front leg as far as it will go without yanking. The toes can lift or stay down. Think “lengthen the spine first, stretch the hamstring second.” That order matters.
38. Puppy Pose
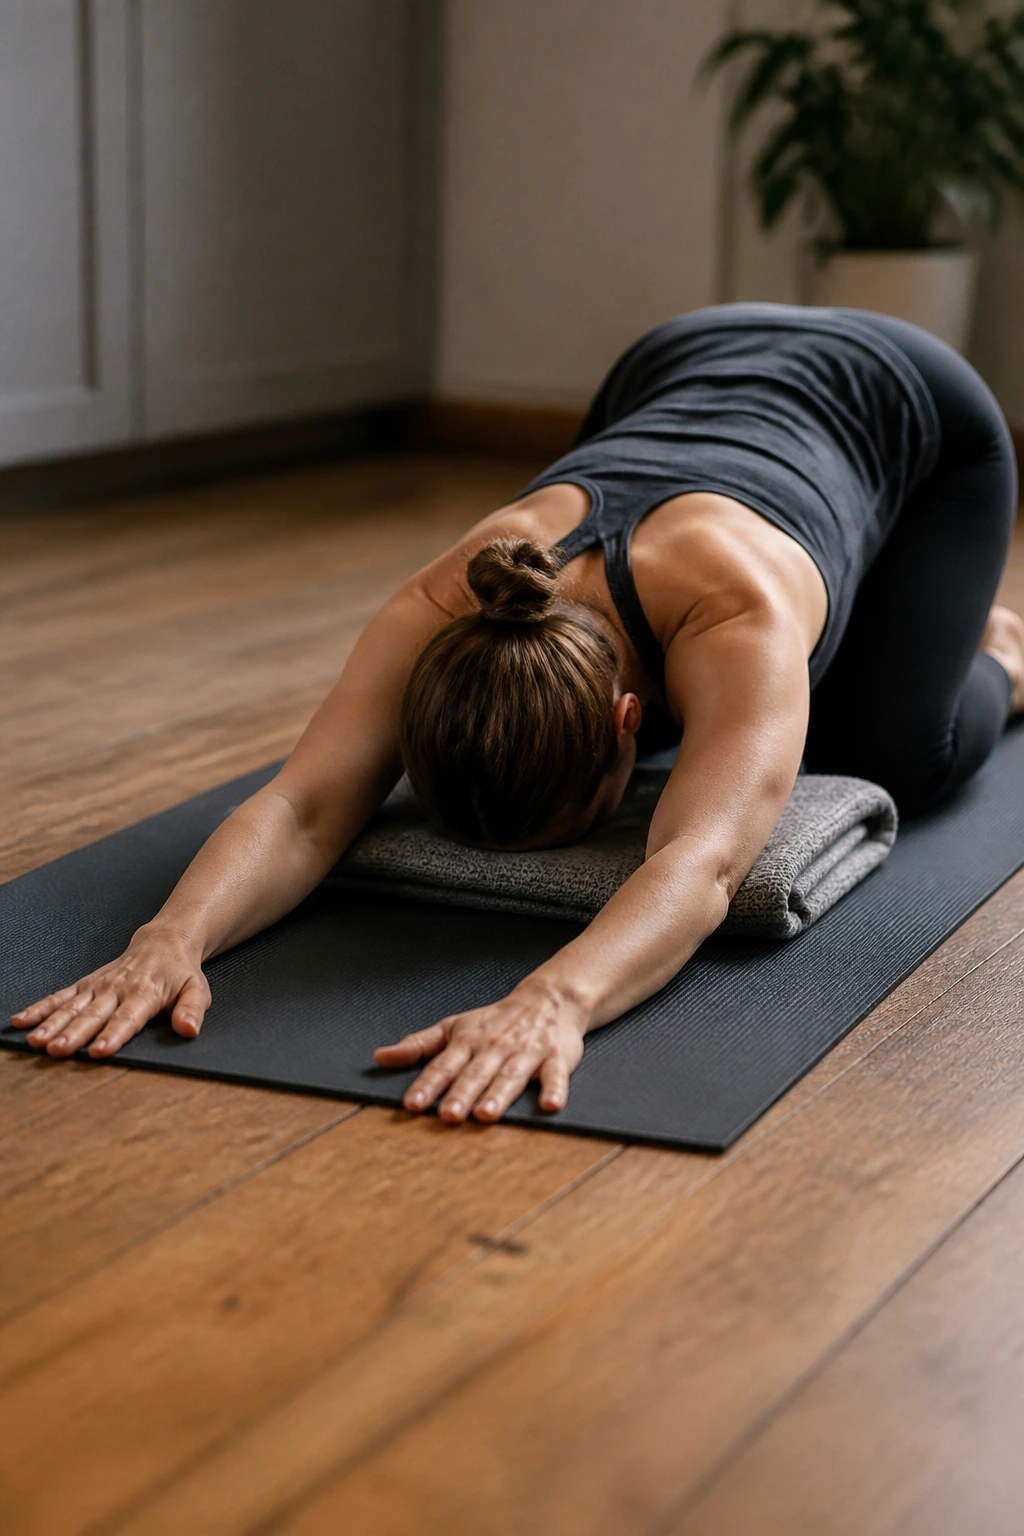
Puppy pose opens the shoulders without the full load of downward dog. Knees stay under the hips, arms stretch forward, and the chest sinks toward the mat while the hips stay lifted. A folded blanket under the chest makes this one friendlier. The neck should feel free, not jammed.
39. Thread the Needle
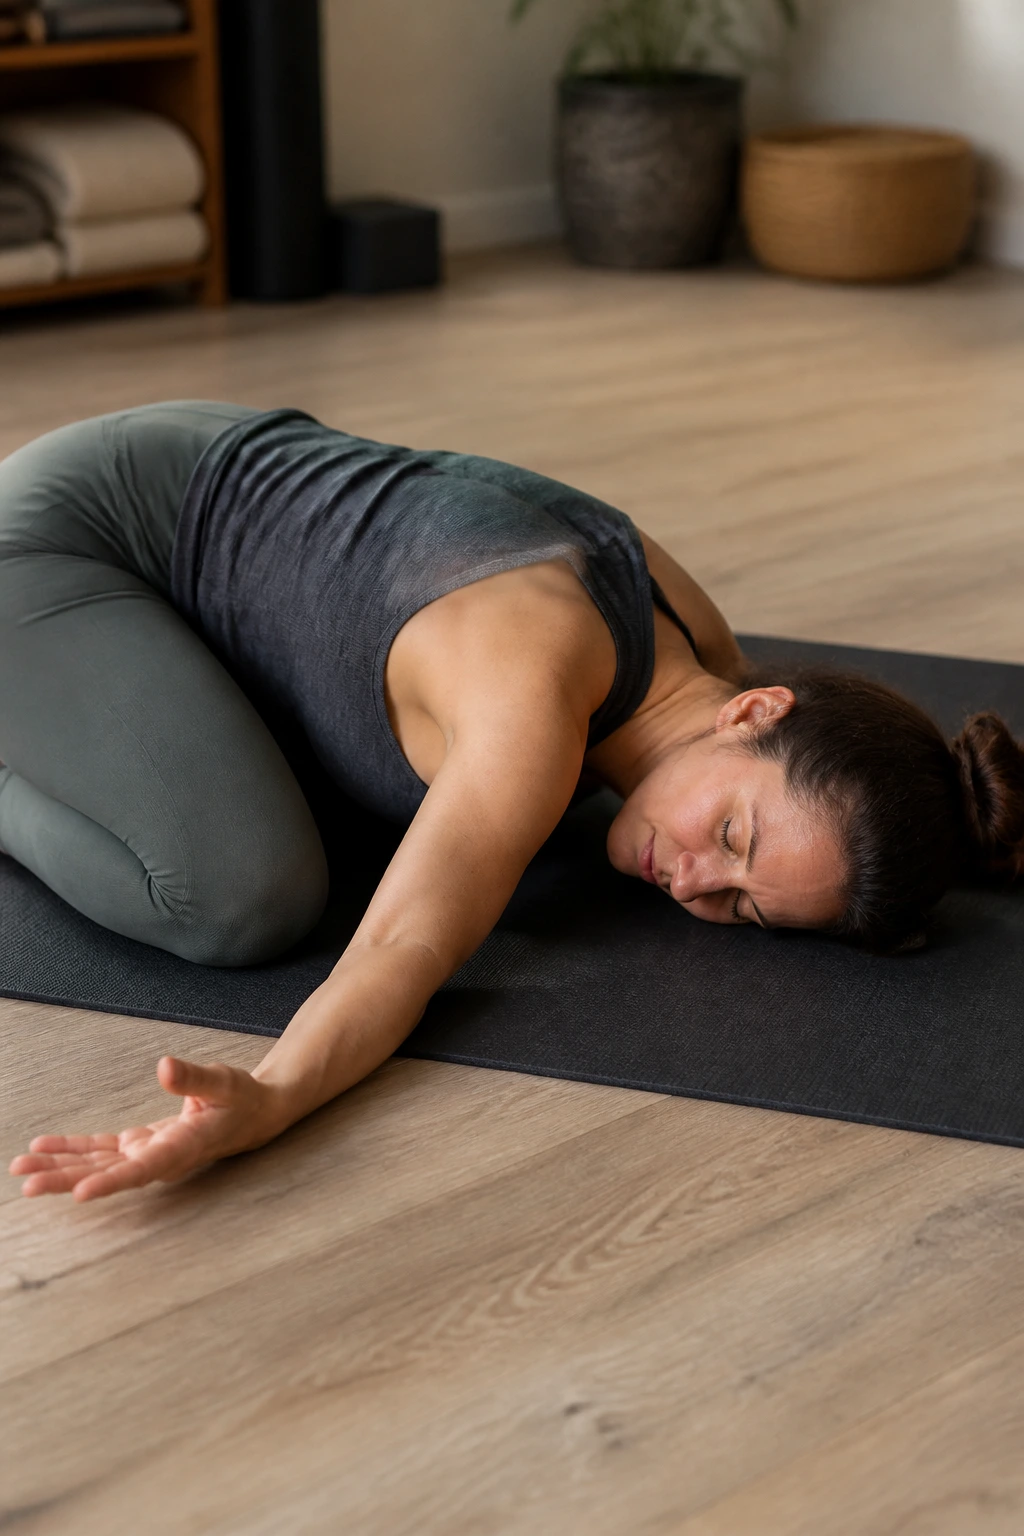
Thread the needle gives the upper back a twist that desk posture rarely offers. From tabletop, slide one arm under the body, palm up, and let the shoulder and side of the head rest down. Breathe into the upper back ribs. The twist should feel roomy, not forced.
40. Frog Pose
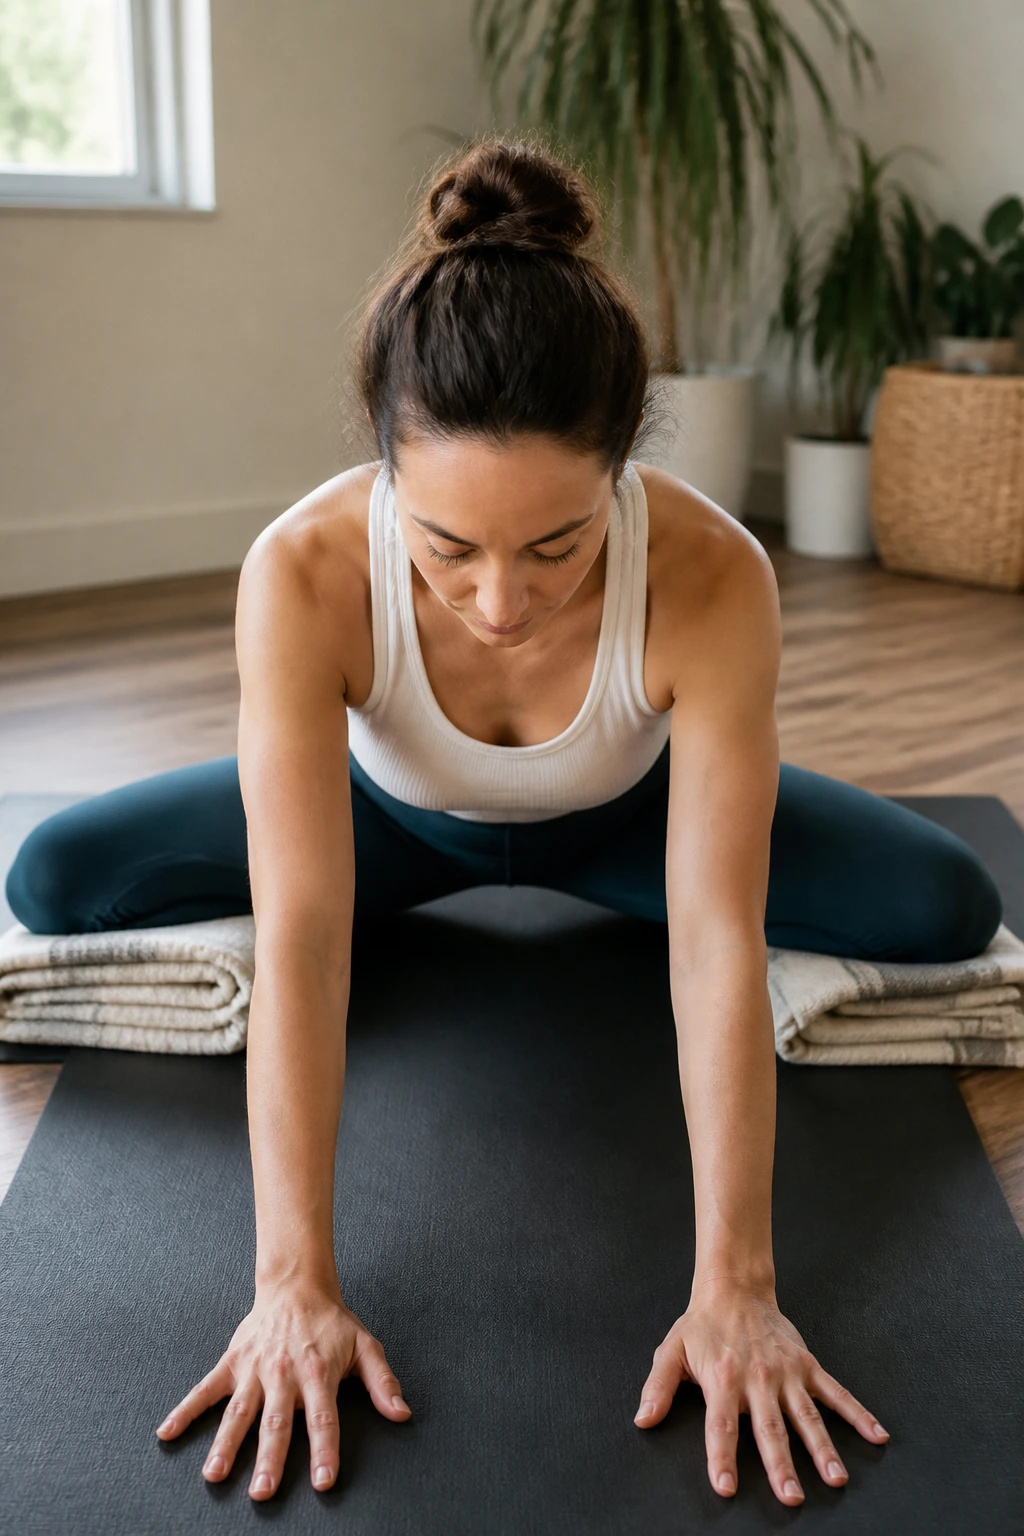
Frog pose is not a pose to rush. Knees open wide on the mat, lower legs angled out, ankles and knees roughly in line. Keep the movement slow and stop early if the inner thighs grab too hard. A folded blanket under the knees can help. Stay modest here.
41. Reclined Hand-to-Big-Toe Pose
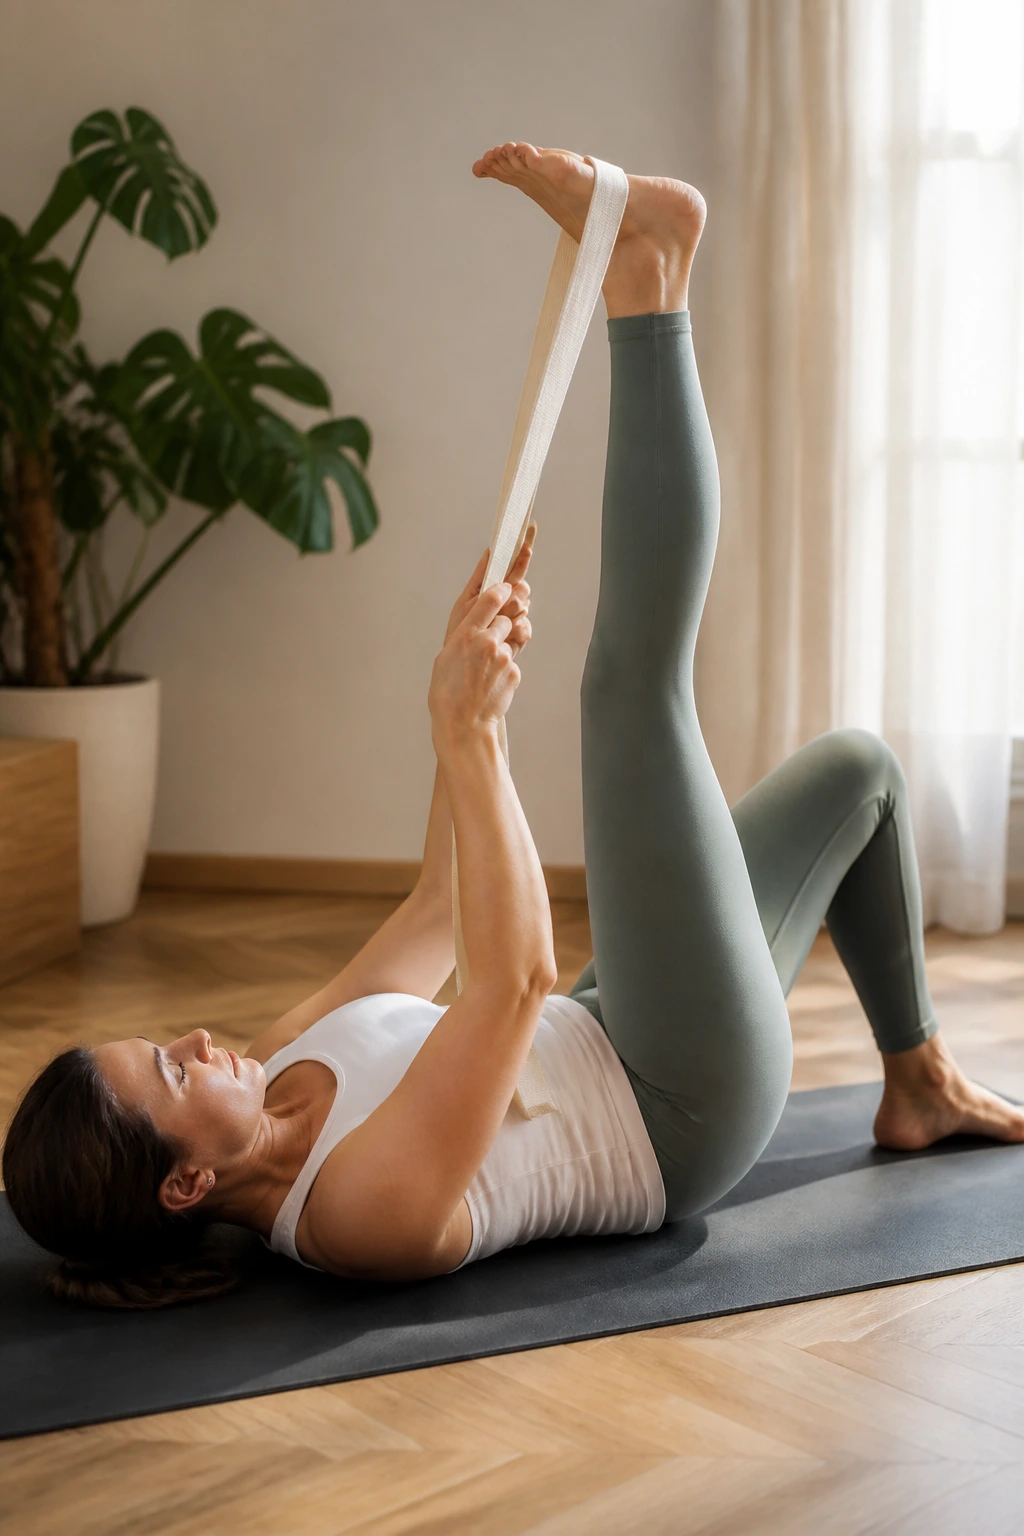
This one gives the hamstrings a stretch without asking for standing balance. Lie on your back, hold the big toe or loop a strap around the foot, and extend the leg upward.
Use a Strap if Needed
- Keep the opposite leg bent or long.
- The lifted leg does not need to be straight.
- Stop before the pelvis rolls hard to one side.
A strap makes the pose cleaner, and cleaner usually feels better.
42. Goddess Pose
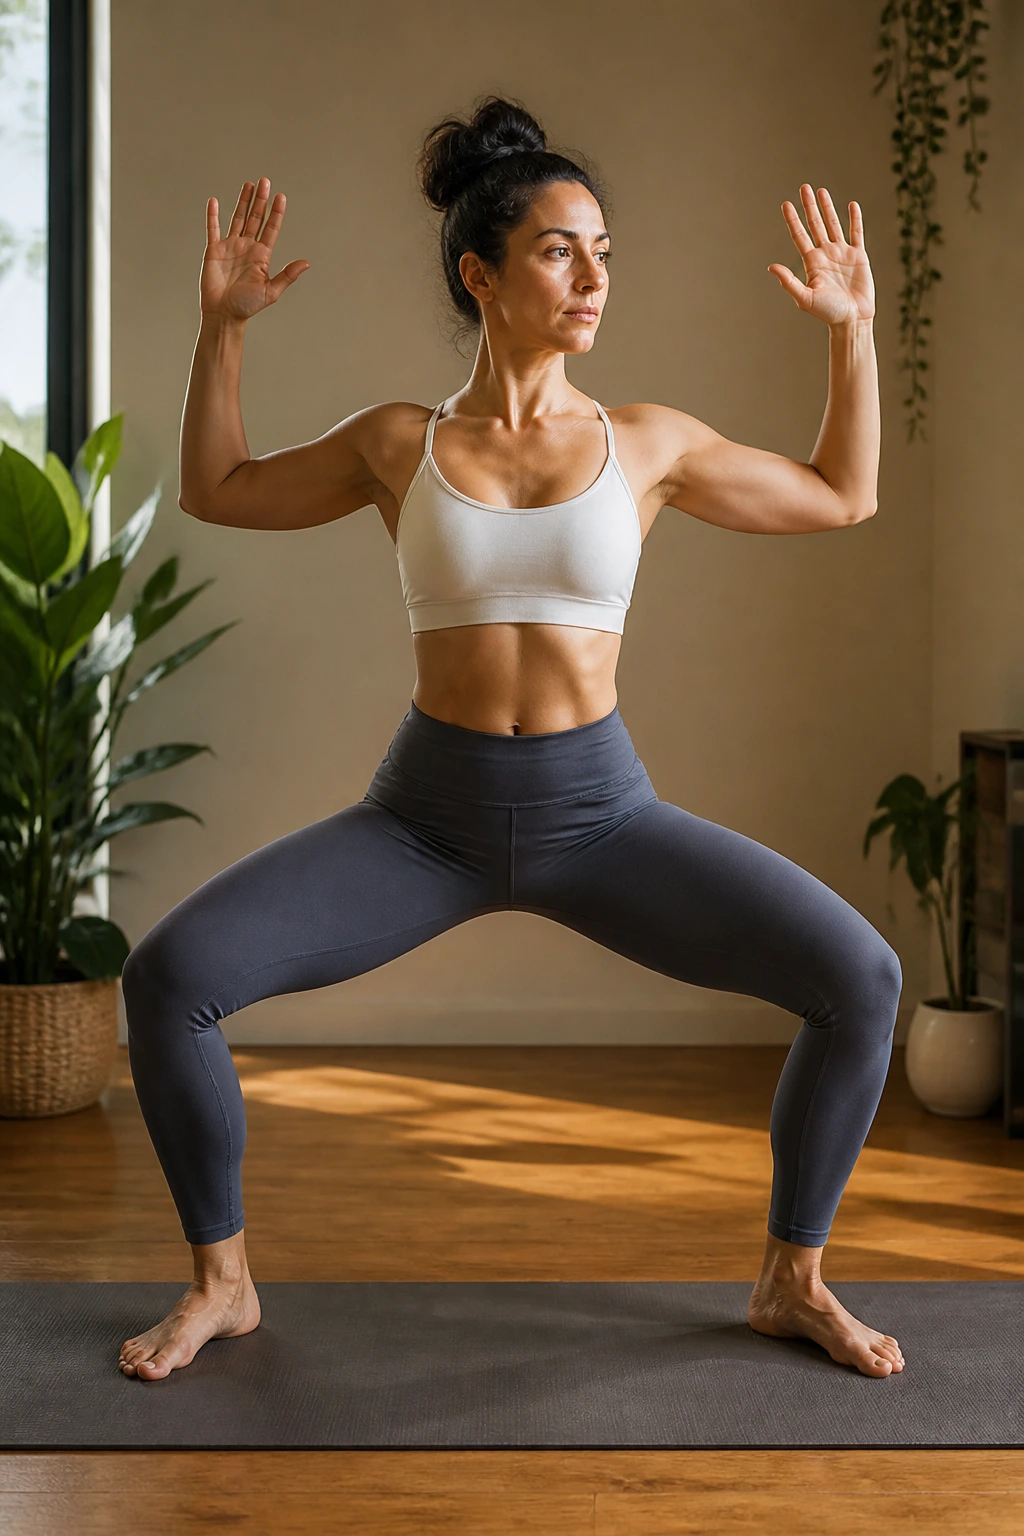
Goddess pose looks strong because it is strong. Step the feet wide, turn the toes out a little, bend the knees, and sit the hips down only as far as you can control. Arms can stay in cactus shape or hands at the heart. Keep the knees tracking over the toes. Wobbling is fine.
43. Gate Pose
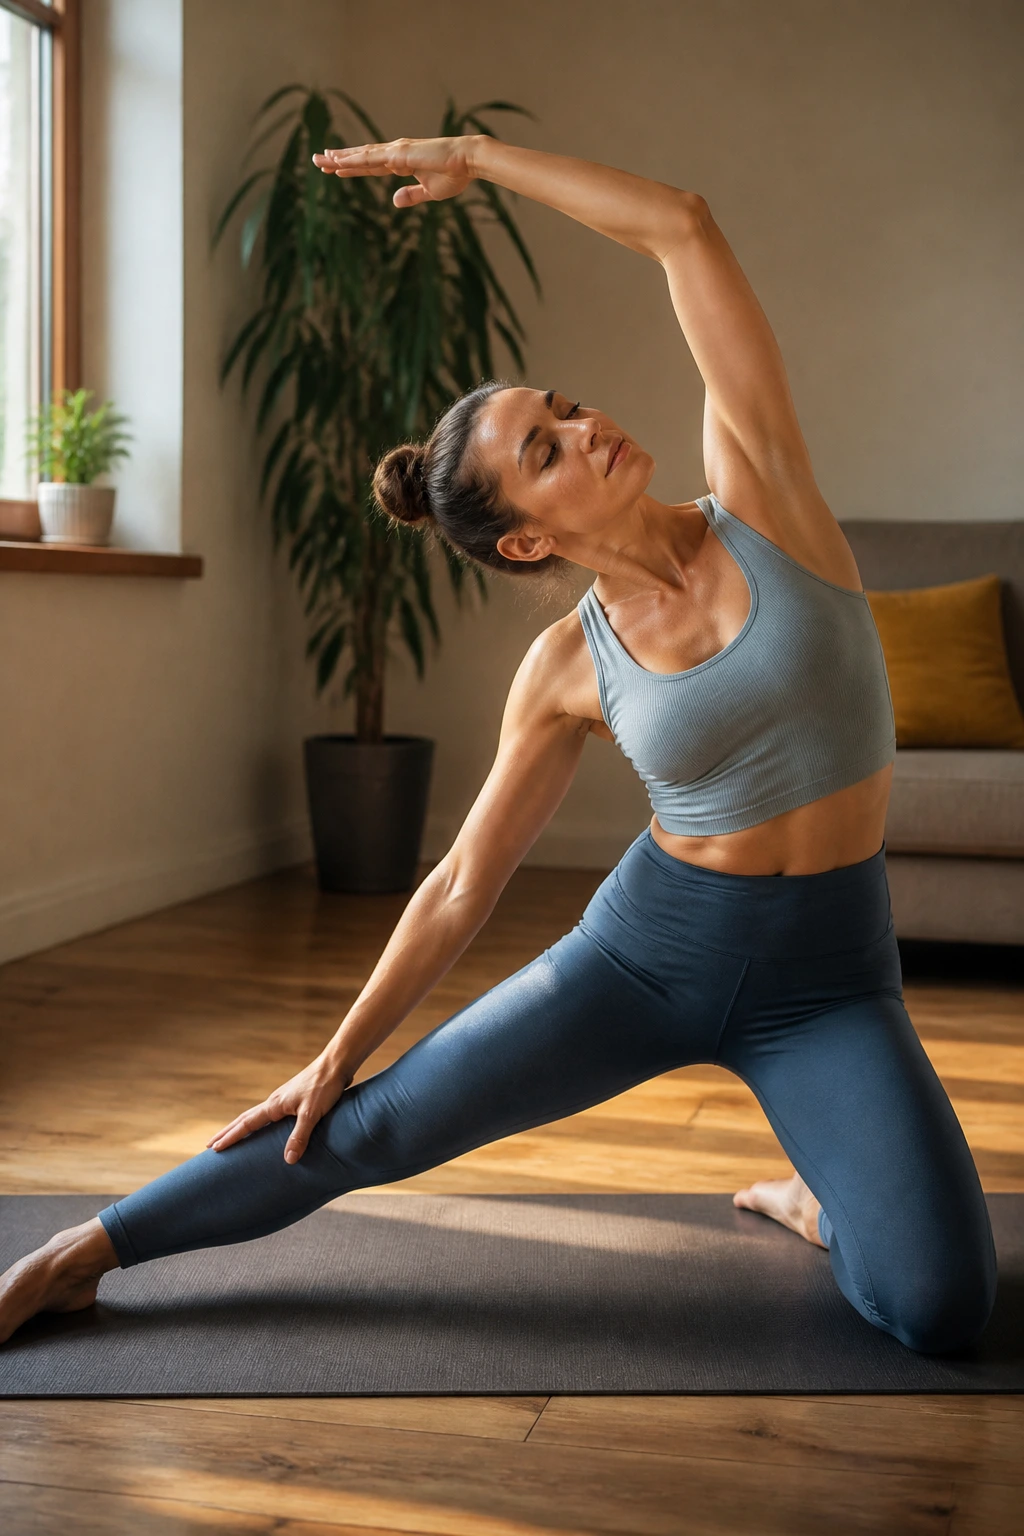
Gate pose is a side-body stretch with a kneeling base, which makes it easier to settle into than many standing side bends. One leg reaches out to the side, the other knee stays down, and the top arm arcs overhead. Let the bottom hand rest on the leg or floor. Don’t force the reach.
44. Supported Fish Pose
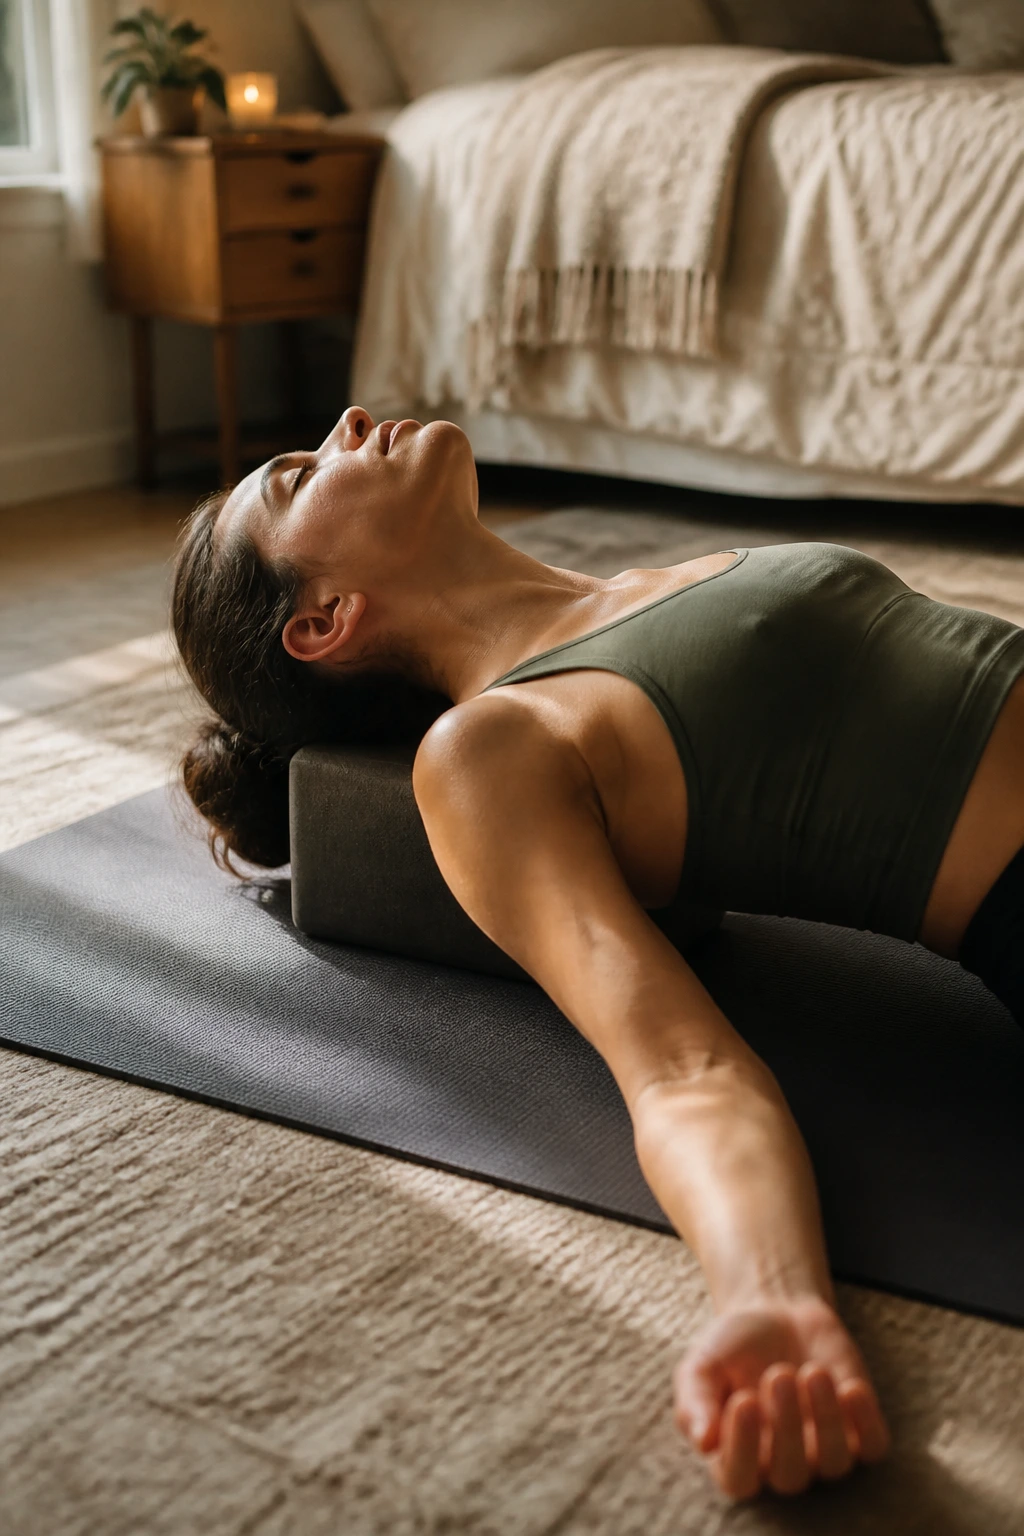
Supported fish pose is the kind of shape your upper back often needs after too much slouching. Place a block or folded blanket under the shoulder blades, let the chest open, and rest the arms wherever they feel natural. Keep the neck long and relaxed. This is a resting backbend, not a contest.
45. Easy Pose
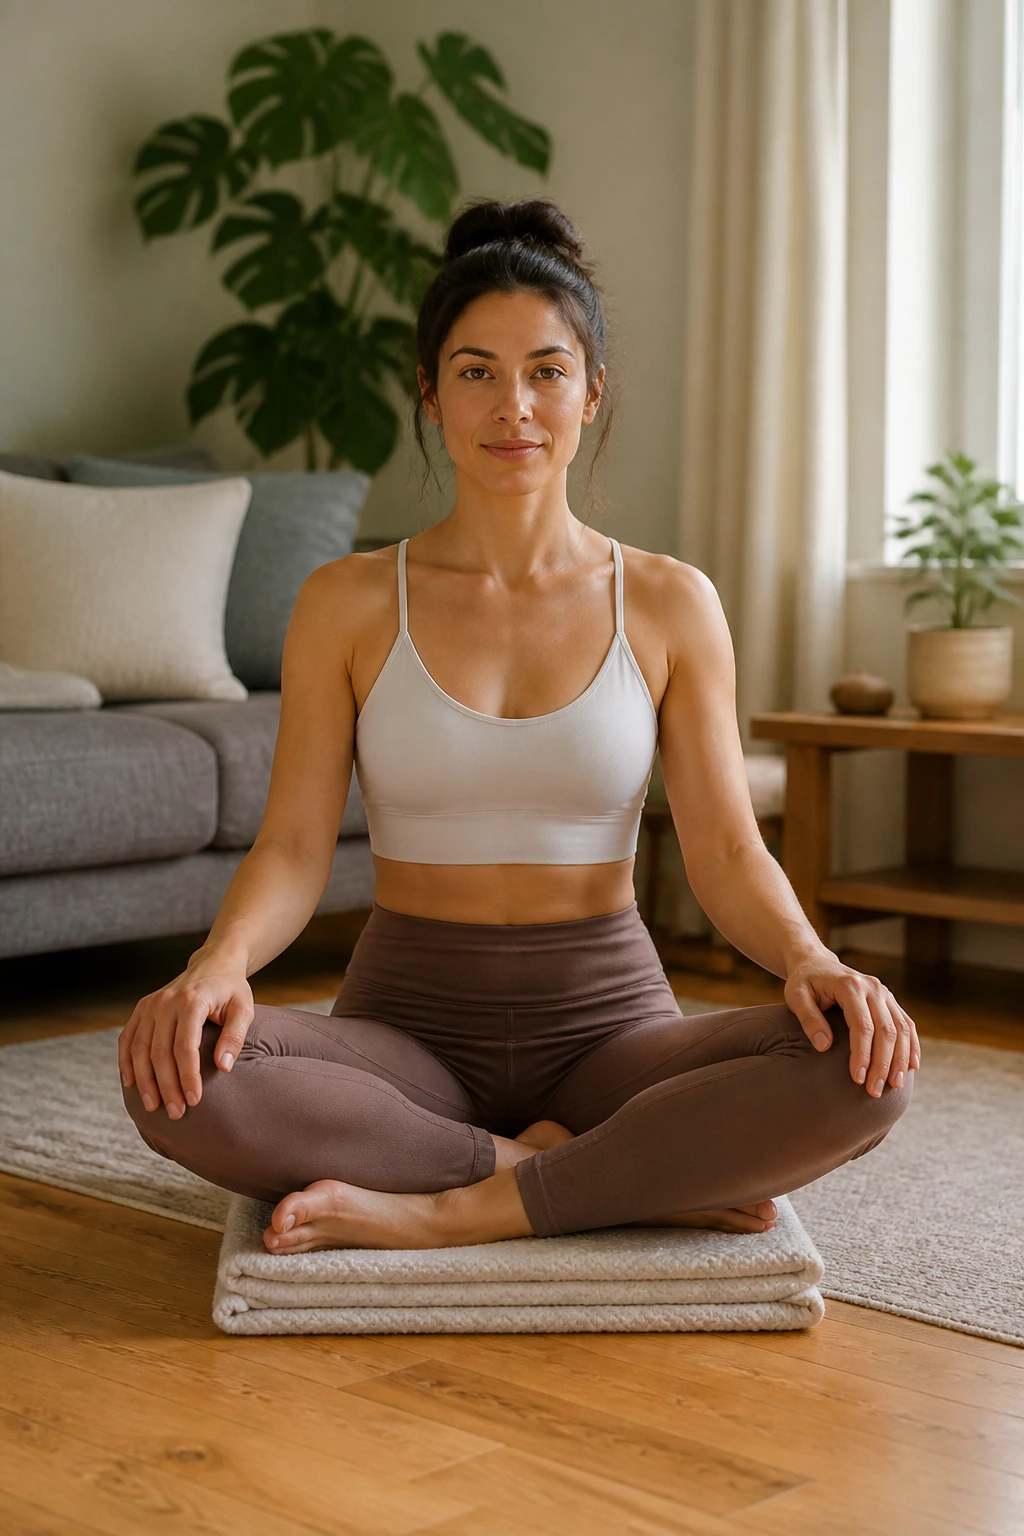
Easy pose is only easy if you give your hips something to sit on. Cross the shins, stack the spine, and place a folded blanket under the seat so the knees can drop lower than the hips. Hands rest on the knees or in the lap. Stay upright without stiffening. Calm and tall.
46. Bound Angle Pose
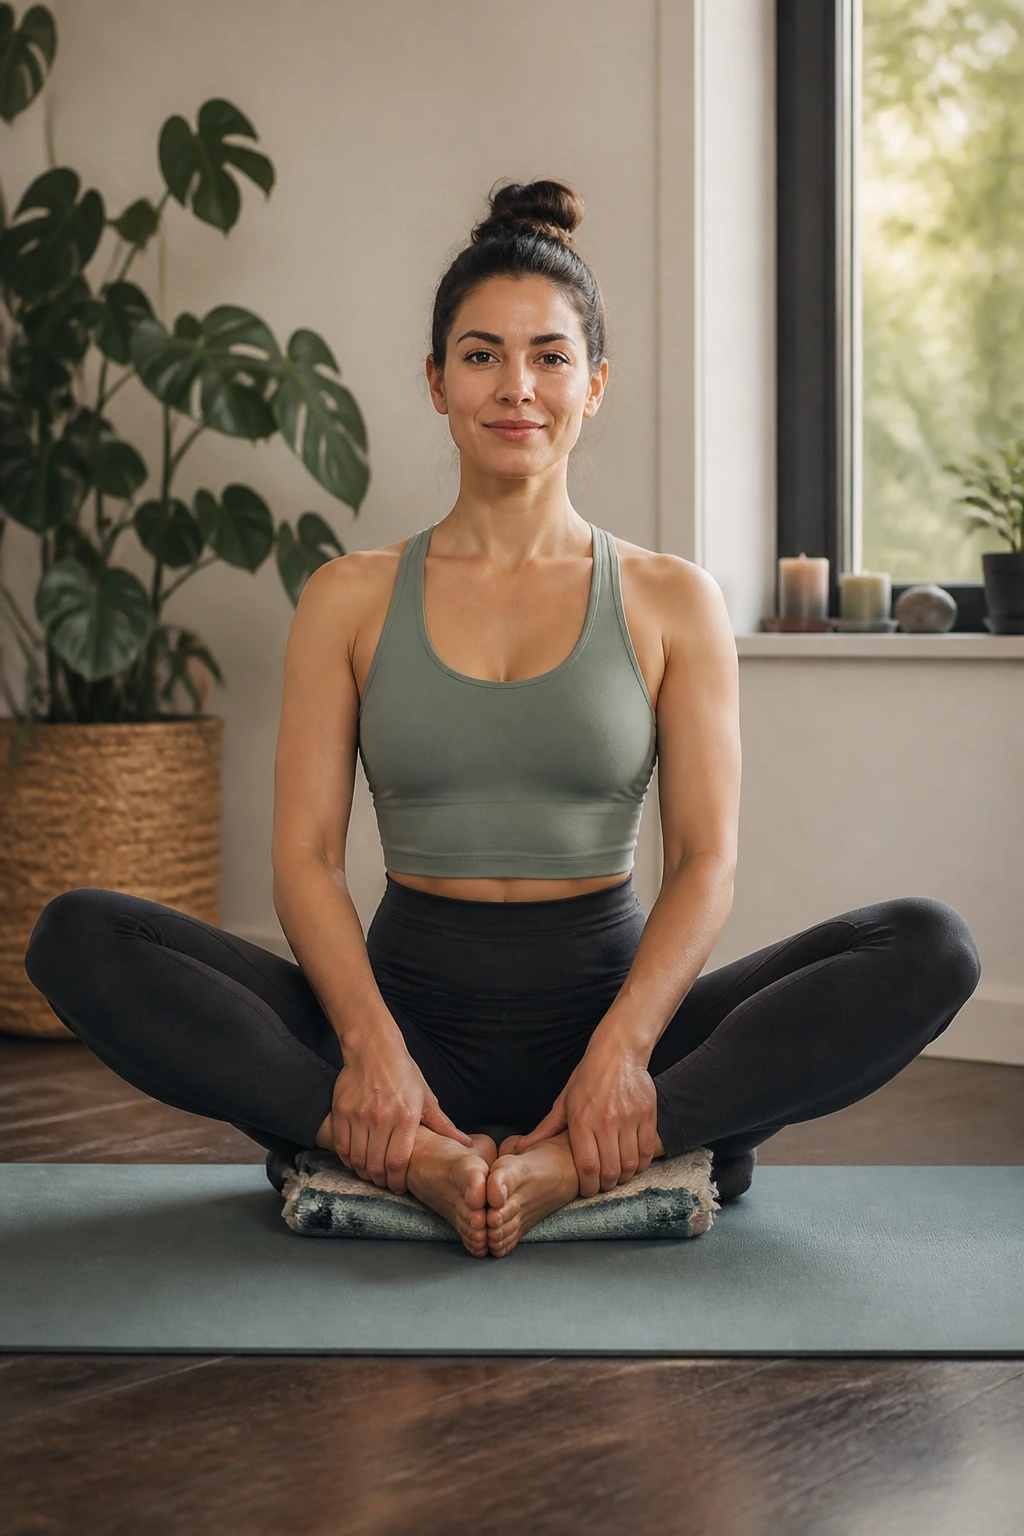
Bound angle pose opens the inner thighs and hips in a very direct way. Soles of the feet come together, knees open out, and the hands hold the ankles or feet. Sit on a blanket if the low back rounds. A tall spine changes the whole shape.
47. Standing Side Bend
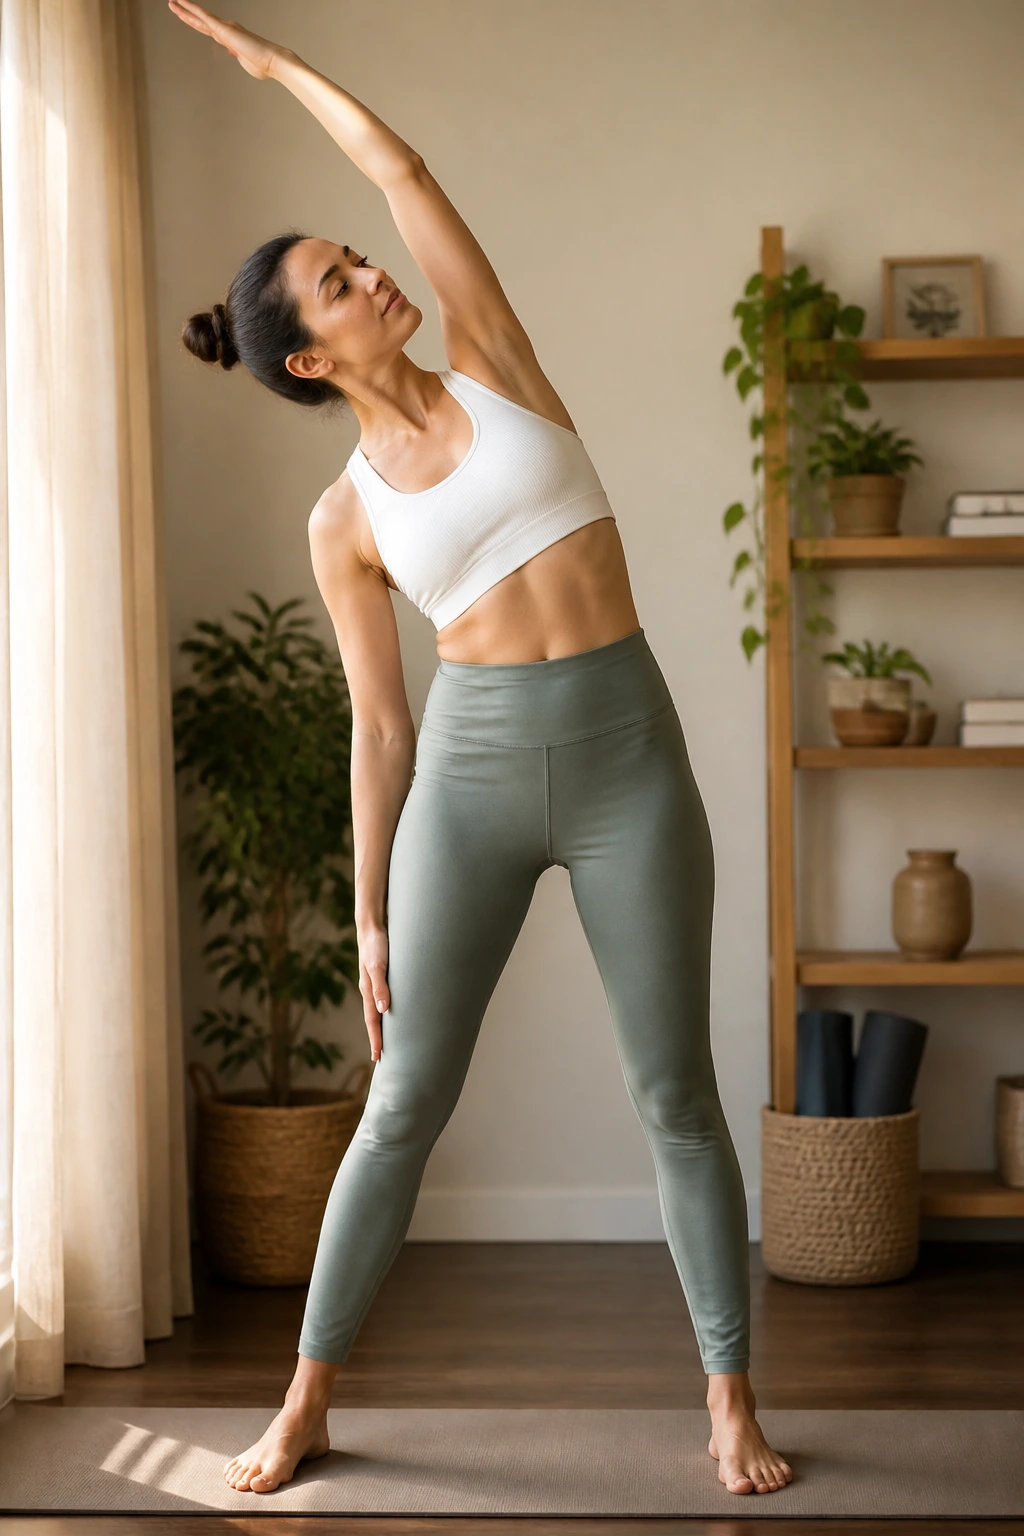
Standing side bend wakes up the sides of the body and often feels better than people expect. Root both feet, lift one arm overhead, and lean gently to the opposite side without tipping forward. Keep both hips facing front. A tiny bend can be more useful than a deep one.
48. Reclined Figure-Four Stretch
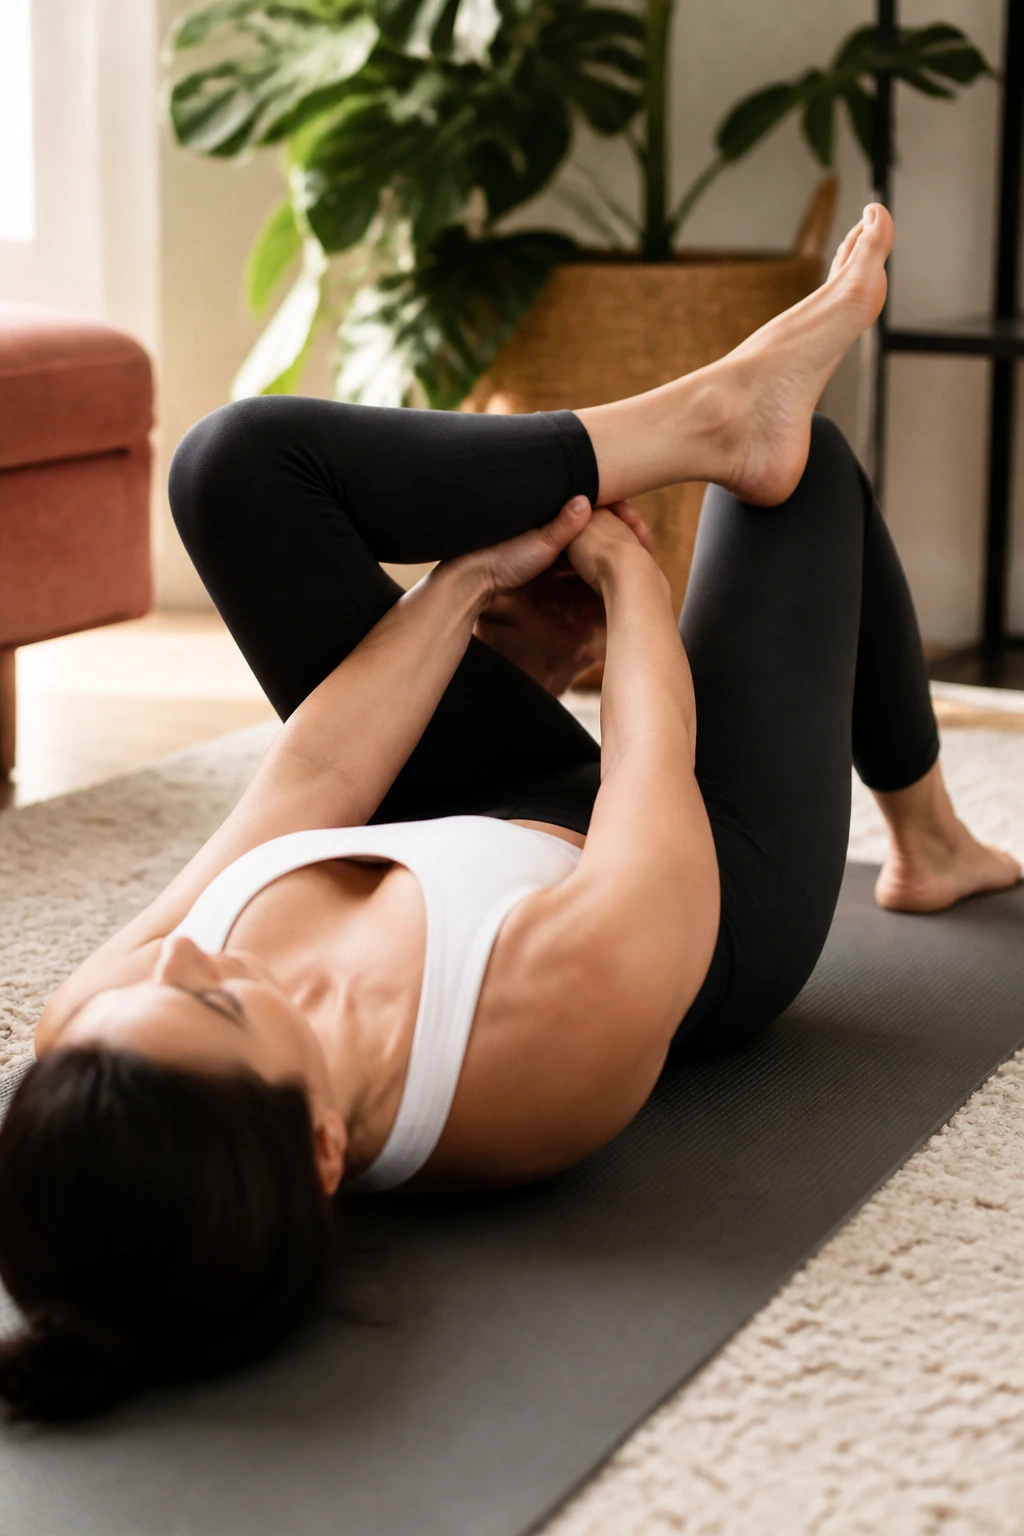
Reclined figure-four is a smart hip stretch for people who do not love sitting stretches. Lie on your back, cross one ankle over the opposite thigh, and draw the legs in. Flex the crossed foot to protect the knee. If the stretch feels sharp, back off and keep it smaller.
49. Camel Prep
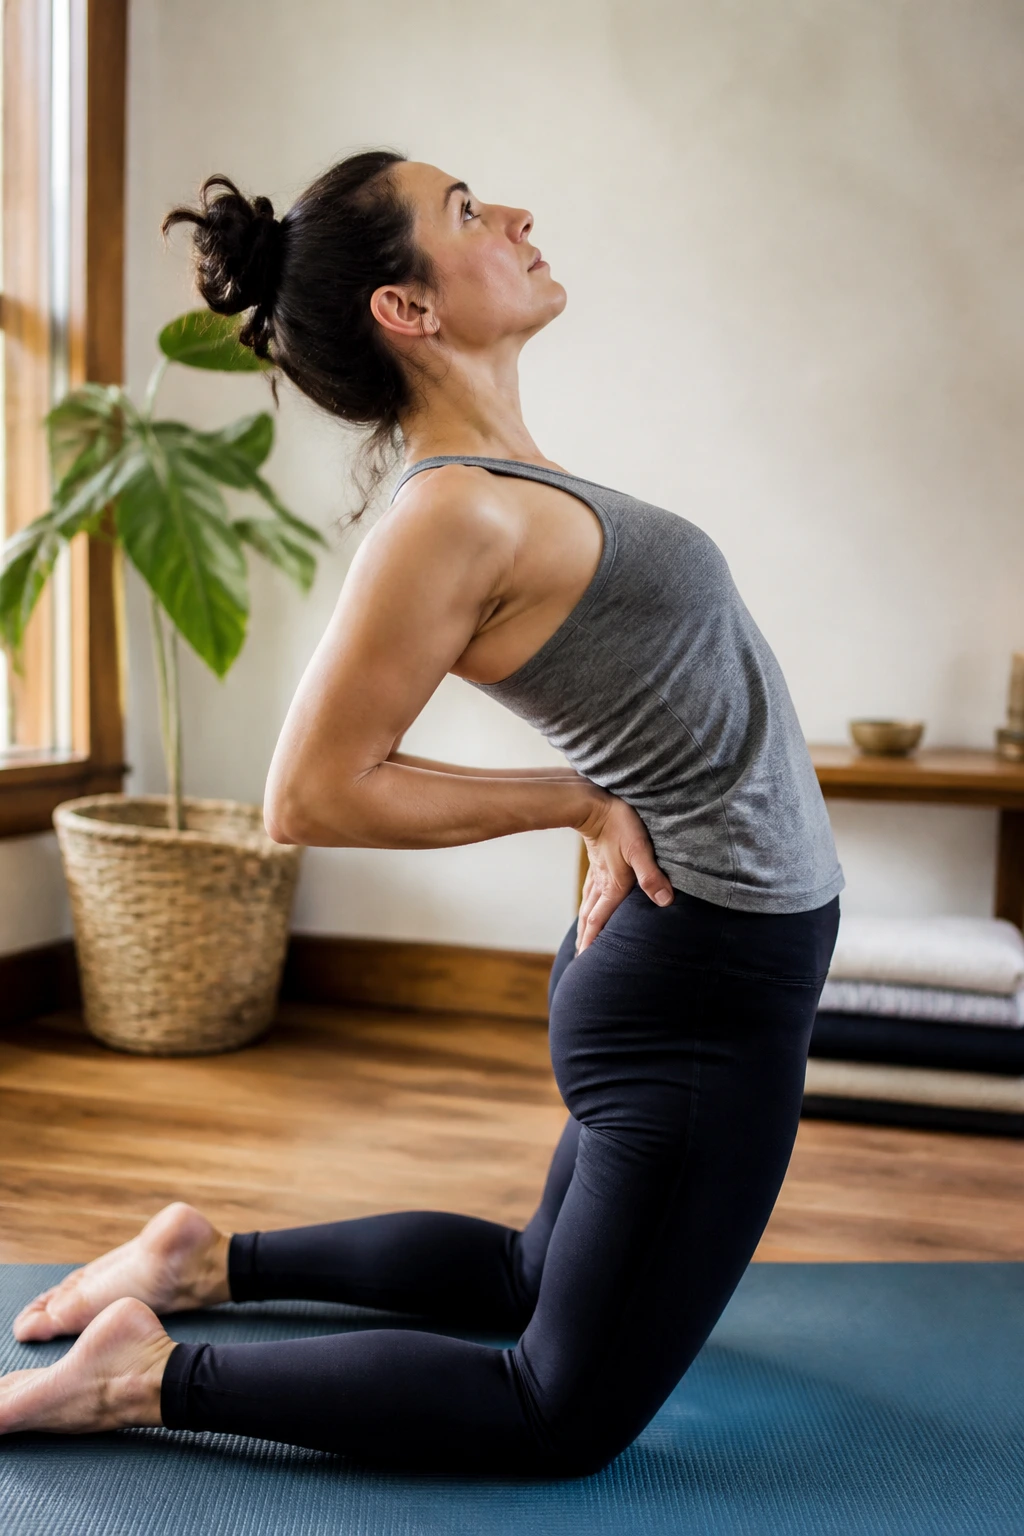
Camel prep gives beginners a taste of backbending without sending them straight into the deep version. Kneel, tuck the toes if needed, place the hands on the lower back, and lift the chest before moving the hips forward. The first goal is length, not a huge arch. Stop if the low back pinches.
50. Savasana and the Quiet Finish
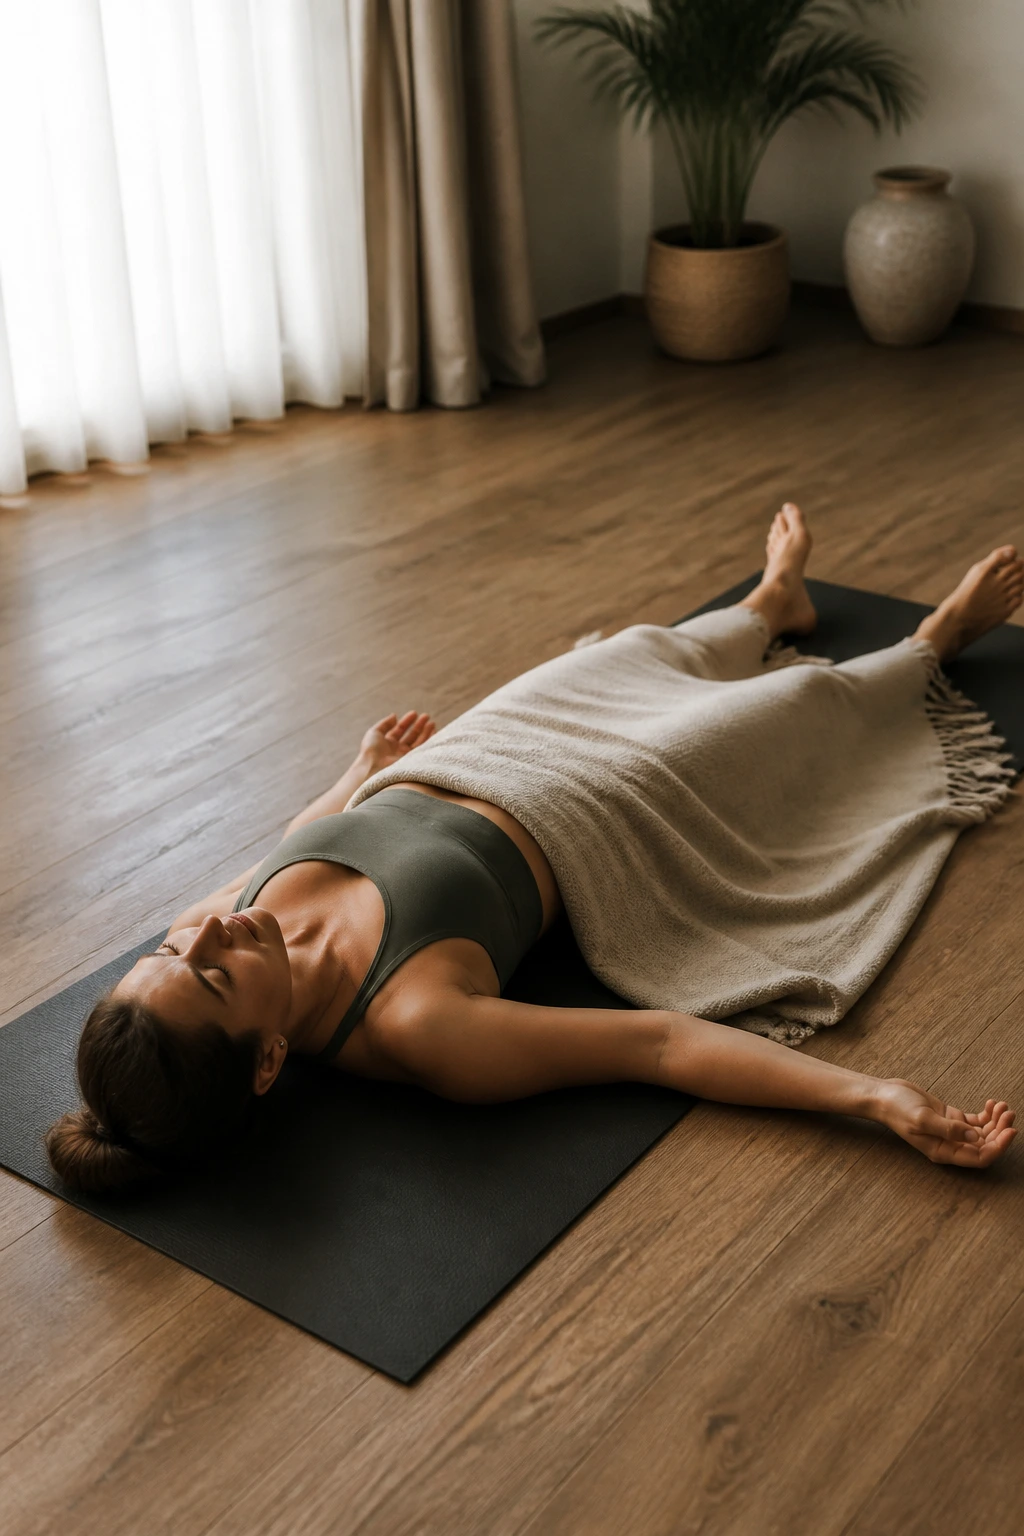
Savasana is the part people skip when they are in a hurry, and that is usually the part they need most. Lie flat, let the feet fall open, rest the arms a little away from the ribs, and cover yourself with a blanket if the room feels cool. Stay for at least 3 to 5 minutes.
If you want a simple home sequence, pick one standing shape, one lunge, one balance, one backbend, one twist, and end here. That’s enough. It is also enough to notice, after a few quiet breaths, that beginner yoga at home doesn’t need to be fancy to work.
