



If a floor push-up feels like a brick wall, that’s not a character flaw. It usually means the floor is too low for your current strength, your wrists are grumpy, or your core is leaking tension somewhere it shouldn’t.
The smartest push up workouts for beginners at home do not start on the floor. They start on the wall, the counter, the couch, or any surface that lets you keep a straight line and actually own the rep. That small change makes the movement honest instead of miserable.
Push-ups are weirdly simple and annoyingly technical. A clean rep asks for chest, triceps, shoulders, abs, glutes, and a little patience — plus a surface that does not slide around, because nothing ruins a set faster than socks on a polished floor.
Start high, lower the angle, keep the reps clean. That is where the progress lives, and the first workout below shows why the wall can be a smarter starting point than the mat.
1. Wall Push-Up Reset
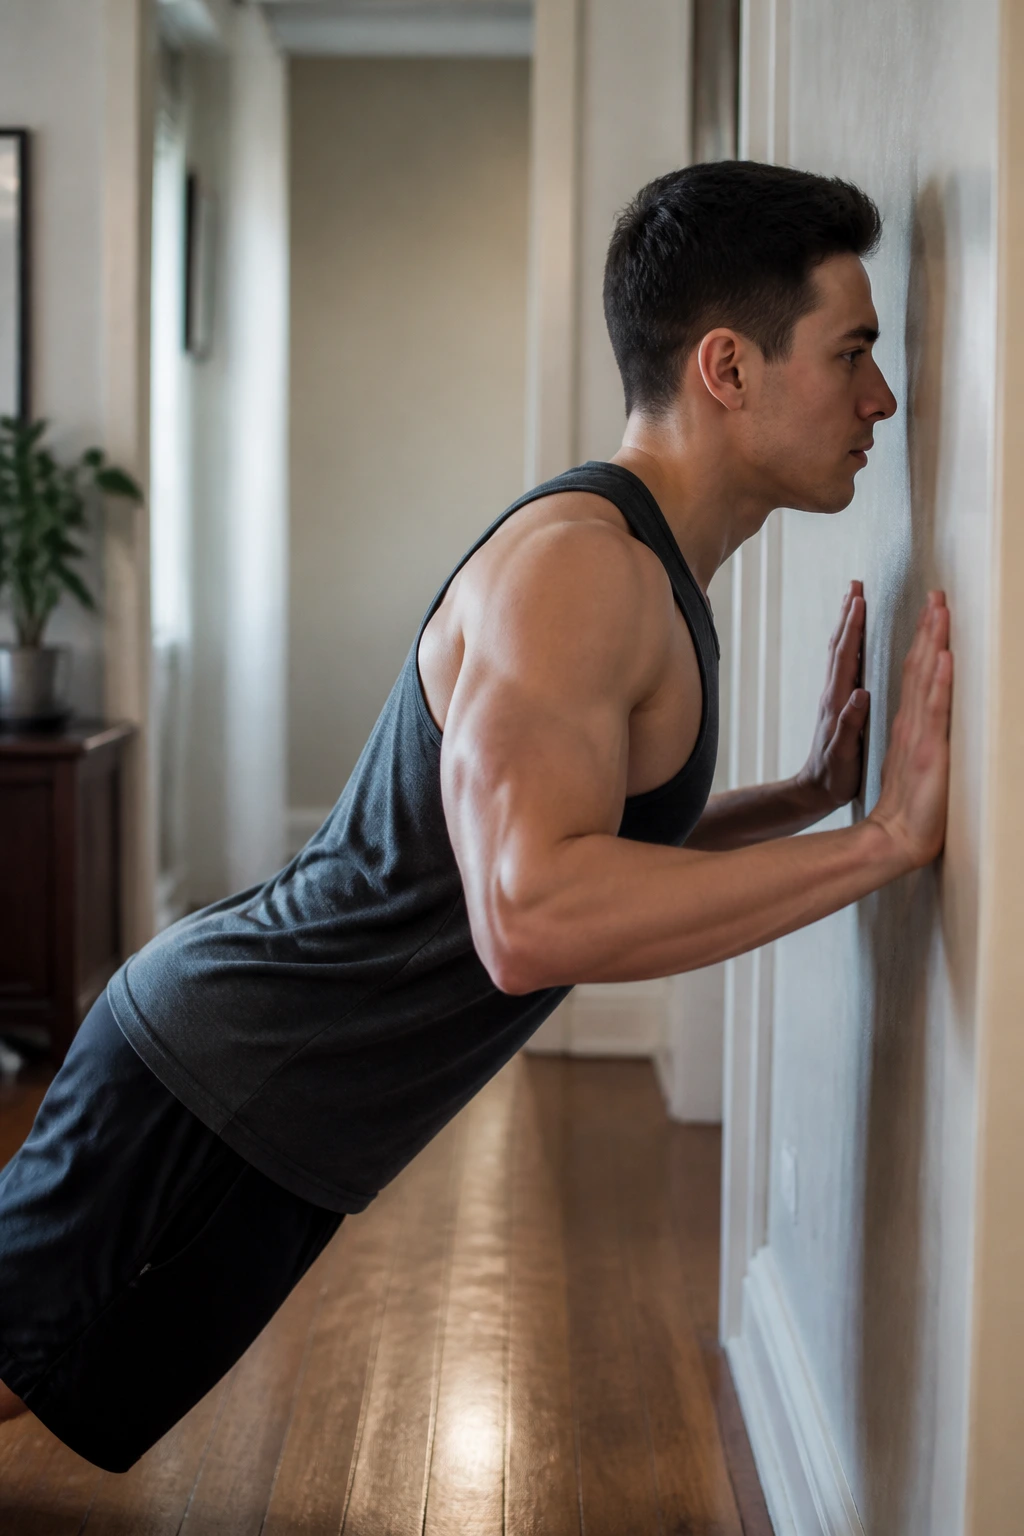
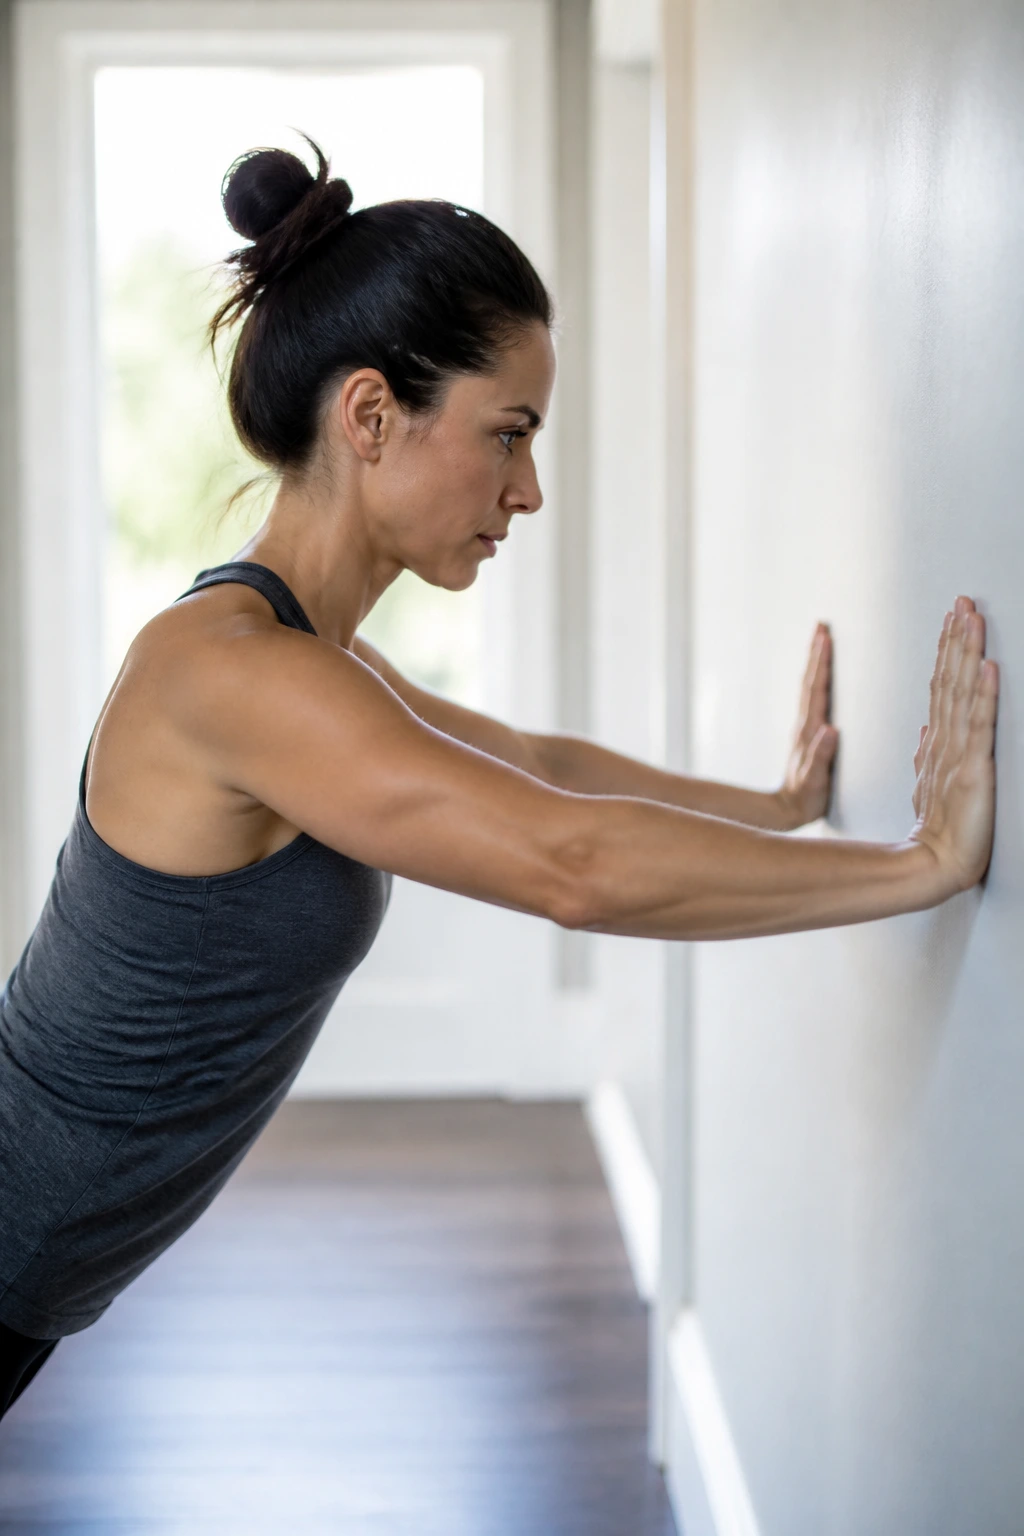
The wall is not a cop-out. It is a shape check.
A wall push-up strips the movement down to the parts that matter most: hand placement, shoulder control, core tension, and a clean line from head to heel. If your elbows flare, your ribs pop, or your neck cranes forward, the wall shows it immediately. That feedback is gold.
Why the Wall Helps
Stand an arm’s length from a wall, place your hands at chest height, and keep your body as straight as you can while you lower your face toward the wall. You should feel your chest and triceps work, but the load stays light enough that form can lead the way.
Do 3 sets of 10 to 15 reps with 30 to 45 seconds of rest. If 15 is easy and tidy, step your feet a little farther back. If your wrists complain, turn your hands slightly out or place them on a folded towel for a softer angle.
Quick Setup and Rep Target
- Hands a little wider than shoulder width
- Elbows tracking about 30 to 45 degrees from your sides
- Chest moving toward the wall, not the chin poking first
- Heels planted, glutes lightly squeezed
- Stop the set when your body starts to bend like a fishing rod
Best use: warm-up work, first-week practice, or a low-fatigue day when you want to groove the pattern without getting wiped out.
Wall push-ups are boring in the best way. Clean reps here make every harder version feel less chaotic later.
2. Countertop Incline Push-Up Ladder
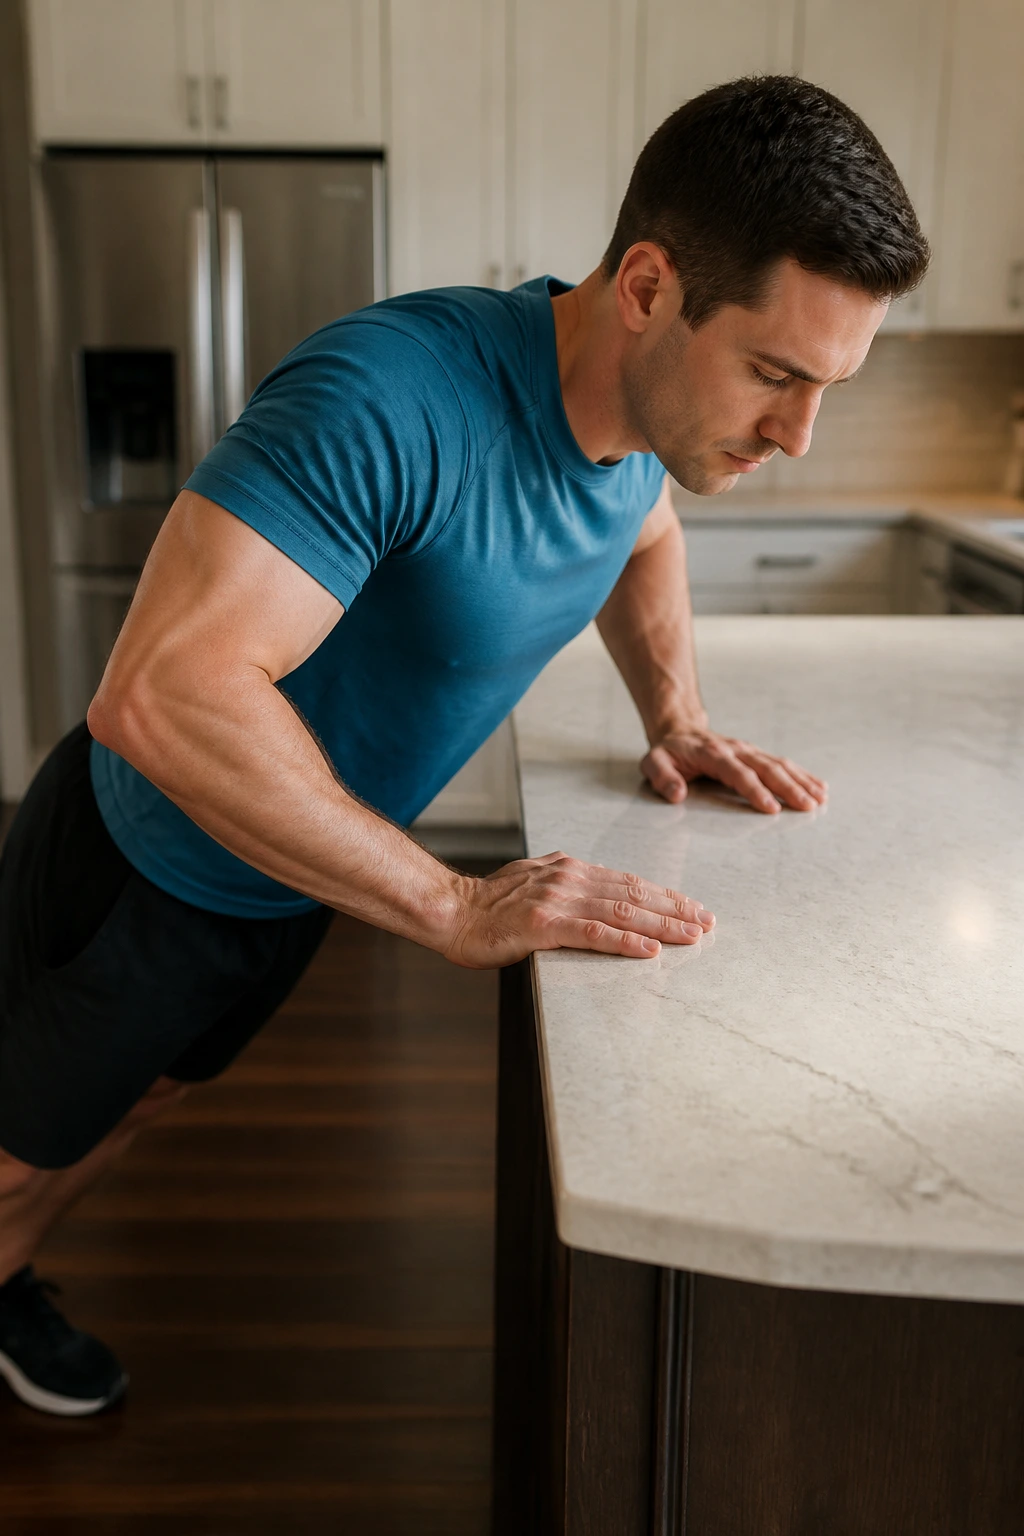
A countertop is the first surface that feels like real training.
The angle is lower than a wall, but still forgiving enough to let your chest, shoulders, and triceps do honest work without forcing a shaky full-floor rep. A kitchen counter, sturdy desk, or bathroom vanity works well as long as it doesn’t wobble or slide.
Start with 3 rounds of 5 reps, then move to 6, then 7 if the first round stays crisp. Keep your chest square to the surface and lower until your upper arms are about parallel with the floor. If the last rep turns into a neck shrug, the surface is too low or the set is too long.
A lot of beginners rush straight from wall to floor and wonder why their form falls apart. This bridge matters. The counter teaches you how to press with your whole upper body while keeping your core from sagging like a hammock.
If you want a simple rule, use this one: when you can finish 3 sets of 8 without losing your line, lower the incline next time. That might mean moving from the counter to the back of a sturdy chair, or from a tall table to a lower shelf. Small changes. Big payoff.
3. Couch-Edge Volume Set

A couch can be helpful, but it can also be sneaky.
Soft cushions eat force, which makes the rep feel less stable than it looks. That is fine if you want a little extra challenge for your core, but it can turn ugly fast if the surface sinks under your hands and makes your shoulders wobble. Use the firm edge or couch arm if you have one.
What Makes the Couch Different
Unlike a hard countertop, the couch gives a tiny bit under pressure. That means your body has to stabilize the rep while it presses, which can light up the chest and front shoulders in a different way. It is not harder in a pure strength sense; it is messier.
Try 3 sets of 6 to 10 reps with 45 to 60 seconds of rest. Keep your hands flat, your wrists stacked under your shoulders, and your body rigid from head to heels. If the cushion swallows your hands, move to the armrest or a firmer section.
- Good for late beginner stage
- Works well after wall or counter practice
- Less friendly to wrist pain if the couch is too soft
- Best done with shoes on or on a grippy floor surface
A little awkwardness here is normal. That’s the point. You are learning to press while the setup refuses to be perfect.
4. Knee Push-Up Strength Builder
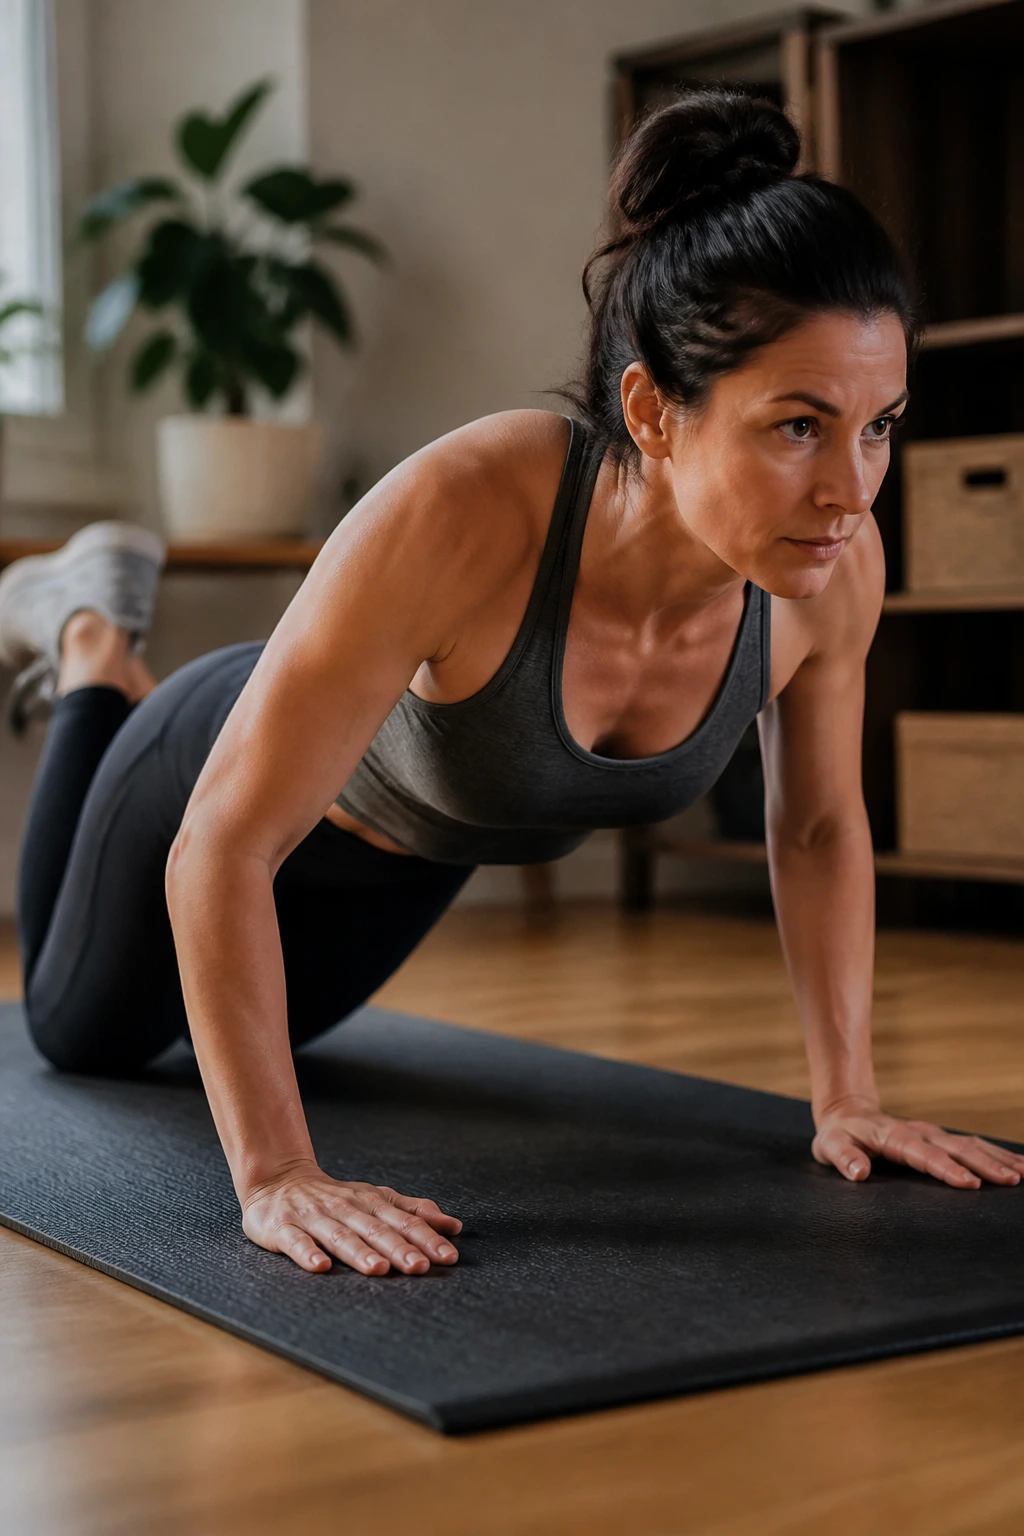
Still collapsing when the set gets hard?
Then knee push-ups can help, as long as you do them with a real plank shape and not a sloppy hinge at the hips. The problem with bad knee push-ups is simple: people let their midsection fold, which turns the movement into a chest dip with a broken line. That teaches almost nothing useful.
How to Use It Without Sagging
Set up with your hands under your shoulders, knees on a mat, and your body angled like a plank from knees to head. Lower your chest toward the floor under control, then press back up while keeping your ribs pulled in.
Use 4 sets of 5 to 8 reps. Rest about 60 seconds between sets. If 8 reps are tidy, slow the lowering phase to 3 seconds. If your lower back starts to arch, shorten the set right away.
Knee push-ups are not a forever exercise. They are a bridge. A good one.
One useful test: if you can hold the bottom position for a second without your shoulders creeping up to your ears, you are ready for more work. If not, keep the sets short and clean. No need to bully the rep. That never ends well.
5. Negative Push-Up Lowering Drill
Negatives are slow on purpose.
You start at the top of a push-up, brace your body, and lower yourself to the floor over 4 to 6 seconds. That slow descent teaches control where beginners usually lose it: on the way down. The press back up can happen from the knees, from a reset, or by stepping back to the top position if you can manage it safely.
The first few reps will feel almost too slow. Good. That means you’re not racing through the weak part.
Only the lowering phase matters here. If you can’t control the descent, don’t worry about the press yet. Drop to the knees to reset, stand back up, and do the next rep with the same careful tempo.
A nice starting dose is 3 sets of 3 to 5 negatives, with 60 to 90 seconds of rest. Keep your chin slightly tucked, your glutes tight, and your elbows from flaring straight out to the sides. If you crash to the floor, the set is done.
This drill is plain, almost stubborn. And that is exactly why it works.
6. Half-Range Floor Push-Up Practice
Unlike negatives, half-range reps teach the first part of the press itself.
That matters because lots of beginners can lower with some control but stall when they try to push away from the floor. Half-range work lets you practice the exact pressing path without demanding a full rep that you cannot yet own. Think of it as training the middle road instead of pretending the summit is within reach.
Start in a floor push-up position, lower only halfway, then press back to the top. The chest does not need to kiss the mat. In fact, it should not. Stop where you can still keep your ribs down and your shoulders from collapsing forward.
Use 5 sets of 3 to 5 reps with 45 to 60 seconds of rest. If that feels too easy, pause for one second in the middle of the rep. If it feels too hard, move back to an incline and come down again later.
A folded towel under your chest can give you a simple depth target. Just keep it low enough that you are still working through a meaningful press. This is not a cheat. It is a bridge with a shorter span.
7. Pause-at-the-Bottom Floor Push-Up
The bottom of a push-up is where people find out what their body is doing.
Chest hovering an inch off the mat, elbows bent, abs braced, and everything suddenly quiet. That pause is uncomfortable in the best way. It removes momentum, so you have to produce force from a dead stop rather than bouncing out of the hole.
The Pause That Builds Control
Hold the lowest position for 2 full seconds before pressing up. Not half a second. Two. That tiny pause makes the rep feel heavier and exposes shaky shoulders fast.
Try 3 sets of 4 to 6 reps. If you can’t hold the pause without sinking your hips or cranking your neck forward, go back to an incline or do the pause from your knees first. The pause is the point, not the heroics.
What to Watch For
- Chest stays close to the floor
- Core stays tight enough that your low back doesn’t arch
- Elbows stay under control instead of flaring wildly
- Breathing stays steady; do not hold your breath for the whole set
A clean pause rep feels calm, not frantic. That is the look you want.
8. Tempo Push-Up at 3-1-1
Three seconds down sounds slow because it is.
Tempo work is brutally honest. It removes the little cheats that sneak into fast reps — the bounce, the half-drop, the rushed press — and replaces them with a pace you can actually control. Use a count of 3 seconds lowering, 1 second pause, 1 second press. Say it out loud if you need to.
The beauty of this version is that it teaches rhythm. You learn where your body gets wobbly, where your elbows drift, and whether your core can stay braced when the rep takes its time. It is also easier to repeat from one workout to the next, which makes progress obvious.
Run 4 sets of 4 to 6 reps with 60 seconds of rest. If the last two reps of a set start looking messy, stop early. Tempo work falls apart fast when you chase fatigue.
The slower lowering phase turns a sloppy rep into a clear one. That is the whole trick. No fancy equipment. No dramatic setup. Just you, a mat, and a count that refuses to let you lie about the quality of the rep.
9. Ladder Push-Up Workout
A rep ladder sounds simple on paper. It isn’t always simple in your triceps.
The classic version goes 1 rep, then 2, then 3, then 4, then 5, with 20 to 40 seconds of rest between rungs. If that feels too easy, repeat the ladder once after a longer rest. If it feels too hard, stop at 4 and call it a win. That still builds volume without turning the workout into a grind.
Ladder Example
- 1 push-up
- Rest 20 to 30 seconds
- 2 push-ups
- Rest 20 to 30 seconds
- 3 push-ups
- Rest 20 to 30 seconds
- 4 push-ups
- Rest 20 to 30 seconds
- 5 push-ups
A ladder helps beginners because each set starts fresh. You are never staring at a giant rep count from the outset, which keeps form cleaner than a long all-out set. It also makes the workout feel a little like a game, which is handy when motivation is thin.
If floor reps are still rough, run the same ladder on a countertop or sturdy table. Same structure. Easier angle. That kind of scaling keeps the workout useful instead of discouraging.
10. EMOM Push-Up Workout
Need a workout that ends before your form does?
An EMOM — every minute on the minute — solves that problem cleanly. You pick a rep count, do the reps at the start of each minute, then rest for whatever time is left. Ten minutes later, you are done. Simple. A little sneaky. Very effective for beginners who need structure.
How to Pick the Right Rep Count
Start with 4 to 6 incline push-ups each minute. If you can finish the reps and still have 20 to 30 seconds left in the minute, the number is about right. If you are still gasping when the next minute starts, drop by one rep. If you are chatting to yourself and bored, add one.
Use a timer set for 10 minutes. Pick the same surface for the whole round — wall, counter, or couch. Consistency matters more than showing off.
A good beginner EMOM feels controlled from minute 1 to minute 10. You should finish tired, not wrecked. That difference matters. Wrecked means the rep count was too high or the angle was too low. Controlled means you can come back and do it again two days later.
Short, tidy, repeatable. That is the point.
11. Push-Up Plus Shoulder Tap Combo
This one is excellent if your core likes to wander.
A push-up plus shoulder tap combo teaches your body not to twist when one hand leaves the floor. That matters because the minute you shift weight off one arm, your hips want to rotate and your lower back wants to help. Neither of those things should happen.
Use a counter, bench, or knee position if the floor feels too wild. Do one push-up, then tap your right shoulder with your left hand, then your left shoulder with your right hand. Keep the tap slow. Keep the hips square. If your torso sways like a boat in wind, the surface is too low.
A clean set might look like 3 rounds of 4 push-ups with 4 total shoulder taps after each rep, resting 45 to 60 seconds between rounds. That sounds mild until you actually try to stay still.
This workout is less about raw pressing strength and more about control. That makes it useful for beginners who can move, but can’t quite keep everything organized while they move. And honestly, that’s most people at the start.
12. Wide-to-Narrow Hand Position Workout
Unlike the same hand position done over and over, this format keeps the pressure shifting.
Wider hands tend to make the chest work a little more. Narrower hands ask more of the triceps. You do not need your hands touching each other or floating way out into the next zip code. Small changes are enough.
Try a simple three-part round:
- 5 reps with hands slightly wider than shoulders
- 5 reps with hands at shoulder width
- 3 reps with hands a little closer, only if your wrists feel fine
Rest 60 seconds, then repeat once or twice.
The payoff is practical. Your muscles get exposed to slightly different lines of force, and the workout feels less monotonous. The caution is practical too: if your wrists start barking, don’t force the narrow version. A slight change in hand width is useful; a wrist complaint is not.
I like this format for beginners who are past wall work but not ready for tons of floor volume. It gives enough variety to feel like training, not enough strain to feel like punishment.
13. Incline-to-Floor Drop Set
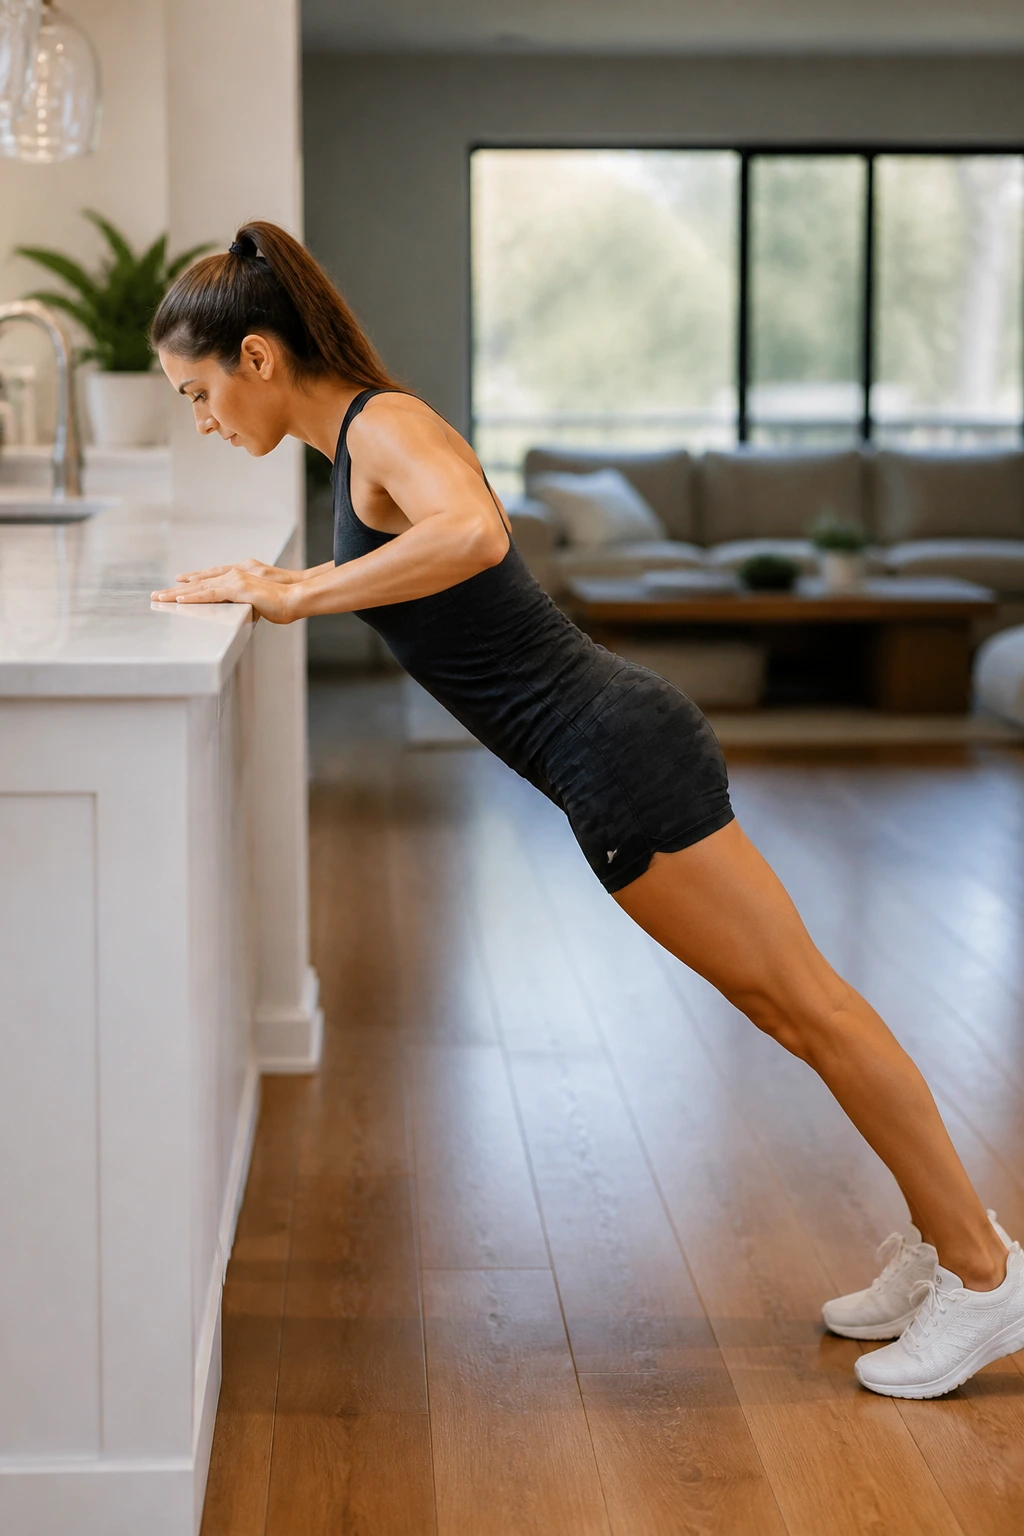
A drop set sounds fancy. It is really just a smart way to stretch one workout into three levels of challenge.
Start with the easiest angle you can handle for clean reps — maybe a countertop. Do 6 to 8 reps, then move immediately to a lower surface like the couch arm or a sturdy chair for 4 to 6 reps, and finish with 2 to 4 knee push-ups if you still have gas left. One round. Then rest.
How the Drop Set Feels
The first incline usually feels smooth. The second one starts to bite. By the time you hit the floor or knees, your triceps know they are in a workout, not a warm-up. That’s useful. It lets beginners touch harder angles without getting trapped there for an entire set.
Keep the hand placement the same across every surface if you can. If the couch is too soft or the chair is too narrow, skip it. No workout is worth a wobbling wrist.
One to three rounds is plenty. If your form starts collapsing midway through the first drop, your first angle was too hard or your rest was too short. Simple fix. Less drama.
This is a strong bridge workout when you are trying to move from incline push-ups toward the floor.
14. Push-Up Circuit With Legs and Core
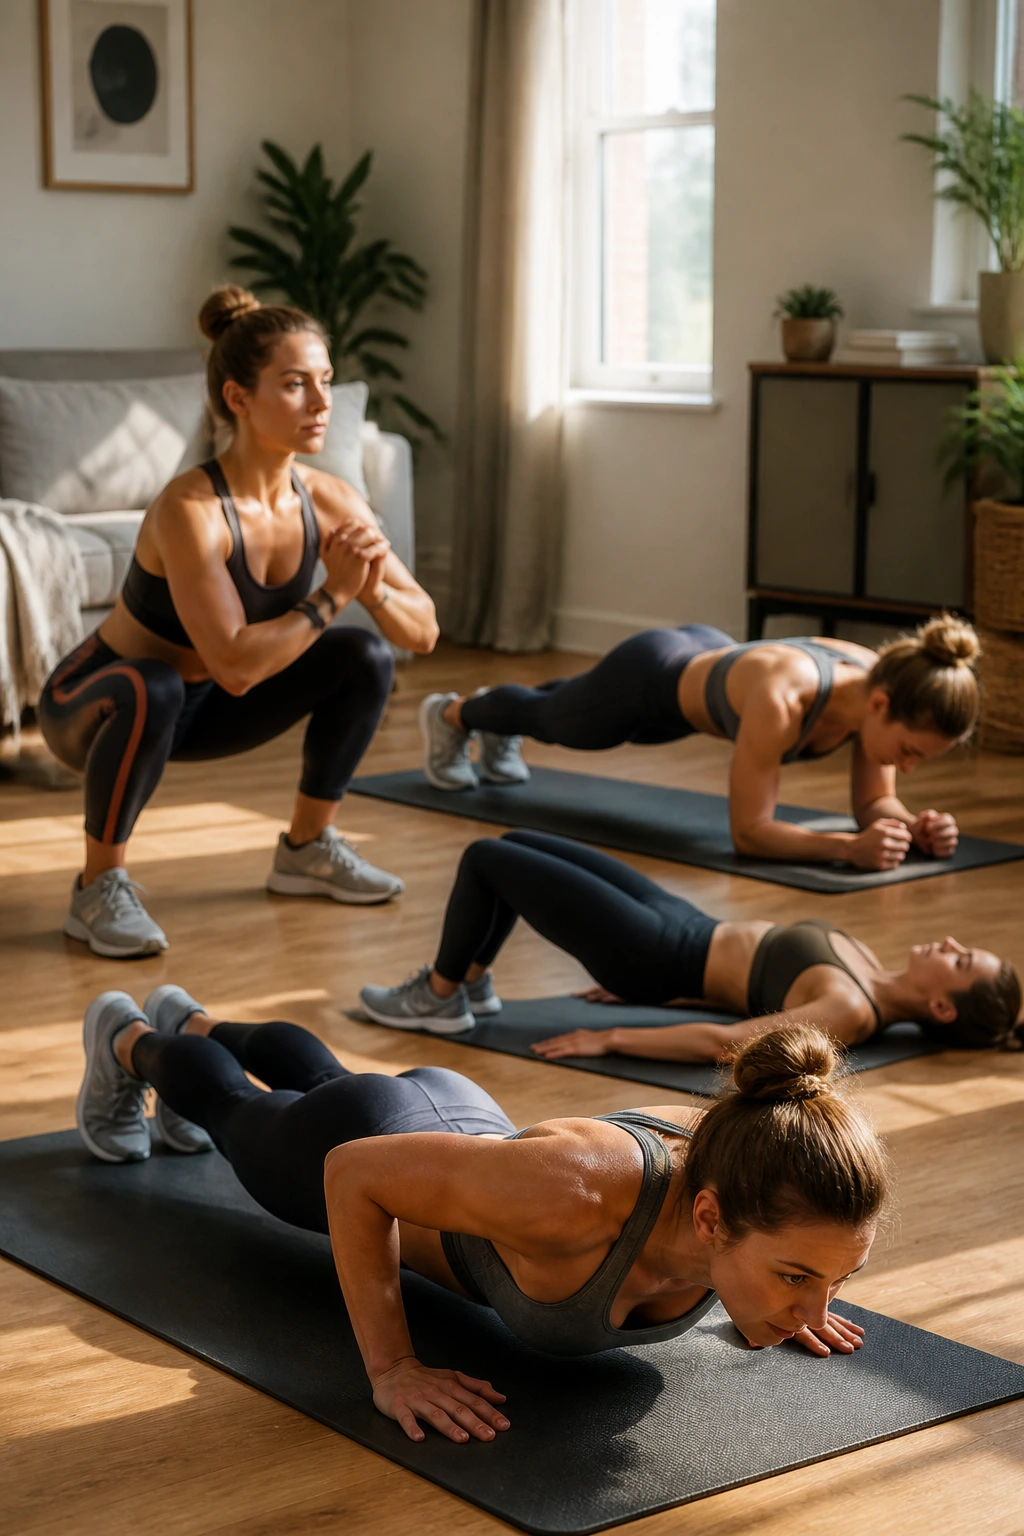
If you only train push-ups, the session can end before your body feels fully awake.
A small circuit gives the workout some shape and keeps your heart rate from dropping every time you stand up. It also reminds your lower body that it is part of the deal. Push-ups work better when the rest of you is not acting like a passenger.
Try this:
- 5 incline or knee push-ups
- 10 bodyweight squats
- 20-second forearm plank
- 8 glute bridges
- Rest 60 seconds
- Repeat for 3 rounds
Keep the push-ups first while your arms are still fresh. The squats and bridges are there to keep the session from becoming a one-move wonder. If the plank feels too easy, extend it to 30 seconds. If the push-ups start turning sloppy in round 2, lower the incline.
This kind of circuit is especially useful at home because it needs almost nothing. A mat helps. A timer helps. That’s about it. The whole thing feels more complete than a pile of random reps, and beginners usually stick with it longer for that reason.
15. Four-Week Beginner Push-Up Builder at Home
The cleanest beginner plan is boring in the best way.
You repeat a few good patterns, lower the angle only when the reps stay honest, and give your joints enough rest to adapt. That’s how push up workouts for beginners at home actually turn into floor reps instead of a pile of half-finished attempts.
Week-by-Week Progression
- Week 1: Wall push-ups and countertop push-ups, 3 sessions, 3 sets of 8 to 12 each
- Week 2: Countertop push-ups plus knee push-ups, 3 sessions, 4 sets of 5 to 8
- Week 3: Negative push-ups and pause push-ups, 3 sessions, 3 to 4 sets of 3 to 5
- Week 4: Ladder work, half-range floor reps, and one light floor attempt after each warm-up
That doesn’t mean you must follow the same order forever. It means you keep the body guessing just enough to adapt without getting lost. If you can complete the top end of the rep range with clean form two sessions in a row, lower the incline or add a rep next time. If your shoulders are smoked, stay at the same level and do not chase more.
Give yourself at least a day between harder push-up sessions. Recovery is not lazy. It is the part where strength actually shows up.
One clean rep beats ten ugly ones. Keep the line straight, keep the angle honest, and the floor stops feeling like a cliff.
