



Thirty yoga poses sound ambitious until you notice something simple: the body learns best when it keeps meeting the same shapes with calmer breath and cleaner lines. A beginner yoga challenge works best when the poses are plain enough to repeat, but not so easy that you can sleepwalk through them.
The good poses for a starter challenge teach more than flexibility. They teach balance in one foot, strength in the legs, control through the ribs, and the habit of breathing without bracing your jaw. Tiny things matter here. A knee turned a little too far in, a shoulder creeping toward the ear, or a forward fold done with locked knees can change the whole feeling.
Three to five breaths is plenty for most of these shapes. Some of the restful ones can stay longer; some of the strength poses are better held briefly and done with care. And if a pose feels awkward, that’s often the point — awkward is where beginners start to learn the map.
What follows is a sequence I’d trust for real beginners: ground first, warm the spine, wake up the hips, build a little leg work, then finish with recovery. Simple. Not easy, exactly. But simple matters.
1. Mountain Pose for a Beginner Yoga Challenge
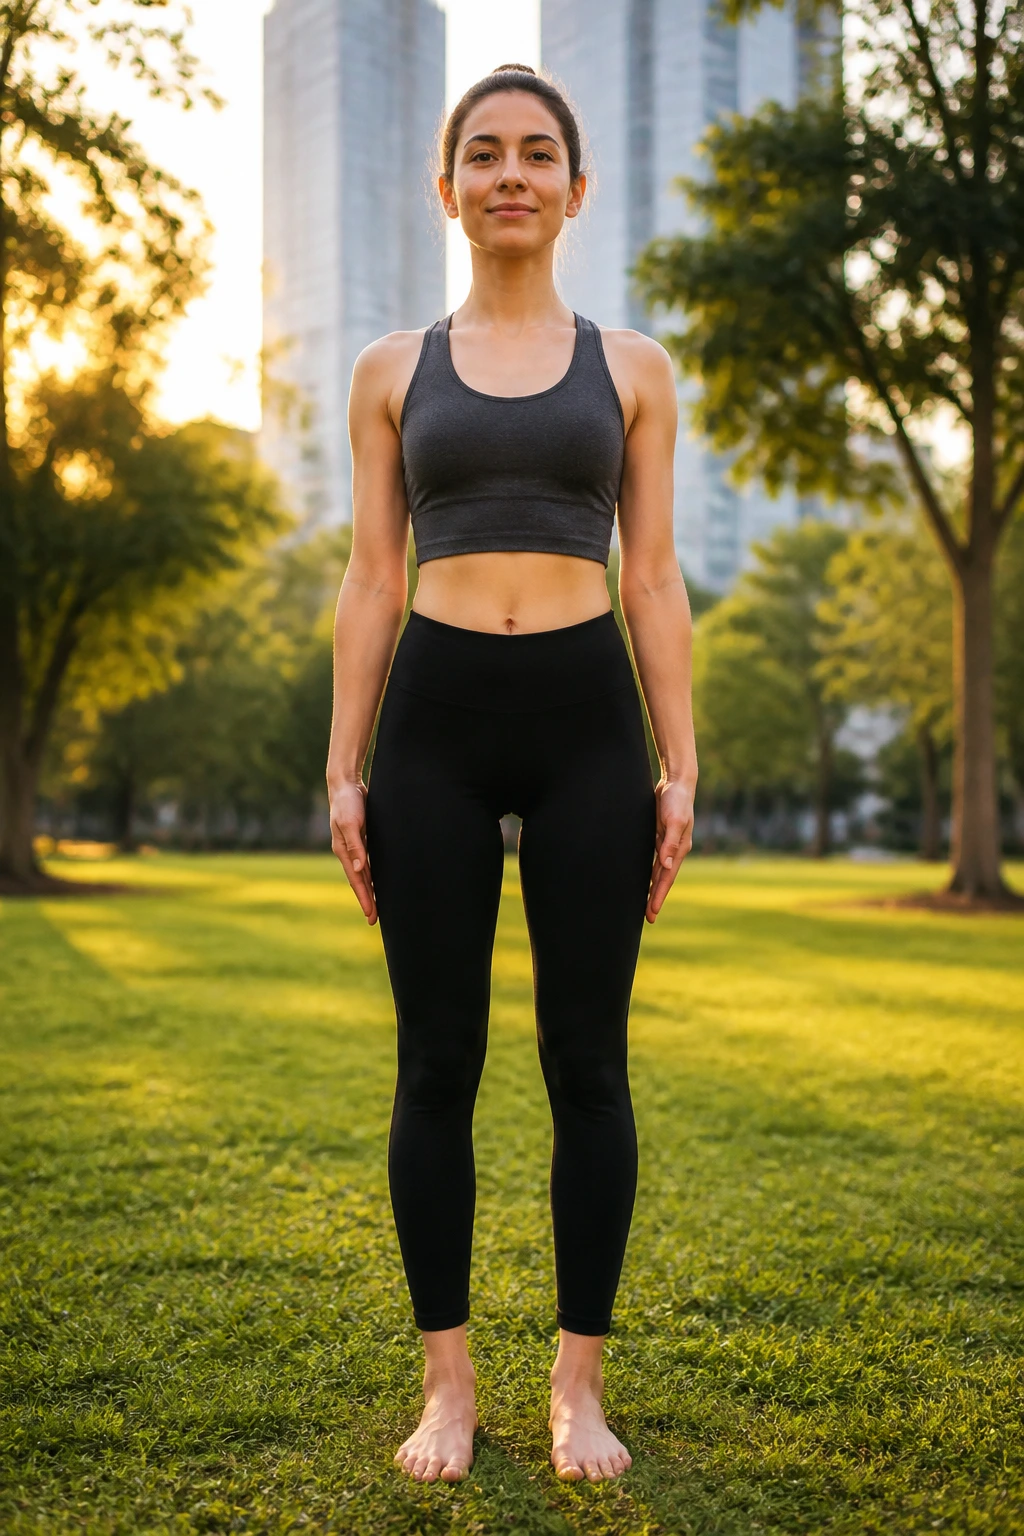
Standing still can be harder than it looks. Mountain Pose is the place where a beginner yoga challenge starts making sense, because it teaches you how to stand like your own body actually belongs to you.
Feet hip-width apart is fine. Toes can point straight ahead or turn out a few degrees if your hips prefer that. Press the four corners of each foot into the floor, soften the knees so they aren’t locked, and let the crown of your head reach upward without puffing your ribs forward.
What to feel
You should feel weight spread through the whole foot, not dumped into the heels. The thighs stay active, the belly stays quiet, and the shoulders sit down instead of hiking toward the ears.
Tiny cue: imagine the top of your head floating up while your feet grow roots down into the mat.
A lot of beginners rush past this pose because it looks too plain. I think that’s a mistake. If you can stand well here, the rest of the sequence gets cleaner almost immediately.
2. Cat Pose
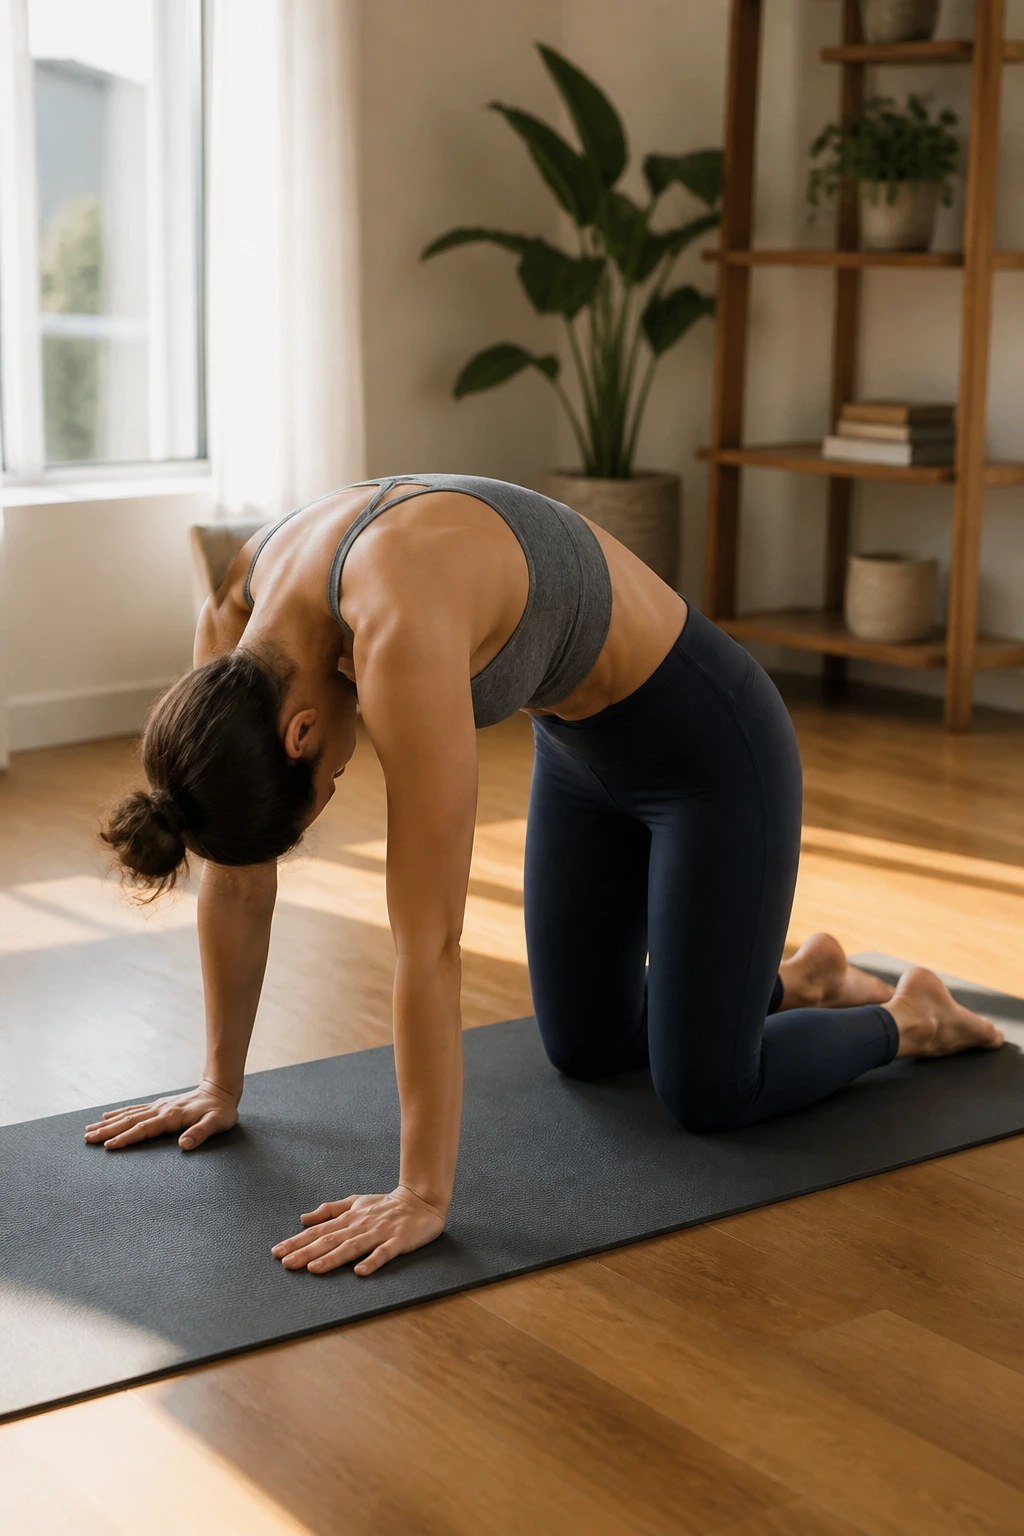
Why does a simple round-back shape matter so much? Because Cat Pose wakes up the spine without asking the rest of your body to do gymnastics.
Come to hands and knees with wrists under shoulders and knees under hips. As you exhale, press the floor away, tuck your tailbone, and round the spine toward the ceiling. The chin can tip slightly toward the chest, but don’t jam it there.
On the inhale, ease the back toward neutral and feel the shoulder blades widen across your upper back. That small motion does a lot. It warms the wrists, reminds the ribs how to move, and gives you a low-stakes way to connect breath with shape.
How to use it
- Move slowly for 6 to 8 rounds.
- Keep the elbows soft, not locked.
- If the wrists feel cranky, make fists or drop to forearms.
- Think “spine moving one section at a time,” not “bend as far as possible.”
Cat is one of those poses that looks tiny and feels huge. It usually becomes more useful the longer you stay with it.
3. Cow Pose
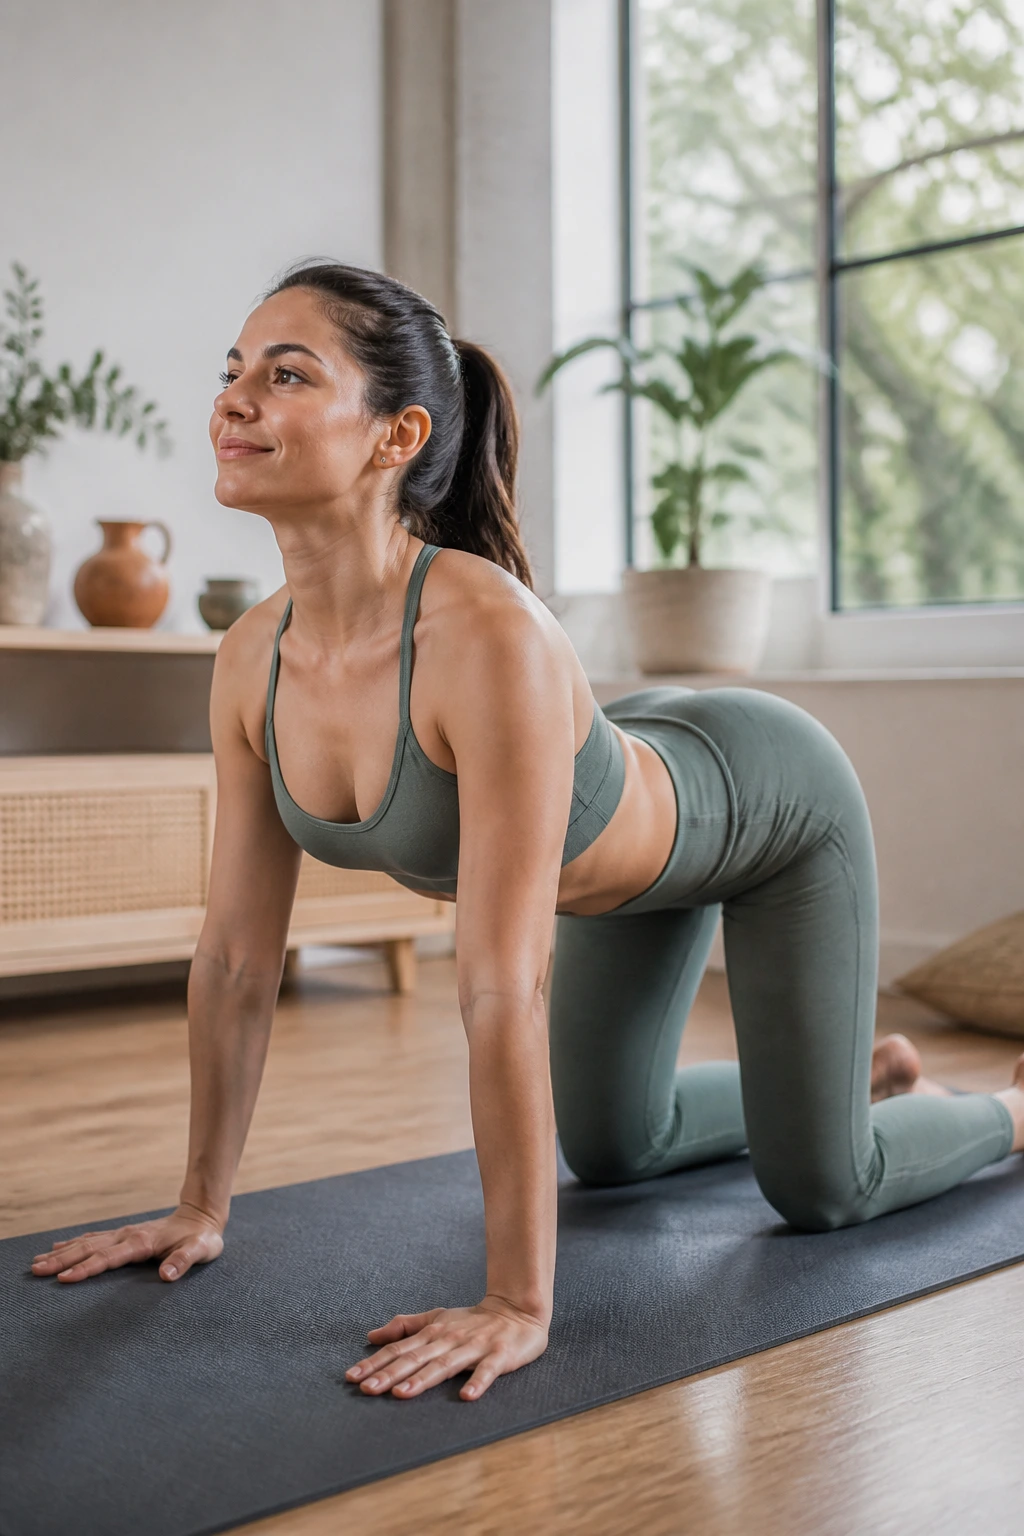
Cow Pose is the partner that keeps Cat from feeling like a one-way street. Together, the two shapes teach the spine to flex and extend without force.
From hands and knees, inhale and let the belly lower toward the mat. Lift the chest forward, let the sit bones tip up, and broaden across the collarbones. The gaze can stay slightly ahead of the mat rather than flinging the neck backward.
The version I like for beginners is gentle, almost spare. No dramatic arching. Just enough movement to feel the front body open and the back body wake up. If your low back already feels compressed, keep the lift small and focus on length through the chest instead.
A nice rhythm is to move Cat on the exhale and Cow on the inhale for several rounds. That pairing gives the breath a job, which makes the whole pose feel less random. And yes, it’s basic. Basic is useful.
4. Child’s Pose
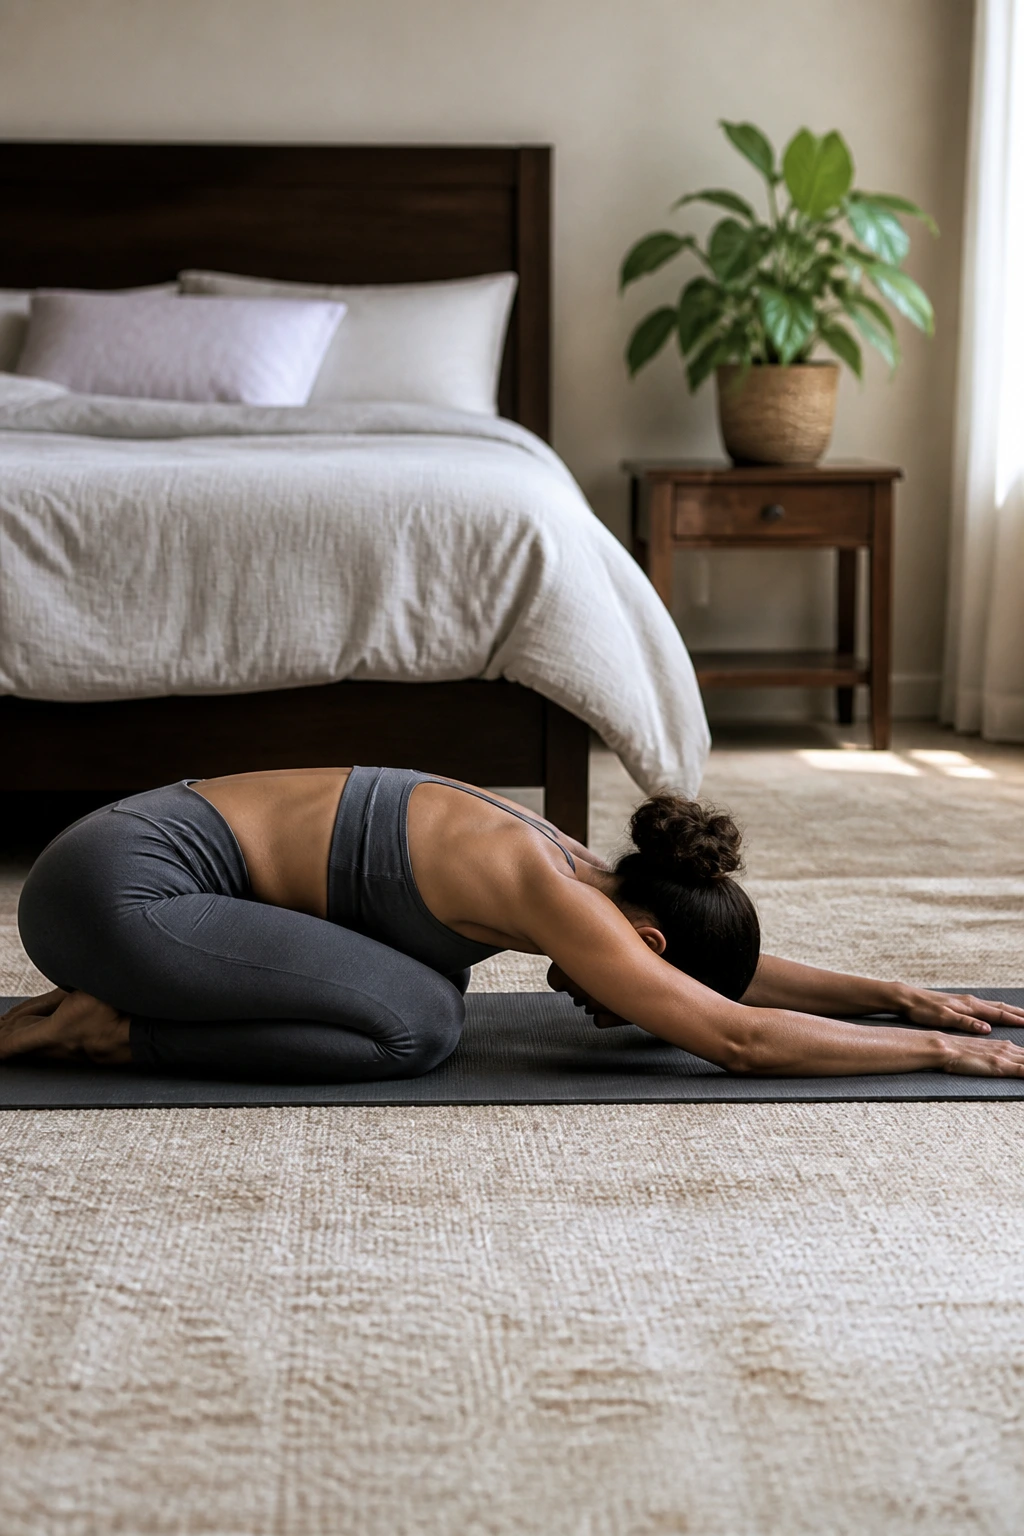
Some poses ask for effort. Child’s Pose asks for release. In a beginner sequence, that matters because not every good yoga shape is about strength or stretch.
Kneel on the mat, bring the big toes together, and either keep the knees close or open them wide if your hips prefer space. Fold the torso down between the thighs and let the forehead rest on the mat or on stacked fists. Arms can stretch forward for a longer side-body line, or rest by the legs if the shoulders need a break.
Make it kinder
A folded blanket under the shins helps if your knees are sensitive. A pillow under the chest can keep the neck from hanging. If your heels don’t touch the floor, leave them alone.
The best thing about this pose is the permission it gives. You can pause without stopping. Breathing into the back ribs here often feels better than trying to “do” anything.
5. Downward-Facing Dog
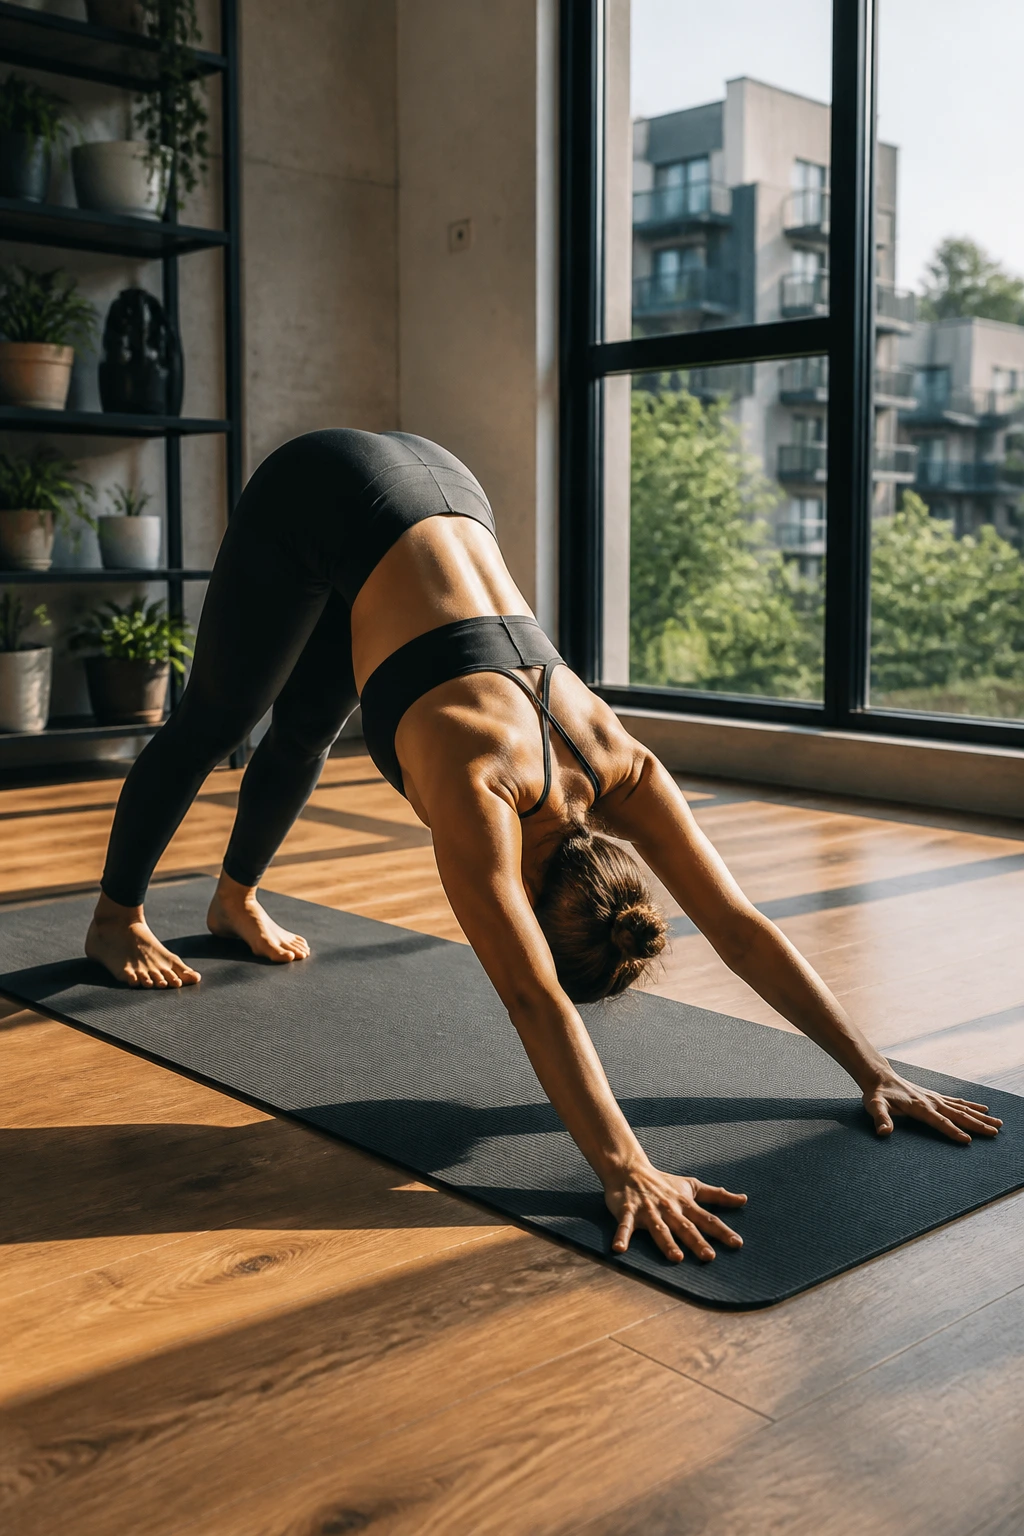
Downward-Facing Dog gets overhyped in a lot of beginner spaces, and I think the hype can make people tense. The pose is not about straight legs. It’s about making a long, steady line from wrists to hips.
Press into the hands, lift the hips high, and spread the fingers wide. Bend the knees as much as you need so your spine can lengthen. Heels may hover well above the floor, and that’s fine. The goal is space, not a floor-touching performance.
Quick alignment cues
- Push the floor away through the whole hand.
- Keep the shoulders away from the ears.
- Let the head hang between the arms.
- Pedal the feet if your calves feel tight.
A beginner who learns to bend the knees in Down Dog usually gets a better stretch than the person trying to “win” the pose with straight legs. That tiny difference changes everything. It also saves the low back from doing work it never asked for.
6. Standing Forward Fold
What should a forward fold feel like when you’re new? A little intense, maybe, but never sharp. That’s the line worth paying attention to.
Stand with feet hip-width apart, soften the knees, and hinge from the hips as you fold forward. Let the hands rest on the floor, shins, or blocks. If the hamstrings feel tight, bend the knees more and keep the belly close to the thighs rather than reaching toward the toes like a limbo contest.
How to make it useful
Hold the elbows and let the head hang if that feels comfortable. Stay for 5 slow breaths and notice whether your weight shifts into the balls of the feet or stays evenly grounded. A clean fold usually feels calmer in the neck than people expect.
The mistake I see most is knee locking. Don’t do that. Bent knees let the pelvis tip forward a little, which gives you actual length instead of a strained tug-of-war.
7. Half Lift
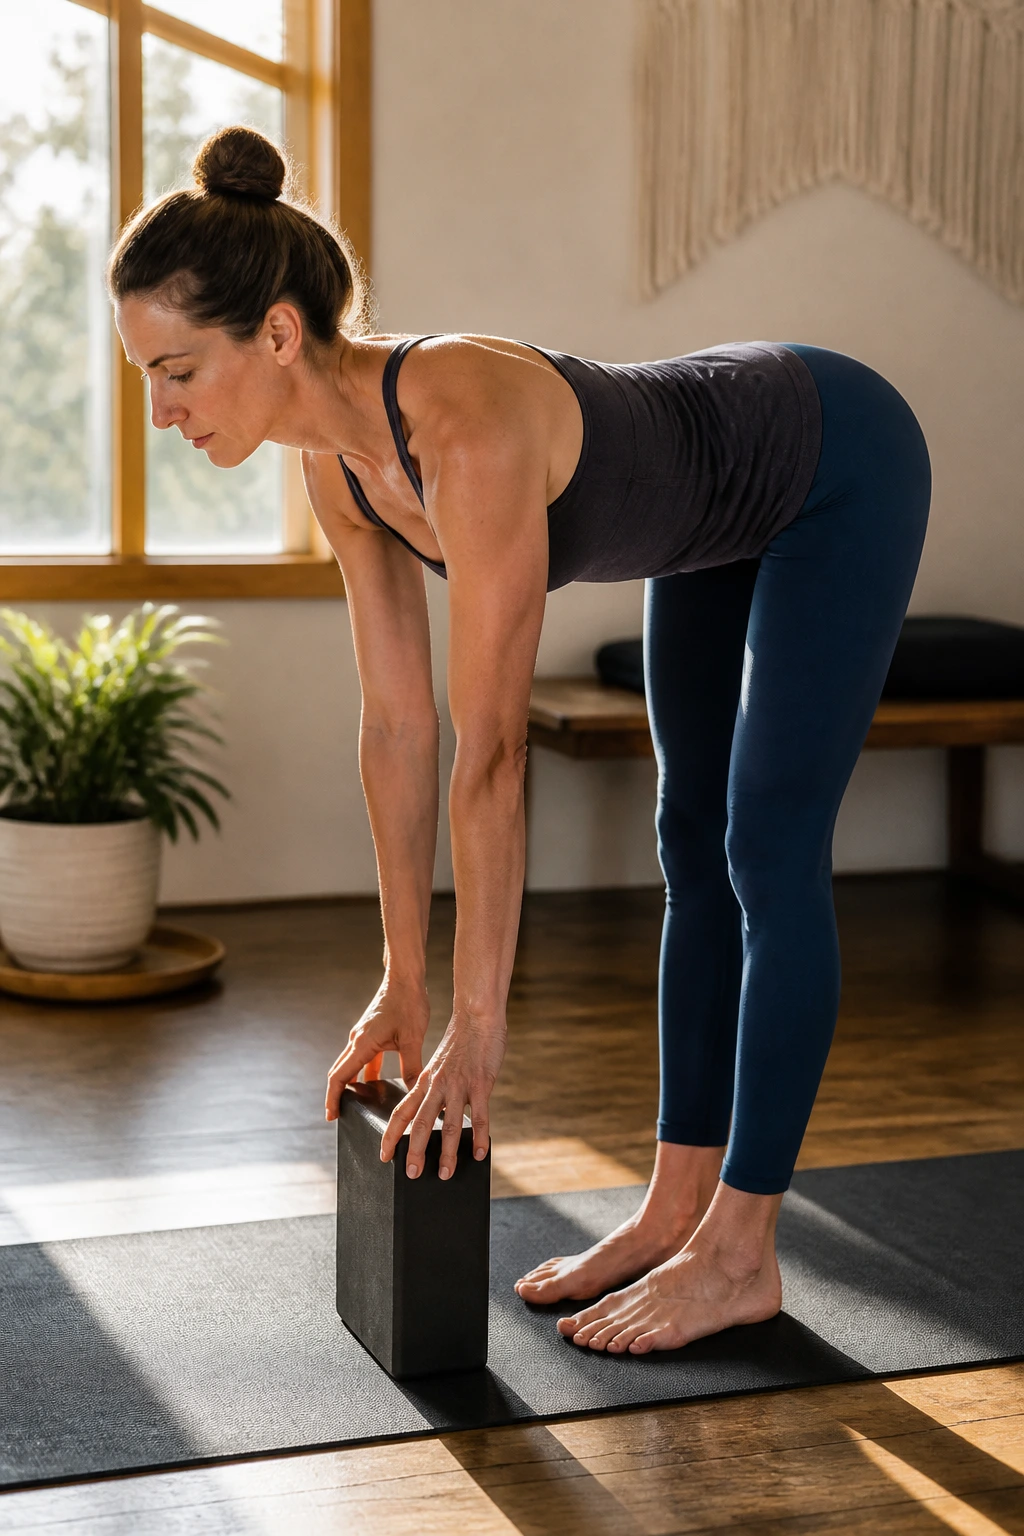
Half Lift is the pose people skip because it looks like “not much,” but it teaches one of the most useful yoga habits: how to hinge without collapsing.
From a forward fold, place the fingertips on the shins or on blocks and lengthen the spine until the chest is roughly parallel to the floor. The tailbone reaches back, the crown reaches forward, and the belly stays lightly engaged so the lower back doesn’t dump.
What to watch for
- Keep the neck long.
- Pull the shoulders away from the ears.
- Press through the heels and the balls of the feet evenly.
- Think “flat back” only as a rough idea, not a rigid rule.
A lot of beginners turn this into a small backbend and then wonder why the low back complains. The fix is boring but effective: keep the ribs from flaring and use the hamstrings to support the hinge. That’s the shape. Not flashy. Useful.
8. Cobra Pose
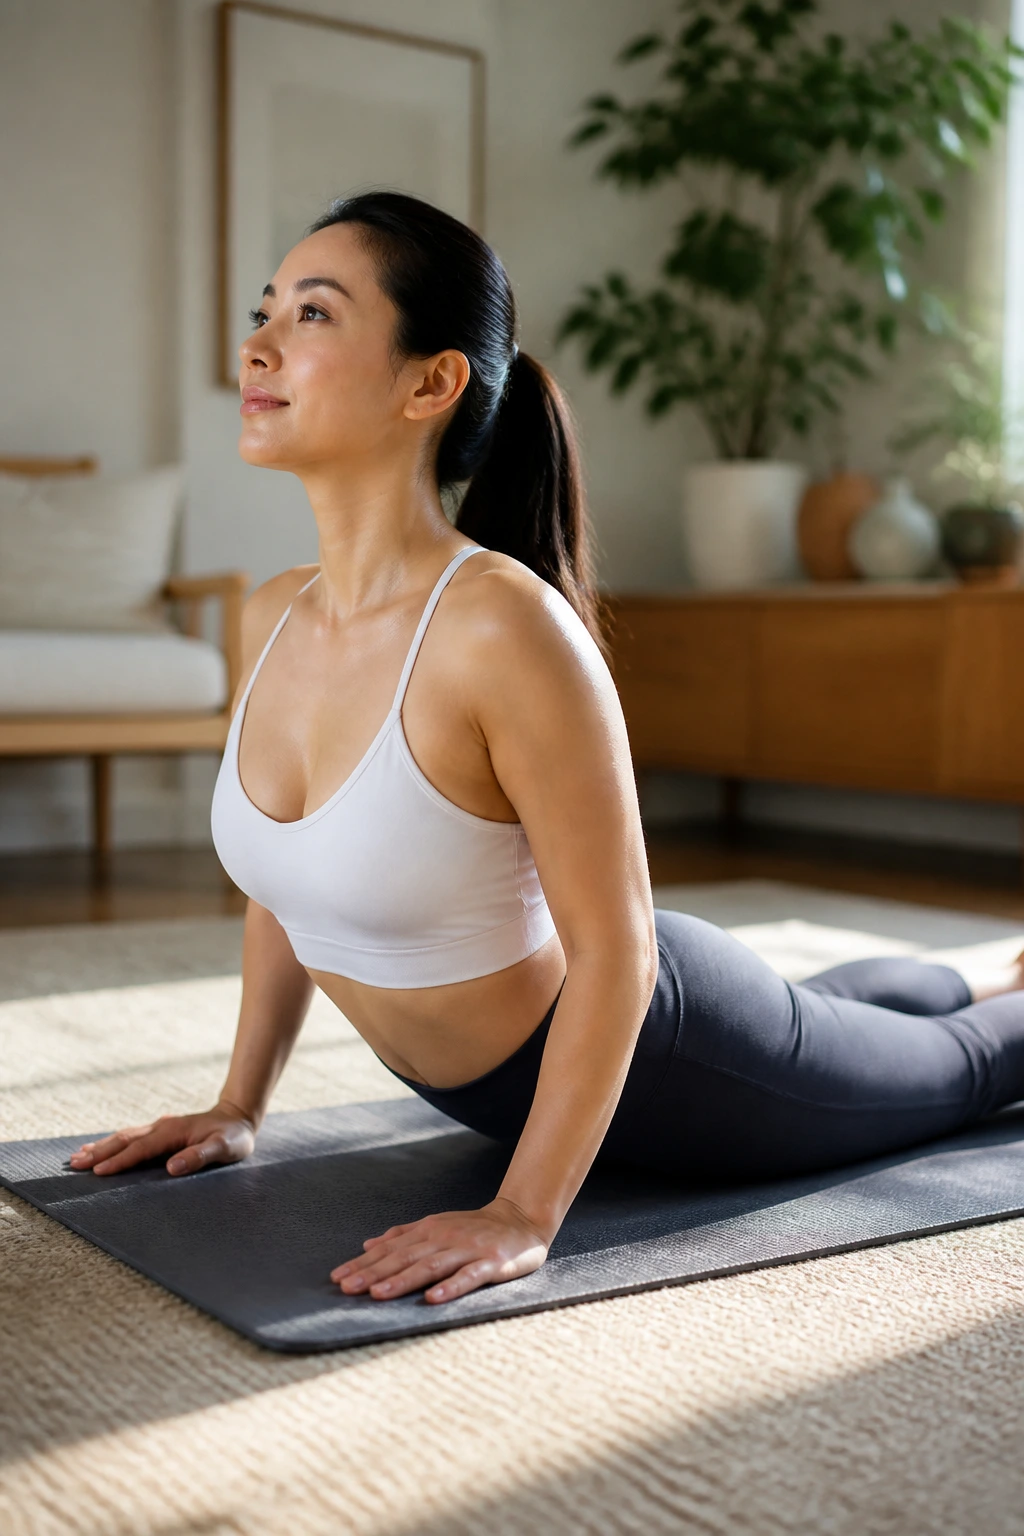
Cobra Pose is where many beginners go too big, too soon. A better version starts low and feels more like length than height.
Lie on the belly with the tops of the feet on the mat and the legs active. Place the hands under the shoulders, then press lightly to lift the chest a few inches. The pelvis stays on the floor, the elbows bend close to the ribs, and the neck remains long.
The part people miss
The lift comes from the back body, not the hands. If the shoulders crowd your ears or the low back pinches, come down a little and try again with less height.
You can keep the chest tiny and still do the pose well. That often feels stronger, not weaker. For beginners, the sweet spot is a mild lift that makes the upper back wake up without dumping pressure into the lumbar spine.
9. Sphinx Pose
Sphinx Pose is Cobra’s slower cousin, and I mean that as a compliment. It’s steadier, less dramatic, and often easier to trust.
Lie on the belly and prop up on the forearms, elbows under shoulders. Press the forearms down and gently draw the chest forward and up. The belly and pelvis stay grounded, and the backbend stays soft enough that you can breathe into it instead of bracing against it.
Some beginners love this pose because it gives the front body a real opening without the strain of a deeper backbend. Others use it as a checkpoint after Cobra to see whether the low back feels okay. If there’s pinching, come down sooner rather than later.
I’d take a controlled Sphinx over a rushed Cobra almost any day. There’s more information in it.
10. Plank Pose
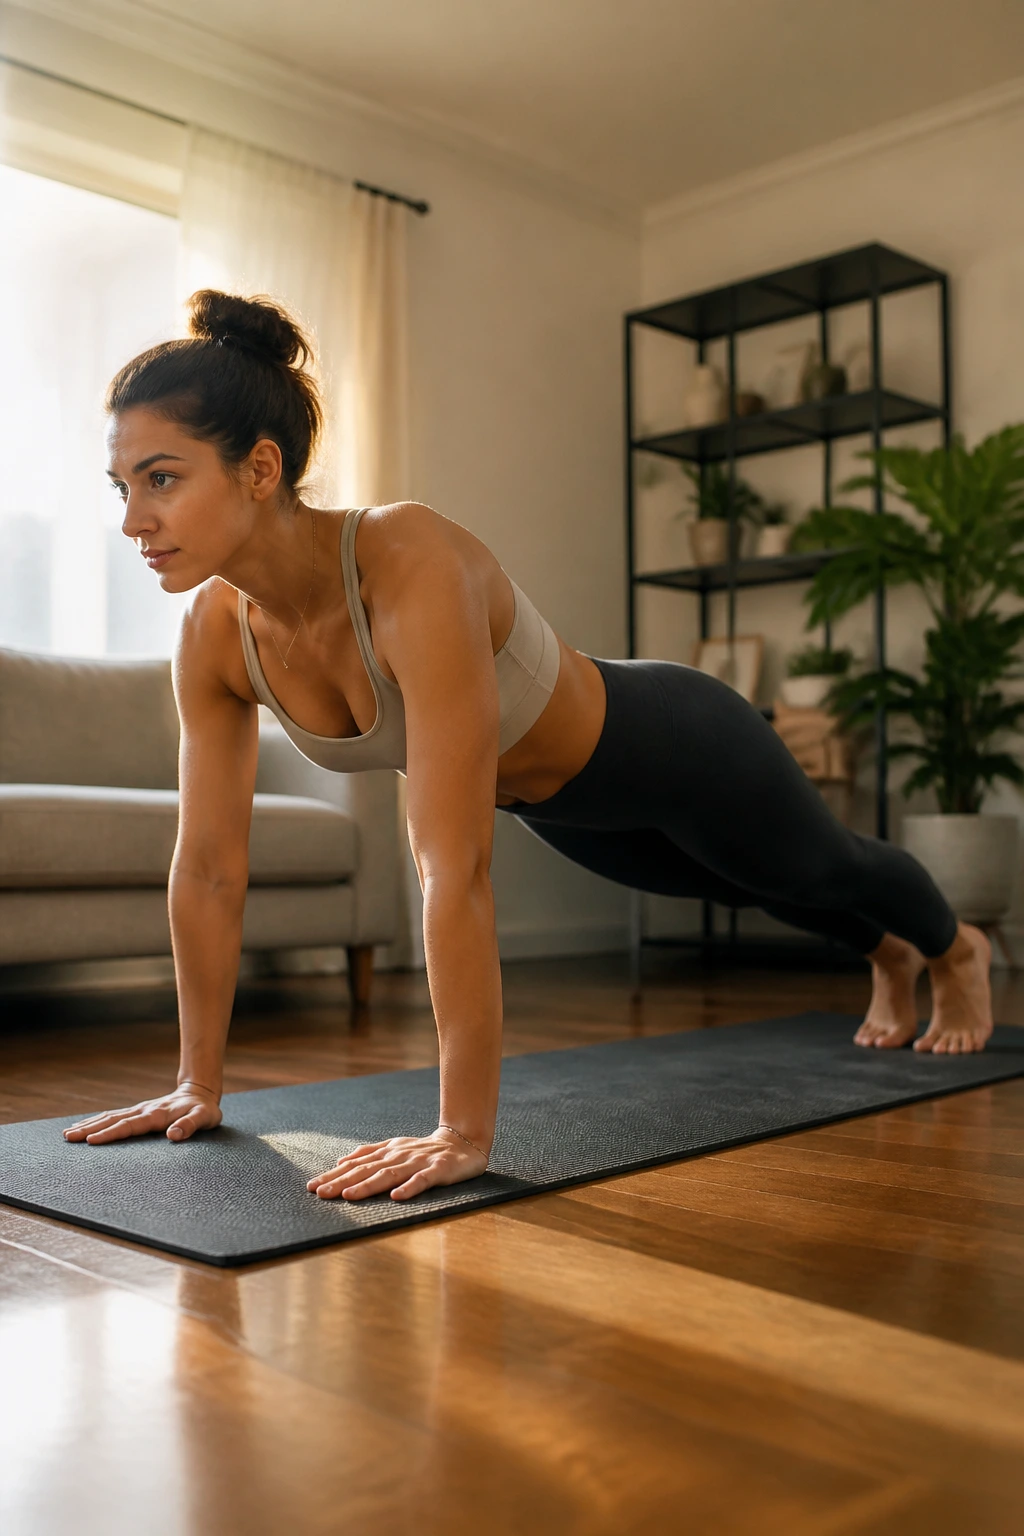
Plank Pose is honest. It shows you exactly where your core is, and it does not care if you were hoping for something easier.
Start with hands under shoulders, legs long, and heels reaching back. Keep the body in one straight line from head to heels, then draw the lower ribs in without rounding the back. The neck stays neutral, not dropped or craned upward.
Quick checklist
- Wrists stacked under shoulders.
- Thighs active.
- Glutes lightly on.
- Belly firm but not sucked in so hard you can’t breathe.
If full plank feels like too much, lower the knees and keep the same shape from shoulders through hips. That version still teaches the important stuff. Hold for 10 to 20 seconds at first; quality matters more than hanging on forever.
A shaky plank is still a useful plank if the shape stays clean. A sagging one is just a long pause in bad form.
11. Low Lunge for a Beginner Yoga Challenge
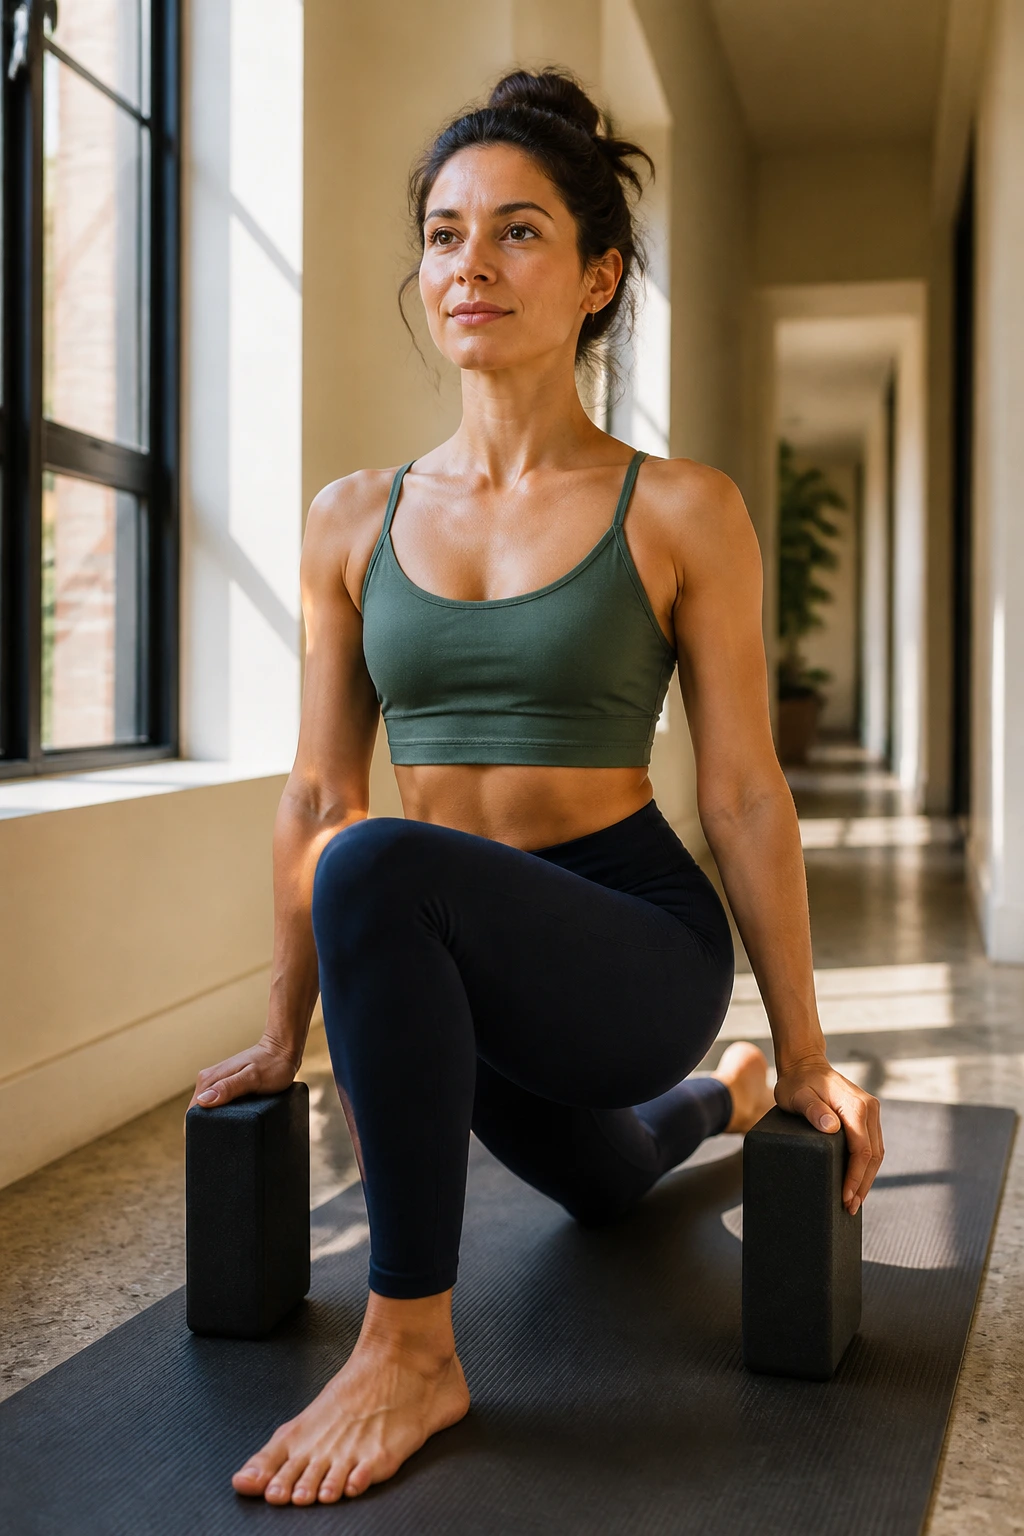
Tight hip flexors make Low Lunge feel like a gift the first time it’s done well. It opens the front of the hip without demanding deep flexibility you may not have yet.
Step one foot between the hands, lower the back knee to the mat, and stack the front knee over the ankle. Keep the torso tall or let the fingertips rest on blocks if the balance feels wobbly. The back leg can stay active even with the knee down; that keeps the stretch from turning floppy.
A few cues that help
- Press the top of the back foot into the mat.
- Squeeze the back glute lightly.
- Keep the front heel grounded.
- Lift through the chest without tipping the ribs forward.
If the low back grabs, shorten the stance by a few inches. That tiny adjustment changes the angle at the hip and usually makes the pose feel much better.
This is one of the first poses in the sequence that teaches patience. You do not need a huge lunge to get a real stretch.
12. Warrior I
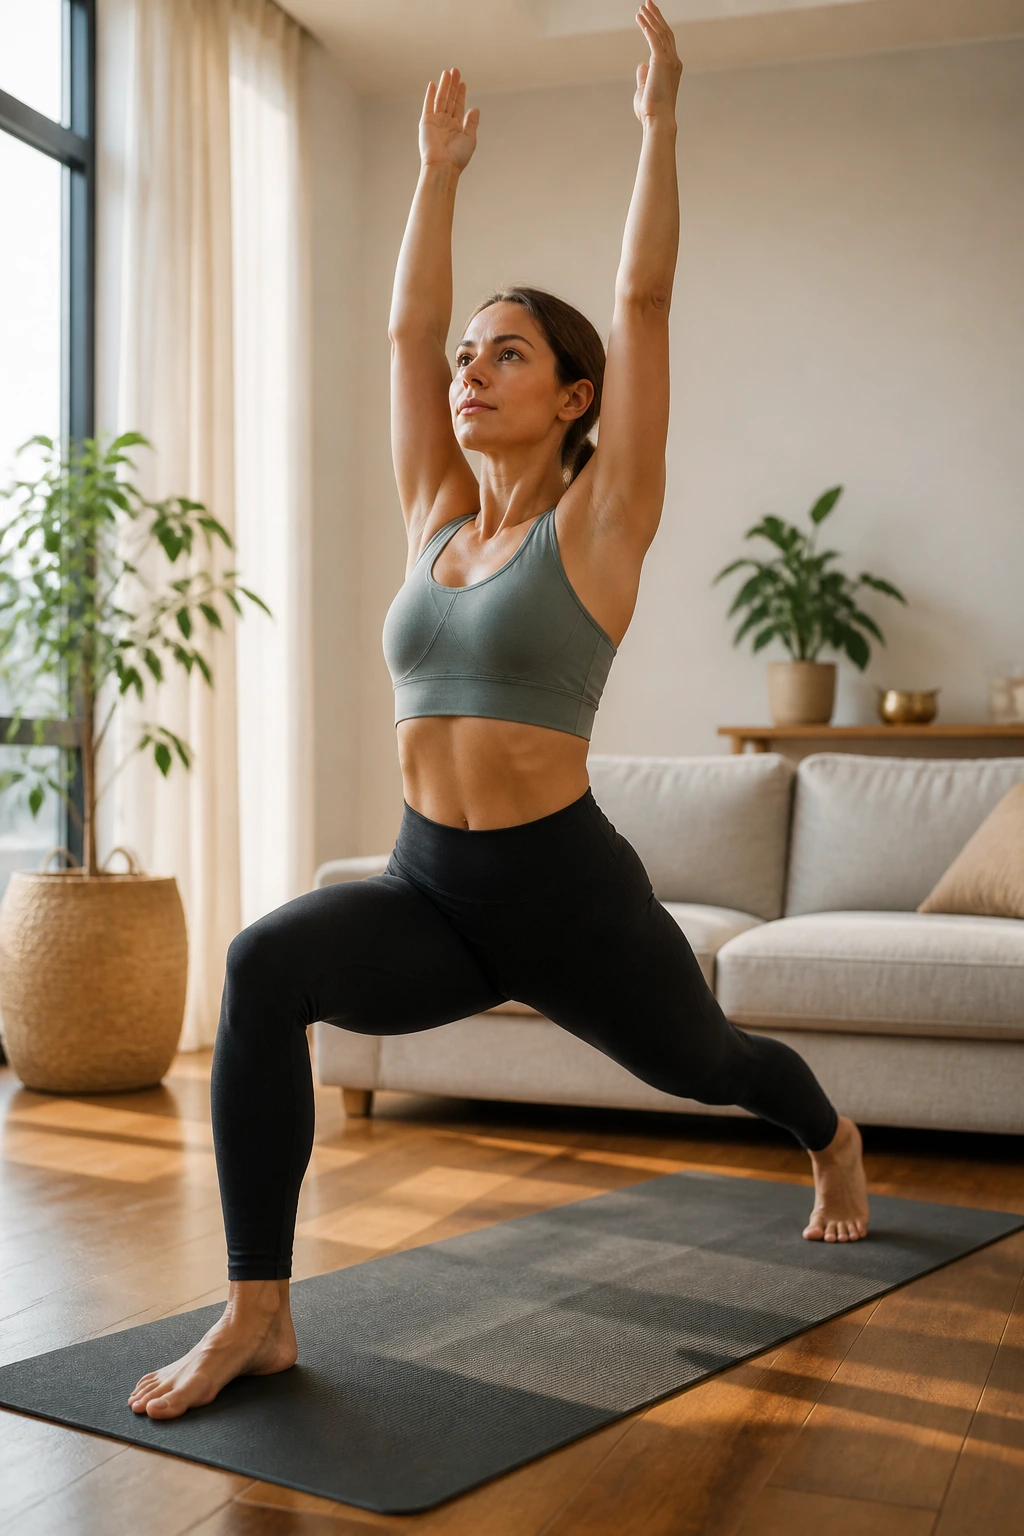
Warrior I looks like a power pose, and it is, but not in the loud way people imagine. It’s more about steadiness than drama.
Step one foot back, keep the feet about hip-width apart rather than walking them on a tightrope line, and bend the front knee. The back heel grounds down, the hips stay mostly forward, and the arms reach overhead if the shoulders allow it. If overhead arms make the ribs flare, keep the hands on the hips or in prayer.
The pose should feel like the front leg is working and the back leg is helping hold the line. The chest can lift, but not at the expense of the lower back. A shorter stance often feels stronger than a long, wobbly one.
Warrior I is useful because it teaches a beginner how to stand in a split stance without collapsing into the hips. That skill shows up everywhere else.
13. Warrior II
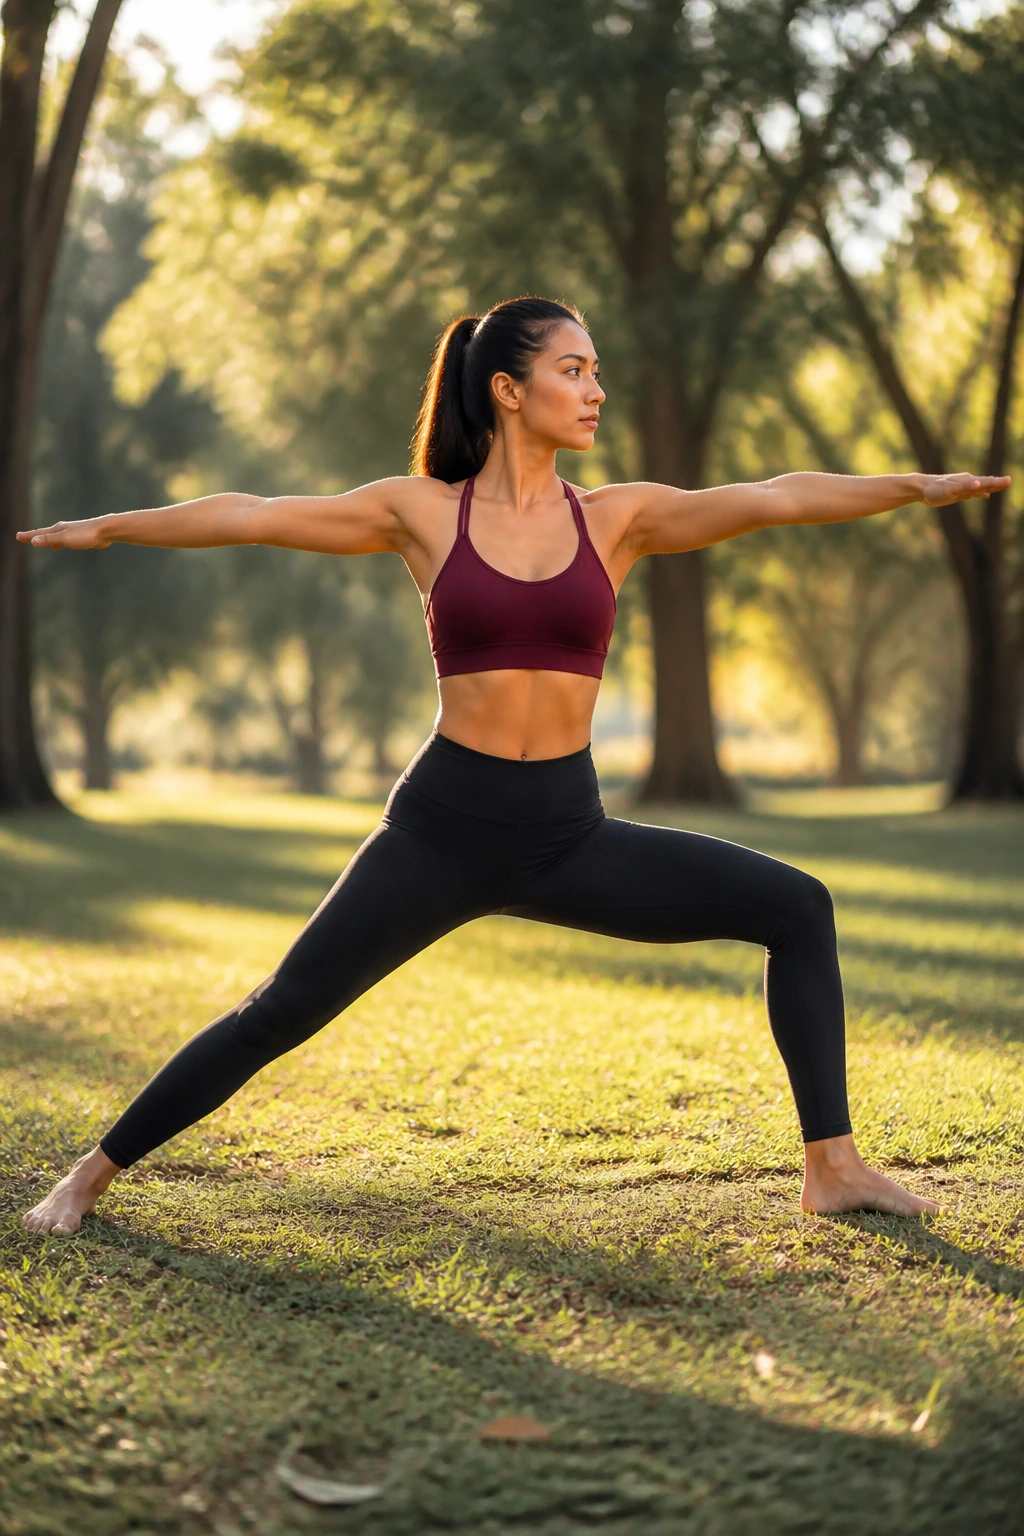
Warrior II is probably the most recognizable standing shape in beginner yoga, and for good reason. It trains the legs, opens the hips, and teaches the arms to hold a clear line.
From a wide stance, turn the back foot slightly in and bend the front knee over the ankle. Stretch the arms wide at shoulder height and gaze over the front middle finger. The front knee can bend deeply, but it should still track in the same direction as the toes.
What to notice
- Keep the torso upright, not leaning forward.
- Relax the shoulders down.
- Press both feet into the mat with equal purpose.
- Let the back arch of the foot stay heavy.
The pose gets better when you stop trying to make it deeper and start making it cleaner. If the front thigh burns, that’s normal. If the front knee caves inward, fix that first.
Warrior II feels like standing your ground, and beginners usually need more of that than they realize.
14. Reverse Warrior
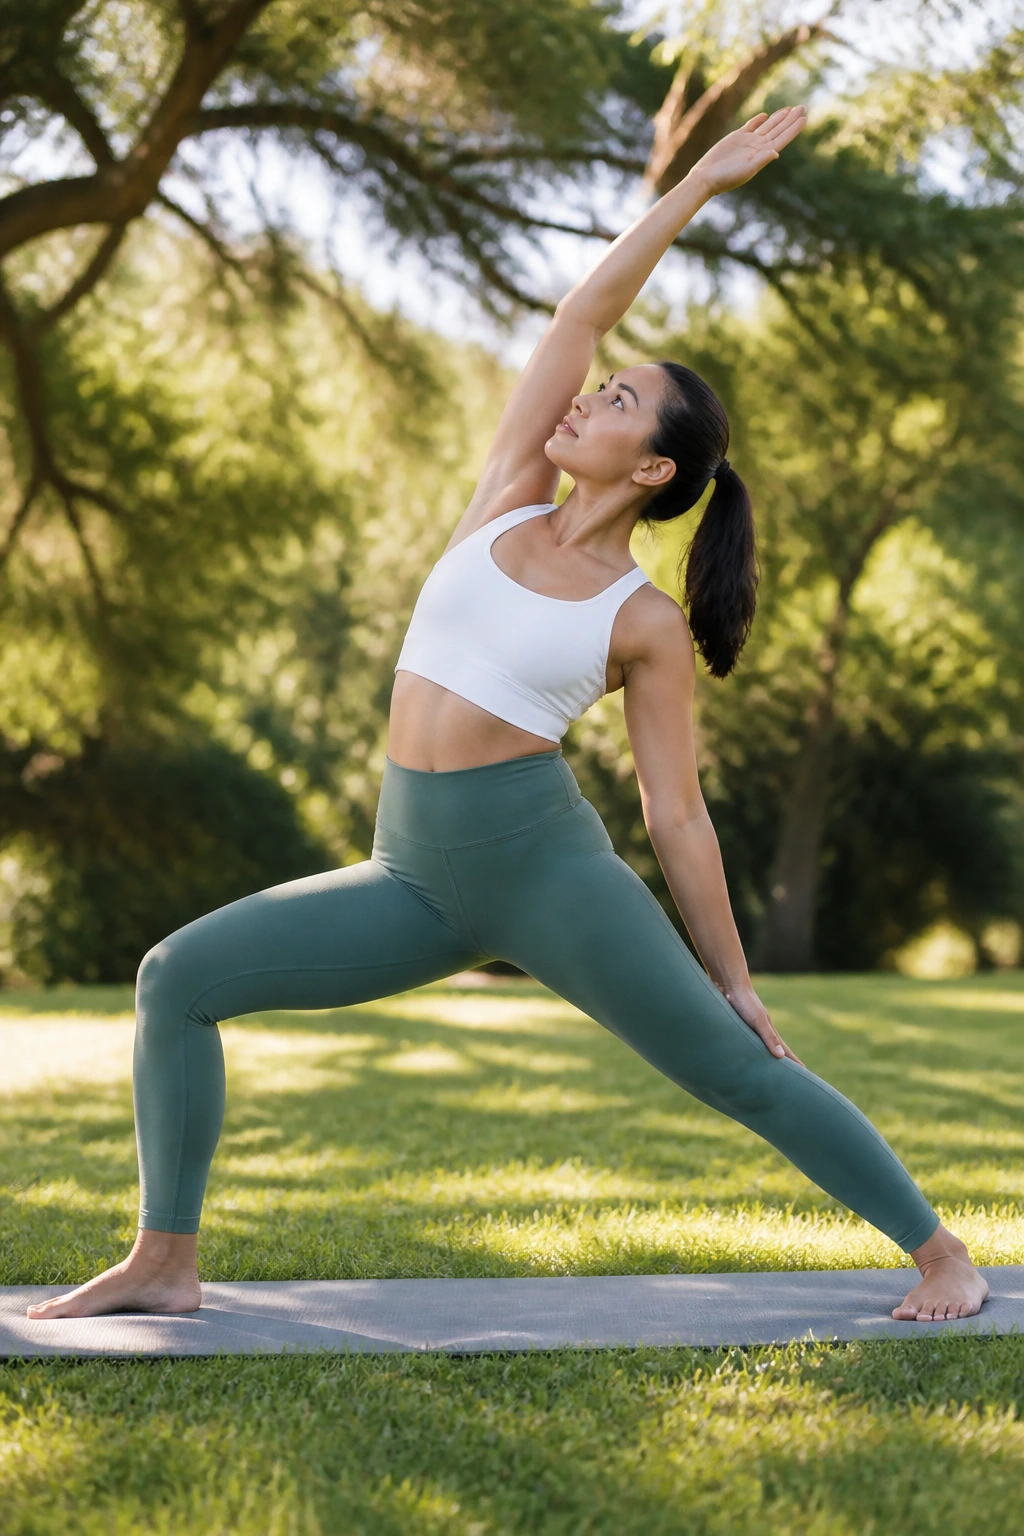
Reverse Warrior is the pose that reminds people Warrior II is not the whole story. There’s side-body length here, and it changes the flavor completely.
Stay in Warrior II, then let the back hand slide lightly down the back leg while the front arm arcs overhead. The front knee stays bent. The hips stay mostly where they are. The chest opens and the side waist lengthens instead of collapsing into the lower ribs.
This is not a deep backbend, and I think that’s the whole point. If you throw yourself backward, the front knee often caves and the back ribs flare. Better to keep the bend modest and the shape readable.
Reverse Warrior is especially nice after a few standing holds because it gives the obliques and ribcage something different to do. It’s a relief without being lazy.
15. Triangle Pose in the Middle of a Beginner Yoga Challenge
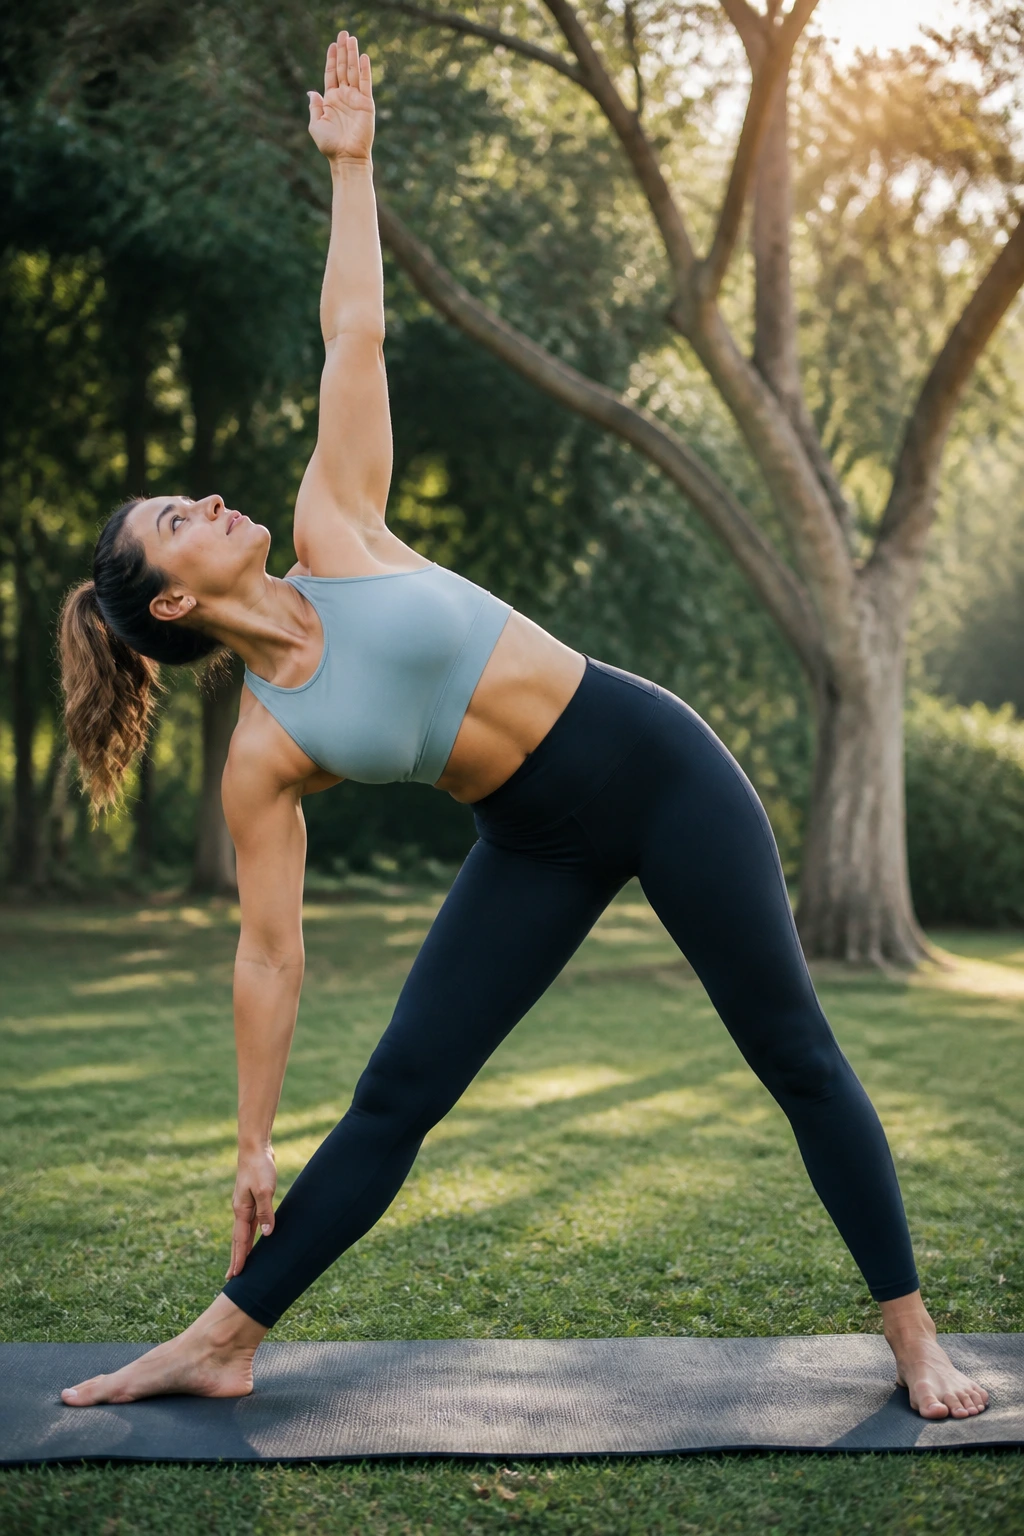
Triangle Pose can feel awkward the first time because it asks for length before depth. That order matters.
Start from a wide stance, turn one foot out, and hinge at the front hip until one hand reaches toward the shin, ankle, or a block. The other arm reaches upward, but only if the chest can stay open. If the floor feels far away, a block under the lower hand keeps the spine from collapsing.
Why the setup matters
- Lead with the hip hinge, not the hand.
- Keep the front knee soft instead of snapping it straight.
- Stack the shoulders only as far as feels natural.
- Let the back of the neck stay long.
A lot of beginners sink into Triangle and round the chest toward the floor. That usually means they’ve gone farther than their hamstrings can support. A shorter stance and a higher block fix more than most people expect.
Triangle rewards patience. Once it clicks, it feels less like a reach and more like a clean line through the whole body.
16. Tree Pose
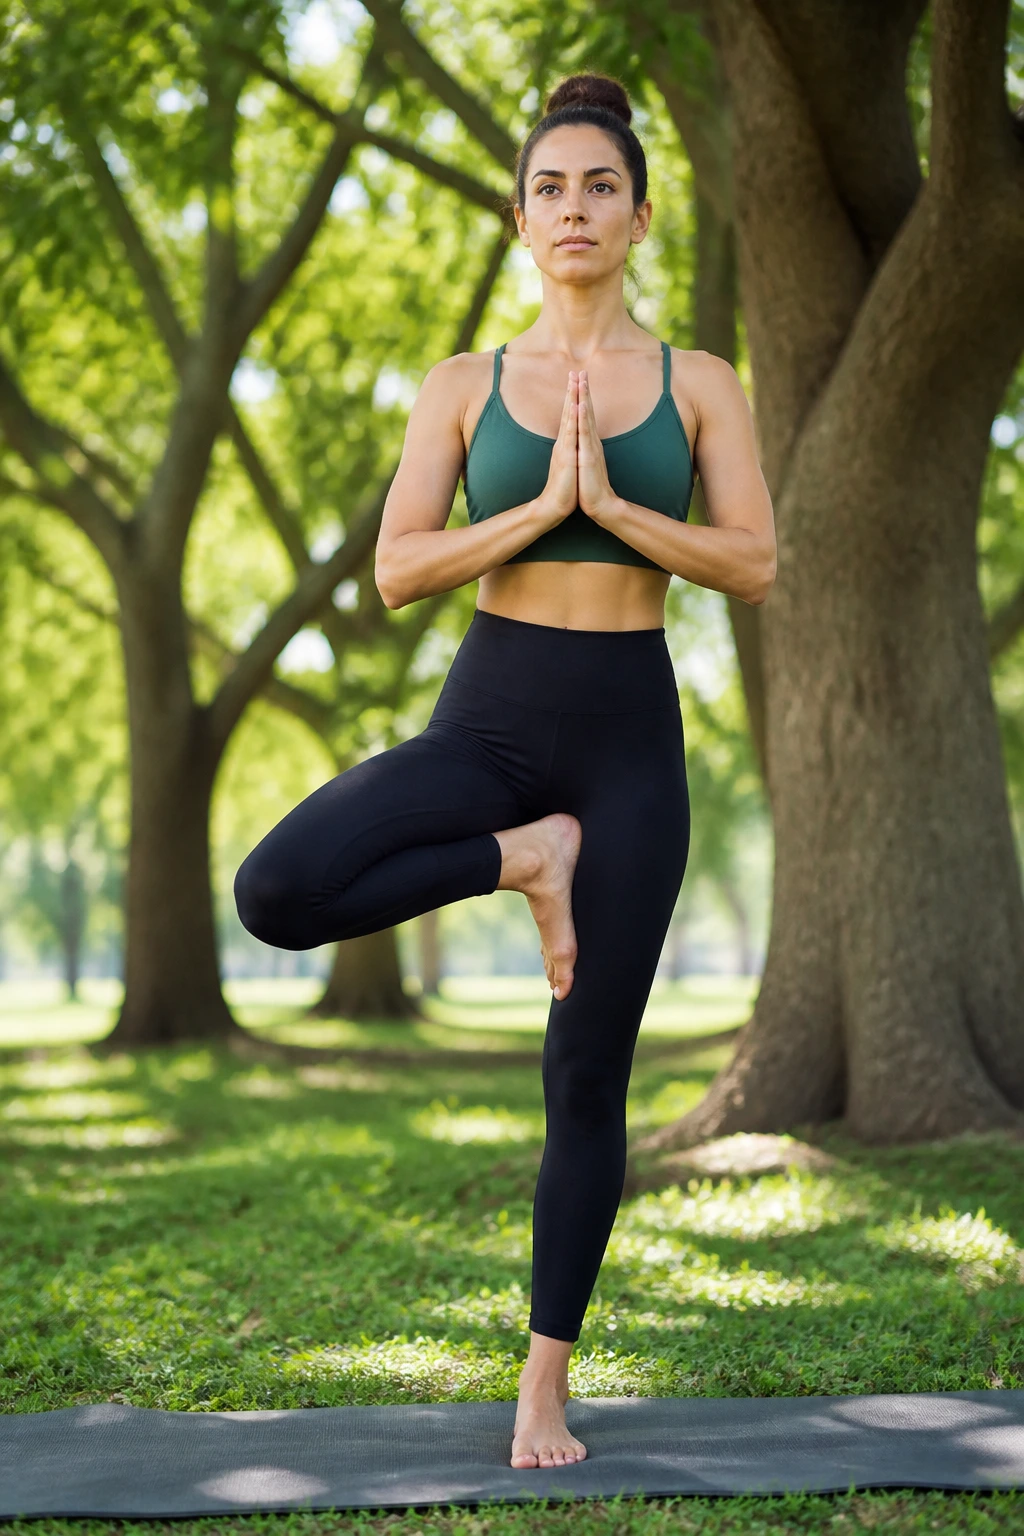
Balance poses tell the truth fast. Tree Pose is no exception.
Stand tall, shift weight into one foot, and place the other foot low on the ankle, calf, or inner thigh. Pick a spot that lets your standing leg stay steady. The lifted foot does not need to crush the standing knee; in fact, it shouldn’t go there at all.
How to steady yourself
Focus your eyes on one unmoving point. Press the standing foot down evenly and keep a soft bend in the standing knee if you need it. Hands can stay at the heart, reach overhead, or rest on the hips.
If you wobble, good. That usually means you’re actually balancing instead of posing for a still photo. A wall near your side can save a lot of frustration and let you practice the shape without the panic.
Tree Pose teaches more than ankle strength. It teaches attention, and beginners can use plenty of that.
17. Chair Pose
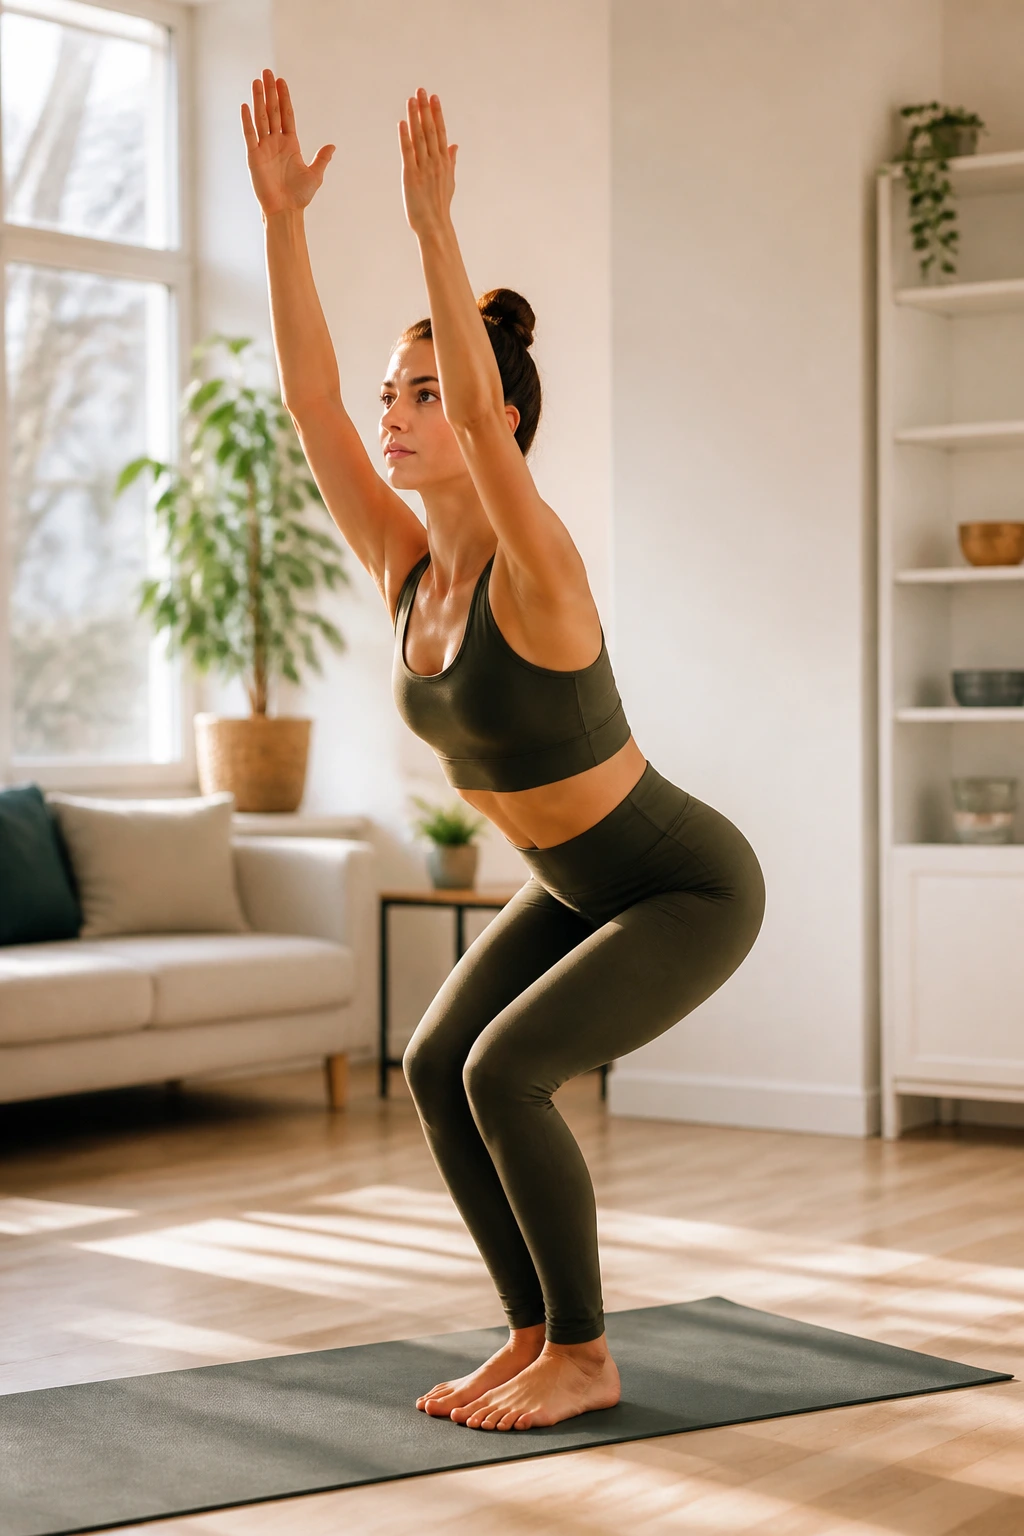
Chair Pose is not a squat contest. It’s a controlled sit-back with the spine still long.
Stand with feet together or hip-width apart, bend the knees, and send the hips back as though you’re aiming for a chair behind you. Keep the chest lifted, arms reaching overhead or staying at the heart if the shoulders are tight. Weight should stay in the heels without tipping the toes up.
Common fixes
- Keep knees tracking over the second and third toes.
- Draw the lower belly in lightly.
- Don’t let the ribs flare.
- Sit back, not straight down.
A wall behind you can be useful if your balance is shaky. Slide down only a few inches at first; there is no prize for getting the deepest shape.
The pose burns because the legs are working, not because the form needs to be dramatic. That burn is normal. The wobble is normal too.
18. Bridge Pose
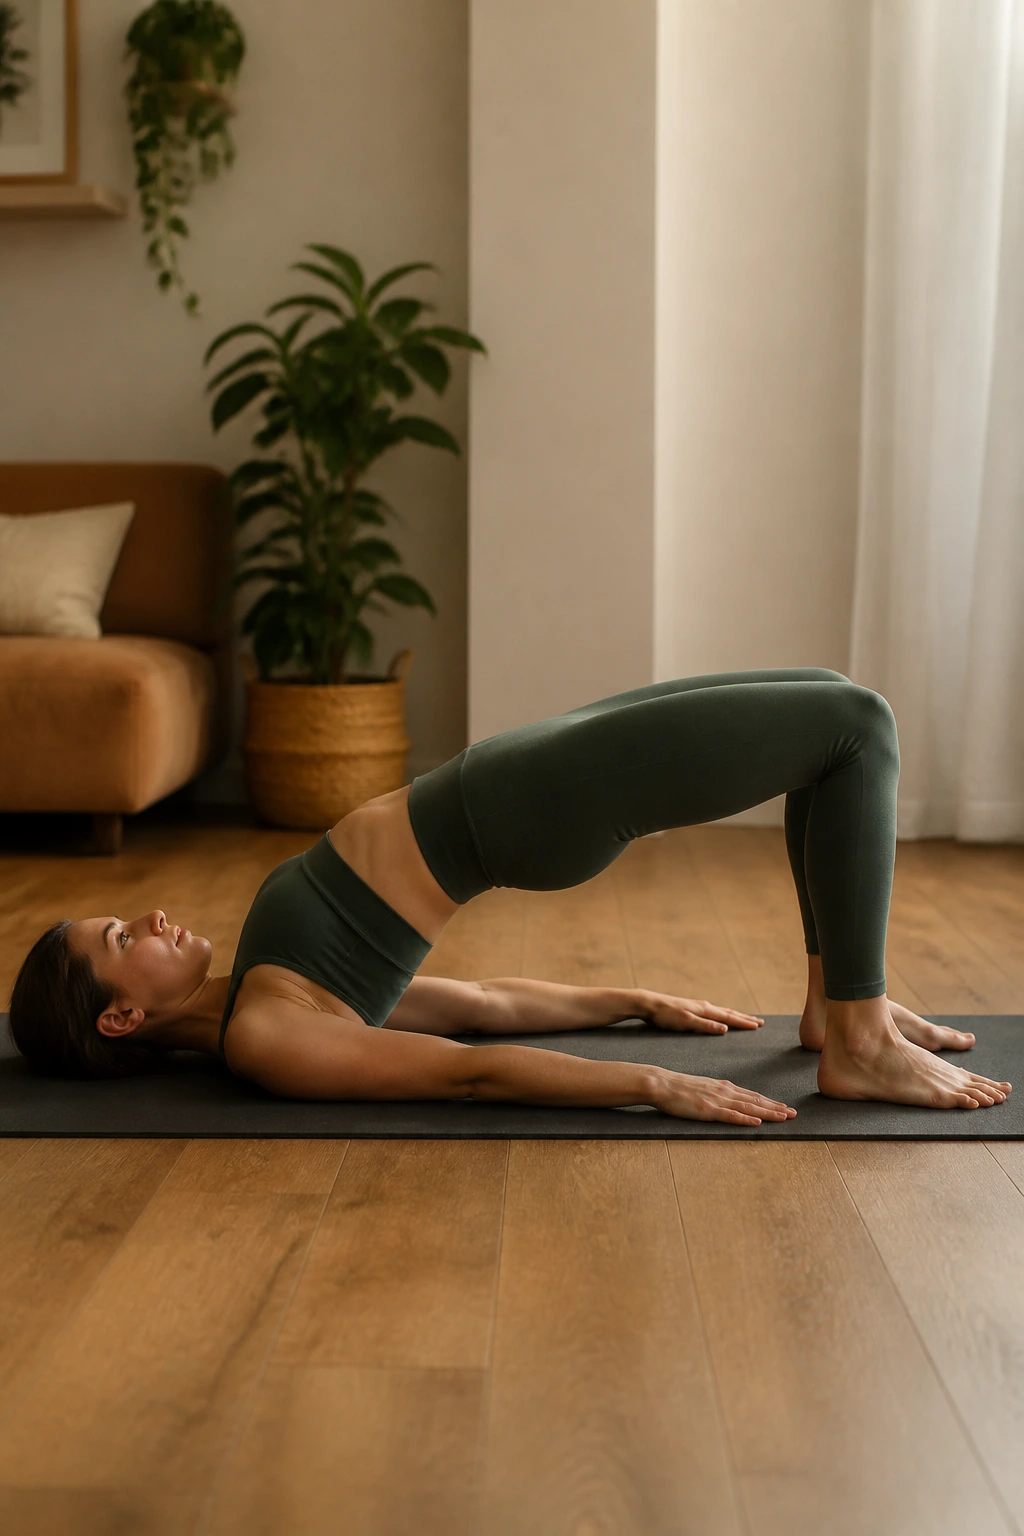
Bridge Pose is one of the best beginner backbends because it teaches lift from the hips instead of the low back. That distinction matters a lot.
Lie on your back with knees bent and feet hip-width apart, close enough that the fingertips can brush the heels. Press the feet down and lift the hips. The knees should stay parallel, not splaying out. Interlace the hands under the body only if the shoulders can stay comfortable.
If you want more support
Place a yoga block under the sacrum for a supported bridge and rest there for a minute or two. That version feels less like work and more like relief, which is useful after standing poses.
Keep the chin slightly tucked so the neck stays long. If the lower back feels pinchy, lower down and reset the feet a little closer to the hips. Small setup changes often solve the issue faster than trying harder.
Bridge is one of those shapes that tends to feel better than it looks.
19. Supine Spinal Twist
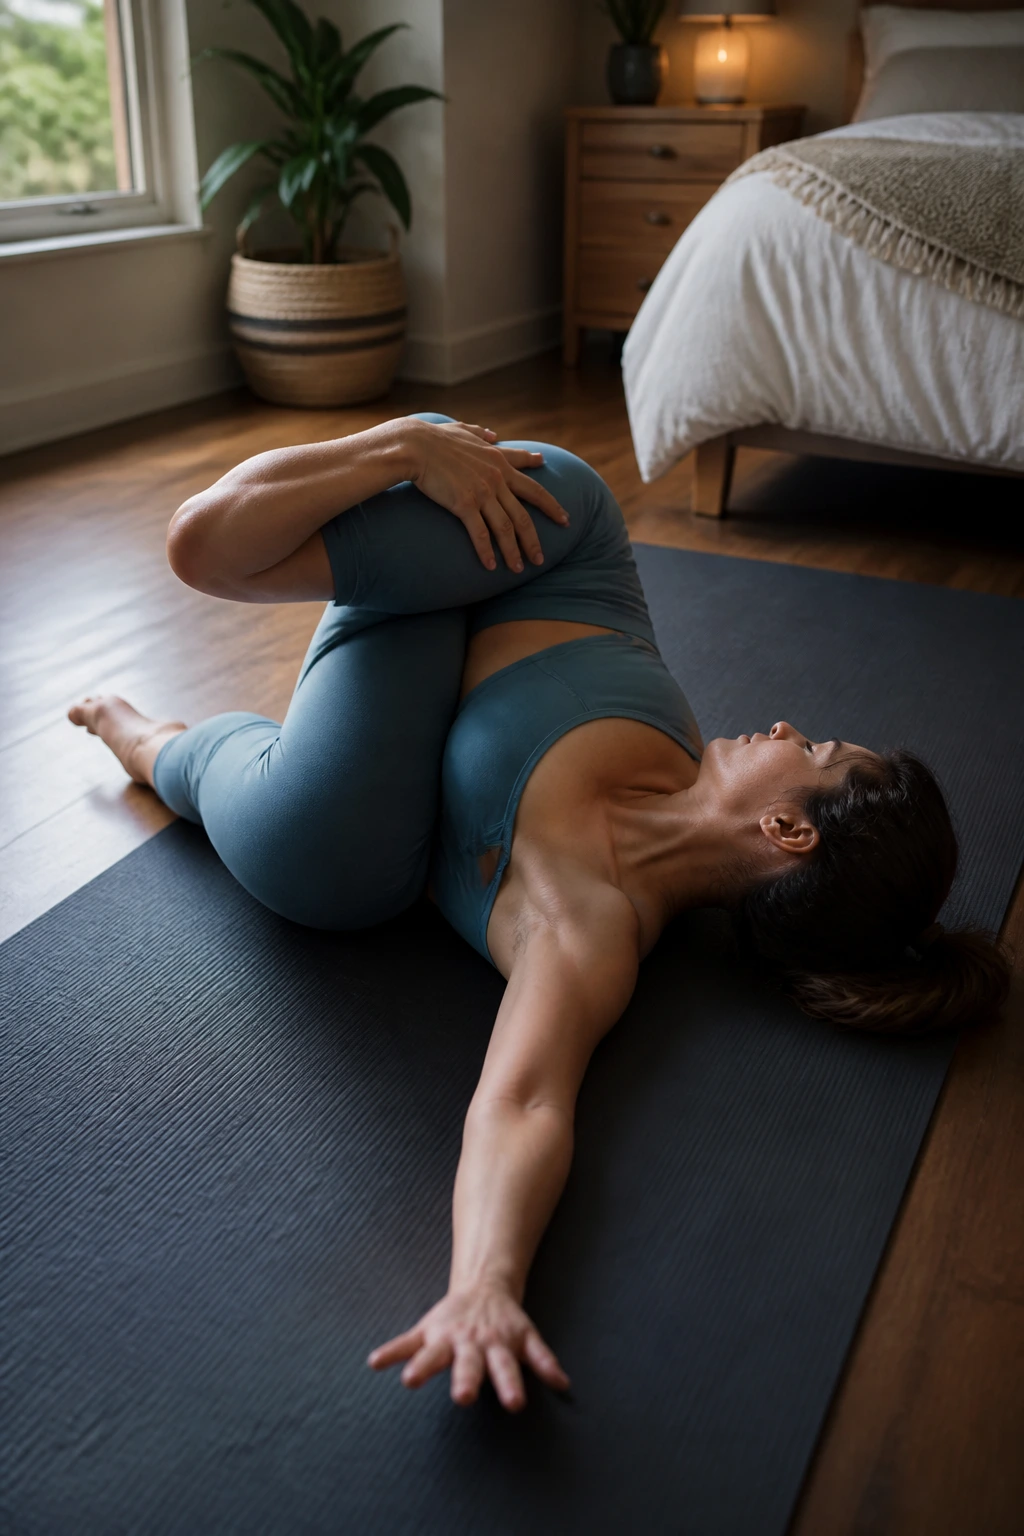
Twists are often sold as dramatic detox poses, which is a bit much. What they really offer is a quiet way to unwind the spine and hips after standing work.
Lie on your back, draw one knee toward the chest, then guide it across the body. Keep both shoulders as close to the mat as feels good. The opposite arm can open wide, and the head can turn away from the bent knee if the neck likes that shape.
If the top knee floats too high, tuck a pillow or folded blanket under it. That keeps the twist from yanking on the low back. Some people feel this more in the outer hip than the spine, and that is normal.
I like this pose near the end of a beginner sequence because it slows everything down without asking you to do much. A twist like this feels better when you stop chasing a bigger range.
20. Bound Angle Pose
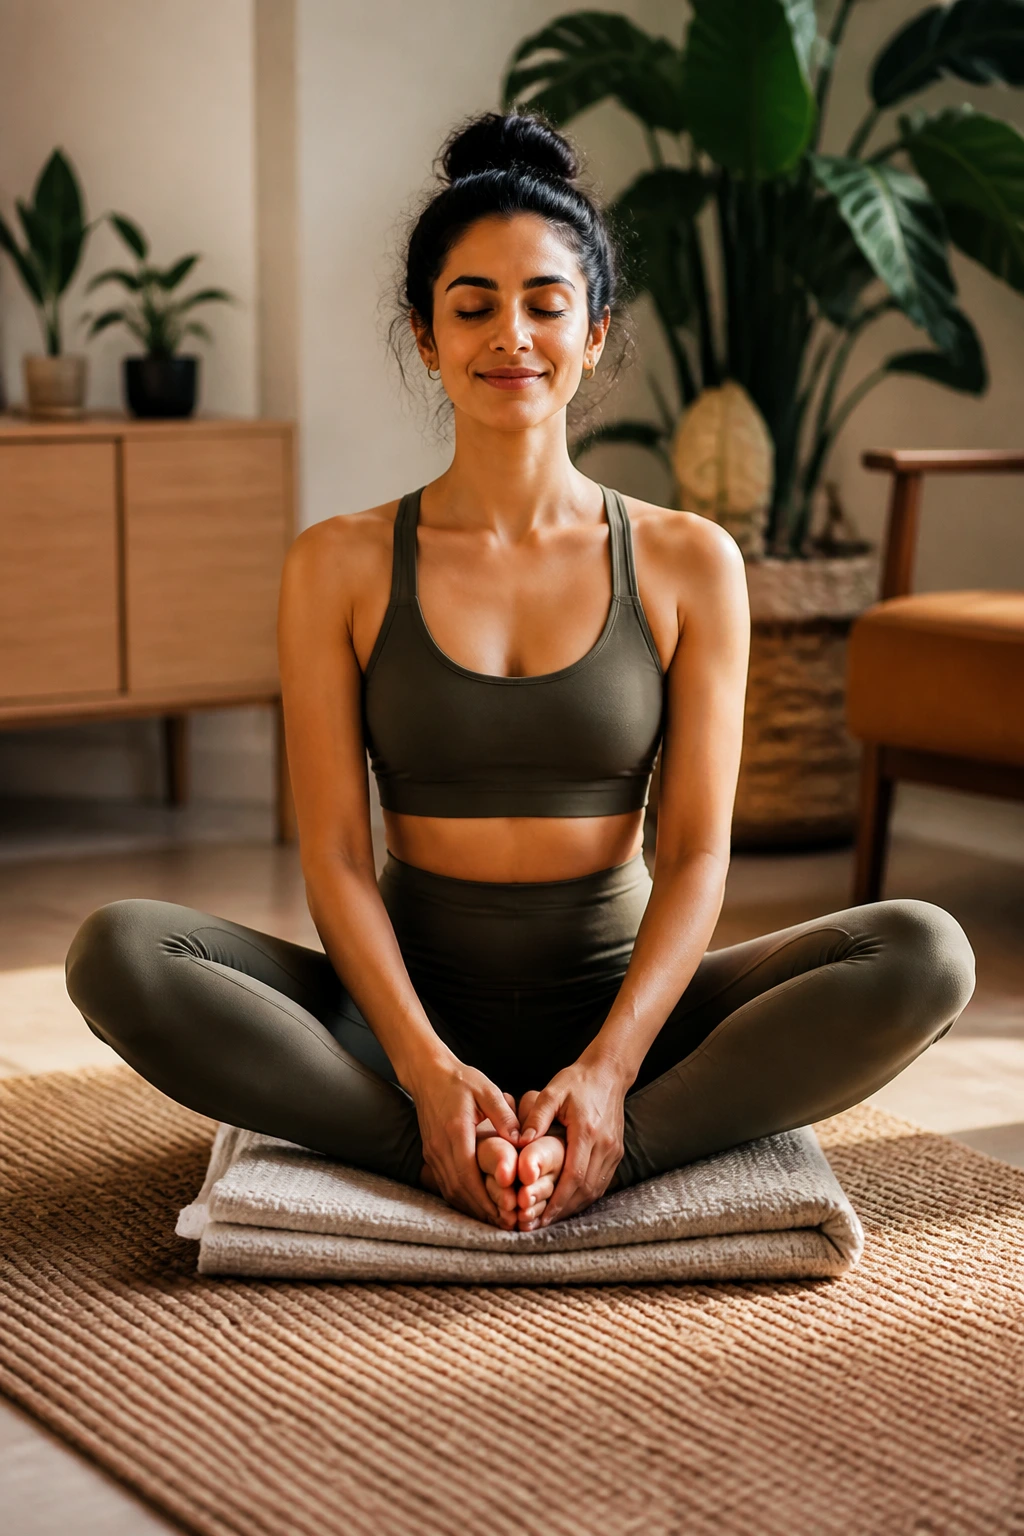
Bound Angle Pose looks simple on the outside and feels like a small revelation on the inside if your hips are tight. The soles of the feet come together, the knees open out, and the spine stays long.
Sit on a folded blanket if your pelvis tips backward. That tiny lift helps more than forcing the knees lower. Hold the ankles or shins lightly, and let the elbows drift out or rest against the inner thighs.
You can stay upright and tall, or you can fold forward a few inches from the hips if the back allows it. No need to flatten the chest onto the feet. That’s a stretch for another day, maybe another month.
Bound Angle is one of the quiet workhorses of beginner yoga. It opens the inner thighs, softens the groin, and gives the nervous system a break from all the standing work.
21. Seated Forward Fold
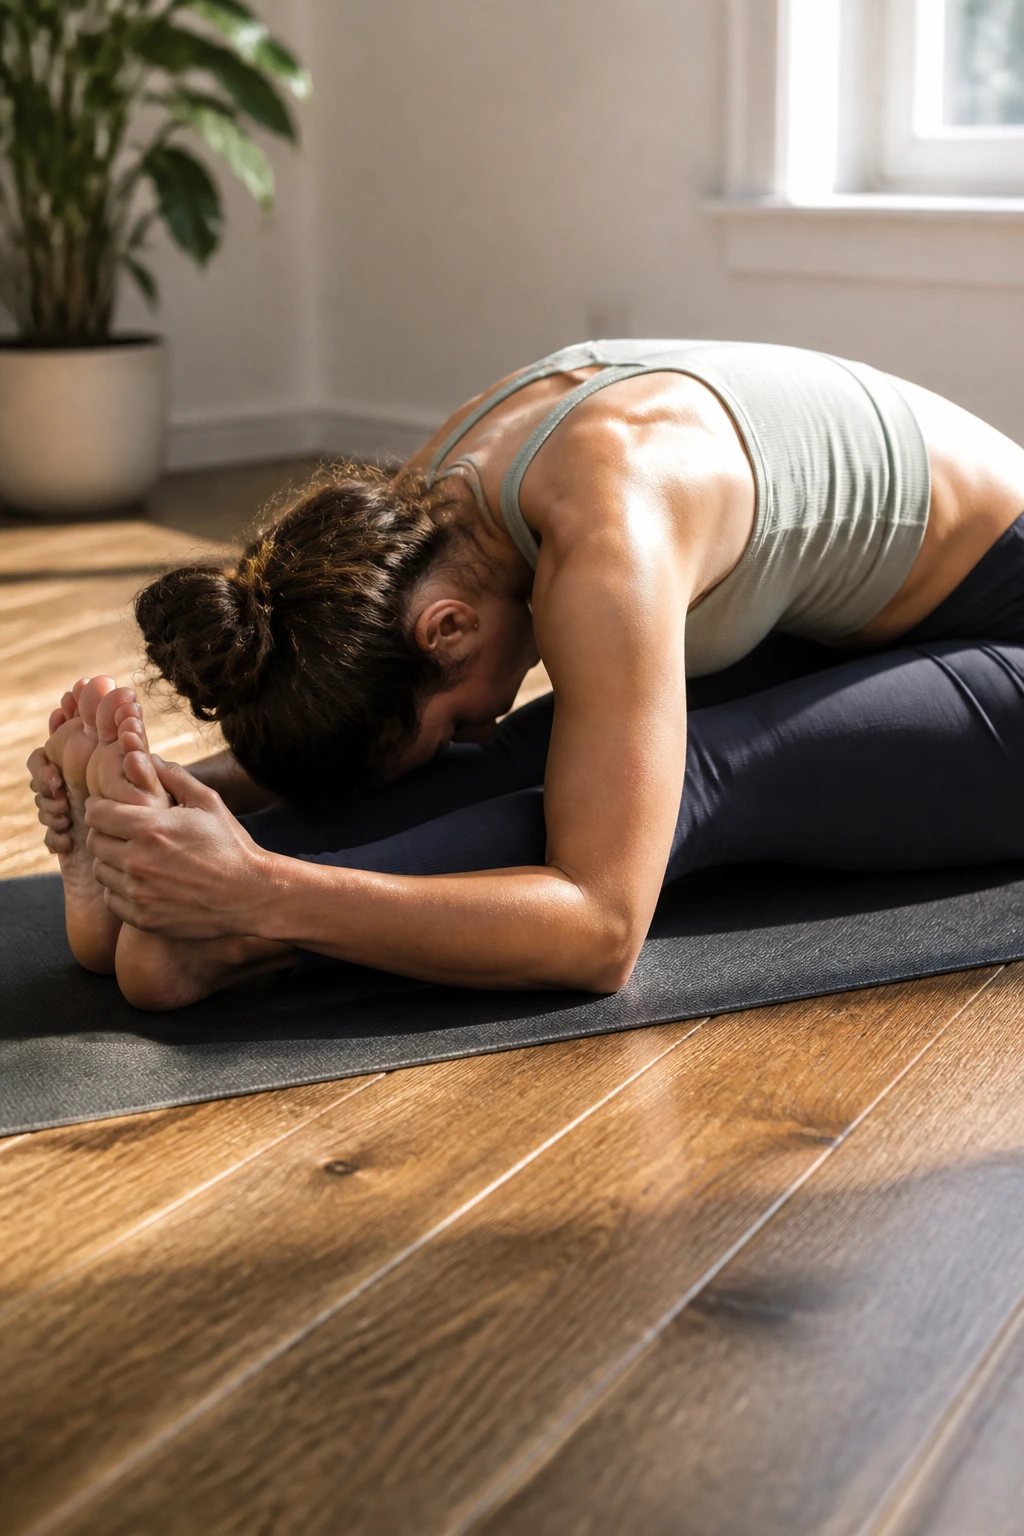
Seated Forward Fold feels different from its standing cousin because gravity changes the game. The trick is to fold from the hips instead of folding the spine like a paper clip.
Sit with legs extended, bend the knees a little if the hamstrings are tight, and place a strap around the feet if reaching is a stretch. Lengthen the spine first, then fold forward from the hips. Hands can hold the strap, the shins, or the thighs.
A couple of useful details
- Sit on a blanket if the lower back rounds hard.
- Keep the feet flexed if that feels better for the backs of the legs.
- Aim for a long exhale before each deeper pause.
- Stop the fold where you can still breathe smoothly.
A beginner who bends the knees and keeps the chest open usually gets more from this pose than someone trying to touch the toes at any cost. That’s the whole theme, really. Better shape, less strain.
22. Locust Pose
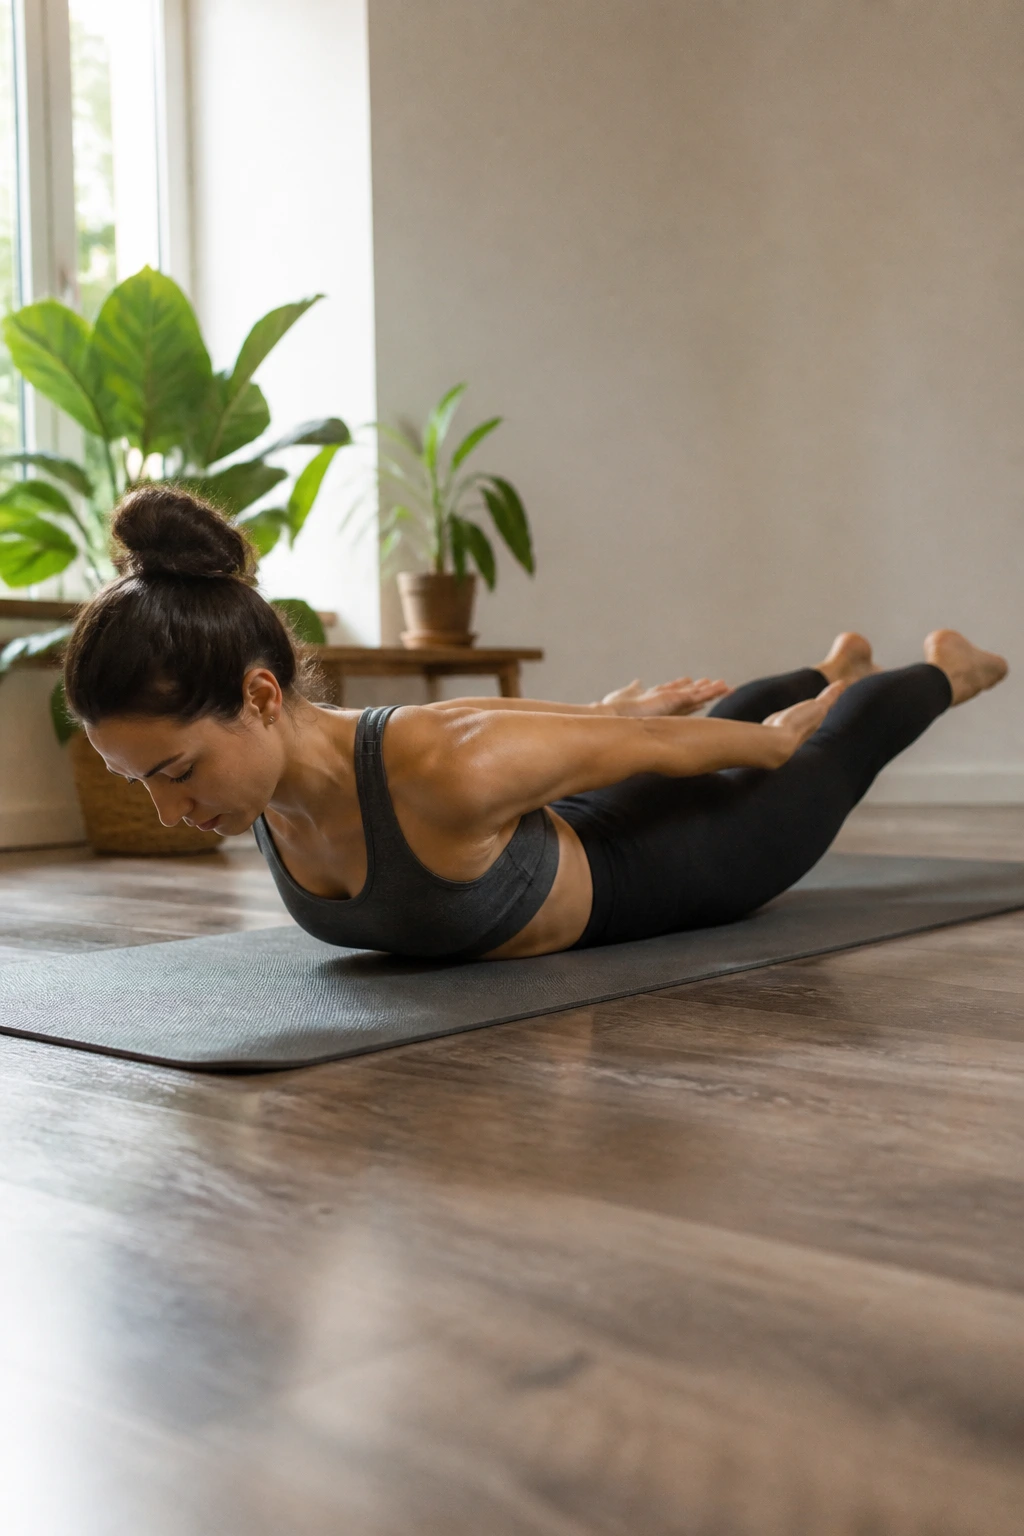
Locust Pose deserves more love than it gets. It strengthens the back body, and beginners often need that just as much as they need front-body stretching.
Lie on the belly with arms by the sides, palms down, and legs long. On an inhale, lift the chest, hands, and legs a little off the mat. Keep the gaze down so the neck stays neutral. The lift can be tiny and still do the job.
What to avoid
- Don’t throw the head back.
- Don’t crunch the low back to get height.
- Don’t tense the jaw.
- Don’t forget to breathe while you hold.
A small, clean lift is better than a big one that feels wobbly. If the whole body comes up only a few inches, fine. That still wakes up the glutes, hamstrings, and upper back.
Locust is a reminder that strength work in yoga doesn’t always look graceful. Sometimes it just looks honest.
23. Crescent Lunge
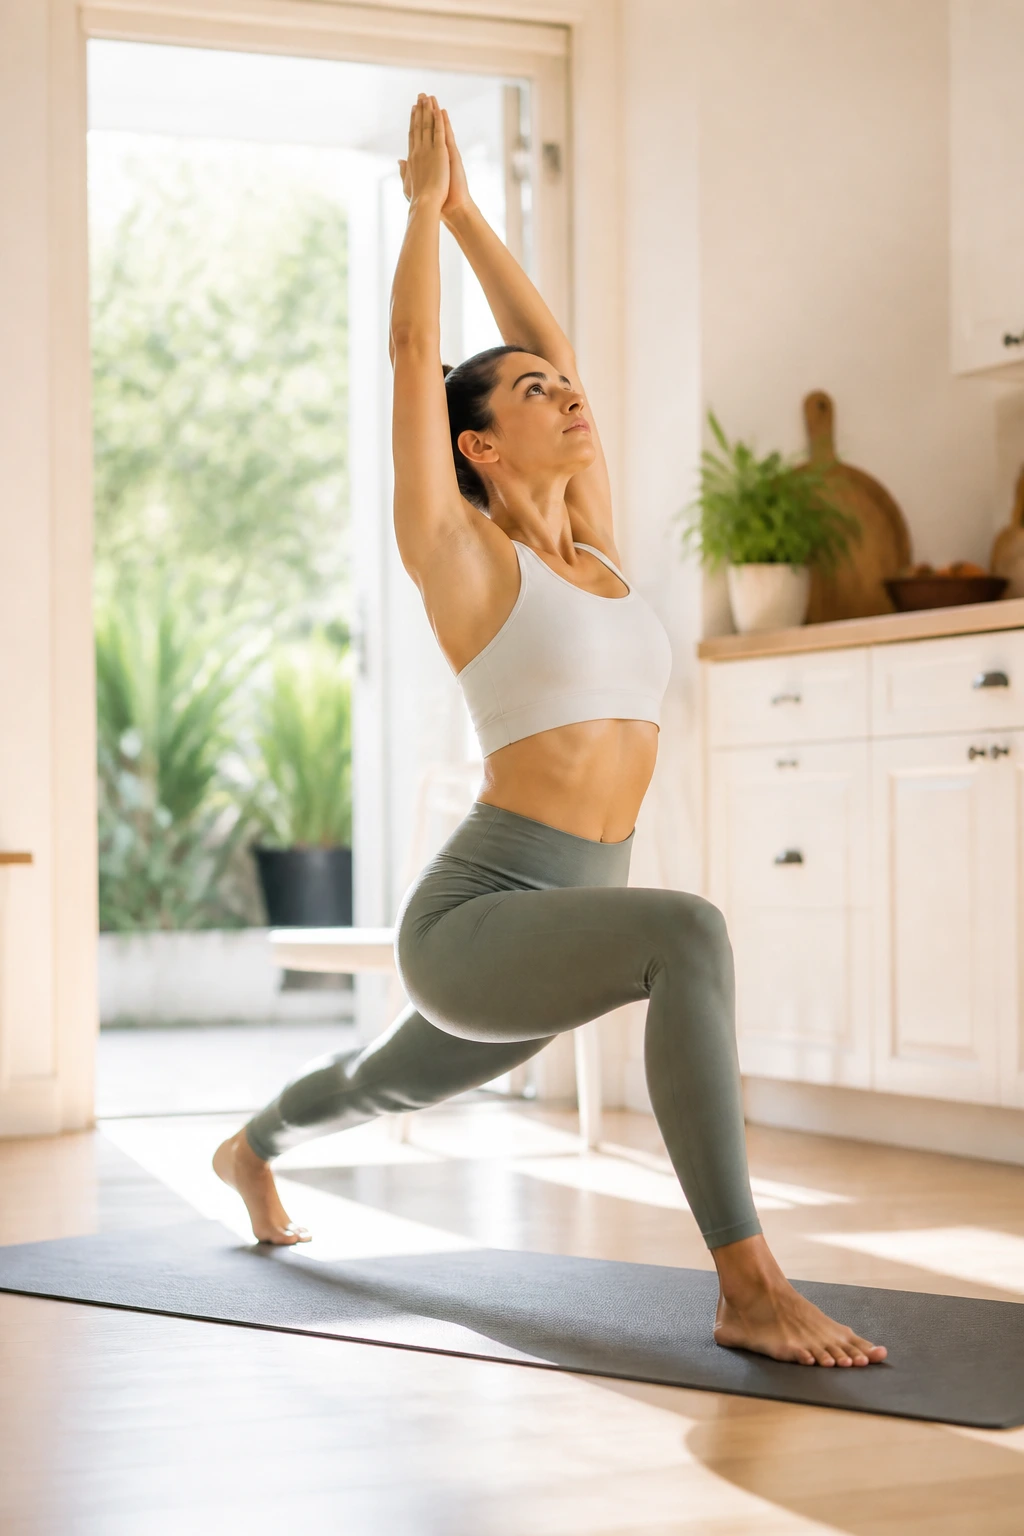
Crescent Lunge is Low Lunge’s more active sibling. The back knee lifts, the legs start doing more work, and the pose begins to feel like a true standing balance.
From Low Lunge, tuck the back toes and lift the knee off the mat. Stack the front knee over the ankle and keep the torso tall. The back heel reaches away, which gives the pose a long line from heel to crown. Hands can stay on the hips, rise overhead, or rest at the heart.
This is one of those shapes that exposes wobble fast. That’s not a problem. It usually means the stance needs a tiny adjustment or the breath got held for too long.
A shorter stance is often the smarter option. You want energy in both legs, not a lurch forward that makes the front knee miserable. Crescent Lunge builds heat without needing a lot of drama.
24. Extended Side Angle
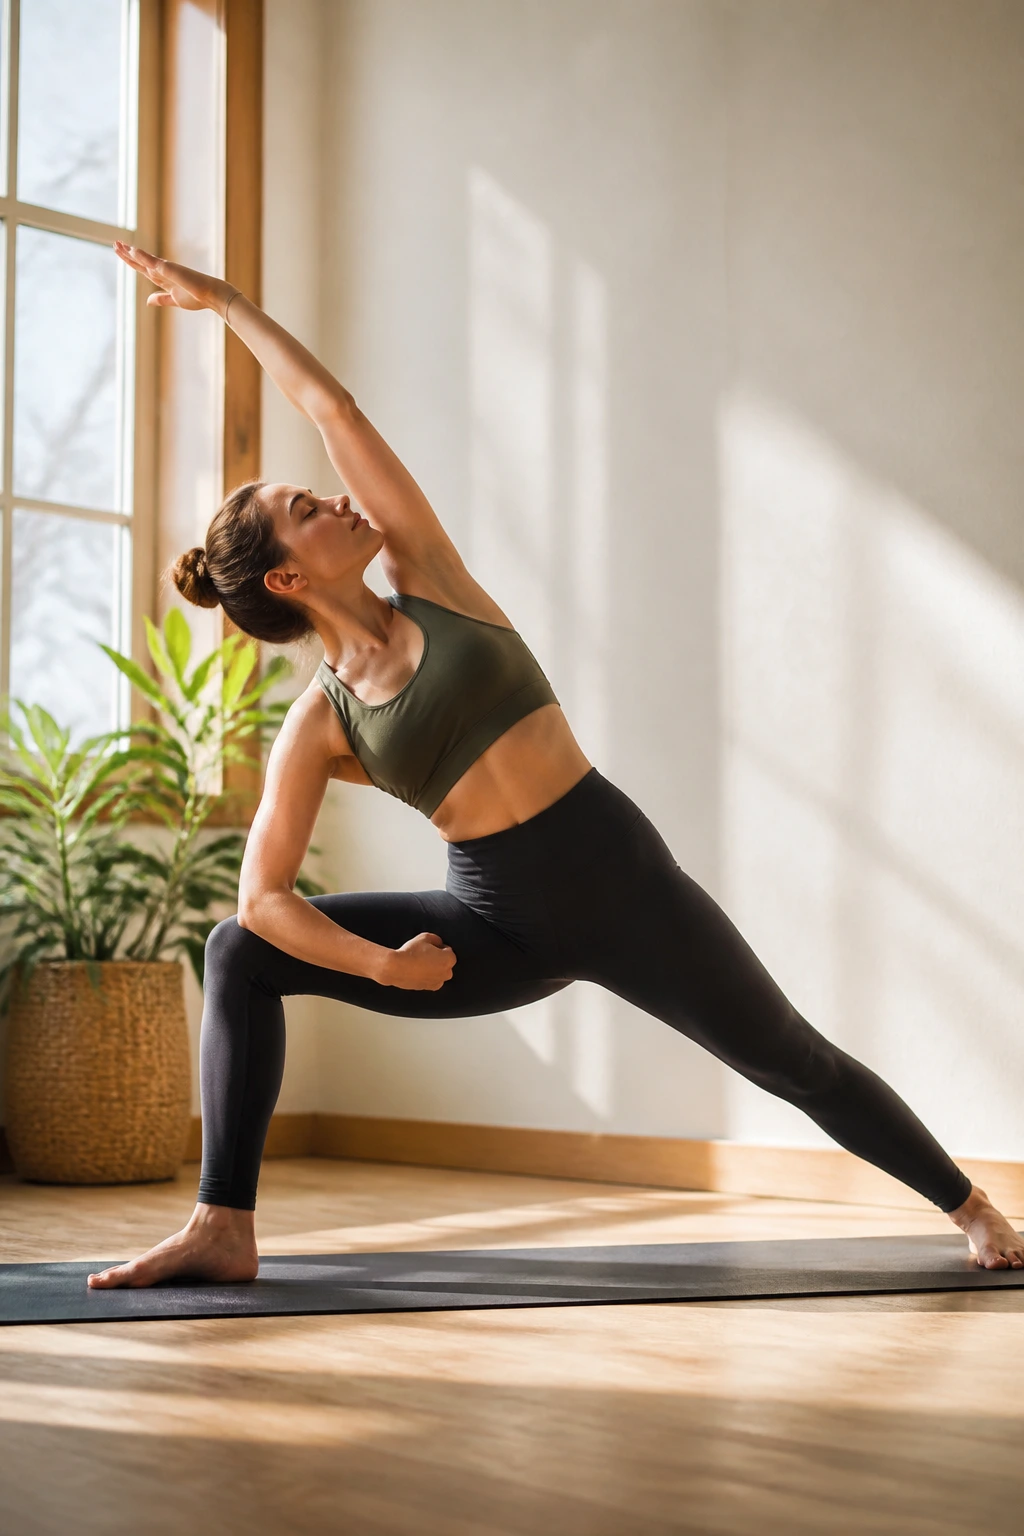
Extended Side Angle is a side-body stretch with a grounded leg foundation. It pairs well after Warriors because the body already understands the shape of the stance.
Start in Warrior II, then lower the front forearm to the thigh or place the hand on a block outside the front foot. Reach the top arm overhead or keep it stretched toward the front wall. The real goal is a long line from the back foot through the fingertips, not a collapsed torso.
The side ribs should feel open, not pinched. If the lower shoulder droops, raise the support higher with a block or stay on the thigh. A beginner does not need to force the hand to the floor.
I like this pose because it teaches effort without compression. That balance is hard to fake, and the body usually tells on you if you try.
25. Goddess Pose
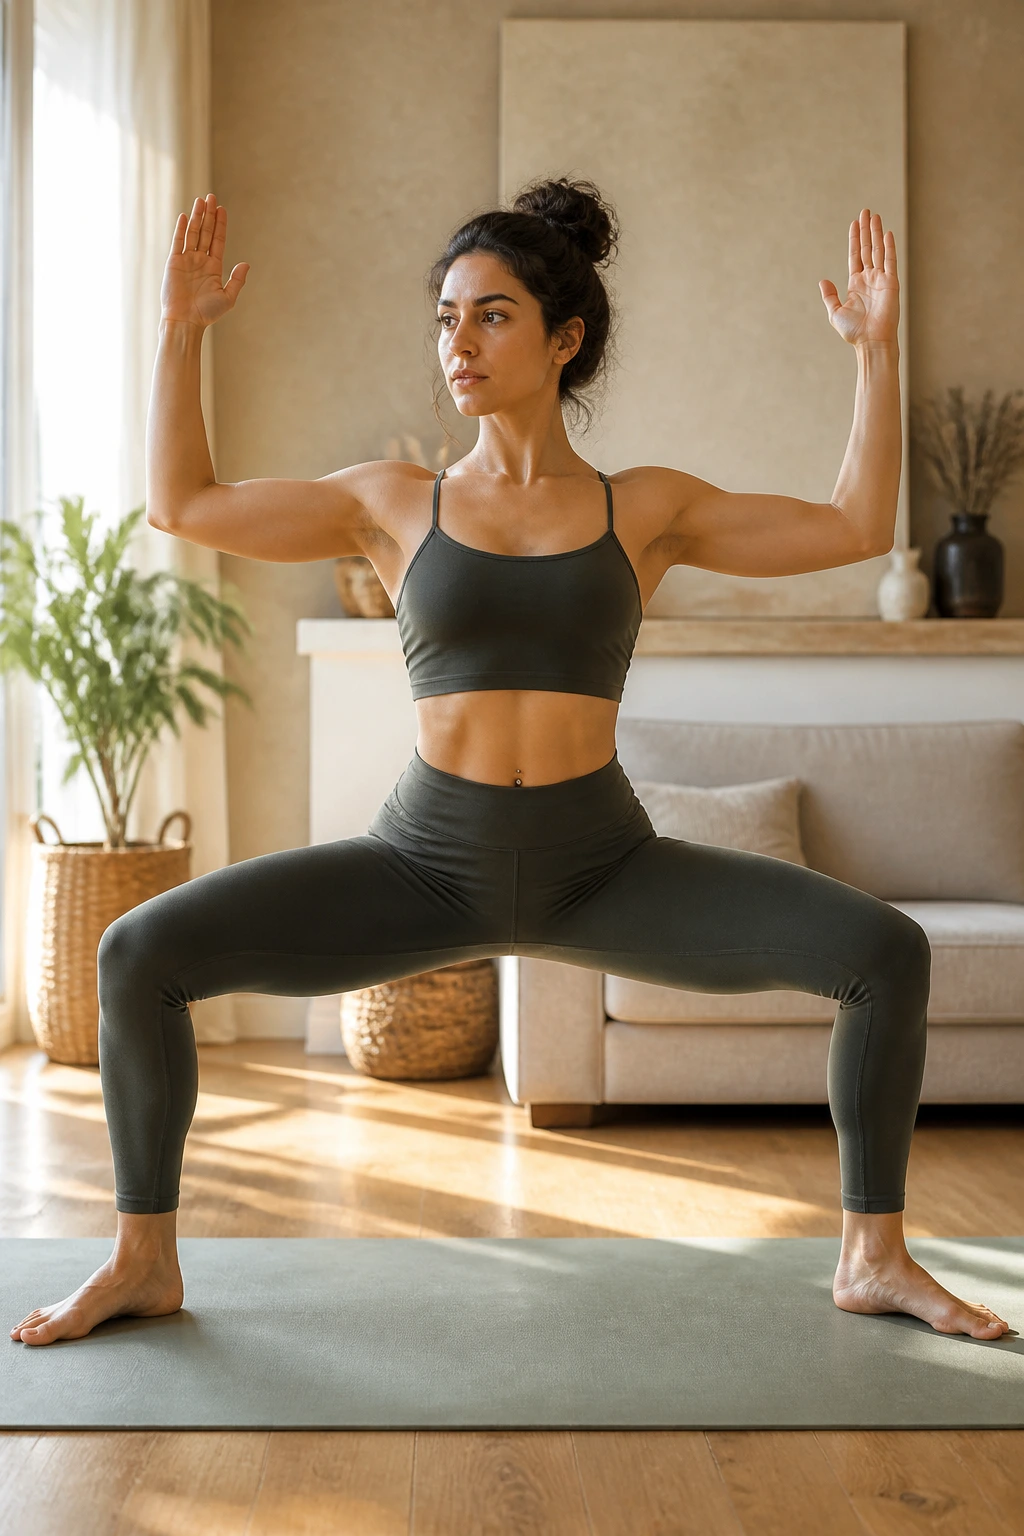
Goddess Pose looks playful and strong at the same time, which is part of why it works so well in a beginner challenge.
Take a wide stance, turn the toes out slightly, and bend the knees so they track over the toes. Lower into a squat only as far as the heels can stay grounded and the spine can remain tall. Arms can open in a cactus shape, with elbows bent and chest lifted.
Good cues to keep nearby
- Knees track outward, not inward.
- Tailbone drops straight down.
- Weight spreads across both feet.
- Chest stays proud without popping the ribs.
If your thighs burn, that’s normal. If the knees feel jammed, widen the stance a bit or back out of the bend. You should feel work, not grinding.
Goddess Pose builds leg heat fast, and beginners usually notice it right away. It also gives the hips a useful kind of opening that feels sturdy rather than flimsy.
26. Eagle Arms
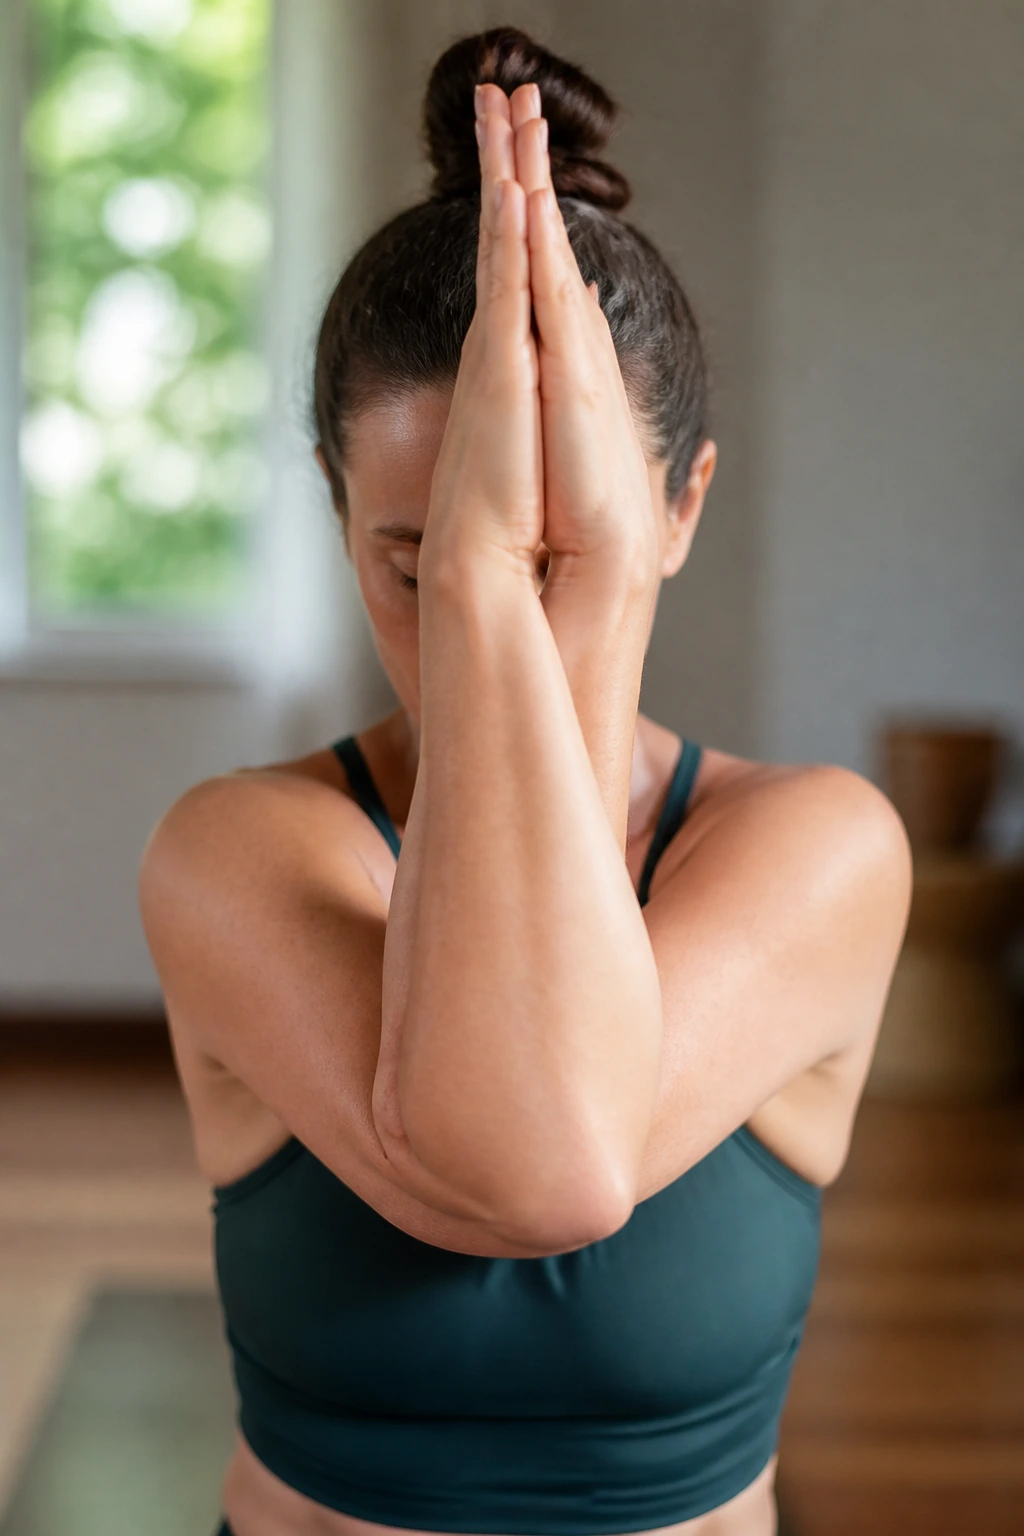
Eagle Pose can be tricky for brand-new students, but Eagle Arms gives you the shoulder and upper-back work without the full balance puzzle.
Sit or stand tall, reach the arms forward, then wrap one elbow under the other. Bend the elbows and bring the backs of the hands or palms toward each other if they meet. Lift the elbows slightly and draw the shoulder blades down the back.
The stretch should feel broad across the upper back and into the back of the shoulders. If the hands don’t touch, that is fine. Hands touching is not the goal; openness is.
I like Eagle Arms in a beginner lineup because it lets tight shoulders soften without needing the legs to cooperate. It’s a small shape with a big payoff, which is my favorite kind of yoga work.
27. Boat Pose
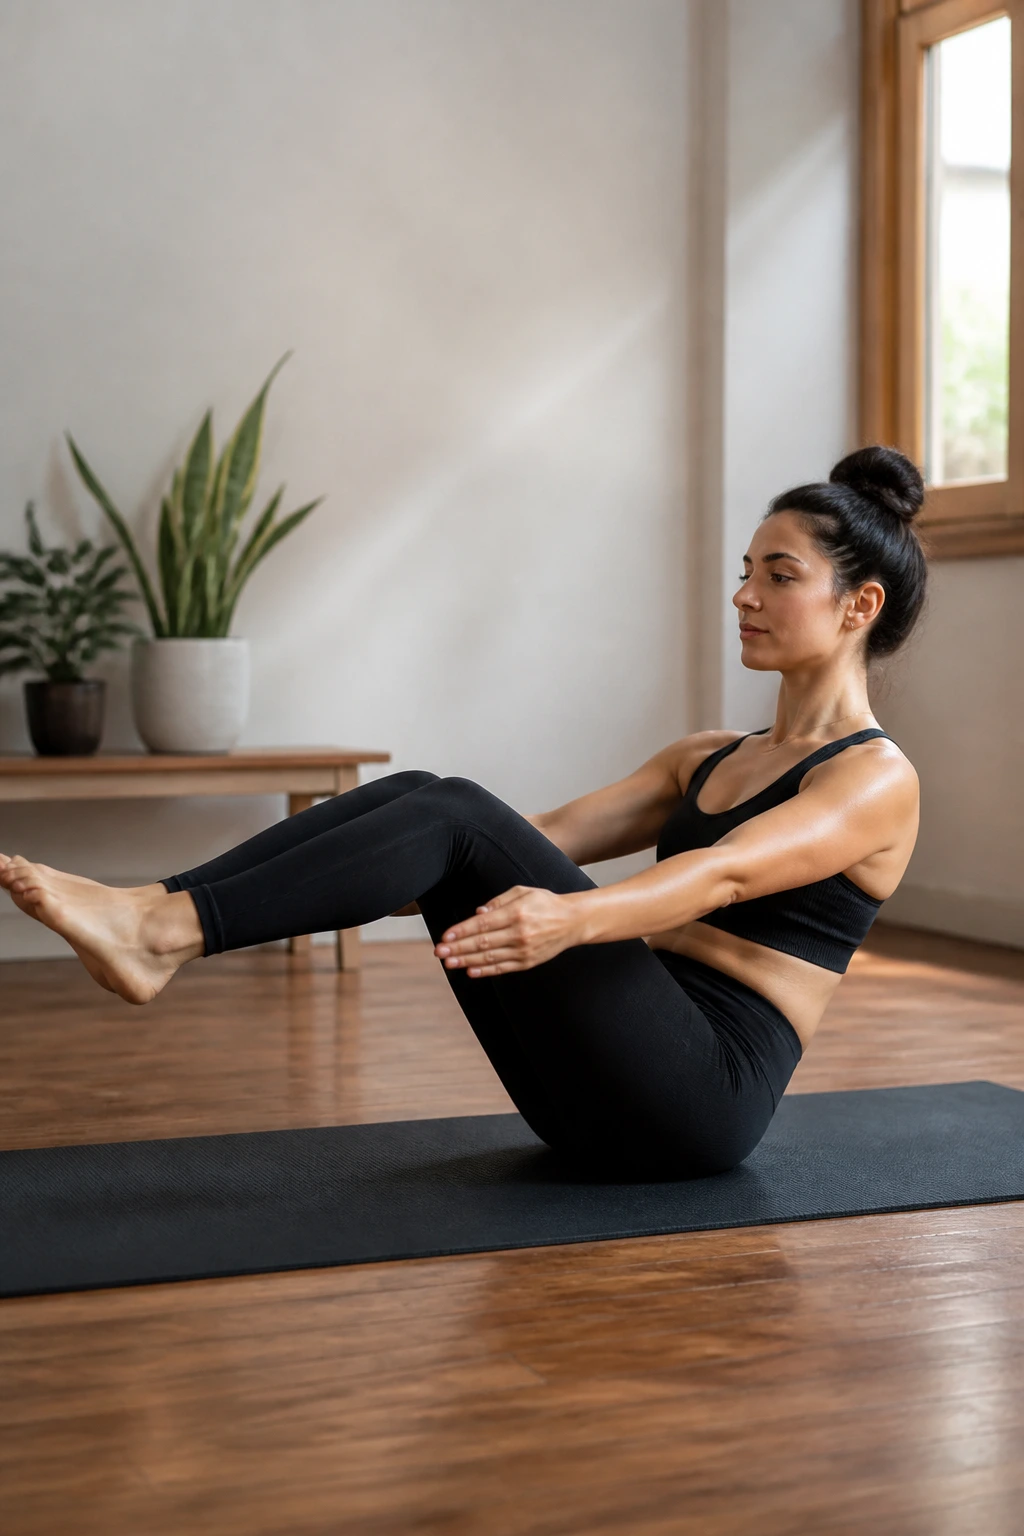
Boat Pose gets a bad reputation because people try to make it look like a magazine shot. Bent-knee Boat is the version most beginners need.
Sit on the mat, lean back slightly, lift the feet a few inches, and keep the knees bent if straight legs pull the low back. The spine stays long, the chest stays open, and the hands can reach forward or rest lightly behind the thighs.
A sane way to practice it
Hold for 10 to 15 seconds, lower down, and repeat 2 or 3 times. That’s enough. You do not need to grit your teeth through a minute-long tremble if your lower back is taking over.
If the neck feels tense, lower the feet or keep the hands behind the thighs for support. A controlled, smaller shape is better than a huge V-sit that steals the breath.
Boat is less about abs on fire and more about learning to stabilize the torso without collapsing. That skill shows up in half the rest of yoga.
28. Reclined Figure-Four Stretch
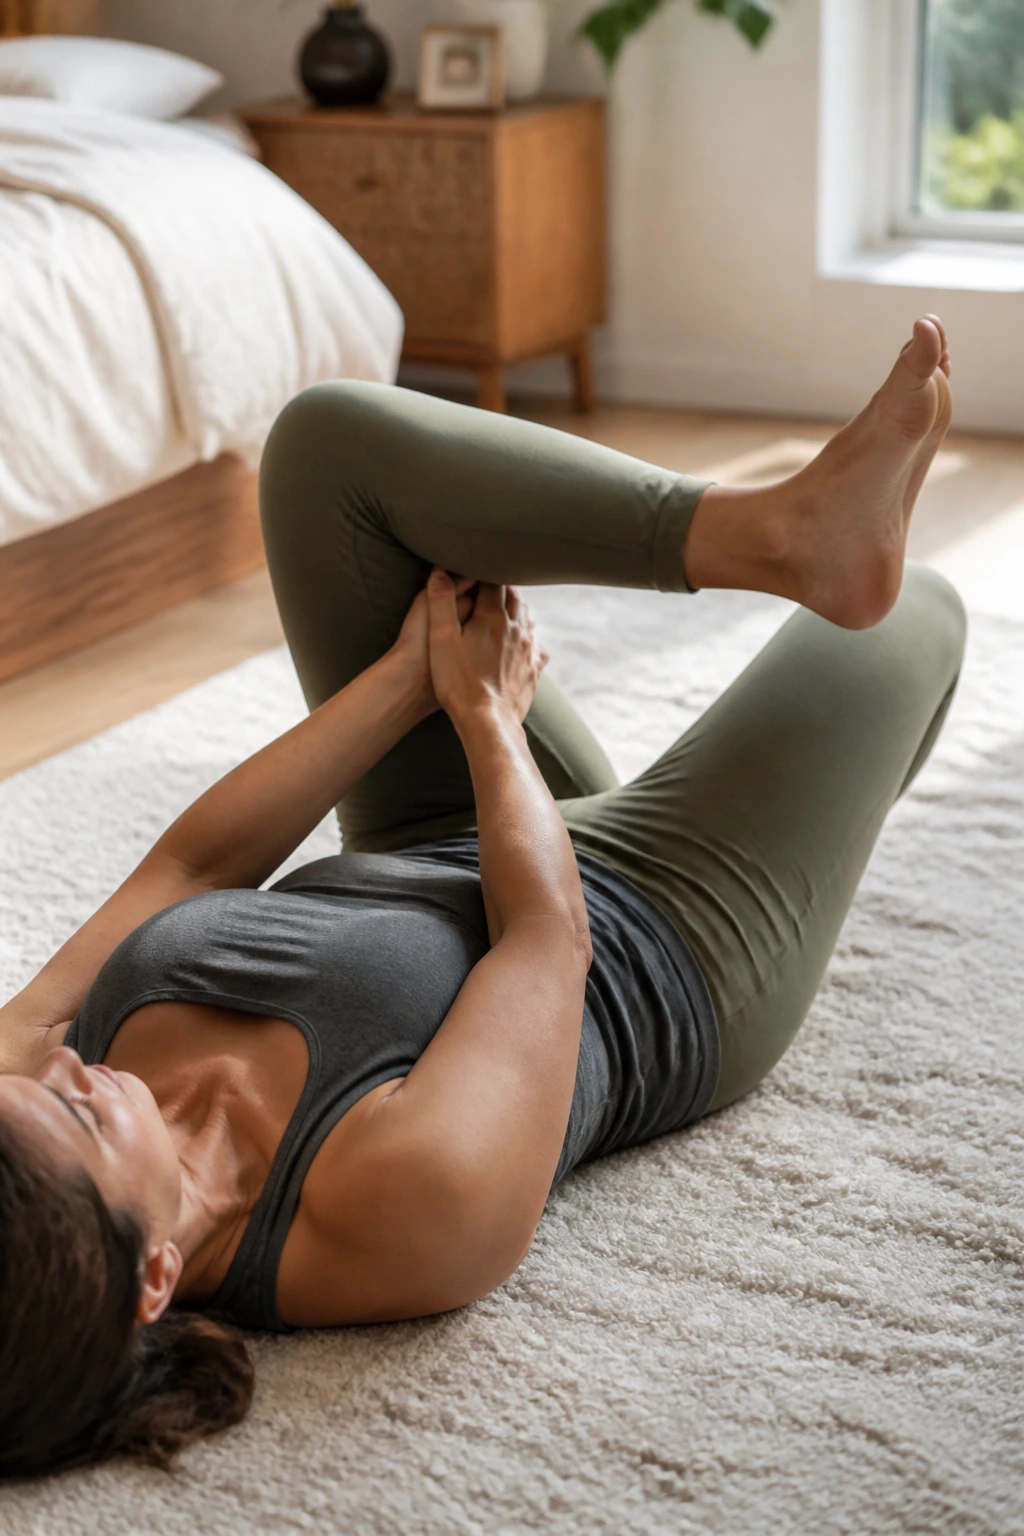
Reclined Figure-Four Stretch is a friendly version of pigeon work, and I like it better for beginners with tight hips or cranky knees. It’s easier to control and a lot less intimidating.
Lie on your back, cross one ankle over the opposite thigh, and keep the foot flexed. Thread the hands behind the standing thigh and draw the legs in until you feel a stretch in the outer hip of the crossed leg. The head can stay down, which keeps the neck relaxed.
If it feels too strong
Keep the standing foot on the floor and leave the hands off entirely. That still gives a useful hip opener. A wider knee angle can also soften the pull.
The stretch should feel deep but not sharp. If the knee complains, back off immediately and adjust the foot flex. Hips usually respond better to patience than to pressure, and this pose is proof.
29. Legs Up the Wall
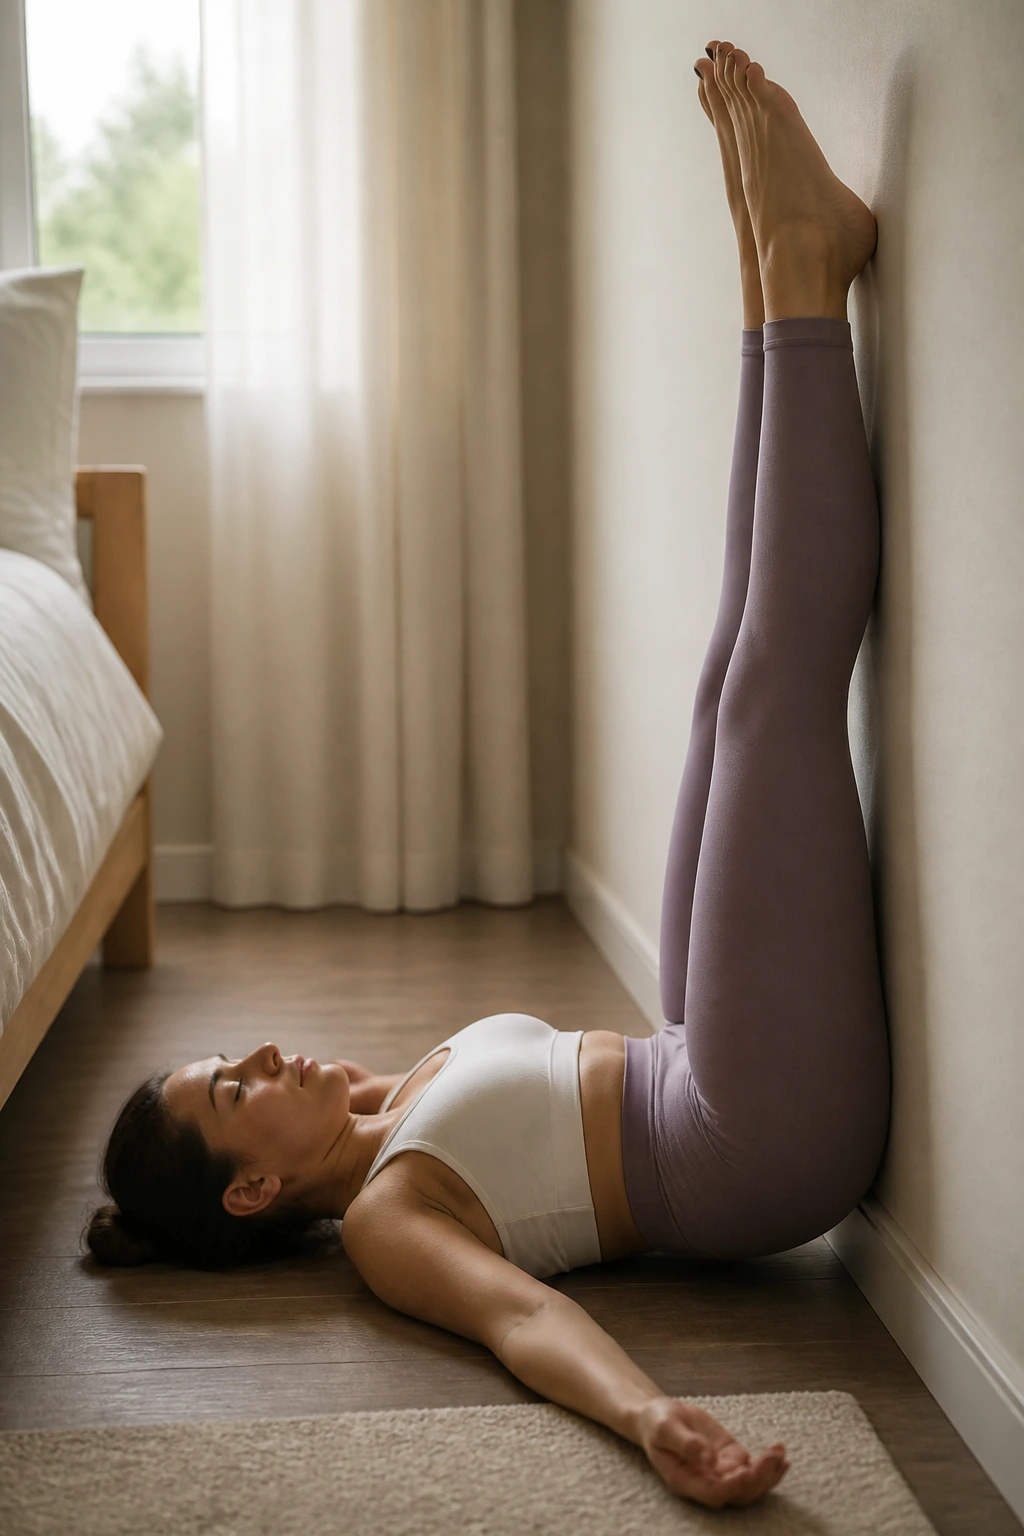
Legs Up the Wall is the pose I reach for when the body wants a pause more than a workout. It’s gentle, quiet, and oddly satisfying after a stack of standing shapes.
Sit with one hip close to a wall, then swing the legs up so the heels rest on the wall and the back lies down on the floor. The hips can be a few inches away from the wall if the hamstrings resist. Arms rest out to the sides or on the belly.
Hold the pose for 3 to 10 minutes if it feels good. A folded blanket under the hips can make the setup easier, but it’s optional. If the low back feels compressed, slide farther from the wall.
This is a recovery pose, not a flex. The breathing often slows on its own after a minute or two, which is half the point.
30. Savasana to End a Beginner Yoga Challenge
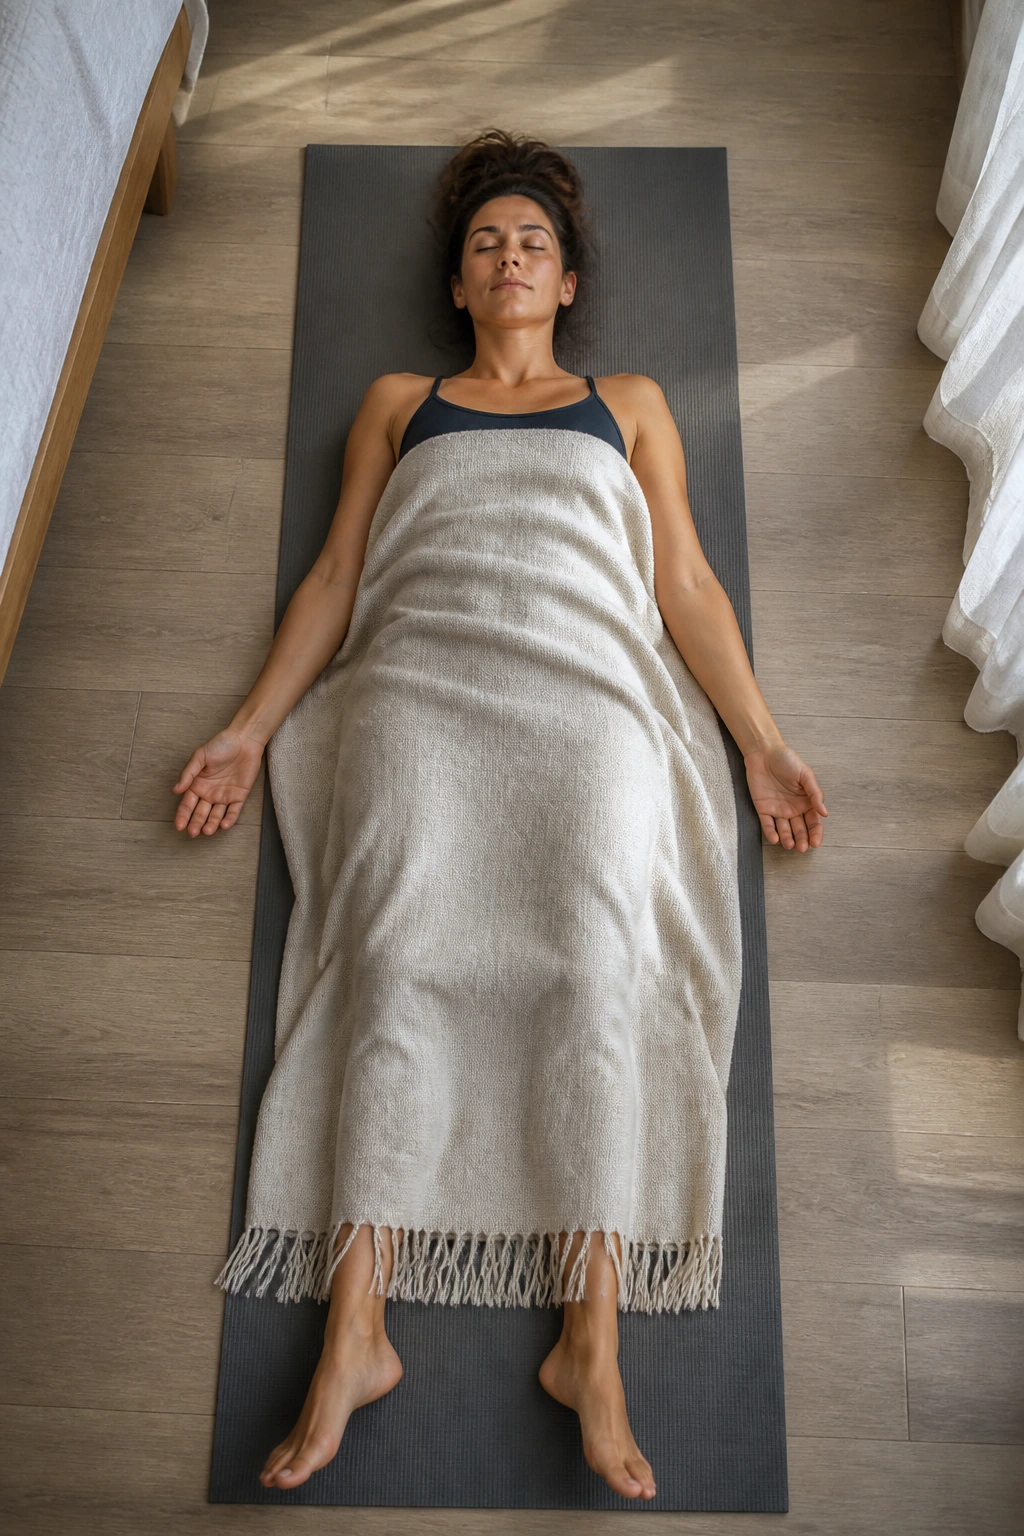
Stillness can feel surprisingly hard after thirty poses, which is exactly why Savasana matters. It gives the body time to absorb the work instead of racing off the mat with all the tension still packed inside.
Lie flat on your back, let the feet fall open, and place the arms a few inches from the sides of the body. If the low back arches, put a folded blanket under the knees. If the shoulders feel tight, cover the body with a light layer so you can stop fidgeting.
There is no shape to fix here. No score to chase. Just let the breath do what it does when nobody is asking it to perform.
A beginner who learns to rest on purpose tends to come back to the mat more willingly. That may be the most useful lesson in the whole sequence.
