



A plain wall can make Pilates feel harder, not easier. Press your body into that flat surface and small mistakes stop hiding fast — ribs flare, hips twist, shoulders creep up, all the usual cheats. That is exactly why wall Pilates workouts work so well at home: the wall gives you feedback before your lower back, neck, or hip flexors do the complaining.
You do not need a reformer, a studio mirror, or a room full of gear. A mat, a clear stretch of wall, and enough space to take two steps back is plenty. If you’ve ever tried to “do Pilates” on the floor and ended up mostly wiggling around, the wall can fix that mess in a hurry.
There’s a nice side effect, too. The wall makes the body honest. When your heels slide too far away, when your ribs pop off the wall, or when your chin juts forward, you can feel it immediately, which is half the battle with any Pilates-style practice.
Keep the movements slow. Keep the breath steady. And keep a towel nearby if you want one under your head or tailbone, because a little comfort goes a long way when you’re spending time building control one rep at a time.
1. Wall Pilates Roll-Down to Wake Up Your Spine
Stand with your back facing the wall and your feet about 6 inches forward, hip-width apart. Soften your knees, tuck your chin slightly, and start peeling your spine away from the wall one section at a time. The lower back goes first, then the mid-back, then the upper back, and the head follows last.
This is one of those wall Pilates workouts that looks simple until you try to do it slowly. Don’t rush the first inch. If your hamstrings tug hard, bend your knees more and shorten the range; that is not “cheating,” that is smart work.
Do 5 to 8 slow roll-downs, pausing for one breath at the bottom if your balance feels steady. Keep your weight in the middle of your feet and let your arms hang heavy. The goal is a loose, stacked spine — not a dramatic forward fold.
2. Wall Pilates Hundred Prep
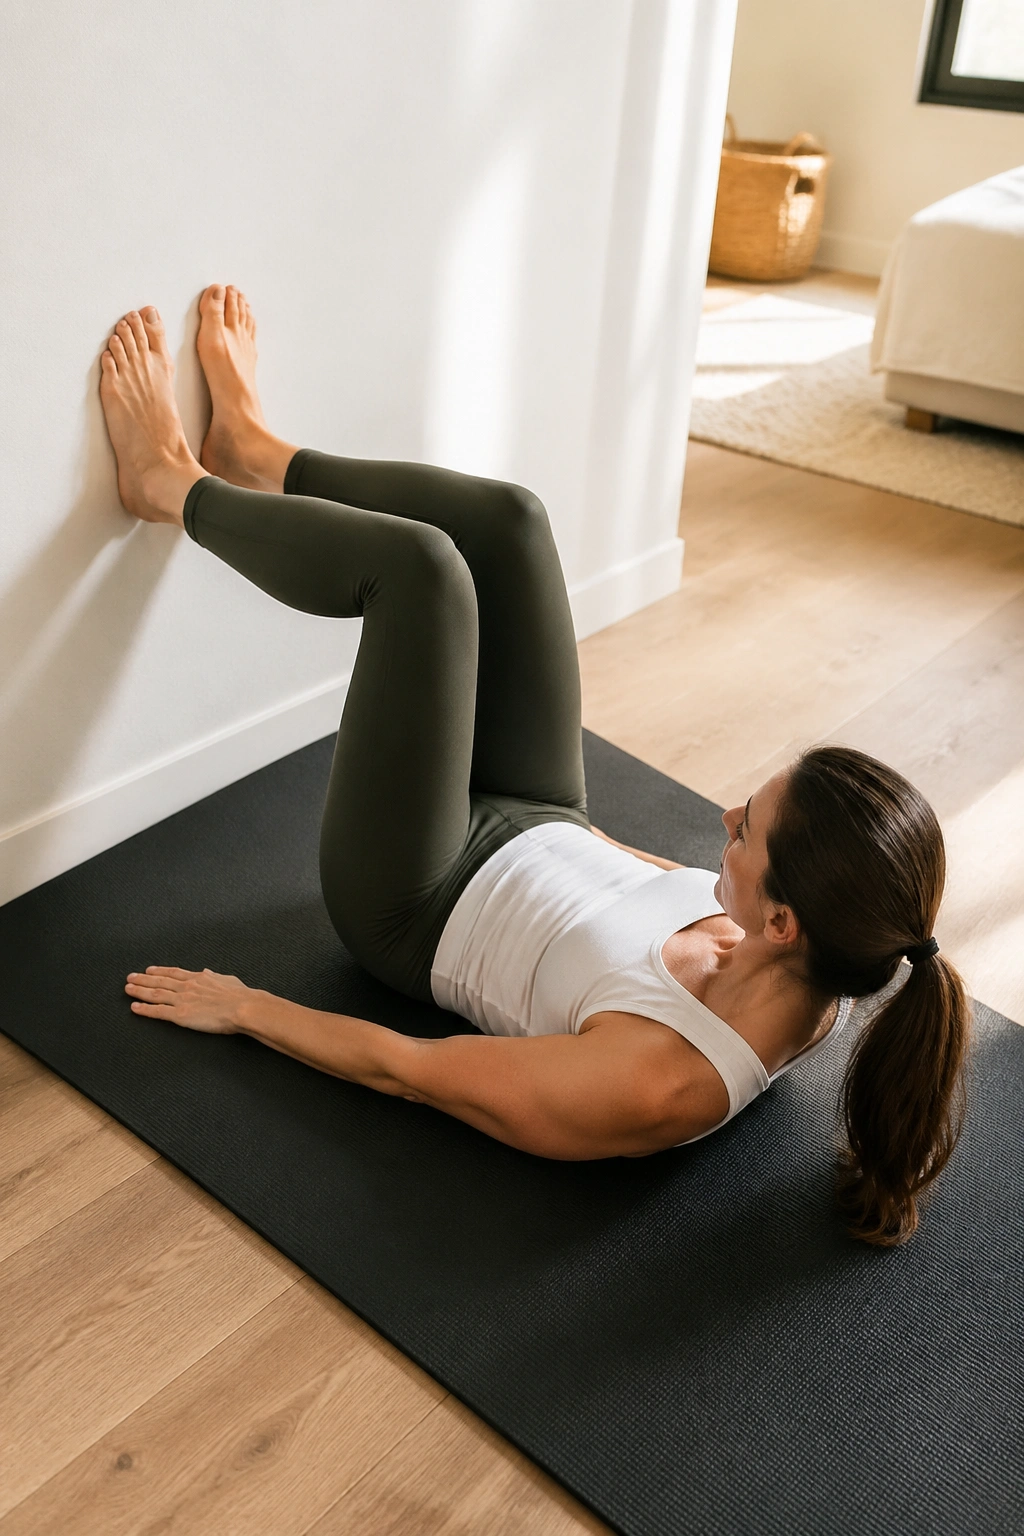
This is the move I’d pick first if your core tends to disappear the second your feet leave the floor. Lie on your back with your calves on the wall, knees bent to about 90 degrees, and your arms reaching long by your sides. Curl your head and shoulders up a few inches, then pump the arms in short, quick strokes while you breathe in for 5 counts and out for 5 counts.
The wall takes some pressure off the low back, which makes this a kinder version of the classic Hundred. You still have to hold your ribs down and keep your belly drawn inward, though. If your neck starts yelling, set your head down for 2 breaths and try again with less curl.
What to watch for
- Keep your thighs quiet.
- Press the lower ribs gently toward the mat.
- Pump from the shoulders, not the wrists.
- Stop at 30 to 50 arm pumps if your breathing gets messy.
3. Standing Wall Squat and Reach
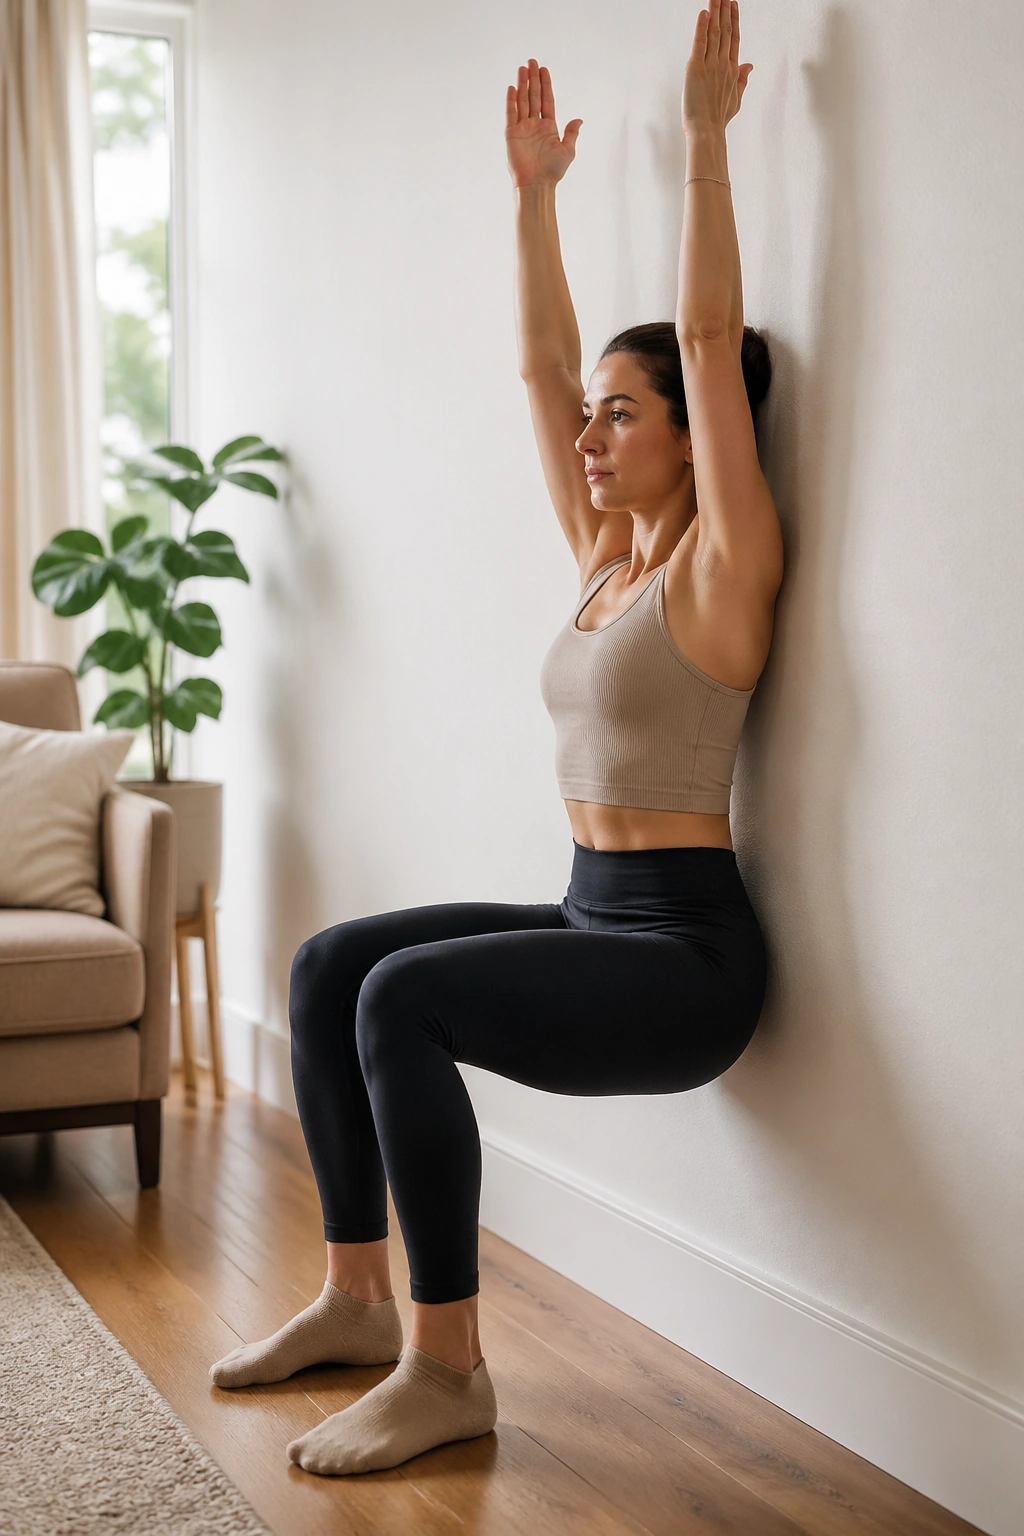
Why does a wall squat burn so fast? Because the wall takes away all the little escapes. Stand with your back against it, walk your feet forward 12 to 18 inches, and slide down until your knees bend around 90 degrees. Reach your arms forward at shoulder height, then lift them overhead on the next breath if your shoulders allow it.
The wall keeps your torso upright, which means the thighs and glutes have to do the real work. That little detail matters. A lot of people turn a squat into a hip hinge without meaning to, and the wall stops that habit cold.
How to use it
Hold for 20 to 40 seconds, or pulse up and down 8 times before sitting in the hold again. Keep your heels planted and your knees tracking over your second toes. If your lower back arches hard, bring your feet closer to the wall and reduce the depth.
4. Wall Pilates Bridge With Feet Pressed High
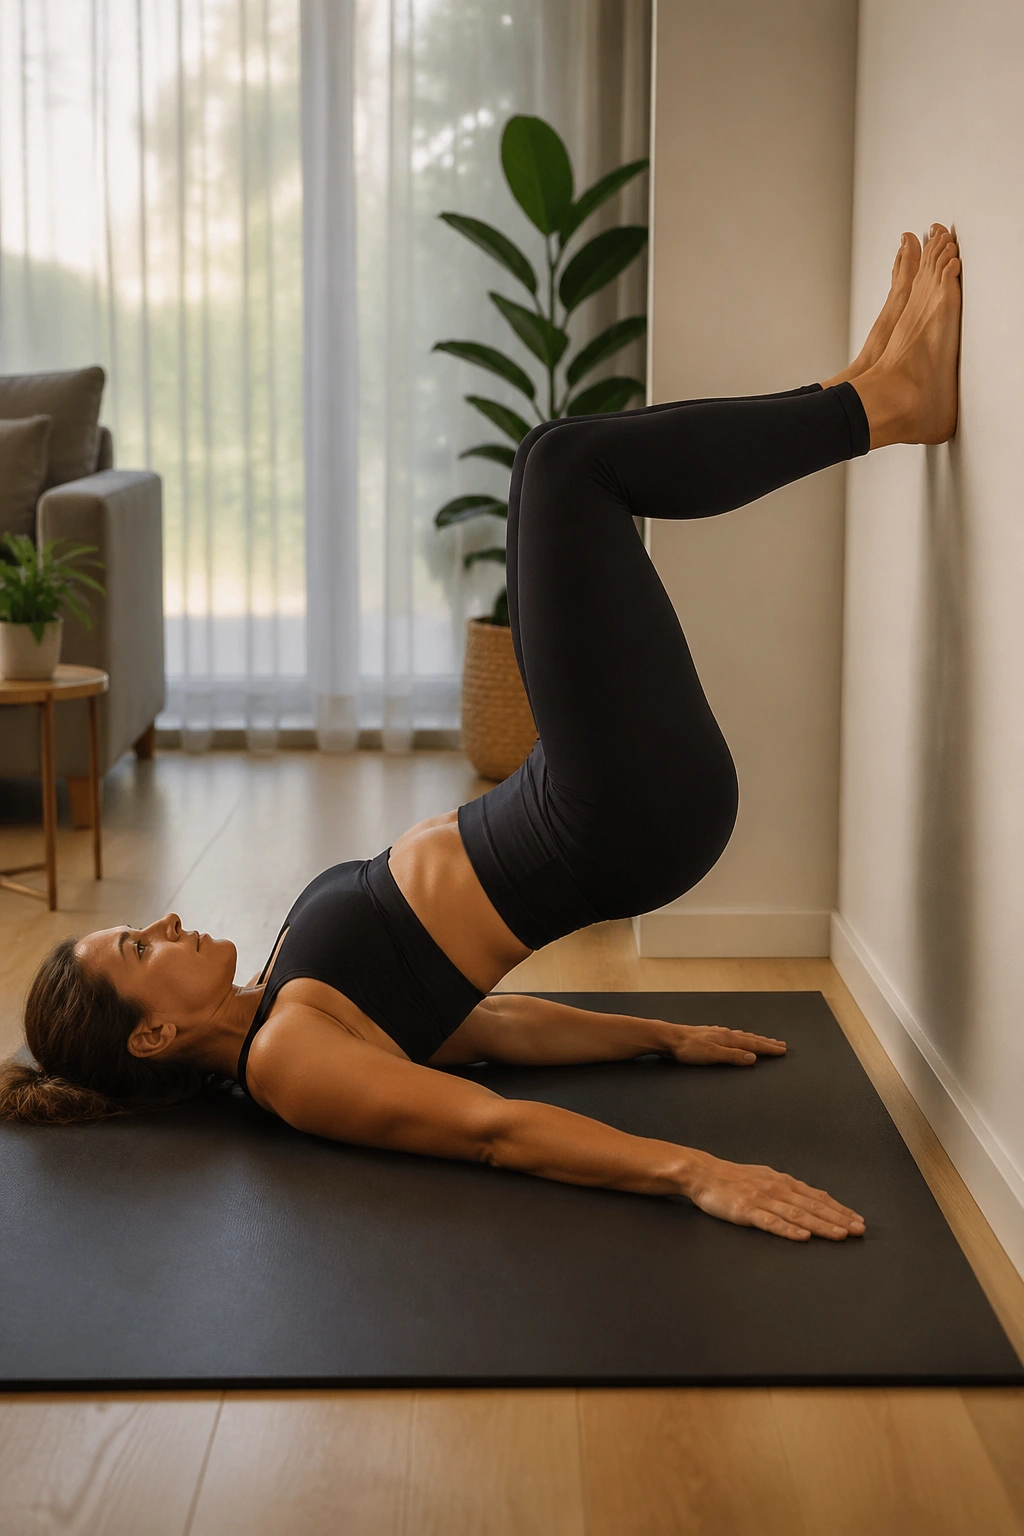
Lie on your back and place both feet on the wall, knees bent so your shins are roughly parallel to the floor. Press through your heels, exhale, and lift your hips until your body forms a long line from shoulders to knees. Pause at the top for one count, then lower with control.
The wall version of the bridge feels different from floor work. You can push into it with more intention, and that gives your glutes and hamstrings a clearer job. It also makes the pelvic tilt easier to notice; if one side of your pelvis hikes up, you’ll feel it fast.
A small lift beats a big sloppy one.
Do 8 to 12 reps, and keep the ribs quiet the whole time. If your hamstrings cramp, move your feet a little higher on the wall and shorten the lift.
5. Wall Plank Shoulder Taps
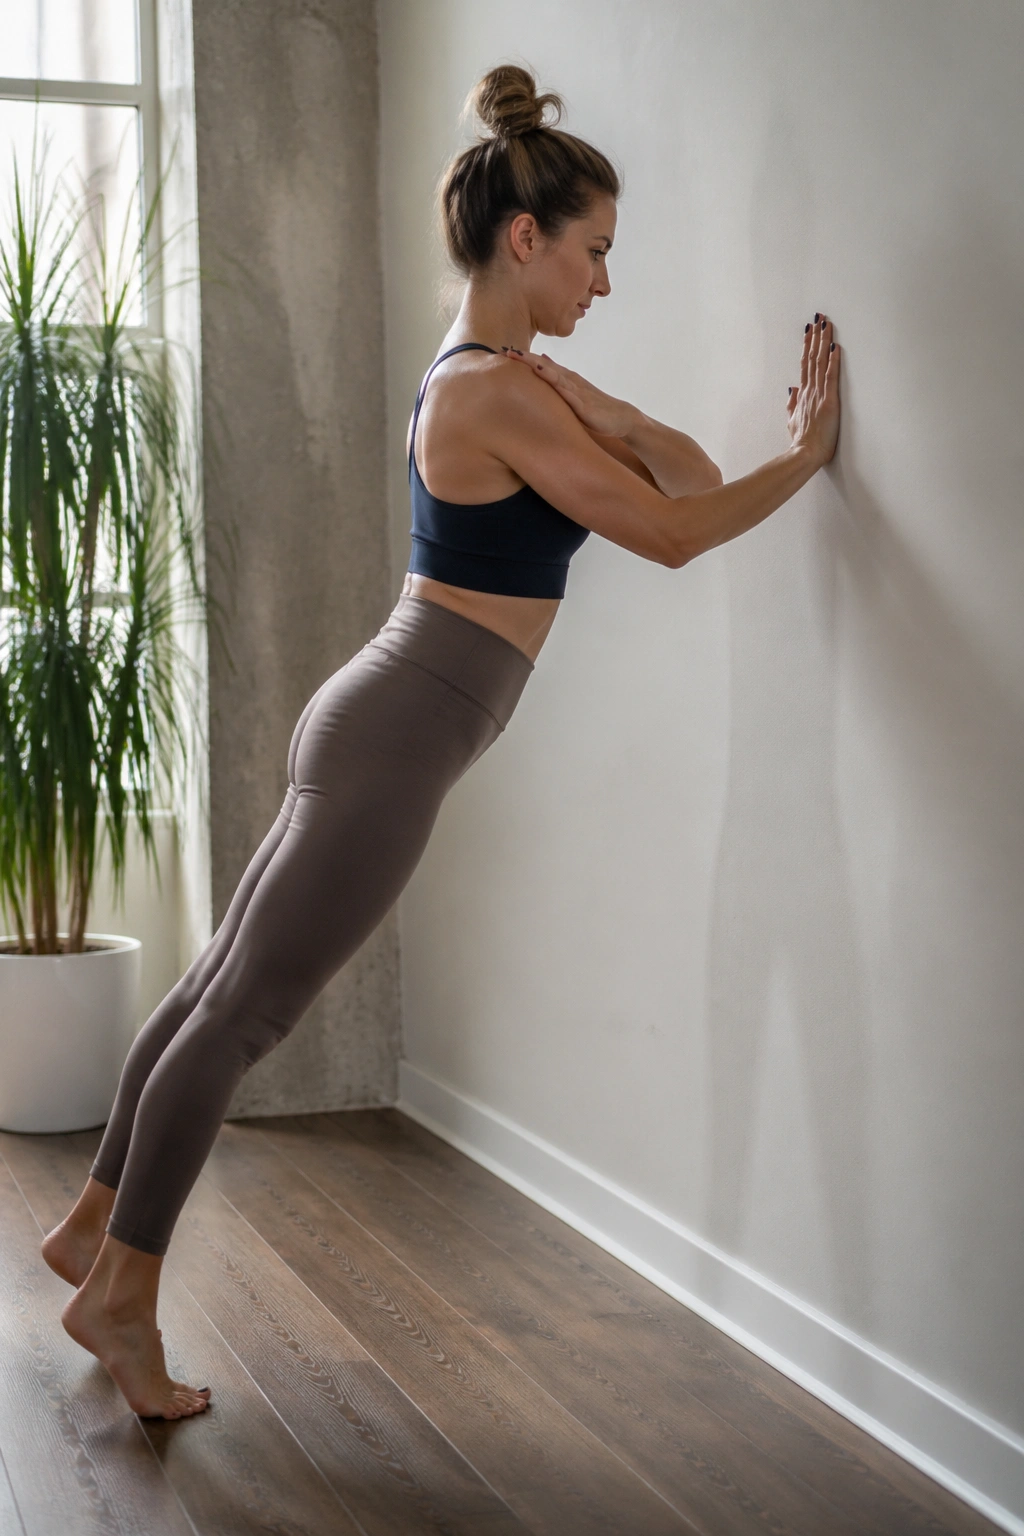
Stand facing the wall and place your hands on it at shoulder height, about a little more than arm’s length away. Walk your feet back until your body makes a long diagonal line, then brace your abs and tap one shoulder with the opposite hand. Set the hand back down, switch sides, and keep the hips from rocking.
This is a smart place to start if a floor plank feels like too much on the wrists or low back. The incline gives you support, but the shoulder taps still ask the trunk to resist twisting. That anti-rotation work is where the Pilates flavor lives.
Aim for 6 to 10 taps per side. Move like you’re balancing a glass of water on your lower back. If your shoulders creep toward your ears, step closer to the wall and slow the taps down.
6. Wall Toe Taps for Lower Abs
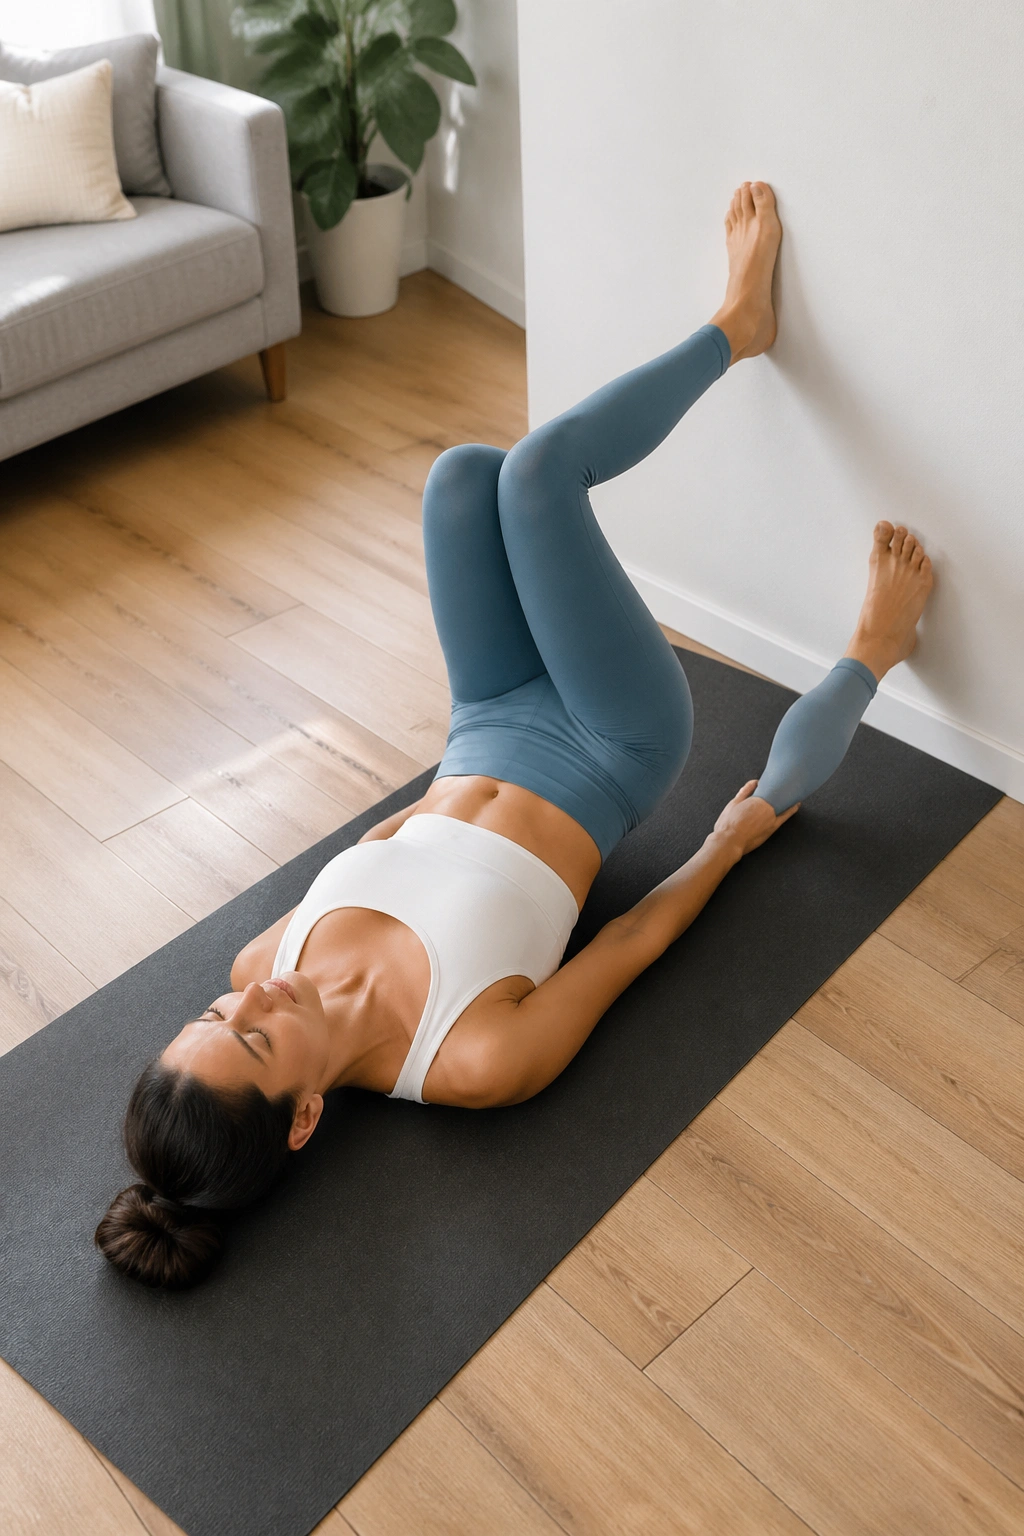
Lie on your back with your calves against the wall, knees bent at 90 degrees. Brace your core, then slide one foot down the wall until the toe lightly taps the floor, and bring it back to the starting point before switching sides. Keep the other leg still the whole time.
Compared with a dead bug on the floor, the wall version gives you a little more structure. Your pelvis knows where to stay, which makes it easier to notice the moment your low back starts to arch. That’s the part that matters.
Do 8 to 12 taps per side, moving slowly enough that the pelvis stays quiet. If your lower back starts lifting, shorten the slide and keep both knees more bent. Little range, clean form. That wins here.
7. Wall Sit With Arm Circles
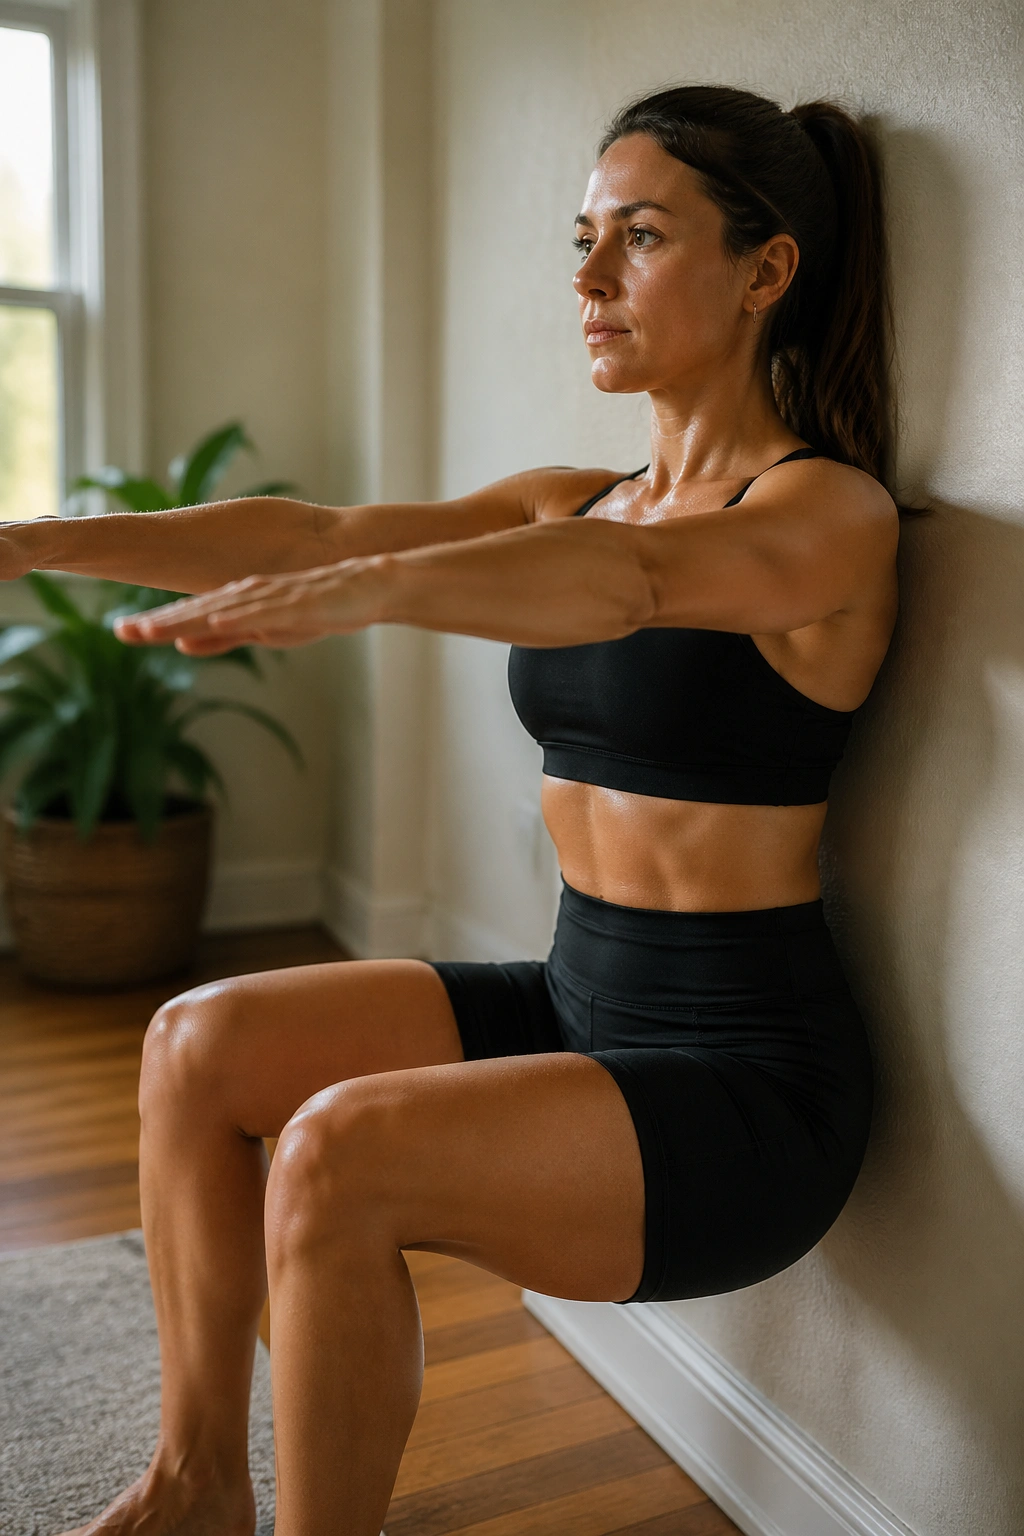
Set yourself in a wall sit, knees bent around 90 degrees and feet far enough forward that your shins stay fairly vertical. Then float both arms out in front of you and draw small circles, 10 forward and 10 backward, while you keep the sit position steady.
Your thighs will heat up first. Then your shoulders. Then your breath gets a little louder, which is fine as long as it stays smooth and you don’t start hunching through the neck.
Hold the wall sit for 20 to 45 seconds, or break it into two shorter rounds if your legs shake hard. Keep the circles small — about the size of a dinner plate. Big circles turn this into a circus act, and the wall does not need a circus.
8. Side-Lying Leg Lift With the Wall as Support
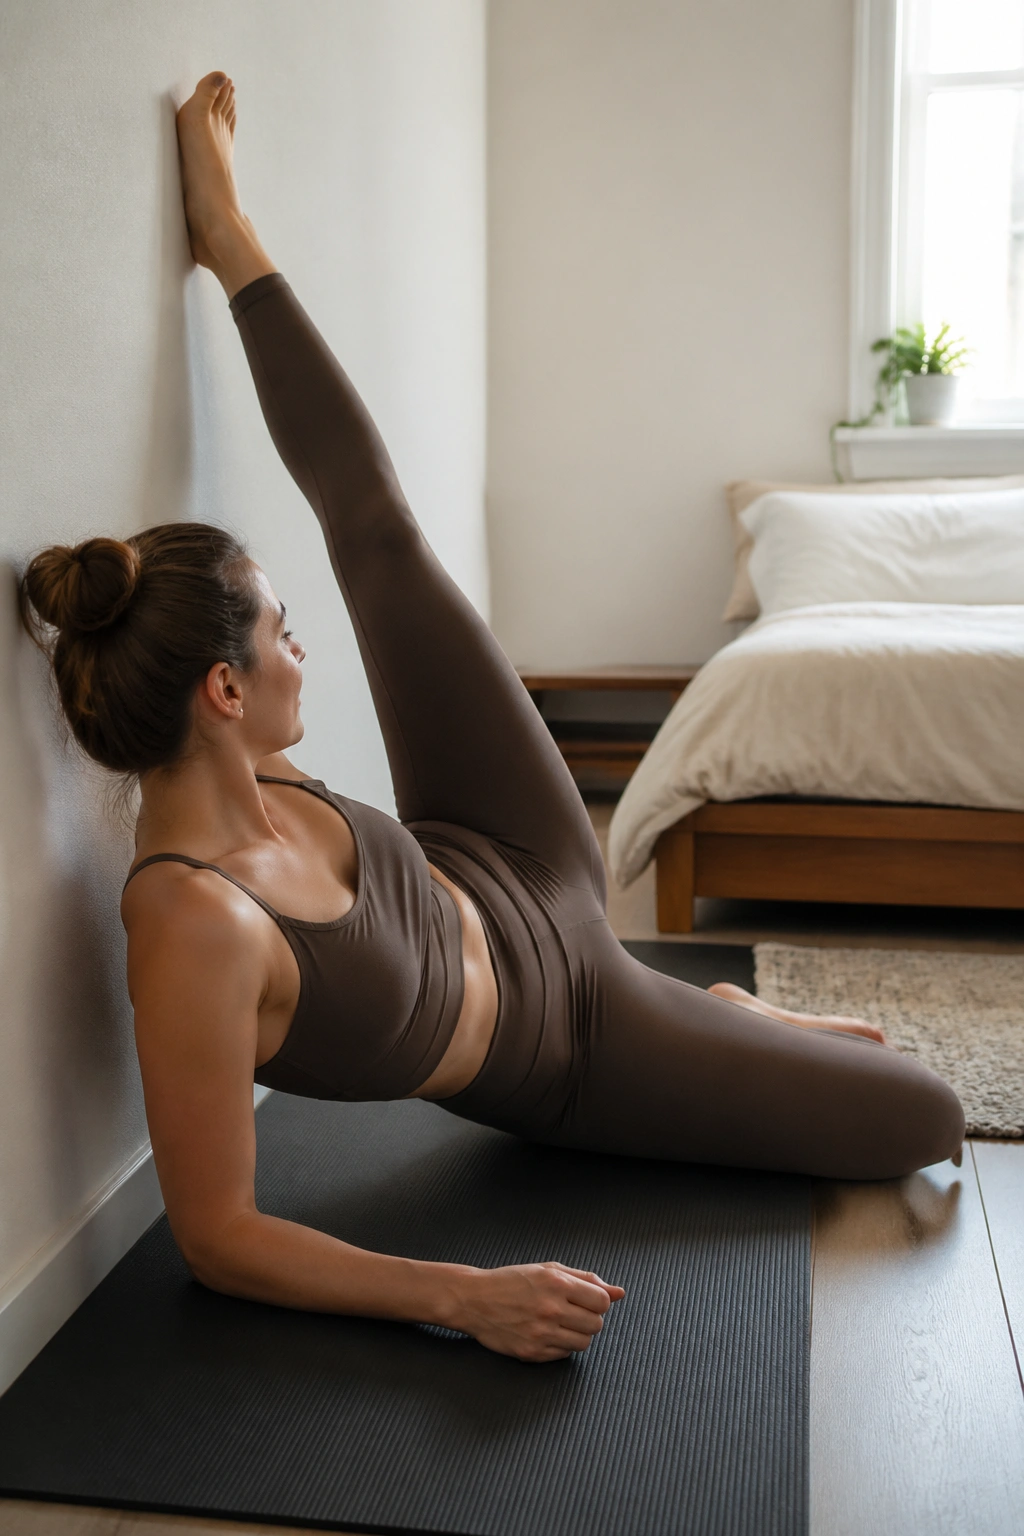
Outer hips do not need fancy gear to wake up. Lie on your side with your back a few inches from the wall, bottom knee bent for balance, and the top leg straight with the heel brushing the wall. Slide that top heel up the wall 4 to 6 inches, then lower it slowly without collapsing through the waist.
The wall gives you a line to follow, which helps keep the leg from drifting forward and taking the work out of the glute medius. That little outer-hip muscle matters more than people think. Weakness there is one reason knees cave in during squats and lunges.
Try 10 to 12 controlled lifts per side. Keep the toes pointing straight ahead or slightly down, not flared open. If your hip flexor grabs, make the slide smaller and think about lengthening the leg rather than forcing height.
9. Wall Glute Bridge March
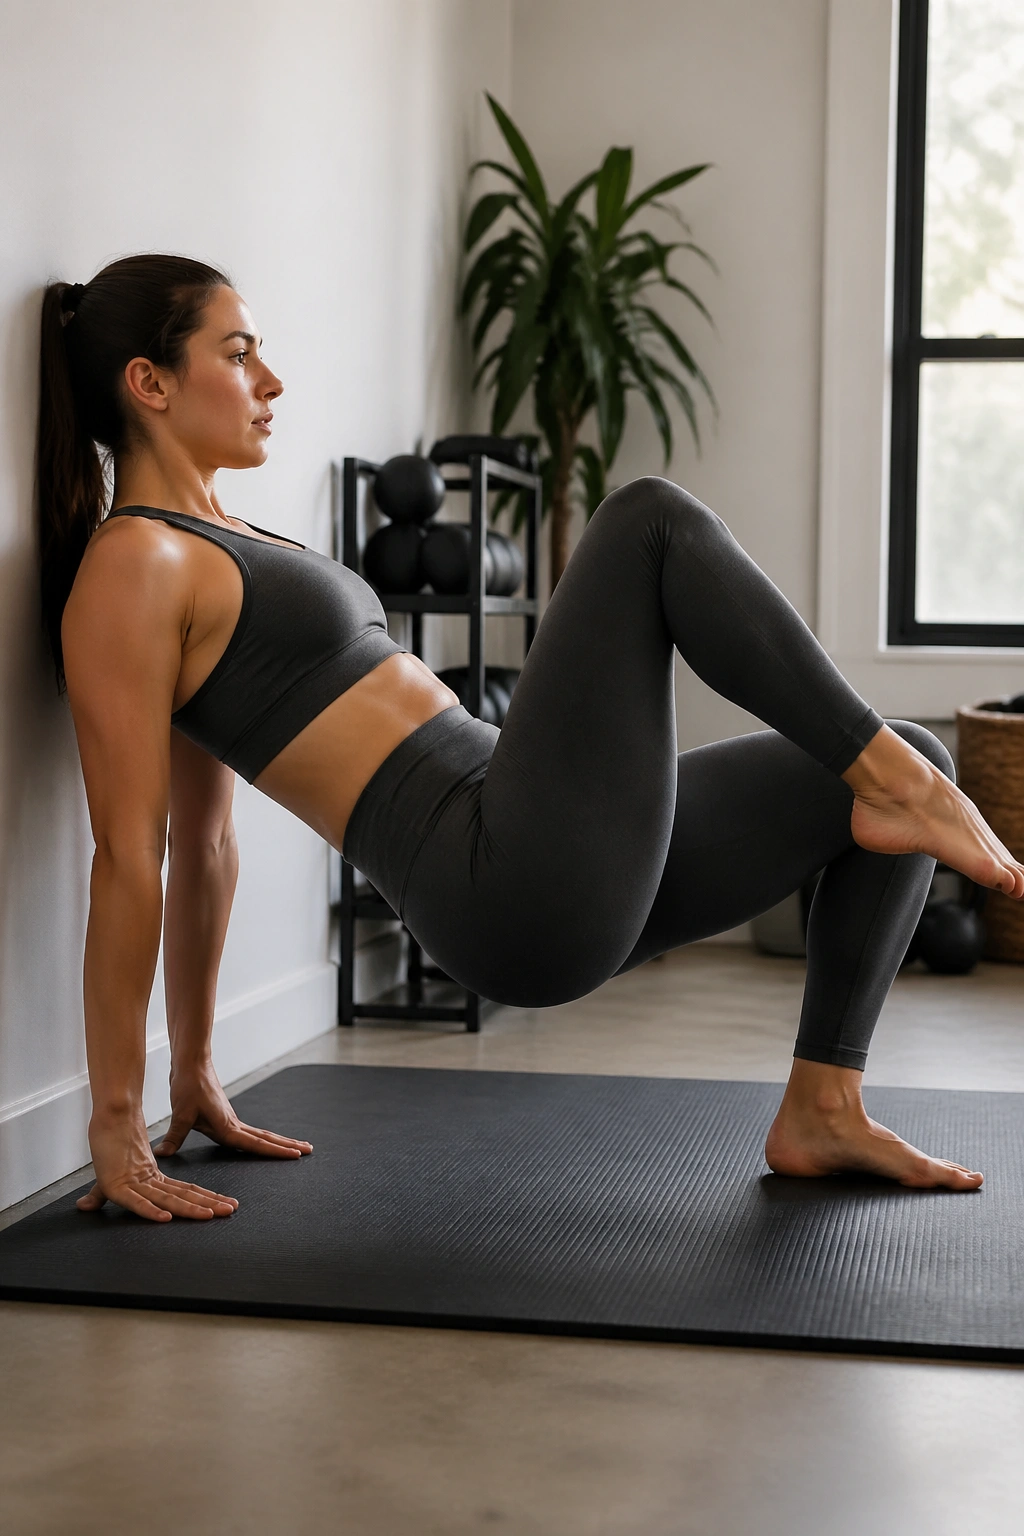
Can a bridge still be stable if one foot leaves the wall? Yes — if you keep the pelvis boring on purpose. Start in a wall bridge, lift your hips, then bring one knee toward your chest just a few inches without letting the hips drop or twist. Put that foot back on the wall and switch sides.
What to feel
- Glutes holding the lift.
- Abs stopping the pelvis from rocking.
- Hamstrings working, but not cramping.
- A steady rib cage, not a flared one.
Do 6 to 8 marches per side. The temptation is to lift the knee too high; don’t. A small march done cleanly is much harder than a sloppy high one. If your hips wobble, keep both feet on the wall and simply hold the bridge for 5 breaths instead.
10. Wall Pilates Push-Up Plus
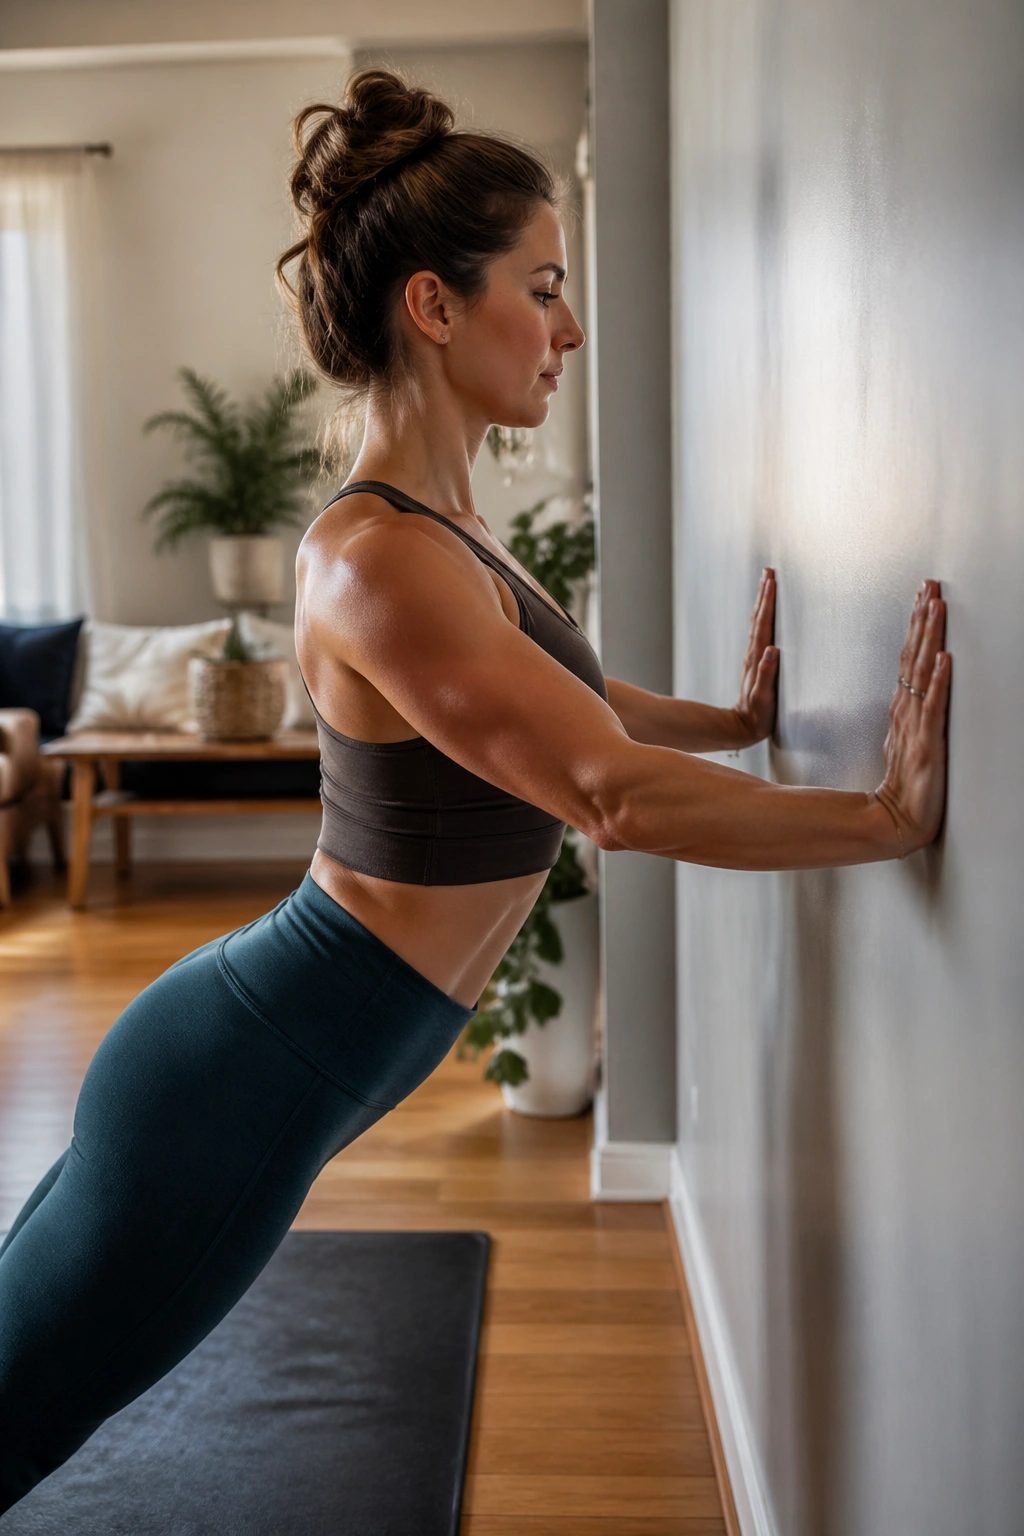
Stand facing the wall, hands a little wider than shoulder-width, and step your feet back until your body is in a firm diagonal plank. Lower your chest toward the wall, then press away and add a small extra push at the top so the shoulder blades spread apart a touch.
That extra “plus” is the useful part. It wakes up the serratus anterior, the muscle that helps the shoulder blade glide instead of pinching. People skip it because it feels tiny. Tiny is the point.
Do 8 to 15 reps, and keep the elbows angled about 30 to 45 degrees from your sides. No chin jutting. No rib flare. If the movement gets messy, move your feet closer to the wall and make the angle easier.
11. Wall Walkout to Pike
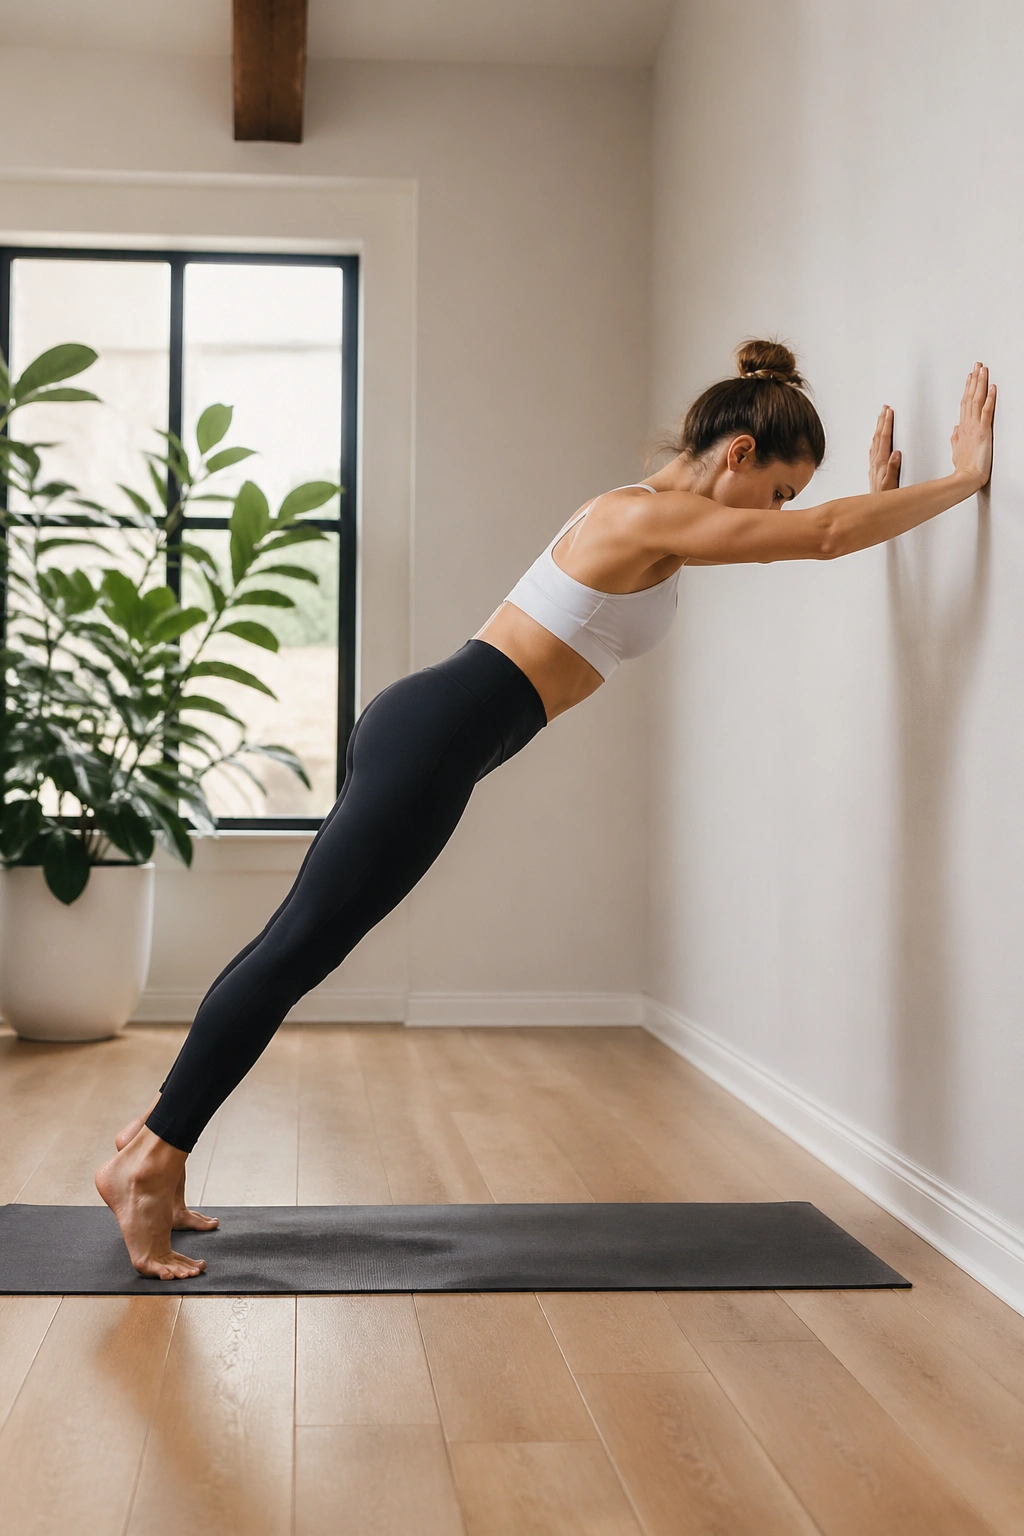
Stand facing the wall with your hands on it at shoulder height, then walk your feet back until your body makes one long diagonal. Exhale, draw your hips a little back and up, then walk your hands and feet back to the starting point with control.
This is a nice way to work the core without jumping straight into floor pikes or advanced inversion work. The wall keeps the line clear. You can feel whether you’re hinging from the hips or just bending your spine in half, which is a useful thing to know.
Do 6 to 8 slow repetitions. Keep the shoulders away from the ears and the back of the neck long. If your wrists get cranky, keep the hands higher on the wall and shorten the walkout. Simple fix. Better form.
12. Wall Calf Raise and Balance
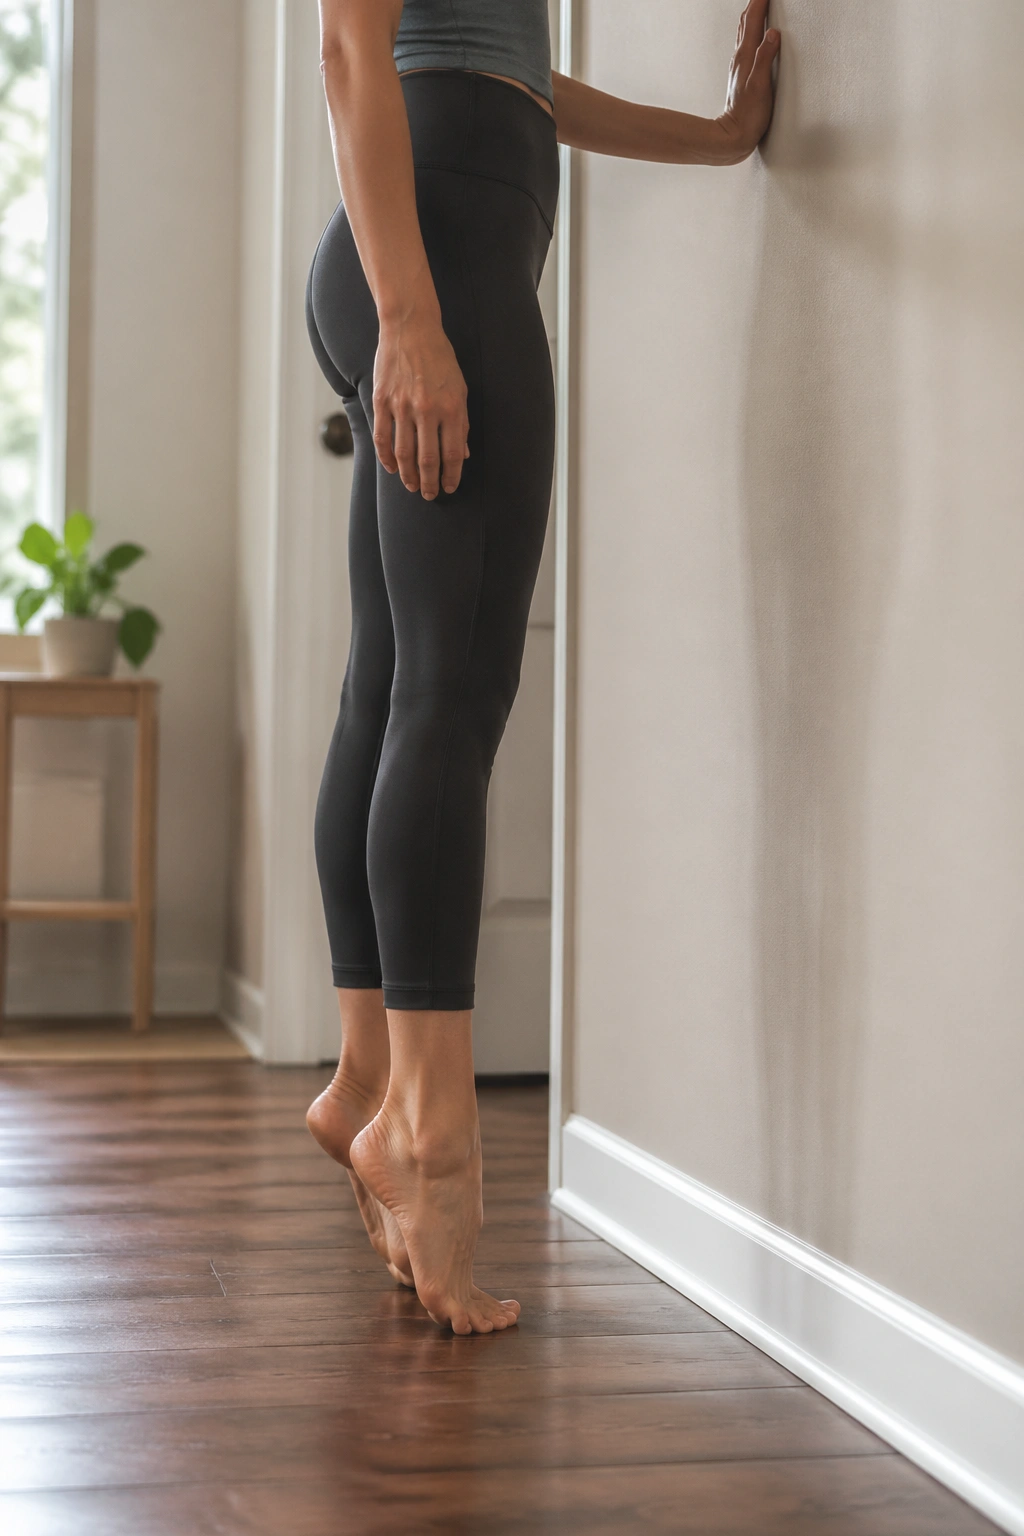
Why do calf raises belong in a Pilates list? Because ankle control shapes the whole chain above it. Stand one hand lightly on the wall, lift both heels off the floor, hold for a second, then lower with a slow count of 3. If you want more challenge, shift into a single-leg raise near the wall.
The slow lowering phase is where the work hides. Most people pop up fast and drop down faster. That gives you almost nothing. The wall keeps balance stress low enough that you can spend your attention on the ankle and foot instead.
Aim for 12 to 15 reps, or 8 per side if you switch to one leg. Keep the big toe grounded on the way up and down. If the ankles roll outward, bring the feet a little closer together and stay more centered over the ball of the foot.
13. Single-Leg Wall Knee Lift
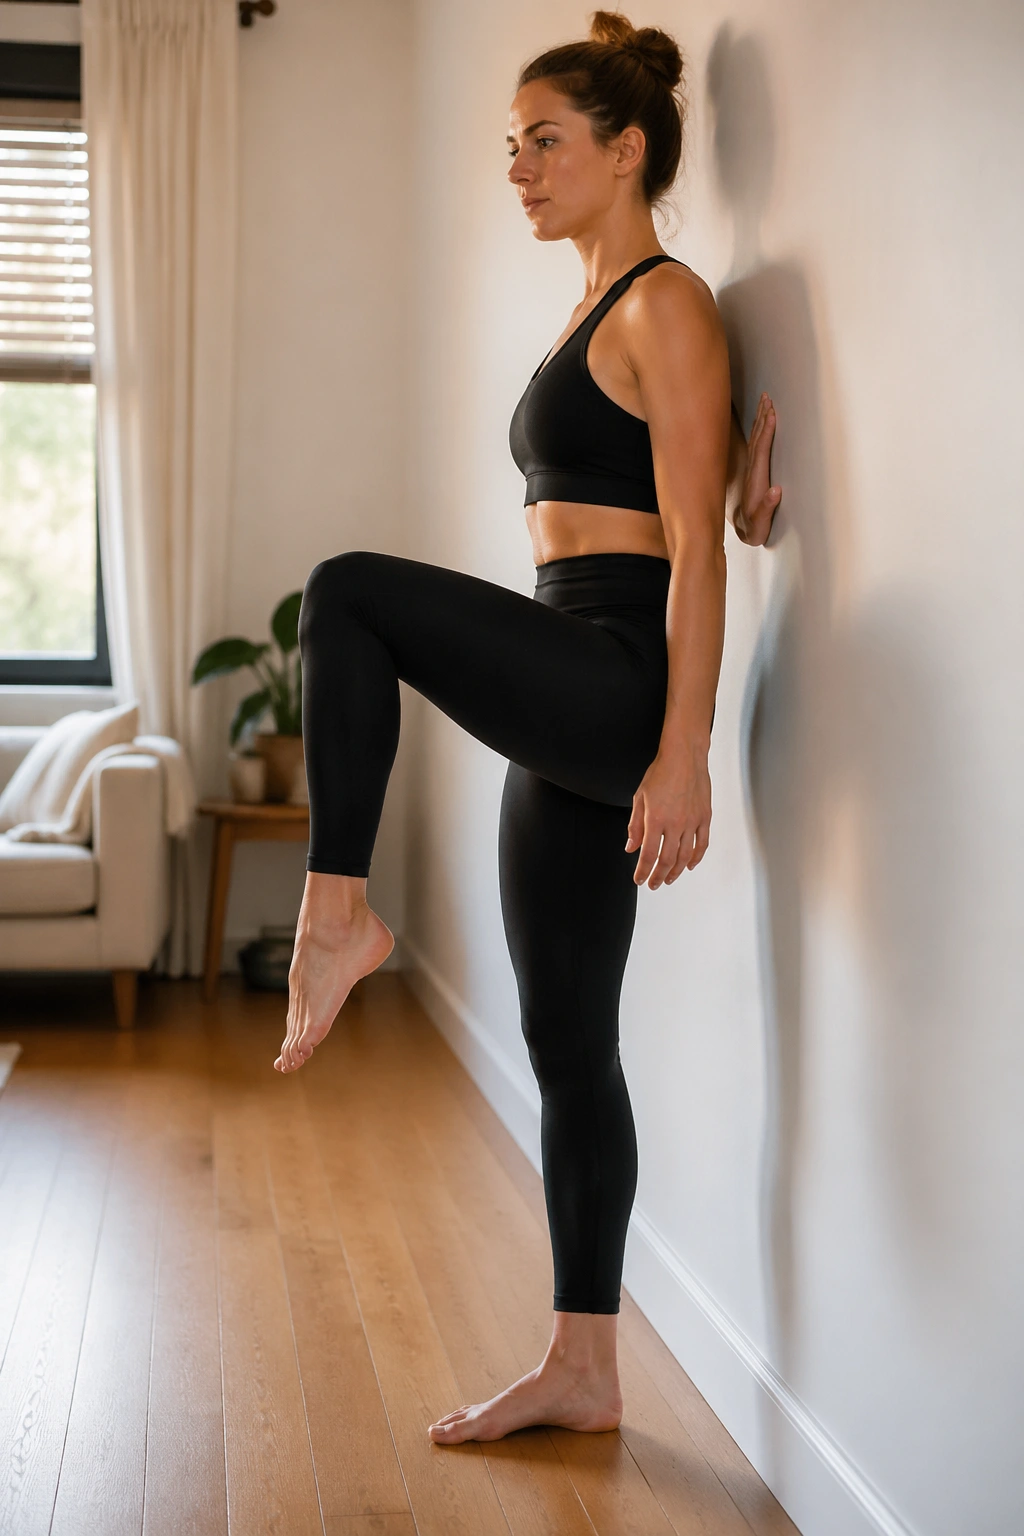
Stand side-on to the wall with one hand touching it lightly. Shift your weight onto the standing leg, then lift the other knee toward hip height and hold for 2 breaths before lowering. The lifted foot can stay flexed, which helps keep the leg active instead of floppy.
This looks plain, and it is a little plain. That’s why it works. The standing leg has to organize the foot, ankle, hip, and trunk all at once, and the wall only gives you enough support to keep the balance honest.
Do 6 to 10 reps per side. Keep the pelvis level, and don’t lean into the wall like it owes you something. If the standing hip feels unstable, lower the lifted knee and make the hold shorter. A 1-second pause still teaches control.
14. Wall Mermaid Side Bend
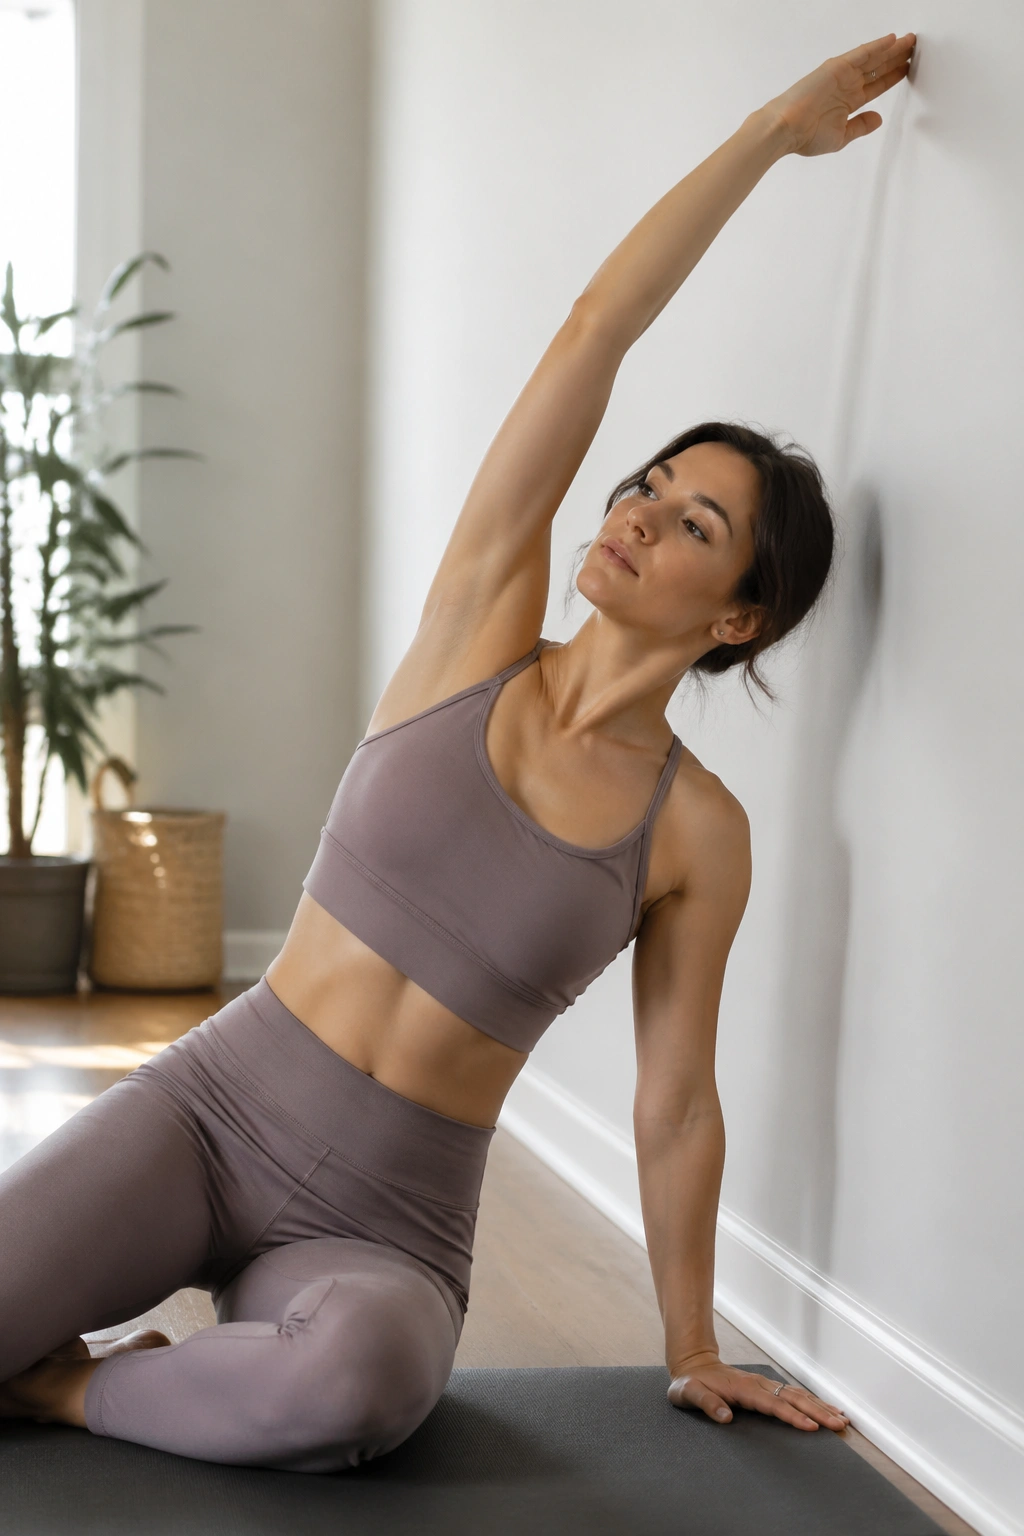
This is the kind of side bend that can make your ribs feel alive again. Sit side-hip to the wall with your lower hand on the floor and your upper arm reaching overhead. Inhale to lengthen, then exhale and arc the top ribs away from the wall without collapsing forward.
The wall gives you a clean line for the torso, which helps keep the movement out of the shoulders and in the side body. That matters if your neck tends to take over every reaching exercise. I like this one after a lot of sitting, because the side waist usually feels sticky.
Hold the bend for 2 to 3 breaths per side, or flow through 4 slow repetitions. Keep the lower shoulder heavy and the chest open. If the hip on the floor lifts, sit on a folded towel to make the position more comfortable.
15. Wall Torso Twist Reach
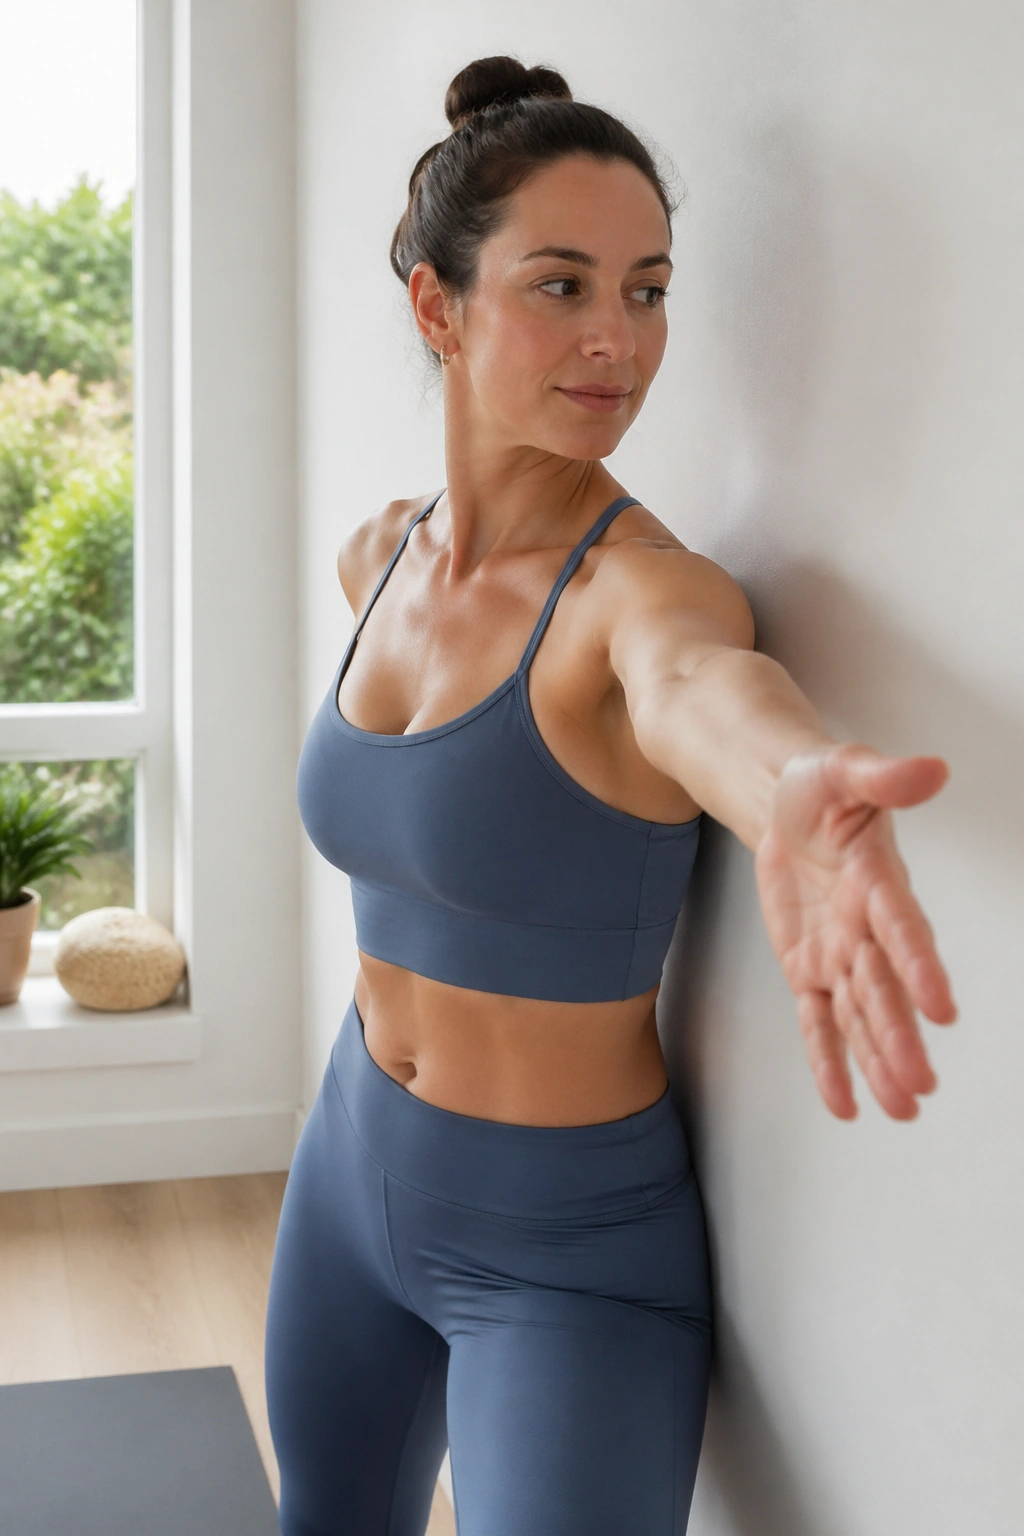
What makes a twist useful instead of random? The hips stay quiet. Sit or stand close to the wall, extend one arm forward, and rotate the rib cage gently toward the wall while the pelvis stays facing ahead. Reach a few inches farther on the exhale, then return on the inhale.
How to get the most from it
- Start the turn from the ribs, not the neck.
- Keep the jaw relaxed.
- Use a slow 3-count turn and 2-count return.
- Stop before the lower back starts to pinch.
Do 5 to 8 reps per side. The movement should feel like wringing the upper trunk, not yanking through the spine. If your shoulders ride up, place the opposite hand on your ribs and remind them to soften down.
16. Wall Hamstring Scoop
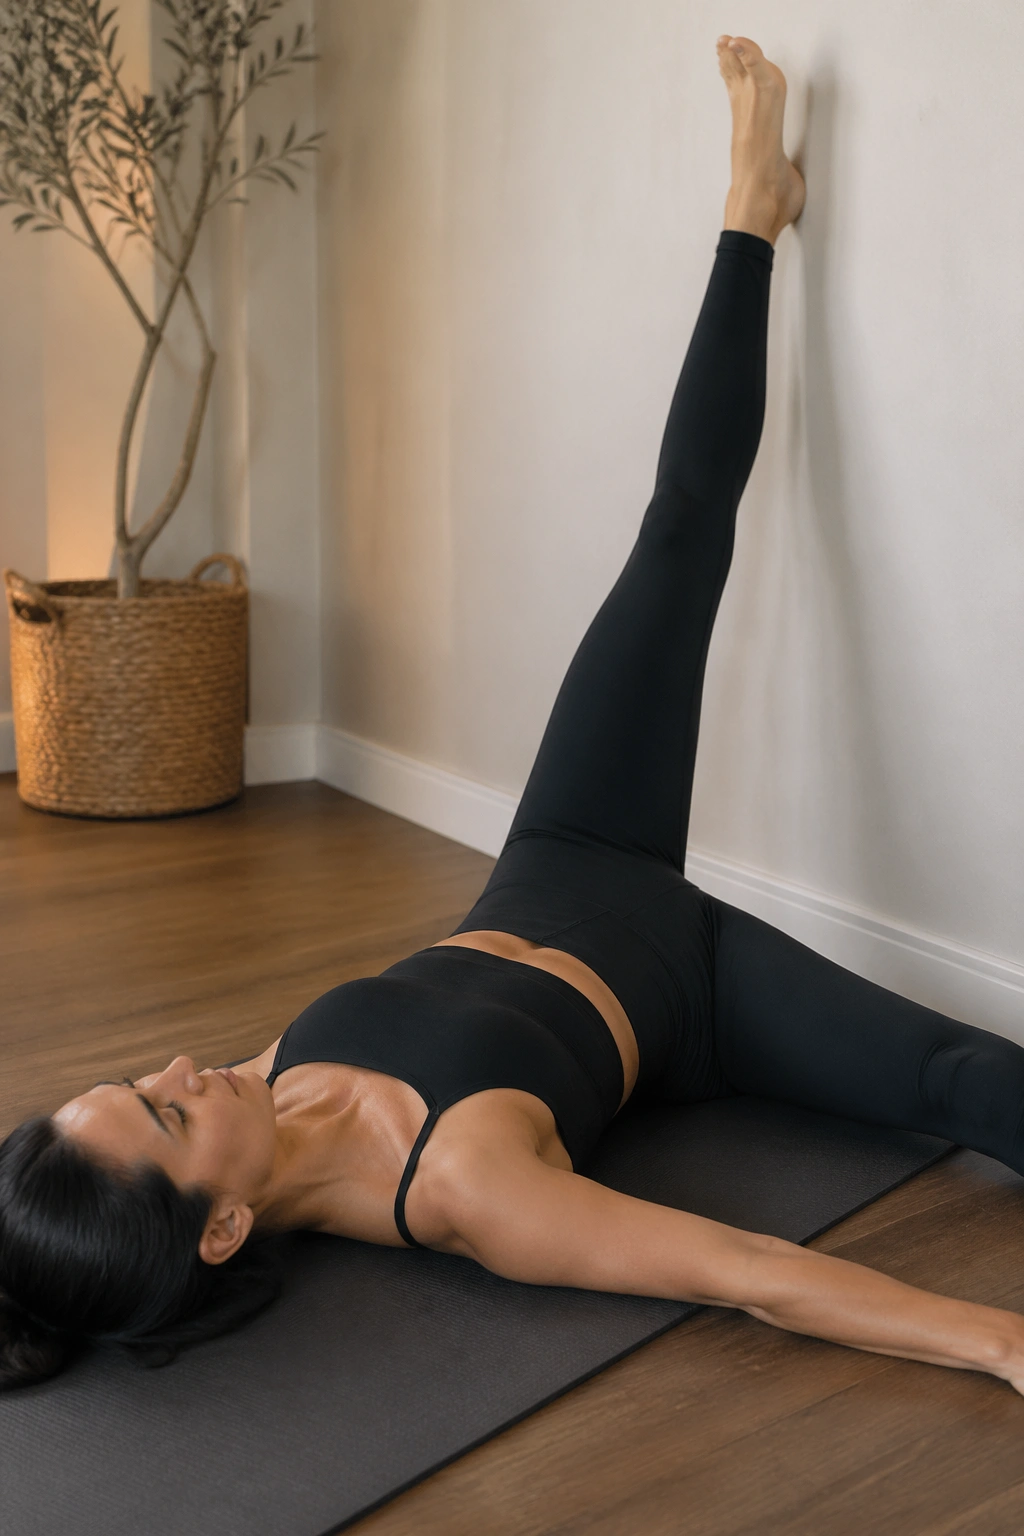
Lie on your back with one heel on the wall and the other leg long on the floor or bent comfortably. Slide the heel on the wall downward a few inches as though you’re scooping the wall with the heel, then draw it back up without letting the pelvis rock.
That sliding action loads the hamstring in a way most people miss when they just hold stretches. You get control and length at the same time. Nice combination. The movement is tiny, but tiny is often enough when the target muscle is asleep.
Try 8 reps per side, with a 2-second lower and 2-second return. Keep the toes flexed toward your face. If your low back starts to arch, reduce the slide and press the opposite side of the pelvis a little more firmly into the mat.
17. Wall Hip Hinge and Reach
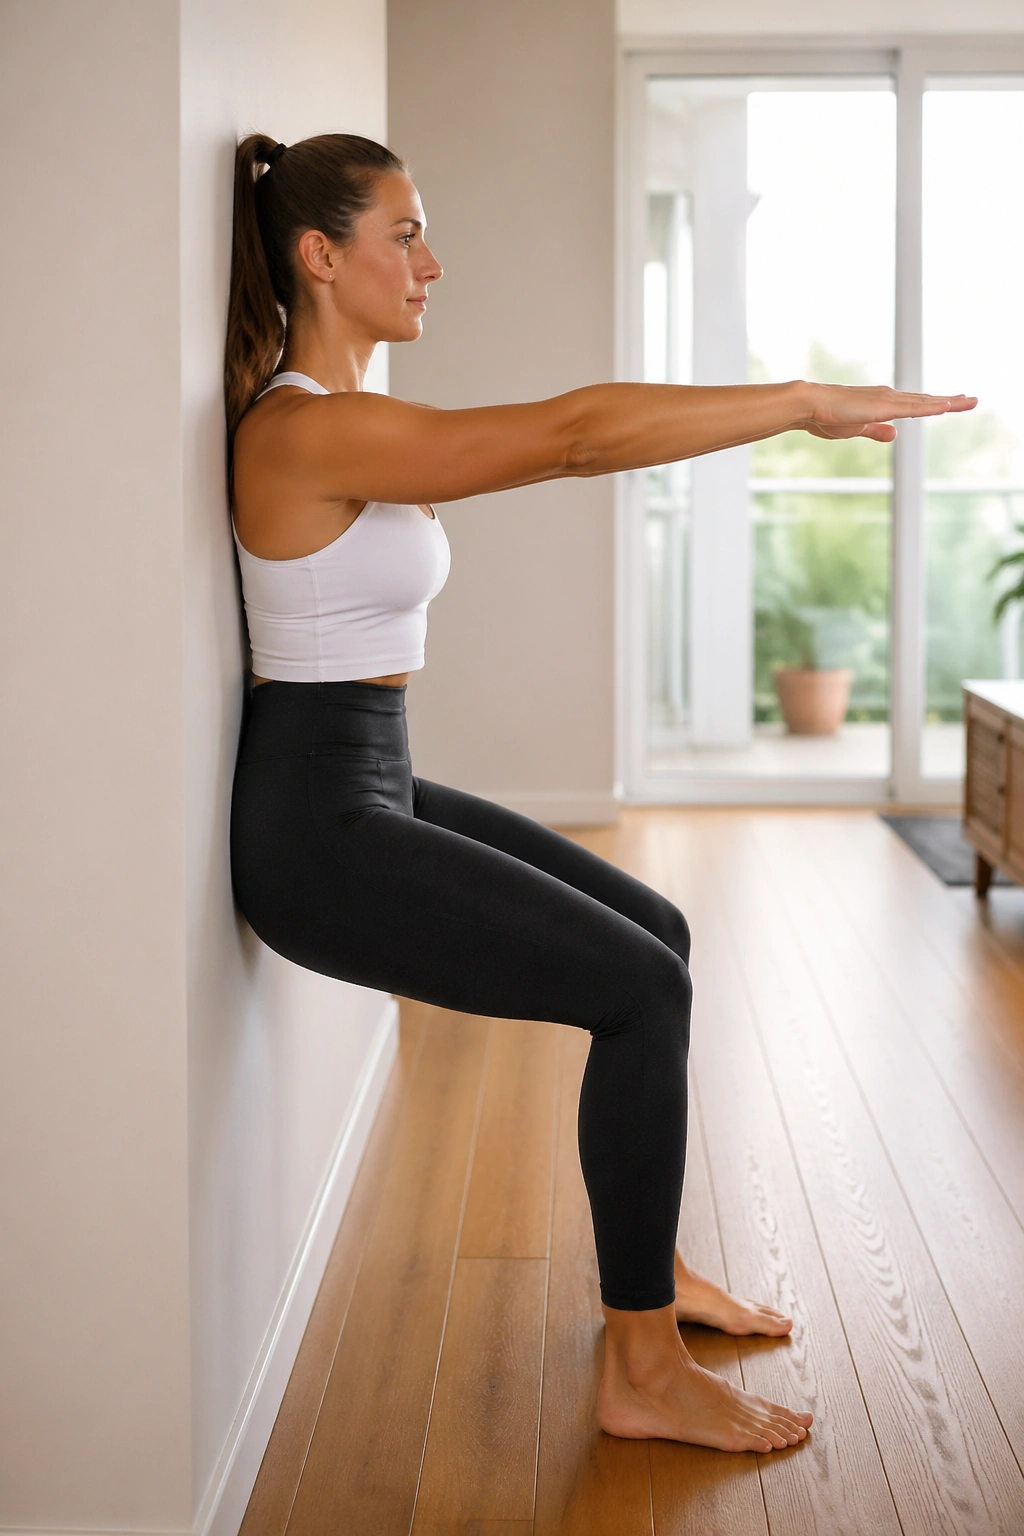
Stand about 6 inches in front of the wall with your back facing it. Push your hips back until they touch the wall, then reach your arms forward at shoulder height and stand back up by squeezing the glutes. The wall gives you a target, which keeps the hinge from turning into a squat.
This is a great drill for anyone who feels deadlifts in the low back instead of the hips. The moment the hips travel backward correctly, the wall catches them. You learn the pattern fast. And yes, your hamstrings will notice.
Do 8 to 10 slow hinges. Keep the weight centered in the heels and the spine long. If you feel the knees drifting far forward, shorten the reach and think “hips back first.” That cue works.
18. Wall Clamshell Pulse
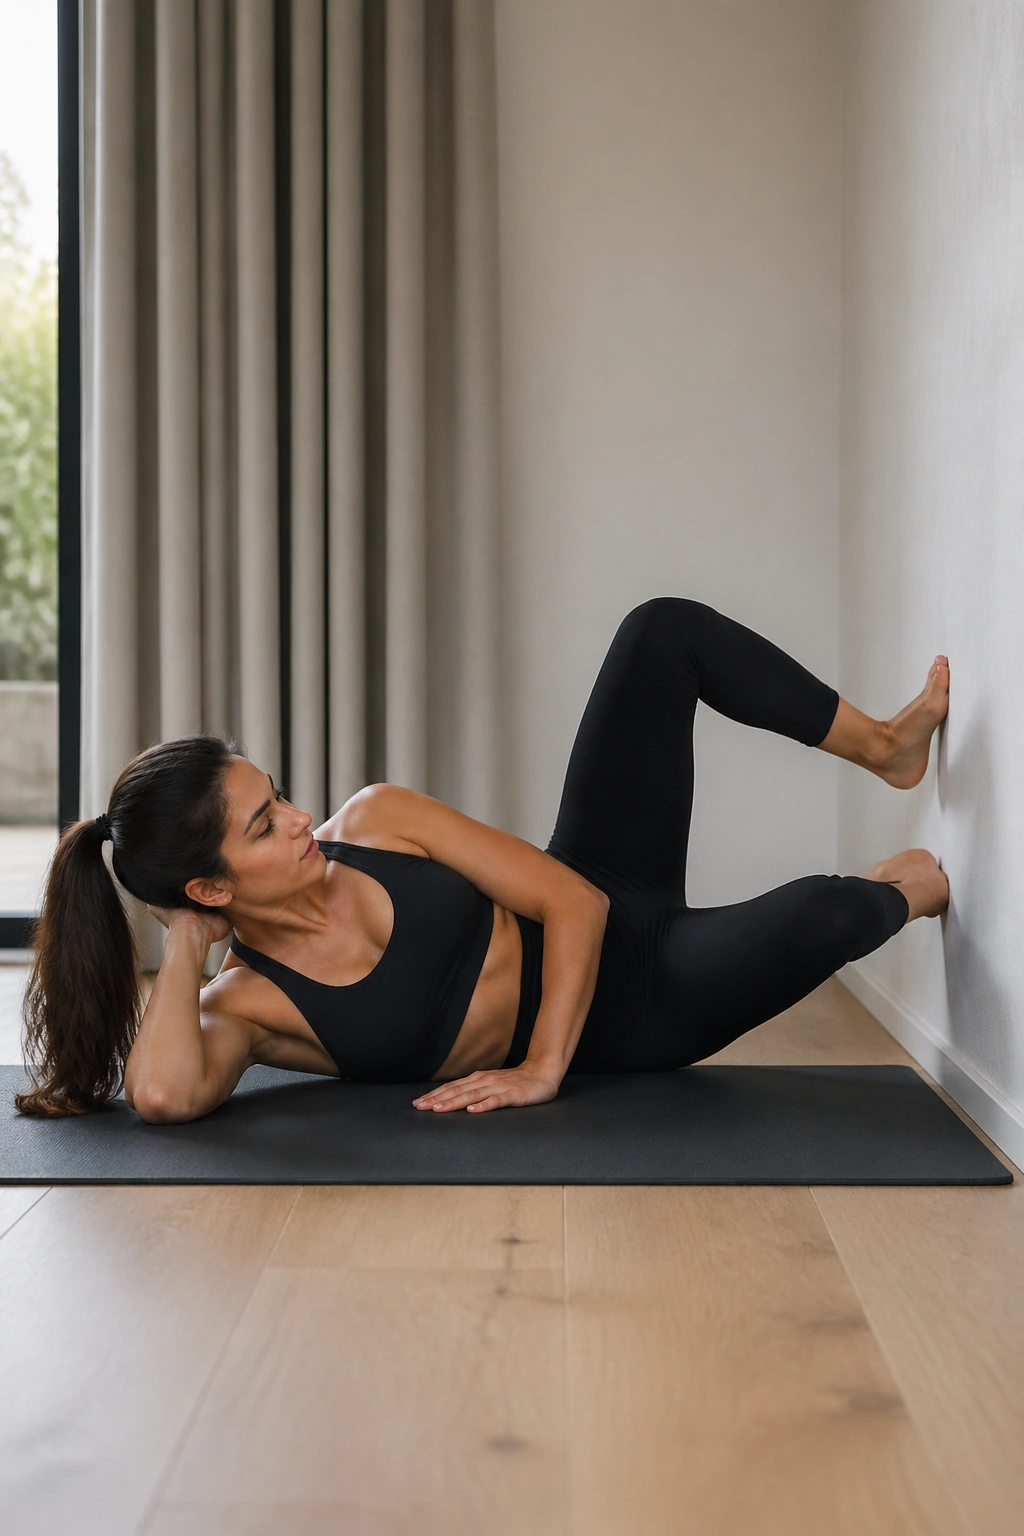
A band is not the only way to wake up the outer hips. Lie on your side with your knees bent and your feet pressed lightly into the wall, then keep the ankles together while you open the top knee a few inches and close it again. The motion should stay small and controlled.
The wall helps keep the feet stable, which is the whole trick. Without that support, people often roll backward or yank the knee open too wide. The result feels more like a shrug than a hip exercise.
Use 12 to 15 pulses per side, and pause for one breath with the knee open halfway through the set. Keep the waist long and the pelvis stacked. If the inner thighs cramp, move the feet a little farther from the wall and lighten the pressure.
19. Wall Side Plank Press
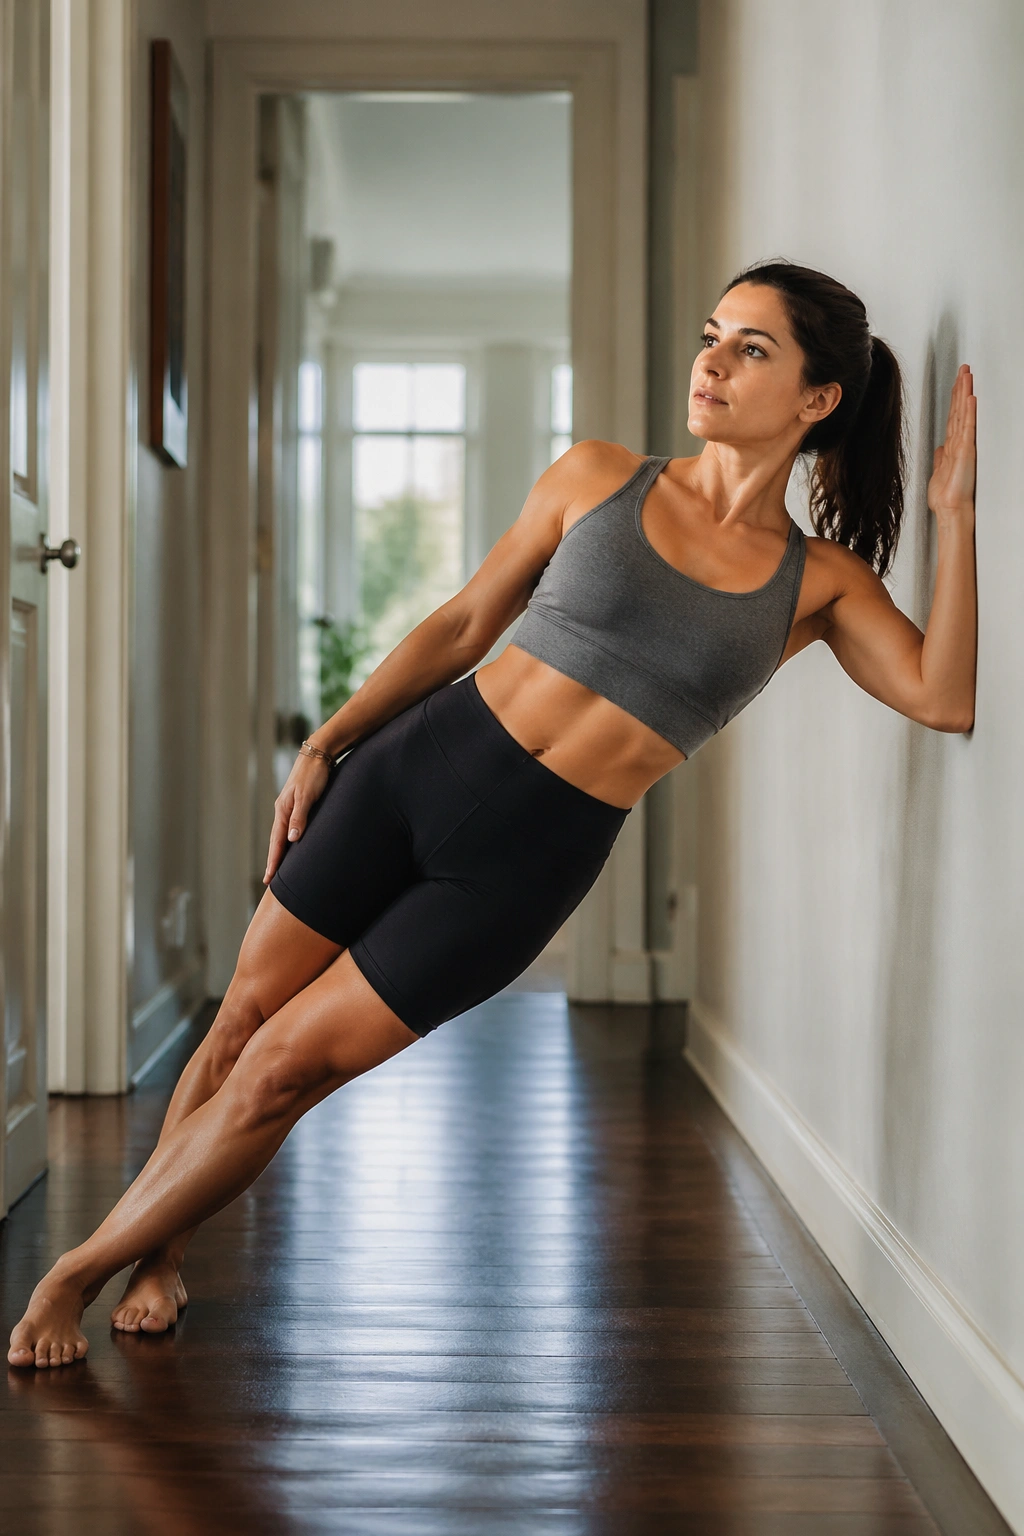
Can a side plank live on the wall? Absolutely. Stand side-on to the wall, place the forearm against it at shoulder height, step the feet out into a staggered stance, and press the forearm into the wall while you lift the opposite hip slightly. The body should feel long from head to heel.
This version is friendlier on the wrist than a floor side plank, but it still makes the obliques and shoulder stabilizers work hard. The press into the wall matters. That pressing force wakes up the side of the trunk in a clean, controlled way.
Hold for 15 to 25 seconds per side, or do 6 slow hip lifts if you want movement instead of a hold. Keep the shoulder blade broad and the neck soft. If the top hip rolls forward, square it up and shorten the stance.
20. Wall Bridge With Heel Slides
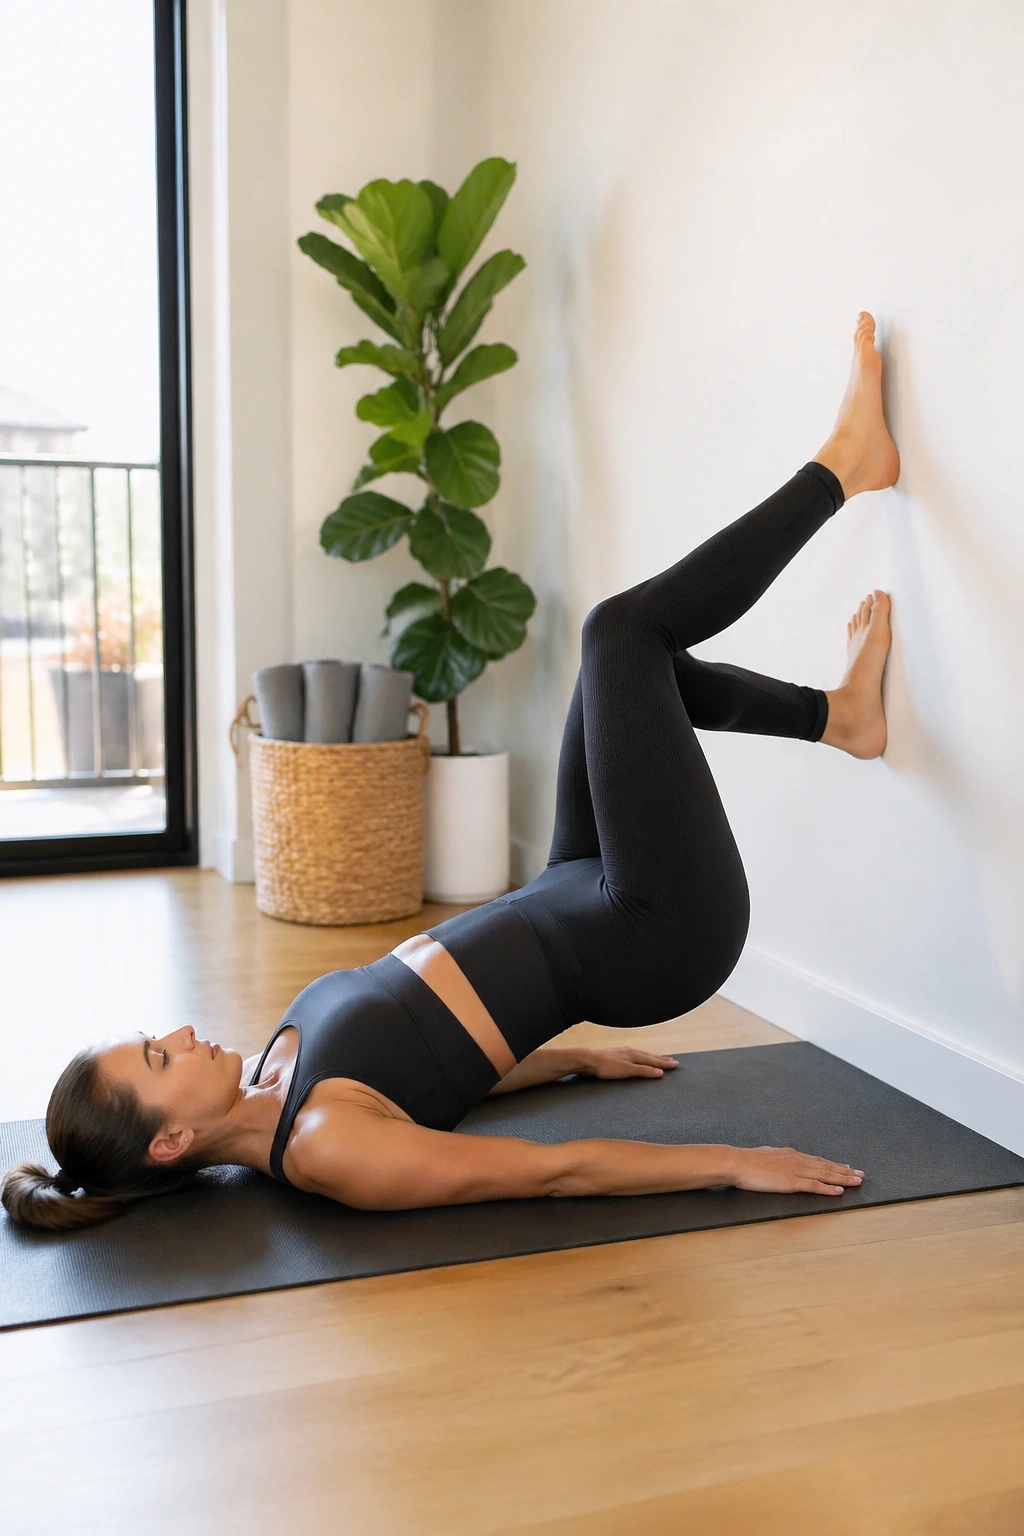
How do you make a bridge harder without turning it into chaos? Add one sliding heel. Start in a wall bridge, lift the hips, then slide one heel a few inches down the wall and pull it back to start before switching legs.
Why this works
The glutes have to keep the hips lifted while the hamstrings manage the slide. That combination exposes any weak spots fast. If one side of your pelvis wants to drop, the wall makes it obvious.
Do 6 to 8 slides per side. Keep the movement smooth and the hips level. If the slide feels too slippery, wear grippy socks or move the feet lower on the wall where the angle is a bit easier.
21. Wall Angel Core Hold
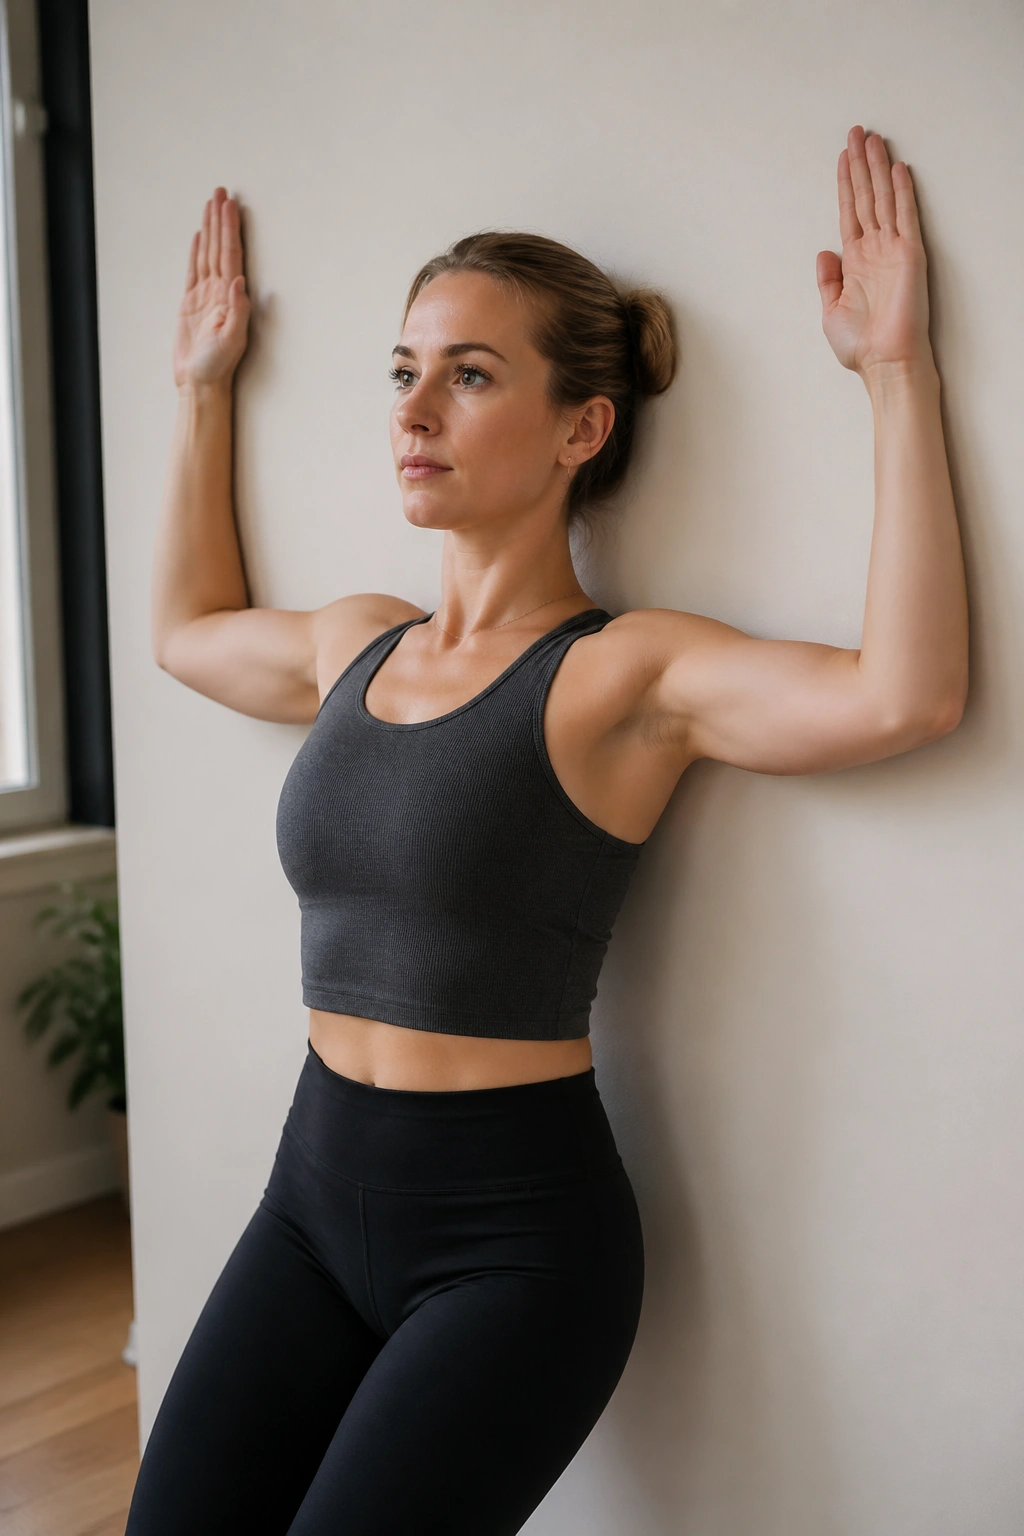
Stand with your back against the wall, feet a few inches forward, and press the back of your head, ribs, and pelvis as close to the wall as you can manage. Bend the elbows into a goalpost shape, then slide the arms up and down a short range without letting the ribs pop.
This one looks like a posture drill, and yes, posture is part of it. But the real job is core control while the shoulders move. If the abs stop working, the low ribs arch and the wall tells on you immediately.
Do 6 slow slides or hold the goalpost shape for 20 to 30 seconds. Keep your chin slightly tucked and the wrists as close to the wall as possible without forcing it. If the shoulders feel tight, reduce the range and breathe into the side ribs.
22. Wall Lunge and Arm Sweep
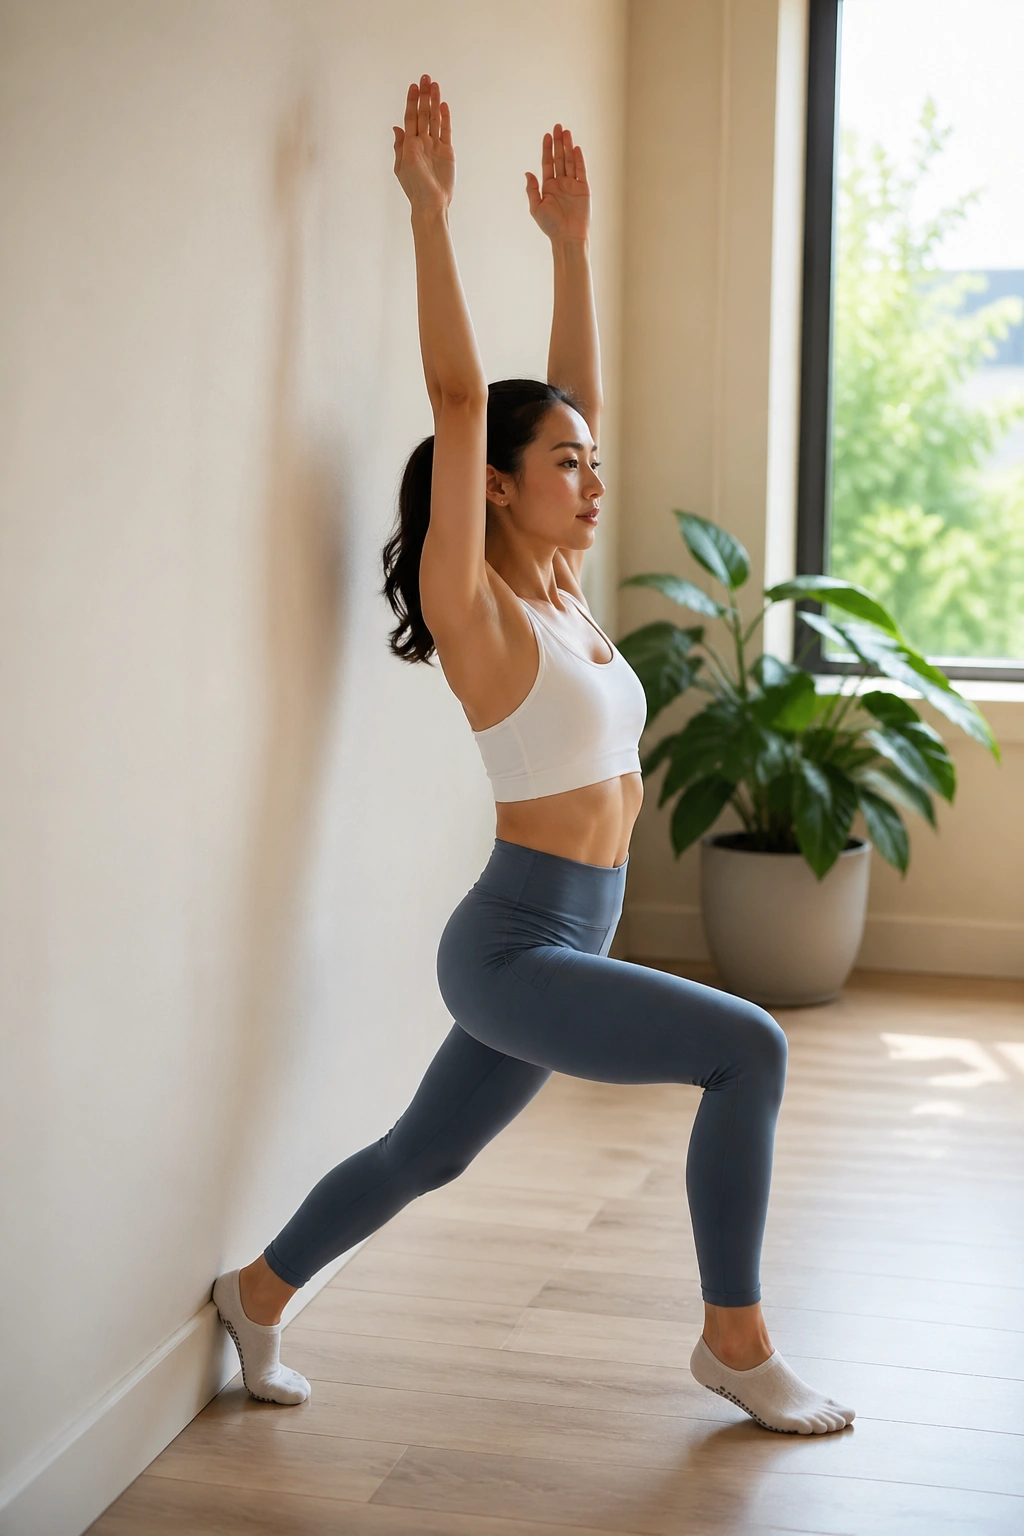
Step one foot forward and one foot back into a split stance, with the back foot far enough from the wall that you can bend both knees a little without wobbling. Lower into a small lunge while sweeping the arms overhead, then rise and bring them back down.
This is a sneaky good combo for the hips and upper back. The wall helps you stay upright, which keeps the front thigh honest and the spine from collapsing. A lot of people fold forward in lunges; the wall makes that hard to hide.
Try 8 reps per side, moving through a shallow range at first. Keep the front heel grounded and the back heel lifted. If the lower back arches on the overhead reach, stop the hands at eye level and keep the ribs down.
23. Wall Chair Pose With March
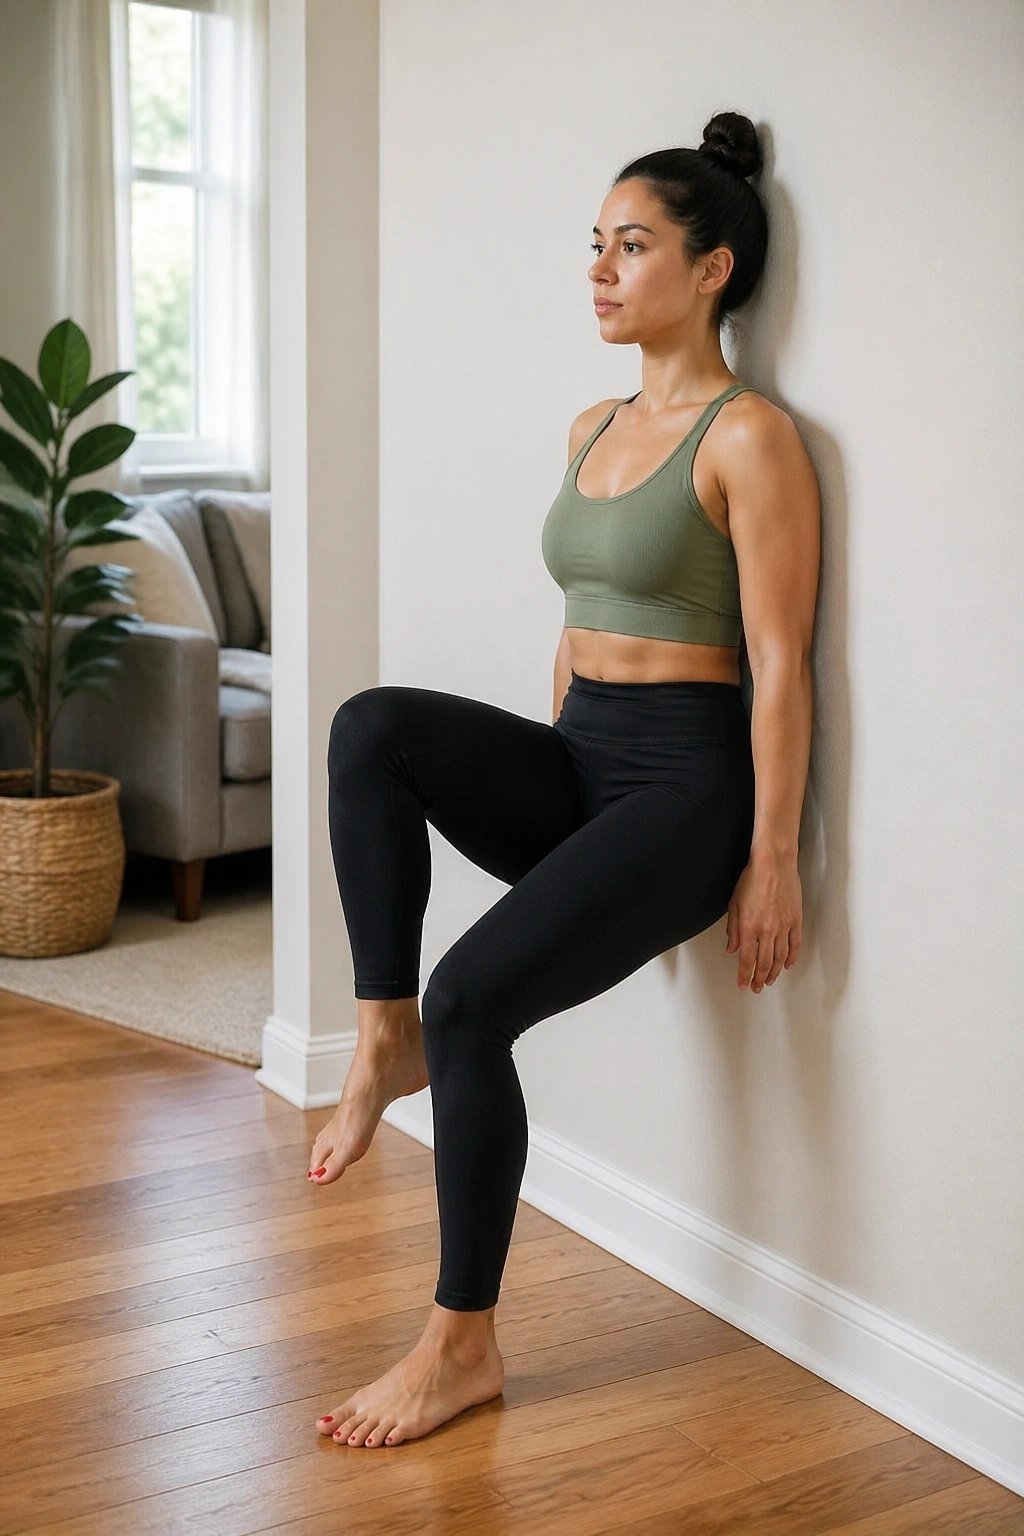
A wall chair pose gets interesting the moment you ask one leg to move. Sit back into a wall squat, then lift one foot a few inches off the floor, set it back down, and switch sides. The torso should stay calm while the legs do the fussing.
That marching step is the whole point. It trains the thighs, glutes, and deep core to keep the pelvis steady when the base changes. You can feel the wobble if the support leg is weak. Good. That’s useful information.
Hold the chair for 15 to 20 seconds, then march 6 to 8 times per side. Keep the knees aligned and the weight spread across the whole foot. If the move turns into a hip hike, come out of the squat a little higher and try again.
24. Wall Pilates Dead Bug Press
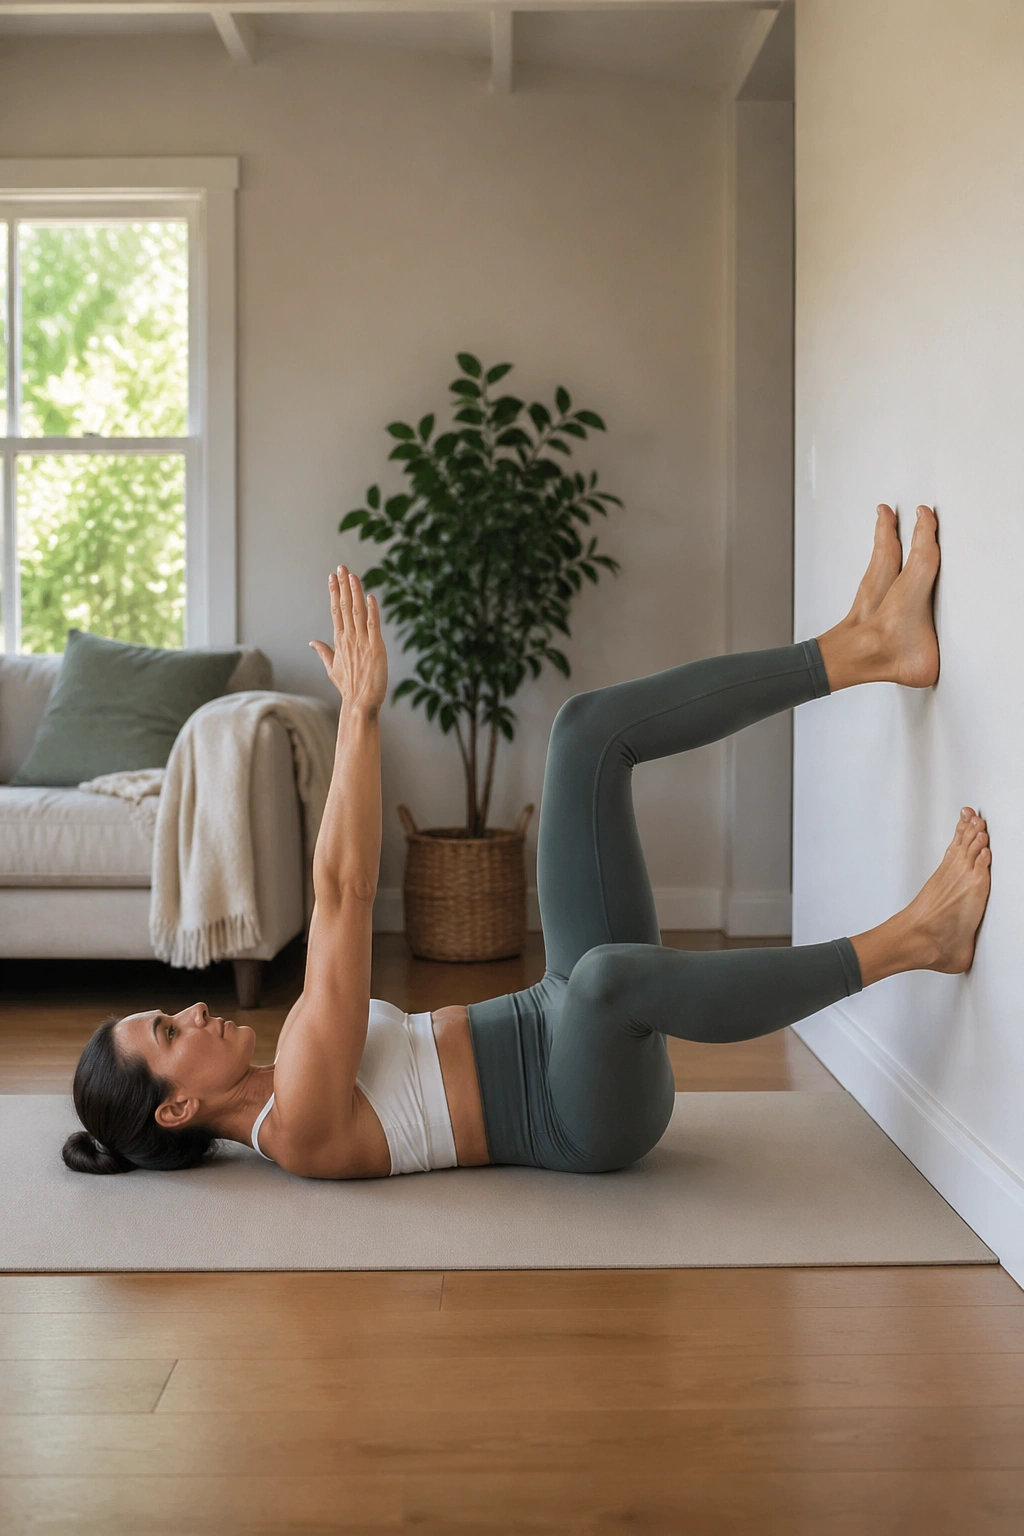
What if the floor version of dead bug feels too slippery? Press into the wall. Lie on your back with both feet on the wall and both arms reaching straight up, then lower one arm overhead while the opposite leg slides away from the wall a few inches. Return with control and switch sides.
What to feel
- The low back staying heavy.
- The ribs not popping up.
- The reach happening slowly, not flung out.
- The exhale helping the abs stay tight.
Do 6 to 10 reps per side. The move gets better when you go slower than you think you should. If your pelvis tilts, reduce the slide and keep one arm or leg still while the other moves. Control first. Range second.
25. Wall Hip Abduction Hold
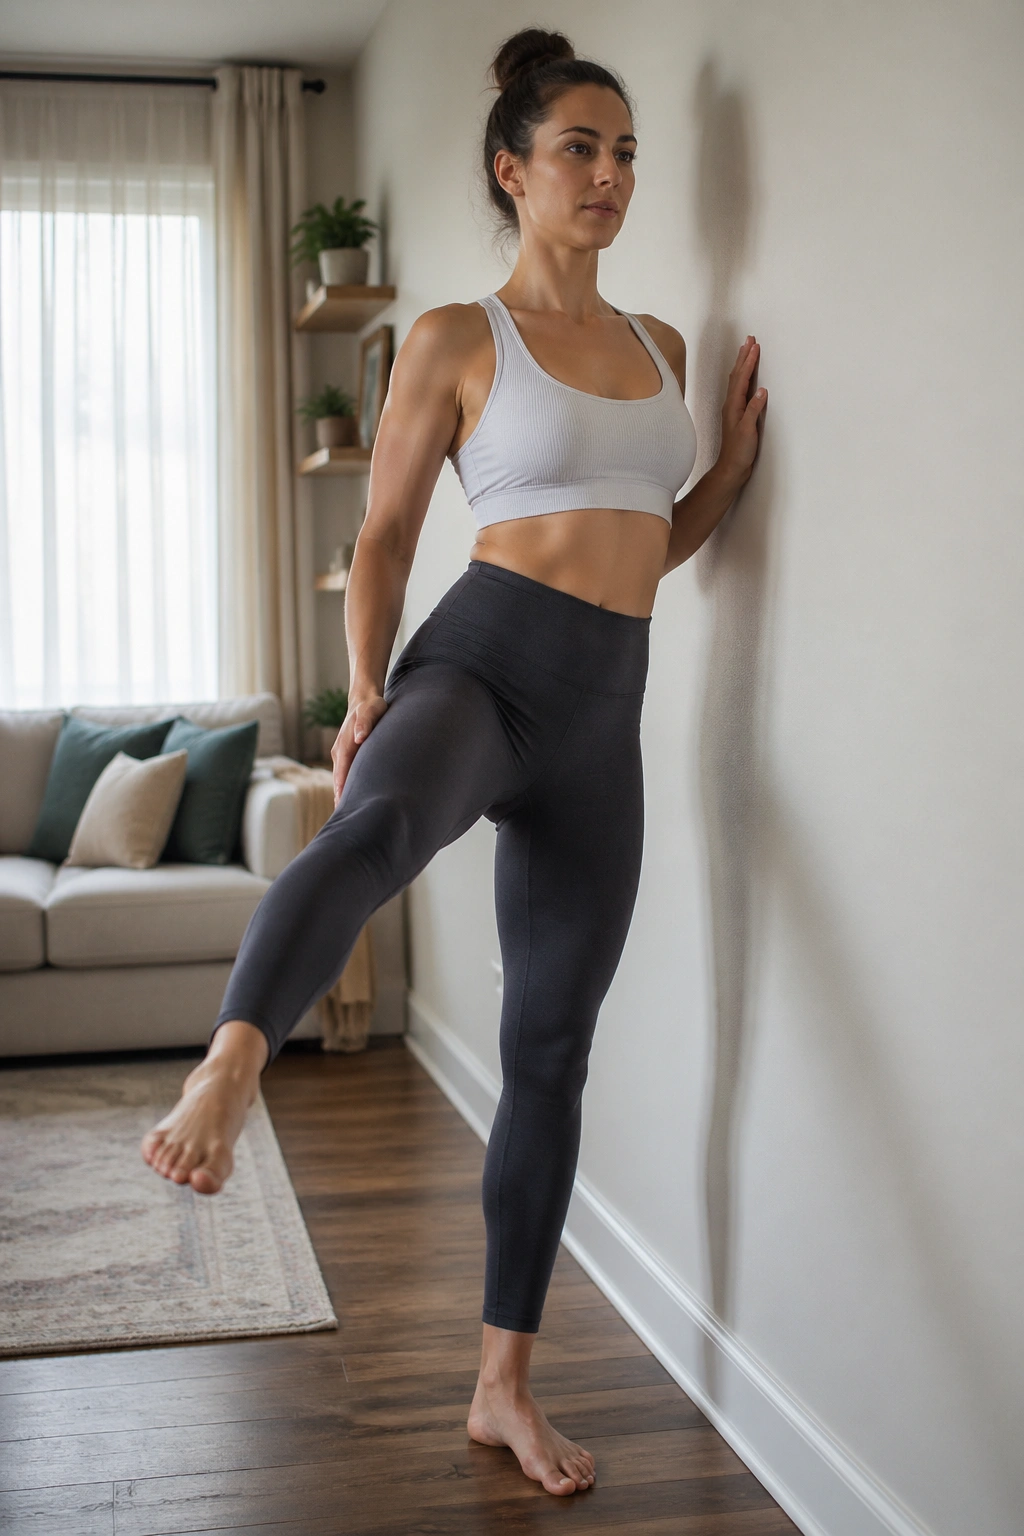
Stand side-on to the wall with one hand lightly touching it and the outside leg free. Lift the free leg out to the side about 6 to 10 inches and hold it there for 10 to 20 seconds, keeping the toes facing forward or just slightly down.
The side-hip muscles hate this kind of quiet work. They’d rather do fast swings. Holding the leg still is more annoying, which is exactly why it helps. The pelvis stays more level, the standing foot works harder, and the waist has to stay long.
Do 2 to 3 holds per side, then finish with 8 small pulses if you want a little more. Keep the torso tall and avoid leaning away from the lifted leg. If the lower back grabs, lower the leg and focus on the standing side instead.
26. Wall Spine Twist Stretch
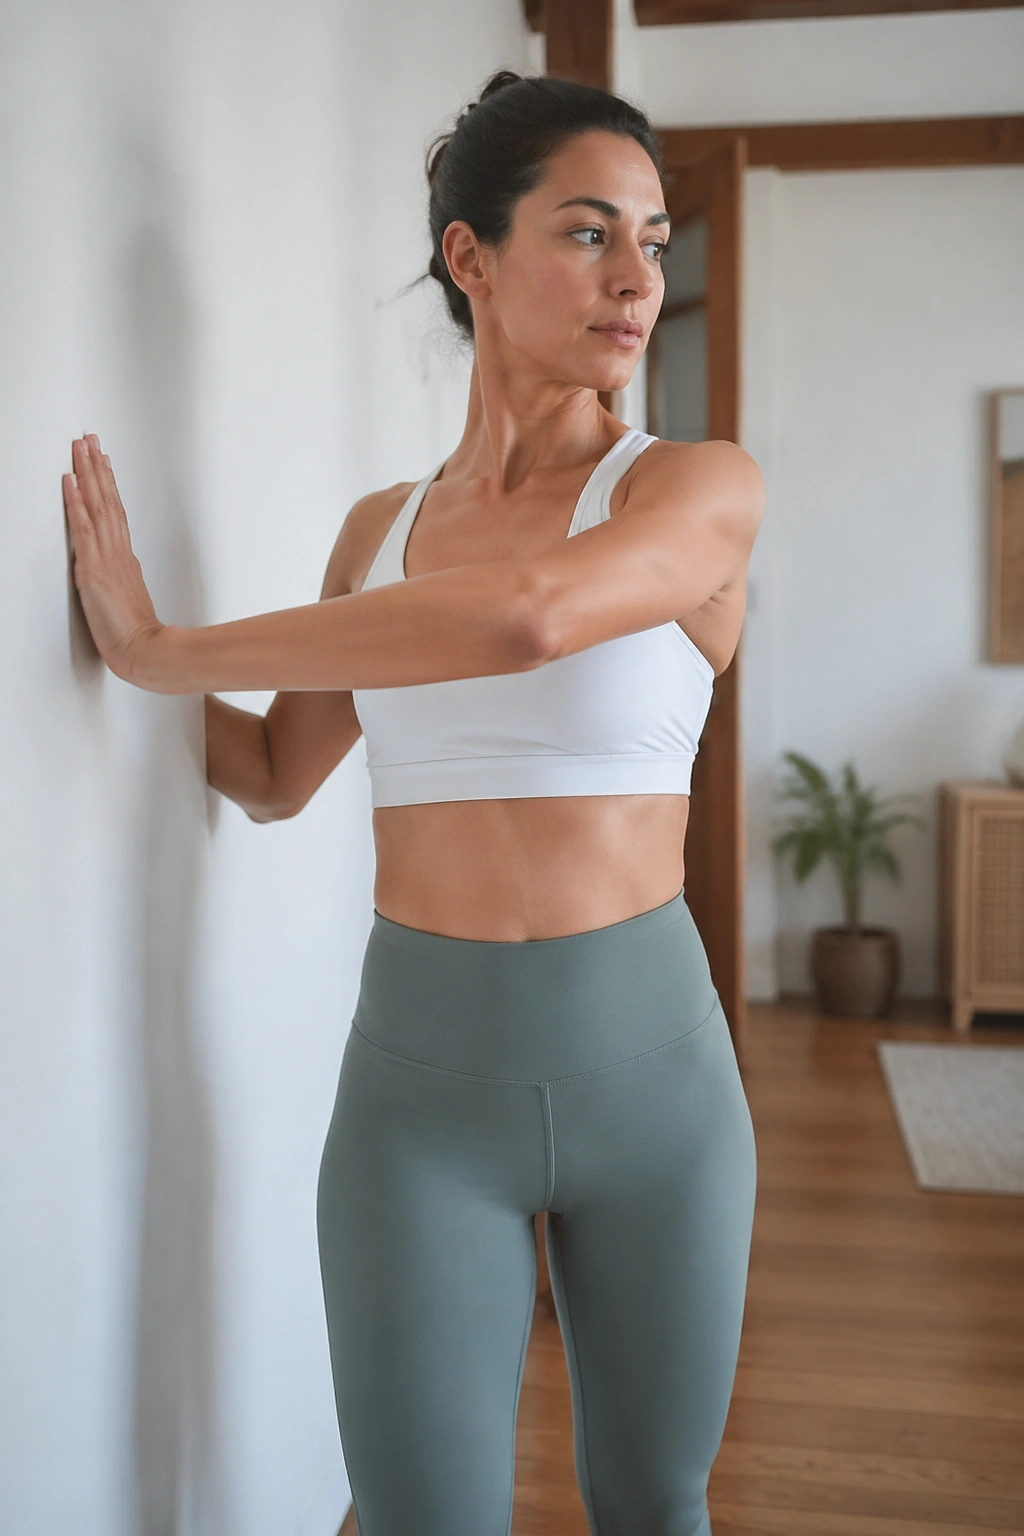
The wall is a useful tool for twists because it stops the hips from freelancing. Stand with one side next to the wall, place the nearer hand on it, and rotate the rib cage away from the wall as the opposite arm reaches across the body. Turn only as far as the shoulders and upper back will allow without forcing the low back.
That restraint matters. A good Pilates twist lives mostly in the ribs and upper spine, not in a wrenching lower back rotation. The wall gives you a clean stop point, which is easier on the body and easier to feel.
Take 4 to 6 slow twists per side. Keep the breath smooth and let the exhale deepen the turn a little. If your neck leads the motion, look straight ahead and let the ribs initiate the twist first.
27. Wall Knee Squeeze Bridge
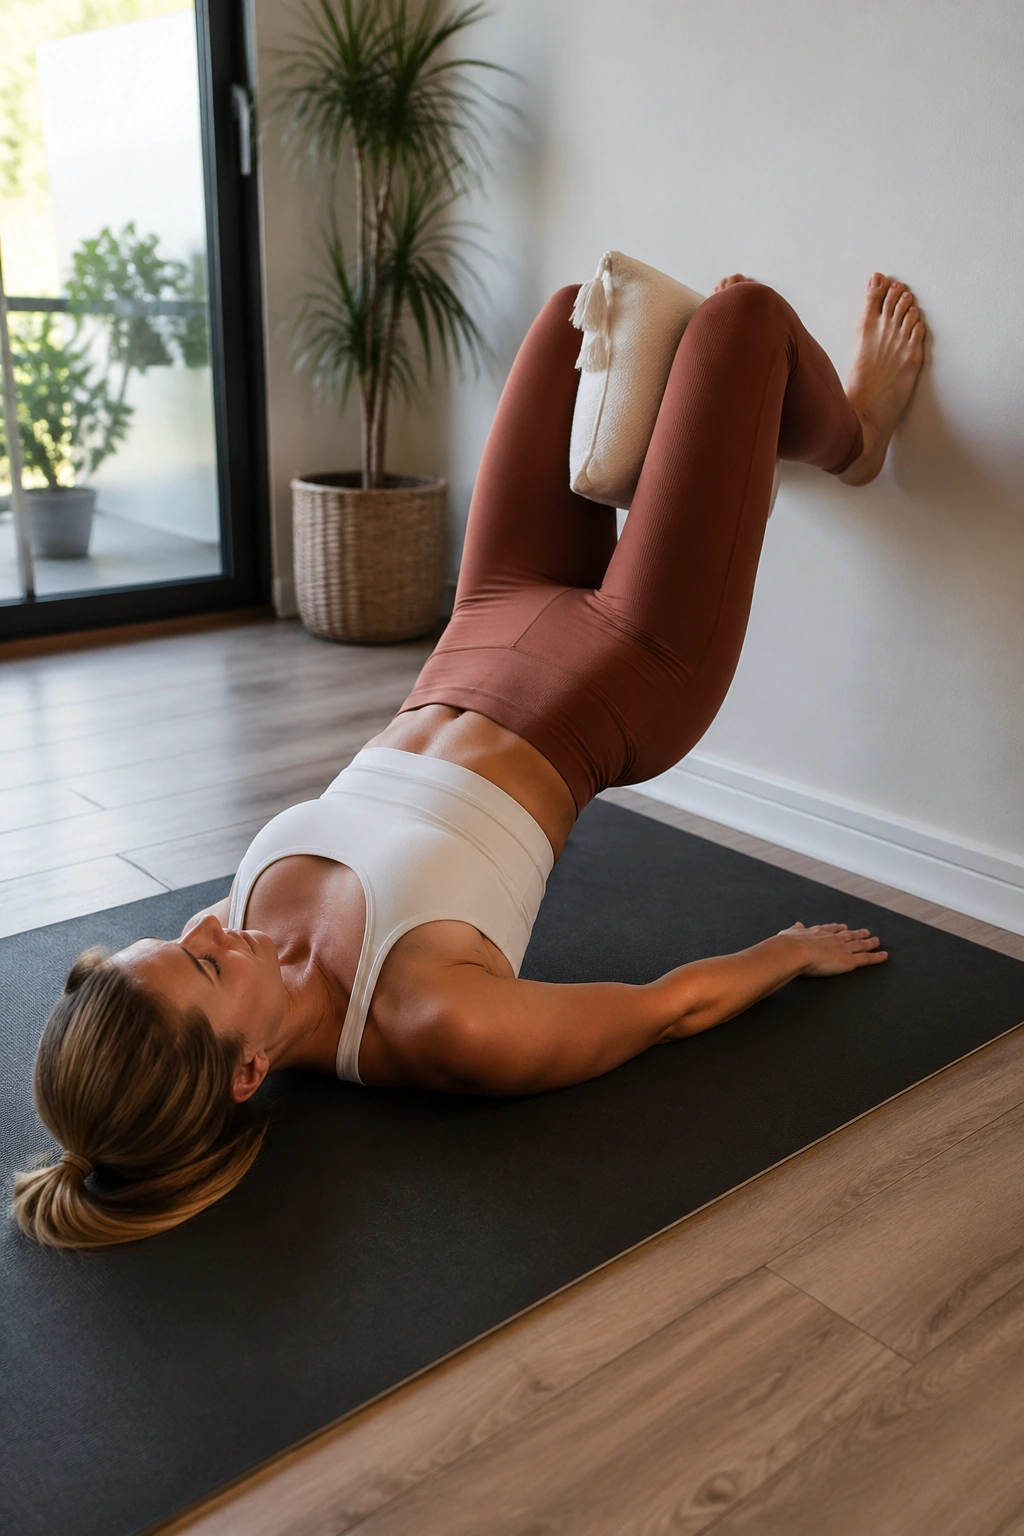
A small pillow or yoga block between the knees changes this bridge in a useful way. Lie on your back with both feet on the wall, place the prop between your knees, and squeeze lightly as you lift into a bridge. Hold the top for one breath, then lower without losing the squeeze.
The inner thighs help the pelvis stay centered. That’s the piece many bridges miss. The wall gives the feet a firm base, while the squeeze adds a little midline work that makes the whole thing feel tighter and more organized.
Do 8 to 10 reps. Keep the pressure gentle — about 20 to 30 percent effort, not a full-on knee clamp. If your hips cramp, lower the bridge less high and focus on the exhale as you lift.
28. Wall Pike Walkout
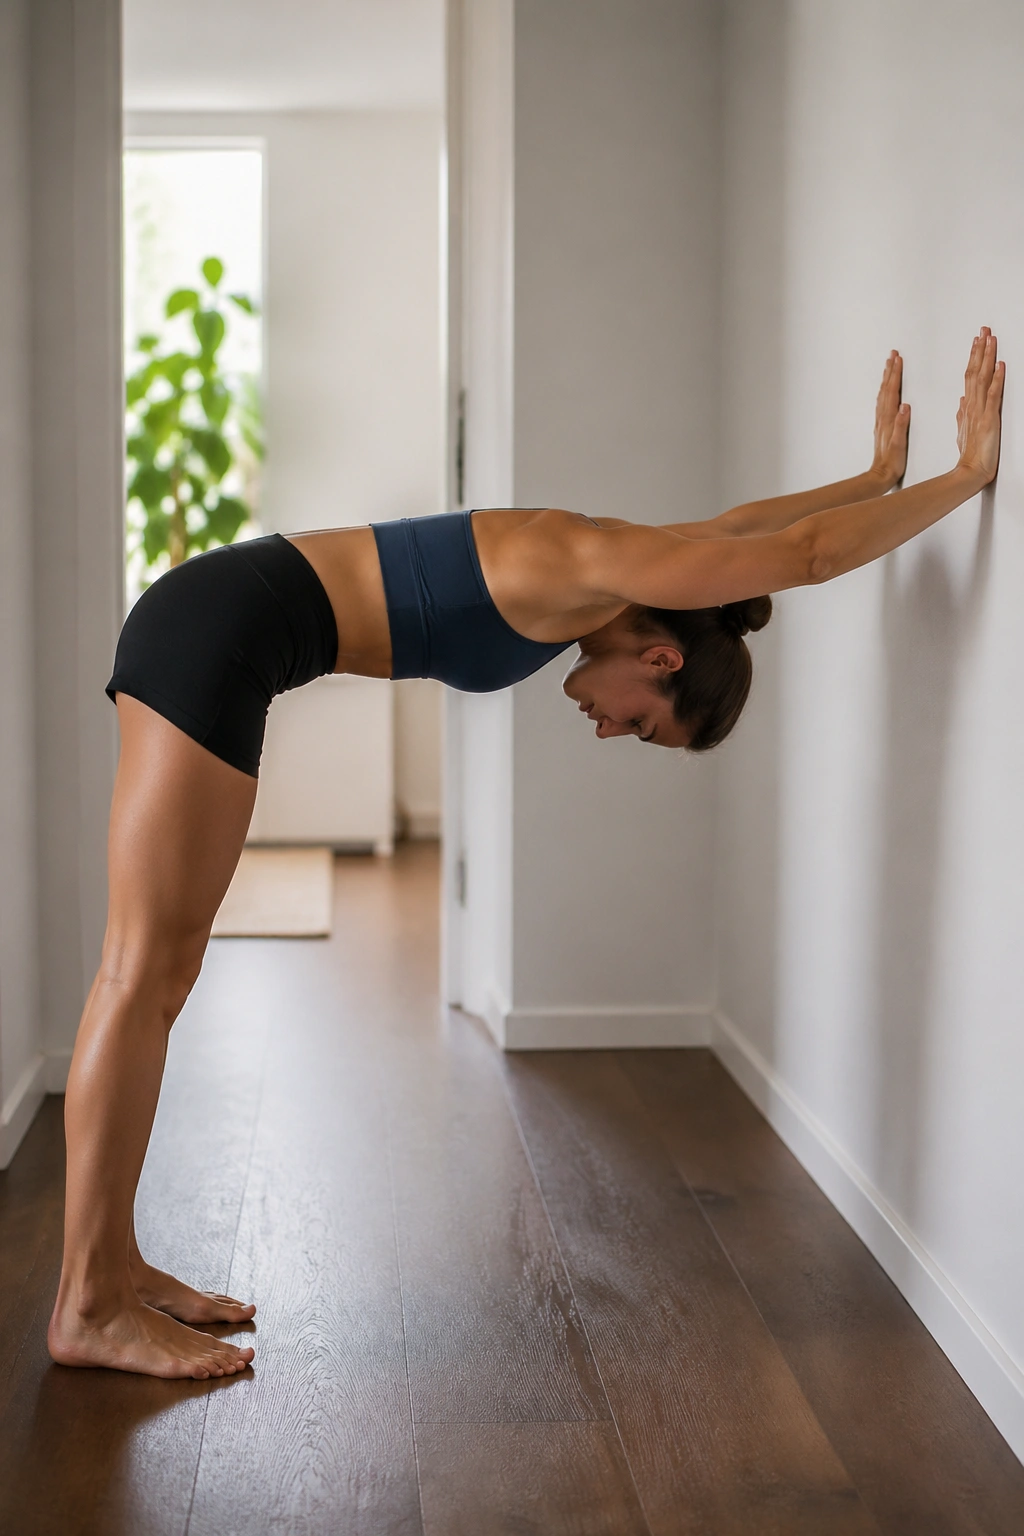
Unlike a floor inchworm, this version is kinder to the wrists and a little easier to scale. Stand facing the wall, place your hands on it, then walk them down until your body forms a sharper angle. Pause there, brace the core, and walk the hands back up.
The challenge is not speed. It’s control. You want the ribs to stay stacked and the pelvis to resist tipping forward as the angle changes. That makes this a nice shoulder-core connection drill.
Try 5 to 8 walkouts, stopping the hands at whatever height keeps the spine long. If your hamstrings are tight, bend the knees a little. If your shoulders get tired fast, keep the hands higher and keep the walkout shorter.
29. Wall Standing Bicycle
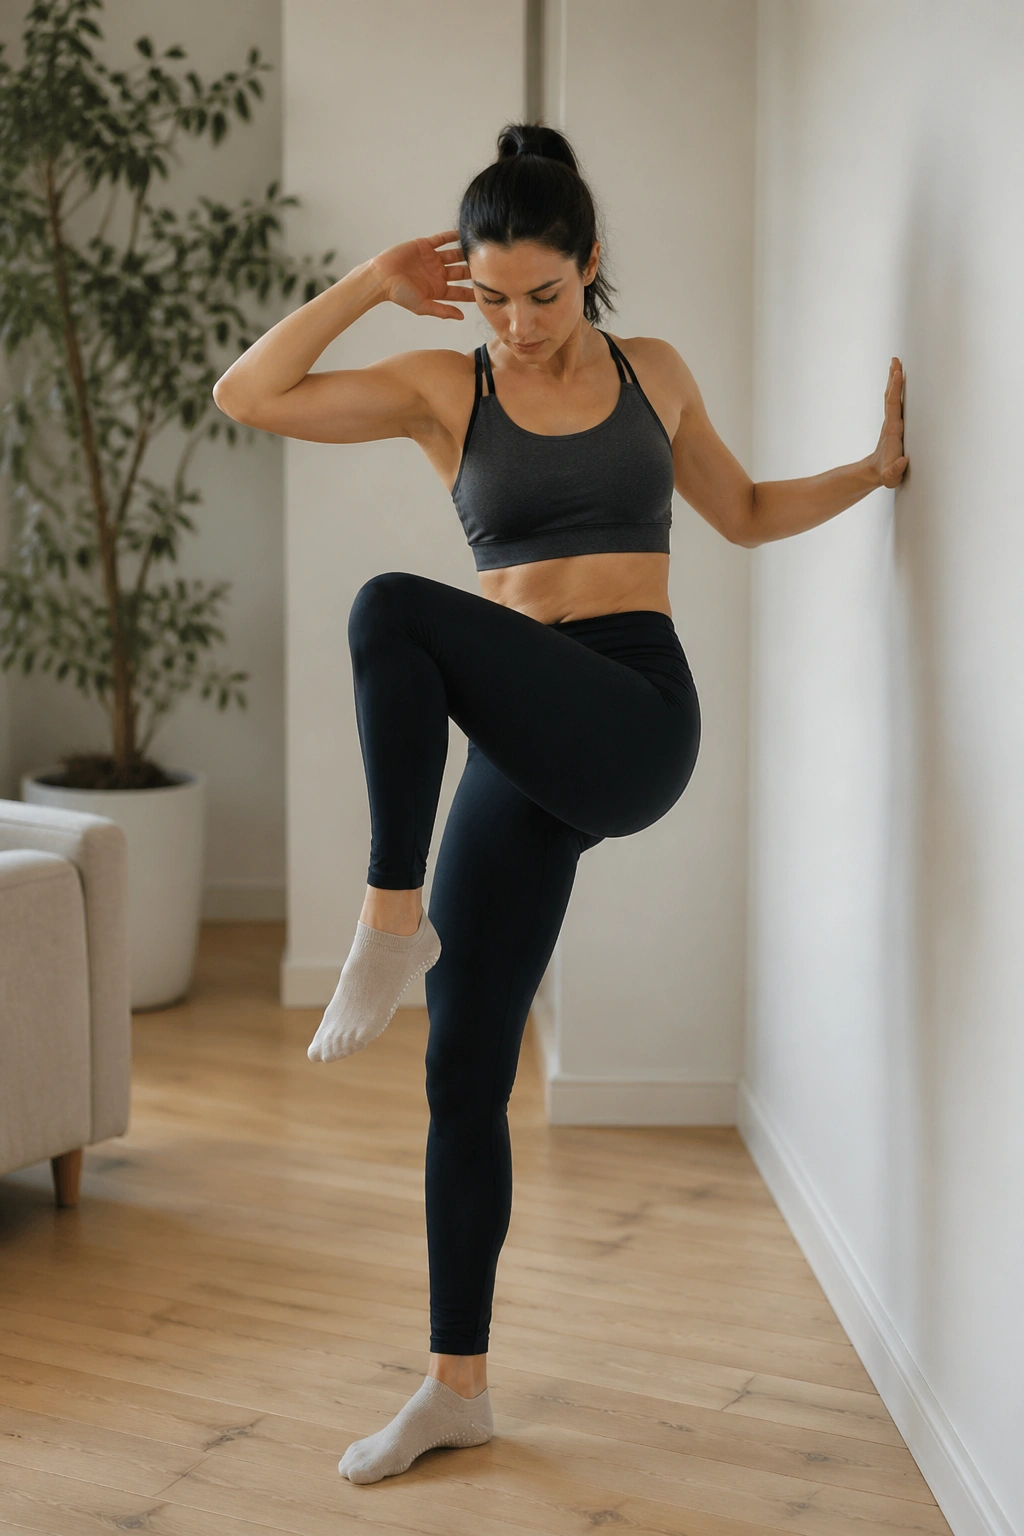
Can you train your obliques standing up? Yes, and it feels more useful than it sounds. Stand a short distance from the wall with your hands lightly touching it, lift one knee while the opposite elbow rotates toward it, then switch sides in a slow marching rhythm.
How to keep it Pilates-like
- Don’t swing the torso.
- Exhale as the knee lifts.
- Keep the standing heel heavy.
- Think rib-to-hip connection, not crunching.
Do 8 to 12 reps per side. The wall keeps you from flying around, which helps the core do the rotation instead of the hip flexors alone. If the movement feels rushed, slow the march to a 3-count lift and 3-count return.
30. Wall Cool-Down Flow for the End of the Day
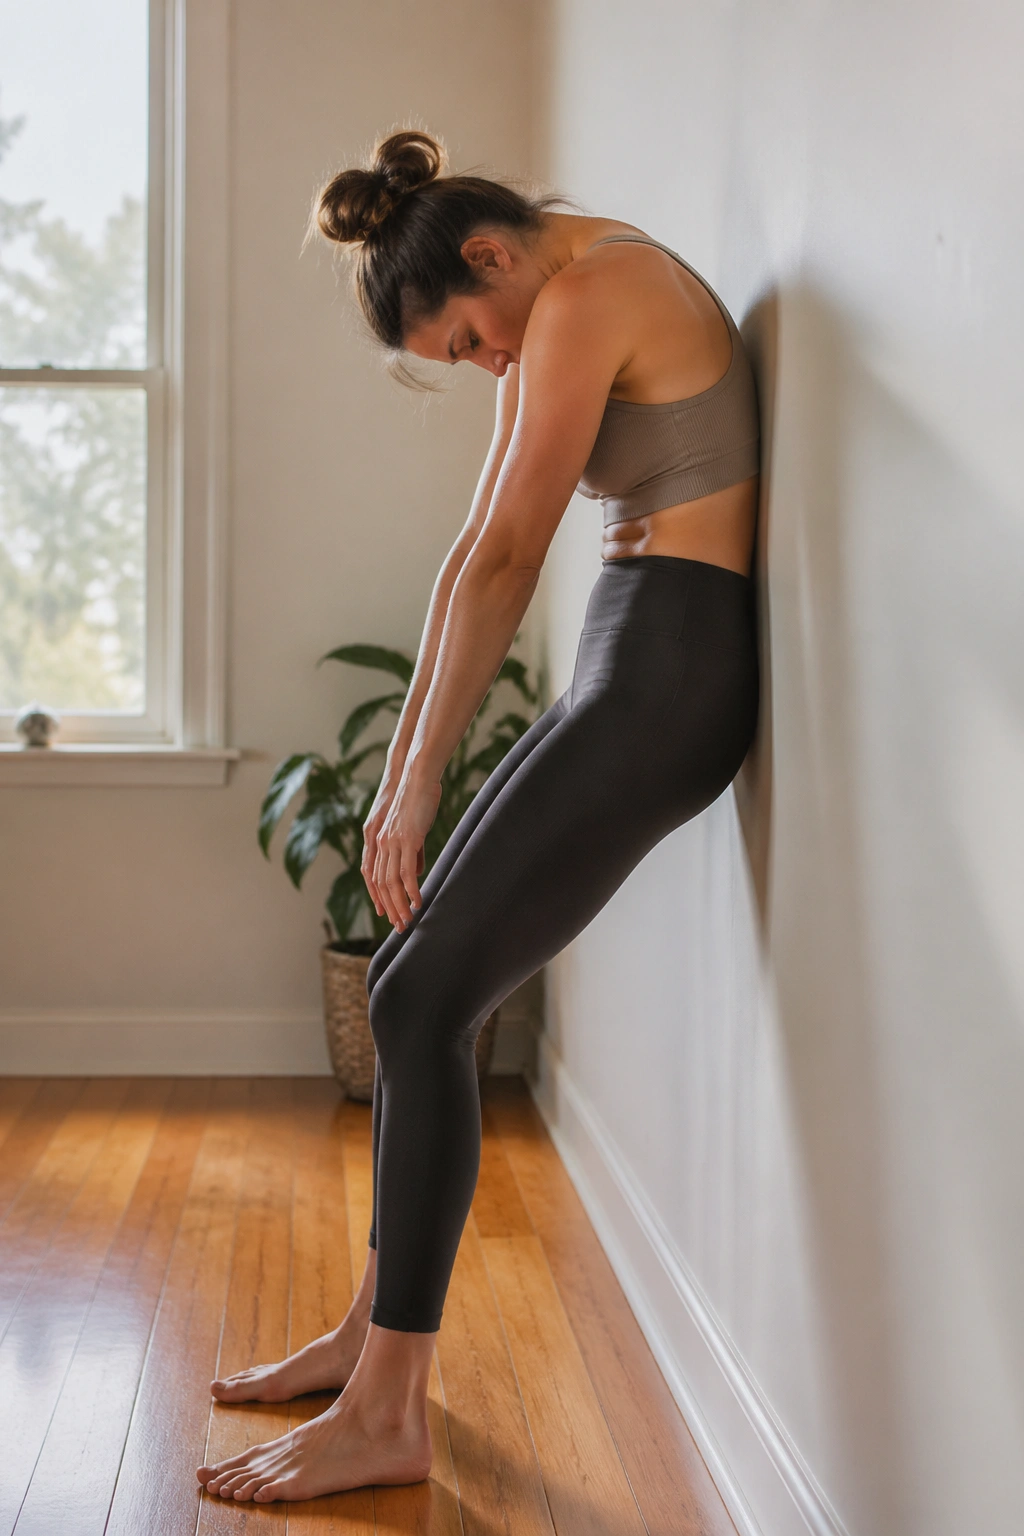
End with a slower sequence, not with a collapse onto the couch. Stand with your calves lightly touching the wall, roll the shoulders down, and take 3 easy breaths. Then slide into a gentle wall roll-down, pause halfway, and come back up with the same control you used at the start.
From there, place one forearm on the wall and open the chest for 2 breaths per side, then finish with a small calf stretch and a standing hamstring hinge. Keep every move soft. No forcing, no yanking, no trying to win anything.
If you’ve done 20 minutes of wall Pilates workouts, this cool-down is where your body gets to register the work. The spine feels a little longer, the hips feel less packed, and the breath should settle down before you leave the room. That quiet ending matters more than people think.
