



A mat Pilates class can look almost too gentle from the outside. Then you hold a tiny curl for eight breaths, or keep your legs in tabletop for longer than feels reasonable, and suddenly the room gets very honest.
That’s the charm of mat Pilates exercises for beginners. No machines. No jumping. No circus tricks. Just a mat, some floor space, and the kind of controlled work that teaches your body how to brace, breathe, stack, and move without creating a mess in your lower back or neck. The movements are small on purpose. Small is the point.
The first thing most new students notice is that Pilates feels slower than regular ab work, but harder in a sneaky way. Your deep core wakes up, your hips stop freelancing, and your shoulders stop living up by your ears. If you’ve ever done a hundred crunches and felt mostly your hip flexors complain, this style will probably feel like a relief.
Start with the breath. The rest gets clearer after that.
1. Pilates Breathing
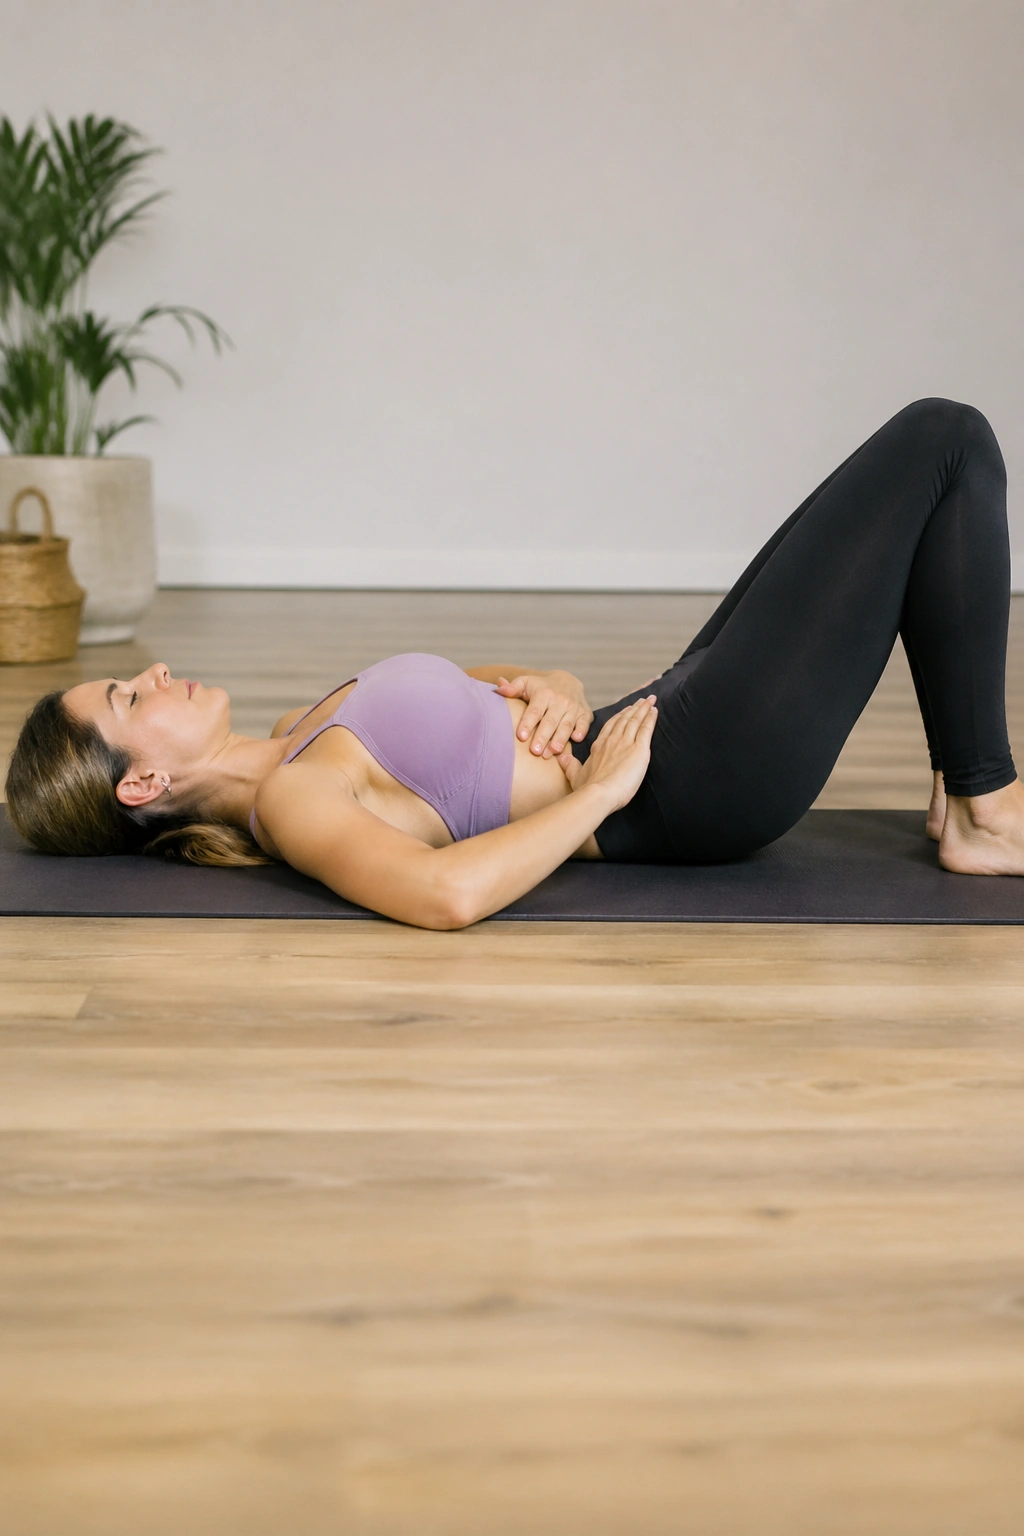
Breathing sounds almost too basic to count as an exercise, but in Pilates it’s the whole wiring behind the work. Lie on your back with your knees bent, feet flat, and hands resting on your ribs. Inhale through your nose so the sides of your rib cage widen, then exhale through your mouth and let the ribs draw back together.
What to Feel
Your shoulders should stay quiet. If they creep up on the inhale, you’re breathing too high in the chest. The goal is a low, wide breath that helps your deep abs turn on without gripping.
- Inhale for a count of 3 or 4.
- Exhale for the same count, or a little longer.
- Keep your jaw loose.
- Let the exhale feel steady, not forced.
One good exhale can clean up the whole movement. When beginners breathe this way, they usually feel their belly flatten a little on the exhale and their lower ribs stop popping forward.
2. Pelvic Tilts on Your Back
Why start with something so small? Because most beginners need to feel where their pelvis is before they ask it to do anything clever. A pelvic tilt is a gentle rock of the pelvis that changes the space under your lower back.
Lie on your back with bent knees and feet hip-width apart. Exhale and tip your pubic bone toward your navel so the low back softens toward the mat. Inhale and return to a neutral, natural curve. Keep the motion tiny.
If your movement turns into a full-back bridge or a hard shove into the floor, you’ve gone too far. The point is control, not drama. This one teaches the relationship between ribs, pelvis, and breath, which is basically the whole Pilates game.
3. Finding Neutral Spine
Neutral spine is the middle ground between flattening your back and arching it. You want the natural curve you’d have when standing tall, only now you’re lying down and paying attention to it. That’s the useful part.
Place one hand on your lower ribs and one on your hip bones. Rock your pelvis a few times between a slight tuck and a slight arch, then settle right in the center. The low back should have a small, comfortable lift off the mat, not a big gap.
Why It Matters
A lot of beginners stay either too tucked or too arched. Both can make core work less effective. Neutral spine gives you a better starting point for leg work, bridges, and hundreds, because the trunk stays stable while the limbs move.
4. Arm Slides for Shoulder Placement
This one looks almost boring. It isn’t. Arm slides help your shoulders stop doing all the work and teach the ribs to stay calm while the arms move overhead.
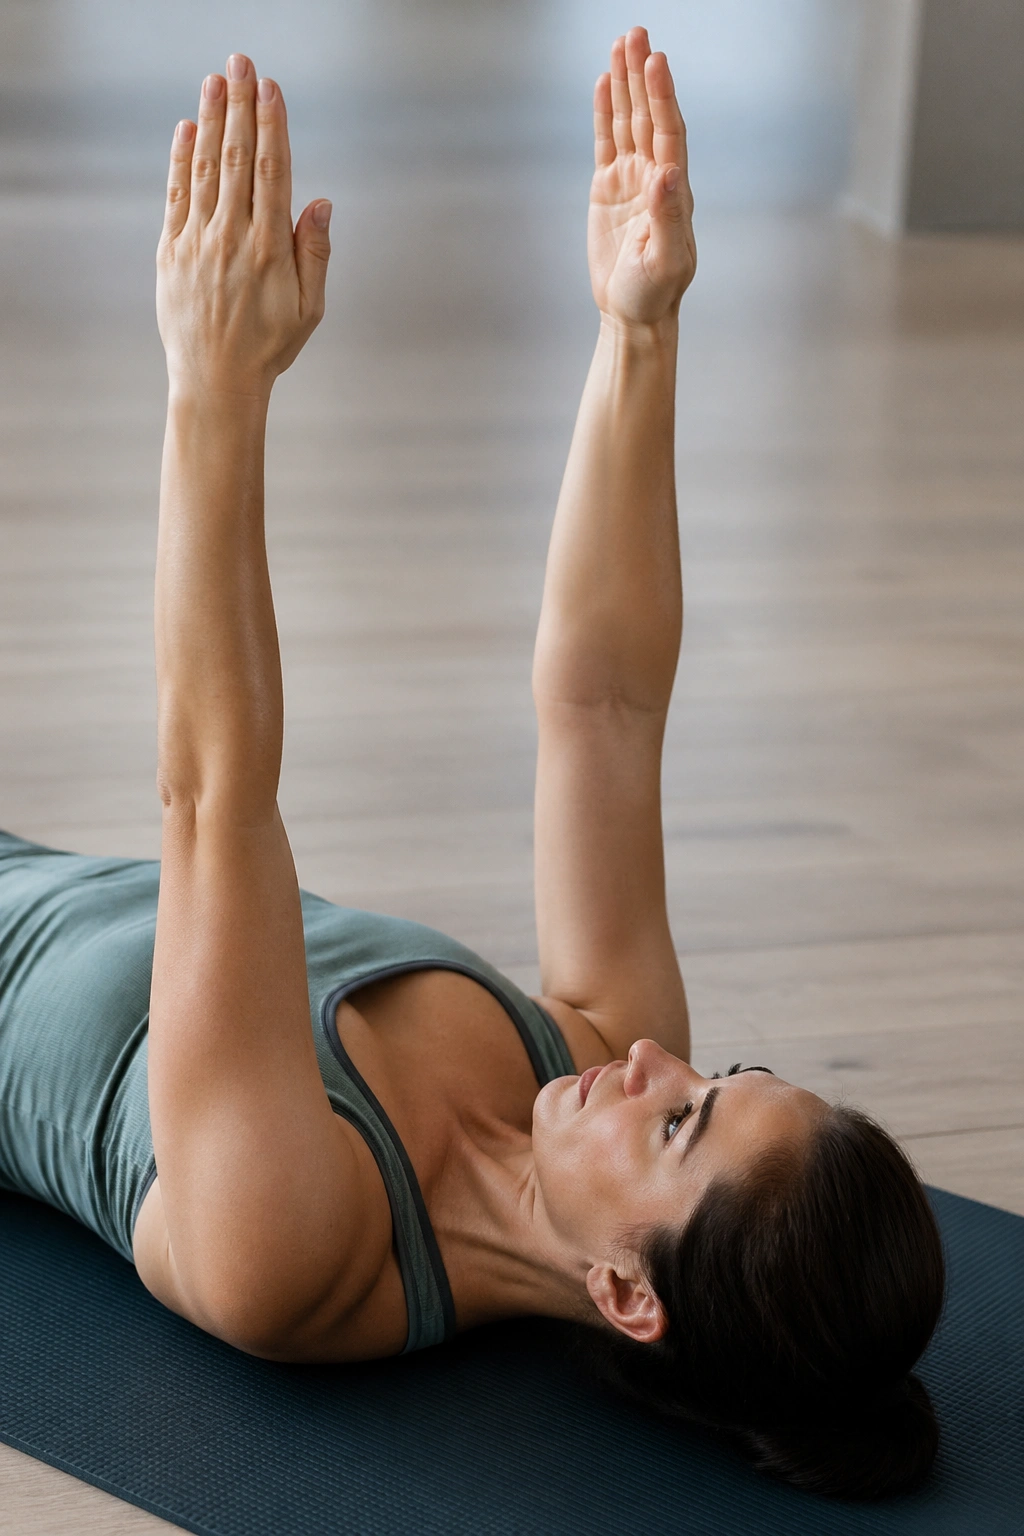
Lie on your back with arms long by your sides. Inhale to raise both arms toward the ceiling, then exhale to slide them back to the floor. If you try to go overhead, only do it as far as your ribs stay down and your lower back stays quiet.
What to Watch For
- Do not shrug.
- Do not flare the ribs.
- Keep the back of the neck long.
- Stop the arms before the back arches.
A clean arm slide is a small lesson in upper-body control. And yes, that matters later when you start pumping your arms in the Hundred.
5. Toe Taps in Tabletop
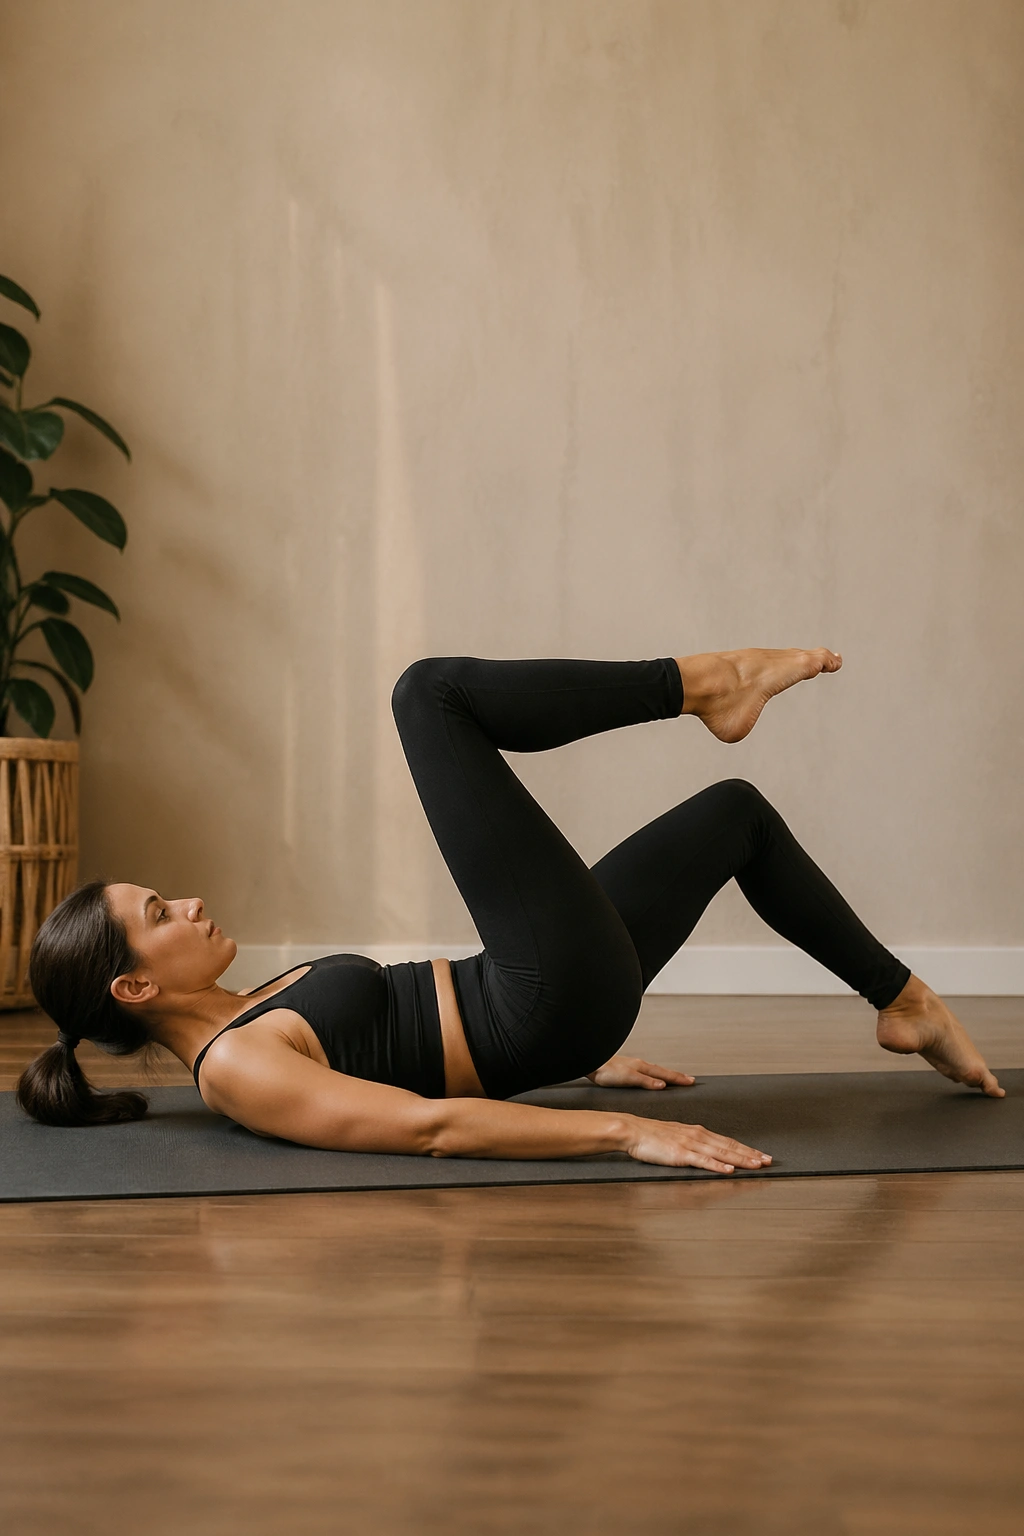
Toe taps are where beginners usually find out whether their core is actually working or just pretending. Start with both knees lifted into tabletop, hips and knees stacked at about 90 degrees. Keep your spine quiet as you lower one toe toward the floor and bring it back up.
The movement should be slow enough that your pelvis doesn’t rock side to side. If it does, make the range smaller. Tap only a few inches down. That’s not cheating; that’s smart training.
You’ll know you’re doing it well when your lower belly stays softly braced and your thighs feel involved without taking over. Small taps beat low-control big taps every time.
6. Tabletop Holds
Can you hold the position before your hips start wobbling? That question tells you a lot. Tabletop hold is simple, but it asks for a steady trunk, quiet ribs, and decent hip control.
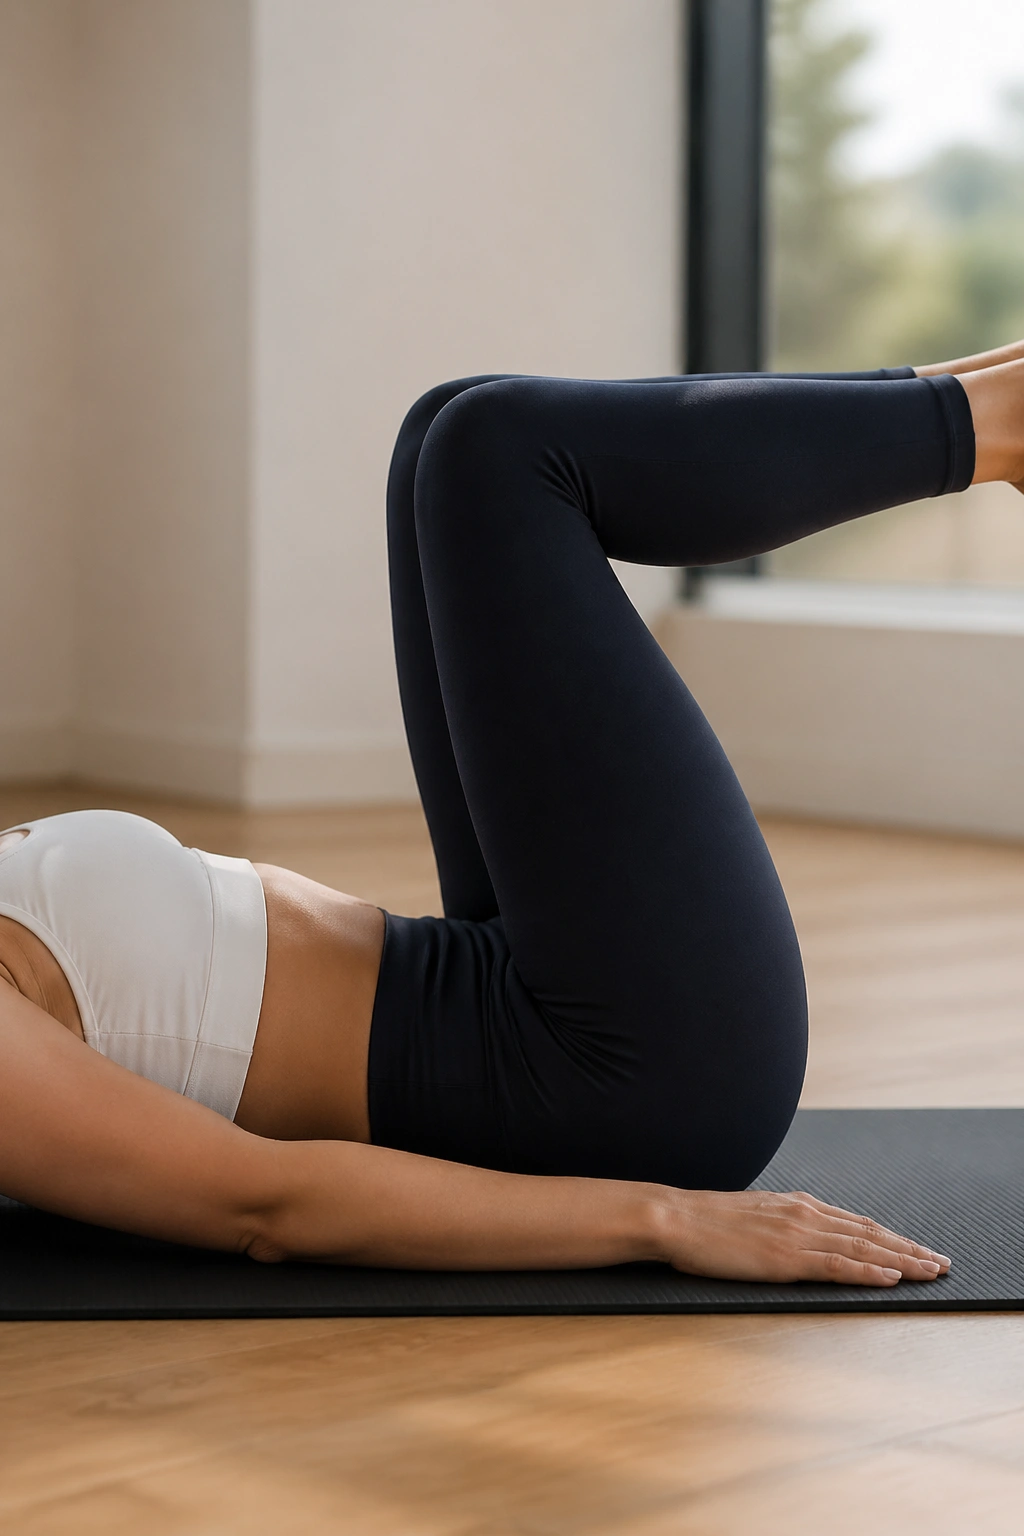
Bring both knees up to tabletop and hold for 3 to 5 breaths. Hands can rest on the floor, on your ribs, or on the fronts of your thighs if you need a little support. If the hip flexors are burning or your lower back feels pinched, lower one foot to the mat and build up from there.
A Useful Cue
Think of the thighs as floating, not clamping. A lot of people grip the front of the hips and lose the deep abs. Let the work feel collected, not clenched.
7. Dead Bug Prep
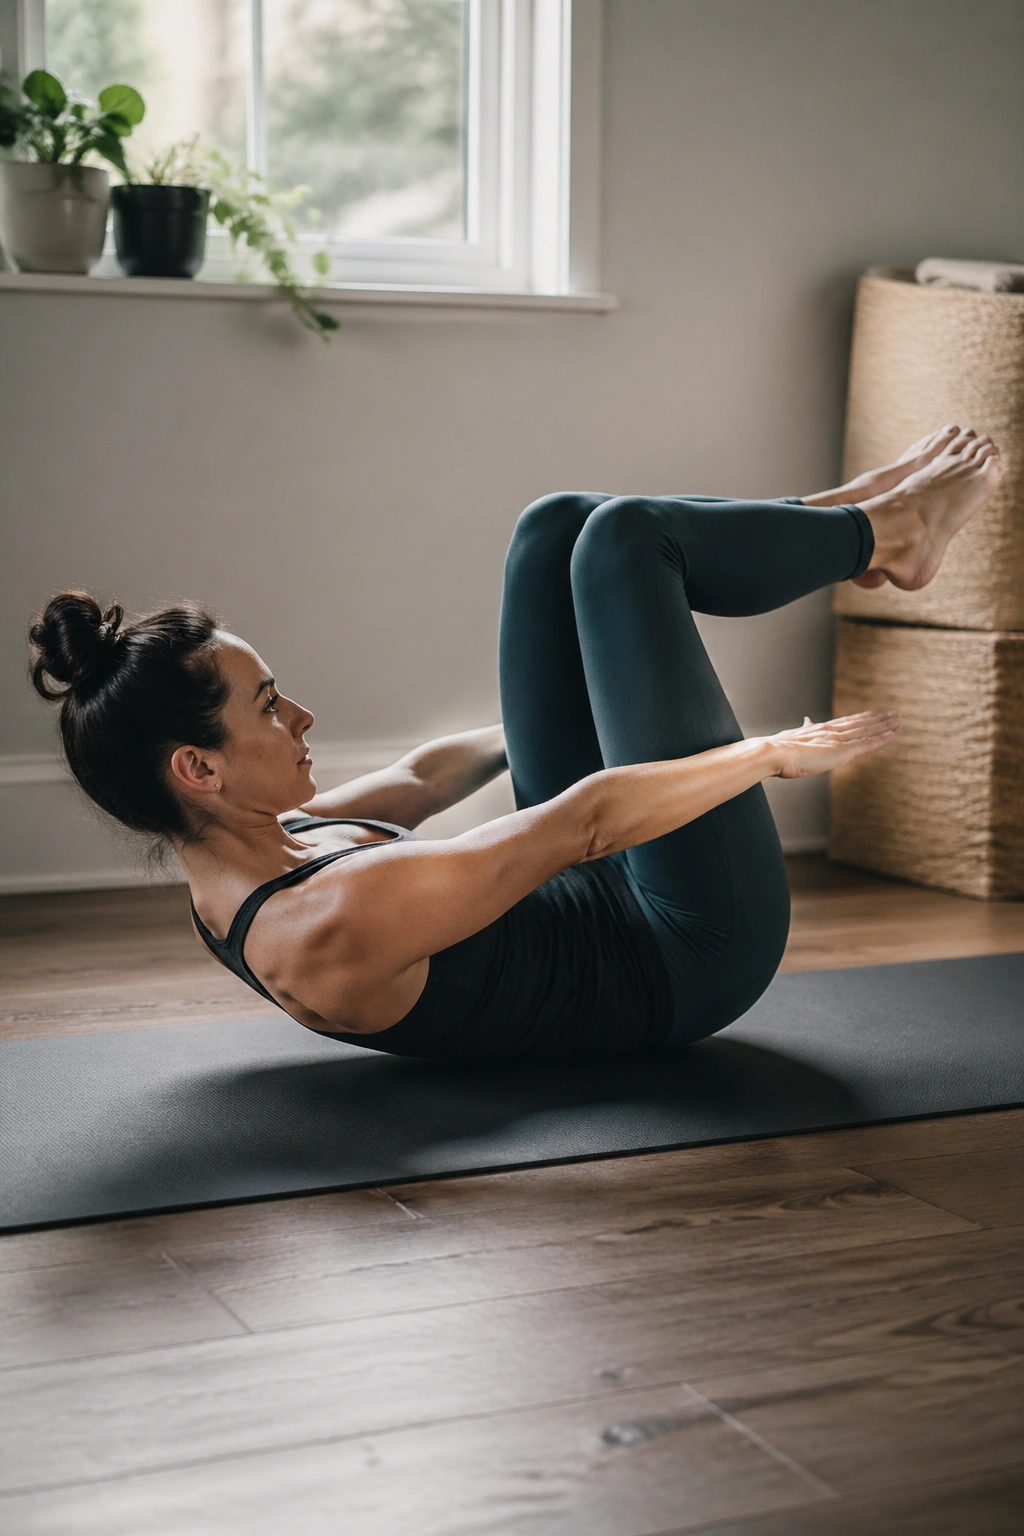
The dead bug prep is where Pilates starts teaching coordination instead of just stability. From tabletop, reach one arm back toward the floor as the opposite leg slides out low, then bring them back to center and switch sides.
Keep the movement modest. The lower back should stay steady, and the leg only goes as far as you can keep control. If the torso starts to arch or the neck starts to strain, shorten the reach immediately.
This is one of those exercises that feels plain in theory and a little shaky in practice. Good. Shaky means you’re meeting the work where it lives.
8. Chest Lift Prep
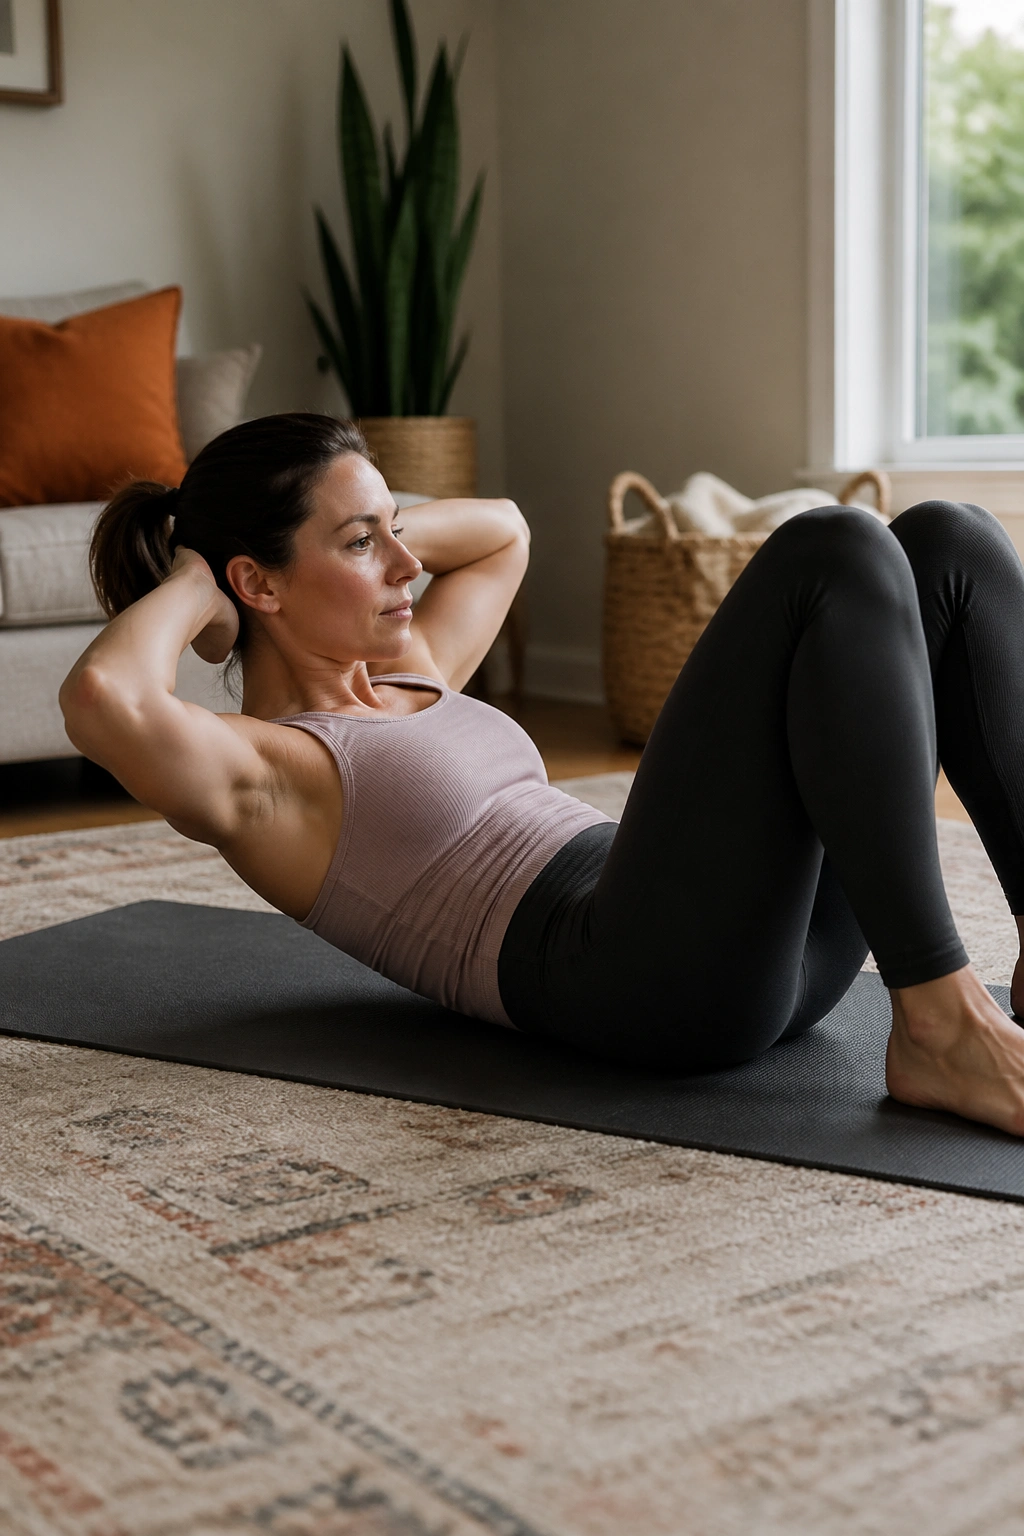
A chest lift is not a sit-up. That distinction saves a lot of necks. In the prep version, you nod the chin slightly, float the head and shoulders a few inches off the mat, and hold the curl without pulling on the neck.
How to Set It Up
Lie with knees bent, feet down, and hands lightly behind the head or crossed over the chest. Exhale to curl up; inhale to hold; exhale to lower with control. The goal is to lift the rib cage toward the pelvis, not to yank the head forward.
If your elbows flare and your neck takes over, pause and reset. A smaller lift is often better than a bigger one. The abs should start the motion, not the hands.
9. Chest Lift
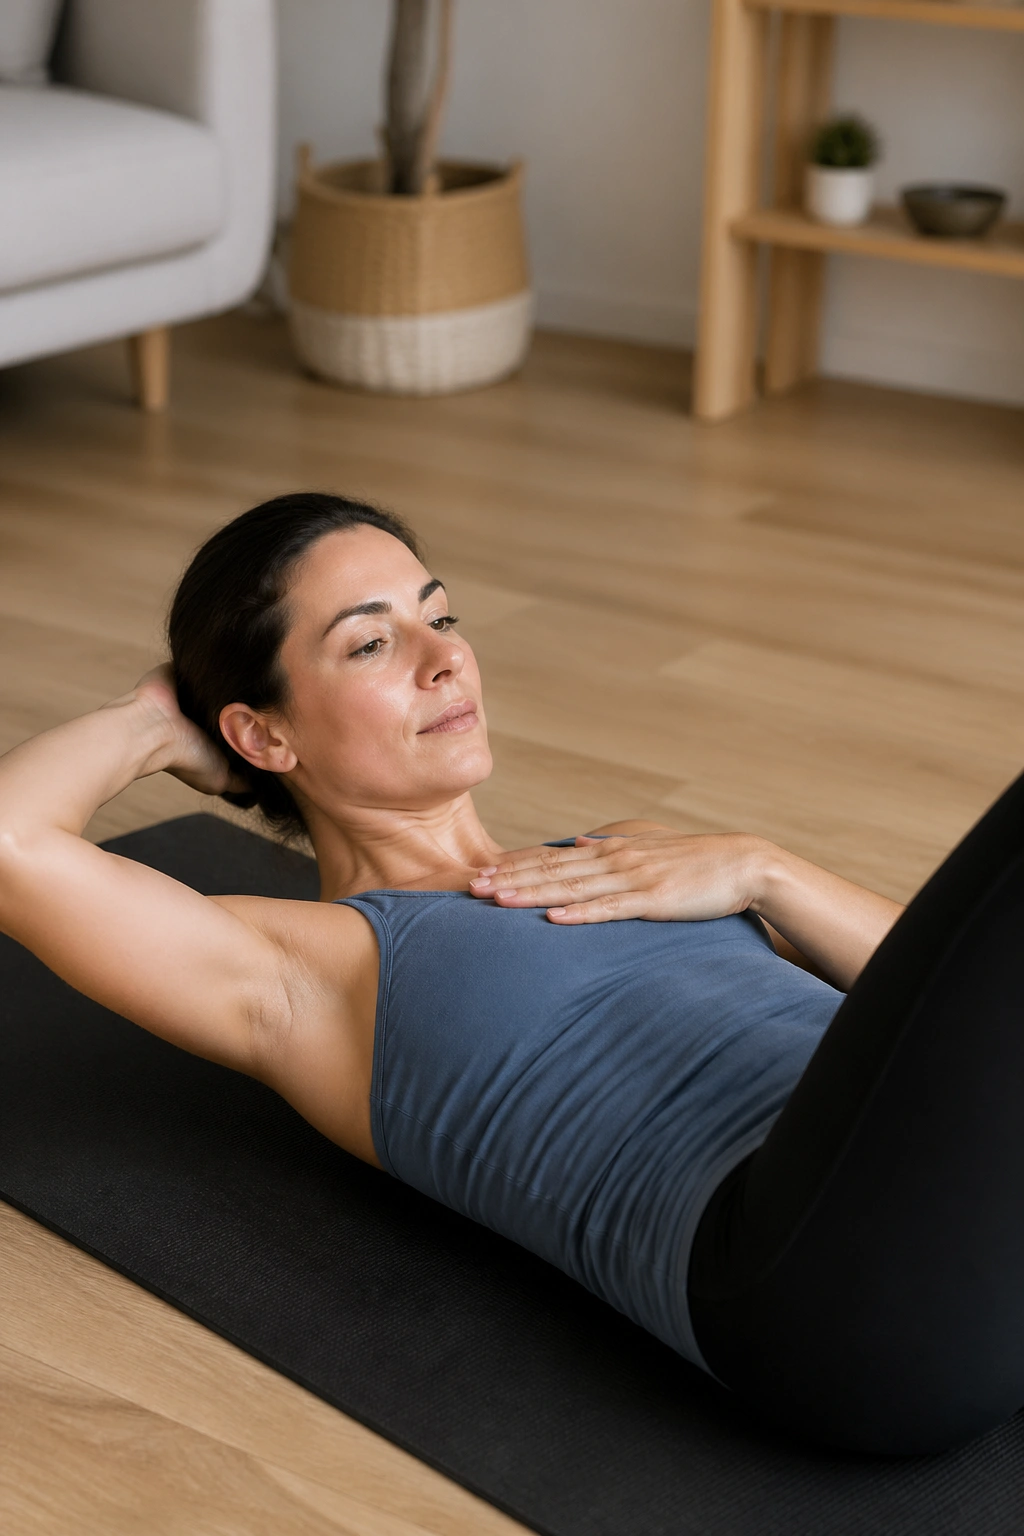
This is the real version of the prep, and beginners usually like it more than they expect once they stop trying to make it a full crunch. Curl up, hold for a breath or two, then lower with the same care you used to come up.
The trick is keeping the ribs heavy as the chest lifts. If the front ribs pop open, the movement loses its purpose. Imagine a zipper running from your pubic bone to your sternum. That line stays short and controlled.
Some people do better with the chin slightly nodded and the gaze toward the thighs. Others like one hand behind the head and one hand reaching forward. Either way works as long as the neck isn’t doing the heavy lifting.
10. The Hundred Prep
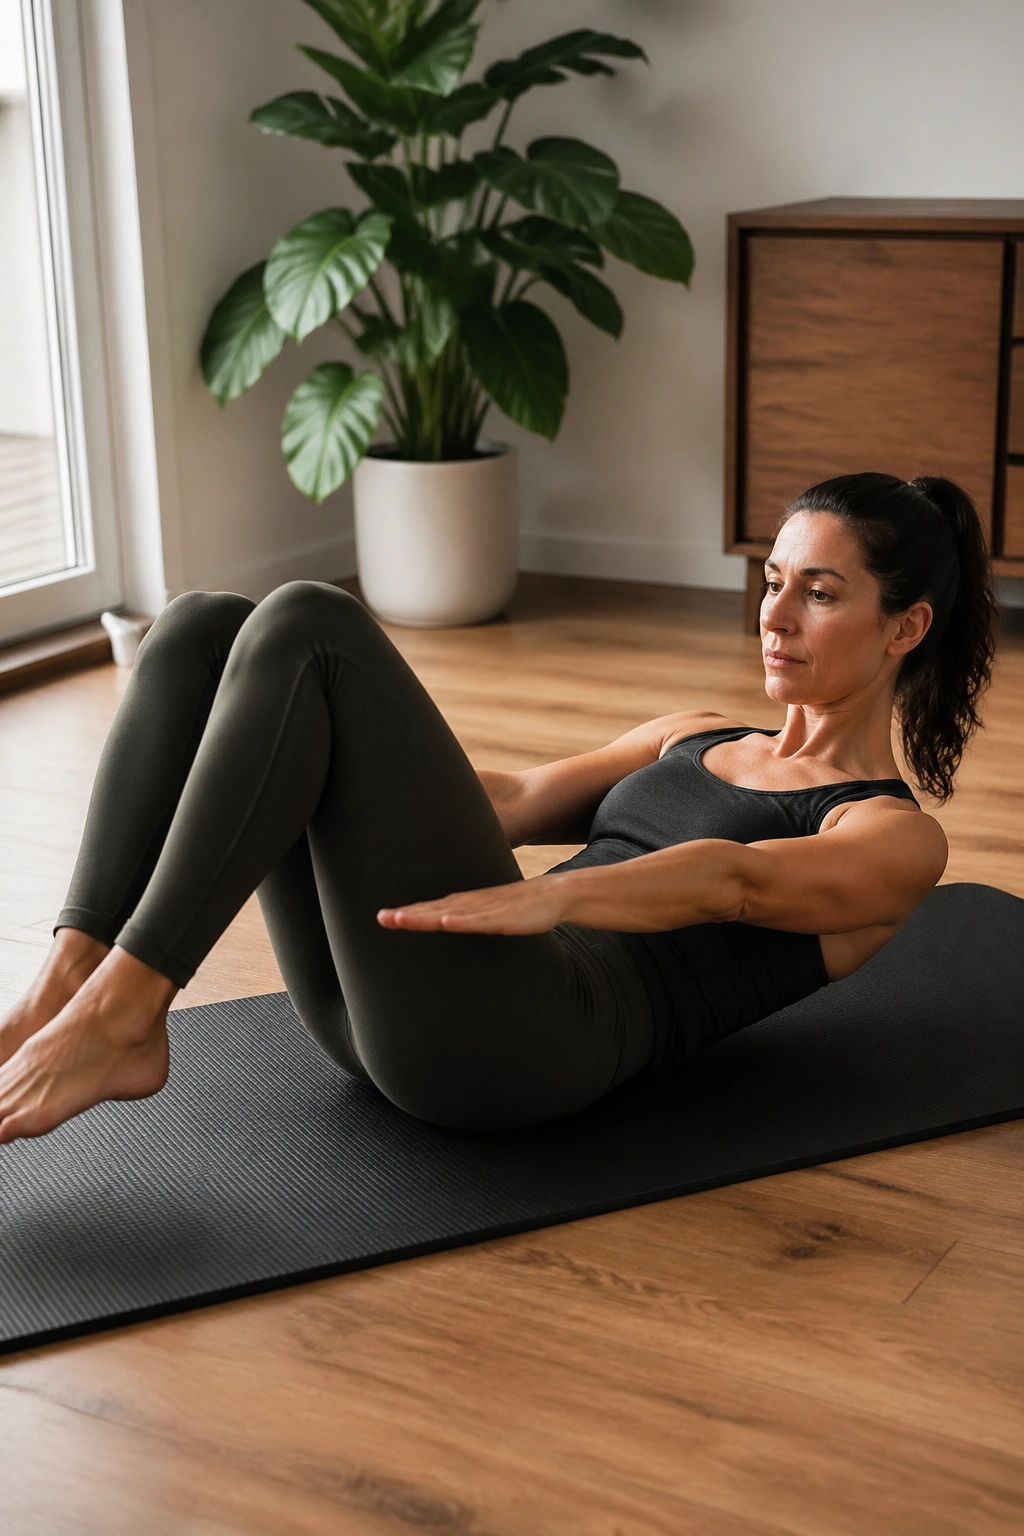
The Hundred prep teaches a lot at once: breath, arm action, abdominal support, and endurance. Beginners should keep it simple. Knees can stay bent, feet can stay on the floor, or both legs can move into tabletop if the back feels stable.
Reach the arms long beside your body and pump them a few inches up and down from the shoulder. Inhale for 5 pumps, exhale for 5 pumps, and repeat a few rounds. The torso stays still while the arms do their quick little work.
Quick Cues
- Keep the neck long.
- Keep the lower ribs heavy.
- Pump from the shoulders, not the wrists.
- Stop before the torso starts shaking apart.
You do not need the full classical version on day one. A cleaner prep is worth more.
11. Single Leg Stretch
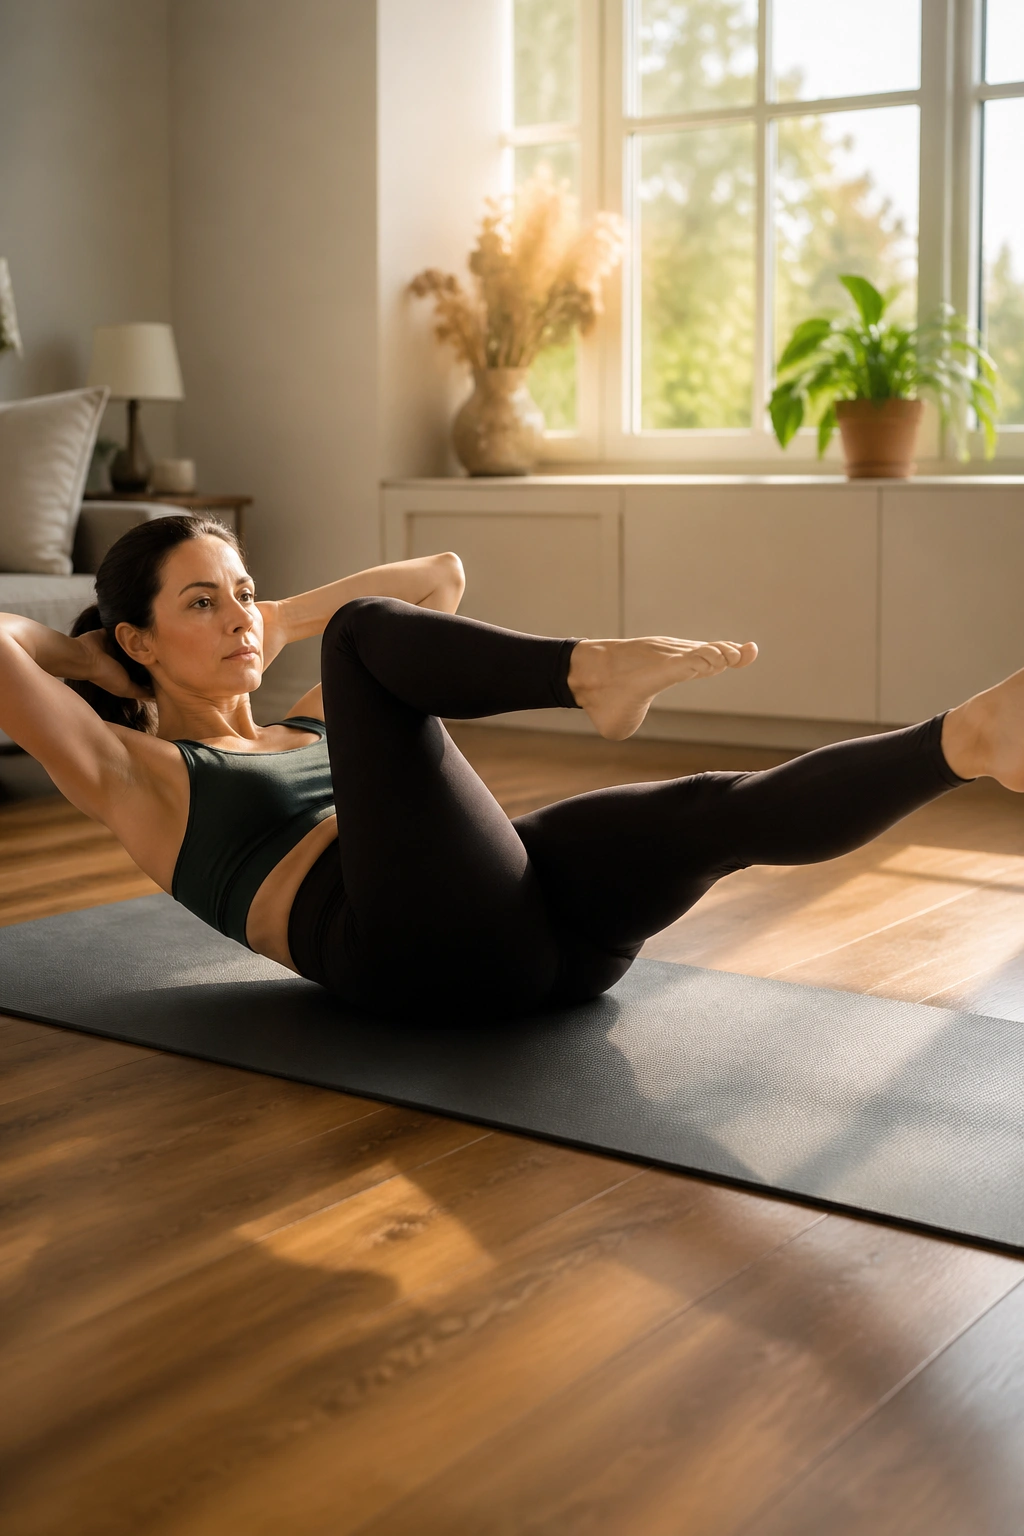
This one is a staple for a reason. It teaches the abs to hold the center while the legs alternate, which is a skill that carries into almost everything else on the mat.
Start in a chest lift with one knee drawn in and the other leg reaching long on a diagonal. Switch legs slowly. Keep the elbows wide, the chest lifted, and the pelvis as still as you can manage. If the low back arches, shorten the extended leg and bring it higher.
The rhythm matters less than the control. If the movement starts to feel like bicycle crunches at the gym, slow it down and reclaim the shape.
12. Double Leg Stretch Prep
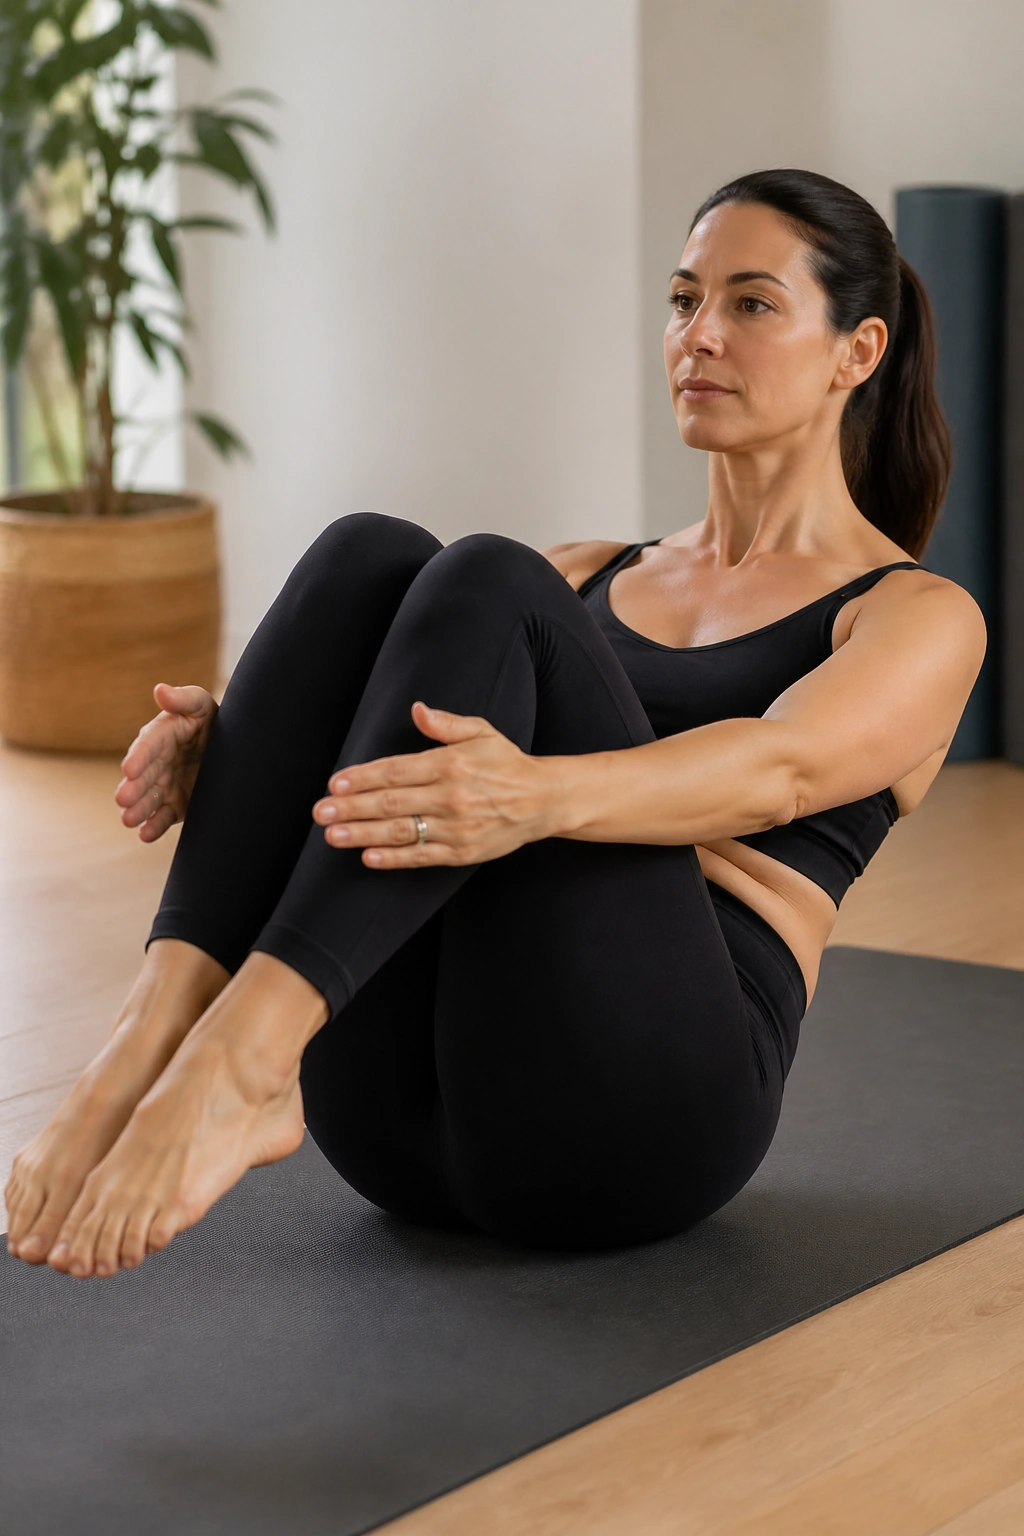
The full double leg stretch can be a lot for beginners, so the prep version is the sensible place to live. Draw both knees in, then reach the arms and legs away at the same time, keeping the reach smaller than you think you need.
The moment the lower back starts to arch, you’ve gone too far. Bring the limbs in closer and keep the shape compact. Compact work still builds real strength.
This exercise is a nice test of trunk stability. If you can move your arms and legs while your ribs stay anchored, your core is doing its job. If not, no big deal. That’s the point of practice.
13. Criss-Cross
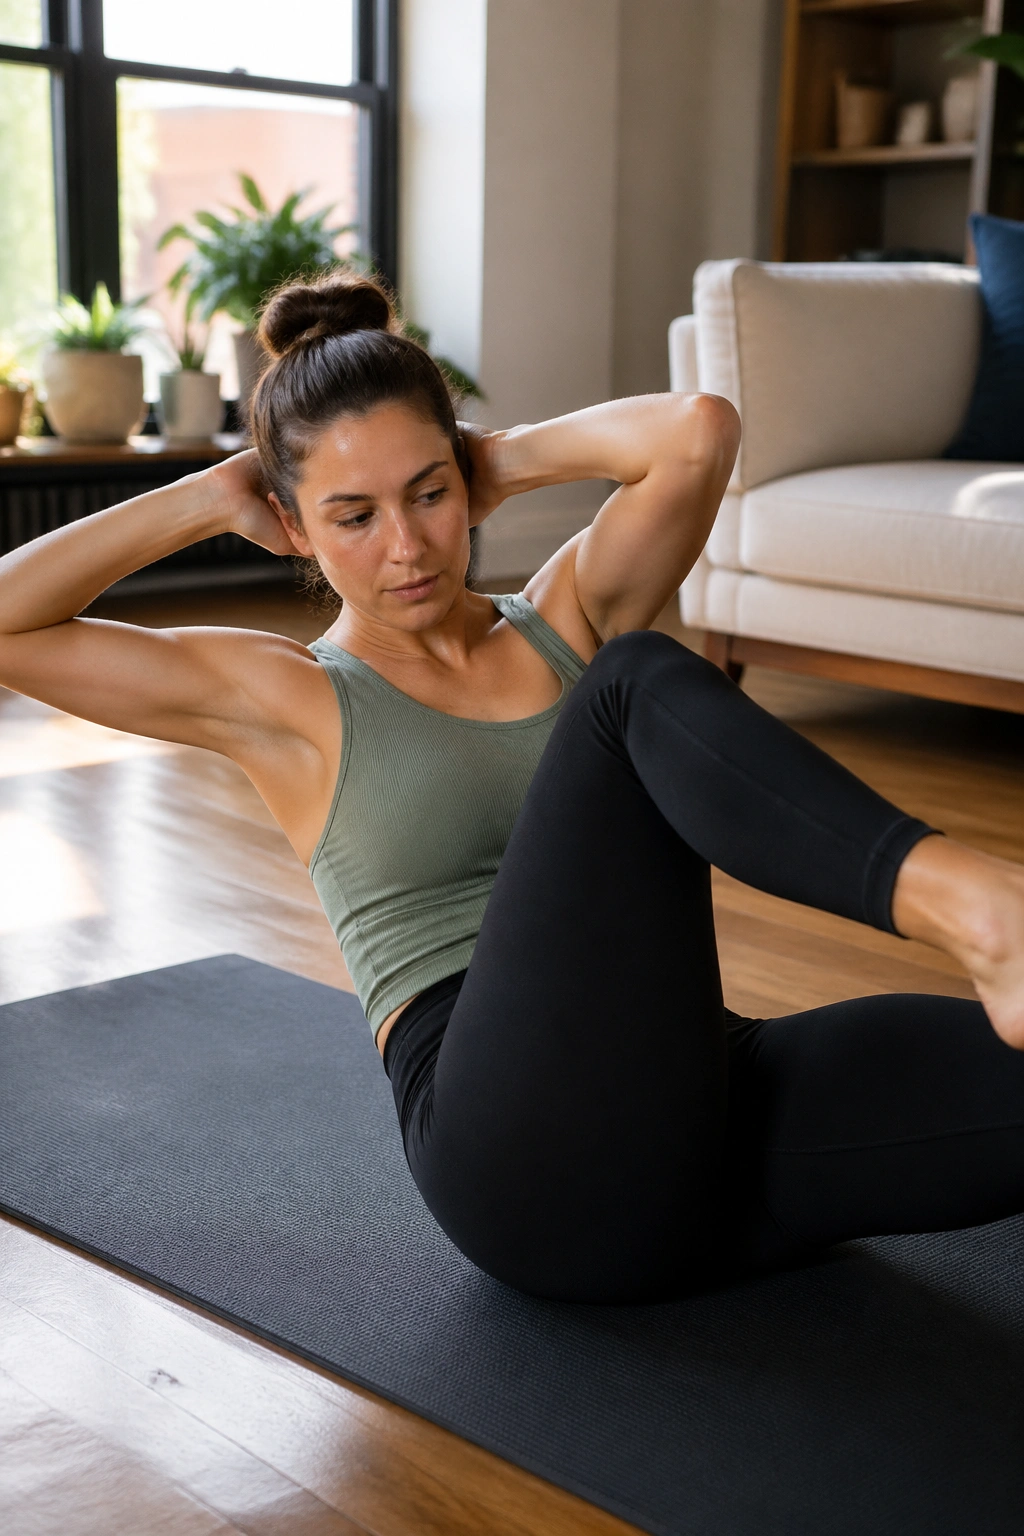
Criss-cross is the first place many beginners notice that rotation is harder than it looks. From a chest lift, bring one knee in and twist the torso so the opposite shoulder moves toward it, then switch sides with control.
What Makes It Different
You’re not just flinging an elbow across the body. You’re rotating the rib cage while keeping the pelvis fairly quiet. That takes more control than the quick, fast version people often do in classes.
A small twist done well beats a big twist done badly. Keep the chest lifted, the elbows open, and the movement smooth. If the neck tires out, lower the head for a breath and come back to it.
14. Half Roll Back
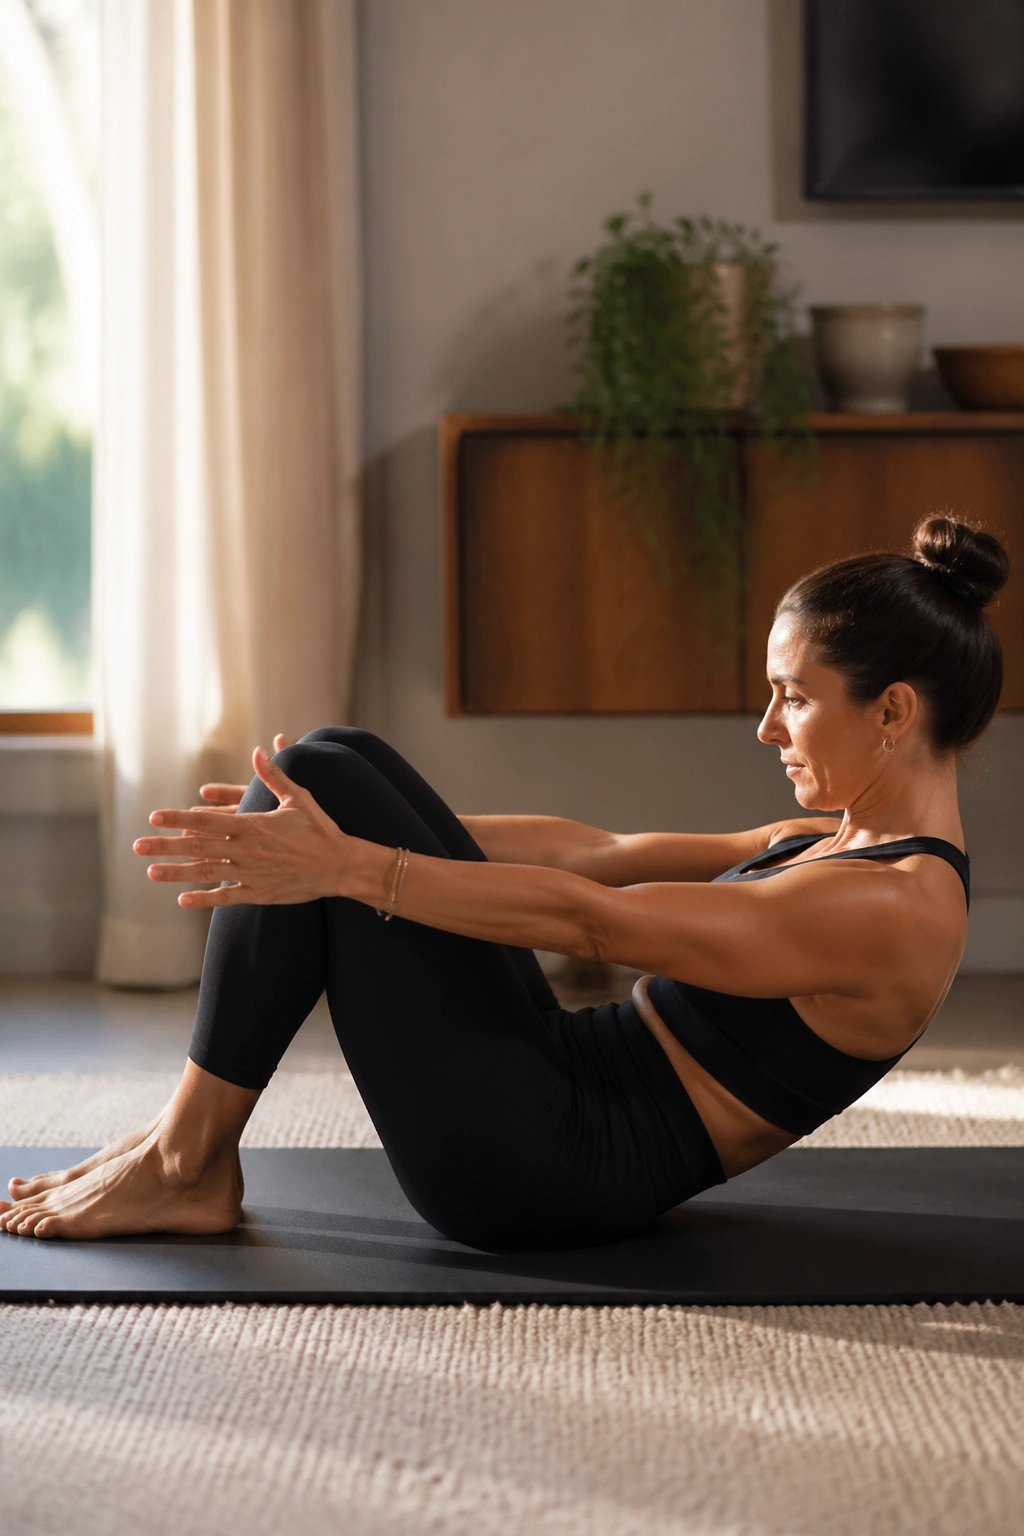
Sit tall with your knees bent and feet flat, then curl the pelvis under and roll back only as far as the shoulder blades or mid-back. Roll forward to sit up again. That’s the whole thing.
Why It Teaches Control
This move shows you whether you can articulate the spine one piece at a time. It also gives the abs a clear job without asking the hip flexors to dominate. If the hamstrings feel tight or the lower back rounds sharply, slide the feet a little farther away.
- Keep the chest open.
- Exhale as you roll back.
- Inhale to pause.
- Exhale to return.
It’s one of my favorites for beginners because it feels honest. There’s nowhere to hide.
15. Roll Up Prep
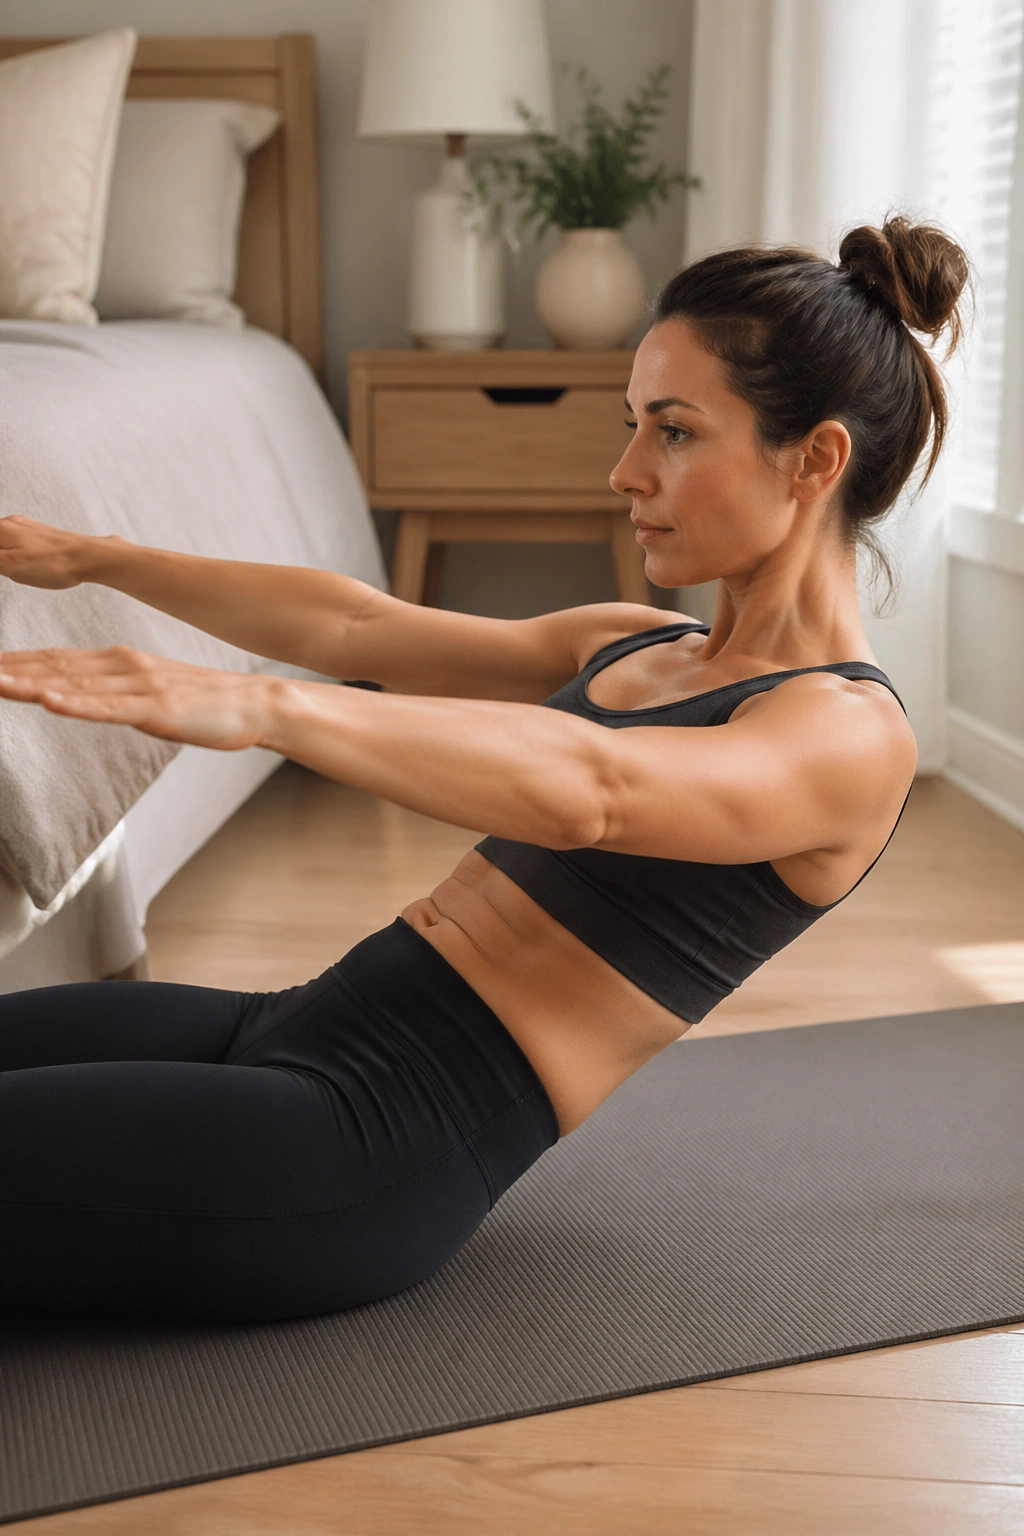
Roll up prep is a friendlier way into spinal articulation. Lie down, reach the arms overhead only as far as your ribs stay down, then nod the chin and curl up one vertebra at a time. If that’s too much, use bent knees and slide your hands up your thighs to help.
The important part is the sequence. The head doesn’t throw the body up. The ribs peel first, then the spine follows. Coming down should feel just as controlled as the lift.
If your hamstrings are tight, bend the knees a little more. That tiny adjustment often makes the difference between a helpful curl and a frustrating tug-of-war.
16. Spine Stretch Forward
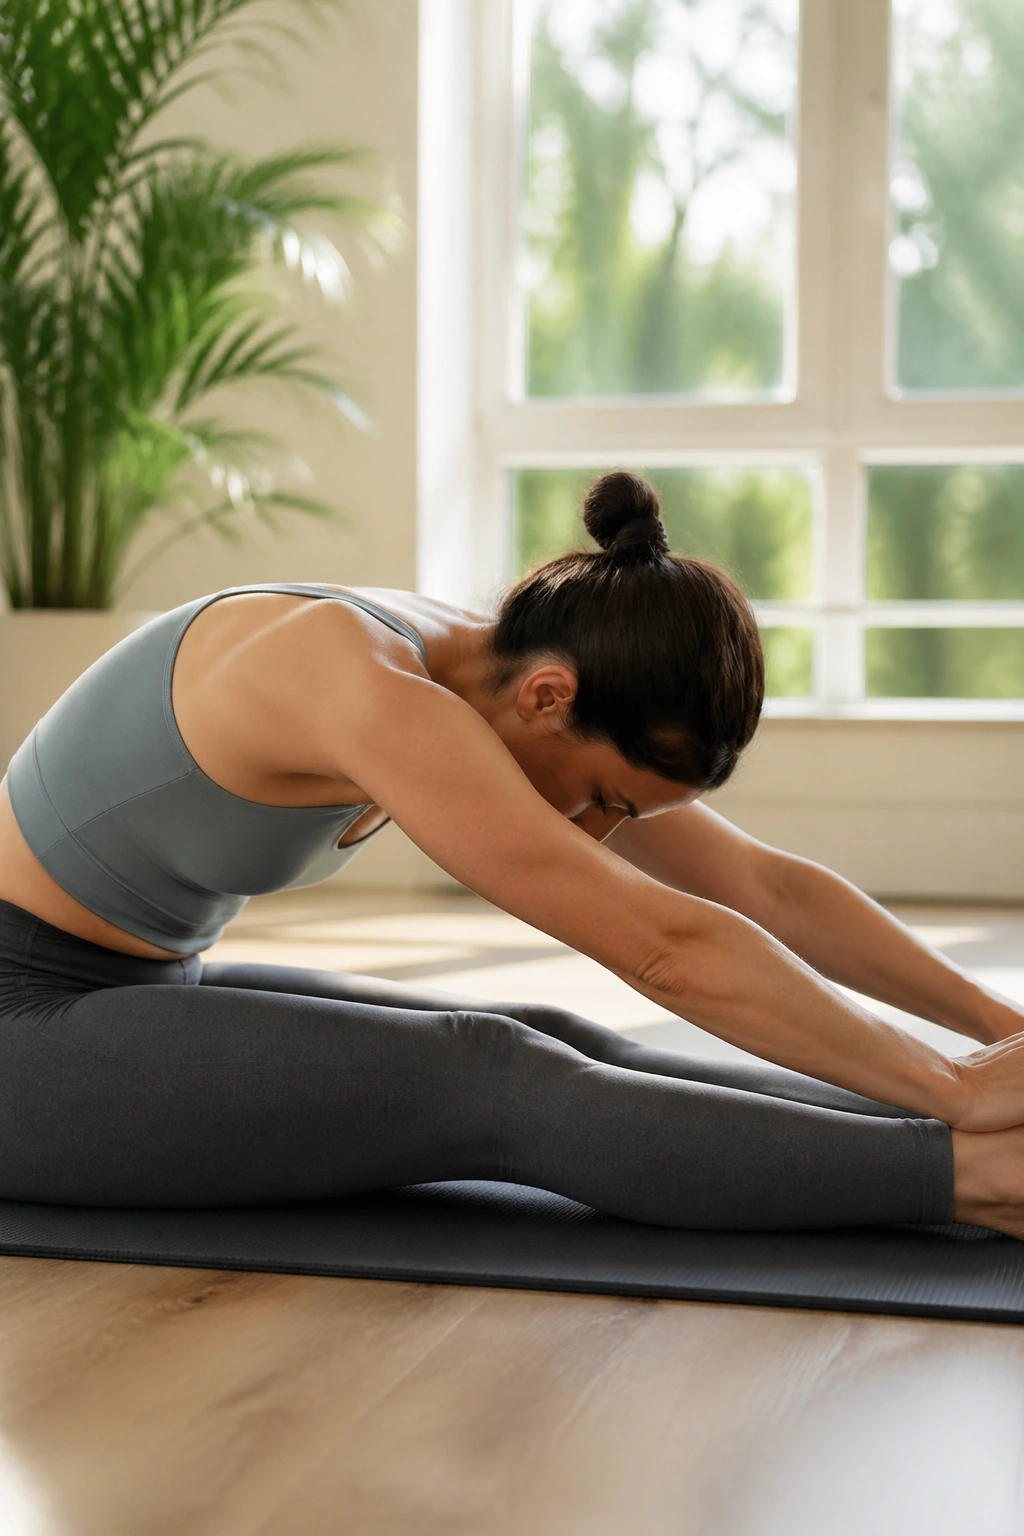
This is one of the cleanest seated Pilates shapes. Sit tall with your legs extended a comfortable amount, or keep the knees softly bent if your hamstrings complain. Inhale to grow upward. Exhale to round forward from the top of the spine, not by collapsing the chest.
The image to keep in mind is length first, fold second. Reach the crown of the head forward while the belly scoops back. The shoulders stay away from the ears, and the low back rounds without slumping.
A Common Mistake
People often try to touch the toes before they’ve created any length. That turns the movement into a hamstring chase. Don’t chase the feet. Make the spine do the work.
17. Spine Twist
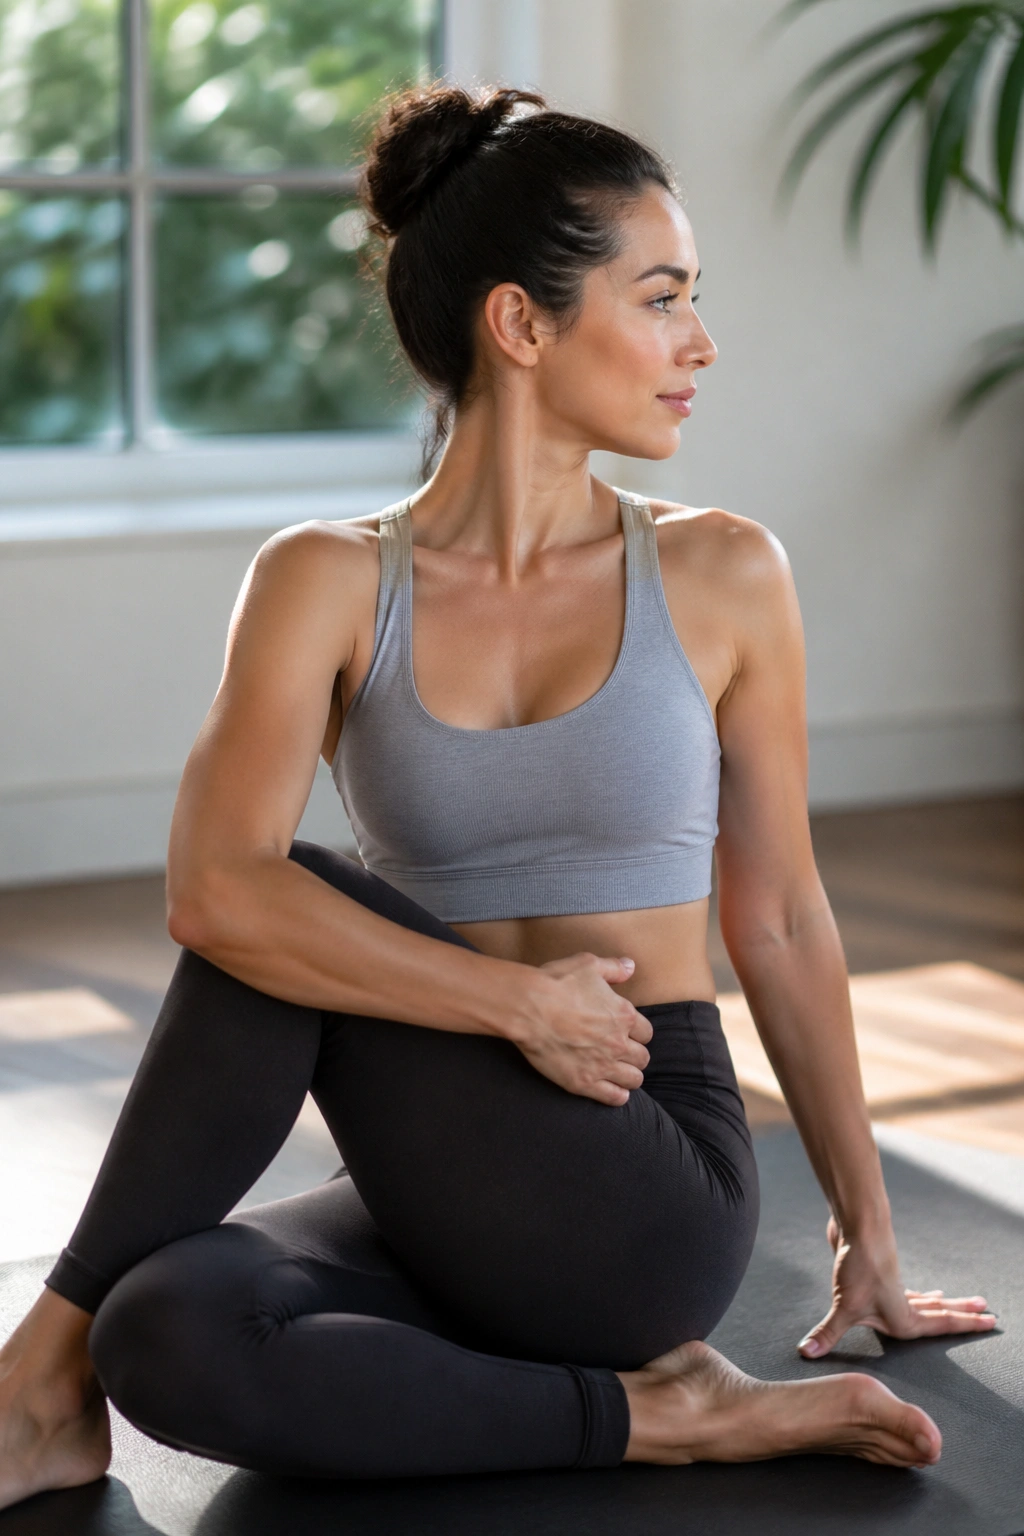
Spine twist is small, but it’s doing a lot. Sit tall, lengthen through the crown of the head, and rotate the upper body to one side while the pelvis stays rooted. Return to center and repeat on the other side.
This is not a flail. Keep the knees and feet quiet. Let the ribs turn over the hips, and keep the neck easy. The motion should feel like you’re wringing the torso gently, not forcing it through a doorway that isn’t open yet.
Rotation is one of the missing pieces in a lot of modern movement. Spine twist gives it back without needing speed or strain.
18. Saw
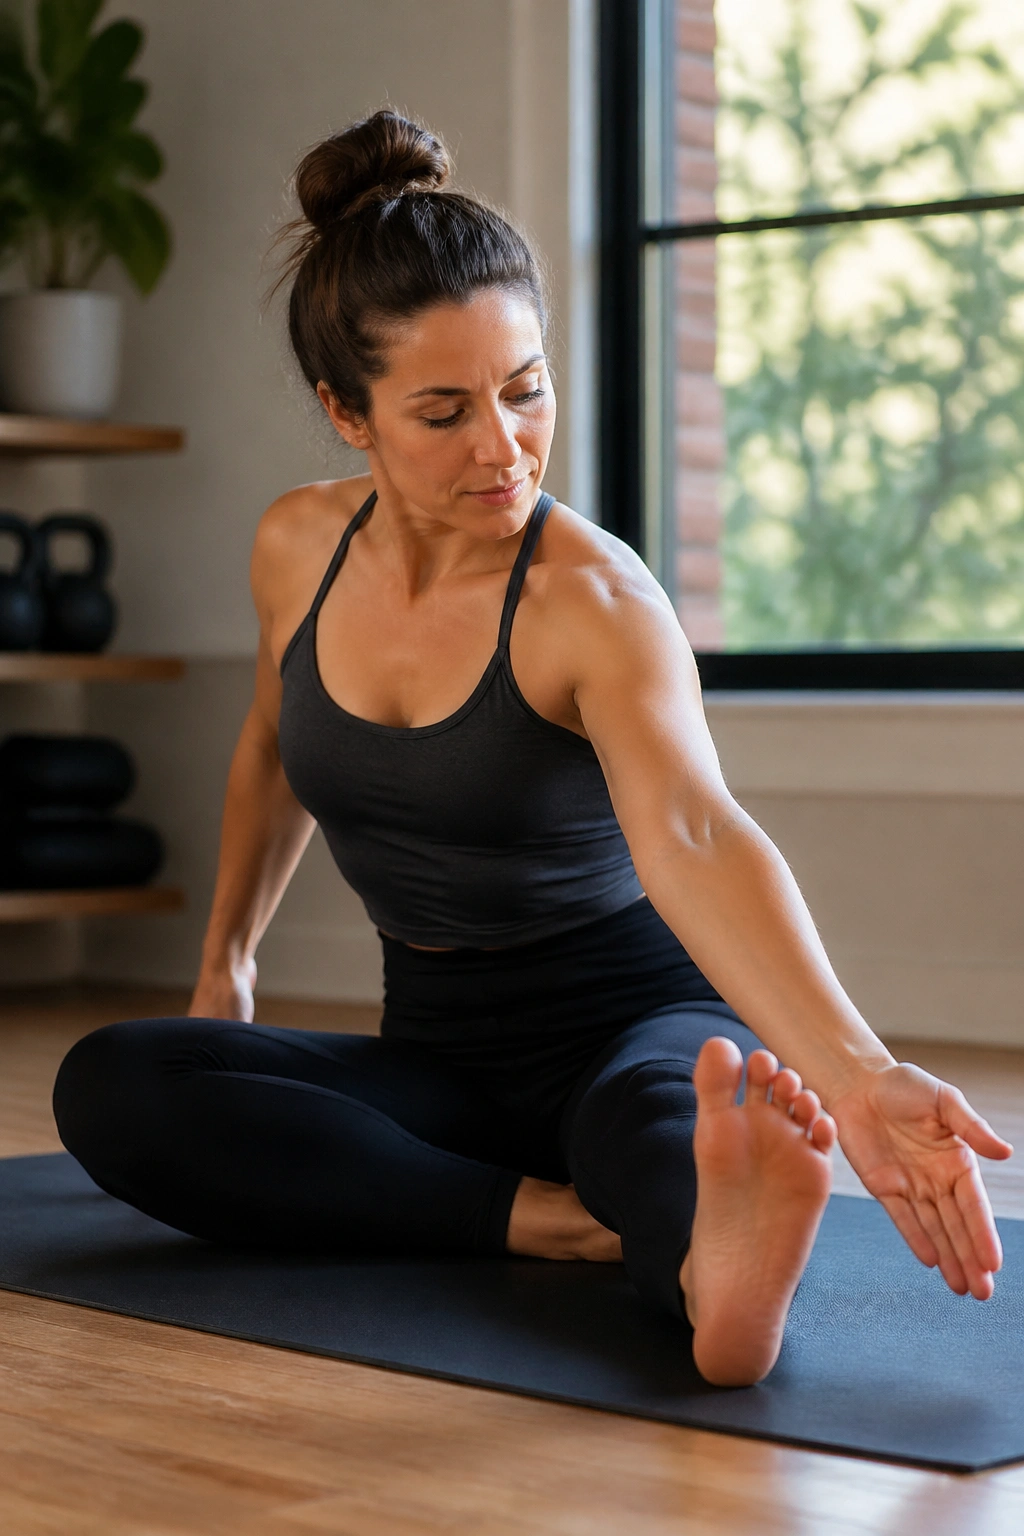
Saw adds a longer reach to the twist. Sit with your legs extended or bent, twist to one side, then reach the opposite hand toward the outside of the little toe as if you’re trying to “saw” the foot in half. Come back up through center and change sides.
The hips stay grounded. That’s the part that makes it Pilates rather than a casual toe touch. Keep the sit bones heavy and the belly lightly pulled back so the reach comes from the torso, not from dumping into the lower back.
How to Make It Work
If the hamstrings are tight, bend the knees. If the twist feels sticky, shorten the reach and work on keeping the spine tall before you fold. A cleaner half-saw beats a sloppy full one.
19. Shoulder Bridge
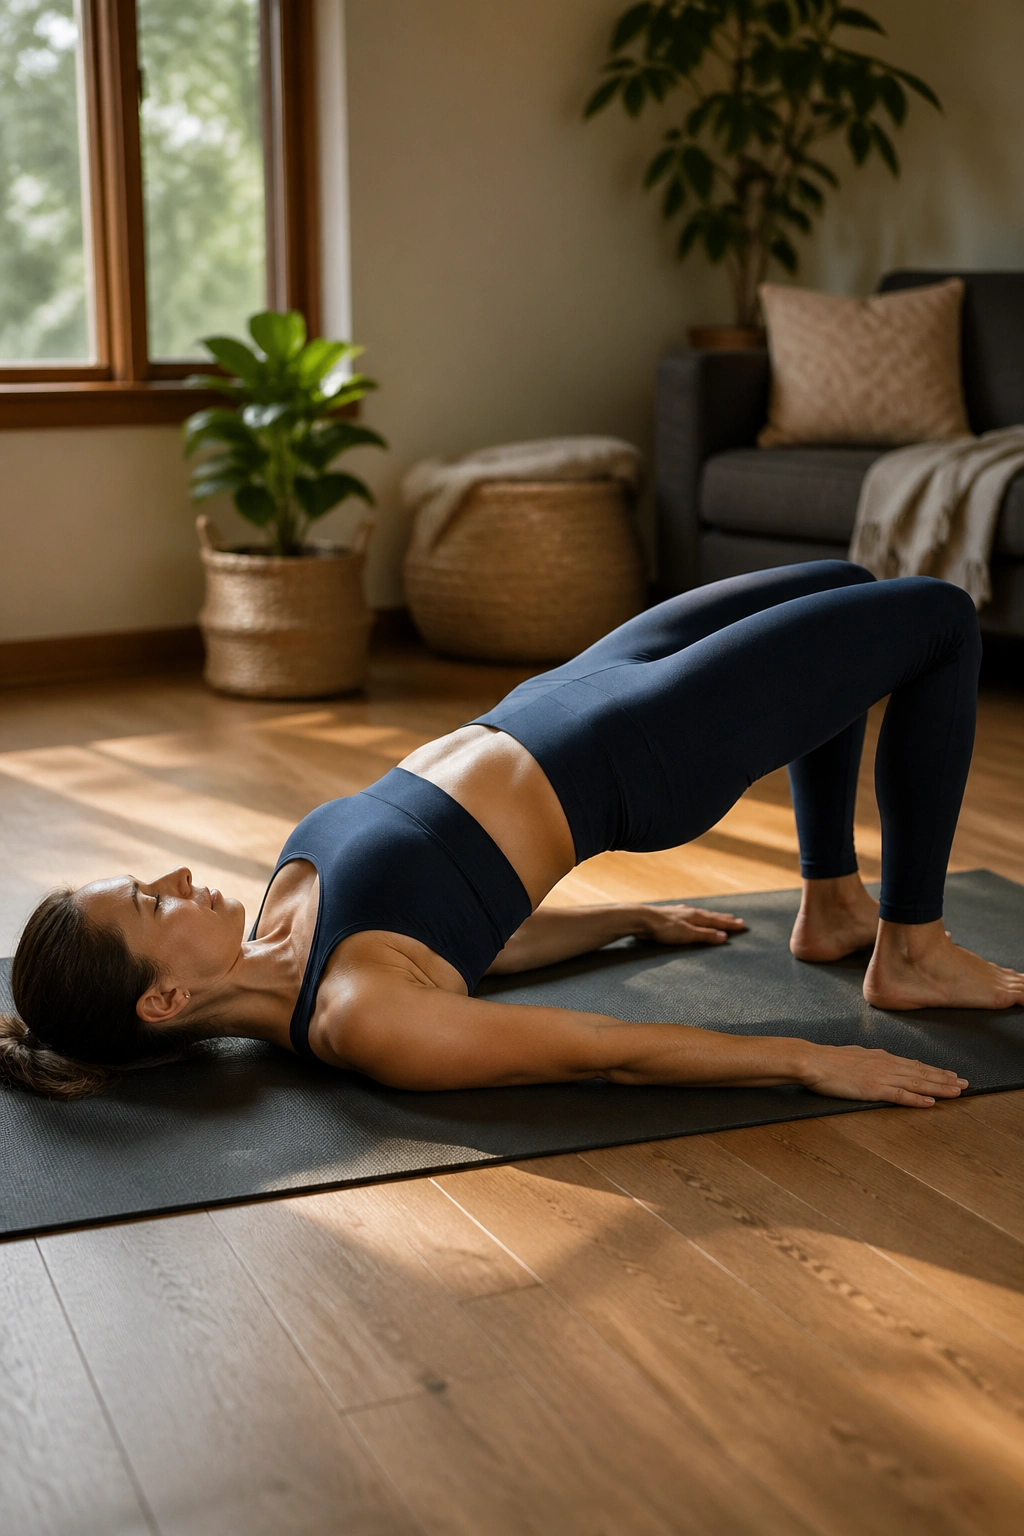
The bridge is a beginner’s best friend when you want glutes, hamstrings, and spinal control in one place. Lie on your back with knees bent, feet flat, and arms by your sides. Exhale to tuck the pelvis slightly and roll the spine up one segment at a time until you’re supported through the shoulders.
Pause at the top. Then lower with the same slow articulation. The ribs should stay knit together, not flare upward like a little tent. If you feel the hamstrings cramp, bring the heels a touch closer to the seat.
The lift comes from the back of the body, not from a big shove through the lower spine. That’s the detail that changes everything.
20. Bridge March
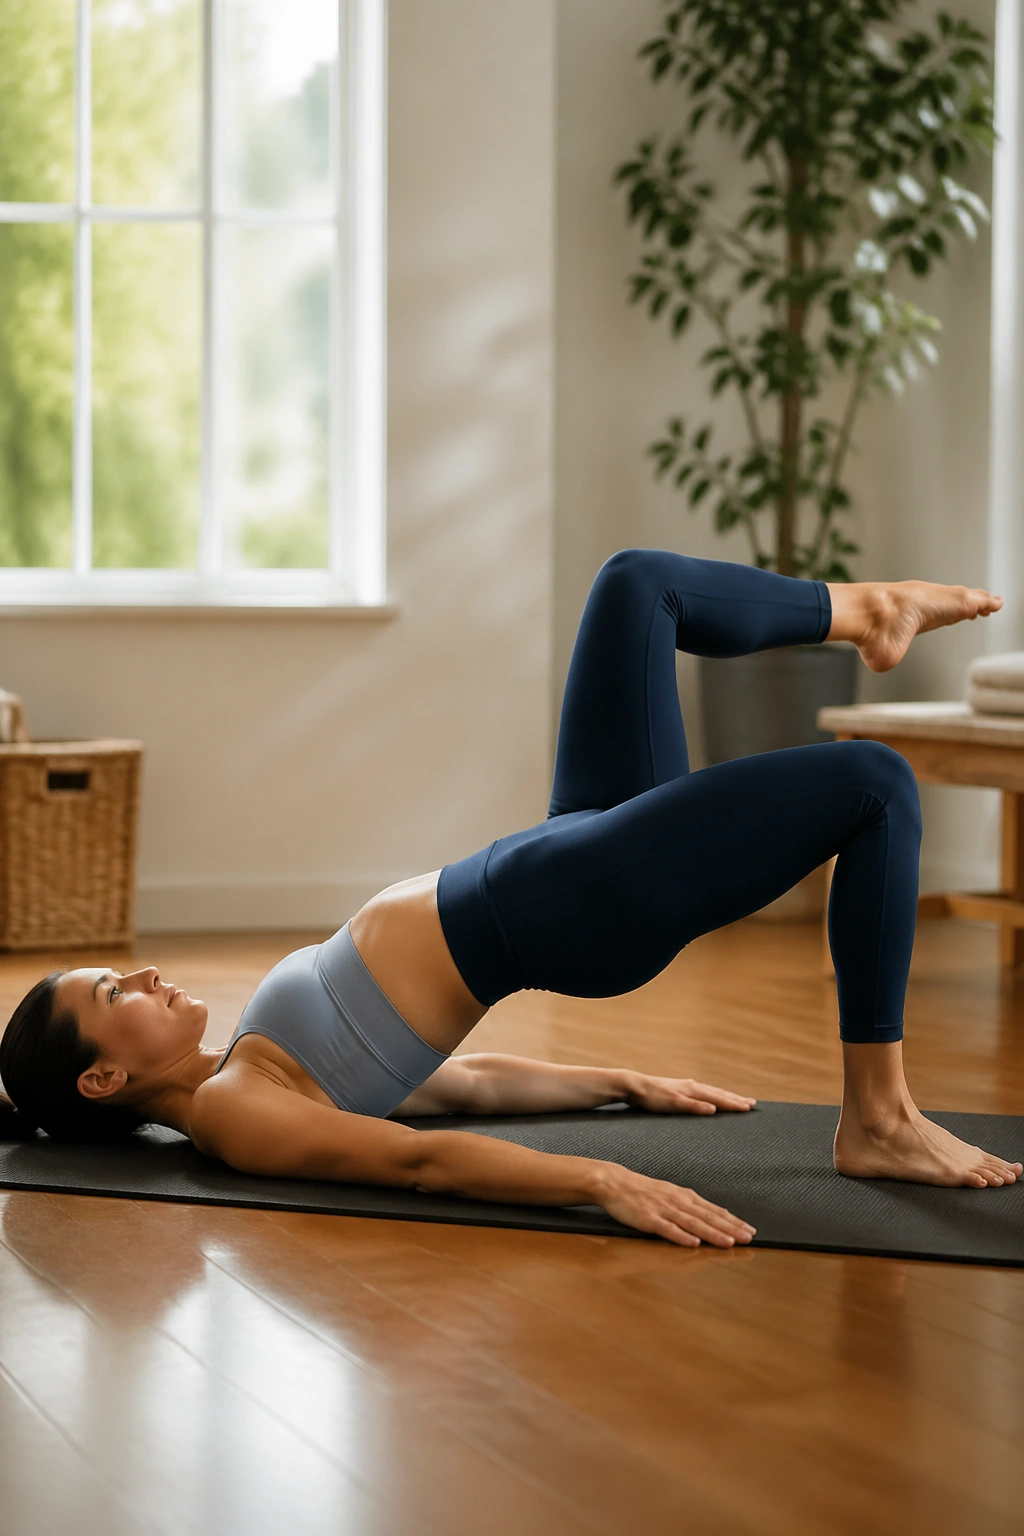
Once a regular bridge feels steady, marching one foot at a time is a strong next step. Lift into bridge, keep the pelvis level, and float one foot a few inches off the floor. Set it down, then switch sides.
The challenge here isn’t height. It’s stillness. If the hips twist or drop, make the bridge lower and the march smaller. You can even keep one heel lightly touching the mat while the opposite foot hovers.
This move tells you a lot about pelvic stability. It’s also sneaky hard. A bridge march done with control is more useful than a big, wobbly version that looks impressive for two seconds.
21. One Leg Circle
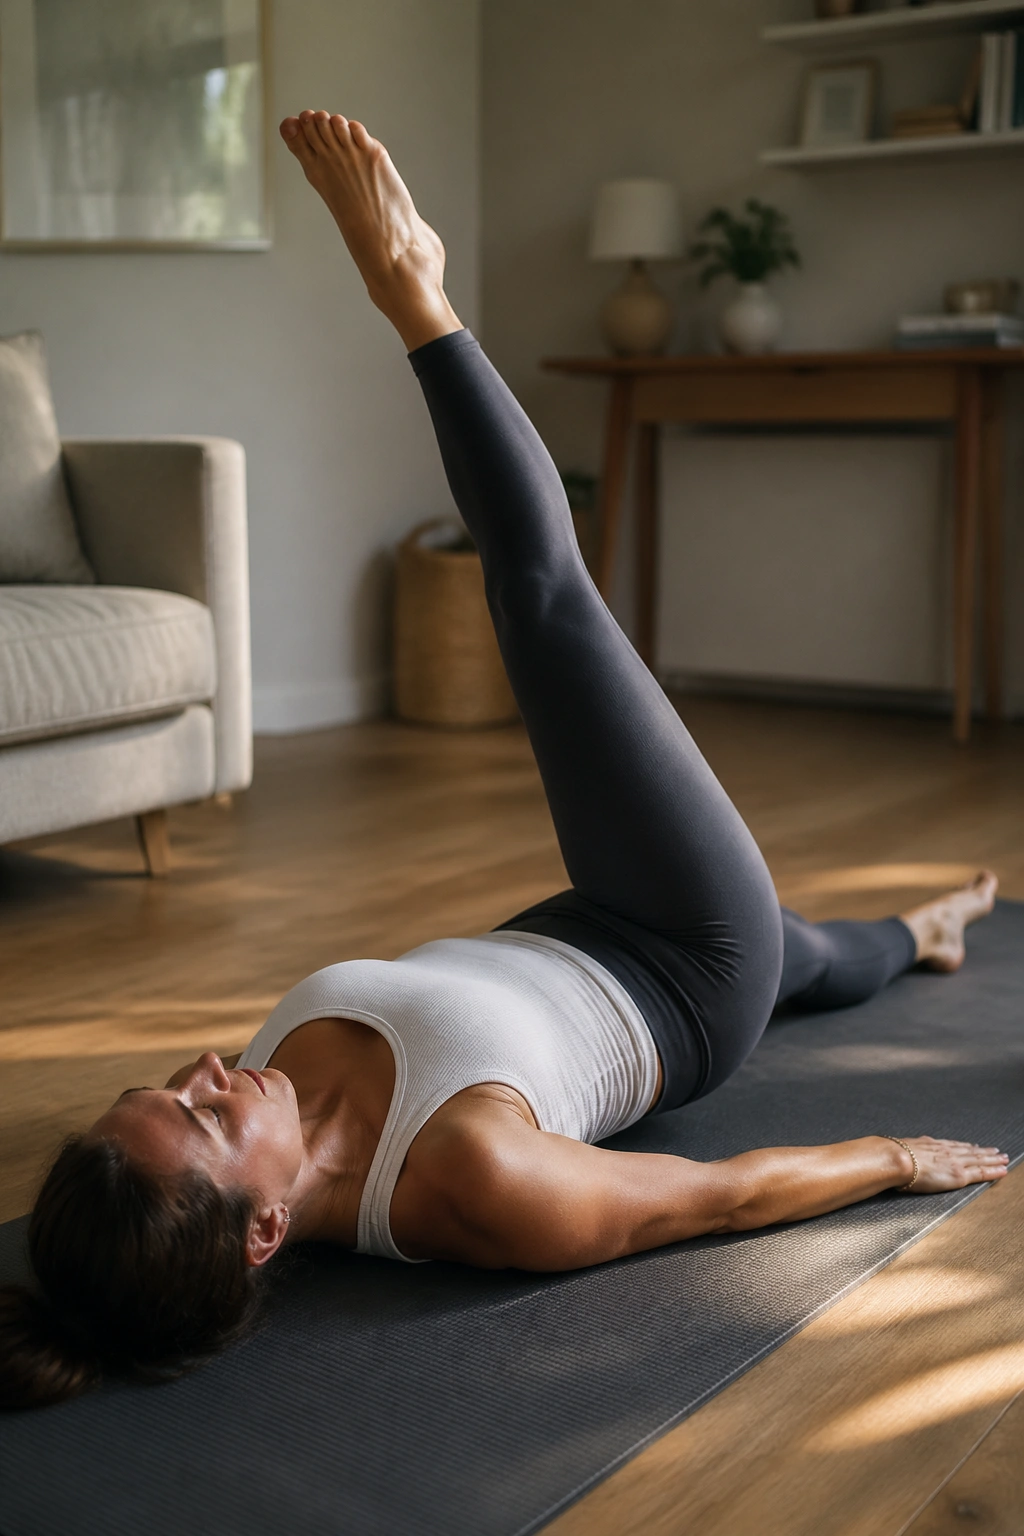
One leg circles look easy until the pelvis starts to dance. Lie down with one leg extended on the mat and the other reaching up toward the ceiling. Circle the lifted leg across the body, down, out, and back to center with a small, smooth path.
Circle Small First
Big circles are usually the wrong answer for beginners. Start about the size of a dinner plate. If the lower back twists, shrink the circle more. The working leg can stay slightly bent if hamstrings are tight.
- Keep both hip bones heavy.
- Keep the circle smooth.
- Breathe evenly.
- Reverse directions after a few reps.
The goal is control at the hip, not a dramatic leg sweep.
22. Side-Lying Clamshell
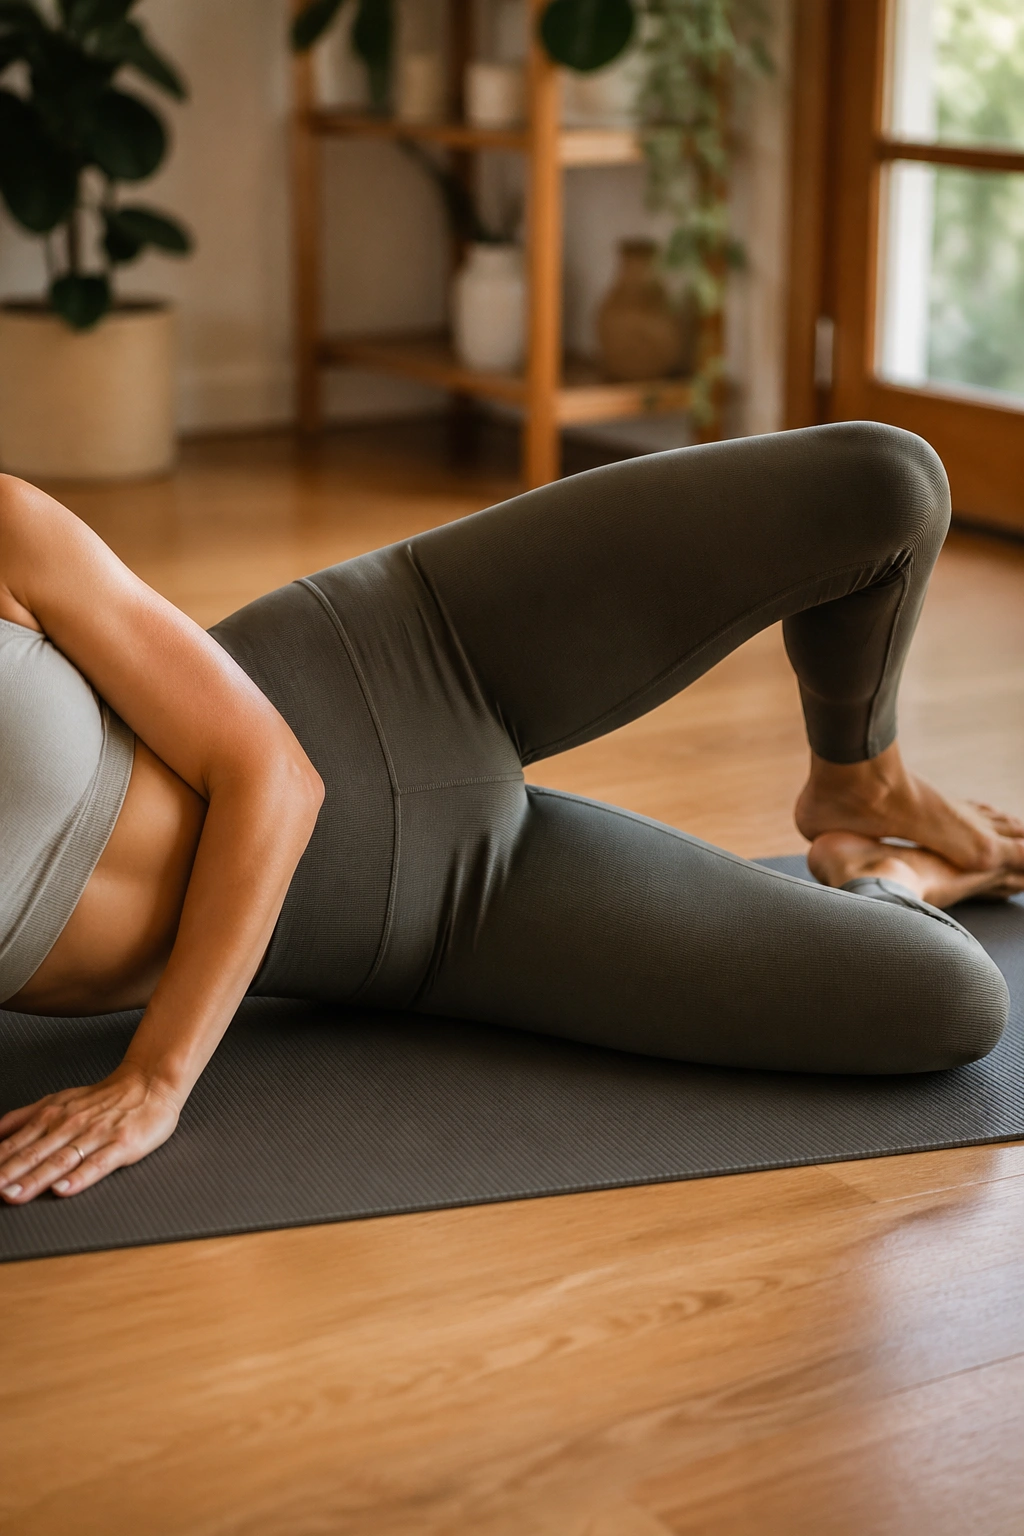
Clamshells are one of the best ways to wake up the side glutes, especially the glute medius, which helps with hip stability. Lie on your side with knees bent and feet together. Keep the pelvis stacked and lift the top knee without rolling backward.
The movement is tiny. Really tiny. If the top hip opens or the lower waist collapses, the work has drifted away from the target muscle. A pillow under the head helps keep the neck long.
This is a quiet exercise, but it pays off fast. Better hip stability makes walking, stair climbing, and standing balance feel cleaner. Small muscle, big job.
23. Side-Lying Leg Lifts
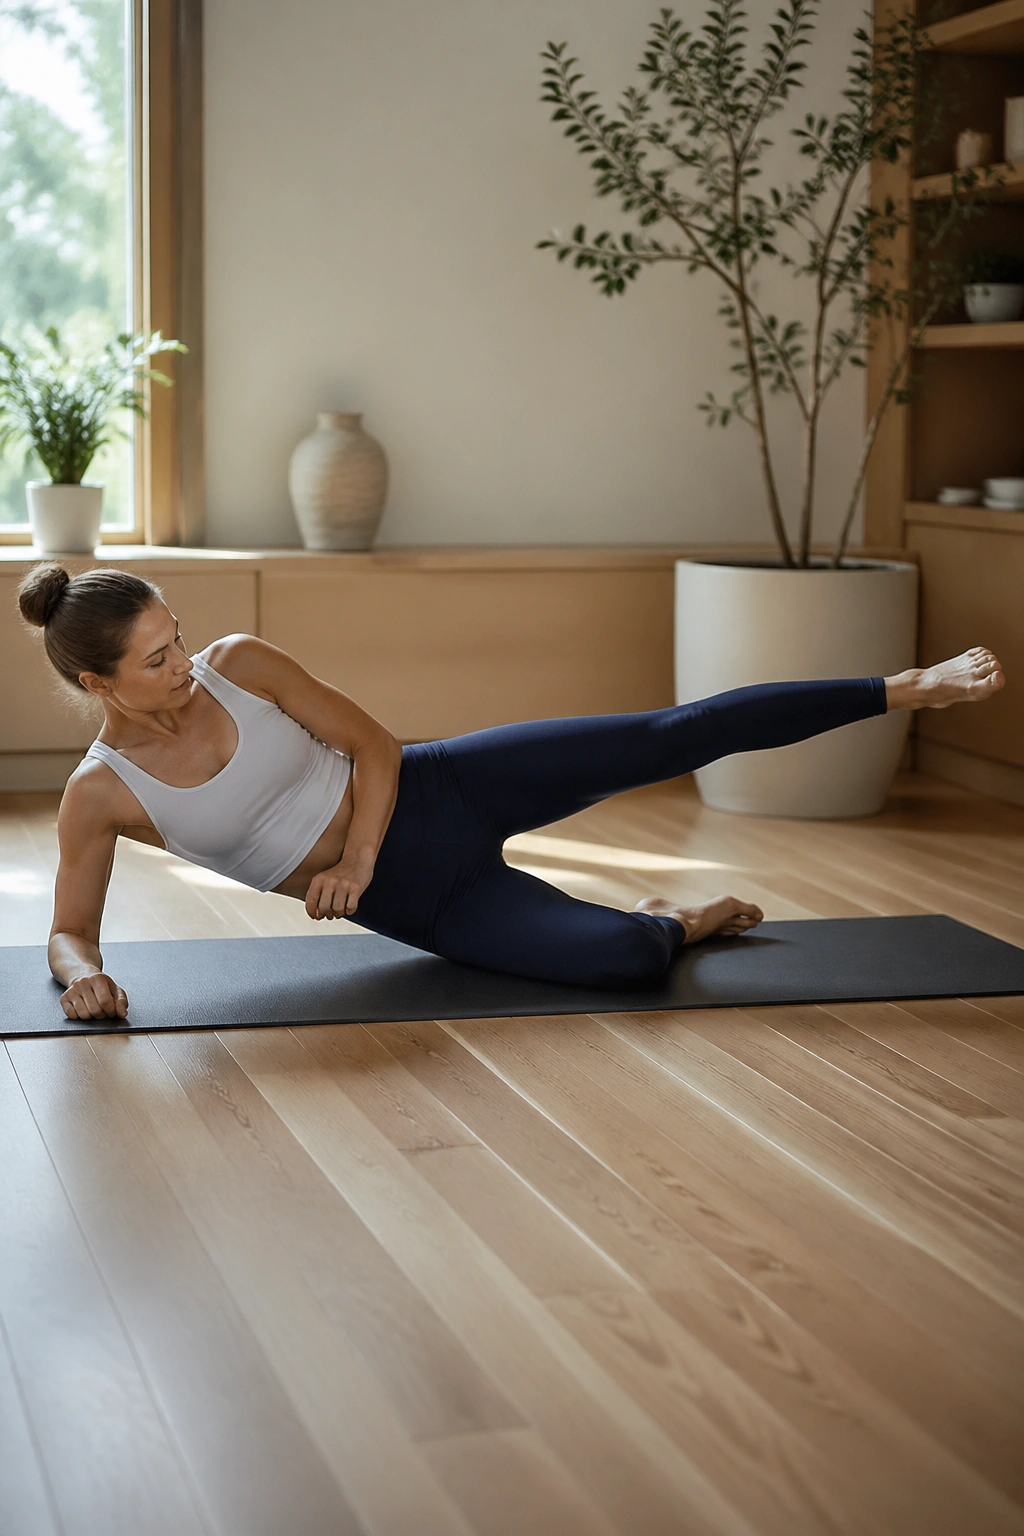
Straight-leg lifts on the side take that same hip work and stretch it out. Lie on your side, bottom leg bent if needed, top leg long and slightly behind the body line. Lift the top leg to about hip height, then lower it slowly without dropping it into the floor.
What to Feel
The outside of the top hip should work, and the waist should stay lifted away from the mat. If the foot keeps turning up toward the ceiling, reset it so the leg stays long and the hip doesn’t rotate open.
A good side-leg lift feels deliberate and a little burny by the last few reps. Keep it clean. If you start swinging, the set is over.
24. Side Kick Front and Back
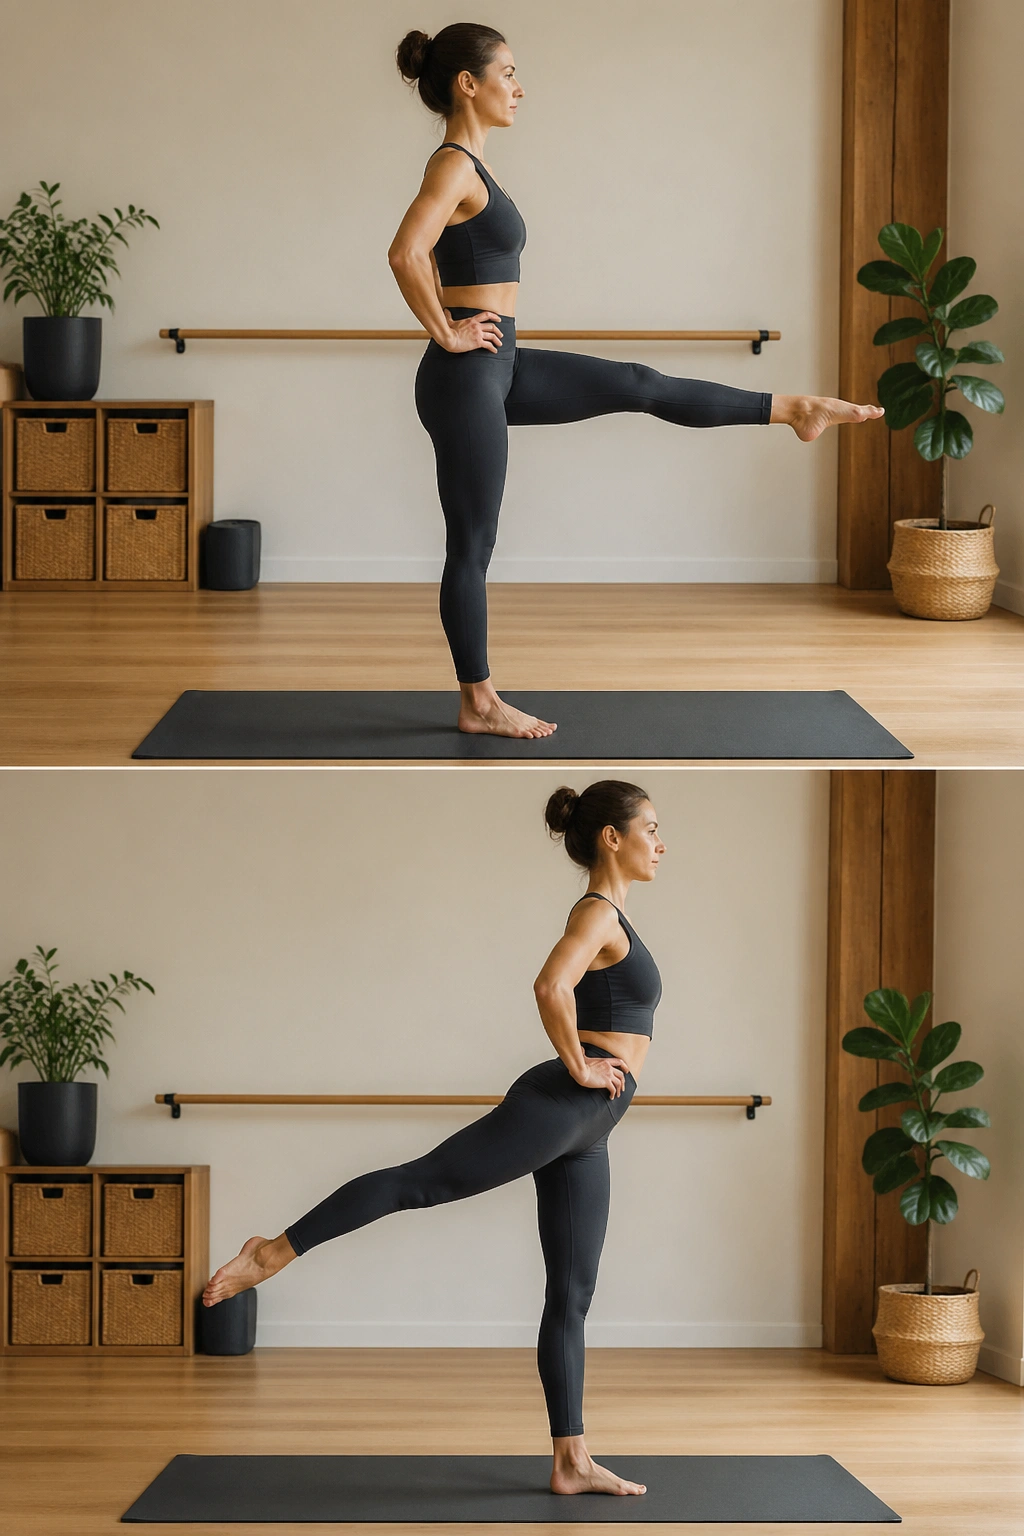
Side kick front and back is more interesting than it sounds. Stay on your side with the top leg long and slightly lifted. Kick the leg forward a little, then sweep it back behind you while keeping the torso stable.
The key is not how far the leg goes. The key is that the pelvis doesn’t rock and the torso doesn’t collapse. Think of the leg moving in a shallow track rather than a giant kick. Small range, honest control.
This one is excellent for hip mobility and hamstring length, but it only works if you keep the core awake. Let the leg move. Don’t let the spine join the party.
25. Swimming Prep
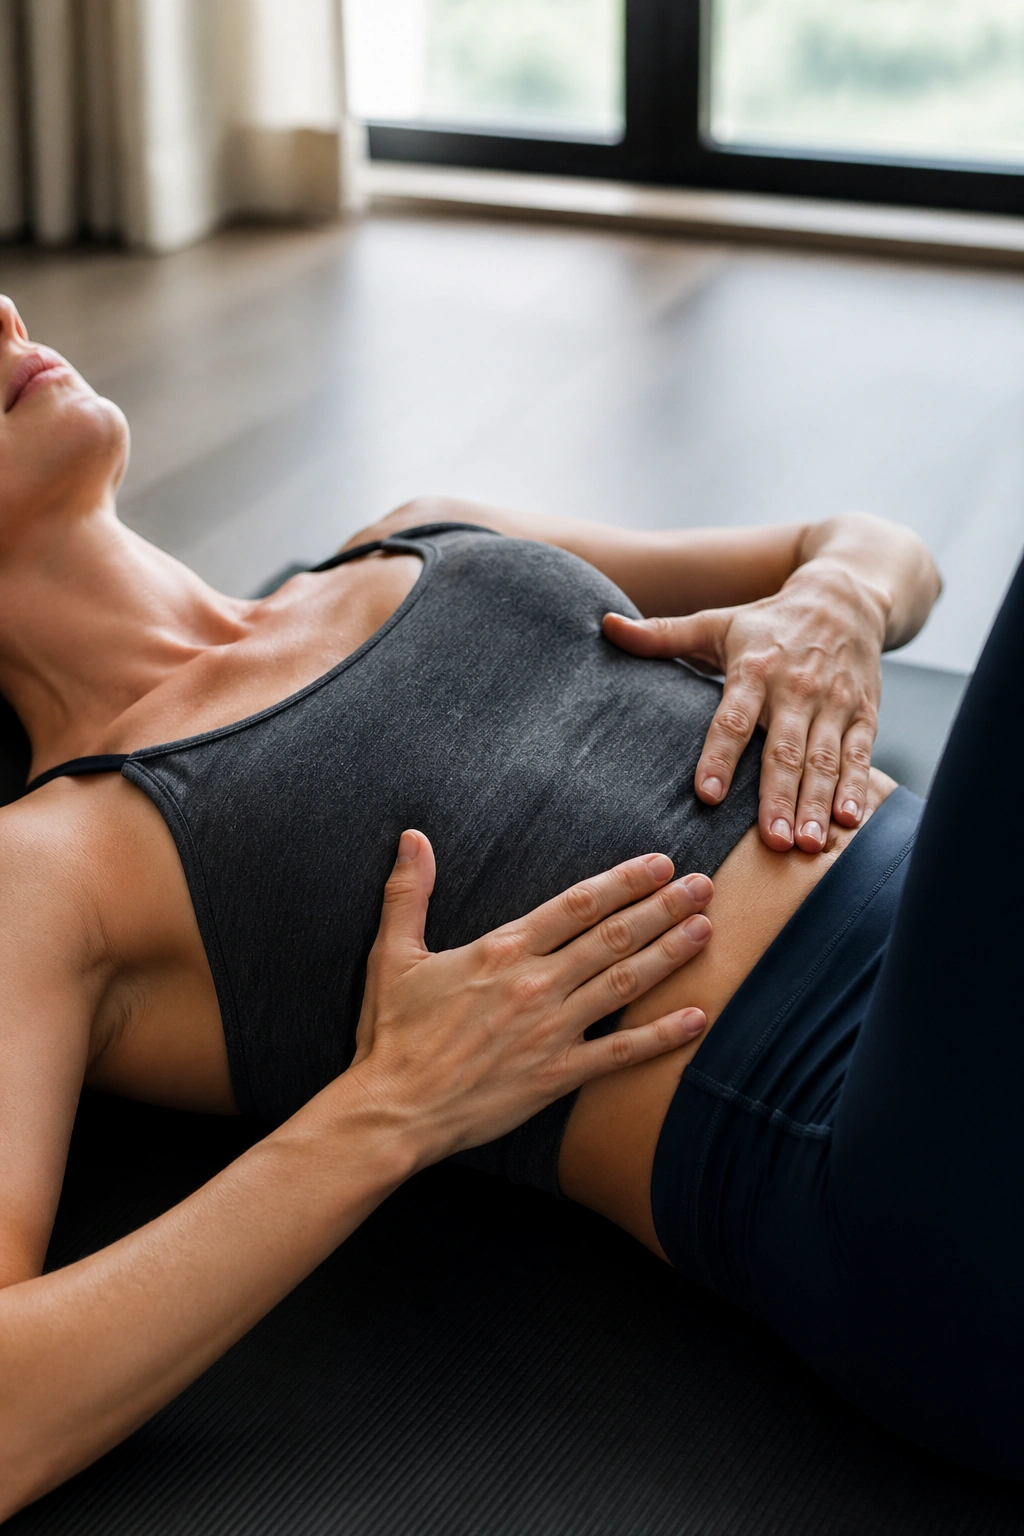
Swimming prep looks like a gentle little hover, and then your back line starts telling the truth. Lie on your stomach, extend the arms long, and lift one arm and the opposite leg just an inch or two off the mat. Switch sides in a slow rhythm.
Keep the pubic bone heavy enough that the lower back doesn’t clamp. If the neck feels cranky, keep the forehead resting down and make the lift even smaller. A tiny lift is still work.
Why Beginners Like It
It strengthens the back body without needing a standing balance drill or a machine. It also teaches opposite-limb coordination, which shows up again in bird dog and other cross-body exercises.
26. Bird Dog
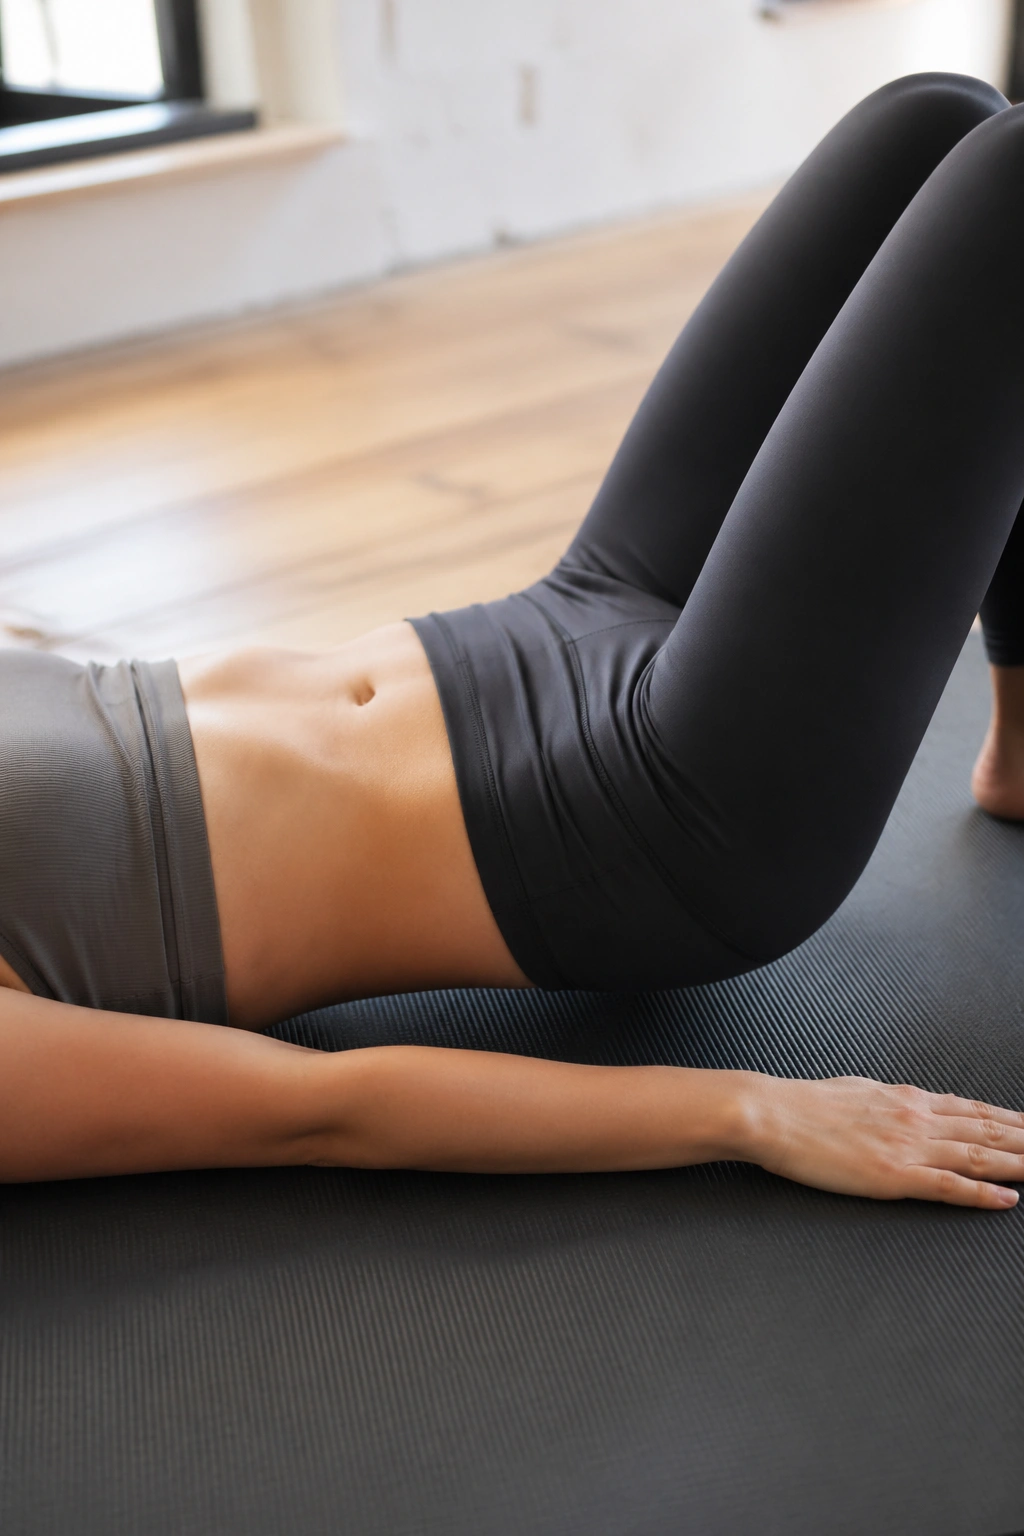
Bird dog is a mat Pilates staple that feels simple until your hips start wiggling. Start on hands and knees with wrists under shoulders and knees under hips. Reach one leg back and the opposite arm forward, then hold for a breath before returning to center.
The spine stays long, not collapsed. If your wrists are sensitive, come down to forearms or place folded towels under the hands. If the balance is shaky, keep toes on the floor and just reach the arm first.
This exercise has a nice honesty to it. You either control the center or you don’t. No drama. Just feedback.
27. Forearm Plank on Knees
A beginner plank should feel like a strong line, not a punishment. Set your forearms on the mat, knees down, and step the body back so the shoulders sit roughly over the elbows. Draw the low belly in and hold.
Form Check
- Keep the back flat.
- Keep the neck long.
- Press the floor away.
- Stop if the low back sags.
The knee-down version lets you build shoulder stability and core endurance without forcing a full plank right away. I like it because it teaches the shape of plank before it asks for the full load. That order matters.
28. Side Plank on Knees
Side plank on the knees is a smart way to train the obliques without getting lost in wobble. Lie on one side, prop yourself on one forearm, stack the knees, and lift the hips so the body forms a side line from shoulder to knee.
Hold for a few breaths, then lower slowly. If the shoulder feels jammed, set the bottom knee slightly forward and keep the lift modest. That tiny adjustment can change everything.
What to Remember
The hip should lift from the side waist, not from a shrug in the shoulder. Keep the neck long and the ribs pulled in. Short holds done well beat long holds with ugly form.
29. Mermaid Stretch
Mermaid is the reward after all that steady work. Sit to one side with your legs folded comfortably, one hand on the floor, and the other arm reaching overhead. Side bend gently, then come back up through the center and switch sides.
The stretch should feel open through the ribs and the side waist, not pinchy in the low back. Move slowly. Breathe into the side you’re opening, and let the shoulder relax down instead of creeping toward the ear.
It’s a nice cooldown because it restores length after all the curling and bracing. The body likes a little space after effort.
30. Cat-Cow Flow
Cat-cow may show up in yoga classes too, but it earns its spot in beginner mat Pilates because it teaches spinal motion without force. On hands and knees, inhale to let the chest open and the tail lift a little, then exhale to round the spine and scoop the belly in.
Keep the movement smooth and small. You’re not trying to create the biggest arch possible. You’re trying to feel each part of the spine move in a calm wave. If the wrists dislike the position, come down to forearms or place your hands on fists.
This is a good place to finish because the body ends where it started: aware, loose, and better organized than before. A tiny flow like this makes the whole mat feel less like a test and more like a place you understand.
Once these movements feel familiar, the next step isn’t to chase harder versions right away. It’s to repeat the basics until they feel clean, because that’s where the shape of real Pilates starts to show up—quietly, and then all at once.
