



A smaller-looking waist rarely comes from crunches alone. Wall Pilates works better as a quiet fixer: it teaches your ribs, pelvis, hips, and deep core muscles to stop fighting each other, which can make your midsection look and feel tighter over time.
The wall matters because it gives you feedback you can’t fake. If your lower back arches, if your ribs flare, if one hip shifts, you feel it right away. That kind of honest feedback is useful, especially when the goal is belly fat loss and you want movements that build control without chewing up your joints.
One blunt truth belongs here early: no exercise melts belly fat in one spot. Fat loss comes from an overall calorie deficit, plus enough movement to keep your body burning energy and holding onto muscle. Wall Pilates can still earn its place, though, because it trains the core, glutes, and posture muscles in a way most people can repeat without dreading it.
A smart way to use these moves is simple. Pick 5 to 8 of them, work for 30 to 45 seconds each, rest 15 to 20 seconds, and repeat the circuit 2 to 4 times. If a move feels sloppy, shorten the range. If your lower back starts taking over, stop and reset. Sharp pain is a stop sign.
1. Wall Roll-Down for a Cleaner Core Brace
Stand with your back against the wall, feet about 8 to 12 inches forward, and let your knees stay soft. Slowly tuck your chin, then peel your spine away from the wall one vertebra at a time until your hands reach toward your thighs. Roll back up just as slowly.
That sounds small. It isn’t. The roll-down forces you to control your torso without throwing your weight around, and that control is exactly what a lot of people lose when they try to “work the abs.” Your deep core has to stay on while the spine moves, which is a sneaky hard job.
A good roll-down feels smooth, not fast. Your shoulders should stay relaxed, your neck long, and your weight balanced through both feet. If you bend only from the hips and ignore the spine, you miss the point.
Best cue: think “ribs down, belly gently in, move one bone at a time.”
Common mistake: yanking yourself up with your lower back.
Use it for: 6 to 10 slow reps as a warm-up or a reset between harder moves.
2. Wall Squat with Pelvic Tuck to Wake Up the Lower Abs
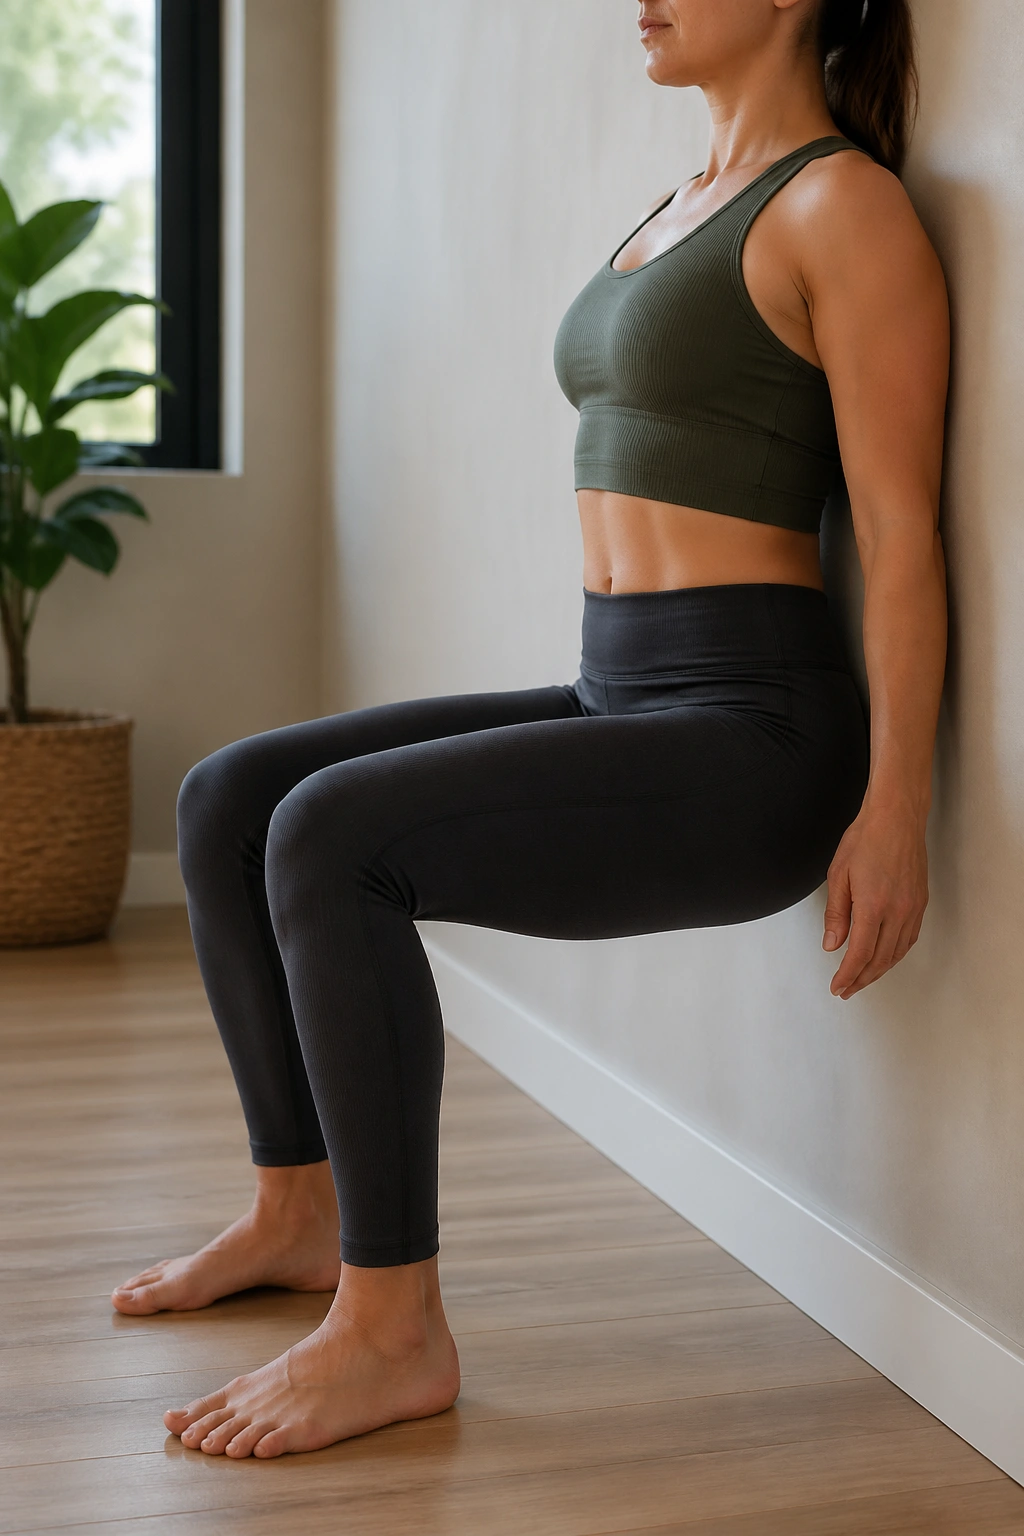
Why does a wall squat feel harder than it looks? Because the wall removes all your little cheats. Once your back is pressed lightly into it, you can’t hide a sloppy pelvis or collapsed rib cage.
Start with your back on the wall and your feet about a foot in front of you. Slide down until your knees are bent around 90 degrees, or stop higher if that’s too much. Before you hold, do a small posterior pelvic tilt — that means gently flatten the low back toward the wall without clenching your glutes hard.
What to watch for
- Knees track over the middle toes, not caving inward.
- Ribs stay stacked over the pelvis.
- Weight stays in the heels and midfoot.
- The thighs should burn before the low back does.
If you want this move to help with a leaner-looking middle, don’t rush through it. Hold for 20 to 40 seconds, or pulse only 2 to 3 inches up and down. Slow work builds more body awareness than the wild up-and-down version people copy from short clips.
3. Wall Dead Bug Press That Forces Your Core to Do the Work
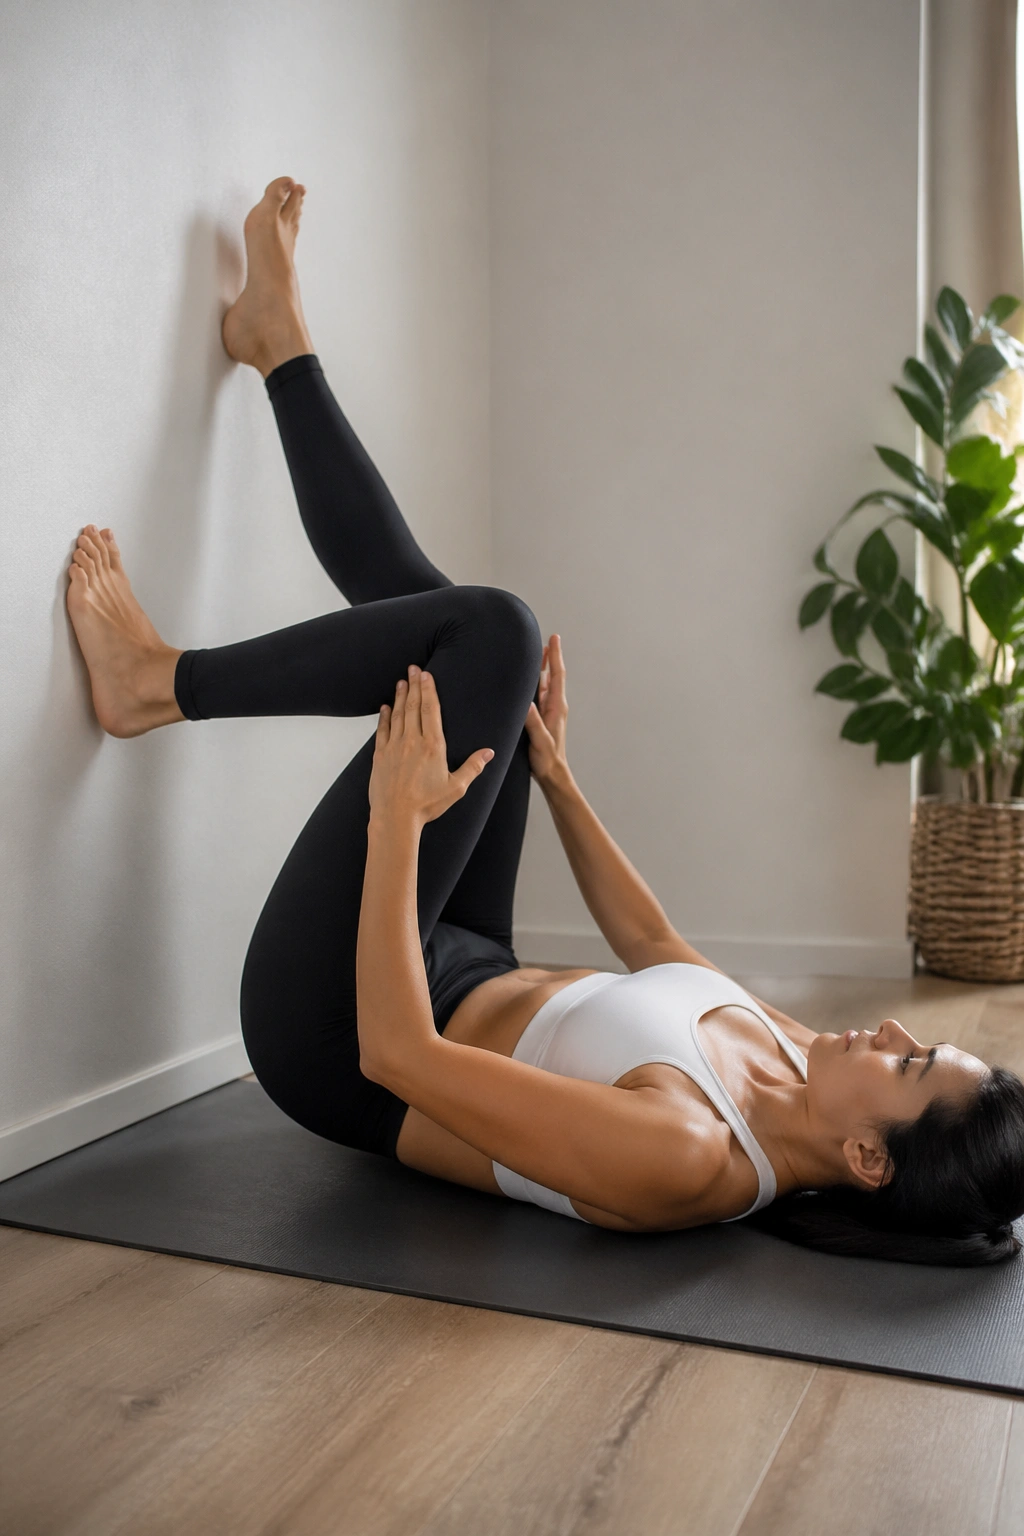
This is one of the best wall Pilates moves for people who can’t feel their abs in floor work. The wall gives your legs something to press into, and that pressure wakes up the deep core fast.
Lie on your back with your feet on the wall, knees bent at about 90 degrees. Press your palms into your thighs as one thigh lowers a few inches away from the wall, then bring it back. Switch sides. The point is not how far the leg travels. The point is whether your lower back stays quiet.
How to use it
- Do 6 to 8 reps per side.
- Move slowly enough that you can exhale during the hard part.
- Keep your shoulders heavy on the floor.
- Stop the set if your ribs pop up or your back arches.
This move is especially good if you sit a lot. Hip flexors get cranky, the low back overworks, and the abs end up asleep at the wheel. The wall dead bug press wakes the whole system up without needing fancy equipment.
4. Wall Bridge with Heel Drive for Glutes and Waist Support
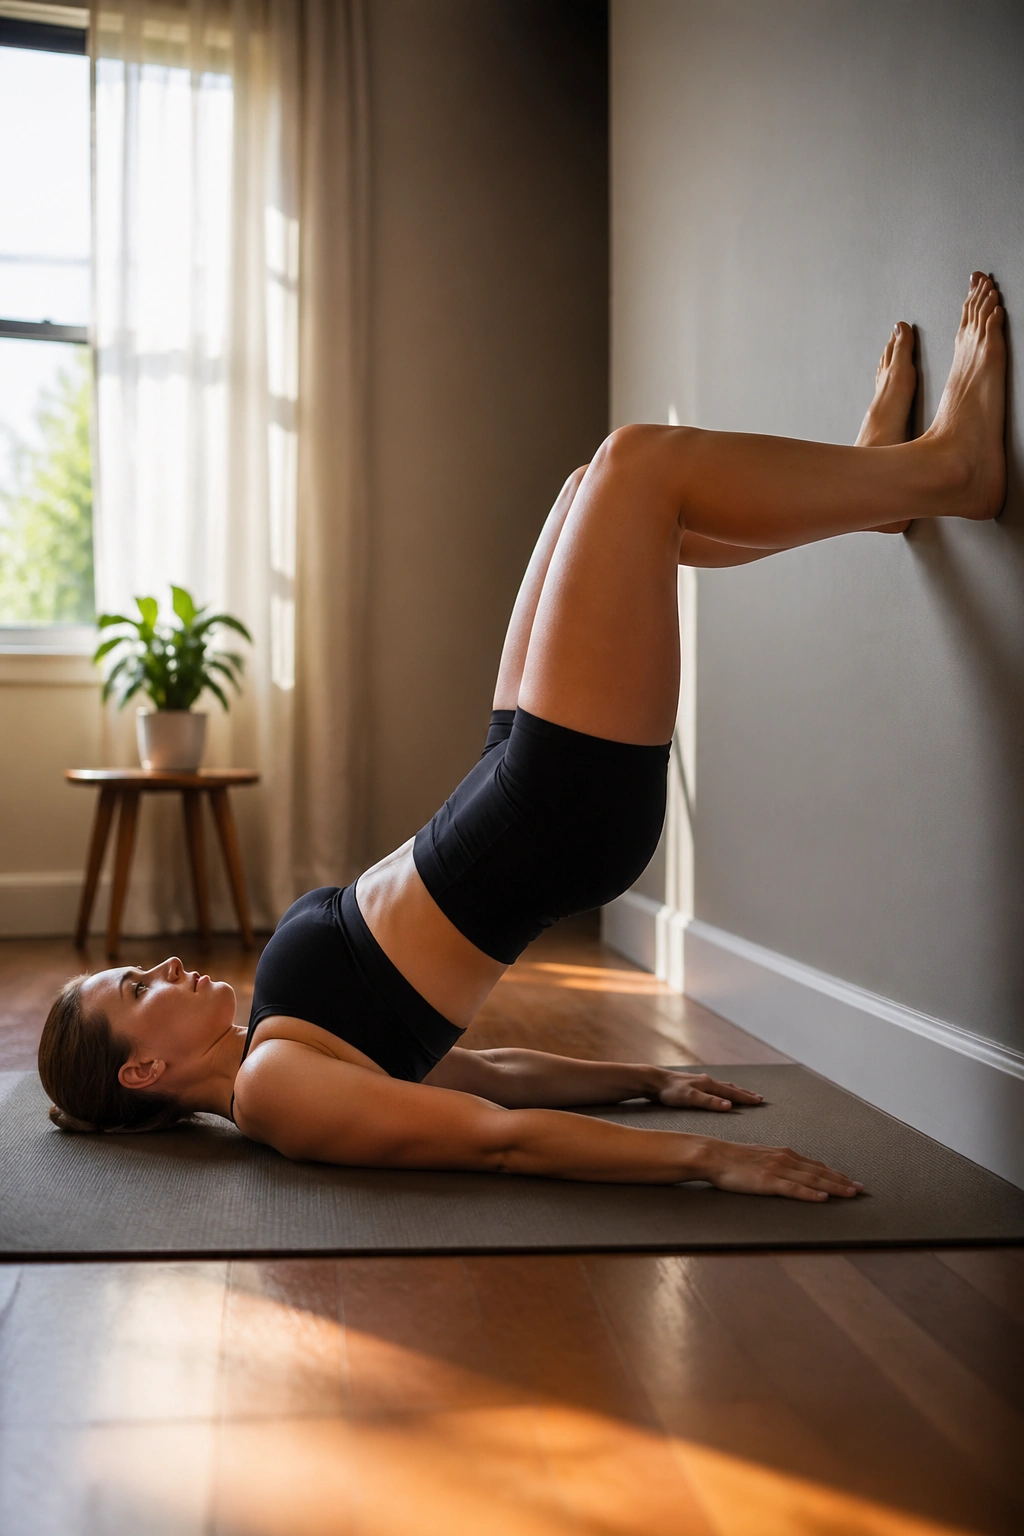
Unlike a regular floor bridge, the wall version gives you a steadier point of contact, which makes it easier to feel the glutes instead of the hamstrings. That matters more than people think.
Lie on your back with your feet on the wall and knees bent. Push through your heels, lift your hips a few inches off the floor, and pause at the top for 2 seconds. Your ribs should stay soft; your back should not arch like a bridge in a cartoon. Lower with control.
The glutes are not just leg muscles. When they do their job well, your pelvis sits better, your low back complains less, and your core does not have to brace quite so hard all day long. That’s part of why posterior-chain work matters for a flatter-looking midsection.
If the hamstrings cramp, walk your feet a little higher on the wall and reduce the lift. If you feel your lower back taking over, make the movement smaller. The bridge should feel like a strong squeeze through the back of the hips, not a fight with gravity.
5. Standing Wall March for Quiet, Steady Ab Work
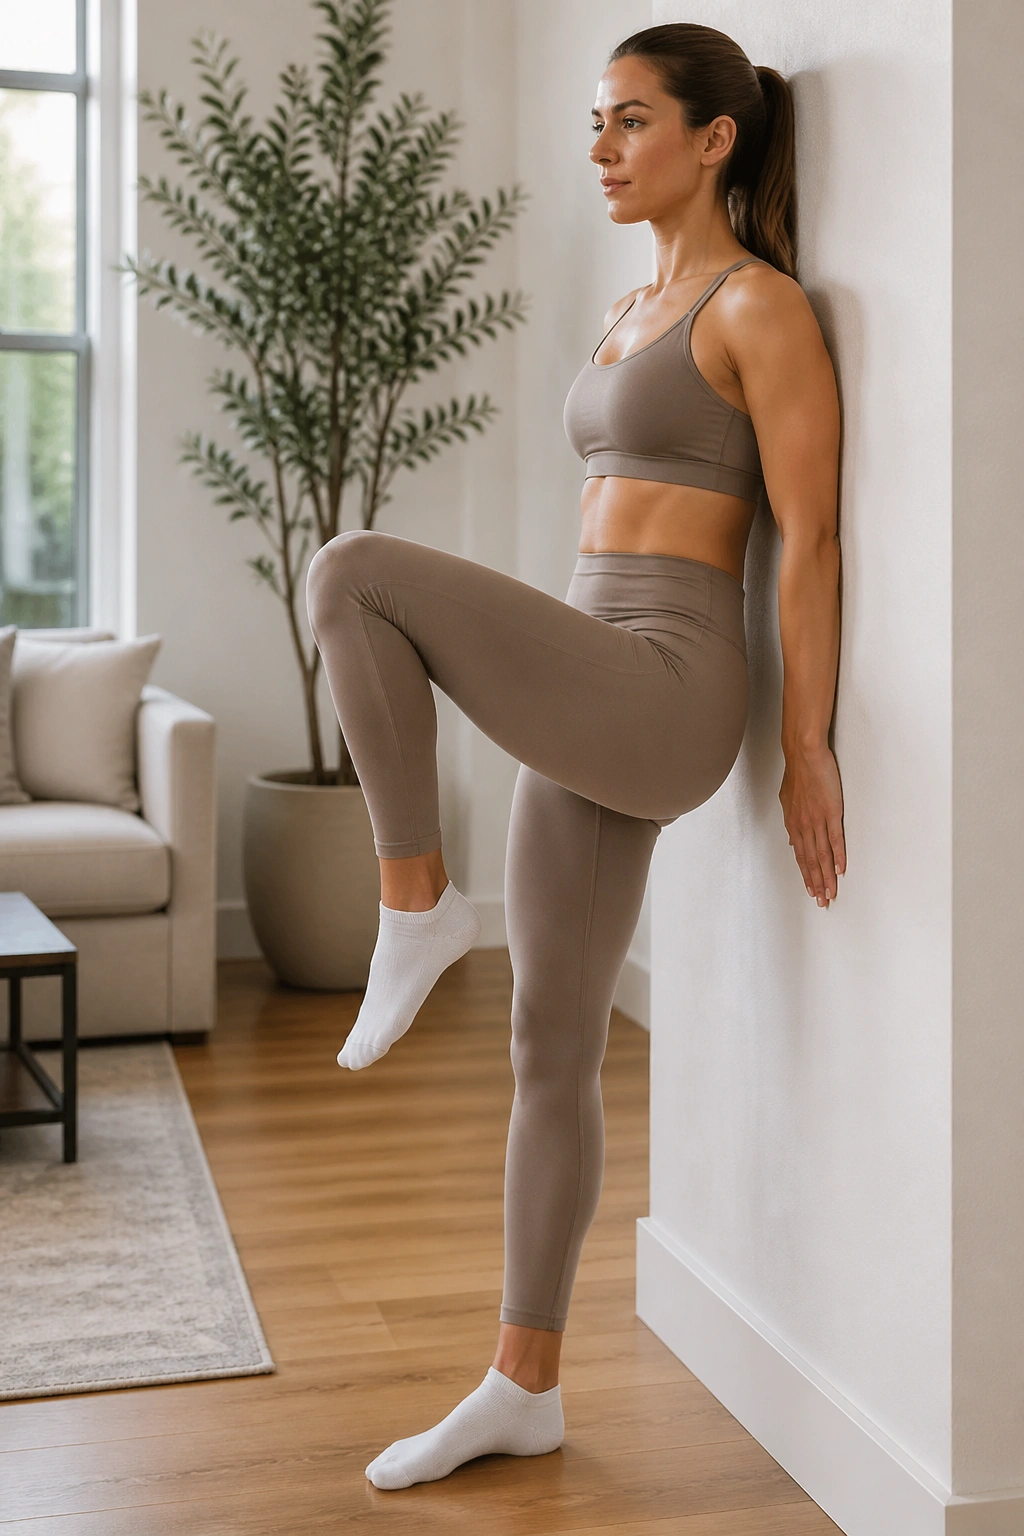
A wall march looks almost too easy. That’s the trap.
Stand with your back to the wall, feet a few inches out, and lightly press your shoulders, ribs, and tailbone toward the surface. Lift one knee to hip height if you can, or lower if you need to. Hold for a second, then switch sides without letting your torso sway.
The magic is in the stillness. Your abs have to stop your body from tipping, and that anti-rotation work is exactly what helps build a tighter, more controlled midline. One strong march won’t do much. Ten slow ones will tell you a lot.
If the standing version feels unsteady, keep one fingertip on the wall for balance. No shame there. Good form beats heroics every time.
That’s the whole point. Stability first, speed later.
6. Wall Plank Hold for Beginners Who Hate Floor Planks
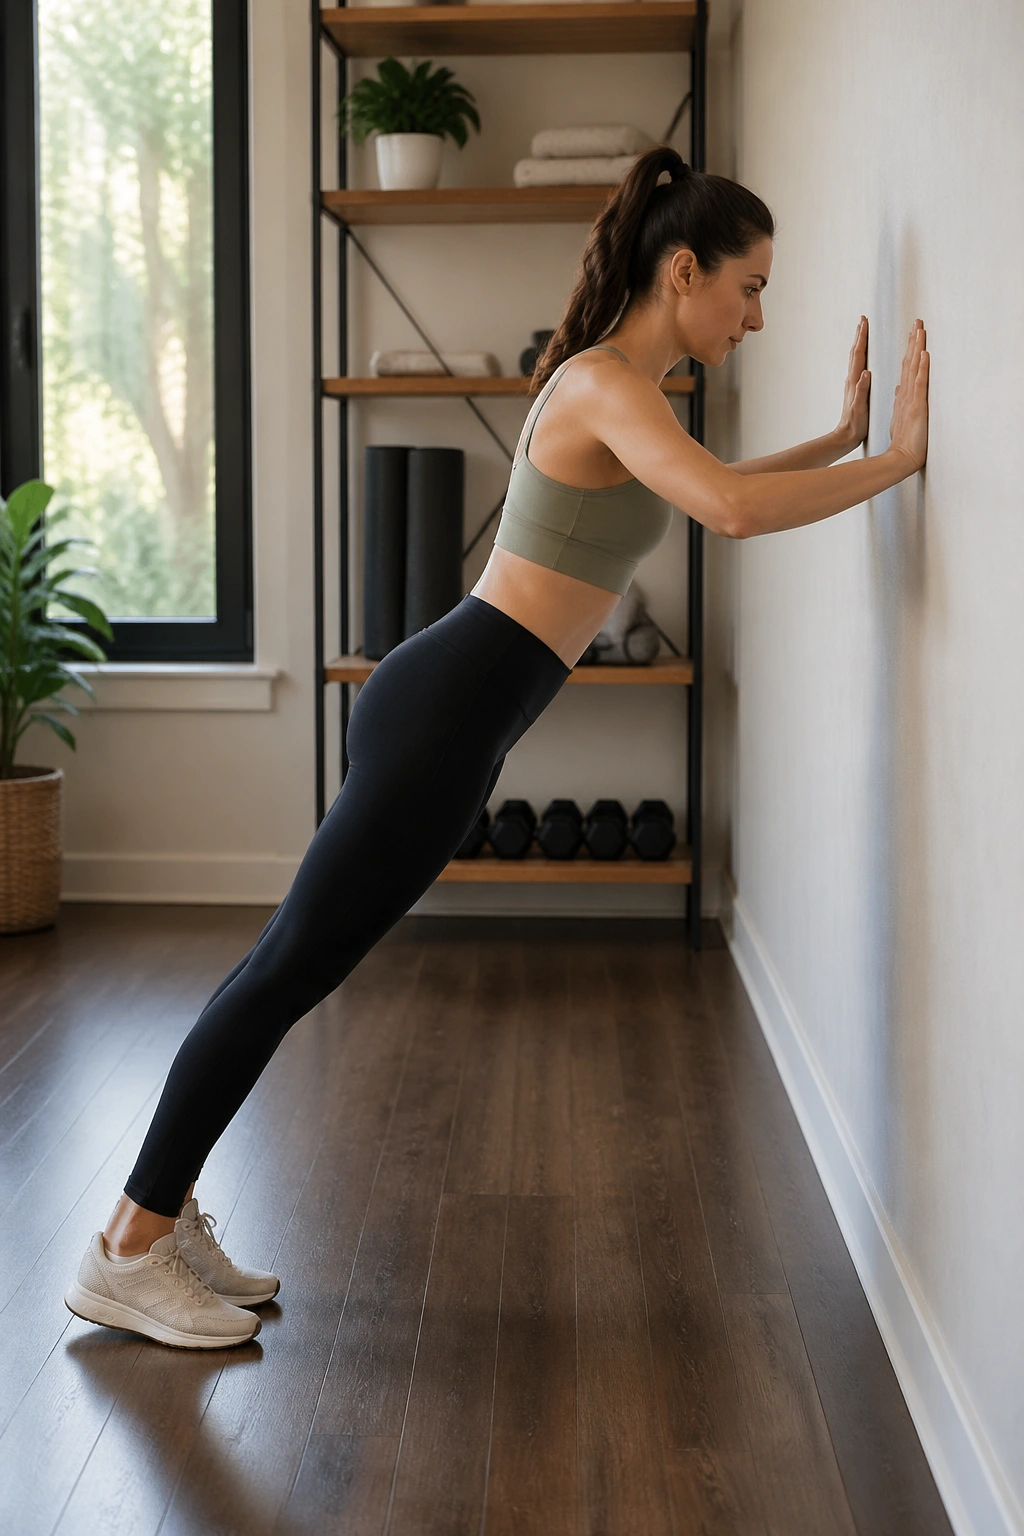
A lot of people skip planks because the floor version feels too punishing on the wrists or too ugly in the lower back. A wall plank solves both problems.
Place your hands on the wall at chest height, step your feet back, and walk into a long diagonal line from head to heels. Press the wall away and gently draw your lower ribs in. Your body should feel like one straight plank, not a banana.
Why it works
- It teaches core bracing without wrist strain.
- It lets you practice shoulder stability at a lower load.
- It is easy to scale by moving your feet closer or farther from the wall.
- It pairs well with breathing drills, which a lot of people skip until they feel winded.
Hold for 20 to 40 seconds, breathing through your nose if you can. If your shoulders shrug up, shorten the hold and reset. If your hips sag, bring your feet closer to the wall. The move should feel honest, not brutal.
7. Wall Leg Slides to Stop the Pelvis From Rocking
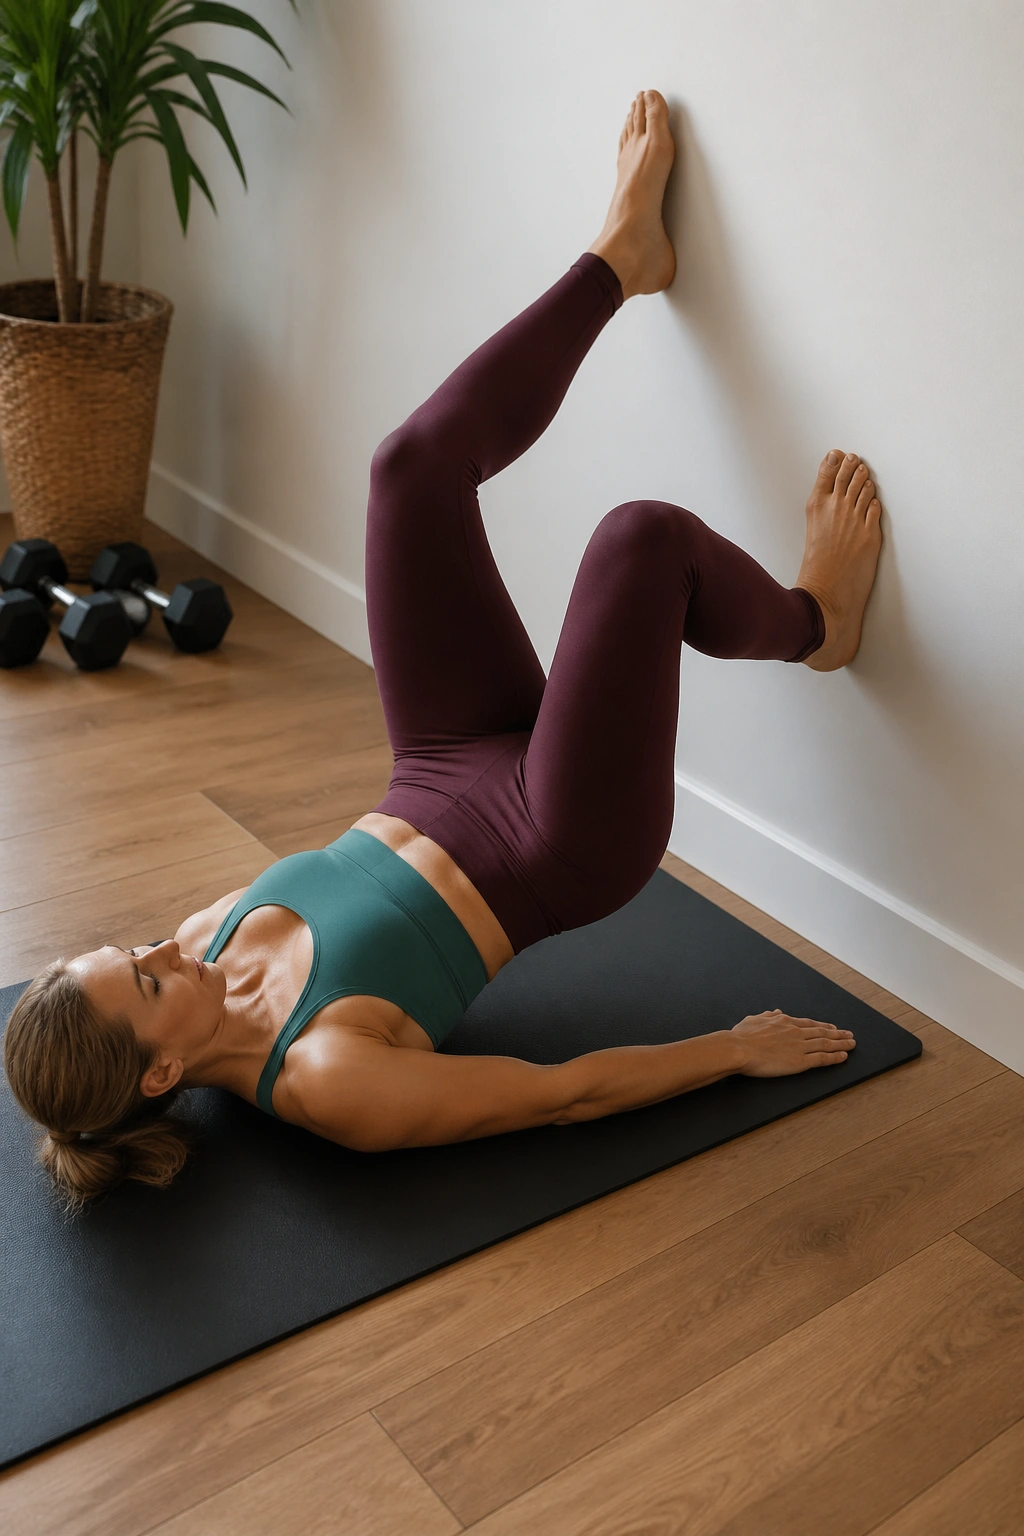
Lie on your back with both heels on the wall, knees bent. Slowly slide one heel down the wall until the leg almost straightens, then bring it back up. Keep the other leg steady. Switch sides.
This move is quiet, and that’s why I like it. No bouncing. No dramatic crunching. Just the deep core learning how to keep your pelvis from tipping every time a leg moves away from the body.
What makes it different
The moving leg wants to drag the pelvis into a tilt. Your job is to stop that. That tiny battle is what makes the exercise useful for the lower abs and the stabilizers around the hips.
Start with 5 to 8 slow slides per side. If your low back pops off the floor, the range is too big. Make it smaller and breathe out on the way down. The exhale matters more than people think; it helps the ribs stay where they belong.
8. Wall Toe Taps for Lower-Ab Control
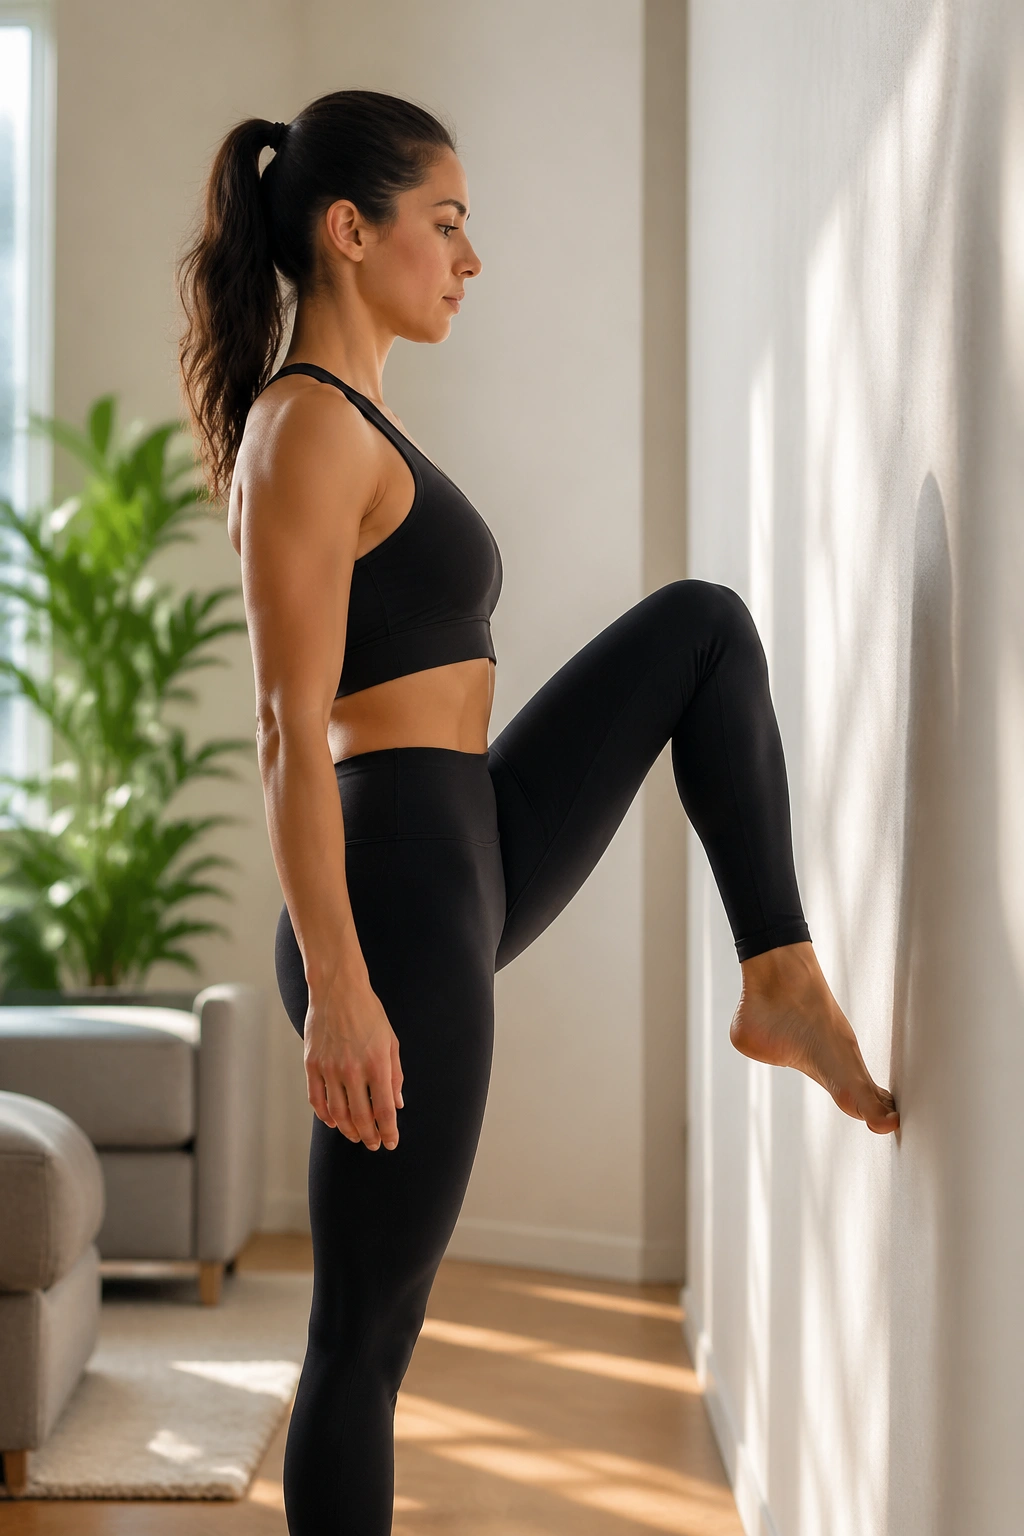
Set up exactly like a wall march, then choose stillness as the rule. One knee comes up, the toe gently taps the wall or hovers near it, then lowers. Alternate sides.
The reason this one earns a place in a belly-fat-loss circuit is simple: it asks the abs to hold position while the hip flexors work. That combination feels basic, but basic work done well is where most people need to start. It builds the skill of bracing without holding your breath or tossing your torso around.
A good toe tap is almost boring to watch. The body stays tall, the shoulders stay down, and the pelvis doesn’t sway. If you need to lean a little into the wall with one hand, do it. A clean rep matters more than a perfect-looking rep.
Try 10 to 16 taps total. If your thighs start to burn before your abs do, slow down even more. Speed usually ruins this move.
9. Wall Side Leg Lift for the Outer Hips and Side Waist
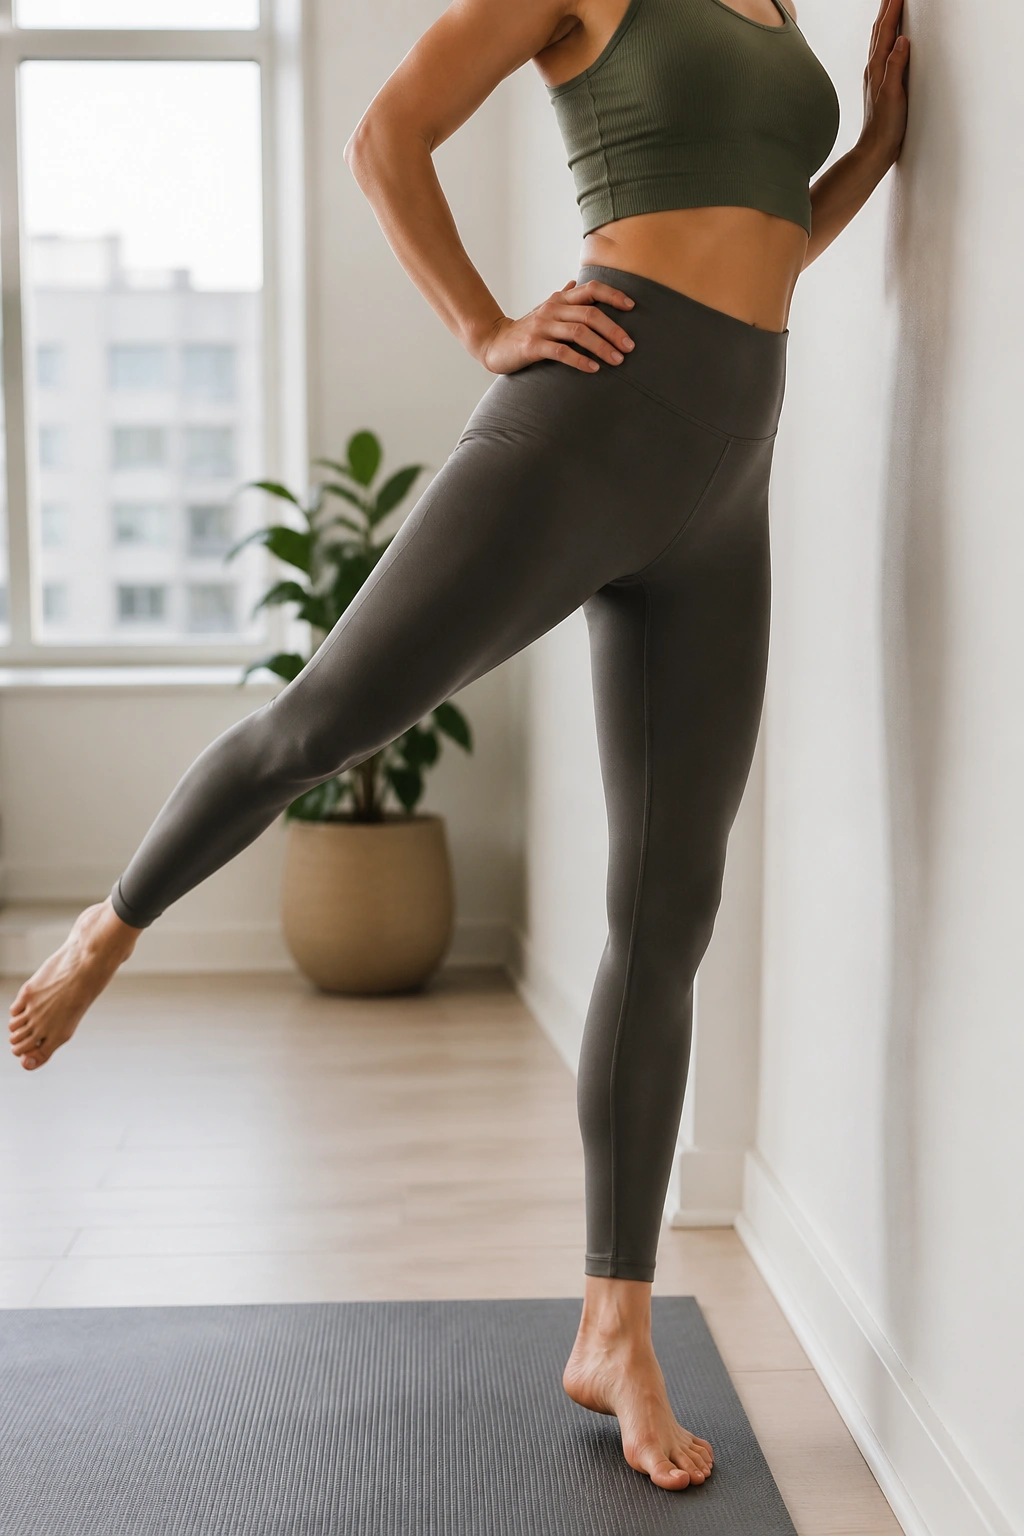
Stand sideways to the wall with one hand resting lightly on it. Lift the outer leg a few inches, pause, and lower it with control. Keep the standing hip stacked and the waist long.
Why bother with a side-leg move in a belly-fitness routine? Because the outer hips and obliques work together to keep your pelvis level. When those muscles are weak, the whole torso gets a little floppy. Not dramatic. Just enough to make standing and walking less tidy than they should be.
A few useful details
- Keep the lifted leg slightly turned out if that feels better in the hip.
- Don’t lean your torso away from the wall.
- Aim for 10 to 15 reps per side.
- Keep the foot flexed so the leg stays active.
This one can burn fast. Good. That means you are close to the right muscles. If the standing side collapses, shorten the range and press the standing foot into the floor more firmly.
10. Wall Hundred Prep with Breath and Reach
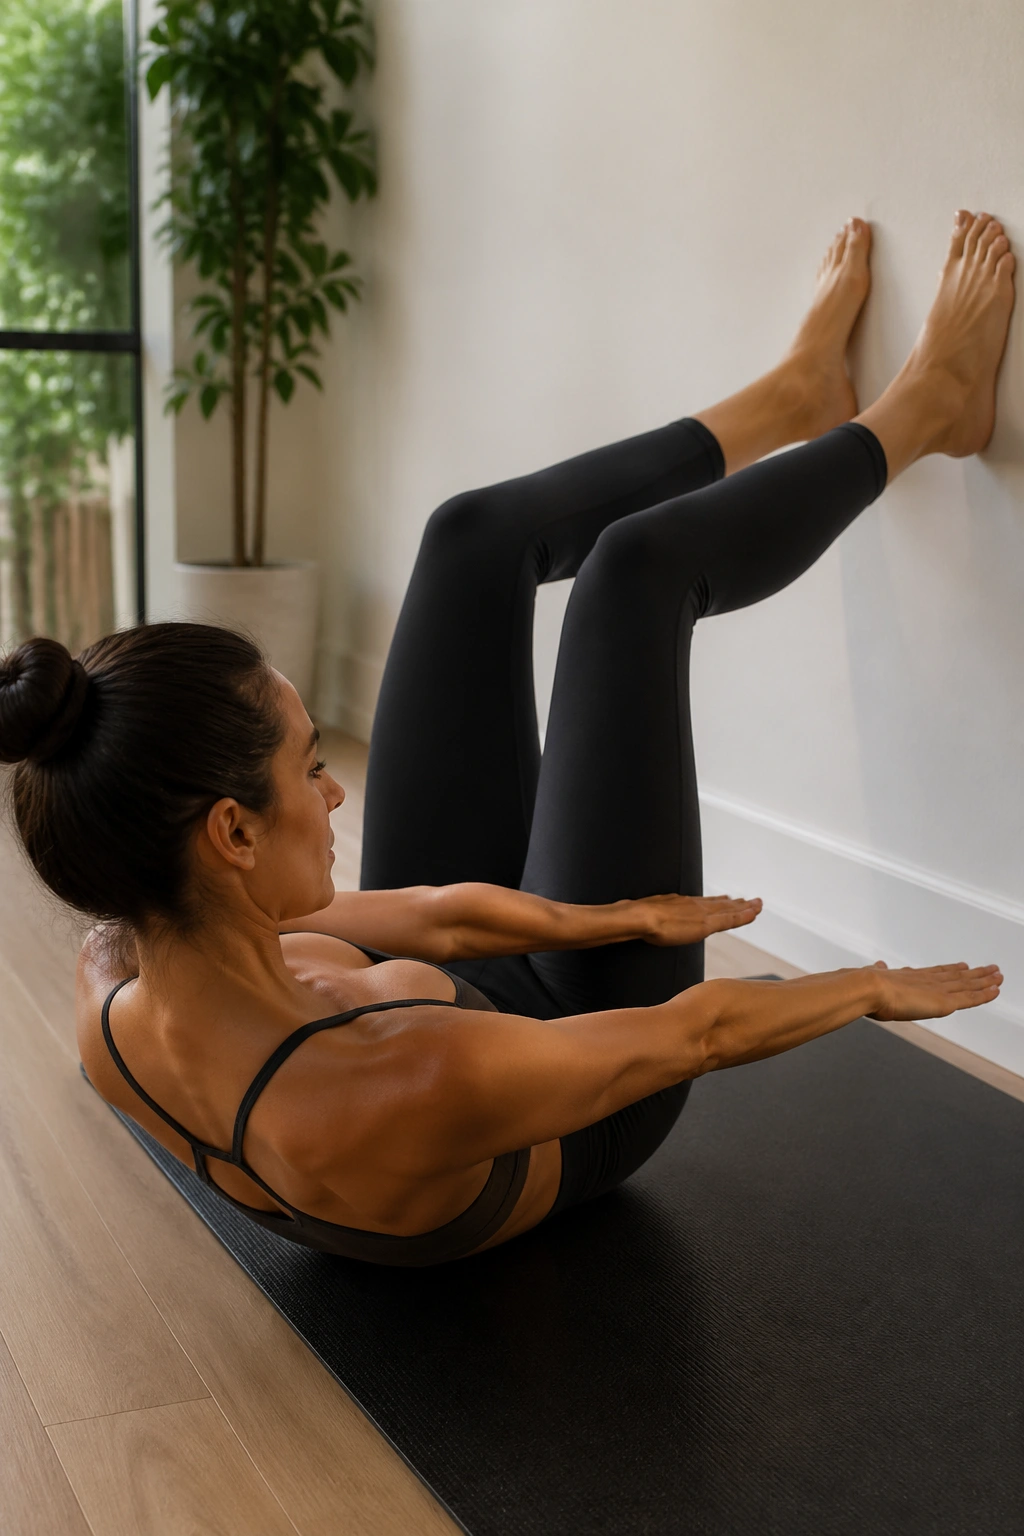
The Pilates hundred has a reputation for being dramatic, but the wall version is calmer and, in some ways, smarter for beginners. Place your calves on the wall, knees bent, and curl your head and shoulders just a little if your neck allows it. Reach your arms long and pump them up and down in small beats.
Your breath drives the whole thing. Five pumps in, five pumps out is the classic rhythm, but the exact count matters less than the discipline of exhaling fully. The abs should flatten and deepen as you breathe out. That’s the sensation to chase.
If your neck complains, keep your head down and still do the arm pumps. If your low back arches, bring your knees a little closer to your chest. Tiny changes make a big difference here.
This is one of those moves that looks mild and leaves you surprised. Not because it’s explosive. Because it’s relentless.
11. Wall Bird Dog Press for Balance and Trunk Control
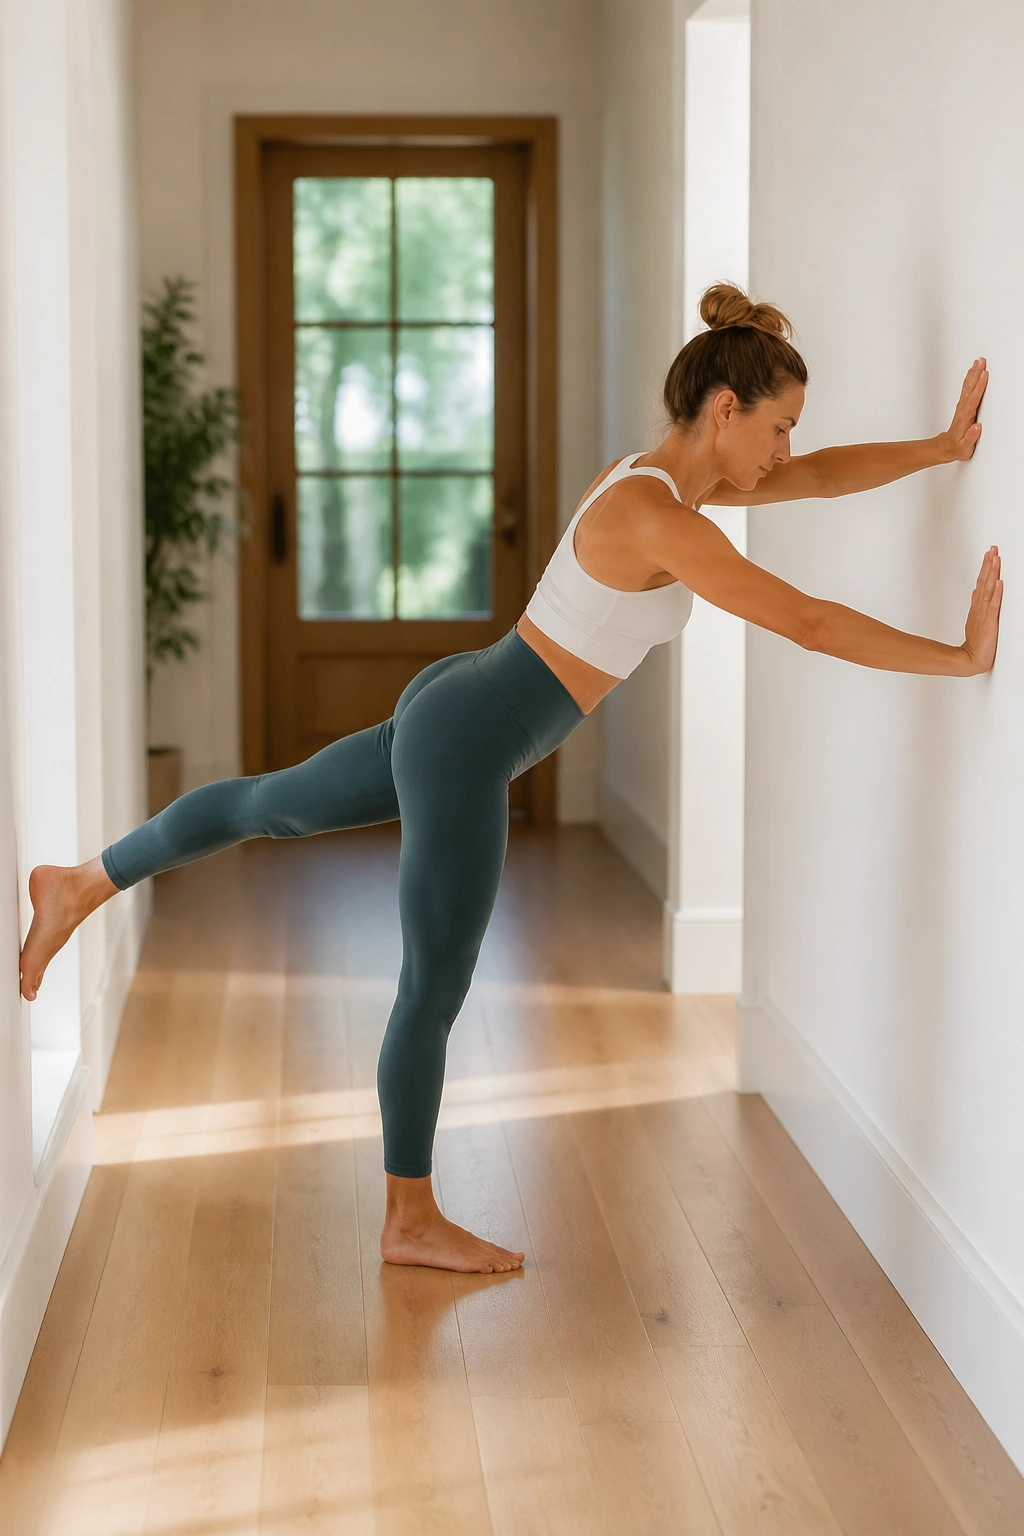
Ever tried balancing one side of your body while the other side reaches? That’s the whole point of a wall bird dog press.
Face the wall, place your hands on it, and hinge forward so your body forms a long line. Extend one leg straight back while the opposite arm reaches forward, then return with control. Switch sides. The wall is there to keep you honest; if you twist or dump weight into one shoulder, you’ll know.
How to do it
- Move slowly enough to feel the standing foot.
- Keep hips level.
- Reach long, not high.
- Use 6 to 10 reps per side.
The bird dog pattern trains coordination more than people expect. It connects the core, glutes, upper back, and balance muscles in one shot. That kind of full-body control is handy if your goal is a tighter-looking waist, because the torso stops acting like a loose hinge.
12. Wall Mountain Climber Slow for a Bit of Heat
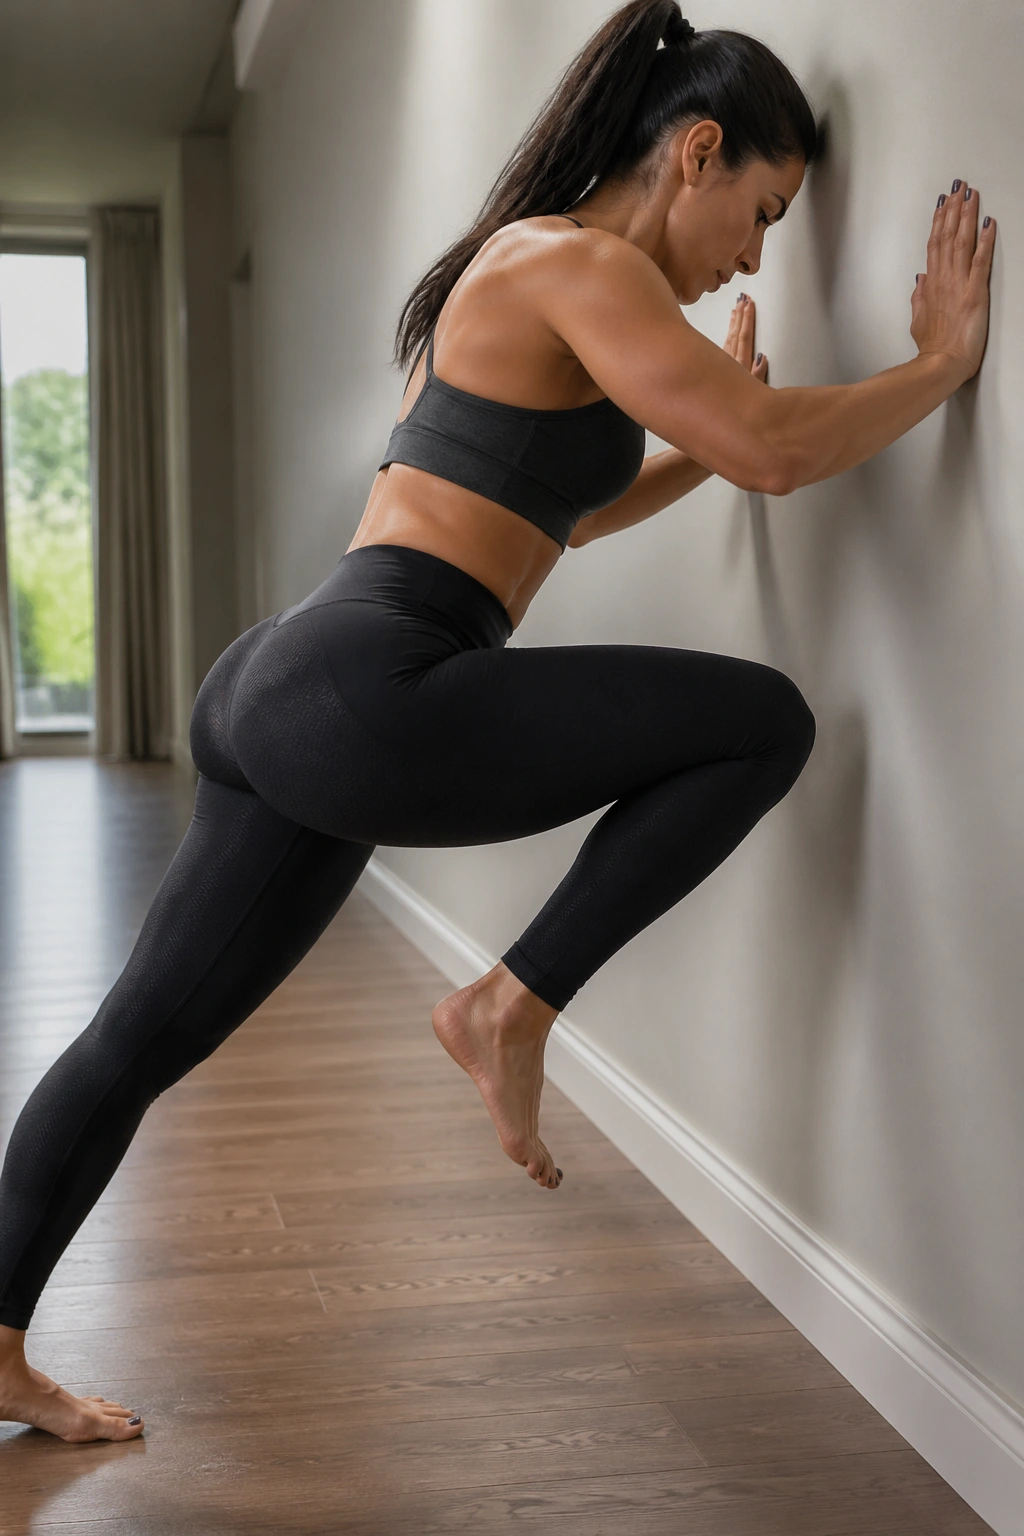
A wall mountain climber is not a sprint. If you turn it into a speed drill, you lose the core work and mostly get annoyed.
Start in a wall plank position with your hands on the wall. Drive one knee toward your chest, return it, then switch sides. Keep the shoulders steady and the hips from rocking side to side. The move should feel controlled and a little hot by rep 8 or 10.
The slower you go, the more your abs and hip flexors have to cooperate. The faster you go, the more it turns into messy cardio. That’s a useful distinction.
Use this one for 20 to 30 seconds at a time. If your wrists are sensitive, place your hands a little higher on the wall. If your lower back starts to sag, bring your feet closer. The goal is tension, not drama.
13. Wall Curtsy Lunge Support for the Glute Medius
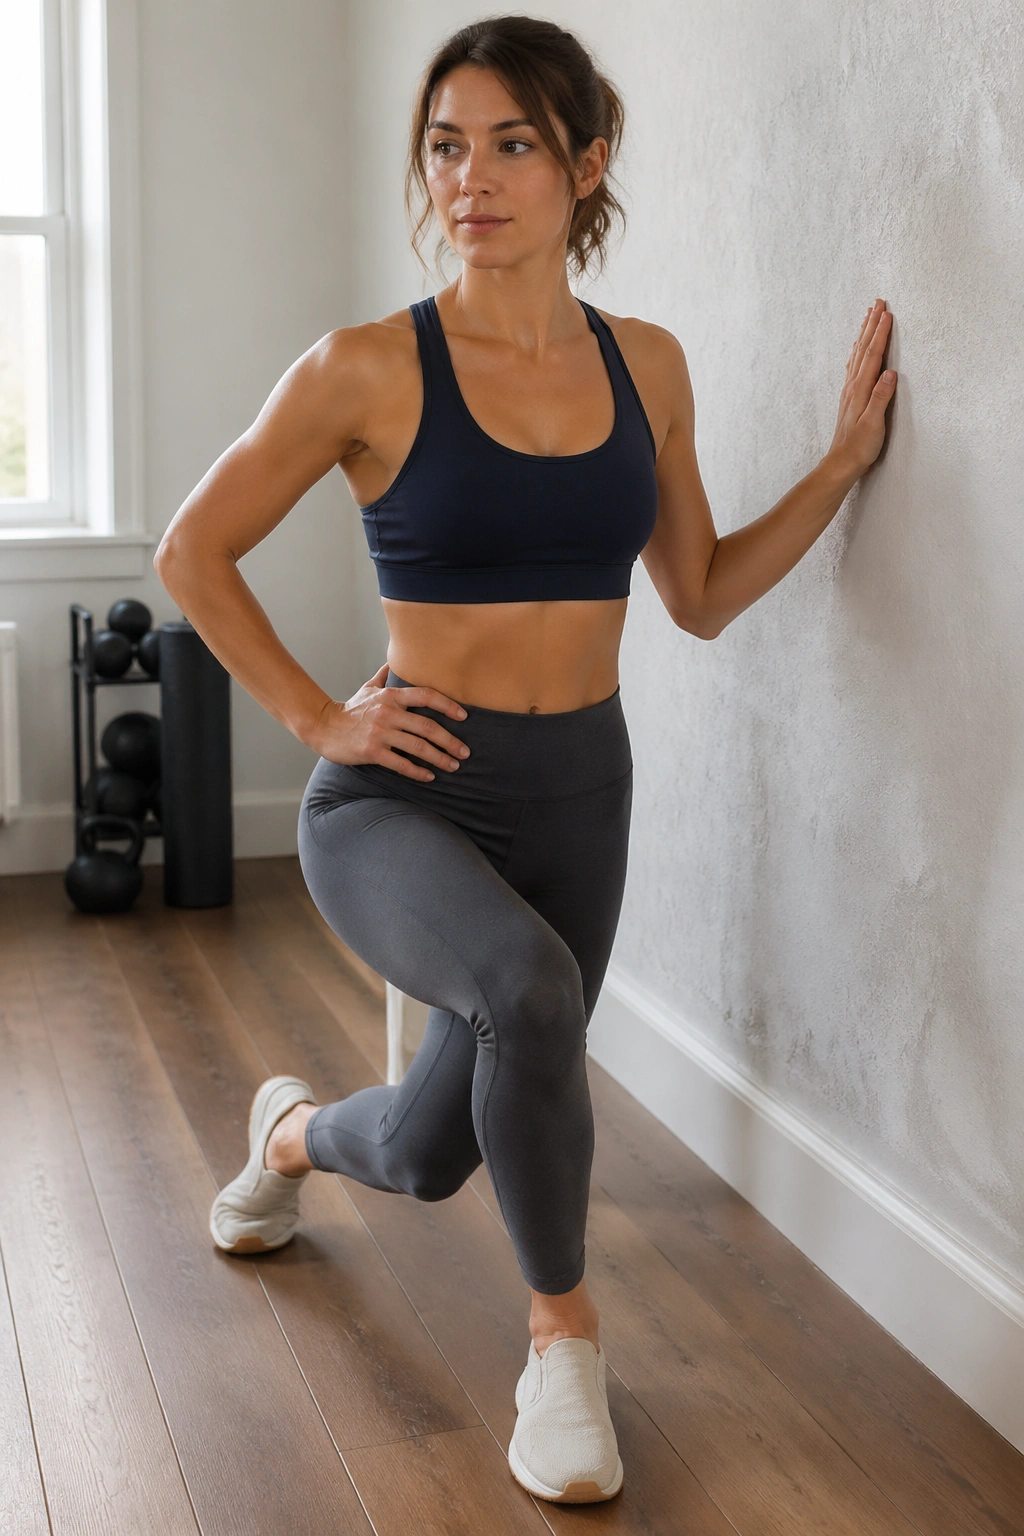
A curtsy lunge looks like a graceful move until your standing leg starts shaking. That shake is often a good sign.
Stand near the wall and place one hand on it for balance. Step one leg behind and across the other, lowering into a shallow curtsy. Keep your front knee tracking cleanly and your torso tall. Return to standing with the front heel pushing into the floor.
Unlike a straight lunge, the curtsy hits the side glutes a bit harder. Those muscles matter because they help keep your hips level, and that helps your midsection stop wobbling around every time you walk or climb stairs.
If your knees complain, shorten the step and stay higher. If balance is the issue, keep two fingers on the wall instead of one hand. Simple fixes. No need to turn the exercise into a circus.
14. Wall Hamstring Curl Bridge for Back-Body Strength
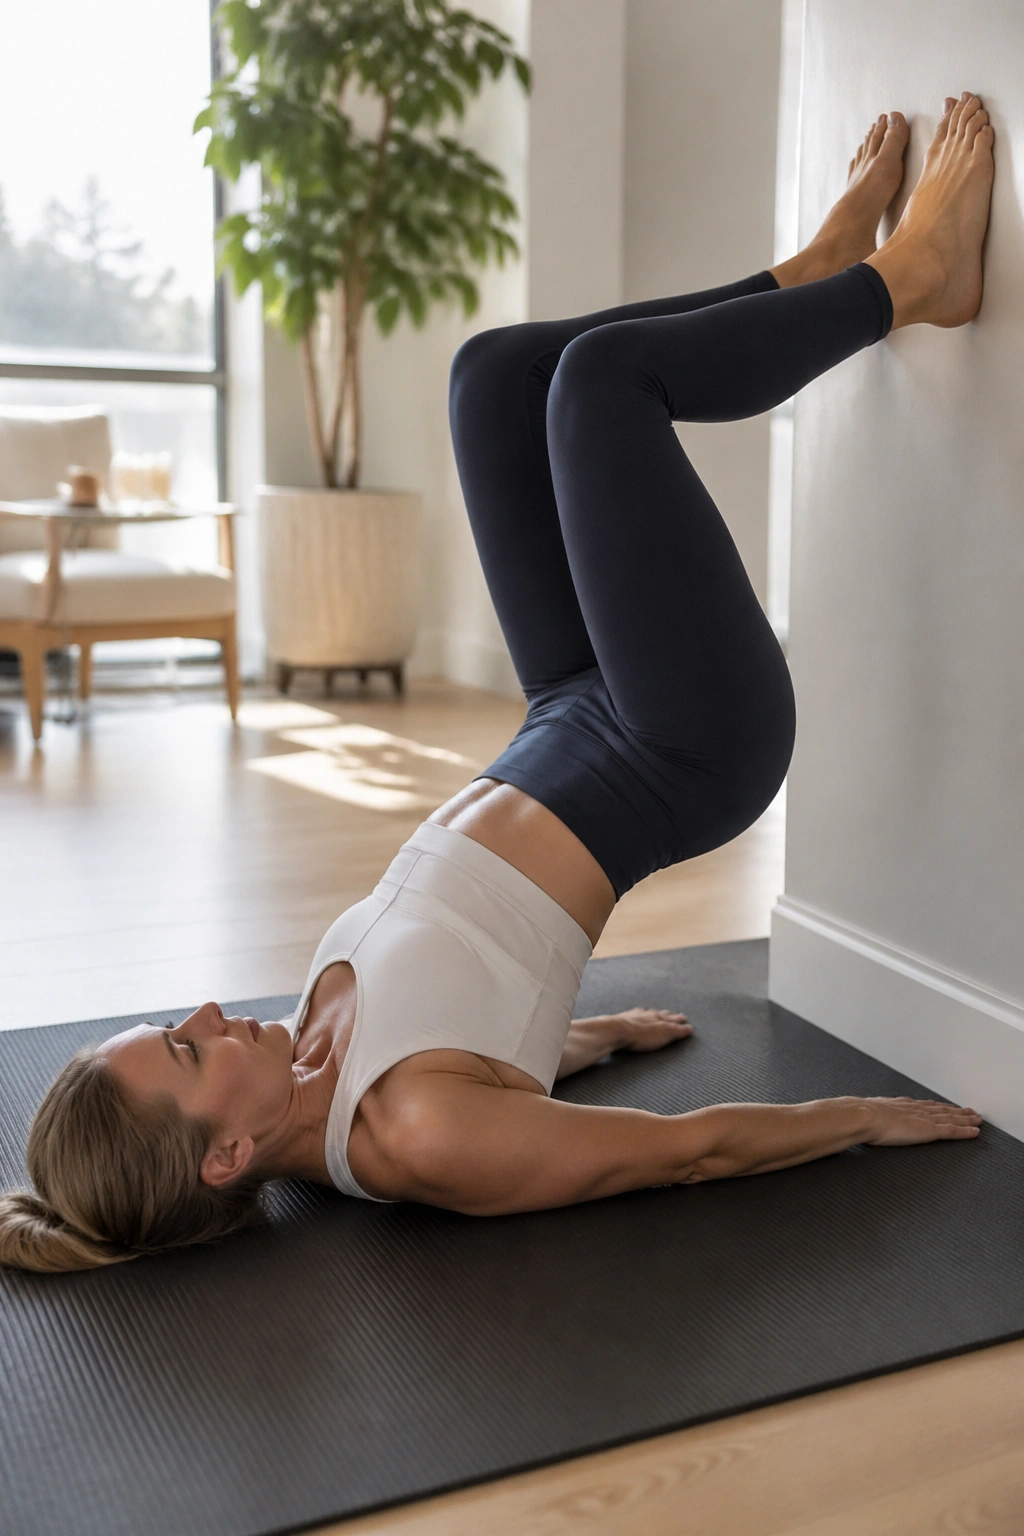
Lie on your back with heels on the wall and hips lifted into a bridge. From there, bend your knees a few inches, then straighten them again without letting your hips drop. That’s the curl.
This one is sneaky hard. The hamstrings work to hold the bridge, but the core has to keep the pelvis from wobbling or sagging. When those two jobs line up, the whole back side of the body starts to feel more connected.
The exercise also teaches a useful lesson: not every core move looks like a crunch. Sometimes the abs are doing their job by preventing movement, not creating it. That is the sort of work that pays off when you want stronger posture and a firmer-looking waist.
Keep the motion small at first. If your hamstrings cramp, lower the bridge height and pause for a breath before the next curl. This is one of those moves that rewards patience.
15. Wall Side Crunch for the Obliques
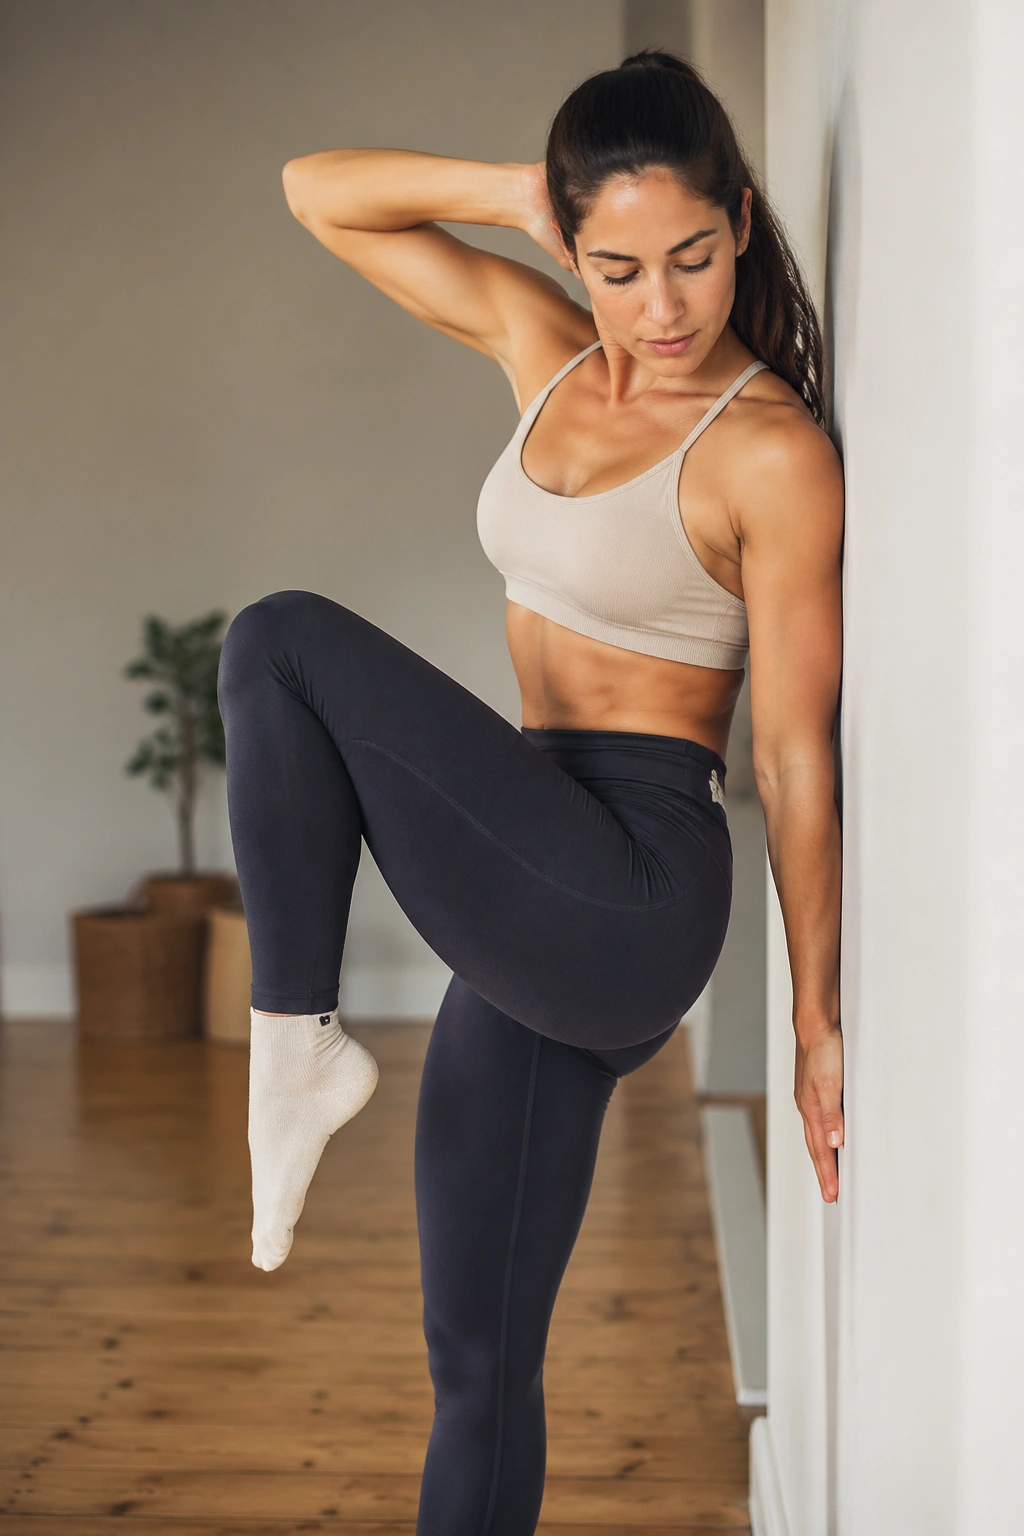
Stand sideways to the wall with one hip close to it and one hand behind your head if that feels comfortable. Lift the knee on the free side while you bring the elbow down toward it, keeping the torso from collapsing forward. Return slowly.
This move is blunt. It asks the obliques to shorten and stabilize at the same time, which is why you feel the side of the waist light up fast. It’s also good for body control because you have to move the rib cage without flinging your shoulders around.
A small range is enough. Don’t chase an elbow-to-knee smash. That usually turns into hip flexor work and neck tension. Instead, think of the rib cage closing a little toward the hip.
If you want extra challenge, pause for one beat at the top of each rep. That tiny pause makes a plain side crunch feel much more deliberate.
16. Wall Chest Opener to Fix Rib Flare and Slouching
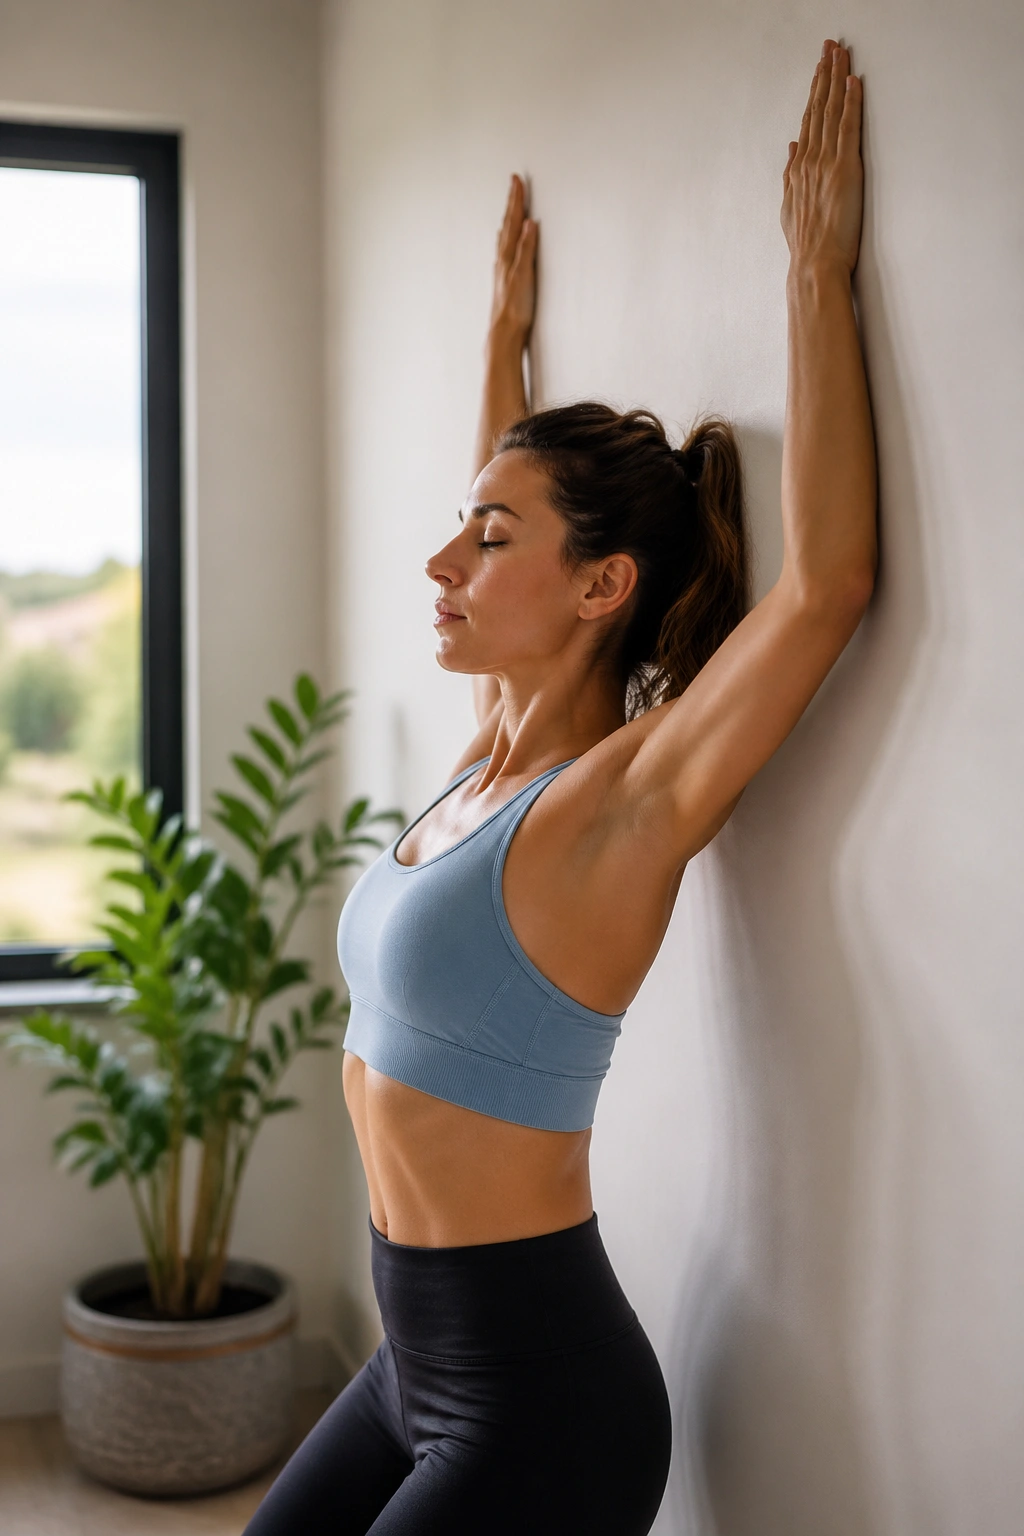
A rounded upper back can make the stomach look softer than it is. Annoying, but true.
Stand facing the wall, place your forearms on it, and slide them upward while keeping your ribs from popping forward. Think of the chest opening while the low ribs stay tucked. If you feel your lower back arching, you’ve gone too far.
What to notice
- The shoulders should feel open, not pinned.
- The neck stays long.
- The breath stays smooth.
- The abs are still on, even though the move looks gentle.
This is more than a stretch. It helps reset posture so your midsection doesn’t spill forward when you stand. People often skip it because it doesn’t burn the way squats do. Big mistake. Posture work matters when you care about how your waist looks in real life, not just in gym photos.
17. Wall Single-Leg Balance Sweep for a Tight Midline
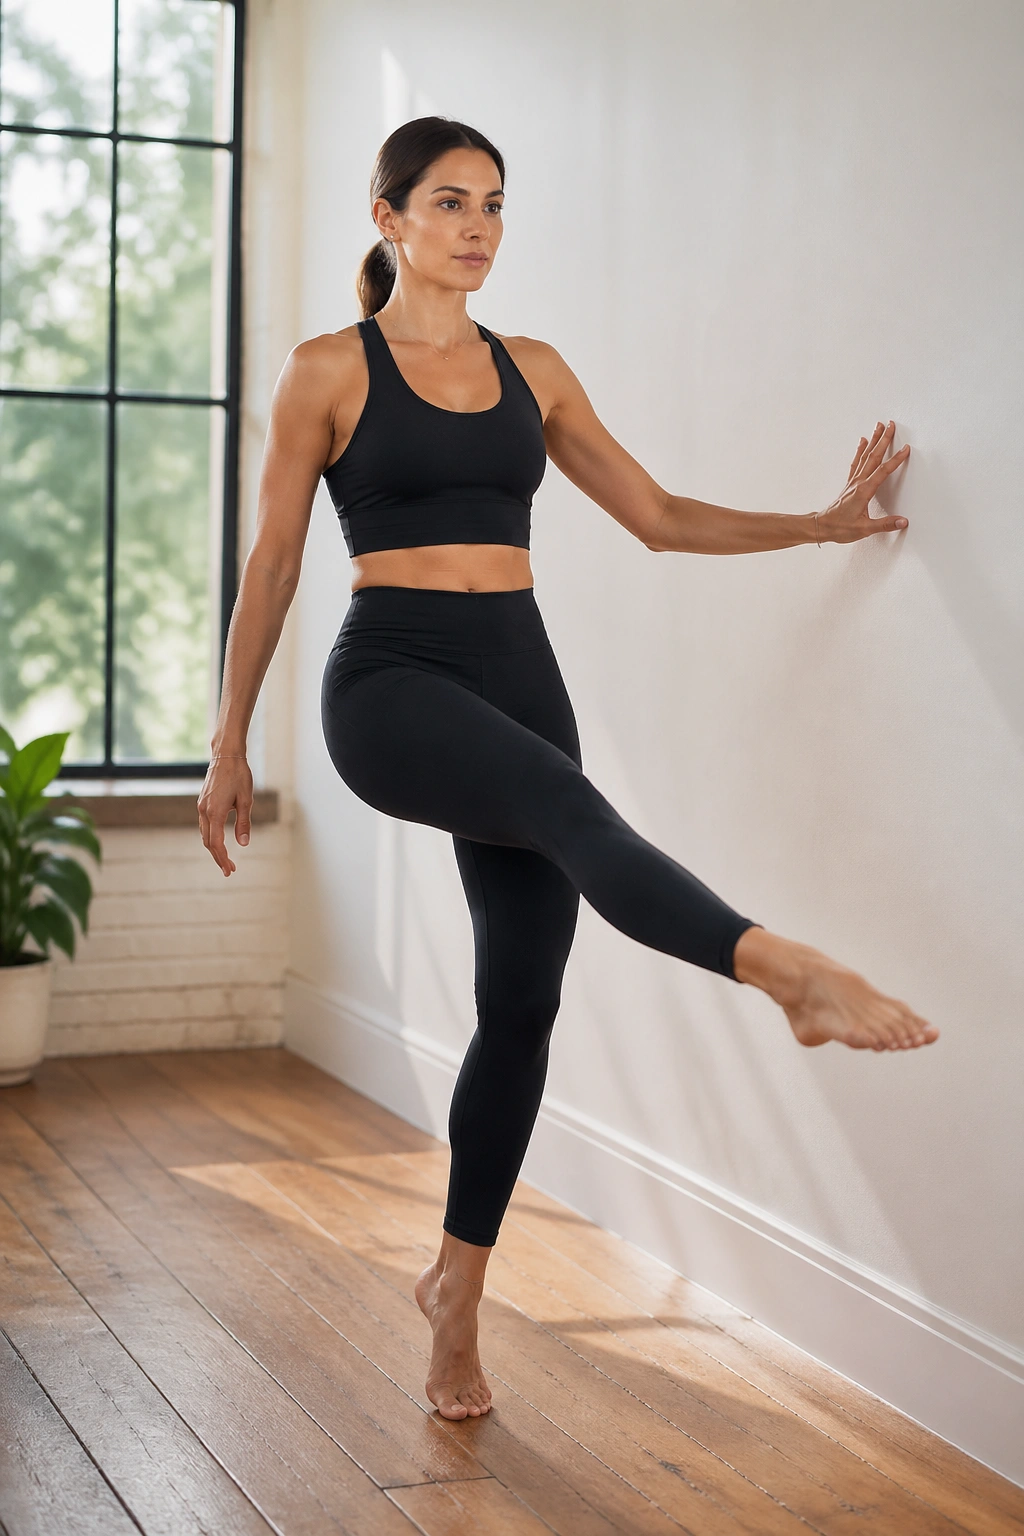
Stand near a wall and keep one fingertip there for support. Balance on one leg while the free leg sweeps a few inches forward, to the side, and then behind you. Keep the trunk steady and the standing knee soft.
That sweeping pattern makes your body organize itself around one strong leg, which is a more honest test of core control than a machine ever gives you. Your obliques, hip stabilizers, and foot muscles all have to wake up and cooperate.
If you wobble, that is the workout. Seriously. Don’t rush to “fix” it by gripping the wall with your whole hand. Use the smallest support you need, then try to reduce it on the next set.
Do 4 to 6 sweeps per direction, then switch sides. Small, clean movement wins here. You’re training control, not showing off range.
18. Wall Glute Kickback for Hip Extension
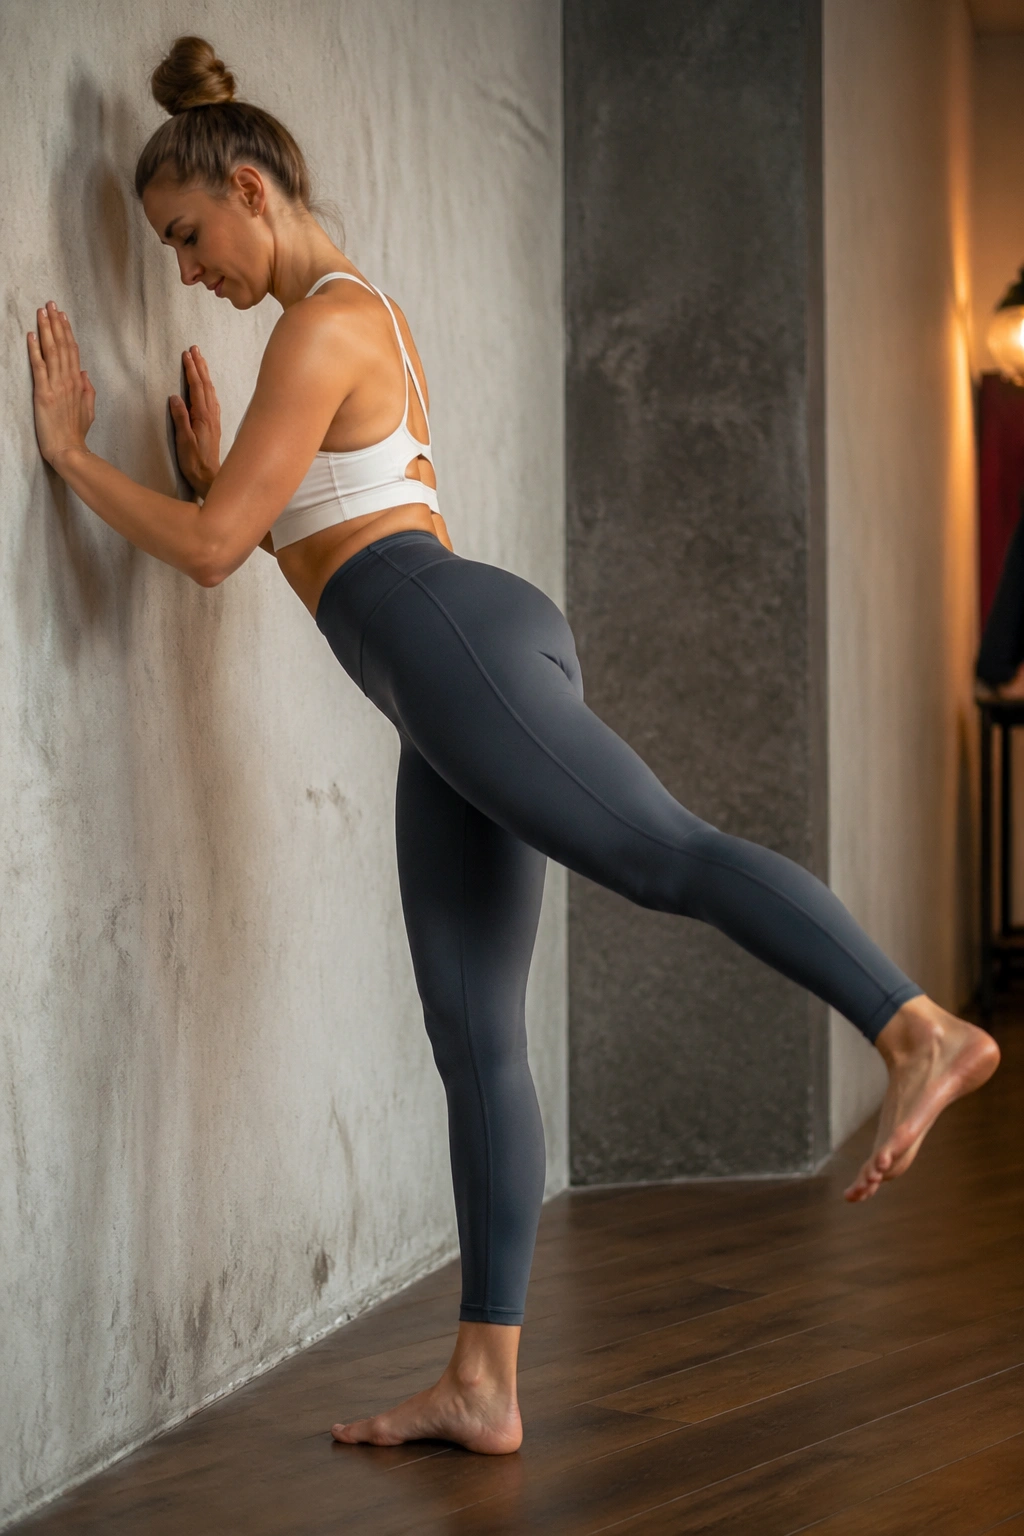
Face the wall, brace one hand on it, and keep your torso long as you kick one leg straight back with the knee softly bent. Squeeze the glute at the top, then return without snapping the lower back.
A lot of people turn kickbacks into a lower-back sway. Don’t. The movement should come from the hip, not from arching the spine. If the ribs flare, the glute stops working as much, and the exercise loses its value.
The wall helps by giving you a place to stabilize the upper body. That lets you focus on the working leg and keep the motion tidy. It’s a simple move, but done well, it adds real work to the back of the body.
Use 10 to 12 reps per leg. Hold the top position for a full second if you want more challenge. That pause matters more than adding wild speed.
19. Wall Calf Raise and Overhead Reach for Full-Body Tension
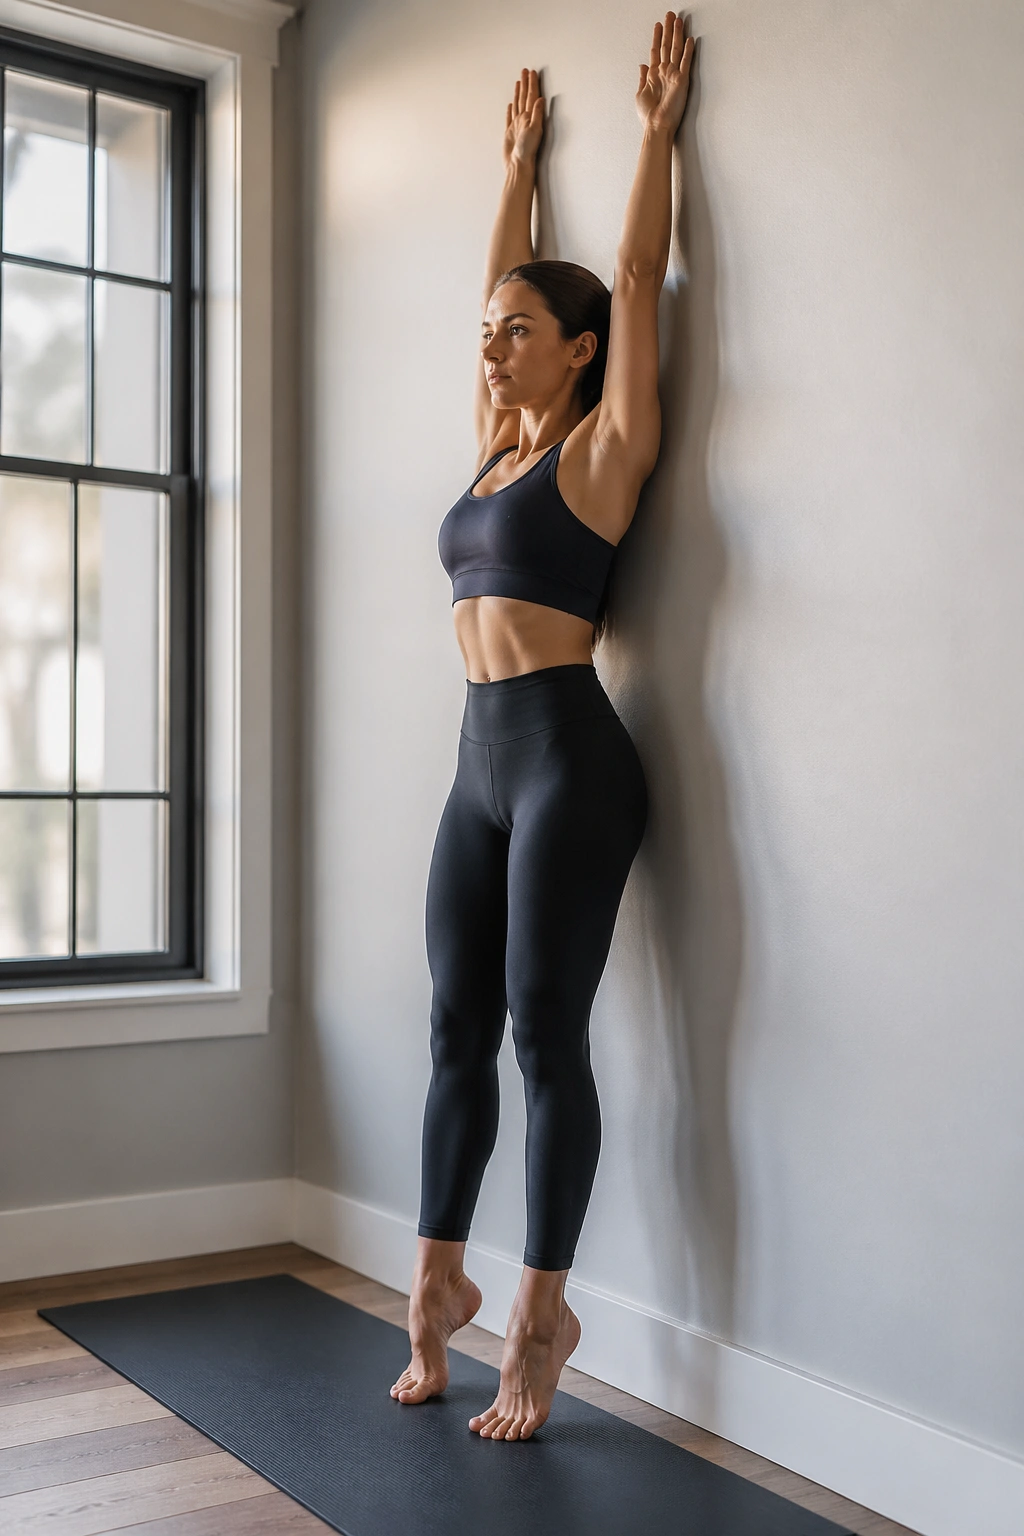
Why include calf raises in a list about waist work? Because the body never works in isolation, and this move helps connect the whole line from feet to fingertips.
Stand tall near the wall, feet hip-width apart. Raise onto the balls of your feet while reaching both arms overhead. Lower with control. Keep the ribs from flaring and the shoulders from creeping up toward your ears.
The interesting part is the brace. Once the calves lift, balance gets less forgiving, and the core has to organize the whole body. That makes this a useful finishing move when you want a little more demand without jumping around.
Try 12 to 15 reps. If balance is shaky, keep one hand lightly on the wall. If your lower back arches on the reach, lower the arms a little and keep the reach smaller. Clean posture matters more than height.
20. Wall Sit Pulse and Core Brace for the Finisher
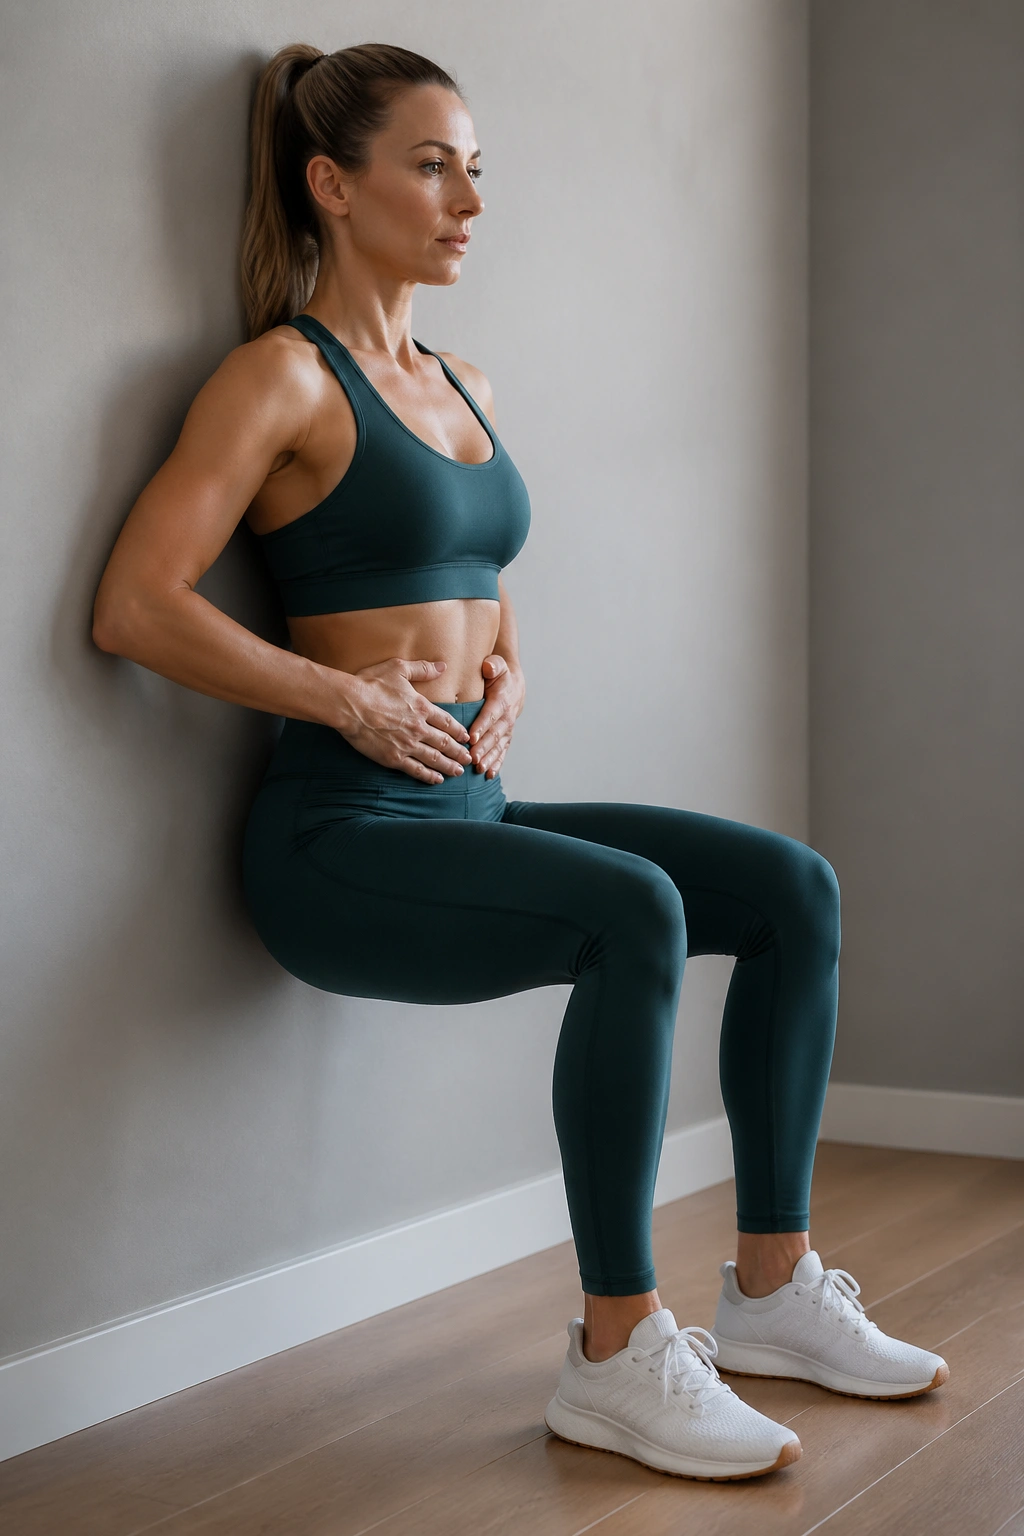
A wall sit is boring in the best possible way. It strips out momentum and leaves you with the work.
Slide down the wall until your knees are bent comfortably, then hold or pulse a few inches up and down. Keep your back flat enough to stay supported, your ribs stacked, and your chin neutral. If you want more core demand, add a slow exhale at the bottom of each pulse.
The burn comes fast. Thighs first, then glutes, then that deep fatigue that makes you check the clock. Good. That’s a sign the move is recruiting big muscles, which matters when you’re trying to build a routine that actually spends energy.
Use this as your last move in a circuit for 20 to 45 seconds. If your knees don’t like deep bends, stay higher. If you want more challenge, add alternating heel lifts. The wall sit can be plain or nasty. Choose your level.
Final Thoughts
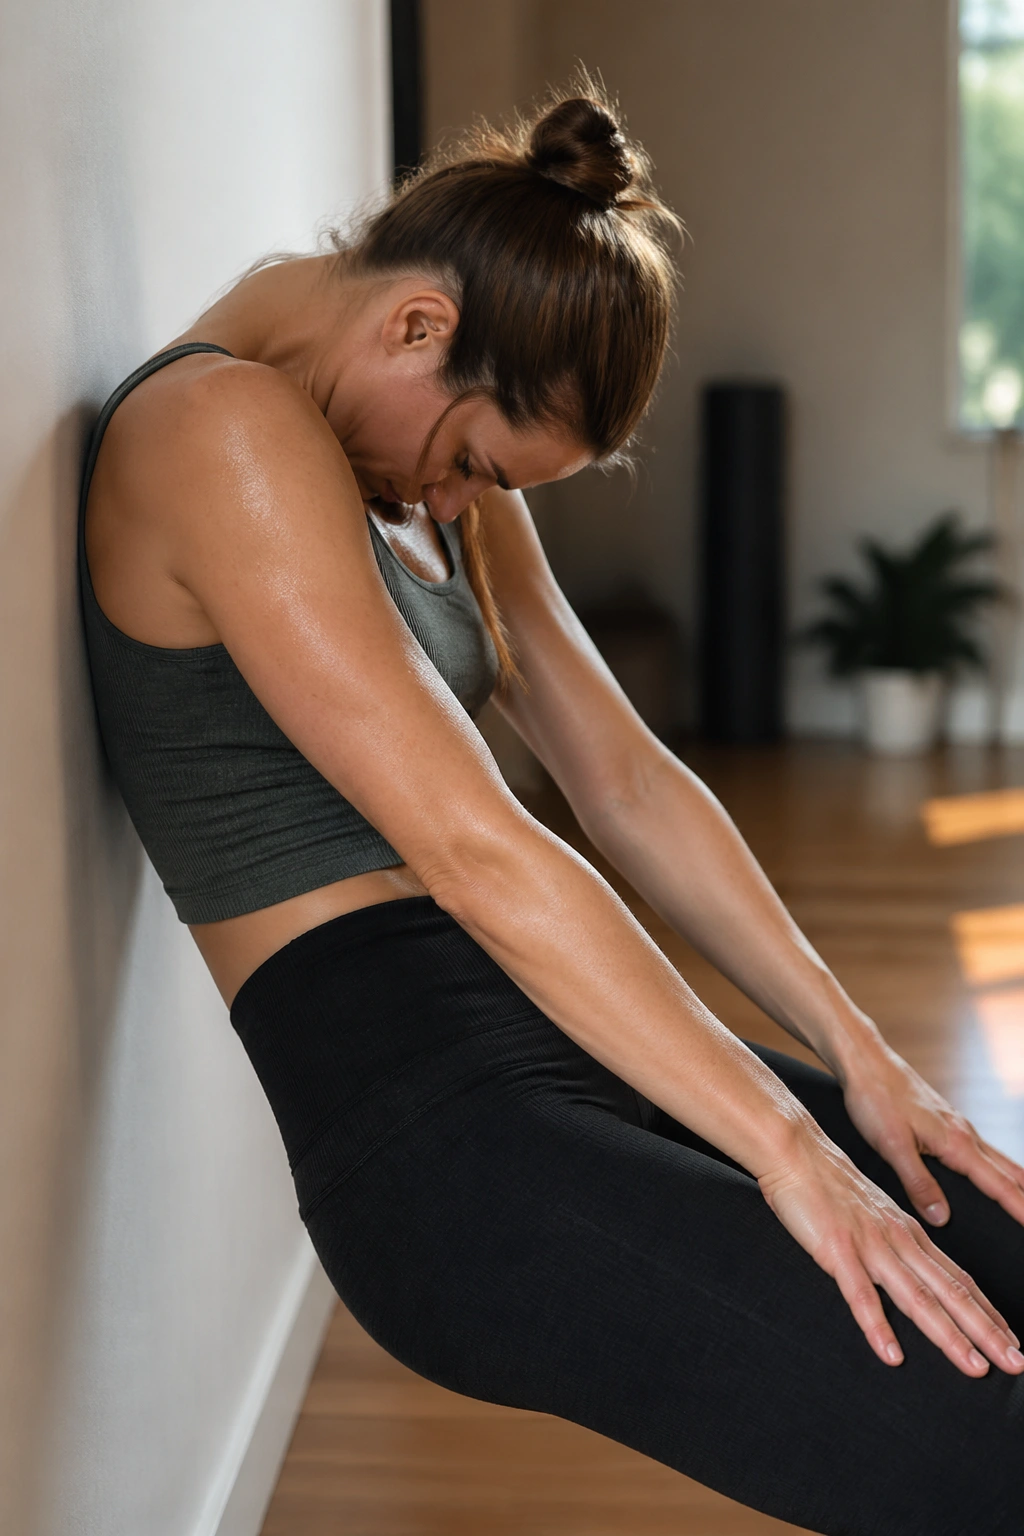
The best wall Pilates work for a smaller-looking waist is rarely the flashiest stuff. The slow, controlled moves that keep your ribs stacked and your pelvis steady are the ones that tend to pay off in the mirror and in daily movement.
If you want a practical starting point, build a circuit around the wall roll-down, wall dead bug press, wall bridge, wall march, and wall sit. That mix gives you posture, deep-core control, glute work, and a little heat. Clean form first. Fancy variations later.
And if one exercise feels wrong, skip it for the day. A good wall Pilates session should leave you feeling worked, not wrecked.
