



A wall Pilates challenge looks tame from across the room. Then you do one clean roll-down, press your back into the wall, and realize how much your body has been getting away with.
That’s the whole charm of wall Pilates moves: the wall gives you feedback you can’t fake. Your ribs flare? You feel it. Your pelvis tips? The wall tells on you. Your shoulders shrug up toward your ears? Same story. It’s a simple setup, but it can make small movements feel honest in a way a mat workout sometimes doesn’t.
My favorite part is that wall work tends to expose the habits people carry all day long — forward head posture, tight hip flexors, sleepy glutes, and that weird thing where the lower back steals every job the core was supposed to do. The good stuff here isn’t flashy. It’s controlled, a little humbling, and weirdly satisfying.
The order below starts with gentle alignment work and builds toward stronger standing and floor-based patterns supported by the wall. If you treat it like a 28-day challenge, one move a day works well, and repeating a few of the earlier ones is fair game when your body wants more practice.
1. Wall Roll Down
Stand with your back near the wall, feet about hip-width apart and a few inches forward. The goal is not to flop down; it’s to let the spine peel away one section at a time, like you’re unrolling a tight ribbon.
Why it belongs at the start
A wall roll down wakes up the back line of the body without asking for strength you do not have yet. It also shows you, very quickly, whether your ribs like to pop forward or your neck tries to lead the whole movement.
- Keep your knees softly bent.
- Exhale as you roll forward.
- Let your arms hang heavy.
- Pause when your fingertips reach toward your shins.
Tip: If your hamstrings shout immediately, bend the knees more. That’s not cheating. That’s smart.
2. Standing Wall Breath Reset
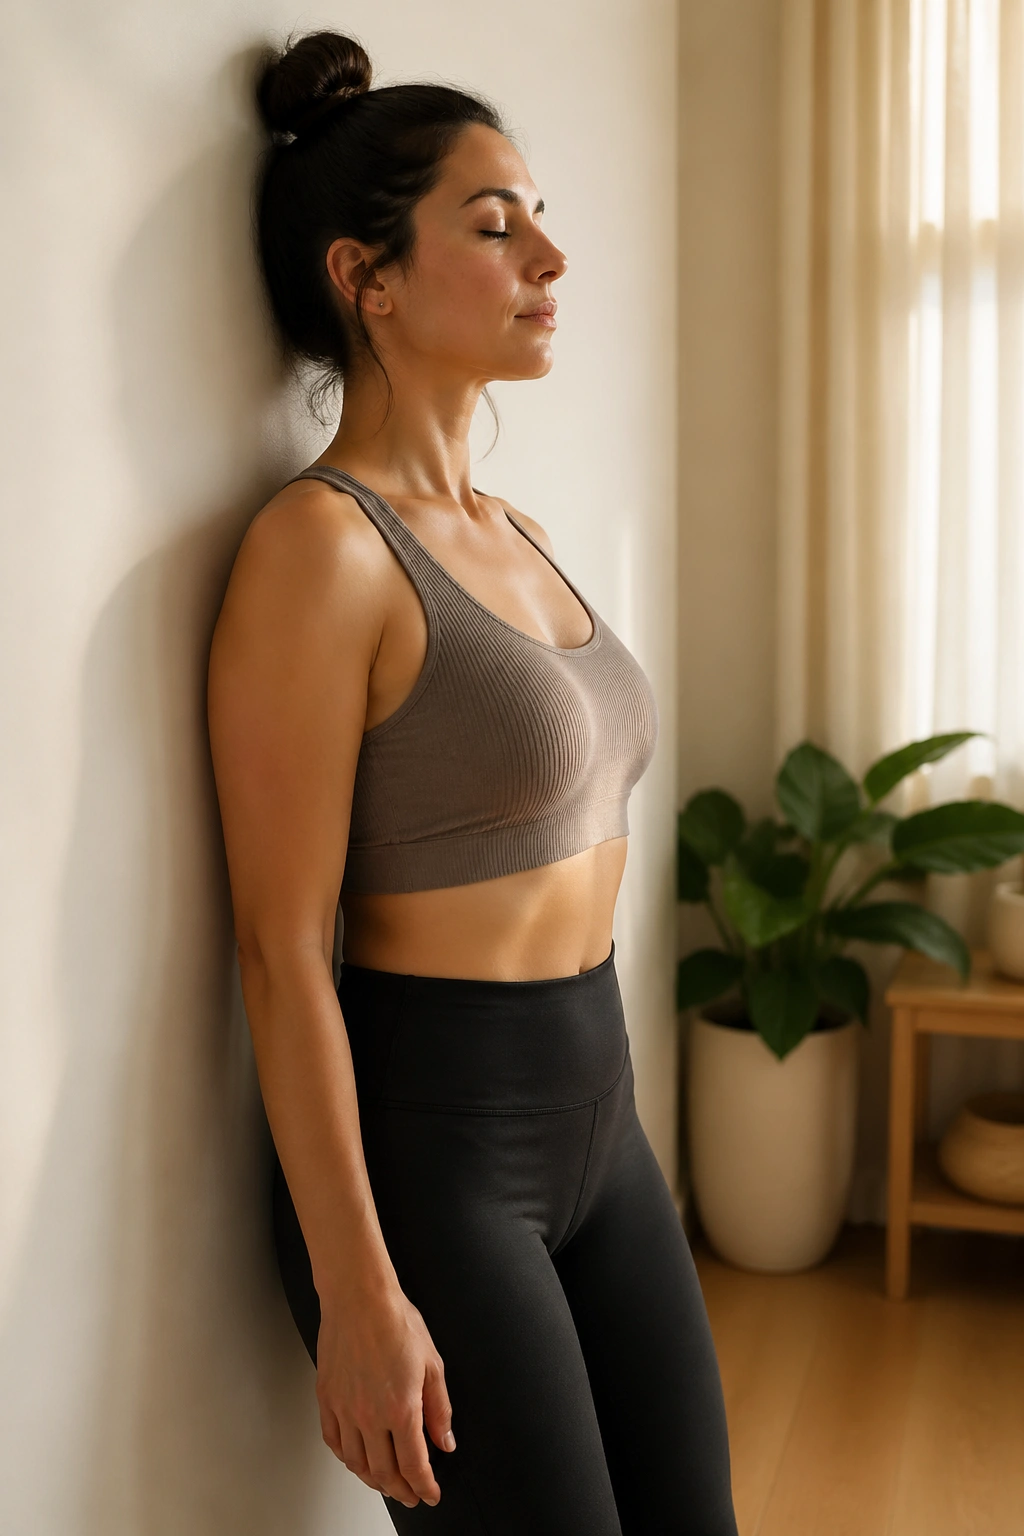
Stand with your heels, sacrum, upper back, and the back of your head touching the wall if that feels possible. If your head can’t quite make it, don’t force it. A quiet, stacked position is the point, not a perfect pose.
Now breathe wide into the side ribs for 4 to 5 slow breaths. On the exhale, feel the ribs settle down instead of puffing out. Small move. Big payoff. This is where the whole challenge gets organized, because the way you breathe changes the way your core turns on.
If you like starting a workout with chaos, skip this. If you want your body to stop freelancing, keep it.
3. Wall Squat Hold
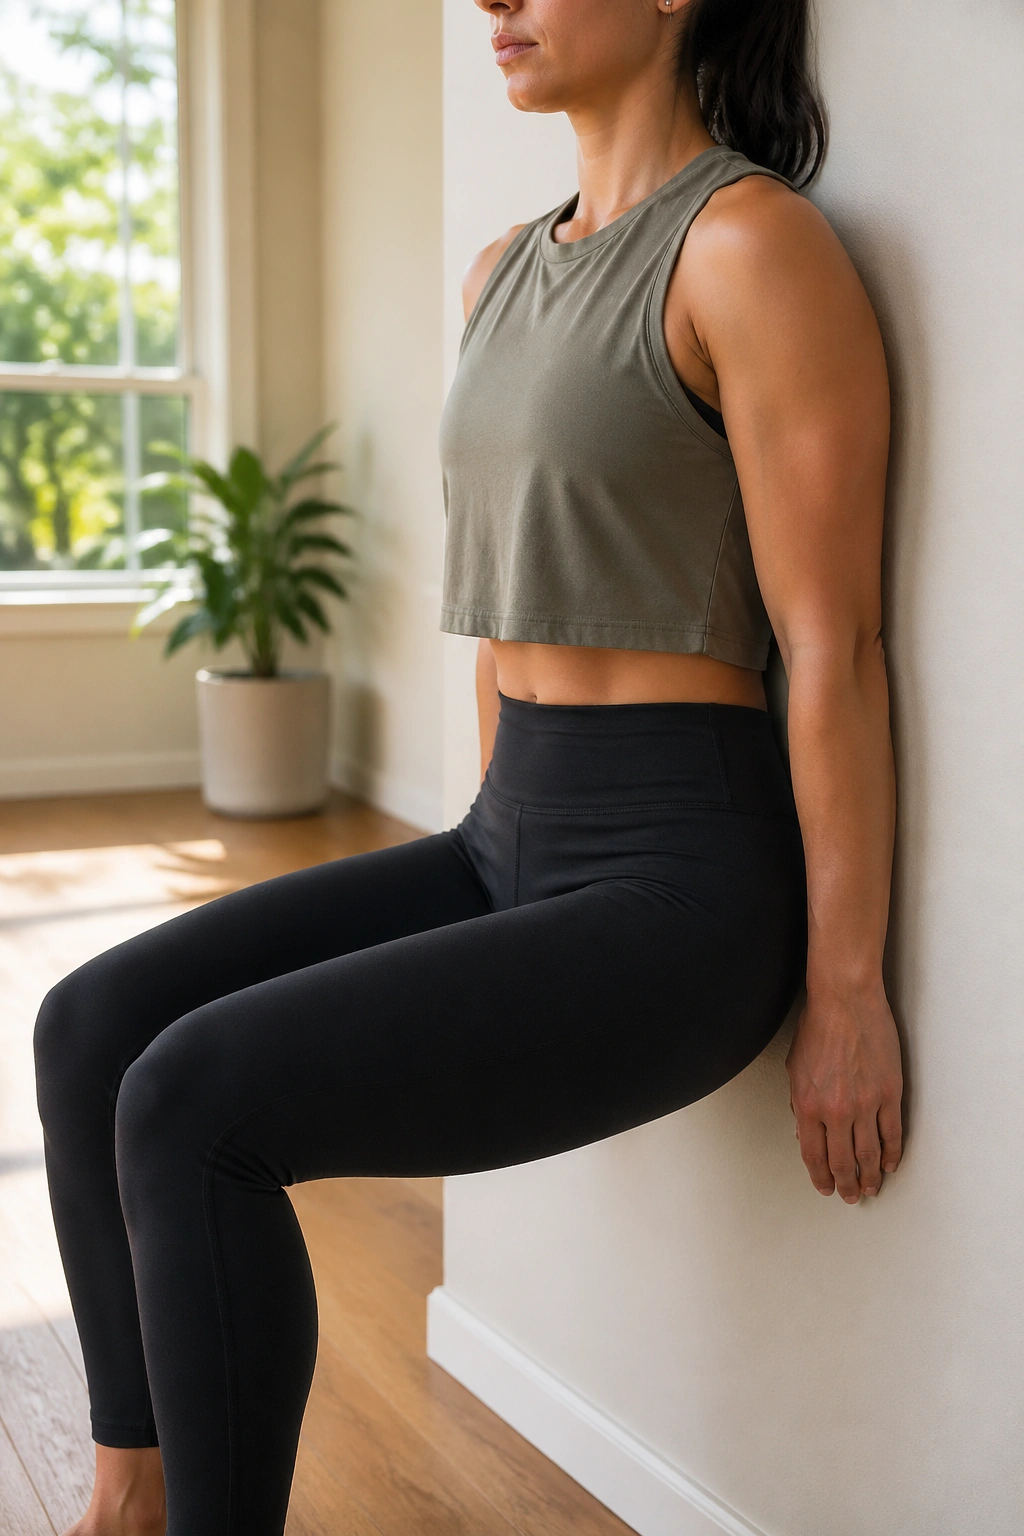
This is the move that tells the truth fastest. Stand with your back against the wall and walk your feet forward until your shins are roughly vertical when you sink into the squat. Then lower until your thighs are parallel to the floor, or stop higher if your knees complain.
Hold for 20 to 45 seconds. Press the whole foot down, especially the heel and big toe mound. If your knees dive inward, squeeze them back over the second and third toes and shorten the hold.
What to watch for
- Lower back stays gently on the wall.
- Chest stays soft, not puffed.
- Weight sits through the whole foot.
- Thighs burn, but your knees do not pinch.
4. Wall Bridge
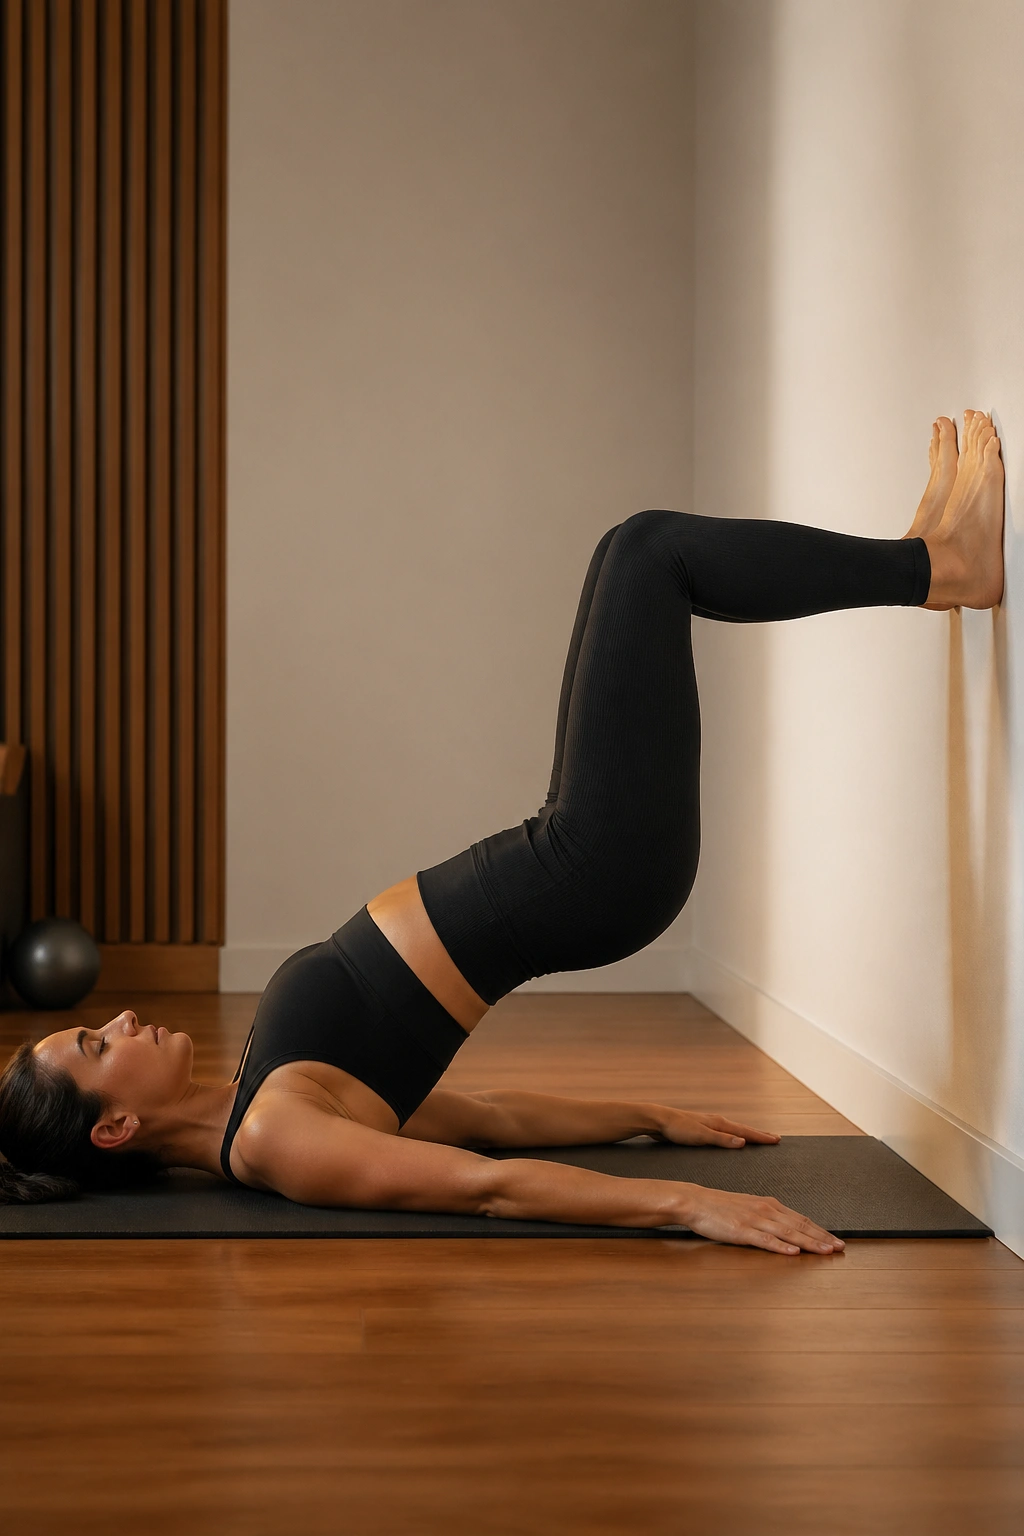
Why does a wall bridge feel easier than a floor bridge at first, then sneak up on you? Because the wall gives you a place to organize your legs while the glutes and hamstrings start doing real work.
Lie on your back with your calves resting on the wall and knees bent about 90 degrees. Press the feet lightly into the wall, tilt the pelvis a touch, then lift the hips until the body forms a long diagonal from shoulders to knees. Lower with control.
How to keep it clean
Keep your ribs quiet. If they flare, the lower back usually steals the movement. Press up on a 3-count, lower on a 3-count, and stop before the shape gets sloppy.
5. Wall Leg Slide
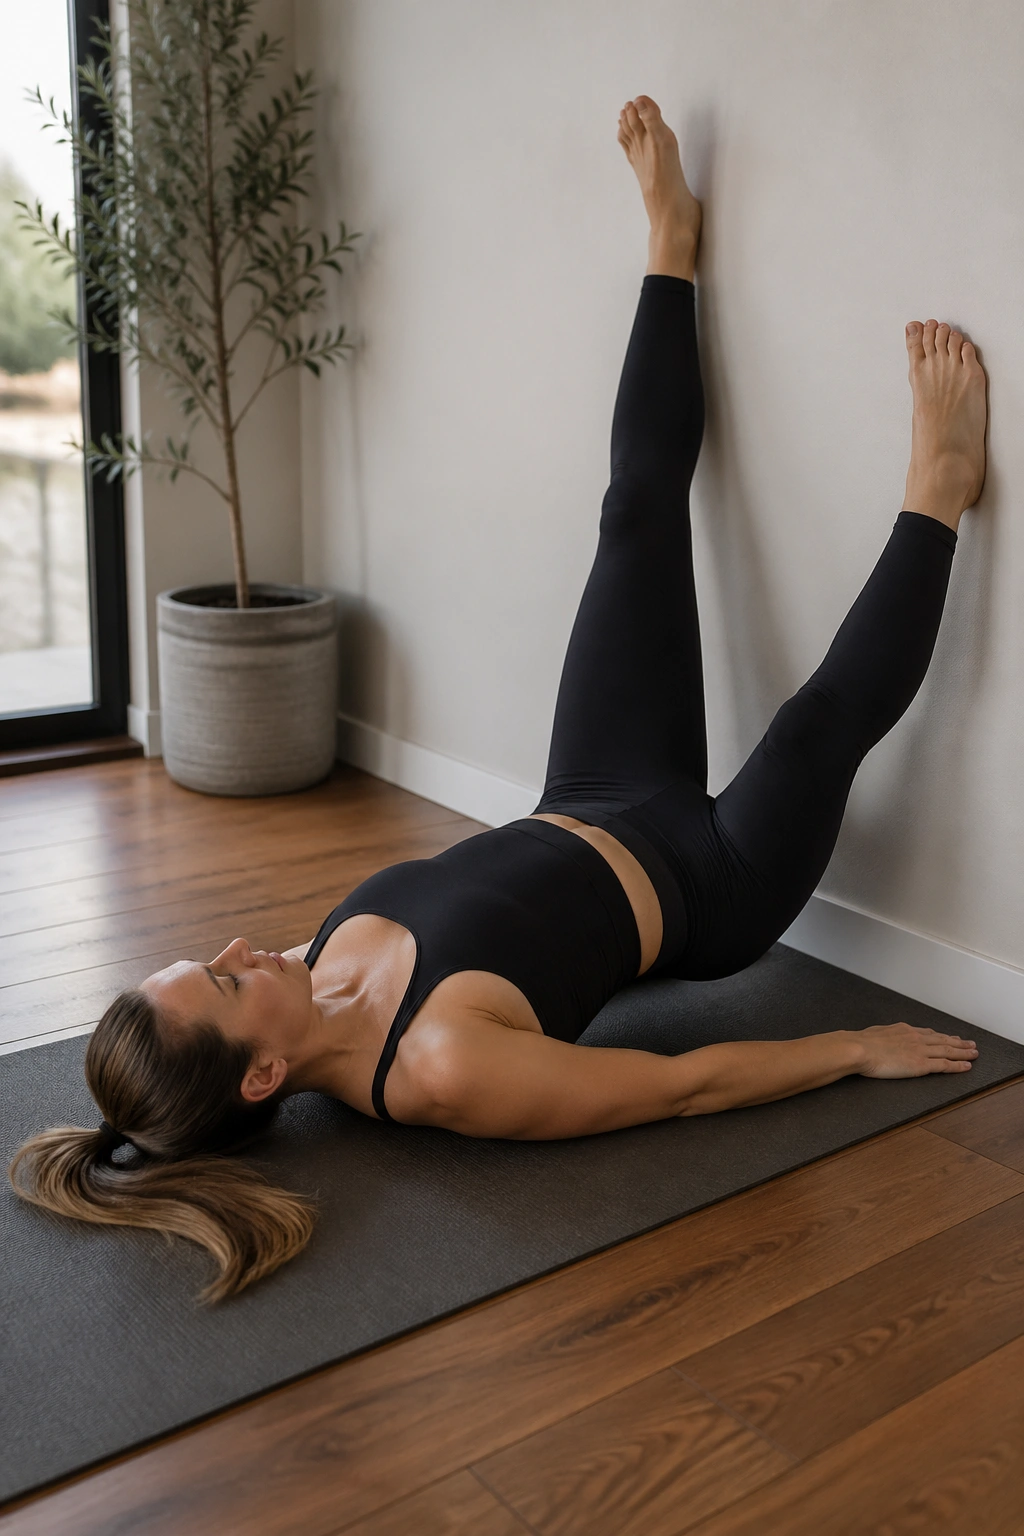
Picture this: you’re on your back, one foot planted on the wall, and the other heel slowly gliding down the wall until the leg lengthens, then sliding back up without your pelvis wobbling. That’s the good version.
The wall leg slide is sneaky core work. It trains hip control, teaches the deep abs to stay awake, and exposes any tendency to arch through the low back the second a leg moves.
- Keep one side stable while the other leg works.
- Move only as far as you can keep the pelvis level.
- Exhale on the slide away.
- Inhale as the leg returns.
6. Wall Calf Raise
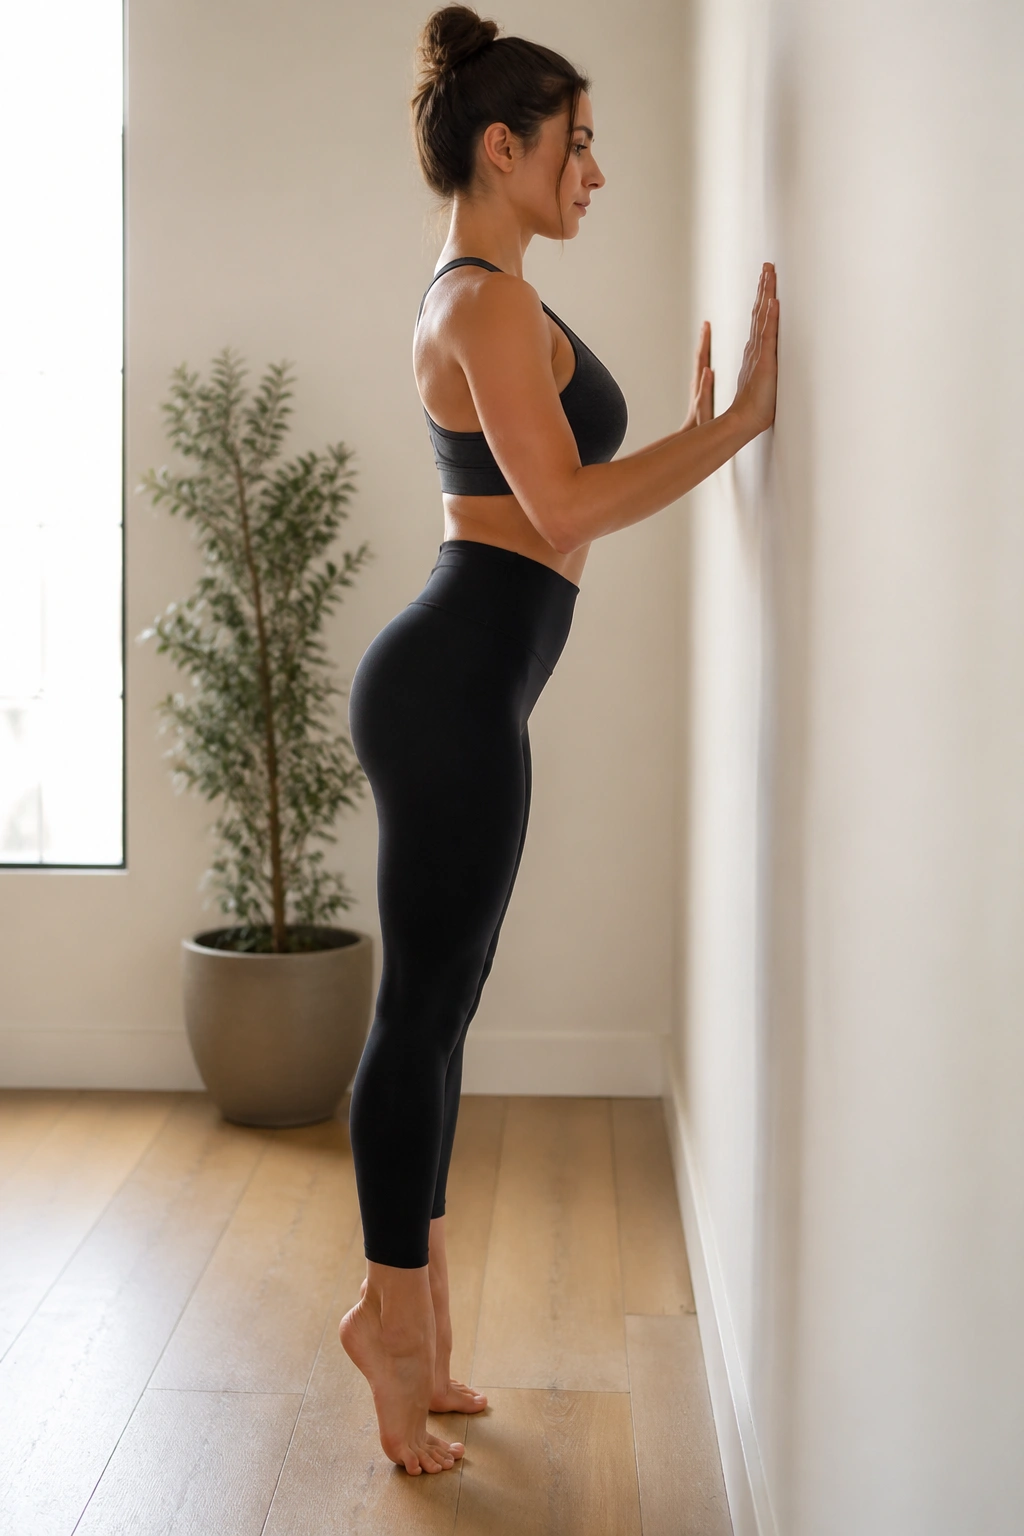
Small movement. Serious burn. Stand facing the wall with fingertips lightly touching it, then rise onto the balls of your feet and lower with control. Do not bounce. That little bounce is where the exercise turns into noise.
I like this one because people usually think calves are easy until they do 20 slow reps and feel their ankles, feet, and balance all getting involved at once. Try 12 to 15 reps, then hold the top position for 10 seconds on the last rep.
If your toes grip the floor like they’re hanging on for dear life, relax them a bit.
7. Wall March
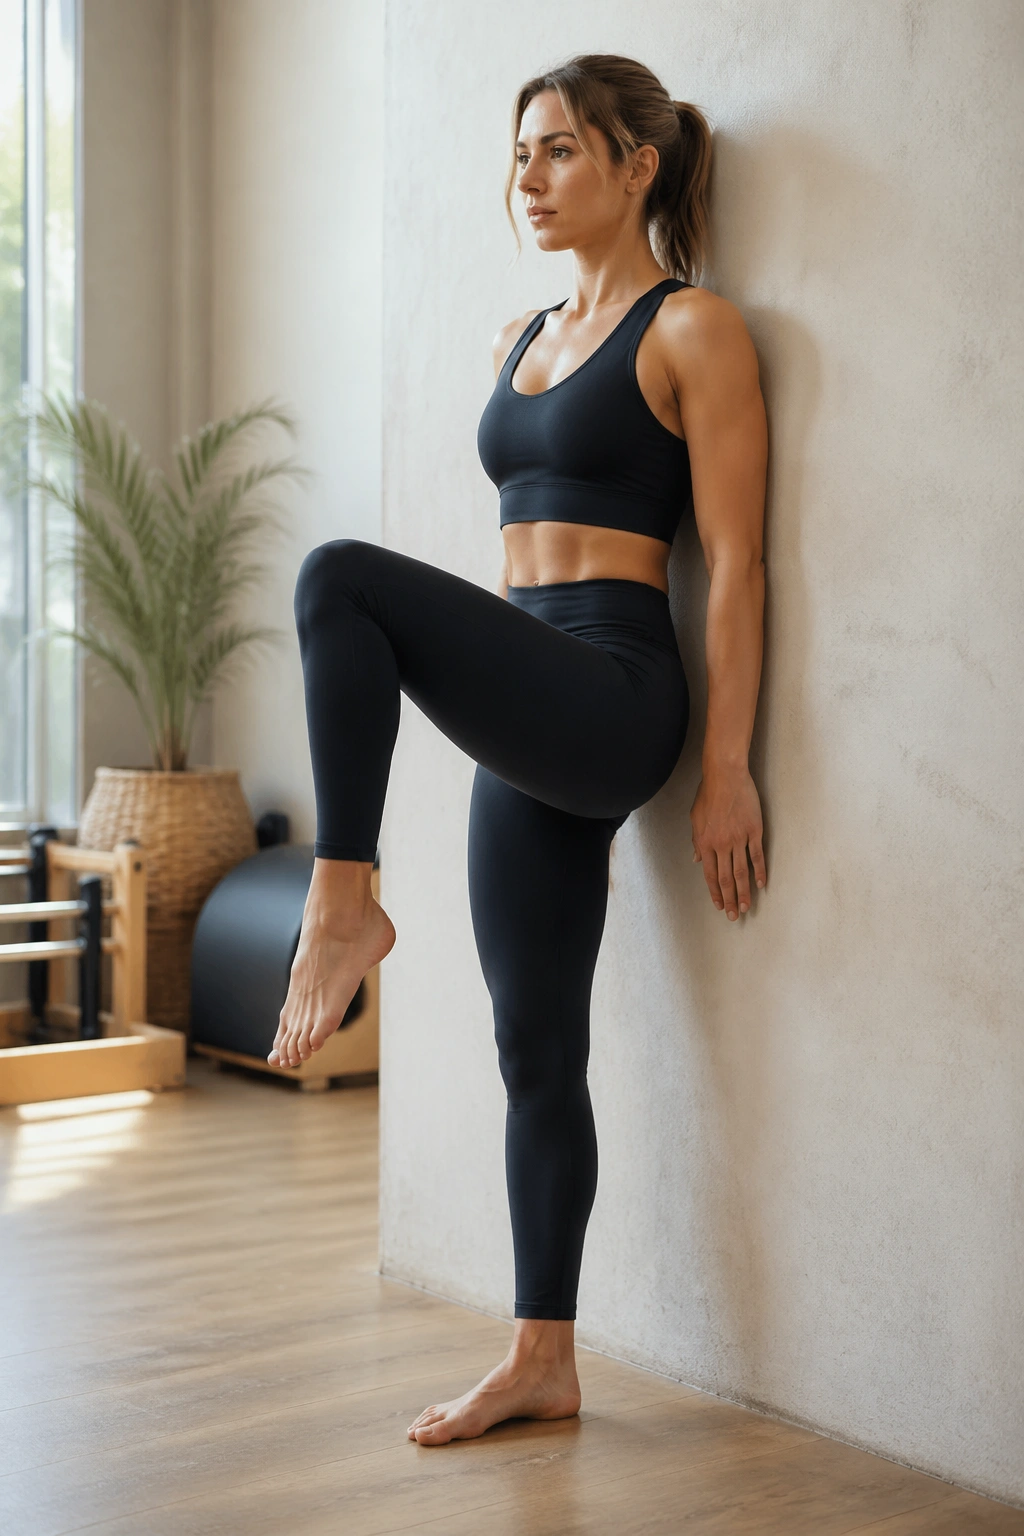
Stand tall with your back against the wall and one foot a few inches forward. Lift one knee to hip height, lower it with control, then switch sides. The wall keeps you honest. If your torso starts leaning back or your pelvis shifts wildly, you’re probably lifting too high.
How to use it
Think of the wall march as standing core work, not a cardio drill. The lifted knee should feel deliberate, almost slow, and the standing leg should stay rooted. Two sets of 8 to 10 marches per side are enough to make the whole midsection wake up.
A lot of people rush this. Don’t.
8. Wall Hamstring Stretch and Press
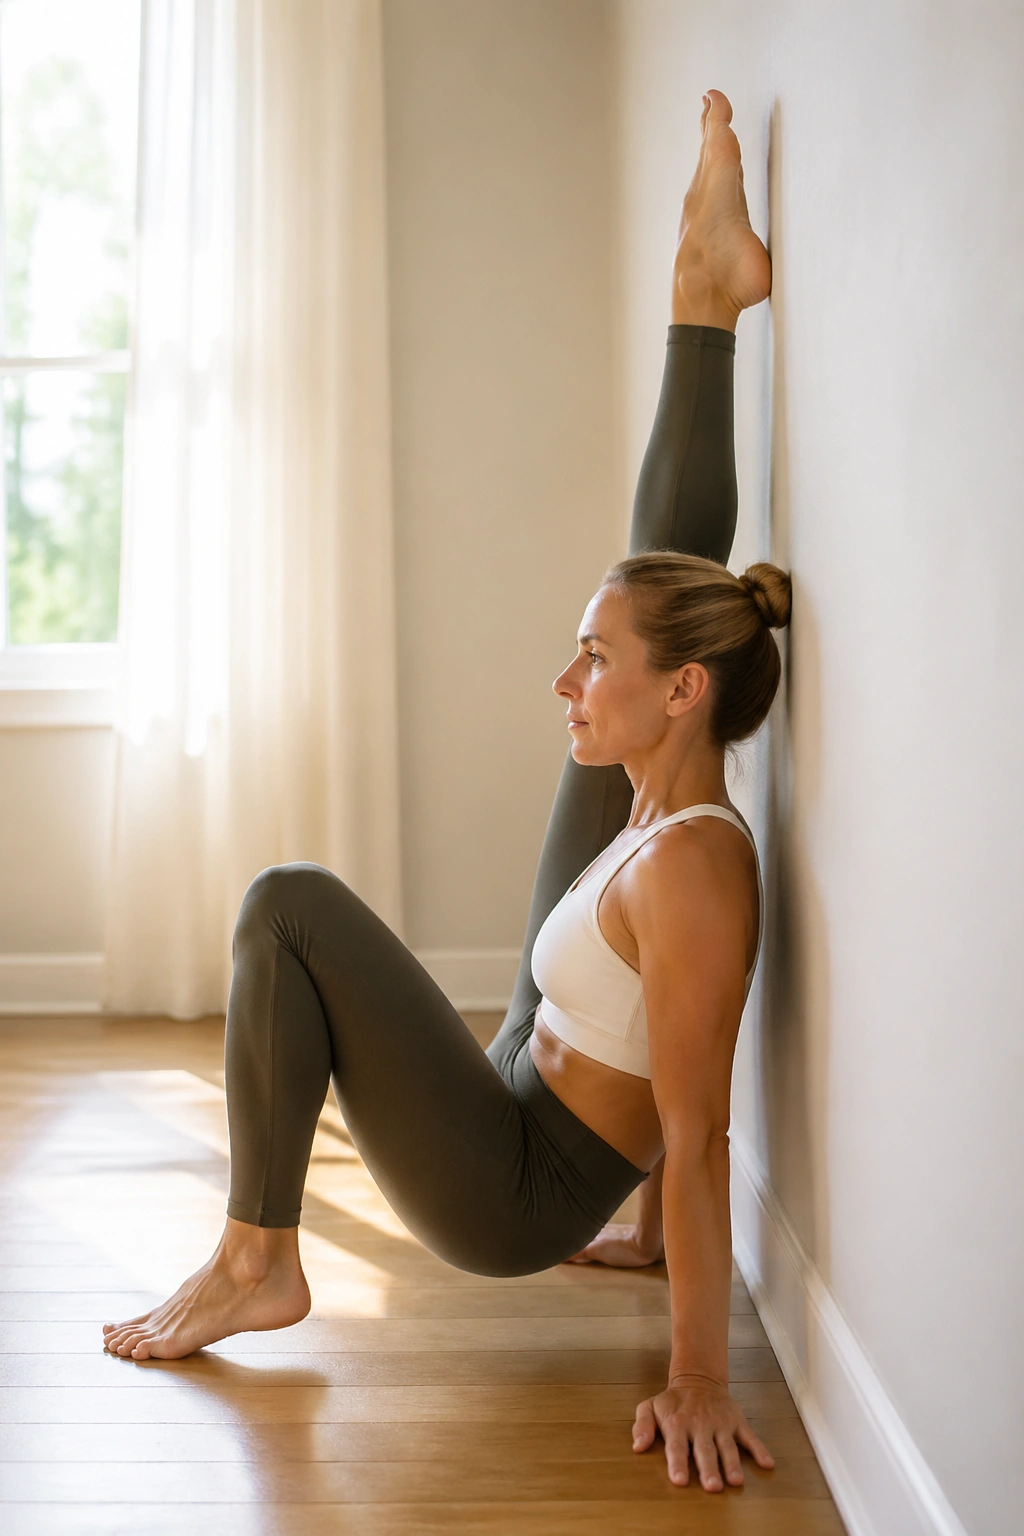
This one is not a passive hangout stretch. One leg goes up the wall, the other stays bent or long on the floor, and then you actively press the heel into the wall for 5 seconds before easing off. That little press matters.
Compared with a floppy hamstring stretch, this version teaches the muscle how to lengthen while staying engaged. It’s a better fit if your hamstrings feel tight but also weak, which happens more often than people think.
Try 3 rounds per side: press, relax, breathe, and then let the leg drift a hair farther only if the low back stays flat.
9. Wall Plank
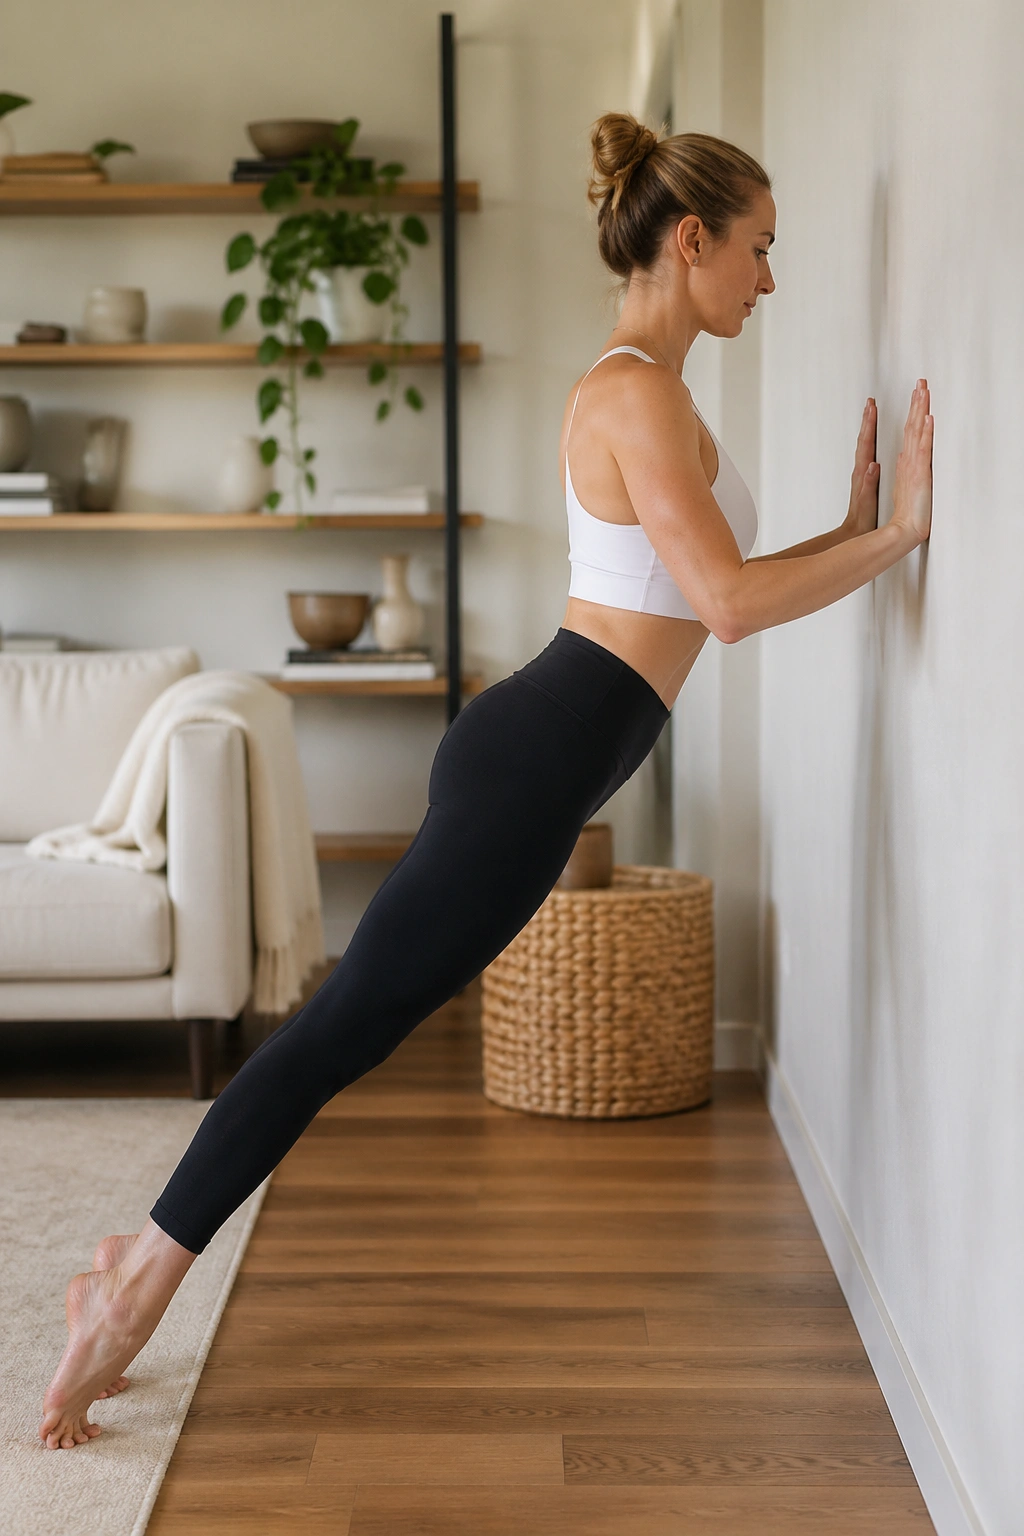
Not every plank needs the floor to be useful. A wall plank is often the smarter place to start, especially if your shoulders are cranky or your core tends to collapse under load.
Stand facing the wall, place your hands at chest height, and walk your feet back until your body forms one long line. Brace gently through the belly, press the wall away, and hold for 20 to 30 seconds. If the rib cage dumps forward, you went too far.
Best cue: think long through the crown of the head and heavy through the heels.
10. Wall Push-Up
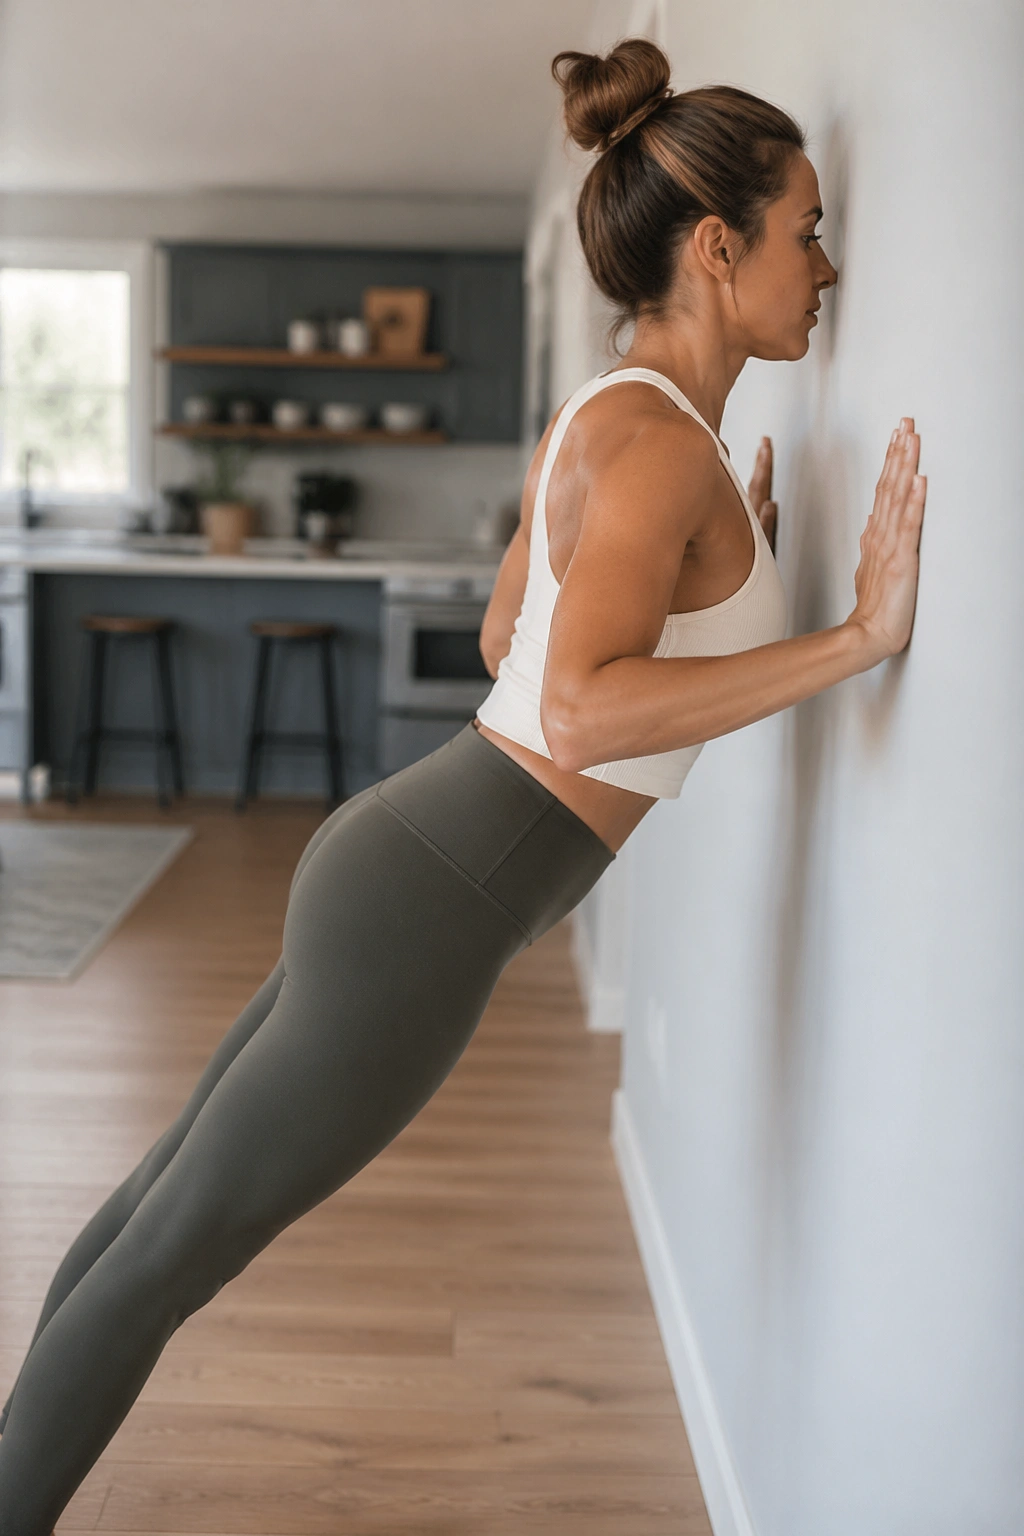
Hands on the wall, body straight, elbows bending back at about a 45-degree angle — that’s the clean version. Lower your chest toward the wall, pause when your nose is still a few inches away, then press away.
What I like here is the shoulder blade control. A wall push-up gives you enough resistance to work, but not so much that the movement falls apart after three reps. Start with 8 slow reps. If your neck tightens, reset and lower the intensity by standing closer to the wall.
11. Wall Side Leg Lift
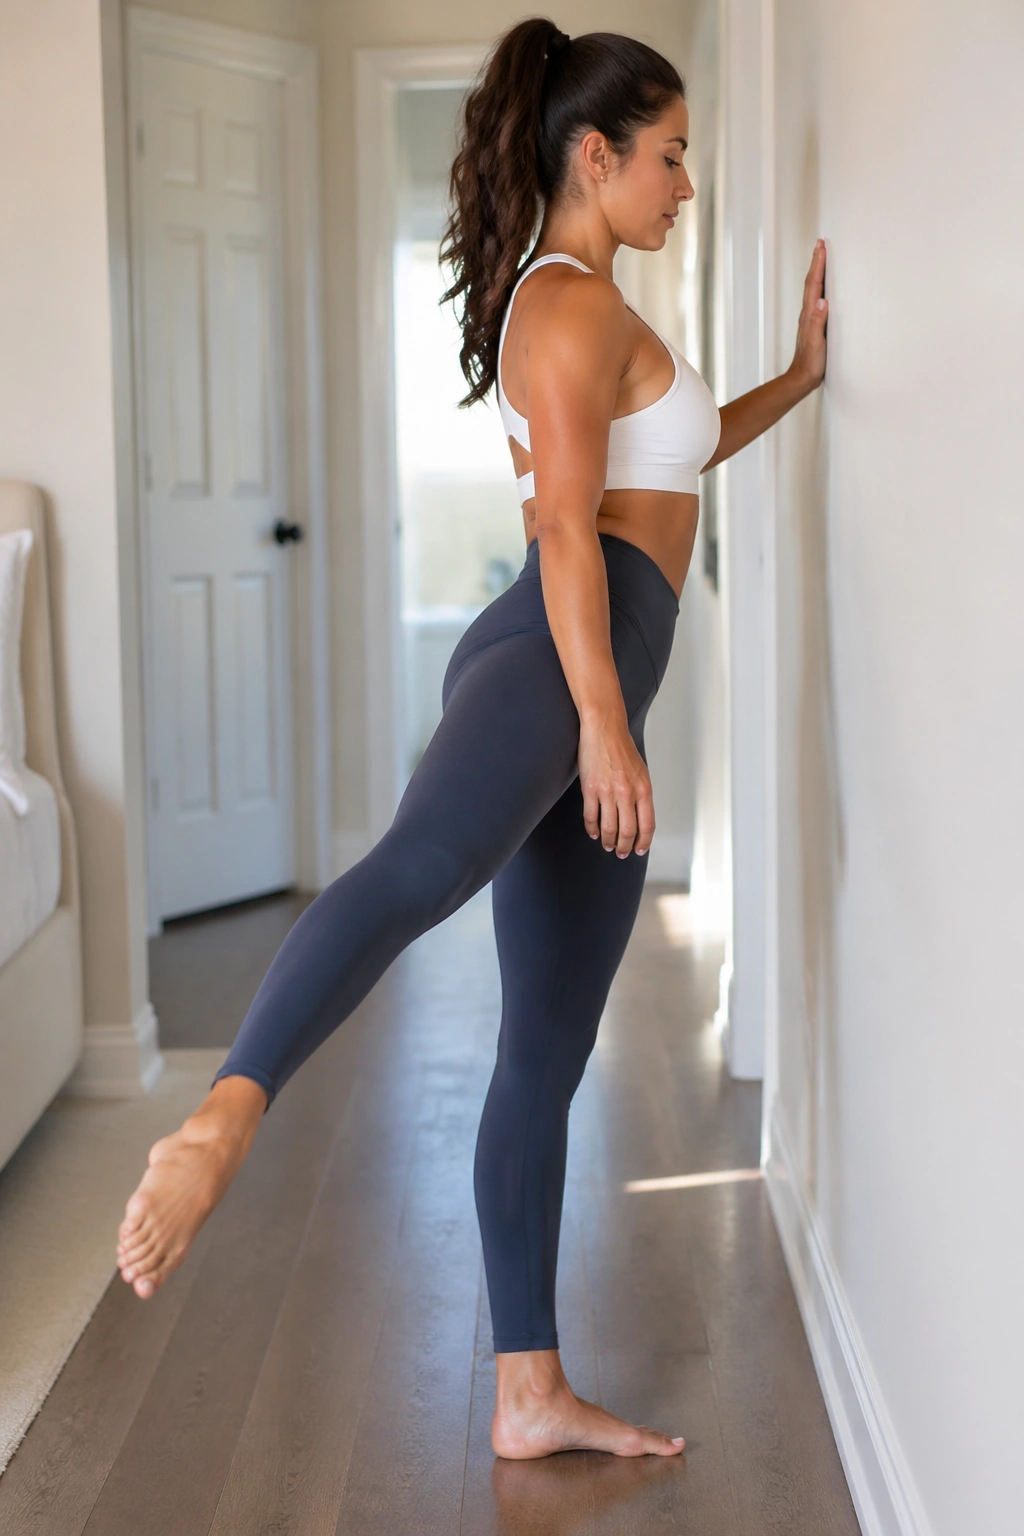
Stand side-on to the wall with one hand resting lightly on it. The outer leg lifts a few inches to the side, then lowers without the hips tipping or the toes turning up toward the ceiling.
Quick form check
- Stand tall through the spine.
- Keep the standing hip stacked.
- Lift from the outer glute, not the low back.
- Move slowly enough to feel the control.
This move looks modest. It is not modest. After 12 to 15 reps, the side of the hip tends to light up in a way that tells you exactly where your stabilizers have been hiding.
12. Wall Side Plank
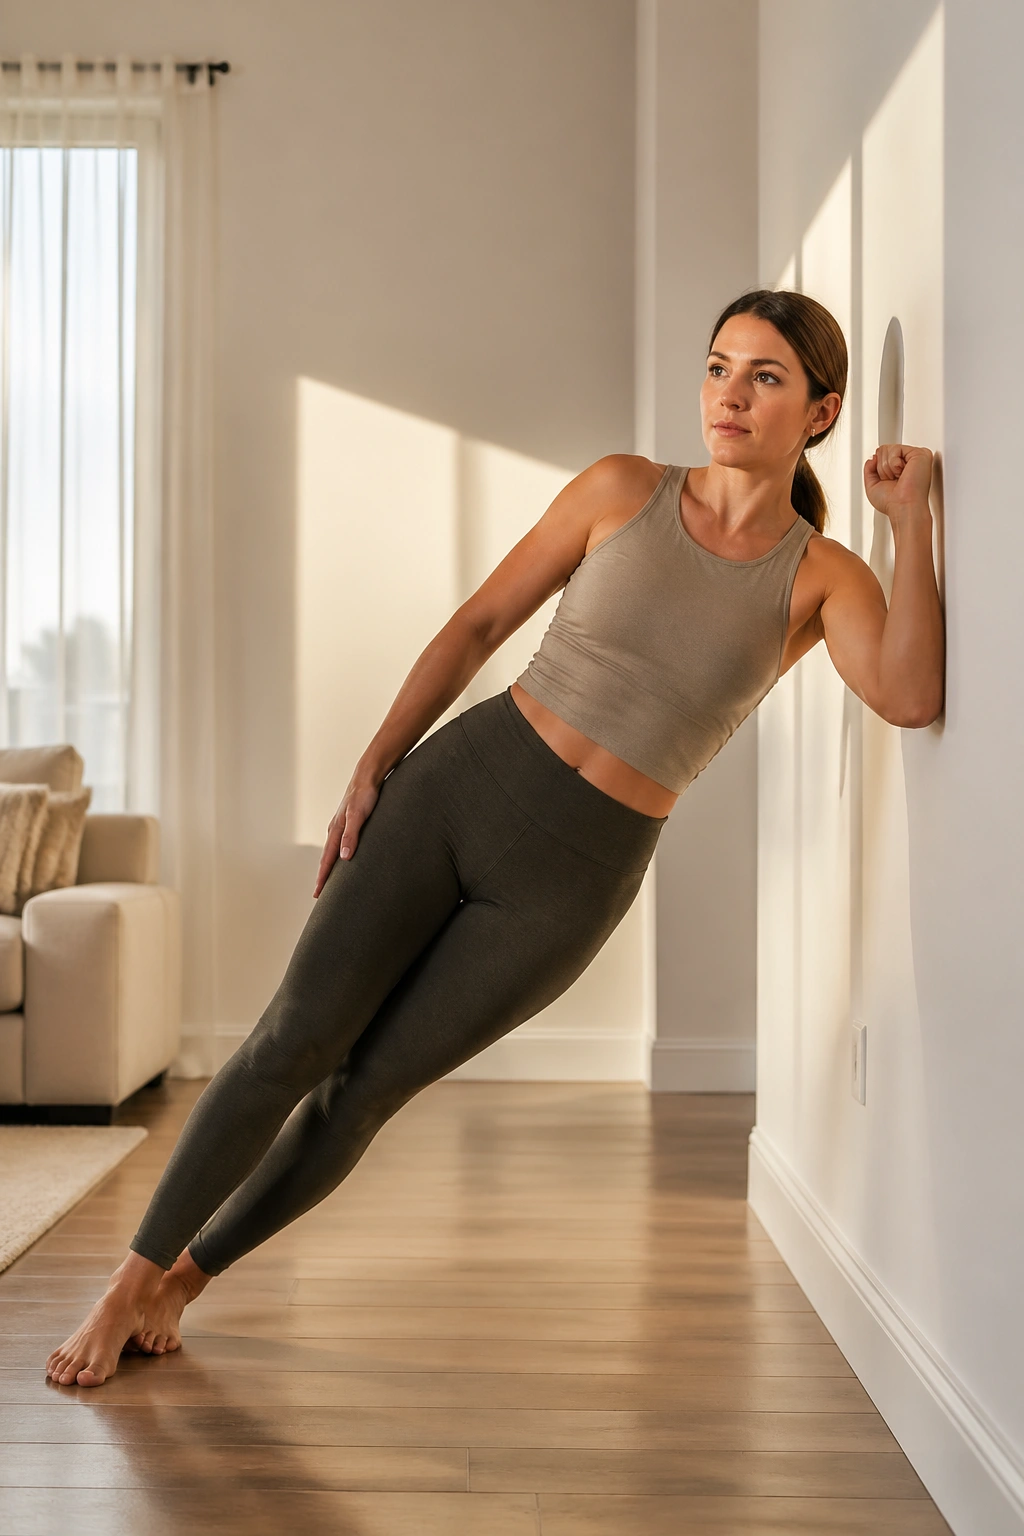
Can a side plank be gentle? On a wall, yes. Stand side-on, place the forearm or palm against the wall at shoulder height, and walk the feet out until your body creates one long diagonal line.
Now press the wall away and keep the waist from collapsing. You should feel the obliques, the shoulder, and the outer hip all working together instead of one area doing all the work. Start with 15 to 20 seconds per side.
What makes it work
The wall side plank is less about holding a dramatic shape and more about staying aligned while gravity pulls you off-center. That’s the real Pilates part.
13. Wall Shoulder Opener
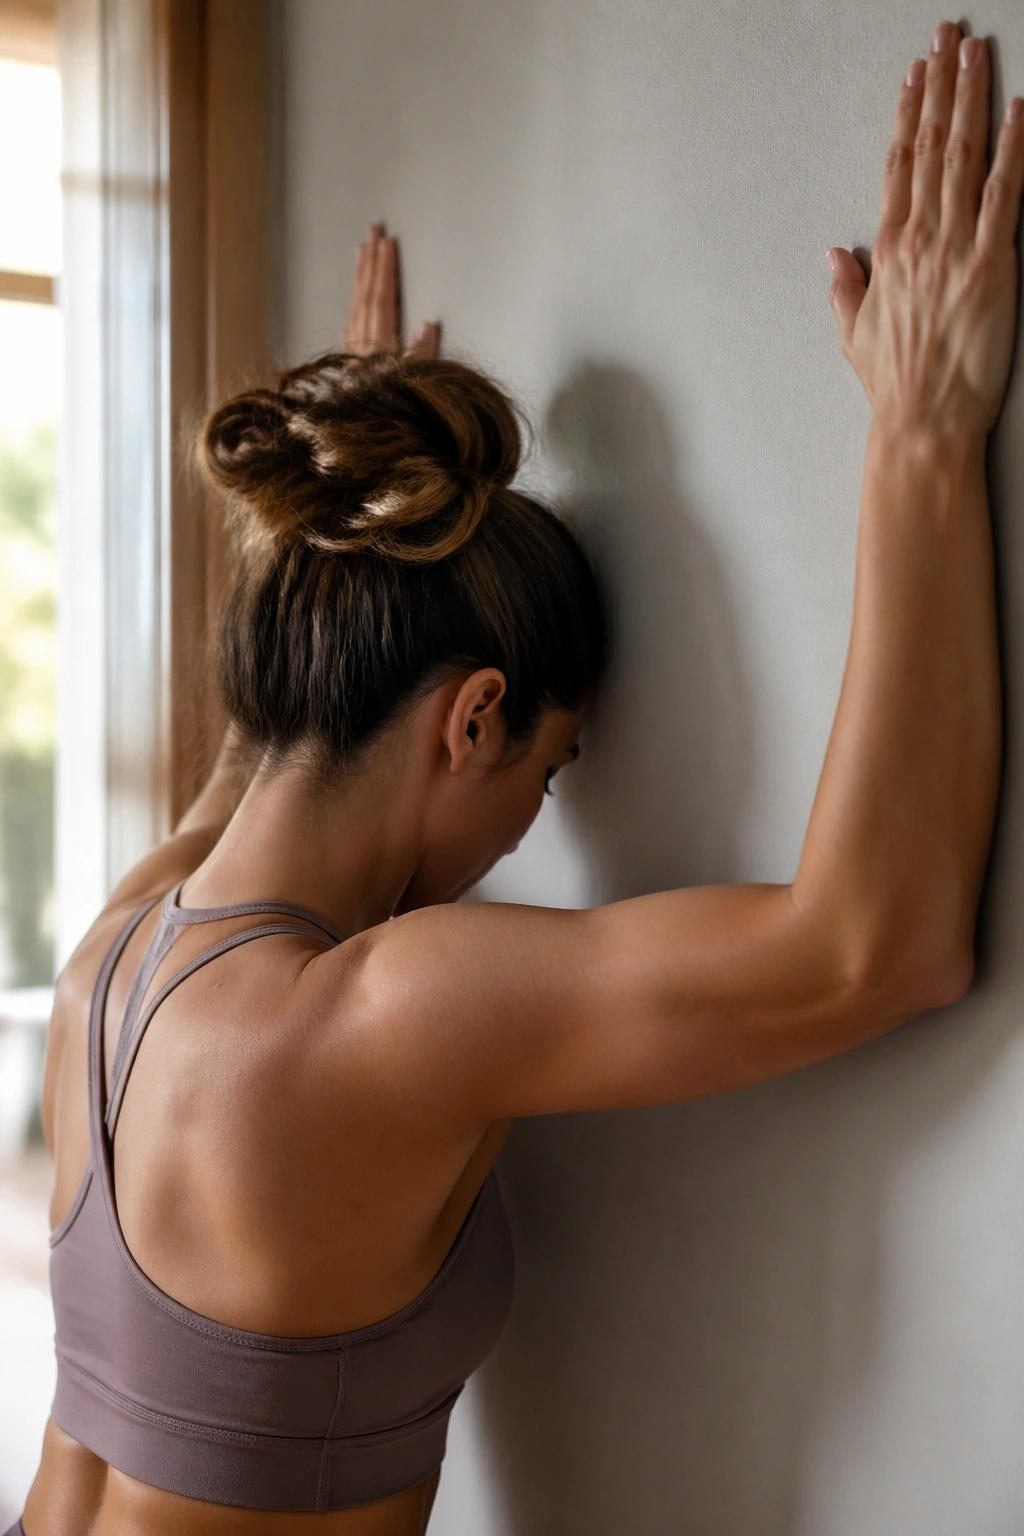
Stand facing the wall, reach both hands up to shoulder height or a little higher, and walk the chest down until the upper back and shoulders stretch. The sensation should feel open, not sharp.
There’s a sweet spot here. Too low and the shoulders crank. Too high and the stretch disappears. Find the middle and breathe into the space between the shoulder blades for 3 to 4 slow breaths. That area is often tighter than people expect, especially if the day has been spent at a desk or behind a wheel.
One good stretch beats five rushed ones.
14. Wall Chest Opener
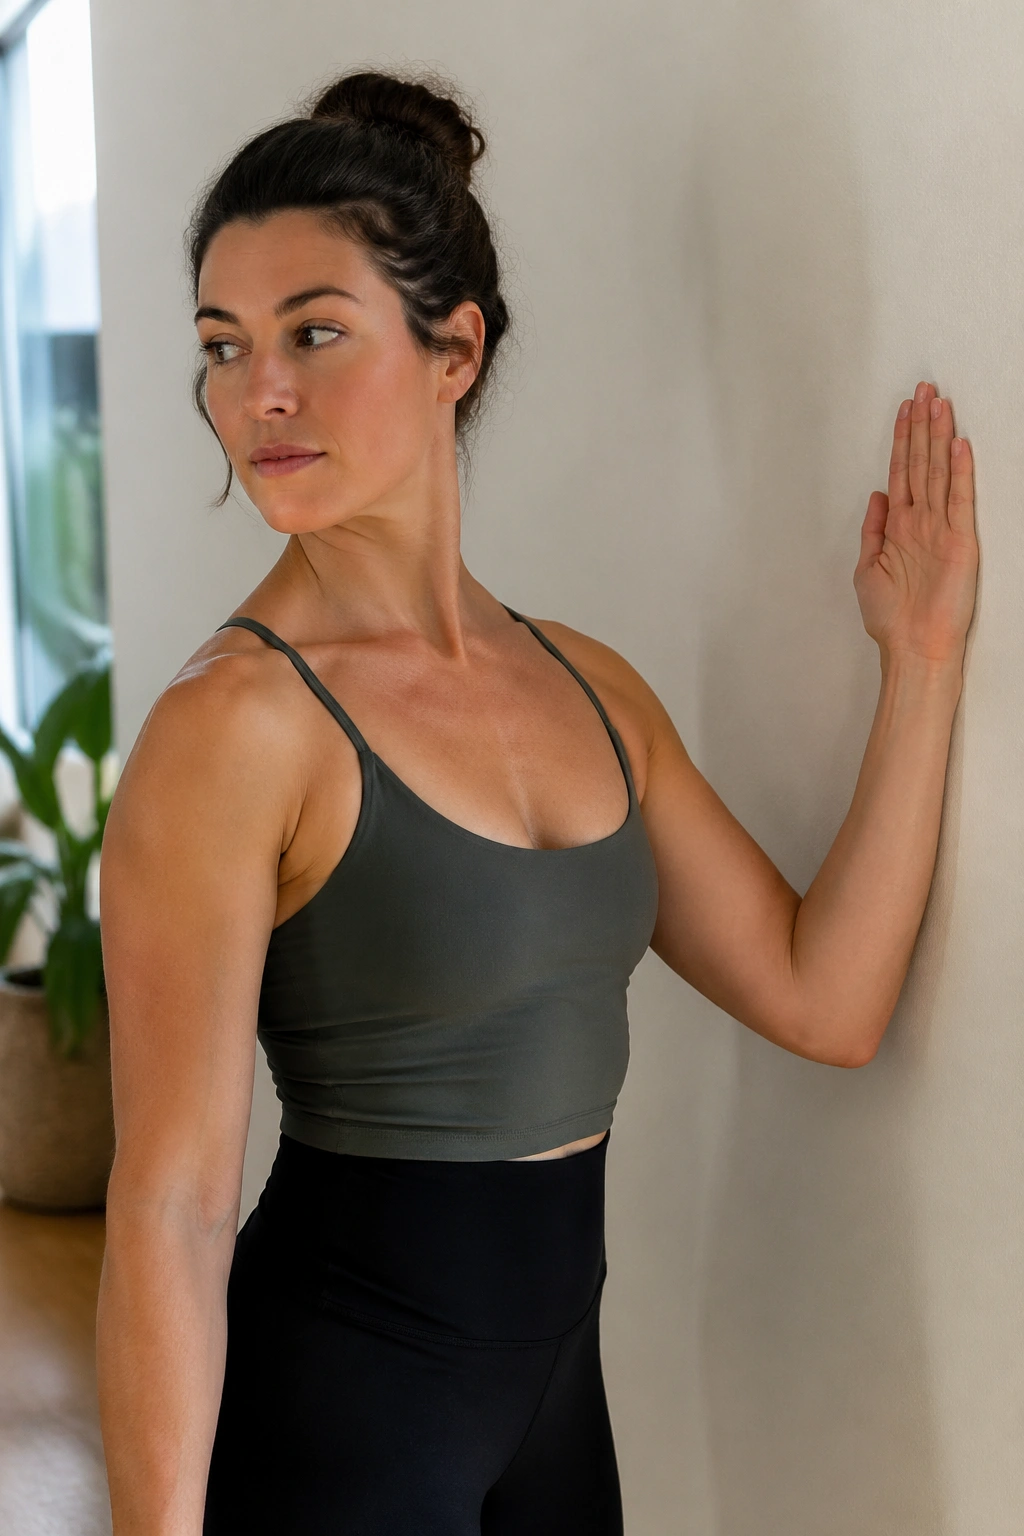
Place one forearm and palm on the wall, elbow bent, then gently rotate your body away until the front of the chest lengthens. The pecs should feel it before the front of the shoulder does.
This move is a nice counter to rounded posture because it lets the chest open without yanking the spine into a dramatic backbend. Hold 20 to 30 seconds per side and keep the ribs from flaring upward.
If the shoulder feels jammed, lower the arm angle a little and try again. That tiny adjustment usually helps more than forcing the stretch.
15. Wall Dead Bug
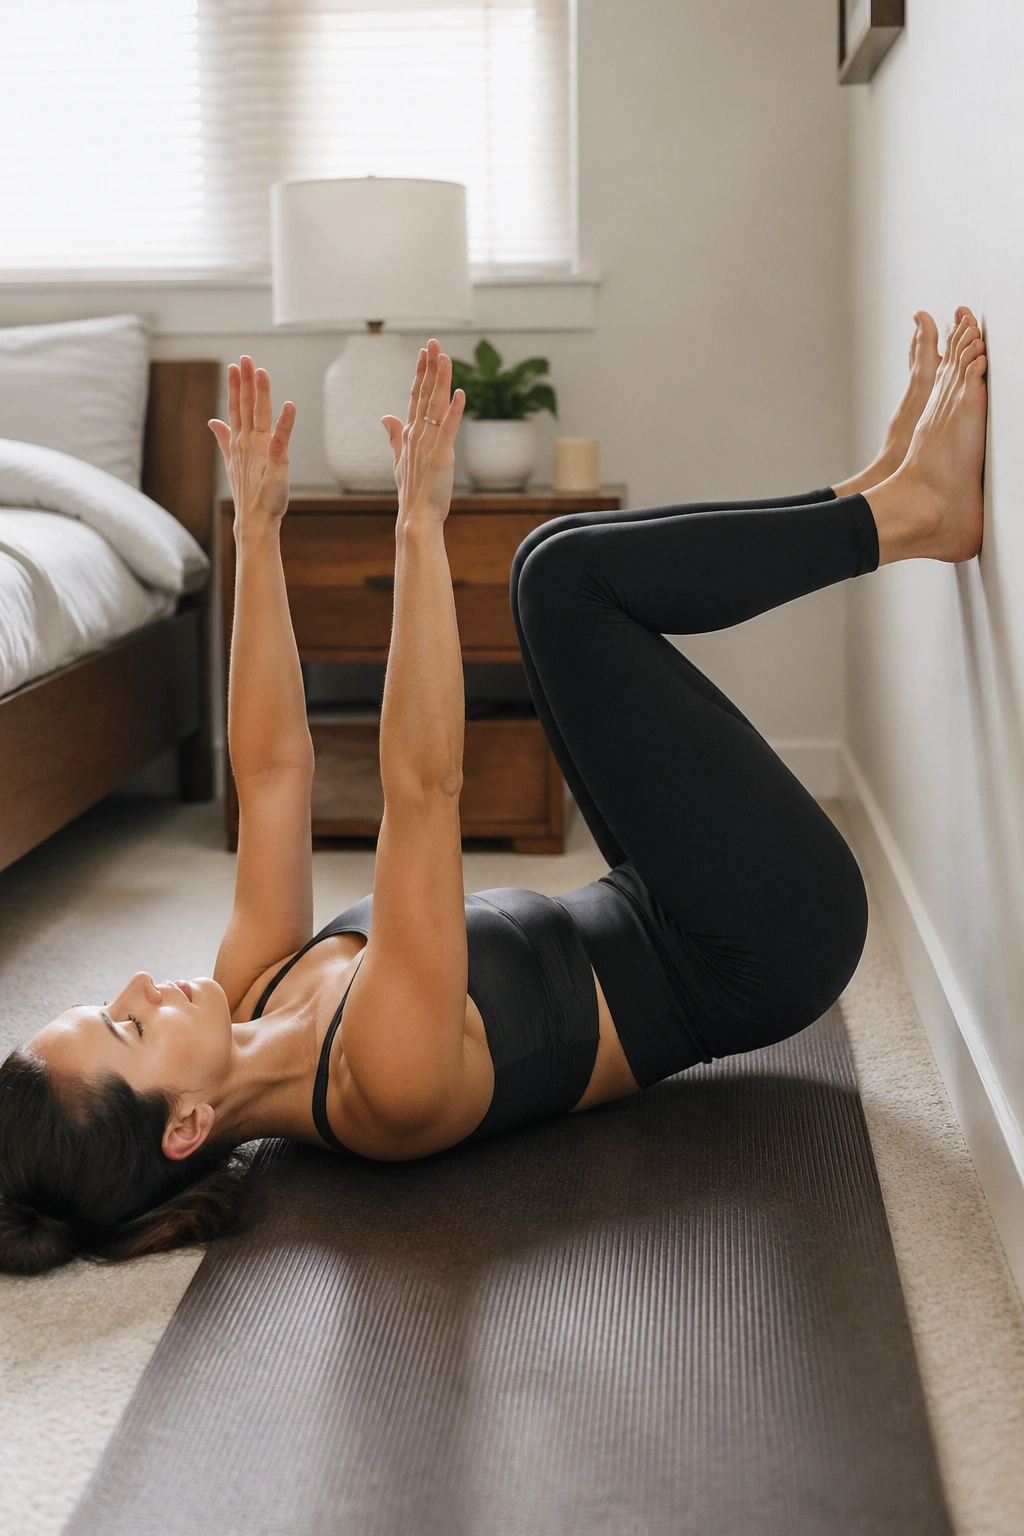
Classic dead bug, but cleaner. Lie on your back with your feet pressed into the wall at tabletop height and arms reaching straight up. Brace the belly, then slowly lower one heel away from the wall while the opposite arm reaches back, and return.
The wall gives you a clear stop point, which makes this easier to control than the floor version. If your lower back arches, shorten the range right away. That arch is your body asking for less drama.
Try 6 to 8 reps per side, slow enough that you can count the exhale.
16. Wall Tabletop Toe Tap
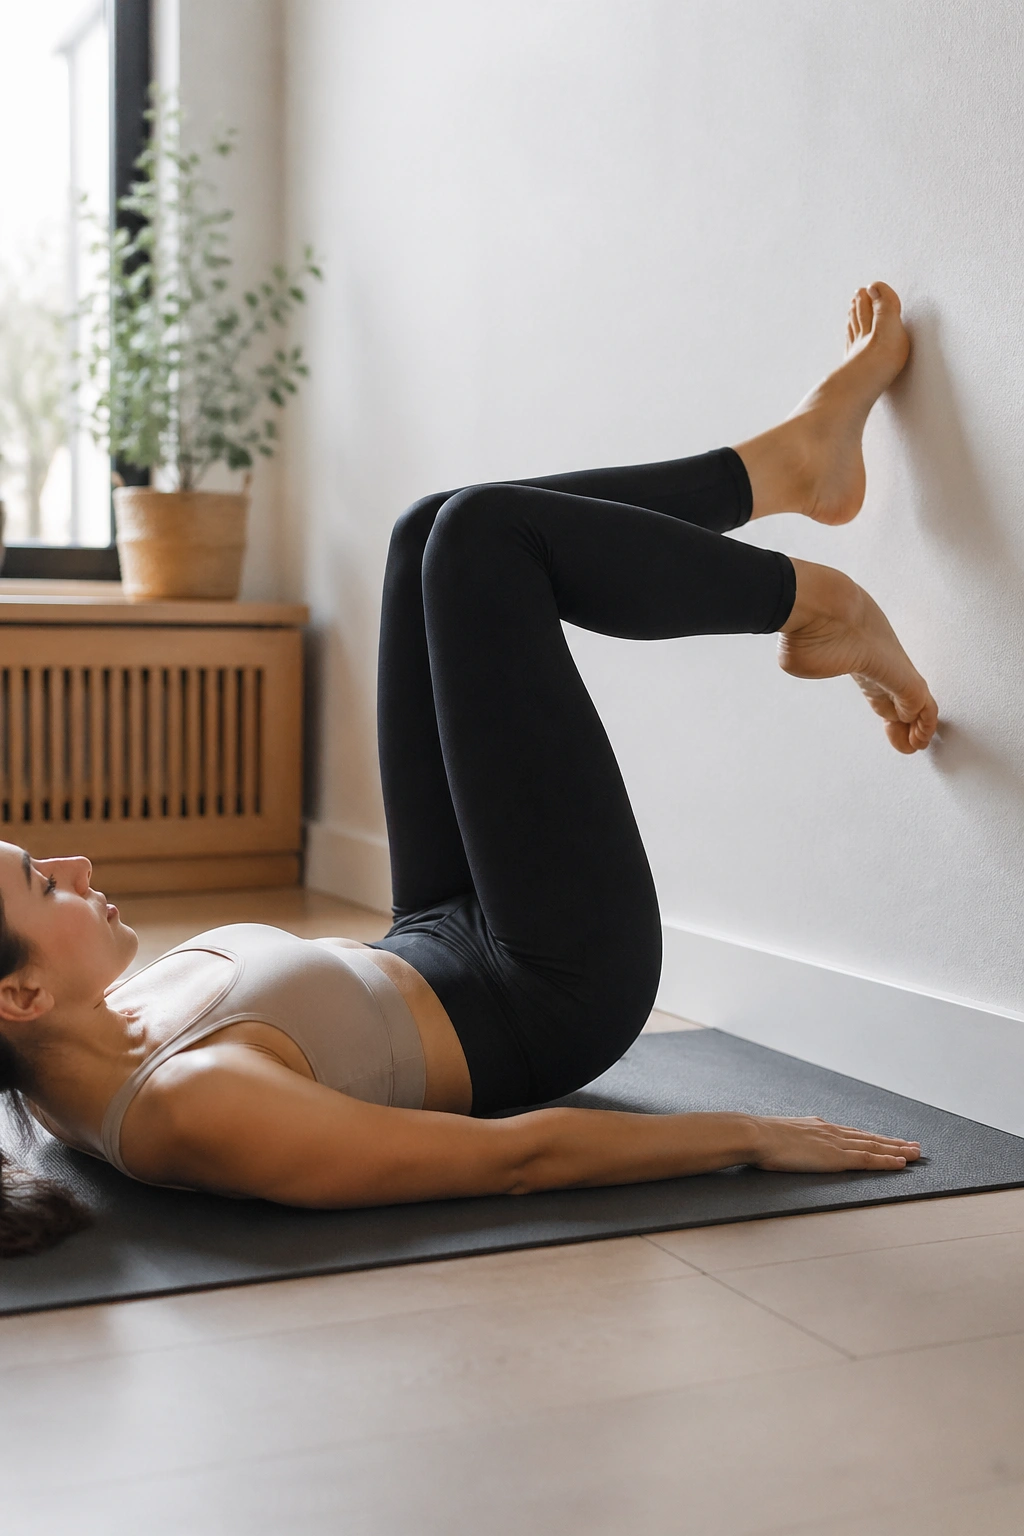
Keep your calves on the wall and bend both knees to 90 degrees. One foot taps lightly toward the floor, then comes back to the wall while the rest of the body stays still. That’s the move.
Common mistakes
- Letting the pelvis rock.
- Pressing too hard into the wall.
- Moving the leg faster than the core can track.
- Turning the toe tap into a kick.
This one pairs well with slow breathing. If you can keep the ribs calm for 10 clean taps per side, your deep core is doing more work than it looks like from outside.
17. Wall Clamshell
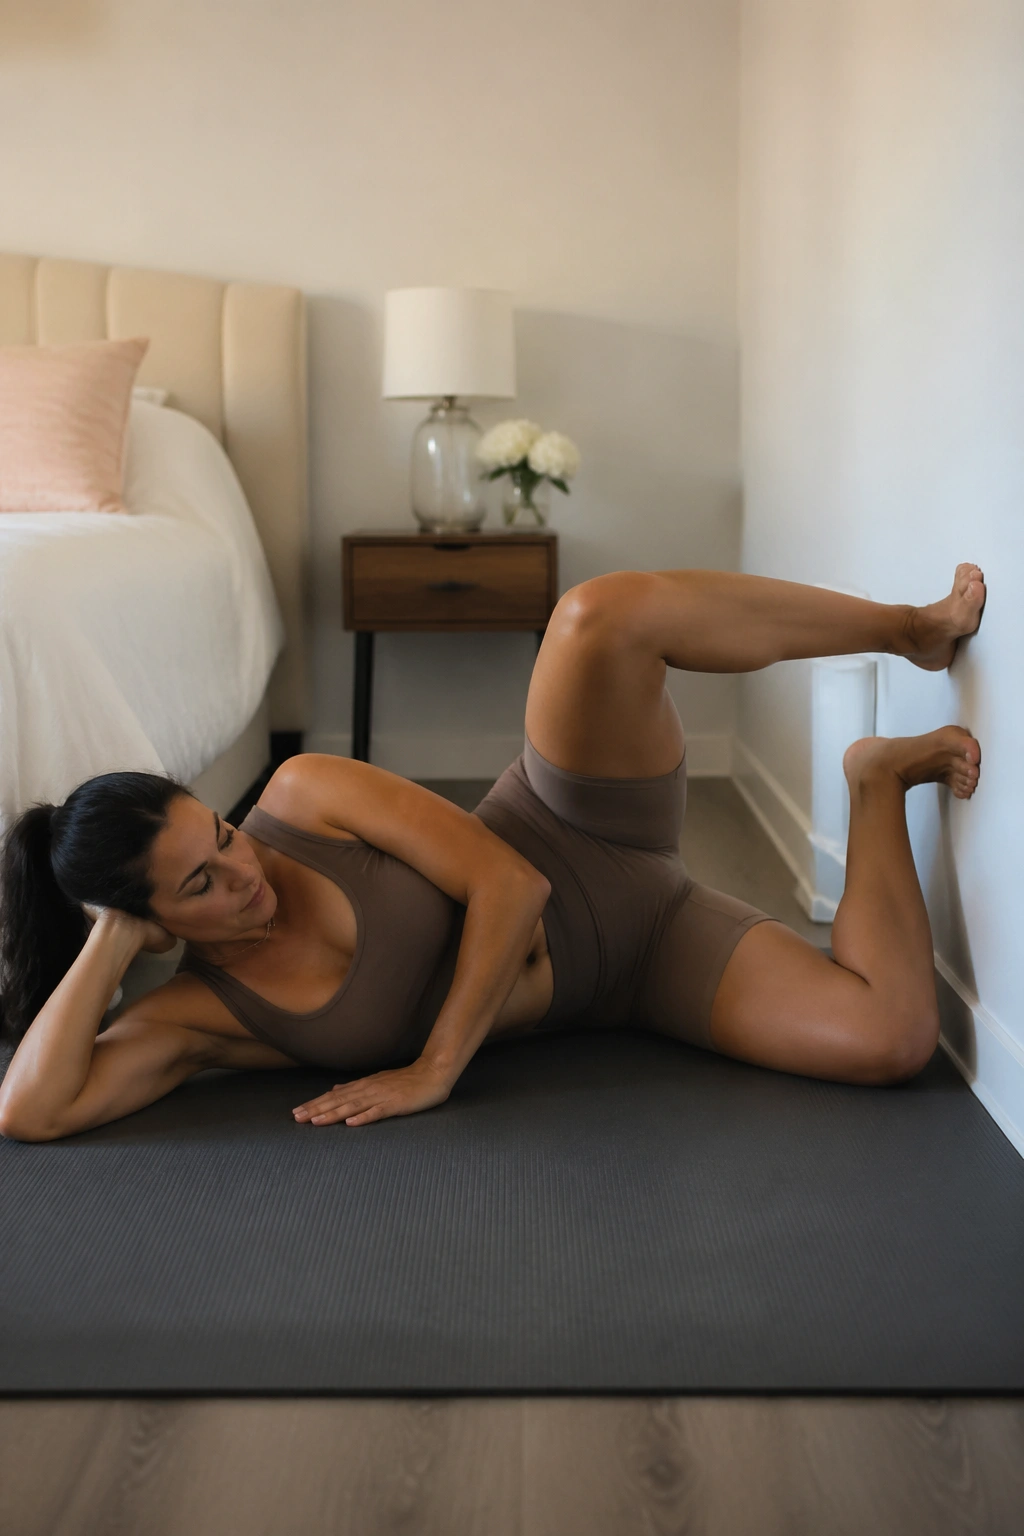
Lie on your side with your feet pressing lightly into the wall, knees bent, and hips stacked. Open the top knee like a clamshell without rolling the top hip backward. Then close it with control.
Why the wall helps
The wall gives your feet something stable to push against, which makes the glute medius work harder without the pelvis cheating. I like this version because it feels less wobbly than a floor clamshell and makes the hip position easier to read.
Try 12 to 15 reps per side. If you feel the low back or the front of the hip take over, reduce the range and slow down.
18. Wall Glute Kickback
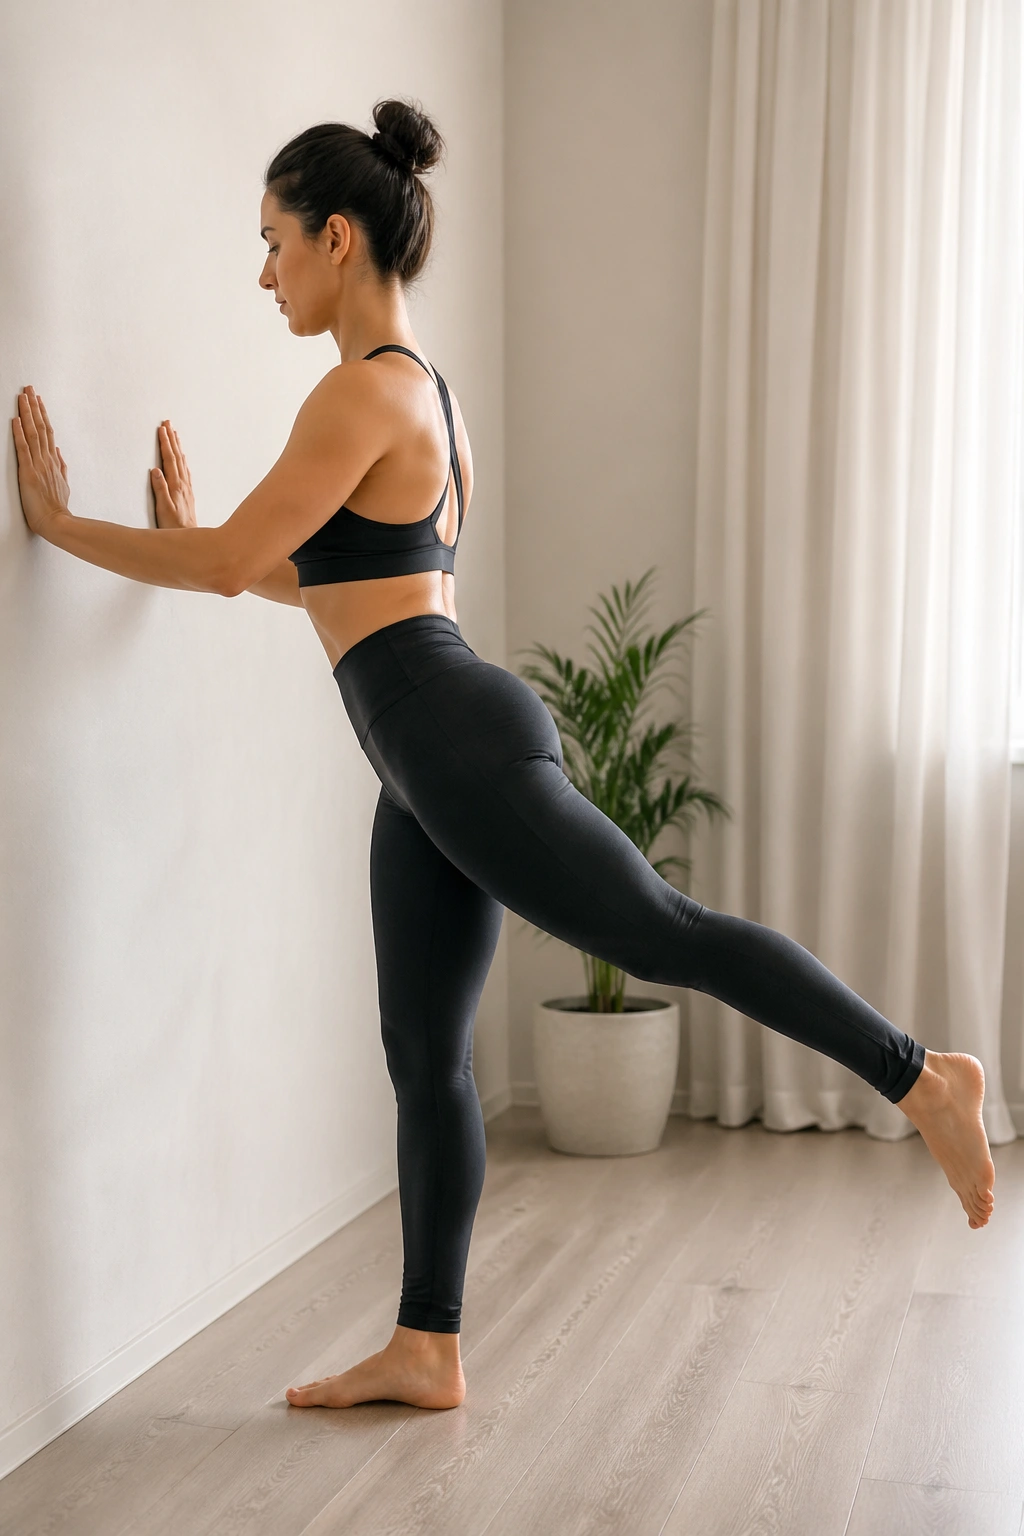
Stand facing the wall with hands lightly resting on it. Shift your weight onto one leg and send the other leg back in a small, controlled kick, stopping before the lower back arches or the hip opens up.
It’s tempting to swing the leg and call it done. Don’t. The real work is in keeping the pelvis square while the glute extends the leg behind you. That’s the part people feel the next morning if they’ve been sitting too much.
A runner, a desk worker, or anyone who stands all day usually notices this one fast. Slow reps. Ten to twelve per side.
19. Wall Lunge Pulse
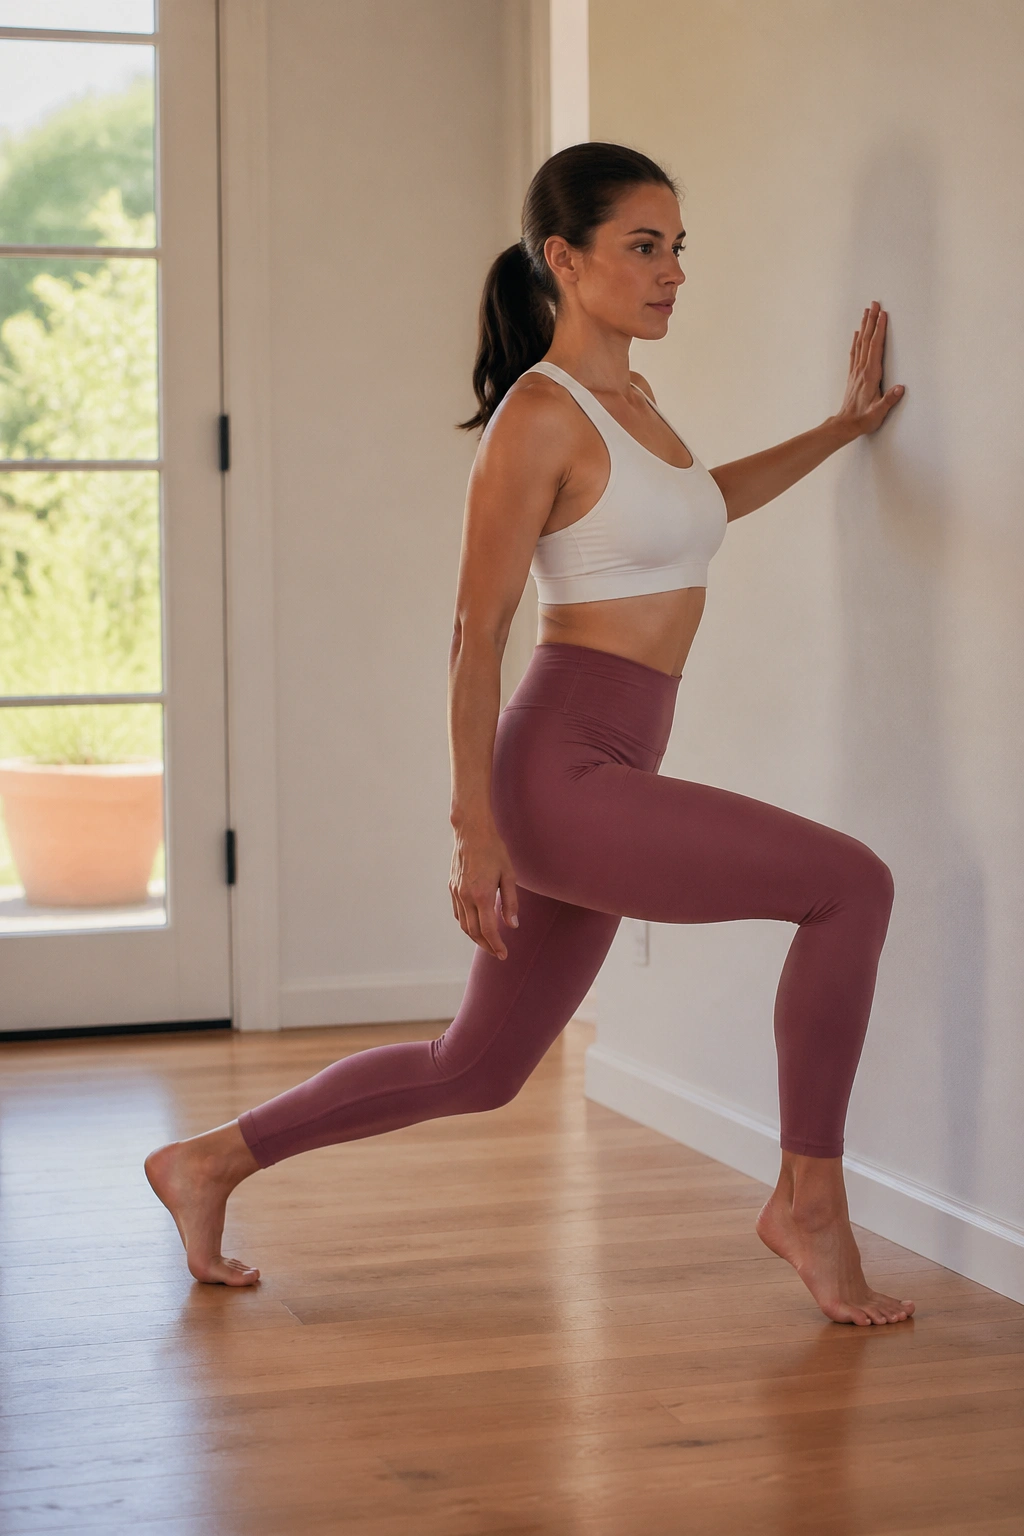
Stand in a split stance and let the wall steady you. One hand can rest on the wall while the front knee bends and straightens in small pulses. The back heel stays lifted if that feels right for your body.
This is a leg move, yes, but it also asks for balance and hip control. Keep the front knee tracking over the middle toes and resist the urge to dump all your weight forward. Eight to 10 pulses, then switch sides, is enough to make the thighs complain in a useful way.
If the knees feel cranky, make the stance shorter.
20. Wall Supported Single-Leg Balance
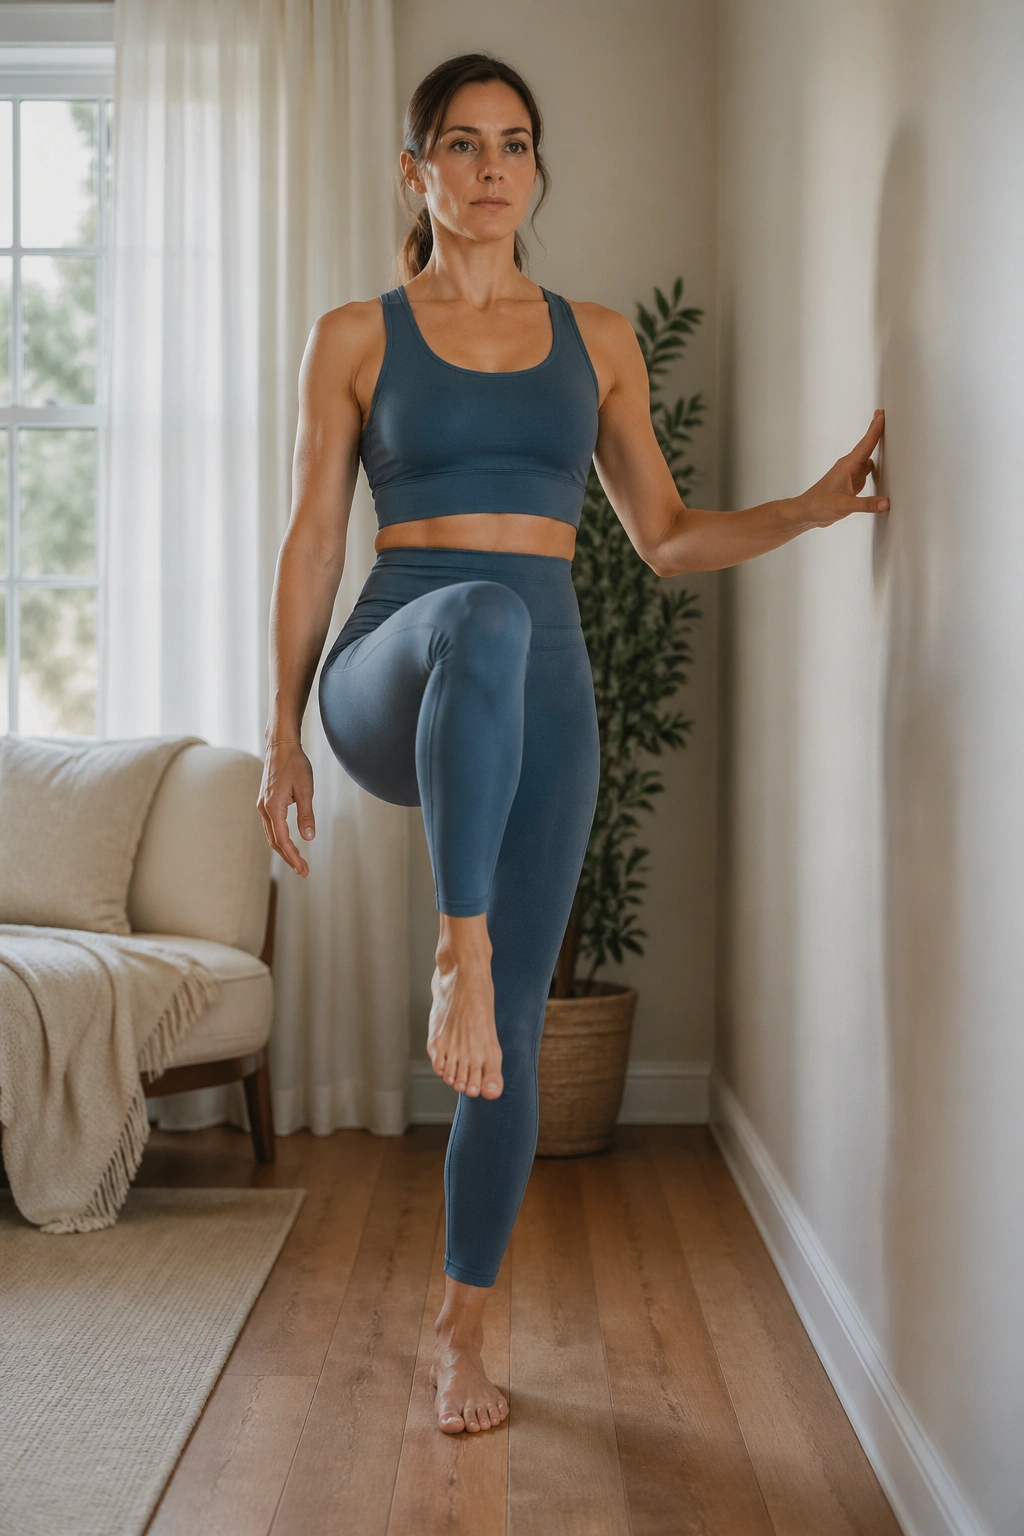
Why is balance work easier near a wall and still hard? Because the wall removes the fear of falling, which leaves the real problem in plain view: one side is doing the stabilizing while the other side gets to hover.
Stand on one leg with one fingertip grazing the wall. Lift the free knee, then hold for 10 to 20 seconds, or add tiny circles with the lifted foot. The standing hip should stay level, not drift out to the side.
How to make it harder
Take the hand away for a few seconds, then touch it back down if you need to. That little on-off rhythm keeps the move honest.
21. Wall Mermaid Stretch
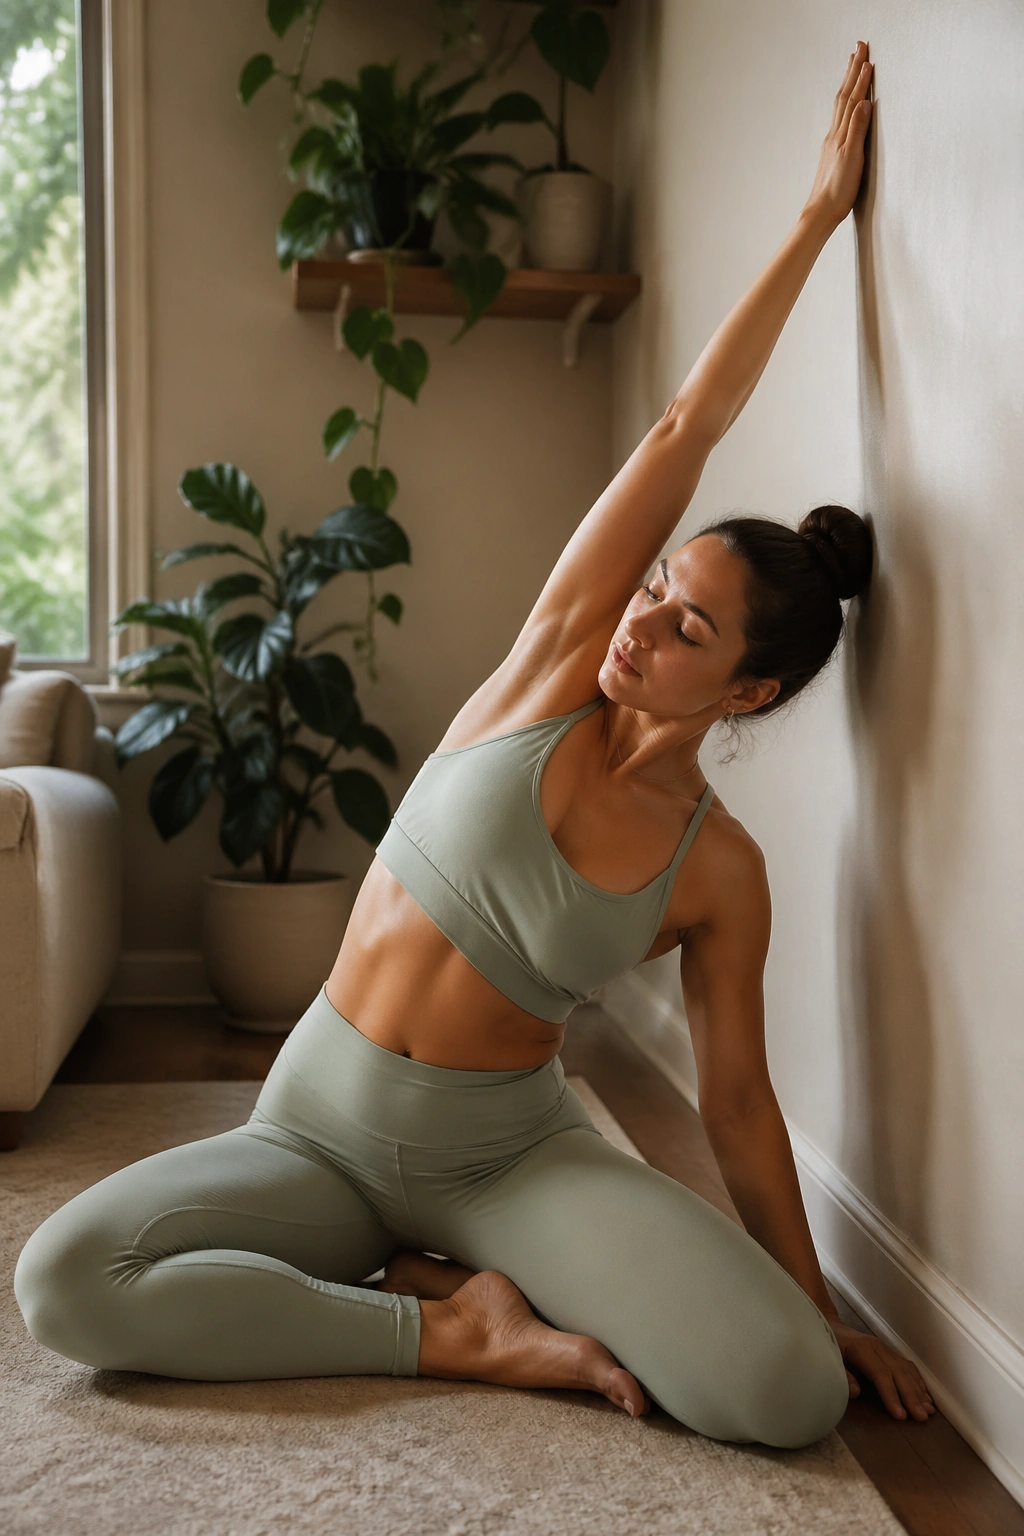
Sit sideways beside the wall with one hip grounded and one hand reaching up or lightly touching the wall. Then side bend away from the wall, letting the ribs open while the spine stays long.
The mermaid stretch feels lovely when it’s done well, but lovely is not the main point. The point is length through the side body, especially around the waist and the space between the ribs and pelvis. Breathe there. The stretch usually deepens on the exhale.
A smooth, slow reach beats a big bend every time.
22. Wall Spine Twist
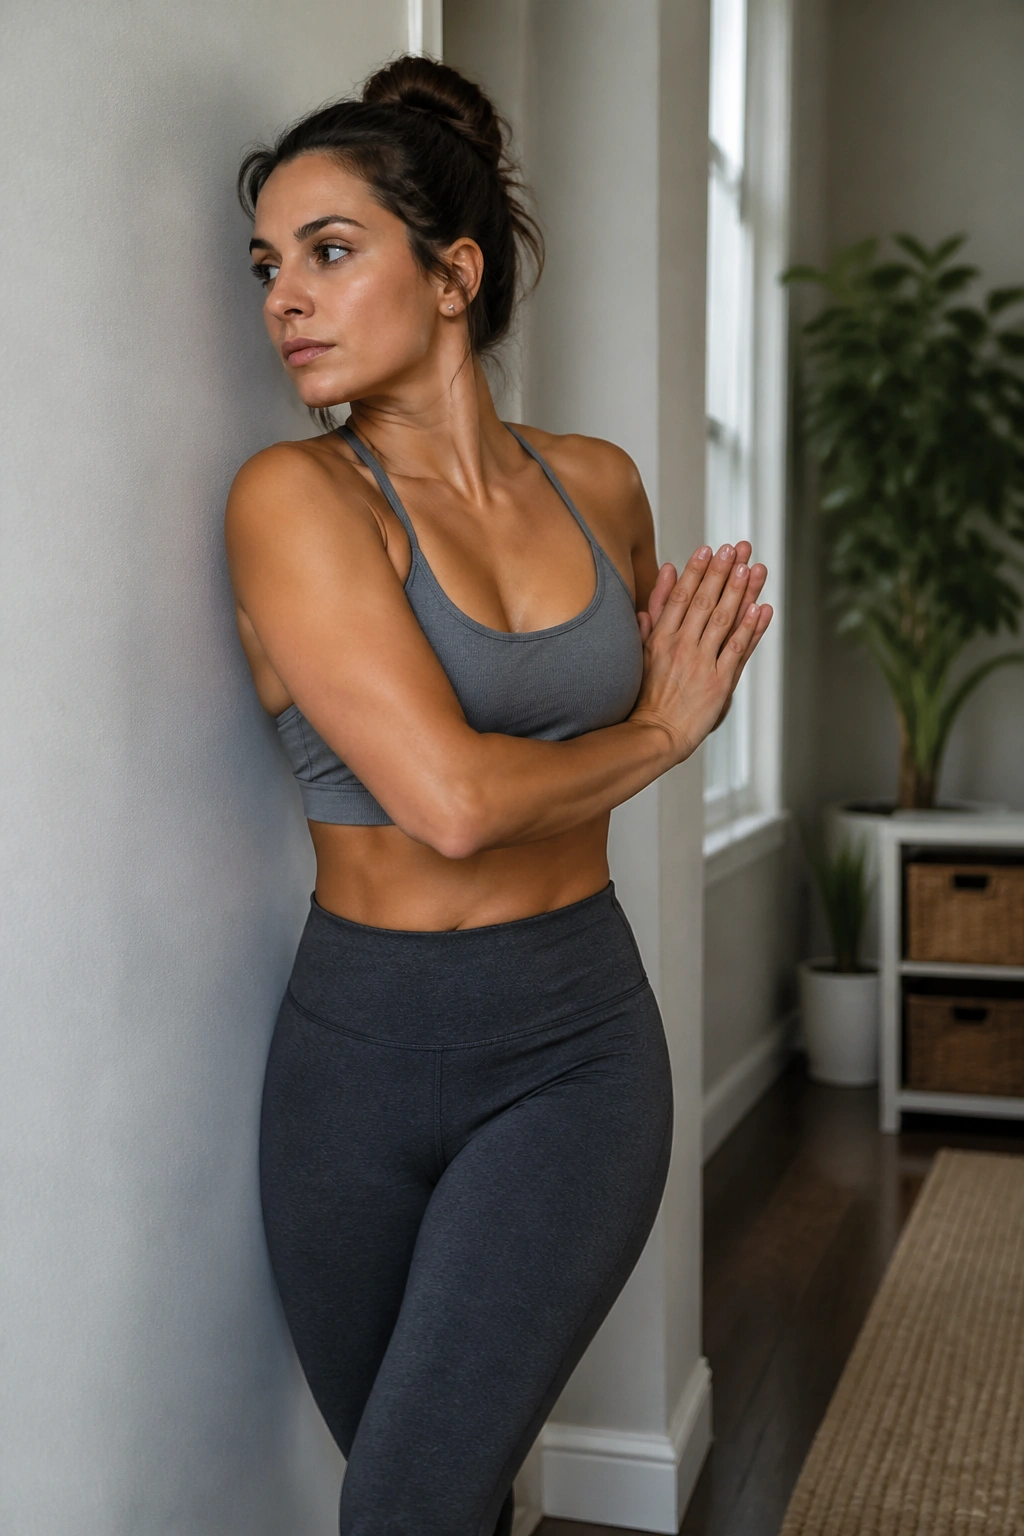
Sit or stand with one shoulder near the wall, then rotate the rib cage away from it in a controlled twist. The hips stay mostly quiet. The movement comes from the torso, not the pelvis spinning around like it’s trying to win a race.
A few cues that help
- Grow tall before you twist.
- Keep both sit bones heavy if you’re seated.
- Turn from the ribs first.
- Stop before the neck starts hauling everything around.
The wall gives you a reference point, which makes it easier to tell whether the shoulders are turning independently or the whole body is cheating together.
23. Wall Saw
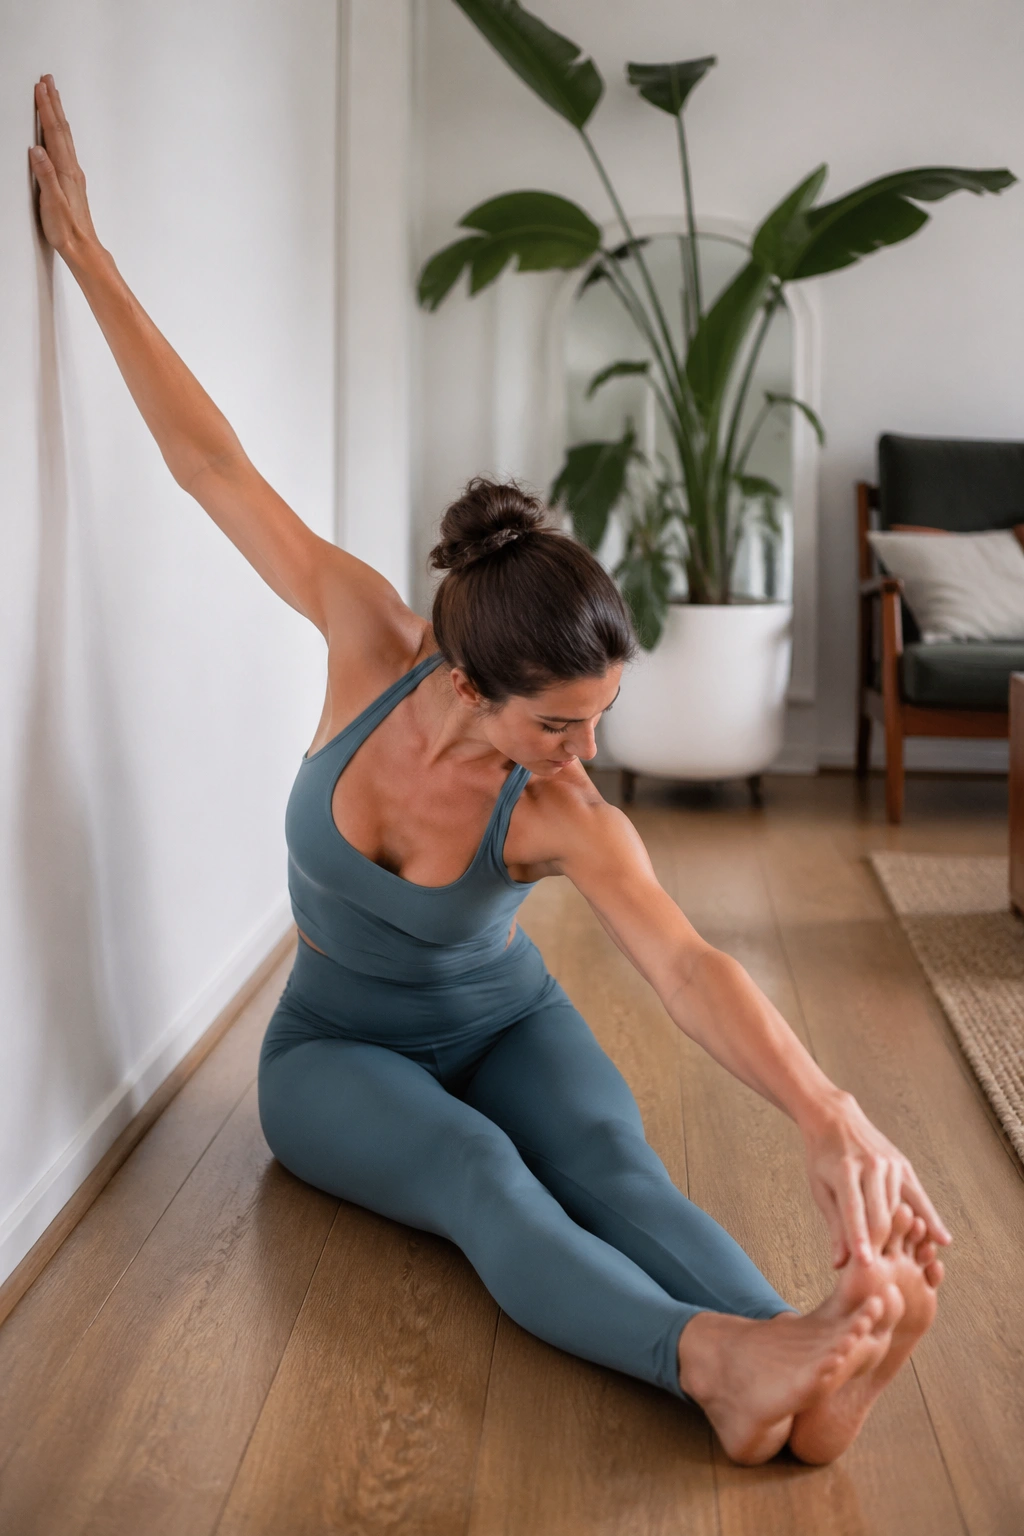
The Pilates saw gets cleaner when the wall gives your spine a line to work against. Sit tall with one arm reaching long, hinge just enough to feel the hamstrings, and rotate as if you’re reaching toward the opposite foot.
The motion should feel like a tidy diagonal, not a crash. You want length before you twist, and twist before you fold. That order matters. A rushed saw usually turns into a sloppy hamstring stretch with a neck problem attached to it.
Try 5 slow reps per side and keep the sitting bones rooted.
24. Wall Bicycle
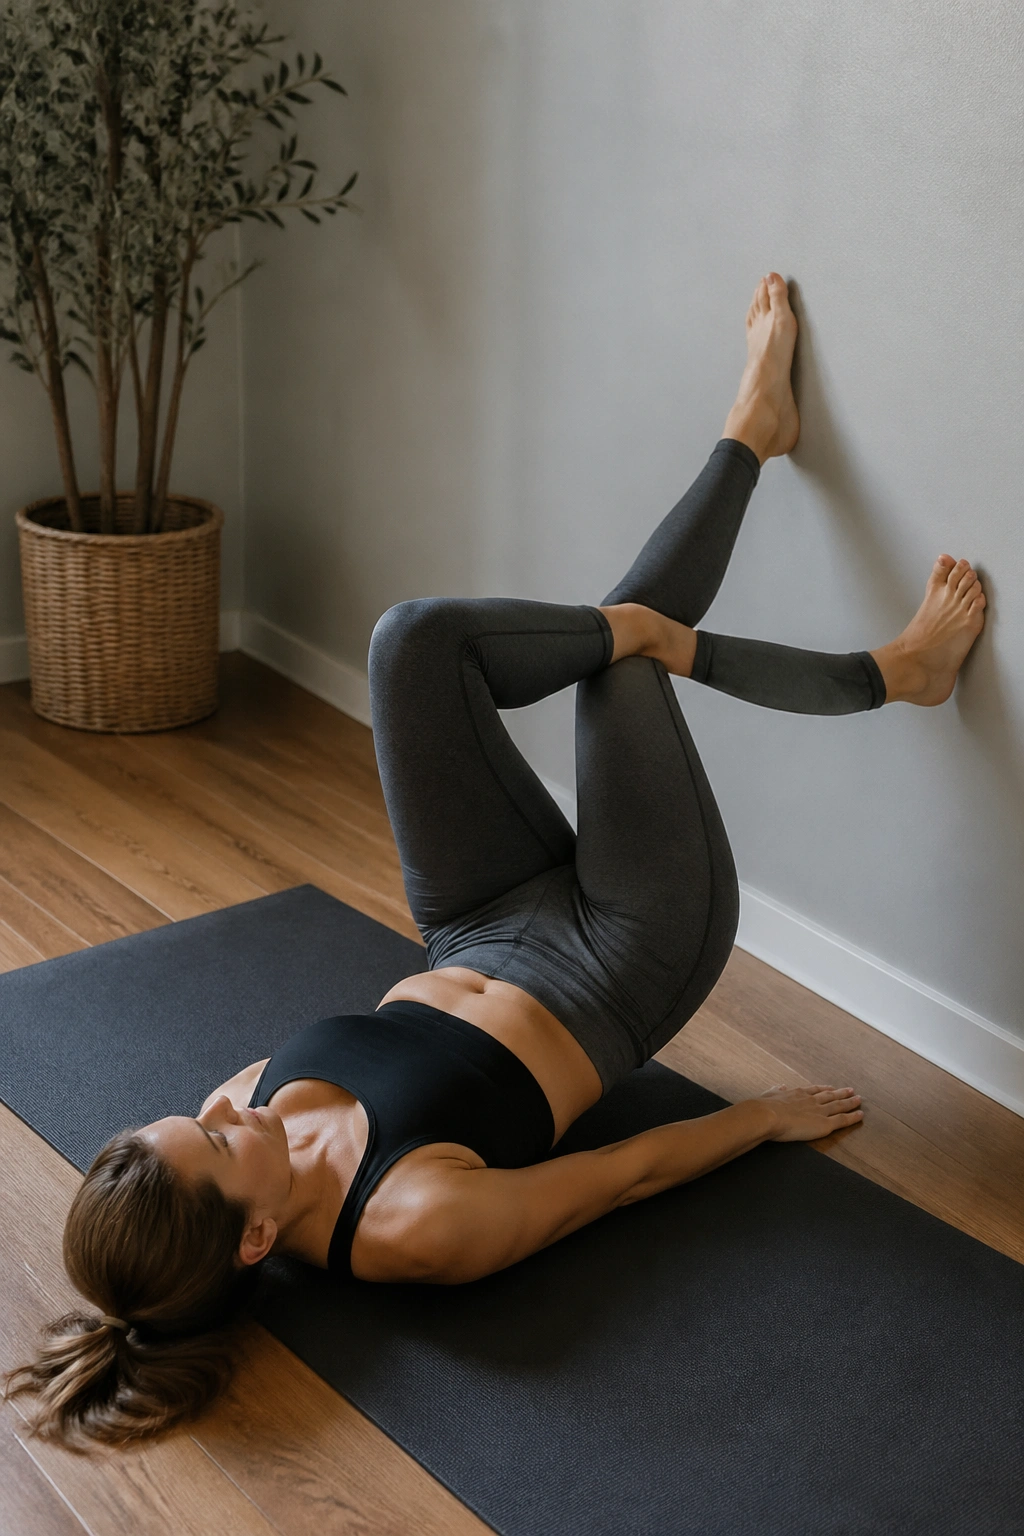
Lie on your back with your feet on the wall and your hips stacked. Then bring one knee in toward the chest while the other leg lengthens, switching sides in a smooth pedaling pattern.
Compared with a floor bicycle, the wall version gives more support and less neck strain. It’s a nice middle ground for people who want core work without the weird crunching feeling that sometimes comes with fast floor reps.
Do 8 to 12 slow cycles. If the lower back starts arching, shorten the reach. That fix works better than muscling through.
25. Wall Frog Press
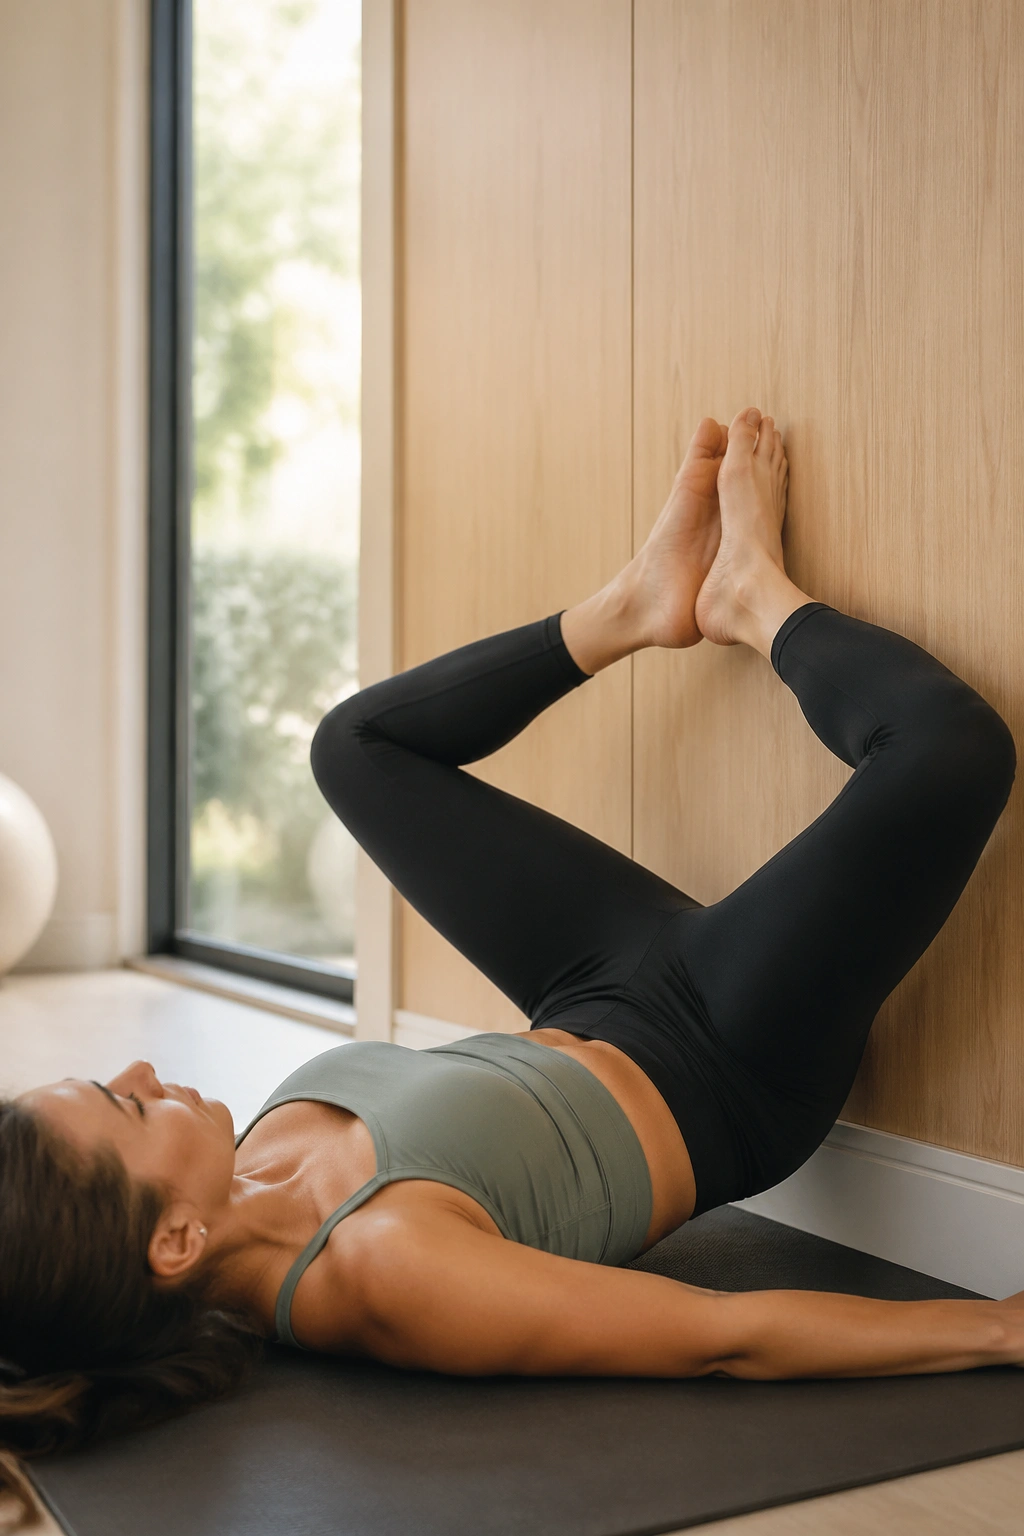
Soles of the feet on the wall, knees turned out into a diamond shape, heels pressing gently into the surface — that’s the start. From there, squeeze the inner thighs and press the feet into the wall as if you’re trying to move the wall itself.
The inner legs and lower abdominals usually kick in quickly. This is one of my favorite moves for showing people that the adductors are not decorative. They help stabilize the pelvis, and when they’re awake, the whole lower body feels more connected.
Short version: 10 presses, pause at the top, breathe, repeat.
26. Wall Inner-Thigh Lift
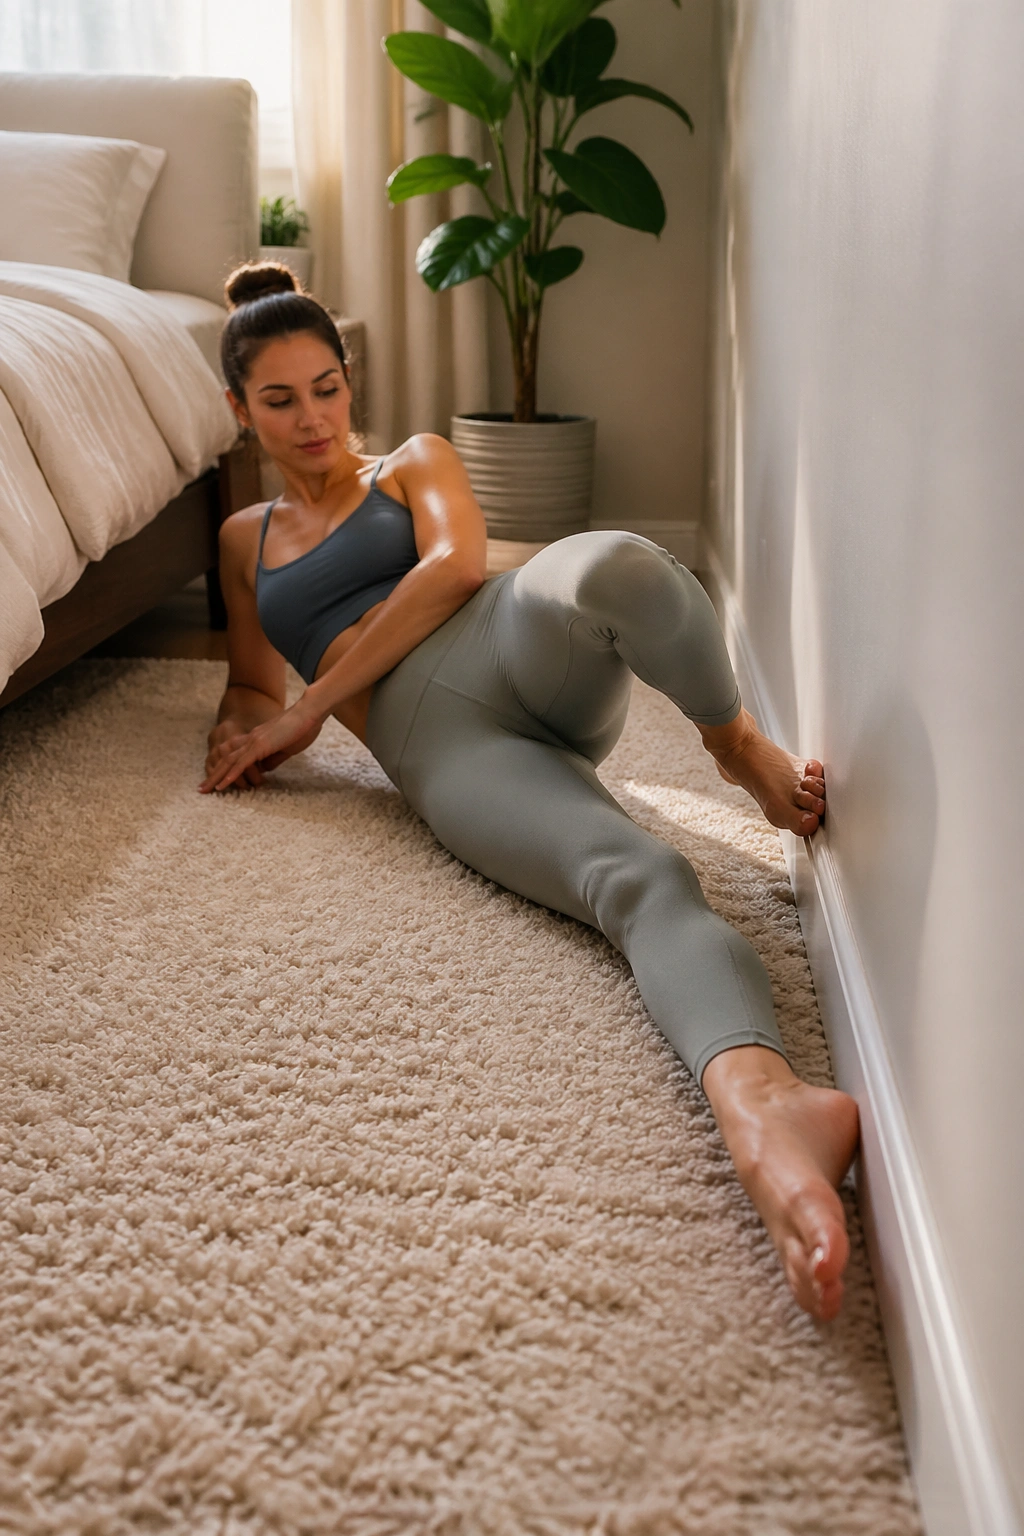
Lie on your side with the top leg bent in front and the bottom leg long along the wall if that setup works for you. Lift the bottom leg a few inches, hold, and lower with control. That tiny range is enough.
No drama here. Just focused work on the inner thigh and the side of the hip. It’s subtle until it isn’t, and then you feel the line from groin to knee light up in the kind of clean burn that wall work is famous for.
If your toes turn out, reset them. Keep the leg long.
27. Wall Hamstring Curl
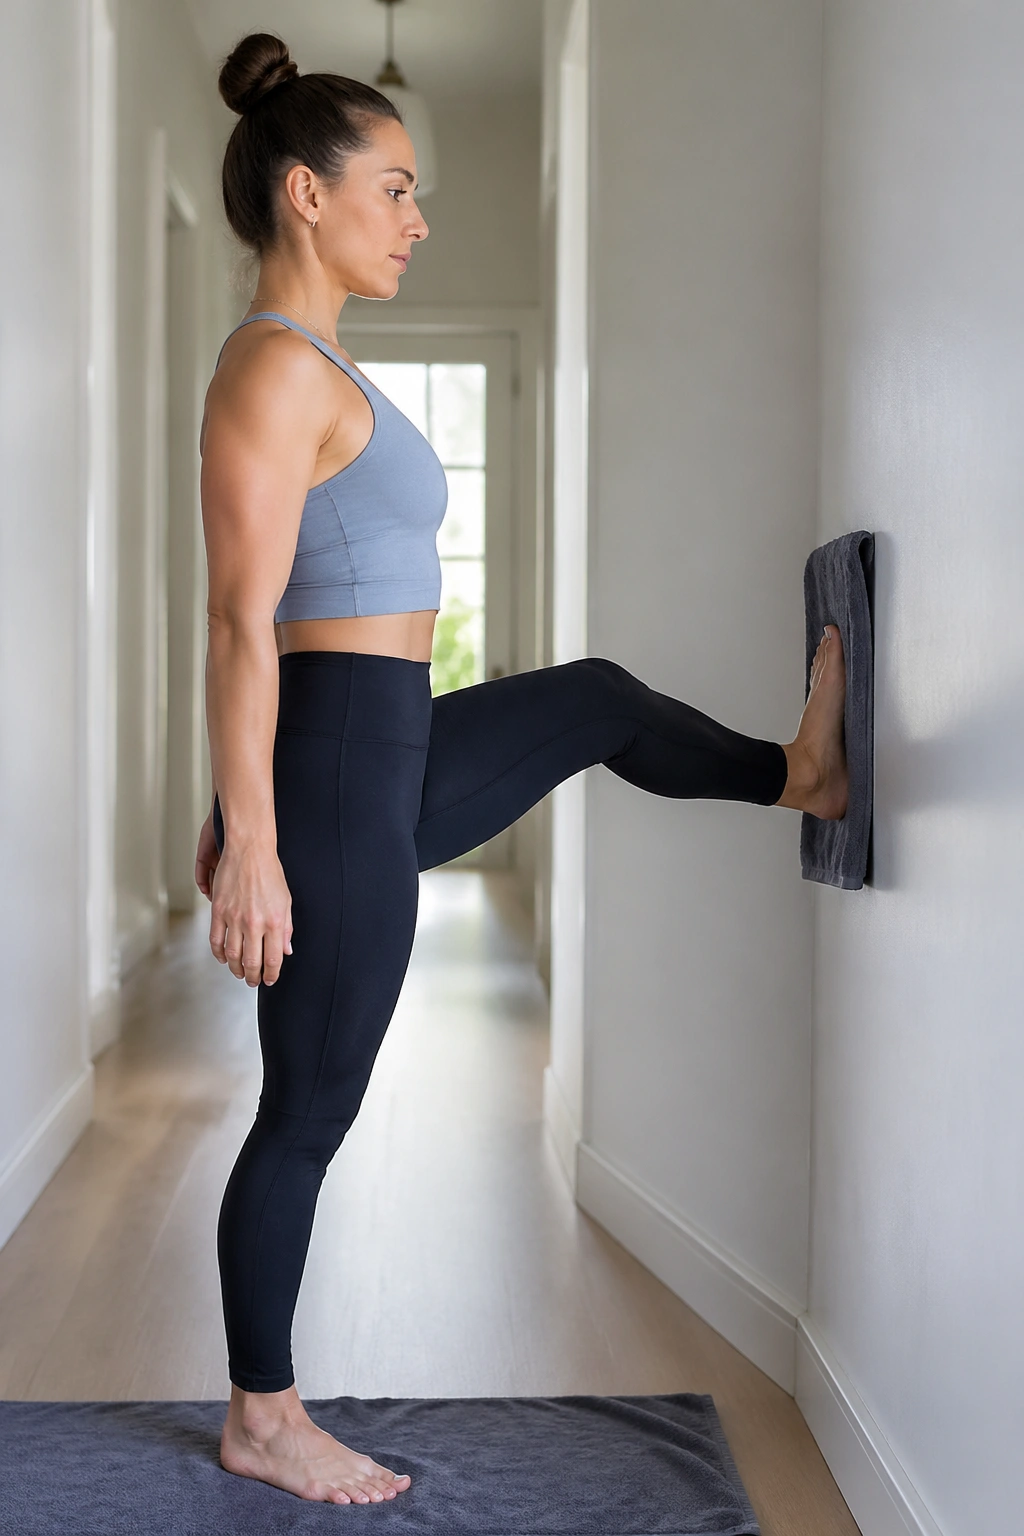
Facing the wall, place one heel against a towel or smooth surface and slowly slide it down as if you’re drawing the heel toward the floor, then curl it back up. The other leg stays grounded and steady.
What to avoid
- Letting the pelvis swing side to side.
- Locking the standing knee.
- Pulling with the hip flexor instead of the hamstring.
- Rushing the curl back in.
The slower the return, the better the work. That eccentric phase — the part where the hamstring lengthens under control — is where this move earns its place in the challenge.
28. Full Wall Pilates Finisher Flow
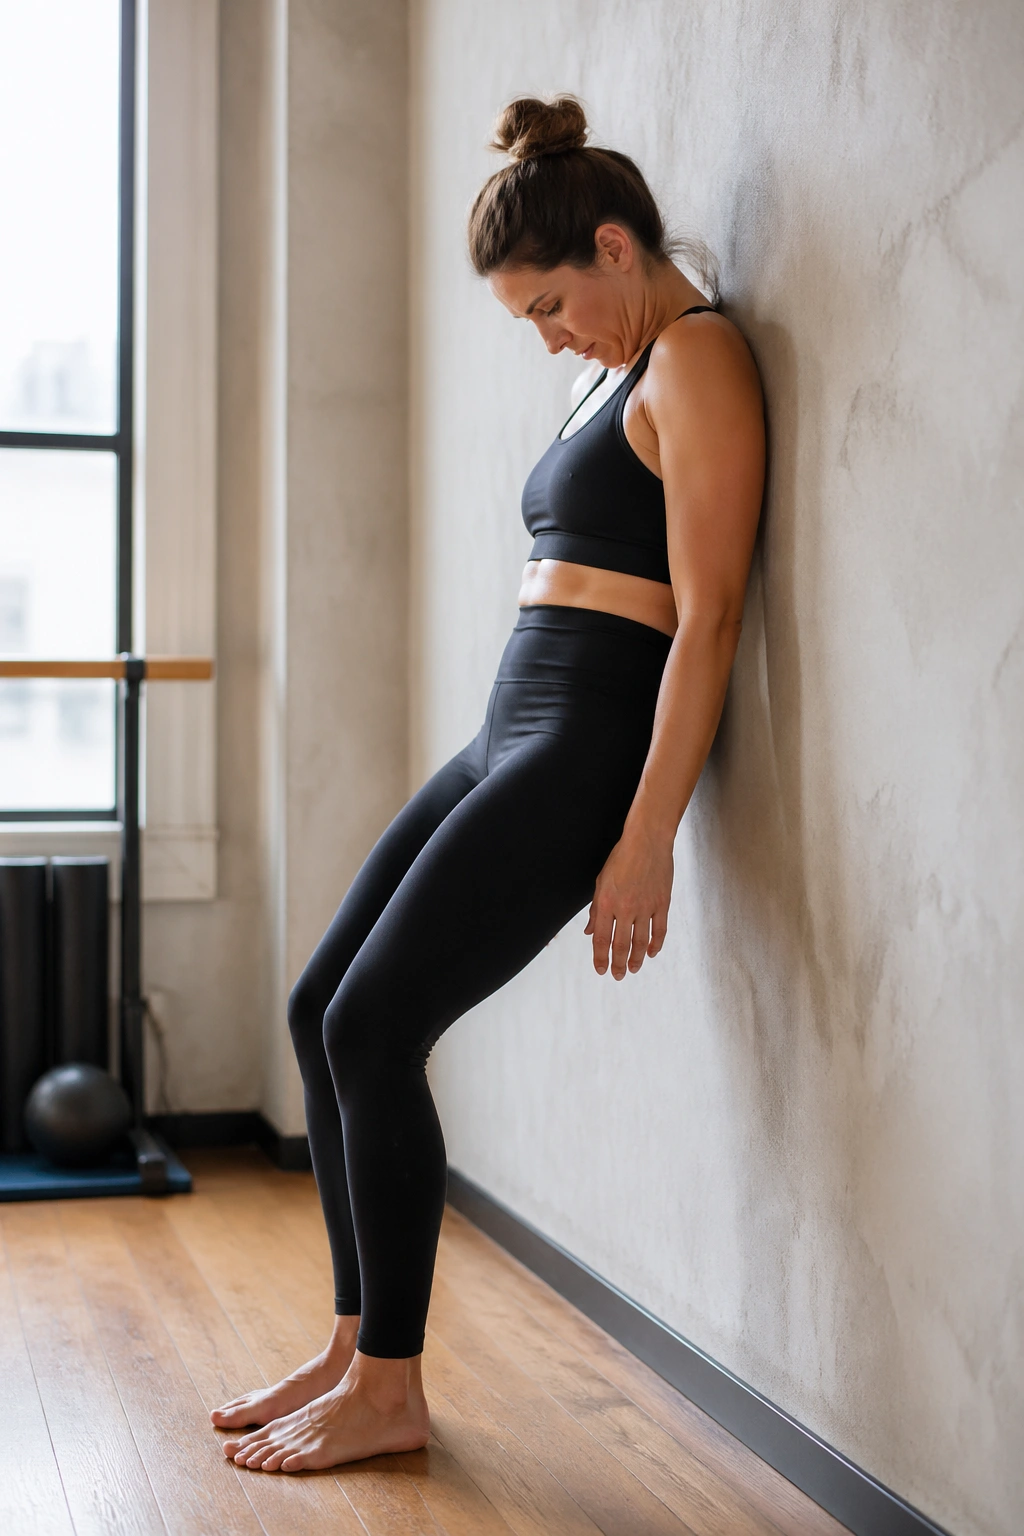
End the 28-day run with a short wall flow that strings together the patterns you’ve already practiced. Try 4 wall squats, 6 wall push-ups, 8 wall marches, and 5 slow roll-downs, resting only long enough to breathe.
That small circuit hits the legs, core, shoulders, and posture all at once. It also gives the challenge a finish that feels earned instead of random. If you want more heat, repeat the circuit once. If your form gets messy, stop after one round and keep the quality high.
Best part: you can return to this flow any time the body wants a clean reset. It stands on its own, and it also works as a neat way to close the loop on the whole wall Pilates challenge.
