



A Pilates ring looks almost too polite for upper-body work. Then you squeeze it between your palms, hold the pressure for eight slow breaths, and your triceps start speaking up in a language you did not ask to learn.
That’s the charm of Pilates ring moves for strong arms: the magic circle gives you resistance, yes, but it also gives you feedback. If your shoulders creep up, the ring makes that obvious. If your wrists bend back, the ring catches it. If you rush, the movement falls apart fast. No fancy setup. No heavy weights clanking around. Just a small tool that forces clean work.
The best arm-focused Pilates ring exercises are not about smashing the ring flat. They’re about steady pressure, quiet ribs, and smooth control through a small range. That is where the burn lives. And because the ring asks your chest, shoulders, triceps, and upper back to cooperate instead of freelancing, you end up training the whole arm line, not only the parts that are easiest to flex in a mirror.
Start with the simplest squeeze. It is more useful than it looks.
1. Standing Chest-Level Squeeze
This is the move people dismiss right before it humbles them. Hold the Pilates ring at chest height, elbows softly bent, and press both palms inward until the ring feels springy and alive between your hands. Keep your shoulders low and your neck long. If your hands clamp down hard enough to make your forearms cramp, you’ve gone too far.
Why It Works
The chest-level squeeze wakes up the pectorals, triceps, and front delts at the same time. That matters because strong arms do not come from one isolated muscle; they come from the chain working together without the shoulders hiking up to your ears.
Quick Form Cues
- Stand with feet hip-width apart.
- Keep the ring right in front of your sternum.
- Squeeze for 3 counts, then release for 3 counts.
- Stop the squeeze at about 30 to 40 percent effort.
Best cue: keep your elbows heavy. If they float upward, the neck takes over.
2. Overhead Reach Press
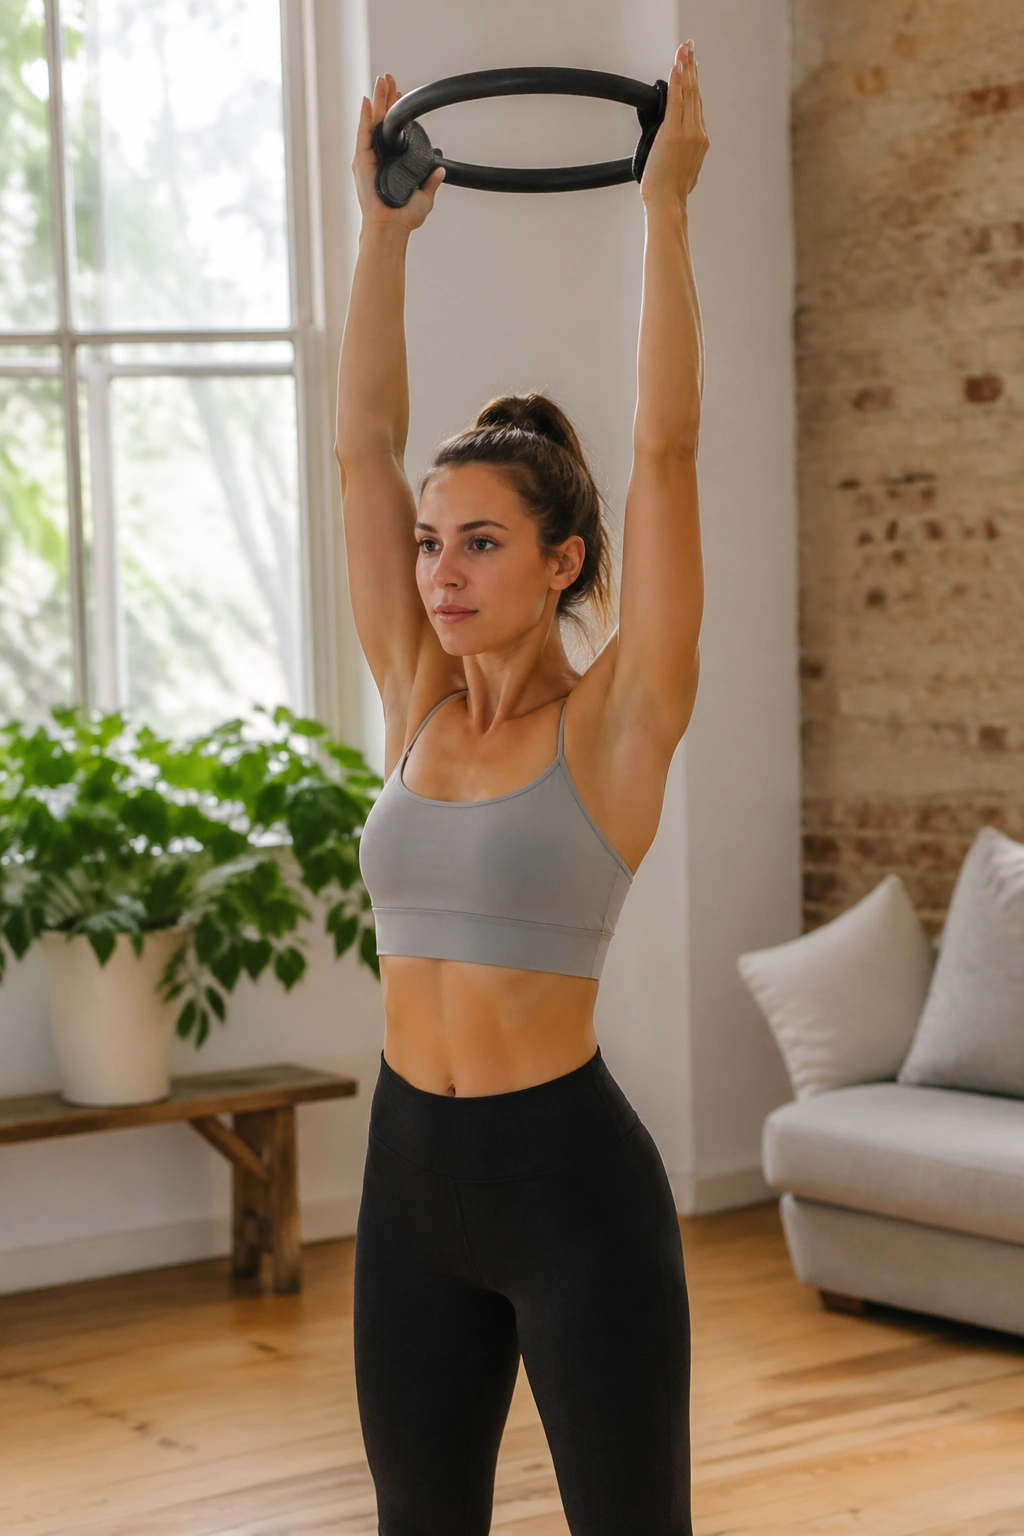
Overhead pressing is where the ring starts telling the truth. A lot of people can squeeze well at chest height and then turn into a shrug the second the arms go overhead. That is normal. It is also exactly why this move is worth keeping.
Press the ring upward until your arms are in line with, or slightly in front of, your ears. Don’t chase a perfect straight line if your ribs want to flare. A small bend in the elbows is fine, and honestly better for most bodies. What you want is a steady upward reach with the ring still alive in your hands, not a locked-out shoulder jam.
Work in 6 to 8 slow reps, with a 2-second pause at the top. If your low back arches, lower the reach by 2 or 3 inches and keep the ribs stacked. That tiny change usually fixes the whole thing.
One good rep here feels calm through the neck and hot through the triceps. Anything else is noise.
3. Triceps Press Behind the Head
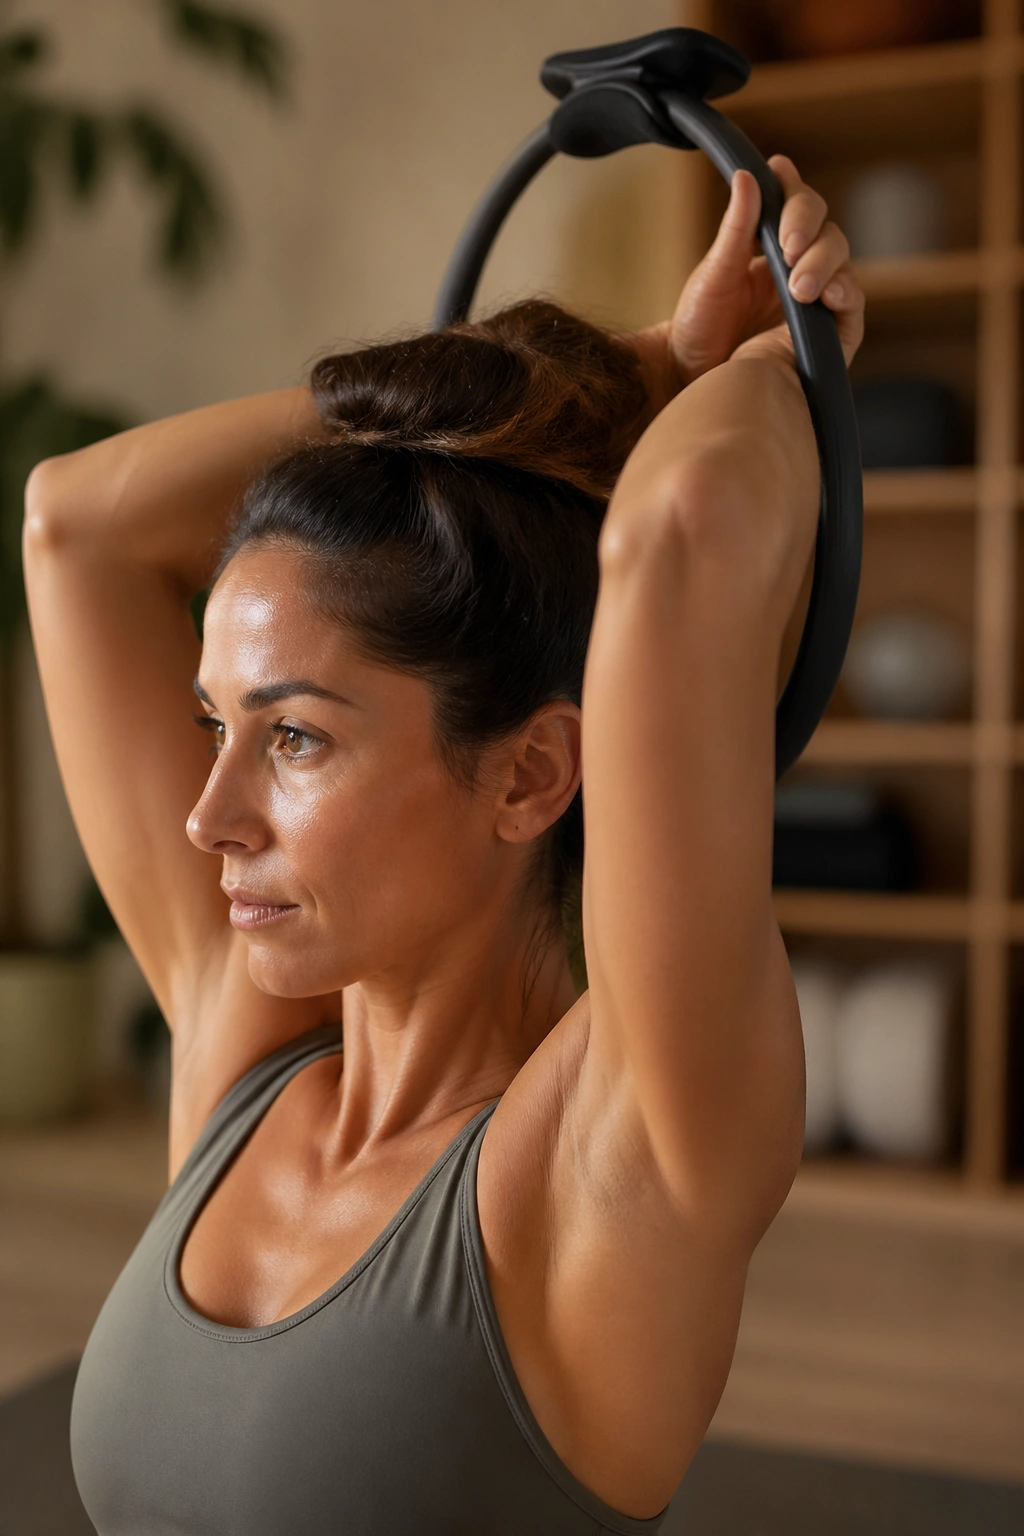
Why does the back of the arm light up so quickly in this position? Because the overhead angle puts the long head of the triceps in a lengthened spot, and that’s where many people find the work they’ve been missing.
Bring the ring just behind the crown of your head, elbows pointing forward rather than flaring wide. Press the ring upward from there, keeping your upper arms as steady as you can. The movement is small. Good. Small is what keeps the triceps in charge instead of the shoulders sneaking in.
How to Use It
Keep your chin tucked a touch and your ribs down. Do 6 to 10 reps, moving slowly enough that you can feel the exact moment the elbow straightens. If your shoulders pinch, stop the range at forehead height and stay there. That is not failure. That is smart training.
The clean version feels like a quiet burn that grows from the back of the arm. The sloppy version feels like your shoulders are trying to rent extra space.
4. Cactus-Arm Chest Compression
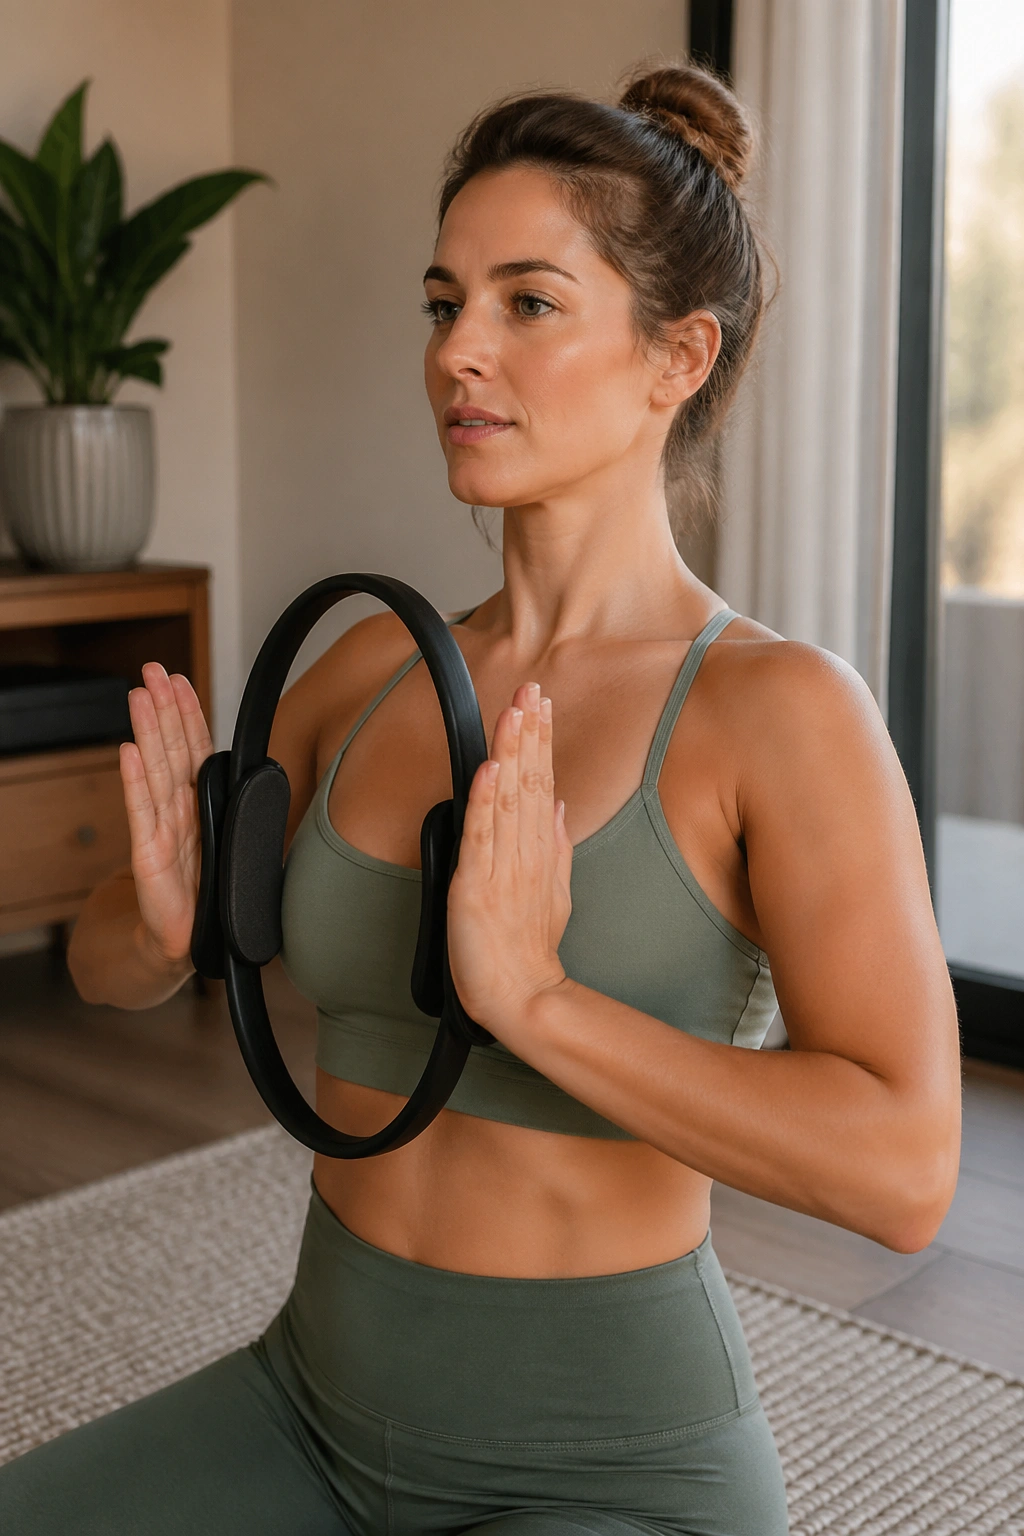
If your upper traps tend to grab every arm exercise, this one is worth your time. Sit or stand with your elbows bent in a cactus shape — upper arms roughly level with the shoulders — and hold the ring between your forearms. Then press the forearms inward with a smooth squeeze while keeping the elbows wide and the chest open.
The setup looks almost too simple. Then the mid-shoulder and triceps work starts stacking up.
- Keep the elbows no higher than shoulder level.
- Press for 5 counts, then soften for 5 counts.
- Keep the wrists long and relaxed.
- Stop the moment your neck feels crowded.
The best version makes the front of the shoulders work without that tight, pinched feeling at the top of the neck. If your breath gets short, you’ve probably pushed too hard. Back off a little and keep the motion clean.
There’s a reason this one shows up in strong upper-body classes. It makes posture do part of the job.
5. Halo Circle with Elbows Narrow
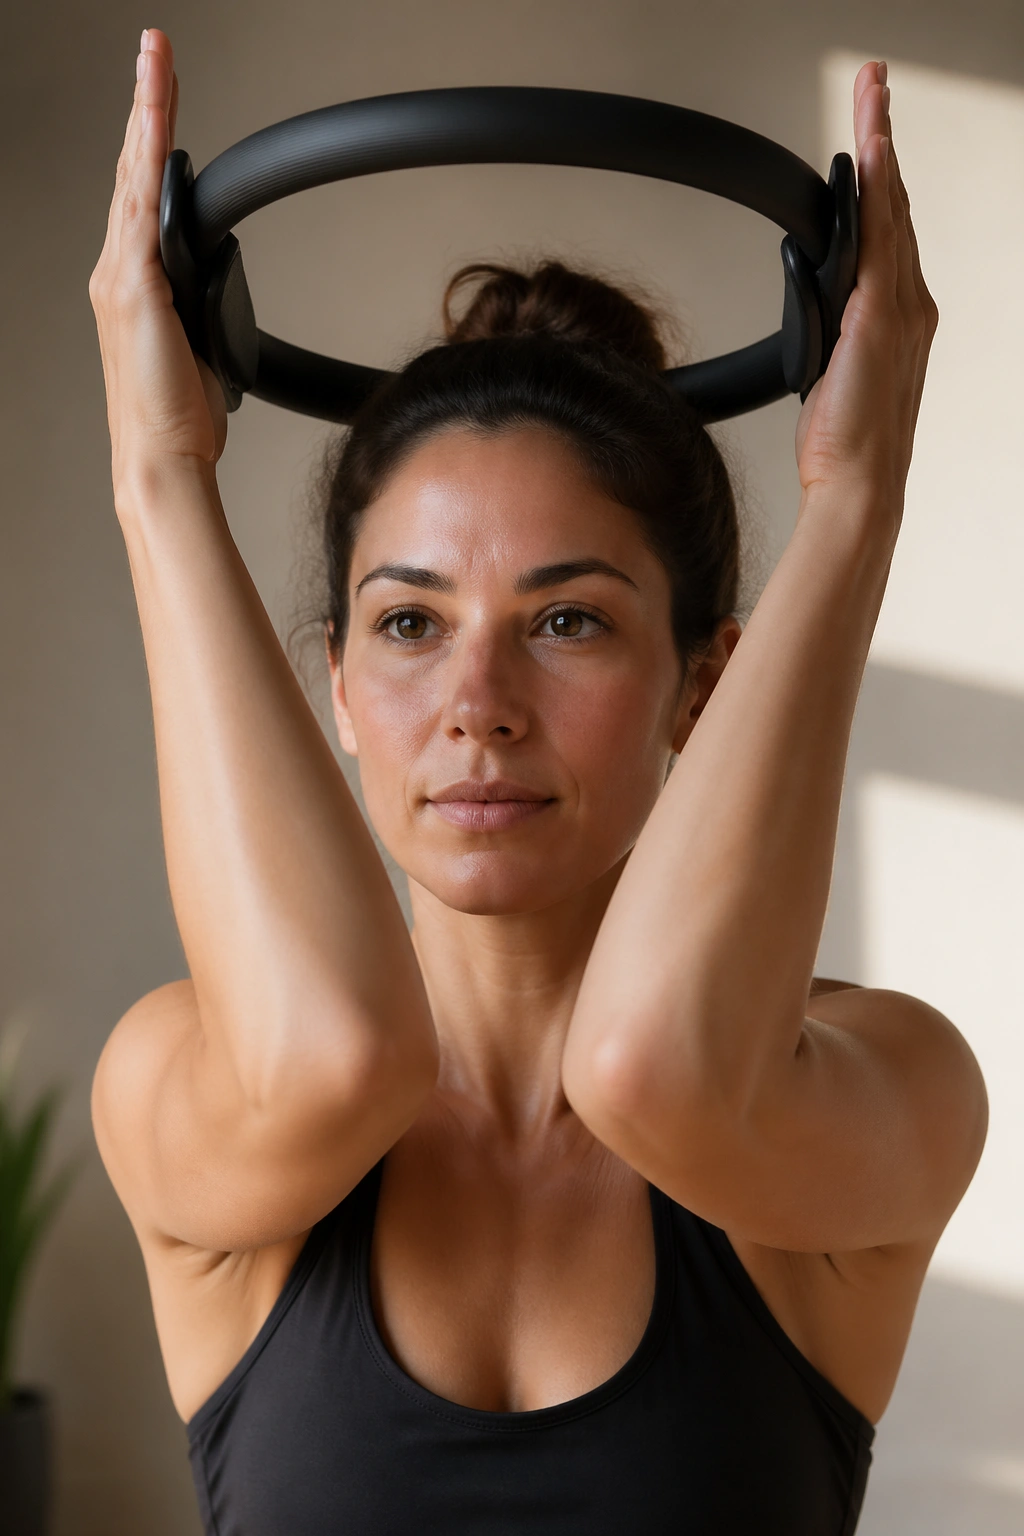
A halo sounds graceful. It can be. It can also turn messy in a hurry if the circle gets too big or the rib cage starts popping forward. Hold the ring by its handles and trace a small circle around your head, keeping the motion close and controlled. The elbows stay narrow. The shoulders stay quiet. The ring moves, but the rest of you resists the urge to overdo it.
This is one of those Pilates ring moves for strong arms that looks almost meditative until your deltoids begin to complain. The shoulders have to stabilize while the triceps help guide the path, and the upper back stays on duty the whole time. The smaller the halo, the better the control. I like a circle that stays just a few inches away from the hairline, not a big sweeping arc that turns into a neck exercise.
Go slowly enough to feel the ring’s weight shift from side to side. That tiny shift is where the control lives. If the circle starts wobbling, shorten it. No drama. Just make it smaller.
6. Single-Arm Offset Press
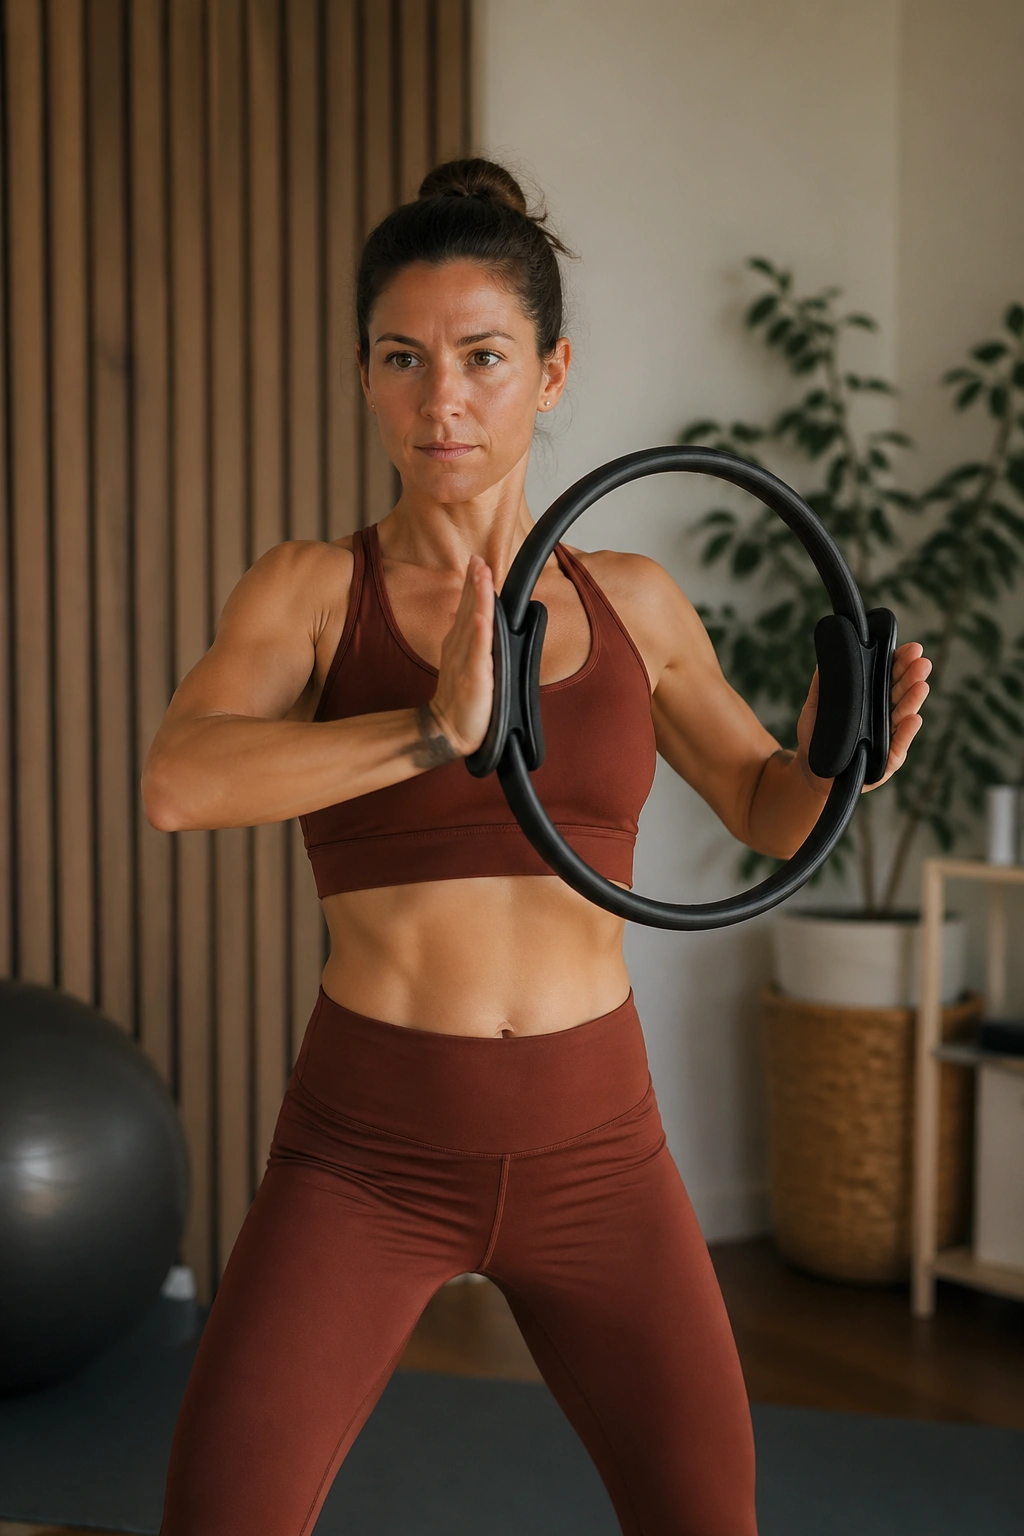
Unlike the two-handed squeeze, this one asks your body to fight rotation. That is the whole point. Hold one handle of the ring in one hand and place the other hand lightly on the opposite side of the ring, then press at a slight diagonal so one side wants to win and the other side has to keep the line straight.
This is the move I’d pick for anyone who tends to dominate on one side. The stronger arm wants to bulldoze. The weaker side wants to drift. The offset press makes both sides negotiate.
Do 5 to 6 reps per side, pausing for 2 seconds at the hardest point. Keep your feet rooted and your ribs level. If one shoulder rises, you’ve lost the battle a bit. That’s fine. Lower the pressure and try again.
Best For
- People with one stronger arm
- Anyone who twists through the torso during presses
- Lifters who want a cleaner anti-rotation challenge
Specific cue: the ring should feel like it is trying to tilt, and your job is to stop it.
7. Seated Biceps Brace
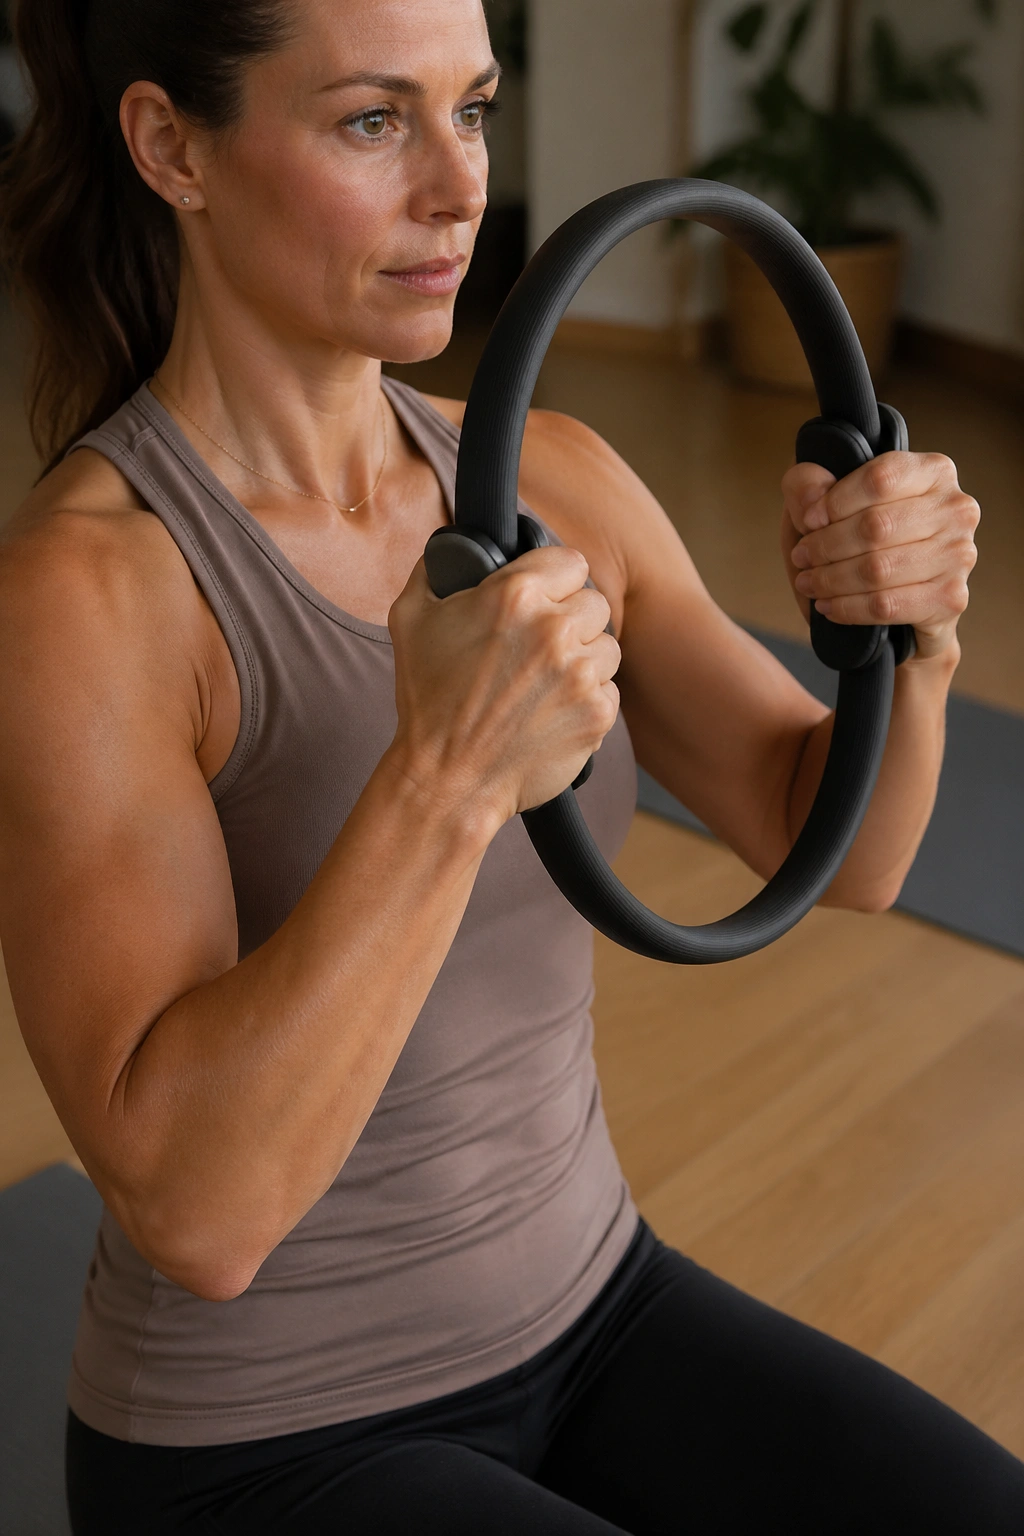
The seated biceps brace is a sneaky little thing. The movement does not look dramatic, which is exactly why people underestimate it. Sit tall, hold the ring at chest height, and keep a light inward pressure as you bend and straighten the elbows in a compact curl pattern. The ring gives your hands a job while the biceps and forearms do the lifting.
What to Feel
- Biceps working before the shoulders do
- Forearms staying warm, not cramping
- Ribs stacked over the pelvis
- Neck relaxed, even as the arms fatigue
Try 8 to 12 slow curls. Bring the hands in with control, pause for a beat, then lower with the same control. If your shoulders roll forward, reset and sit a touch taller. If your wrists ache, ease the grip and keep the ring closer to the body.
The nice thing about this move is how honest it is. You either keep the upper arms steady, or you don’t. There isn’t much room to fake it.
8. Plank Ring Press
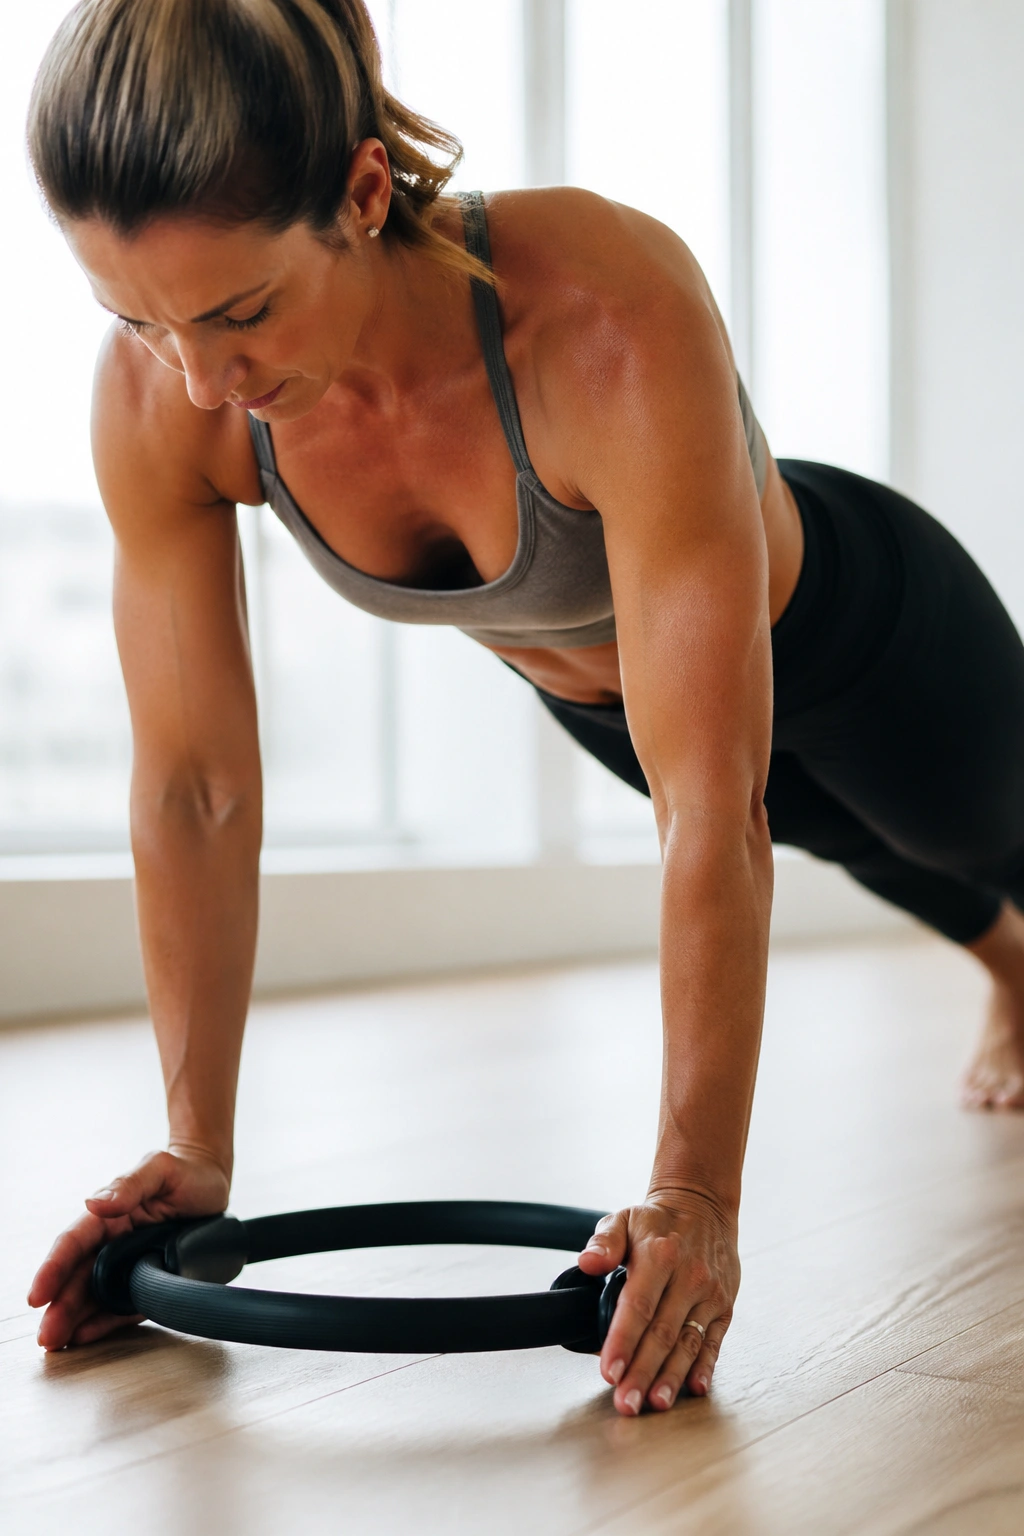
This one gets hard fast. Put the ring between your palms in a high plank or, if needed, a kneeling plank, and press inward while keeping the body in one long line from head to heels. The ring should stay just under the shoulders, not drifting forward where the wrists and neck start bossing the movement around.
The pressure is small. The demand is not. Your chest, triceps, serratus, and deep shoulder stabilizers all have to pitch in while your core keeps the shape from sagging. If that sounds like a lot, good. That’s why the move earns its spot.
Keep the squeeze for 15 to 20 seconds, or do 6 to 8 tiny pulses if the hold feels better. If your low back drops, come down to your knees before the form unravels. That is not a downgrade. It is a better rep.
A clean plank press feels steady and almost quiet. A sloppy one turns into wrist strain and a shrugging neck. Choose the first version.
9. Kneeling Diagonal Chop
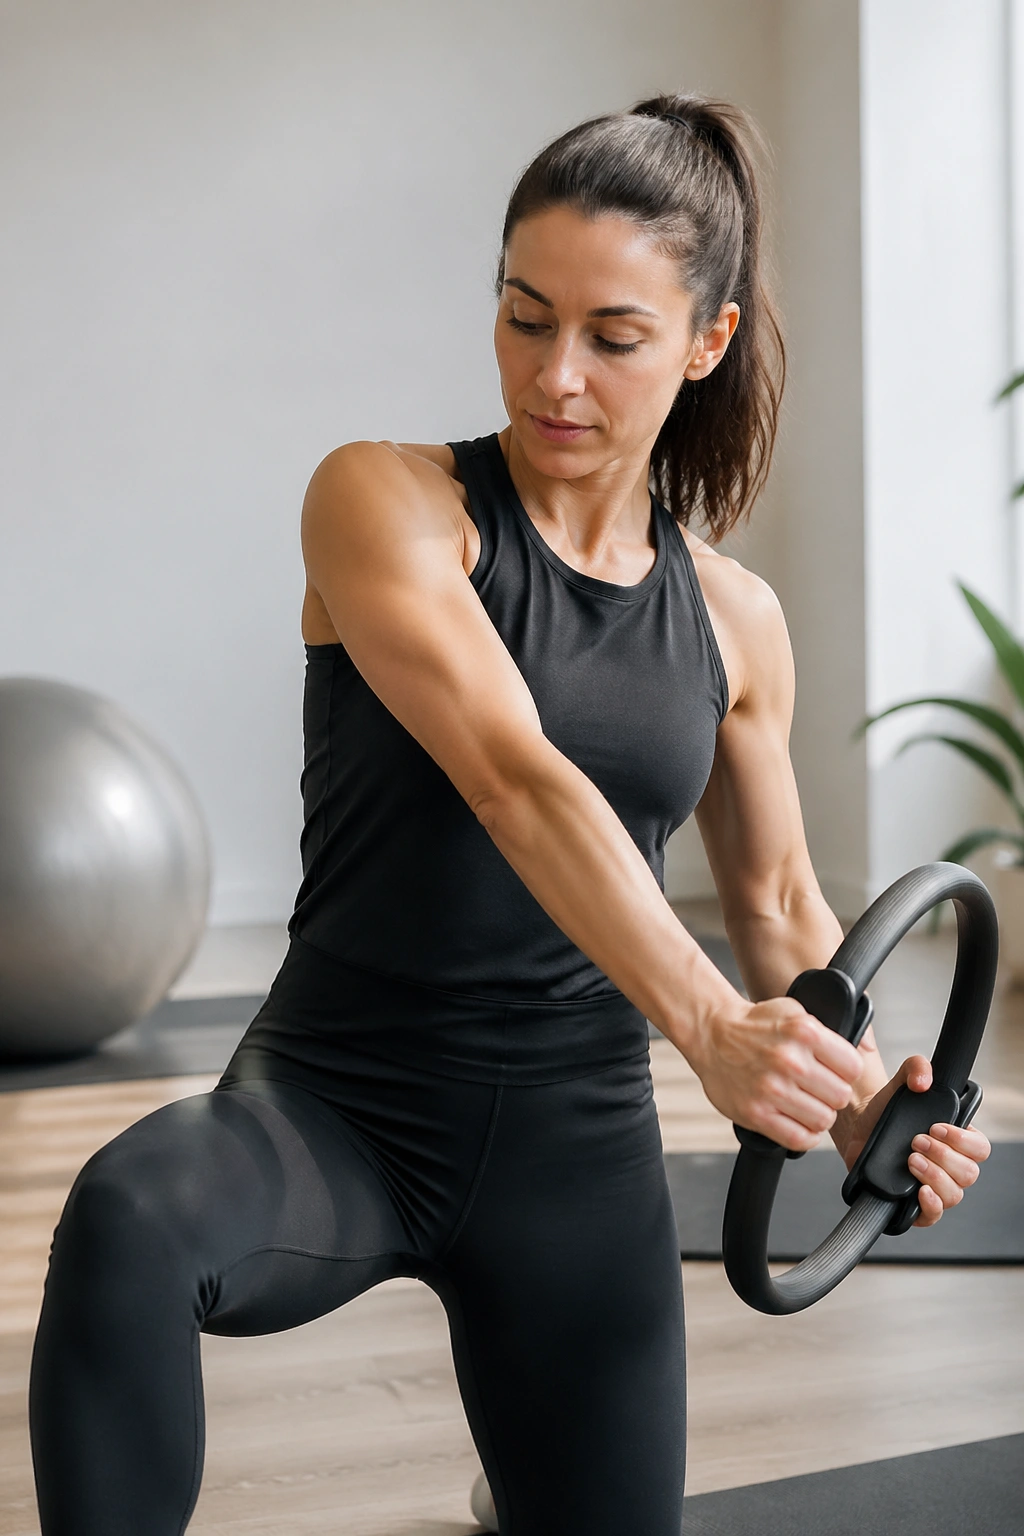
Why use a chop pattern for the arms? Because it teaches the shoulders to move without letting the torso spin wildly, and that tends to show up as better arm control everywhere else.
Start tall in a half-kneeling position. Hold the ring near one shoulder, then chop diagonally toward the opposite hip in a controlled arc. Keep the movement smooth, and don’t let the back knee or front hip twist to cheat the line. The arm path should feel purposeful, not rushed.
How to Use It
Move through 6 to 8 chops per side, exhaling on the way down and inhaling on the return. Keep the ring close enough to your body that you can feel the shoulder blade staying engaged. If the motion turns into a big swing, shrink the range by a few inches and slow the count.
This one is especially useful for the parts of the arms that always seem to miss the memo during regular presses. The diagonal path wakes up the shoulders differently, and the triceps usually show up too.
10. Supine Reach-and-Squeeze
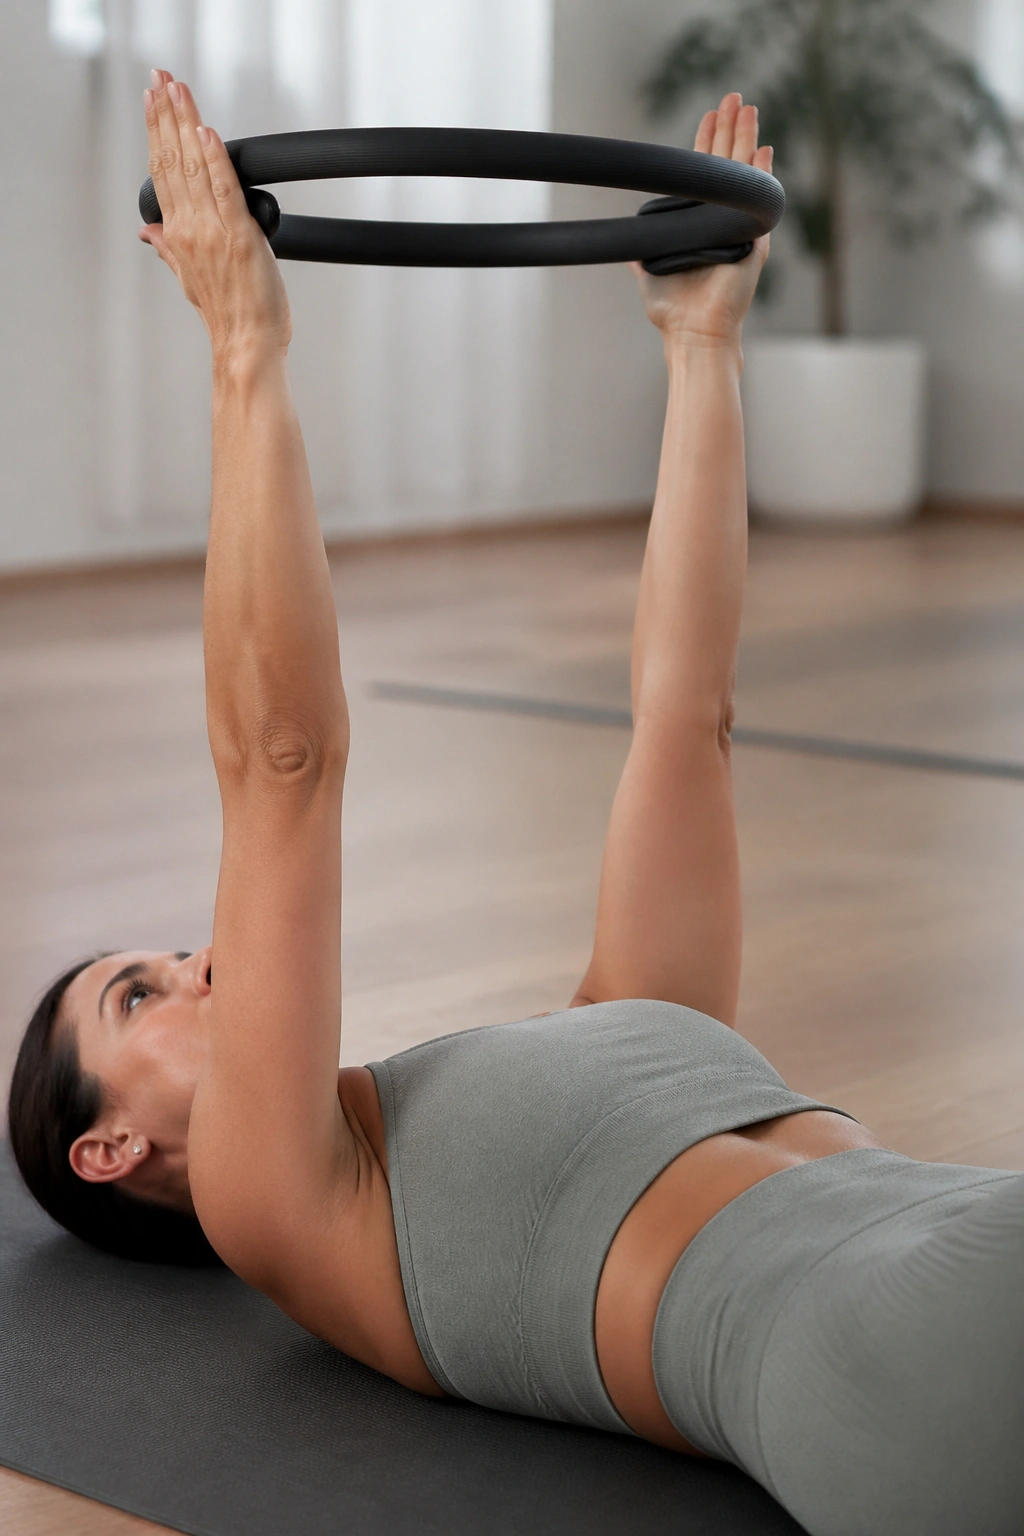
Lie on your back and let the floor do half the work. That alone can change the whole feel of an arm exercise. With the ring between your palms, extend the arms toward the ceiling, then reach them slightly overhead while keeping a gentle squeeze on the ring. The key is not distance. It is control.
Your ribs should stay heavy. Your lower back should stay quiet. If the low back starts lifting off the mat, you’ve gone too far with the reach. Cut it back by an inch or two and try again. That tiny adjustment usually makes the movement better, not worse.
- Keep the chin softly nodding, not jutting forward.
- Press the ring for 4 counts and release for 4 counts.
- Stop the overhead reach before the ribs pop.
- Keep the elbows soft, not locked.
This is one of the calmer Pilates ring arm moves, and I like that about it. It lets the arms work without the neck joining the conversation.
11. Side-Lying Top-Arm Press
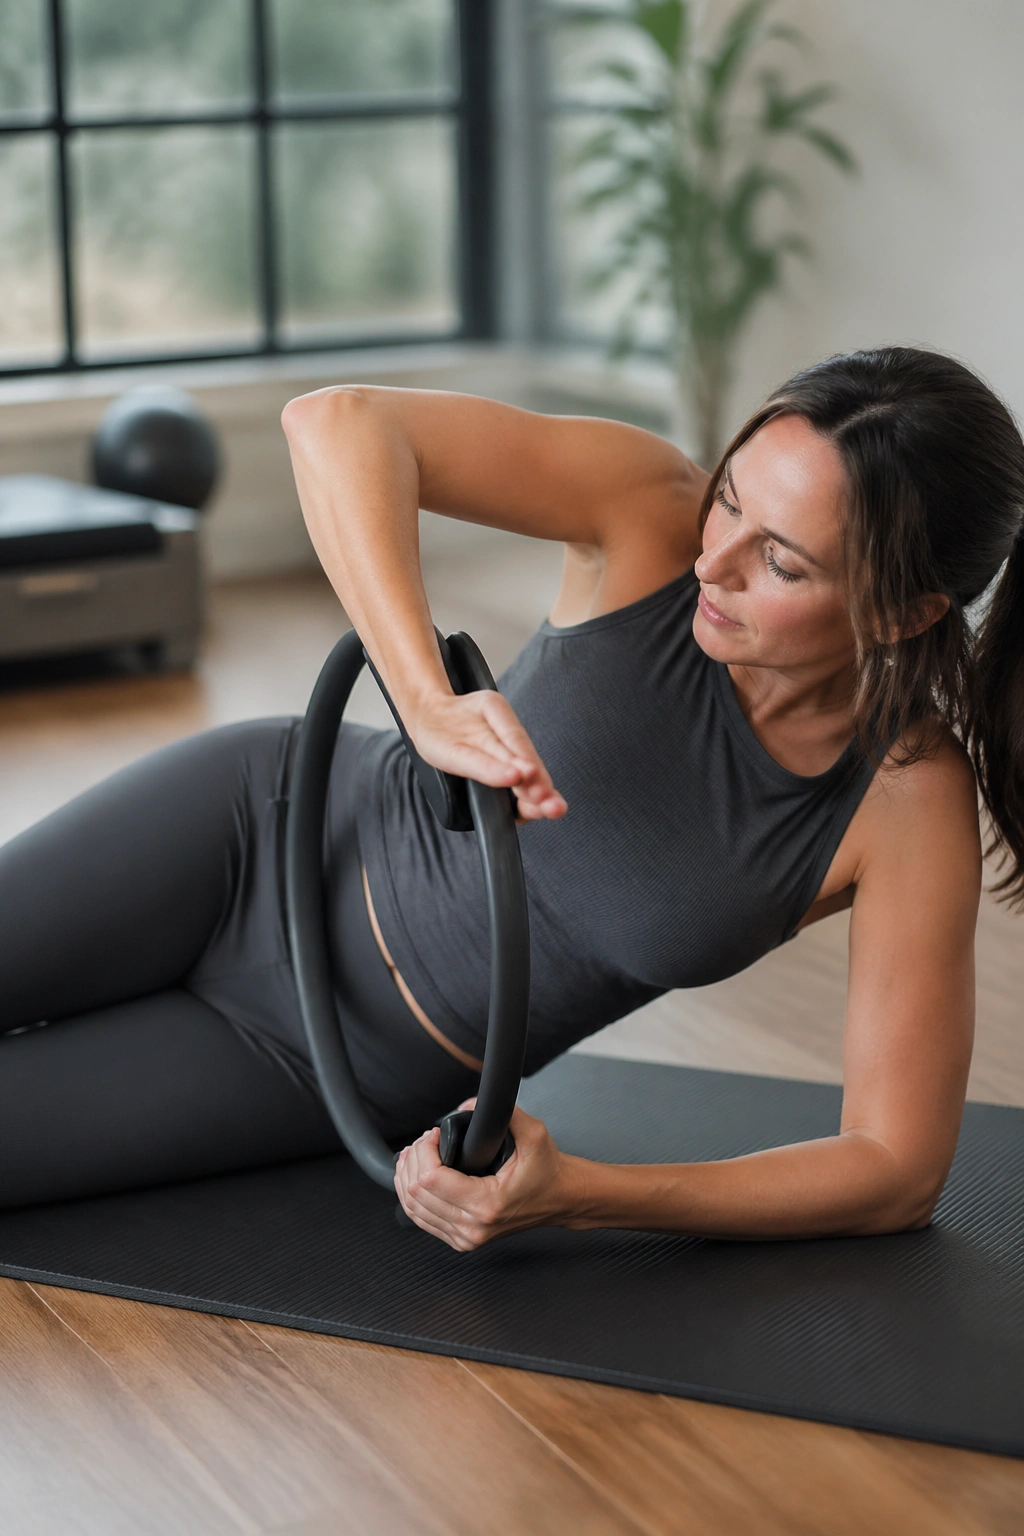
Side-lying arm work has a nice trick up its sleeve: gravity changes the game. Lie on your side with your lower waist lifted lightly away from the mat and hold the ring in front of your chest. As the top arm presses into the ring, the shoulder and triceps have to work without the body’s usual standing momentum.
The range does not need to be big. In fact, a small lift and press is usually cleaner. If the arm goes too high, the neck starts to pinch and the shoulder blade loses its line. Keep the top shoulder broad, the lower side long, and the ring steady in front of the sternum.
I like this move for people who need arm work without a lot of spinal noise. It feels focused. A little stubborn, too. Do 8 slow lifts per side and keep the hand pressure gentle but constant.
If your top shoulder starts climbing toward your ear, pause and reset. The fix is usually a shorter range and a quieter breath.
12. Reverse Fly Hold with Ring
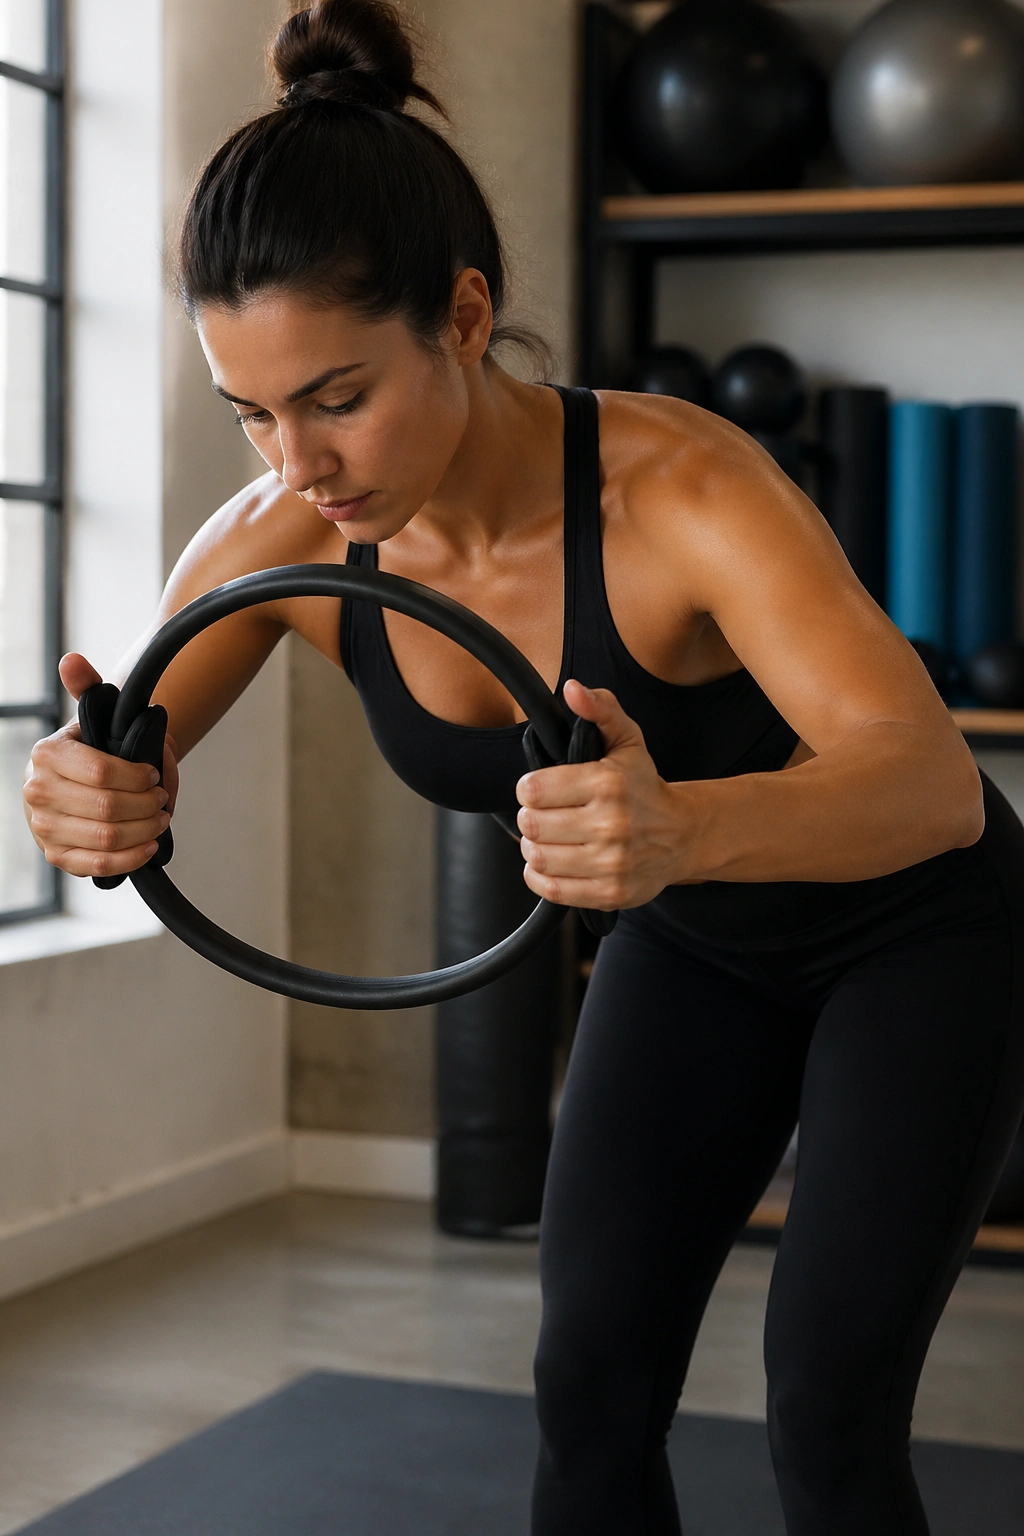
Unlike dumbbell reverse flys, this version gives you a fixed point to work against. That matters because a lot of people swing rear-delt work all over the place and never quite feel the upper back doing its job. Hold the ring at chest height, hinge forward slightly from the hips, and maintain a soft outward shape through the elbows as you squeeze the ring into a stable oval.
The ring is not there to turn this into a chest exercise. It is there to help the shoulders stay honest while the rear delts, upper back, and triceps support the hold. If the neck tightens, the hinge is probably too deep or the arms are too high. Back both off a bit.
This is best for people who live in desks, drive a lot, or tend to round the shoulders forward. Keep the hold for 10 seconds, rest for 5, and repeat 4 to 5 times. That short, firm work usually beats flinging the arms around for a minute.
A good reverse fly hold feels like your upper back wakes up first. That’s the signal.
13. Front Raise with Soft Elbows
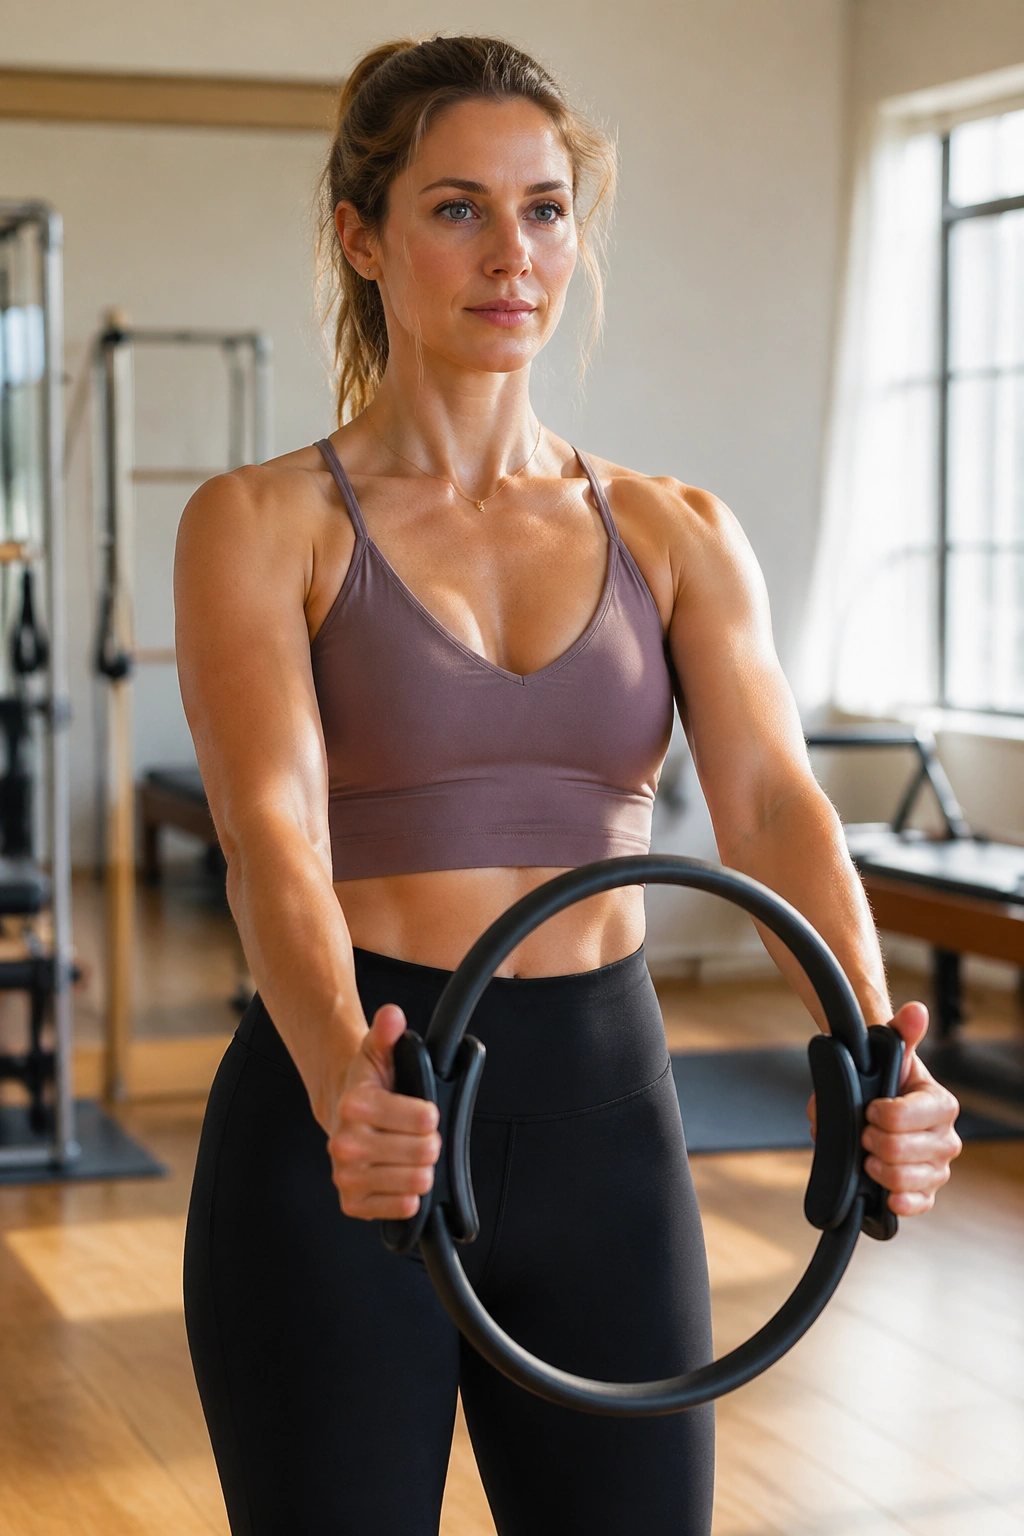
Some front raises are all swing and no control. This is the opposite of that. Stand tall, hold the ring in front of your thighs, and raise it to shoulder height with a tiny bend in the elbows. Keep the pressure light and steady so the shoulders and triceps stay engaged without the wrists bending back.
Why It Works
The front raise trains the anterior delts and upper arms in a clean line, and the ring gives the hands a job so the movement doesn’t become floppy. If the shoulders hike, you’re lifting too high or too fast.
What to Watch For
- Stop at shoulder height if the neck tightens.
- Keep the palms level, not tipped forward.
- Lift for 2 counts, lower for 3 counts.
- Use a smaller range if the low back wants to arch.
A soft elbow is not a weak elbow. It is a smarter one. The move feels more controlled that way, and it usually lands better on the joints.
14. Seated Punch and Return
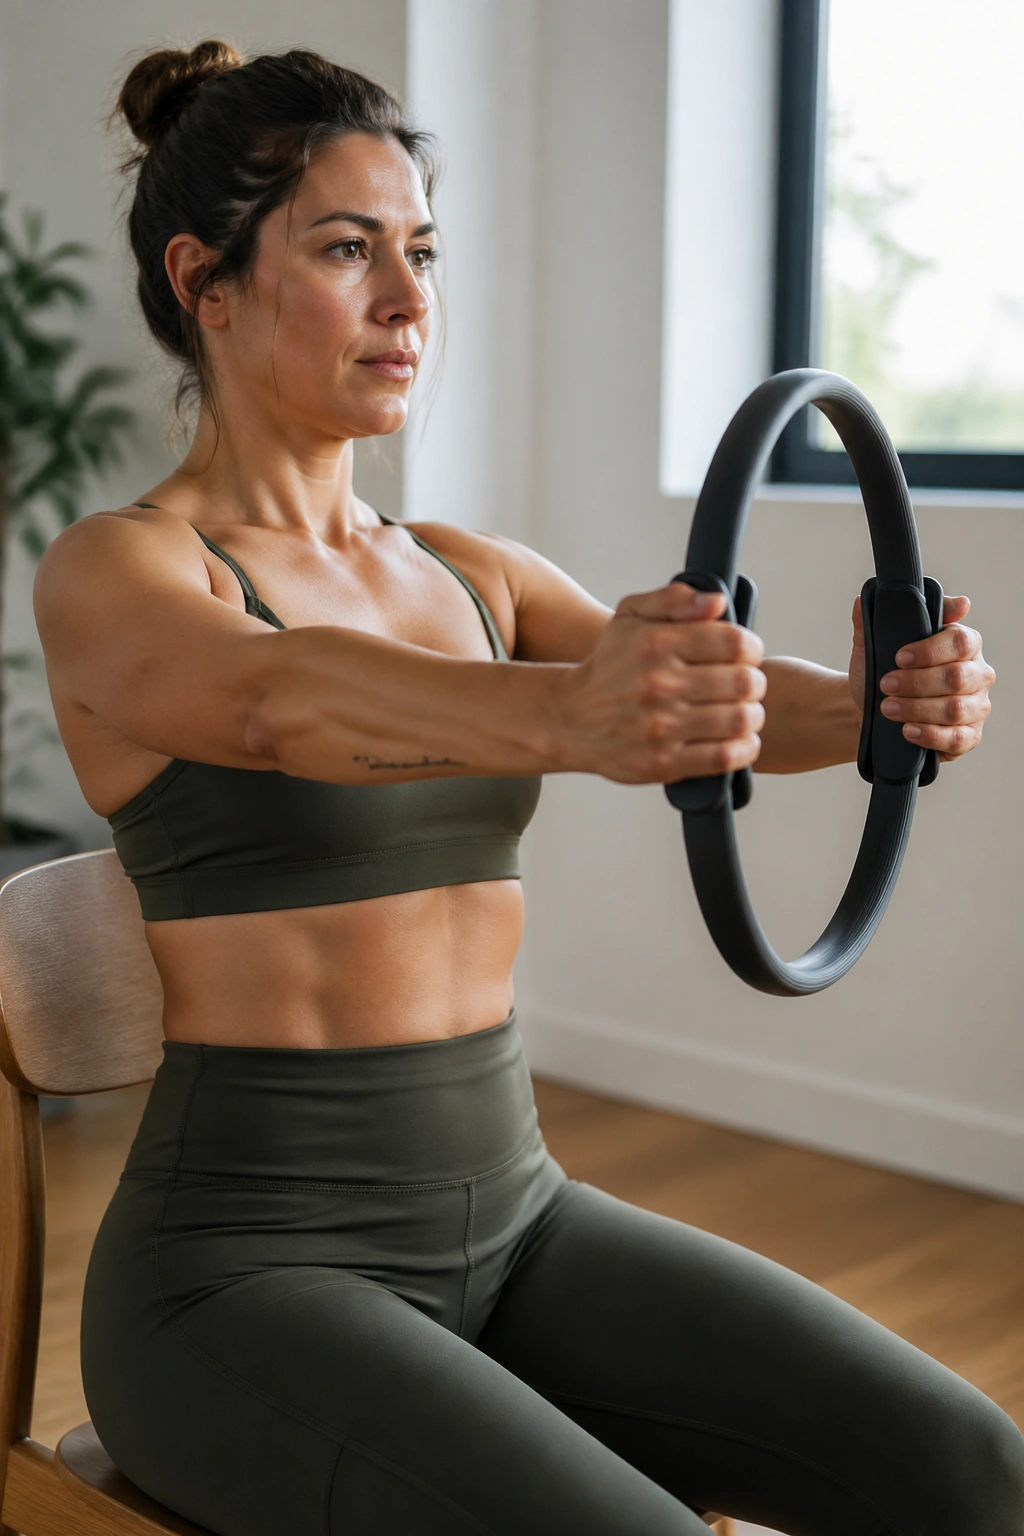
The punch gets the attention. The return does the actual work.
Sit tall with the ring held in front of your chest, elbows bent. Press the ring forward in a straight line like a compact punch, then bring it back slowly for a count of 3 or 4. The slow return keeps the triceps and shoulders under tension longer than a rushed push ever will.
This move is especially good when you want arm fatigue without a lot of setup. It looks plain. It is not. The repeated forward reach asks the chest and shoulder muscles to stay organized, while the slow comeback tests control. If the shoulders roll forward, sit a little taller and keep the elbows closer to the ribs.
Try 8 to 10 reps with a steady breath. If the wrists complain, hold the ring a touch lower and keep the knuckles pointed forward.
The longer you own the return, the more useful the exercise gets. That’s the whole game here.
15. Bridge Press with Arms Long
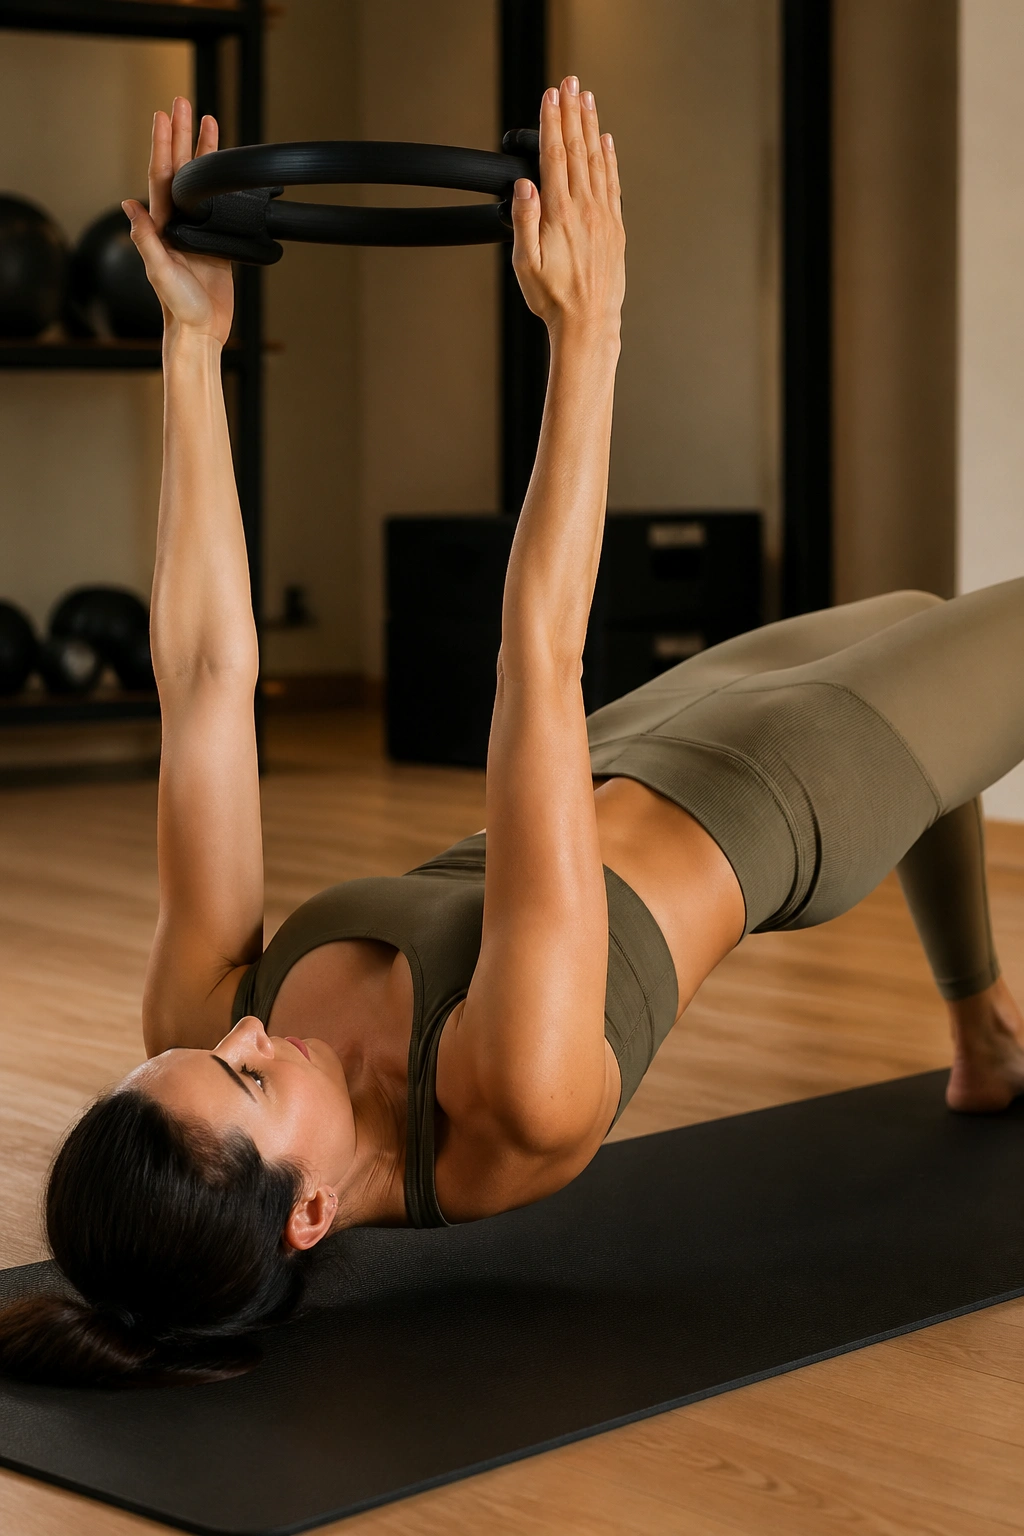
Why drag the hips into an arm exercise? Because the bridge strips away a lot of the body’s lazy options. Once the pelvis is lifted and stable, the arms have to work without getting support from sloppy trunk motion.
Lie on your back, bend your knees, and lift into a firm bridge. Reach the ring toward the ceiling with the arms long, then press inward as you keep the hips level. You can also lower the ring a few inches toward the thighs and bring it back up, as long as the bridge stays steady. The glutes, core, chest, and triceps all have to show up.
How to Use It
- Lift into bridge with ribs gently knit down.
- Reach the ring straight above the chest.
- Press the ring for 2 to 3 counts.
- Lower and repeat for 6 to 8 reps.
If your hamstrings cramp, place the feet a little farther away from the hips. If the bridge wobbles, shorten the arm range. That solves more problems than people expect.
16. Standing Side Reach Press
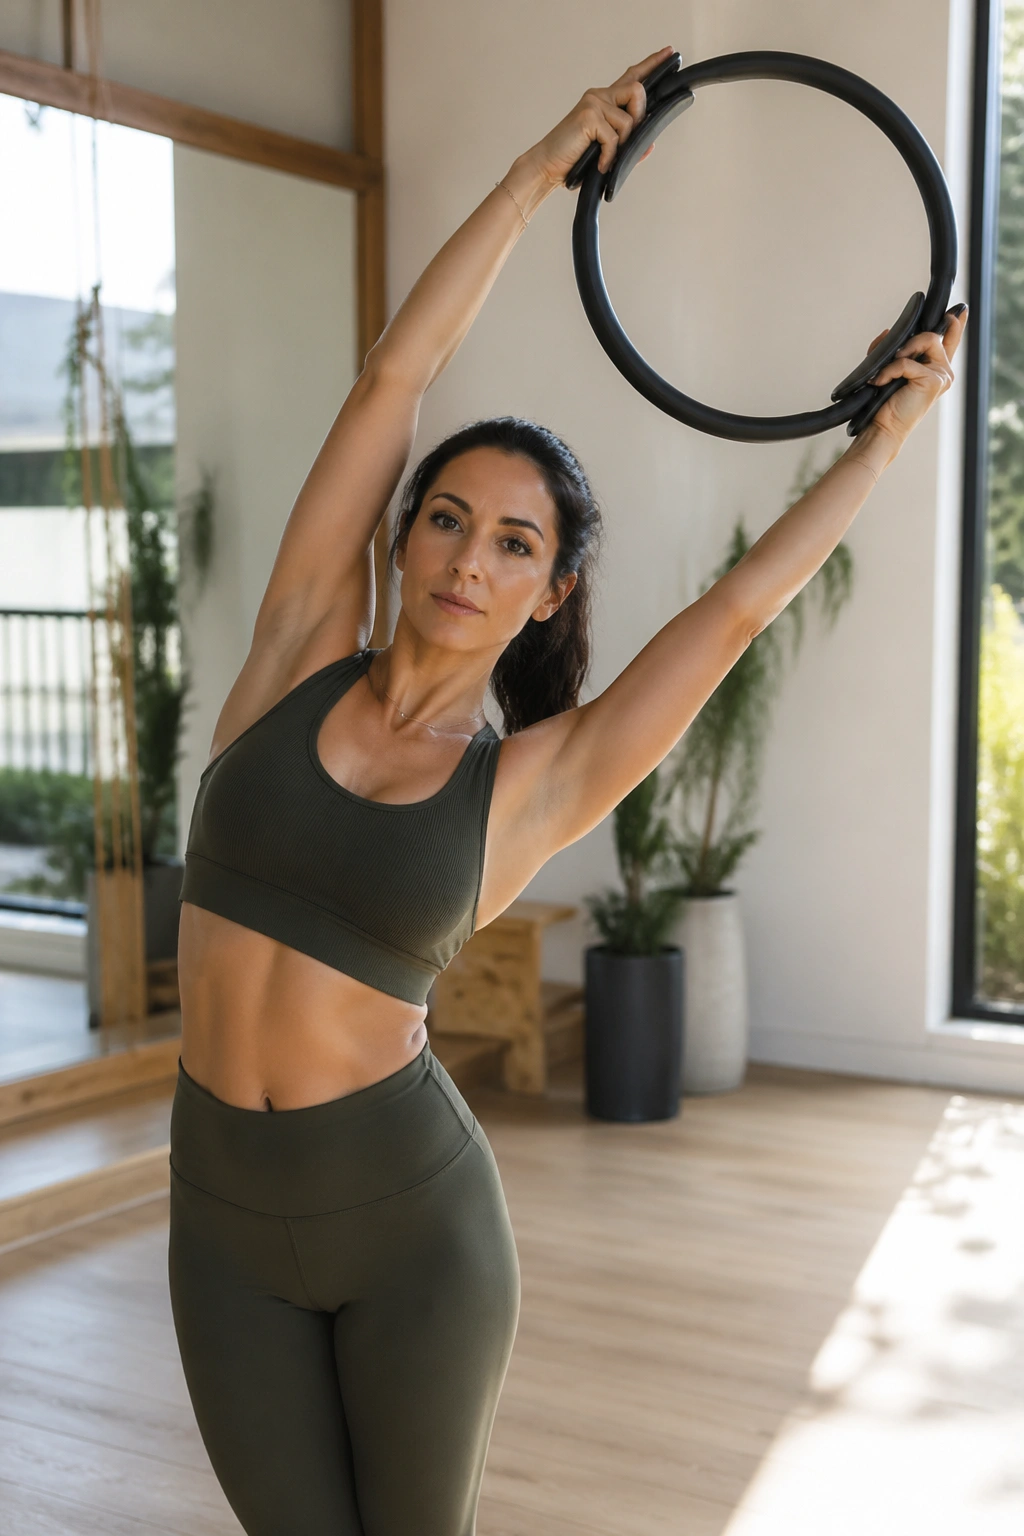
A side reach makes the whole upper body negotiate balance, and that is exactly why the arms feel it. Stand with one hand on each handle of the ring and lift it overhead or just above shoulder height. Then reach the ring slightly to one side while keeping the ribs from collapsing. The outer arm and the shoulder on the reaching side have to hold the line while the other side stays engaged too.
This move is good for the days when you want the arms to work without the same old straight-up, straight-down pattern. It also teaches the shoulders to stay organized in a sideways line, which carries over to a lot of real-life carrying and reaching.
- Keep both feet planted.
- Do 5 reps per side.
- Move only as far as you can keep the ribs quiet.
- Let the neck stay long, not compressed.
A small side reach with good control beats a huge lean every time. The smaller version is the one that actually trains.
17. Figure-Eight Arm Path
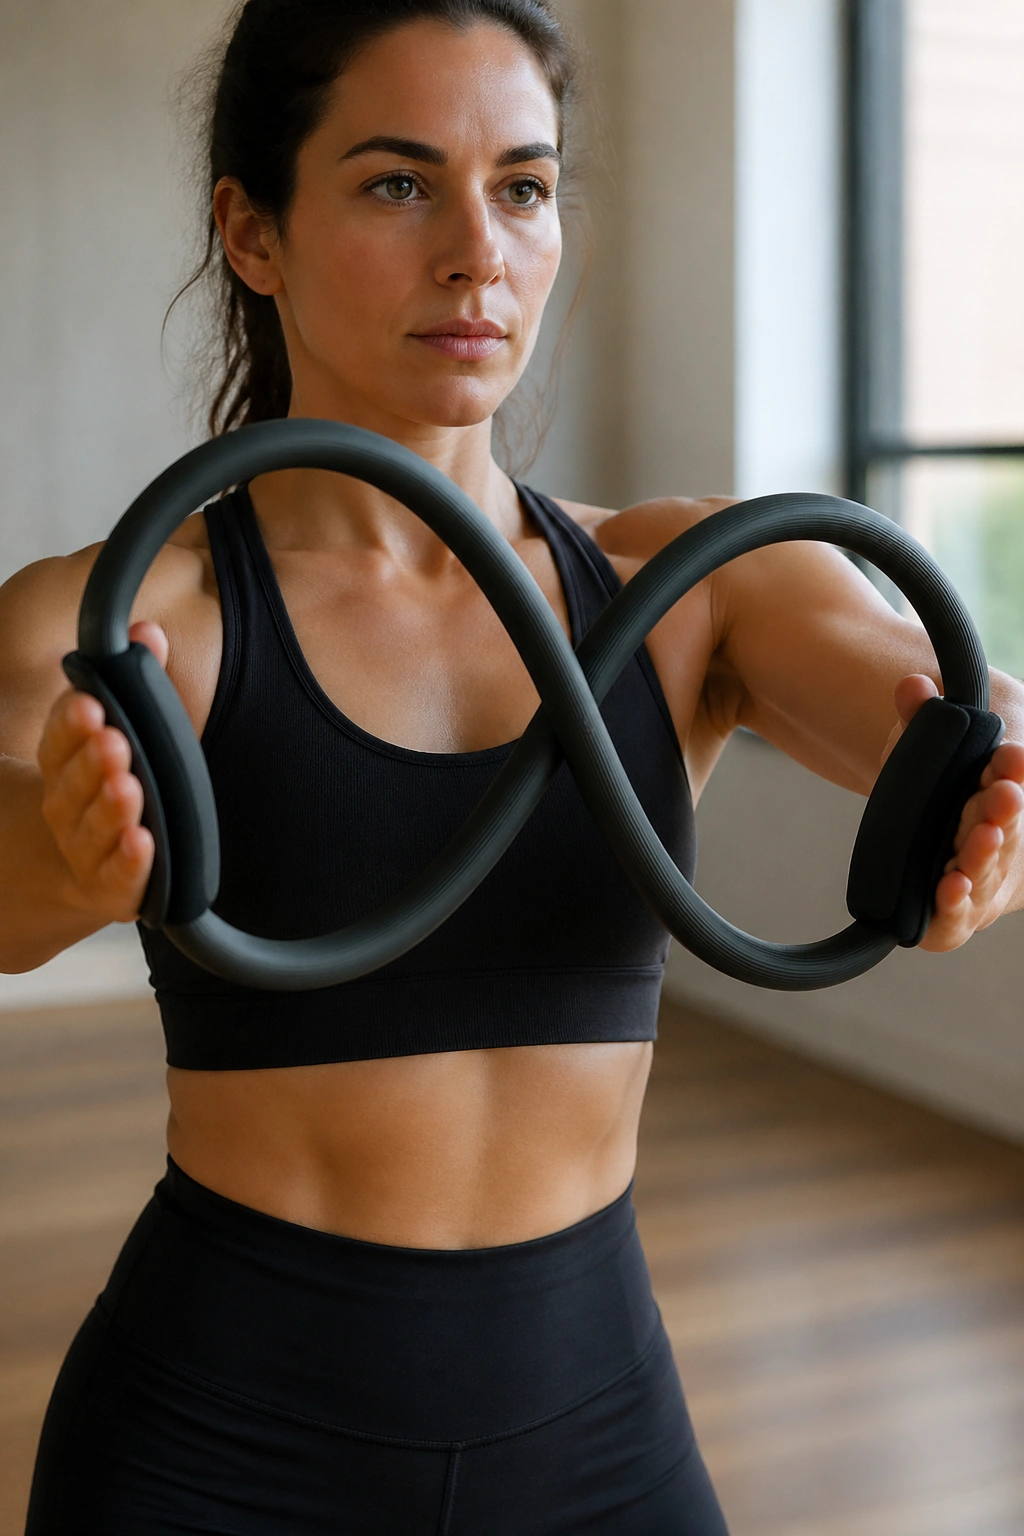
Hold the ring at chest level and trace a horizontal figure eight in front of your body. That is the whole idea. The trick is keeping the path smooth enough that the shoulders have to steer instead of jerk. Your hands guide the ring, but the upper arms, delts, and triceps stay on duty the entire time.
This one feels almost like choreography, except the burn shows up fast enough to keep you honest. If the loop gets messy, shrink it into a narrow oval and slow the pace. The ring should glide through the pattern without banging around or drifting far from center.
A good figure-eight makes the forearms warm first, then the shoulders, then the upper back. That order is useful. It tells you the movement is coordinated instead of brute-forced.
Try 30 to 45 seconds at a time. Keep breathing. The arms will start to complain in a very specific way, and that is usually the sign you are doing it right.
18. Triple-Position Pulse Finisher
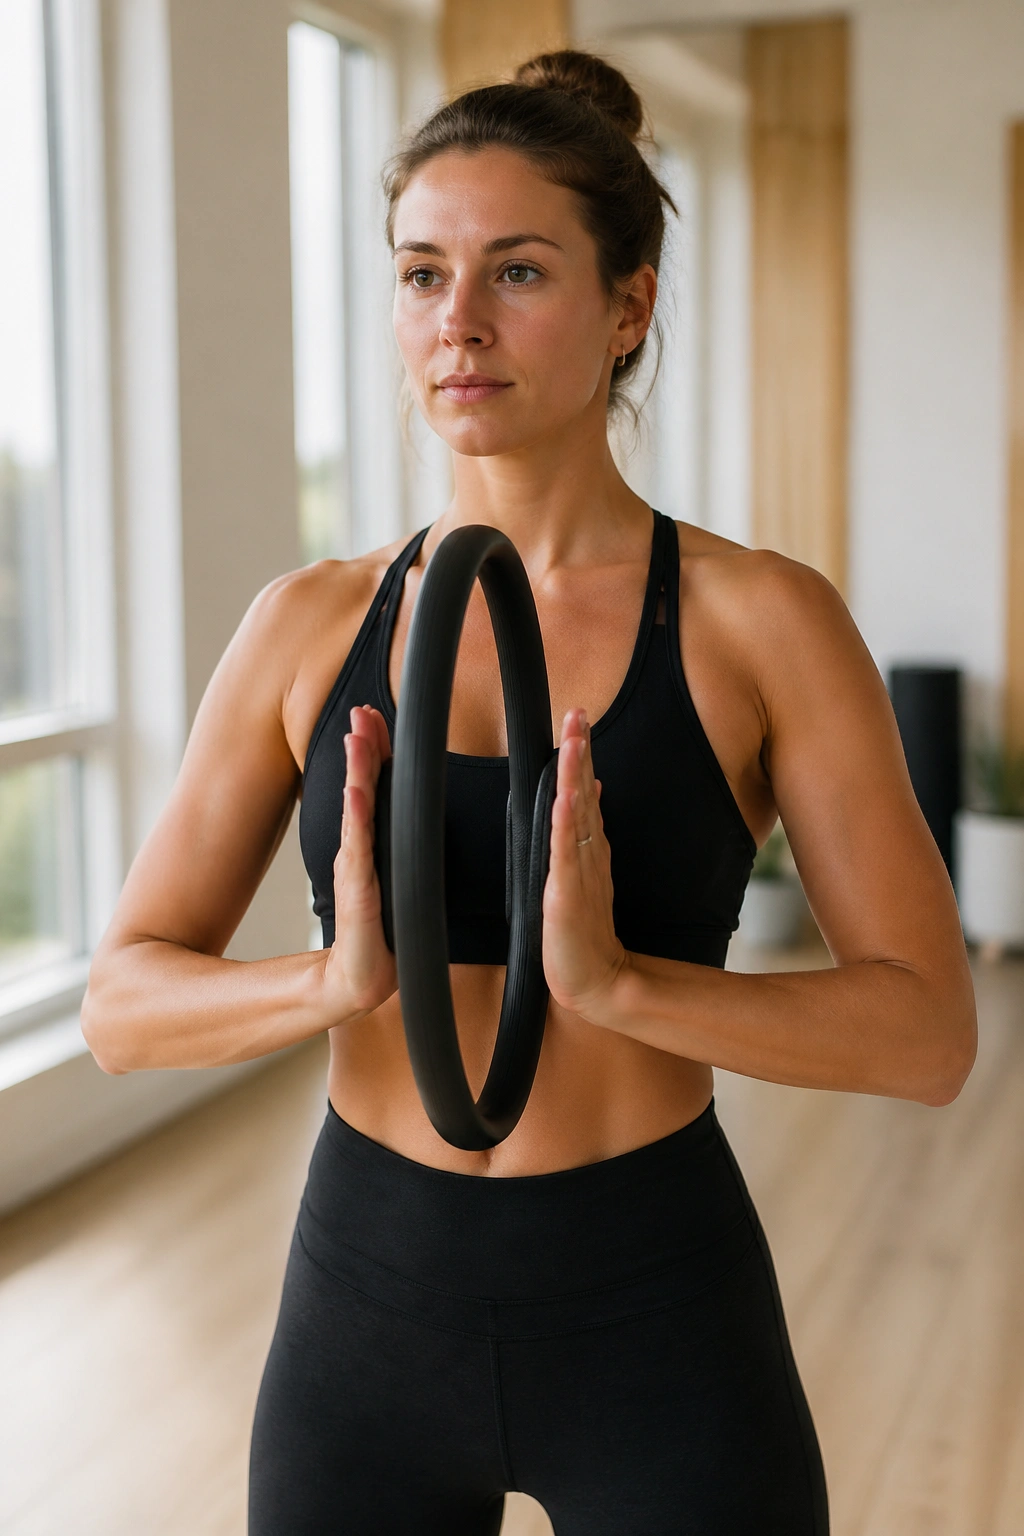
This is not the move for a fresh start. It is the one you save when you want the arms lit all the way through. Hold the ring at chest height for 8 pulses, lift it to overhead for 8 pulses, then bring it into a cactus-arm position for 8 more pulses. That sequence sounds tiny. It is not tiny after the first round.
The reason this works is simple: each position changes what the shoulders and triceps have to hold, and the pulse keeps the muscles under tension without giving them much of a break. The chest height pulses hit the arms in a more direct line. The overhead pulses challenge stability. The cactus pulses bring the shoulders and upper arms into that hard-to-cheat angle where posture matters.
Do 2 to 3 rounds with a 15-second rest between rounds. If the neck starts to rise into your ears, slow the pace and reduce the range. That matters more than chasing a bigger burn. A cleaner finisher always feels better the next day.
A small ring can do a lot when you stop treating it like a prop and start using it like a precision tool.
