



These gentle Pilates workouts for women over 70 ask for breath, control, and small clean movements — not athletic drama, not floor acrobatics, not a race. That is part of why Pilates works so well for older bodies when it’s kept sensible. The goal is to feel steadier leaving the mat, not more worn out.
A good session should leave your joints calm and your posture a little taller. If a movement makes you hold your breath, brace your jaw, or wonder whether you can get back up safely, it’s too much for this kind of work. Simple is not boring here. Simple is the point.
A chair, a wall, a mat, and maybe a folded towel are enough for most of what follows. A small range of motion beats a big one almost every time at this stage of life, especially if balance is fragile or the low back has a habit of talking back. Start where you feel organized, then build from there.
1. Seated Rib Breathing at the Kitchen Table
The easiest Pilates move is often the one people skip. Seated rib breathing looks almost too plain to matter, yet it sets up the rest of the session by relaxing the neck, widening the ribs, and helping the belly soften instead of grip.
Sit near the front of a sturdy chair with both feet flat. Place one hand on the side of your ribs and the other on your lower belly. Inhale through the nose for a count of four, aiming the breath into the sides and back of the rib cage. Exhale through the mouth for a count of five or six, as if you are gently fogging a mirror.
What to feel
- Your shoulders stay down.
- Your neck feels long.
- The ribs expand sideways.
- The exhale feels a little slower than the inhale.
Do 5 to 8 breaths, rest for a moment, then repeat once. That is plenty. If you like to move into a session with a few more cues, keep the breath going and add a tiny pelvic floor lift on the exhale — just a whisper of effort, not a squeeze.
2. Chair-Back Cat-Cow for a Stiff Spine
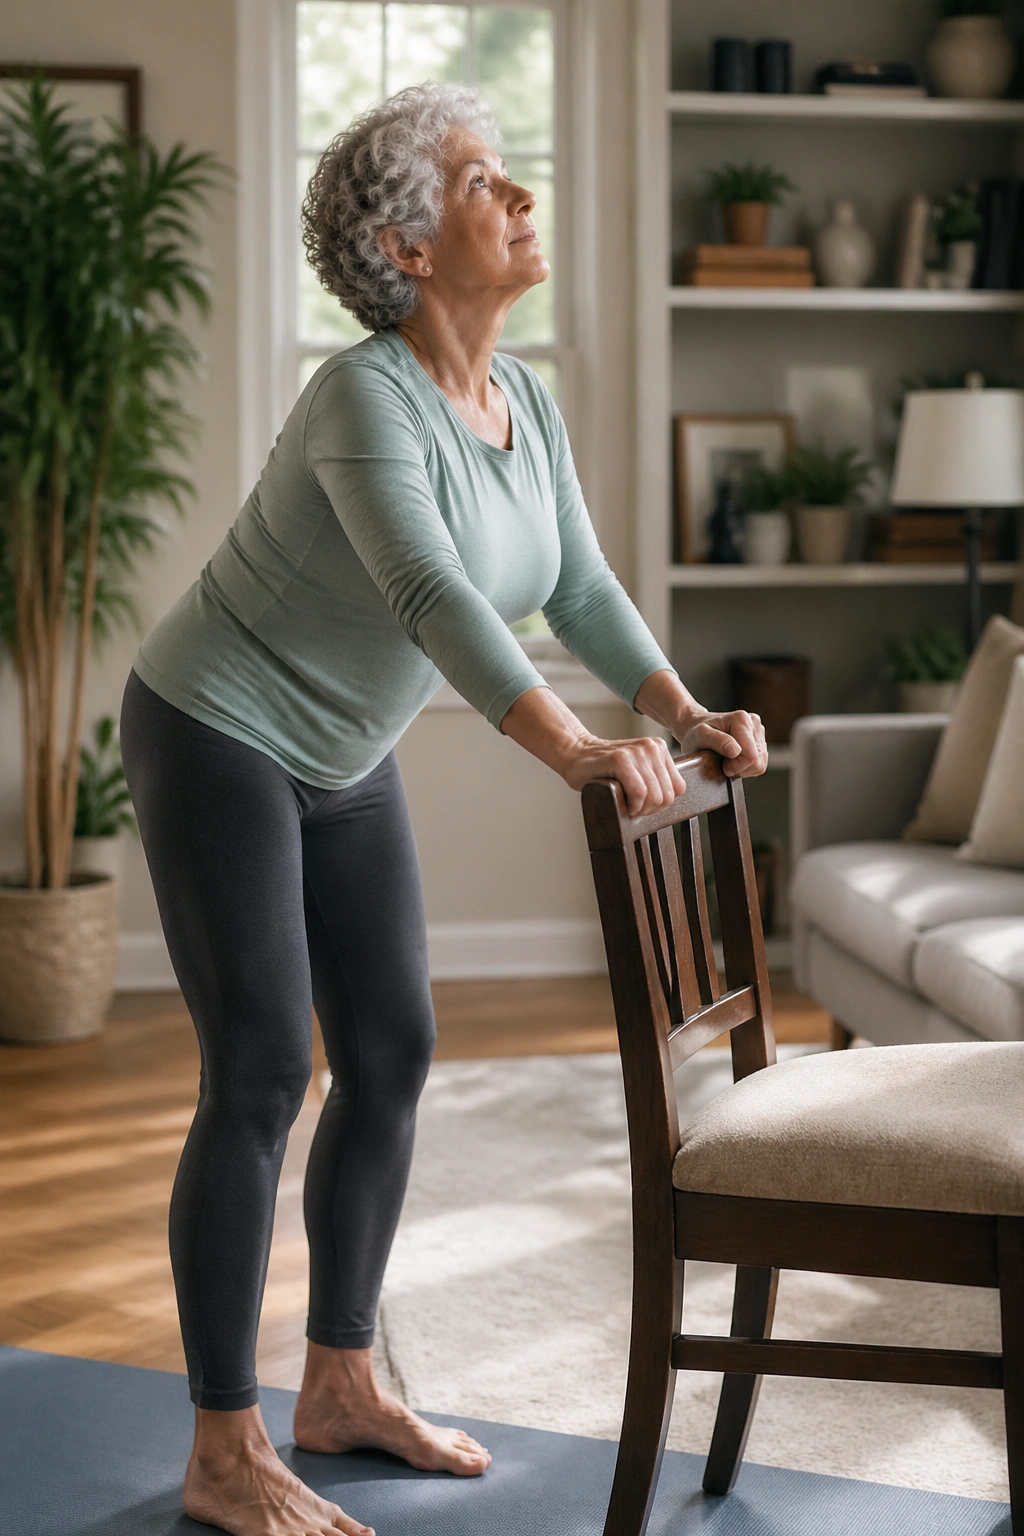
A chair-back cat-cow looks modest, but it wakes up the whole spine without asking you to kneel on the floor. That matters when the wrists, knees, or balance are having an off day.
Stand facing the back of a chair and place both hands on it. Step your feet back until your spine feels long and your hips can hinge. Inhale as you tip the tailbone back and gently arch through the middle of the back. Exhale as you round slightly, drawing the belly in and letting the head follow the line of the spine. Keep the movement small; no need to chase a huge curve.
How to keep it gentle
- Bend the knees a little if your hamstrings pull.
- Keep the hands light on the chair.
- Stop before the shoulders creep up.
- If osteoporosis is part of your story, keep the rounding tiny and stay mostly long.
Five to 6 slow reps are enough. The point is not to wring out the spine. It is to remind the back that it can move in both directions without strain.
3. Pelvic Tilts on a Firm Mat
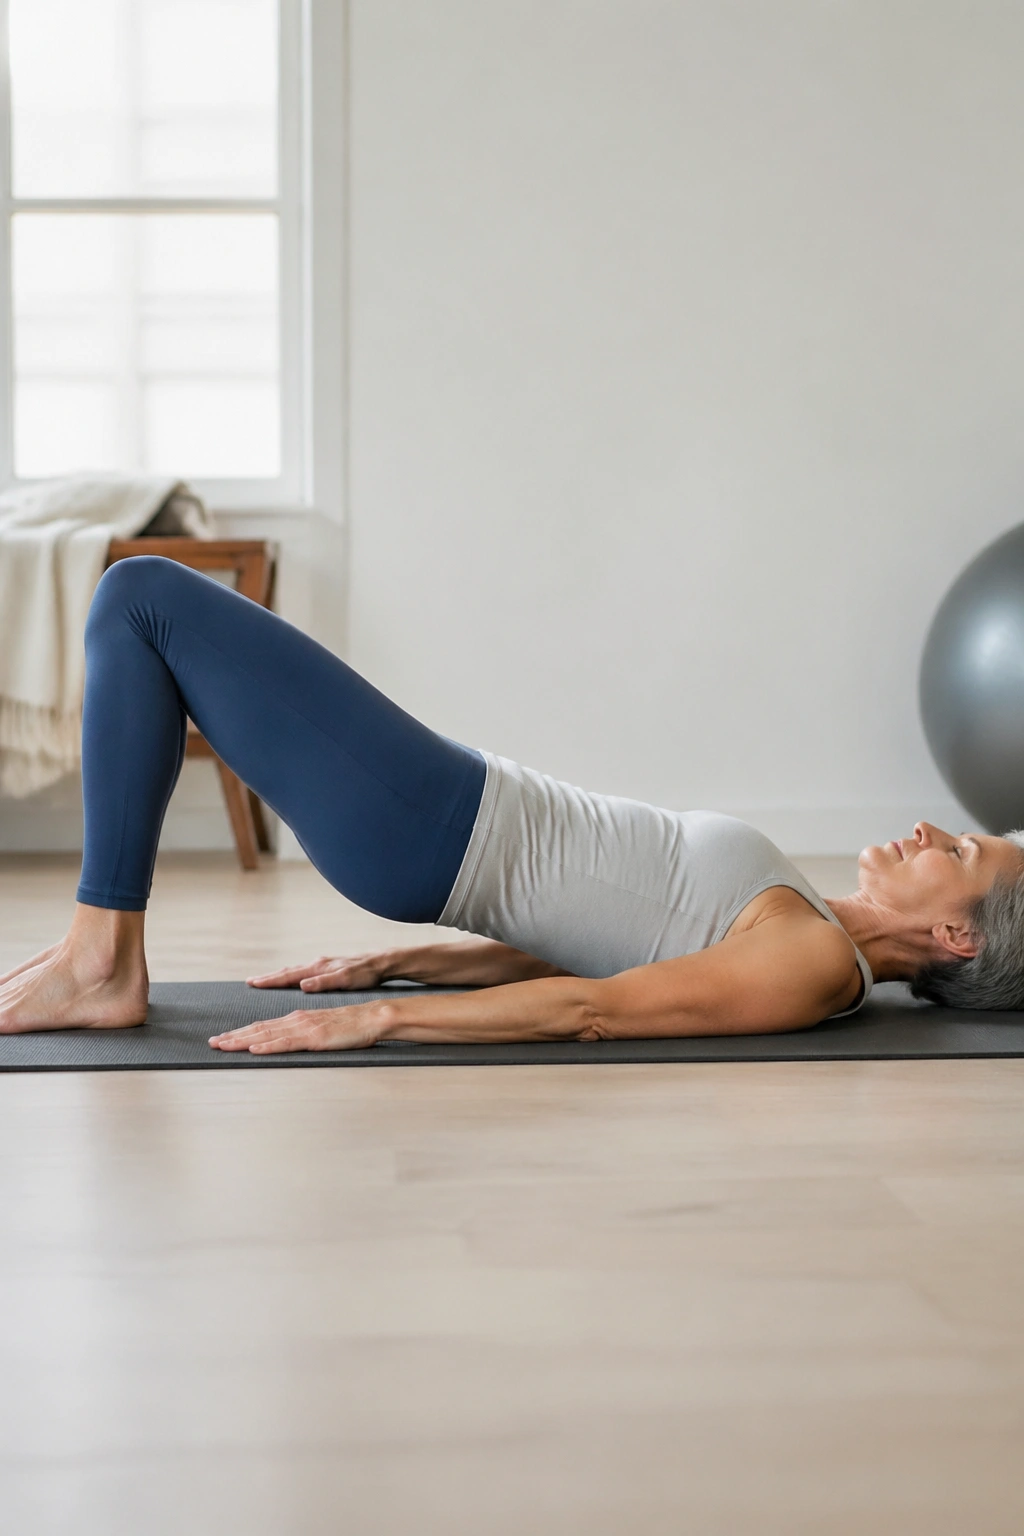
Flat on the mat, with knees bent and feet planted, pelvic tilts feel almost too simple. That simplicity is useful. A small tilt can calm the low back, wake up the deep abdominal muscles, and give you a cleaner sense of where your pelvis sits when you stand.
Lie on your back with a folded blanket or thin pillow under the head if that feels better. Inhale in the middle position. Exhale and gently press the lower back toward the mat by tipping the pubic bone toward the ceiling. Then release back to neutral on the inhale. The movement is tiny — think of it as a slow nod of the pelvis, not a crunch.
Do 8 to 10 repetitions. If the back feels pinchy, make the tilt smaller. If the neck feels tense, check that your chin is not jutting upward. The best version is almost boring in the moment and surprisingly useful when you get up.
4. Heel Slides for Quiet Core Work
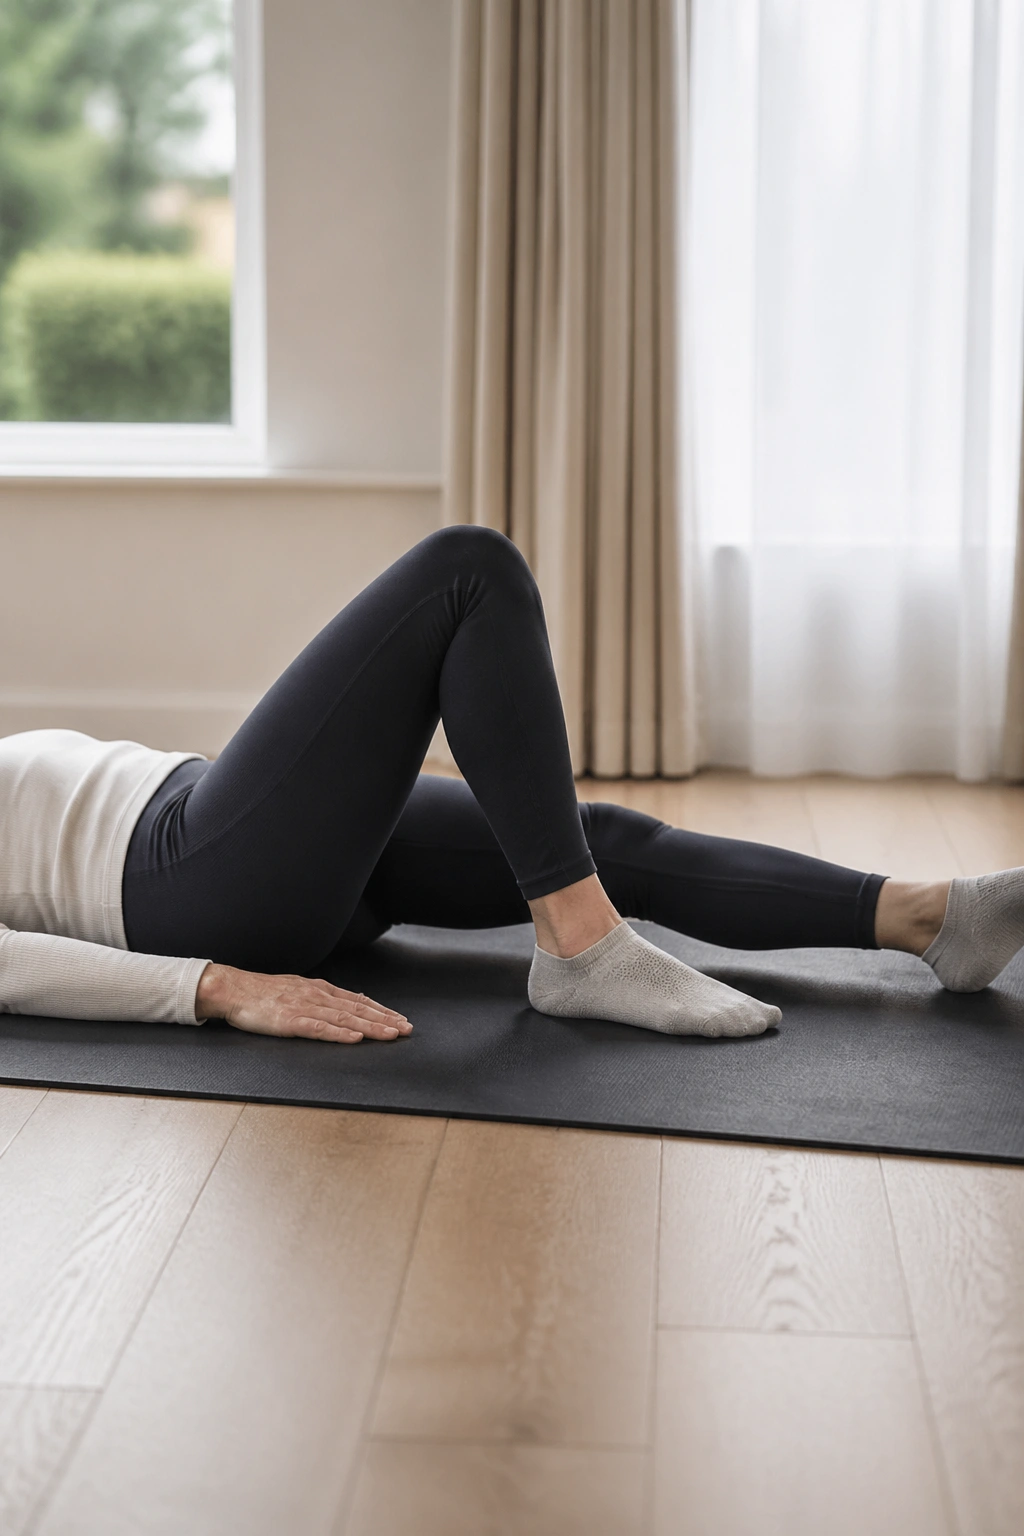
If the low back complains during core work, heel slides are usually the cleaner choice. They ask for control without putting much pressure on the spine, and they teach the legs to move while the torso stays quiet.
Lie on your back with knees bent. Slowly slide one heel away from you until the leg is almost straight, or until the point where the pelvis starts to wobble. Then drag the heel back in. Keep the ribs soft and the belly gently engaged. Repeat on the other side.
A few details that make this work
- Wear socks only if the floor is smooth enough.
- Keep the foot close to the mat; do not kick the leg out.
- Exhale as the heel slides away.
- Stop if the lower back lifts or arches hard.
Five slides per side is a fine starting point. Some women over 70 find that this move feels easier than traditional ab work, and I agree. It’s cleaner. Less noise. More control.
5. Supported Bridge Lifts
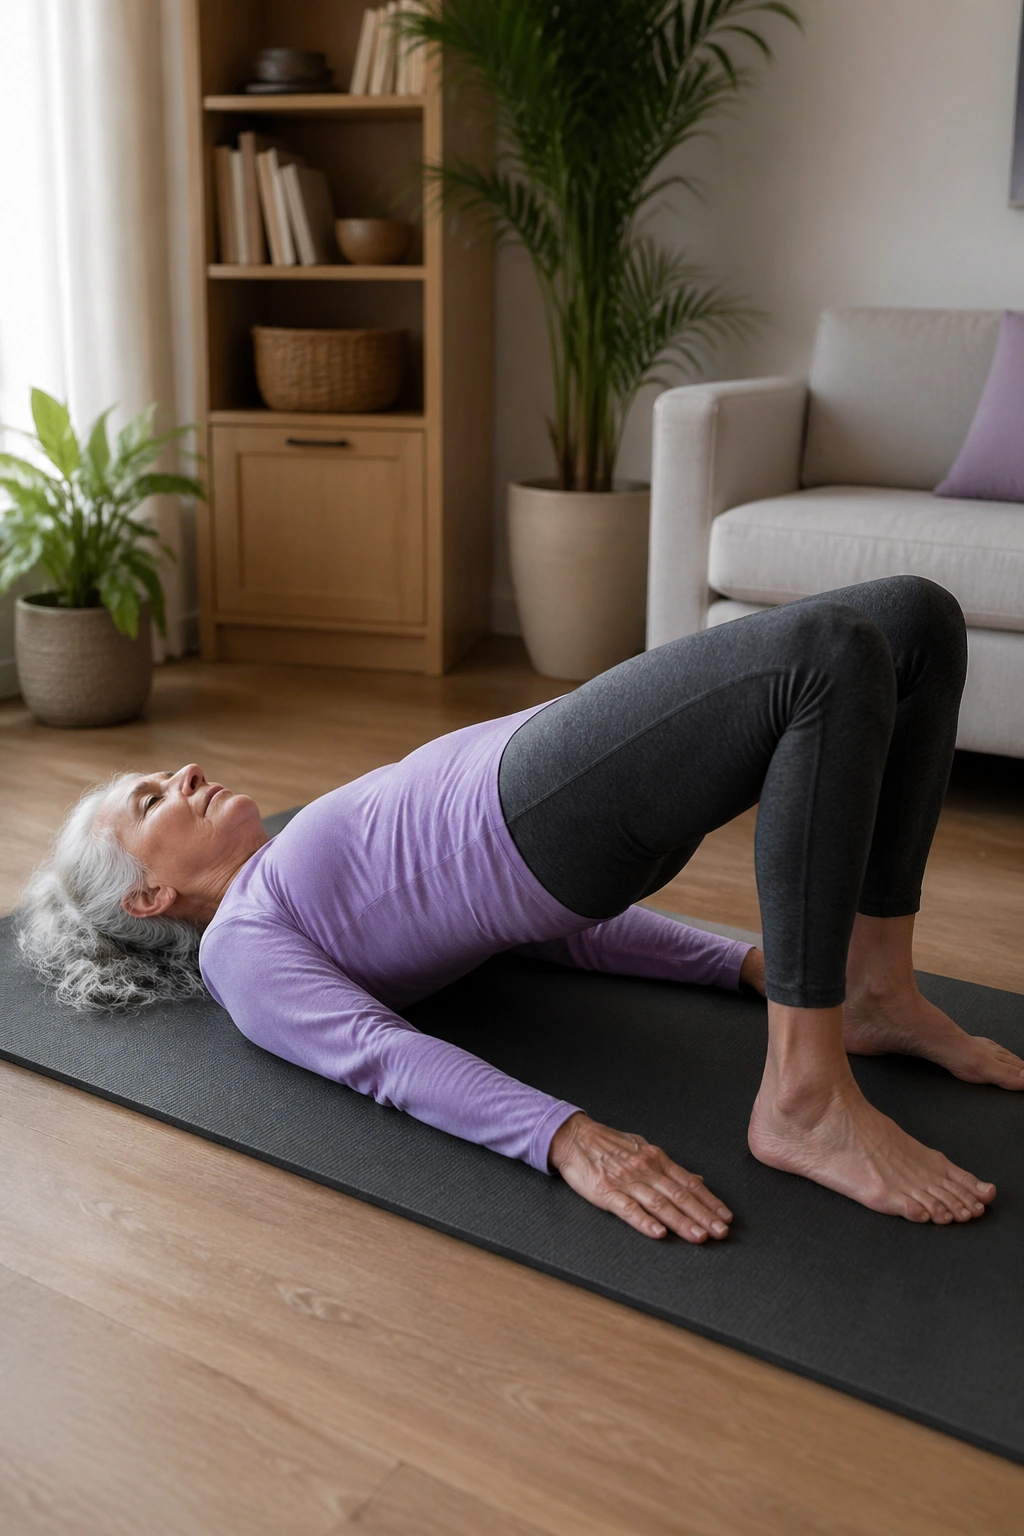
Bridge work gets a bad reputation because people lift too high. A good bridge is small, steady, and felt more in the glutes than the low back. If you keep it modest, it can be one of the best strength moves in a gentle Pilates routine.
Lie on your back with knees bent and feet hip-width apart. Press through the feet and curl the tailbone up until the hips lift just an inch or two. Hold for 2 breaths, then lower with control. The shoulders stay heavy. The neck stays relaxed. If the hamstrings cramp, bring the feet a little closer to the seat.
Do 6 slow lifts. If that feels fine, add a second round after a short rest. Some people like to imagine the pelvis rising like a tray being carried level to the ceiling. That image helps keep the lift even instead of lopsided.
Never shove the hips up just to make the movement look bigger. Bigger is not better here. Smoother is.
6. Countertop Marching for Balance
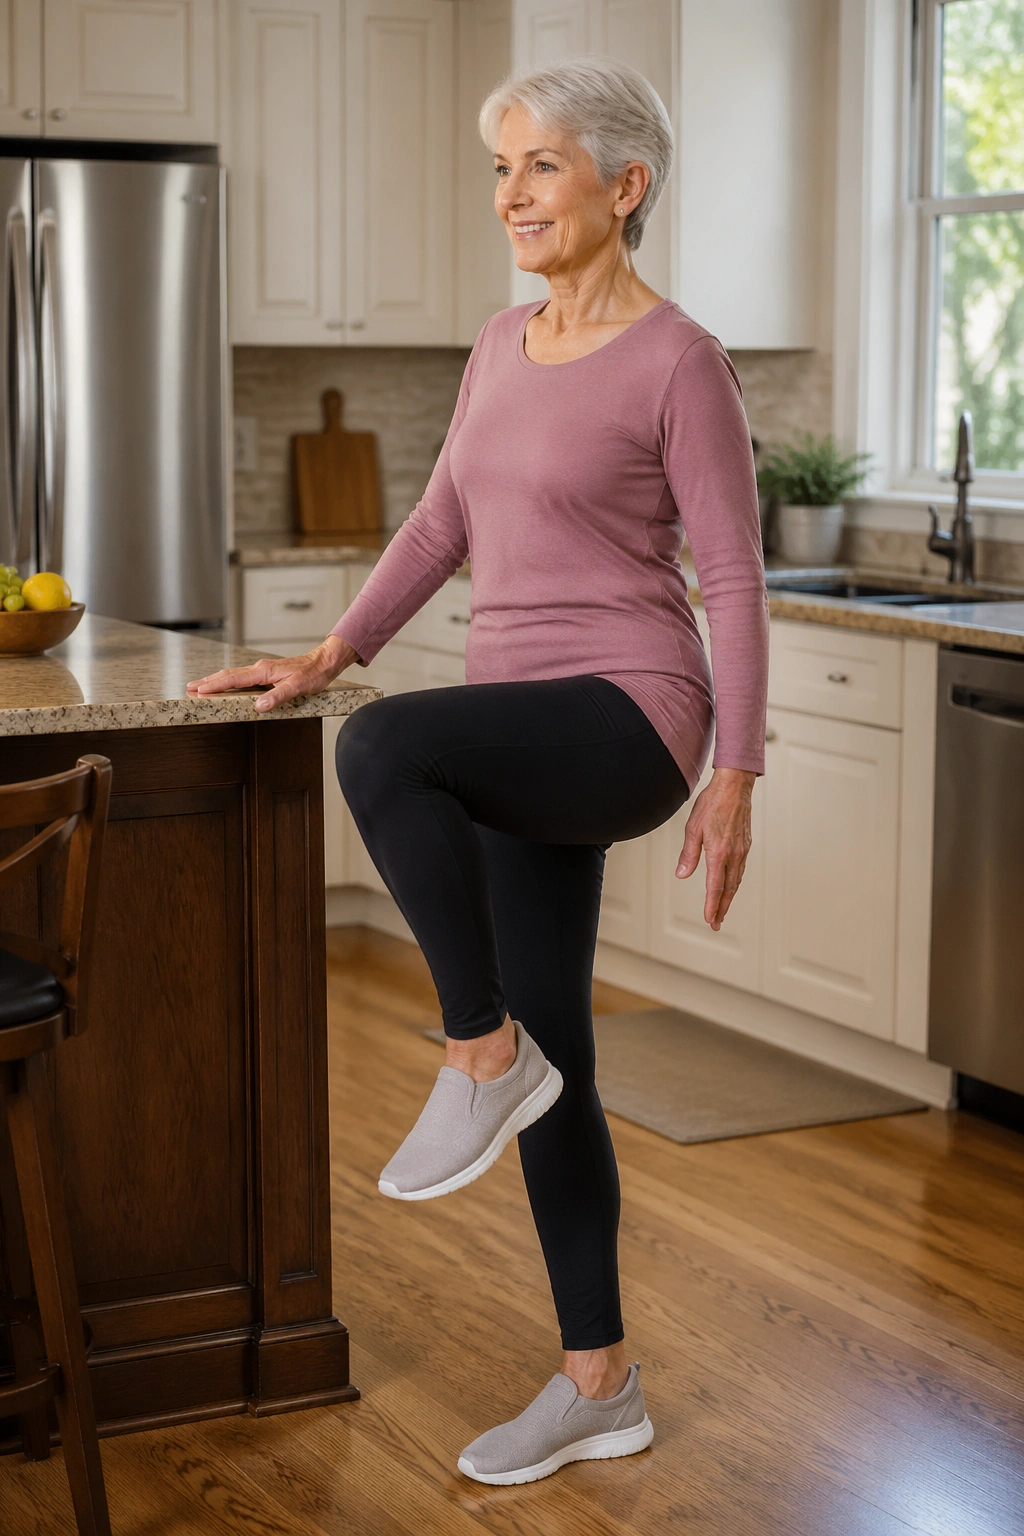
A kitchen counter makes a steady balance bar. That is useful, because marching in place can do a lot for hip mobility and standing stability without turning into a balance test you did not ask for.
Stand sideways or facing the counter with one hand resting lightly on it. Lift one knee to a comfortable height, set it down, then switch sides. Keep the torso tall and the pelvis level. The movement should feel like walking with intention rather than stomping in place.
Try 10 to 12 marches, then pause and reset your posture. If you want a little more challenge, slow the lowering phase and let each foot find the floor with care. That tiny pause after each lift teaches control. It also keeps the exercise from becoming a rushed little flop.
If your balance is shaky, do not remove the hand from support just because the movement feels easy on paper. Support is not cheating. It is what makes the work possible.
7. Side-Lying Clamshells With a Pillow
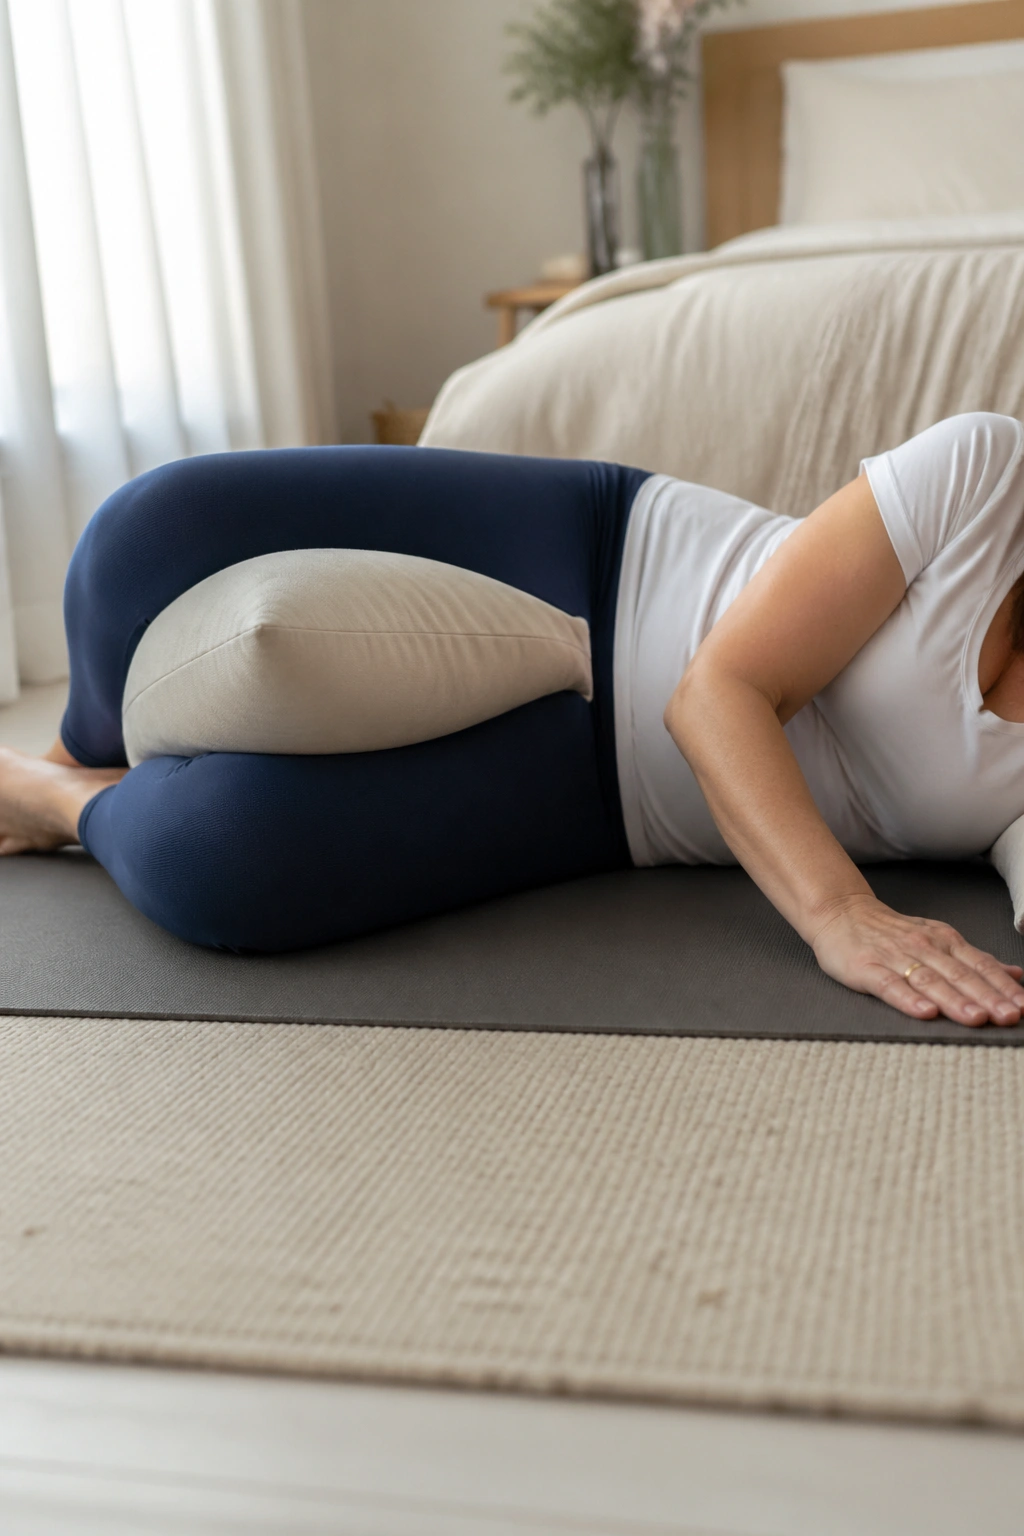
Side-lying clamshells are not flashy. They are one of those unglamorous Pilates moves that quietly help the hips stay stable when you walk, climb stairs, or stand on one leg to put on socks.
Lie on one side with a pillow under the head and another between the knees if that helps the top hip stay stacked. Knees bend comfortably, feet stay together, and the top knee opens like a clamshell. The pelvis should not roll backward. That part matters more than the height of the knee.
- Open only as far as the top hip stays quiet.
- Keep the feet touching.
- Exhale on the lift.
- Lower slowly, not with a drop.
Eight repetitions per side is enough to start. If one hip feels weaker, that side often needs less movement, not more. The outer hip muscles do the job best when the motion is small and honest.
8. Wall Roll-Downs for Easier Posture
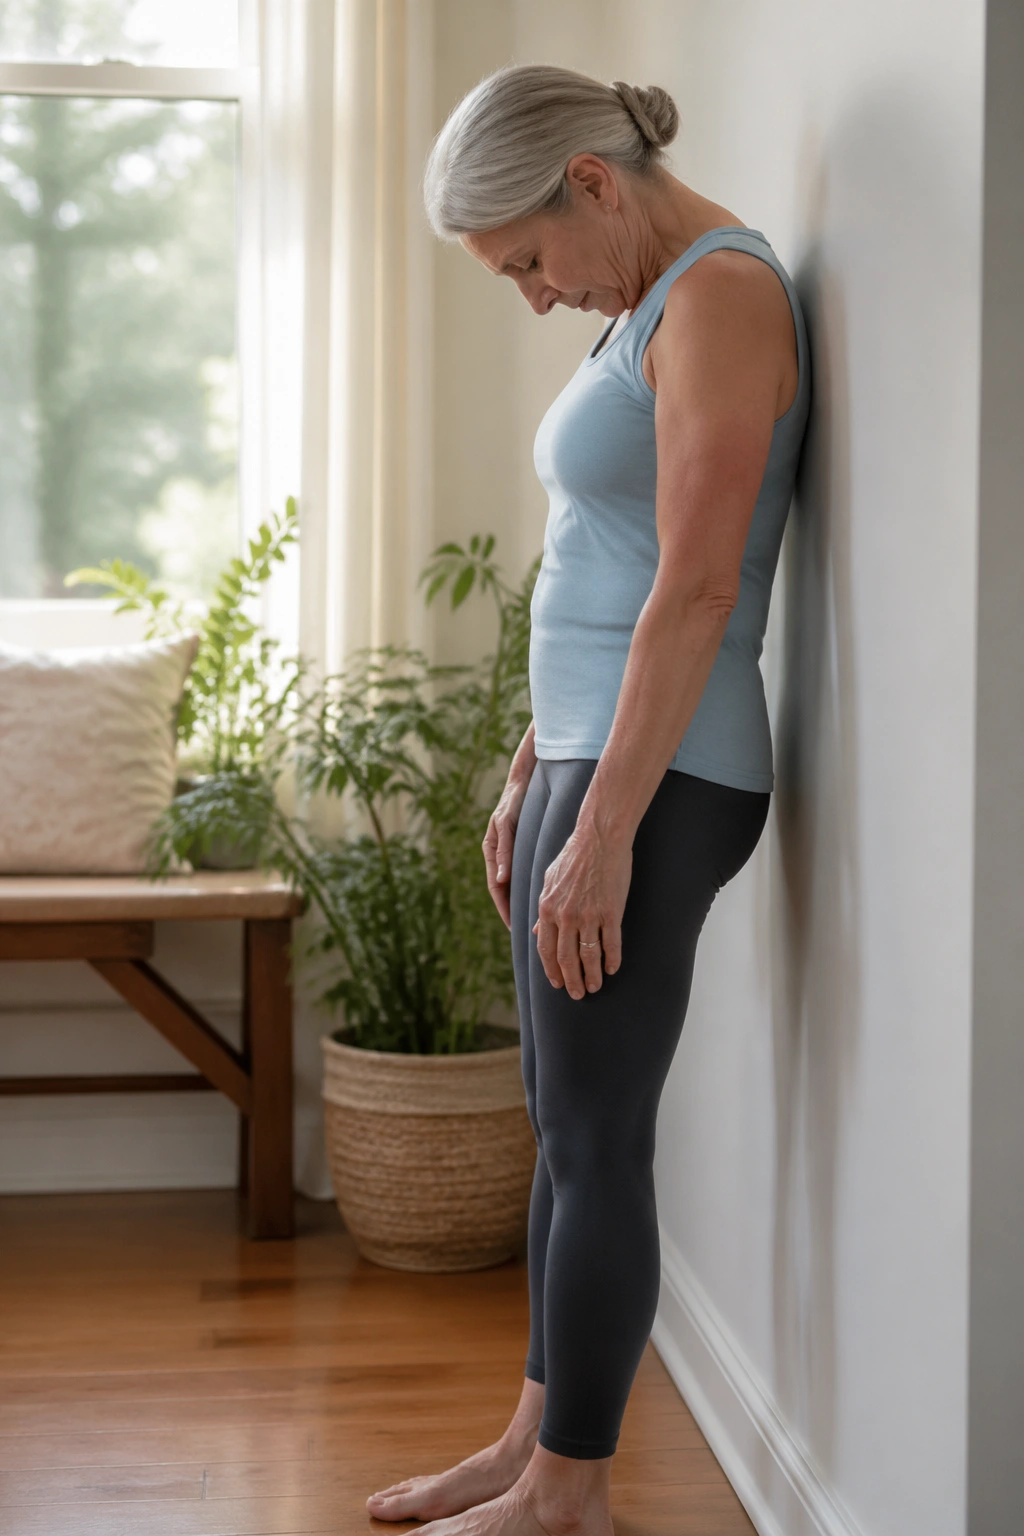
Wall roll-downs are the closest thing to posture practice without a mirror. They also give the back a way to flex and lengthen while staying upright enough to feel safe.
Stand with your back near a wall, heels a few inches away. Chin slightly tucked, arms relaxed. Exhale and let the head nod forward, then the upper back, then the middle back, rolling only as far as feels comfortable. Inhale there. Exhale and stack the spine back up, one piece at a time.
Keep the knees soft. Do not chase the floor. A small roll is enough to wake up the back line of the body and make the ribs feel less glued in place. If standing with your back to the wall feels awkward, place your hands on your thighs and do the same shape with a little more support.
Three to 5 repetitions are plenty. If dizziness is a problem, skip this one or keep the range tiny. No Pilates move is worth a dizzy spell.
9. Mermaid Side Bends in a Chair
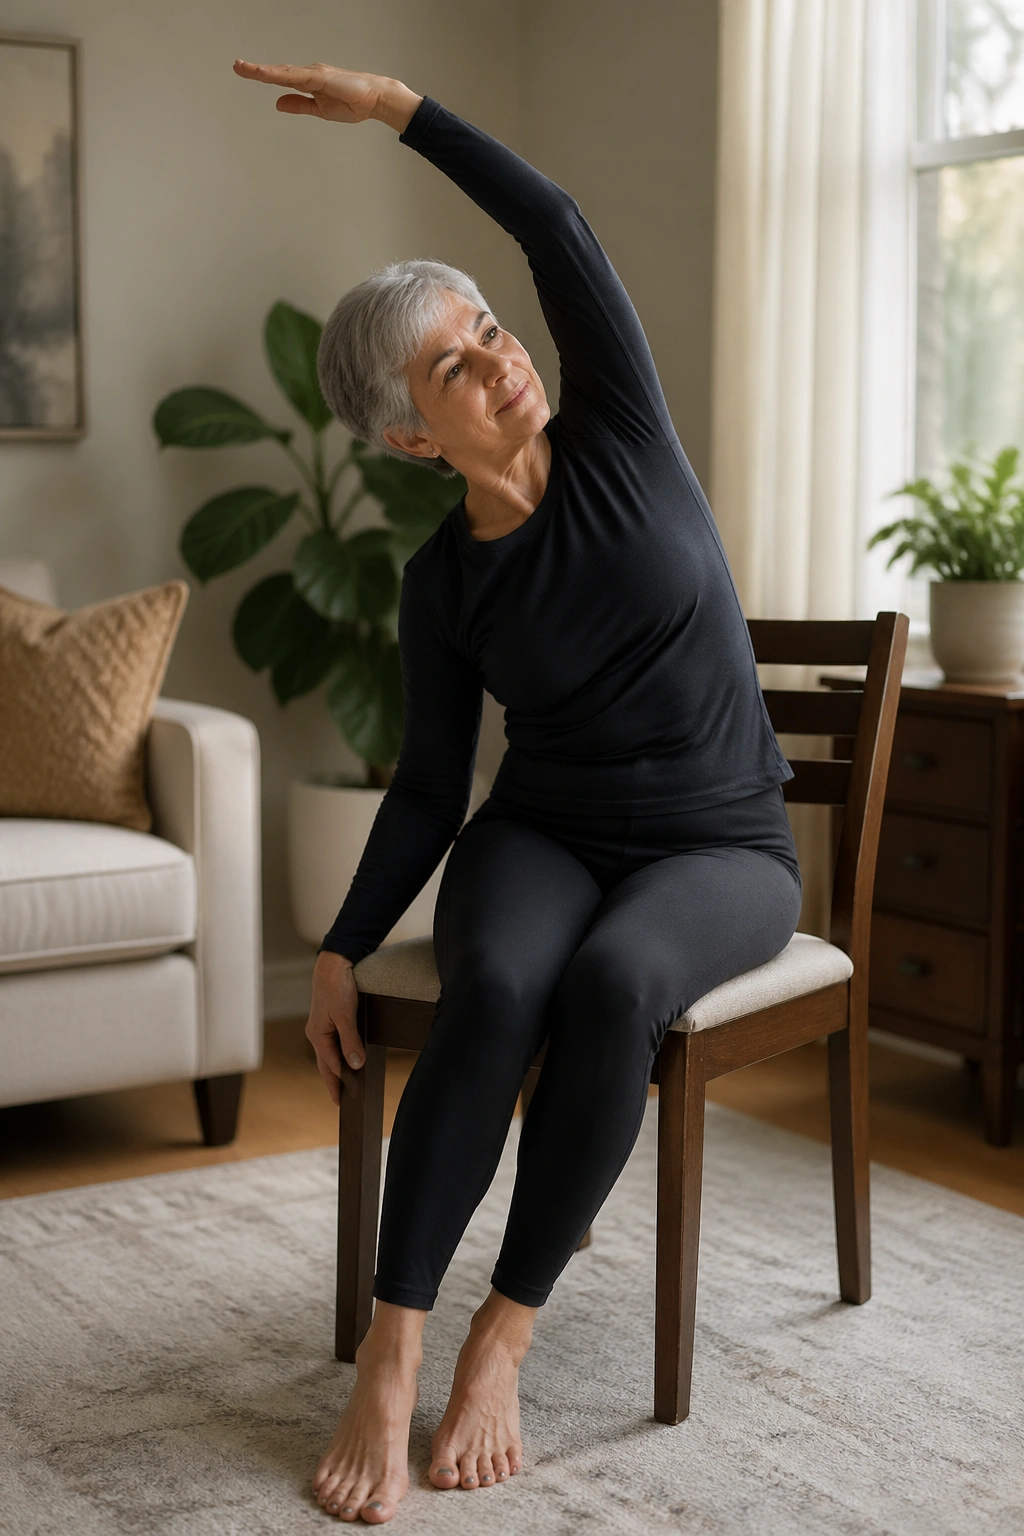
Can one chair stretch open the ribs and waist? Yes, and it does so in a way that feels especially kind to a stiff upper body.
Sit sideways on a chair with one hand holding the seat and the other arm reaching overhead. Inhale to grow taller. Exhale and lean the upper body slightly away from the chair, keeping both sit bones grounded. The side stretch should feel long, not collapsed. Then return to center and switch sides.
This move opens the spaces between the ribs, which can feel wonderful if breathing has been shallow. It also gives the waist and the side body a little length without putting much demand on the knees or wrists. Keep the bend small; a dramatic side crunch is not the goal.
Three breaths per side can be enough. If the shoulder on the reaching side is cranky, let the arm hover lower and work with a smaller line. Small changes matter.
10. Seated Spine Twists With a Tall Back
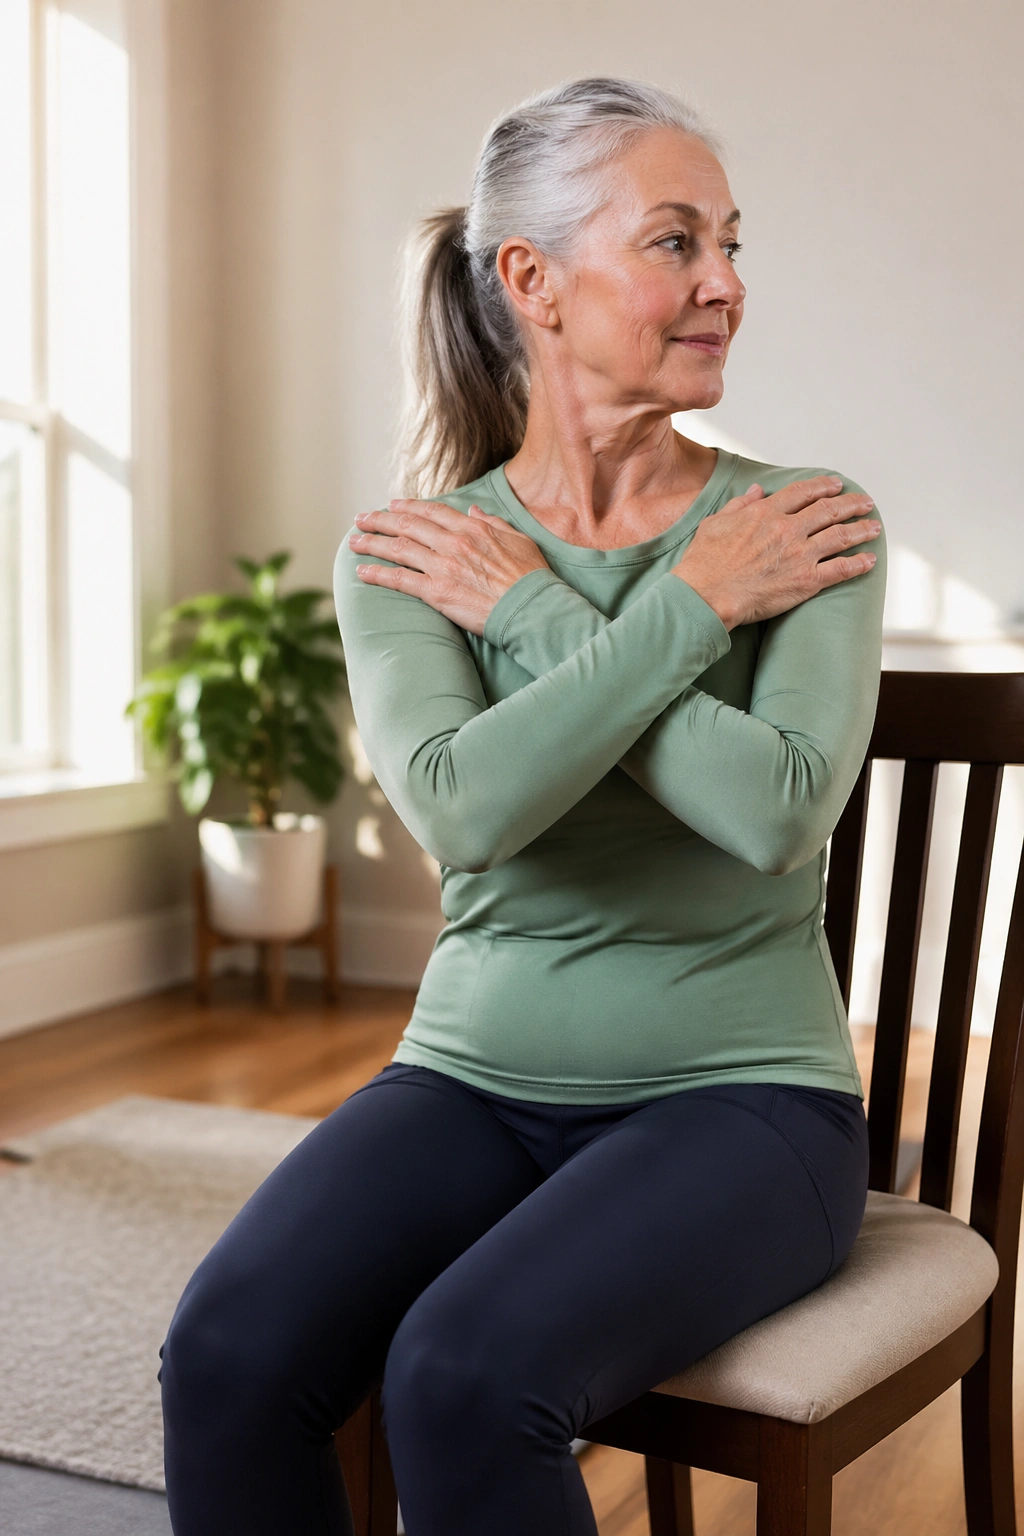
Twisting is where Pilates gets fussy. A little bit can feel freeing. Too much can feel cramped fast, especially if the low back or hips do not love rotation.
Sit tall near the front of a chair with feet grounded. Cross your arms over your chest or rest your hands on your shoulders. Inhale to lengthen up through the crown of the head. Exhale and turn the rib cage a few inches to one side while the pelvis stays square. Come back to center on the inhale, then repeat on the other side.
What to watch for
- Keep the twist small.
- The knees stay forward.
- The shoulders do not yank the neck around.
- The movement comes from the ribs, not from a sudden crank through the low back.
Four slow twists each way is enough. If you have osteoporosis or a history of spine compression, keep this one especially gentle or skip it altogether. Twists can be useful, but only when they stay controlled.
11. Bird-Dog Reach From a Countertop
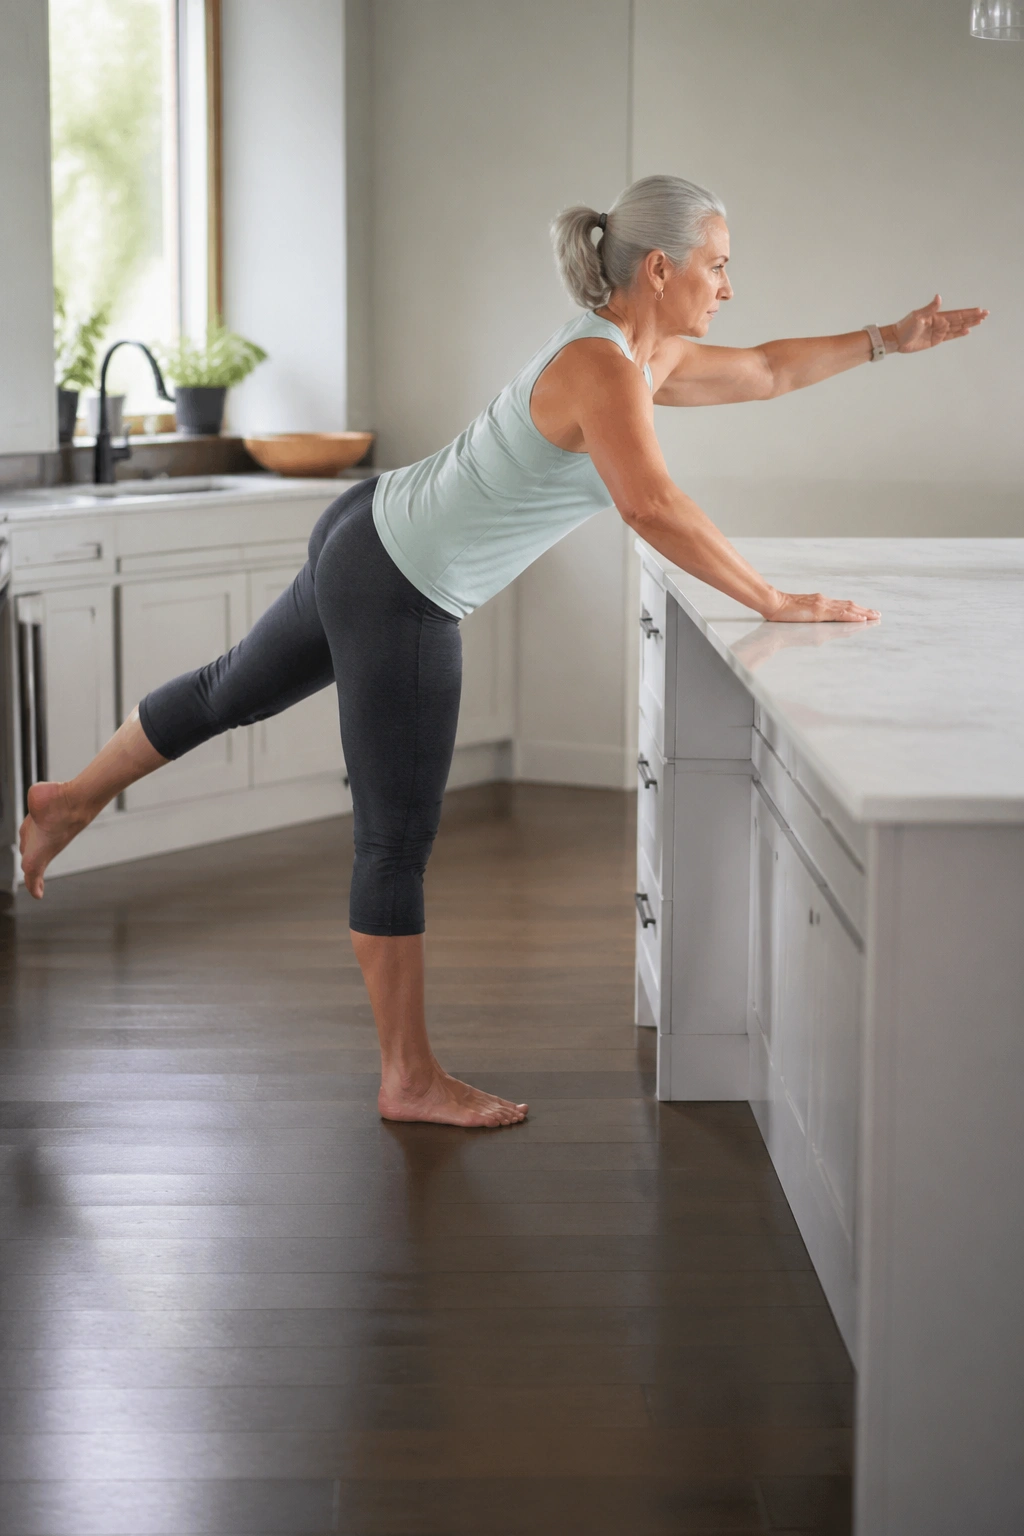
Bird-dog at a counter gives you the same lesson as the mat version, with fewer floor battles. That is a win for anyone who dislikes getting down and up from the ground more than once.
Stand facing a counter with both hands lightly resting on it. Step one foot back and keep the heel lifted, then reach the opposite arm forward if that feels steady. Some people prefer to keep both hands on the counter and simply extend one leg back behind them. Either version works if the spine stays long and the torso does not sway.
The main goal is steadiness. Lift the leg only as high as you can without arching the low back. Pause for one breath, then lower with control. Repeat on the other side. Think of it as balance practice mixed with back support, not a test of how high the leg can go.
Six reps per side is a clean start. If the wrists complain, place forearms on the counter instead of palms.
12. Supported Swan Prep Over a Pillow
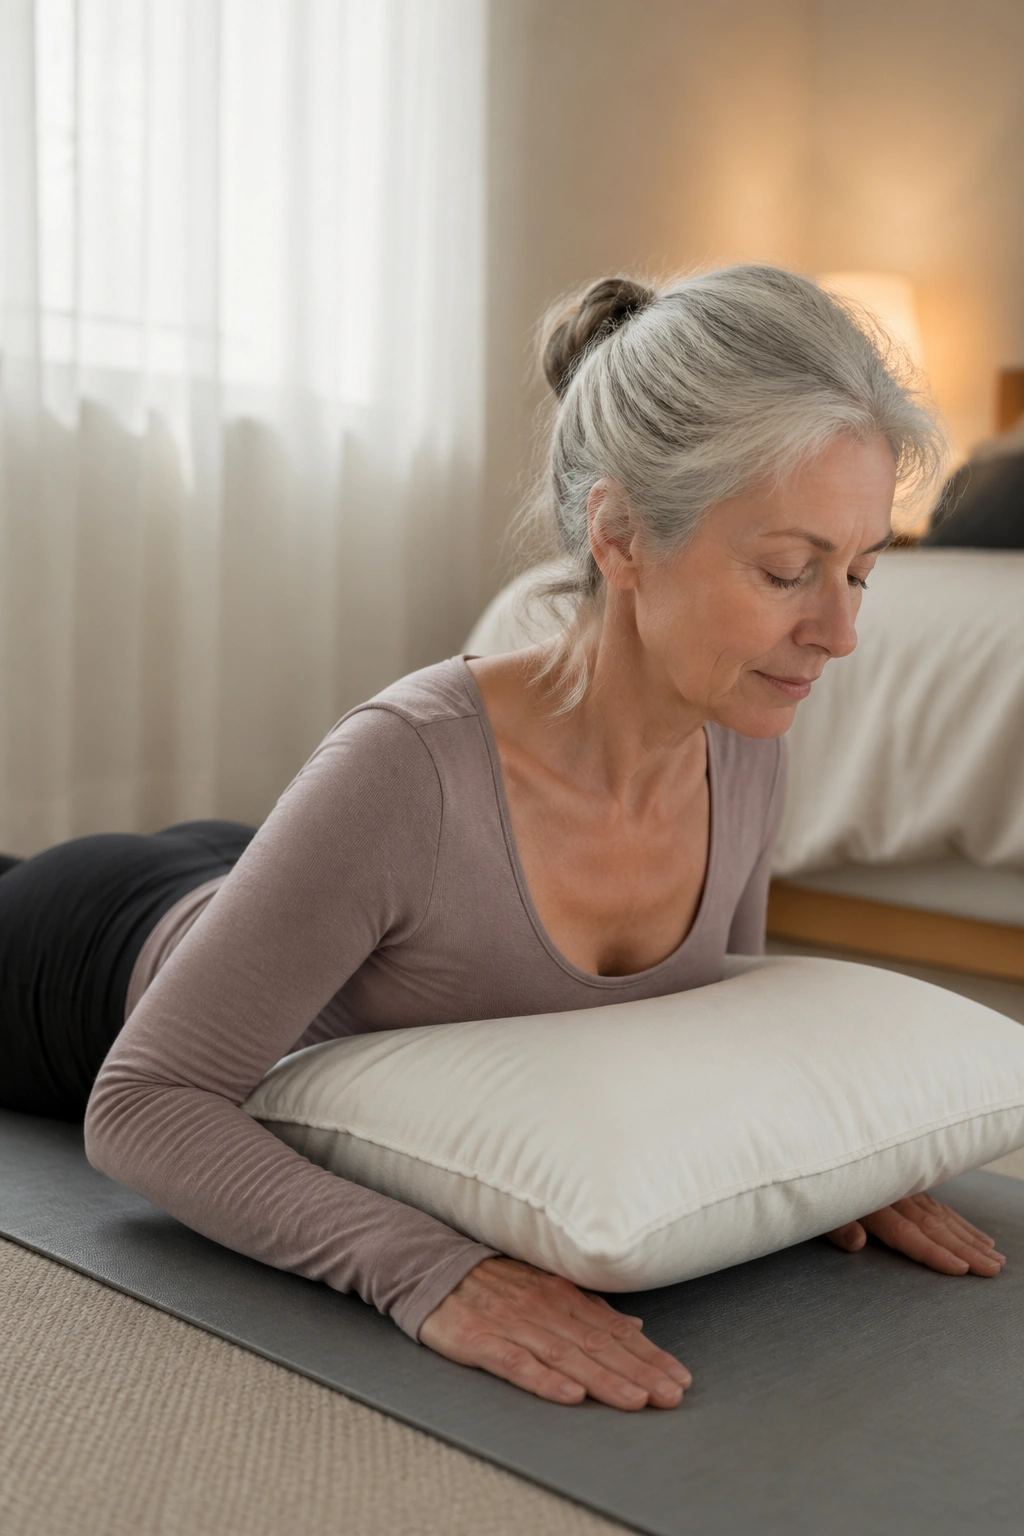
A pillow under the chest changes prone work from pushy to manageable. That matters because some women over 70 love the feeling of a gentle back extension but hate the strain of lifting from a flat floor.
Lie face down over a firm pillow or folded blanket so the chest is supported and the forehead can rest comfortably. Place the hands under the shoulders or by the sides of the rib cage. Inhale to lengthen the spine. Exhale and lift the chest just an inch or two, keeping the neck long and the gaze down. Lower slowly.
This is not a full backbend. It is a small wake-up for the muscles along the spine, plus a nice antidote to hours spent rounded over a book, a phone, or a sink full of dishes. If the low back feels pinchy, the lift is too large or the support is in the wrong spot.
Do 4 to 6 gentle lifts. If lying face down does not feel good, skip it. There are enough other options here that you do not need to force this one.
13. Side Leg Lifts With One Hand on the Wall
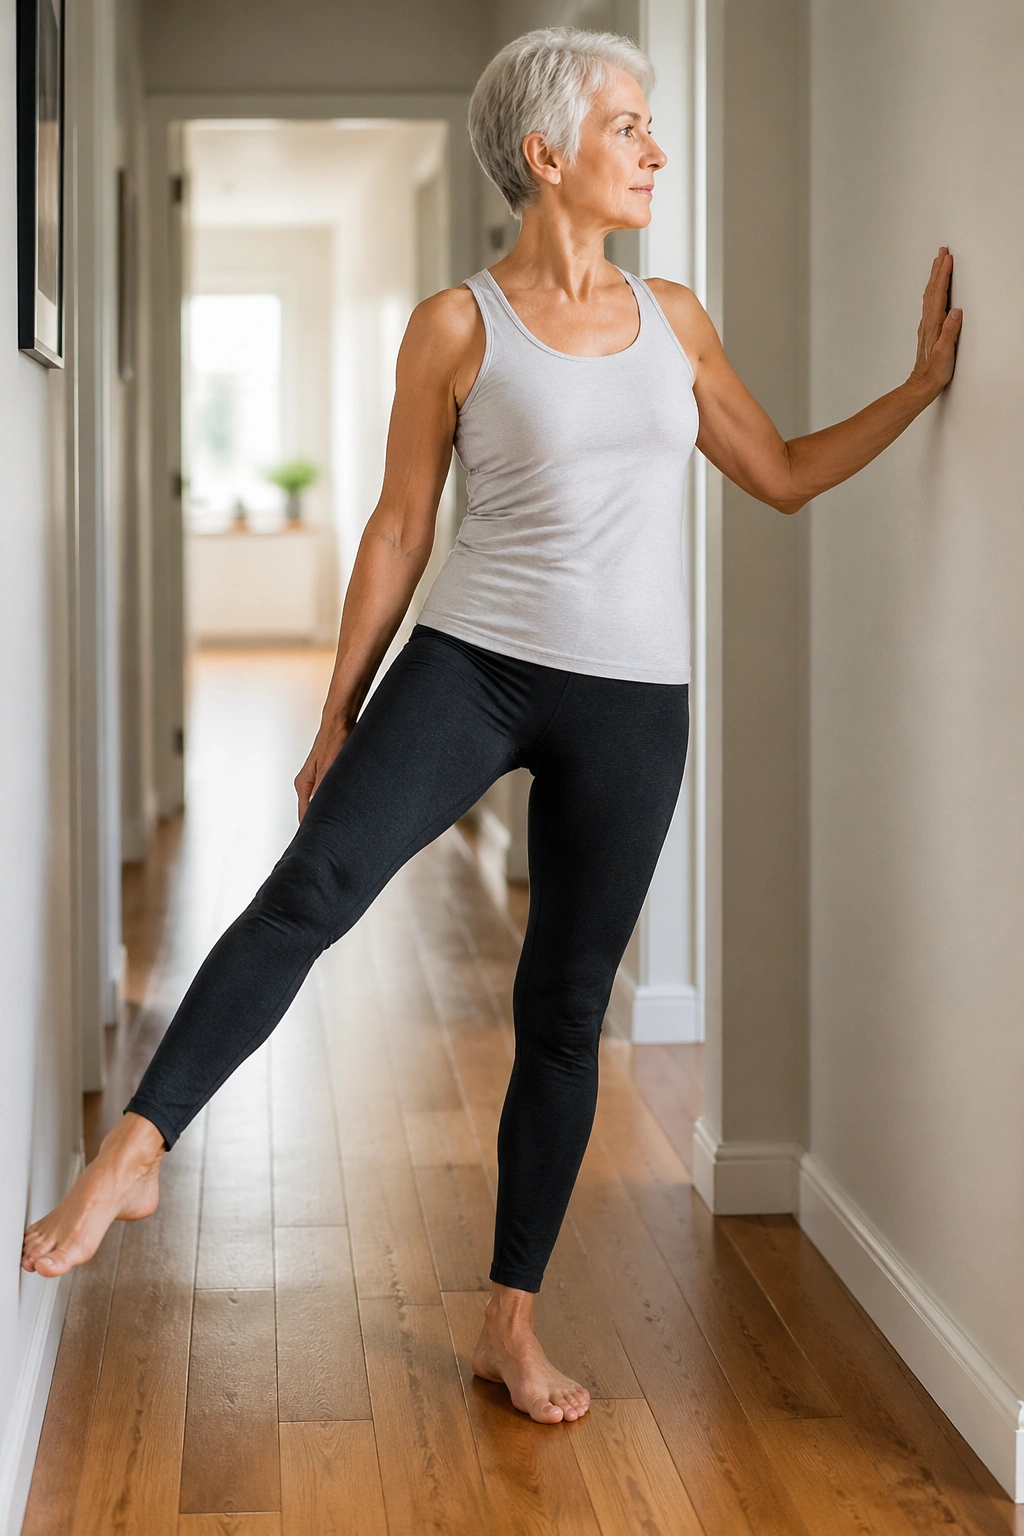
Side leg lifts at the wall are sneaky. They look like a basic standing drill, but they ask the outer hip to work while the standing leg and core keep the body from wobbling.
Stand side-on to a wall and place one hand there for light balance support. Shift your weight into the standing leg. Lift the other leg out to the side about 6 to 8 inches, then lower it slowly without letting the torso tilt. Keep the standing knee soft, not locked. The lift should feel clean, not thrown.
Keep the effort in the right place
- Toes point forward or slightly down.
- The lifted leg stays only as high as the pelvis remains level.
- The standing hip does not jut out.
- The hand on the wall stays light.
Eight lifts per side is a fine dose. This move is worth keeping in the routine because hip strength and balance tend to support each other. When one improves, the other often gets easier to trust.
14. A Gentle Standing Pilates Workout for Balance and Hips
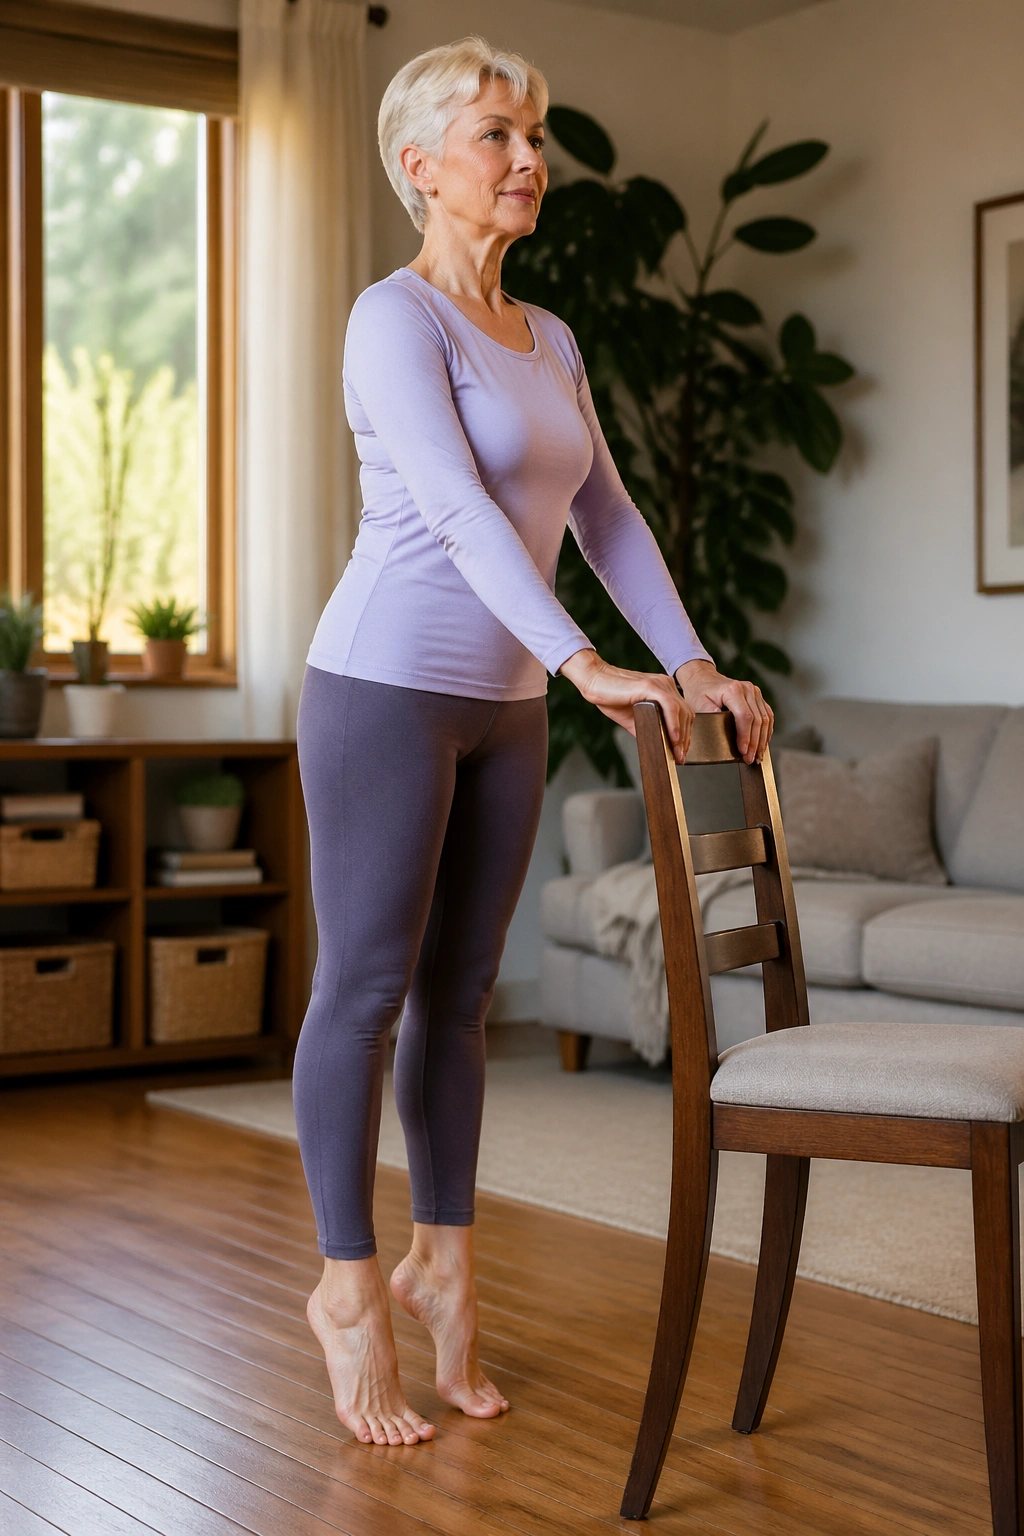
A good standing flow should feel like daily life, only cleaner. You are not trying to perform fancy shapes. You are practicing the parts of movement that make walking, reaching, and turning easier.
A simple sequence
- 6 heel raises with both hands on a chair or counter.
- 6 mini squats to a chair, stopping just before the seat.
- 8 side steps to the right and 8 to the left.
- 4 overhead reaches, one arm at a time, with the ribs kept quiet.
Do the circuit once if you are short on energy. Do it twice if the first round feels easy and your breath stays smooth. Rest after each move if you need to. There is no prize for moving nonstop.
This kind of standing Pilates workout is useful on days when getting down to the floor feels like too much effort. It keeps the legs, hips, and arms involved without making the session feel stiff or precious. And yes, a chair nearby is still a smart idea.
15. A Five-Minute Full-Body Cool-Down
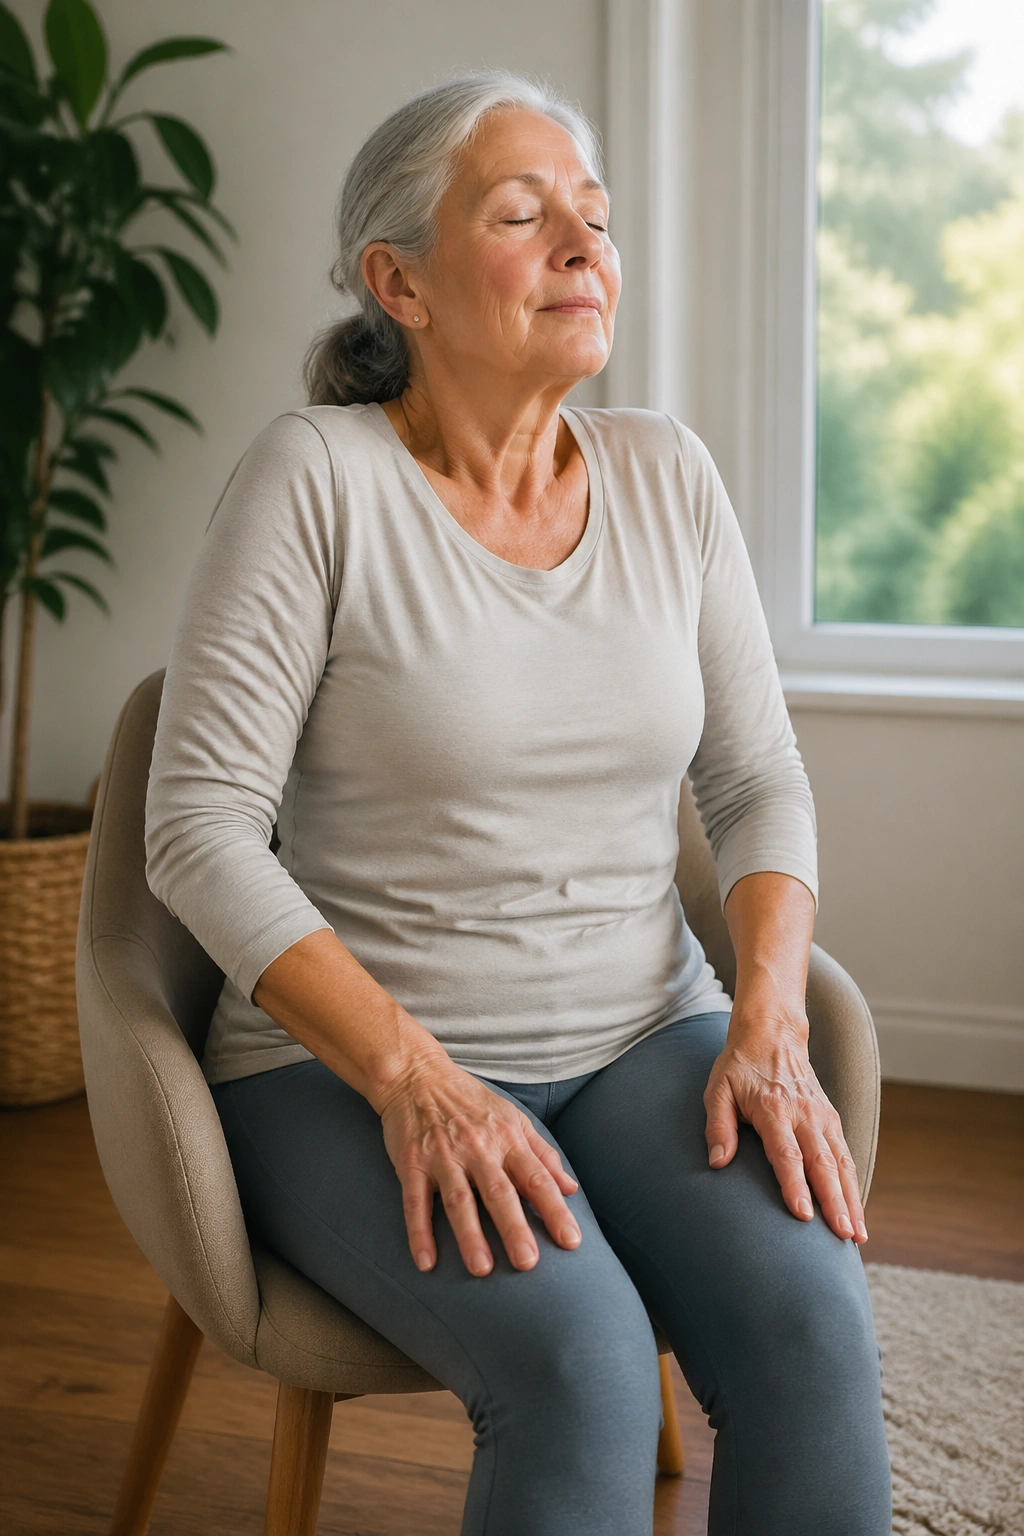
A short cool-down matters more than people think. It gives the body a way to settle after standing work, floor work, or even a long walk around the block.
Sit back in the chair and return to the same breathing pattern from the opening section: ribs wide on the inhale, slower exhale on the way out. Add a gentle shoulder roll, then a soft neck turn from side to side. Reach both arms forward and let the upper back round a little, then sit tall again.
A simple finish
- Take 4 slow breaths with one hand on the ribs.
- Roll the shoulders up, back, and down 3 times.
- Reach the arms overhead if that feels good, or keep them low.
- Extend one leg at a time and point and flex the foot 3 times each.
- Sit still for one breath before standing up.
This is a good ending for low-energy days, and it is also a decent standalone routine when you only have a few minutes. The body likes closure. So does the nervous system.
Final Thoughts

The best gentle Pilates for women over 70 is the kind that respects the day you’re having. Some days call for a full standing sequence. Other days, breathing on a chair and doing three pelvic tilts is enough.
That is not a compromise. It is intelligence.
Keep the chair close, keep the range small, and keep the breath moving. If a routine leaves you feeling looser, steadier, and a little more willing to stand tall afterward, you picked well.
