



Some days, getting down on the floor is the hard part, not the workout.
That’s where wall Pilates earns its place. A plain wall gives you support, feedback, and a clean line to work against, which matters a lot when you want strength without feeling wobbly or beaten up afterward. For women over 60, that combination can be gold: joint-friendly, low-impact, and still serious enough to wake up the legs, core, back, and shoulders.
The wall also tells the truth. If your ribs flare, your hips shift, or your shoulders creep toward your ears, you feel it right away. That little bit of honesty is useful. It keeps the movement tidy, and tidy movement is usually safer movement.
Skip any move that causes sharp pain, dizziness, or numbness. A mild muscle burn is one thing. A joint protest is another. Start with the wall, a pair of supportive shoes if you prefer them, and a pace slow enough that you can notice what your body is doing.
1. Wall Roll-Down for Spinal Mobility
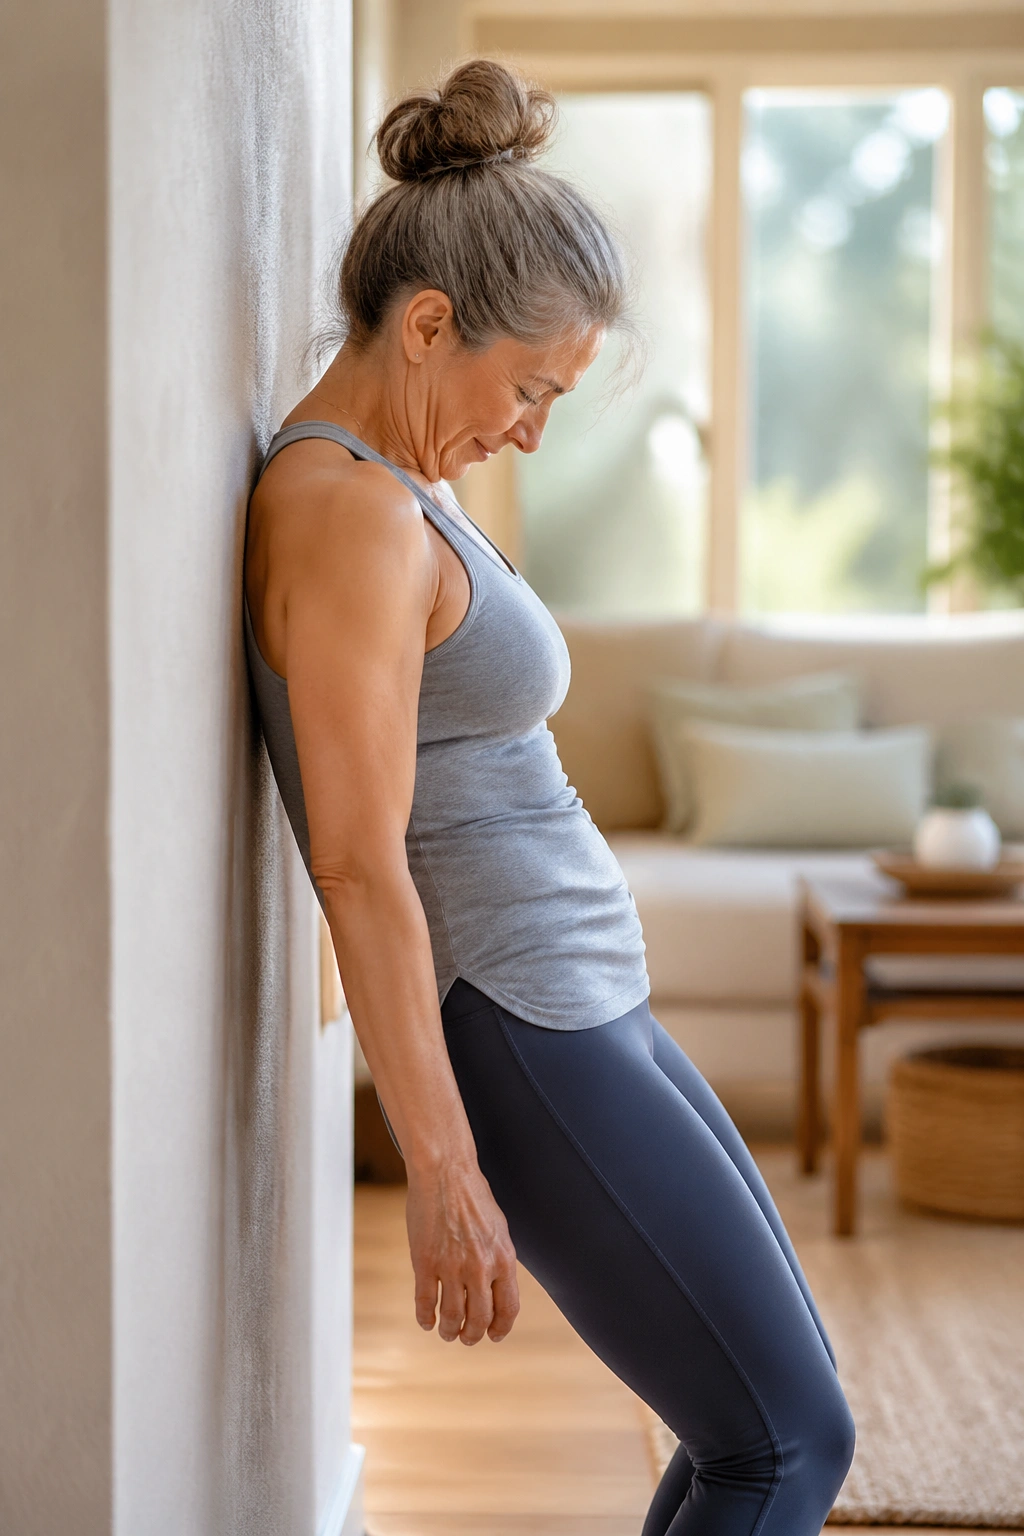
This is the move I’d start with almost every time. It warms the spine, lengthens the back body, and gives you a quick read on how stiff or loose you feel that day.
Stand with your back to the wall, heels about 6 to 10 inches away. Press the back of your head, shoulder blades, and pelvis lightly into the wall, then exhale and let your chin nod as you peel your spine down one segment at a time. Go only as far as feels smooth. For some bodies, that means mid-thigh. For others, it means hands near the knees. Both are fine.
How to do it
- Inhale tall through the nose.
- Exhale and roll down slowly, keeping your knees softly bent.
- Pause at the bottom for one breath.
- Inhale, then stack your spine back up as if you’re placing each vertebra back on the wall.
The big mistake is rushing. If you drop down fast, you miss the whole point and your lower back usually does the work instead of your abs and hamstrings. Move like you’re trying not to spill a glass of water.
Tip: If hamstrings are tight, bend your knees more. Straight legs are not a prize.
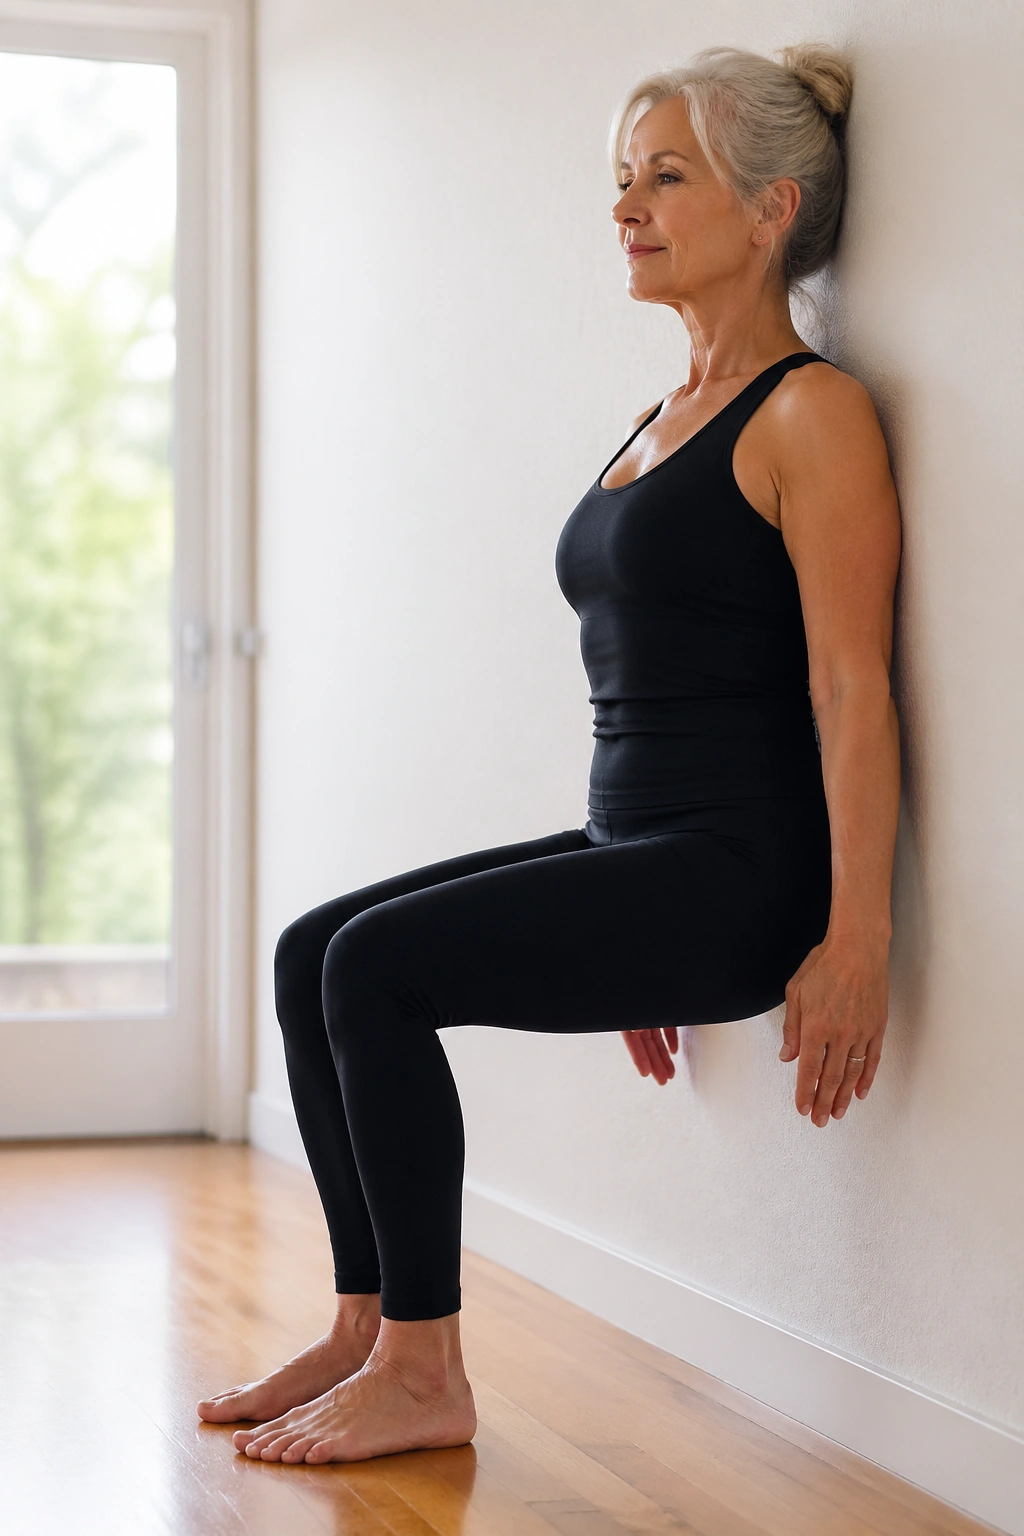
2. Supported Wall Sit with Arm Reach
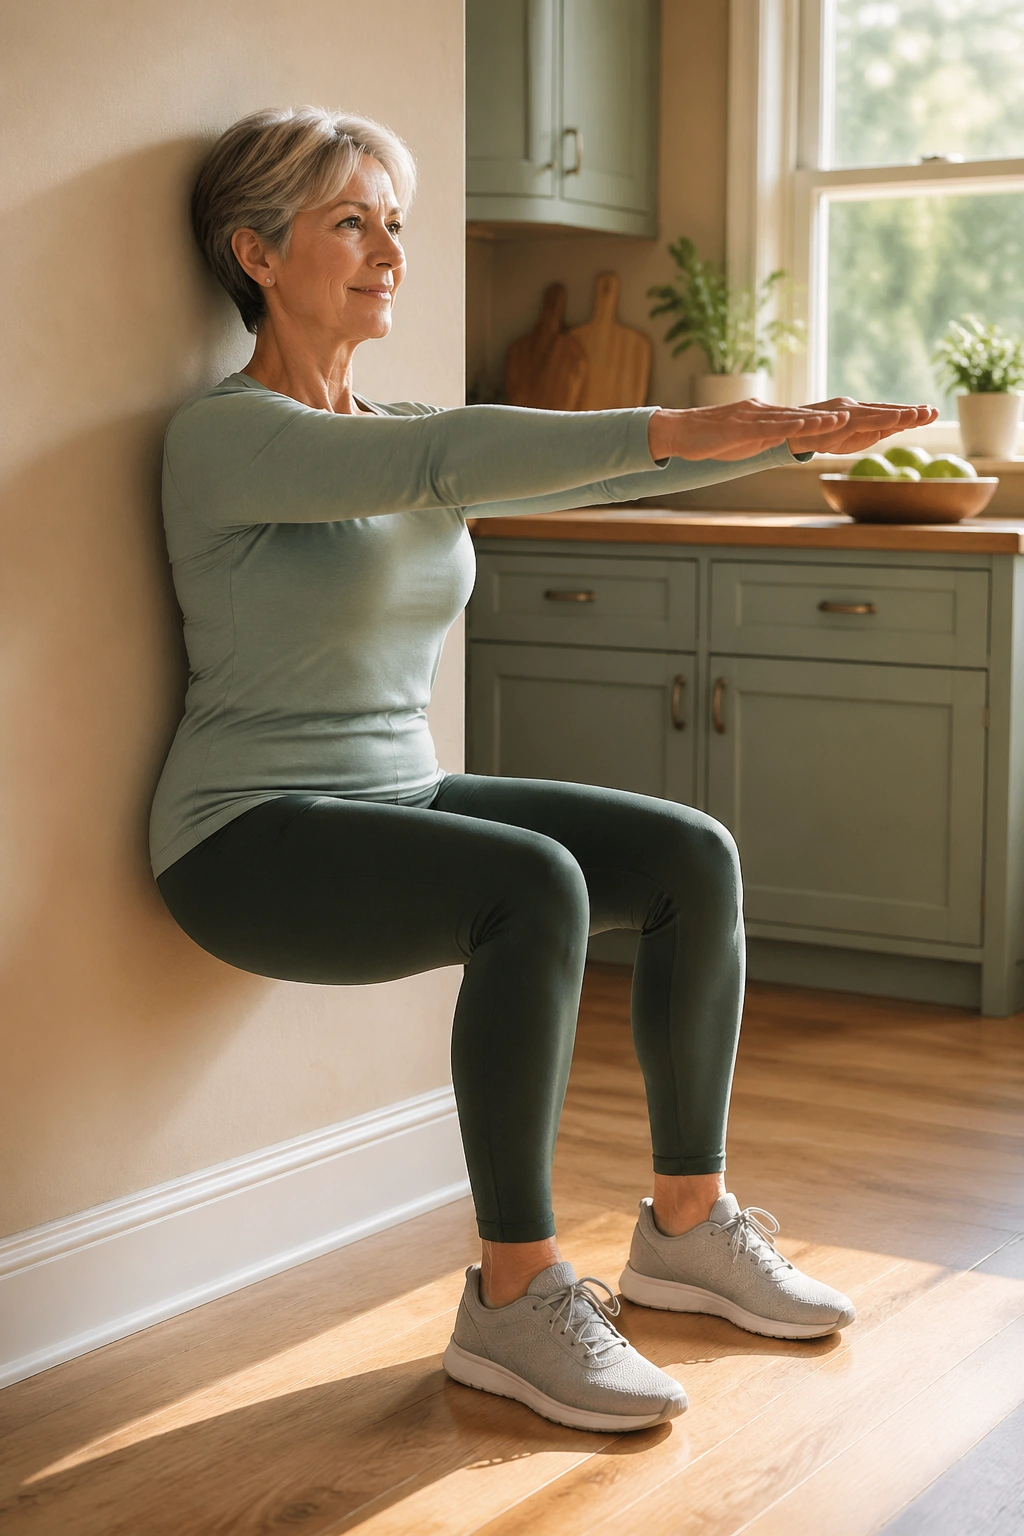
A wall sit does not need to be long to be useful. Twenty seconds done well beats a minute of fidgeting and collapsing.
Slide your back down the wall until your thighs are about halfway to parallel, or stay higher if your knees prefer it. Feet stay hip-width apart, about 12 to 18 inches from the wall. Then reach both arms forward at shoulder height, or overhead if your shoulders are happy there. That reach makes your trunk work harder without adding impact.
The goal is a steady hold, not a dramatic burn-fest. You want the fronts of the thighs to work, yes, but you also want your ribs stacked over your pelvis and your lower back gently long. If your knees ache, come up higher. If your low back arches, tuck your tailbone under a little and shorten the hold.
A good starting point is 3 holds of 15 to 20 seconds. Rest for 20 to 30 seconds between rounds. Quiet, controlled, done.
3. Standing Wall March for Balance
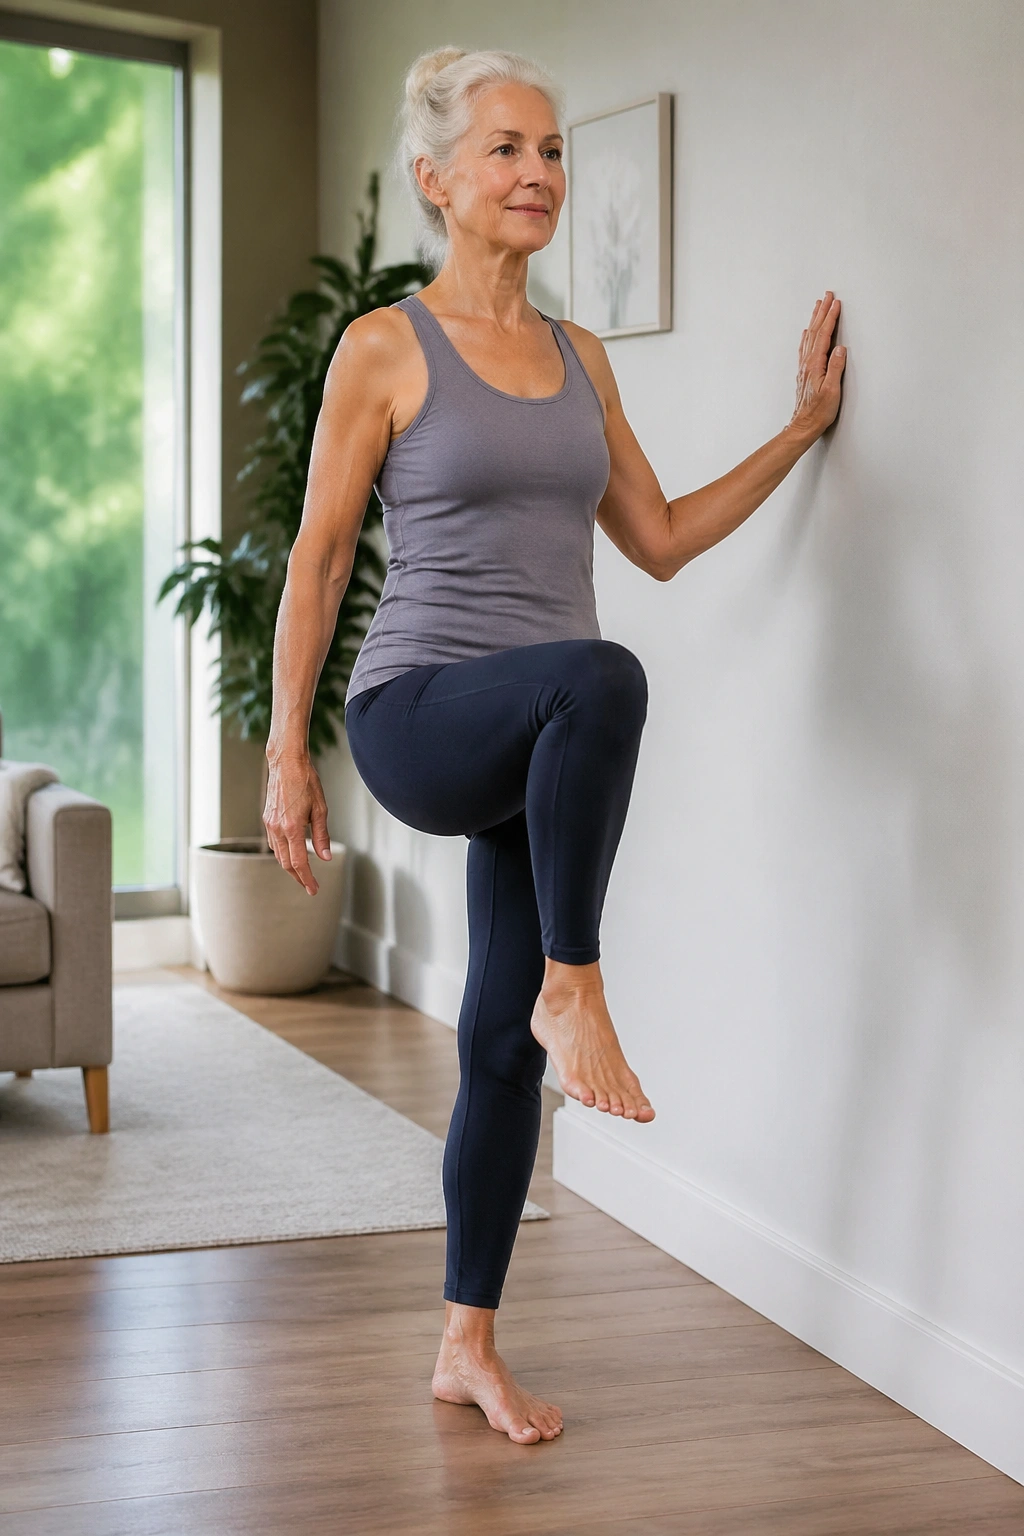
Want one move that wakes up balance, hips, and posture at the same time? This is the one.
Stand tall with your fingertips on the wall for light support. Lift one knee to hip height, or lower if that’s where control stays clean, then lower it with control and switch sides. The wall keeps you honest; it stops the body from leaning or twisting to fake the movement. That matters more than people think. A sloppy march is just a knee lift. A clean march trains the deep stabilizers around the hip.
What to watch for
- Keep your standing leg soft, not locked.
- Stay tall through the crown of the head.
- Lift the knee without hiking the hip.
- Place the foot down softly, not with a thud.
Two sets of 10 marches per side is a smart start. If balance feels shaky, keep both hands on the wall and make the lift smaller. There’s no medal for making it harder than it needs to be.
4. Feet-on-the-Wall Pelvic Curl
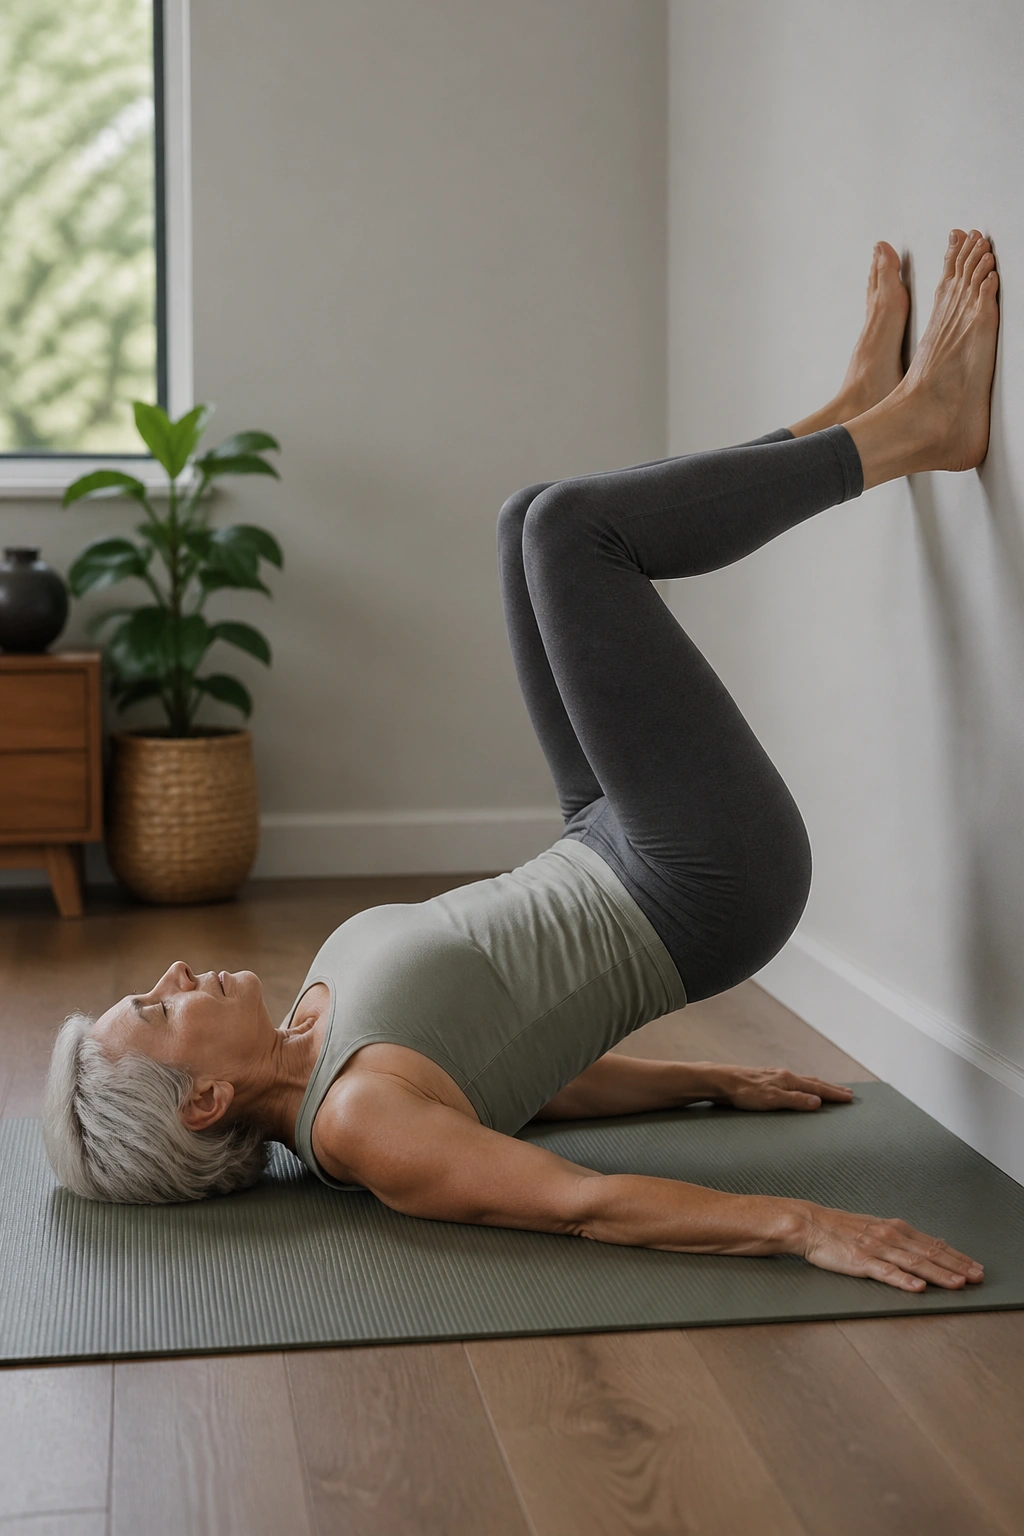
A tired low back usually likes this one.
Lie on your back with calves resting on the wall, knees bent about 90 degrees, and feet relaxed. Before you move, exhale and gently tilt the pelvis so the low back gets a little heavier on the mat. Then press lightly through your feet and lift the hips a few inches, only as high as you can keep the ribs calm and the neck loose. Lower slowly. That’s the whole game.
This move is a close cousin of the Pilates bridge, but the wall helps with alignment. Your feet stay fixed, your knees don’t wander, and you can feel whether one side is pushing harder than the other. If that happens, the wall makes it obvious. Good. You want obvious.
Make it smaller if needed
- Keep the lift low.
- Leave the hips on the mat and do pelvic tilts only.
- Place a folded towel under the head if the neck feels strained.
Eight slow lifts is enough for most people. More is not always better here. Better is better.
5. Side-Leg Press into the Wall
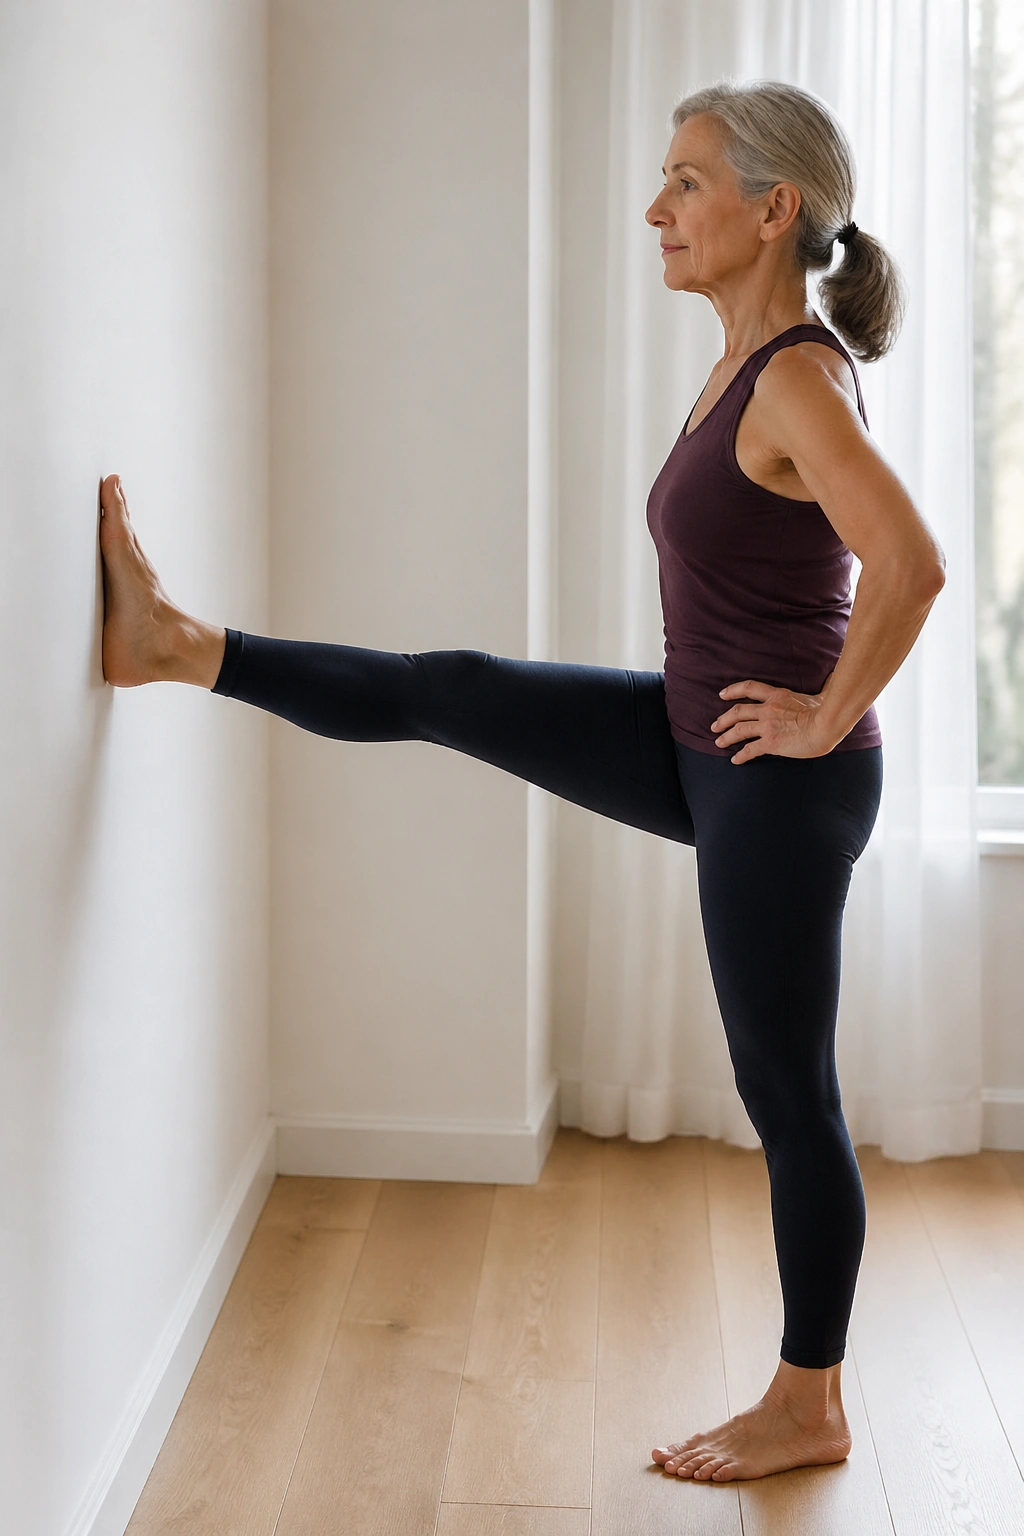
Unlike floor leg lifts that can tug on the hips, this standing version asks less of your knees and more of your glutes.
Stand side-on to the wall, about an arm’s length away, and place the outside foot flat on the floor. Bend the standing leg a little. Now press the lifted leg’s outer edge or bent knee gently into the wall, then release. You may feel the side of the hip light up fast. That’s normal. The glute medius is a small muscle with a big job, and many people ignore it for years.
Keep your torso tall and your waist long. If you lean, you’ll turn the move into a side crunch and miss the hip work. Ten controlled presses per side is plenty. Slow pressure works better than a hard shove.
A tiny detail makes this one cleaner: keep the toes of the standing foot pointed forward. If they turn out, the hip often cheats. That’s one of those annoying little truths wall work exposes right away.
6. Wall Push-Up with Deep Core Brace
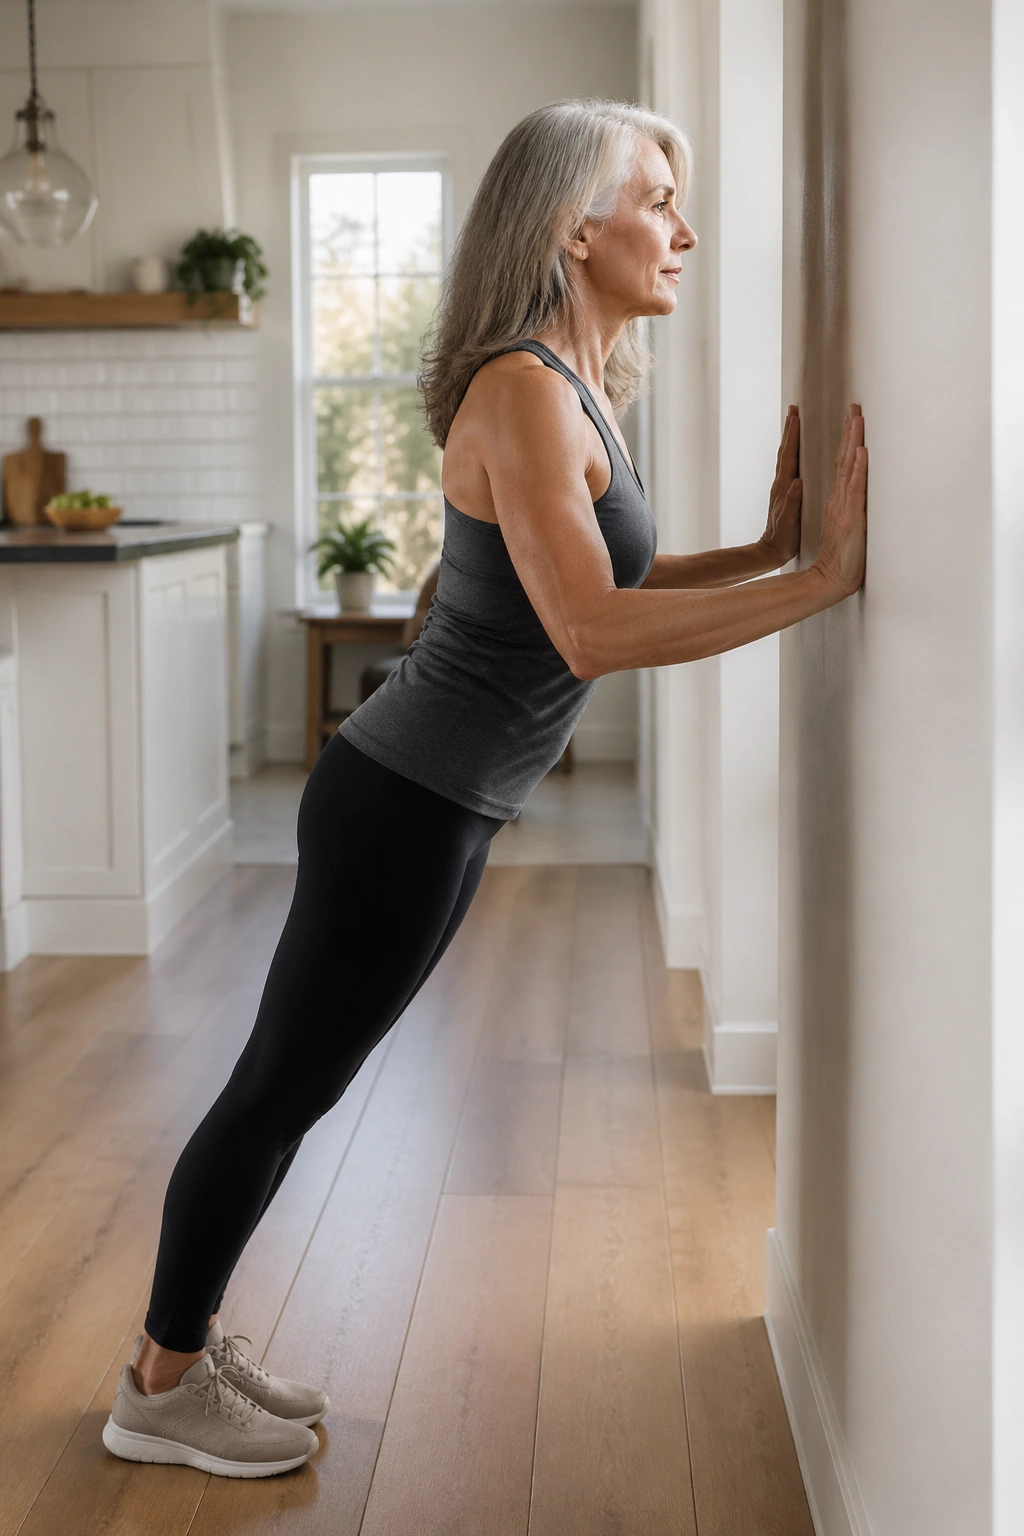
Why use a wall instead of the floor? Because it’s easier on the wrists, easier on the shoulders, and kinder when you want to learn clean form without getting pinned under your own body weight.
Stand facing the wall with hands at chest height, a little wider than shoulders. Step your feet back until your body makes a straight line from head to heels. Bend your elbows and bring your chest toward the wall, then press away. The ribs should stay quiet. The lower back should not sag. If you feel your shoulders crawling up toward your ears, you’re going too fast or standing too close.
How to use it
- Keep elbows angled about 30 to 45 degrees from the body.
- Exhale as you press away from the wall.
- Stop before the chest touches if your shoulders feel pinched.
- Use a higher hand position if wrist extension bothers you.
Do 2 sets of 8 to 12 reps. If that sounds too easy, slow the lowering phase to 3 seconds. That changes everything.
7. Wall Angels for Upper Back
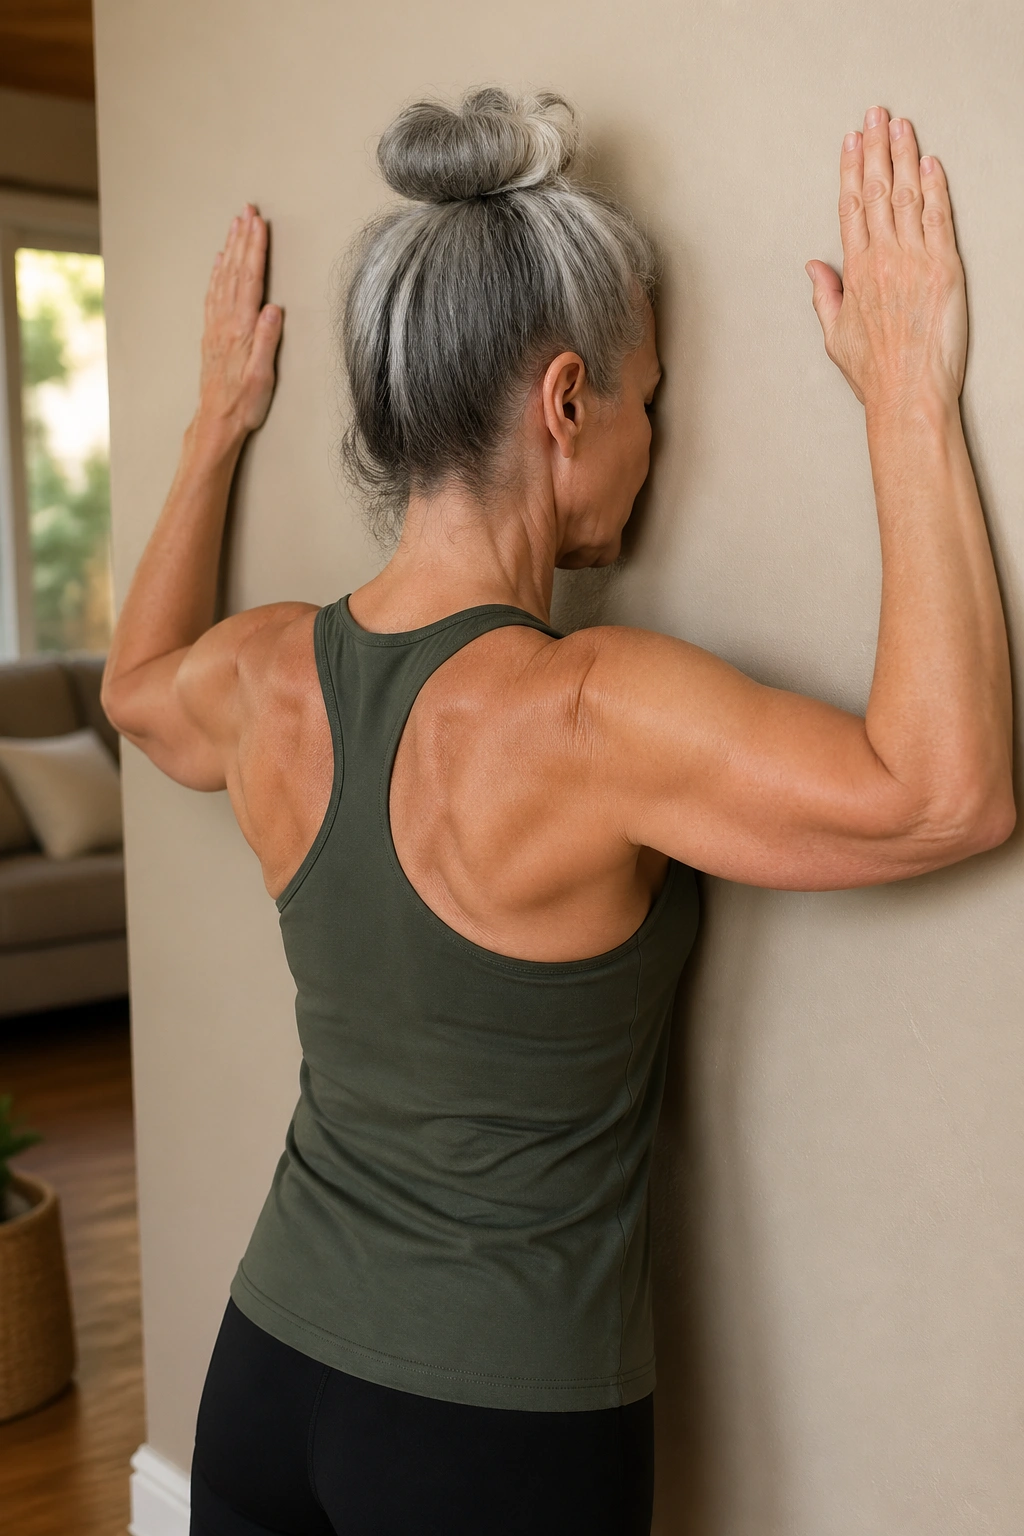
Your upper back may complain before it cooperates. That’s normal.
Stand with your back to the wall, feet a little forward, and bend your elbows so your arms make a goalpost shape. Try to keep the back of the head, ribs, and pelvis as close to the wall as your body allows. Then slide the arms up and down like you’re tracing a snow angel on dry pavement. The movement is small, and that’s the point. Big arm swings usually mean the ribs have popped open and the low back is taking over.
One small fix
If your wrists or shoulders don’t like the full shape, keep the elbows lower and work in a smaller range. If your low back arches, move the feet a few inches farther from the wall. That usually makes the whole thing easier.
Wall angels are not flashy. They’re better than flashy. After a few reps, the chest feels less tight and the shoulder blades settle down a bit. Eight slow repetitions is enough to feel the shift.
8. Calf Raise and Ankle Mobilizer
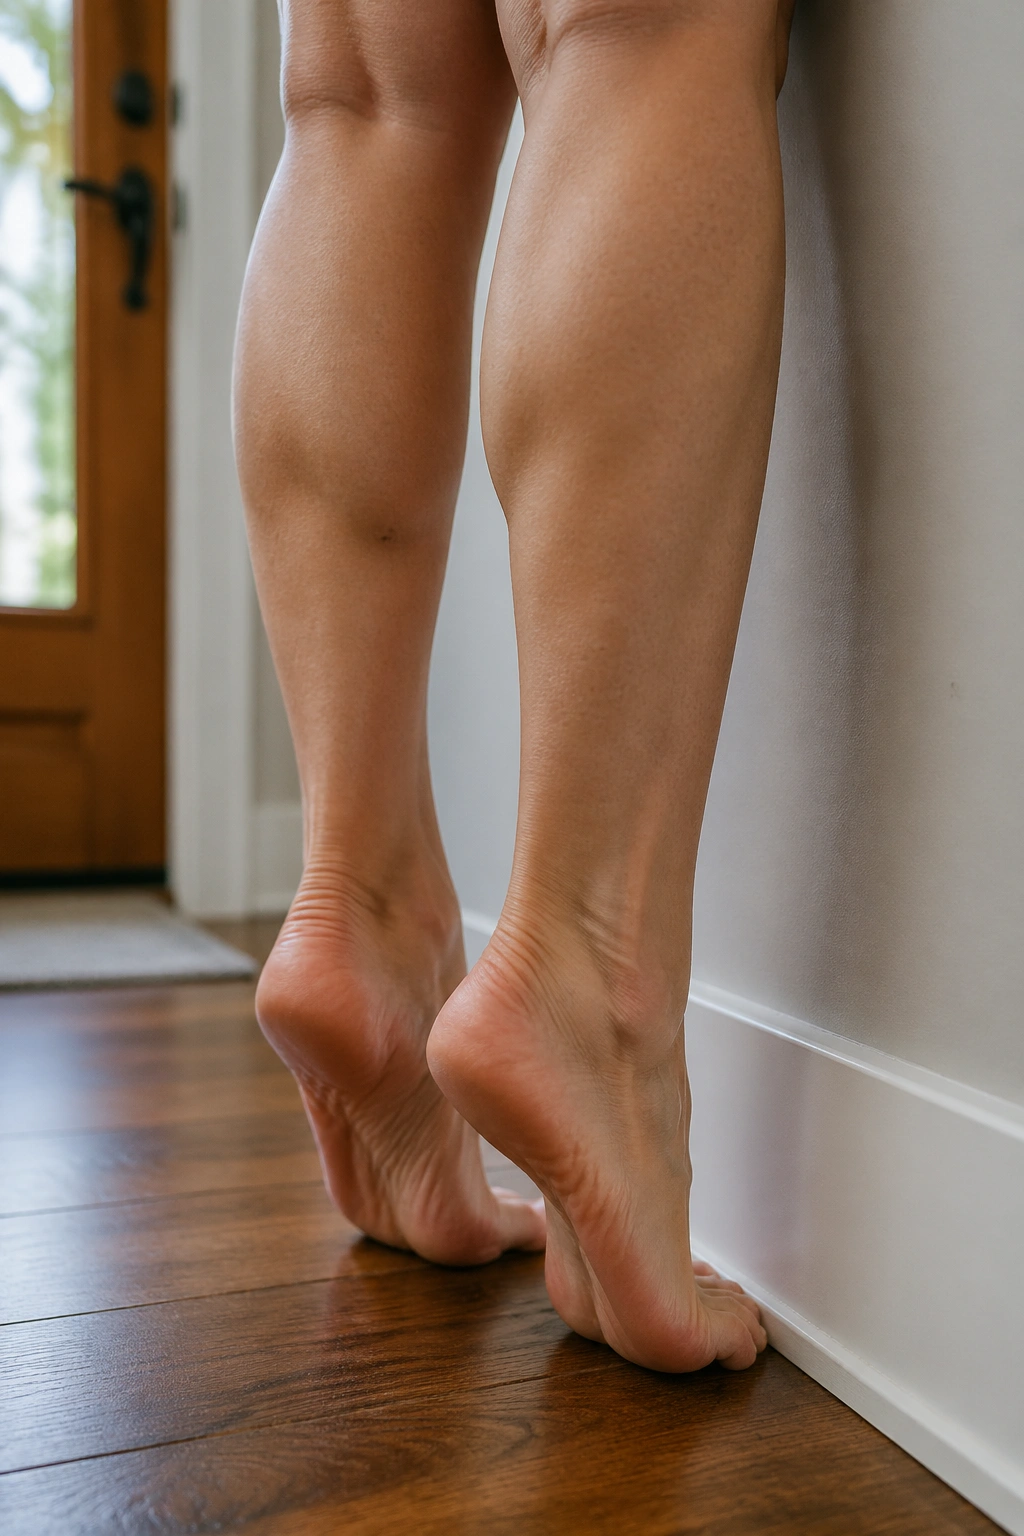
This one looks simple. Do not skip it.
Stand with one or both hands on the wall for balance. Lift your heels slowly, hold for a beat at the top, then lower with control until the heels kiss the floor again. That controlled descent matters. It trains the calves, but it also teaches the ankles to absorb and manage weight. For balance and walking, that is a bigger deal than most people realize.
Keep the weight spread across the big toe, little toe, and heel. If you roll to the outside of the foot, the ankle works in a messy way. Ten to 15 raises is a solid dose. If you want more challenge, pause at the top for 2 seconds and lower for 3.
Your calves may feel warm fast. Good. That heat is useful, especially if your feet tend to feel stiff when you first stand up in the morning. A few slow raises before a walk can change how the whole leg chain feels.
9. Incline Wall Plank Hold
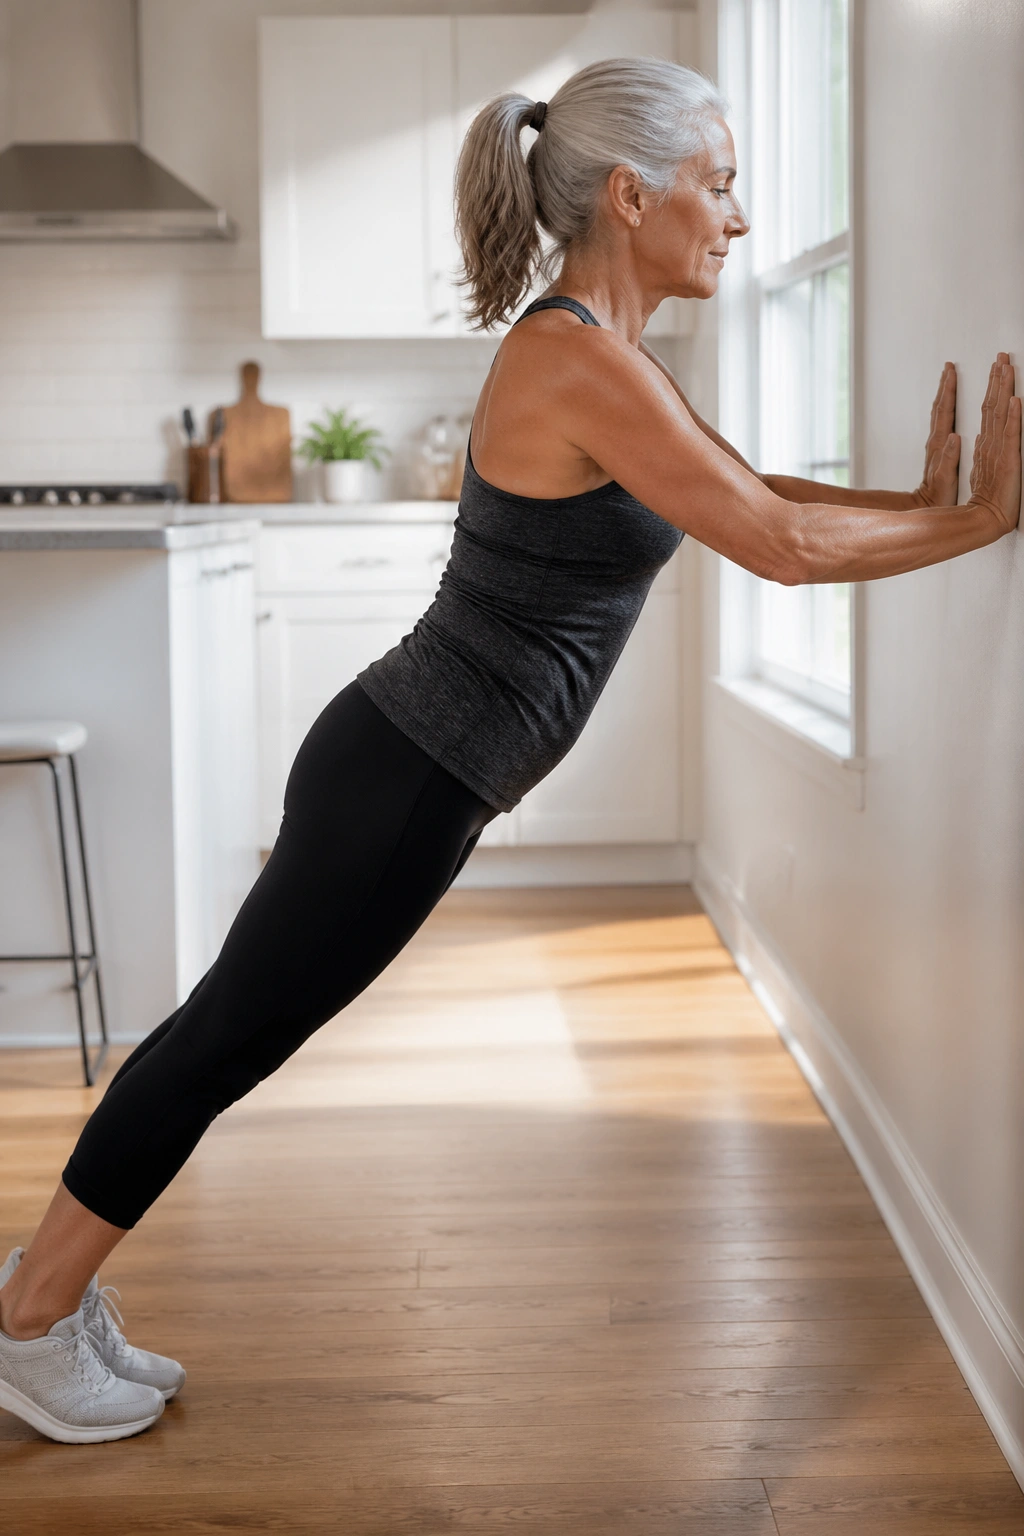
A plank doesn’t have to live on the floor.
Place your hands on the wall at chest height, then walk your feet back until your body forms a long line. Brace the abdomen gently as if you’re zipping up a snug jacket. Hold for 10 to 20 seconds to start. The neck stays long, the ribs stay down, and the glutes stay lightly awake. If you feel the low back, ease off and bring your feet closer.
What good form feels like
- Pressure through both palms, not just the heels of the hands.
- Shoulders stable, not pinched.
- Core firm without holding your breath.
- Legs active, not locked straight like sticks.
This is a smarter choice than a floor plank for many women over 60 because the angle is friendlier to the wrists and the shoulders. It also teaches body tension without making the move feel like a wrestling match. Keep the holds short. Quality matters more than time here.
10. Standing Side Bend and Reach
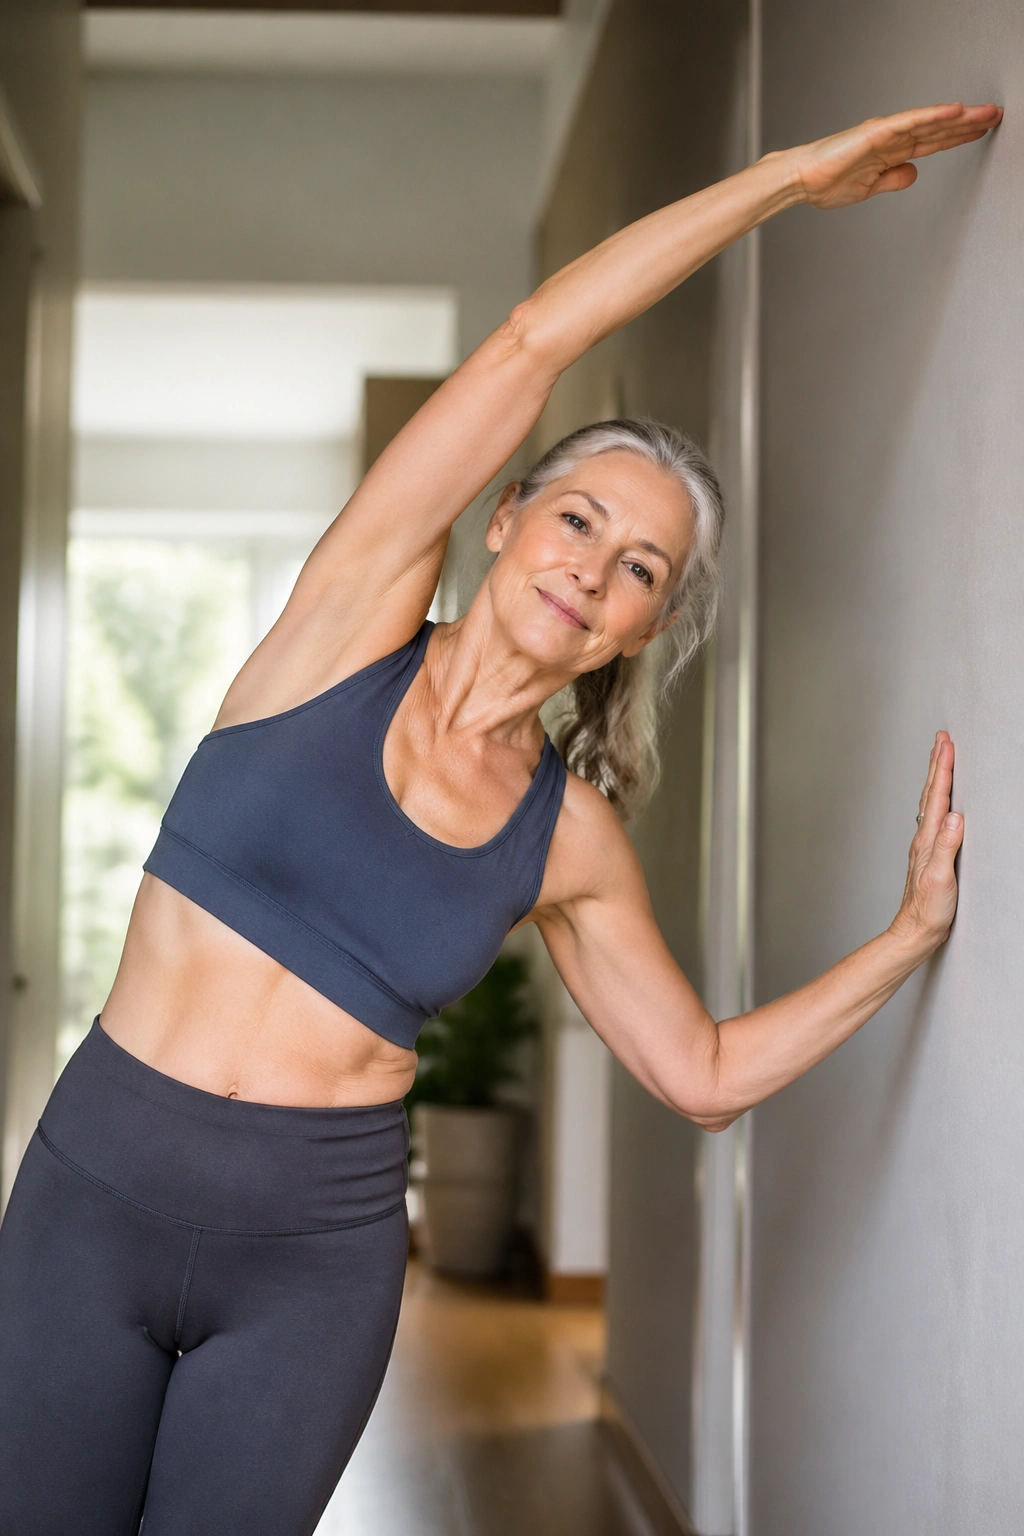
A side bend on the wall is one of those moves that looks gentle and sneaky at the same time.
Stand sideways with one hip close to the wall and one hand resting lightly on it. Let the other arm reach overhead, then bend away from the wall in a smooth arc. Don’t collapse through the waist. Think length first, bend second. You should feel the side body open and the ribs expand as you breathe into the stretched side.
If your shoulder feels cranky, keep the arm lower and reach diagonally instead of straight up. If your balance is unsteady, widen your stance. Simple fixes usually work better than forcing the textbook shape.
Six slow bends per side is enough. Use the exhale to deepen the reach a little. Not a lot. Just enough to feel the ribs move. The wall keeps the movement from becoming sloppy, which is exactly why it’s so useful.
11. Seated Wall Spine Twist
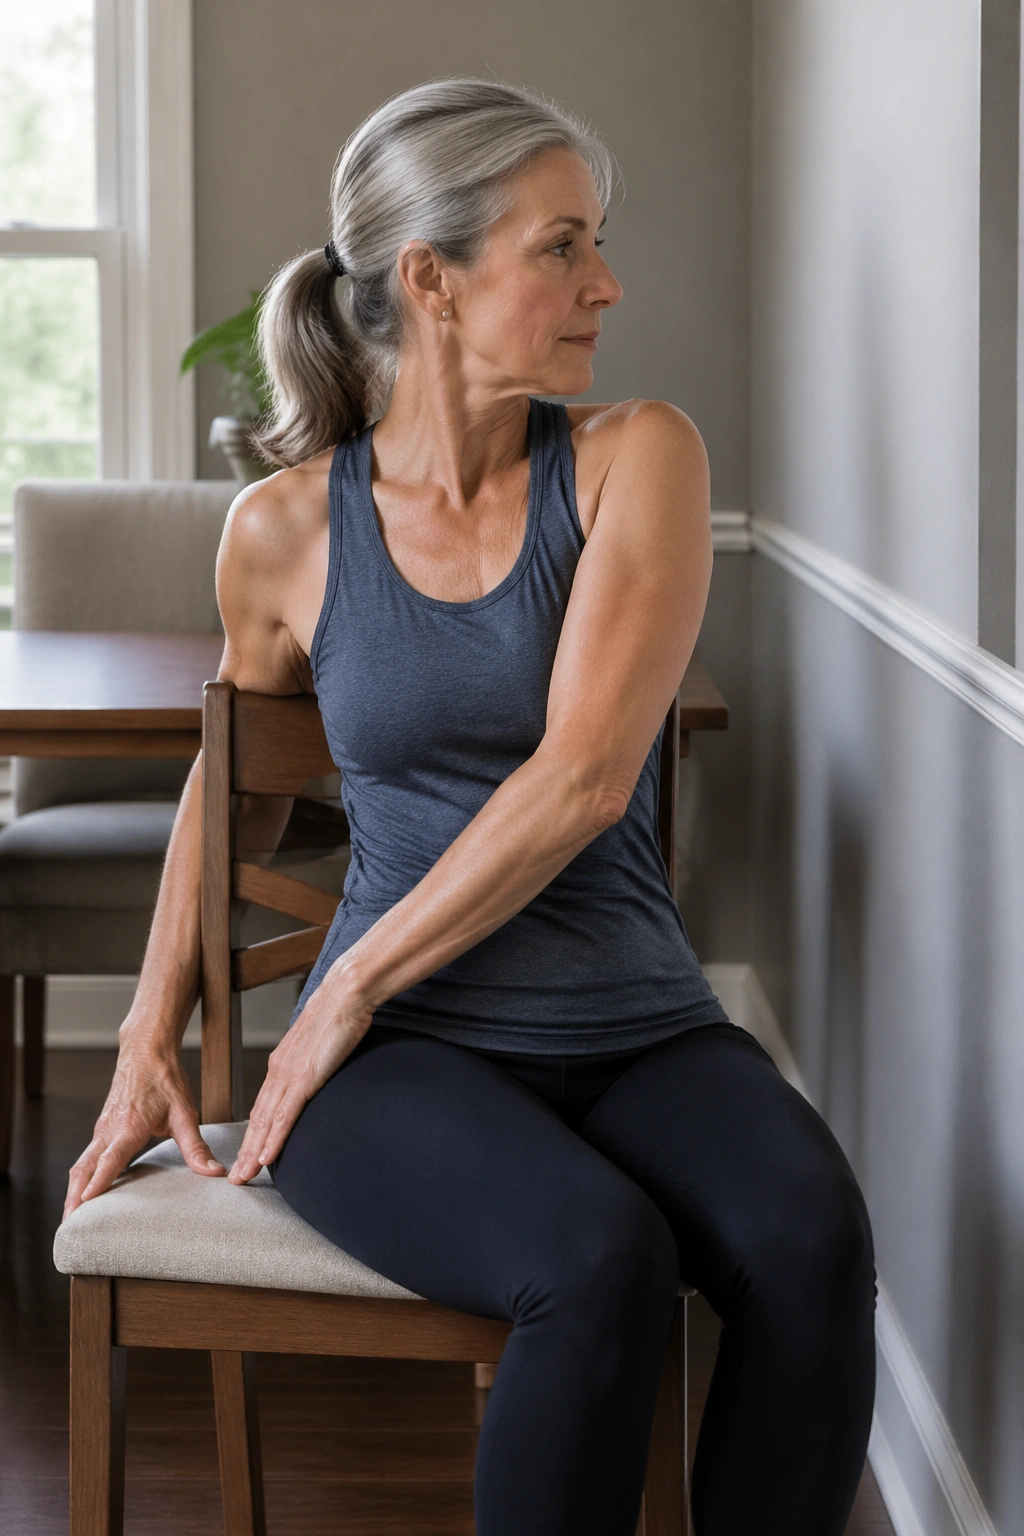
Twisting while seated can be kinder than twisting on the floor, especially if your hips and knees prefer a little more room.
Sit on a sturdy chair with your back tall and one side close to the wall. Keep both feet flat. Rotate your ribcage toward the wall, then back to center, letting the shoulders stay relaxed. The twist should come from the middle of the back, not from yanking the neck or swinging the knees. That distinction matters. A real Pilates twist is controlled. A fake one looks busy and does very little.
What to feel
- A gentle turn through the ribs.
- The pelvis staying grounded.
- The neck staying long.
- The breath getting fuller on the exhale.
If you want more challenge, place the hands across the chest instead of on the thighs. If your spine feels tight, make the turn smaller and slower. Four to six rotations each side is plenty. This is one of those exercises that looks almost too easy until you realize how stiff you were.
12. Wall Squat with Heel Lift
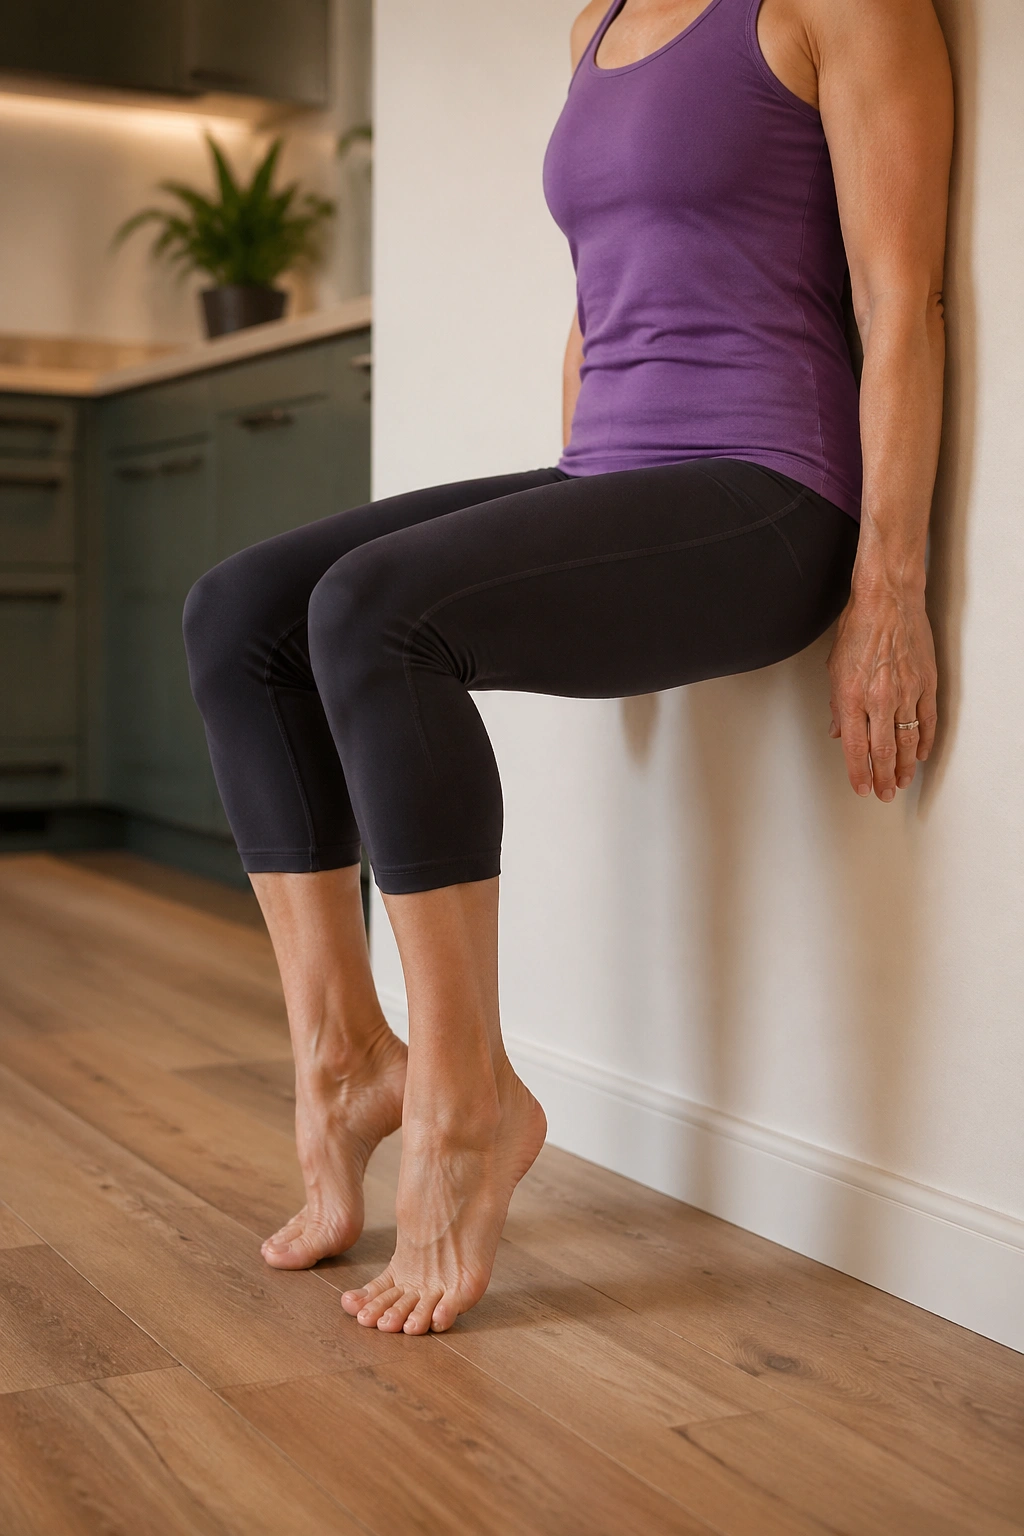
If you want a leg burner that still feels controlled, this is the one.
Slide into a shallow wall squat, not a deep one. Then lift both heels an inch or two off the floor, or alternate heels if both at once feels too much. The calves, quads, and core all have to stay organized. That organization is the secret. The movement is small, but it asks the body to hold its shape while the support under the feet changes.
Keep your knees tracking over the second and third toes. If they drift inward, come up higher. If your ankles cramp, lower the squat and shorten the hold. Simple adjustments keep the move useful instead of miserable.
Good reasons to keep this one
- It loads the legs without jumping.
- It builds calf strength and ankle control.
- It gives the hips a clean line to work from.
- It can be scaled up or down fast.
Try 6 to 8 heel lifts, then rest. You should feel work in the thighs and calves, not pain in the knees.
13. Wall Hamstring Stretch with Core Set
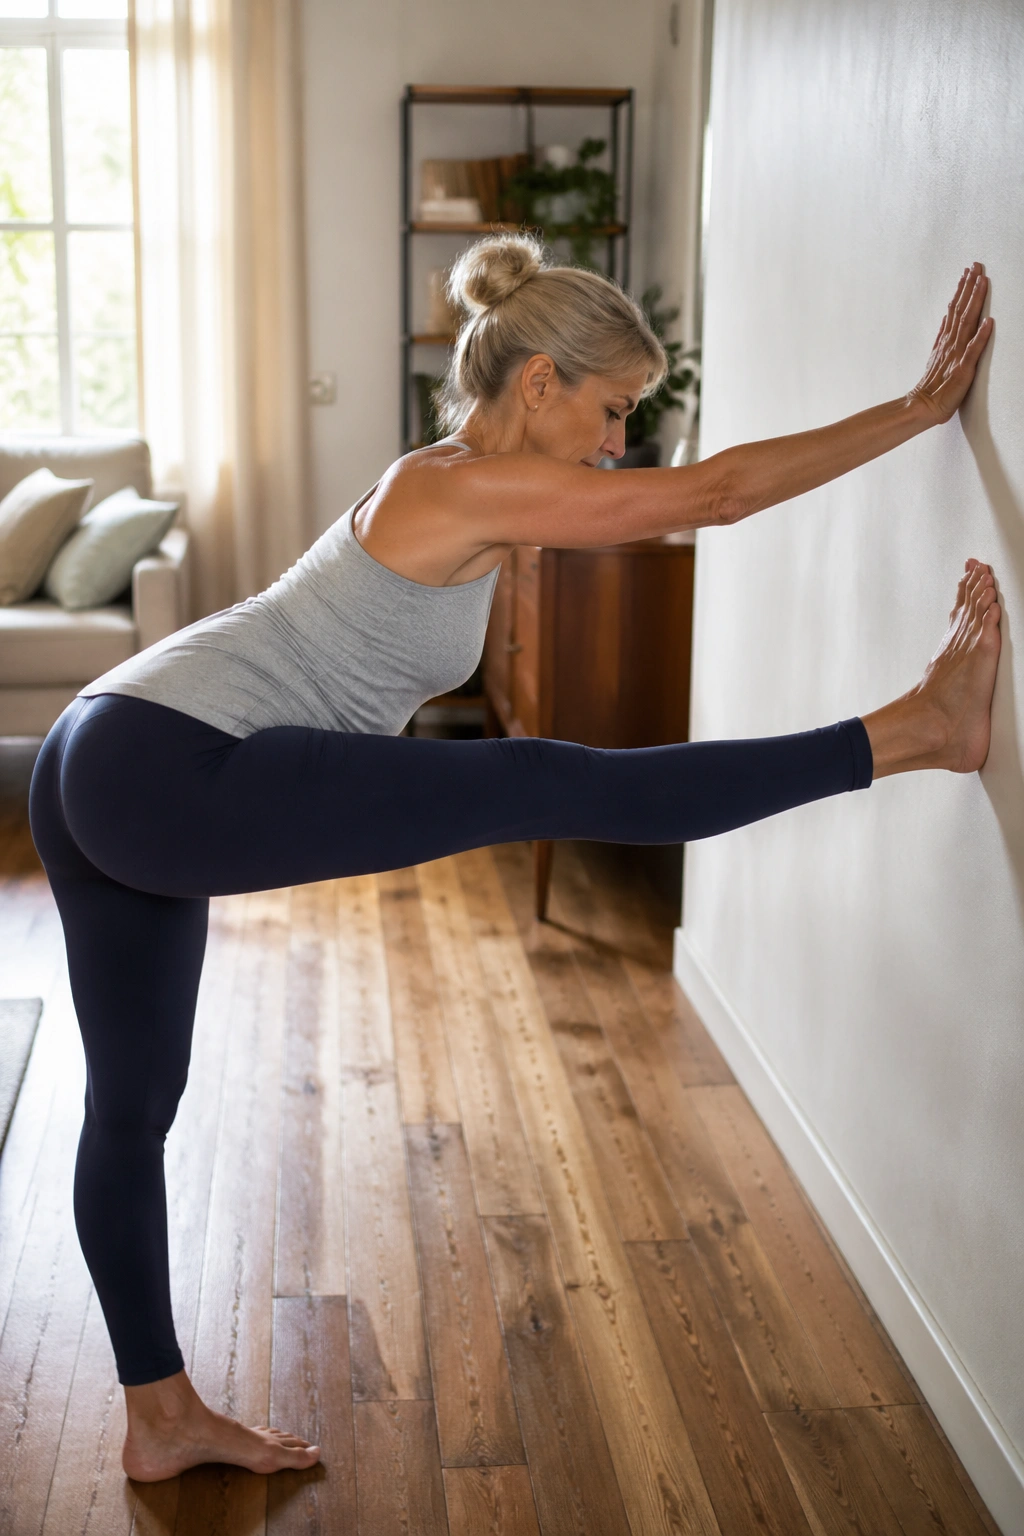
The back of the leg can feel tight for reasons that have nothing to do with age and everything to do with sitting too much.
Place one heel on the wall at a comfortable height, usually below hip level, and keep the standing leg slightly bent. Hinge forward from the hips with a long spine until you feel a stretch along the hamstring. Don’t round hard through the back just to get lower. That usually steals the stretch from the right place and irritates the low back.
Breathe into the back of the thigh for 20 to 30 seconds. Then switch sides. If you need more support, keep a hand on the wall or a chair. No shame in that. Support lets you aim the stretch where you want it.
A slow hamstring stretch helps after leg work, but it also helps before a walk if the back of the legs feels like it’s pulling everything else out of line. Keep it gentle. A hamstring stretch should feel like release, not a contest.
14. Single-Leg Balance Tap Drill
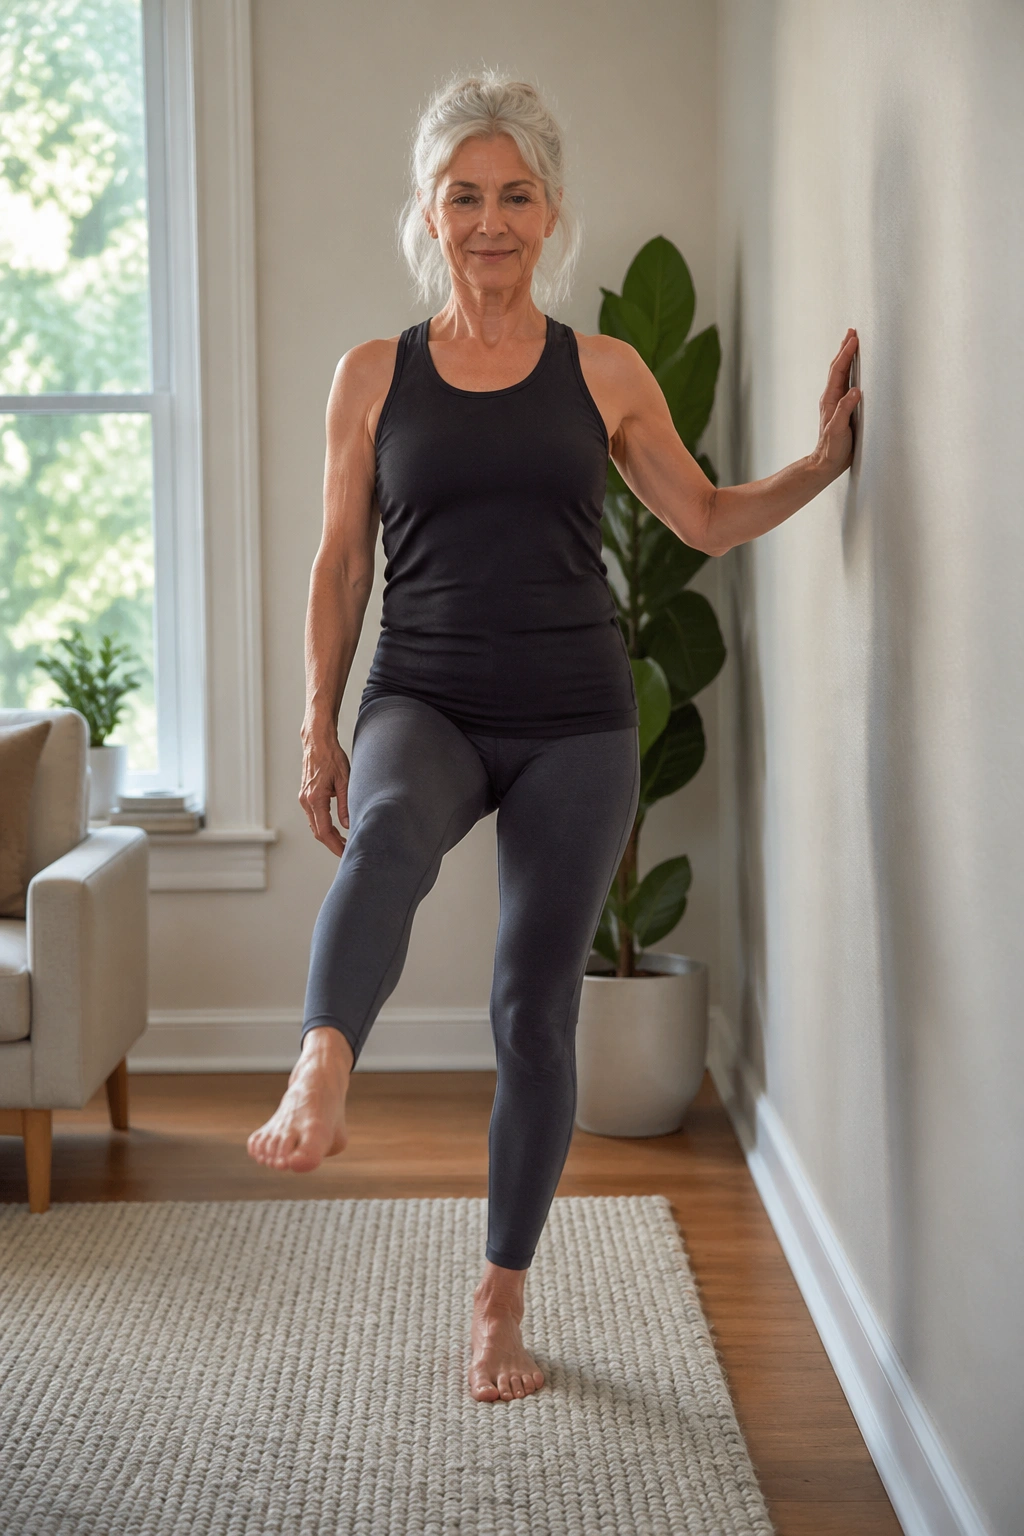
Can you stand on one leg for five seconds without gripping the wall? If not, this drill is the place to begin.
Stand sideways or facing the wall with one hand hovering near it, not hanging on it. Lift one foot a few inches off the floor and tap the toe forward, then to the side, then behind you. Return to center after each tap. The standing leg has to stabilize the ankle, knee, and hip while the body stays upright. That’s real balance work, not just a pose.
How to make it easier
- Keep both fingertips on the wall at first.
- Make the taps tiny.
- Bend the standing knee slightly.
- Breathe out on each tap.
Start with 3 taps in each direction per side. The win here is control, not a high foot. If you wobble, pause and reset. Everyone wobbles. Some people just hide it better.
15. Glute Kickback Press
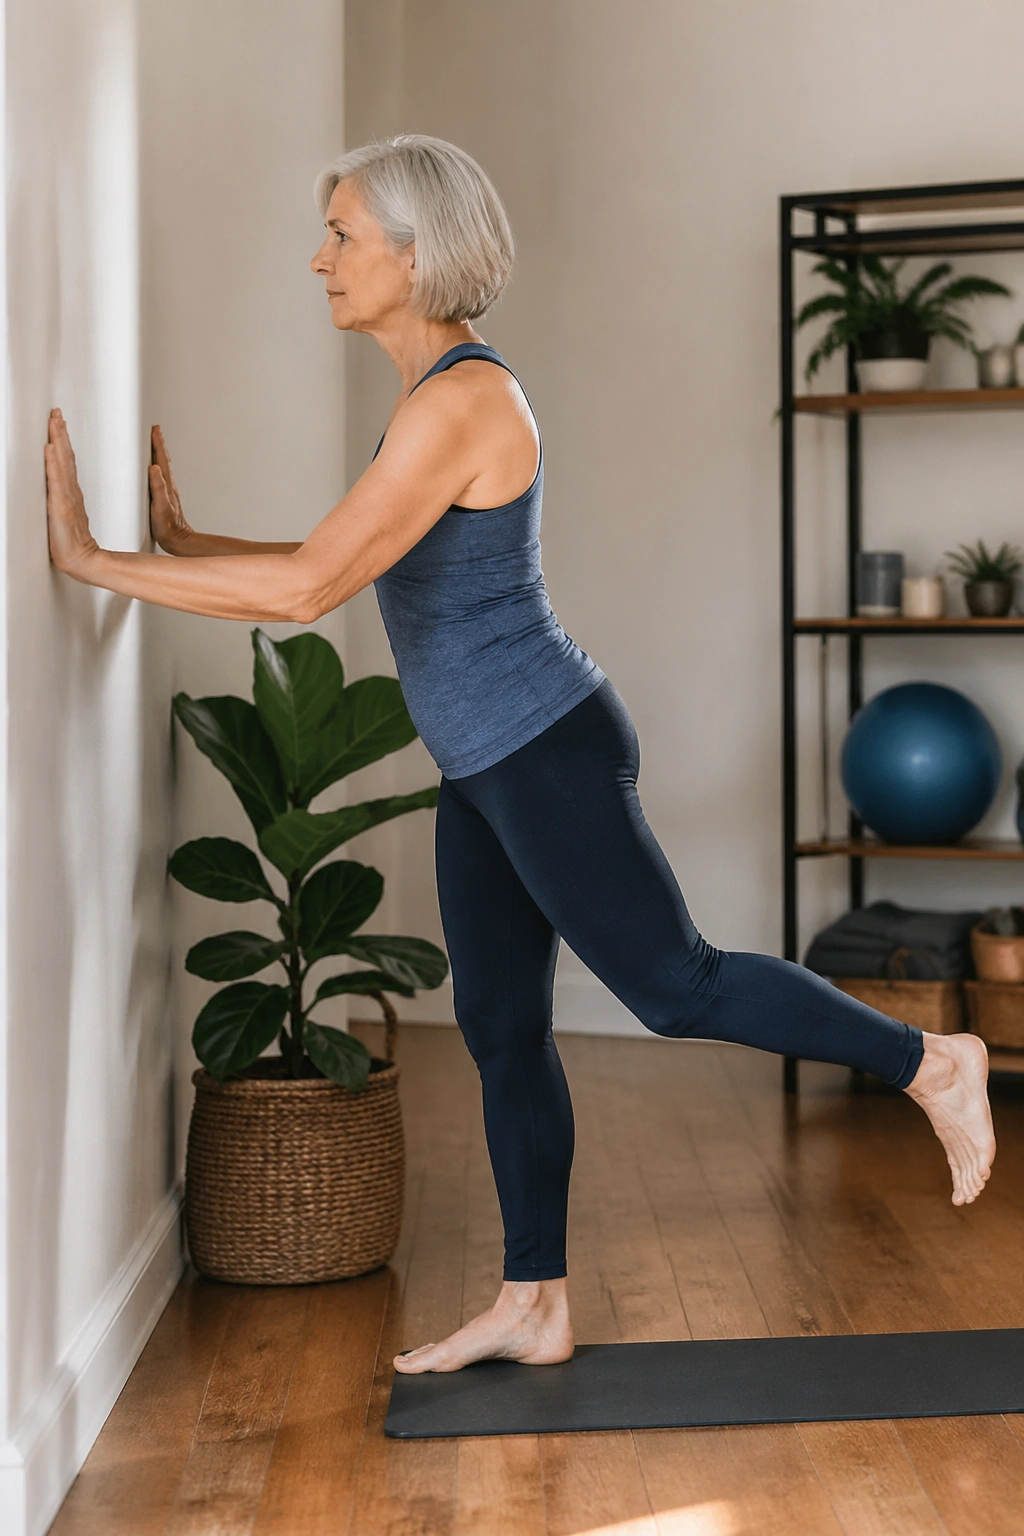
The back of the hip often wakes up late.
Face the wall and place your hands lightly against it. Shift your weight onto one leg and send the other leg straight back a few inches, then return. You can keep the working knee soft or straight, depending on what feels cleaner in your low back. The aim is to feel the glute, not the lumbar spine. If your low back takes over, shorten the range immediately.
A small kickback done with control is worth more than a big swing. Tighten the belly a bit, keep the pelvis square, and imagine the standing hip as the anchor. Eight to 12 reps per side works well. If you want more challenge, pause for 2 seconds with the leg extended.
This one pairs nicely with the wall march. One wakes up the front-side balance pattern, the other hits the back side. Together, they cover more ground than people expect.
16. Wall Mermaid Side Reach
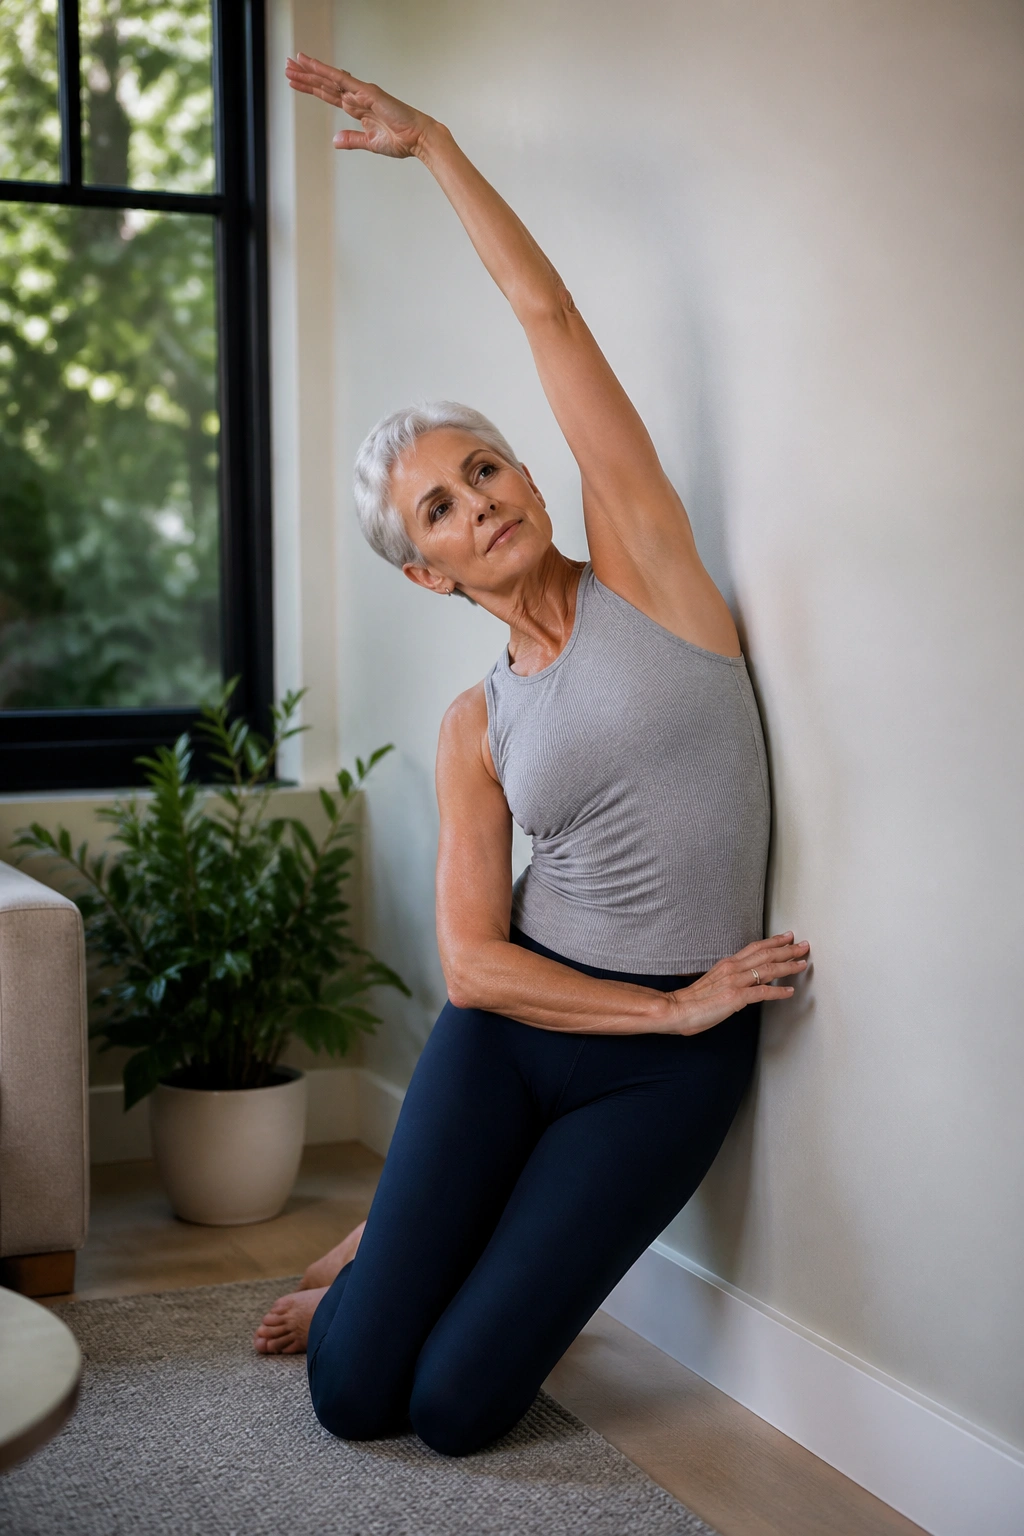
This is the calming move people keep ignoring.
Sit or stand beside the wall, then slide one arm overhead and arc the body gently away from the wall. The ribs open. The side waist lengthens. The breath gets a little slower and fuller, which is useful after all the strength work. If you’ve been tense through the shoulders or upper back, this is a clean way to unwind without flopping around on the floor.
You do not need a huge range. A small reach with a long exhale often feels better than trying to bend far. If the shoulder grumbles, keep the arm lower and think more about length through the side body than the shape of the arm.
I like this one at the end of a session because it leaves the body feeling organized, not scattered. Three slow reaches per side, held for one breath each, is enough. More is fine if it feels good. But three is enough to matter.
17. Seven-Minute Wall Pilates Flow
A single wall workout is nice. A short flow is better when you want something you’ll actually repeat.
Start with the wall roll-down for 4 repetitions. Move into a shallow wall sit for 20 seconds, then stand tall and do 10 marching steps. Follow that with 8 wall push-ups, 8 calf raises, and 6 standing side bends per side. If your body wants a little more, finish with the seated wall twist and a hamstring stretch.
A simple order
- Wall roll-down
- Wall sit
- Standing march
- Wall push-up
- Calf raise
- Side bend
- Seated twist
- Hamstring stretch
That little circuit covers the big jobs: posture, legs, balance, upper body, and flexibility. It’s also easy to remember, which matters more than people admit. Fancy plans fail when they’re annoying. A plain sequence done three times a week tends to beat a complicated one that never leaves the page.
For women over 60, the wall is not a crutch. It’s smart feedback. It lets you train with enough support to stay steady and enough resistance to feel your muscles wake up. That combination is hard to beat, and honestly, it’s the reason wall Pilates keeps earning a spot in real routines.
