



Wall Pilates is kinder than most people expect, and that is exactly why it works so well for women over 50. A wall turns into a steady backstop, a form checker, and a place to press against when balance feels a little wobbly or the floor feels too far away.
That matters more than people think. The right wall Pilates workouts for women over 50 do not ask for deep bends, fast transitions, or brute force. They ask for control, breath, and a little patience, which is a much better deal for knees, hips, shoulders, and an overworked lower back.
The wall also tells on you. If your ribs flare, your hips shift, or one shoulder climbs higher than the other, the wall makes it obvious in a way a mirror sometimes misses. I like that. It keeps the work honest without feeling punishing, and that honesty is gold when you want strength that shows up in everyday life — carrying groceries, climbing stairs, standing taller, getting up from a low chair without that little grunt we all know too well.
You do not need a full studio setup. A clear wall, a mat, and enough space to step back are enough for a smart, joint-friendly session. Start with the spine, move into the hips and legs, then finish with balance and breath. Small moves. Real payoff.
1. Wall Roll-Downs for Women Over 50
Wall roll-downs are one of those quietly brilliant Pilates moves that look almost too simple until you do them properly. The wall gives you a reference point for each inch of movement, so you can feel where your spine gets stiff and where your hamstrings start to complain.
How to do it
Stand with your back a few inches from the wall, feet hip-width apart, and knees softly bent. Inhale to grow tall, then exhale, tuck your chin slightly, and peel your spine forward one section at a time until your hands slide down your thighs. Go only as far as feels smooth, then roll back up slowly, stacking your spine bone by bone.
- Do 5 to 8 slow reps.
- Keep your knees bent the whole time.
- Do not yank your head down; let the neck follow the spine.
- Stop before you feel a sharp pull in the low back.
The magic here is control, not range. If you move too fast, the wall becomes meaningless and you just fold. If you move slowly, you start to notice the difference between tight hamstrings, stiff upper back, and an overgripping neck. That kind of awareness pays off in every other move on this list.
2. Wall Sit with Arm Reaches
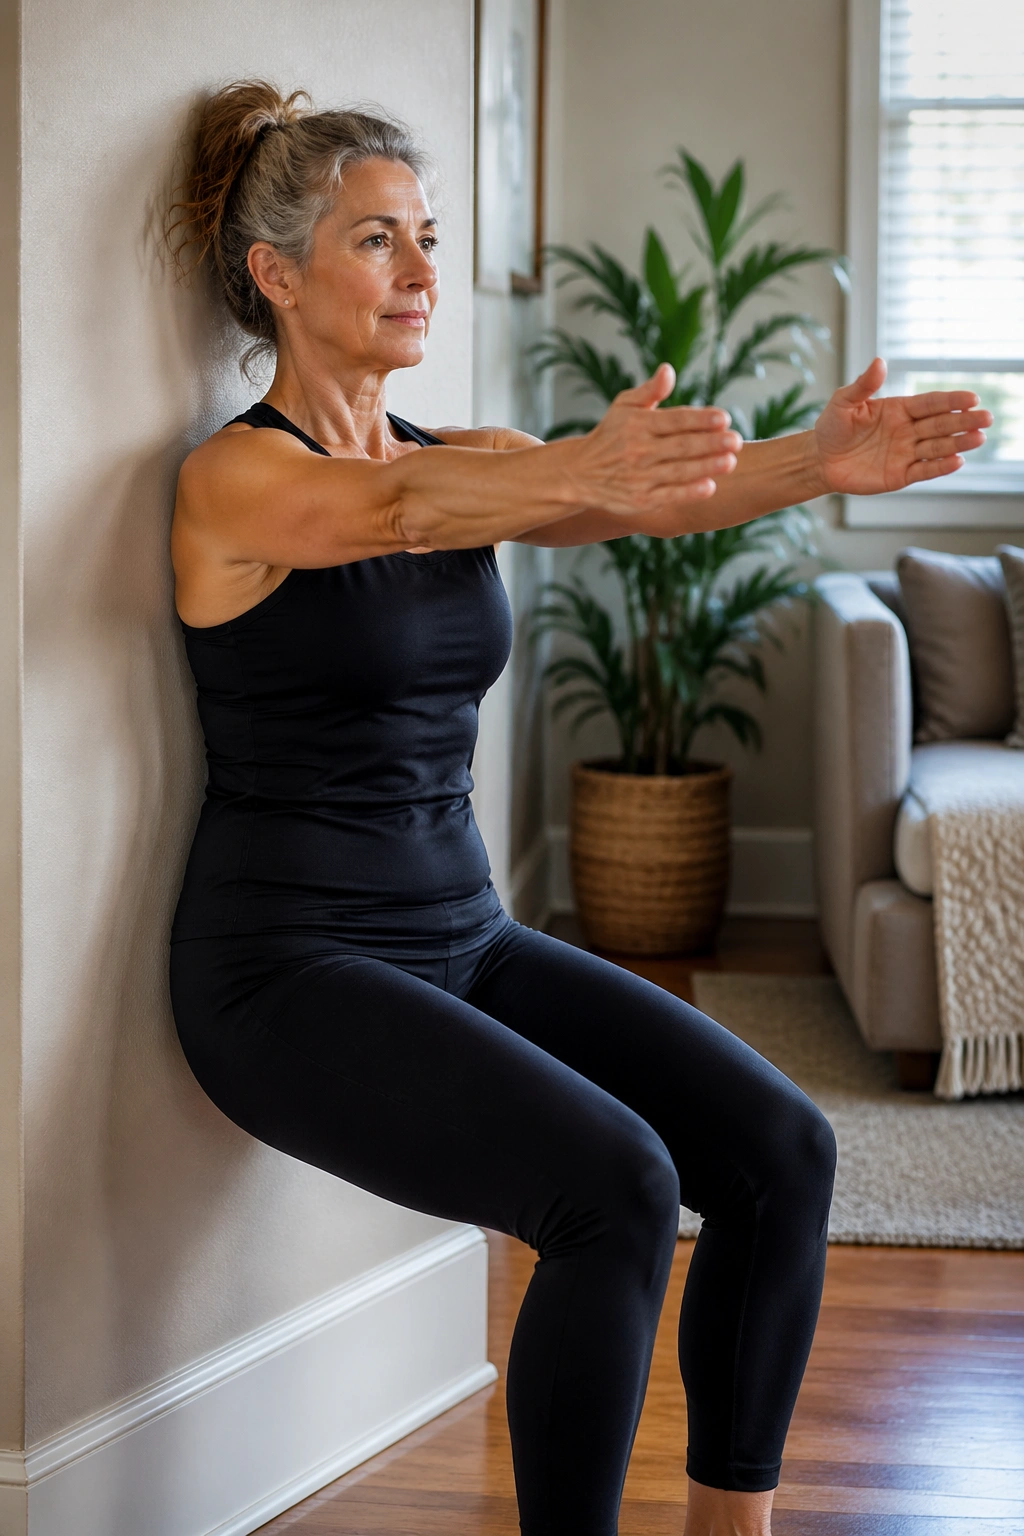
Can a wall sit feel graceful? Surprisingly, yes — if you keep the depth sane and use the arms well. This is a leg burner, sure, but it also teaches posture, breathing, and how to keep your ribs from popping forward when your thighs start working.
Stand with your back against the wall and walk your feet forward until your knees bend to about 60 to 90 degrees, depending on what your joints like. Press the back of your body into the wall, then reach your arms forward at shoulder height or overhead if your shoulders allow it. Hold for 20 to 40 seconds, breathe steadily, and keep your weight even through both feet.
If your knees are cranky, sit higher. No medal for suffering.
The arm reach changes the whole exercise. It brings the upper body into play and makes the core work harder to stop you from arching. That’s the part I like most. A wall sit is never just about the thighs.
3. Standing Pelvic Tilts Against the Wall
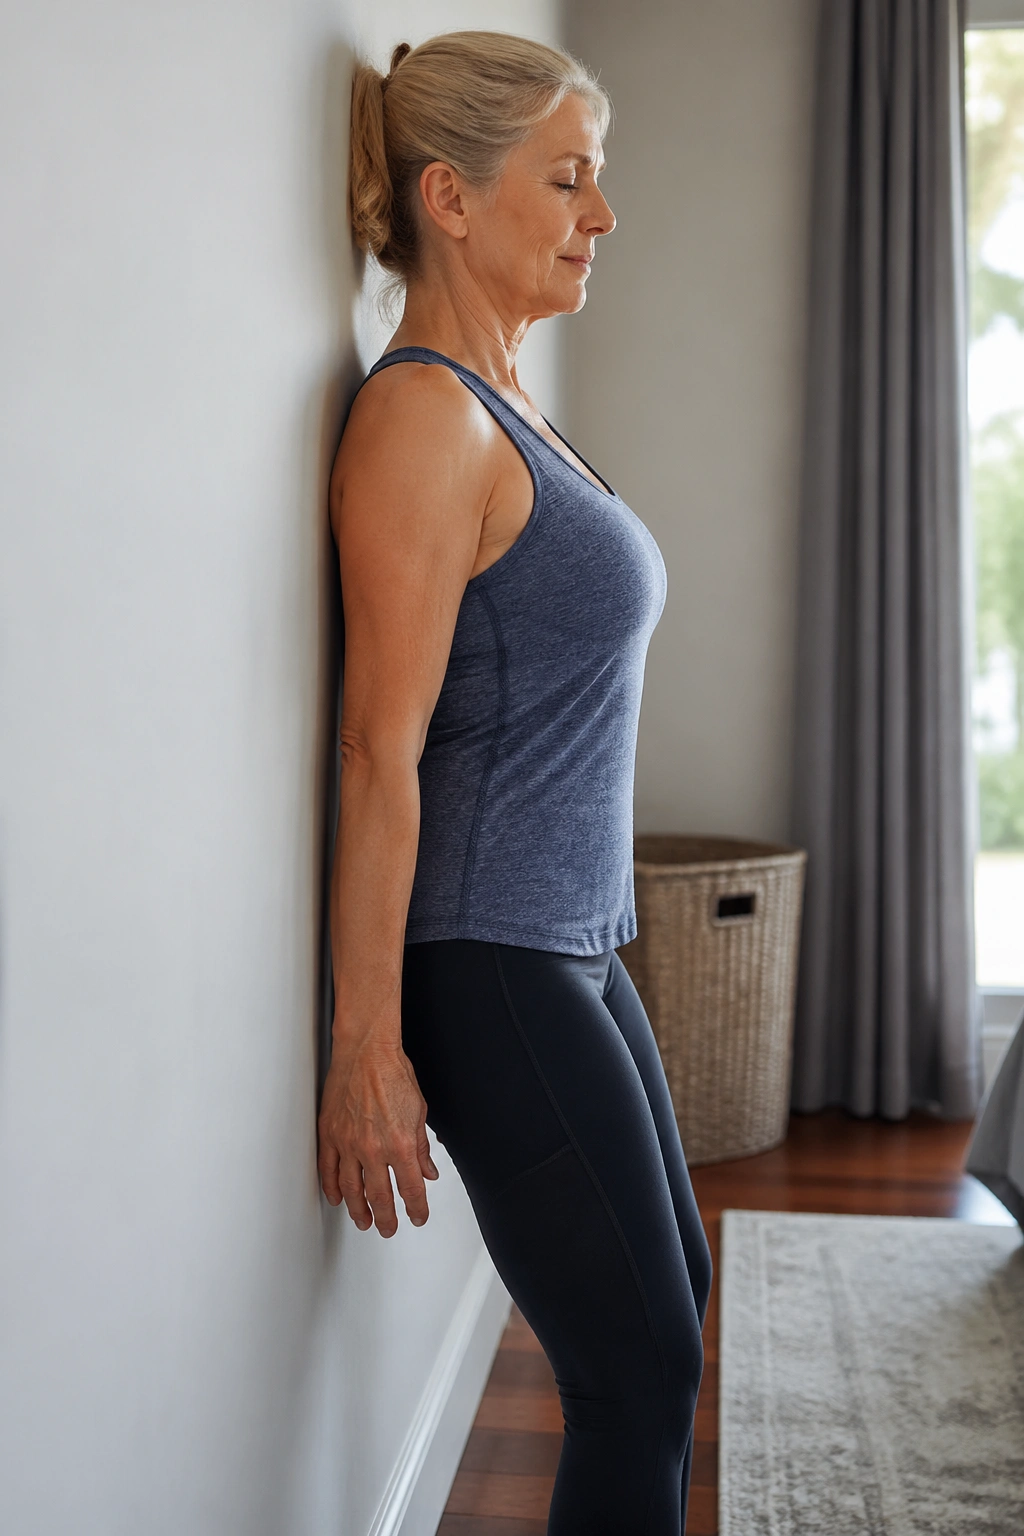
This move is small, and that is the point. Standing pelvic tilts teach your pelvis where neutral actually lives, which sounds boring until you realize how many people spend the day with a tucked tail, a pushed belly, or an exaggerated low-back curve.
Stand with your back against the wall, feet about a foot away, knees soft. Gently flatten your low back toward the wall by tipping your pelvis under on an exhale, then release to a more neutral shape on the inhale. Keep the movement tiny. You are not rocking your whole body; you are learning control at the base of the spine.
What to watch for
- Your ribs should stay calm, not flare.
- Your glutes should assist, not clamp.
- Your shoulders should stay relaxed and heavy.
Do 8 to 10 slow tilts. If you feel the front of your hip pinching, narrow the range. That usually means the movement is getting driven by the wrong muscles. The goal is a clean, gentle reset, not a dramatic tuck-and-release performance.
4. Wall Bridge for Glutes and Hamstrings
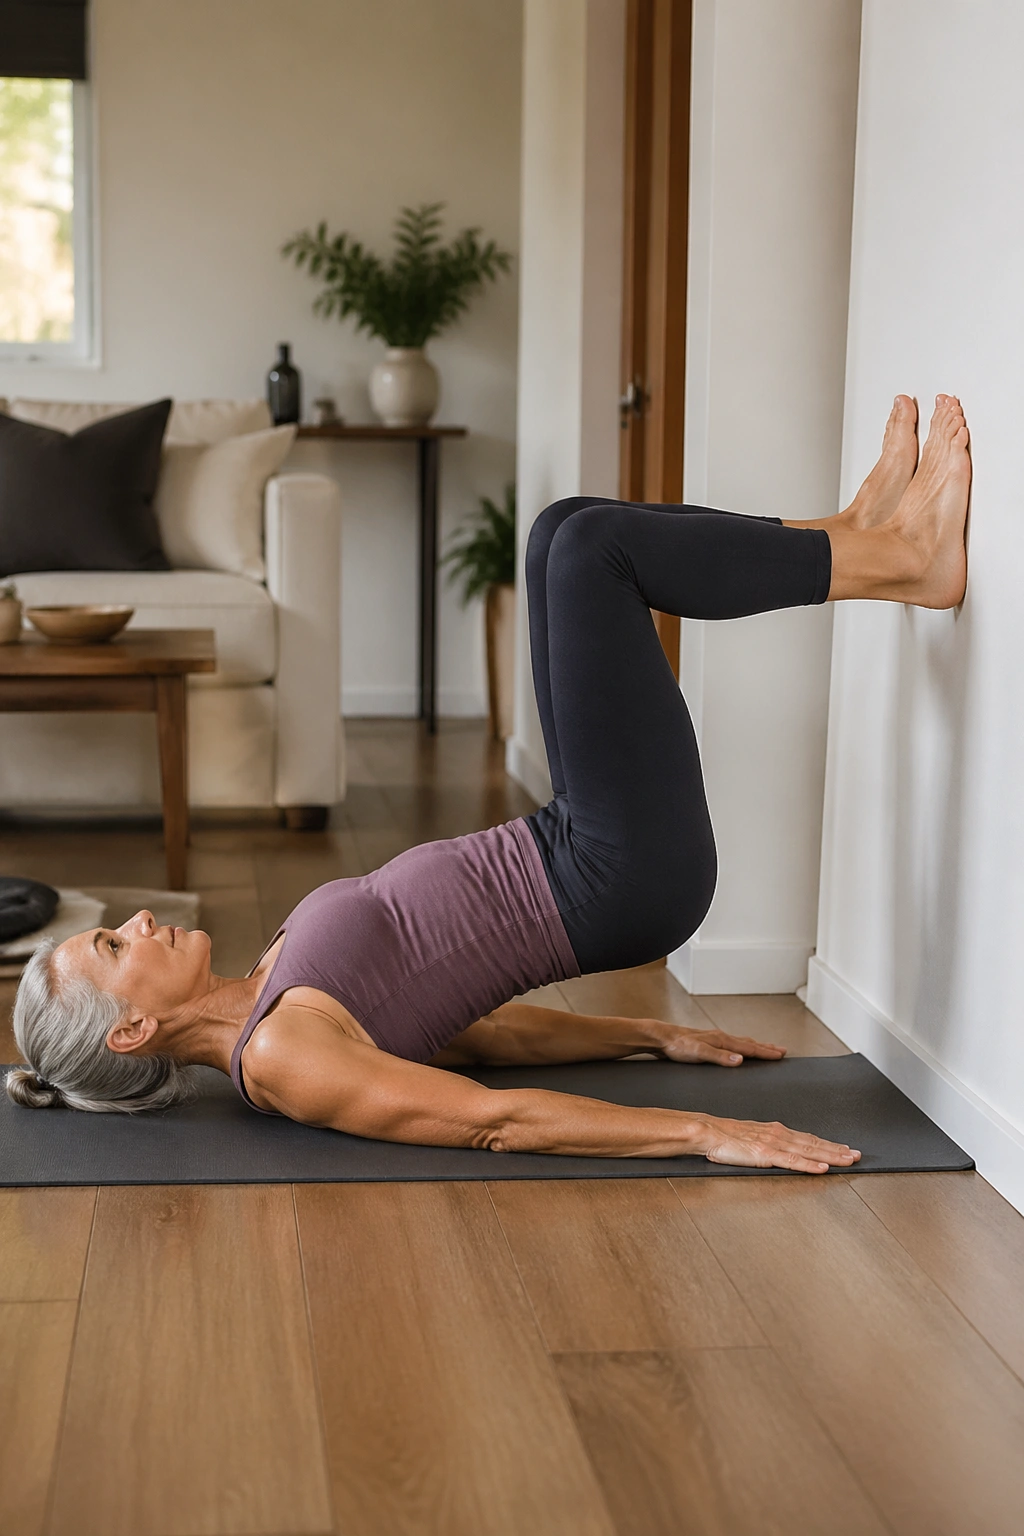
A wall bridge is a smart way to build glutes without asking the lower back to do all the heavy lifting. The wall supports the legs, which often makes the movement feel more stable than a floor bridge, especially if getting down and back up is annoying.
Lie on your back with your feet on the wall, knees bent roughly 90 degrees. Press through your heels, exhale, and lift your pelvis a few inches off the mat until your body forms a gentle line from shoulders to knees. Pause for a beat, then lower with control. Aim for 8 to 12 reps.
If your hamstrings cramp, move your feet a little higher on the wall. If your low back arches, lift less. The bridge should feel like the glutes doing the work, not your spine chasing the ceiling.
I like this version because it gives you feedback right away. You can feel whether both heels are pressing evenly, whether one hip is sneaking higher, and whether the ribs are staying anchored. That honesty is useful. Very useful.
5. Wall Push-Ups with Rib Control
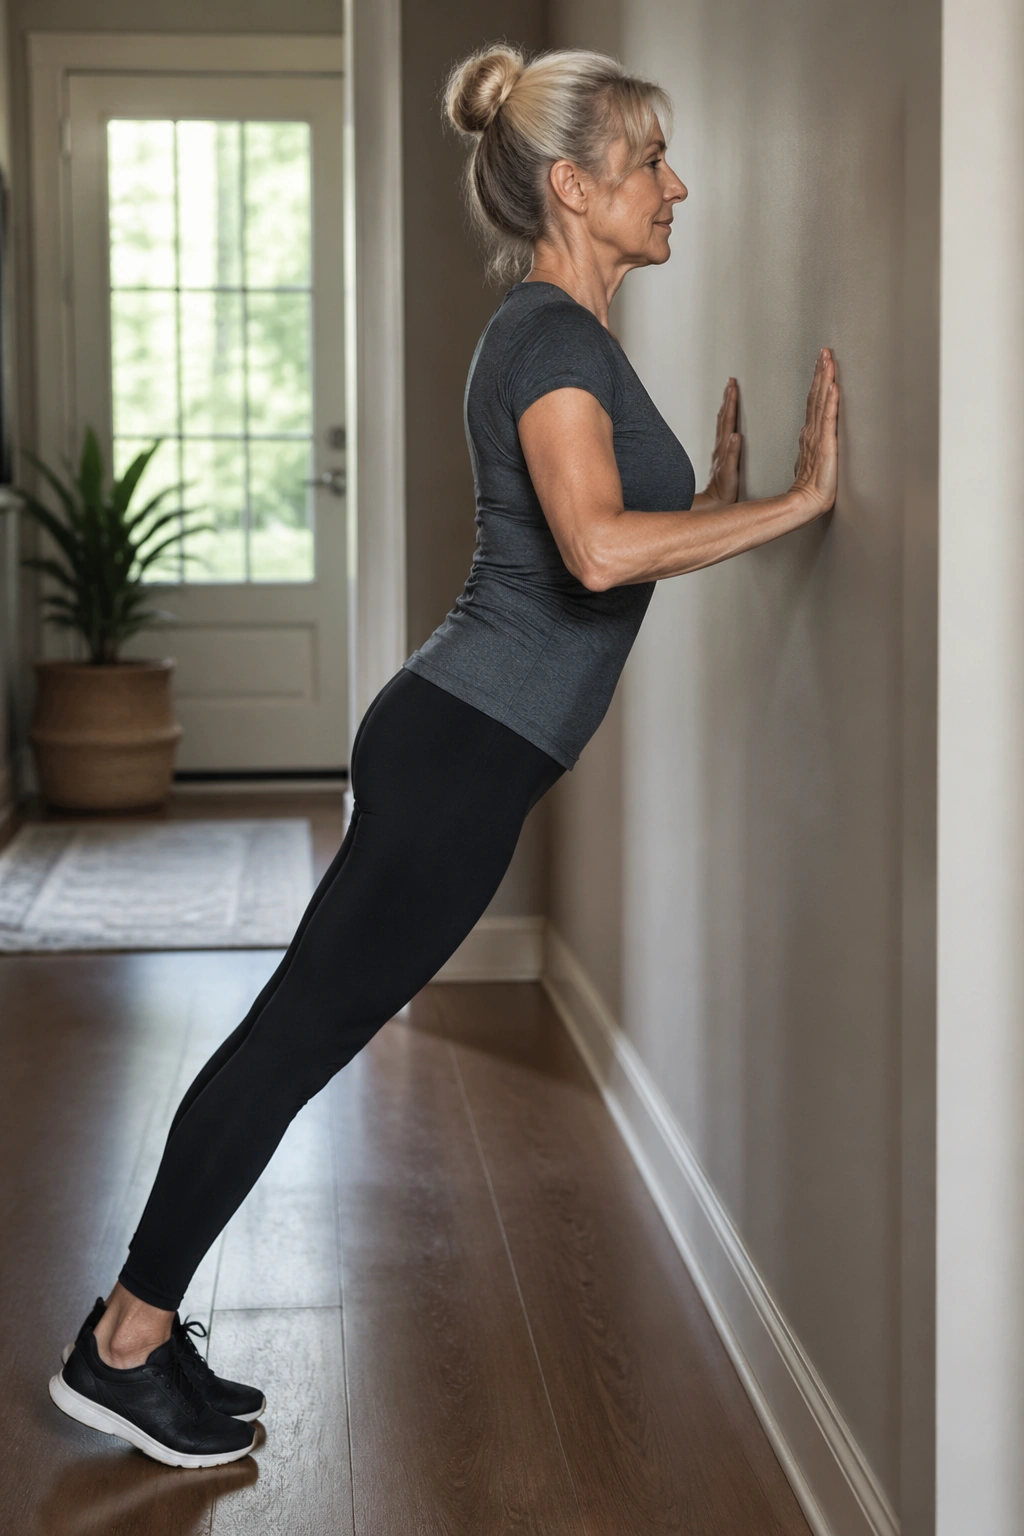
Wall push-ups are not a watered-down version of “real” push-ups. They are a clean, joint-friendly way to train the chest, shoulders, triceps, and deep core without dropping to the floor. If your wrists dislike floor work, this is a friendlier place to start.
Place your hands on the wall at chest height, a little wider than your shoulders. Step your feet back until your body makes a straight line from head to heels. Bend your elbows and lower your chest toward the wall in one smooth line, then press back to the start. Keep the elbows angled about 30 to 45 degrees away from the body.
Do 6 to 12 reps. Pause at the top and feel your ribs settle.
A lot of people dump into the low back here. Don’t. Keep your abdomen lightly braced, almost as if you’re zipping up a snug jacket. The wall push-up works best when the torso stays quiet and the shoulders move with intent. That quiet torso is what turns this from an arm exercise into Pilates.
6. Wall Angels for Rounded Shoulders
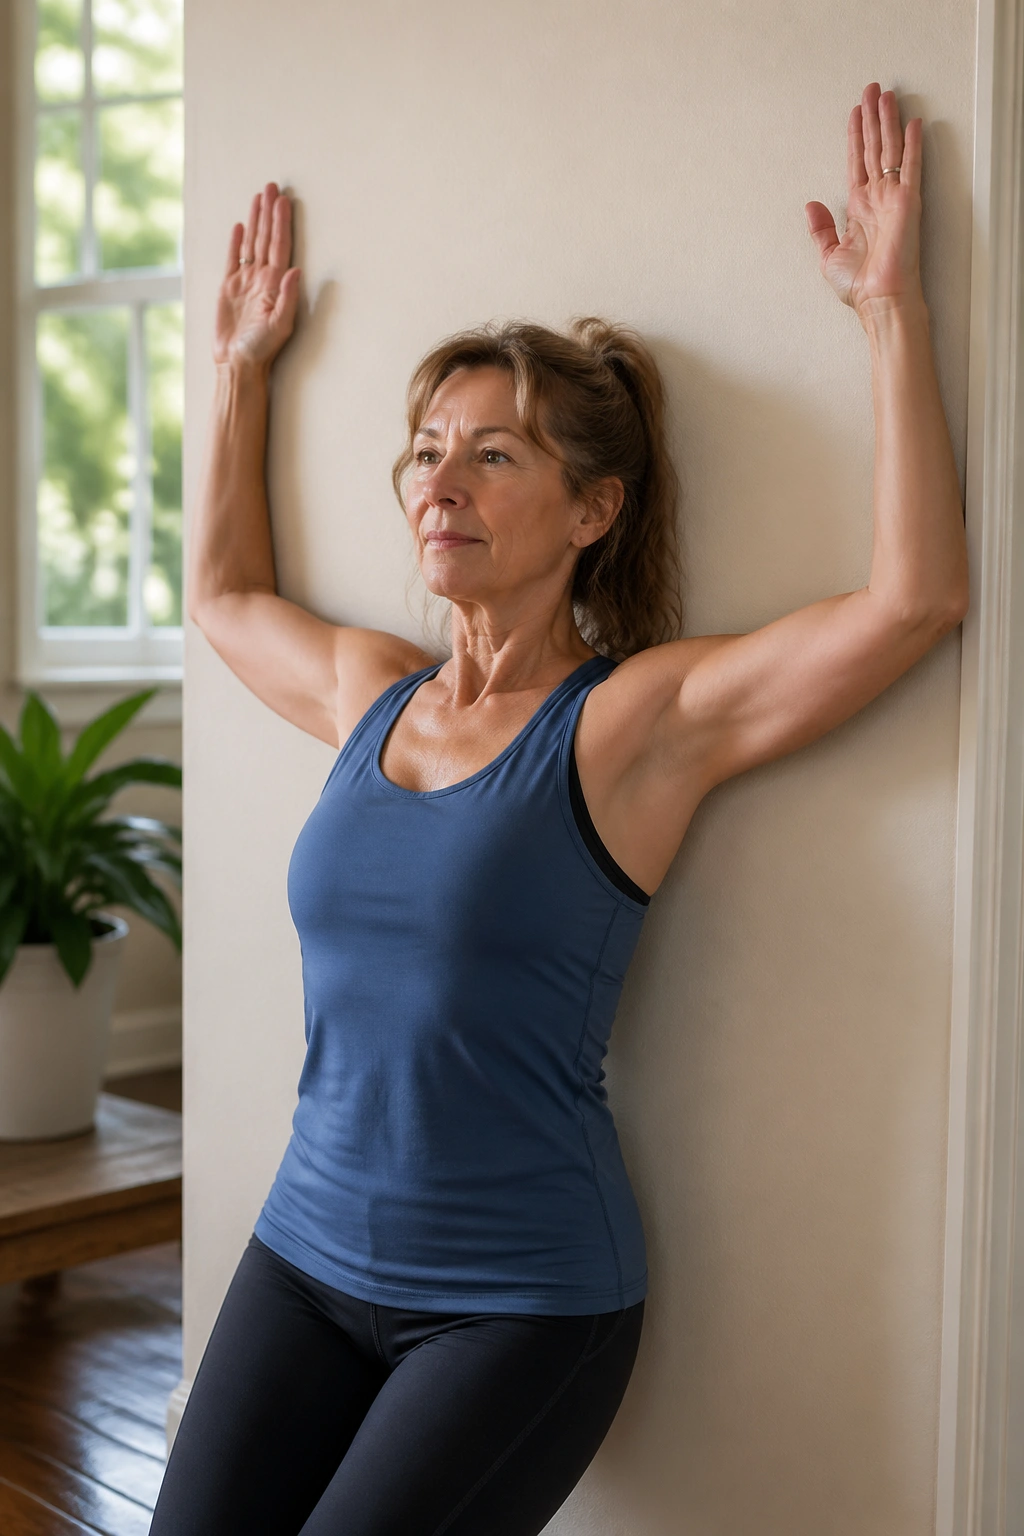
If your shoulders live a little too far forward, wall angels are worth their weight in gold. They open the chest, strengthen the upper back, and teach the ribs not to flare like they are trying to escape the room.
Stand with your back against the wall, feet a few inches forward, and flatten the back of your ribcage as much as feels natural. Bend your elbows to a goalpost shape, with the backs of your arms near the wall. Slide your arms upward until they reach as high as you can manage without shrugging, then return them to the starting shape.
Small range is fine. Tiny range beats sloppy range every time.
A few useful cues
- Keep your chin level, not poked forward.
- Let the shoulders stay down.
- If your low back arches, lower the arms less.
Do 6 to 8 slow reps. You may feel a little opening across the chest and a burn between the shoulder blades. Good. That means the right muscles are waking up. If your neck takes over, reset and make the movement smaller.
7. Side Leg Lifts with Wall Support for Women Over 50
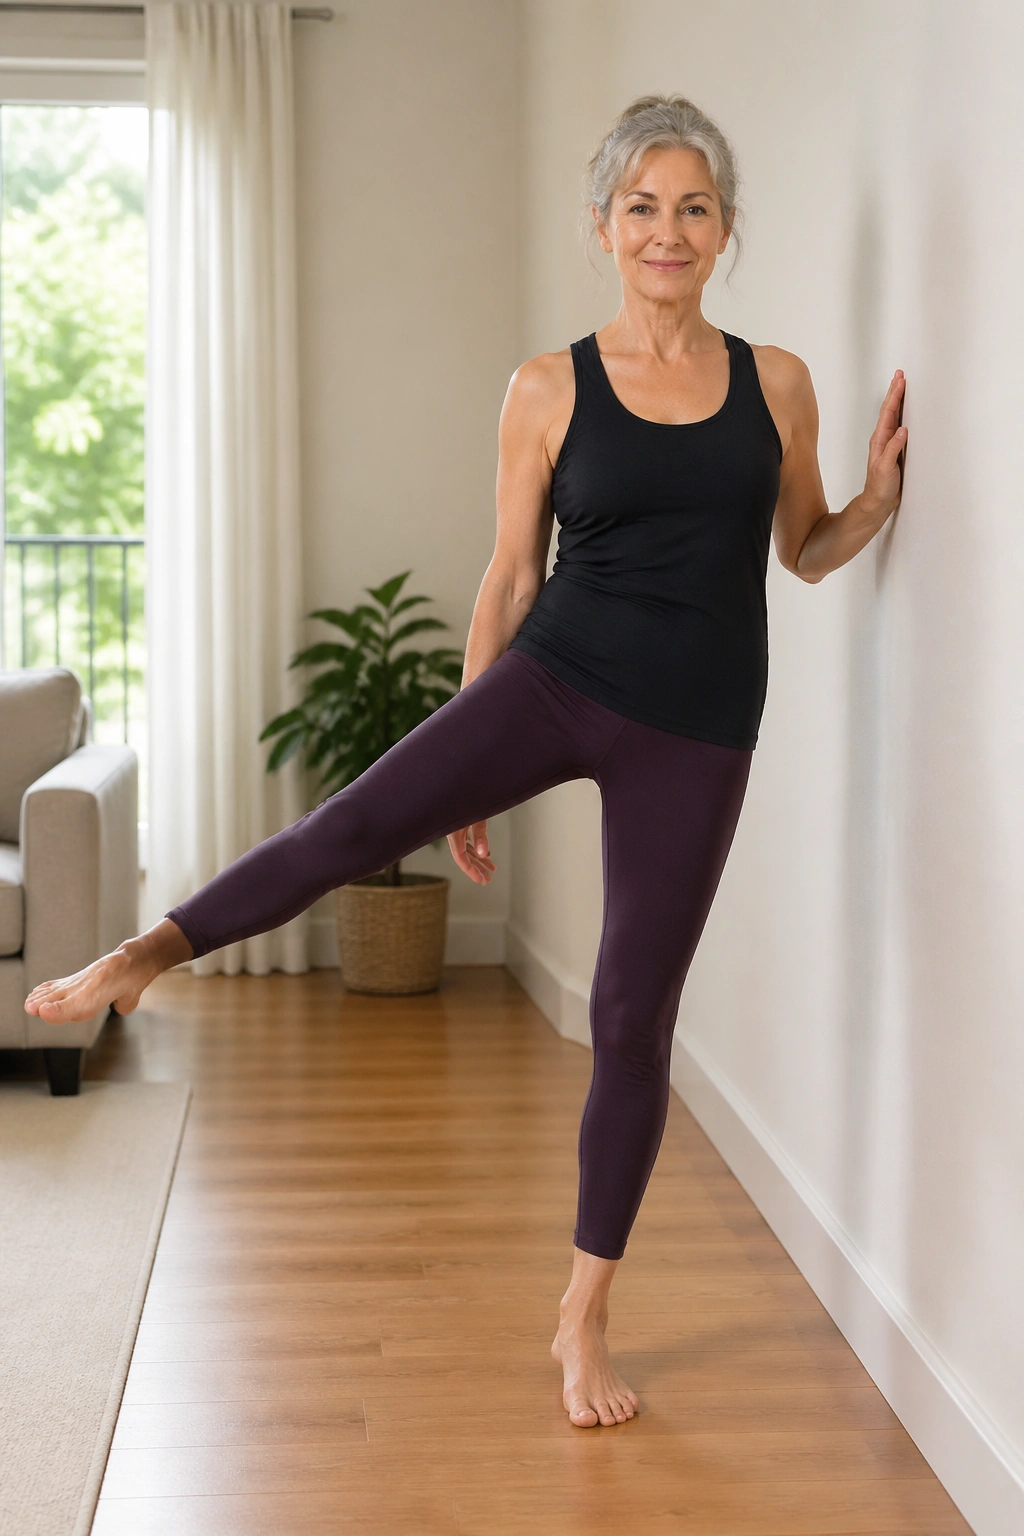
Side leg lifts are one of the cleanest ways to wake up the outer hip, and the outer hip is one of the most neglected parts of the body. It matters for walking, stair climbing, and balance. It matters more than flashy ab work, honestly.
Stand sideways to the wall with one hand resting lightly on it for support. Shift your weight onto the standing leg, keep the standing knee soft, and lift the free leg a few inches out to the side without leaning your torso. Lower slowly. Aim for 10 to 15 reps per side.
The trick is keeping the pelvis quiet. No hip hiking. No swinging. No grabbing with the waist. Just a clean, controlled lift.
If you want a little more challenge, turn the lifted foot slightly downward. That tends to shift the work into the side glute instead of letting the hip flexor cheat. The movement is small, but it has a sneaky way of making your stance leg feel far more awake afterward.
8. Wall Marches for Better Balance
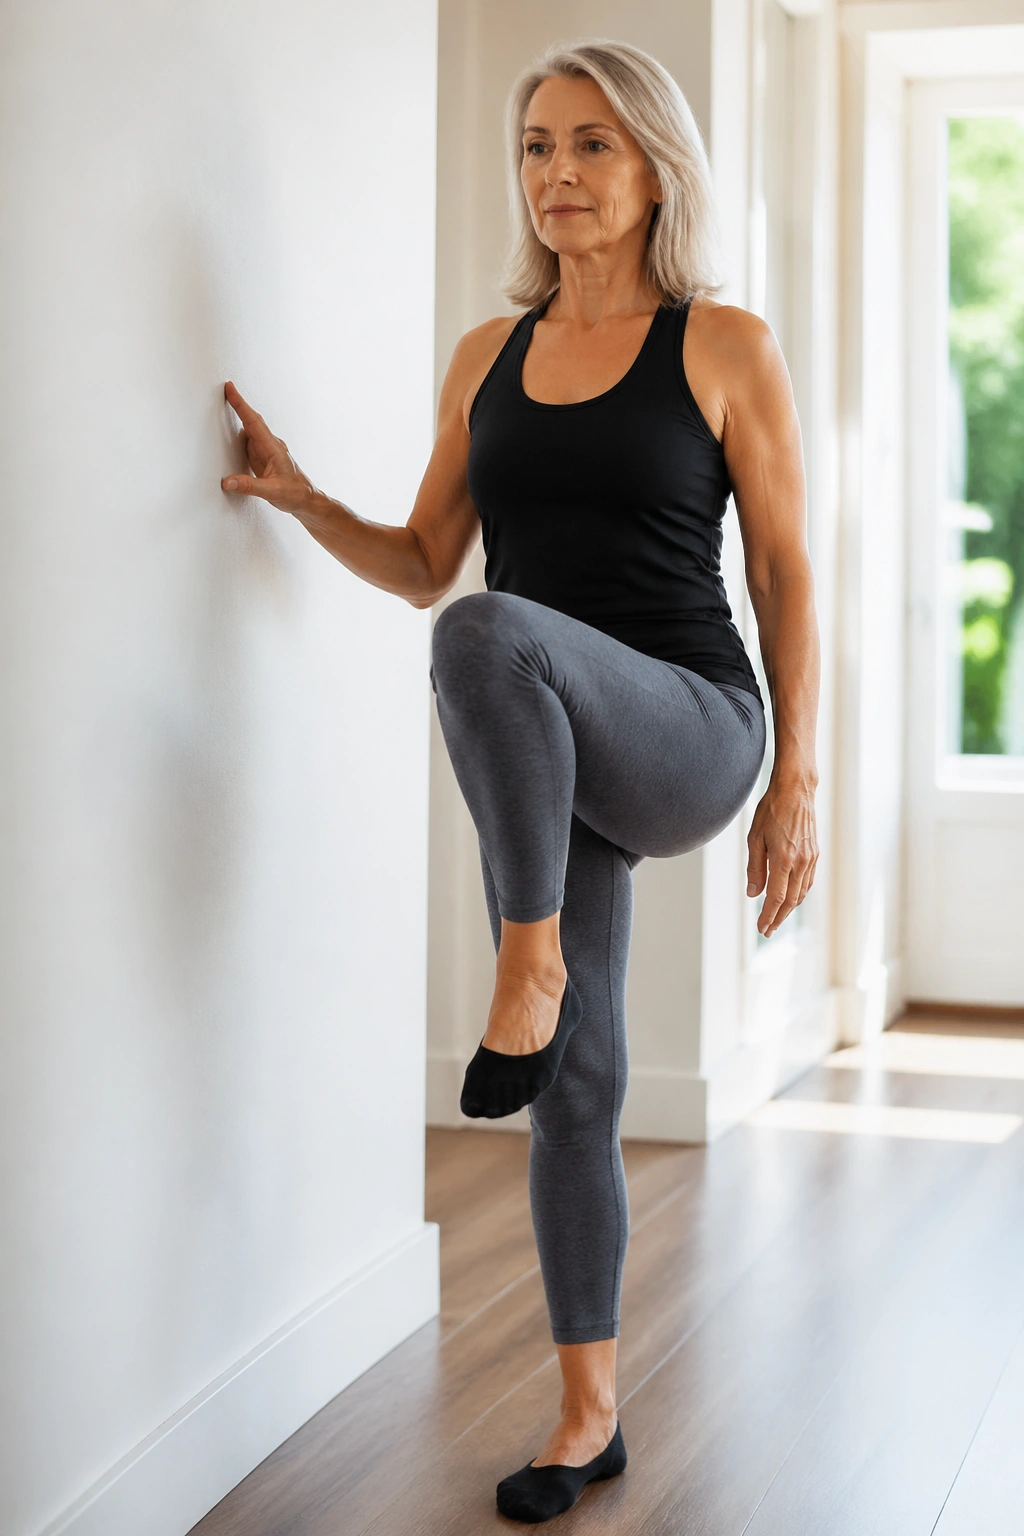
A wall march looks almost silly until your standing leg starts to tremble. Then it gets serious in a hurry. This move trains balance, hip flexor strength, and the ability to keep your torso steady while one leg moves.
Stand tall near a wall and place one fingertip on it for light support. Lift one knee to about hip height, or lower if that feels steadier, then set it down and switch sides. Keep the pelvis level and the trunk upright. Do 8 to 12 marches total, or 6 to 8 each side.
The wall should be a guide, not a crutch. Use just enough touch to keep your confidence up.
What I like here is the honesty of the move. If one side is sloppy, you feel it right away. If your standing foot rolls inward, you feel that too. The goal is not to make the marching huge. The goal is to keep the body neat while it changes shape. That skill carries into stairs, curbs, and quick turns.
9. Heel Raises Facing the Wall
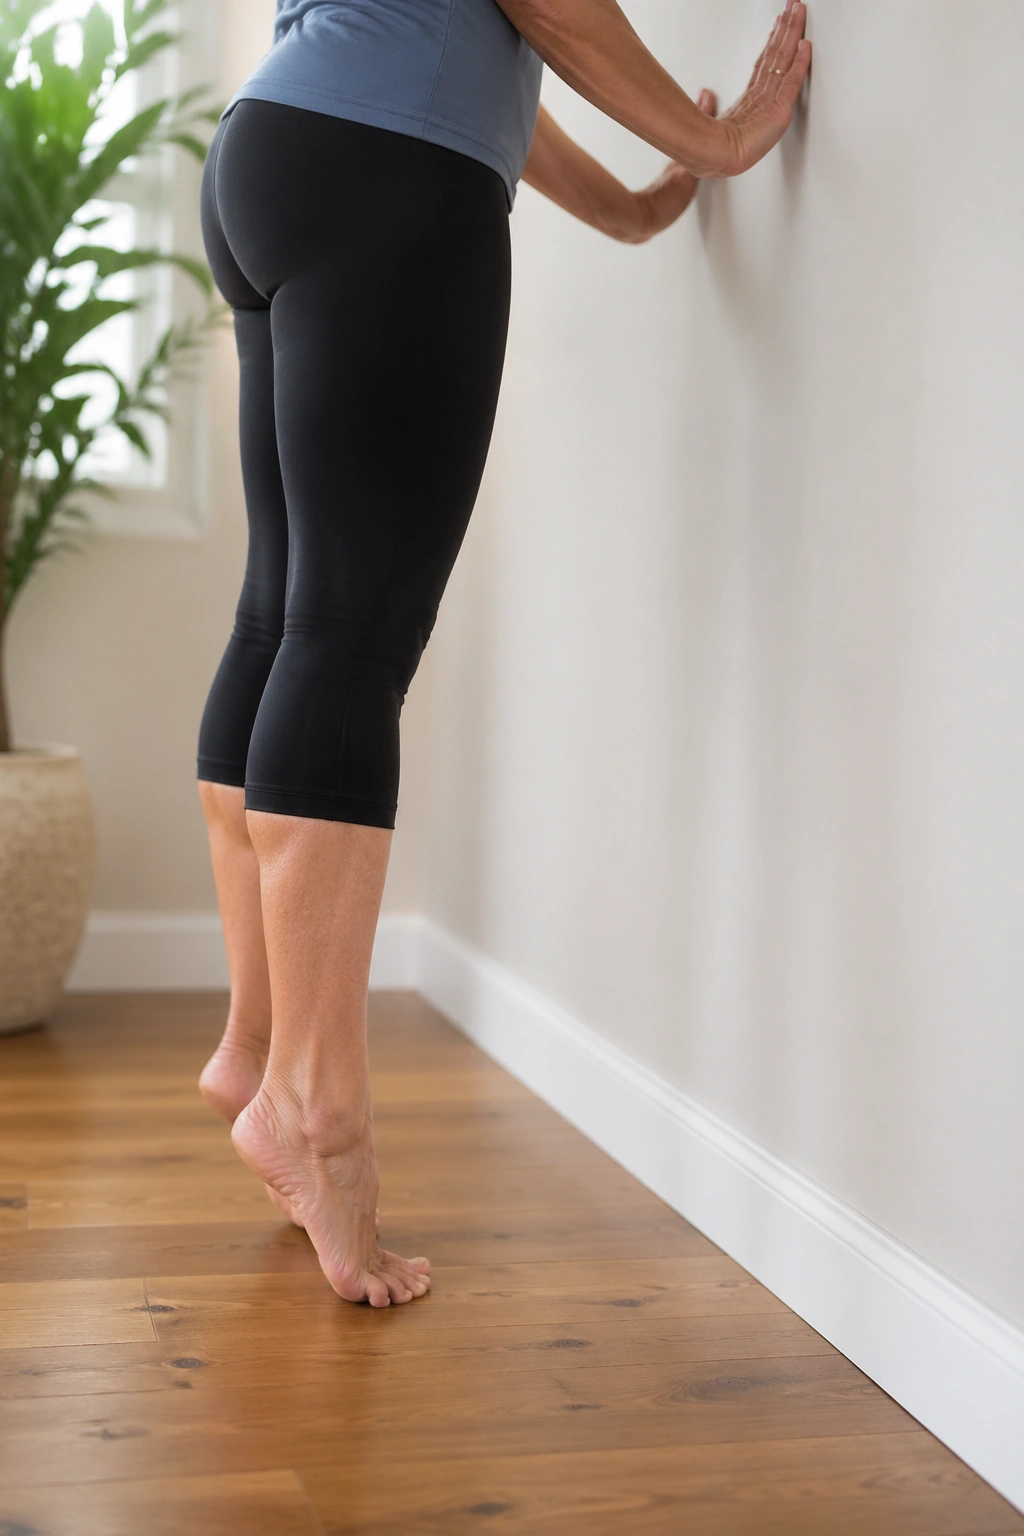
Your calves and feet are part of your balance system, not just the part that gets squeezed into shoes. Heel raises train both, and facing the wall gives you a steady point of contact so the movement stays controlled instead of bouncy.
Stand facing the wall with fingertips resting on it, feet parallel and about hip-width apart. Rise up onto the balls of your feet over 2 seconds, pause for a beat at the top, then lower slowly over 3 seconds. Do 12 to 15 reps. Keep the ankles from rolling outward.
Slow lowering matters. That’s where the work gets honest.
You may feel this more than you expect in the arches of the feet and the backs of the calves. Good. That slow, steady load helps build better control for walking and standing for longer stretches. If your toes want to claw the floor, relax them. If your knees lock, soften them. The wall makes it easier to notice those habits before they turn into full-body compensation.
10. Standing Oblique Knee Lifts at the Wall
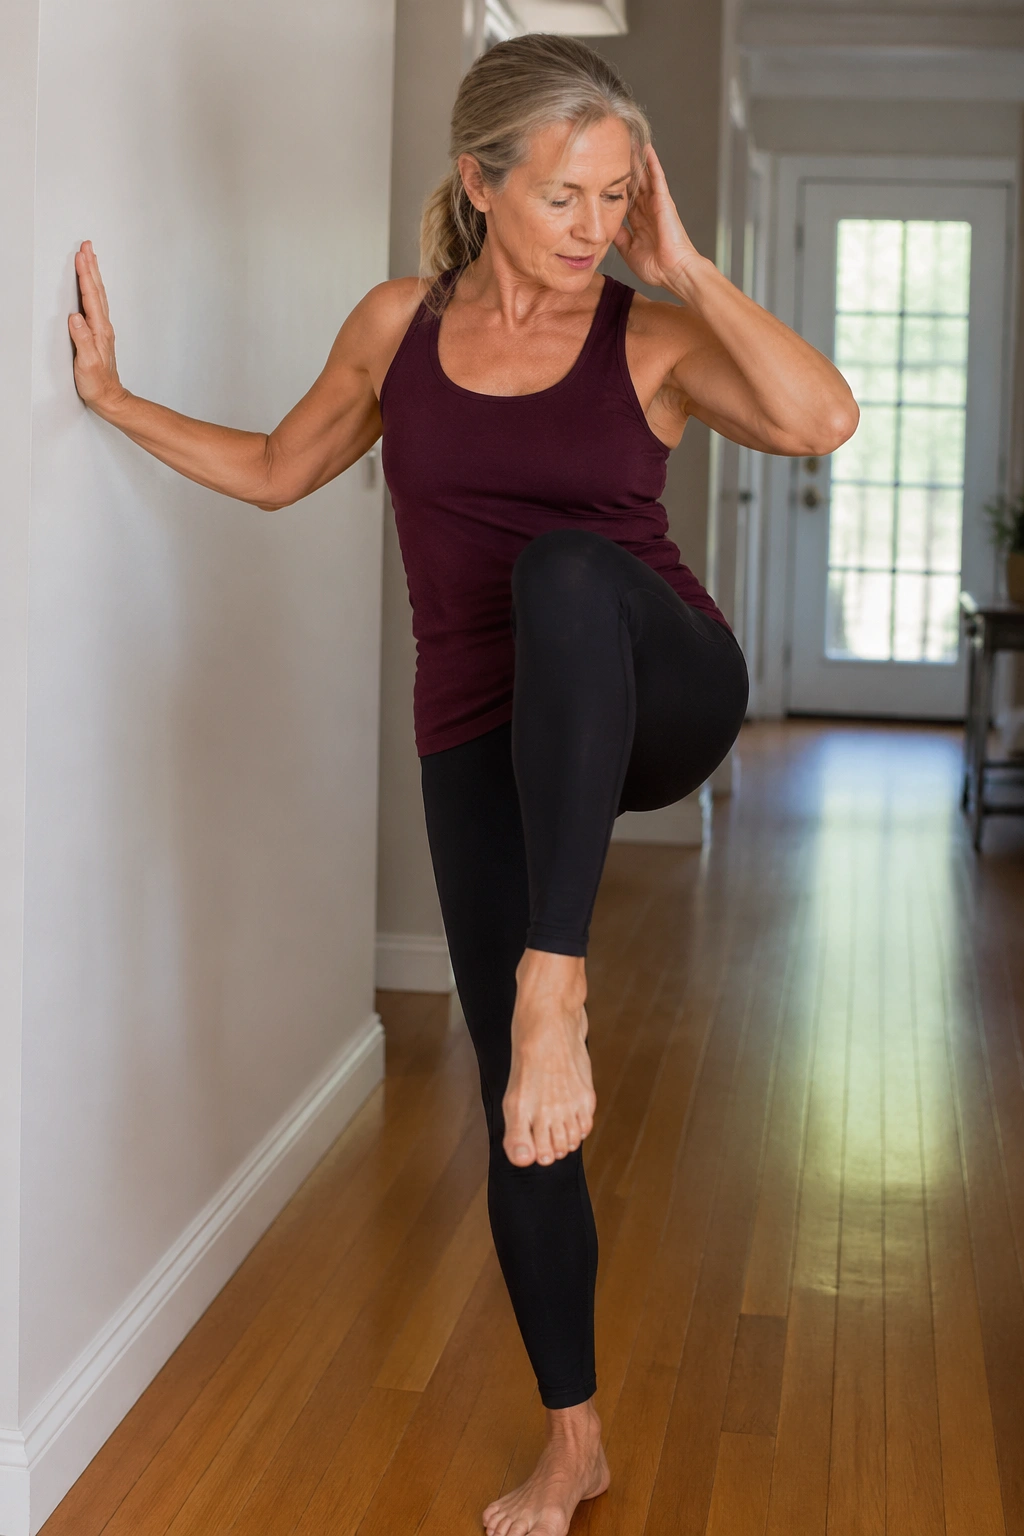
Here’s a move that looks modest and behaves like a sneaky core drill. Standing oblique knee lifts challenge the waist, hip flexors, and balance system without asking you to get down on the floor and back up again.
Stand sideways to the wall with the nearest hand resting on it. Lift the outer knee toward the same-side elbow or across the body a touch, depending on what feels cleaner. Bring the torso with it only a little. You want a crisp side-body crunch, not a collapse. Lower with control and repeat 8 to 12 times per side.
Keep the movement slow enough that you can actually feel the side waist shorten and lengthen. If you swing the knee, the obliques miss the party.
What makes this useful
- It trains the waist without straining the neck.
- It asks the standing leg to stabilize.
- It gives the hip flexors work without speed.
Try a gentle exhale as the knee lifts. That little breath pattern helps the core engage in a more organized way. And yes, organized is the right word here.
11. Wall Plank for a Deep Core Hold
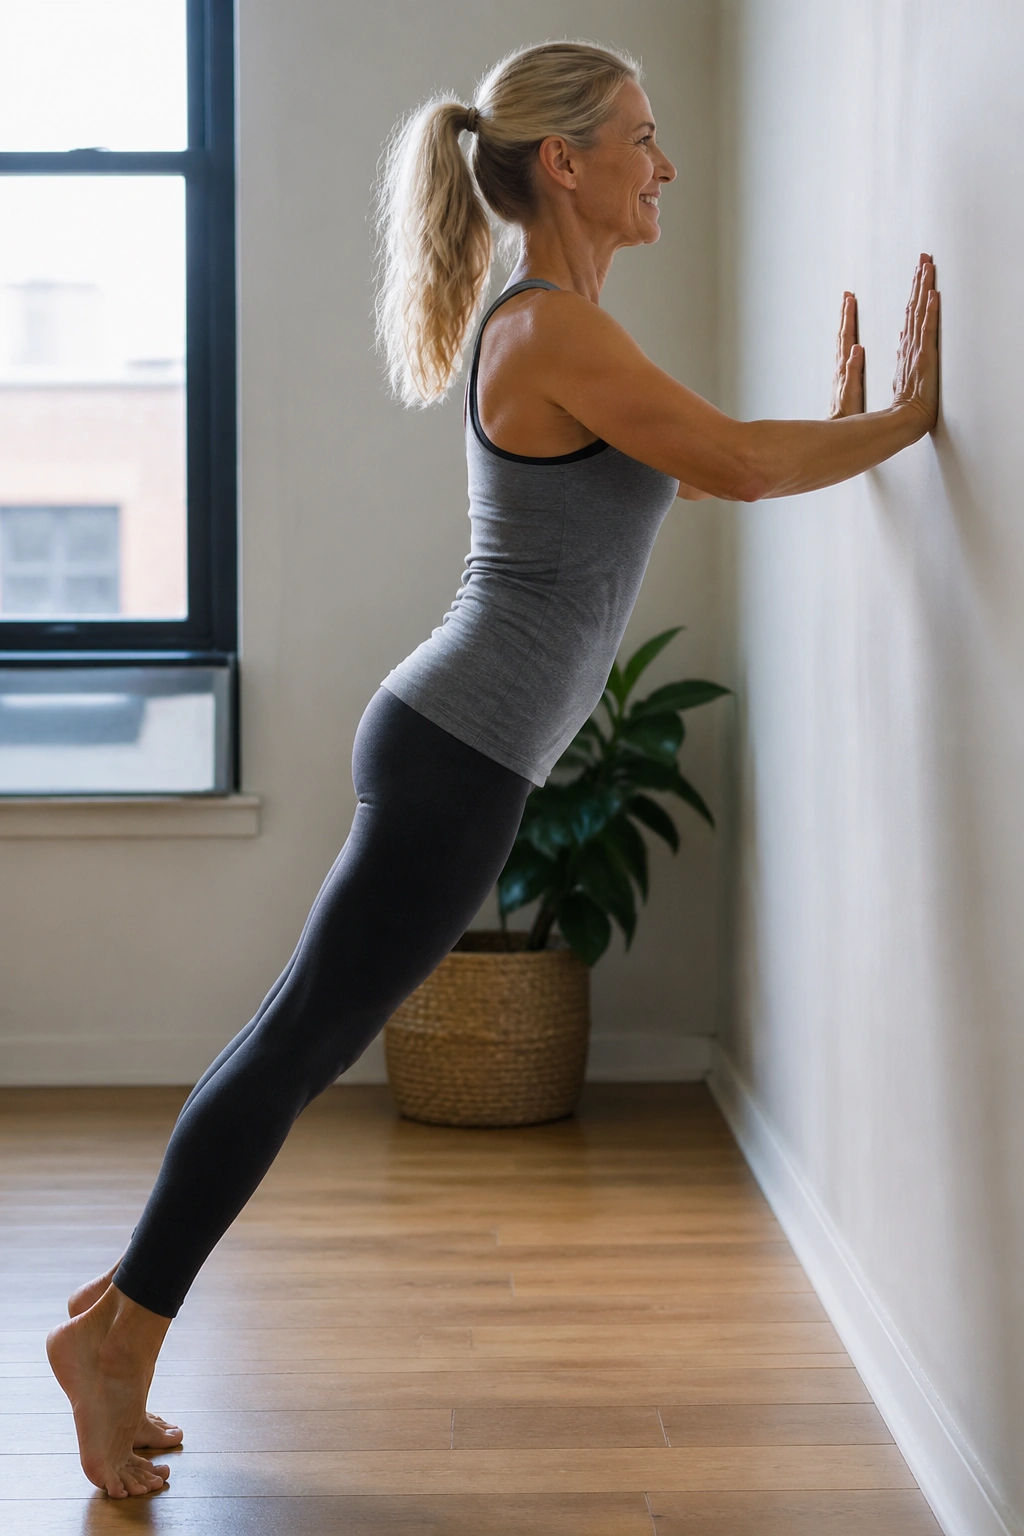
A wall plank is a beautiful compromise between doing nothing and going full floor plank. It teaches bracing, shoulder stability, and body alignment without overloading the wrists or demanding too much from the low back.
Place both hands on the wall at shoulder height, then walk your feet back until your body makes one long diagonal line. Pull the belly in gently, lift the chest away from the wall, and hold for 15 to 30 seconds. Breathe through your nose if you can. Keep the neck long.
Do not let the ribs dump forward. That is the whole game here.
You can make this harder by stepping your feet farther back or softer by standing more upright. I like that scale. It lets you find a version that feels productive instead of irritating. If your shoulders are sensitive, keep the hands slightly lower and the hold shorter. A clean 20-second hold beats a sloppy 45-second grind.
12. Inner Thigh Press with a Pillow
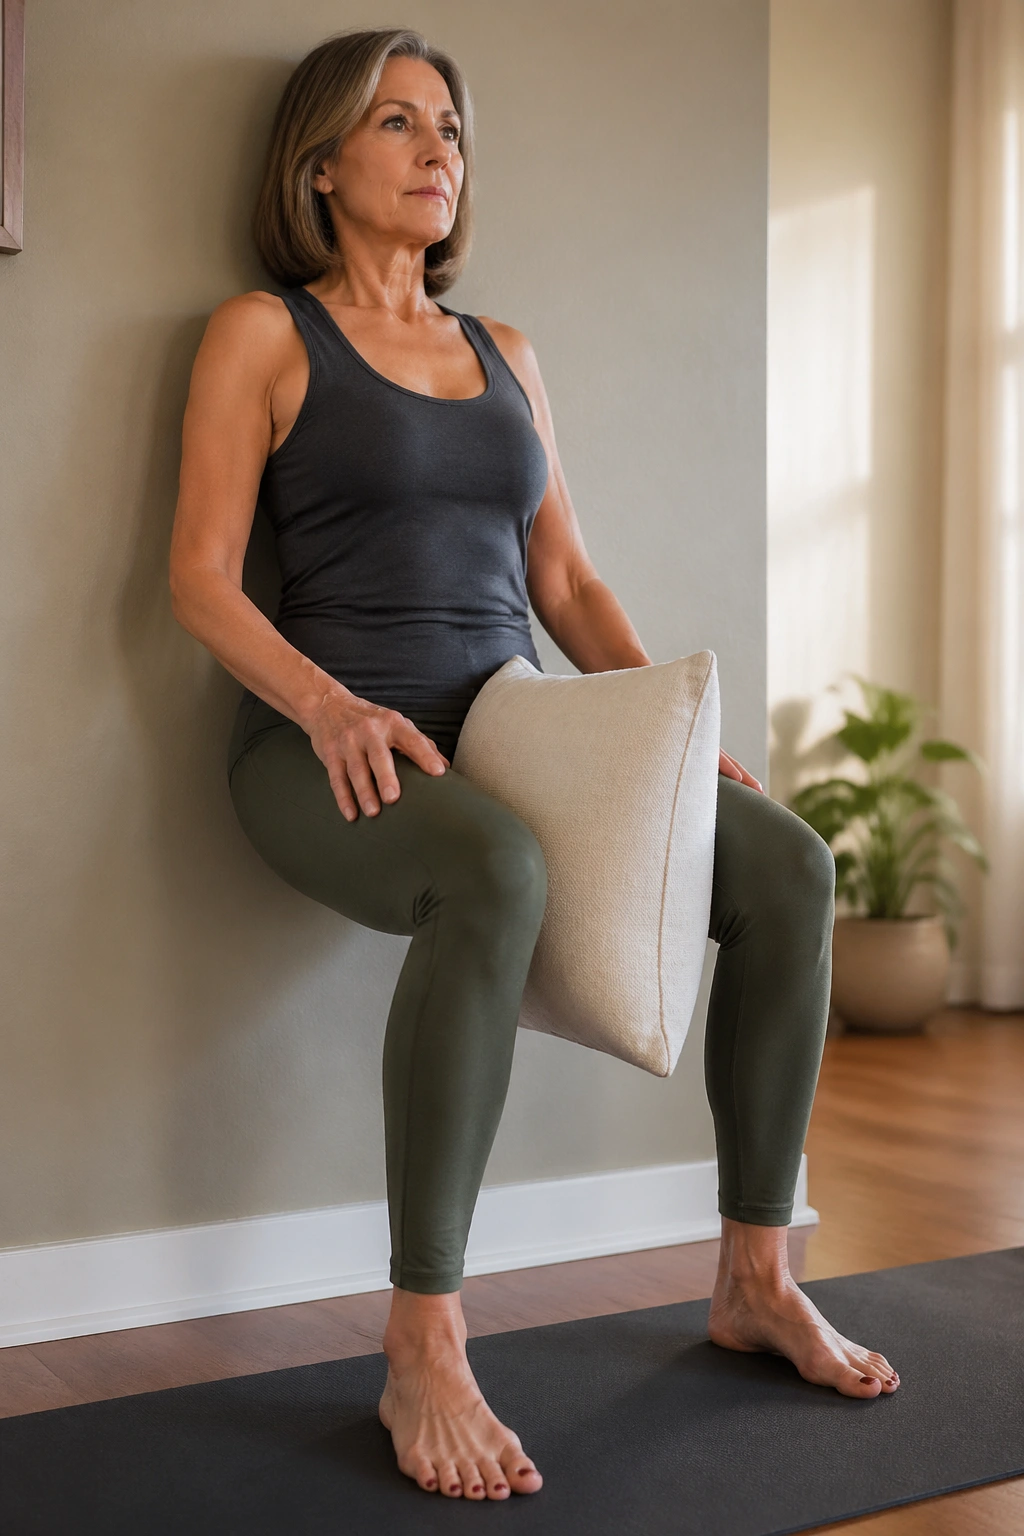
The inner thighs get neglected all the time, yet they matter for pelvic stability and leg control. A simple pillow squeeze gives them work without needing equipment or floor acrobatics.
Stand with your back lightly against the wall and place a small pillow, folded towel, or soft ball between your knees. Keep your feet hip-width apart, then squeeze the object gently for 5 seconds and release for 5 seconds. Do 8 to 10 rounds. If standing bothers your knees, you can do the same thing seated against the wall.
The squeeze should feel firm, not white-knuckle hard. You are looking for steady engagement, not a cramp.
This move pairs nicely with the pelvic tilt work from earlier because it reminds the lower body that the inner thighs, lower belly, and pelvic floor often work together. No need to make that mysterious. It’s just a useful little team. When they coordinate well, walking and standing tend to feel smoother.
13. Wall Hamstring Slides on the Floor
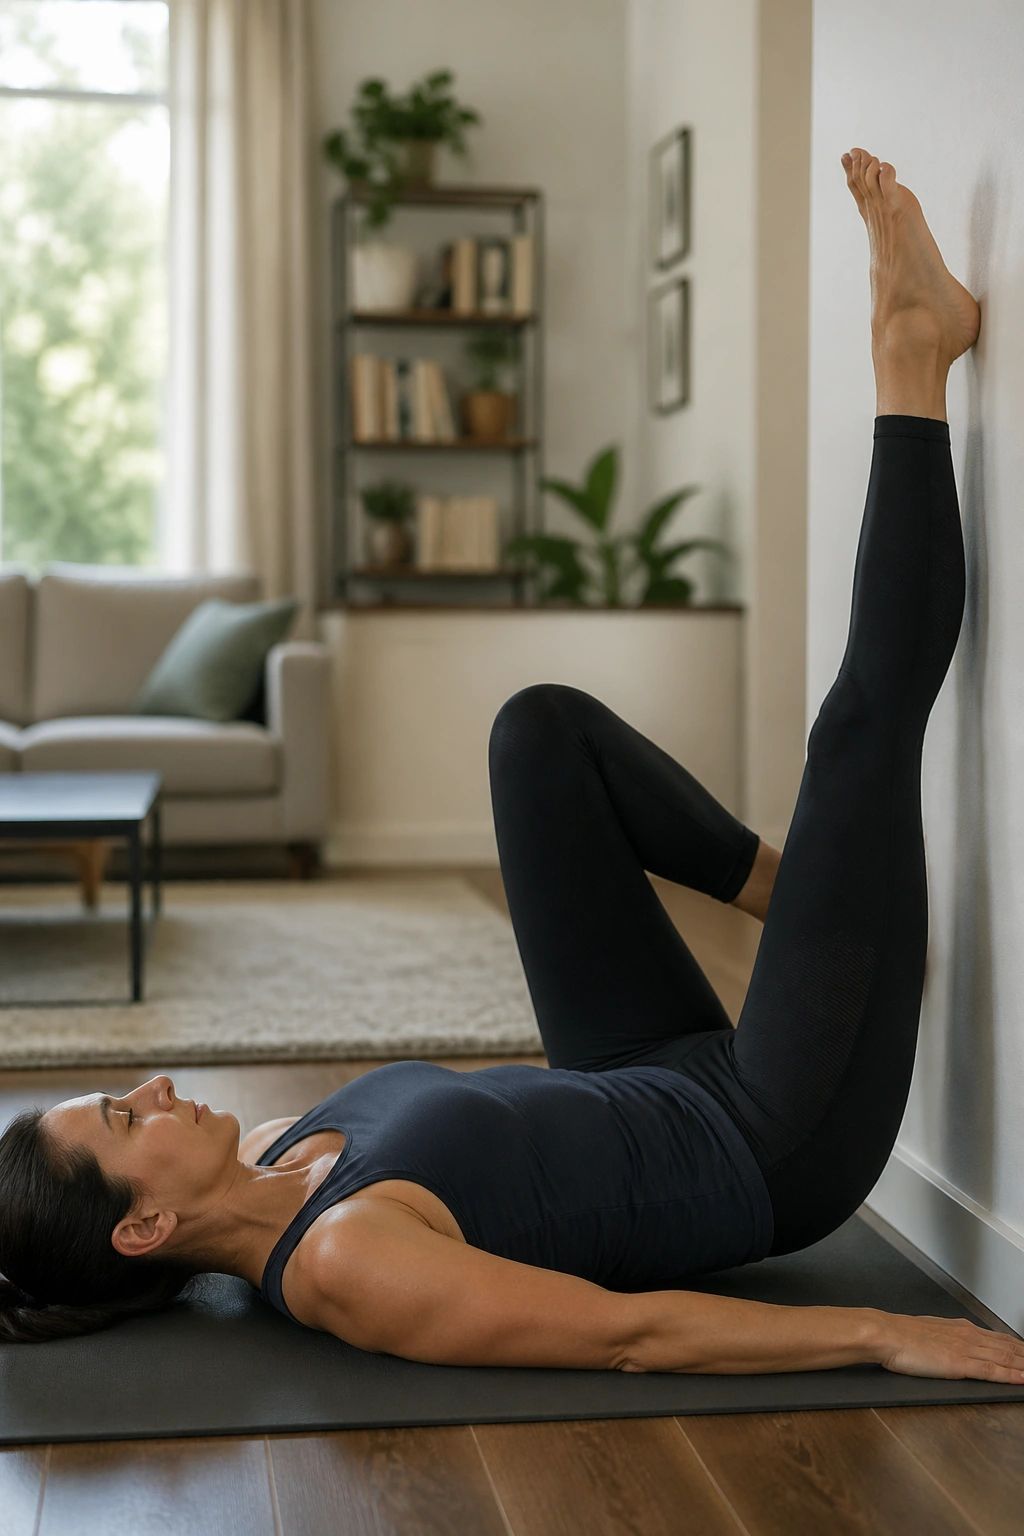
Tight hamstrings can make a lot of standing work feel harder than it needs to. Wall hamstring slides let you stretch and strengthen at the same time, which is why they earn a place here.
Lie on your back close to the wall with one heel resting against it and the other knee bent or foot on the floor. Slide the heel slowly down the wall until the leg lengthens to a point that still feels manageable, then draw it back up. Keep the movement smooth and controlled. Do 6 to 8 slides on each side.
If your lower back starts to arch, shorten the range. If the hamstring grabs, bend the knee more. The leg should glide, not fight.
This is a good one for anyone who sits a lot or feels tight behind the knees when standing up from a chair. The wall removes some guesswork. You can feel exactly when the stretch starts to turn into strain, and that line matters.
14. Glute Kickbacks with Hands on the Wall
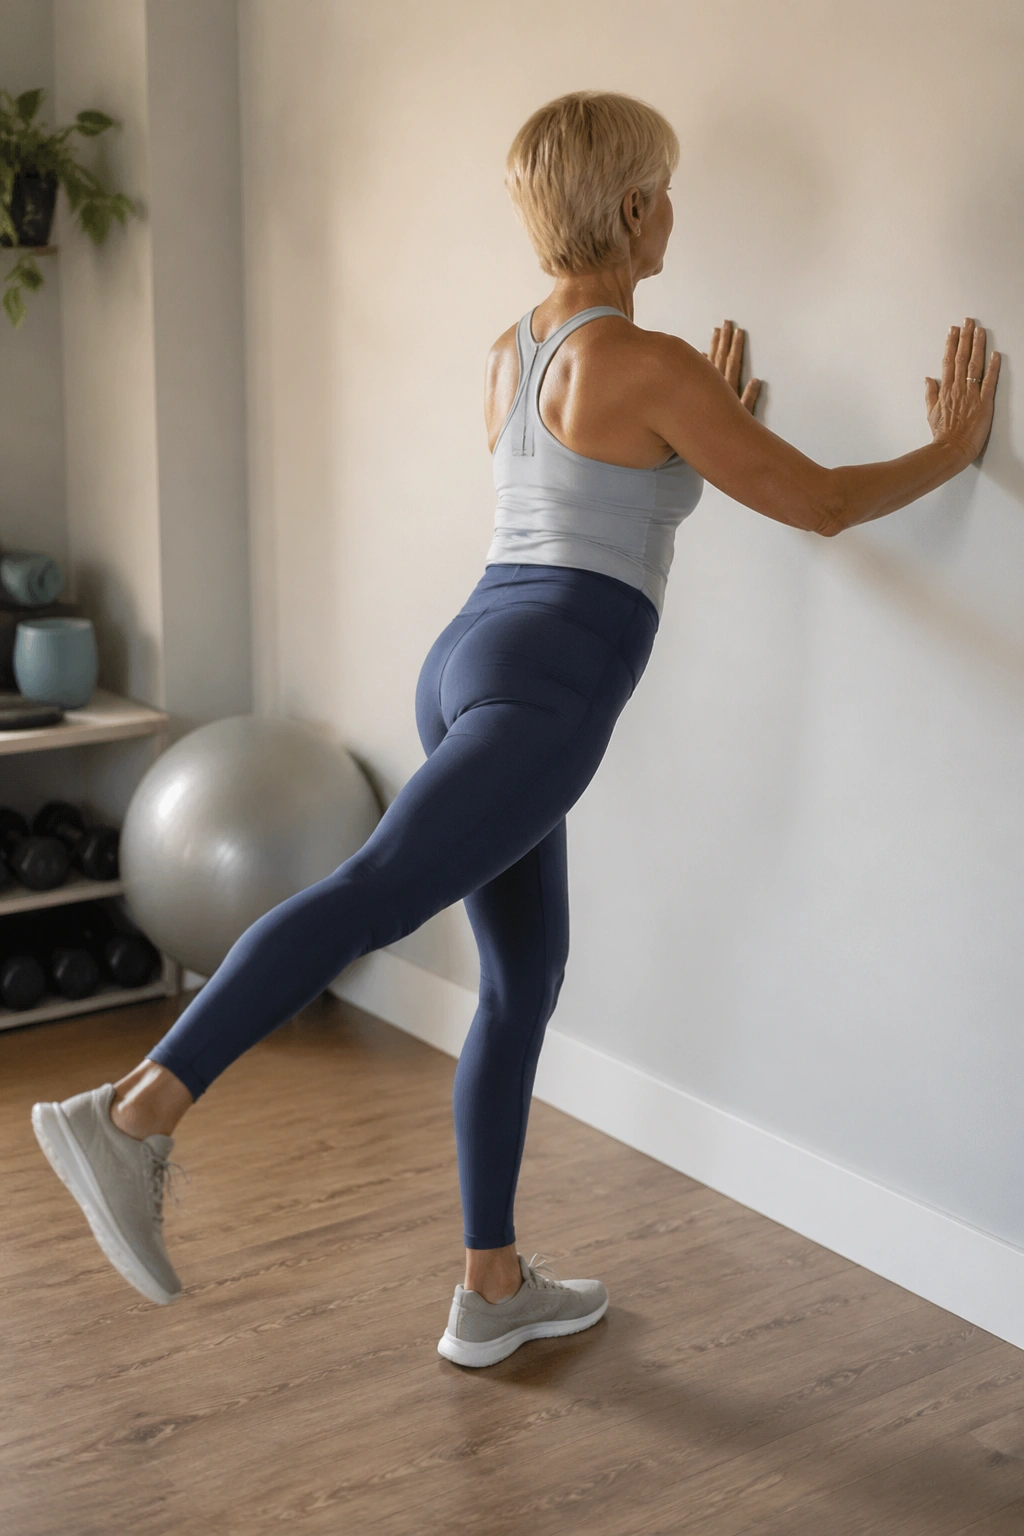
Glute kickbacks are a classic for a reason. They wake up the backside of the body without pounding the joints, and the wall makes them more controlled than swinging the leg in open space.
Stand facing the wall with both hands resting lightly on it and feet hip-width apart. Shift your weight onto one leg, keep the standing knee soft, and extend the other leg straight back a few inches. Squeeze the glute at the top, then return with control. Repeat 10 to 12 times per side.
The leg does not need to lift high. In fact, too much height usually turns the low back into the hero, which is not what we want.
Keep your hips square to the wall. If the working side twists open, reduce the lift and slow down. You should feel the glute doing a clean, deliberate job. The standing leg will work too, which is part of the point. Stability and strength are partners here.
15. Seated Wall Hundred
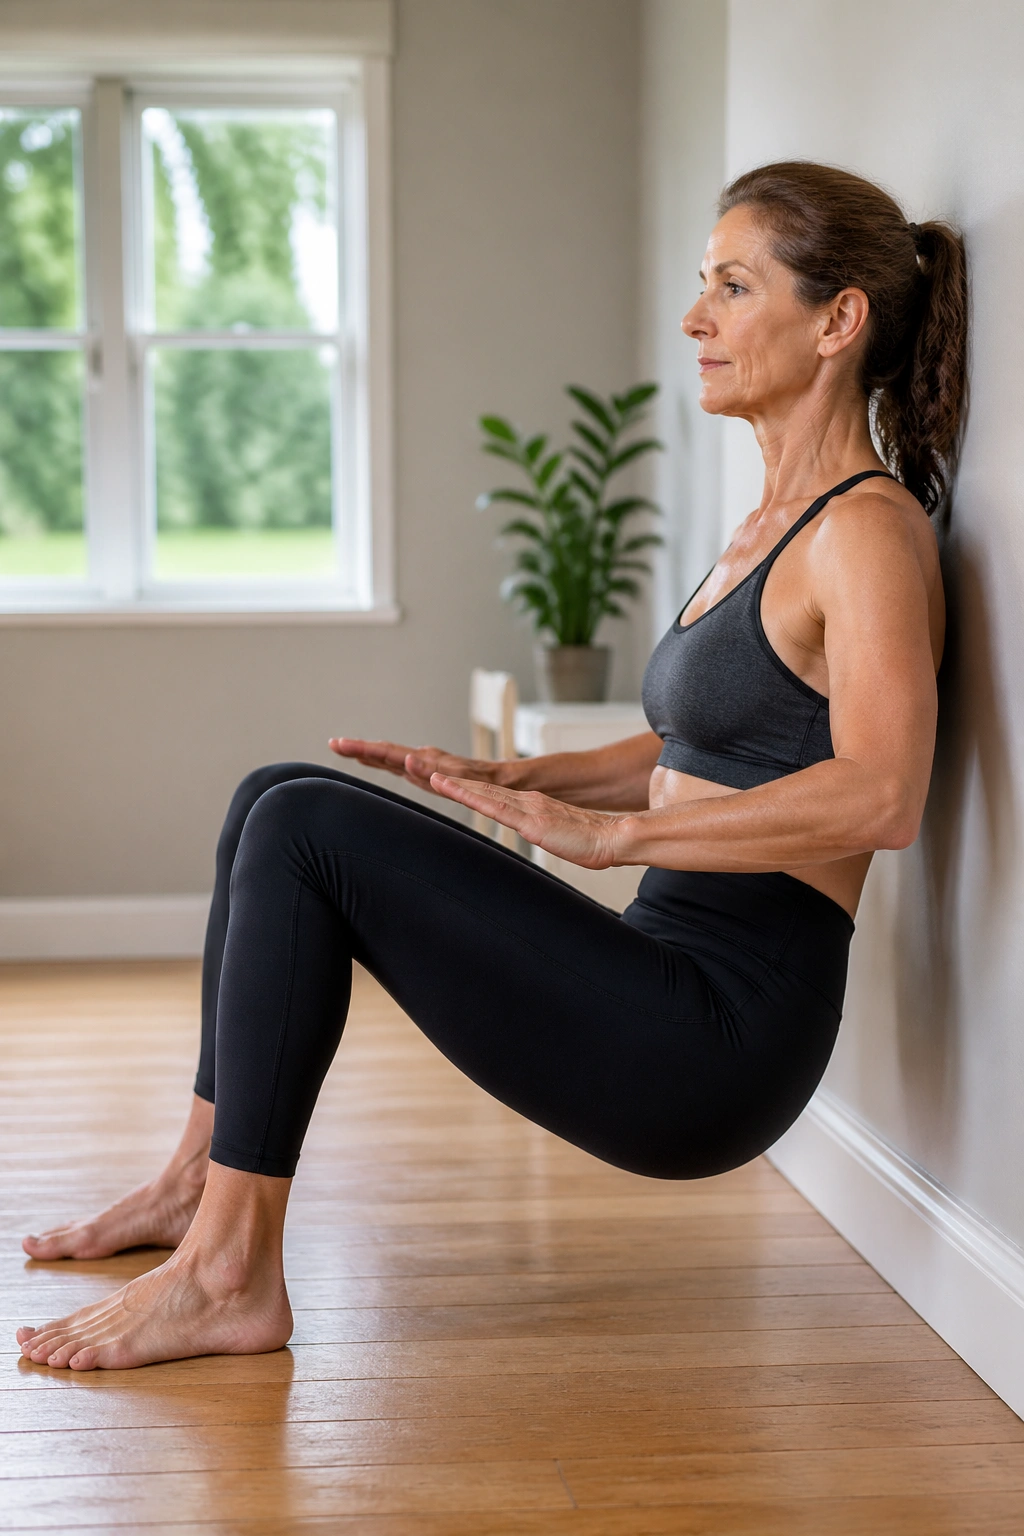
The Hundred gets friendlier when the wall is behind you. That little bit of support helps you stay tall, keep the ribs in place, and focus on breath rather than fighting to hold a shaky position.
Sit on the floor with your back against the wall, knees bent, feet flat, and arms reaching long beside your hips. Curl the chin slightly, lift the chest a touch away from the wall if you can, and begin pumping the arms up and down in small, brisk motions. Take 5 short inhales and 5 short exhales while pumping. Repeat for 5 rounds, or shorten it if your neck gets tired.
If the legs lifting is too much, keep the feet on the floor. That still counts.
The wall keeps the torso honest. You’ll know right away if you start collapsing through the ribs or hunching the shoulders. Keep the movement crisp. Keep the breath steady. This is core endurance, not a race.
16. Wall Mermaid Stretch
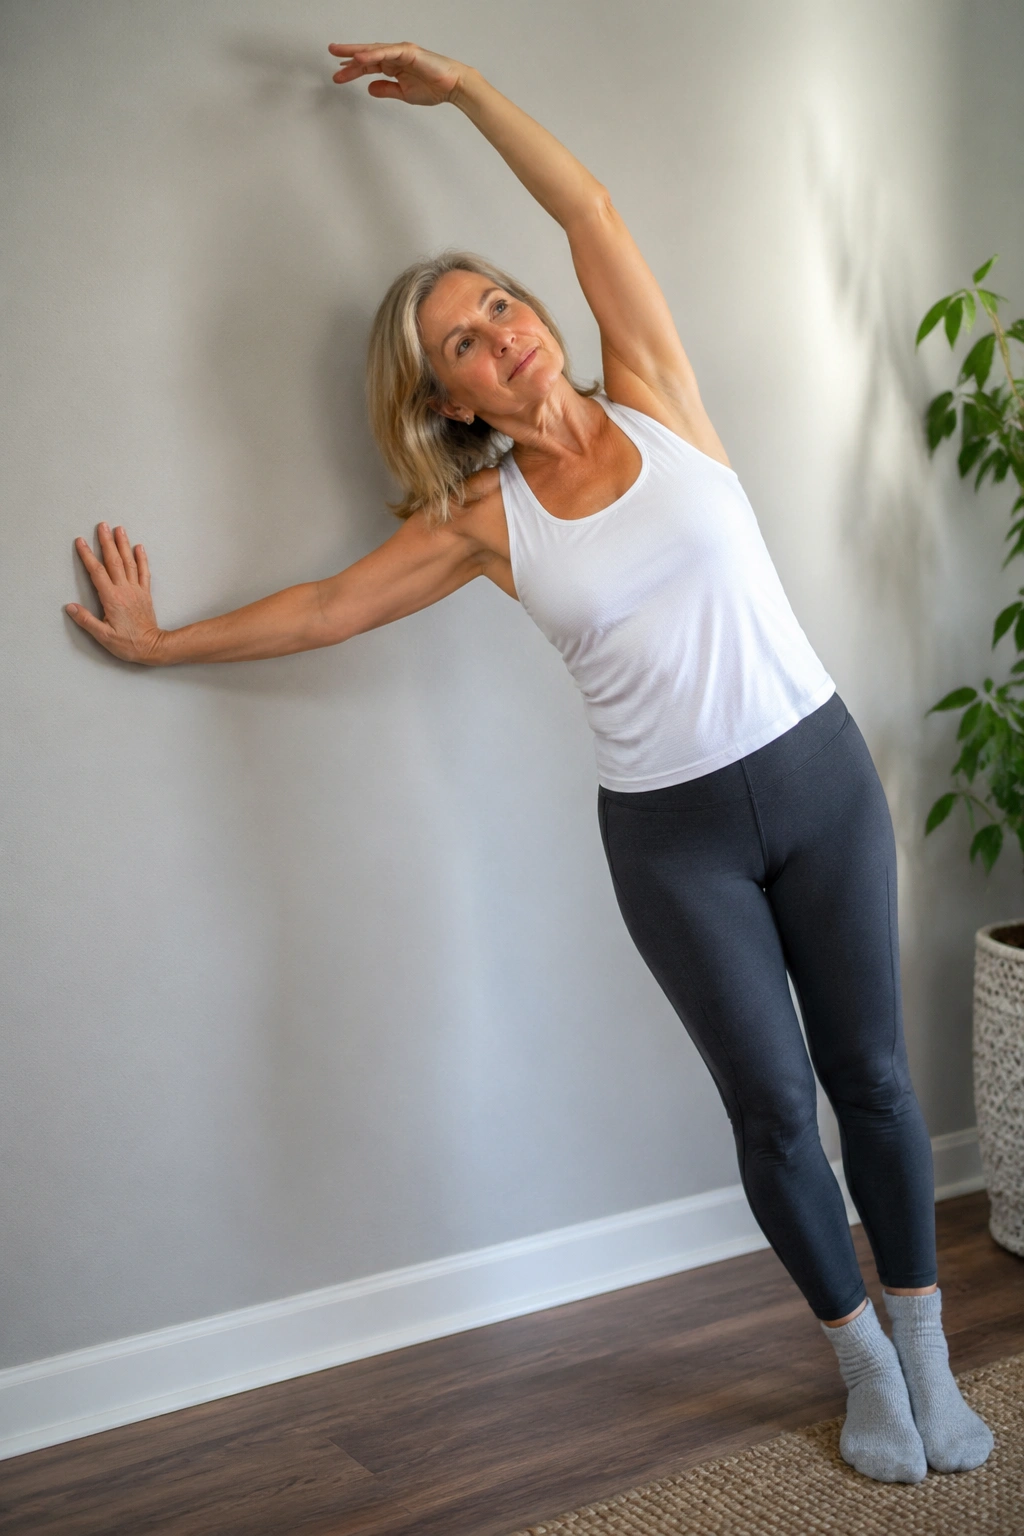
A mermaid stretch against the wall feels luxurious after all the strength work. It opens the side body, which tends to get stiff from sitting, carrying bags, and all the everyday twisting we do without noticing.
Stand sideways to the wall, with the closest hand low on the wall for support and the far arm reaching overhead. Slide the supporting hand down a little as you reach the top arm long, then gently side-bend away from the wall. Hold for 2 to 3 breaths, then come back up slowly. Repeat 3 to 4 times per side.
The stretch should feel like space opening between the ribs and the hip on the same side. Not a cranky yank. Space.
I like to keep the shoulders relaxed here and let the breath do some of the work. If your neck tries to help too much, lengthen the crown of the head toward the ceiling before you side-bend again. That small correction usually changes the whole feeling of the stretch.
17. Single-Leg Stand with Fingertip Support
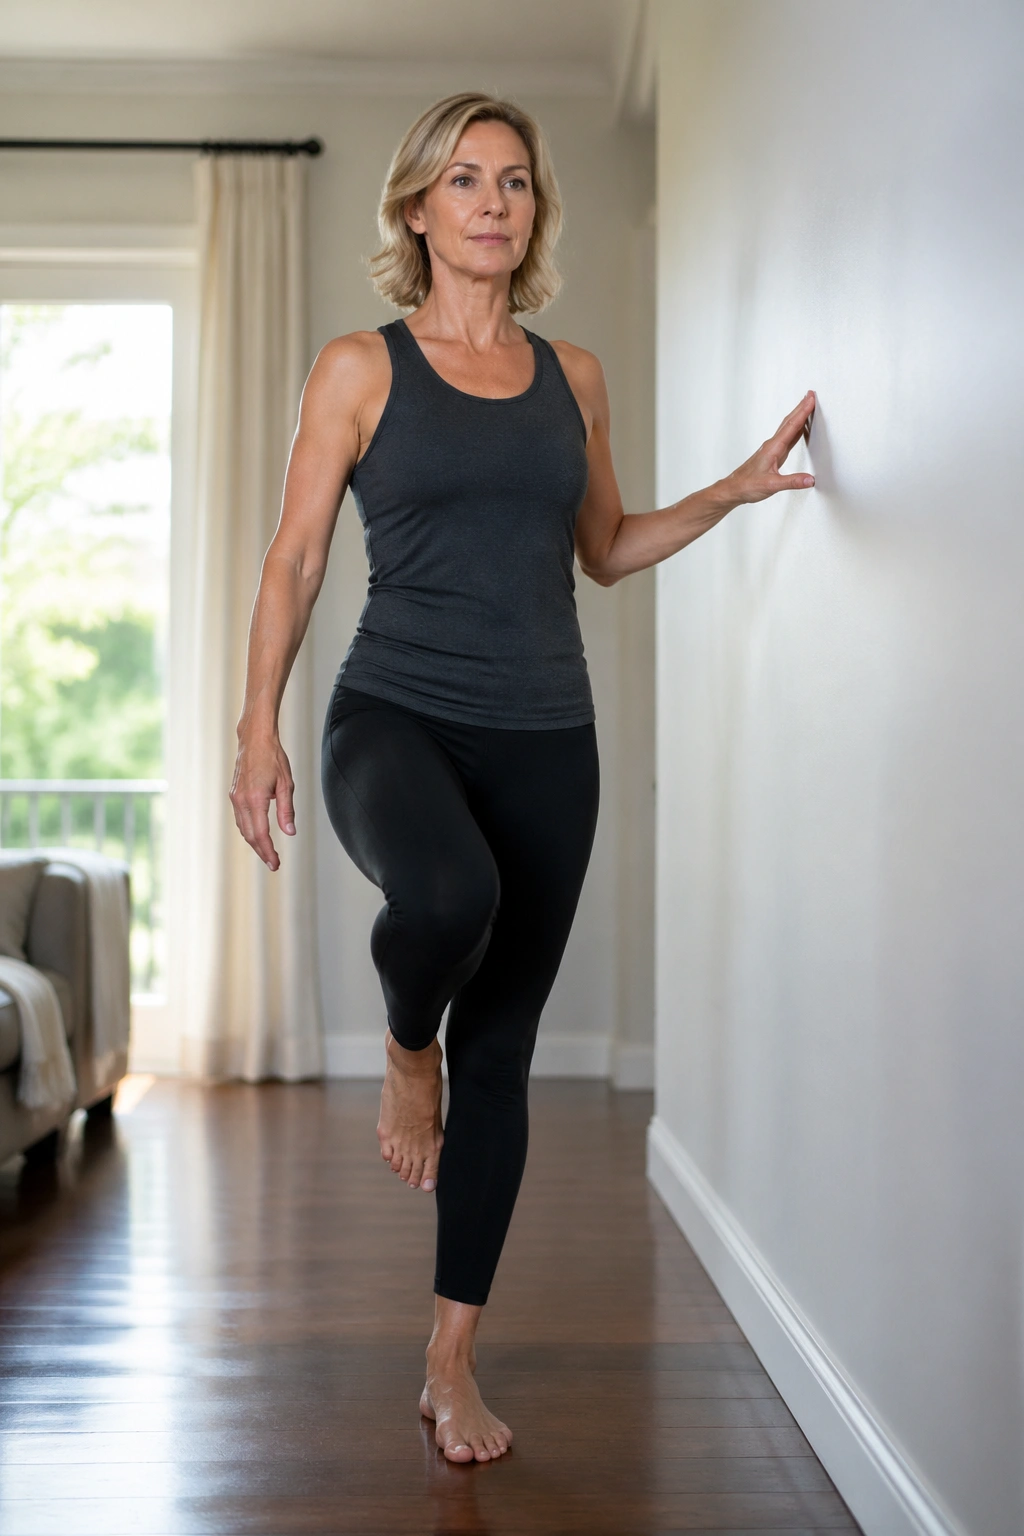
Balance work gets better when it starts small. A single-leg stand with the wall nearby is one of the simplest ways to train the nervous system without triggering a wobble-fest.
Stand facing the wall and rest one or two fingertips on it. Lift one foot off the floor and hold for 15 to 30 seconds. Keep the standing knee soft, the hips level, and the eyes steady on one spot. Switch sides. If that feels easy, try lightly turning the head side to side while holding the balance.
Do not lock the standing knee. That makes the body less responsive, not more stable.
This is one of those exercises that quietly pays off in daily life. You feel it when stepping off a curb, standing on one foot to put on pants, or catching yourself when the floor changes under you. Keep the wall touch light. If you lean hard into it, the standing leg stops doing its job.
18. Wall Dead Bug with Alternating Reach
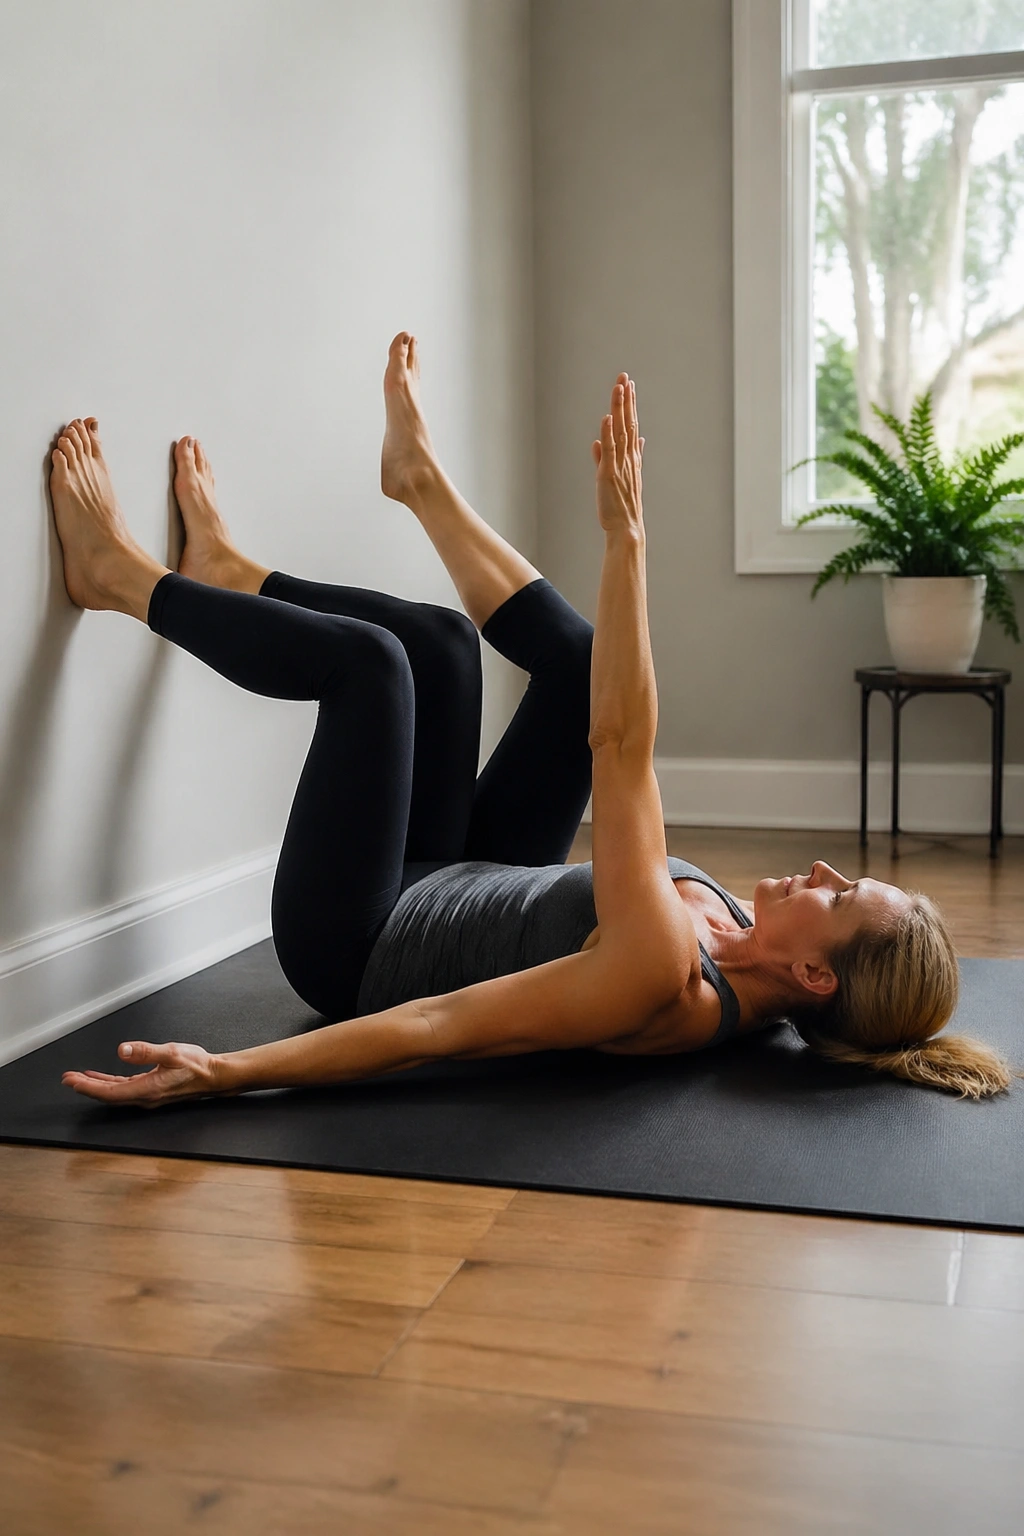
The dead bug is a core classic for a reason, and the wall version keeps it cleaner than many floor variations. It asks the ribs, pelvis, and deep abdominals to stay put while the arms and legs move.
Lie on your back with your calves or feet on the wall, knees bent about 90 degrees. Reach both arms toward the ceiling. As you exhale, lower one arm overhead while the opposite leg slides down the wall a few inches, then return to the start and switch sides. Do 6 to 10 reps per side.
The lower back should stay gently connected to the floor. If it arches, shorten the leg reach. If your neck strains, keep your chin slightly tucked.
What I like here is the precision. There’s no hiding. The wall gives your legs a track, and the floor gives your spine feedback. If your body wants to twist, you’ll know fast. That makes this a strong choice for core control without the drama of faster ab work.
19. Shoulder Blade Squeezes in a Wall Cactus Hold
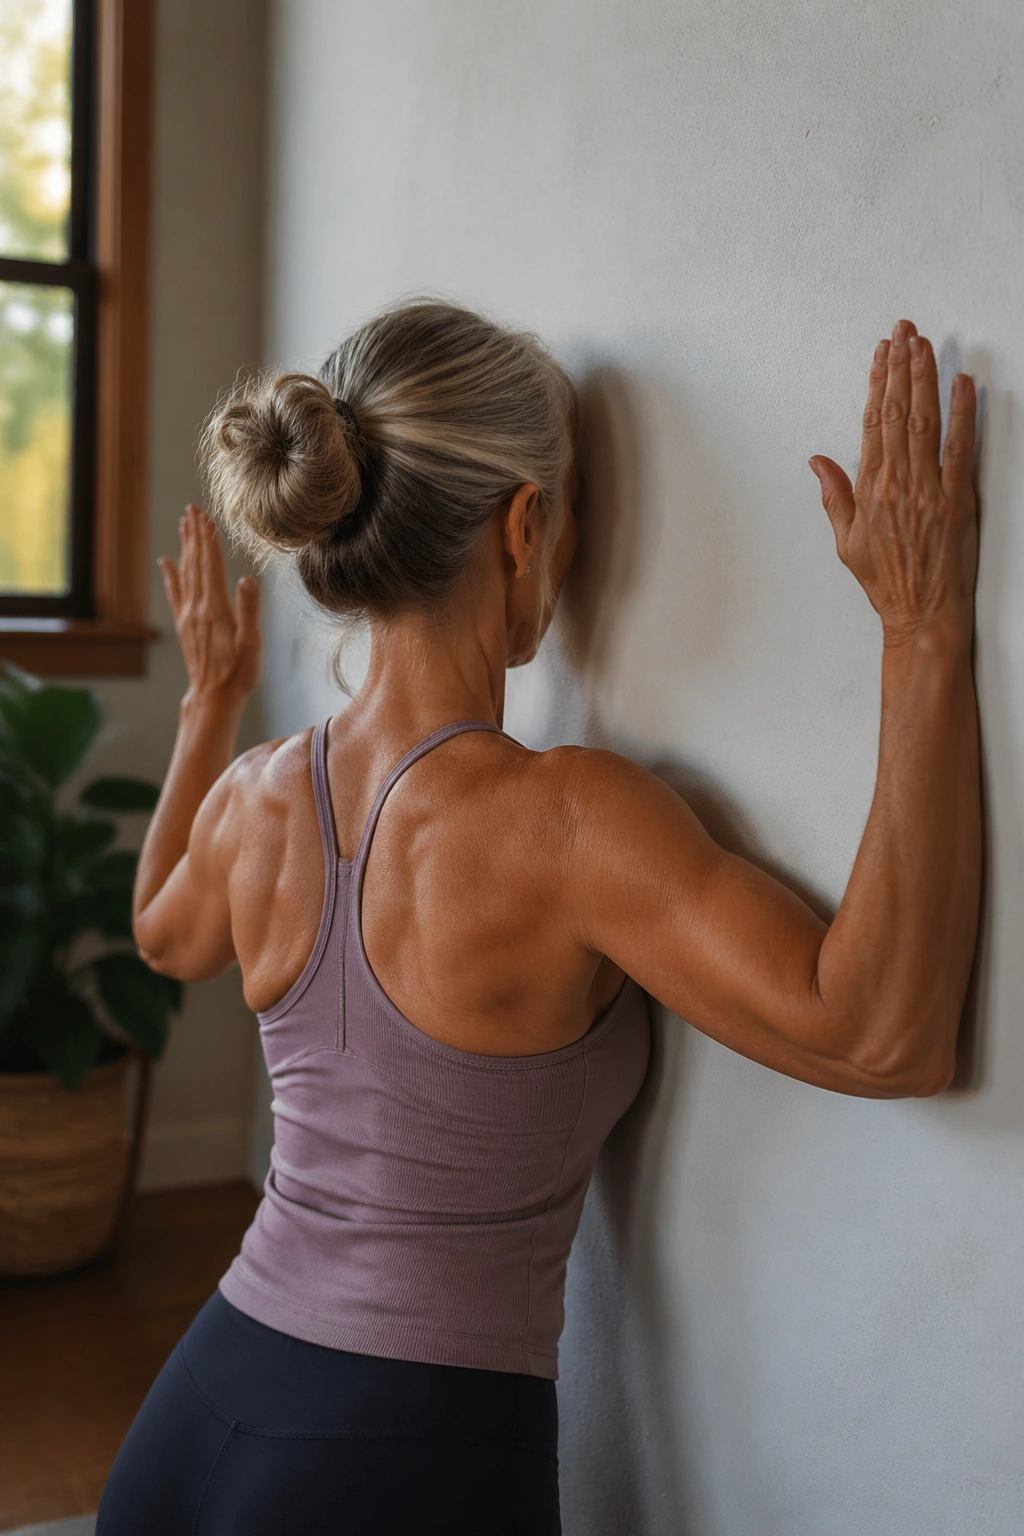
This move looks calm, but it wakes up the mid-back in a way most people can feel within a few breaths. It’s a good antidote to rounded shoulders and a good companion to wall angels because it isolates the shoulder blades a bit more.
Stand with your back against the wall, elbows bent in a cactus shape, upper arms near shoulder height. Gently press the elbows and forearms toward the wall, then draw the shoulder blades down and slightly together. Hold for 2 seconds, release, and repeat 8 to 12 times.
Keep the movement small. The point is not to pinch the shoulders together like you’re trying to hold a pencil between them.
If the low back arches, bring the feet farther forward and soften the ribs. If the neck tightens, drop the shoulders and start again. This is one of those moves that looks easy but feels oddly deep when done well. That’s usually a sign you’ve found the right muscles.
20. Standing Hip Circles with Wall Balance
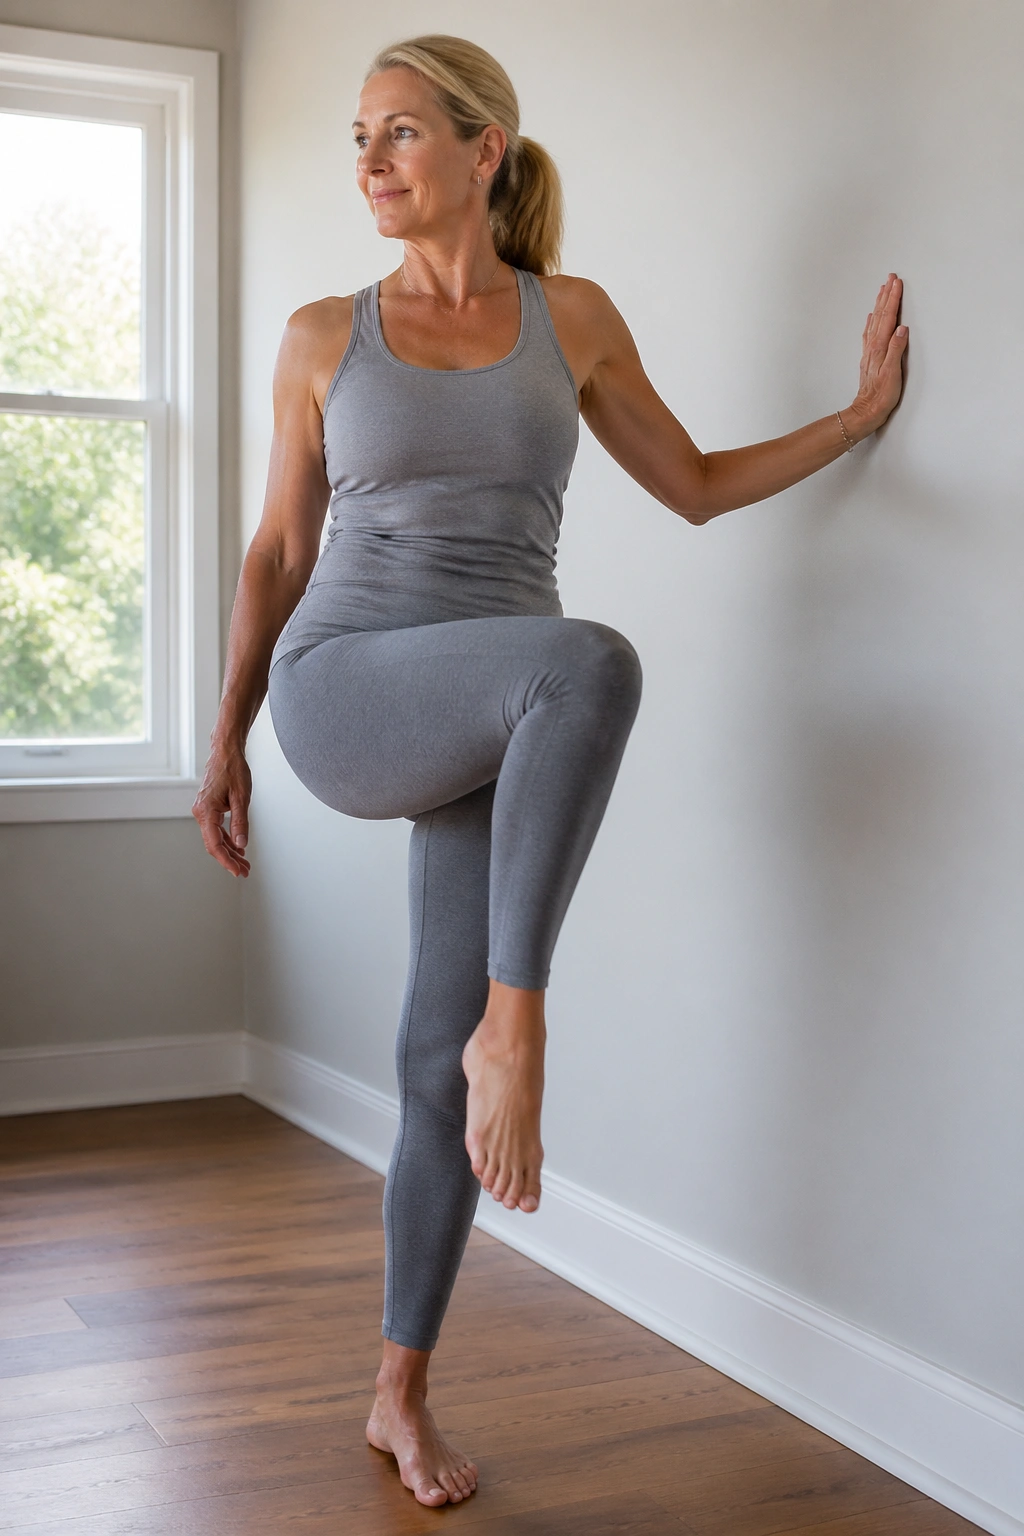
Stiff hips can make everything from walking to twisting feel clunky. Standing hip circles loosen the joint while teaching the standing leg to stay steady, which makes them a smart choice for older bodies that want mobility without chaos.
Stand near the wall with one hand resting on it. Lift one knee and draw small circles in the air, keeping the torso quiet and the circle controlled. Make 5 circles one direction, then 5 the other, and switch sides. If lifting the knee feels awkward, keep the foot lower and make the circle smaller.
Keep these cues in mind
- The pelvis stays level.
- The standing foot stays grounded.
- The circle stays smooth, not jerky.
You may feel this in the outer hip, hip flexor, or even the lower abdominals. That’s normal. The smaller the circle, the more honest the work tends to be. Big circles can turn into swinging. Small circles reveal control.
21. Wall Reset and Breath Finish for Women Over 50
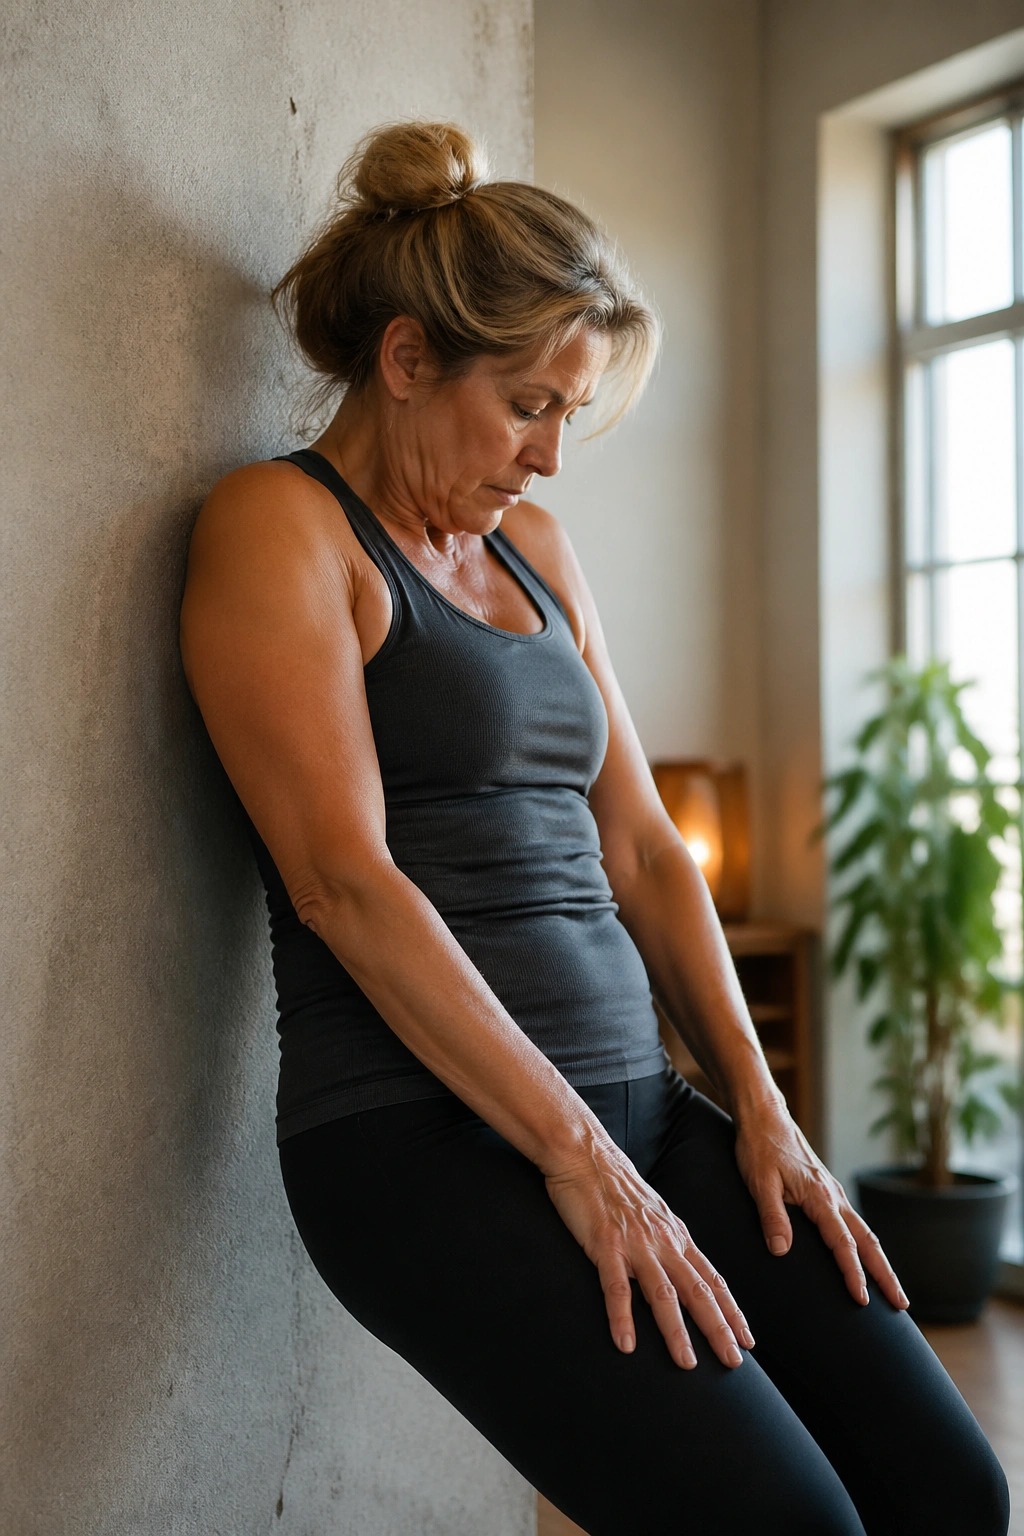
A good wall session should end with your body feeling taller, not just tired. This final reset brings the whole thing back to breath, posture, and a quieter nervous system.
Stand with your back a few inches from the wall and your feet parallel. Inhale as you reach both arms overhead, then exhale as you lower them slowly, letting the shoulders soften and the ribs settle. Repeat 5 to 6 times. If you want a little extra release, lift the heels on the inhale and lower them on the exhale.
That’s it. Simple and calming.
This finish matters because it reminds you that wall Pilates is not only about muscle work. It is about alignment, breath, and the odd little satisfaction of standing in a room and feeling your own body stack itself a bit better than it did ten minutes earlier. Use it after the other moves, or use it on its own when your back feels stiff and your mind is busy. Even a short session can leave you feeling longer through the spine, lighter through the chest, and less pinned to the floor.
