



Outer-thigh work in Pilates has a funny little trick to it: the movement looks small, then your hip starts arguing with you about 20 seconds later.
That is exactly why people keep coming back to it. The outside of the thigh is not a neat, isolated strip of muscle that you can carve out with one magic move. It’s a mix of hip abductors, glute medius, glute minimus, and a few stabilizers that help keep your pelvis from wobbling when you walk, squat, climb stairs, or stand on one leg to get dressed.
A lot of women notice the same pattern. Squats feel fine until the knees drift inward. Side lunges feel fine until the standing hip gets lazy. Walking uphill feels fine until one side of the pelvis starts dropping. Pilates fixes that kind of thing with precision, not drama. Small range. Clean alignment. Controlled tempo. That’s where the real burn lives.
The best outer-thigh Pilates workouts don’t chase height. They chase control. If the movement is working, you should feel it high on the outer hip and upper outer thigh, not in your lower back or the front of your hip. Start there, and the rest gets much easier.
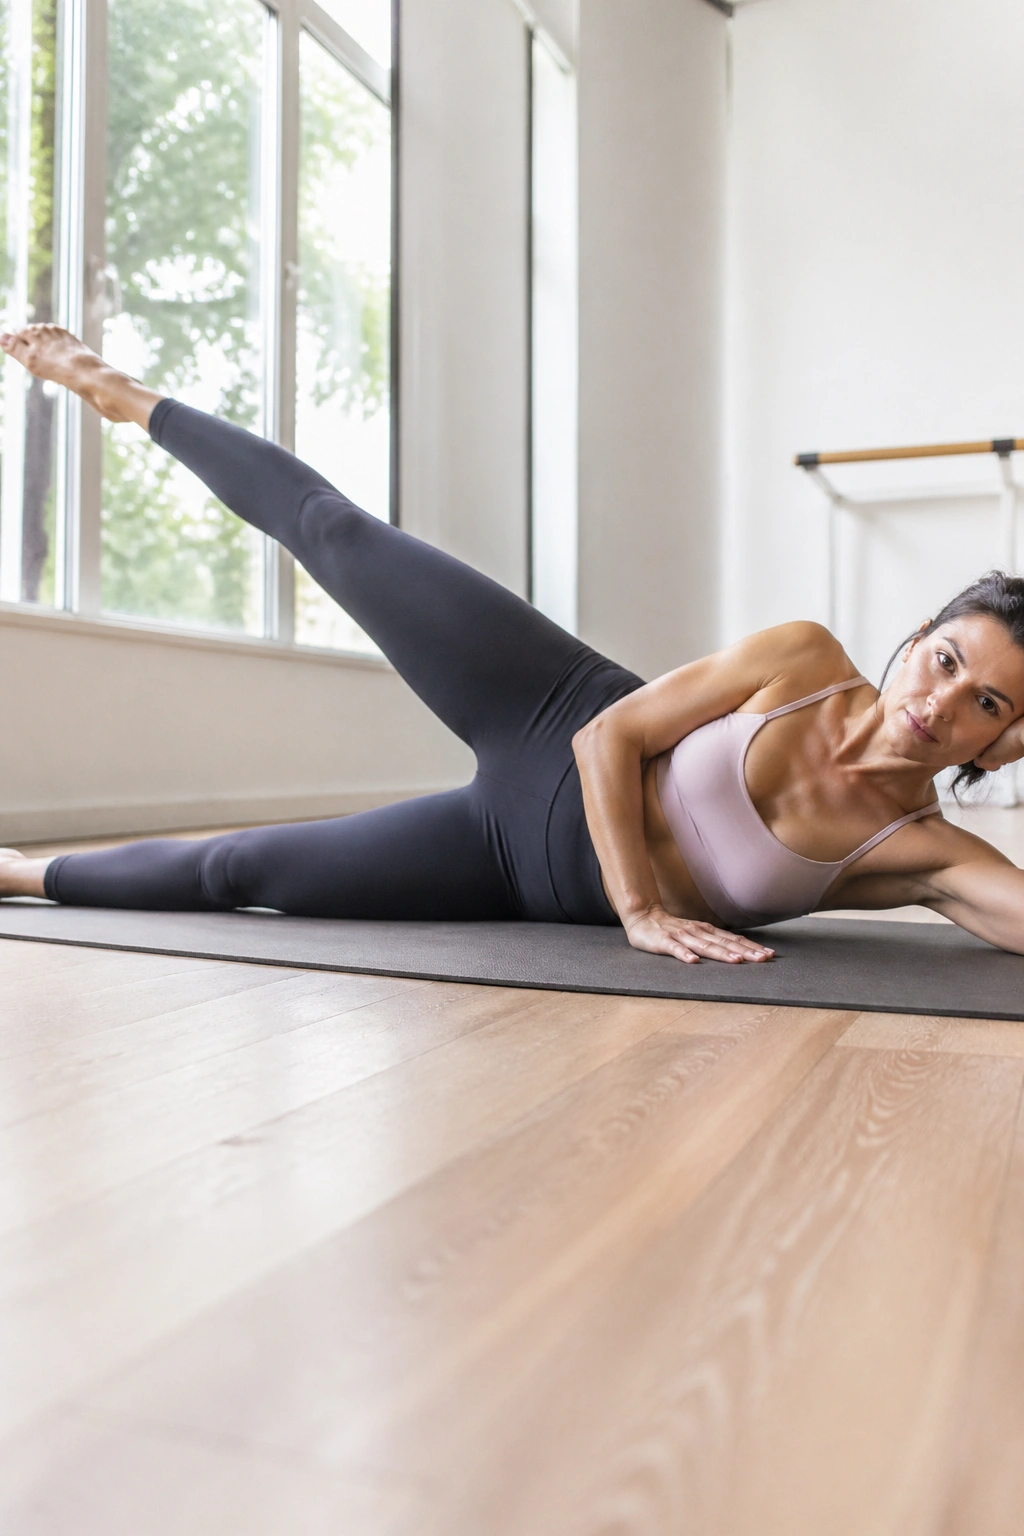
1. Side-Lying Leg Lifts
A clean side-lying leg lift still earns its place because it shows you, fast, whether your hip is doing the work or your whole body is cheating.
Why it hits the outer thigh
Lie on your side with your hips stacked, legs long, and your bottom waist lightly lifted off the mat. The top leg comes up only 6 to 10 inches. That’s enough. More height usually turns into hip hiking, which shifts the load away from the outer thigh and straight into your lower back.
Keep the top toes either pointed forward or just slightly angled down. That tiny angle matters. It keeps the lift honest and helps the glute medius take over instead of the front of the hip.
- Do 10 to 15 slow reps per side.
- Pause for 1 second at the top.
- Lower with control, not gravity.
- If your waist collapses into the mat, bend the bottom knee for support.
Best cue: lift less than you think you need to. Tiny range, deep burn.
2. Clamshells
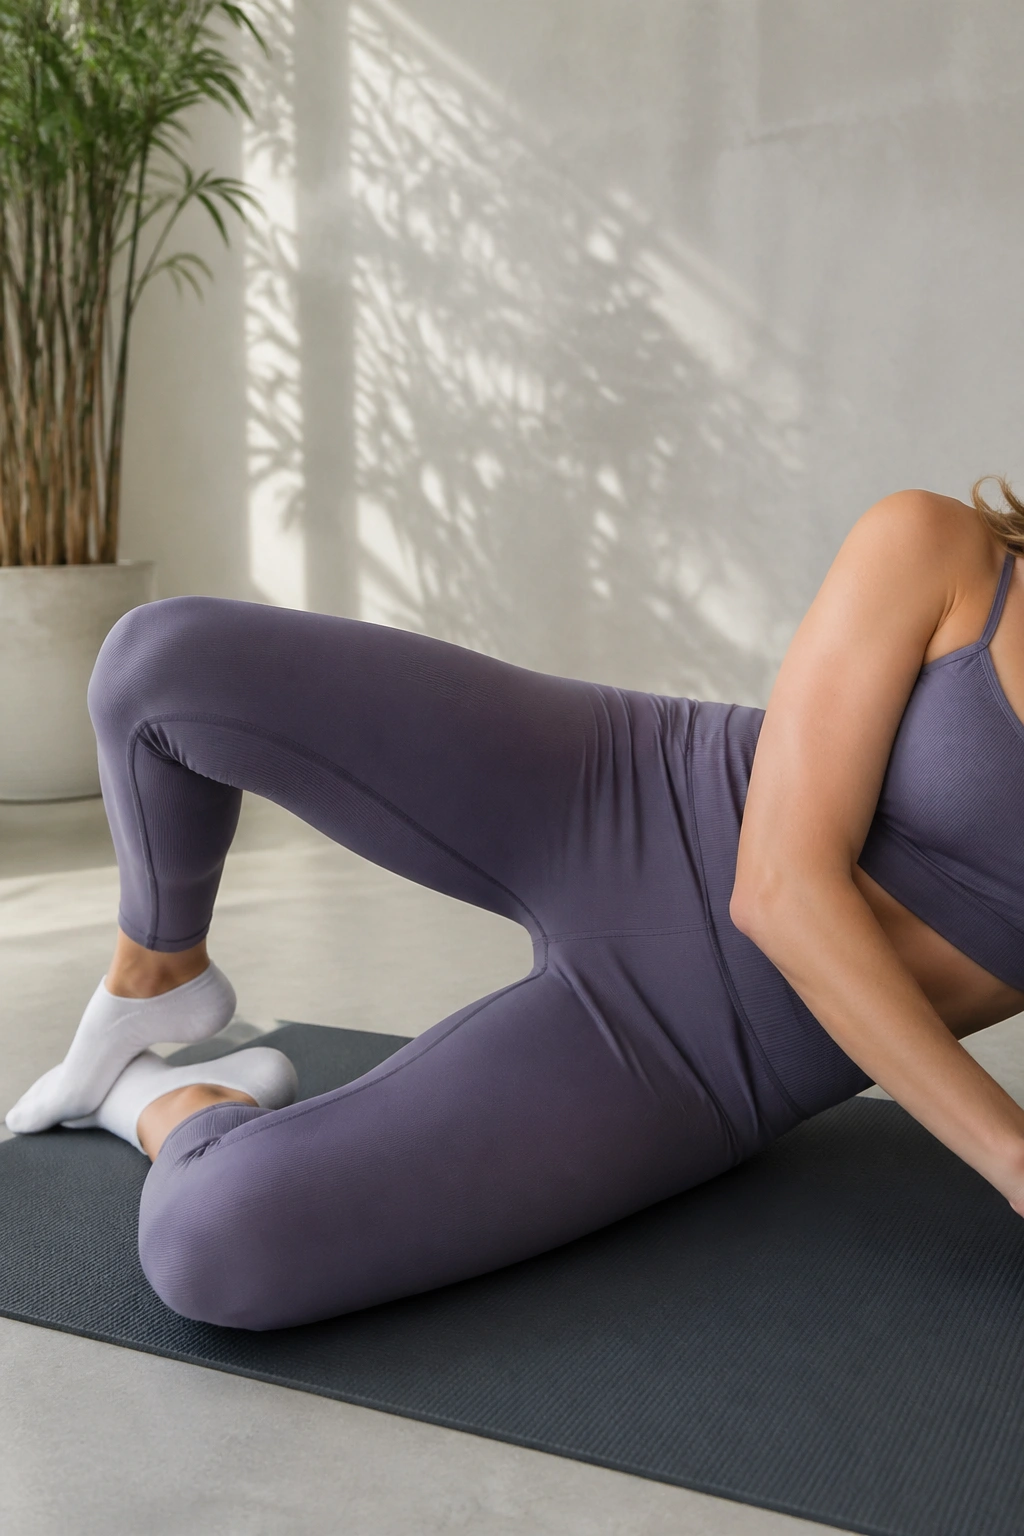
This one looks harmless. Then the last five reps start to feel like they were designed by someone with a grudge against your side hip.
Lie on your side with knees bent, heels together, and hips stacked. Open the top knee like a clamshell, but keep your pelvis still. That last part is the whole point. If the top hip rolls backward, you are not training the outer thigh anymore. You’re giving it a shortcut.
A loop band above the knees makes this move even better, though bodyweight works fine when you’re learning the pattern. Keep the feet glued together and open only as far as the pelvis stays quiet. Think of the movement as a small door hinge, not a dramatic split.
The clamshell is one of the best Pilates outer thigh workouts for women who sit a lot. Sitting tends to make the glutes sleepy. This wakes them up without pounding the knees. Start with 12 reps per side and slow down if the burn never shows up where it should.
3. Side-Kick Front-to-Back
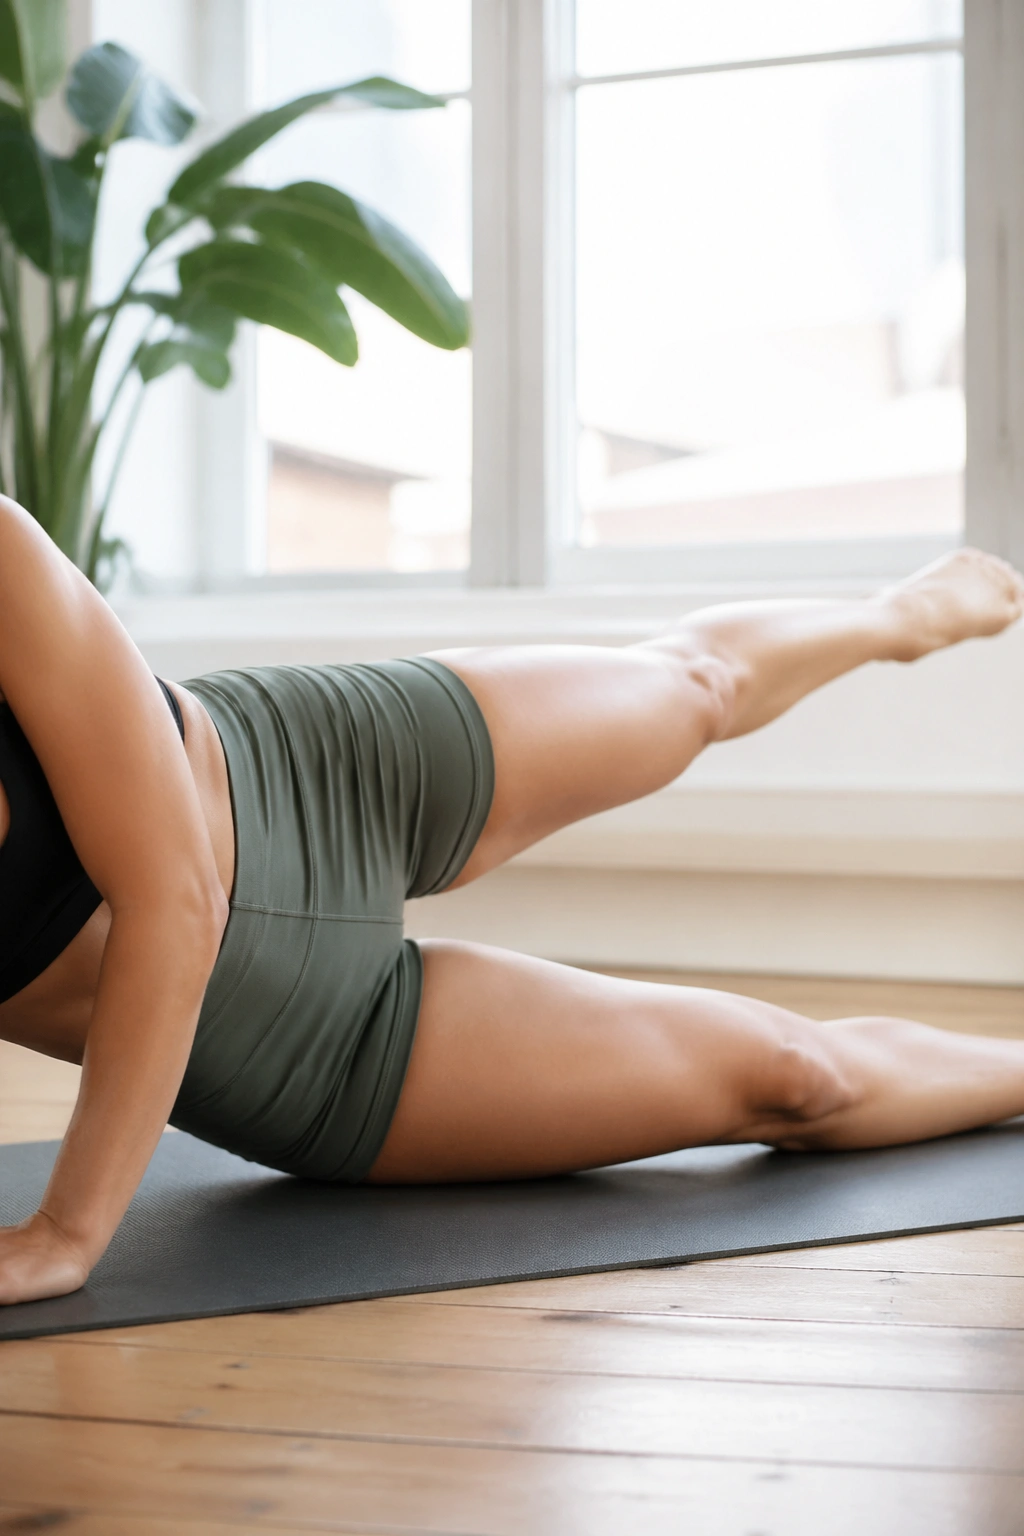
Why does this one work so well? Because it forces the outer hip to stay organized while the leg moves through two directions at once.
Lie on your side and prop your head on your bottom arm. The top leg lifts a few inches off the mat, then swings forward and back without letting the torso rock. The challenge is not the kick itself. The challenge is keeping the pelvis steady while the leg travels.
How to use it
Keep the working leg long and the foot lightly flexed. That helps you feel the back of the thigh and outer hip instead of flinging the leg around with momentum. The front swing should stay low. The back swing should stop before your low back starts to arch.
Do 8 to 12 controlled swings in each direction. If your hip flexor starts barking, shorten the front kick and focus more on the back sweep. That usually fixes it.
This move is one of those Pilates classics that looks simple on paper and very different after three honest sets.
4. Side-Kick Circles
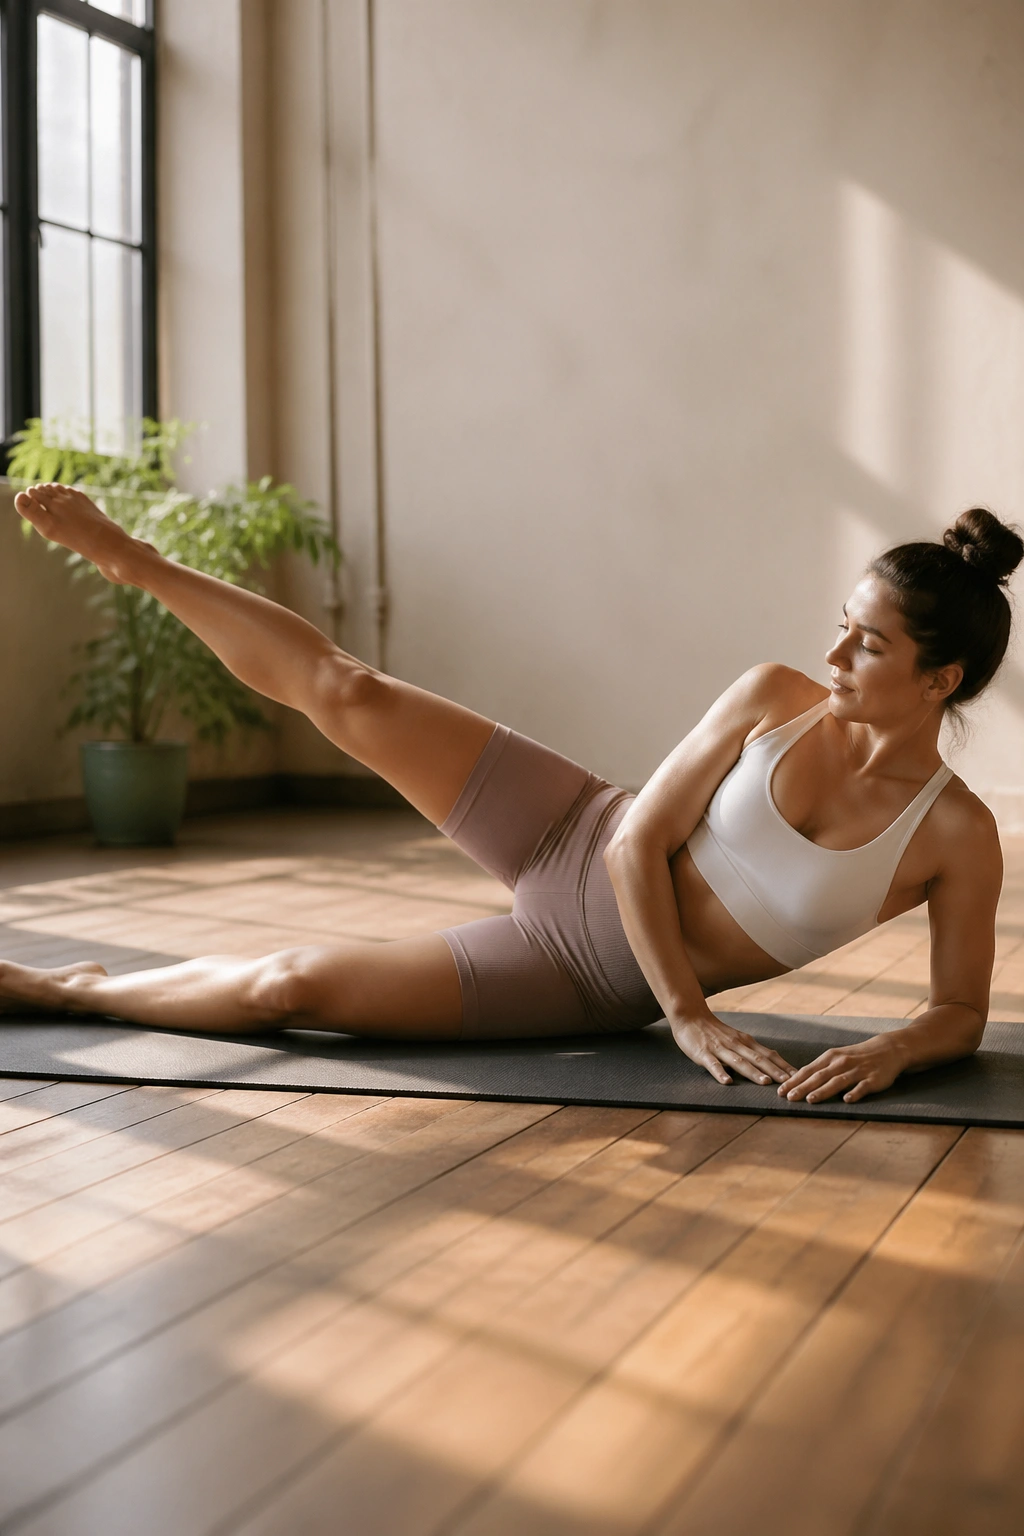
A small circle can light up the side of the hip faster than a big one, and that’s the version I prefer.
Set up the same way as side-kick front-to-back. Then draw circles with the top leg, keeping the shape small enough that your pelvis stays quiet. If the circle gets wide, the torso starts to roll and the outer thigh loses the job. Smaller is better here. Much better.
What to watch for
- Circle the leg from the hip, not the knee.
- Keep the movement smooth, with no jerks at the bottom.
- Hold the waist off the floor.
- Switch directions after 8 to 10 circles.
A lot of people make circles huge because huge feels productive. It usually is not. A tighter circle gives you more control and a cleaner burn along the outer hip. If your lower back feels busy, shrink the circle until the movement calms down.
One clean set of these can leave your side hip feeling awake for the rest of the workout.
5. Side-Lying Small Pulses
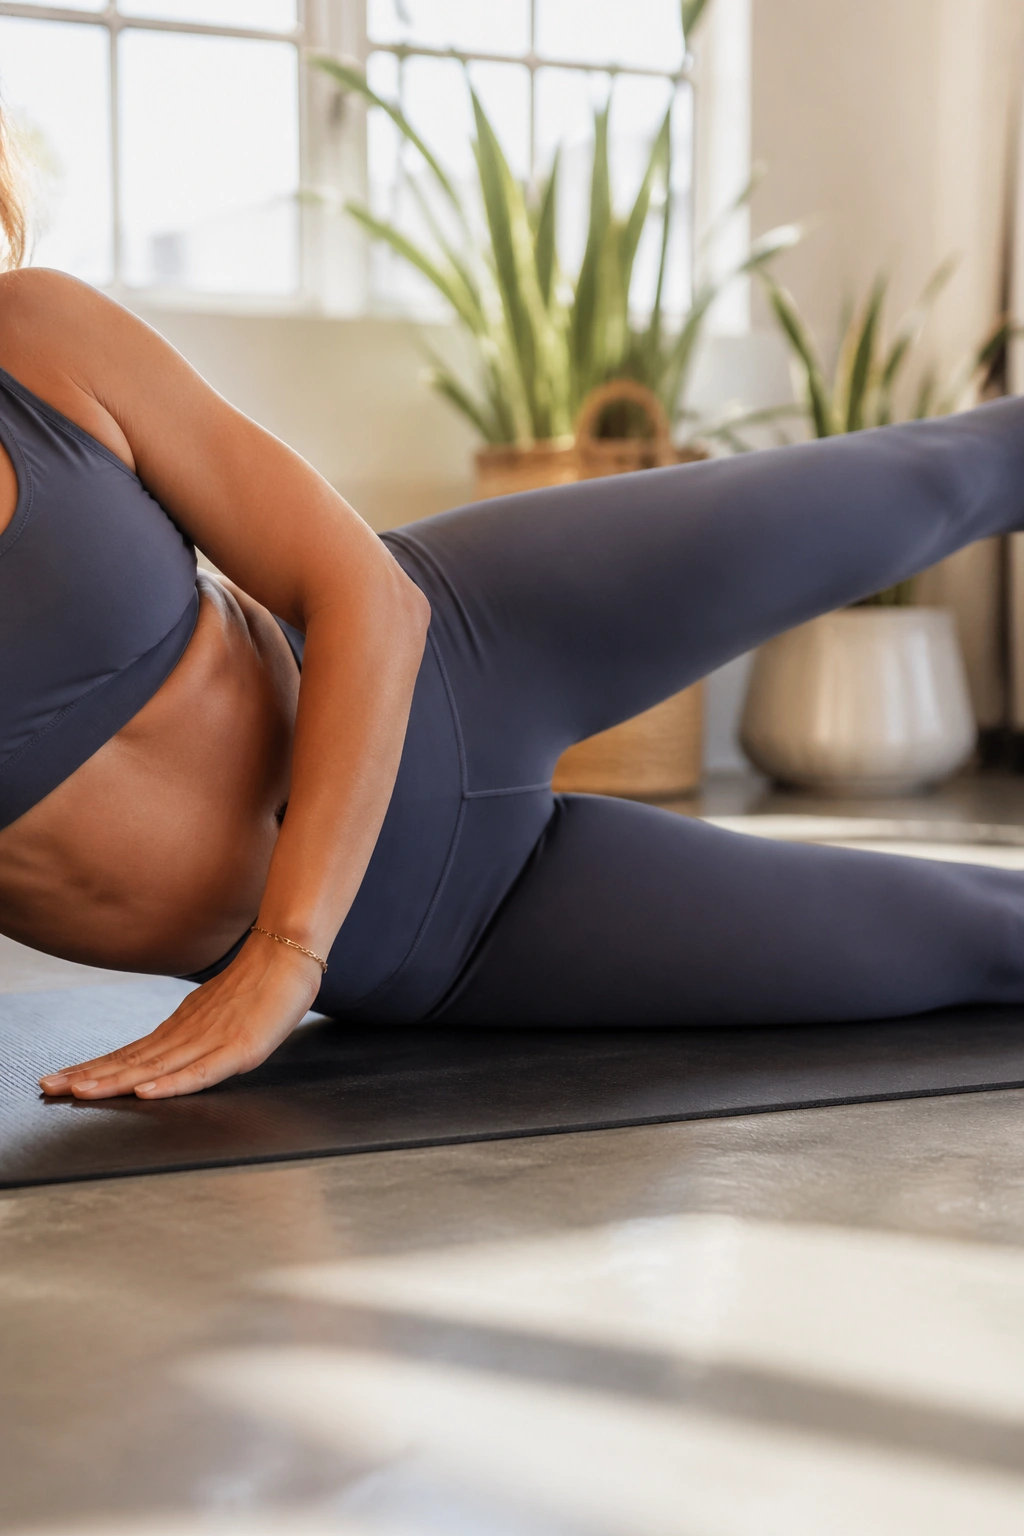
Tiny pulses are rude in the best way. They ask for almost no motion and somehow manage to light up the whole outer thigh.
Stay on your side and lift the top leg into a mid-range position, then pulse up an inch or two. That’s it. No swinging. No rocking. No drama. The pulse should feel like it lives deep in the side of the hip, not in the front of the thigh.
Breathe out on the lift and keep the foot turned slightly down if you want more glute medius work. If the leg is lifting high enough to make your waist crunch, you’ve gone too far. Bring it down.
Twenty to 30 pulses is a useful target, but even 12 honest ones can sting if you’ve set up well. This is a perfect finisher move, especially after side kicks or clamshells. The outer thigh doesn’t need wild range to work hard.
6. Side Plank with Top-Leg Lift
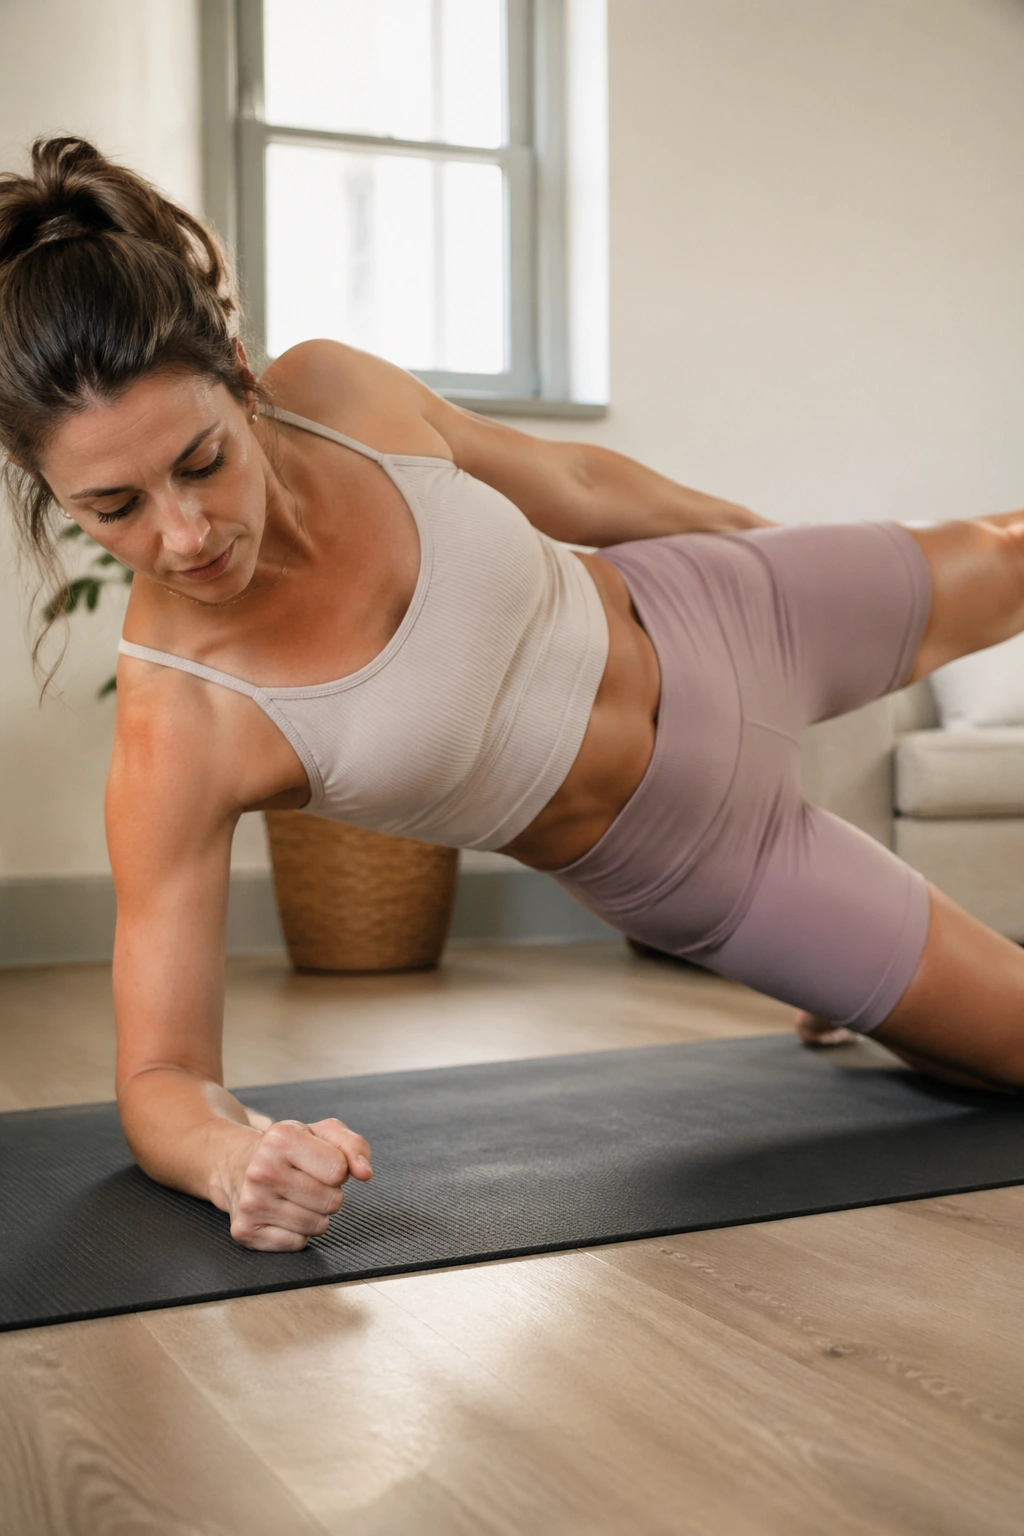
Unlike a basic side plank, this version asks your trunk to hold steady while the outer hip on top side does the lifting. That combination is what makes it so useful.
Set up in a forearm side plank, either on your knees or with straight legs if you’ve got the strength and balance. Once the side plank feels steady, lift the top leg a few inches. You’re trying to keep the body in one line while the leg does a very separate job. No twisting. No dumping into the lower shoulder.
A bent-knee version is fine and often smarter. The point is not to impress anyone with a long lever. The point is to keep the ribs from flaring and the top hip from rolling backward.
Good version, better version
- Good: knees down, top leg lifts slowly.
- Better: straight legs, top leg lifts without hip rotation.
- Best: no neck strain, no shoulder collapse, clean breath.
Do 6 to 10 lifts per side, or hold the top leg up for 15 to 20 seconds. This one hits the outer hip hard and gives your waist a nice side-body challenge too.
7. Standing Side Leg Lifts With a Chair
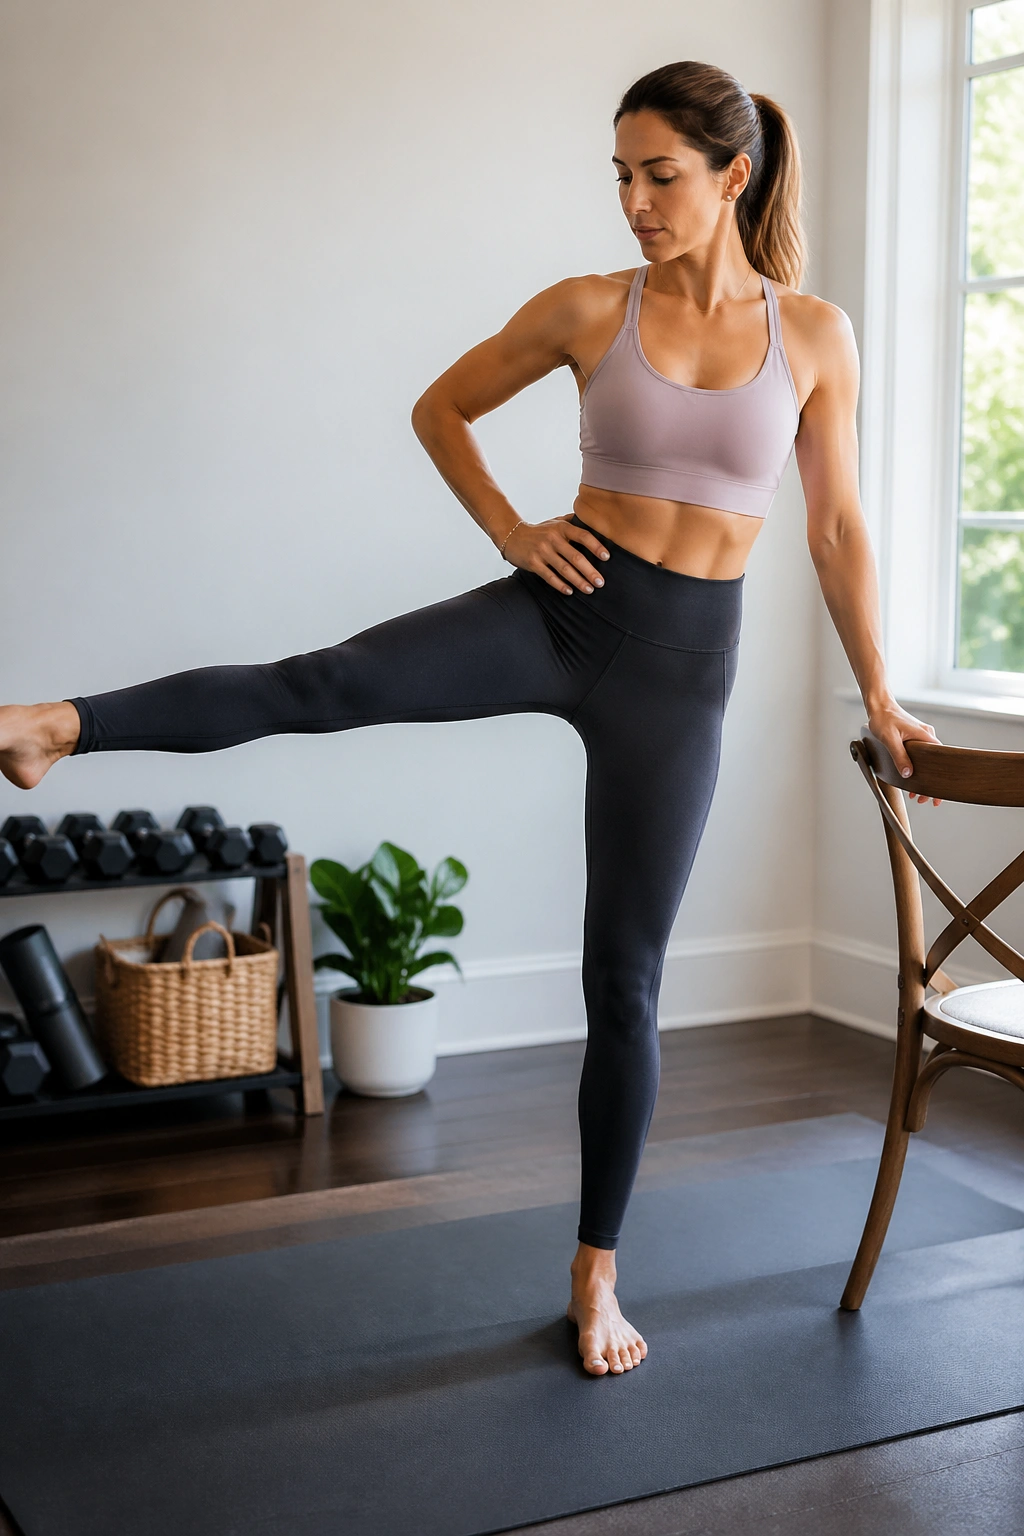
Standing work matters because your outer thigh does not only function on the mat. It works when you are upright, loaded, and balancing on one leg.
Stand beside a chair, countertop, or wall with one hand lightly touching for support. Shift your weight onto the standing leg, keep the torso tall, and lift the free leg straight out to the side. The movement should stay clean and boring-looking. That is a good thing.
If the standing hip sways, lower the height. If the toes turn out, fix them. If the torso leans, stop and reset. This move gets sloppy fast, so the support hand earns its keep. You can even think of your standing side as the real working leg, because that’s where the stabilizers get challenged.
Try 12 reps on each side. If balance is the weak point, slow the tempo and pause for one count at the top. The chair version is also a smart entry point for women who want outer thigh work without getting down on the floor.
8. Lateral Band Walks
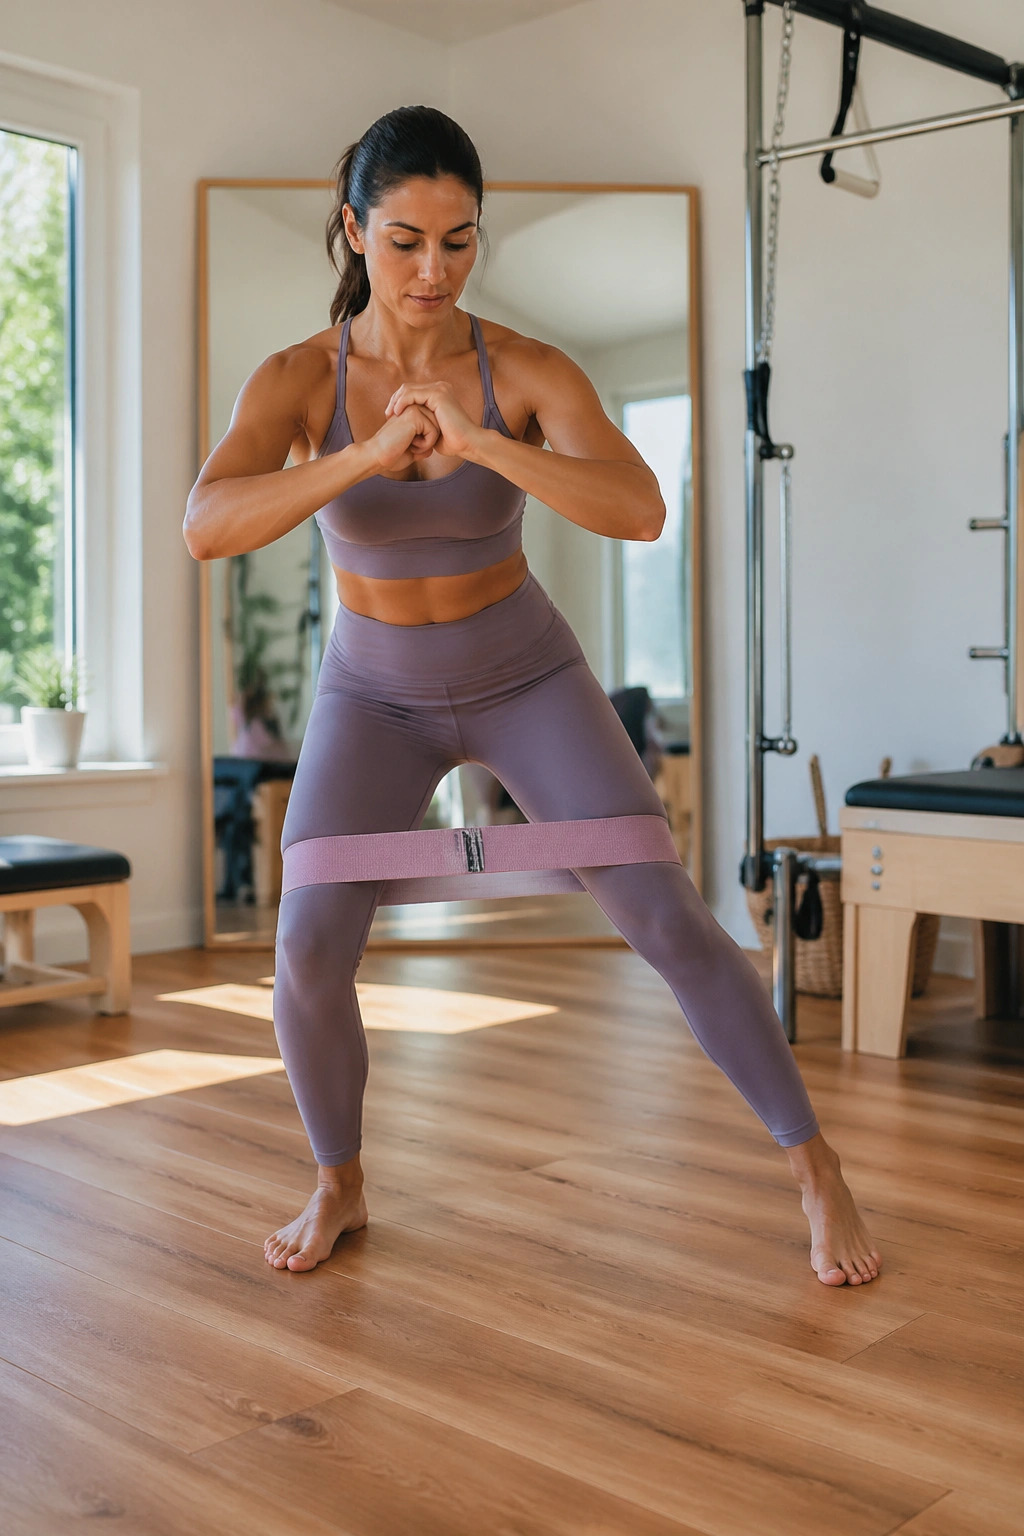
Put a loop band around your thighs or ankles and the outer hips wake up almost immediately.
Take a small athletic stance, knees soft, chest lifted, and step sideways with enough tension on the band to feel resistance the whole time. Then bring the trailing foot in without snapping the band slack. The steps are short. The burn is not.
What makes the difference
The band should not force you into a wide, duck-footed posture. Keep the feet mostly parallel and the knees tracking over the second toe. If your knees cave inward on the return step, slow down and shorten the distance.
Eight to 12 steps in one direction, then back the other way, is enough for most people. I like this move as a warm-up before harder outer-thigh work because it wakes up the hip stabilizers before they get tired.
A band around the ankles makes the exercise harder. A band above the knees is friendlier. Start there if you’re new to lateral band work. Your outer thighs will tell you when the set is done.
9. Curtsy Lunge to Side Reach
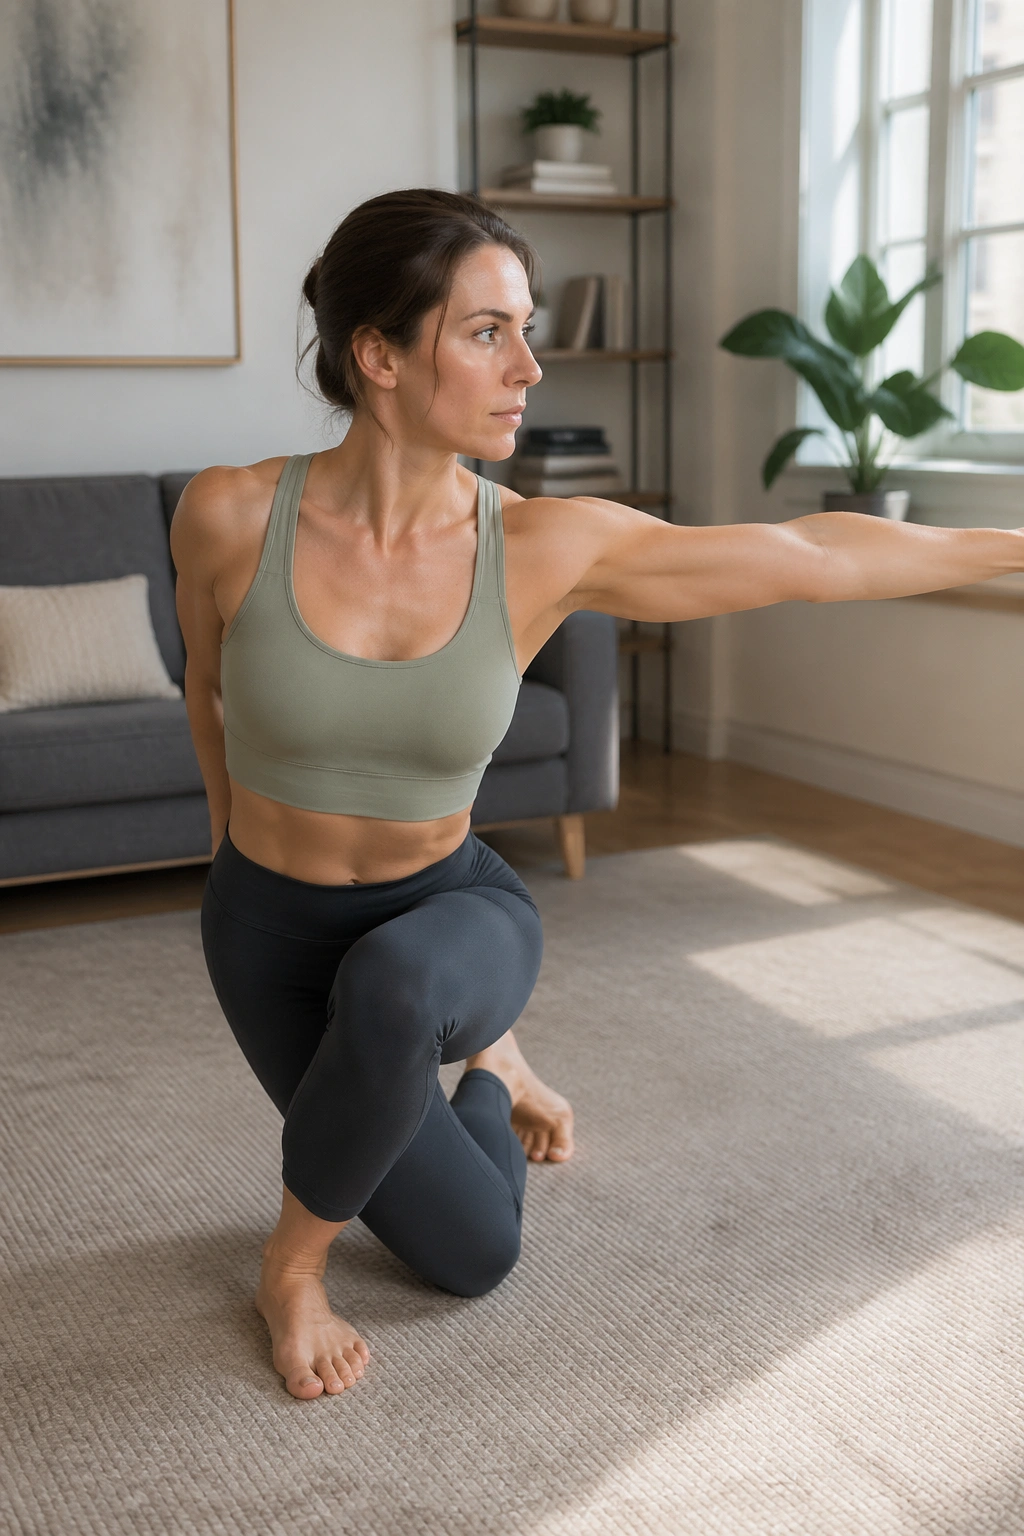
The first time you try this, it can feel a little like a dance step that got ambushed by strength training.
Step one leg back and across into a curtsy lunge, keeping the torso tall. Then come up and reach the same leg or the opposite arm out to the side, depending on the variation you choose. The cross-behind angle makes the outer hip work harder than a straight lunge does, and the side reach adds balance and control.
If your knees are sensitive, shorten the depth of the lunge. A shallow curtsy still trains the outer thigh without forcing the knees into a deep bend. Keep your front heel grounded and your front knee tracking over the toes.
I like this one for people who want Pilates-style control with a little more standing strength. It feels athletic, but not harsh. Do 8 to 10 reps per side, and keep the tempo smooth enough that you never lose the line of the movement.
10. Glute Bridge with Band Press-Out
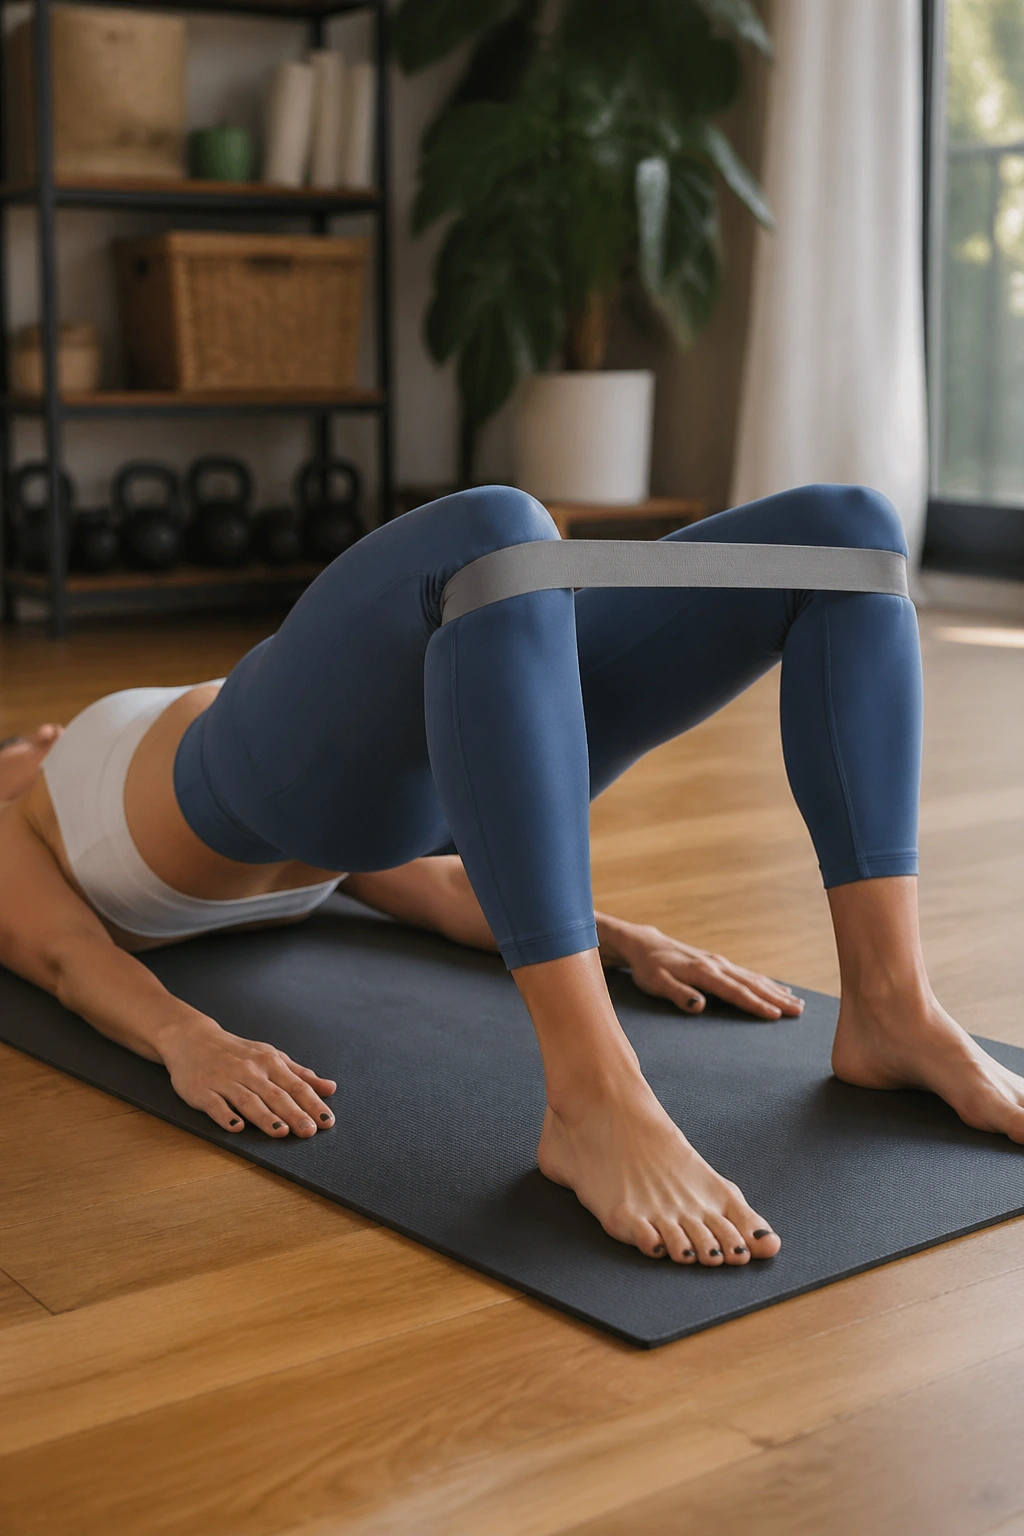
A regular bridge is fine. A bridge with a band around the thighs is better when you want the outer hips to get involved.
Lie on your back, knees bent, feet flat, and place a loop band just above the knees. Lift into a bridge, then gently press the knees outward into the band without rolling the feet or flaring the ribs. That little outward pressure brings the glute medius and side hip into the party.
The trick is not to shove the knees open as hard as possible. Press just enough to feel the band fight back. Your ribs should stay down, your weight should stay in the heels and mid-foot, and your lower back should not take over.
Do 10 to 15 bridges with a 2-second squeeze at the top. If your hamstrings cramp, move your feet a touch farther away from your hips. If you feel the move mostly in the front of the thighs, check that the knees are not drifting too far forward.
11. Fire Hydrants
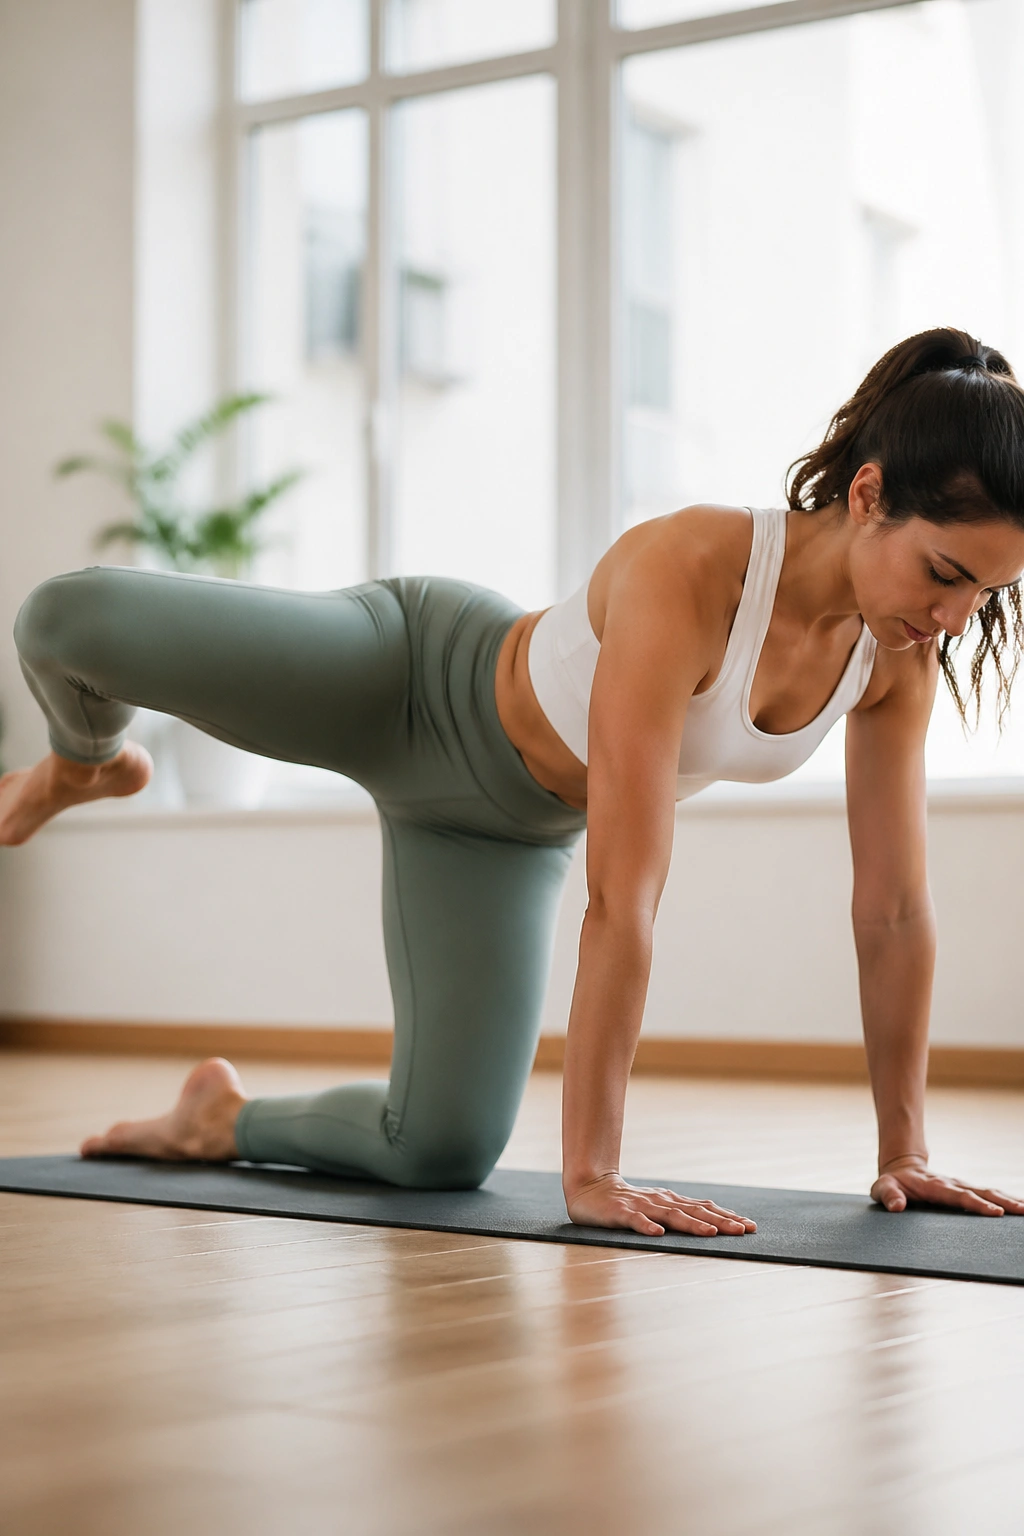
Fire hydrants get dismissed too easily. They shouldn’t.
Set up on hands and knees with wrists under shoulders and knees under hips. Keeping the knee bent, lift one leg out to the side until the thigh reaches about hip height or stops where the pelvis stays stable. The goal is not height. The goal is a steady pelvis and a working outer hip.
How to keep it honest
- Keep the belly lightly braced.
- Do not twist the torso open.
- Move slowly enough to control both directions.
- Use 10 to 15 reps per side.
If the supporting shoulder gets tired, take a quick reset between sides. That’s normal. If the standing hand is uncomfortable, drop to forearms or place a folded towel under the wrists. The outer thigh work still happens.
I like fire hydrants after bridges because the hip has already been warmed up, and the movement feels cleaner. Add a small pulse at the top if you want more intensity, but only if the pelvis stays square.
12. Rainbow Kicks
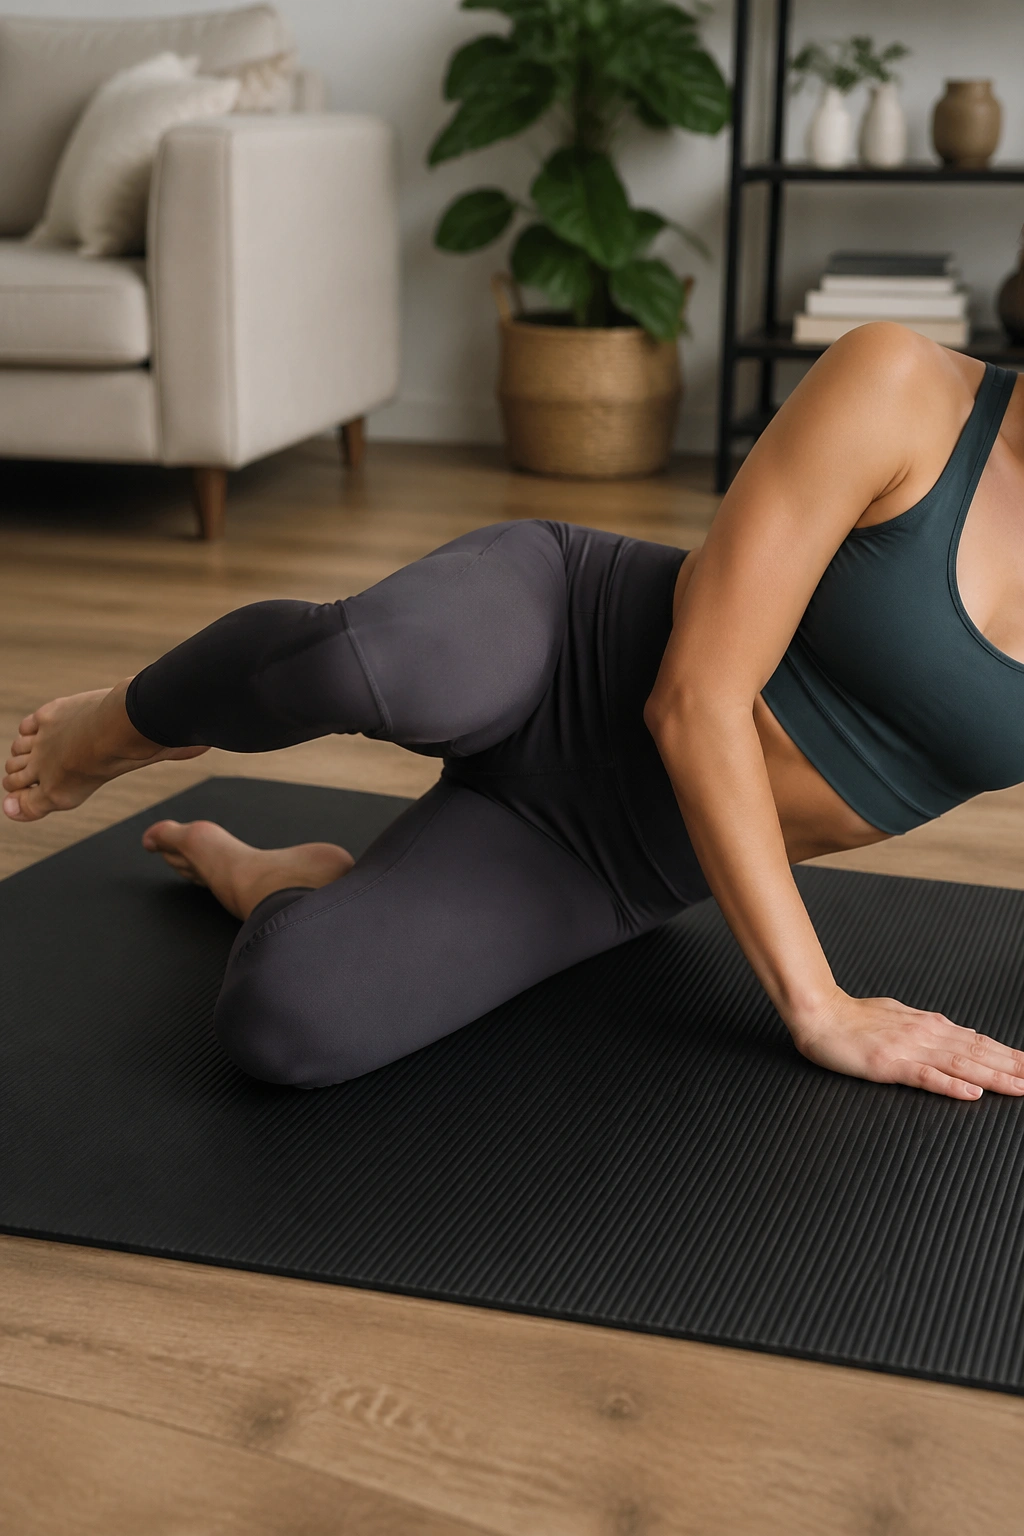
Imagine drawing a small rainbow with your foot while lying on your side. That’s the whole exercise, and it’s sneakier than it sounds.
Lift the top leg a little bit forward, then arc it back behind you in a controlled sweep, staying low the whole time. The arc should be small enough that your torso never rolls backward. This version asks the outer thigh to stabilize while the hip moves through a longer path than a simple lift.
The key is to keep the kick close to the mat. If the leg goes high, the low back gets involved and the shape gets messy. A modest range keeps the tension where it belongs and makes the movement far more useful.
Eight to 12 arcs per side is a good start. Add a pause when the leg reaches the back point if you want the glute side muscles to work harder. That tiny pause can be brutal in the best way.
13. Wall-Assisted Standing Abductions
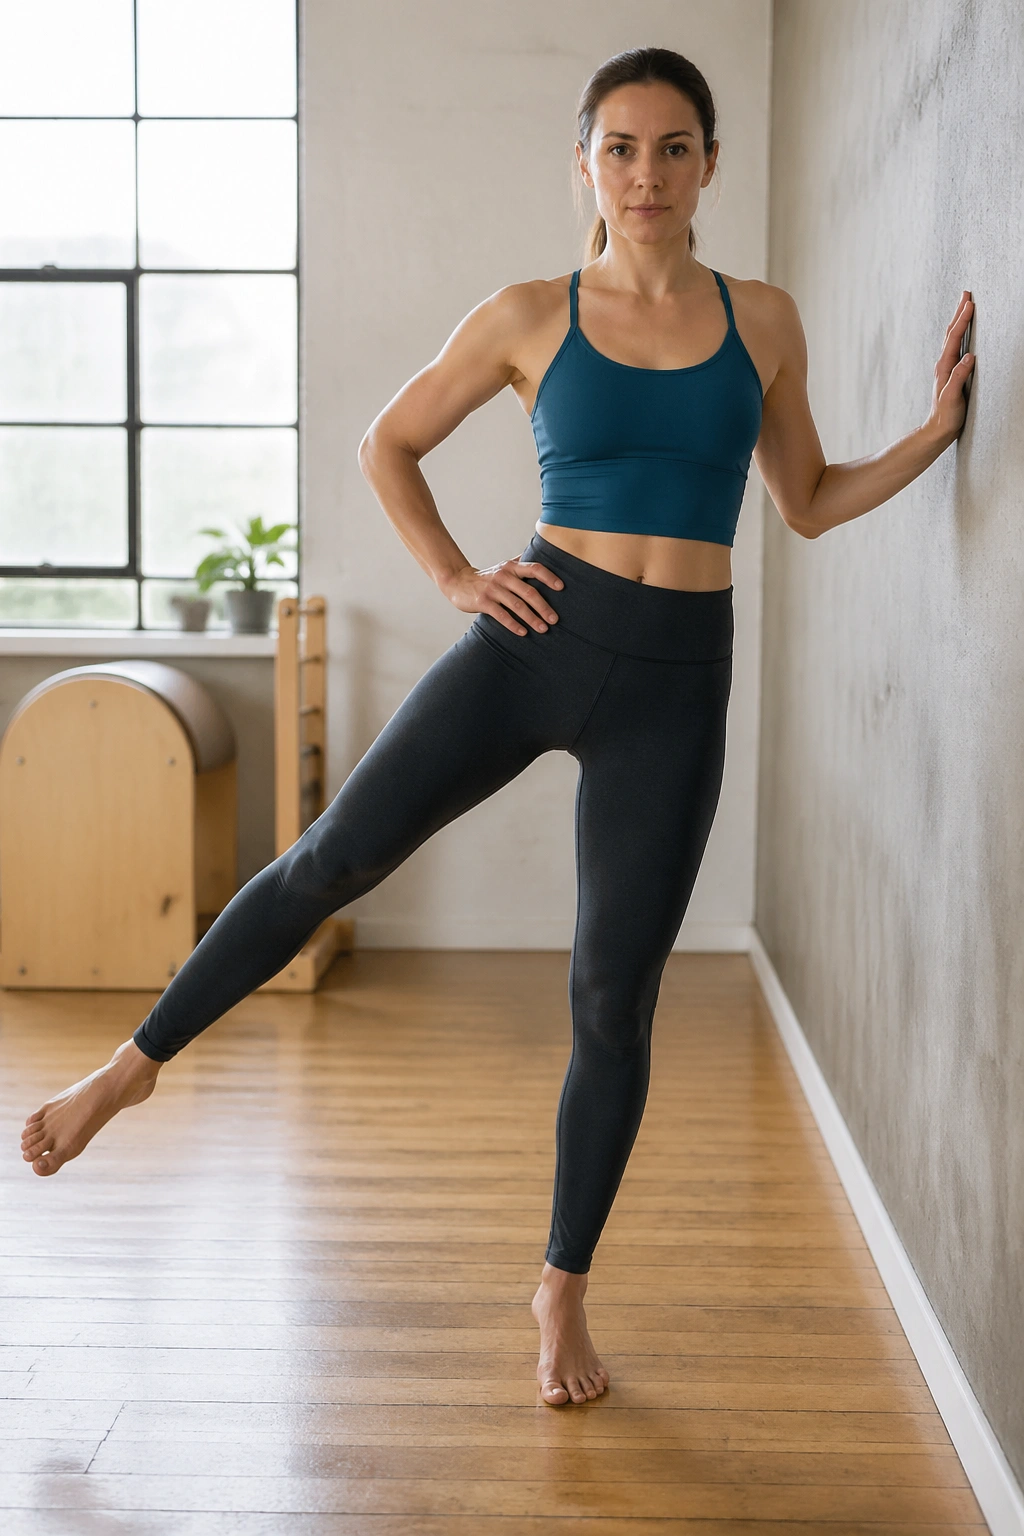
Stand beside a wall and you’ll learn fast how much your standing hip has been doing for you all along.
Place one hand lightly on the wall, stand tall on the support leg, and lift the free leg out to the side. The wall keeps your torso from drifting, which lets you feel the outer hip on the standing side in a very direct way. That’s what makes this version useful. It strips out a lot of the balance noise.
Try to keep the standing foot rooted and the pelvis level. If the body leans toward the wall, reduce the range. If the free leg turns out, bring the toes forward again. Small corrections matter a lot here.
This is one of the easiest outer-thigh Pilates workouts to teach and one of the easiest to do badly. Slow is your friend. Ten to 12 controlled lifts per side is usually enough.
14. Skater Hinge and Reach
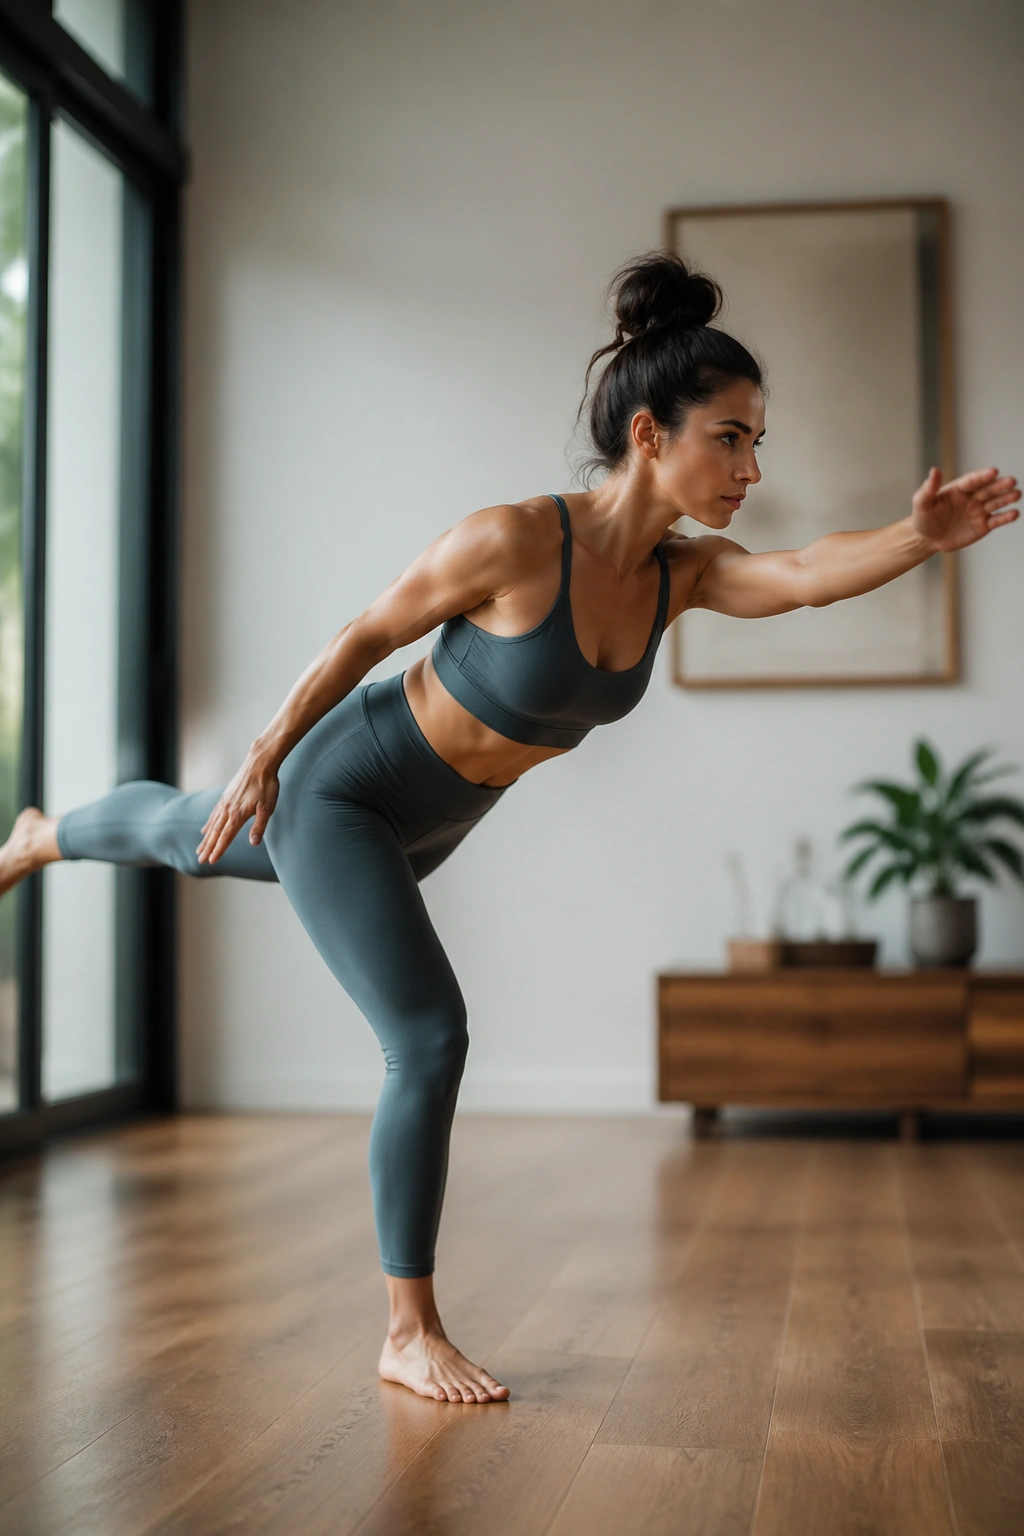
A skater hinge looks simple until the hips start asking for real control.
Stand on one leg, hinge slightly at the hip, and let the free leg reach behind you while the opposite arm reaches forward or down. Then return to standing. The body should feel like it’s balancing on one clean line, not collapsing into the standing knee. The outer thigh on the standing side works hard to keep everything centered.
I like this move because it feels like life. You’re not lying on a mat in a perfect little pose. You’re stabilizing, reaching, loading, and standing back up. That has real carryover to walking and stair climbing.
Keep the stance soft and the reach modest. Big reaches tend to cheat the hip. Do 8 to 10 reps per side, and stop if the standing knee caves inward. That knee position tells you more than the leg lift does.
15. Ankle-Weight Side Kicks
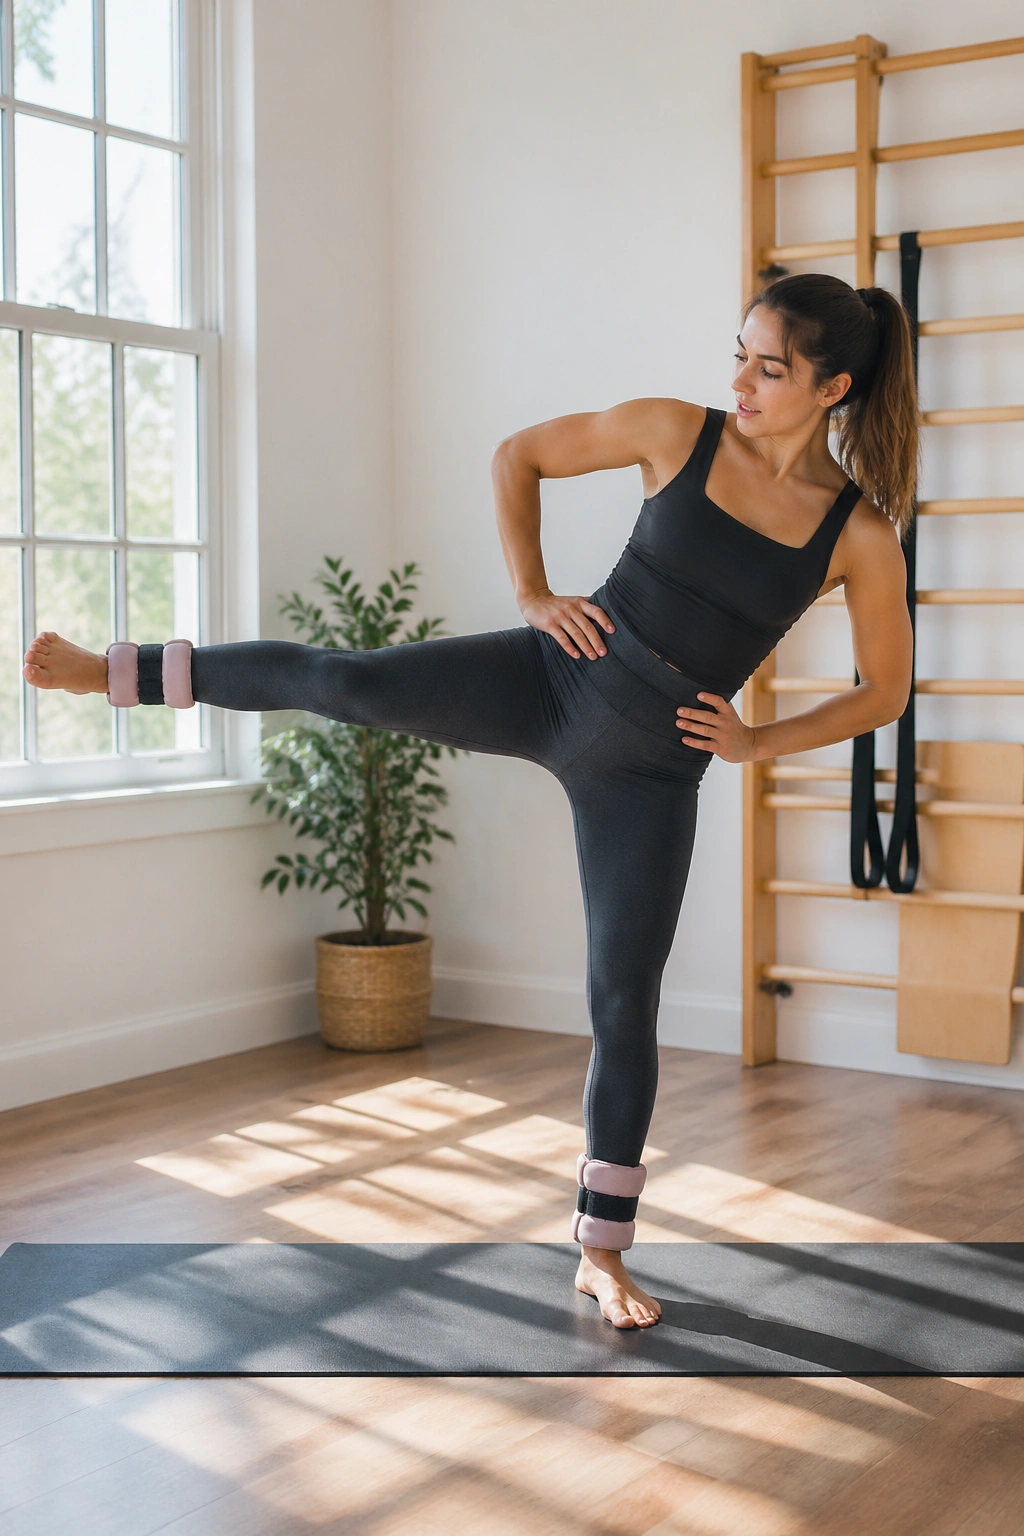
Ankle weights are not mandatory. They are, however, a blunt little tool when bodyweight side kicks stop being enough.
Attach light ankle weights, usually somewhere around 0.5 to 2 pounds per ankle, and repeat your side kicks or side leg lifts with the same strict control you’d use without them. The extra load changes the feel fast. If your alignment is loose, the weights will expose it in a hurry.
That’s the part people miss. Heavier is not better here. Clean movement with a modest load beats flailing around with anything heavier. Start with one set of bodyweight reps before you add the weights, and use the same range you could control without wobbling.
This variation works best for women who already have solid mat form and want more challenge without jumping into equipment-heavy work. Eight to 10 reps is enough at first. If the front hip starts to grip, take the weights off and finish unweighted.
16. Frog Bridge with Band Press-Out
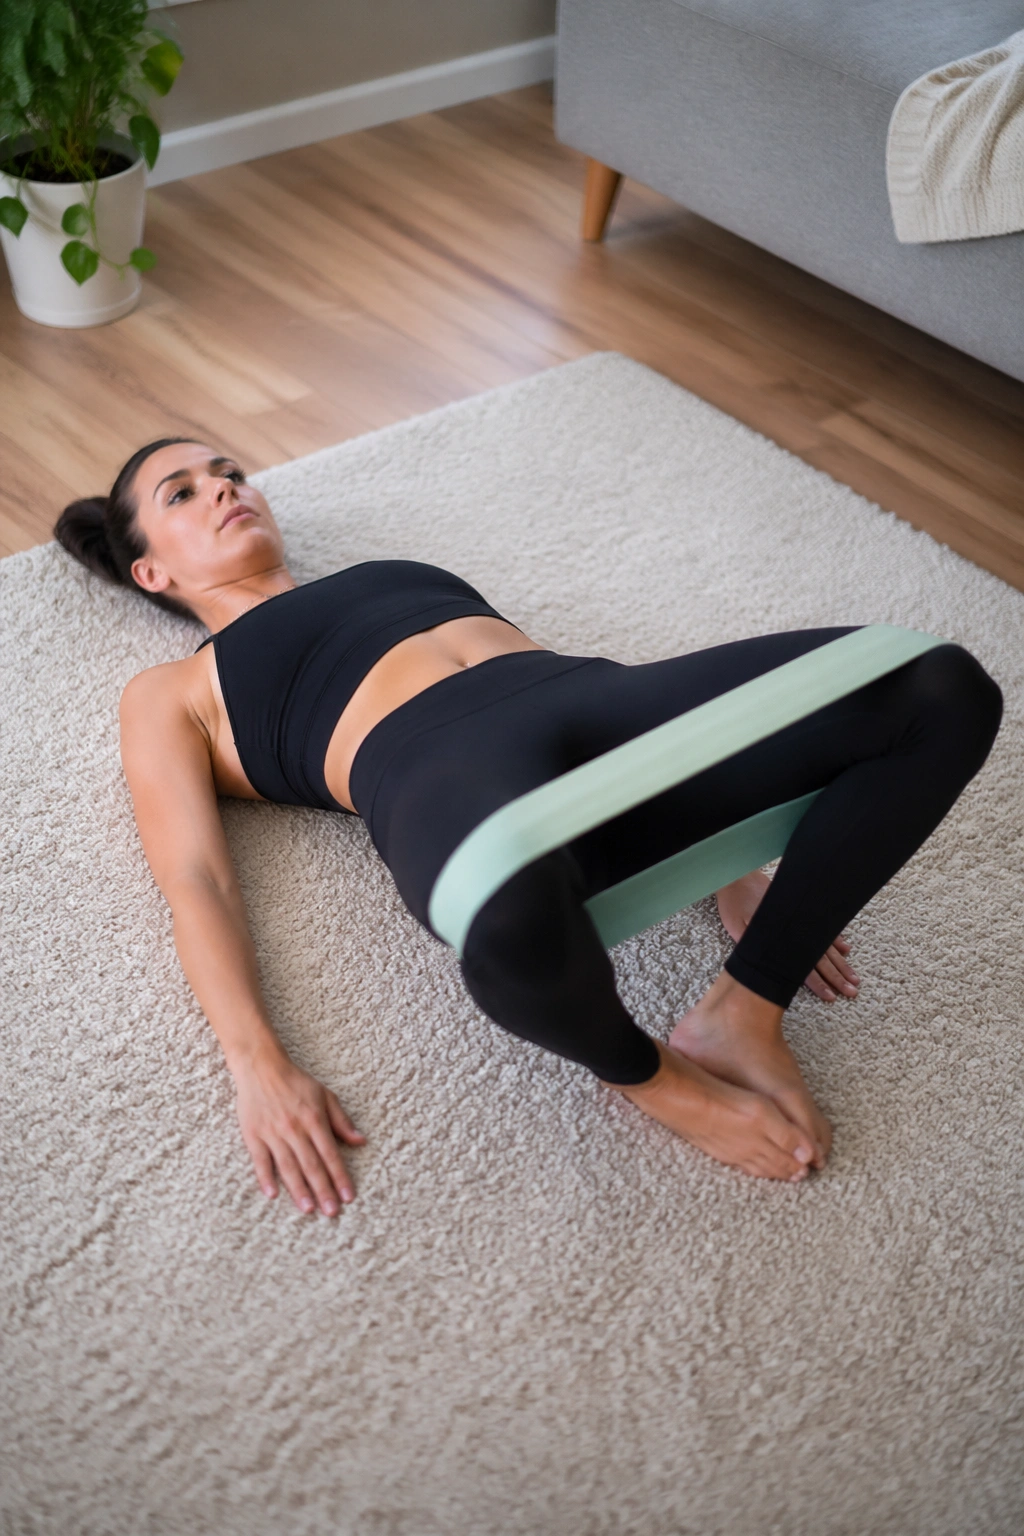
A frog bridge feels awkward for about ten seconds, then it becomes one of the most useful glute and outer-hip drills in the bunch.
Lie on your back with the soles of your feet together, knees open wide, and a loop band just above the knees. Lift the hips into a bridge, then press the knees gently outward against the band while keeping the soles together. That combination lights up the glutes, the outer hip, and even the inner thigh in a coordinated way.
The feet should stay close to the pelvis, not drift far away. If your lower back arches, lower the hips a little and reset. If the knees slam open, the band is probably too light or the cue is too aggressive. Use pressure, not force.
This move is a nice change of pace because it trains outer-thigh stability from a more open hip position. Do 10 to 12 slow reps, and hold the top for 2 seconds on the last three.
17. Side Plank Hip Dips with Top-Leg Reach
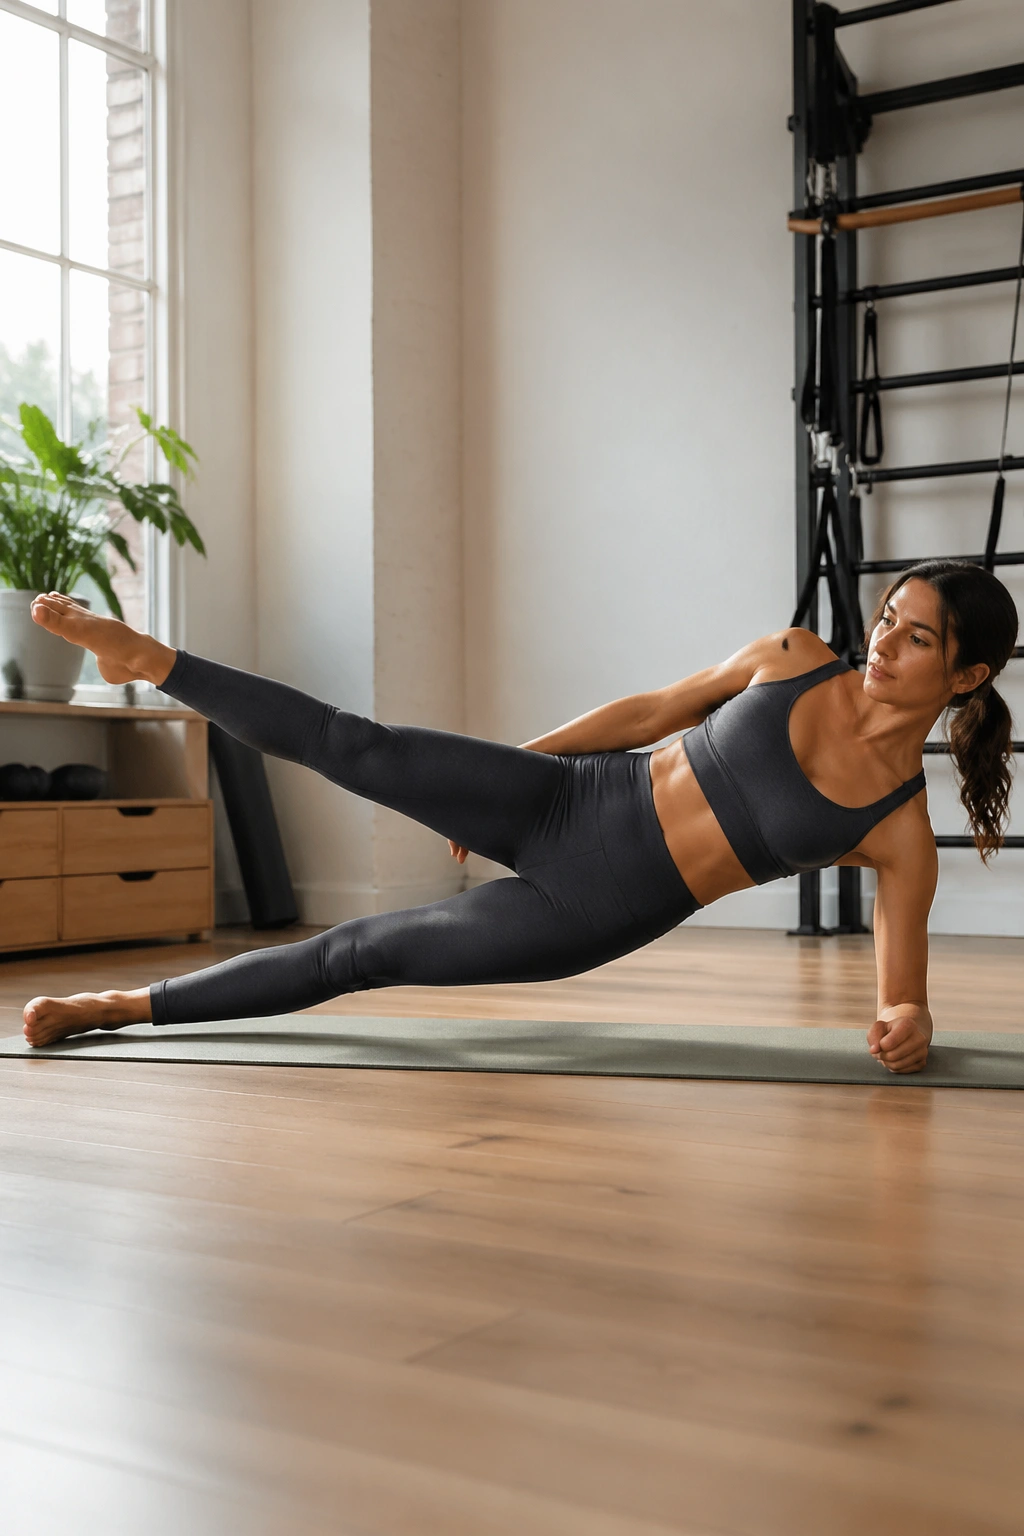
This one looks like a core move, and it is, but the outer thigh gets plenty of work too.
Set up in a side plank on your forearm. Lower the hips an inch or two toward the floor, then press back up. If you want more outer-thigh demand, add a small top-leg reach or lift while holding the plank. That combination asks the side of the standing hip to stay strong while the waist and shoulder do their own job.
A knee-down version is smart if the full side plank makes your shoulder complain. You still get the side-body tension and outer hip work, just with less strain. The goal is to keep the body long, not to contort it into a fancy shape.
Three to six controlled dips per side can be enough. Add the top-leg lift only if the trunk stays steady. If the top hip rolls backward, shorten the range and fix the line before you chase more reps.
18. Standing Clock Taps
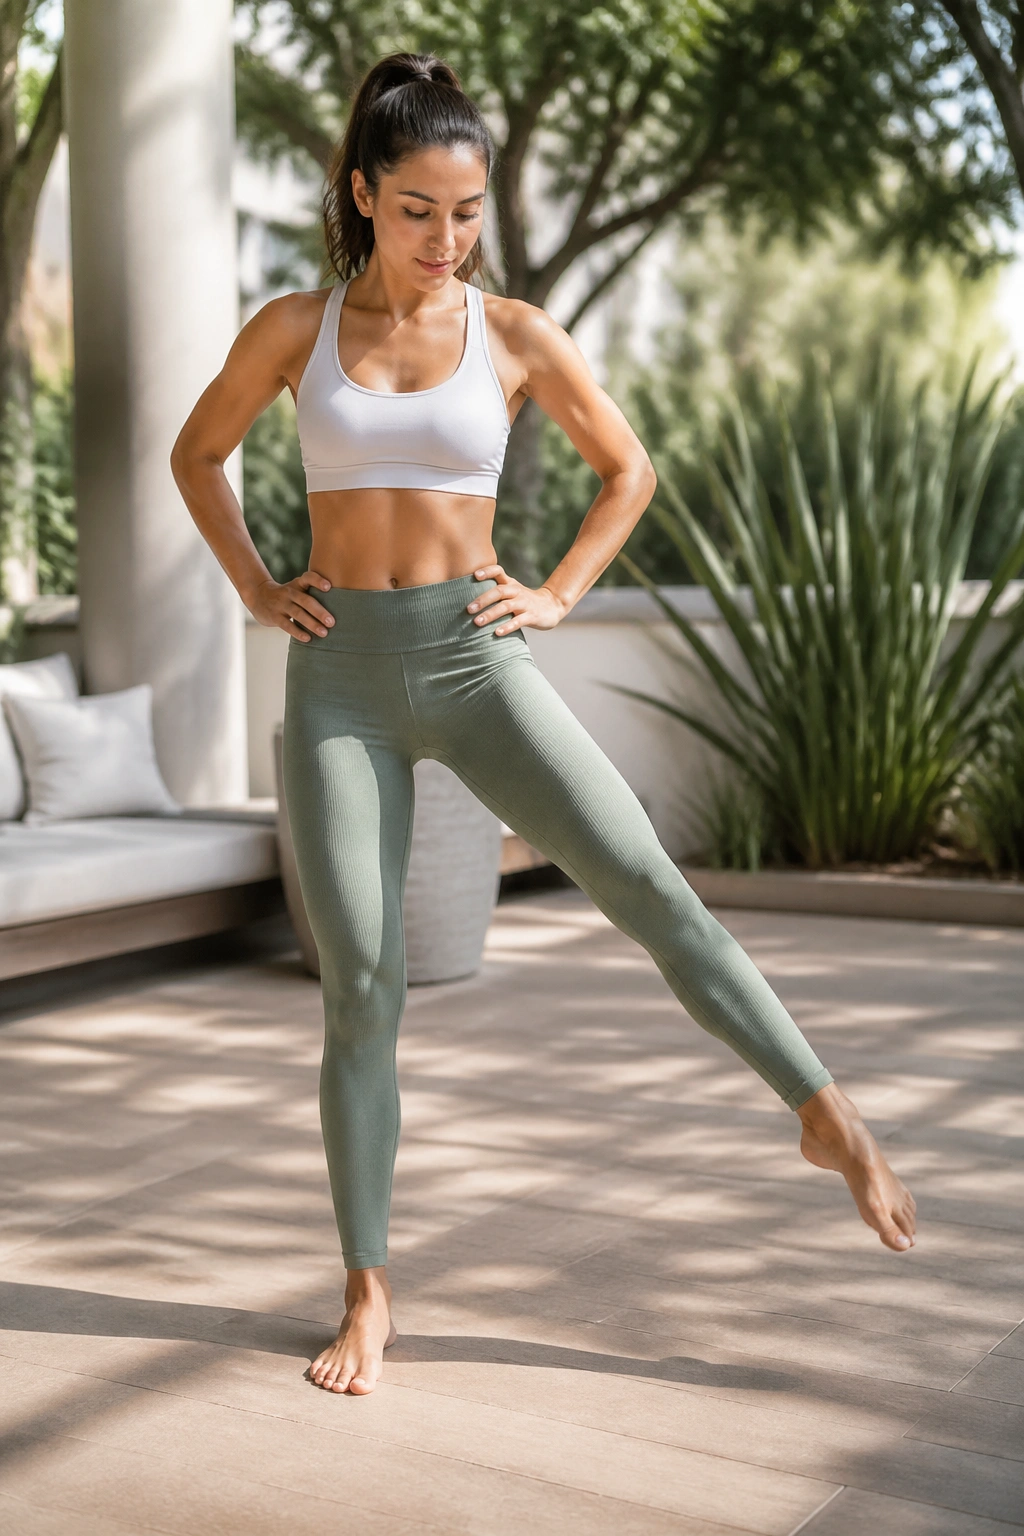
Standing clock taps are one of those simple balance drills that make your outer thigh look lazy only until you try them.
Stand on one leg and imagine a clock face on the floor. Tap the free foot to 12, 3, and 6 o’clock, or use front, side, and back taps. The standing hip has to keep you level through every direction change. That side hip is doing stabilization work the whole time, even though the tapping leg looks busy.
The taps should be light. Do not dump weight into the floor with every touch. Keep the pelvis level, the standing knee soft, and the torso tall. If balance is shaky, hold a wall or chair with one finger. That tiny bit of help keeps the drill honest without turning it into a cheat.
This is a smart finisher because it brings everything together: balance, hip control, and outer-thigh endurance. Eight taps in each direction is enough to start. If the standing side starts wobbling hard, that’s the work.
Final Thoughts
Outer-thigh Pilates works best when it stays small, clean, and a little bit stubborn. Big leg height looks impressive for about two seconds. Controlled range, on the other hand, teaches your hips how to hold you together when you move through the rest of the day.
If you want the simplest formula, pick one floor move, one standing move, and one band move. That gives you glute medius work, balance work, and hip stability without turning the session into a marathon. Honest reps beat flashy ones every time.
And if a move lands in your lower back instead of your side hip, shorten it immediately. That adjustment is not a downgrade. It’s usually the thing that makes the exercise worth doing in the first place.
