



A wall, a mat, and ten quiet minutes can do more than most people expect. Wall Pilates exercises use the wall as a blunt little coach: it keeps your ribs from flaring, shows you when one hip cheats, and gives beginners something solid to press into when balance gets shaky.
That is why a wall Pilates chart works so well. The moves look simple on paper, but the wall turns every rep into feedback. If your lower back arches during a bridge, you feel it. If your shoulders creep up during wall angels, the wall exposes that too.
All you need is a sturdy wall, a thin mat, and enough open floor space to step back without bumping furniture. Bare feet help with grip. Socks can be nice for sliding work, though they can also make you wobble if the floor is slick.
These 28 wall Pilates exercises move from gentle posture drills to tougher core and balance work, so the order matters more than people think. Start with the calm standing pieces, then move into the strength work, and finish with the stretches that make your back stop grumbling. The first one is the one I use most when someone says, “I feel stiff everywhere.”
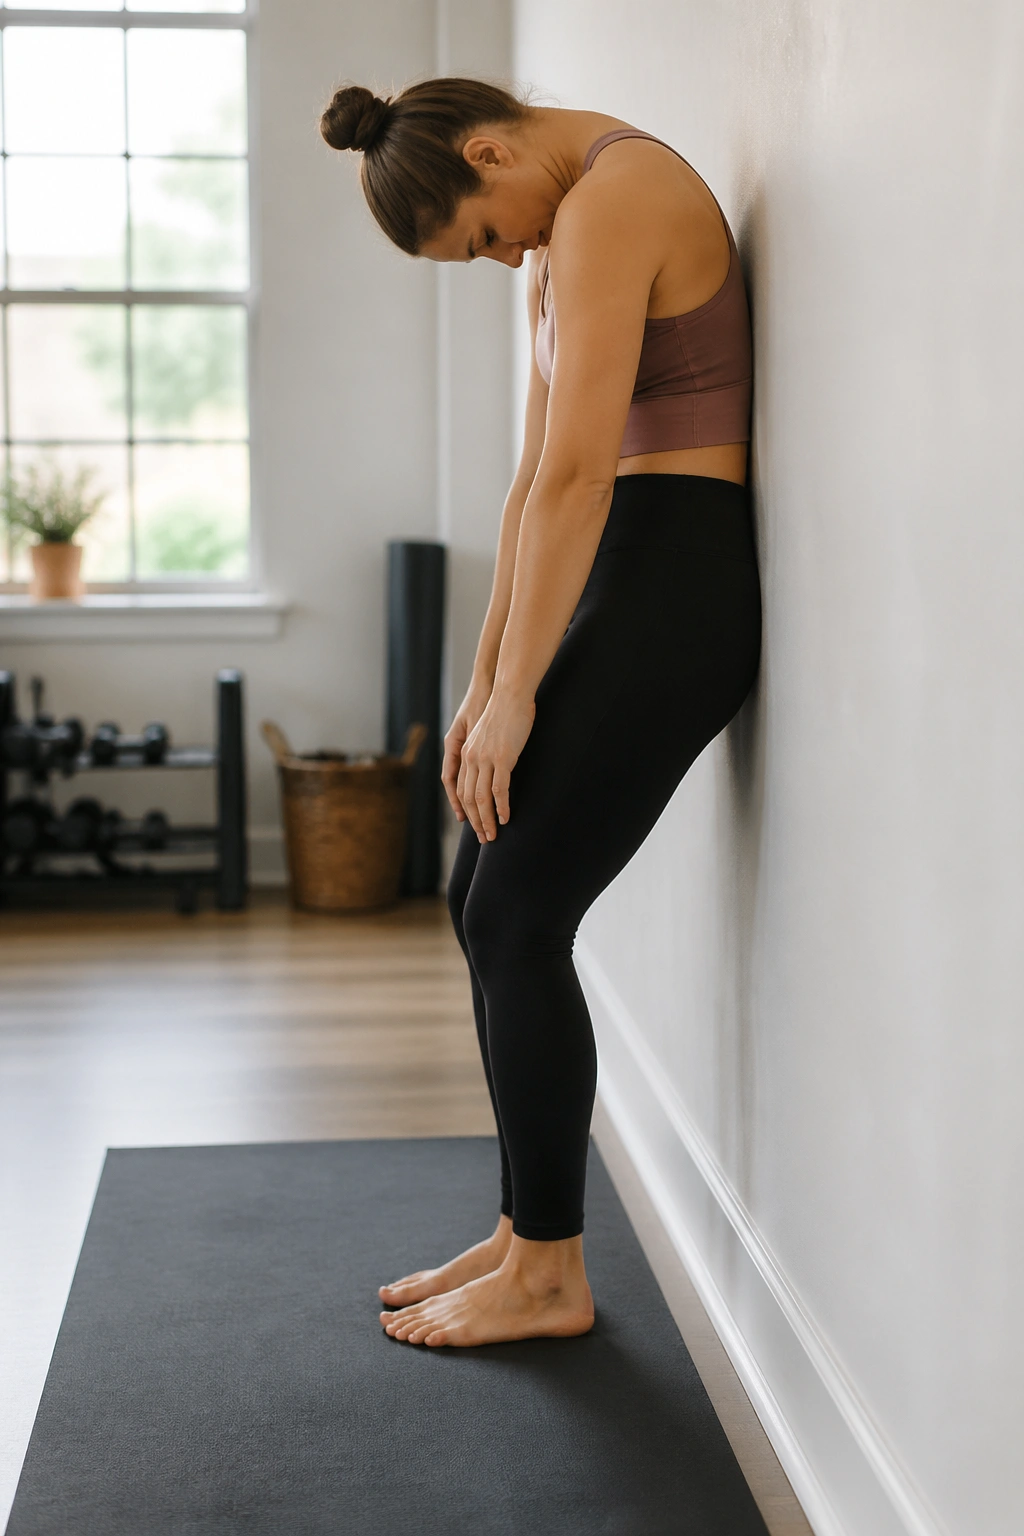
1. Wall Roll Down
The wall makes this one honest.
Stand with your heels a few inches from the baseboard, knees soft, arms relaxed. Breathe in, then let your chin nod forward and peel your spine down one section at a time until your hands hang toward the floor. You are not folding in half. You are rolling through the back like a wave, and the wall gives you a clean line to return to when you come back up.
What to Feel
- The back of your neck stays long.
- Your ribs narrow instead of flaring.
- The stretch lands in the hamstrings, not the low back.
- Your weight stays spread through the whole foot.
Tip: If your hamstrings are tight, bend your knees more. The roll down should feel smooth, not like a tug-of-war.
A lot of people rush this move because it looks easy. Don’t. Three slow rolls are better than ten sloppy ones, and the slow version gives your core time to wake up before the harder wall Pilates exercises begin.
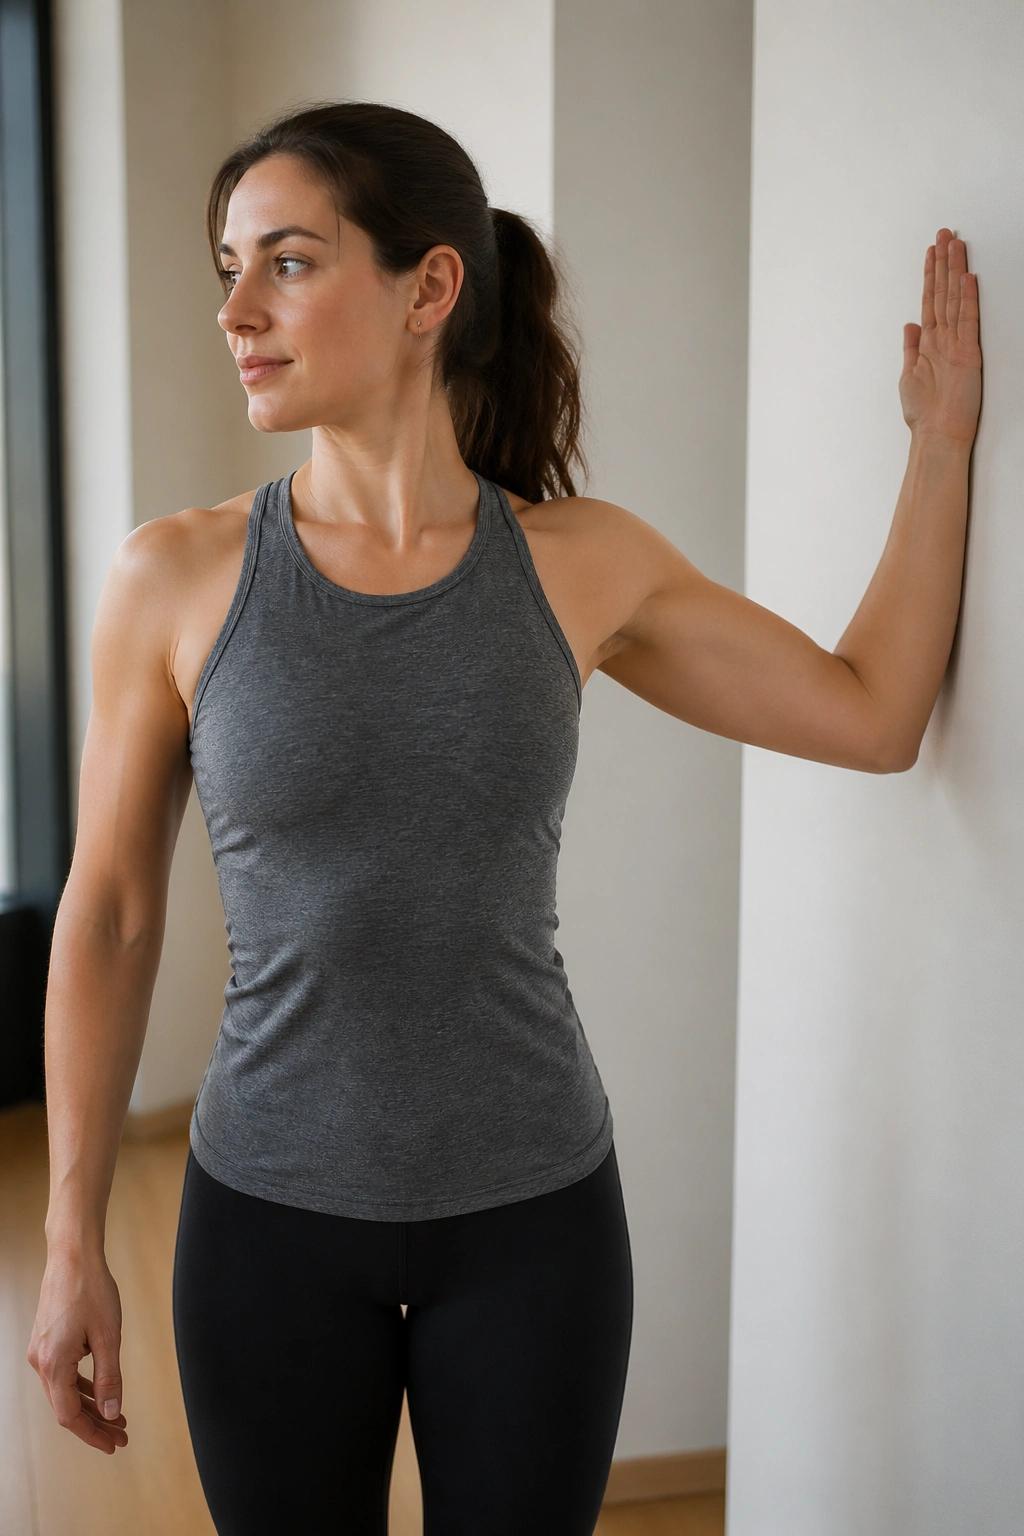
2. Wall Chest Opener
Desk posture hates this one. That is exactly why it belongs near the top of a wall Pilates workout.
Stand a forearm’s length from the wall with one arm out to the side at shoulder height, palm forward. Gently turn your body away from that arm until you feel the front of the chest open. Keep the shoulder blade down instead of shrugging it toward your ear. Switch sides after 20 to 30 seconds.
This is not a brute-force stretch. If you crank the shoulder back, the front of the joint complains and the chest never gets the chance to soften. A lighter turn, plus steady breathing, usually opens the pecs better than yanking ever will.
Use it after long sitting stretches or before wall push-ups. The shoulder line feels cleaner, and that makes the next exercise less grumpy.
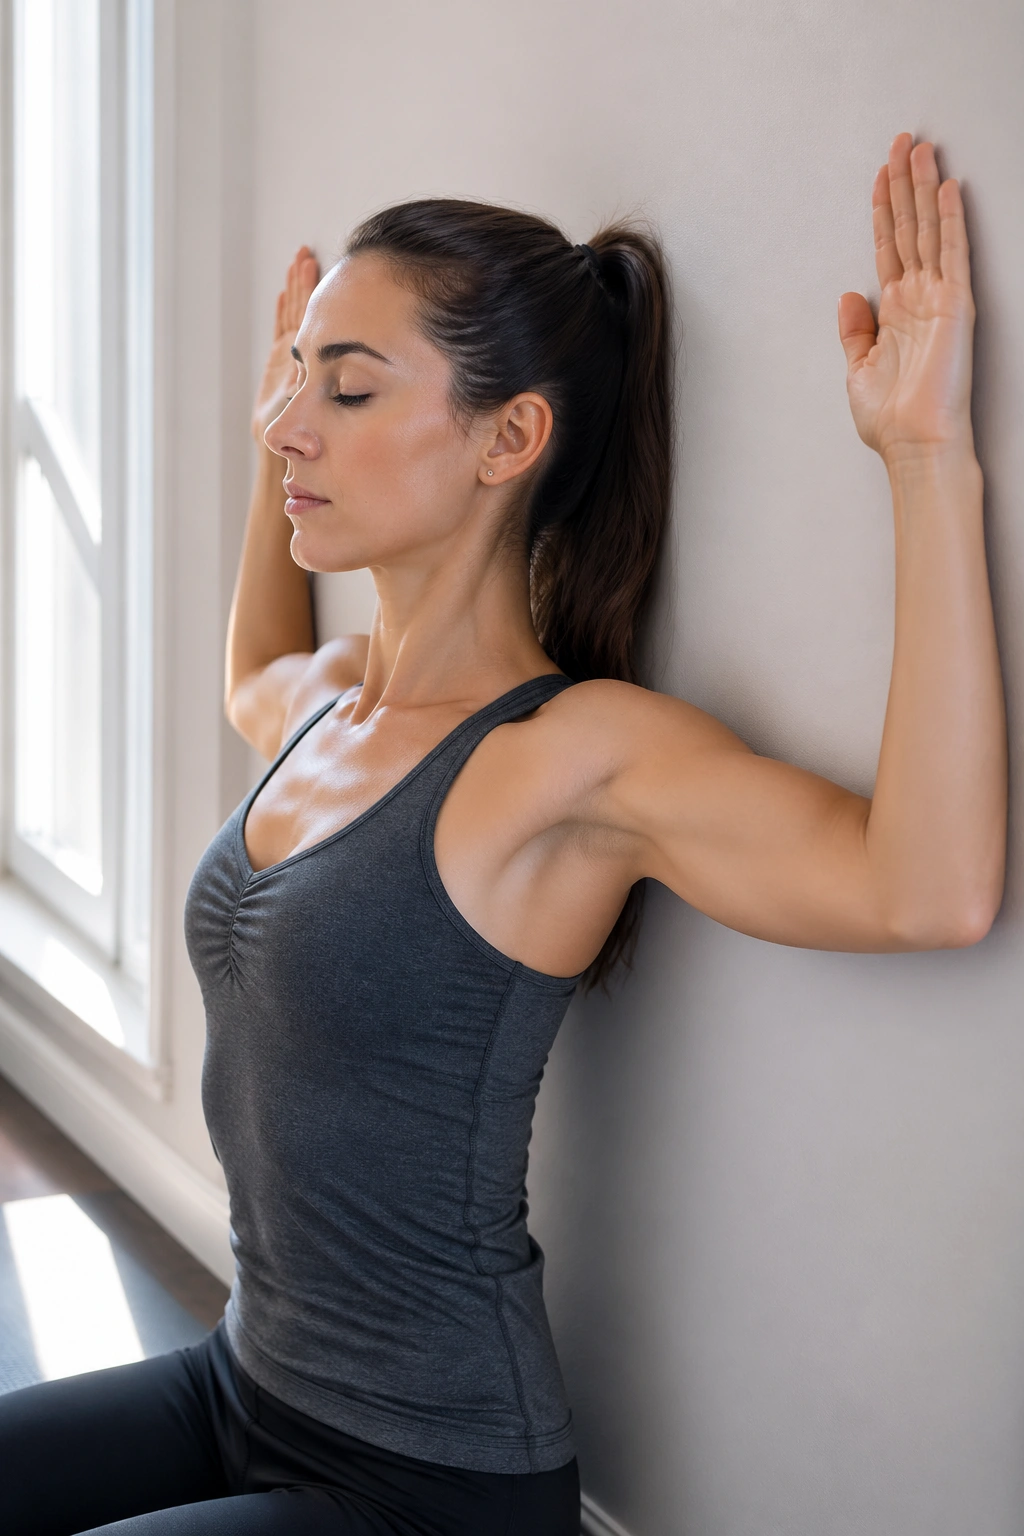
3. Wall Angel
Why do wall angels feel awkward at first? Because they expose every place where the ribs, shoulders, and low back want to cheat.
Press your back to the wall, feet a little forward, and bring your arms up so your elbows make a goalpost shape. Slide the arms up and down in a slow arc while keeping the lower ribs pulled in. If your wrists cannot touch the wall, fine. Work within the range you can control.
How to Use It
Do 6 to 8 slow reps, pausing for one breath at the top and bottom. If the low back arches, walk the feet farther forward. If the neck starts to tense, drop the shoulders and shorten the range.
This move is one of the cleanest wall Pilates exercises for posture because it teaches the upper back to work without drama. That matters more than people admit. A strong core means little if the shoulders are living up by your ears.
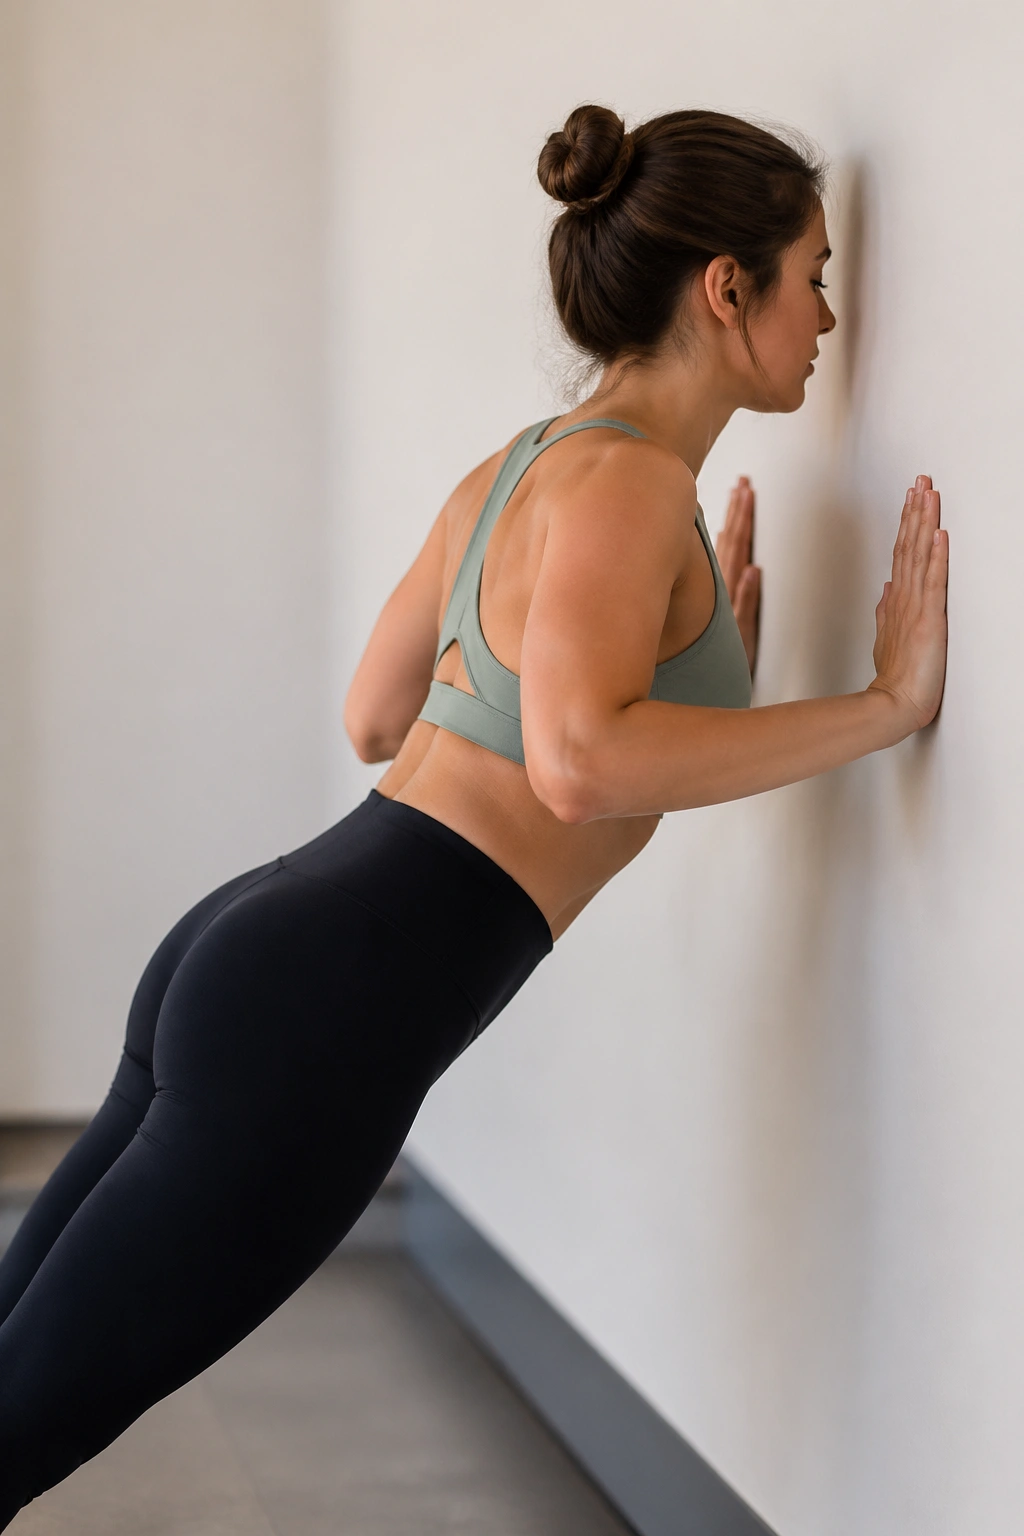
4. Wall Push-Up
A wall push-up is the entry point for anyone who wants upper-body strength without dropping to the floor.
Place your hands on the wall at chest height, a little wider than your shoulders. Step your feet back until your body makes a straight line from head to heels. Lower your chest toward the wall with elbows tracking at about a 45-degree angle, then press back out until the arms are long again.
Keep the heels heavy and the ribs steady. If the hips drift forward, you lose the whole point. If the head pokes toward the wall first, the neck takes over.
- Hands slightly lower make the exercise harder.
- Feet farther from the wall make it harder too.
- 2 sets of 8 to 12 reps is a clean place to start.
- Stop a rep or two before your shoulders start to wobble.
The beauty here is the angle. You still get chest, triceps, and shoulder work, but your wrists and core get a friendlier introduction than they would on the floor.
5. Wall Sit
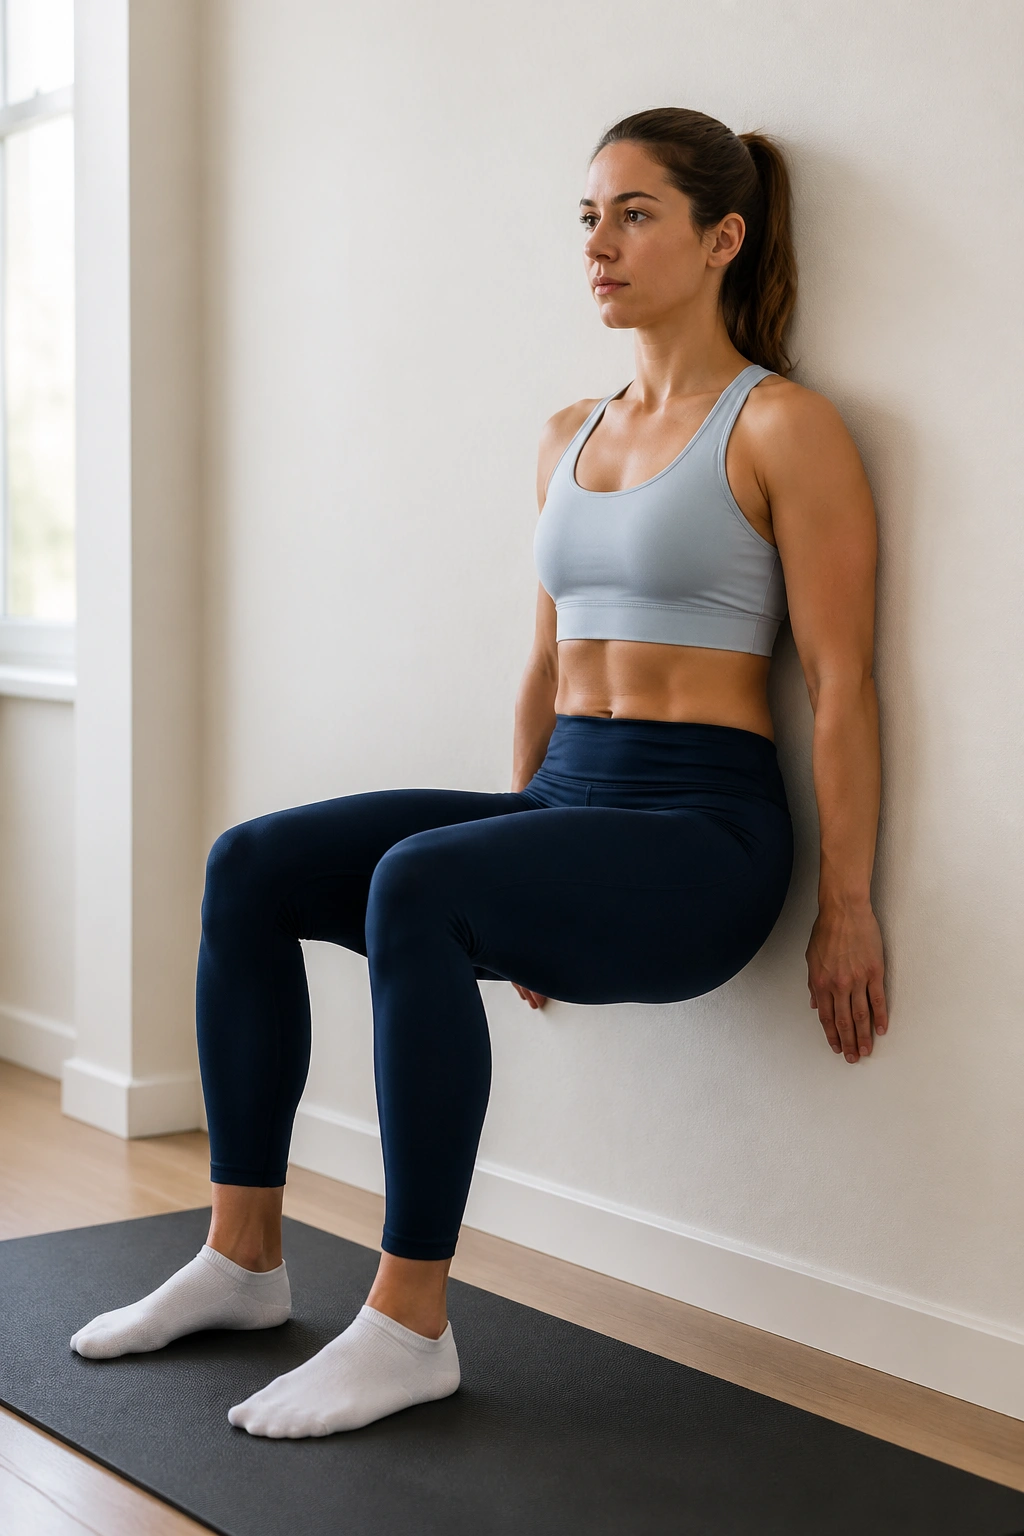
A wall sit looks dull until your thighs start talking back.
Slide your back down the wall until your knees land close to a 90-degree bend. Keep the feet hip-width apart and a small step forward from the wall so your shins stay vertical. Press the low back gently into the wall, then hold.
The burn usually starts in the quadriceps, then creeps into the glutes if you stay long enough. That is normal. What you do not want is sharp knee pain or a low back that arches away from the wall. Adjust the depth before you chase time.
Hold for 20 to 45 seconds if you are new, or 45 to 60 seconds if your legs already know the drill. One clean hold beats three sloppy ones every time.
This is one of those wall Pilates exercises that earns respect the hard way. It is simple, yes. It is also brutally useful for leg endurance, especially when you want strength without jumping.
6. Wall Sit with Heel Lift
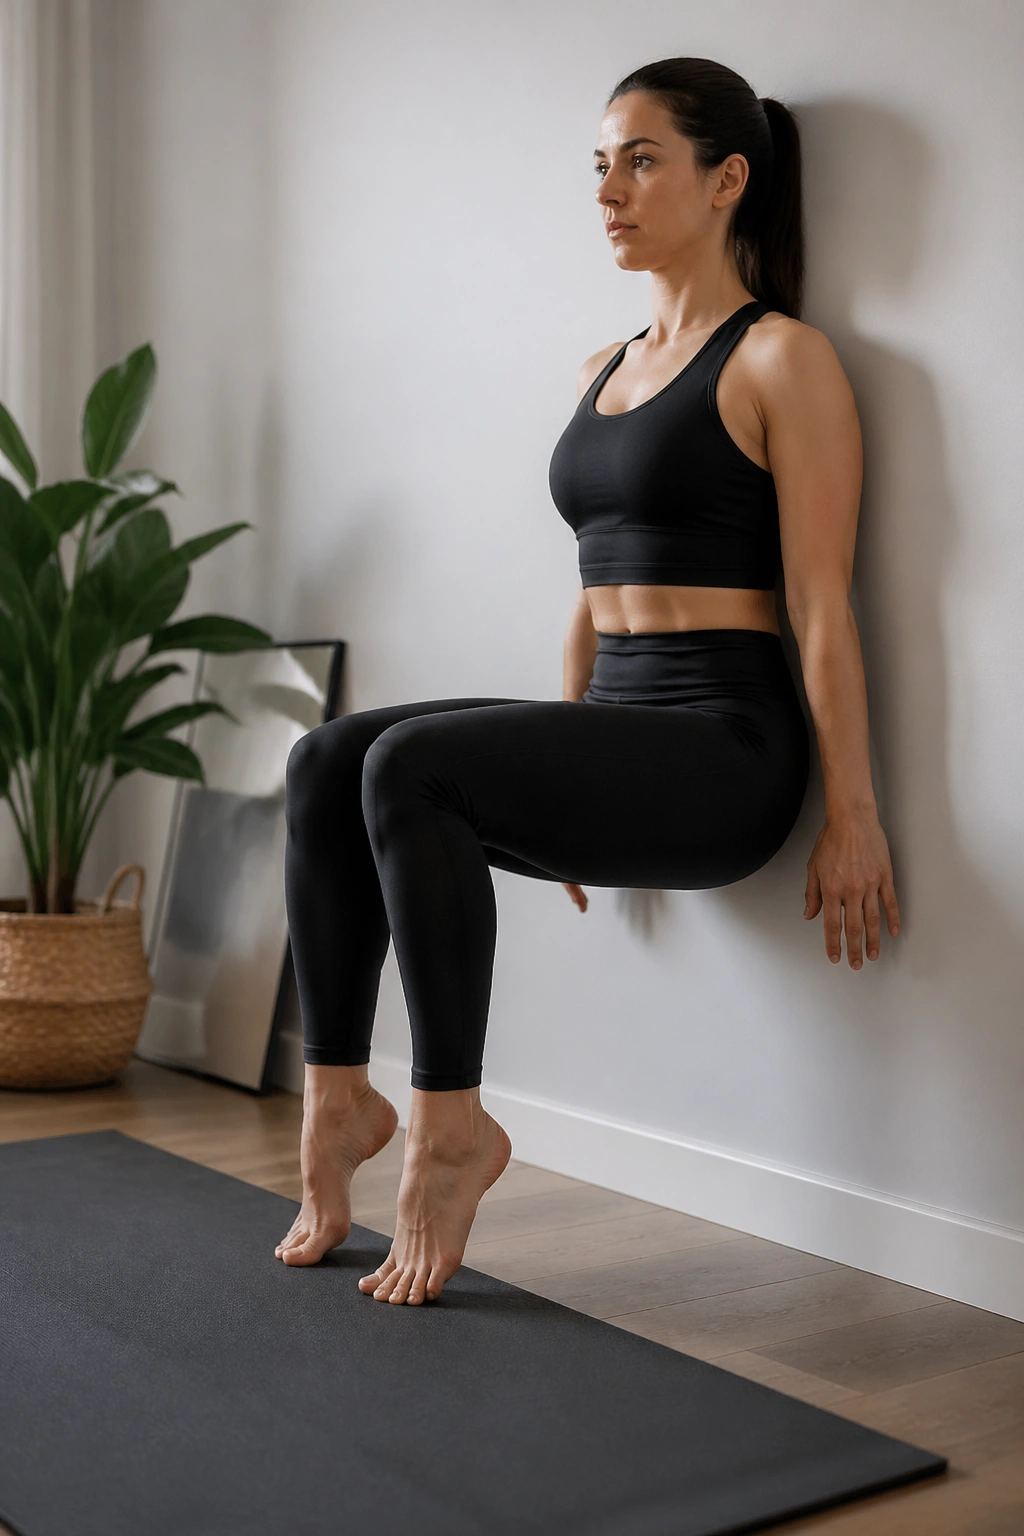
This one is the wall sit’s less polite cousin.
Stay in your wall sit, then lift both heels an inch off the floor. Hold for 3 to 5 seconds, lower with control, and repeat for 5 to 8 rounds. The calves will light up fast, and the ankles have to work harder to keep you steady.
Compared with a regular wall sit, this variation asks for more lower-leg control. It is a smart choice if you want to wake up the feet and calves without adding more impact. It also tends to expose wobble in the arches, which is useful if your feet collapse inward when you squat.
Best part? You can feel the work almost immediately. That is the whole point. If the heels shoot up and down like a trapped spring, slow down and hold the lift longer.
7. Wall Calf Raise
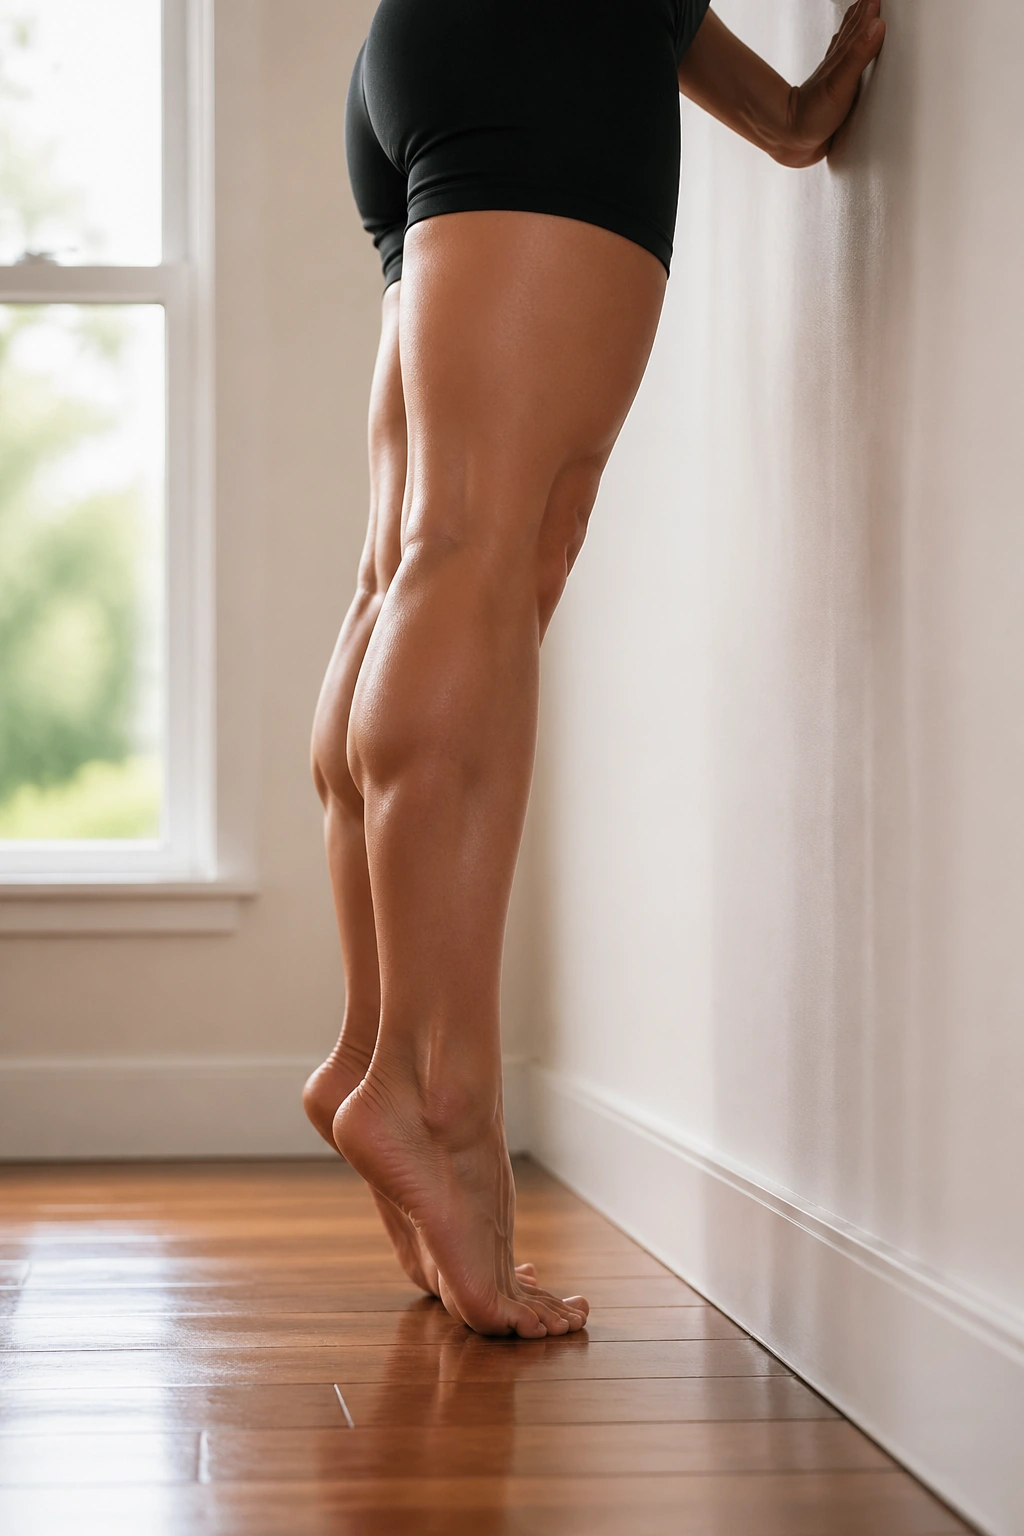
The wall gives balance. Your calves do the rest.
Stand facing the wall with fingertips resting lightly on it. Lift both heels slowly until you are on the balls of your feet, pause for a count of one, then lower until the heels kiss the floor again. Keep the ankles from rolling out or in. Straight up, straight down.
Why the Wall Matters
- It keeps the torso from swaying.
- It lets you use a smaller, cleaner range.
- It makes the lowering phase easier to control.
- It helps you notice if one ankle is weaker than the other.
Do 12 to 15 reps for 2 rounds. The lowering phase should feel smooth, not dropped. That little descent is where the real work lives, and most people rush past it because the burn is less glamorous than the lift.
If you want a wall Pilates chart that actually changes how you walk, this is one of the quieter winners.
8. Wall March
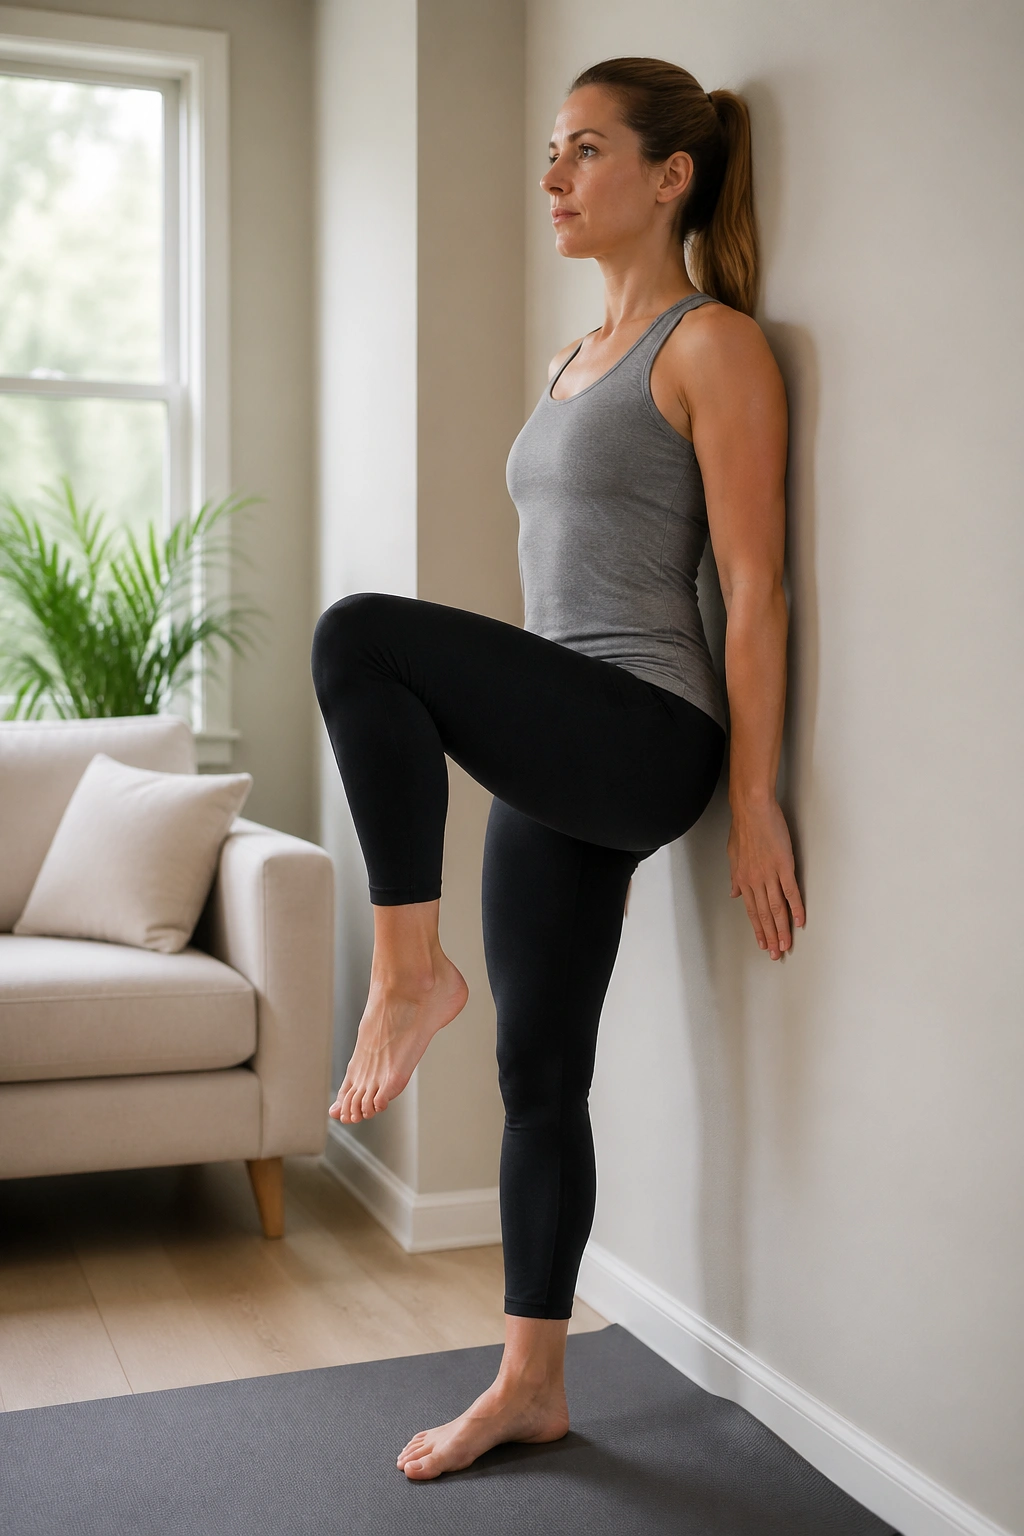
A wall march is one of the best ways to check whether your pelvis stays level when one leg leaves the floor.
Stand tall with one hand on the wall. Lift one knee to hip height, set it down with control, then switch sides in a slow marching rhythm. The torso should stay quiet. No side-to-side sway. No rib flare. No leaning back to make the leg look higher than it is.
The goal is control, not speed. I like 10 marches per side, then a short pause to reset the standing posture. If you feel it mostly in the hip flexors, shorten the lift and tighten the lower belly a little before the knee comes up.
This one pairs well with wall roll downs and wall squats because it links posture, balance, and core work in a very plain way. Nothing fancy. Just honest mechanics.
9. Wall Single-Leg Knee Lift Hold
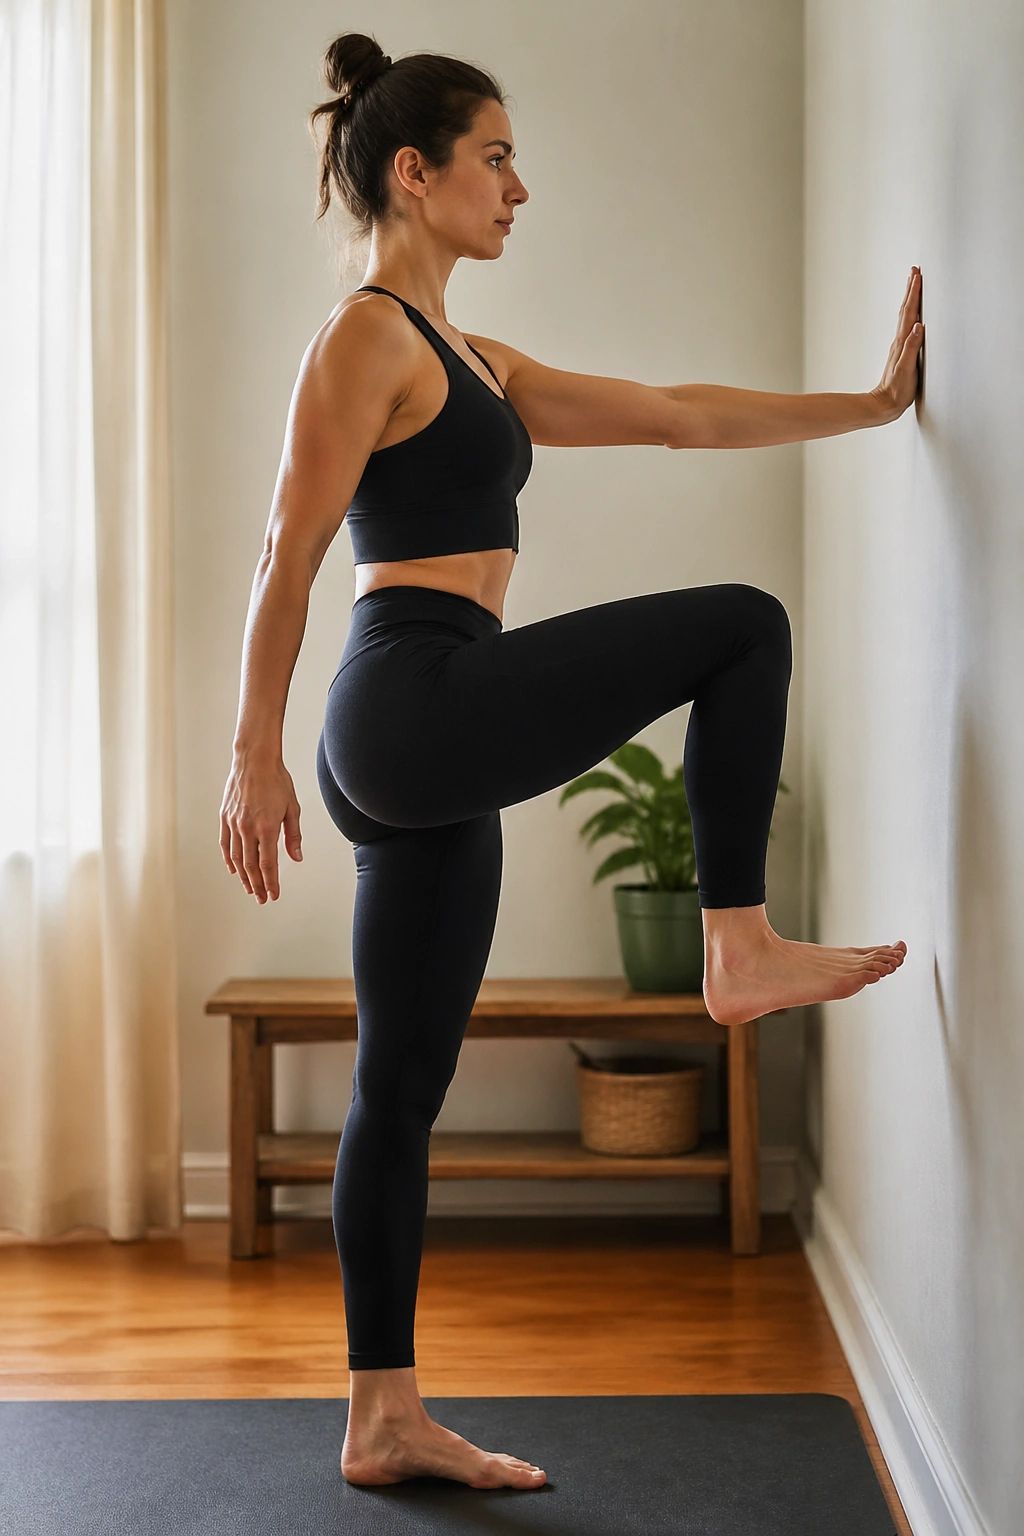
Why does this one matter? Because balance is rarely about the foot alone. It is about the whole chain above it.
Stand sideways or facing the wall, depending on what feels steadier. Lift one knee until the thigh is parallel to the floor, then hold for 10 to 20 seconds while keeping the standing hip level. Light wall contact is fine. Leaning on the wall is not the same thing, so use just enough touch to keep the torso from drifting.
How to Make It Harder
- Close your eyes for the last 5 seconds.
- Keep the lifted foot flexed.
- Hold a small Pilates ring or light object at chest height.
- Slow the breathing instead of holding it.
This is a quiet test of hip stability and core timing. If the standing foot grips the floor like it is worried, ease up. You want steady, not clenched.
10. Wall Side Leg Lift
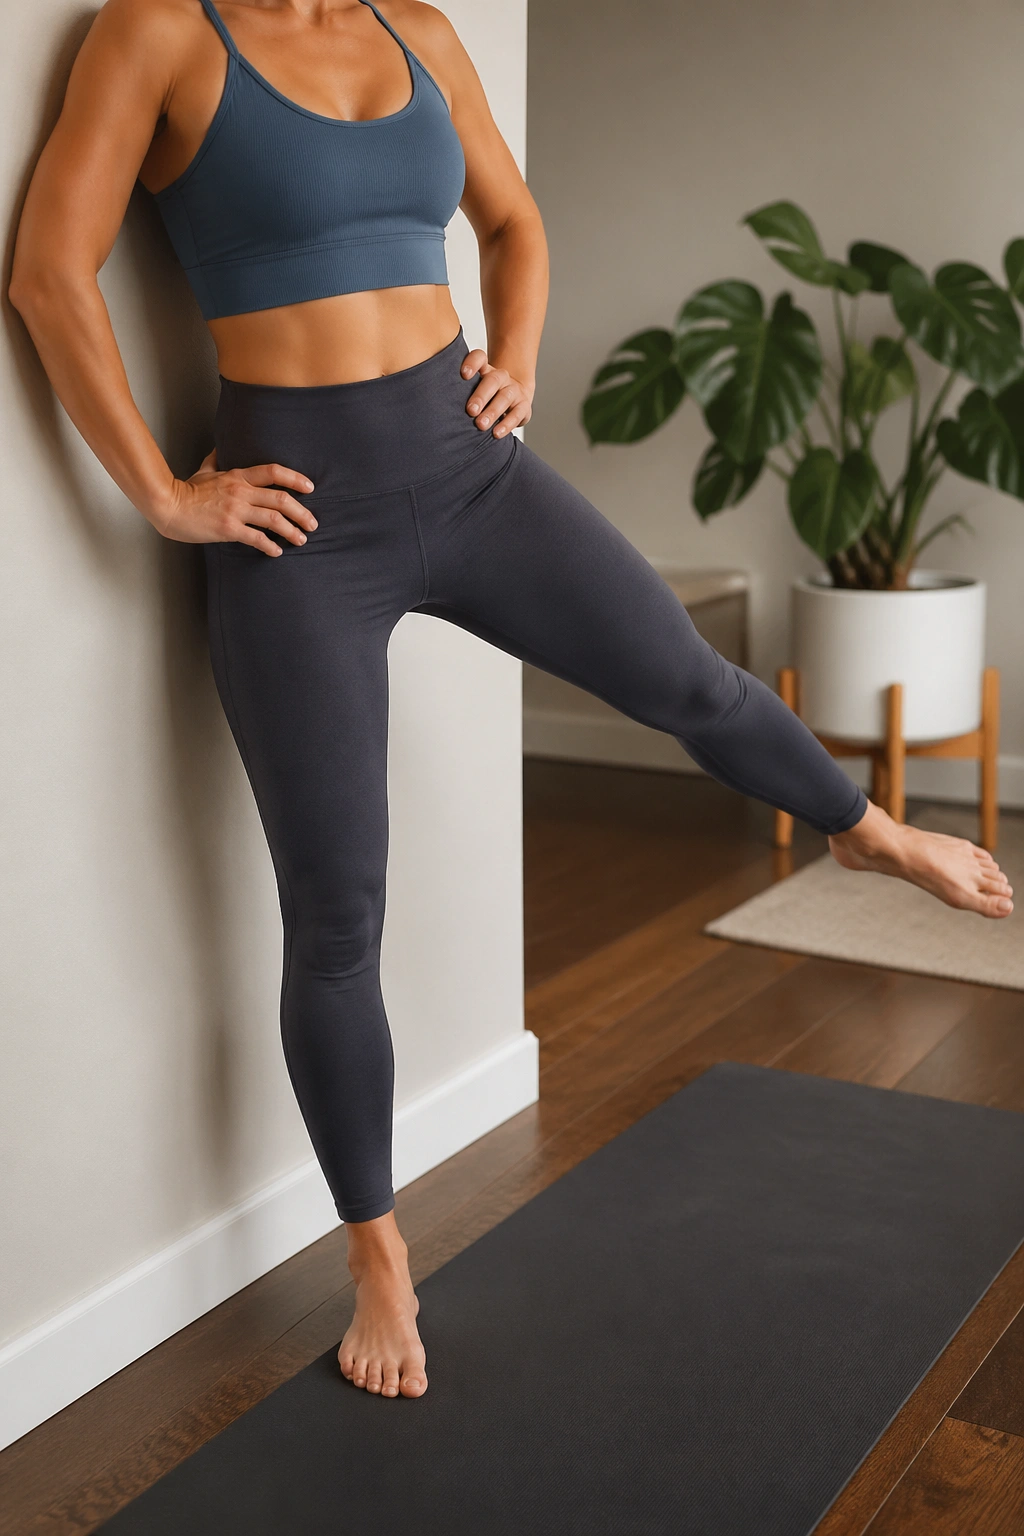
Stand side-on to the wall and use one hand for light support. Shift your weight into the standing leg and lift the outer leg to the side without tipping your trunk.
The movement is small. That matters. If the leg swings high, the hip hikes, the waist shortens, and the glute medius does less than you think. A clean 20-degree lift often works better than a dramatic one.
You can feel this along the outside of the standing hip if you keep the pelvis square. It is a sneaky little burner, especially after a few days of sitting. Use 8 to 12 lifts per side, then switch.
The wall is handy here because it stops the upper body from turning into a balancing act. That leaves the side hip to do its job instead of the torso stealing the show.
11. Wall Glute Kickback
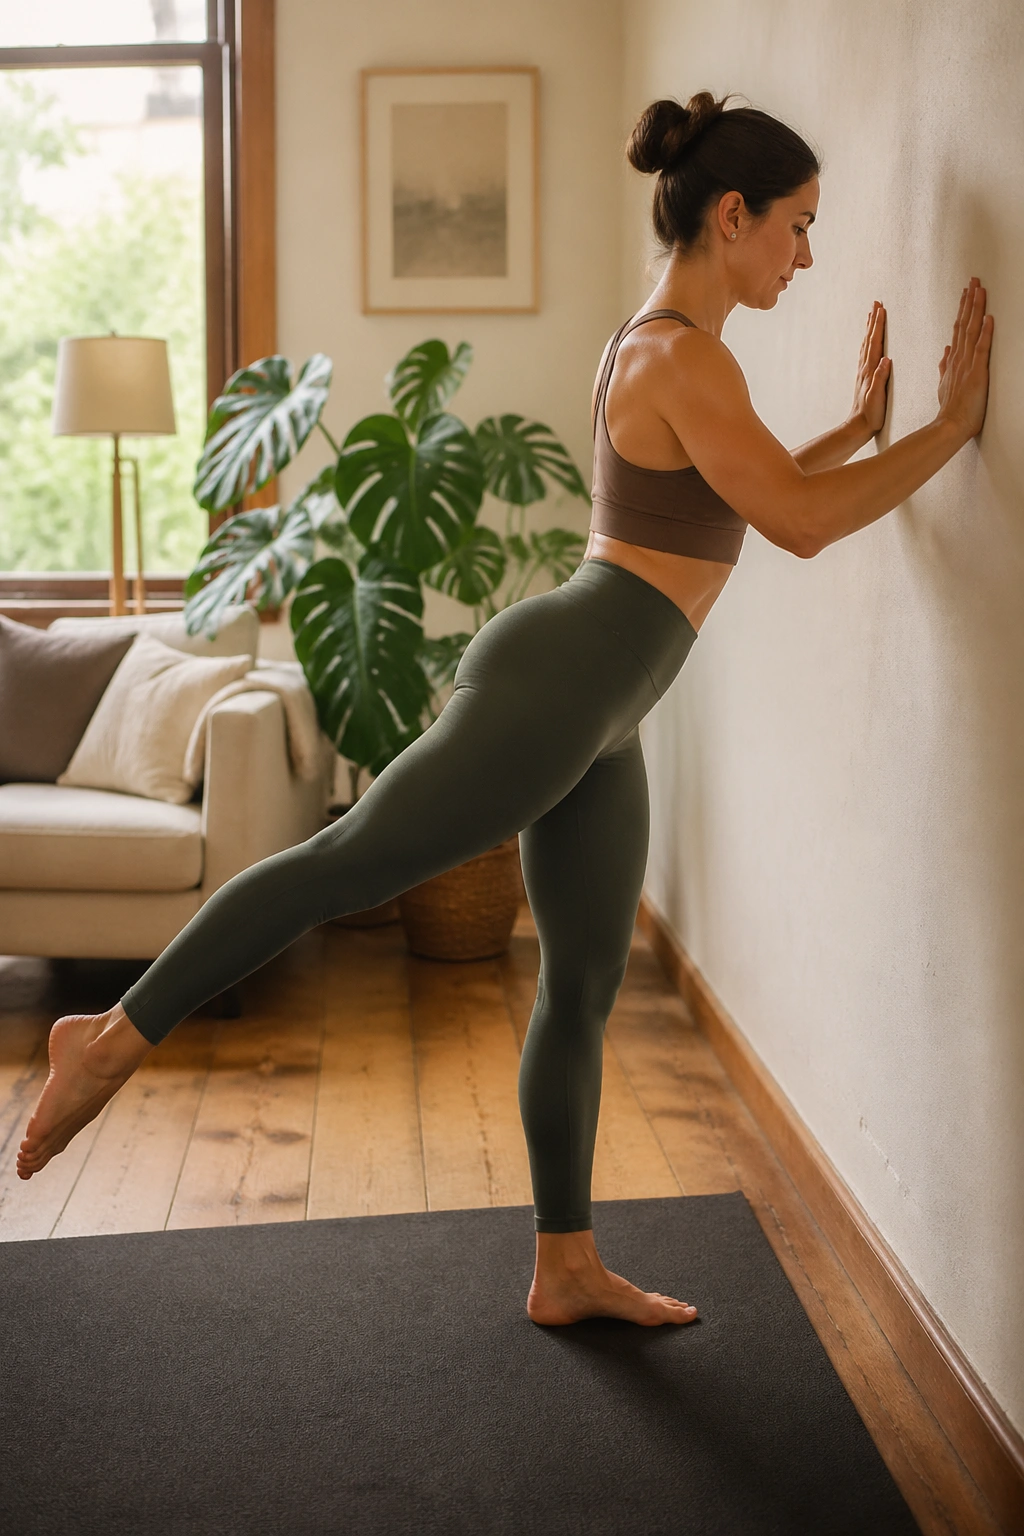
This move looks simple and can turn sloppy fast.
Face the wall, place both hands on it, and step one leg back with the knee straight or softly bent. Hinge just enough at the hips to keep the torso long, then squeeze the glute to lift the leg a few inches behind you. The pelvis stays square. No twisting. No flinging the leg up just to feel a bigger arc.
The working leg should feel like it is reaching long through the heel, not snapping from the lower back. That distinction matters. A kickback done well wakes up the glute without irritating the spine.
Take 10 slow reps per side and pause for one breath at the top of each lift. The wall makes the standing side more stable, which lets you notice whether one glute is lazy. Usually one is.
12. Wall Lunge Stretch
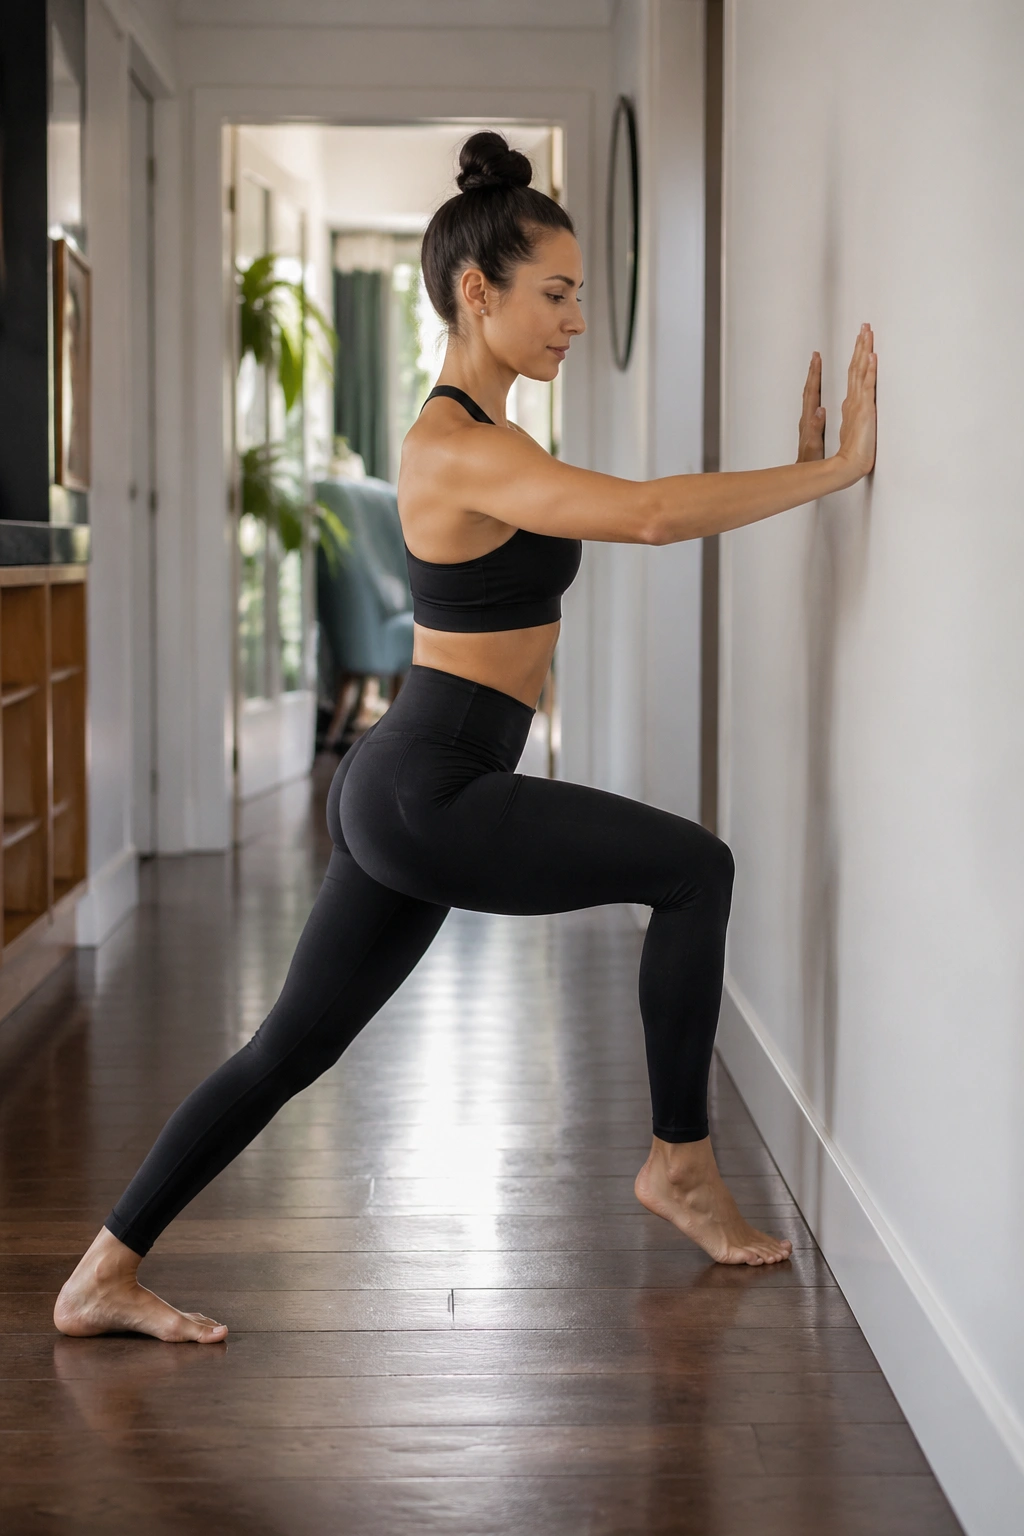
This is more useful than the average hip stretch because it adds a little strength with the stretch.
Place both hands on the wall and step one foot forward into a split stance. Lower into a shallow lunge by bending the front knee and sending the back heel slightly away from the floor. Keep the back leg long enough to feel the hip flexor open, but not so far back that the low back arches.
Unlike a passive stretch on the floor, this version asks the legs to hold position while the front hip opens. That matters. It teaches the body to find length without collapsing into it.
Hold for 20 to 30 seconds per side, then switch. If your front knee caves inward, press the big toe down and think about spreading the floor with the whole foot.
13. Wall Bridge Feet on Wall
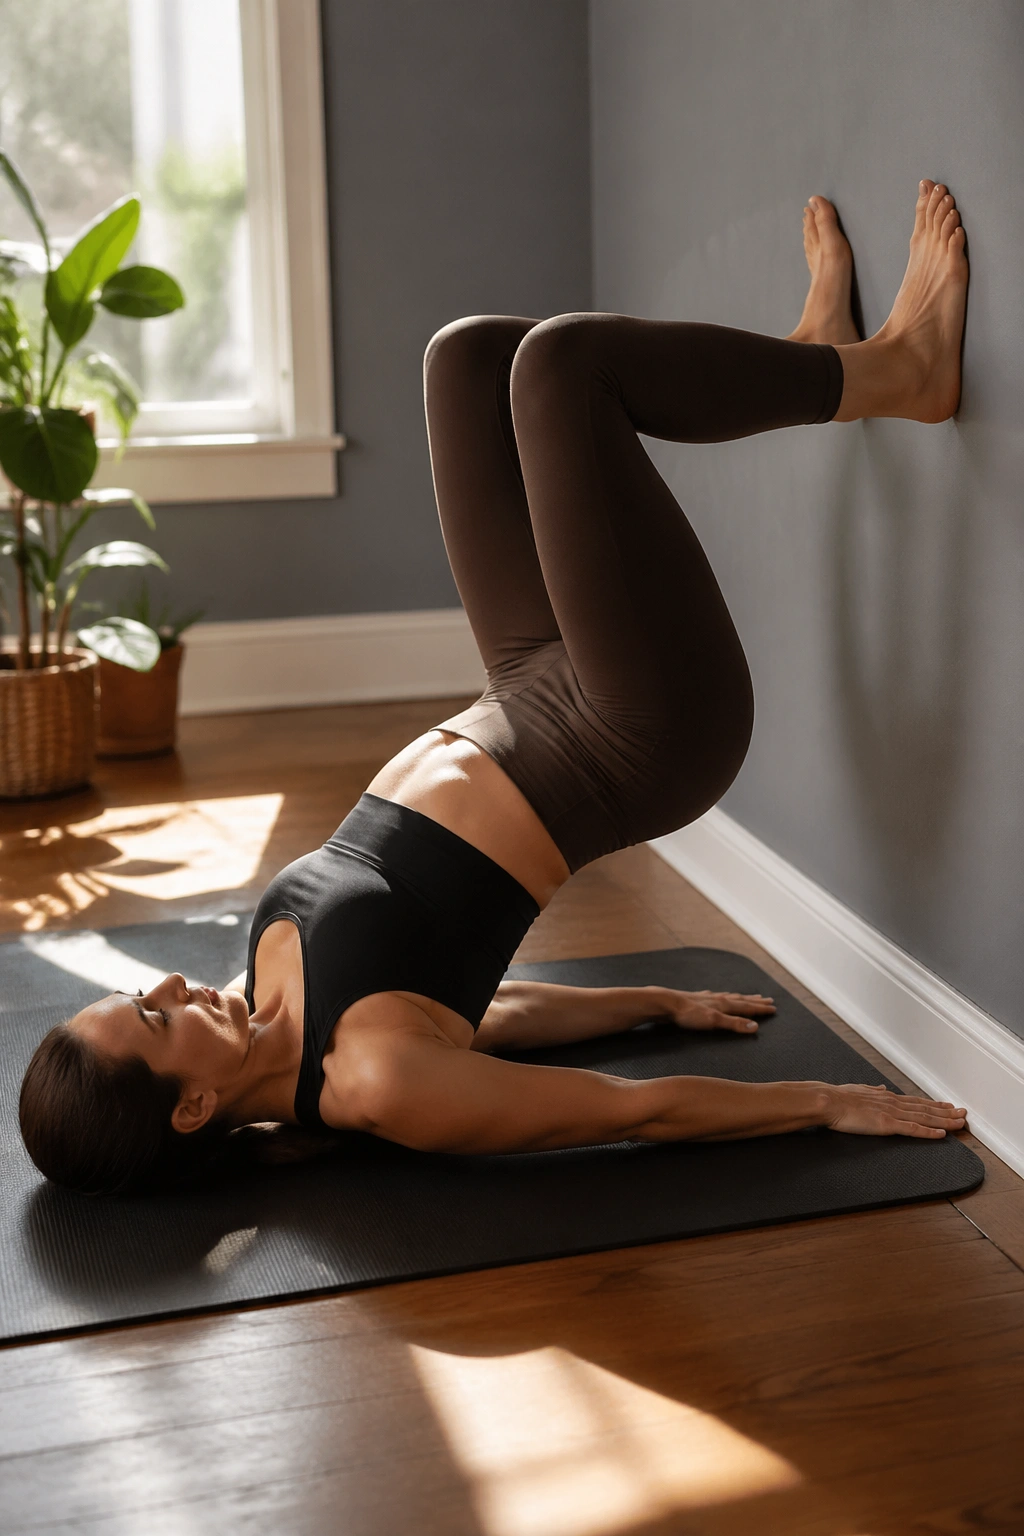
Lie on your back with both feet on the wall, knees bent so the shins are roughly parallel to the floor. Walk your feet just far enough away that the knees and hips stack in a comfortable angle. From there, exhale and lift your hips until your body forms a long line from shoulders to knees.
Set, Breathe, Lift
- Set the feet hip-width apart.
- Press the arms into the floor.
- Exhale and tuck the tail just enough to keep the low ribs heavy.
- Lift the hips without jamming the lower back.
- Lower one vertebra at a time.
That last part matters. If the bridge snaps up and drops, the hamstrings often take over and the glutes never fully join the party.
Aim for 8 to 10 slow reps, or hold the top for 15 seconds if you want a steadier burn. This is one of the strongest wall Pilates exercises for people who want glutes, hamstrings, and core working together instead of in separate little boxes.
14. Wall Hamstring Curl
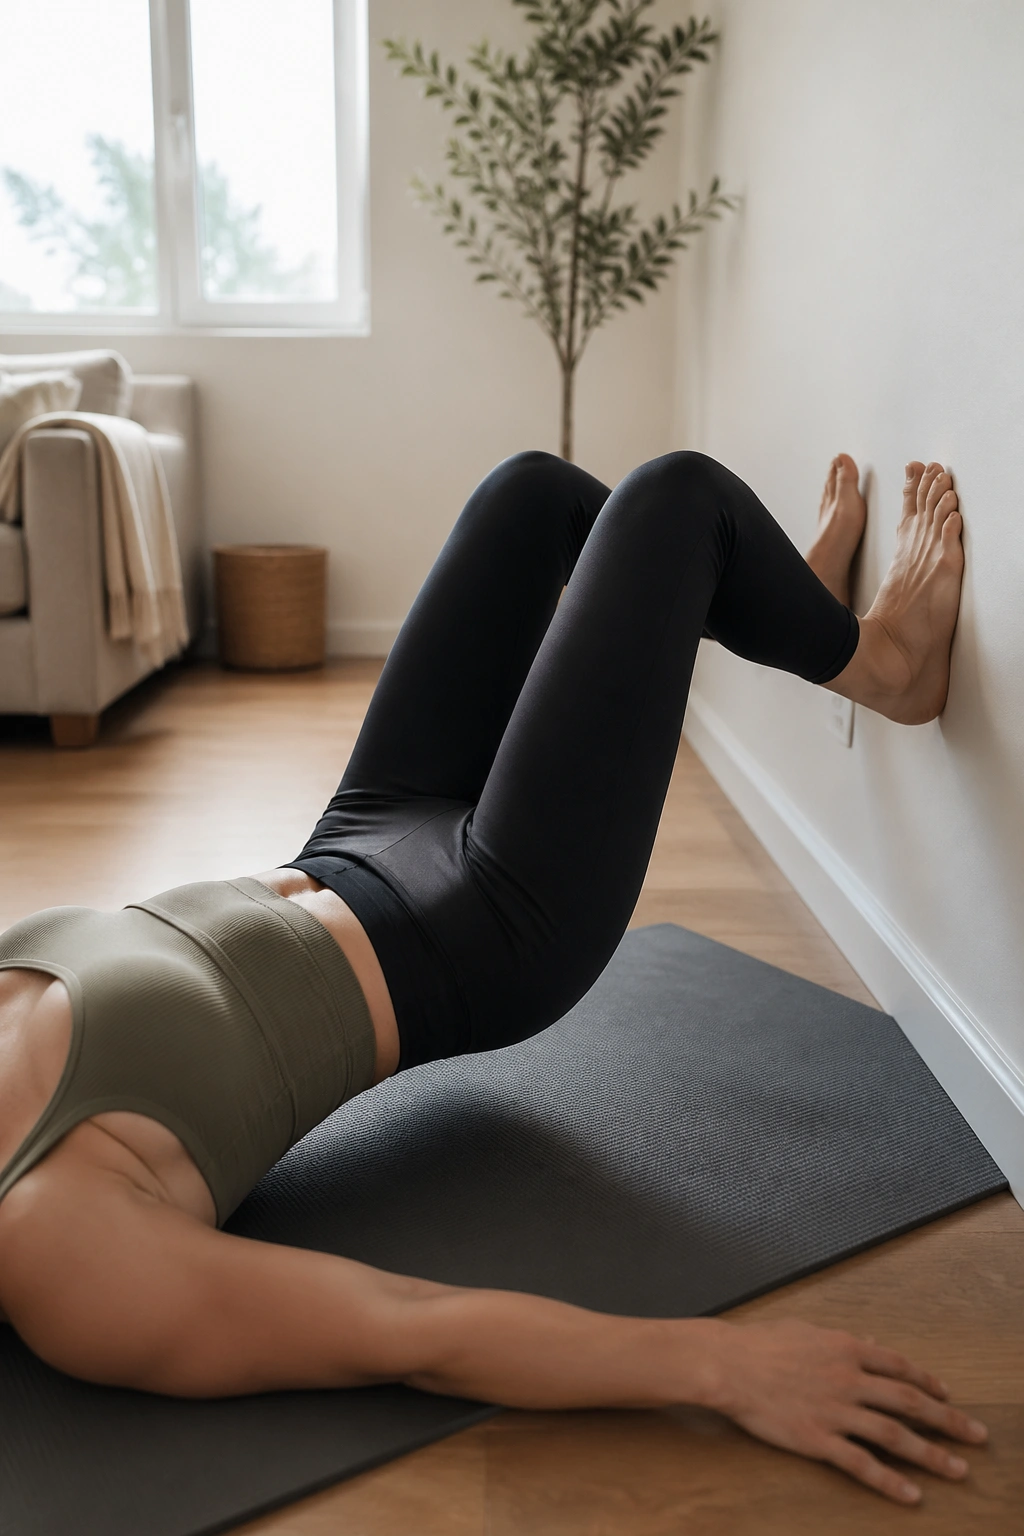
This one is sneaky-hard. People expect a stretch and get a hamstring drill instead.
Stay on your back with your heels on the wall and your hips lifted in a bridge. From there, bend the knees a little so the feet slide down the wall toward you, then press the feet back up to the starting angle. Keep the hips lifted the whole time.
The lower the hips sink, the less useful the curl becomes. So watch that part. Think of the pelvis as a tray you are trying not to spill.
A small range is enough. Six to eight controlled reps can make the back of the thighs sing without turning the exercise into a mess. If the hamstrings cramp, bring the feet a touch higher on the wall and shorten the slide.
15. Wall Dead Bug
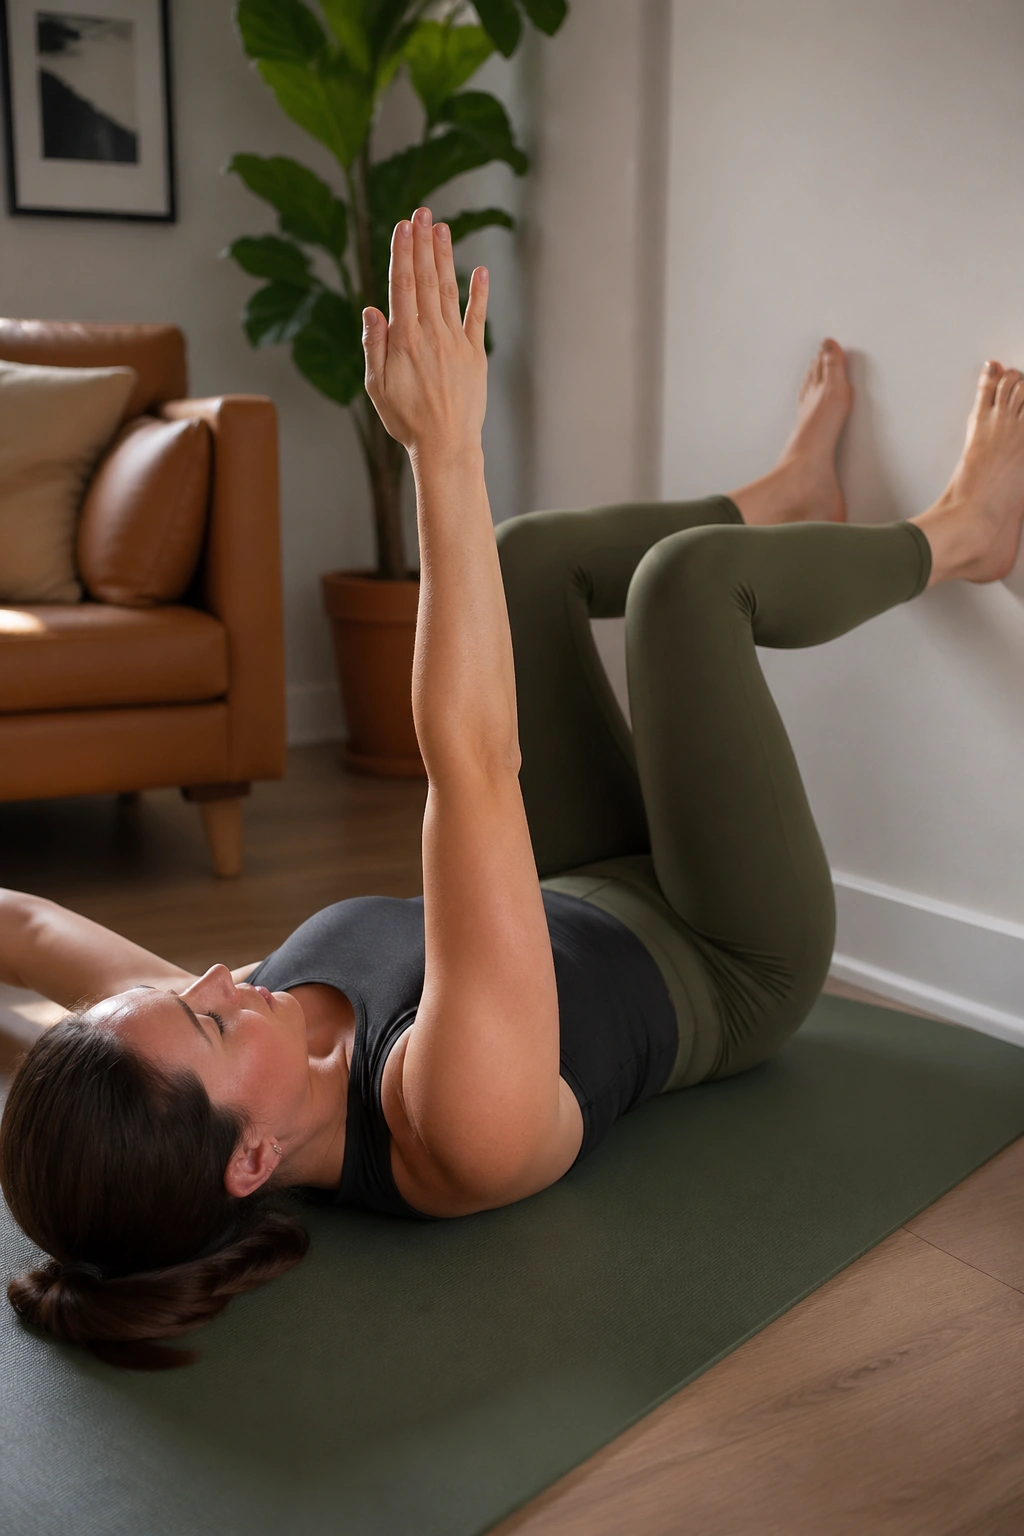
Why do dead bugs show up in so many Pilates routines? Because they teach the trunk to stay quiet while the limbs move.
Lie on your back with both feet on the wall, knees bent, and arms reaching toward the ceiling. Press one heel lightly into the wall while lowering the opposite arm overhead. Return to center, then switch sides. The low back should stay heavy and the ribs should not pop upward.
How to Use It
Start with 6 reps per side and keep the movements slow enough that you can actually notice the back of your pelvis. If your stomach domes or the low back peels off the mat, shorten the range and make the arm reach smaller.
This exercise sits near the center of a good wall Pilates chart because it teaches coordination without speed. That is a rare thing. Most people can move fast. Not as many can keep the trunk quiet while doing it.
16. Wall Toe Tap
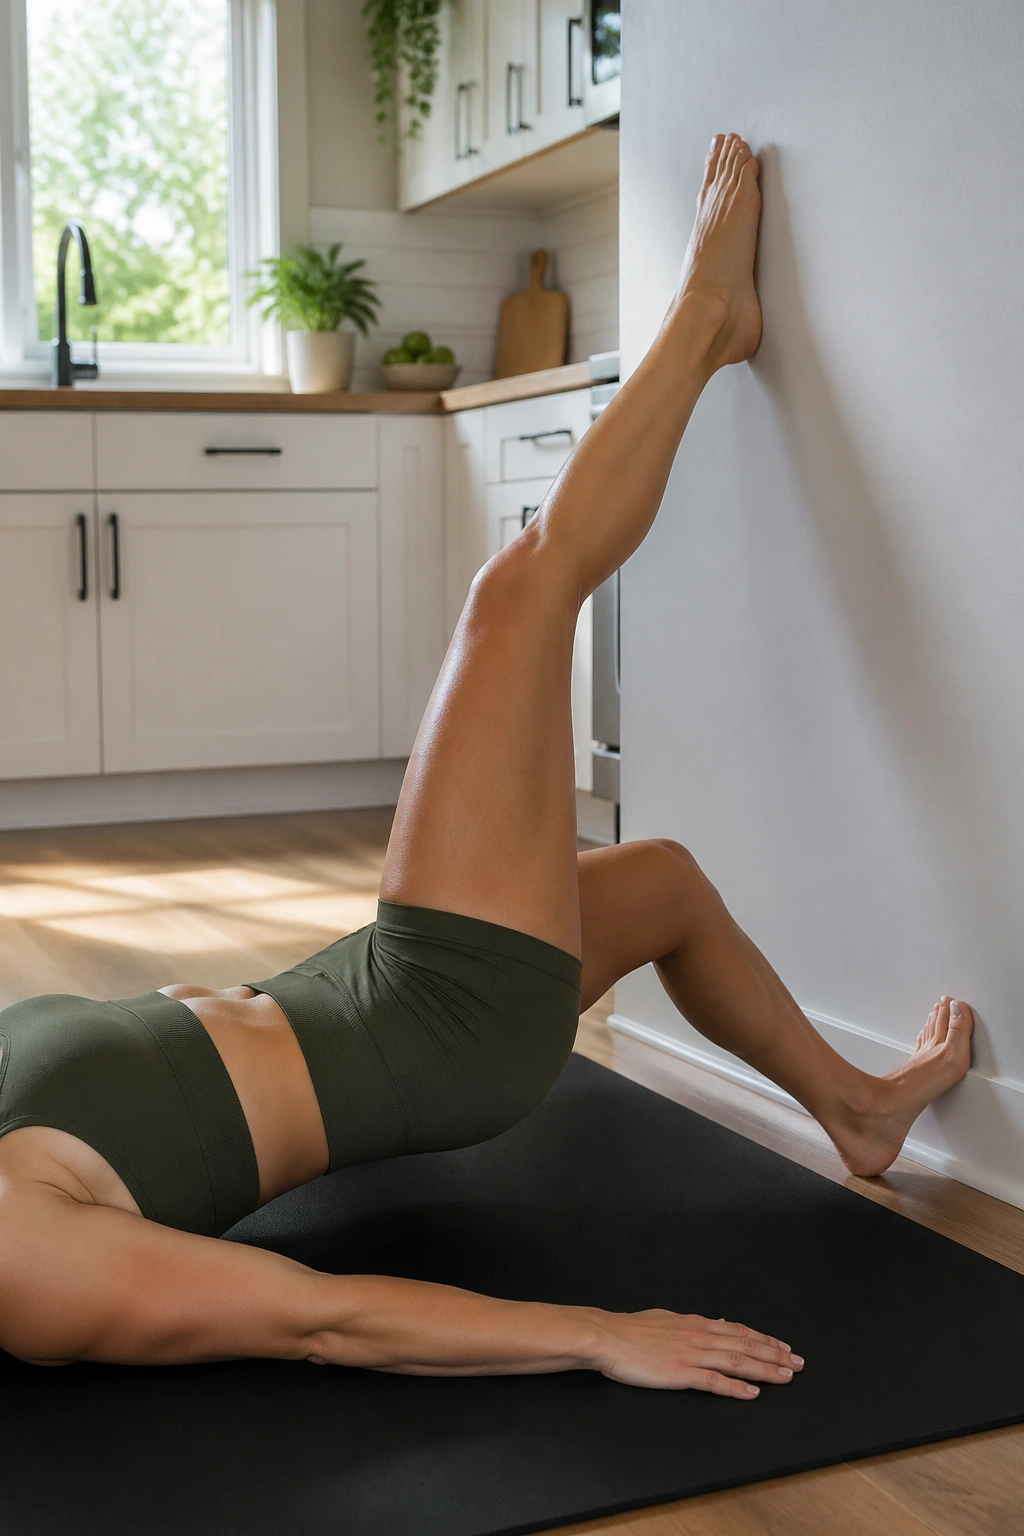
This is the cleaner, more beginner-friendly cousin of the dead bug.
Lie on your back with your legs bent and feet placed on the wall. Lift one foot just enough to tap the toes down to the mat, then return it to the wall and switch sides. The other foot stays planted. The movement is tiny, but the pelvis wants to rock if you let it.
Keep the belly gently pulled inward and the arms long by your sides. If the lower back arches off the floor, move the feet higher on the wall and shrink the tap. Smaller usually works better here.
- Move slowly enough to feel the switch.
- Exhale on the tap.
- Keep the chin neutral.
- Stop if the hip flexors start cramping hard.
It is a good reset when a harder floor core move feels like too much.
17. Wall Plank
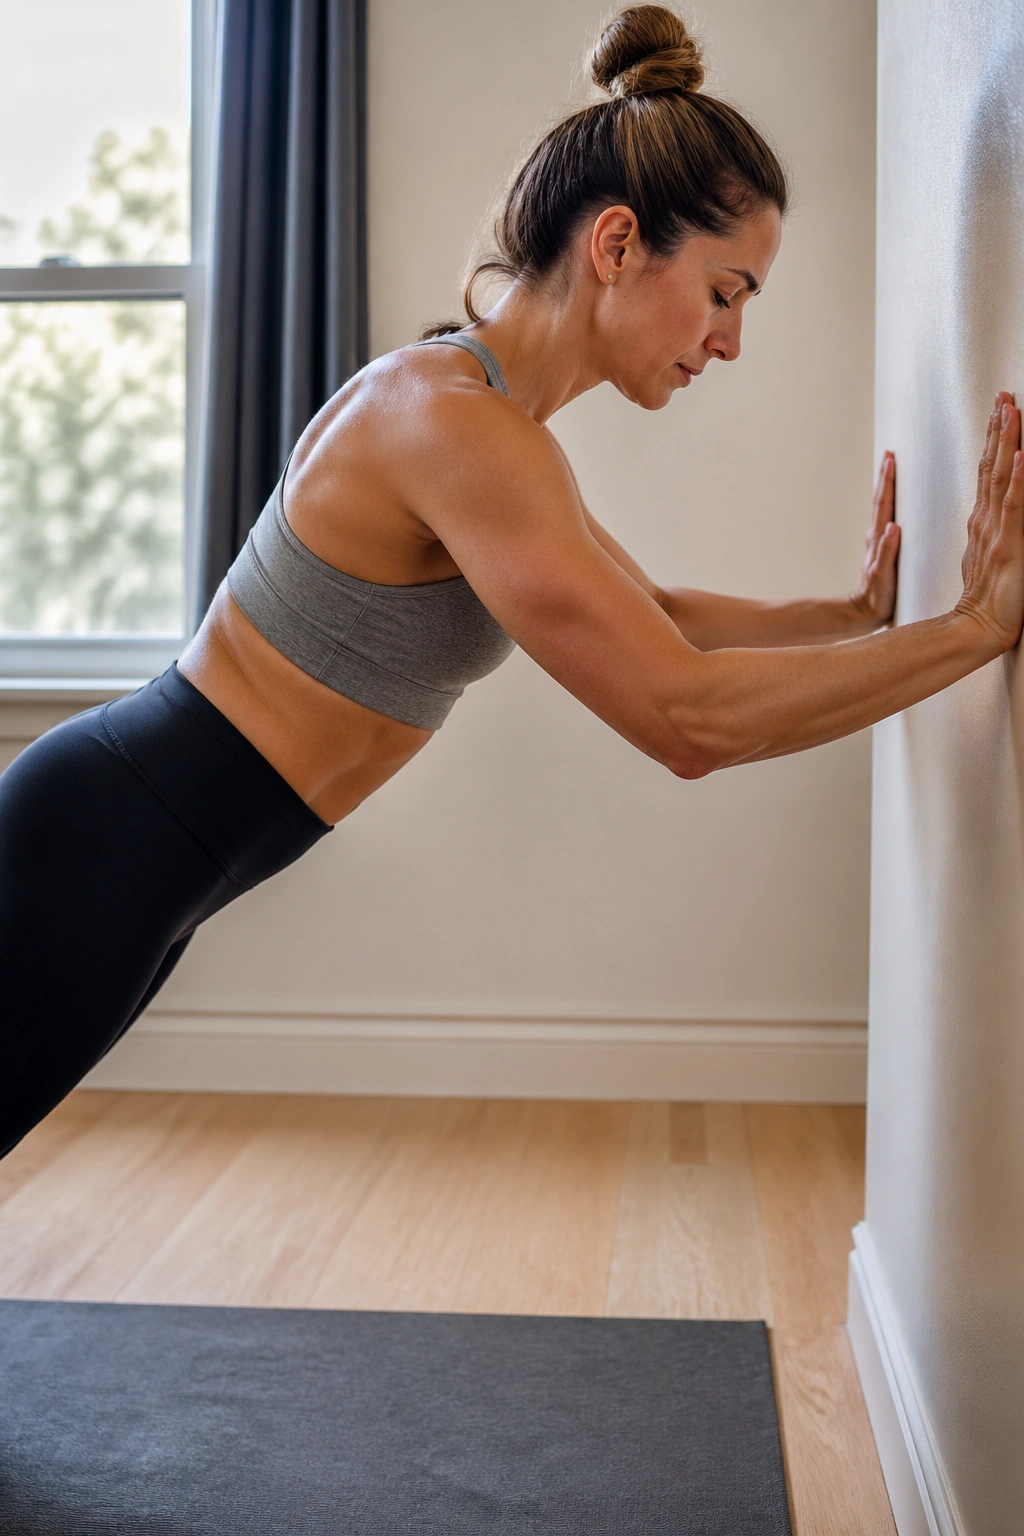
A wall plank is not glamorous. It is useful, and that is better.
Place your hands on the wall at chest height and walk your feet back until your body makes one straight line. Press the floor away through your hands, firm the belly, and draw the ribs toward the hips without rounding the upper back. Hold for 15 to 30 seconds.
The temptation is to sag into the shoulders or let the chin poke forward. Neither helps. A better cue is to imagine the back of the neck getting long while the shoulder blades slide gently down the ribs.
This is one of my favorite wall Pilates exercises for beginners because it teaches plank shape without the wrist load of the floor version. The angle is kinder, but the body still has to organize itself. That is the win.
18. Wall Mountain Climber
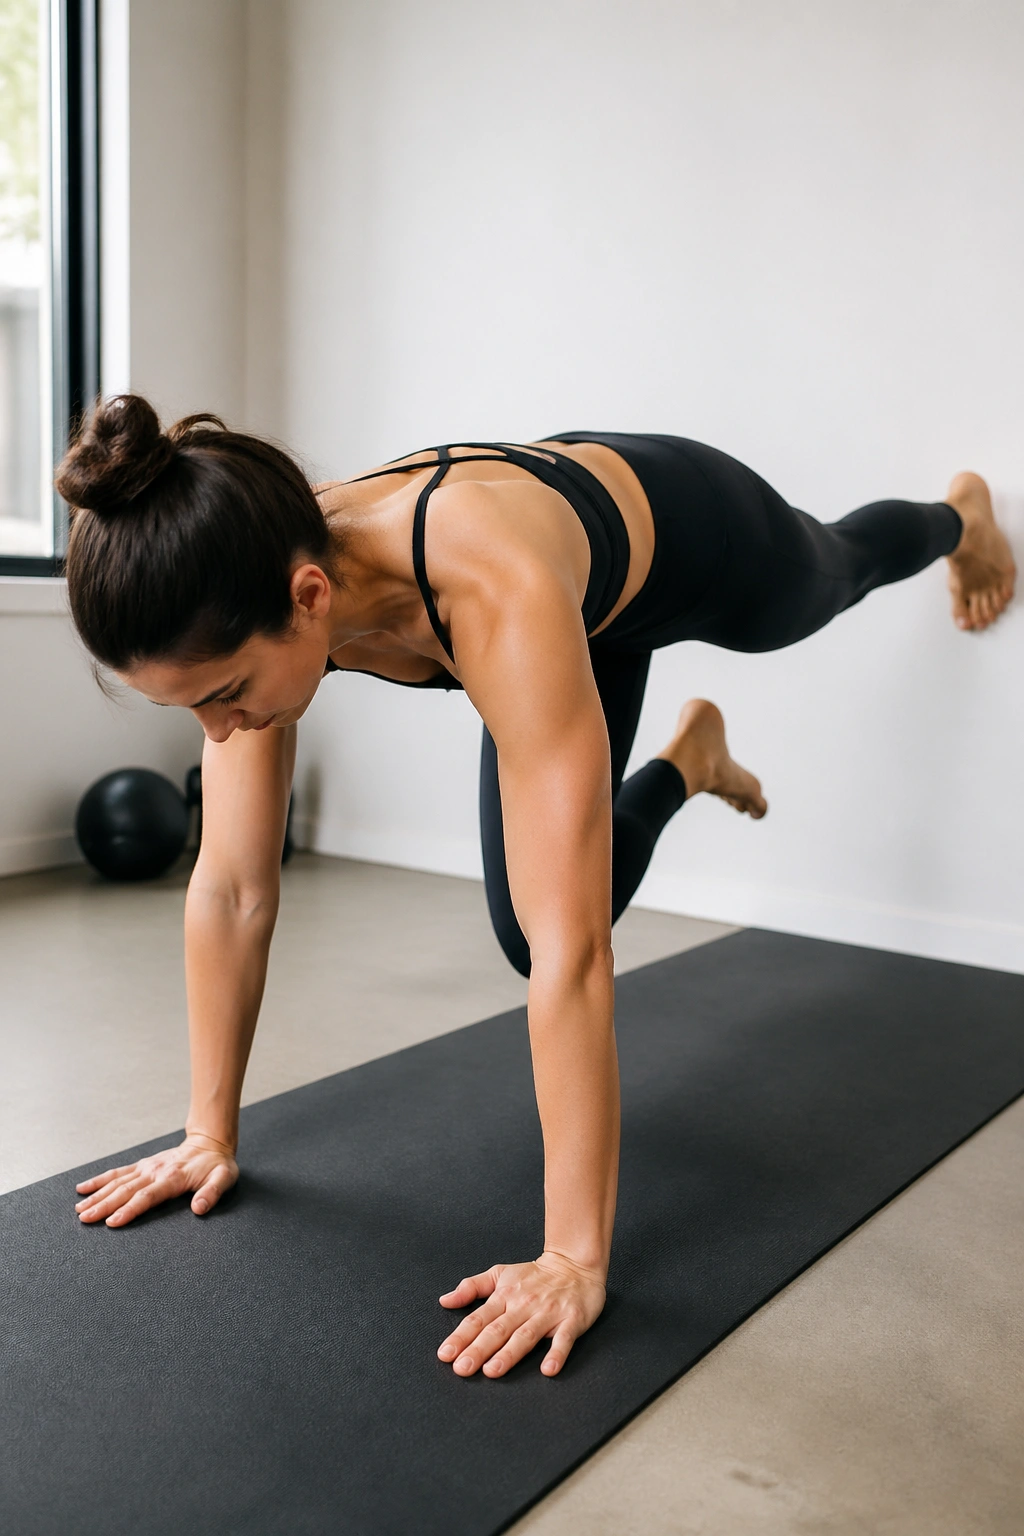
Once the wall plank feels steady, the mountain climber adds rhythm.
Keep the hands on the wall and the body angled in a long line. Drive one knee toward the chest, set it back, then switch sides in a smooth, deliberate tempo. Do not bounce. Do not hike the hips up to fake a faster knee drive.
Compared with the floor version, this one is easier on the shoulders and lower back while still asking the core to brace. It is a smart swap when you want a little cardio feel without turning the workout into a jump fest.
Try 20 alternating reps. If the shoulders start creeping, step the feet a little closer to the wall and slow the pace. Clean reps beat fast ones, especially with wall work.
19. Wall Pike
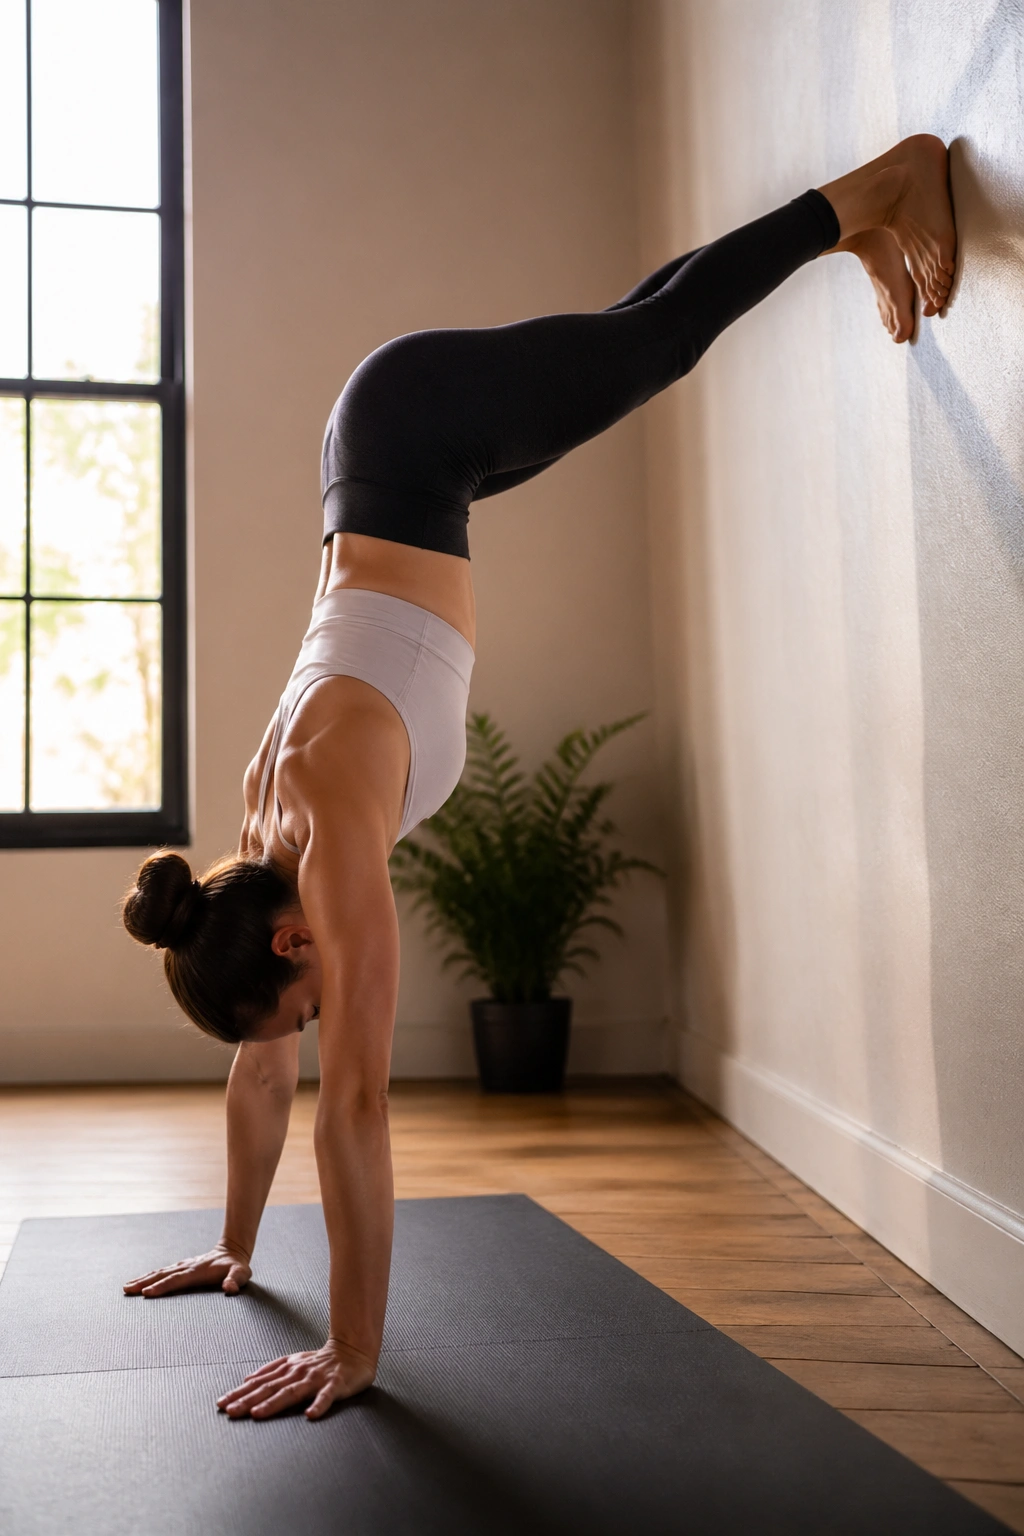
A wall pike is where the workout gets serious.
Start in a plank with your feet on the wall and your hands on the floor. Walk the feet up just enough to place the body in a steep angle, then use the abs to pull the hips upward as the feet slide slightly down the wall. Lower back to the starting line with control.
What to Watch For
- Keep the shoulders stacked over the wrists.
- Do not throw the head down.
- Keep the neck long.
- Stop the range before the low back pinches.
This is not the move to rush. A controlled pike teaches deep core strength and shoulder stability at the same time, which is why it earns a spot on any serious wall Pilates chart. If it feels too big, bend the knees and make it a short pike. The shape matters more than the height.
20. Wall Saw
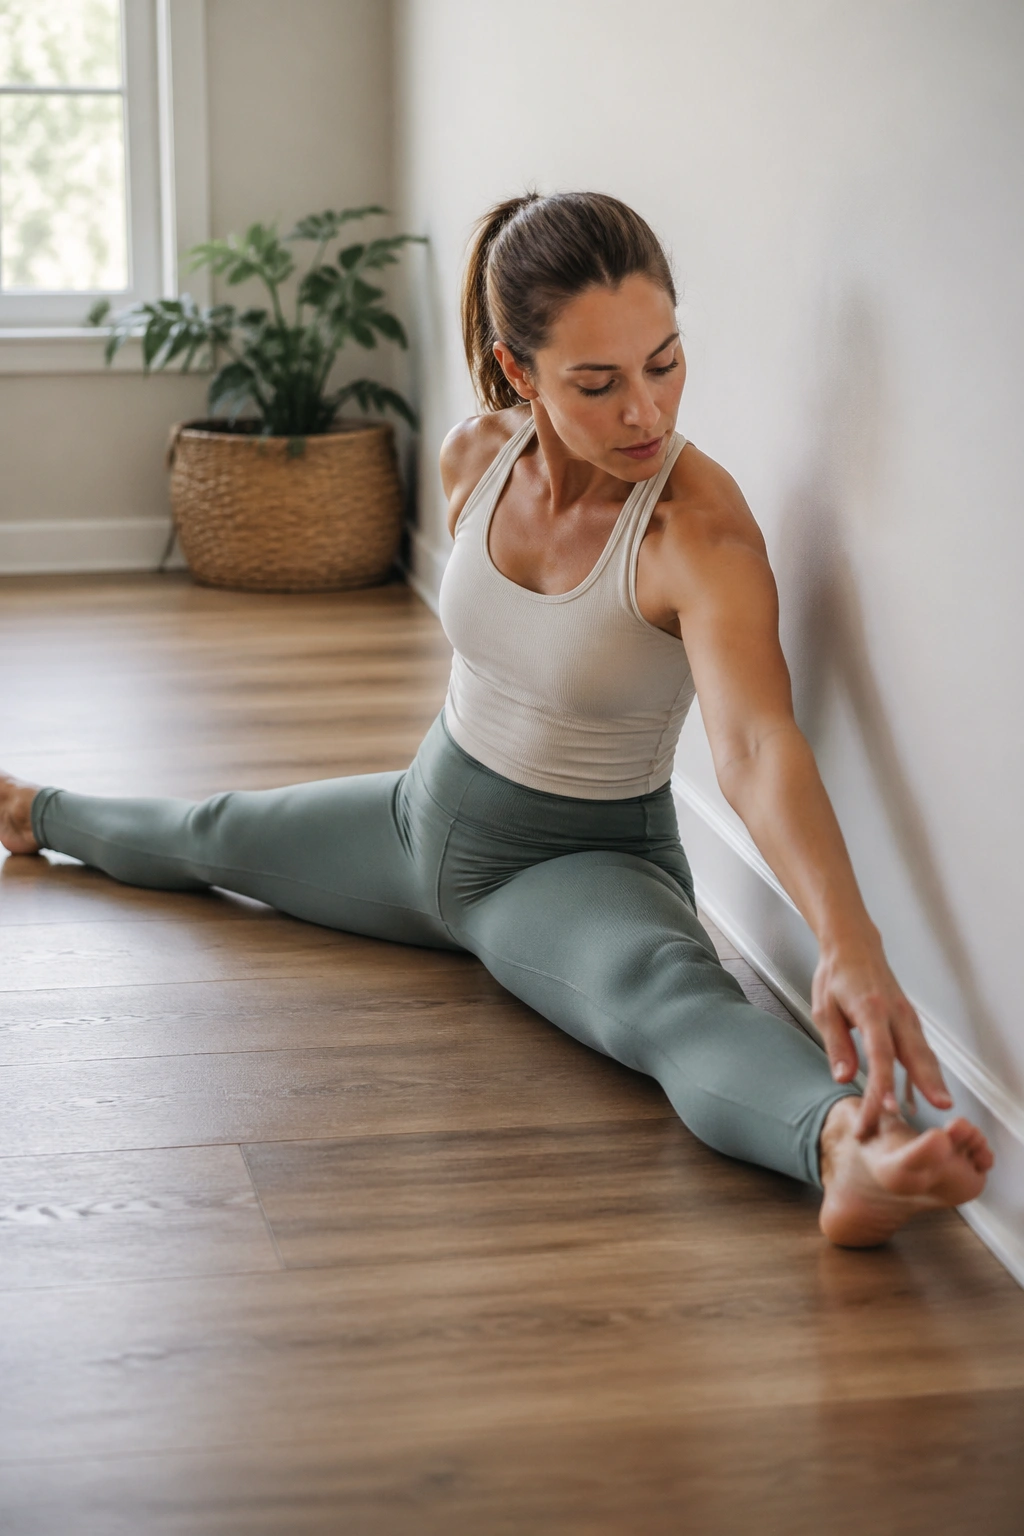
The wall saw is all about trunk control, and it gets better when you stop trying to make it dramatic.
Sit on the floor with your legs open in a comfortable V, back tall and close to the wall. Reach one arm across the body toward the opposite foot while the torso rotates and folds slightly forward. Return to center, then switch sides. The wall keeps you honest about sitting tall before you twist.
The saw should feel like a long diagonal stretch through the side body, not a collapse into the knees. If the shoulders round hard, sit on a folded towel to lift the hips and make the pelvis easier to tip forward.
I like this move after planks and bridges because it gives the spine a clean chance to lengthen again. Small twist. Long exhale. No drama.
21. Wall Mermaid Stretch
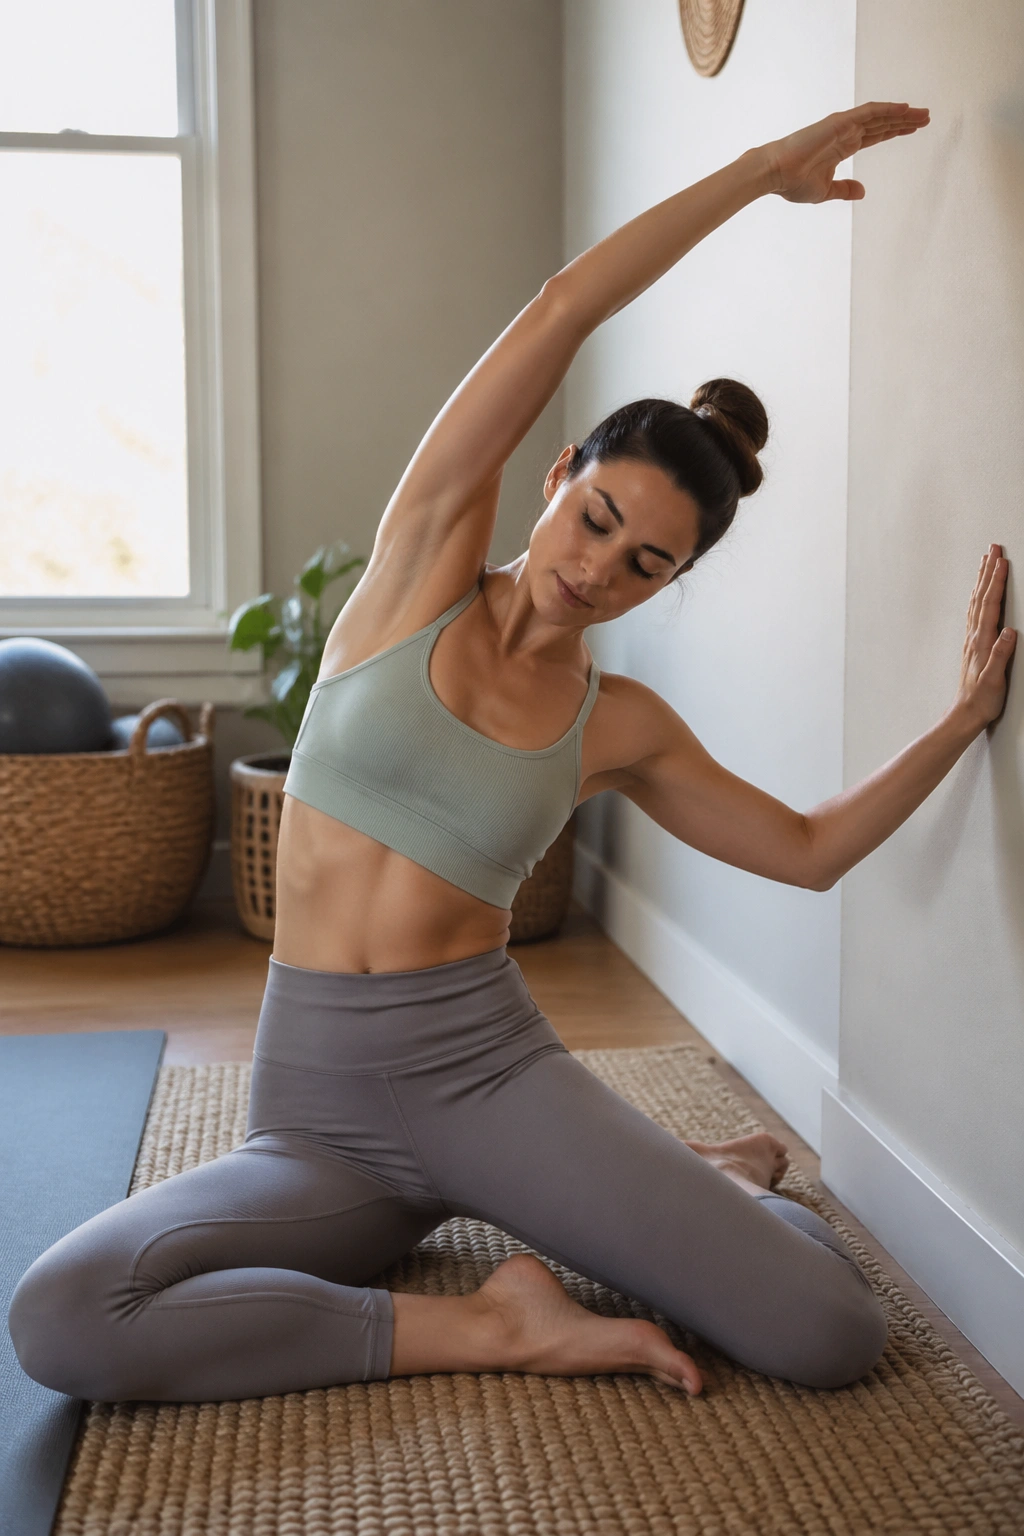
Why does the mermaid stretch feel so good against a wall? Because the wall stops the body from sneaking into a fake side bend.
Sit sideways with one hip near the wall and one hand lightly touching it. Sweep the free arm overhead and arc the ribs away from the wall while keeping both sit bones as grounded as you can. Breathe into the side ribs for two or three slow breaths, then switch.
The stretch should reach from the waist through the lats and into the side body. If the shoulder creeps up toward the ear, shorten the arc. You want length, not a compressed neck.
Use this one when your sides feel tight from too much sitting or after stronger core work. It is gentle, but it does real work.
22. Wall Spine Twist
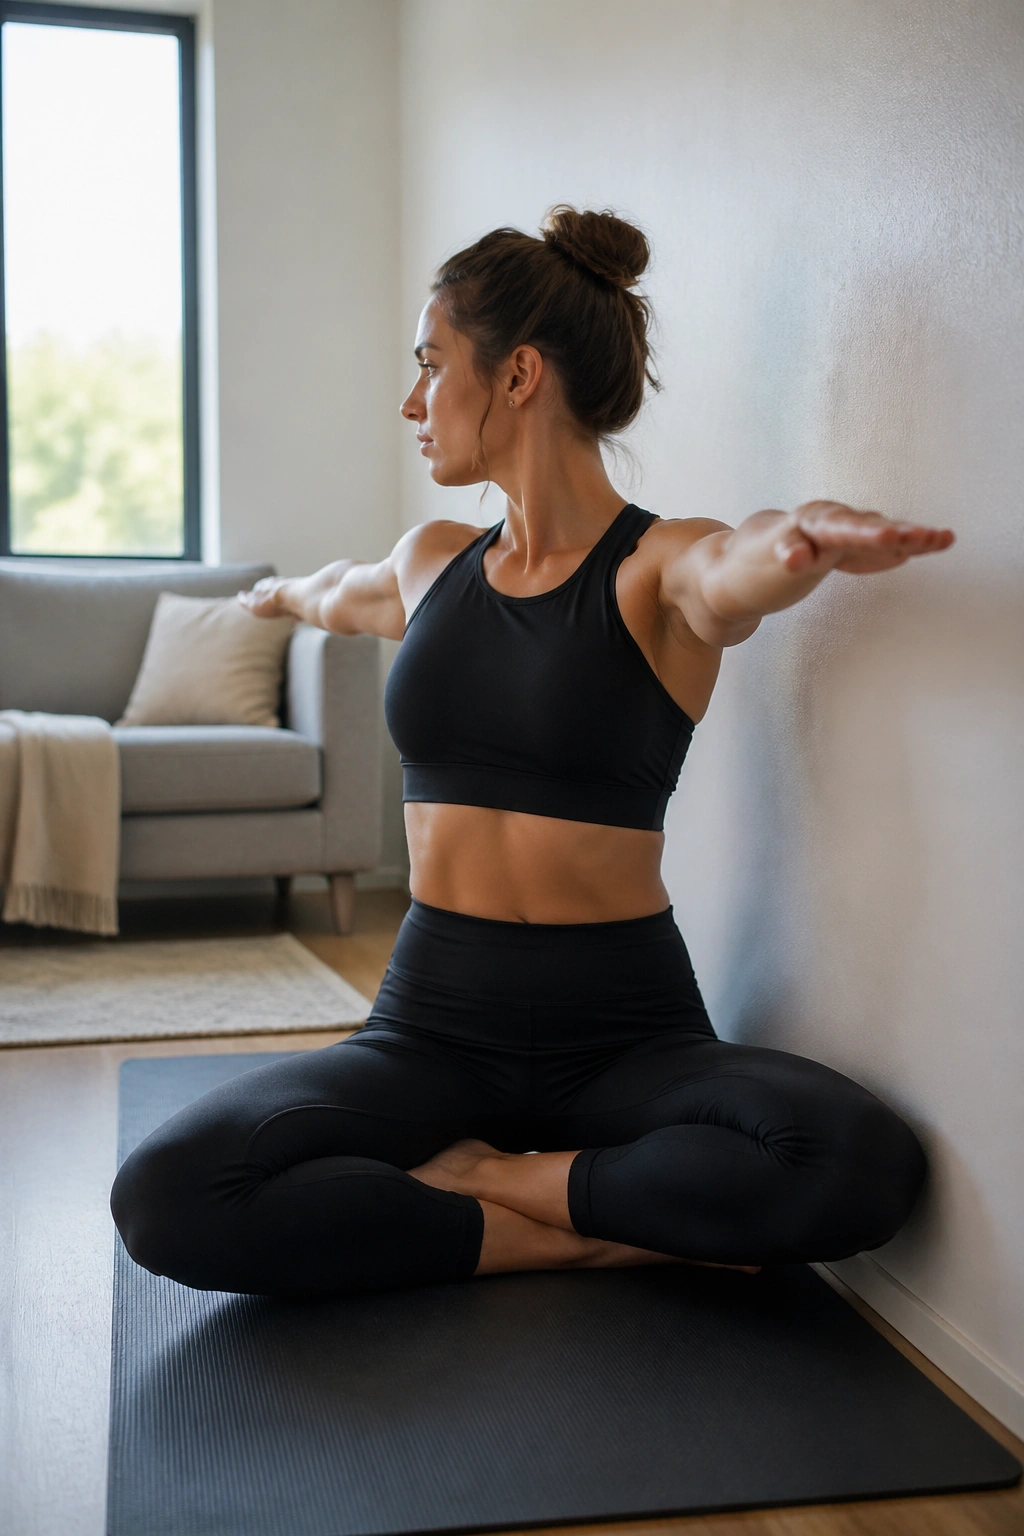
A wall spine twist looks mild until you try to keep the pelvis still.
Sit tall with your side near the wall or stand with your back lightly touching it. Extend the arms at shoulder height and rotate the ribcage to one side while the hips stay square. Return through center, then rotate the other way. The wall helps you feel whether the lower body is helping when it should not.
The twist comes from the ribs, not from heaving the shoulders around. That distinction matters in Pilates more than people think. If the knees or feet move to help, the spine never learns the job.
Do 5 slow turns per side. I like the exhale to lead the twist, because it keeps the movement from getting sharp or rushed.
23. Wall Side Bend
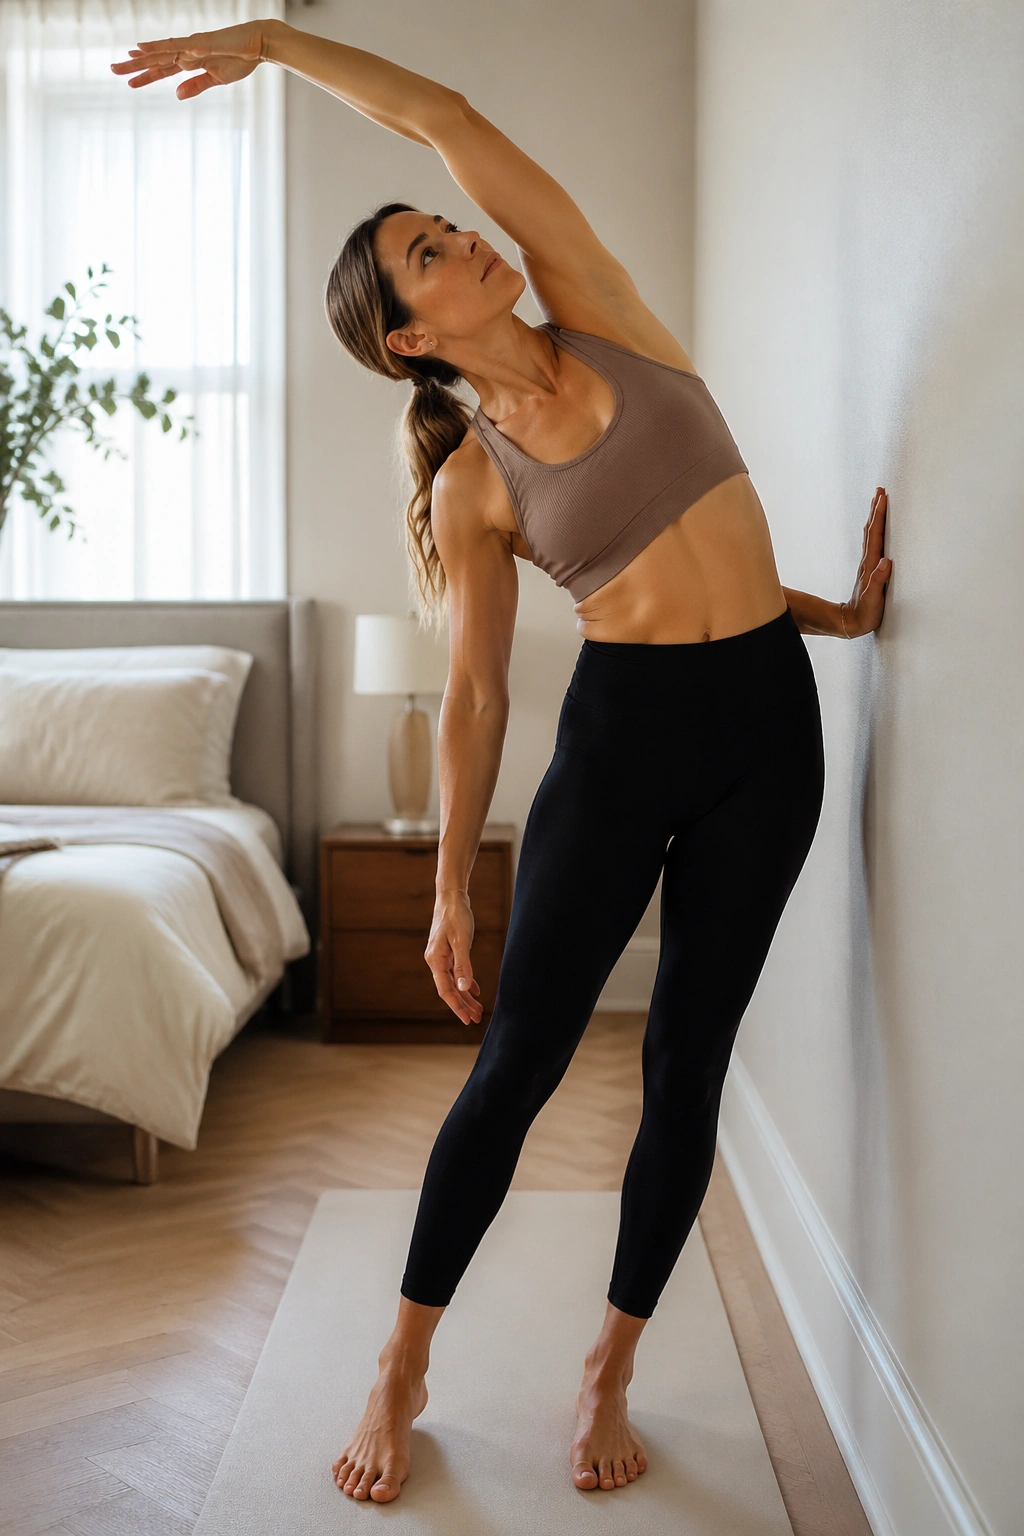
This is the move that makes people realize how much the side body does all day.
Stand side-on to the wall with one hand sliding down it for support. Reach the opposite arm overhead and gently side-bend away from the wall, keeping the hips heavy and the lower ribs from thrusting forward. Come back to center with control and repeat.
The best version feels like space opening between the ribs and the hip on the stretched side. The worst version is a collapse at the waist. If that happens, shorten the range and keep the top arm more in line with the ear.
It pairs nicely with wall mermaid and wall spine twist because it finishes the spine sequence without forcing anything. The body likes that.
24. Wall Figure Four Stretch
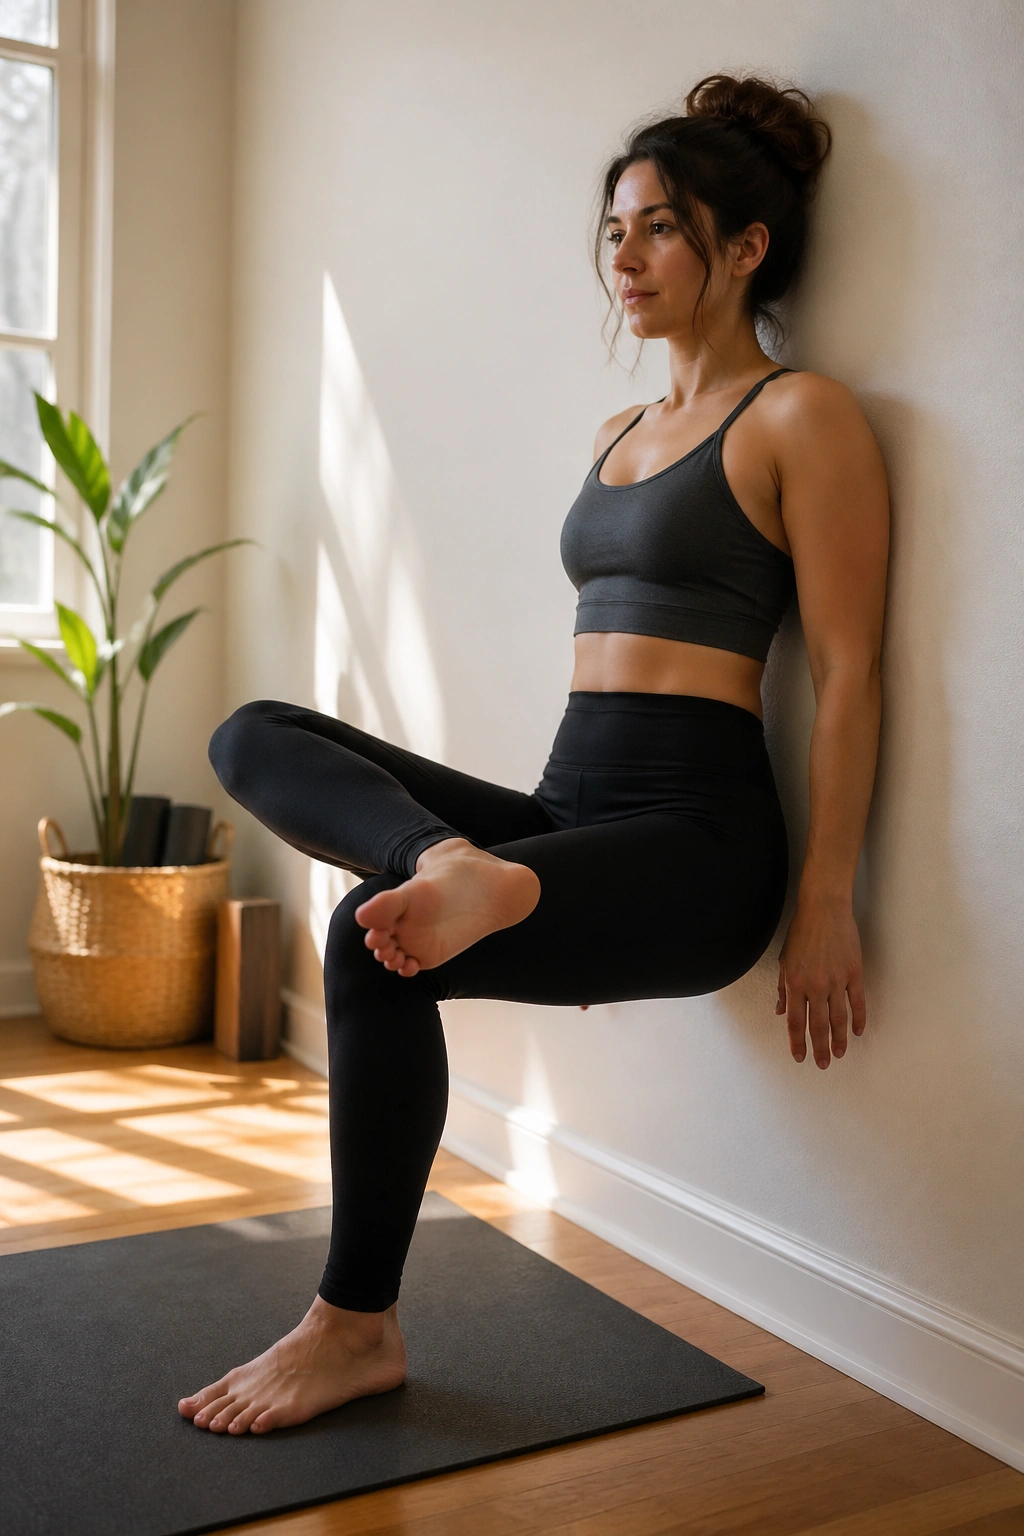
Compared with the floor version, this one is easier to get into and easier to get out of.
Stand with your back against the wall and cross one ankle over the opposite thigh, making a figure four shape. Sit the hips back a few inches as if reaching for a chair, then hold. Keep the standing knee tracking over the foot, and keep the lifted knee open rather than collapsing inward.
The glute stretch lands fast here. If you feel it in the standing knee, come out a little and reduce the depth. The wall gives enough support that you do not need to sink deeply to get a good stretch.
Hold for 20 to 30 seconds per side. It is a clean choice after bridge work or long walks, especially when the hips feel stubborn.
25. Wall Frog Press
The frog press is one of those odd little Pilates moves that looks tame and then surprises you.
Lie on your back with the soles of your feet pressed together on the wall and your knees open wide. Keep the heels close enough to the wall that you can press gently through the inner edges of the feet. Then squeeze the inner thighs together a little, release, and repeat.
How It Should Feel
- Inner thighs light up first.
- The low back stays quiet.
- The breath stays smooth.
- The hips feel open, not jammed.
Do 10 to 12 presses. If the knees ache, move the feet a little higher and narrow the angle. The point is to connect the adductors with the core, not to force the knees into the floor.
This is a good one for days when the hips feel sleepy and the legs need a more careful wake-up.
26. Wall Teaser Prep
Teaser is famous for a reason. It asks for control that most people do not build by accident.
Lie on your back with your feet on the wall and your knees bent. Exhale, curl your head and shoulders off the mat, and extend one leg away from the wall just enough to challenge the center line. Hold for one breath, then set it back down and switch sides. If the low back arches or the neck strains, the range is too big.
The wall is useful here because it gives the legs a reference point while the torso learns to lift. That makes teaser prep safer and cleaner than jumping straight into the full version.
A few controlled reps are enough. You are looking for a deep abdominal brace and a long spine, not a wrestling match with gravity.
27. Wall Standing Reach
Can one small reach change your whole balance? Sometimes, yes.
Stand facing the wall with one hand lightly touching it. Reach the opposite arm forward and the opposite leg back at the same time, then return to center and switch sides. The motion is tiny, almost like a standing Pilates arabesque, and the wall keeps it from turning into a wobble contest.
The key is that the standing hip stays level. If the pelvis tips or the low back arches, shorten the reach and think about length instead of height. A long line is better than a big one.
This is a strong bridge between strength and grace, which is exactly what a wall Pilates chart should include. You get core, glute, and balance work in one tidy rep.
28. Wall Standing Balance Reach and Reset
After all the pulses, planks, and bridges, this is the move I like most for finishing a wall Pilates sequence.
Stand tall near the wall with one hand hovering for balance. Shift weight into one leg, hinge slightly at the hip, and let the free leg reach long behind you while the opposite arm reaches forward. Return to standing with control, then switch sides. Keep the movement slow enough that the standing foot stays awake.
If the body feels wobbly here, that is useful information, not a failure. The wall shows you whether the ankle, hip, or midsection is doing its share. A clean reset rep can be more revealing than ten harder ones done badly.
Use 5 reps per side and finish with one long breath in tall standing. The posture should feel quieter on the way out than it did on the way in. That is the whole point of wall Pilates: honest work, plain feedback, and no need for fancy equipment.
