



The first time most people try Pilates board exercises for beginners, the strange part is not the resistance. It is the sliding. A mat stays put. A board gives you feedback the second you rush, yank a strap, or shift your weight half an inch too far forward.
That is why a Pilates board can be such a smart training tool. It does not let you fake control for long. If your ribs pop up during a bridge, you feel it. If your shoulders creep toward your ears during a row, the tension changes fast. And if your core switches off in a plank, the board tells on you right away.
I like that honesty. It makes beginner work cleaner.
A compact Pilates board also gives people something a floor routine sometimes does not: clear resistance and a shorter setup. You can train your legs, back, arms, glutes, and deep core muscles with one piece of gear that usually folds away under a bed or behind a door. Still, the board is not magic. Start with moves that teach breathing, pelvic position, and slow control, and your workouts feel strong rather than shaky.
Why Pilates Board Resistance Feels Different From Mat Work
The board exposes momentum. On a mat, you can fling a leg out, swing through a row, or rush a bridge and still finish the rep. On a Pilates board, momentum changes the carriage, the strap tension, or your balance. That extra feedback is why beginner sessions often feel humbling in a good way.
There is also a joint-friendly side to it. The resistance bands on most boards create a softer load than heavy dumbbells, and the sliding surface reduces impact during split squats, side lunges, and glute work. Your muscles still work hard, yet your knees and wrists often take less of a beating than they do in jump-heavy workouts.
Pilates training has long been used to build trunk endurance, body awareness, and balance. The board adds another layer: control under light instability. Not chaos. Not circus tricks. Small corrections. That is the sweet spot for beginners.
Slow reps matter more here than big reps. Lower for three counts. Pause for one. Come back with control. If a move feels easier when you speed it up, that is a clue, not a win.
How to Set Up Your Pilates Board for Beginner Exercises
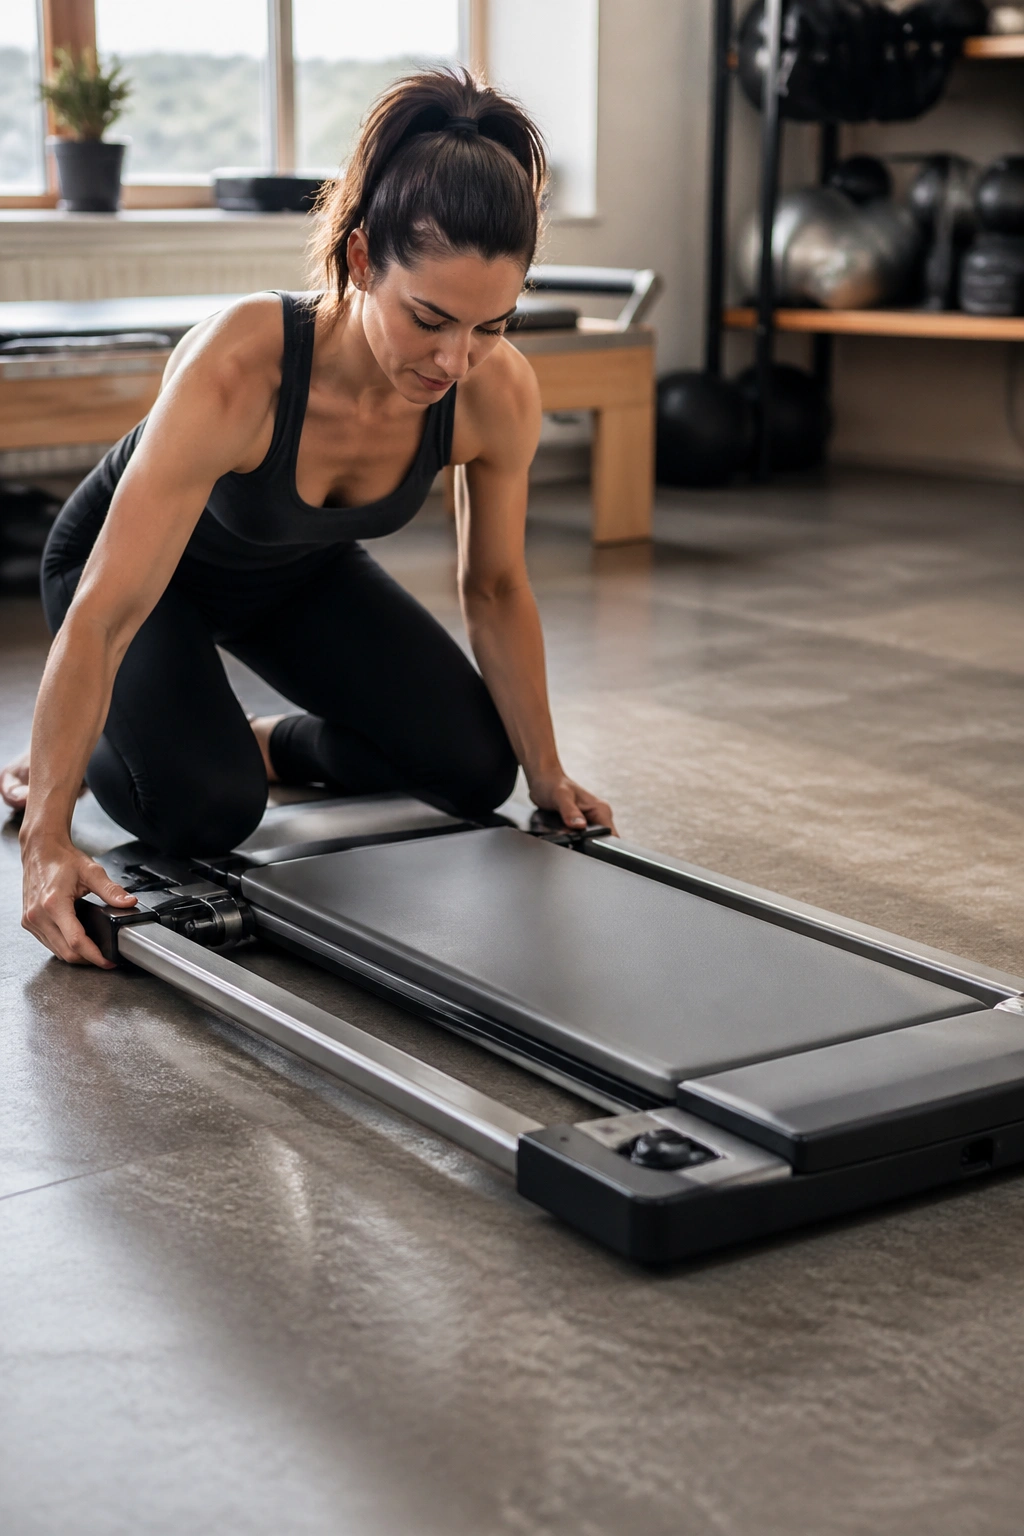
A bad setup can ruin an easy workout.
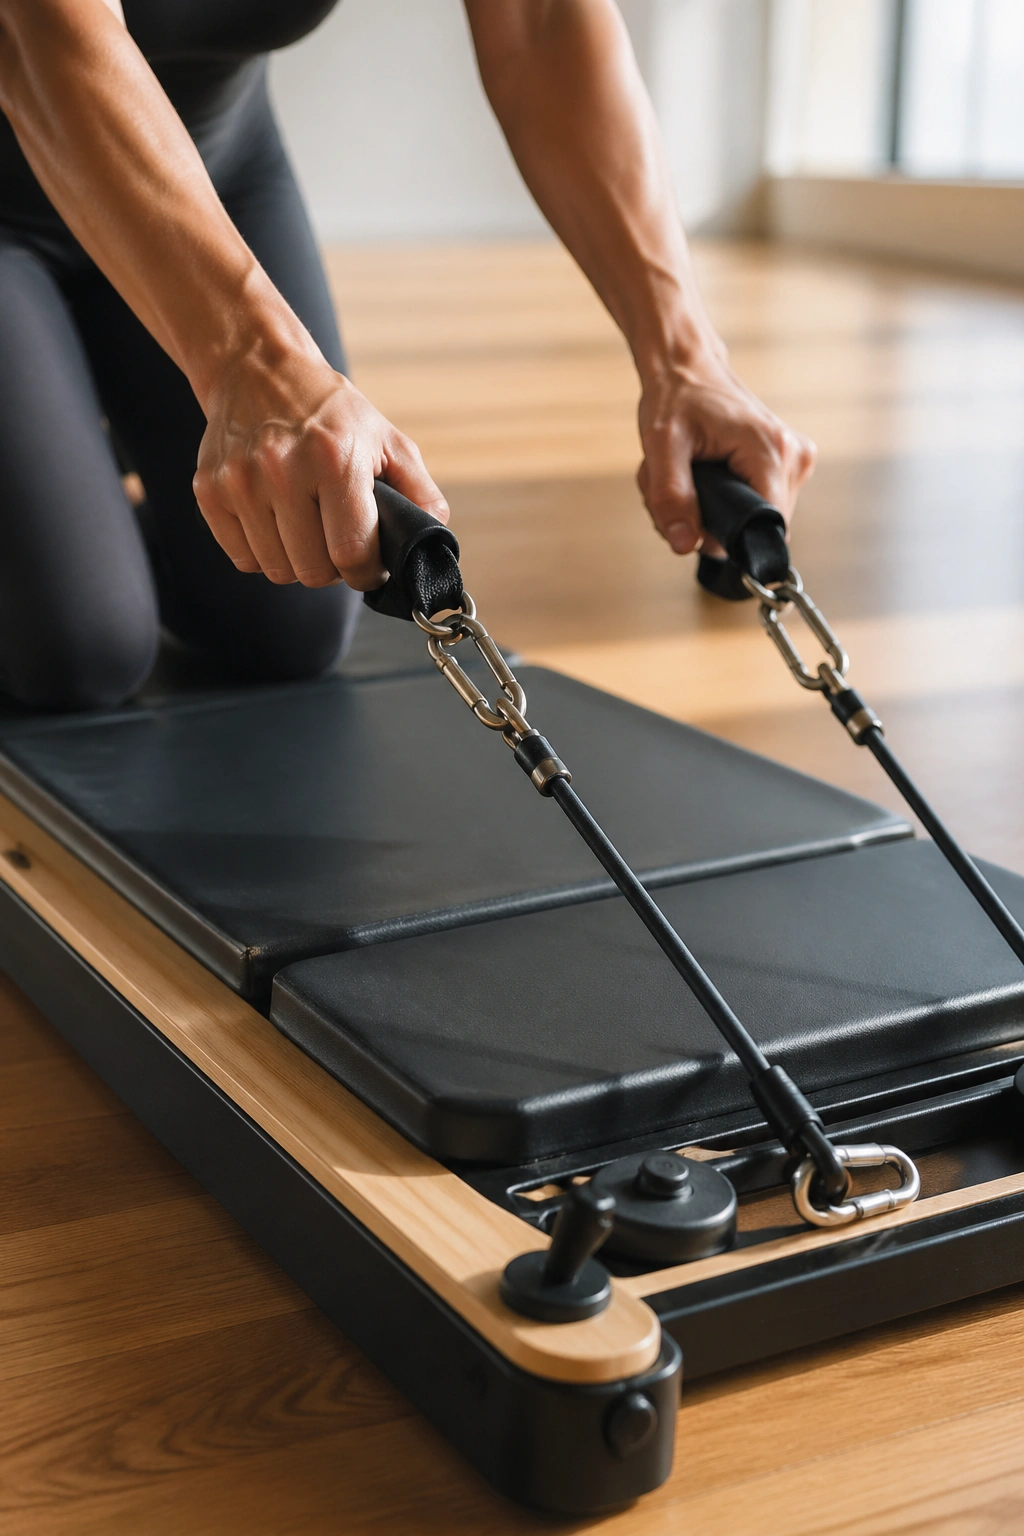
Put the board on a hard, flat surface if you can. Tile, wood, and low-pile carpet work better than thick carpet because the base stays more even. If the board tends to shift, place a non-slip exercise mat underneath it. If your model folds, lock it open before you step on. If it has detachable bands, clip both sides in and tug them once before the first rep.
Start with the lightest tension that still gives you feedback. Most beginners choose bands that are too heavy, then compensate by shrugging, arching the back, or gripping the handles like they are hanging from a cliff. Light resistance teaches position. Heavier resistance can wait.
A short setup checklist helps:
- Wear flat shoes or grippy socks if the board surface feels slick.
- Stand close to a wall for the first session if balance is shaky.
- Test each move with half range first, then widen the motion only if you stay steady.
- Leave 2 to 3 feet of clear space around the board so your arms and legs can move freely.
- Stop at sharp pain, pinching in the joints, or any numb feeling in the hands or feet.
One more thing. Check the handles and clips every session. Resistance bands wear out, and a frayed strap is not something you want snapping loose near your face.
Form Cues That Make Pilates Board Exercises Safer
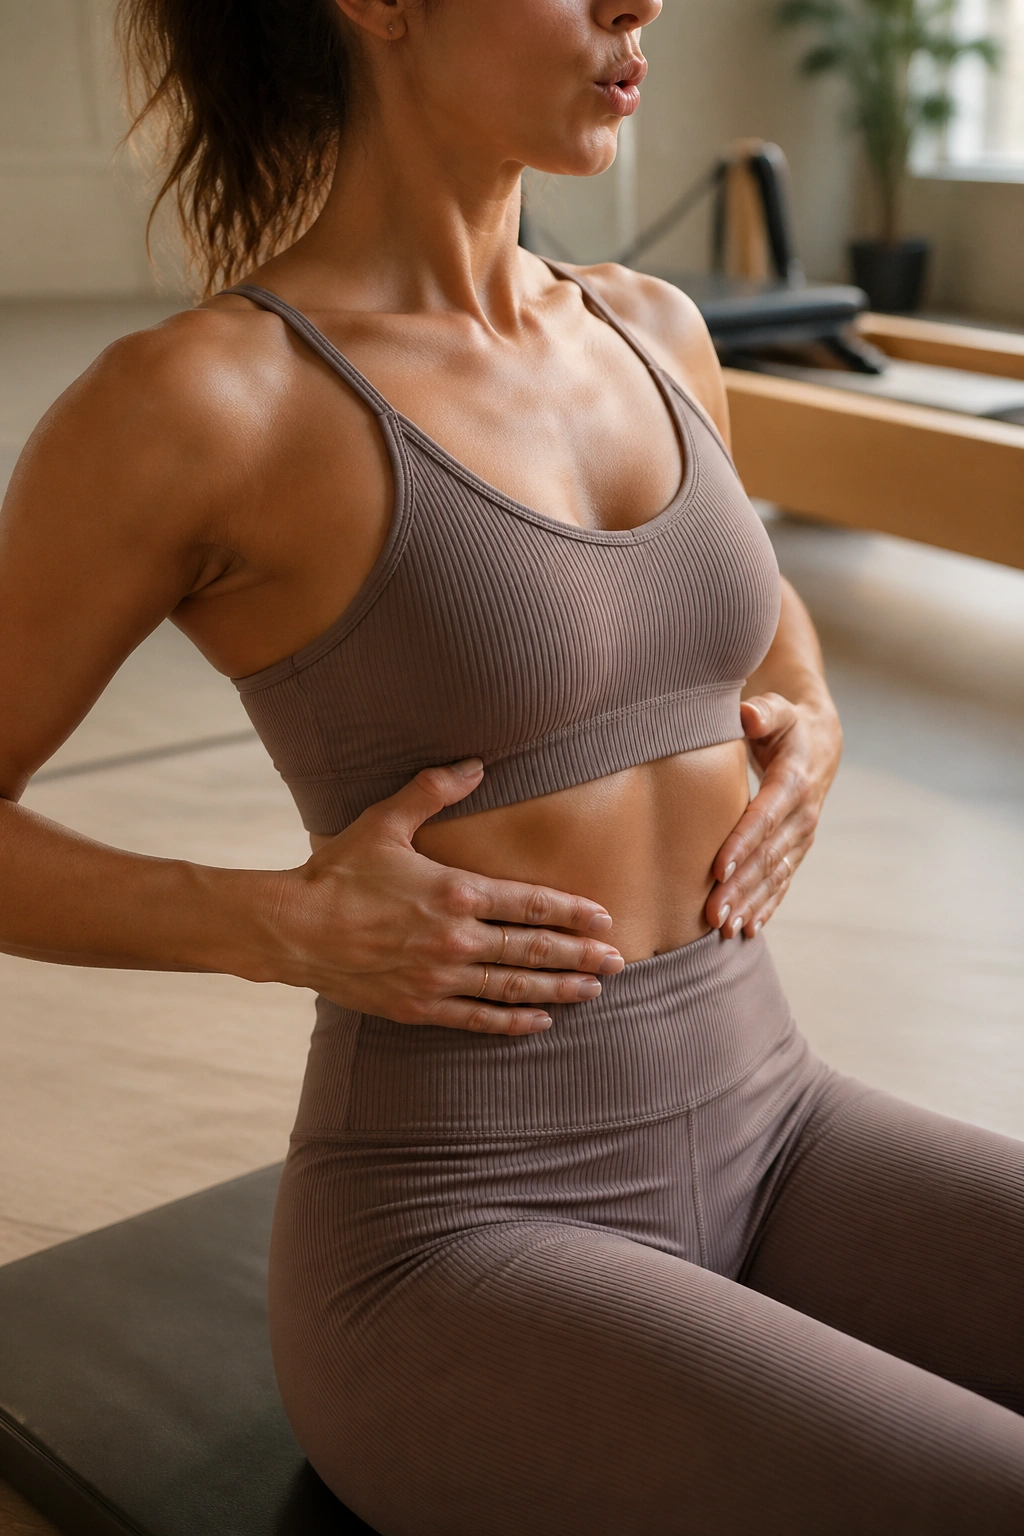
You do not need ten cues in your head at once. Three will carry most of the session.
Breathe out during the hard part
When you pull, press, lift, or stand up, exhale through pursed lips. That breath helps brace the trunk without making you clamp down so hard that your neck tightens. If you hold your breath on every effort, your shoulders often tense up first.
Stack the ribs over the pelvis
Think of your rib cage and pelvis as two bowls that should stay lined up. In standing moves, that means no big chest flare. On your back, it means you do not crank your low back into the board or arch away from it. Neutral usually feels smaller than people expect.
Move slower than feels natural
This is the cue people ignore and then regret. A slow tempo lets you feel where the work lands: glutes in a bridge, mid-back in a row, lower abs in toe taps. If the board starts rattling, wobbling, or jerking, cut the range and slow down.
Small range wins.
1. Seated Core Breathing and Pelvic Tilt
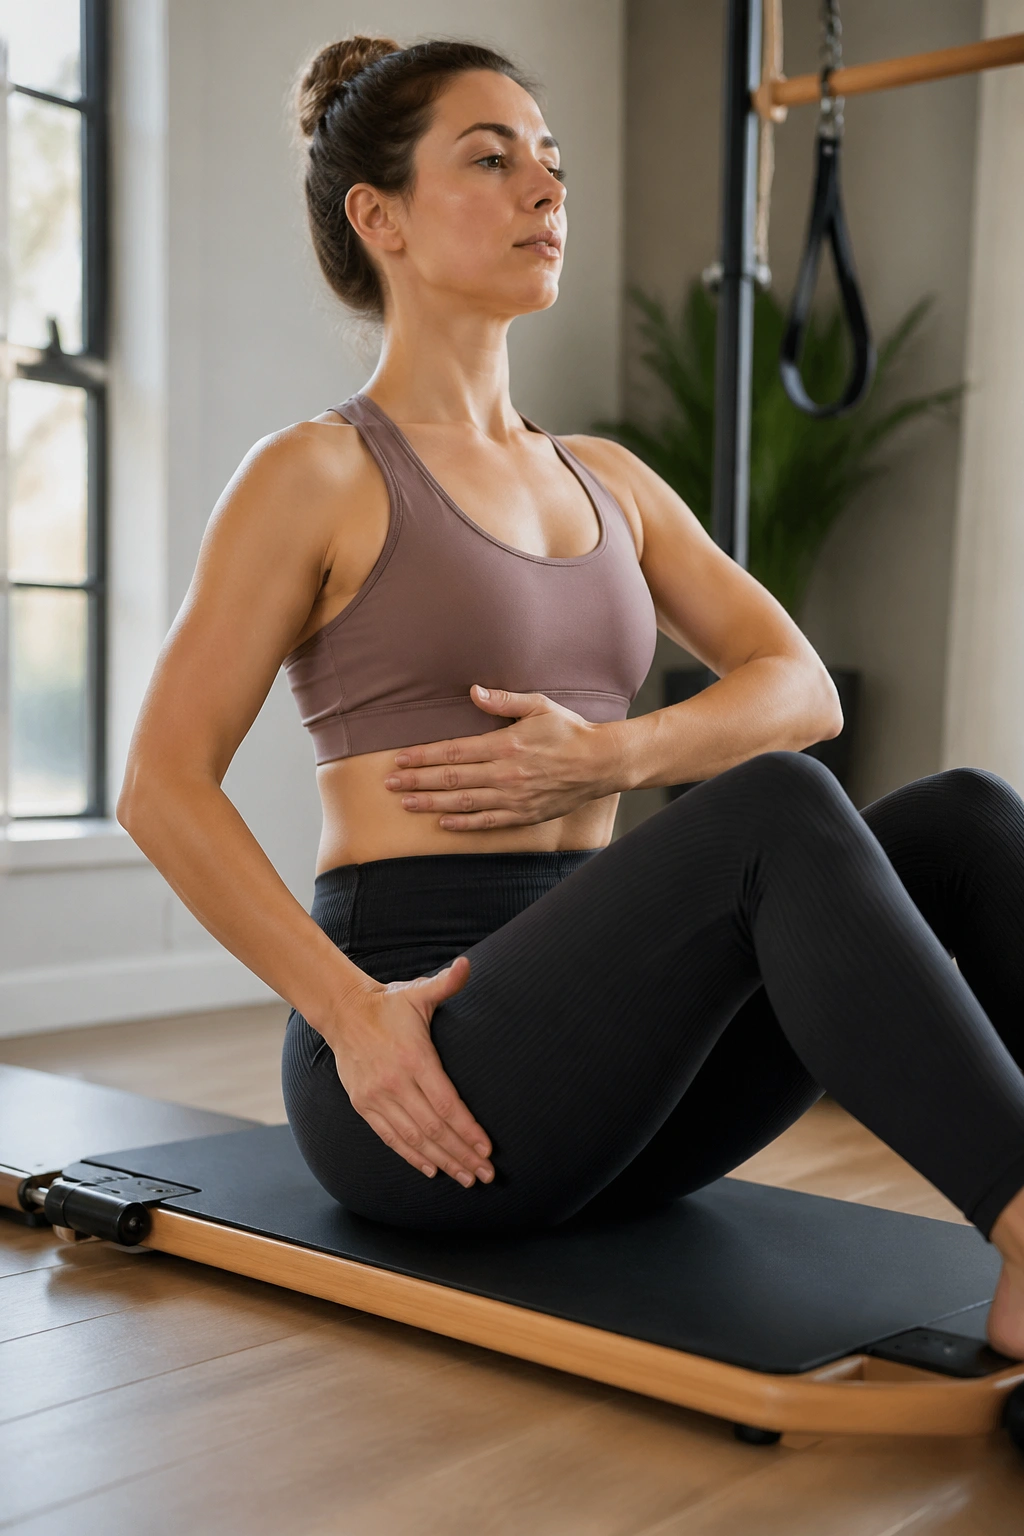
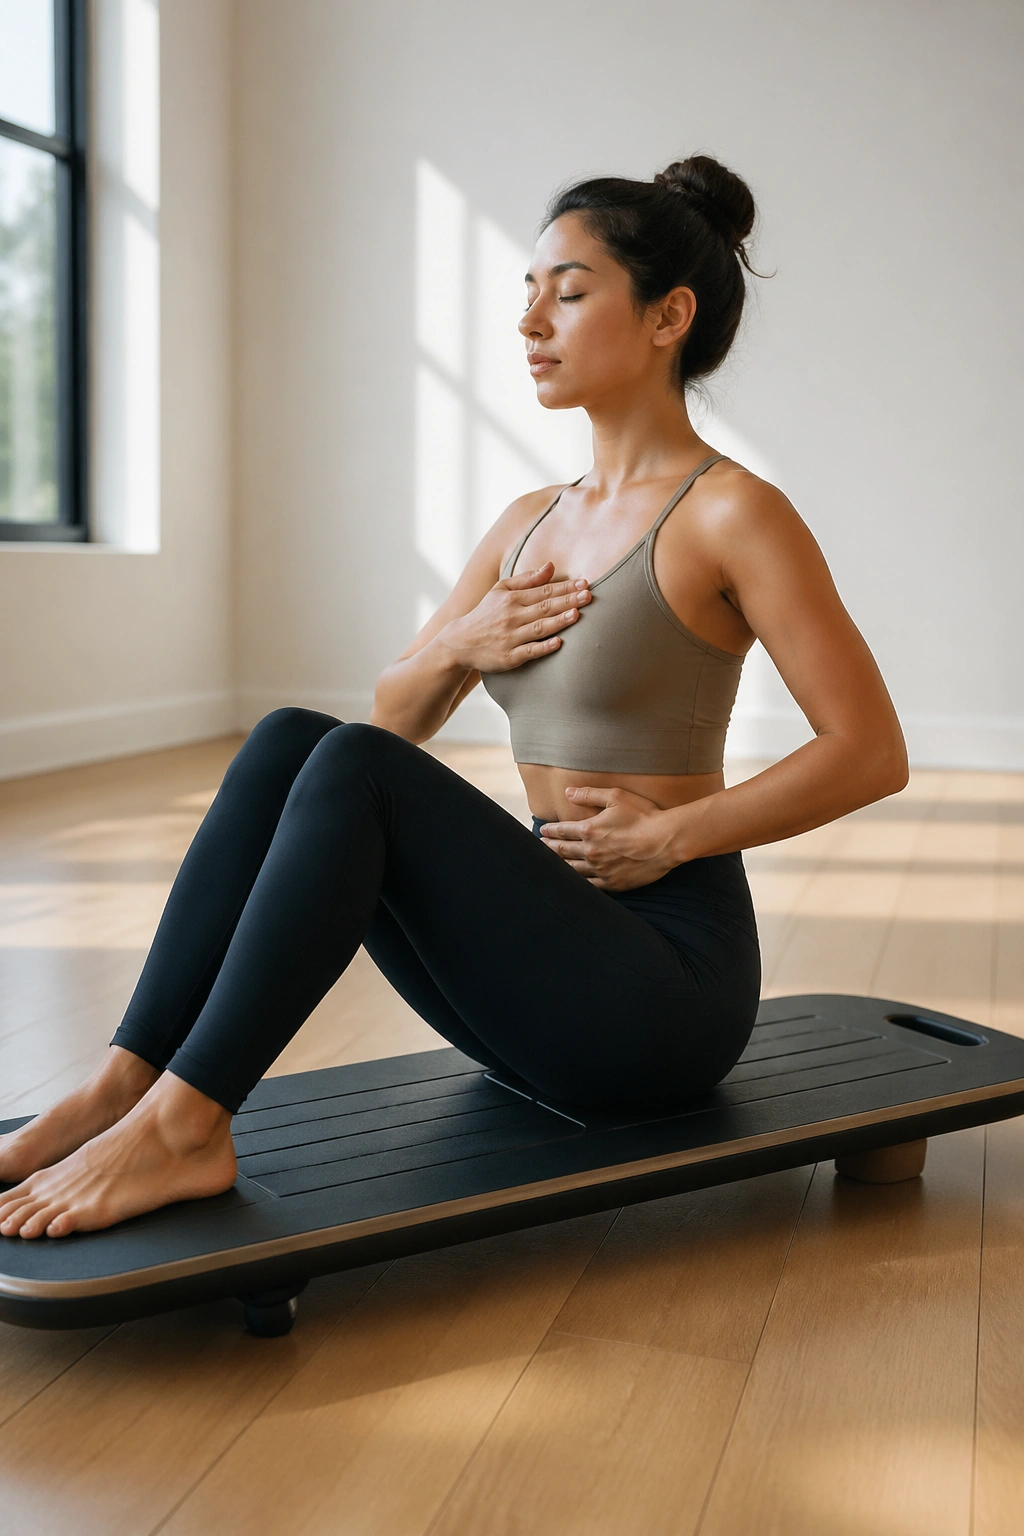
Start here if you have never used a Pilates board before. Sit in the center of the board with your knees bent and feet flat, hip-width apart. Put one hand on your lower ribs and the other on the front of your pelvis.
Why this first move matters
A seated pelvic tilt looks almost too simple, which is why people skip it. They should not. This drill teaches you how to exhale, brace the lower abdominals, and move the pelvis without dragging the shoulders or neck into the job.
Inhale through your nose. As you exhale, gently tuck the pelvis so your low back rounds a little and your belly draws inward. Then return to a neutral upright seat on the inhale. The movement is small—think 1 to 2 inches, not a huge slump.
Quick setup targets
- Do 6 to 8 slow breaths.
- Keep your feet planted and your jaw loose.
- Let the shoulders stay heavy instead of rounding forward.
- If your hip flexors grab, sit on a folded towel.
Coaching cue: You are not “sucking in” your stomach. You are tightening the lower front of the torso as the pelvis tips under.
2. Supported Roll-Back With Handles
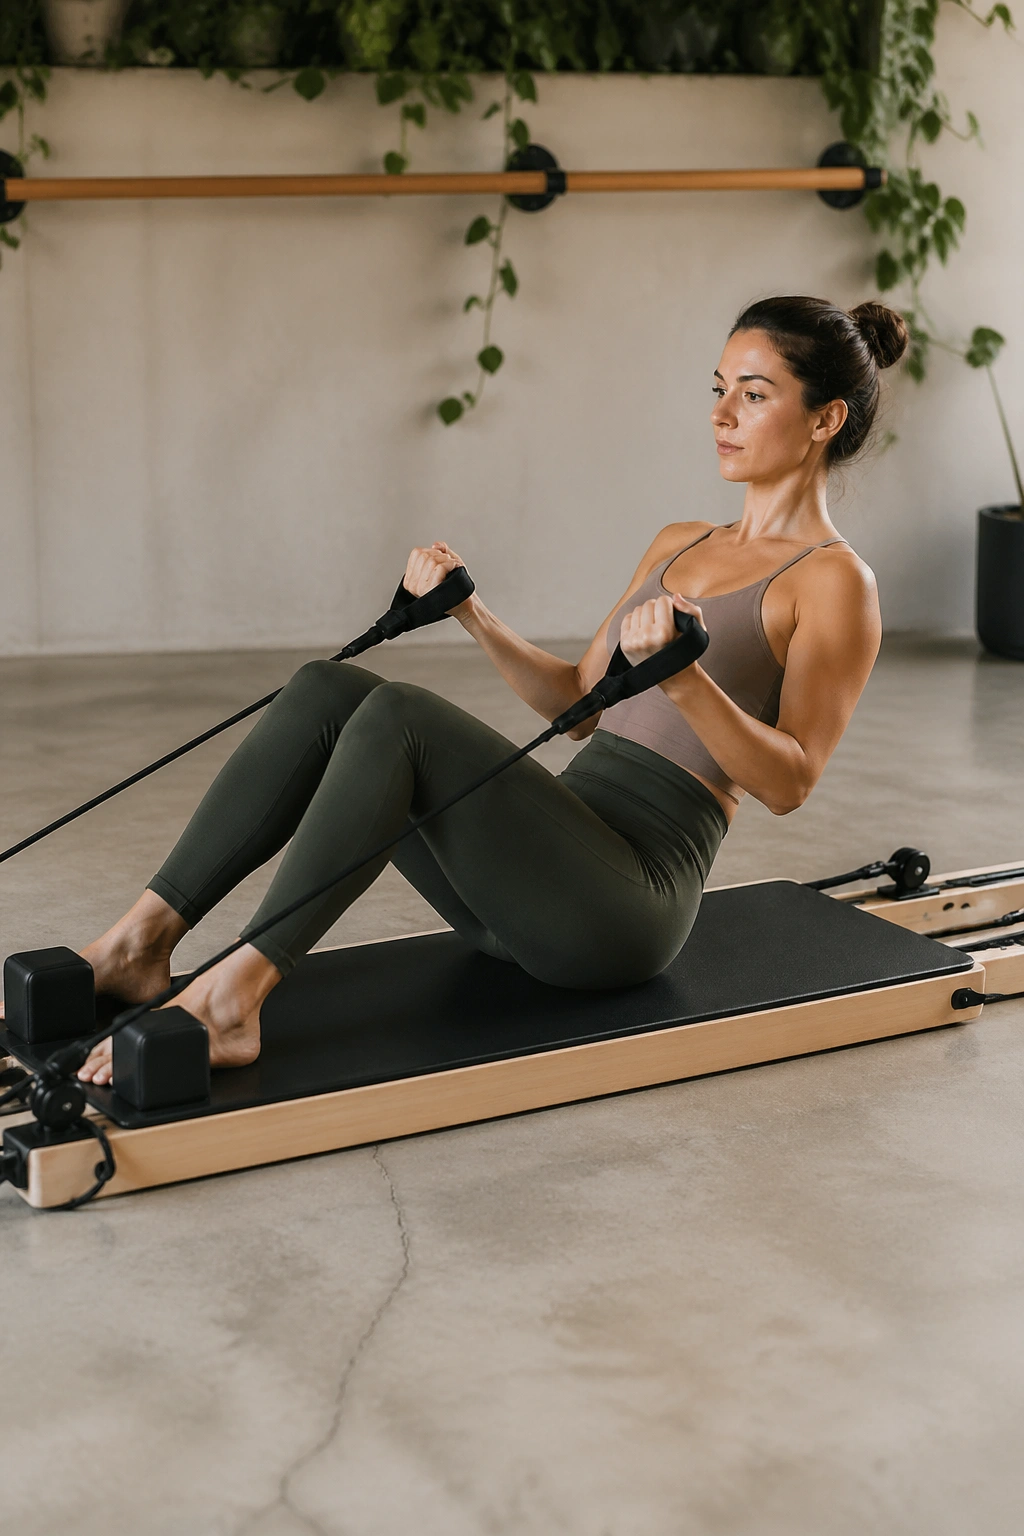
This is the first exercise that makes beginners feel Pilates in the way they expected to feel it. You hold the handles, lean back with control, and your abs light up fast—provided you do not turn it into a biceps curl.
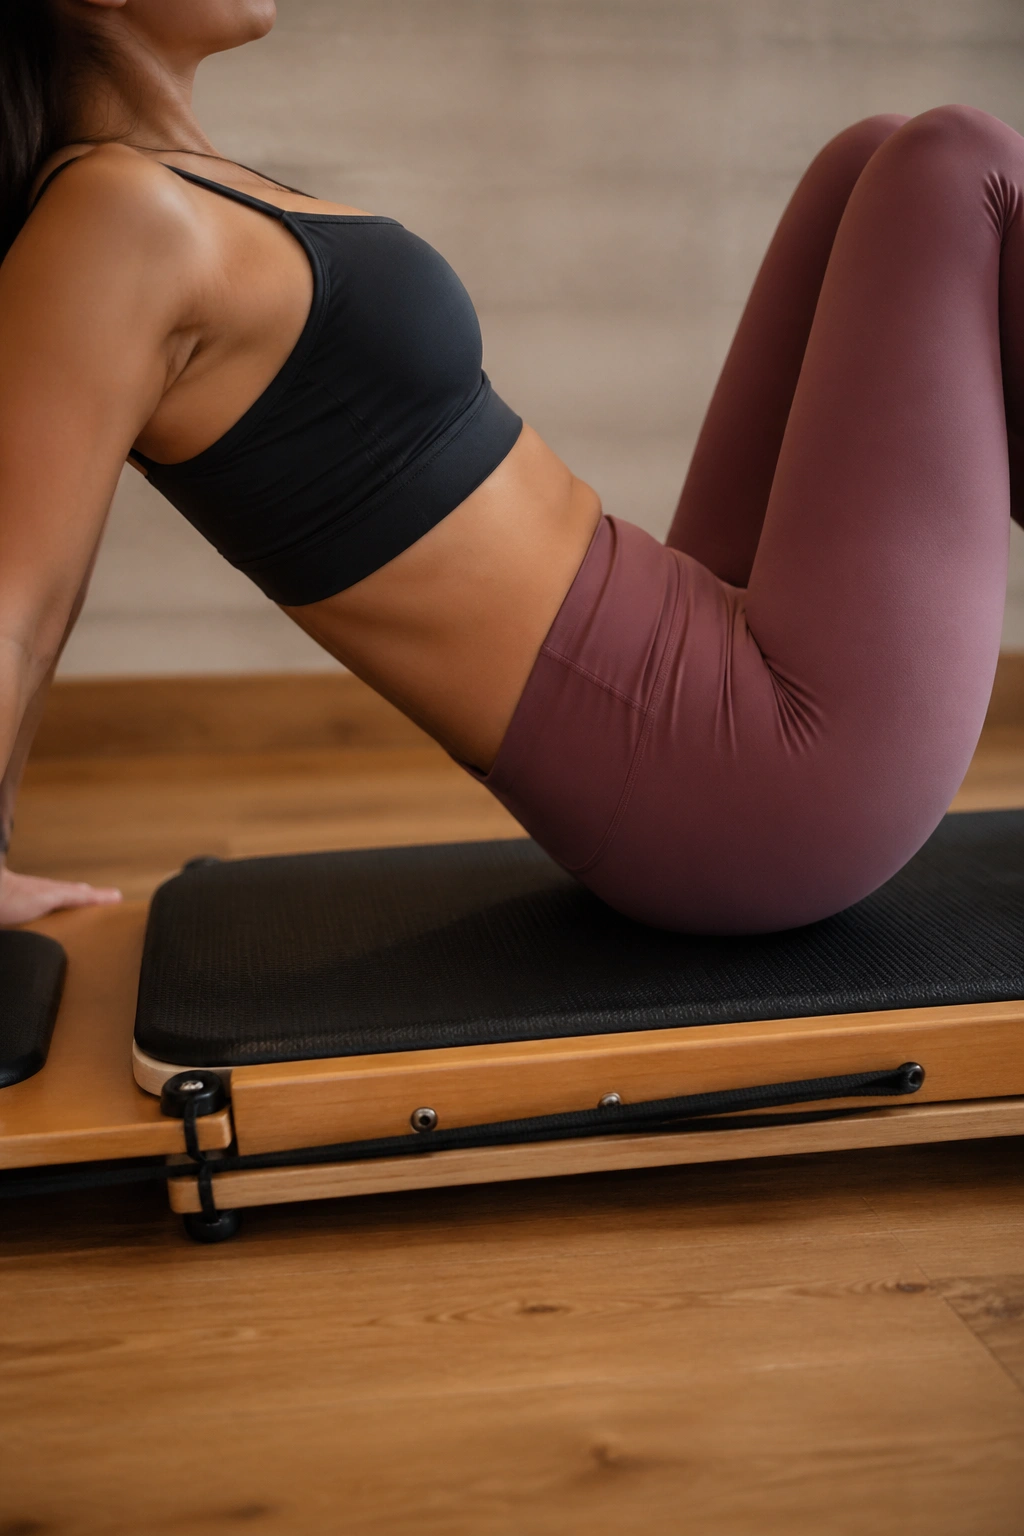
Sit tall with knees bent and heels planted. Hold a handle in each hand with light tension on the straps. Exhale, tuck the pelvis slightly, and roll back until your arms are almost straight and your shoulder blades hover well behind your hips. Then pause. Inhale there. Exhale to return upright.
The sweet spot is halfway down, not all the way to the floor. If you drop too low too soon, the hip flexors usually take over and the lower back starts barking. A smaller range lets you keep the C-curve through the spine and feel the front of the trunk doing the work.
Aim for 6 to 10 reps. If your feet lift, place them a bit wider. If your neck strains, soften the chin and think about pulling the waistband back rather than yanking the straps.
Do not yank the straps.
3. Spine Stretch Forward With Heel Anchor
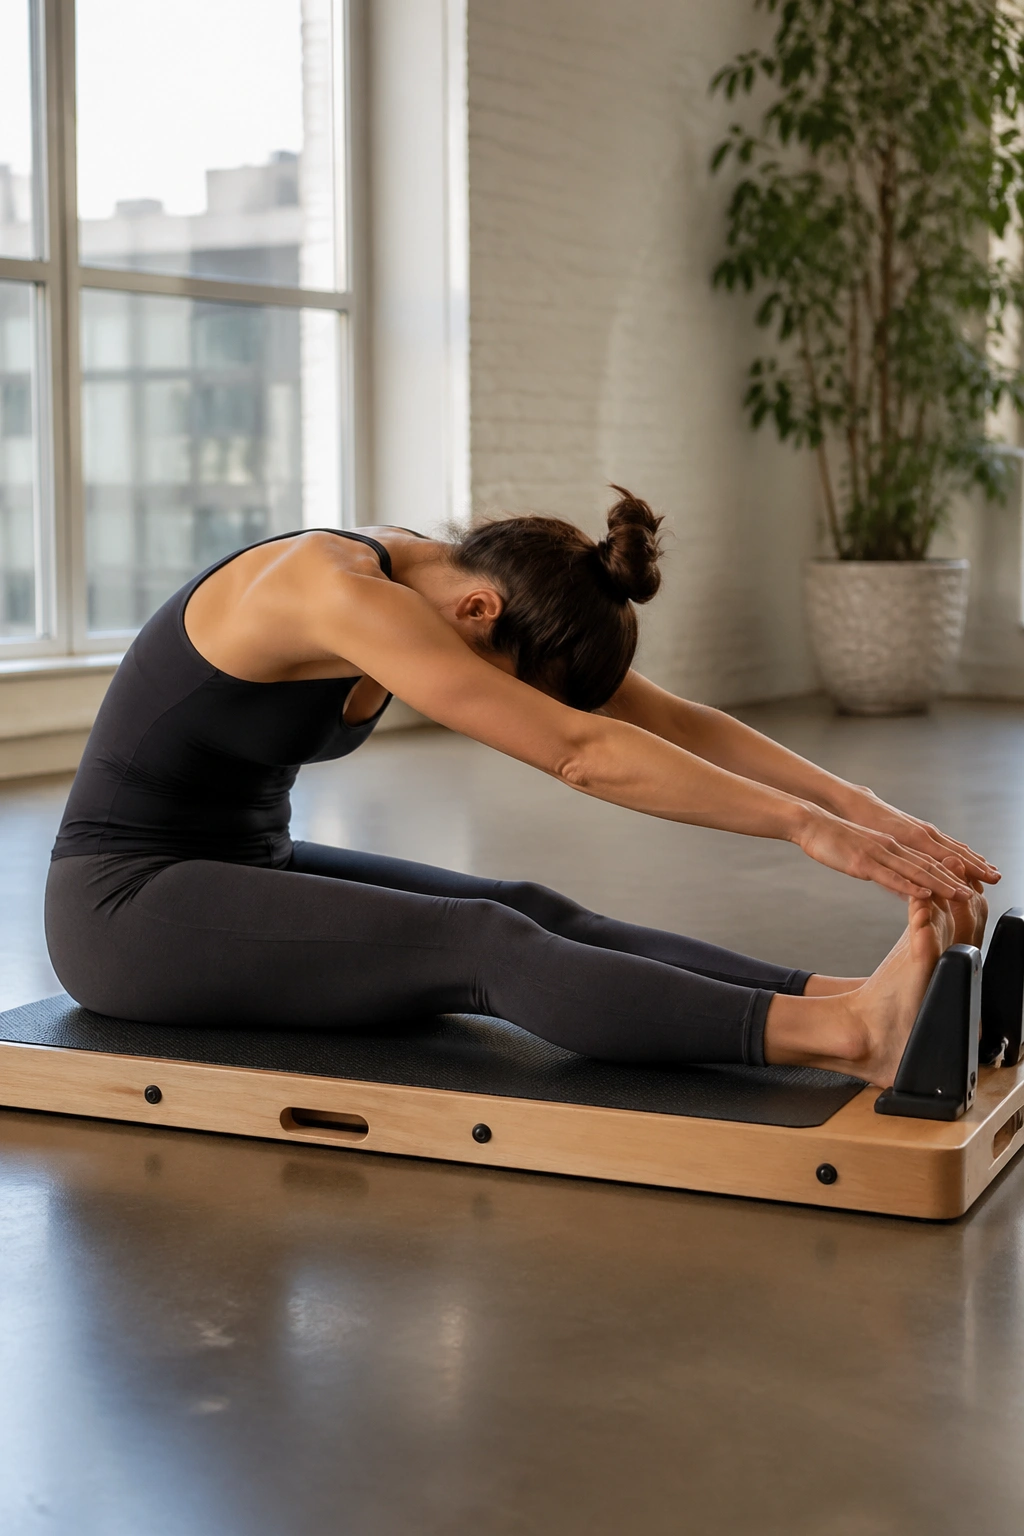
Why use a stretch as an exercise? Because beginners on a Pilates board are often tight through the hamstrings, stiff through the mid-back, and too eager to fling themselves into bigger moves. A controlled spine stretch cleans that up.
Sit with your legs extended as far as you can manage without locking the knees. If that is not comfortable, keep a soft bend. Press your heels lightly into the board or against its front edge for feedback. Reach your arms forward at shoulder height.
On the exhale, nod your chin and round forward one vertebra at a time, as if you are draping your spine over a beach ball. The goal is not touching your toes. The goal is segmental flexion—upper back, mid-back, then lower spine. Inhale at the deepest point. Exhale to stack back up.
How to use it well
Move in a pain-free range and stop before the pelvis tucks hard under. Three to five reps is enough if you go slowly. You should feel length through the back body and a steady abdominal pull, not a jam behind the knees.
4. Glute Bridge on the Board
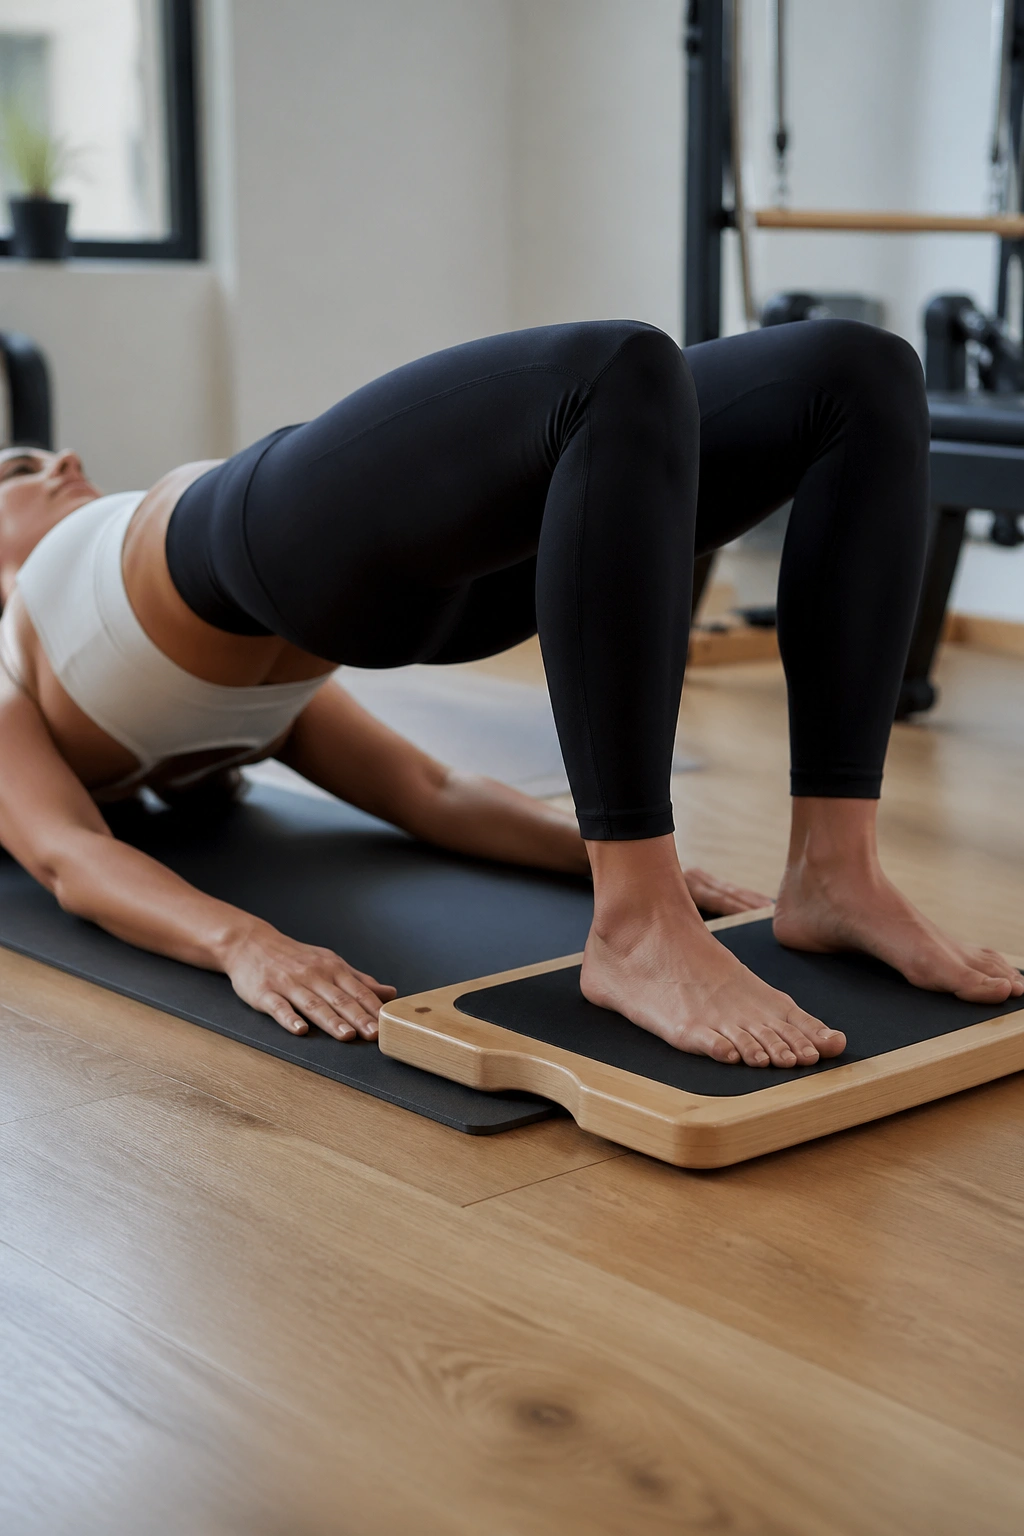
I have watched plenty of beginners say they “feel bridges in the hamstrings only,” and most of the time the fix is simple: feet too far away, ribs lifted, or a push through the toes instead of the heels.
Lie on your back with both feet on the board, knees bent about 90 degrees, and arms resting long by your sides. Exhale, press through your heels, and lift your hips until your body forms a straight line from shoulders to knees. Hold for one beat, then lower for a slow count of three.
The board adds useful pressure feedback under your feet. If one foot pushes harder than the other, you notice. That helps clean up side-to-side imbalances before you try single-leg work.
A few details make a big difference:
- Keep the knees tracking over the middle toes.
- Press more through the heels than the balls of the feet.
- Stop the lift when the glutes are firm; do not chase extra height with the low back.
- Try 8 to 12 reps with a one-second pause at the top.
When a bridge is done well, the glutes feel warm and solid. The front of the hips should not feel pinched.
5. Bridge With Alternating Heel Slide
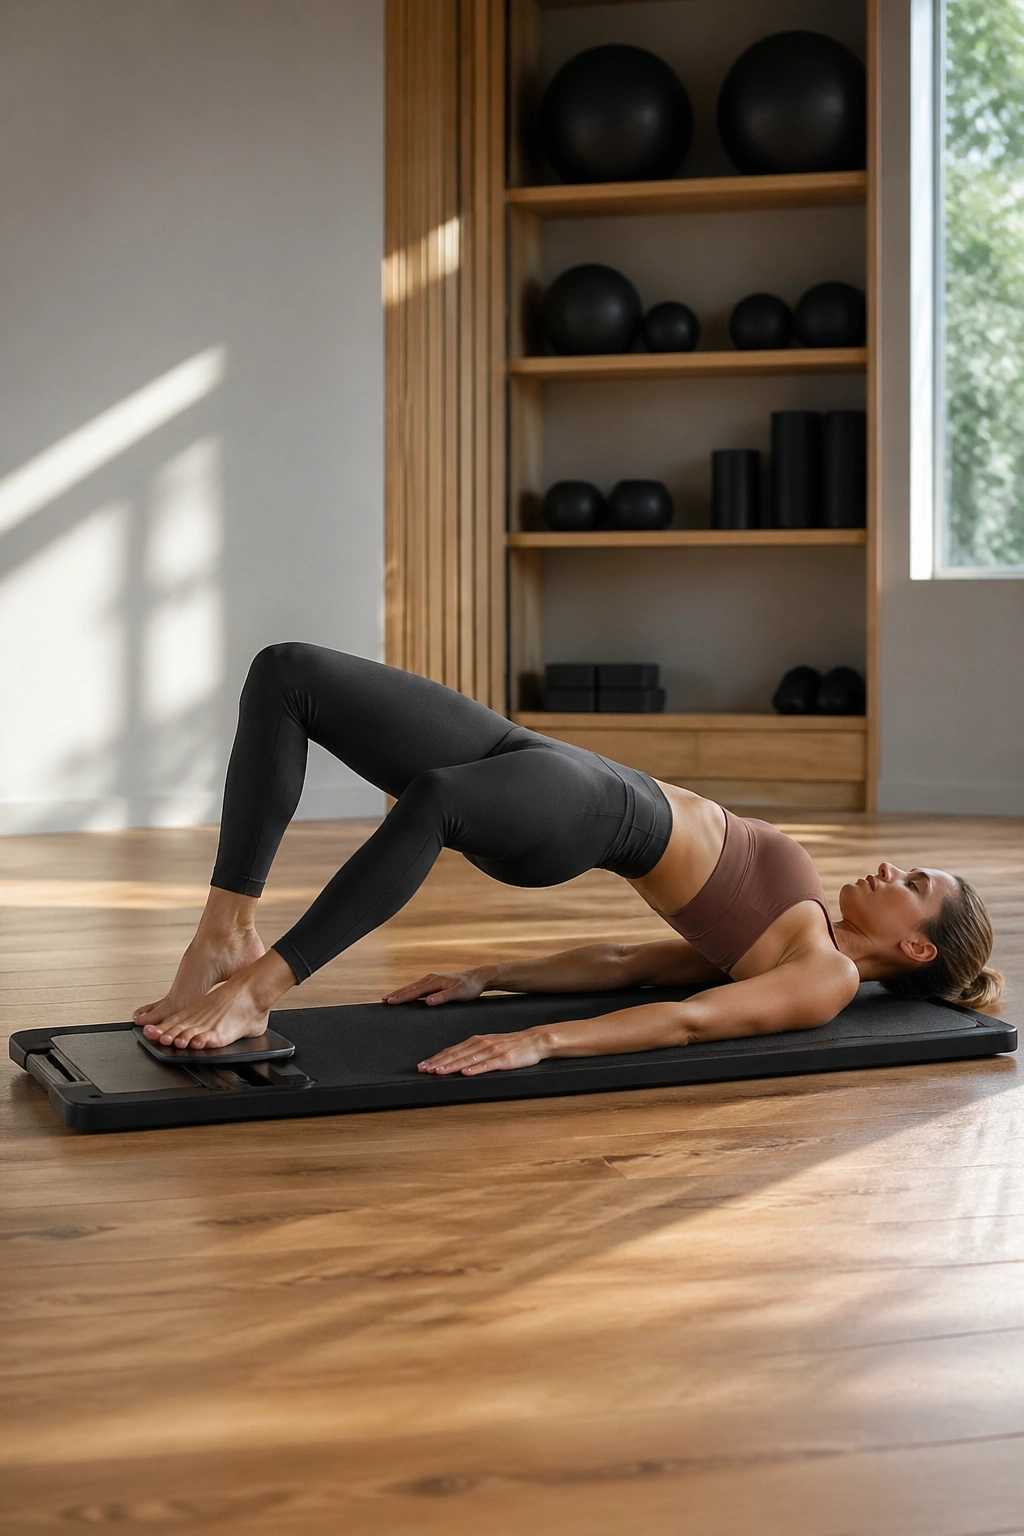
This one looks mild. It is not.
Set up in the same bridge position, lift the hips, and hold that line steady. From there, slide one heel forward 4 to 6 inches, keeping the pelvis level, then pull it back in. Switch sides. One slide out and in counts as one rep per leg.
The reason this move works so well for beginners is that it teaches anti-rotation. Your trunk has to resist twisting while one leg changes leverage. In plain language, the moment one heel glides away, your core and glutes have to stop the hips from wobbling.
Range matters more than bravery here. A tiny slide done cleanly beats a big slide with a dropping hip. If your hamstrings cramp, lower the hips, reset the feet closer to your body, and try again. Cramping does not mean failure; it usually means the muscles are working in a new way.
Start with 5 to 6 slides per side. If the pelvis rocks like a see-saw, trim the range in half and own that smaller version first.
6. Supine March With Handle Press
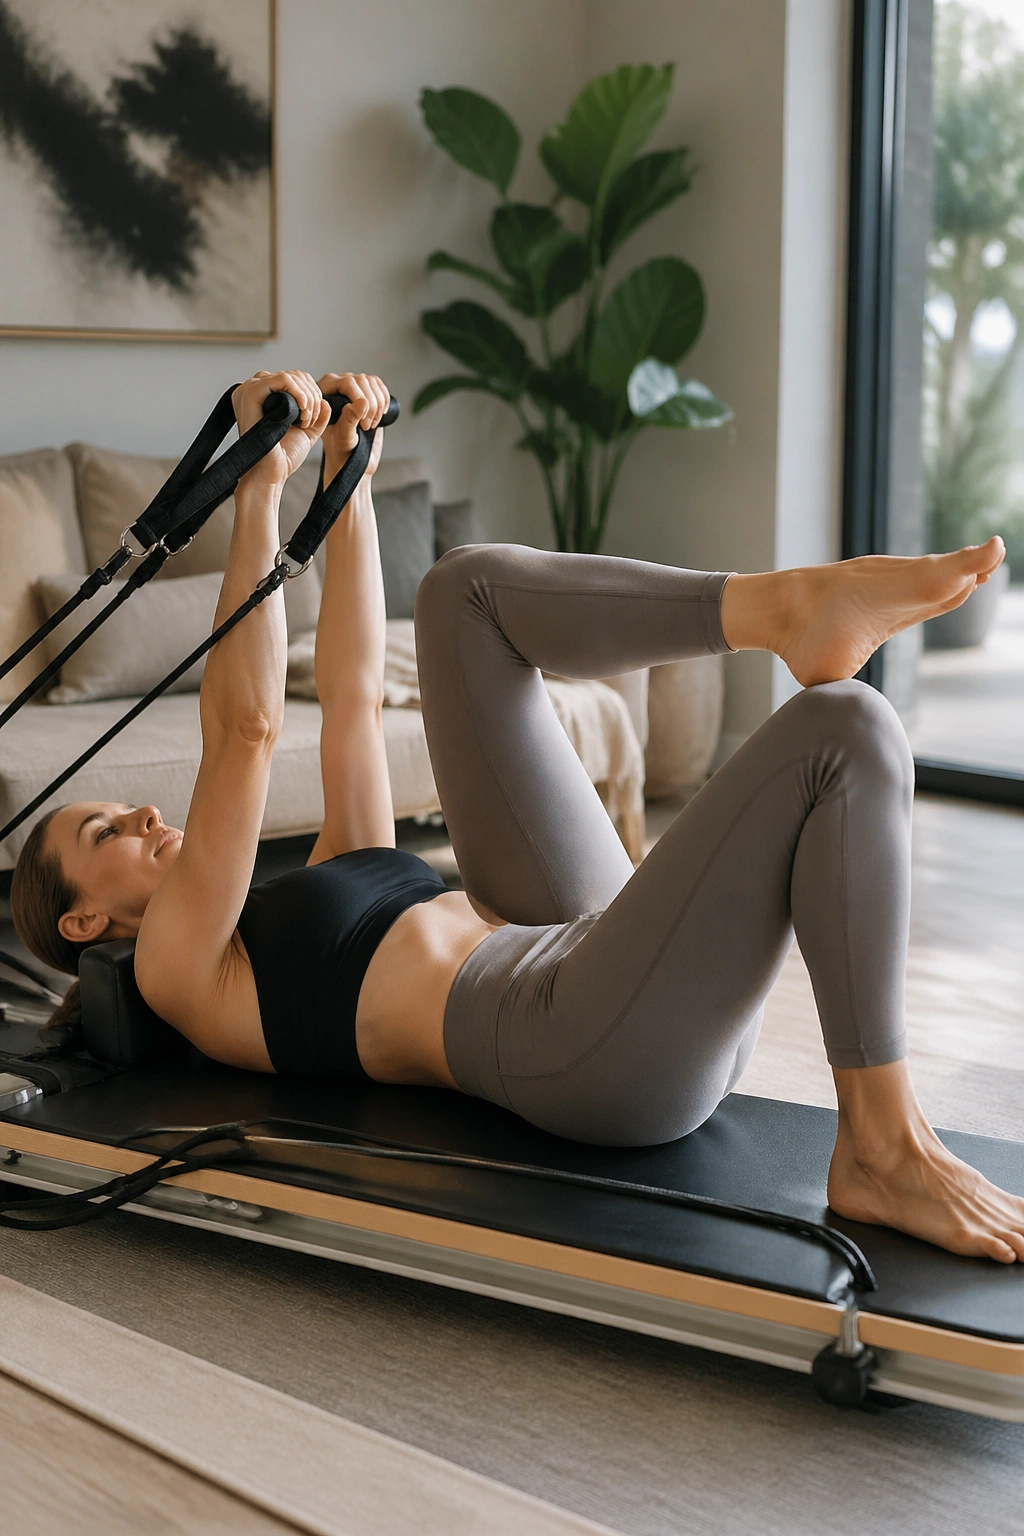
Unlike a mat march, the Pilates board version can tie the upper and lower body together. That is the hidden benefit. Pressing the handles down gives the lats something to do, and when the lats switch on, many people find it easier to keep the ribs from popping up.
Lie on your back with knees bent and feet flat. Hold the handles above your chest with straight arms. Exhale and press the handles toward your thighs while lifting one knee to tabletop. Inhale to lower. Alternate sides.
This is not a race. If you whip the leg up, the pelvis will tip and the straps will wobble. Lift like you are moving through wet sand. Heavy, slow, steady.
Who gets the most from this move? Beginners who lose core tension the second one foot leaves the floor. Start with 6 to 8 marches per side. If tabletop feels too hard, lift the foot only an inch or two off the board and keep the handle press light.
7. Dead Bug Toe Tap With Bands
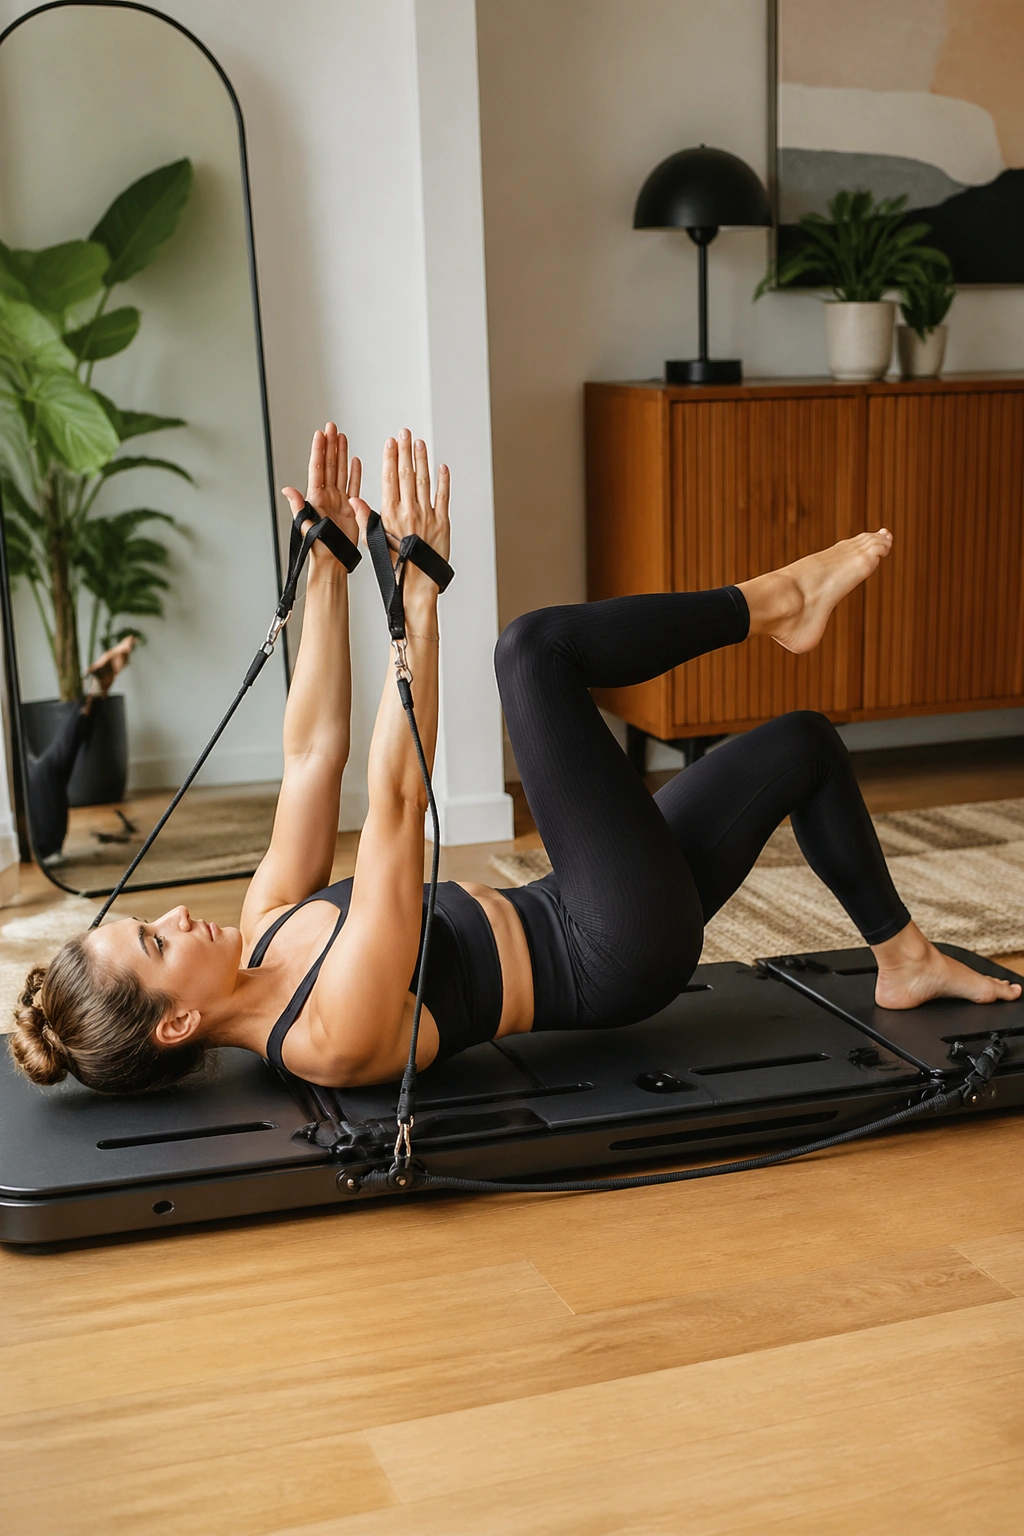
A dead bug is one of the cleanest beginner core drills around, and the board version gives you more to organize. That can be a gift or a mess. Depends on your pace.
Lie on your back and bring both knees to tabletop. Hold the handles so your arms point toward the ceiling, then press the bands down until your hands hover above your hips. That press should connect the sides of your back to the board. From there, lower one foot toward the floor or board, tap lightly, and bring it back up. Alternate.
What to watch for
Your low back does not need to be crushed into the board, though it should not arch away either. Think heavy waistband. If the ribs jump up when the leg lowers, go smaller. A partial toe tap still trains the pattern.
Most beginners do well with 5 to 8 reps per side. Exhale on the lowering phase if that helps you brace more cleanly. Strange, maybe, but it works for a lot of people who struggle to keep the trunk quiet.
8. Tabletop Arm Press for Deep Core Control
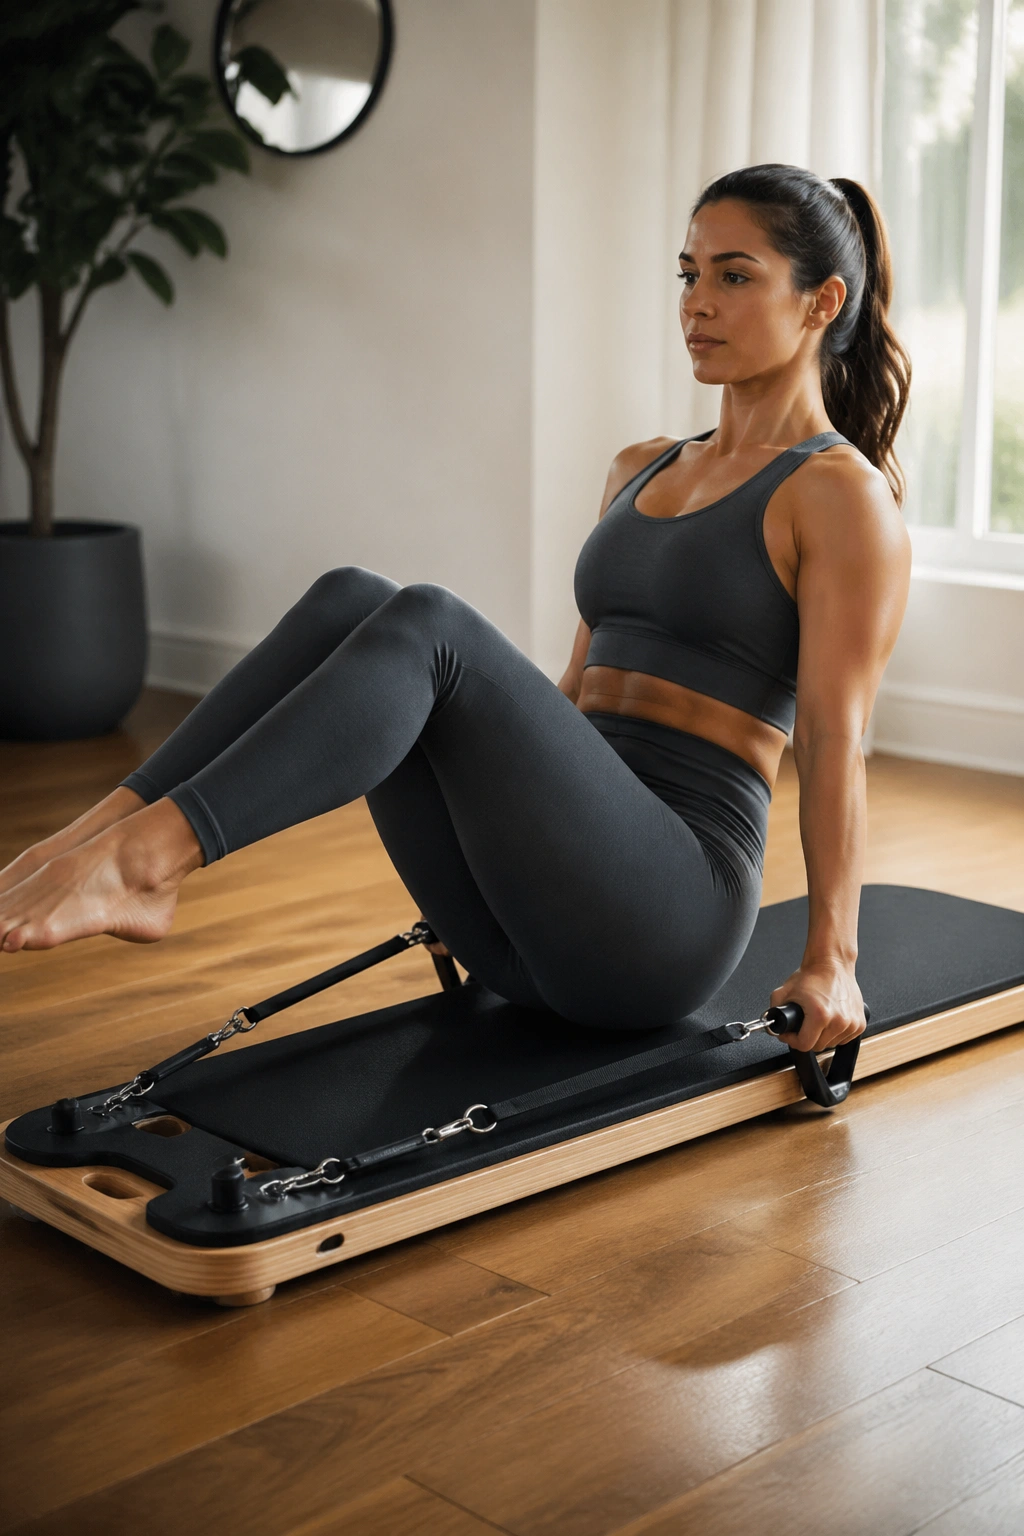
A hard truth: many people think they are training abs when they are only flinging their legs around. This drill strips that nonsense away.
Bring both legs to tabletop and hold the handles above the shoulders. Exhale and press the arms straight down toward the hips without changing the leg position. Pause for two counts. Return with control. That is one rep.
Nothing flashy happens, yet the front of the trunk, deep core, and lats all have to cooperate. Your legs should stay still enough that someone standing beside you could balance a coffee mug on your shins. If the knees drift toward the chest or away from it, the resistance is too heavy or the brace has faded.
Try 8 to 10 slow presses. If tabletop is too much, put one foot down and keep the other knee lifted. Then switch halfway through the set. It is a clever step-down version, and it still teaches the same pattern.
9. Seated Row With Tall Posture
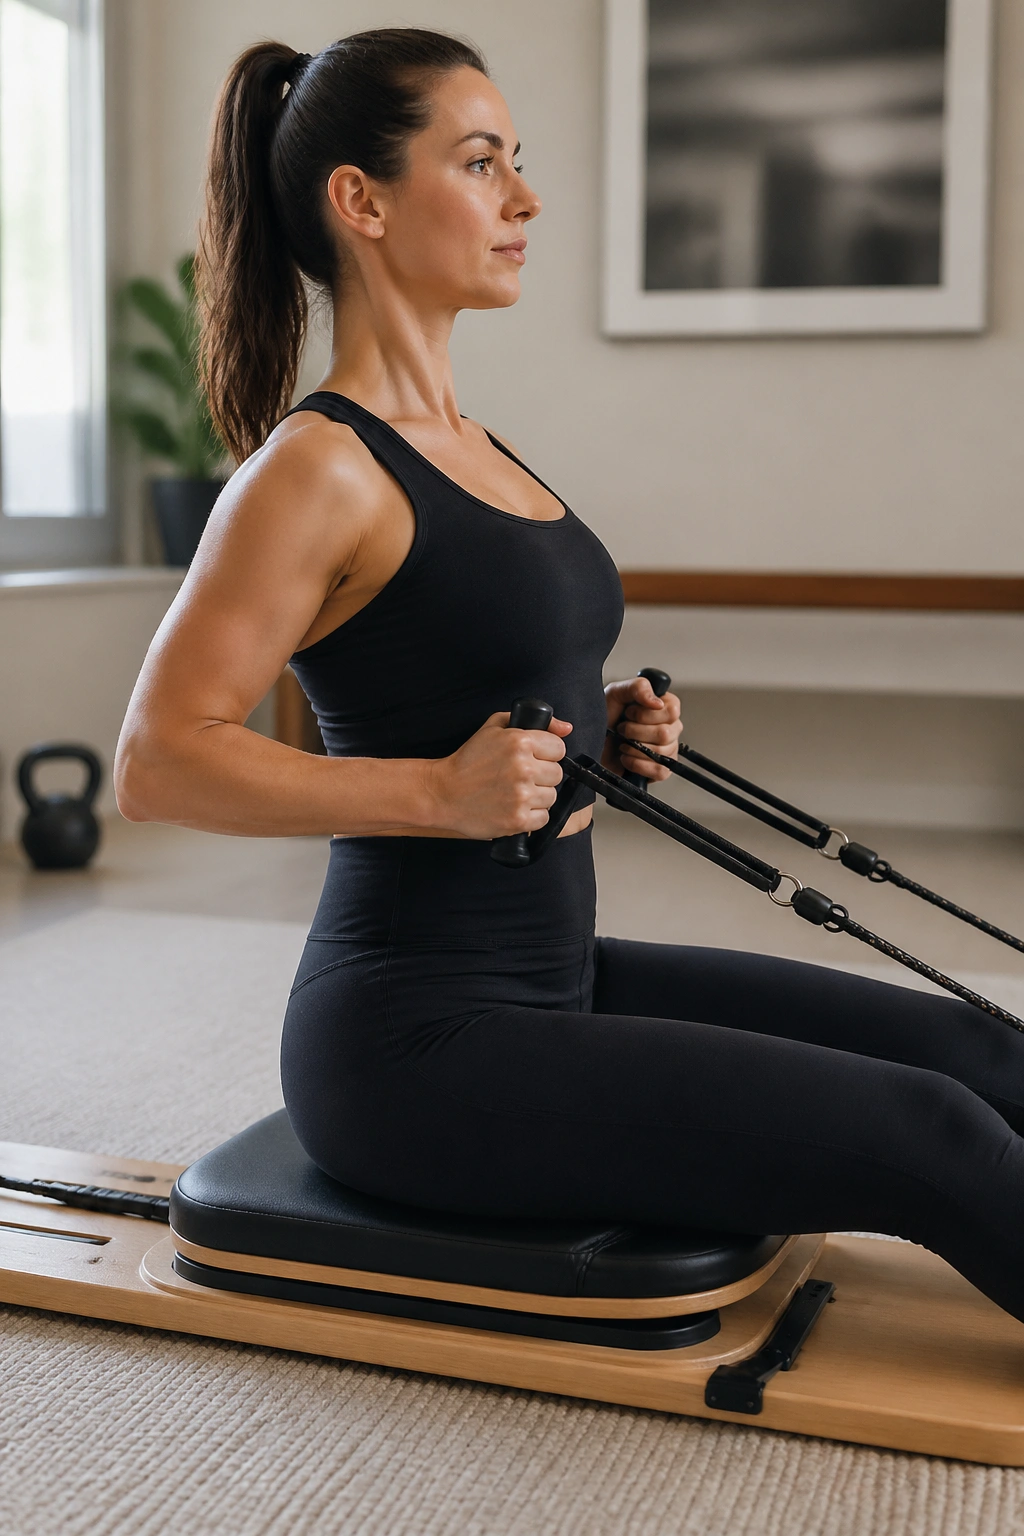
This is where shoulder habits show up.
Sit tall with legs bent or extended, depending on what your hips allow. Hold a handle in each hand with palms facing one another. Start with the arms long, chest open, and shoulder blades resting down your back. Exhale and pull the elbows alongside the ribs until the handles reach the lower chest. Inhale to return slowly.
What makes it different from a lazy row
The row should come from the back, not the neck. If your shoulders climb up toward your ears, lower the resistance and think about sliding the shoulder blades into your back pockets. That image sounds old-school, but beginners get it right away.
Quick row checkpoints
- Use 8 to 12 reps.
- Keep the wrists straight rather than curled inward.
- Pause for one beat when the elbows pass the torso.
- Sit on a folded blanket if the pelvis keeps rolling back.
A clean row can make standing posture feel better within one session. No magic there. Your mid-back muscles are finally doing their share.
10. Chest Opener Pull-Apart on the Board
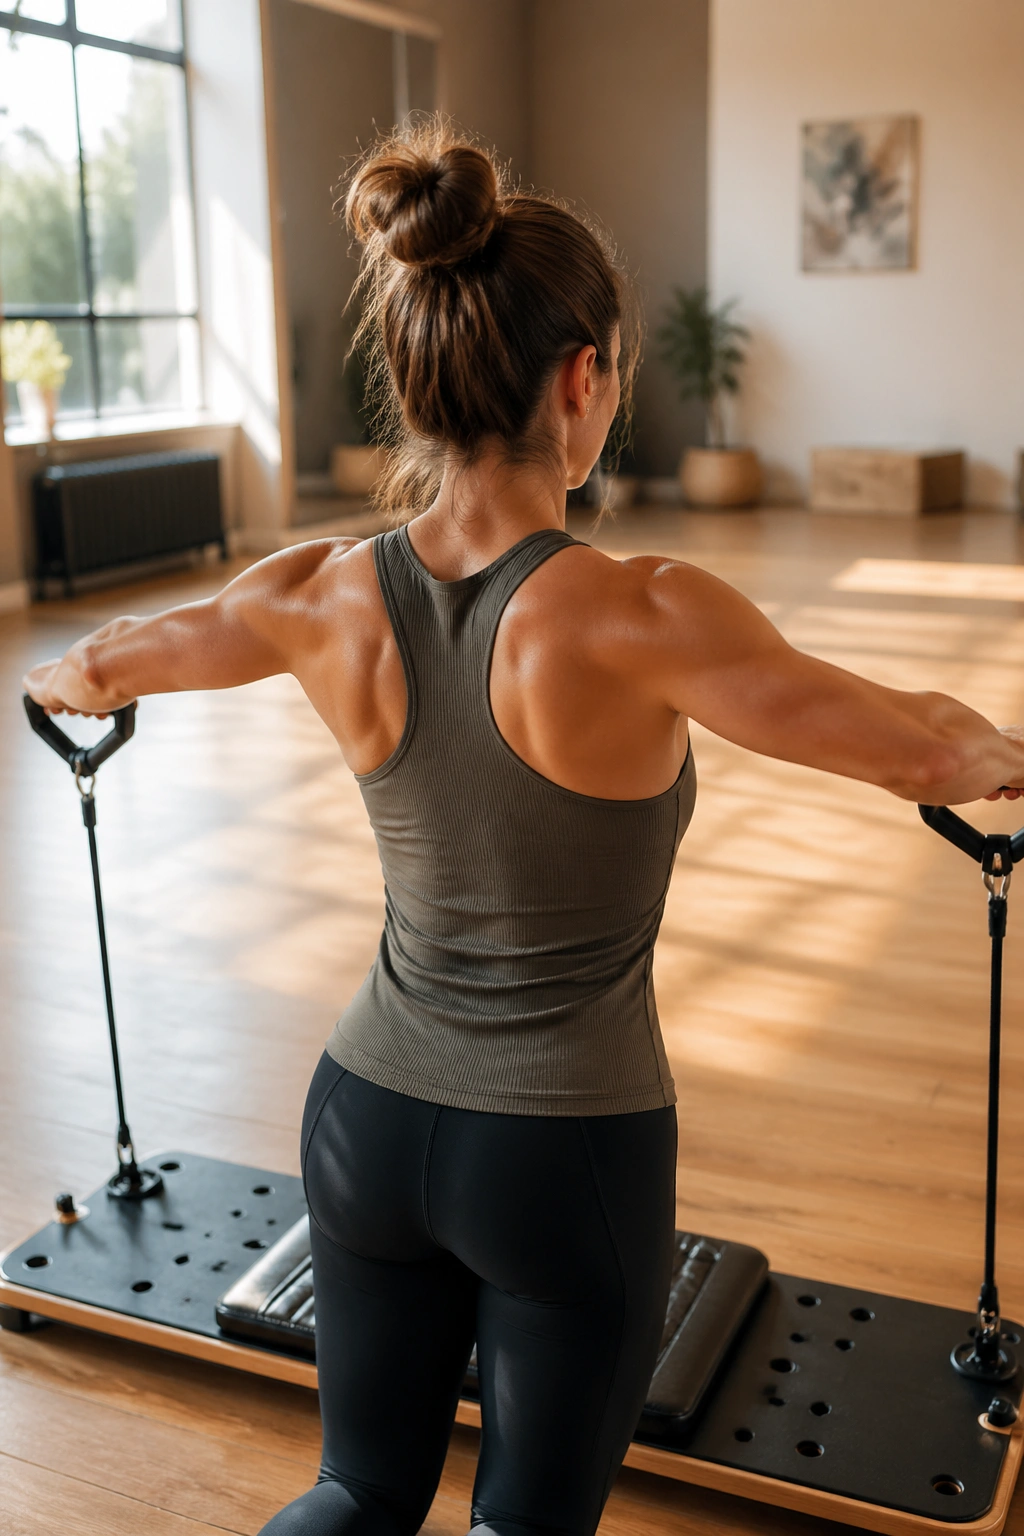
Beginners spend a lot of time pushing—pushing carts, pushing keyboards, pushing through long desk hours with rounded shoulders. Pull-aparts can be a useful antidote when they are done without flaring the ribs.
Stand or sit tall holding the handles in front of you at shoulder height with a soft bend in the elbows. Exhale and open the arms outward until they form a wide T shape, then return slowly. The motion is small to moderate. You are not trying to yank the bands apart as far as possible.
The better cue is across the collarbones. As the arms open, think about the breastbone staying quiet while the shoulder blades glide slightly toward one another. If the lower back arches, shrink the range. If the neck tightens, lower the arms an inch or two.
Do 8 to 10 reps with smooth control. The back of the shoulders and upper back should work. The front of the neck should feel uninvolved. If it does not, reset and go lighter.
11. Biceps Curl With Soft Knees
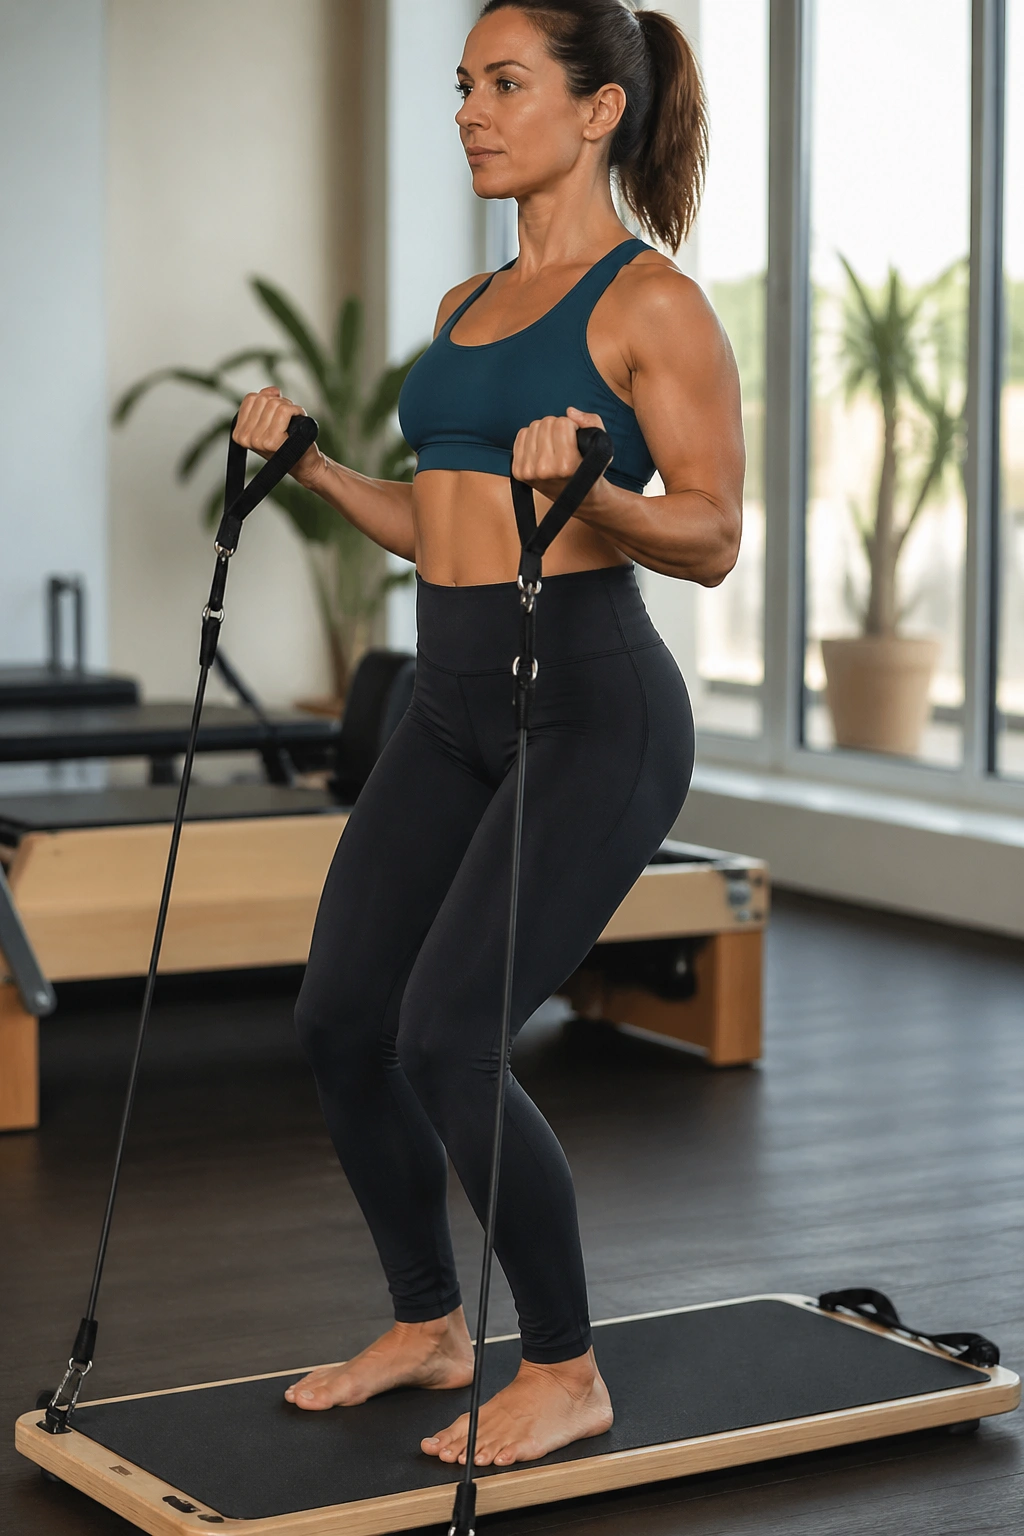
A Pilates board biceps curl sounds almost too basic to mention. I am mentioning it anyway because the board changes the demand. The curl becomes a balance drill if you stand on the board, and beginners need that practice.
Stand centered with feet hip-width apart and knees slightly bent. Hold the handles with palms facing up. Curl the handles toward the shoulders over two counts, pause, then lower over three counts.
Who this move helps most
If you tend to lock the knees and sway backward during arm work, this version teaches you to stay stacked. The ankles, hips, and trunk all have to make tiny corrections while the arms move.
The trap is leaning back to “help” the curl. Do not. Keep your ribs over your pelvis and let the elbows stay close to the sides. Start with 10 to 12 reps. If balance is shaky, place one hand lightly on a wall for the first set and use one handle at a time.
12. Kneeling Triceps Press-Back
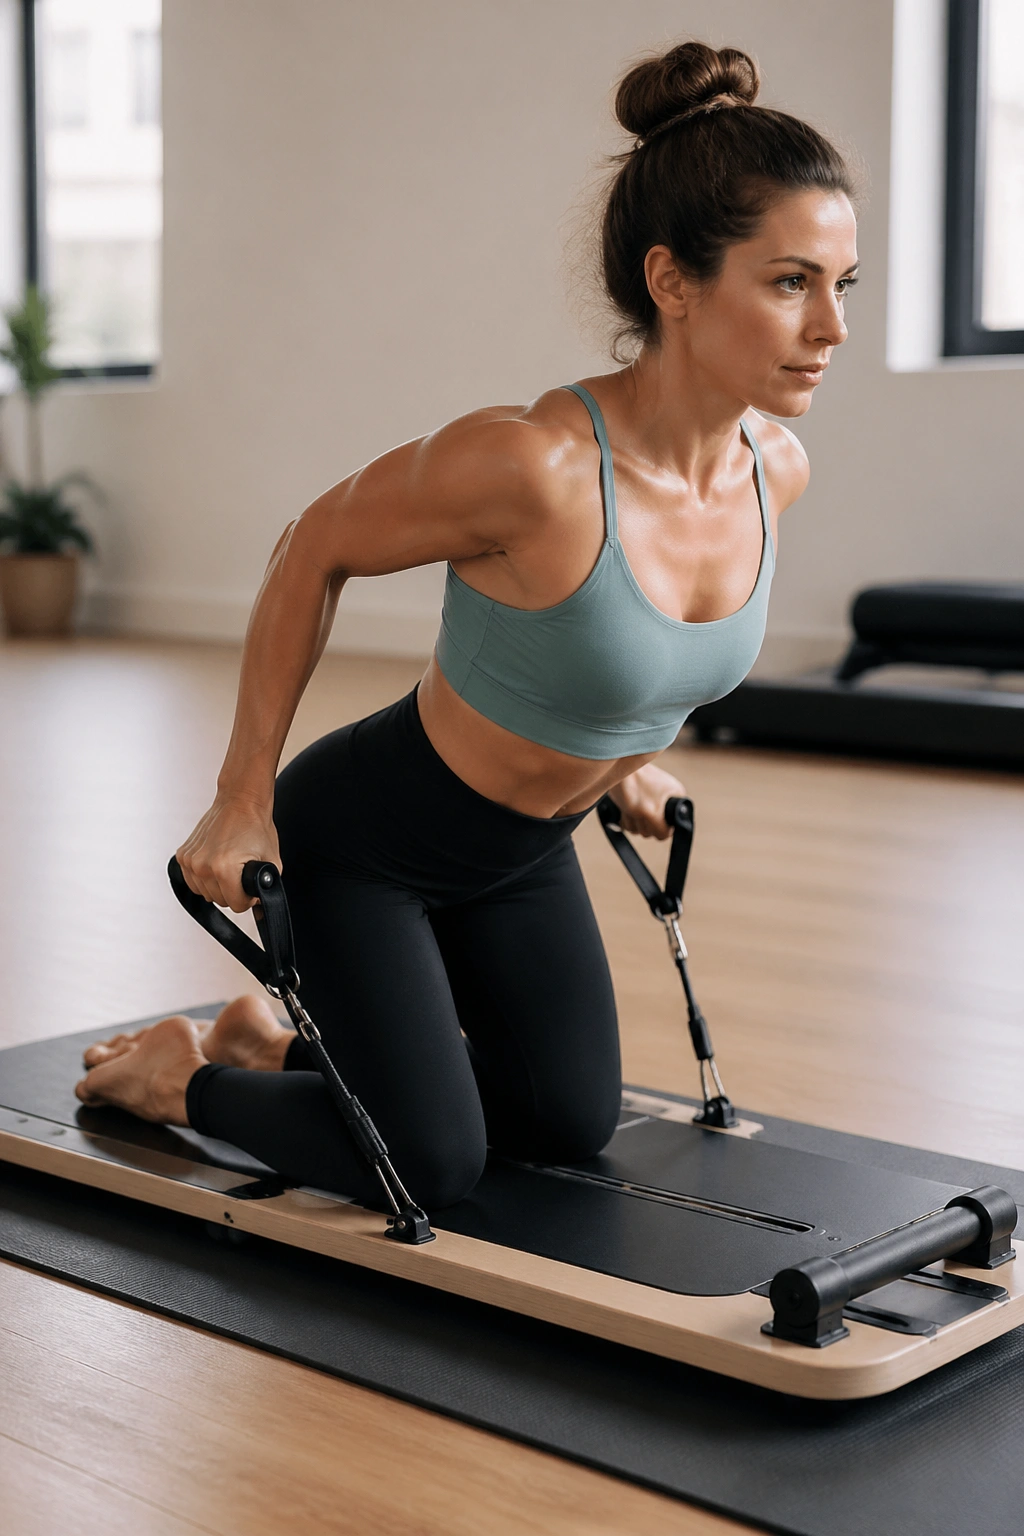
Plenty of people can row. Far fewer can extend the elbows without shifting the whole torso. That is why I like this move.
Kneel on a pad or folded mat behind the board if your knees are sensitive. Hold the handles, hinge forward from the hips about 20 to 30 degrees, and pin the elbows near your sides. From there, press the handles backward until the arms straighten, then bend the elbows to return.
The body should stay almost frozen from head to knees. If the chest bobs up and down, you are turning a triceps drill into a full-body swing. Lower the band tension and try again.
A few cues clean it up fast:
- Keep the upper arms still as the forearms move.
- Squeeze the back of the arms at full extension for one count.
- Do 8 to 10 reps.
- If kneeling bothers your knees, do it standing in the same hip-hinged position.
The burn arrives early on this one. That is normal.
13. Squat to Row for Full-Body Coordination
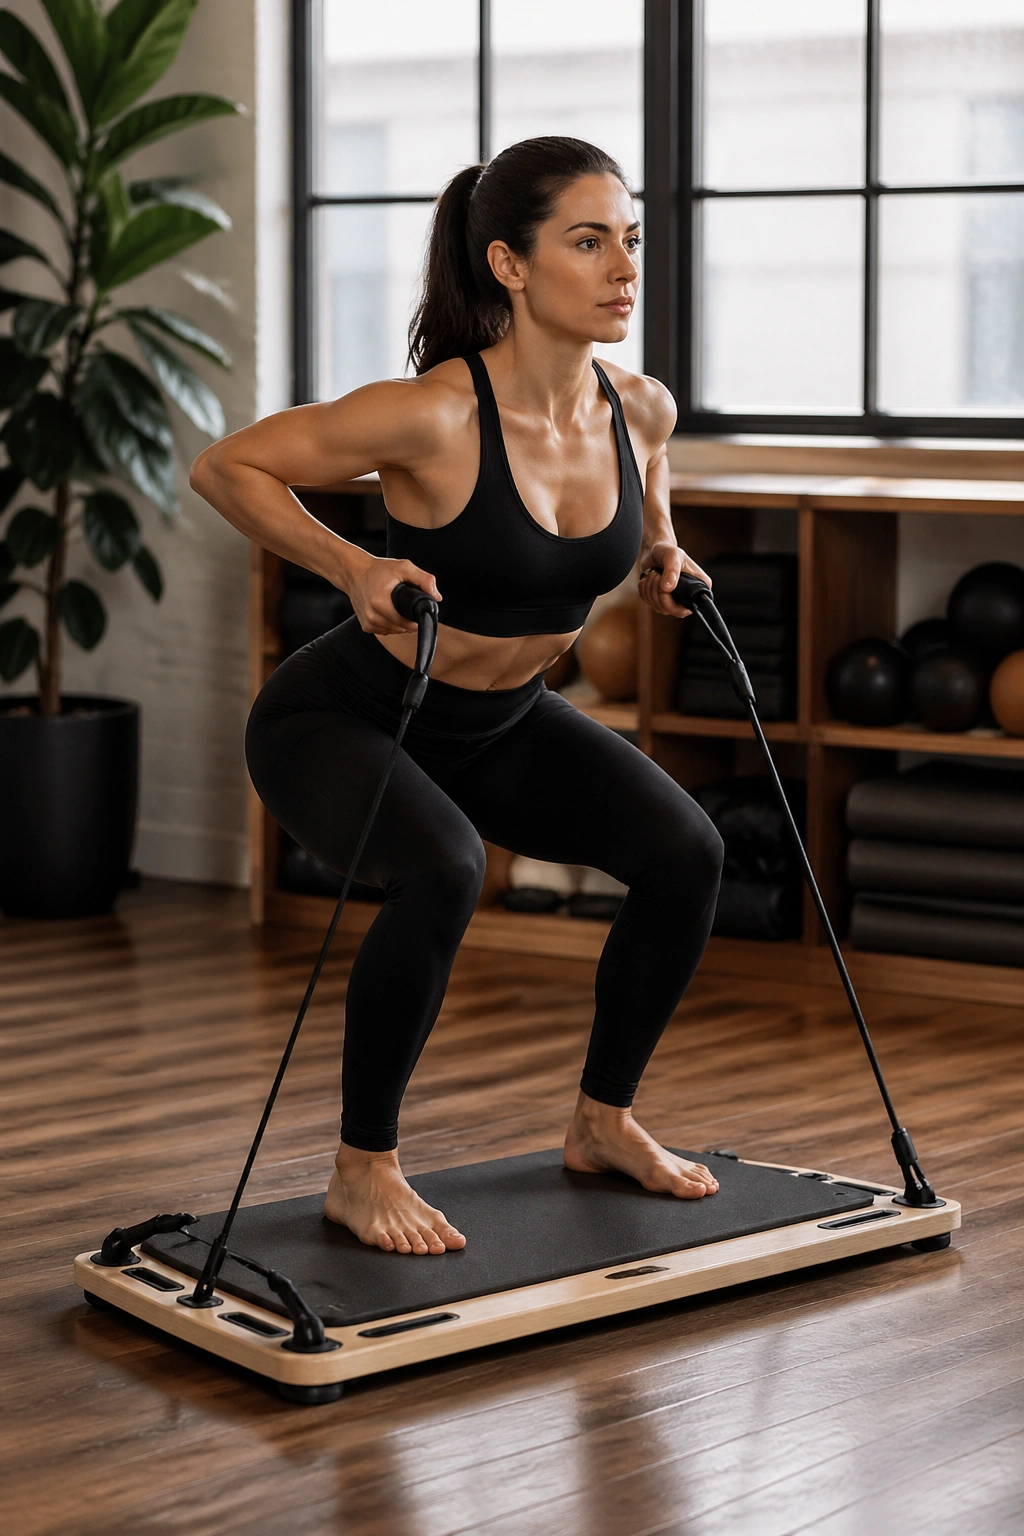
If you only learn one standing beginner move on the Pilates board, make it this one. A squat to row teaches lower-body control, hip hinge awareness, and upper-back strength in the same pattern.
Stand with feet a little wider than hip-width, holding the handles with the arms long. Sit the hips back into a squat while keeping your chest lifted enough that you can see forward. As you stand, row the handles toward the ribs. Return the arms long as you lower back into the squat.
Why it works so well
The timing matters. Squat down first. Stand up. Then finish the row as the hips extend. That sequence stops beginners from yanking with the arms and forgetting the legs.
Rep plan
Use 8 slow reps at first. Your weight should stay through the mid-foot and heel, not the toes. If your knees dive inward, widen the stance slightly and think about spreading the floor apart with your feet.
This move has a nice rhythm once it clicks, and when it clicks, the whole body feels connected rather than pieced together.
14. Supported Reverse Lunge With Board Glide
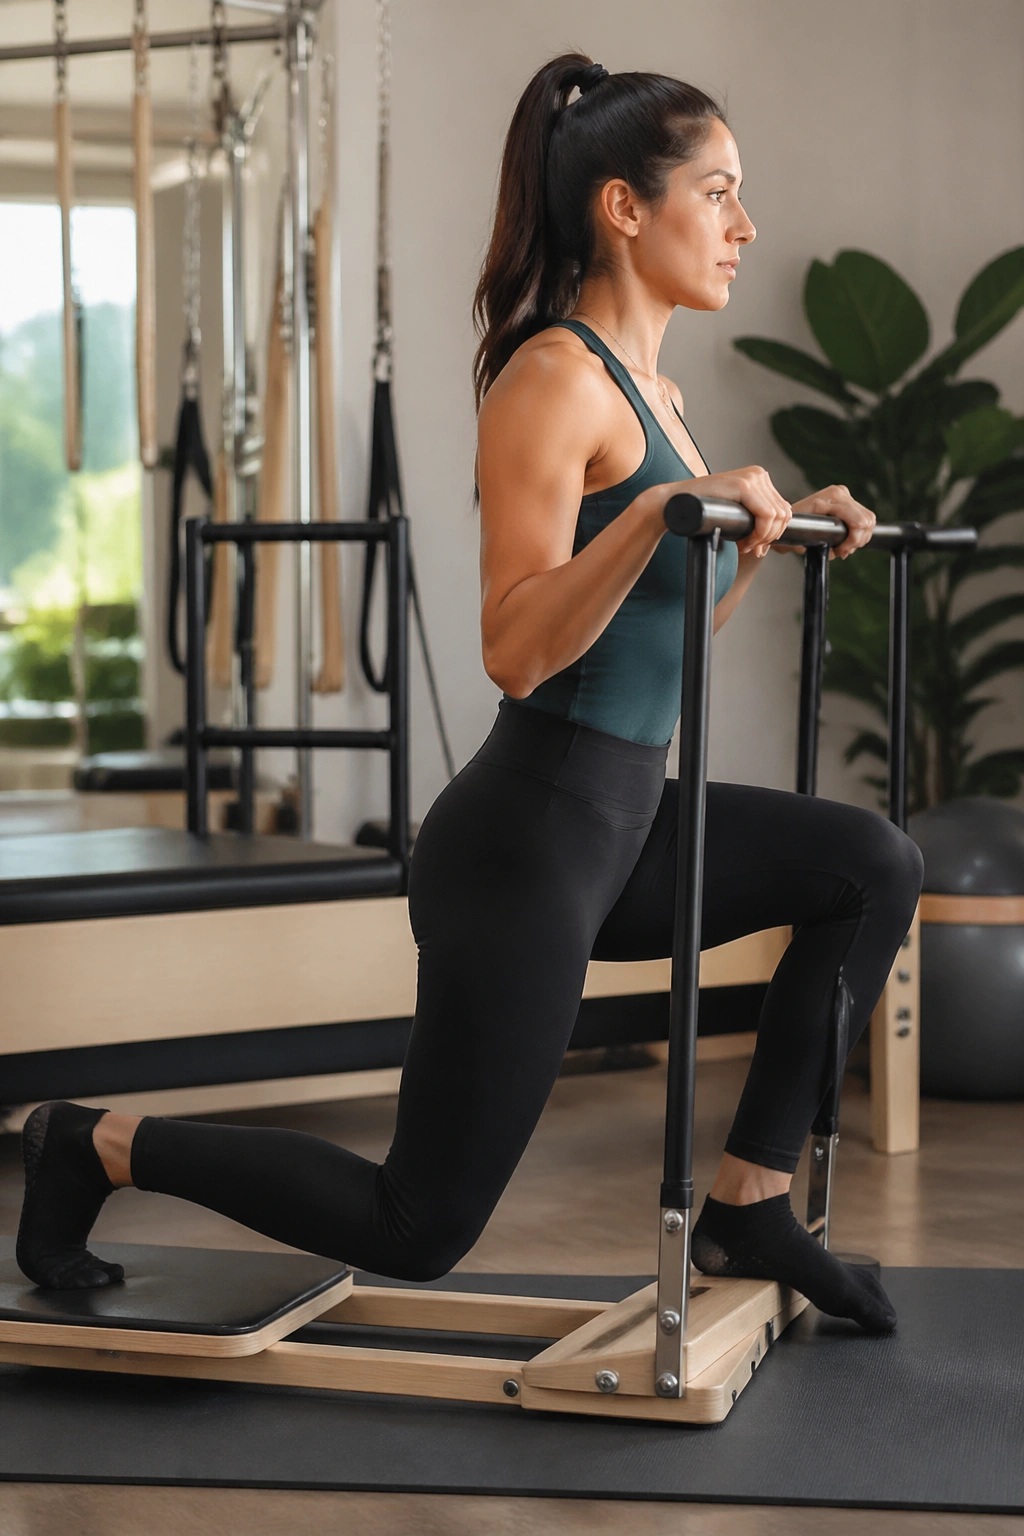
A reverse lunge on a sliding board is kinder to many knees than a step-back lunge because the rear leg glides instead of dropping hard onto the ball of the foot.
Stand with one foot planted on the floor next to the board and the other foot resting lightly on the board surface behind you. Hold the handles or side support if your model has one. Bend the front knee and let the back leg glide behind you into a split stance, then press through the front heel to return.
Your front shin does not need to stay perfectly vertical, though it should not shoot way forward either. Think about lowering straight down rather than lunging out into space. The torso can lean forward a little, which often helps the glutes engage more than a stiff upright posture.
Start with 6 to 8 reps per side. If balance feels sketchy, hold both handles and reduce the depth. A shallow reverse lunge still teaches control, and for beginners that control is the whole point.
15. Side Lunge Glide for Inner Thigh Strength
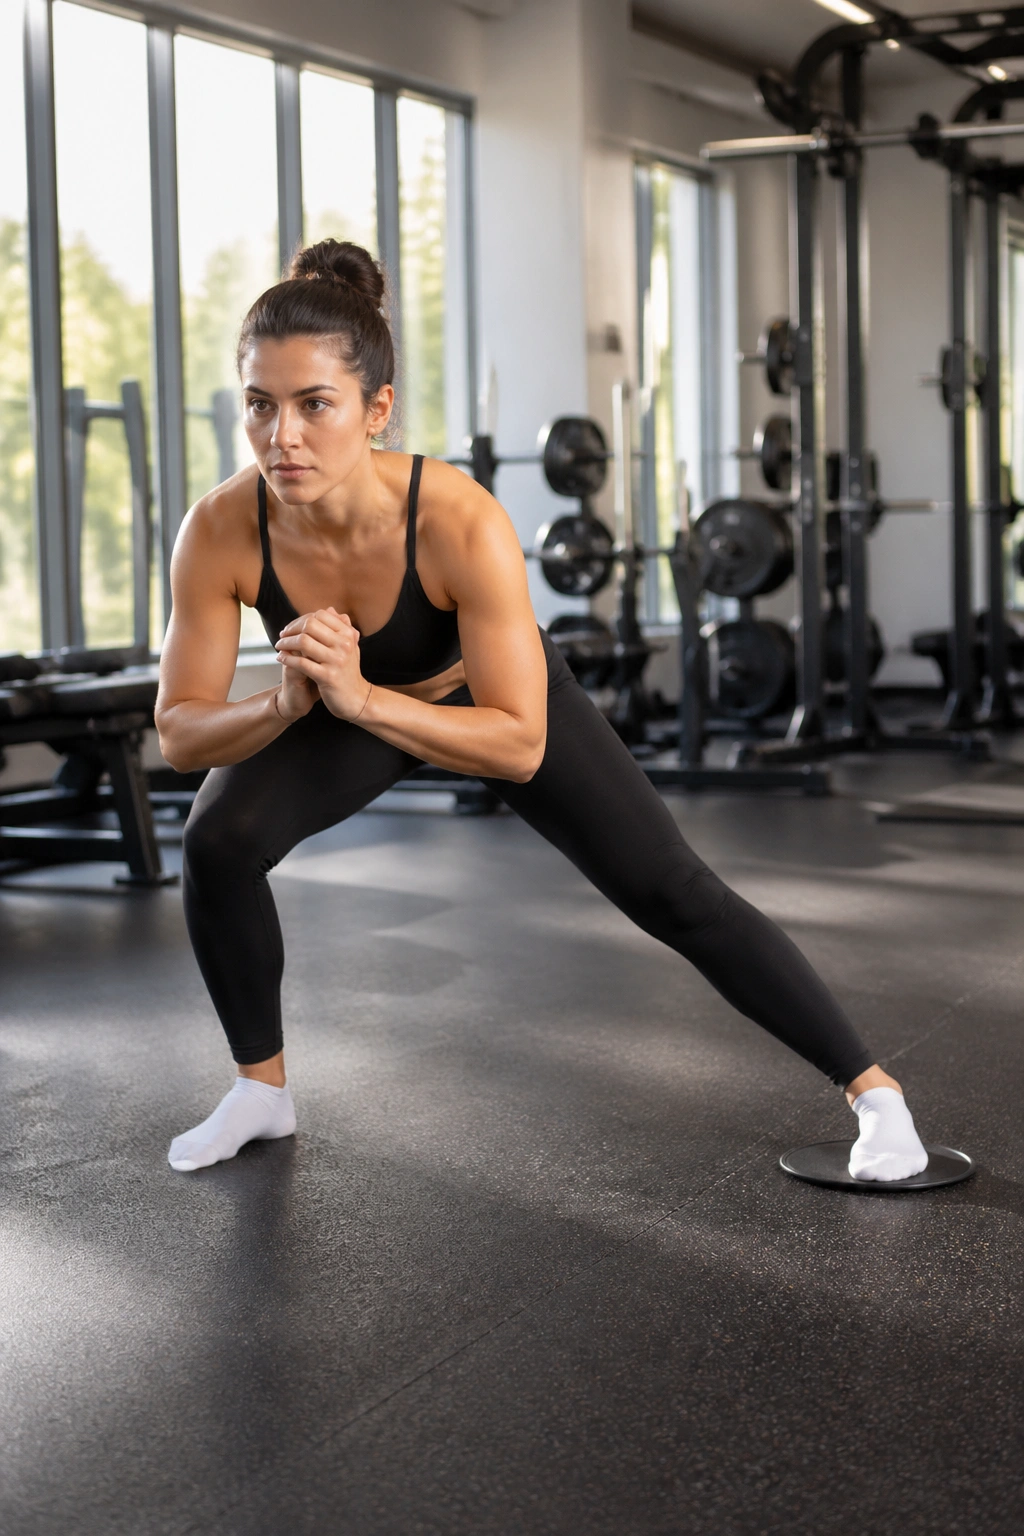
This is one of those moves that looks graceful when taught well and awkward when rushed. Most people rush it.
Stand with one foot on the floor and the other foot on the board. Shift your weight into the standing leg as the board foot glides out to the side. Bend the standing knee, sit the hips back, and keep the gliding leg long. Then pull the board back in using the inner thigh and glute of the moving leg while the standing leg helps you rise.
You should feel a stretch through the inner thigh of the gliding leg and a strong load in the glute of the bent standing leg. If the standing knee collapses inward, shorten the glide and think about tracking the knee over the second or third toe.
A clean set is 6 to 10 reps each side. Keep the chest angled slightly forward rather than upright like a statue. That small hip hinge makes the movement stronger and safer for most beginners.
16. Standing Glute Kickback Glide
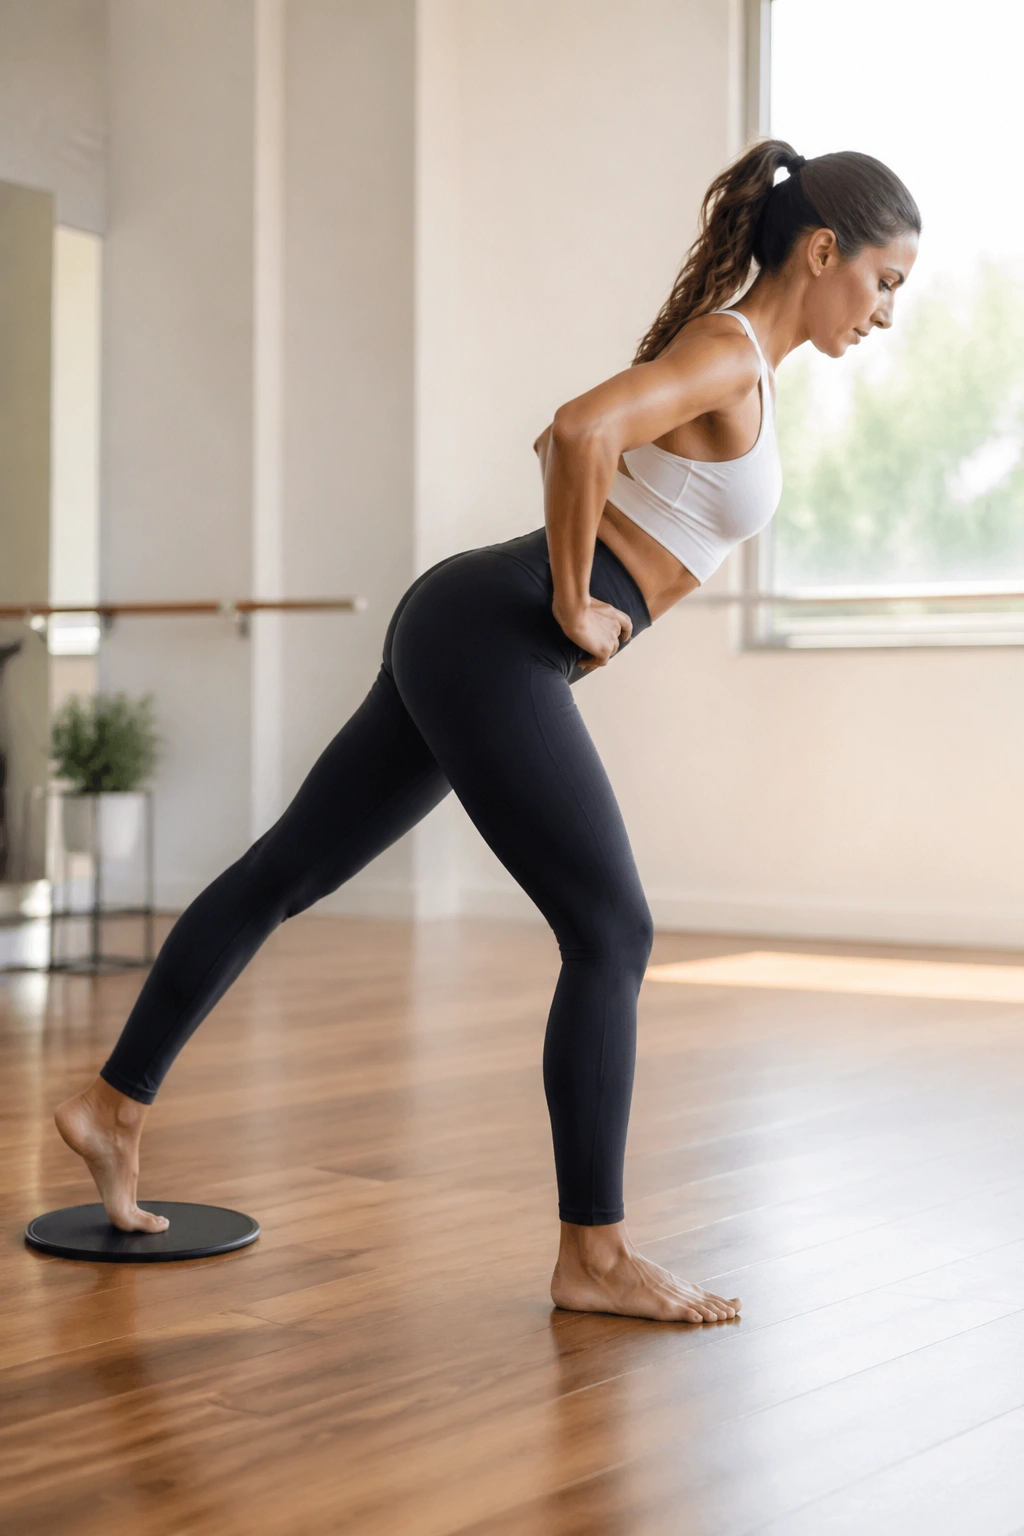
Forget the cartoon version of a kickback where the leg flies behind you and the low back does all the work. A board glide makes you earn the motion from the hip.
Stand tall holding the handles or side support. Put one foot on the floor and the other foot lightly on the board. Shift your weight into the standing leg, brace the torso, and glide the board leg straight back without twisting the pelvis. Pull it back in with control.
The range can be tiny—6 to 10 inches is enough for many people. You are training hip extension, not trying to draw a giant semicircle on the floor. The standing glute will work hard because it has to stabilize the pelvis while the moving leg travels.
Do 8 to 12 reps per side. If you feel it mostly in the lower back, the moving leg has gone too far. If you wobble side to side, bend the standing knee a touch more and slow down until the glide feels smooth.
17. Bird Dog With Hands on the Board
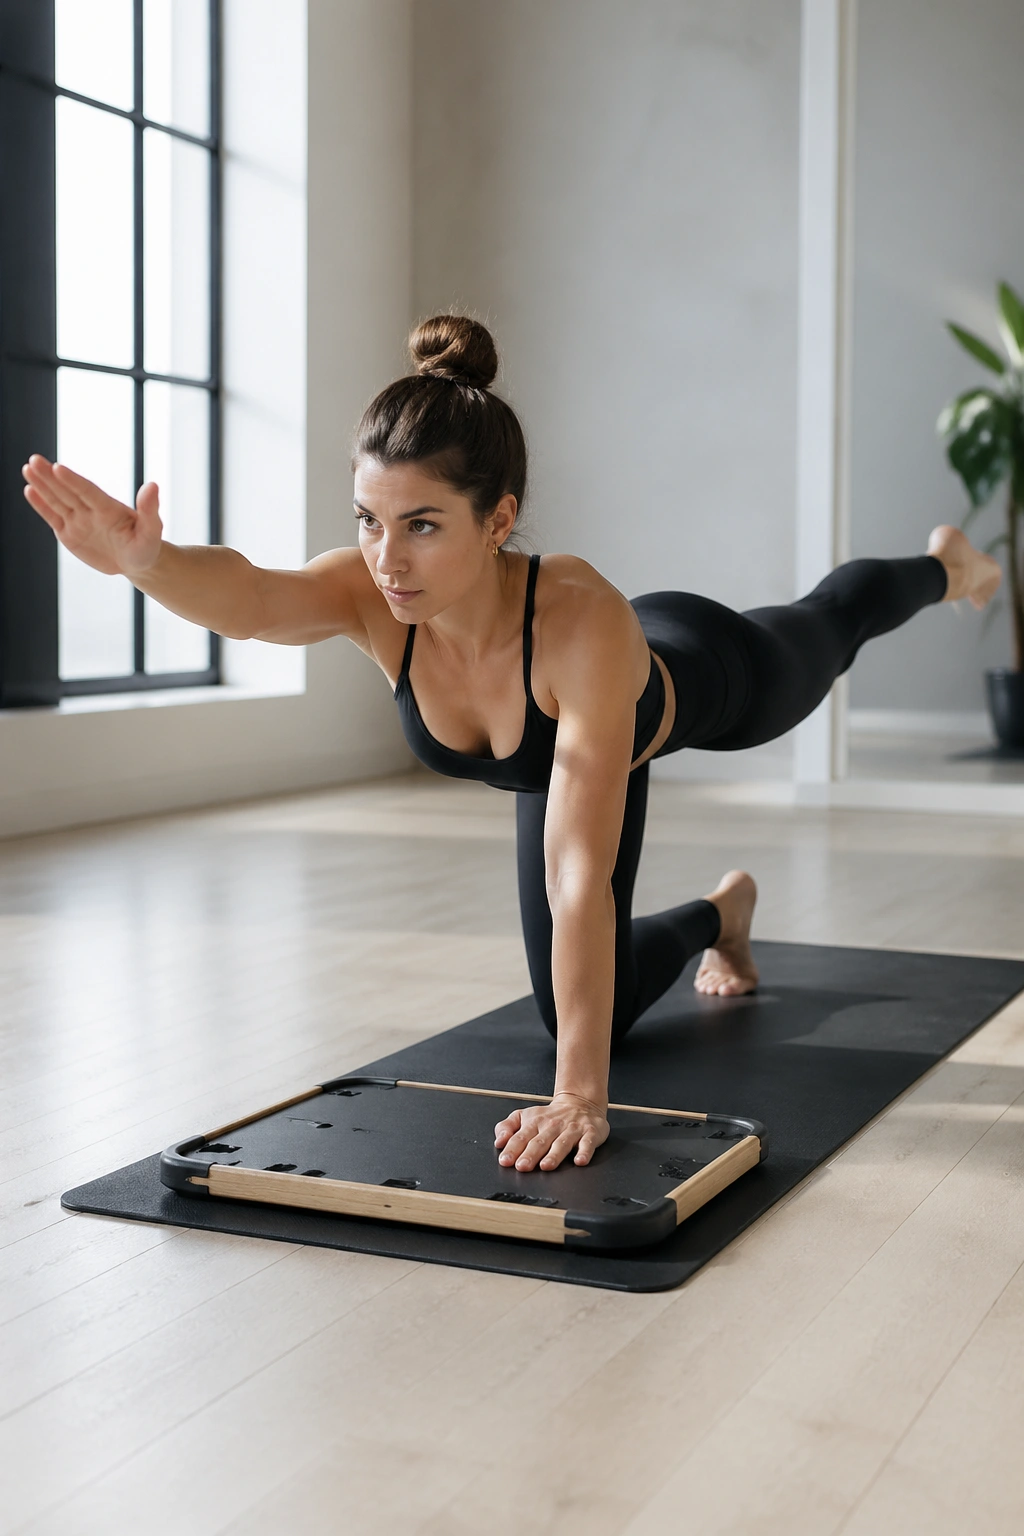
Unlike floor bird dogs, the board version adds feedback under your hands. That can make the exercise better—or sloppier—depending on how you set it up. If your board locks, lock it. If it does not, brace it against a wall.
Come onto all fours with your hands on the board and knees on a mat. Stack shoulders over wrists and hips over knees. Exhale, reach one leg straight back, and extend the opposite arm forward if your balance allows. Hold for 2 to 3 seconds, then return and switch sides.
What to feel
The goal is a still trunk. Your coffee-cup pelvis should not spill. If the lower back dips or the board rolls around under the hands, keep both hands down and extend only one leg at a time until that feels solid.
Five to six reps per side is enough. Done properly, bird dog trains cross-body control—the same kind of trunk stability you need for walking, carrying groceries, or climbing stairs without twisting all over the place.
18. Incline Plank With Slow Knee Tuck
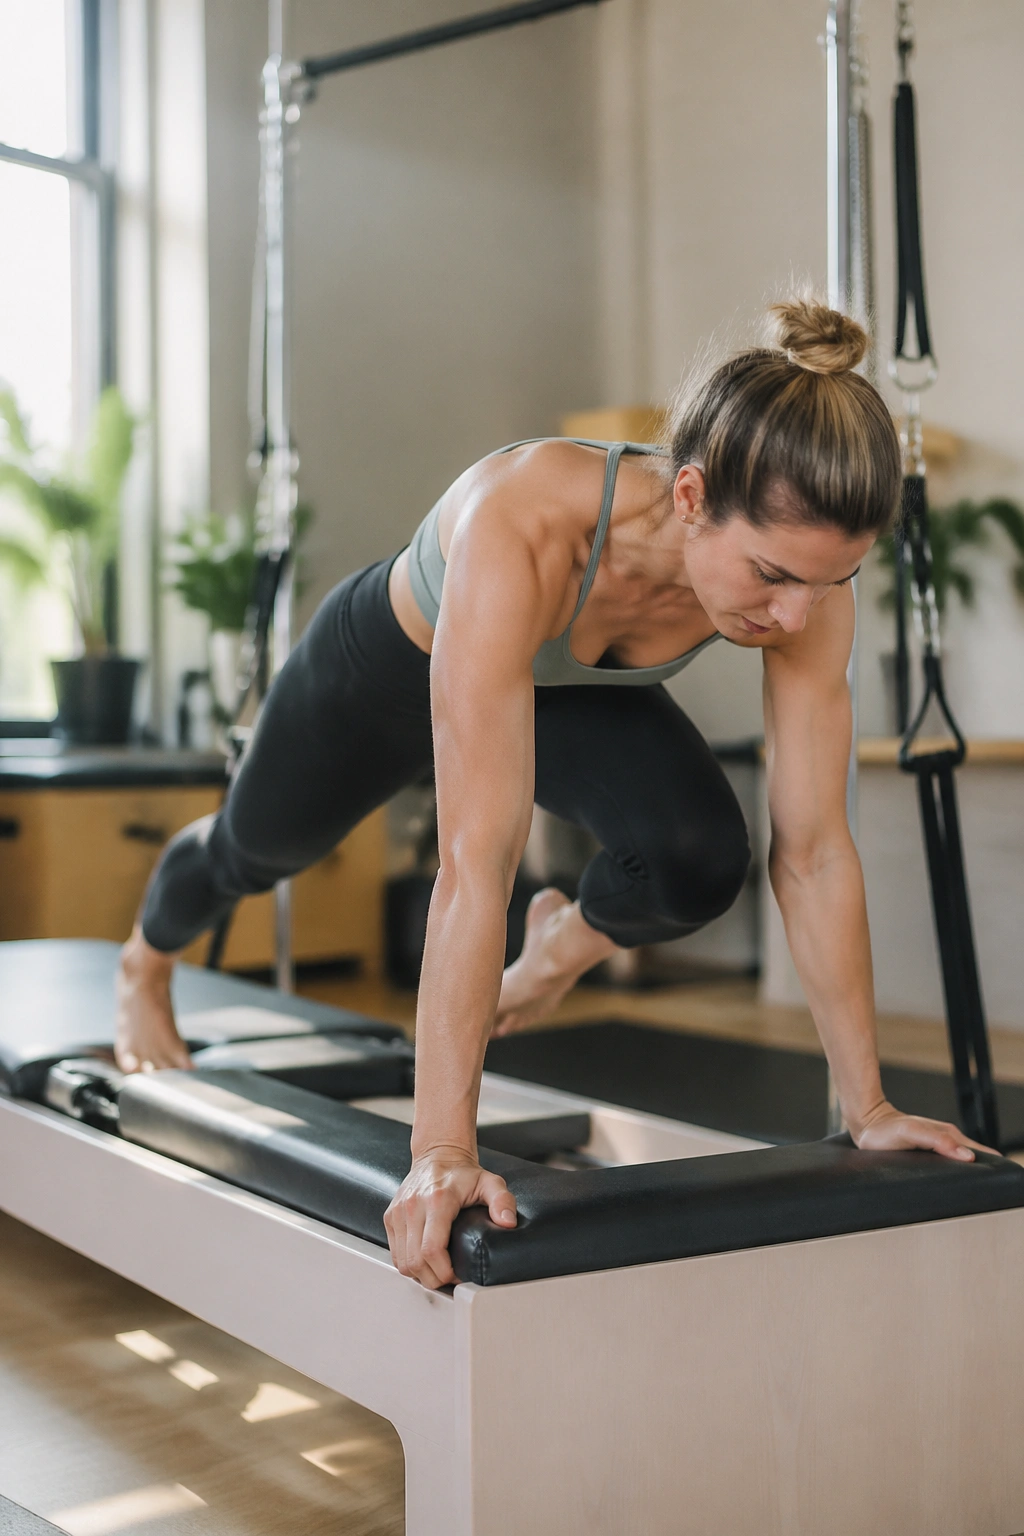
Beginners do not need to start with a full floor plank on a moving surface. An incline plank gives you the same lesson with less wrist and core strain.
Place your hands on the board handles or stable front edge and walk your feet back so your body forms a straight line from head to heels. Hold that plank for 15 to 20 seconds first. If you stay steady, add a slow knee tuck by drawing one knee forward a few inches, then placing it back down and switching sides.
The key is resisting the urge to pike the hips up. Keep the pelvis level and the chest broad. If the shoulders burn before the core even wakes up, push the floor away and spread the shoulder blades slightly. That creates better support through the upper back.
Six knee tucks per side is enough for a first round. A clean incline plank feels quiet, almost stern. No sagging, no bouncing, no frantic breathing. Good. That means the right muscles are working.
How to Build a Short Beginner Pilates Board Routine
You do not need all 18 moves in one workout. That would turn a smart beginner session into a long slog.
Pick 6 exercises: one breathing or mobility drill, two core moves, one upper-body pull or press, and two lower-body patterns. A balanced beginner session might look like this:
- Seated Core Breathing and Pelvic Tilt — 6 breaths
- Supported Roll-Back — 8 reps
- Glute Bridge — 10 reps
- Seated Row — 10 reps
- Supported Reverse Lunge — 6 reps each side
- Incline Plank Hold — 20 seconds
Run that circuit 2 to 3 times, resting about 30 to 45 seconds between exercises if needed. If your form starts to slip before the muscles feel challenged, stop the set there. Clean reps build progress. Sloppy volume builds habits you then have to unlearn.
Three sessions per week is plenty for most beginners. More than that can work, though only if the sessions stay short and your muscles recover well between them. Soreness in the glutes, abs, and upper back is common at first. Joint pain is not.
Mistakes That Make Beginner Pilates Board Work Less Well
The biggest mistake is choosing tension that is too heavy. People do it because heavy feels like progress. On a board, heavy often means you shorten the range, grip the handles too hard, arch the back, and call it strength. Use a load you can control for the full rep.
Speed is the second problem. Fast reps hide weak spots. They also turn many board exercises into momentum drills, which is the opposite of what makes Pilates-style training useful. If the carriage jerks or the straps snap back, slow down and own the path.
Range gets overestimated too. You do not need the deepest lunge, the longest glide, or the highest bridge to get a training effect. A smaller motion done with steady breathing and joint alignment gives beginners more than a huge motion done with wobbly knees and a cranked neck.
And yes, people skip the easy-looking drills. They should stop doing that. Pelvic tilts, half roll-backs, supported marching, and incline planks are where the good mechanics are built. Skip those, and the flashy stuff never looks or feels right.
Final Thoughts
A Pilates board is most useful when you treat it like a feedback tool, not a stunt prop. The best beginner exercises are the ones that teach you how to breathe under effort, stabilize the trunk, and move the limbs without losing position.
Start smaller than your ego wants. That is the move.
If you keep the resistance light enough to control, slow the lowering phase, and repeat the same few patterns until they feel smooth, the board stops feeling slippery and awkward. It starts feeling precise. That is when the workouts get satisfying, and that is also when your strength begins to show up outside the board—in your posture, your balance, and the way everyday movement feels.
