



The moment you walk into a studio, the air feels different. There is a specific kind of quiet—not empty silence, but the focused, tense anticipation of people preparing to move with precision. When you combine the technical discipline of ballet with the functional, muscle-shaping focus of Pilates, you aren’t just exercising. You are re-training your body to find a center that feels both rock-solid and fluid.
Many people think ballet-inspired movement is just about standing by a barre and looking graceful. They are wrong. It is about the subtle, microscopic work that happens when you stabilize your hips, knit your ribs together, and hold a position that feels like it’s pulling you in two different directions. The beauty of this training method is how it builds lean muscle without the bulk, while simultaneously forcing you to confront the weaknesses in your posture that life, desks, and gravity have carved into you.
You do not need a professional dance background to do this. In fact, some of the most effective movements come from stripping away the theatricality of ballet and leaving only the raw, skeletal alignment. This is about deep core work, long levers, and precise articulation of the feet. If you are ready to stop moving in big, imprecise gestures and start working from the inside out, this list of exercises will change the way your body responds to gravity.
1. The Classic Plié Pulse
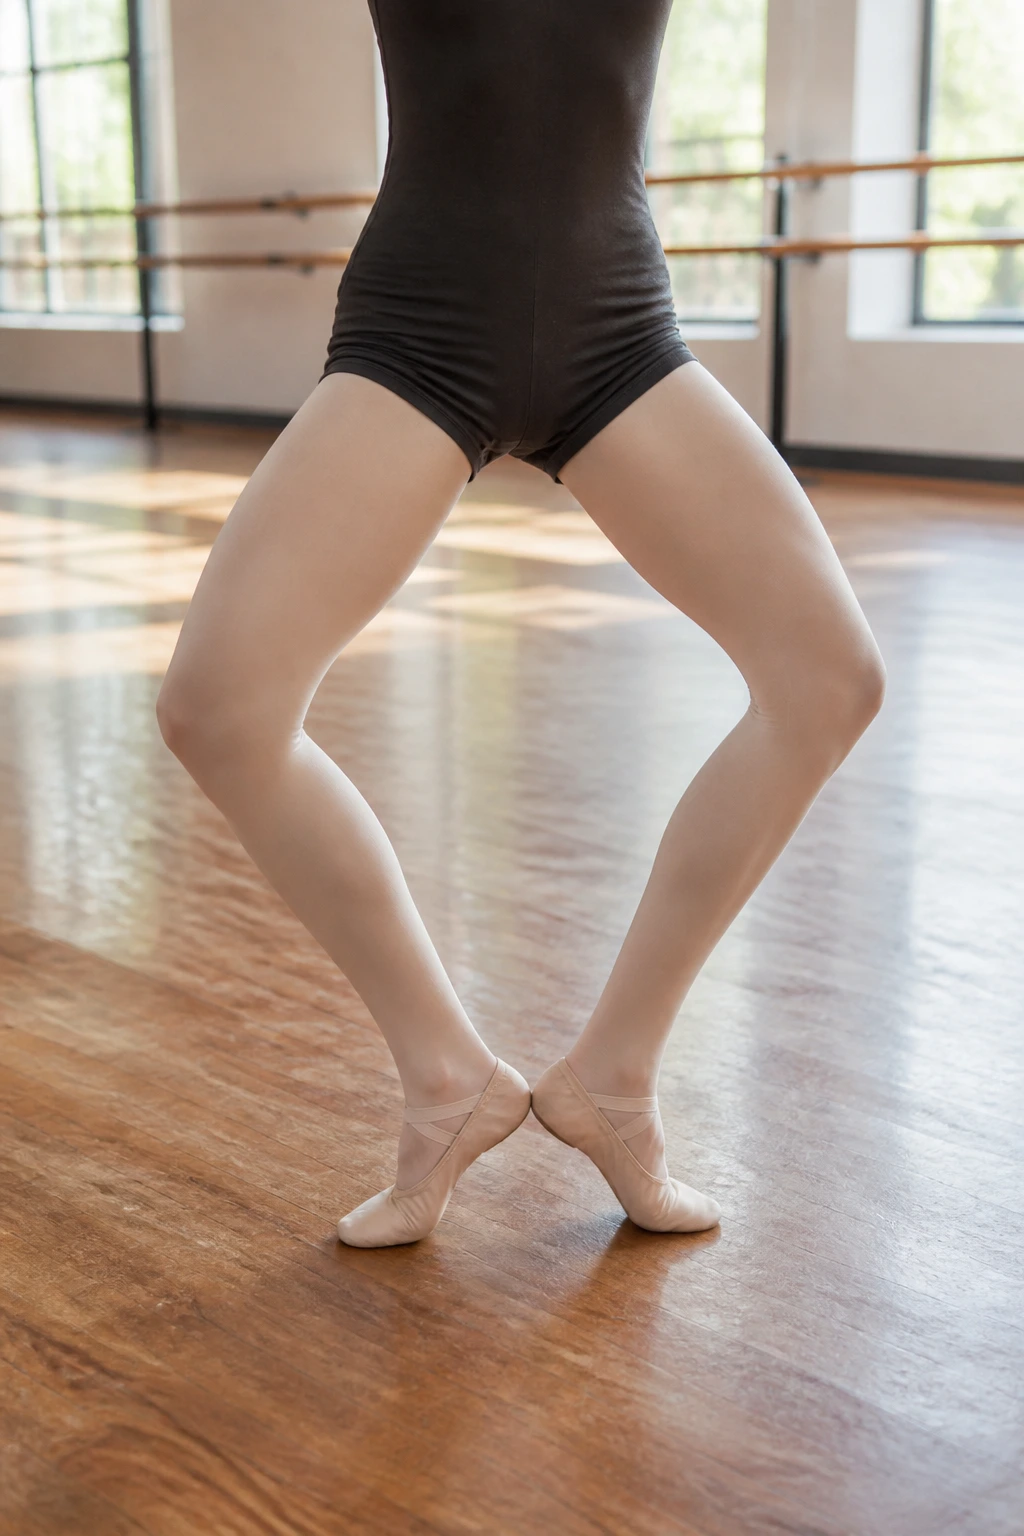
Most beginners rush the plié. They treat it like a standard squat, dropping down and coming up without much thought to the mechanics. In this hybrid discipline, a plié is a game of resistance. Stand with your feet in first position—heels touching, toes turned out about forty-five degrees. Do not force the turnout from your ankles, which causes your knees to cave inward. Instead, rotate from the top of your hips.
Once you are in your turned-out stance, engage your glutes and lower yourself halfway down, keeping your torso perfectly upright. It should feel as if your back is sliding down a vertical pane of glass. When you reach that midpoint, begin to pulse. Do not bounce. These pulses should be small, controlled, and driven by your inner thighs and the lower abdominals.
The goal here is not to see how low you can go; it is to see how much control you can maintain while you are at the bottom of the movement. If your lower back starts to arch, you have lost your core connection. Tuck your tailbone slightly under—think of it as lengthening the space between your bottom rib and your hip bone. Hold that tension for the duration of the set.
2. Relevé Balance
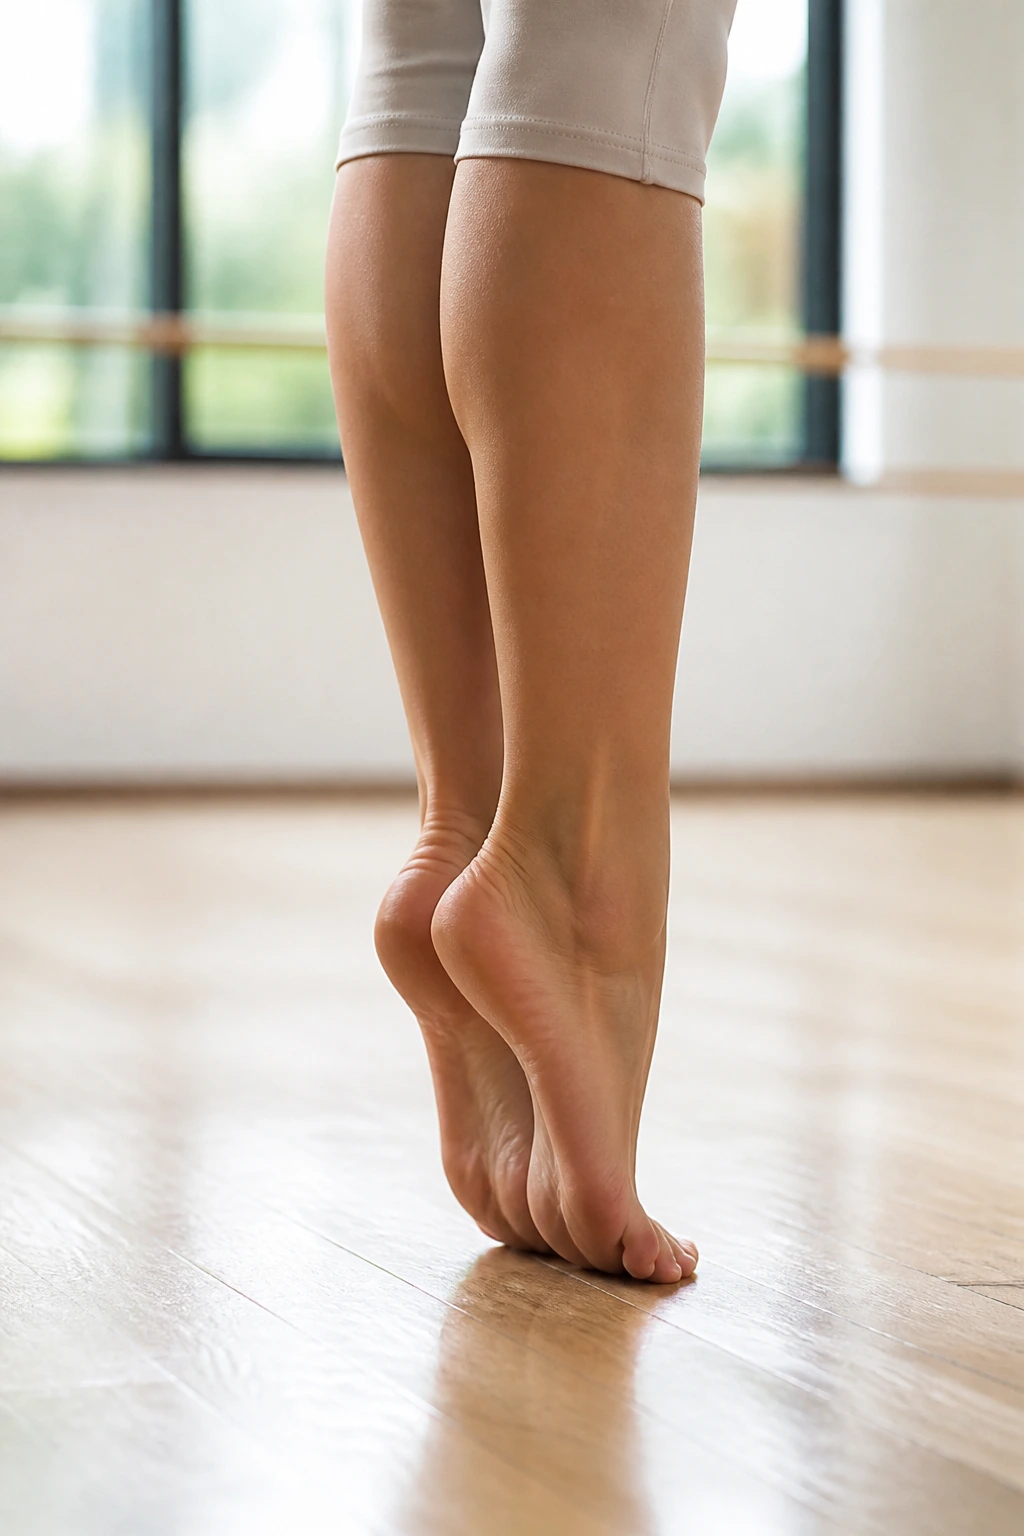
If you want to understand true core stability, you need to lift your heels. Stand in first position and rise onto the balls of your feet. This is a relevé. Most people wobble here because they try to balance with their shoulders or their head. That is backward. You balance with your ankles and your deep, lower-belly muscles.
Keep your heels together as you rise. If they split apart, your weight has shifted forward, and you are no longer aligned. Imagine a string pulling the crown of your head toward the ceiling, while simultaneously anchoring your tailbone toward the floor. This opposition is where the Pilates magic happens.
Hold this position for thirty seconds. While you are up there, try to close your eyes. If you fall out of it immediately, it proves that you have been using your vision to compensate for a lack of proprioception. Practice this until you can stand in a relevé with closed eyes for ten full seconds without a single twitch. That is the definition of a stable center.
3. Arabesque Leg Lifts
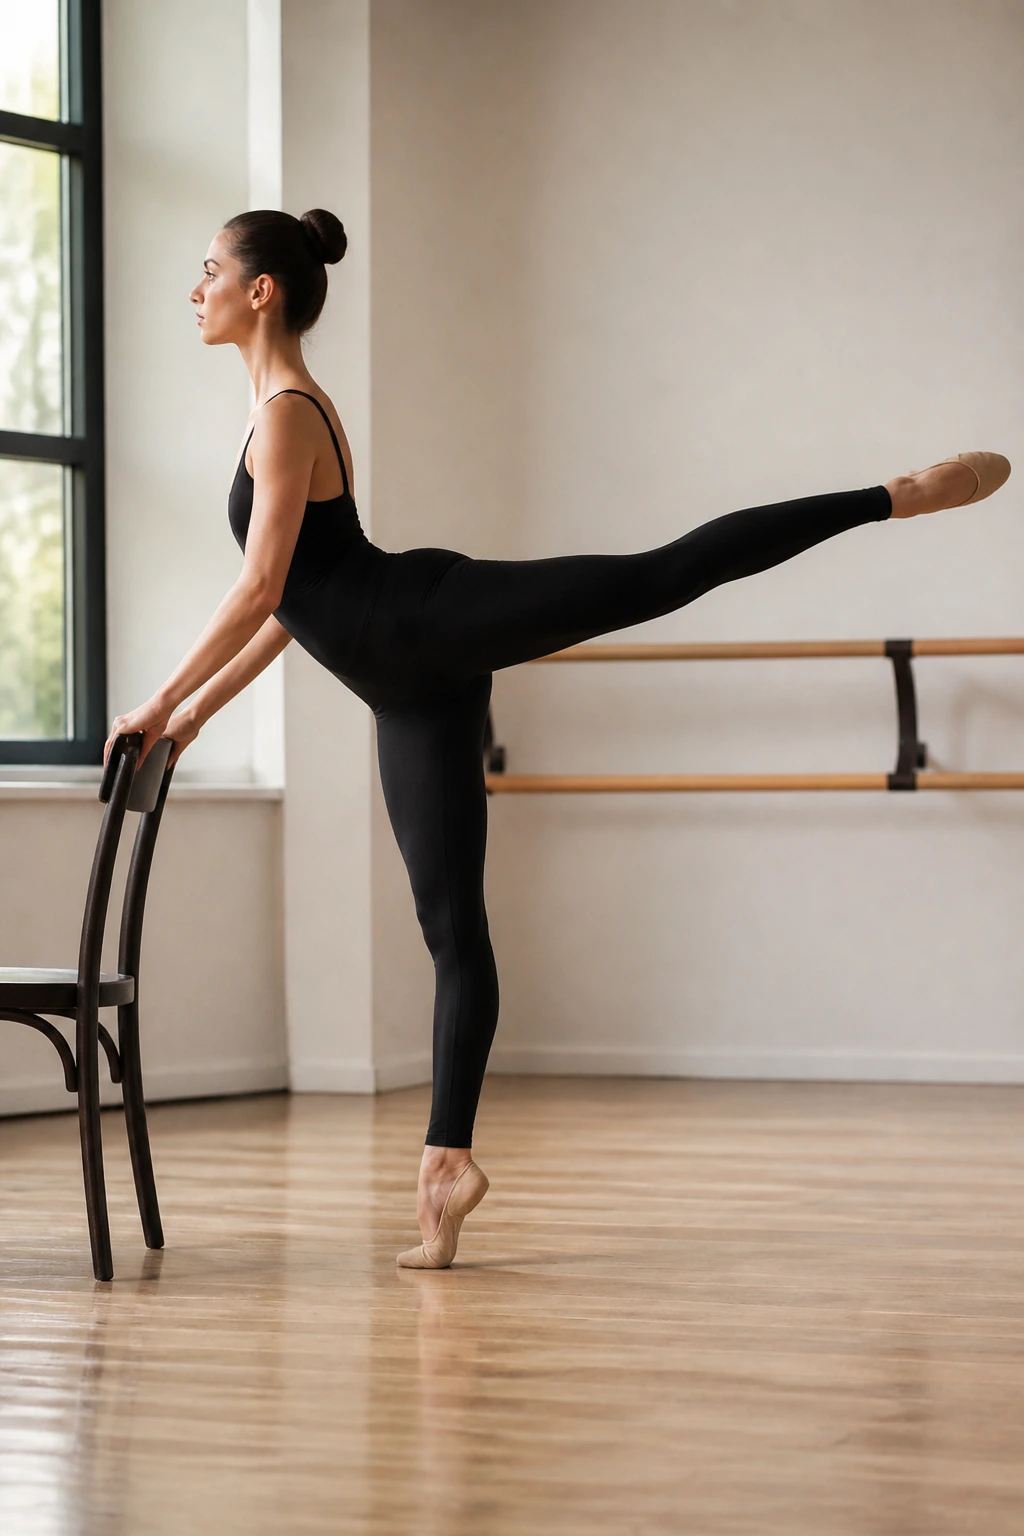
The arabesque is the signature ballet move, but in a Pilates context, it is a glute-isolation powerhouse. Start by facing the floor with your hands resting on a chair or a barre for balance. Hinge forward at your hips, keeping your back flat. Extend one leg straight back behind you, pointing your toes to create a long, continuous line.
Lift that extended leg. Do not worry about how high it goes. If you lift the leg so high that your hip opens up or your back arches, you have ruined the exercise. The height should be dictated entirely by your glute muscle. Keep your pelvis square to the floor. Imagine there is a spirit level sitting across your sacrum, and the bubble must stay perfectly centered.
Pulse the leg upward in tiny, incremental movements. You should feel a distinct burn in the upper quadrant of your glute, right where it meets the hamstring. If you feel this in your lower back, you are lifting with your lumbar spine. Drop the leg a few inches, re-engage your abdominals, and start again.
4. Tendu Side Circles
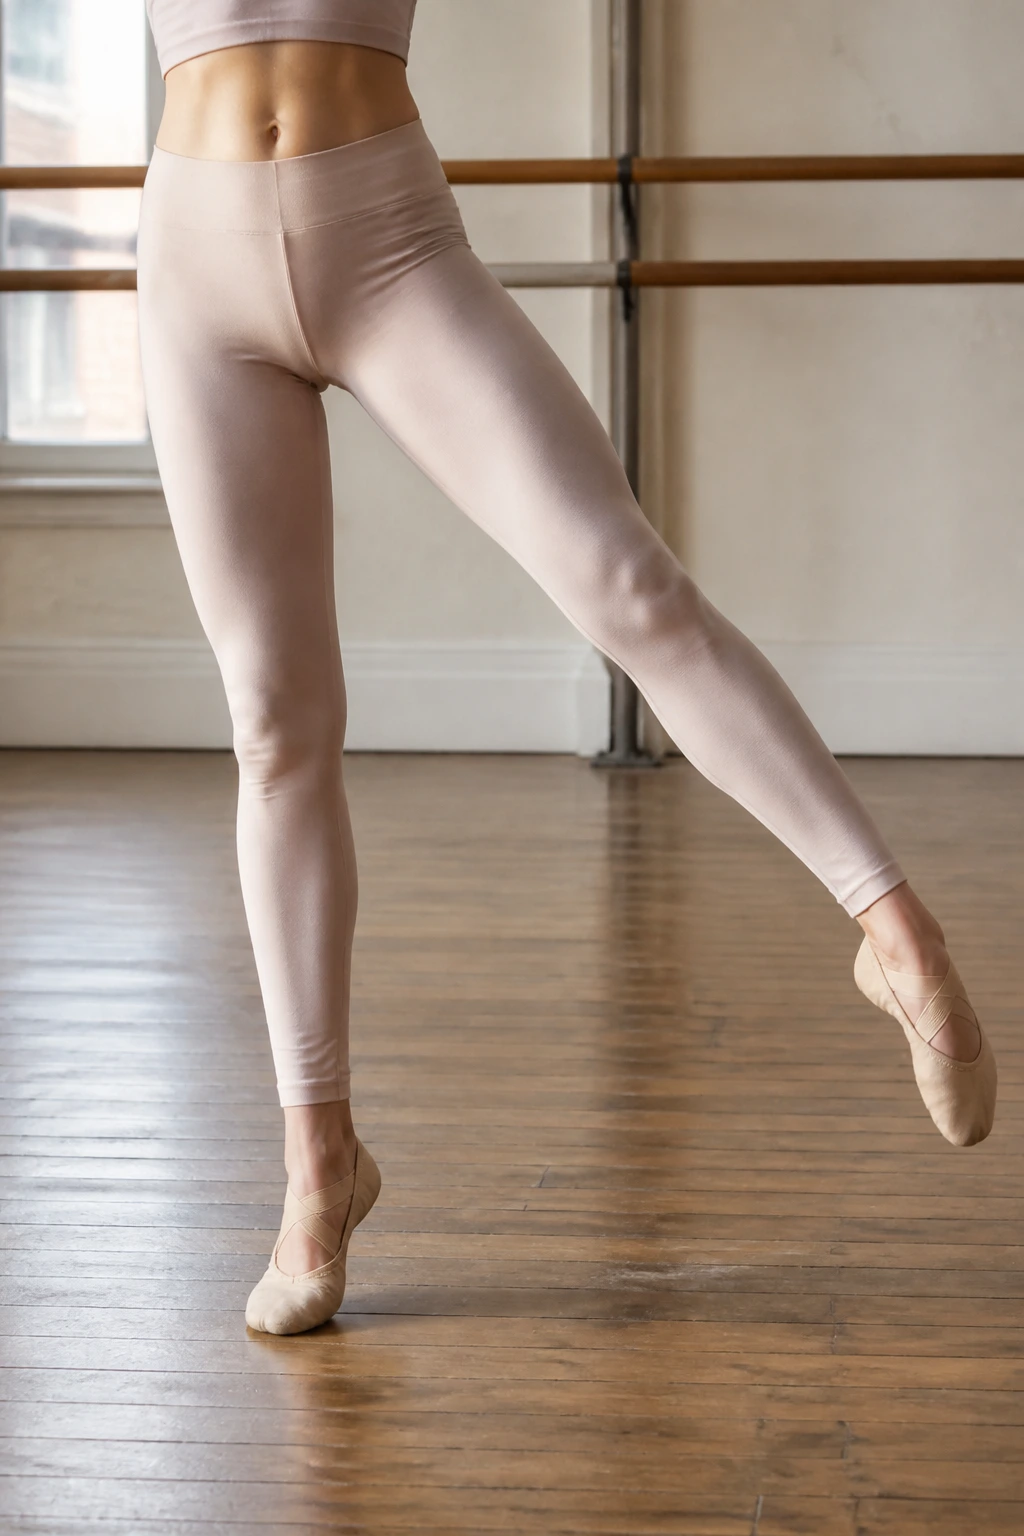
The tendu is the bridge between stillness and movement. Stand with your feet in first position. Point one foot out to the side until only the tip of your big toe touches the floor. Now, draw a semi-circle with that toe, moving it from the side, around to the back, and then back to the center.
The secret to this move is that the standing leg does all the heavy lifting. While your moving leg is drawing circles, your standing leg should remain absolutely motionless. It should not shift, it should not bend, and it should not tremble. This requires immense stabilization from your standing hip.
This exercise is excellent for addressing hip imbalances. You will likely find that one side feels smooth and easy, while the other side feels jerky or resistant. That is your body telling you exactly which side is weaker. Do not rush to even them out; move slowly, articulating the foot through the arch and the toe, making the movement fluid.
5. Passé Holds
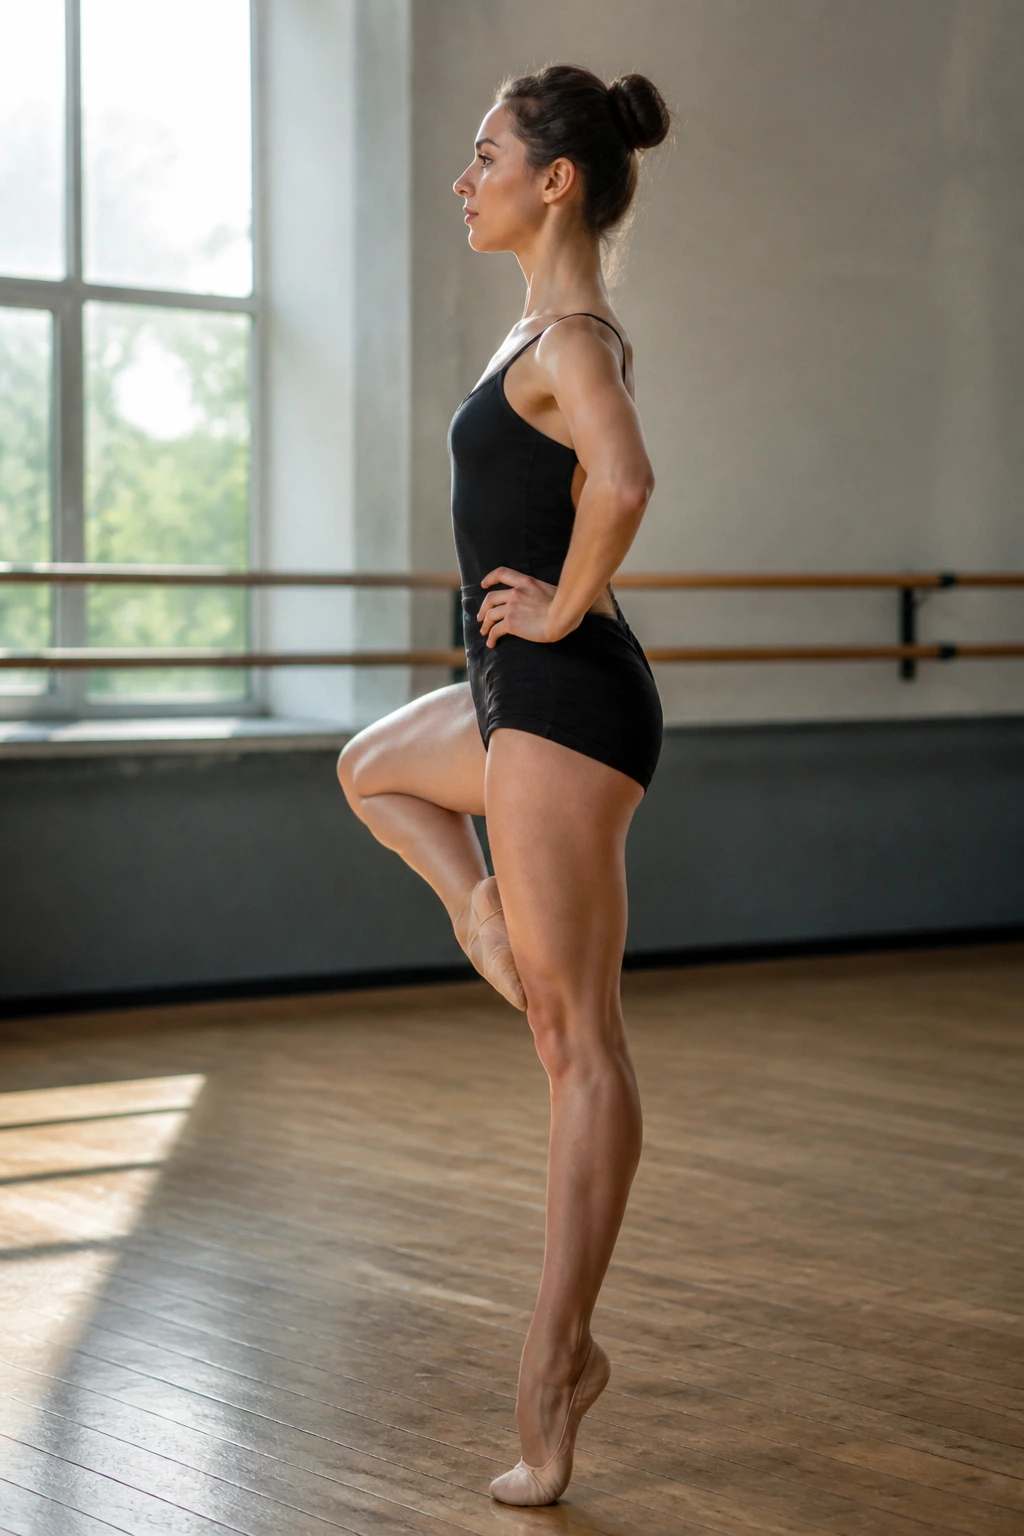
A passé is when you bring your toe to rest just below your standing knee. In ballet, it looks effortless. In Pilates, it is a demanding balance and oblique-activation drill. Standing on one leg, slide your other foot up along your standing leg until your big toe touches the inside of your knee.
Keep your turned-out knee open wide. This is not just a leg move; it is a hip-opening stretch and a core stability test. Place your hands on your hips to ensure they remain level. As you hold this position, lift your pelvic floor. Visualize drawing your lower belly in and up, almost like you are zipping up a tight pair of pants.
Hold for thirty seconds, then switch legs. The most common mistake is to let the knee of the bent leg drift forward toward your midline. It must stay rotated out. If you feel like you are tipping over, focus your gaze on a single point on the wall at eye level. Fix your eyes, fix your core, fix your posture.
6. Grand Battement Control
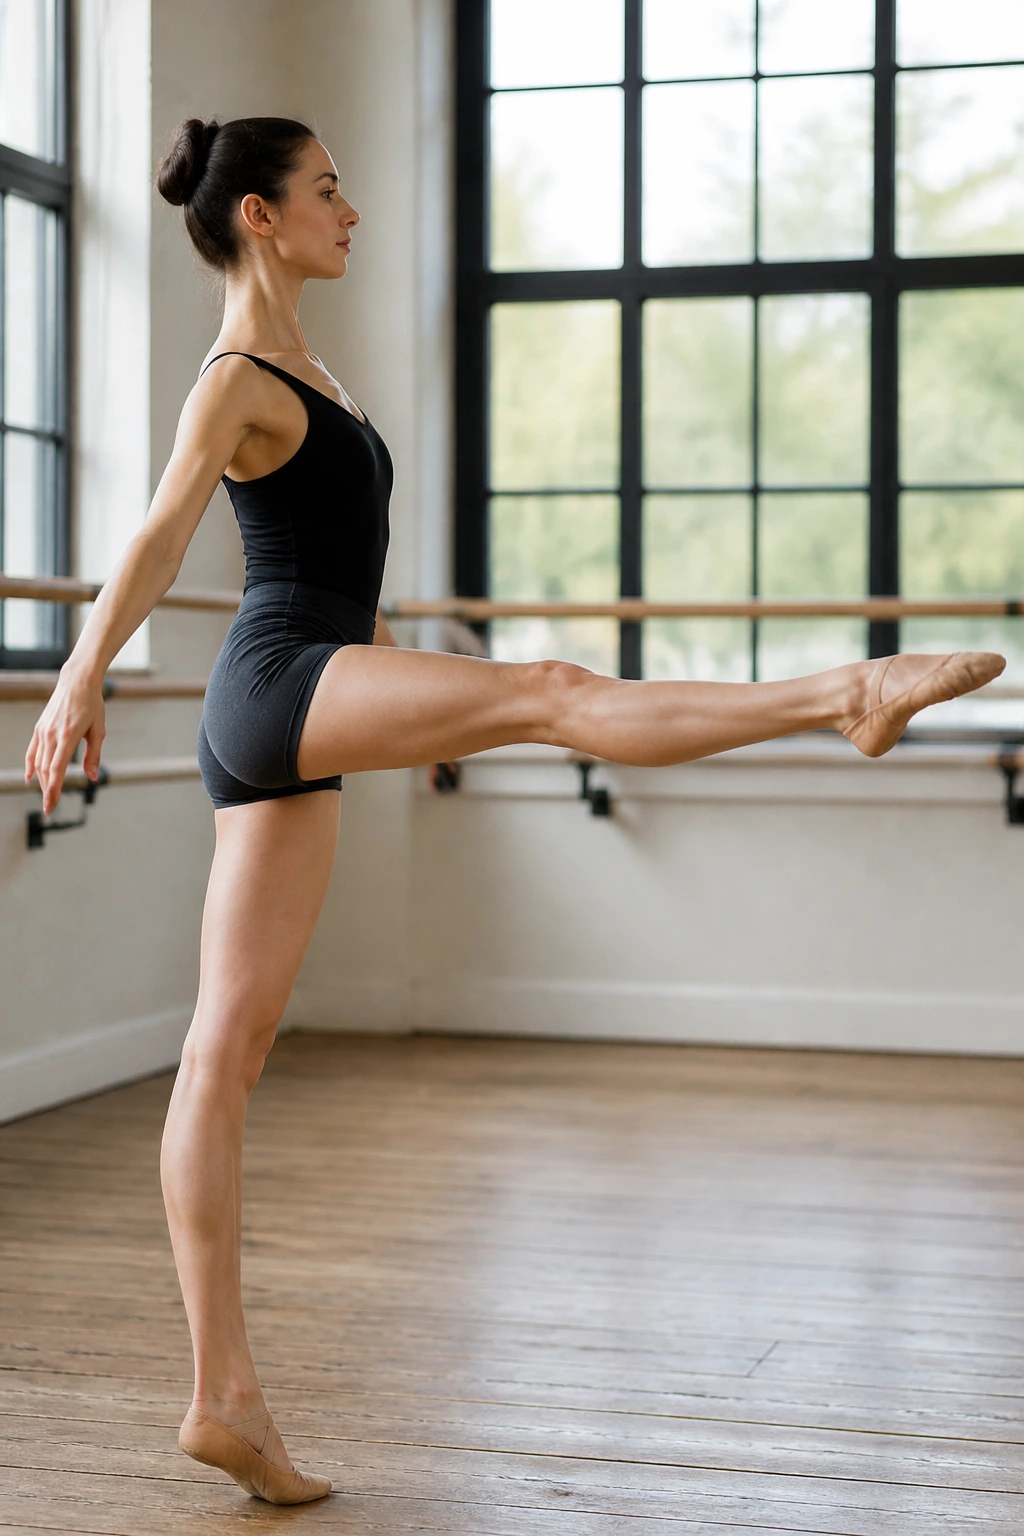
We are slowing down the grand battement. Usually, this is a fast, explosive kick. Here, we are removing the momentum to make it a test of muscular control. Start in first position. With a strong exhale, extend your leg forward (or to the side) in a controlled sweep, reaching for height without swinging.
The challenge is the return. Do not let gravity drop your leg. Lower it with the same muscular intensity you used to lift it. Think of the air around your leg as thick water or honey. You are pressing through resistance on the way up and pressing through resistance on the way down.
This teaches your hip flexors and quads to work in harmony with your core. If your torso leans back to compensate for the leg lift, you are using your back to cheat. Stay tall. If you can only lift your leg to waist height while maintaining perfect posture, that is better than kicking your leg over your head while collapsing your spine.
7. Port de Bras with Core Engagement
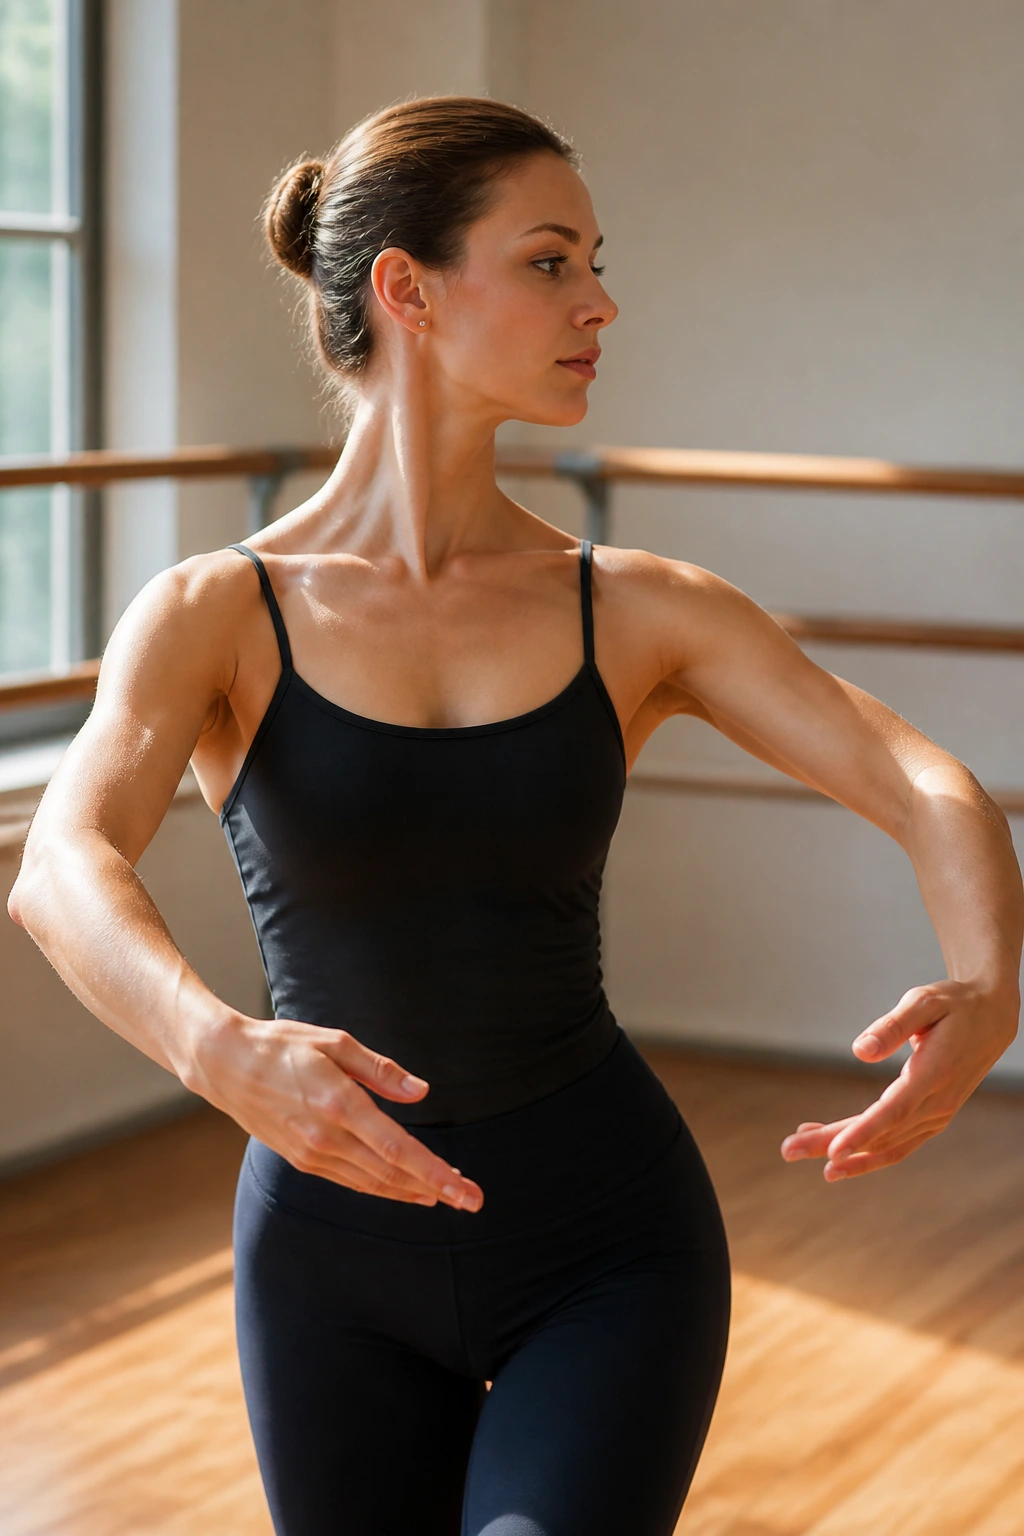
Port de bras refers to the carriage of the arms. It sounds like a rest period, but if you do it correctly, your shoulders, lats, and core will be on fire. Stand in first position. Reach your arms out to the side, rounded as if you are holding a giant beach ball.
Keep your shoulders down. Most people hike their shoulders toward their ears when they lift their arms. Depress your scapulae—pull them down your back toward your pockets. Now, while holding that shape, engage your core and gently rotate your torso from side to side.
Your arms should not move independently of your body. They should move with your body, locked in that rounded shape. You are using your obliques to initiate the turn, and your arms are merely an extension of that movement. This creates a beautiful, sculpted look in the upper back while teaching you how to move your torso independently of your hips.
8. Soutenu Turns
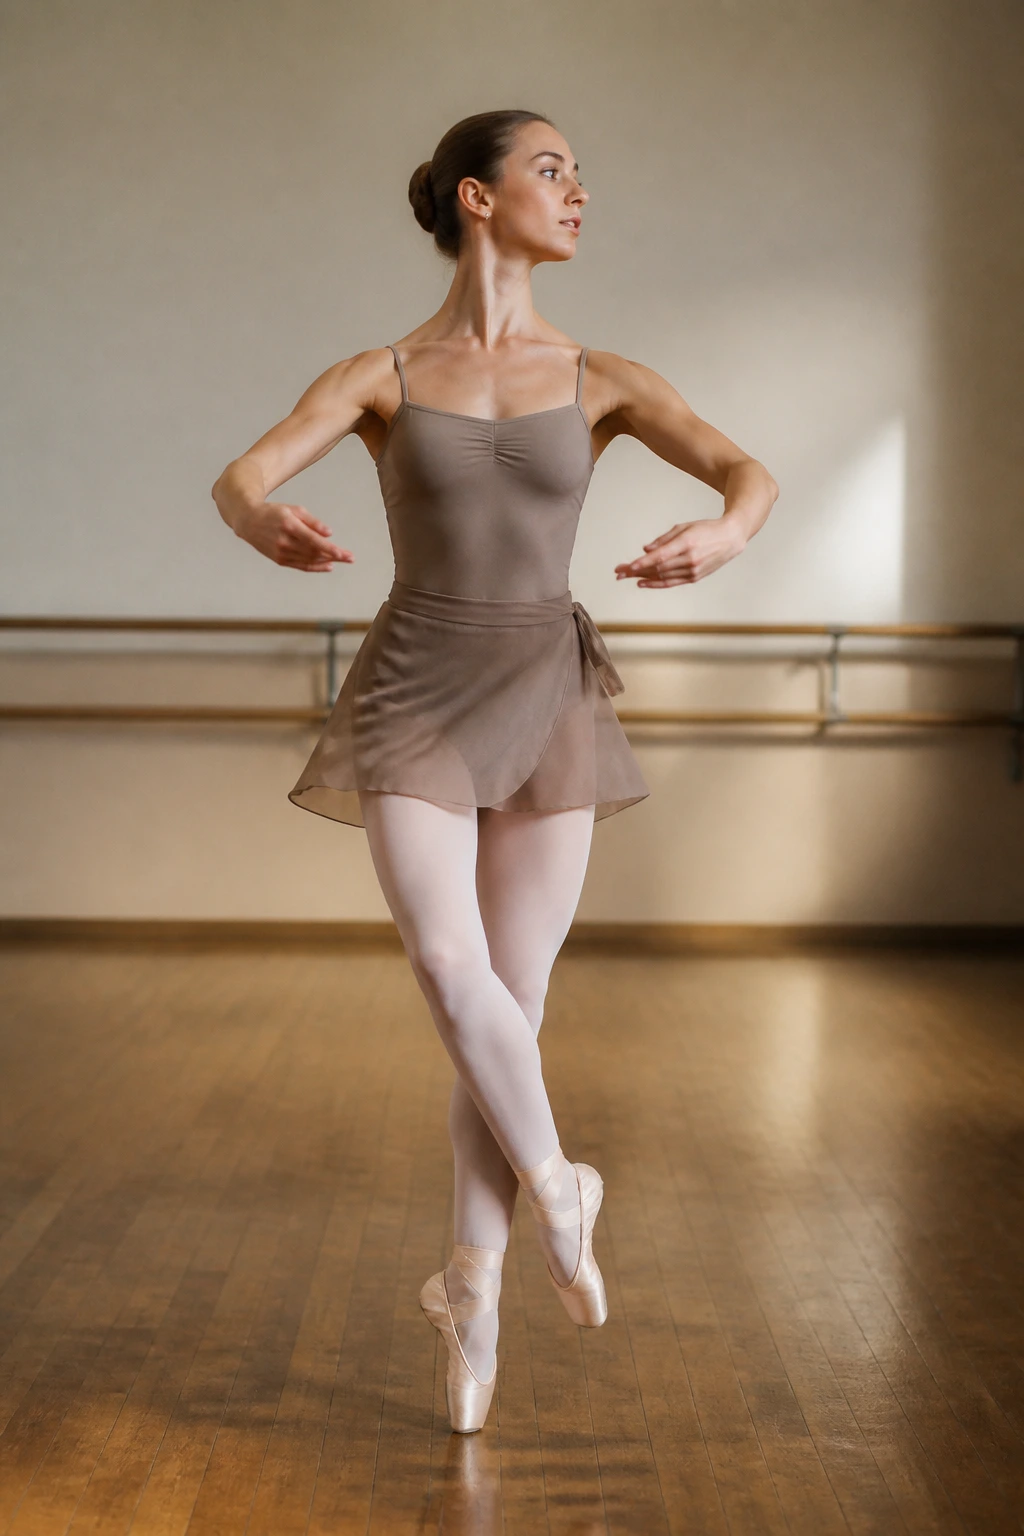
This is a turn done in place, utilizing the cross-legged position. Start in a wide second position (feet wider than shoulder-width, turned out). Cross one leg in front of the other, rising onto the balls of your feet, and pivot to face the opposite direction.
The trick is the transition. You need to rise onto your toes before you turn. If you try to turn flat-footed, you will just grind your feet into the floor. As you spin, keep your eyes on a single spot as long as possible—this is “spotting,” a dancer’s technique to prevent dizziness—and let your head be the last thing to leave and the first thing to return.
The Pilates element here is the internal rotation and the rapid closure of the inner thighs. Squeeze your inner thighs together like you are holding a piece of paper between them during the turn. It creates that long, clean line that is the hallmark of a dancer’s physique.
9. Cou-de-pied Extensions
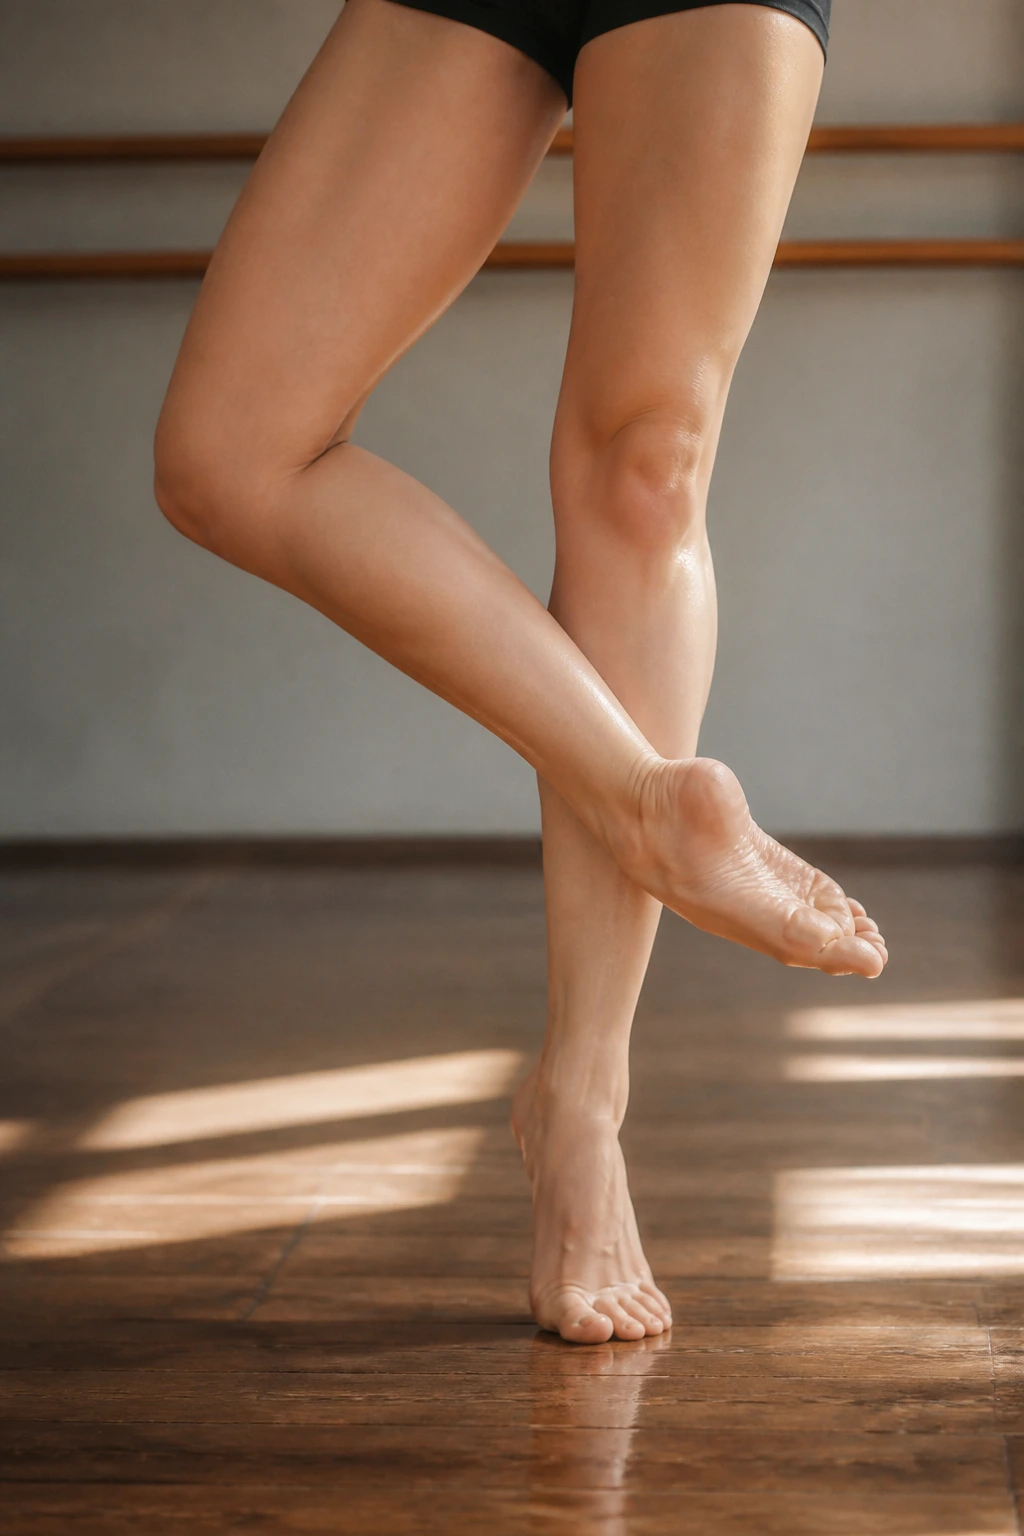
The cou-de-pied is the position where one foot is wrapped around the ankle of the other. Stand on your left leg, and wrap your right foot so the arch sits right against your left ankle bone. Now, tap your right toe forward, then back to the ankle, then side, then back to the ankle.
This is a precision drill. Your standing leg is holding your entire body weight, while the moving leg is working the muscles around the ankle and the hip socket. Do not let your standing hip “pop” or jut out to the side. Keep it tucked firmly under you.
The faster you can do this while maintaining stability, the better. It builds incredible strength in the small stabilizing muscles around the ankle, which are often ignored in standard gym workouts. If you find your standing leg trembling, that is a good sign. It means the deep stabilizers are finally waking up.
10. Développé Slow Motion
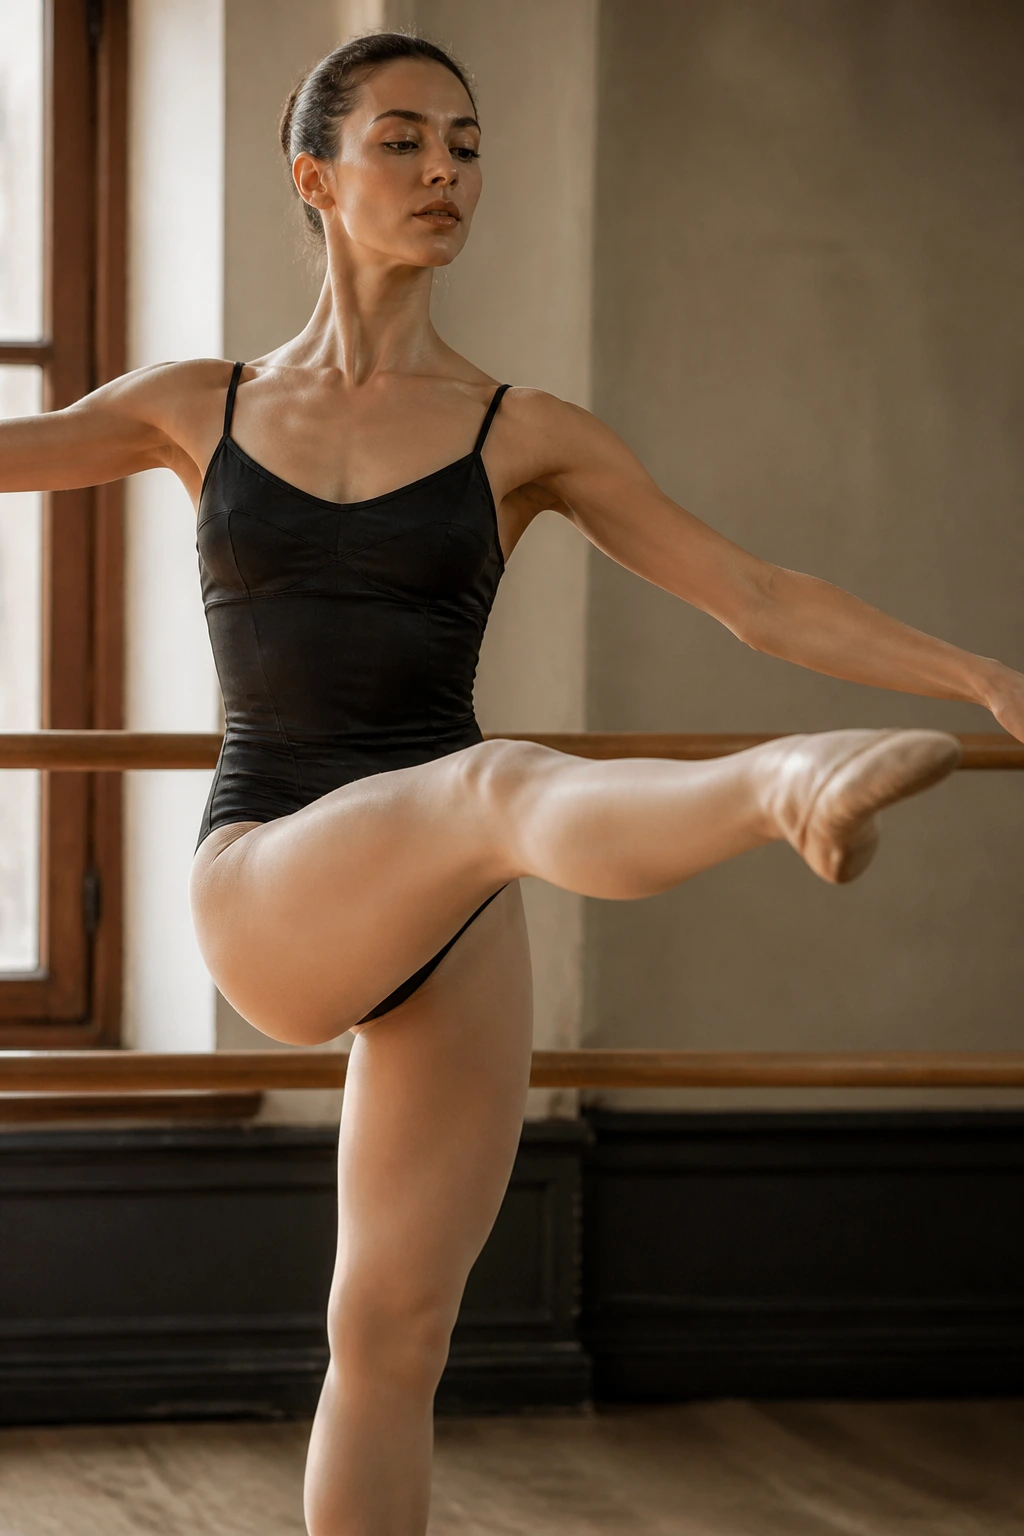
A développé is the slow unfurling of the leg from a bent position to a straight one. Start in that passé position we discussed earlier. From here, slowly extend your bent leg out to the front or side, aiming for a full, straight line.
This requires immense strength in the quadriceps and the hip flexors. If you just flick your leg out, you are using momentum. You must use the strength of the thigh to push the leg out, inch by agonizing inch. Imagine you are pushing a heavy weight away from you with your foot.
When the leg is fully extended, hold it there for three seconds. Then, slowly bend the knee back to the passé position. Do not drop the leg. The descent should be as controlled as the ascent. This exercise is the single best way to develop the long, lean look that ballet-pilates is famous for, as it requires holding the muscle in a contracted state under tension.
11. Glute-Focused Attitudes
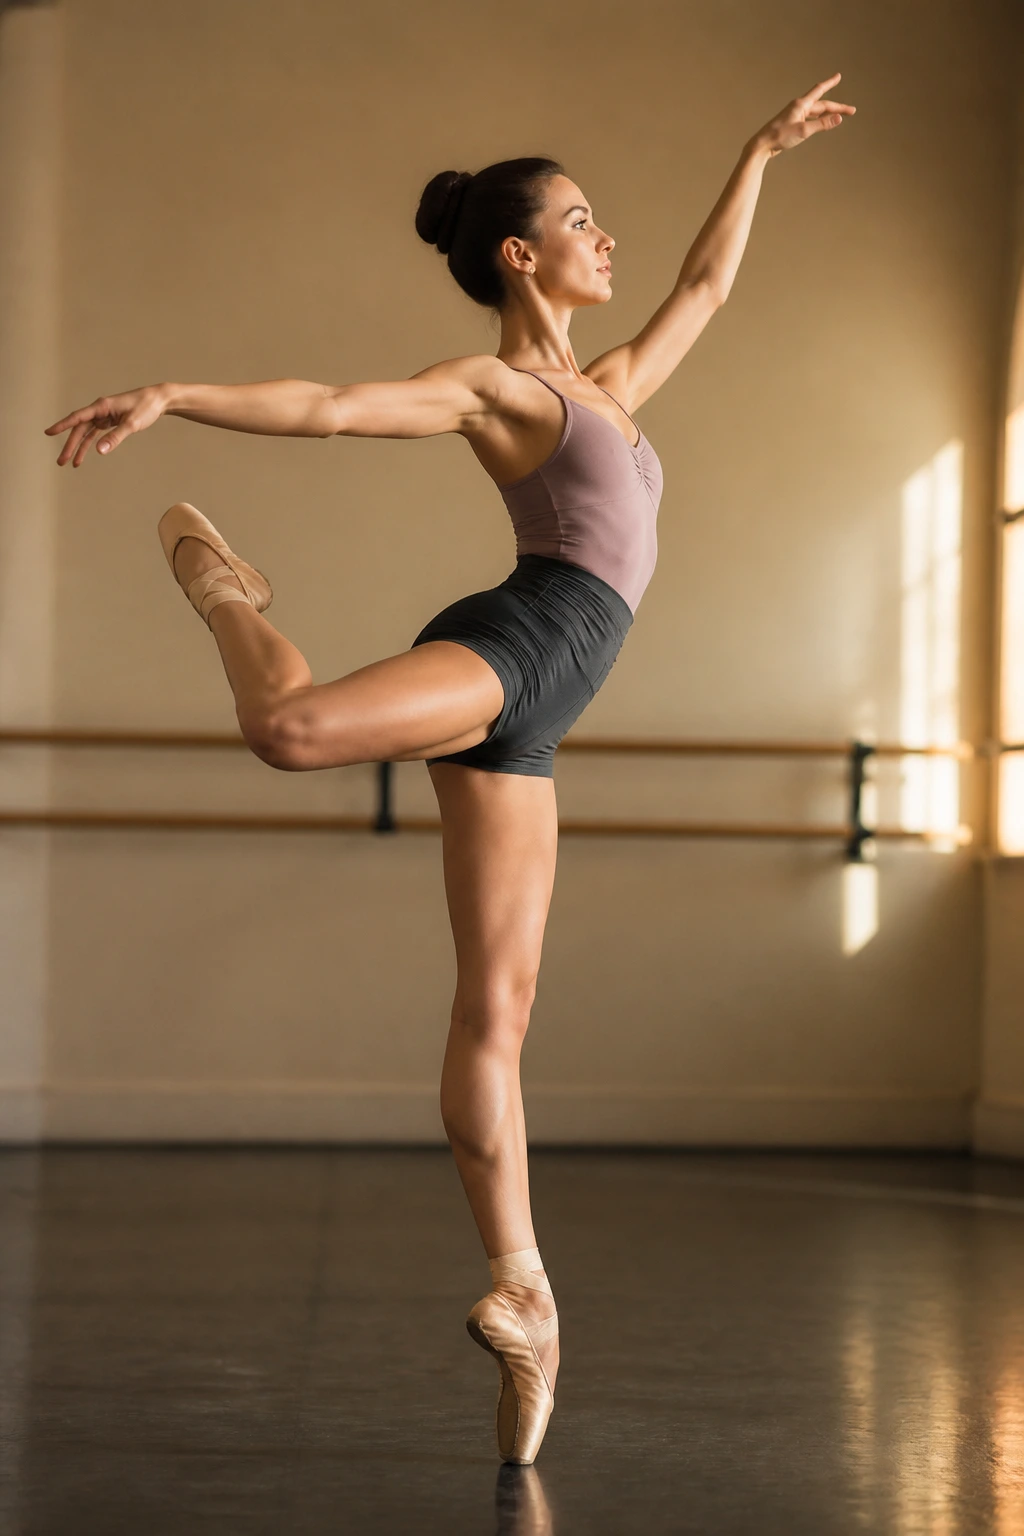
An attitude is a ballet position where the leg is bent, creating a soft, curved line rather than a straight one. Standing facing the barre, lift one leg behind you with the knee bent at a ninety-degree angle. This is your starting position.
Lift the knee toward the ceiling, keeping the lower leg reaching away from you. The goal is to isolate the gluteus medius. Because the leg is bent, the lever is shorter, which allows you to target the glute with more precision than with a straight-leg arabesque.
Focus on the rotation of the knee. The knee should point slightly toward the side, not straight down. This external rotation is key to hitting the glute properly. If the knee points down, your hamstring will take over. Keep the spine long and resist the urge to crunch into your lower back to get the leg higher.
12. Swan Arms Pilates Integration
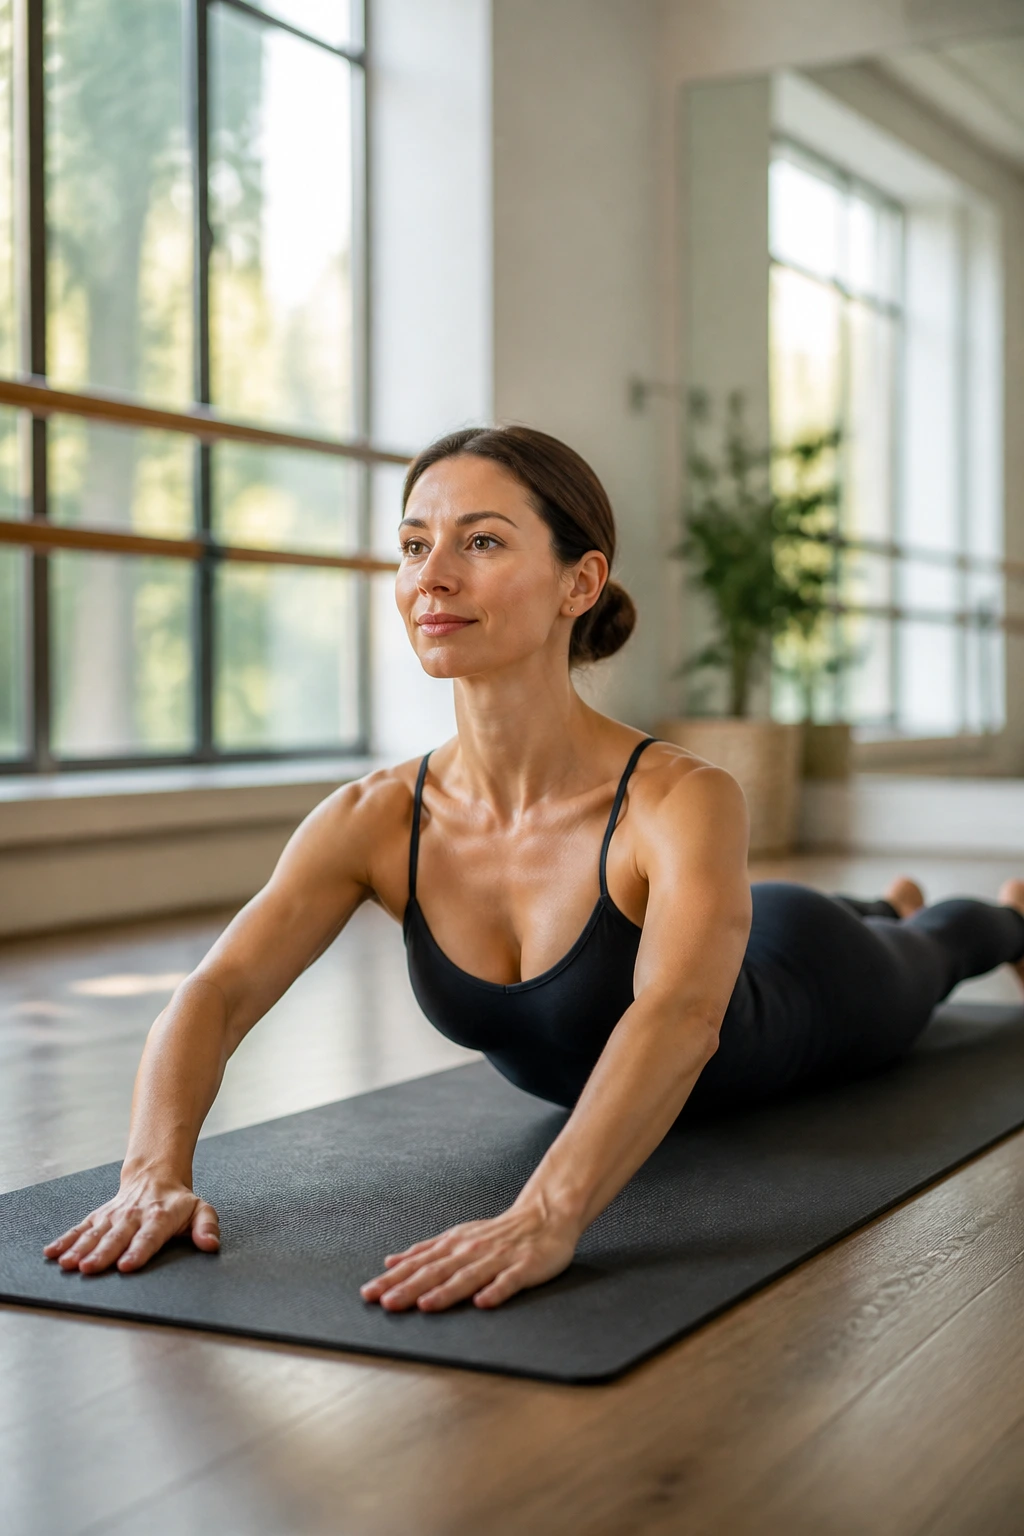
You have probably seen this in Pilates classes, but adding the ballet “port de bras” element changes the sensation entirely. Lie on your stomach, legs long and toes pointed. Place your hands under your shoulders. As you inhale, peel your chest off the mat using your back muscles, not your hands.
Once you are in that extended position, reach your arms forward, keeping them rounded like a ballet dancer’s carriage. Sweep them out to the side, circle them back, and then return them to the starting position under your shoulders.
This is the ultimate posture corrector. By keeping the arms rounded and the shoulders depressed while your spine is extended, you are strengthening the rhomboids and the trapezius—the muscles that counteract our tendency to slump forward at desks. It is essentially a standing-posture drill done while lying on the floor, which makes it significantly more challenging.
13. Second Position Squat Plies
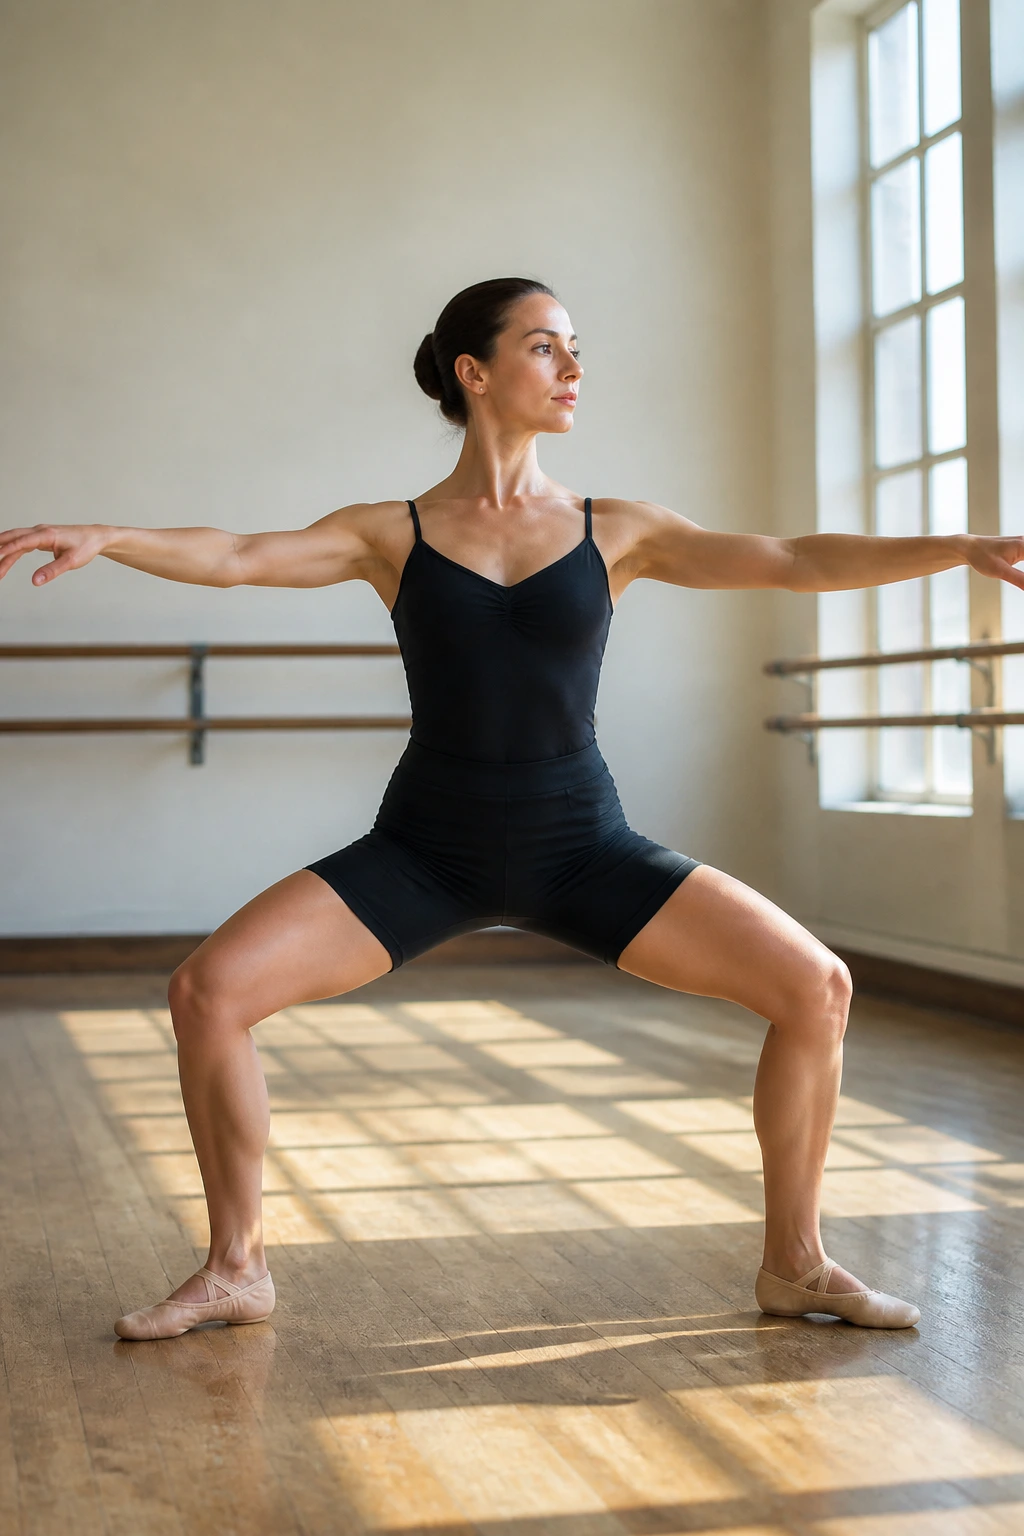
Stand with your feet wider than your shoulders, toes turned out. This is second position. Now, squat down. Unlike a standard gym squat, where you hinge at the hips and push your butt back, a second position plié is vertical. Your spine stays perfectly straight, and you sink straight down as if you are lowering into an elevator.
Your knees must track over your toes. If your knees are collapsing inward, you are not ready for a wide second position; bring your feet in slightly. Hold the squat at the bottom and pulse.
To add a Pilates layer, reach your arms out to the side and hold them there the entire time. The burning sensation will radiate from your thighs into your shoulders. Keep your ribs knit together. It is very common to flare the ribs when the legs start to burn, but that breaks the core connection. Keep everything contained.
14. Roll-Down to Plank
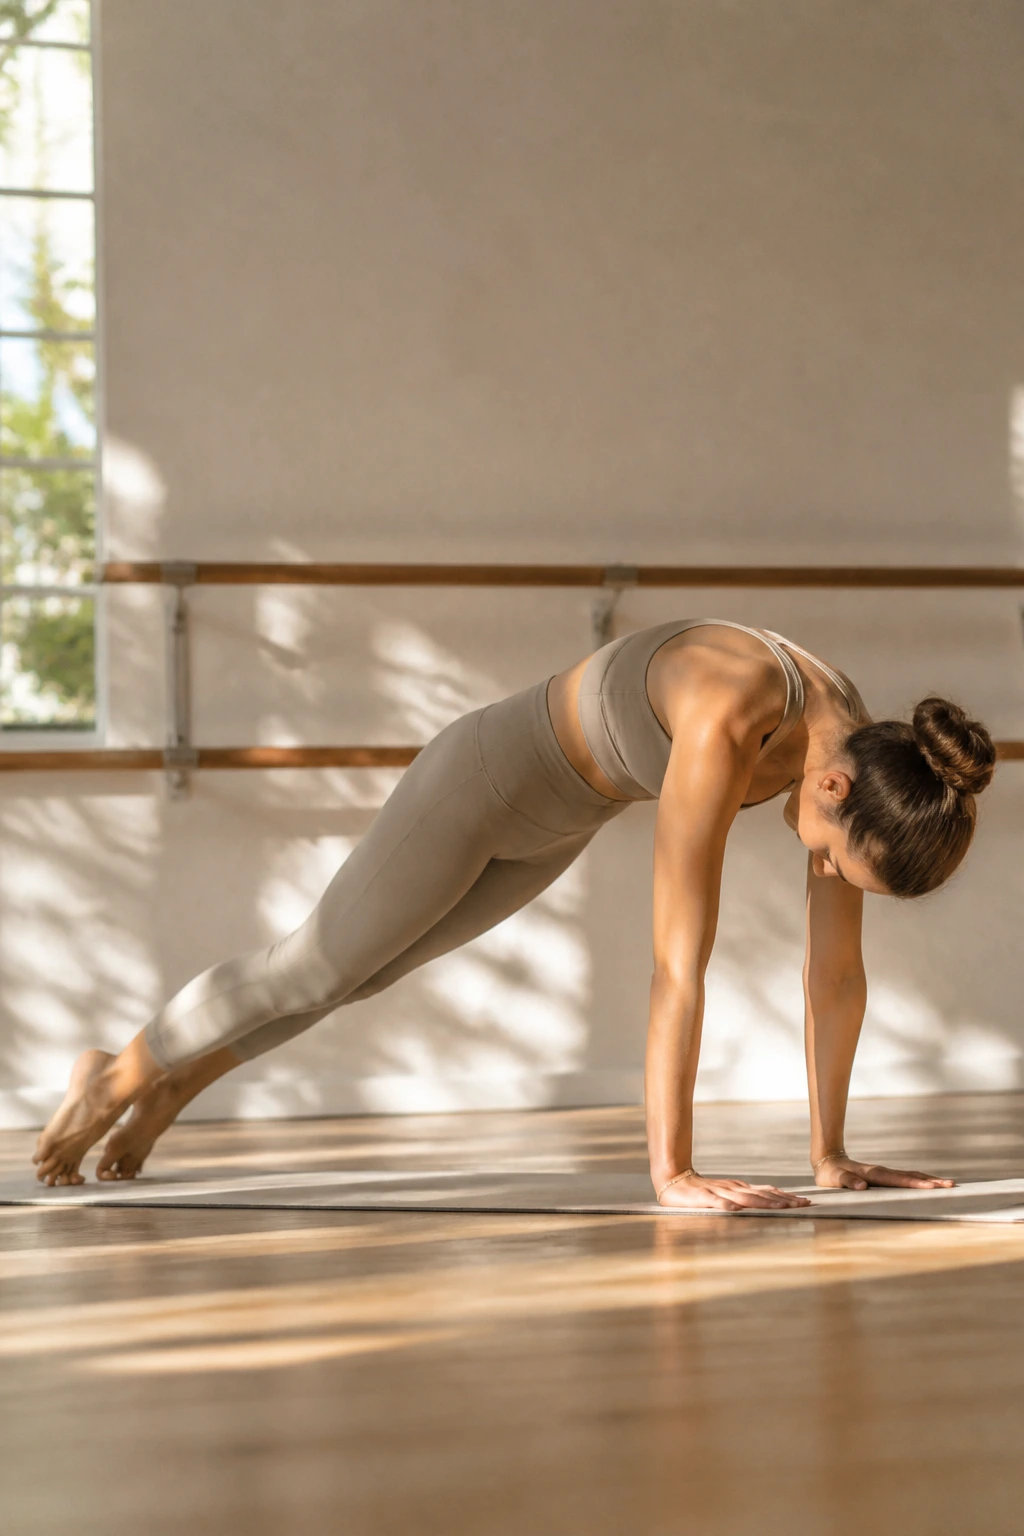
This is a classic Pilates movement with a balletic grace. Stand tall at the back of your mat. Tuck your chin to your chest and begin to roll down, vertebra by vertebra, until your hands reach the floor. Walk your hands out until you are in a high plank position.
In the plank, do not just hold; articulate your body. Ensure your heels are reaching toward the back wall, lengthening your calves, and your head is reaching forward, lengthening your spine. Engage your core as if you are trying to pull your belly button through to your spine.
Hold the plank for five seconds, then walk your hands back to your feet and roll back up, stacking your spine one bone at a time. The transition is where the work happens. Moving through the space between the floor and the standing position requires total body control. It prevents the clunky, disjointed movement patterns we develop when we just move “as fast as possible.”
15. Side-Lying Leg Series
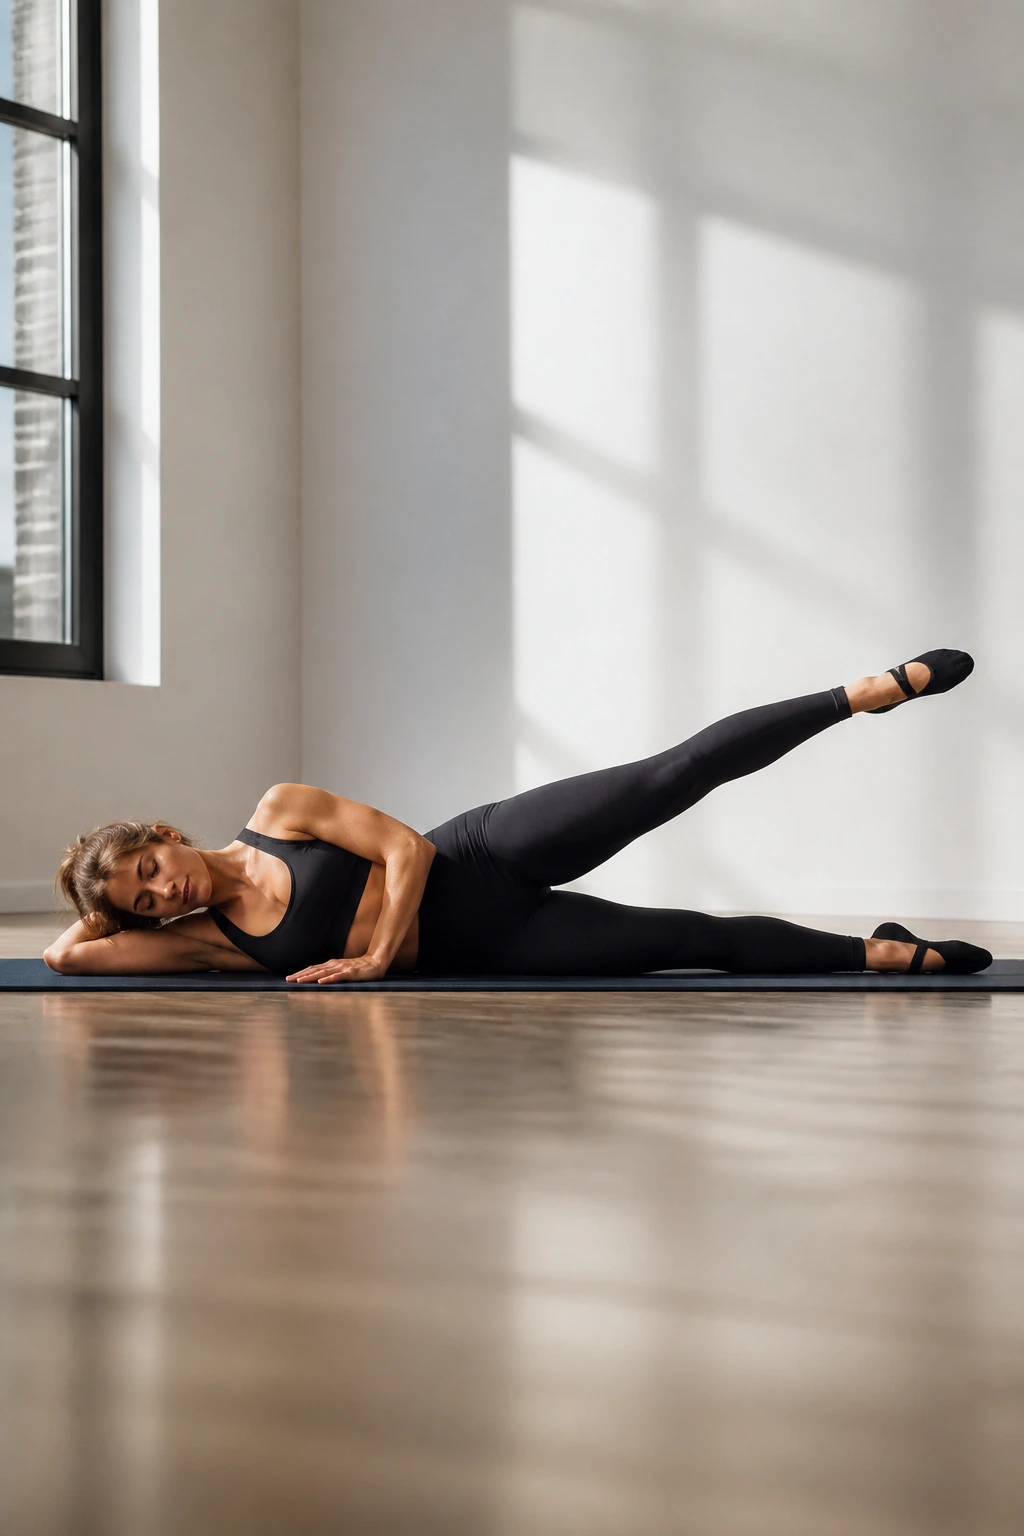
This is pure Pilates, but we are going to modify the foot position to mimic ballet. Lie on your side, legs stacked and slightly forward of your hips. Extend your bottom arm and rest your head on it. Point your toes—really point them, stretching through the arch of the foot.
Lift the top leg to hip height, then kick it forward twice, then sweep it back. Keep the top hip stacked directly over the bottom hip. Do not let it roll backward or forward. The movement should come purely from the hip socket.
This series targets the abductors and the external rotators of the hip. Because you are pointing the toes throughout, you are also engaging the calf and the ankle, creating a continuous line of energy. If you let the foot go “dead” (unpointed), you lose half the effectiveness of the exercise. Keep the leg active from the glute all the way to the tip of the toe.
16. Single-Leg Standing Balance
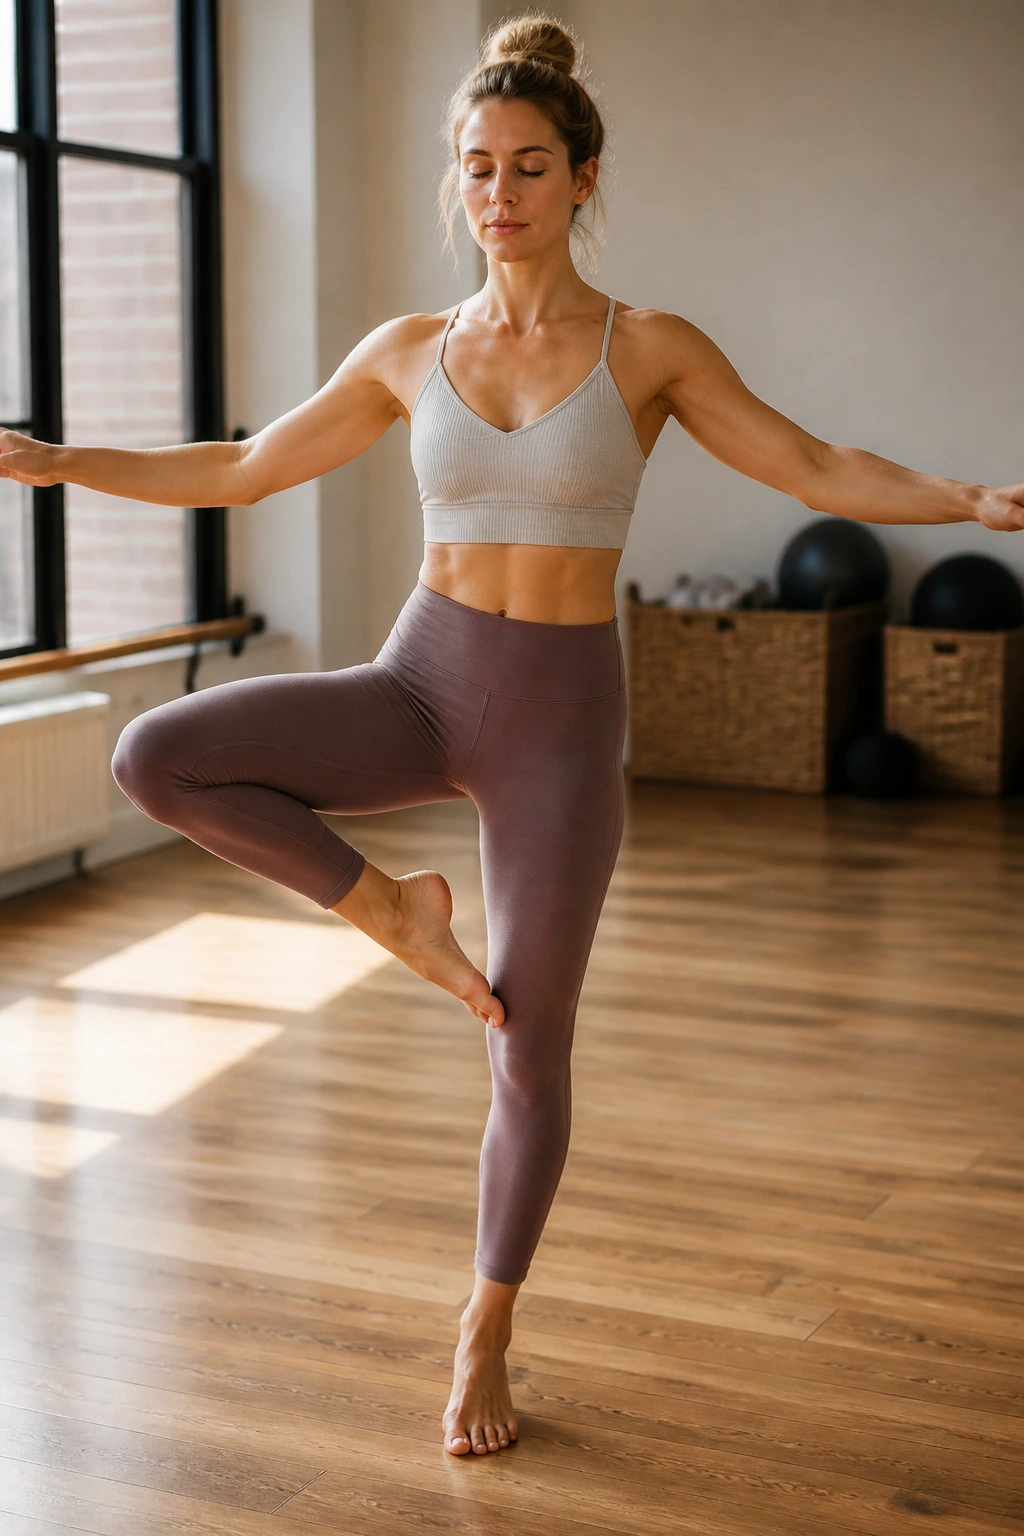
Sometimes the simplest movements are the most revealing. Stand on one leg. Lift the other leg just an inch off the floor, keeping it slightly bent. Now, simply stand there. Close your eyes.
You will immediately feel your standing ankle working to stabilize you. Micro-adjustments will ripple up through your calf and into your hip. This is where your body learns to balance. It is not a static state; it is a constant, tiny negotiation between your muscles and gravity.
If you want to make it a workout, add subtle movements. Tilt your torso slightly to the side, then back to center. Or, try to move your floating leg in a slow circle. This challenges your balance while your standing leg remains under tension. Do this for one minute per side, and you will understand why dancers spend hours on simple standing drills.
17. The Hundred with Pointe Feet
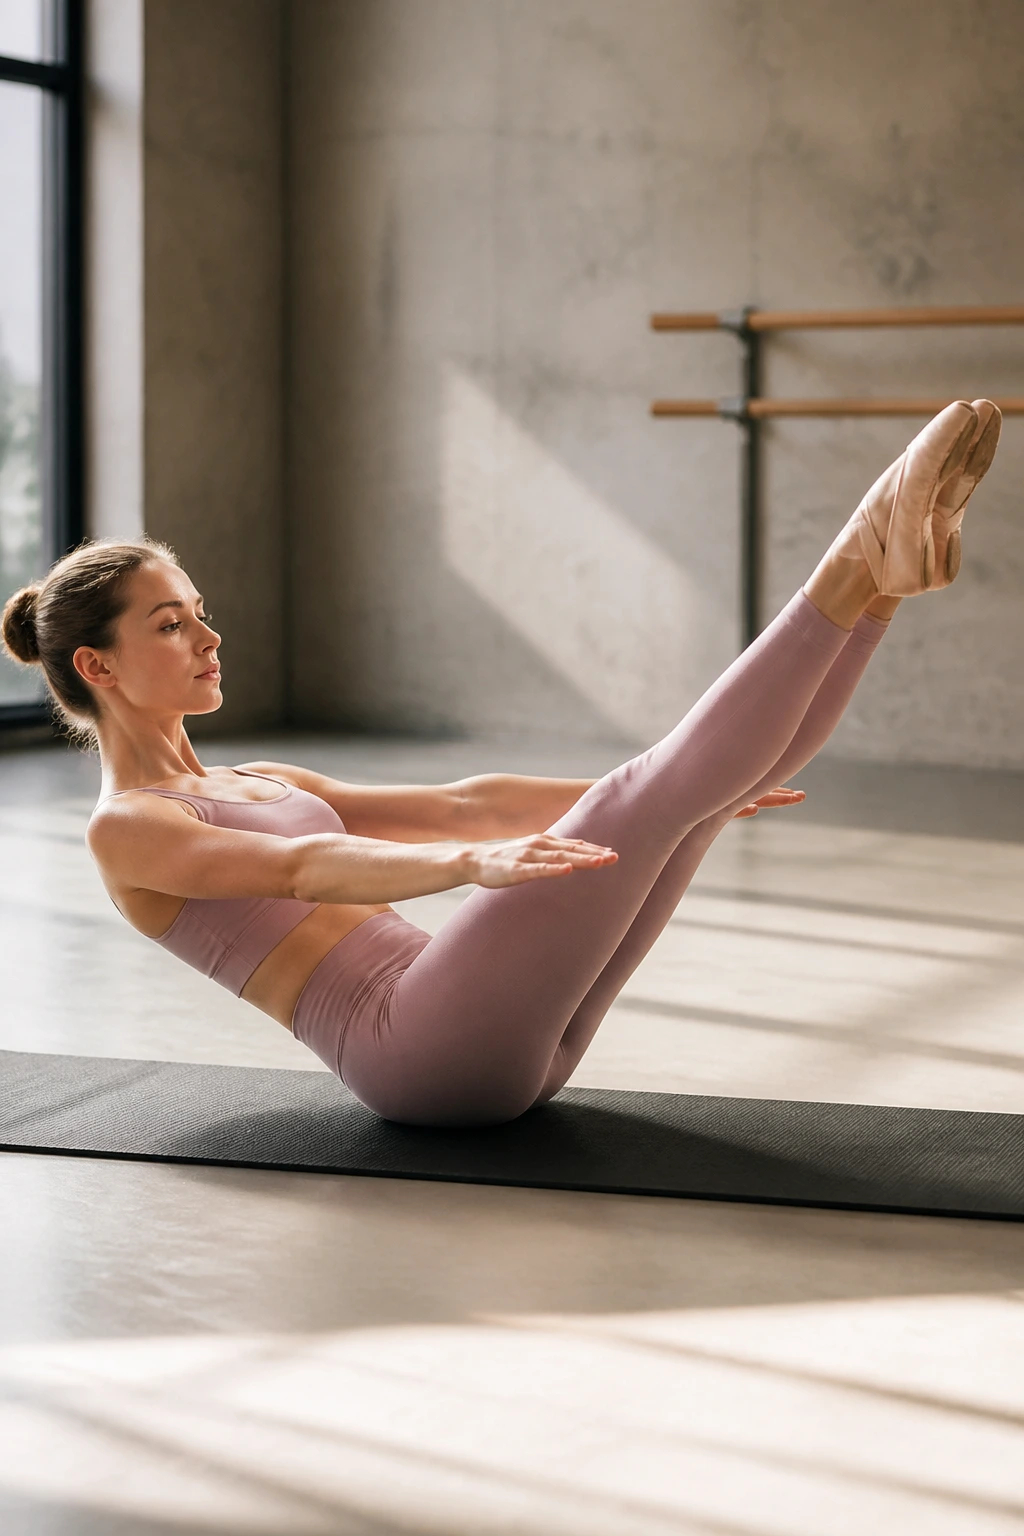
The “Hundred” is the most famous Pilates exercise, usually done with flexed feet. We are going to change the intent. Lie on your back, knees in tabletop, head and shoulders curled up. Extend your legs out to a forty-five-degree angle and point your toes with the intensity of a prima ballerina.
Pump your arms up and down as you inhale for five counts and exhale for five counts. Repeat this until you reach one hundred. The difference here is the foot position. By pointing your toes, you activate the entire kinetic chain of your legs. You will feel the connection through the shins, the quads, and the lower abs much more intensely.
If your neck starts to hurt, drop your head back down to the mat, but keep the legs and arms working. The core is the priority. The curled head position is secondary. You should feel your abdominal wall working hard to keep your lower back pressed firmly into the floor.
18. Mermaid Stretch
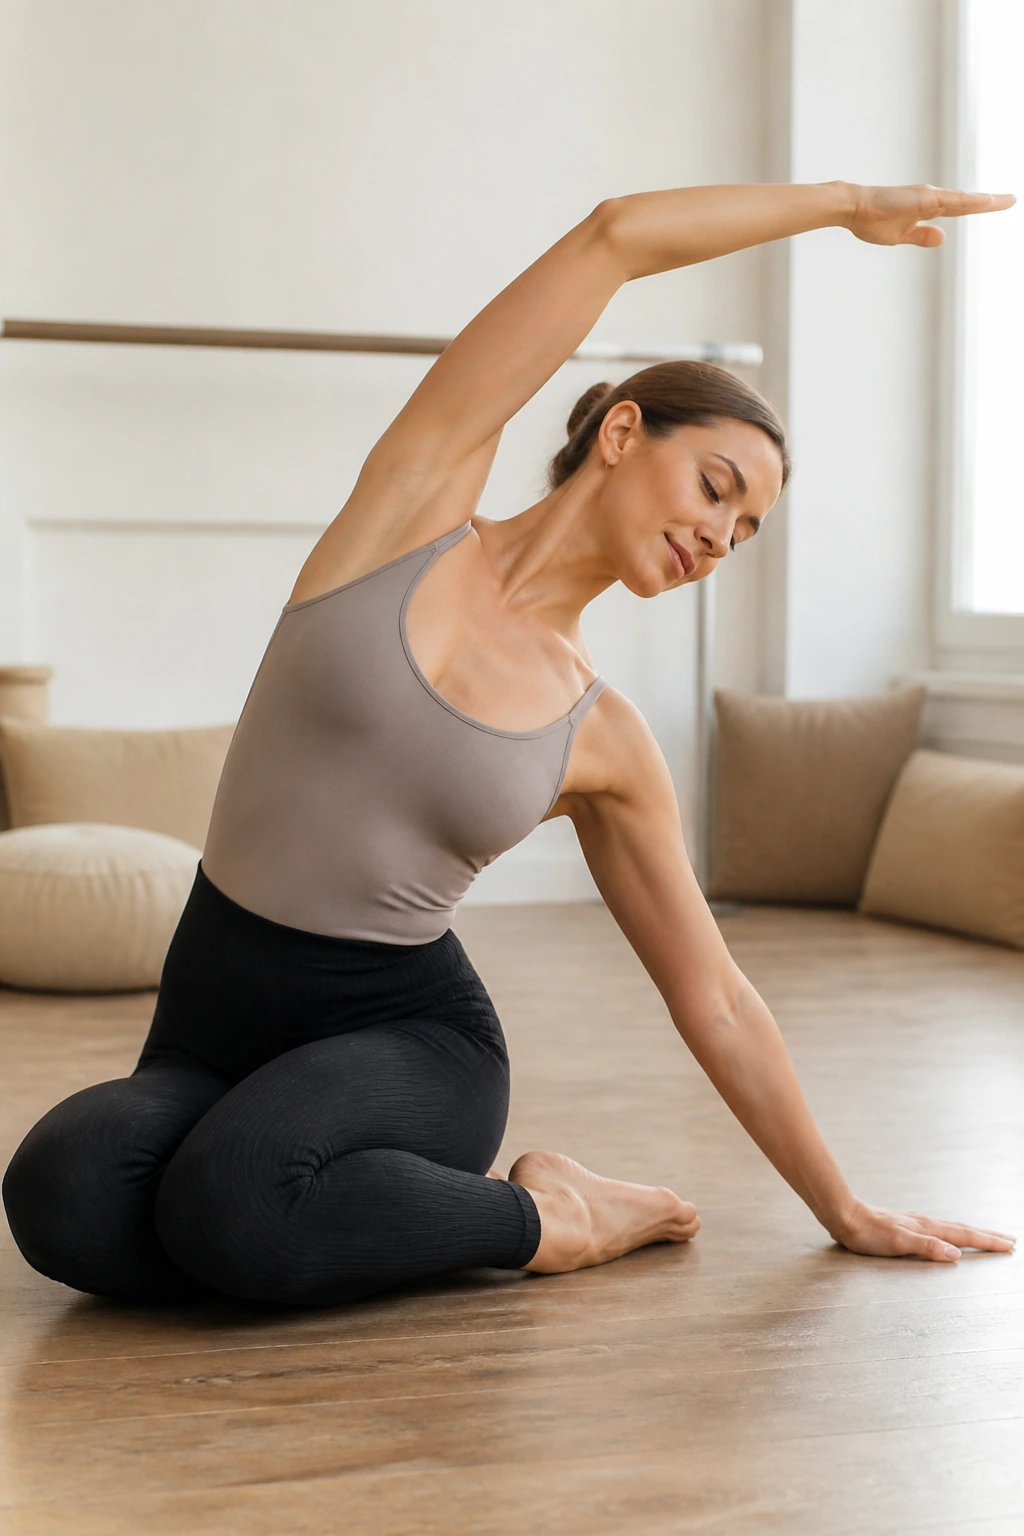
Sit on the floor with your legs tucked to one side, like a mermaid. Place one hand on the floor and reach your other arm up and over your head, bending your torso into a lateral stretch. This is the setup. Now, turn it into a dynamic exercise.
Inhale to reach long, stretching the ribcage. Exhale to return to center, using your obliques to pull your torso upright. Do not use your hand on the floor to push you up. The work must come from your side abdominals.
This exercise provides the “lengthening” that ballet-pilates is famous for. It creates space in the spine and the ribcage. It is the perfect antidote to the “crunching” feeling we get from doing too many sit-ups. You are strengthening your core in a lengthened position, which is far more functional than shortening it.
19. Saw with Port de Bras
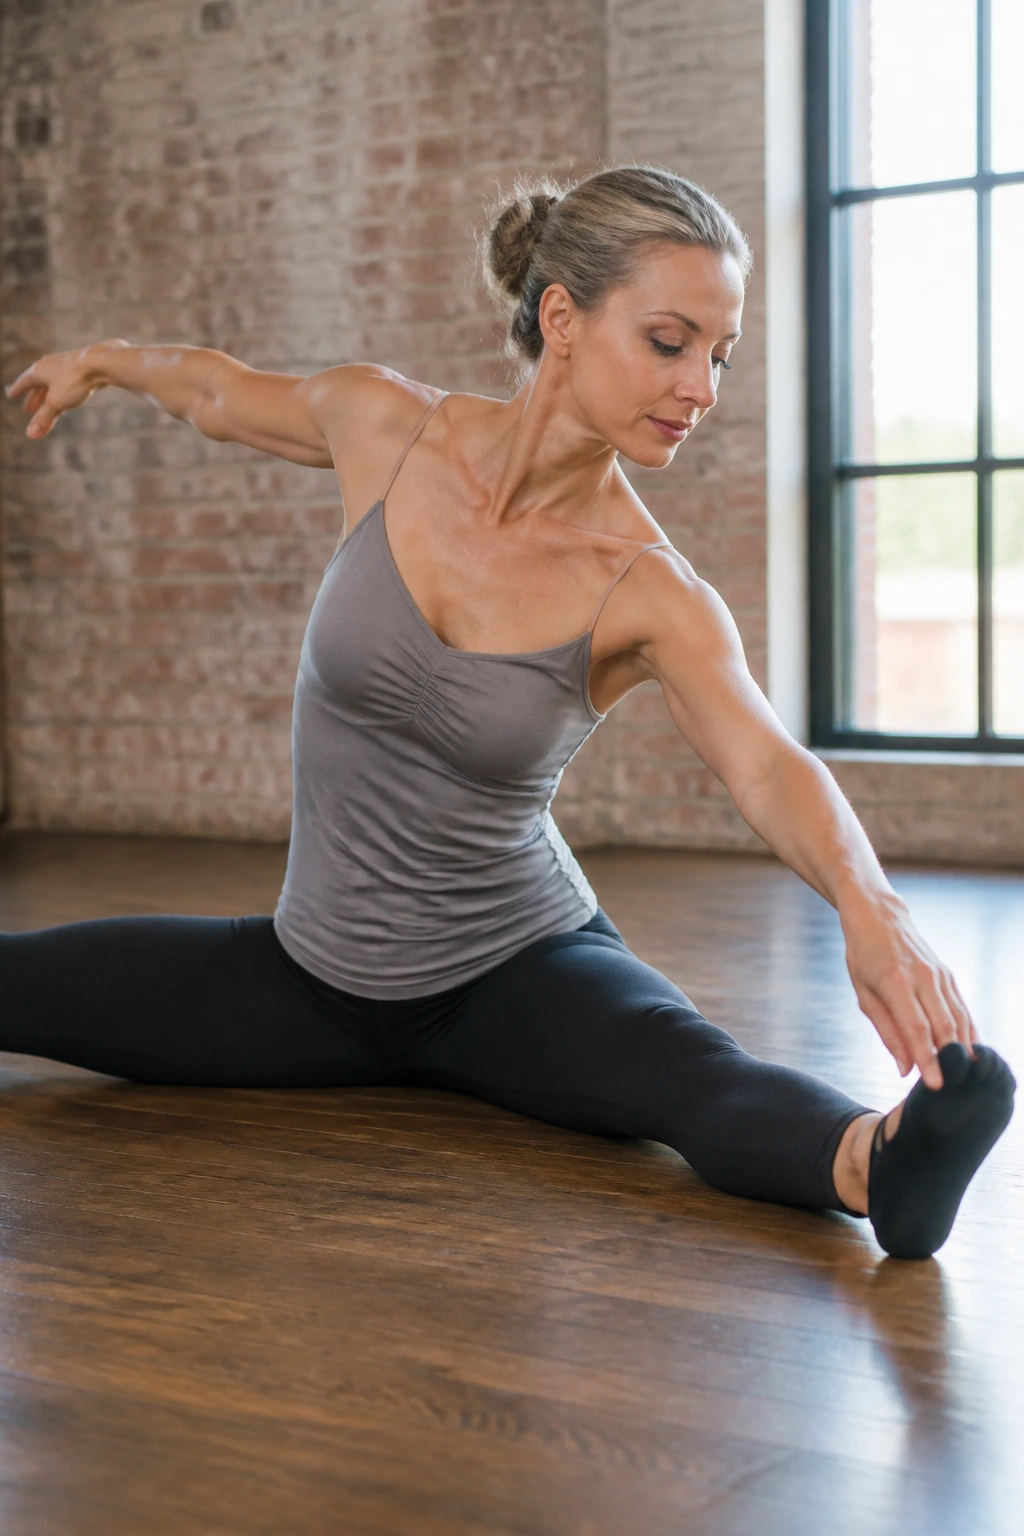
Sit with your legs wide apart, feet flexed. Reach your arms out to the sides in that rounded ballet shape. Twist your torso to the right, and then reach your left hand toward your right pinky toe, rounding your spine forward.
The key to the “Saw” is the opposition. As you reach forward, keep your left hip glued to the floor. Do not let it lift. The rotation comes from your waist, not your hips. The ballet-style arm carriage forces you to keep your chest open and your shoulders down, even as you rotate.
This is a deep oblique and hamstring stretch. It is excellent for spinal mobility. If you cannot reach your toe, that is perfectly fine. Reach for your shin or your knee. The goal is not the toe; the goal is the twist and the stabilization of the hips. Focus on keeping your sit-bones grounded.
20. Corkscrew with Pointed Toes
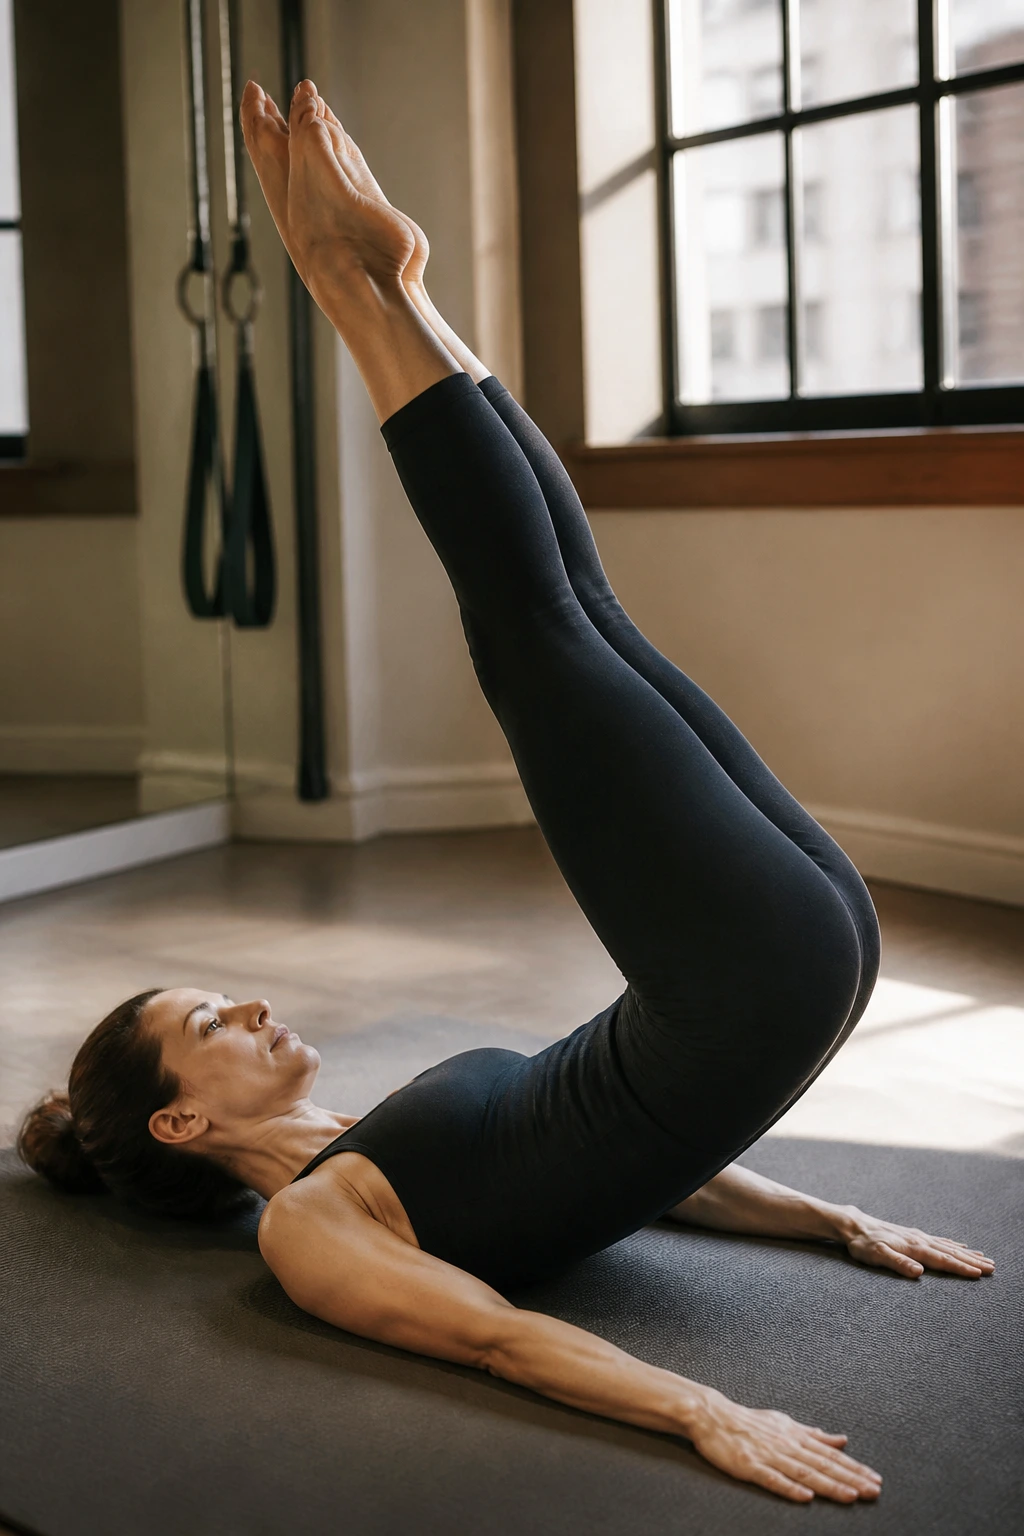
Lie on your back, legs straight up toward the ceiling. Point your toes intensely. Glue your legs together—they should feel like one single unit. Slowly circle your legs to the right, down toward the floor, and back up to the left, using your core to control the movement.
This is a test of pelvic stability. Your hips should remain perfectly still on the mat. If your hips are rocking and rolling with your legs, you are not using your abs; you are using your momentum. Make the circles smaller if you have to, but keep the pelvis anchored.
The pointed toes are essential. They act as a visual guide to ensure your legs are working and that the energy is extended all the way through your body. This exercise is the ultimate core drill, as it demands stabilization while the legs are creating a large, circular lever. If you can do ten perfect, slow circles without your lower back popping off the floor, your core is in excellent shape.
Final Thoughts
You might notice a theme as you progress through these movements. It is never about the drama of the kick or the height of the lift. It is about the quiet, invisible work that happens when you refuse to let your body sag or swing.
That is the intersection of ballet and Pilates. It is where grace meets structural integrity. You are building a body that is not just aesthetically pleasing but functionally resilient. Stick to the basics, focus on the alignment cues, and remember that in this method, the smallest movement often yields the biggest result. Slow down, breathe into the shapes, and let your body learn to hold itself together.
