



A stronger core does not come from endless crunches. The best ab workouts do two jobs at once: they build muscle you can actually feel, and they teach your trunk to stay stacked when the rest of you is moving.
That matters more than people think. A visible midsection depends on muscle, sure, but a useful core also keeps your ribs from flaring, your pelvis from dumping forward, and your lower back from doing all the work.
I like core training that mixes floor drills, hanging work, carries, and a few anti-rotation moves. Crunches still have a place. So do planks, rollouts, and loaded walks that make your obliques earn their keep.
Start with control, not speed. The first move looks easy on paper, which is usually a good sign.
1. Dead Bug for Ab Workouts That Teach Bracing
If you want one exercise that tells the truth about your core, start here. The dead bug looks tame, but it forces your abs to hold your ribs down while your arms and legs move away from your centerline.
Lie on your back with your arms pointed at the ceiling and your hips and knees bent at 90 degrees. Press your lower back gently into the floor, then lower one opposite arm and leg at the same time. Move slow. If your back arches, you’ve gone too far.
What to feel
- Your lower abs should tighten before the limb moves.
- Your ribcage should stay quiet.
- Your lower back should not pop off the floor.
Best starter load: bodyweight only, 6 to 10 reps per side, with a 2-second exhale on each rep.
Harder version: hold a light dumbbell in one hand or extend the leg a little lower without losing contact through your low back.
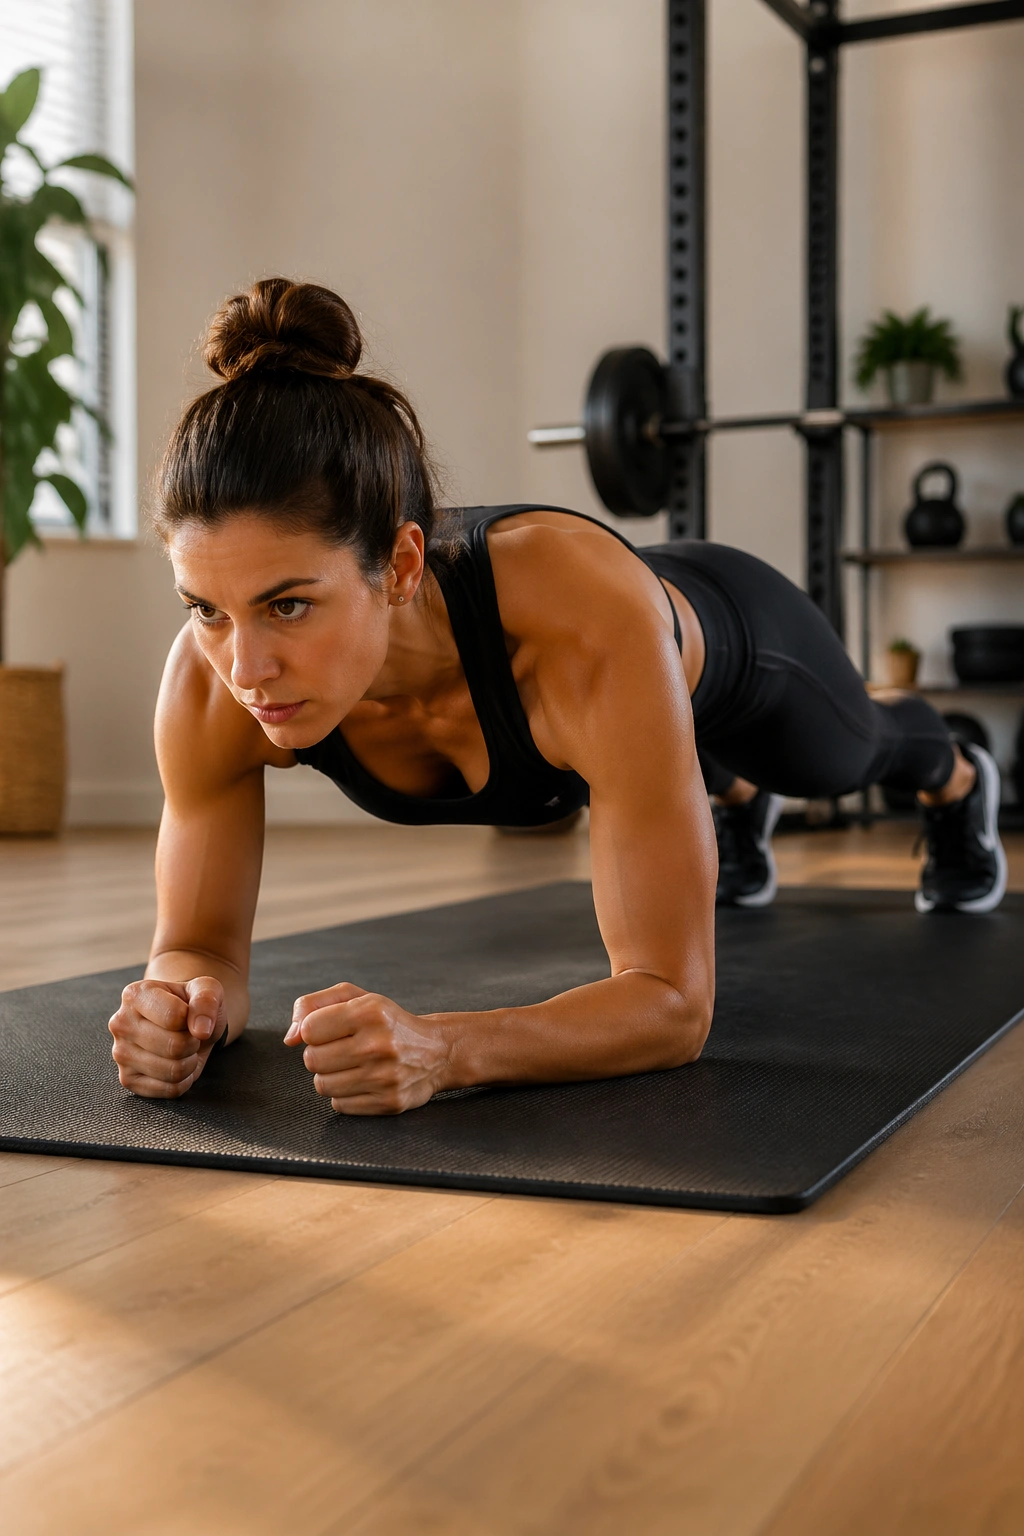
2. Forearm Plank
Why does a plank feel harder than it looks? Because it exposes every loose part of your brace. If your ribs flare, your hips sag, or your glutes go soft, the plank makes that obvious fast.
Set your elbows under your shoulders and walk your feet back until your body makes a straight line from head to heels. Squeeze your glutes, tuck your pelvis slightly, and keep your neck long. You are not trying to survive the hold. You are trying to make it clean.
A good plank feels like pressure through the whole midsection, not a pinch in the lower back. Once that pinch shows up, stop. Quality beats duration every time.
Hold for 20 to 45 seconds and rest 30 to 60 seconds. If 20 seconds feels shaky, shorten the hold and rebuild it. That is smarter than chasing a sloppy minute.
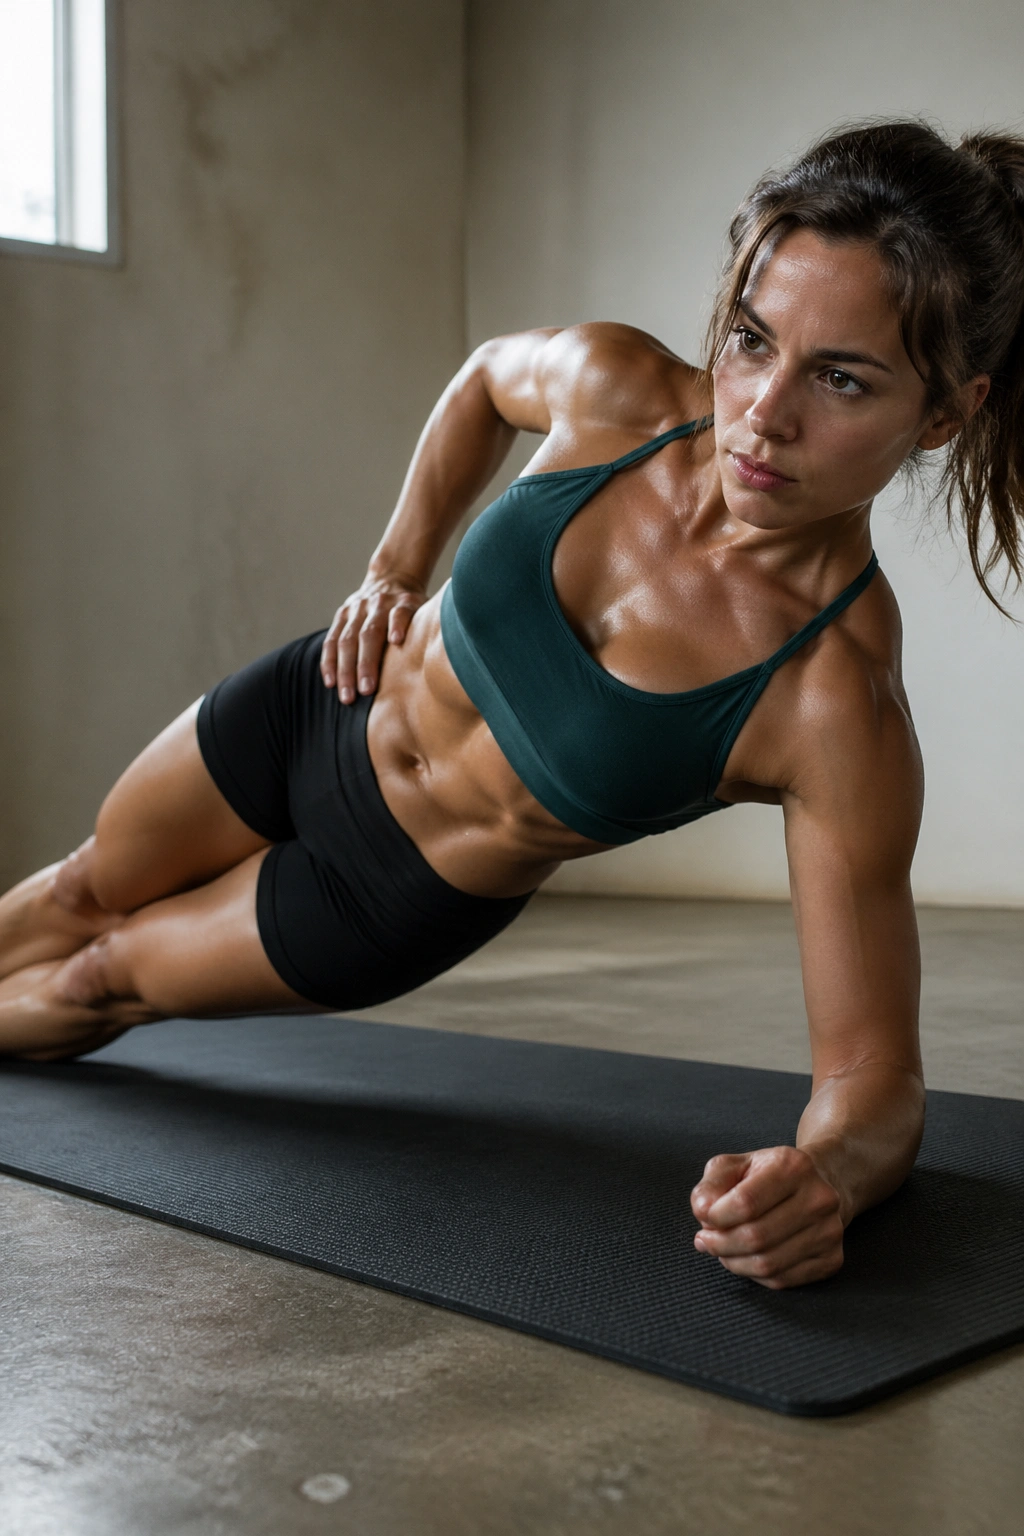
3. Side Plank
Side planks deserve more respect than they get. The obliques do not just twist the torso; they also stop you from collapsing sideways, and that matters in lifting, running, and carrying groceries without tilting like a broken shopping cart.
Stack your feet, place your elbow under your shoulder, and lift your hips until your body makes one long line. If that’s too much, drop the bottom knee and keep the same shape from knee to shoulder. Hold steady. No bouncing.
How to make it useful
- Keep the top shoulder pulled slightly back.
- Think “hips high,” not “hips forward.”
- Hold 15 to 30 seconds per side, then switch.
Once you can stay solid without shaking like mad, raise the top leg or add a reach-through. That turns a basic hold into a real challenge.
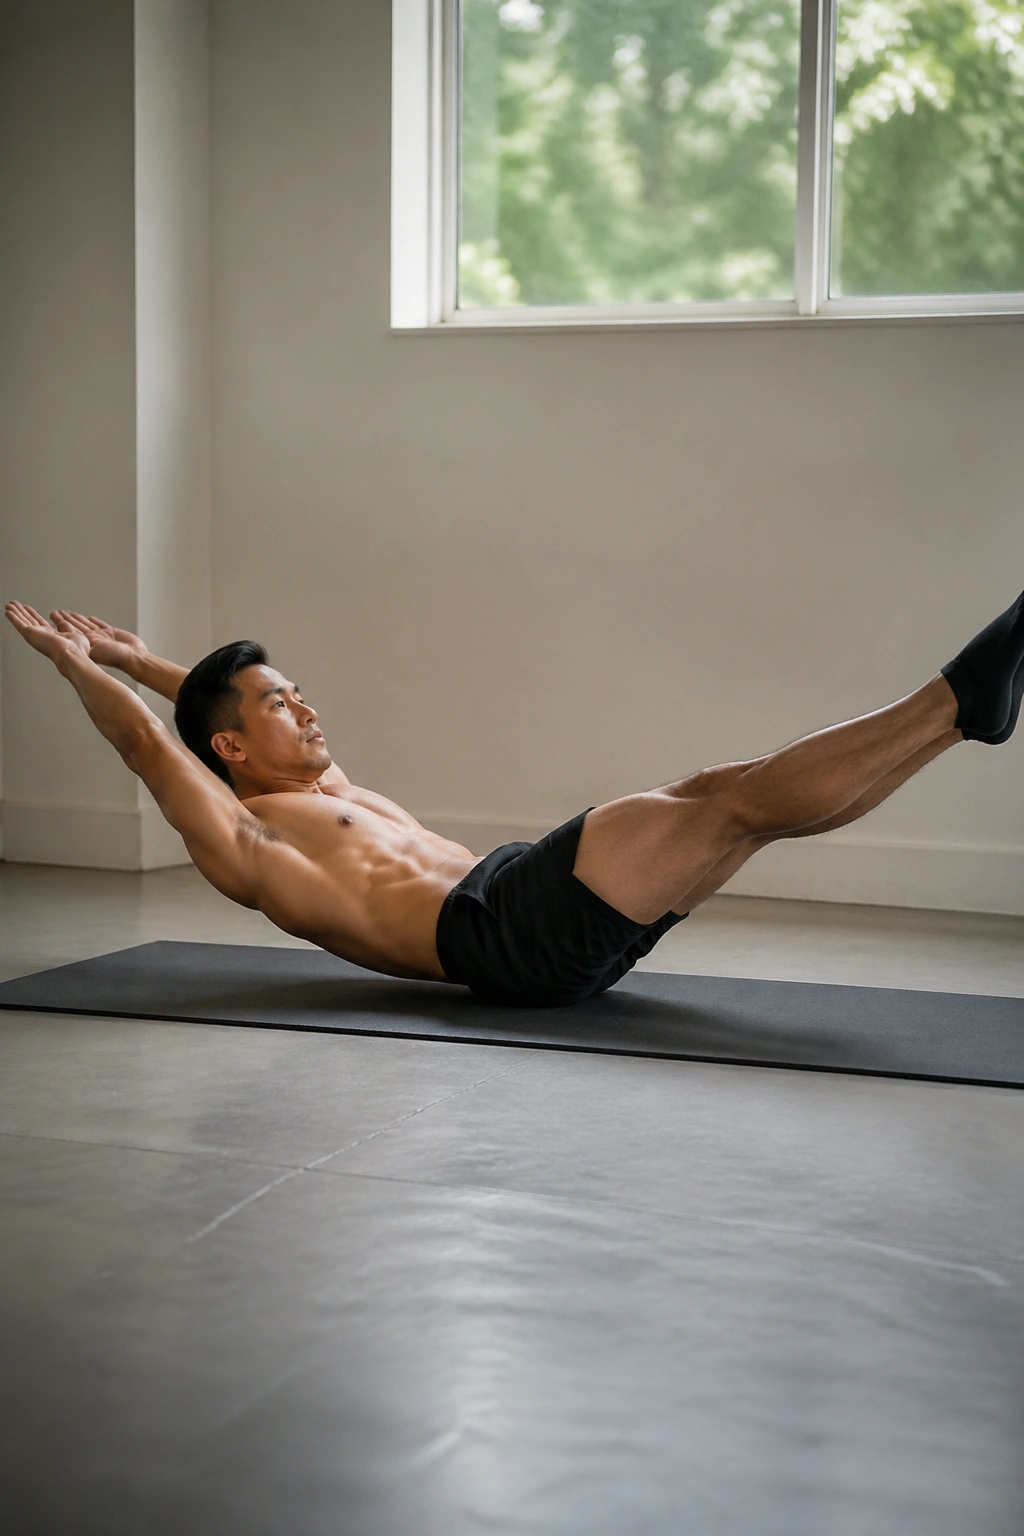
4. Hollow Body Hold
The hollow body hold is one of those exercises gymnasts make look effortless, which is rude, because it is not effortless at all. It lights up the front of the torso, teaches rib control, and builds the kind of tension that carries over to hanging work and rollouts.
Lie on your back, press the floor with your low back, and lift your shoulders and legs a few inches. The lower back stays pinned. The chin stays slightly tucked. If you start feeling this in your hip flexors before your abs, bring the knees in a bit.
It helps to think small. Tiny adjustments matter here more than heroics.
Hold 10 to 30 seconds. If your back pops up, regress to a tuck hollow hold with bent knees. That version still works, and it is a lot better than pretending the full version is under control.
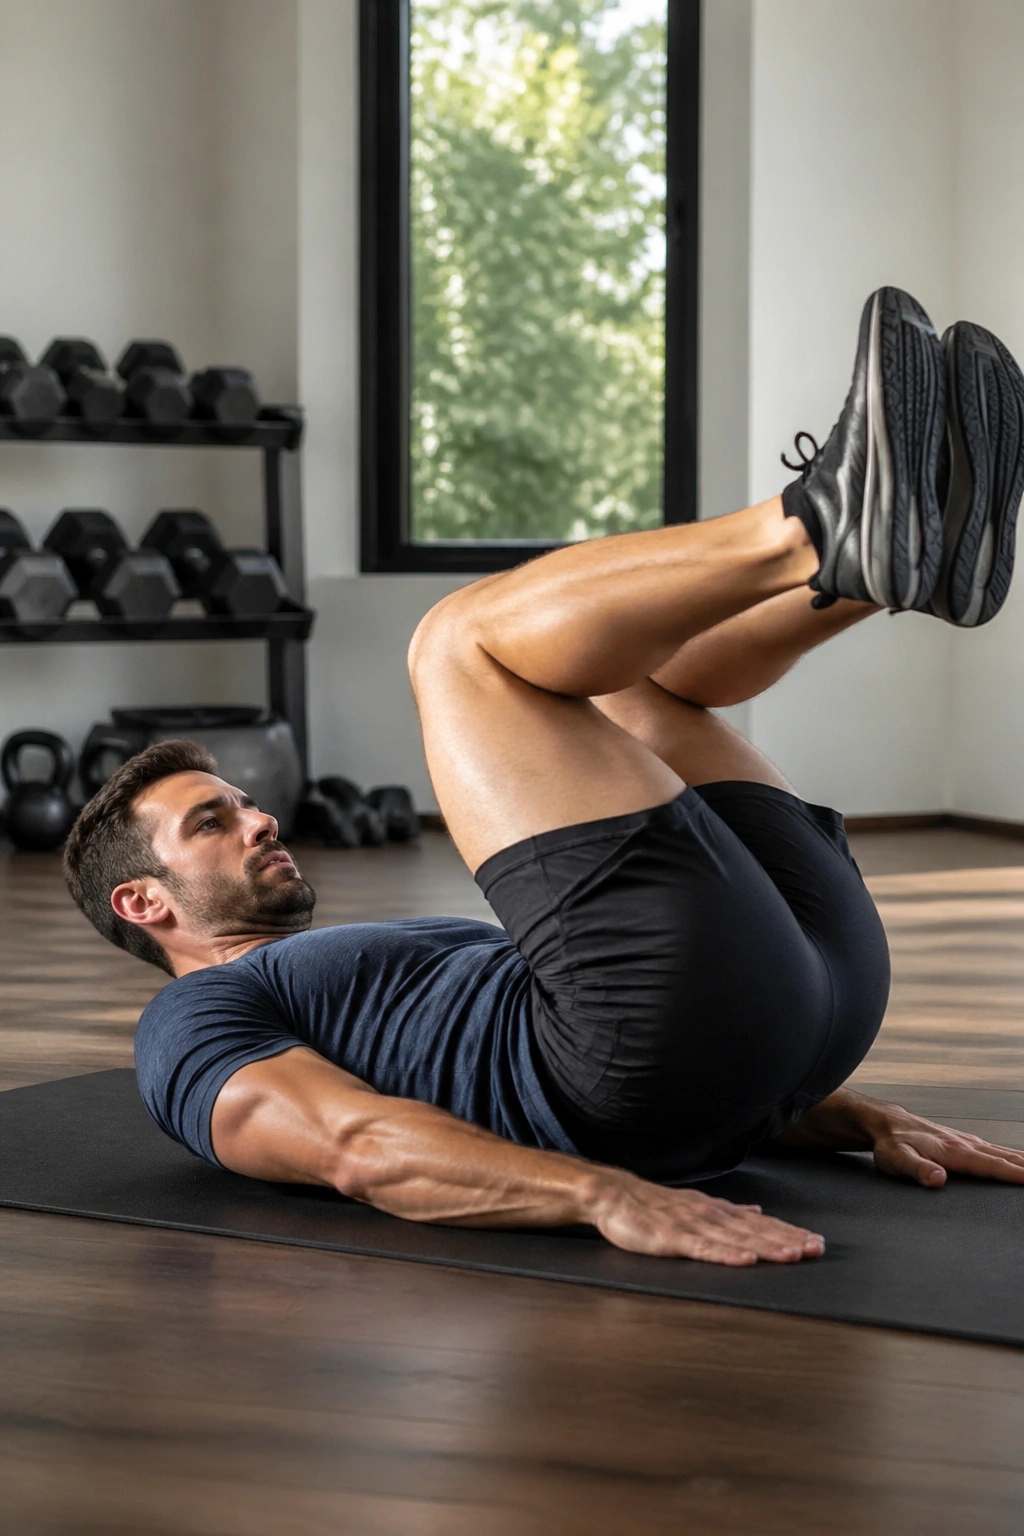
5. Reverse Crunch
Reverse crunches are one of the cleanest ways to train the lower portion of the rectus abdominis without yanking on your neck. They are also a nice reminder that abs work by curling the pelvis, not by flinging the legs around like a metronome.
Start on your back with knees bent and feet off the floor. Exhale, curl your pelvis upward, and let your knees travel toward your chest. The movement is small. The pelvis should roll up, not the legs swing toward your face.
If you do these right, the burn shows up low in the abdomen and stays there. If you do them wrong, your momentum takes over and your lower back starts complaining.
Watch for this
- Do not kick your legs to help.
- Do not yank with your hands.
- Pause for one second at the top.
Use 8 to 15 controlled reps, and slow the lowering phase to make the exercise count.
6. Bicycle Crunch
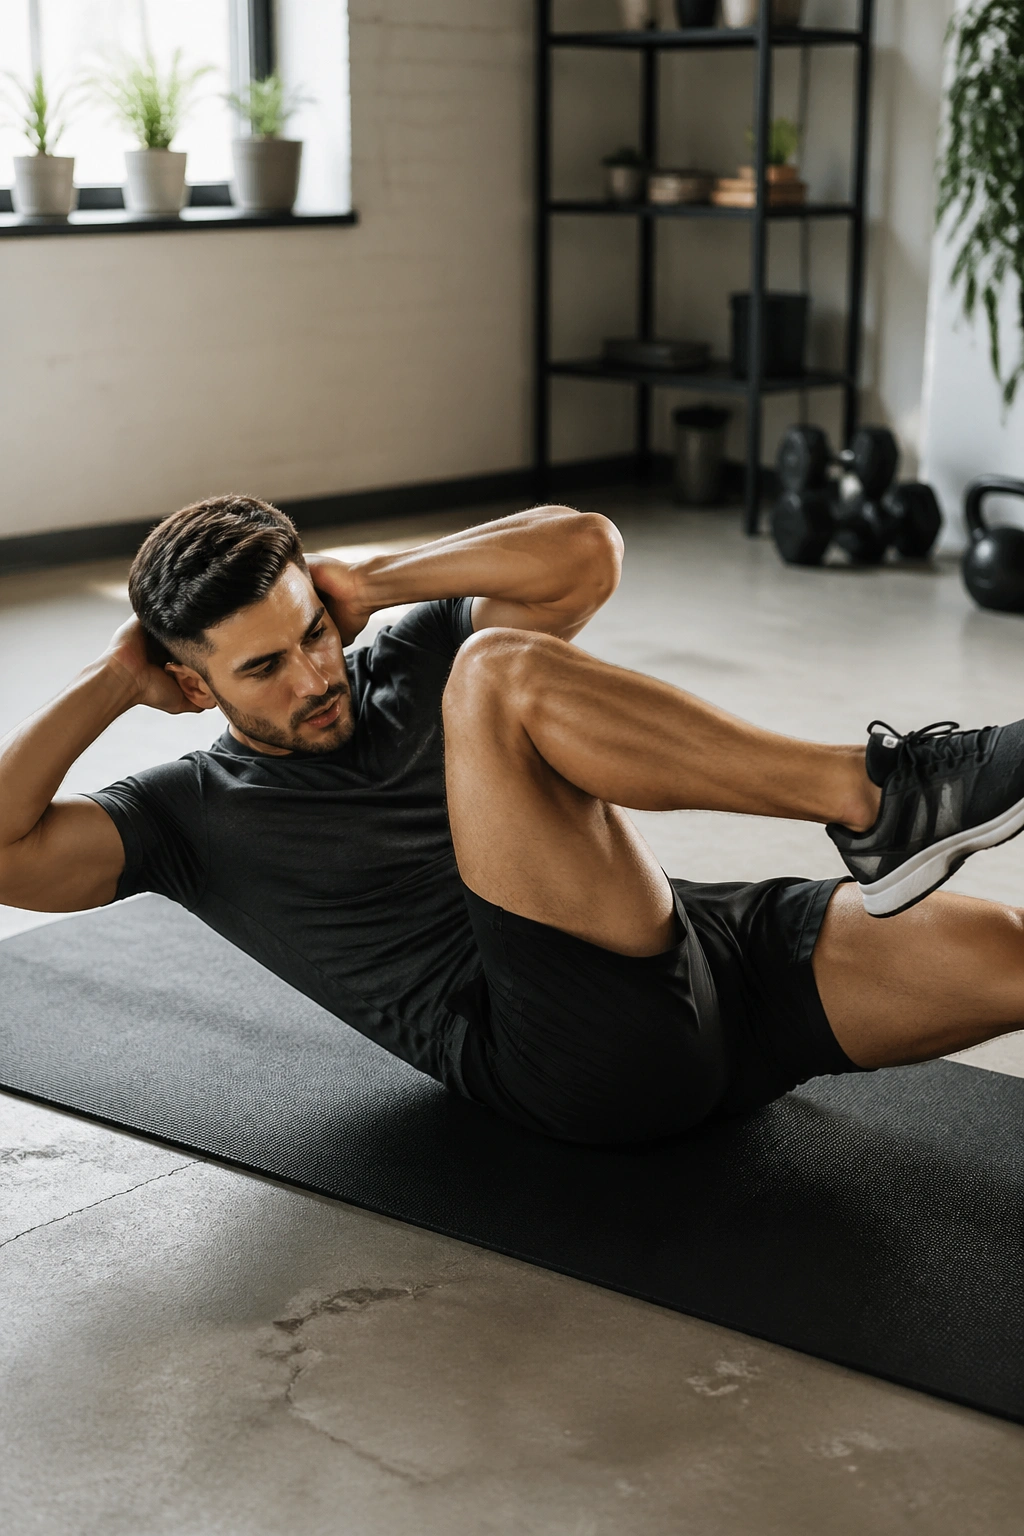
A bicycle crunch done fast is noise. A bicycle crunch done slowly is a real ab exercise.
The temptation is to rush through it and call the burn “cardio.” Don’t. Twist from the ribcage, bring one elbow toward the opposite knee, and fully extend the other leg without losing your brace. The slow version feels awkward for the first few reps, then it starts to bite.
I prefer this move when someone wants a bit more dynamic work than a plank but is not ready for hanging raises or loaded rotations. It still hits the obliques, and it asks the hip flexors to help without letting them hijack the whole thing.
Use 8 to 12 reps per side. If your neck gets tense, keep your hands light at the sides of your head instead of pulling.
7. Heel Tap Crunch
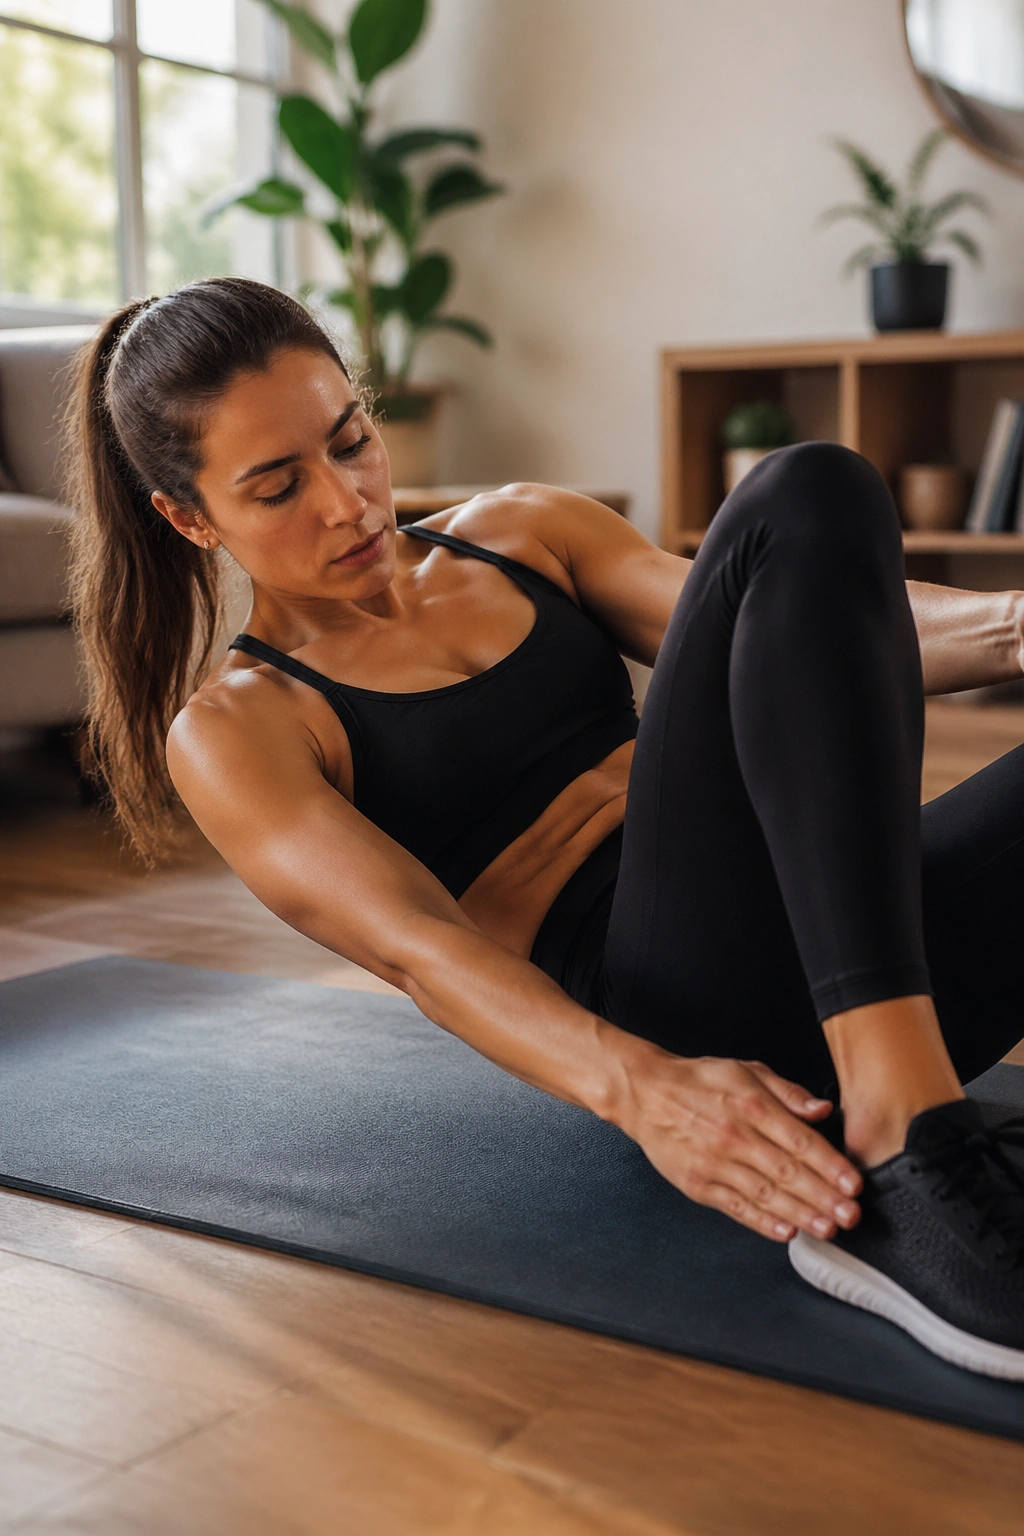
Heel taps are one of the friendliest ab moves for beginners, but do not mistake friendly for easy. The small range keeps the lower back calmer while the front of the torso stays under tension.
Lie on your back with your knees bent and feet flat. Curl your shoulders off the floor just enough to keep the abs engaged, then reach one hand toward the same-side heel and switch sides. The torso should stay lifted the whole time. If you lie all the way back down between taps, you lose the tension.
How to use it
- Keep the neck relaxed and the chin slightly tucked.
- Tap the heels, not the floor behind you.
- Use 12 to 20 total reps.
This is a good move for the end of a workout when you want a deep burn without going full chaos mode. It also works well in circuits because it does not require much setup.
8. Hanging Knee Raise
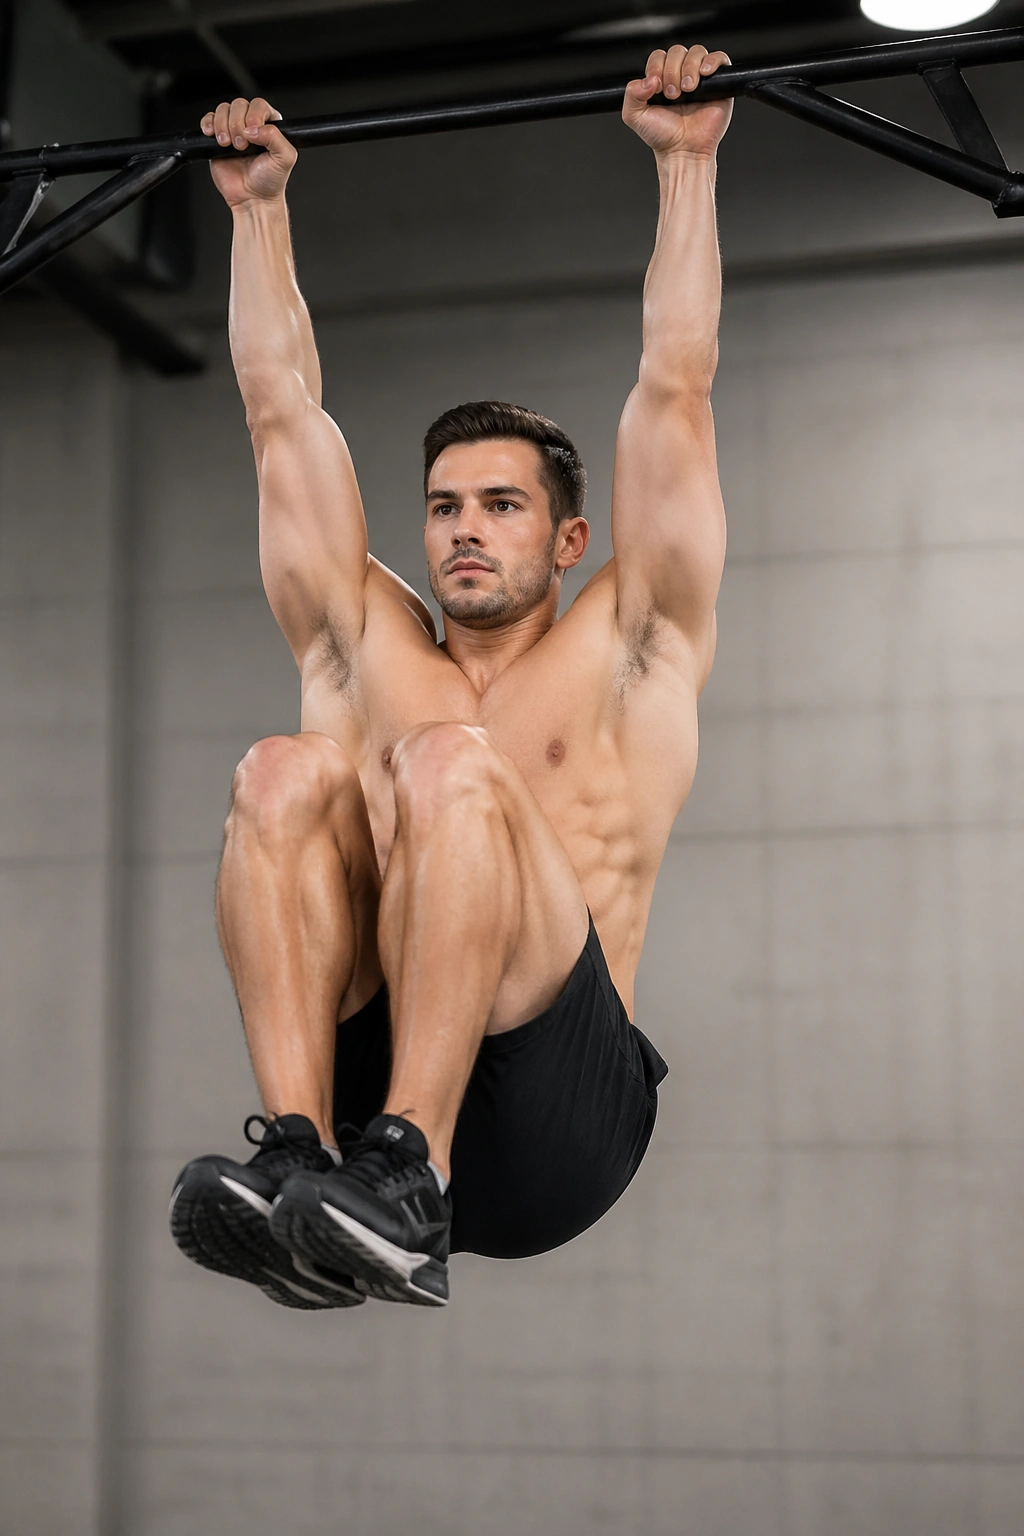
If floor work feels too easy, hanging knee raises change the conversation fast. Grip strength, shoulder stability, and core control all show up at once, and sloppy reps are obvious from across the room.
Hang from a pull-up bar with your shoulders packed down. Bring your knees up toward your chest, then lower them slowly without swinging. The trick is to start each rep by bracing the abs and lightly tucking the pelvis, not by heaving the legs up like you are trying to start a lawn mower.
That little pelvic tuck matters. A lot.
Use 6 to 12 reps. If the swing gets wild, pause between reps or use a captain’s chair so your body stops acting like a pendulum.
9. Hanging Leg Raise
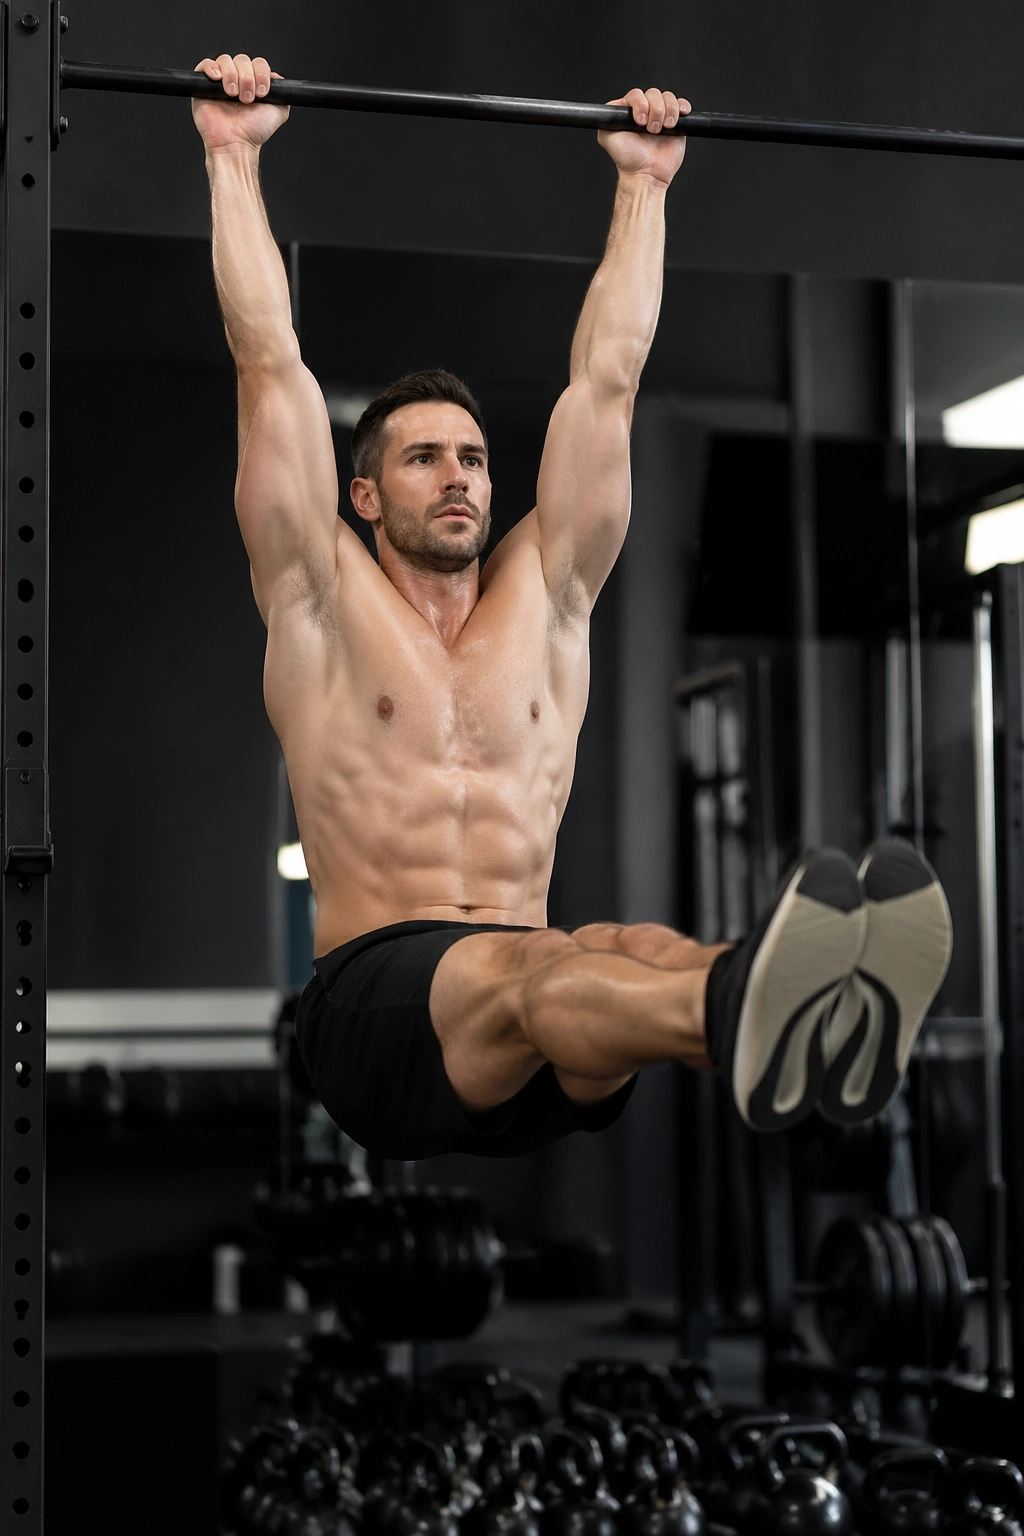
Can you keep your torso still while your legs move? That is the real test here. Hanging leg raises are the harder sibling of knee raises, and they punish weak bracing immediately.
Start with bent knees if straight-leg reps are too much. Lift the legs under control, pause near hip height or a little higher, then lower for 2 to 3 seconds. If your lower back arches hard on the way down, shorten the range and earn back control.
I like this exercise because it teaches patience. No rushing. No kicking. No swinging.
Use 5 to 10 reps, and treat each lowering phase like a separate rep. If you can do that cleanly, you are ahead of most people already.
10. V-Up
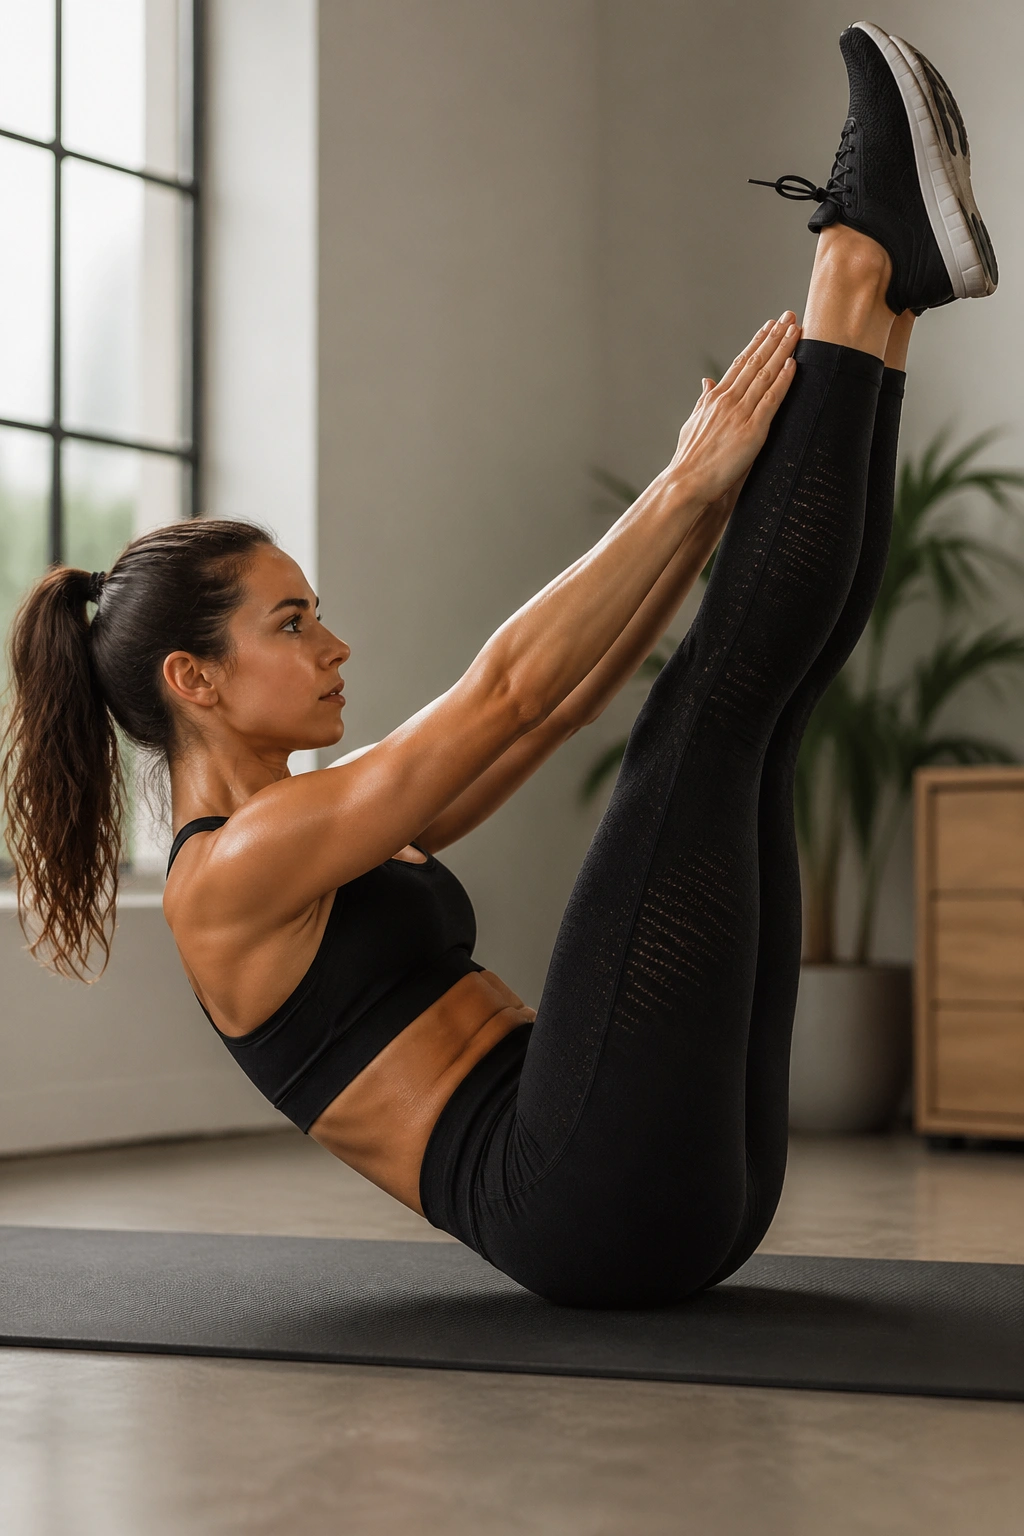
A V-up is what happens when a crunch and a leg raise decide to meet in the middle. It asks for compression, timing, and a decent amount of hamstring mobility, which is why people either love it or groan the second they see it.
Start flat, then lift your torso and legs at the same time, reaching your hands toward your shins or feet. If the full version is too much, bend the knees a little or work one leg at a time. The goal is a sharp fold through the center, not a wild throw of the limbs.
Do not let momentum take over. That is the fastest route to a sloppy rep and a tight hip flexor.
Aim for 6 to 12 controlled reps. Once you can keep the shape crisp, the exercise starts feeling a lot more serious.
11. Russian Twist
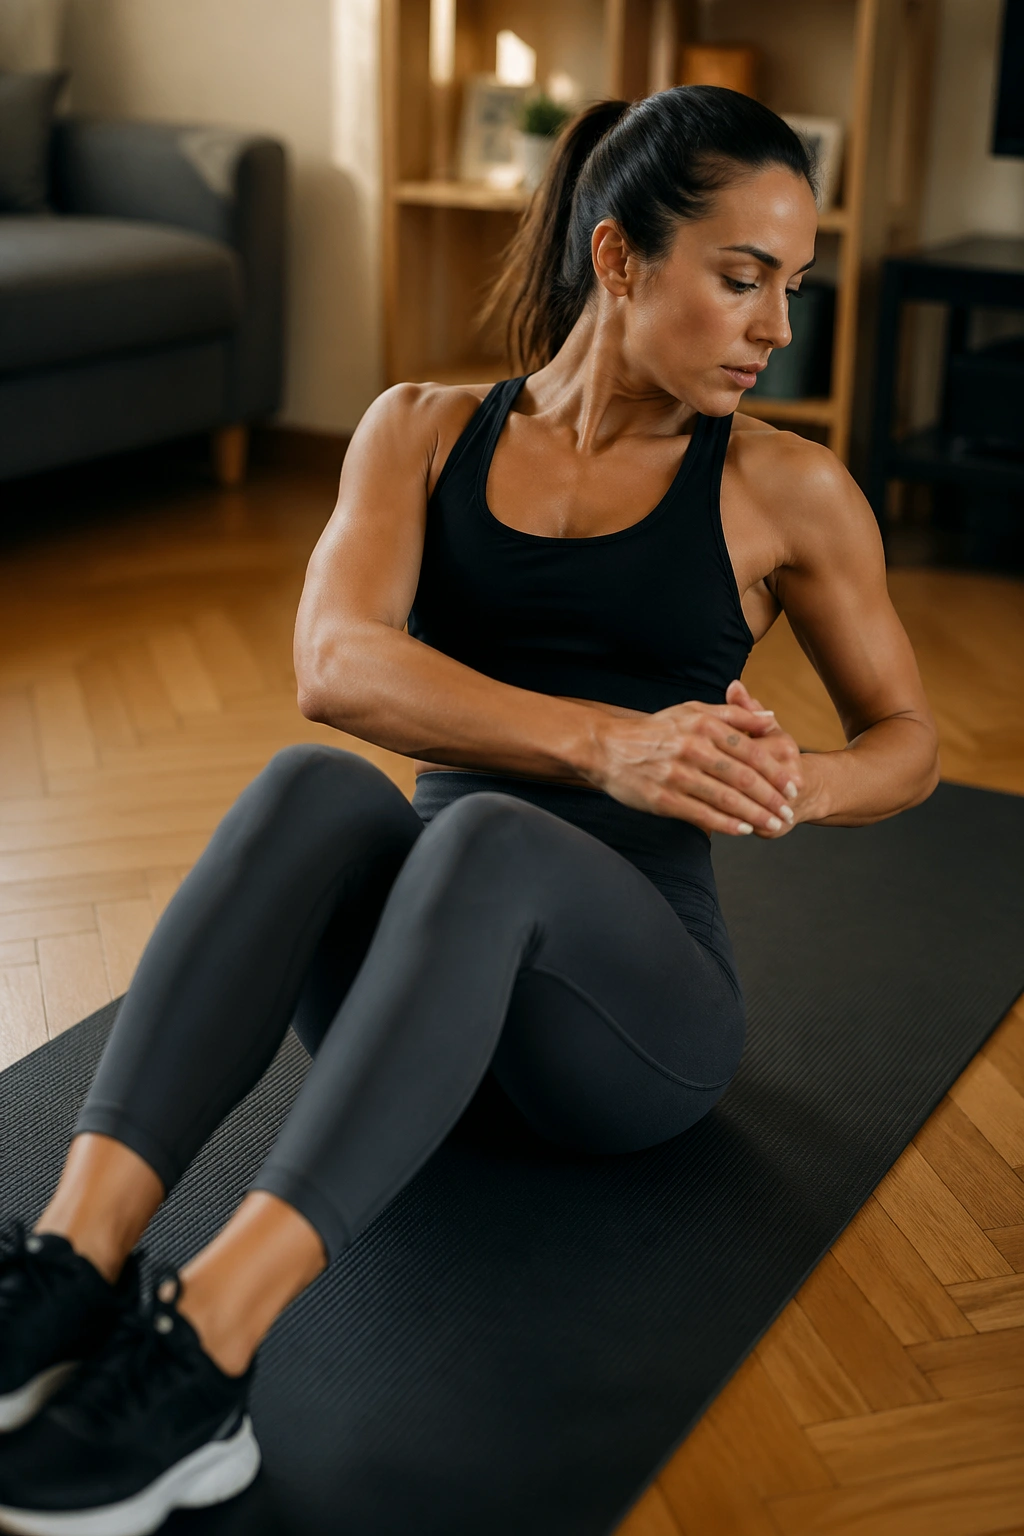
Russian twists get a bad reputation, and honestly, sometimes they deserve it. People load them too heavy, swing too fast, and rotate from the arms instead of the torso. Then they wonder why the lower back feels cranky.
Do the simple version first. Sit tall, lean back just enough to engage the abs, and rotate the ribcage from side to side with feet on the floor if needed. A light medicine ball or dumbbell is enough. Heavy load is not the point here unless your form is already solid.
What makes it different
Unlike a lot of crunch variations, this one trains rotation directly. That can be useful, but only when the movement stays controlled and the pelvis does not rock everywhere.
Use 8 to 16 total twists. If the lower back starts rounding hard, stop and shorten the range.
12. Mountain Climber
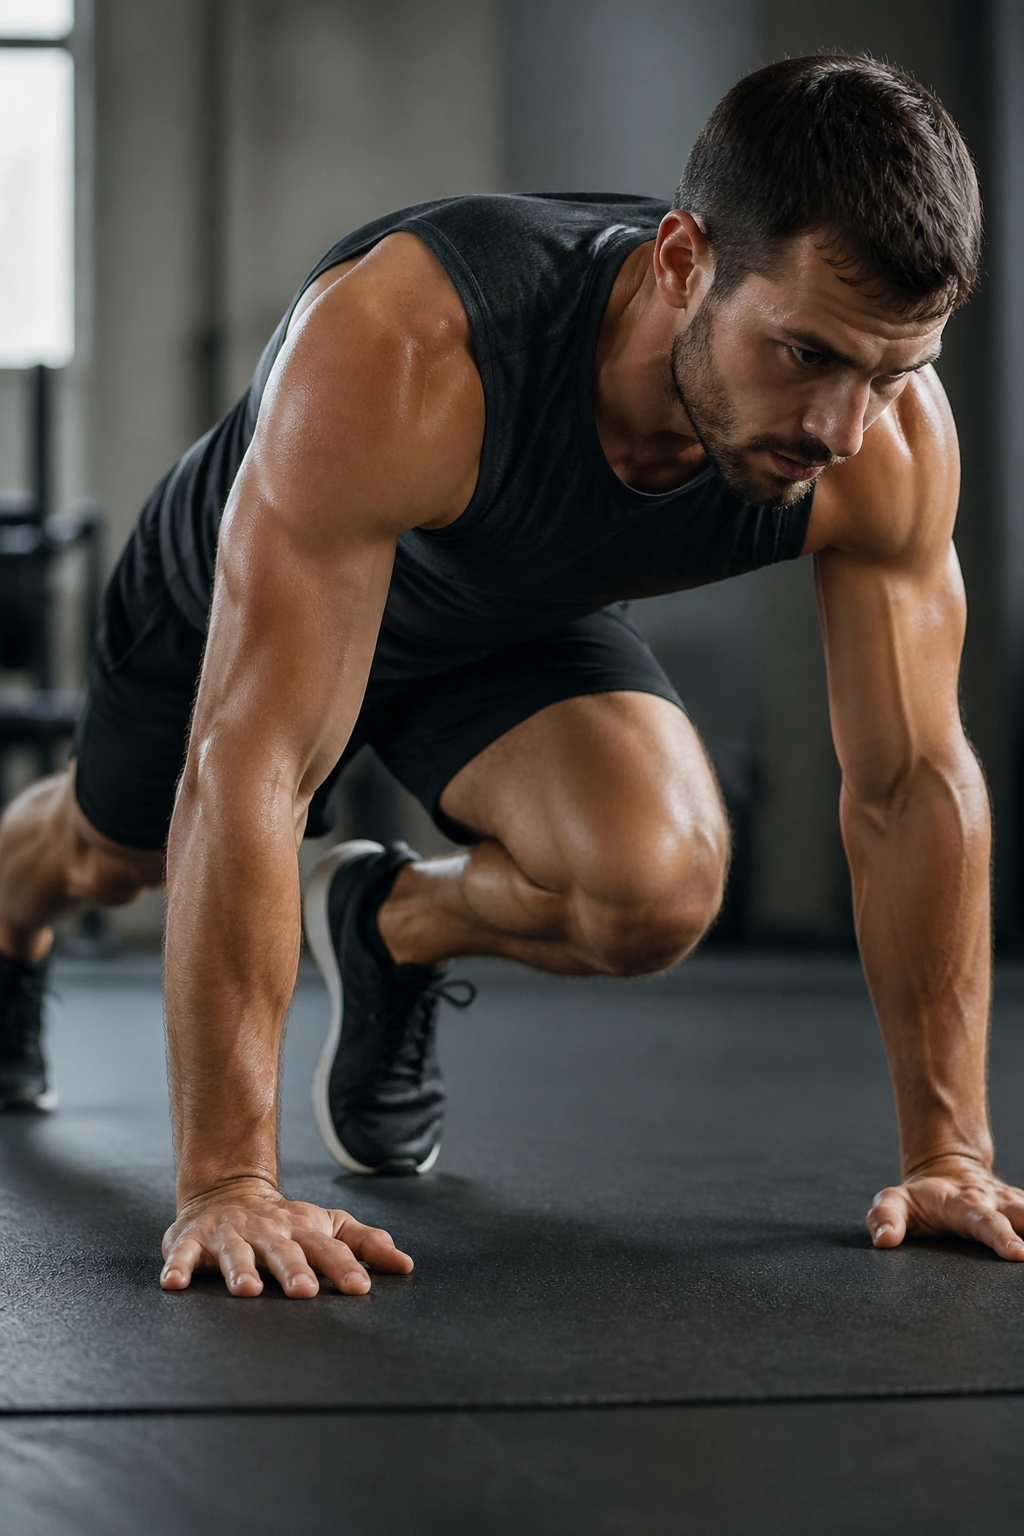
A mountain climber can be a cardio drill or a core drill. The difference is pace. Fast and messy turns it into a heart-rate game. Slow and deliberate turns it into a plank with moving legs, which is much more interesting.
Set up in a high plank and drive one knee toward your chest while keeping the shoulders stacked over the hands. Switch sides without letting the hips bounce. Cross-body climbers, where the knee drives toward the opposite elbow, hit the obliques a little harder.
I like this move as a finisher because it wakes up the whole front line of the body. It also exposes a weak brace quickly. If the hips wag from side to side, slow down.
Do 20 to 40 seconds. Stop before the plank shape falls apart.
13. Plank Shoulder Tap
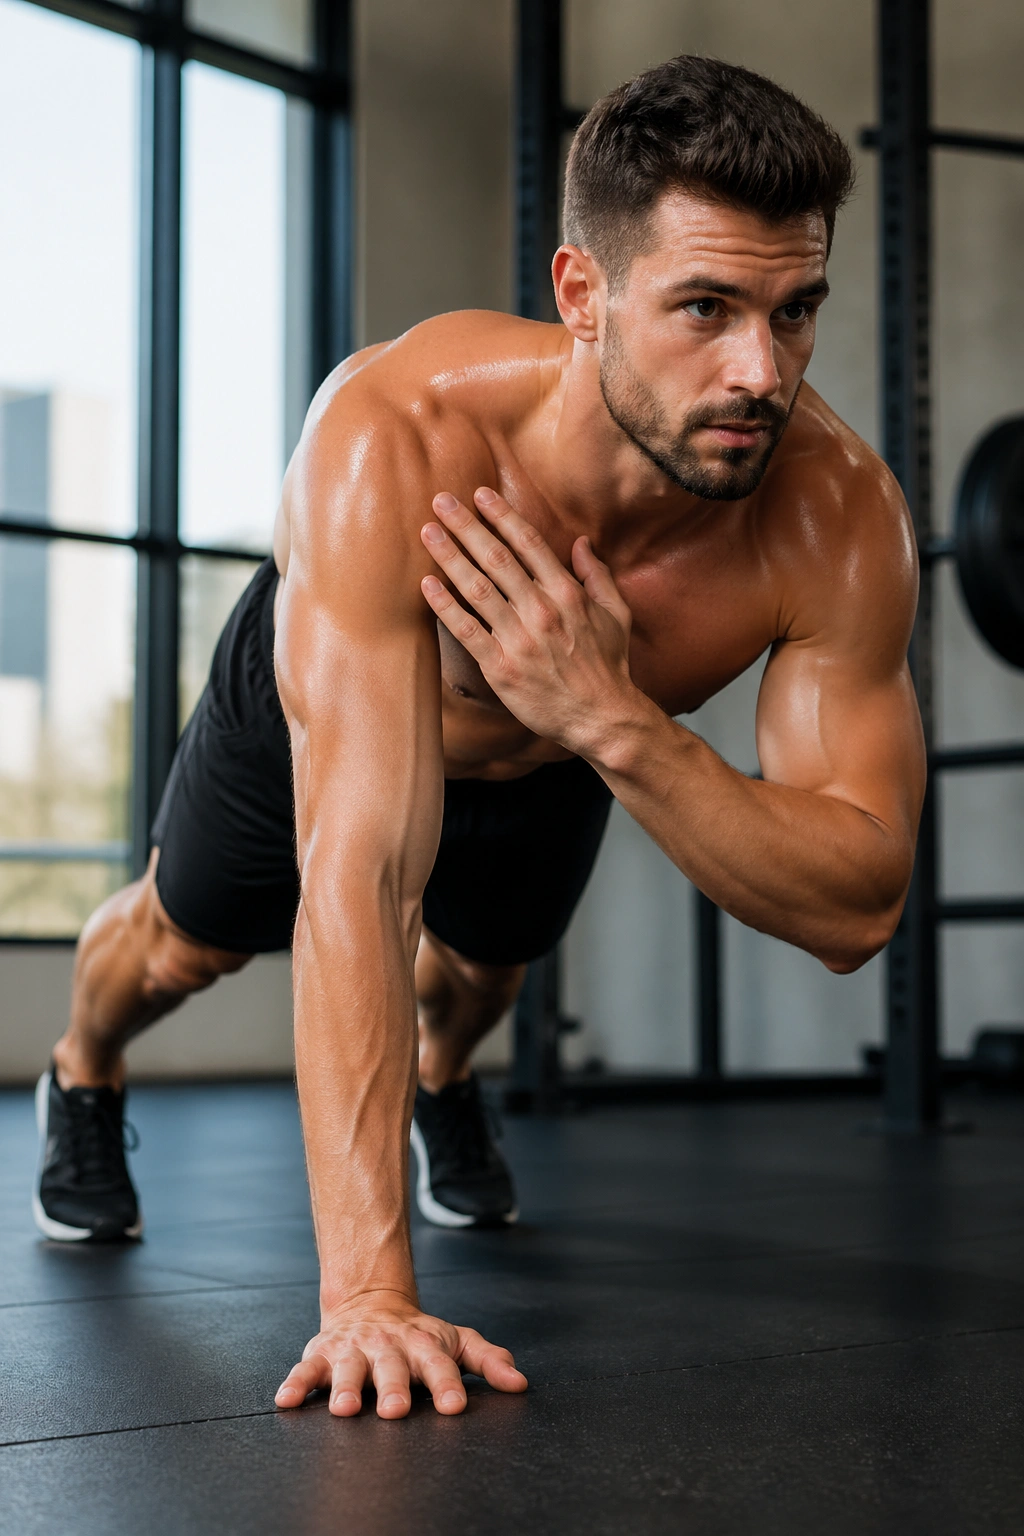
What happens when you ask your core to stop a little sway over and over again? You get shoulder taps.
Start in a high plank with your feet a bit wider than hip-width. Tap one shoulder with the opposite hand, then switch. The wider stance makes it easier to keep the torso quiet. Narrow the feet later if you want more challenge.
This drill is all about anti-rotation. Every tap tries to twist you, and your abs have to fight back. That makes it a very honest test of stability, especially if your plank is already decent.
How to get more from it
- Keep your hips level.
- Move slower than you think you need to.
- Use 10 to 20 taps per side.
If you rock side to side, spread the feet wider and shorten the range of motion. The point is control, not speed.
14. Bird Dog
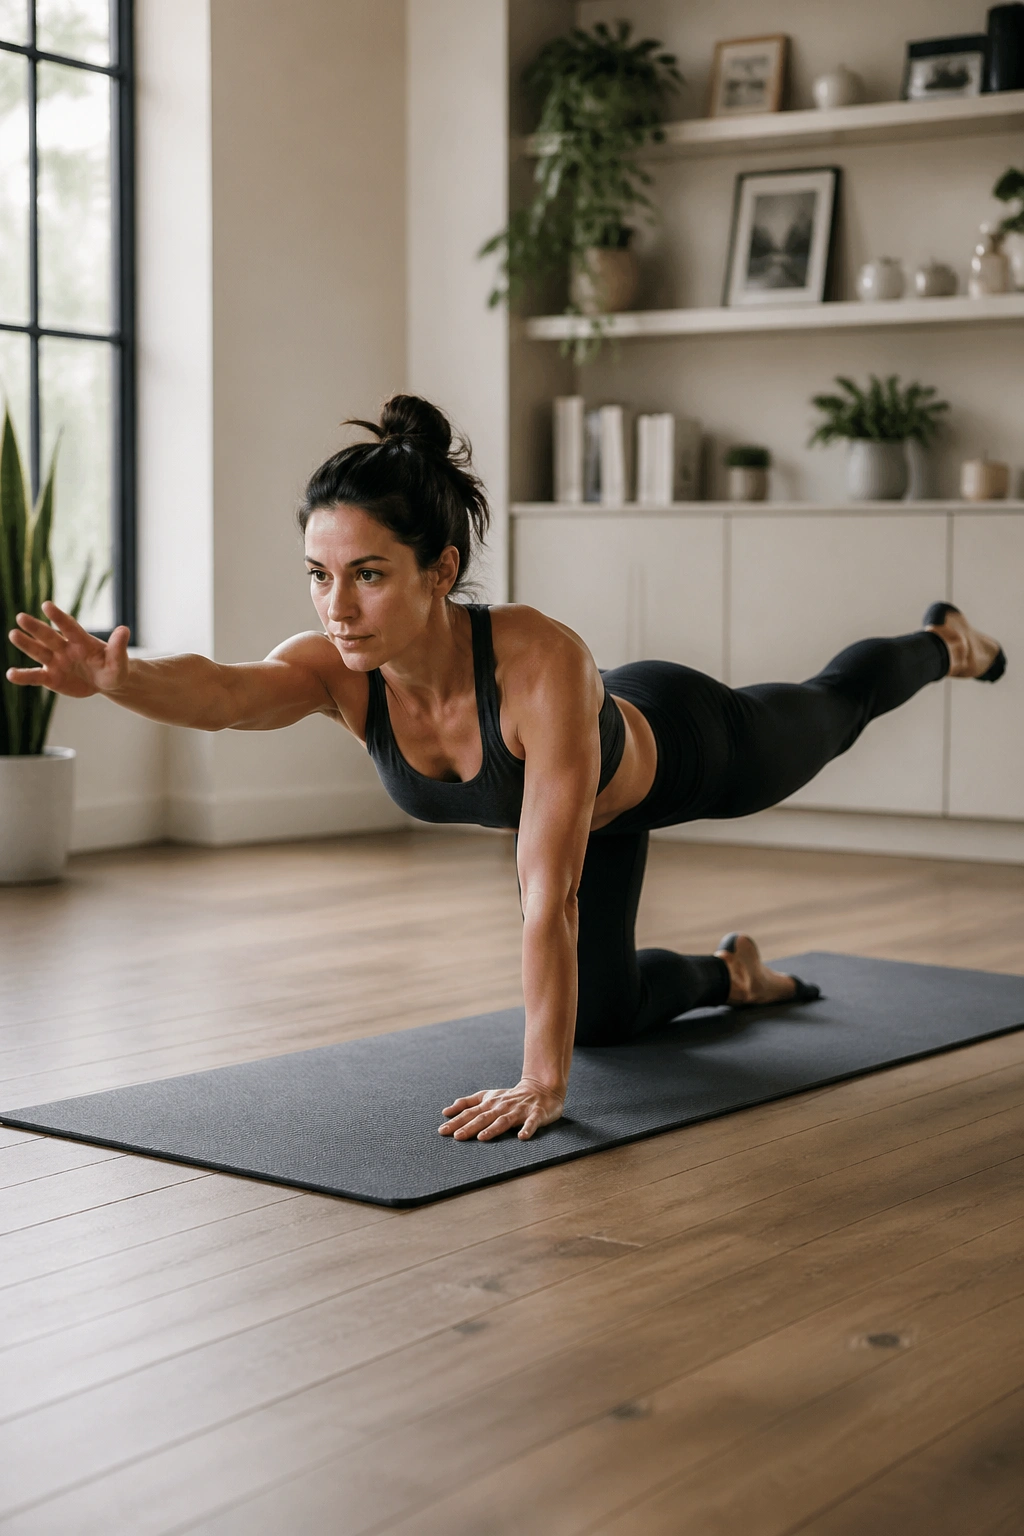
Bird dogs are the quiet kind of brutal. They do not look flashy, and that is exactly why they belong in a real core routine. They teach the trunk to stay steady while opposite limbs reach away from each other, which is useful in lifting, walking, and basically any day when your body has to stay organized.
Get on all fours, extend one arm and the opposite leg, and pause for 1 to 2 seconds before returning to start. Keep the hips square to the floor. No twisting. No reaching so far that the back caves.
This is one of the best moves for someone whose lower back feels overworked. It gives the abs and glutes a chance to coordinate without drama.
Use 6 to 10 reps per side, slow enough that each rep feels deliberate.
15. Bear Crawl
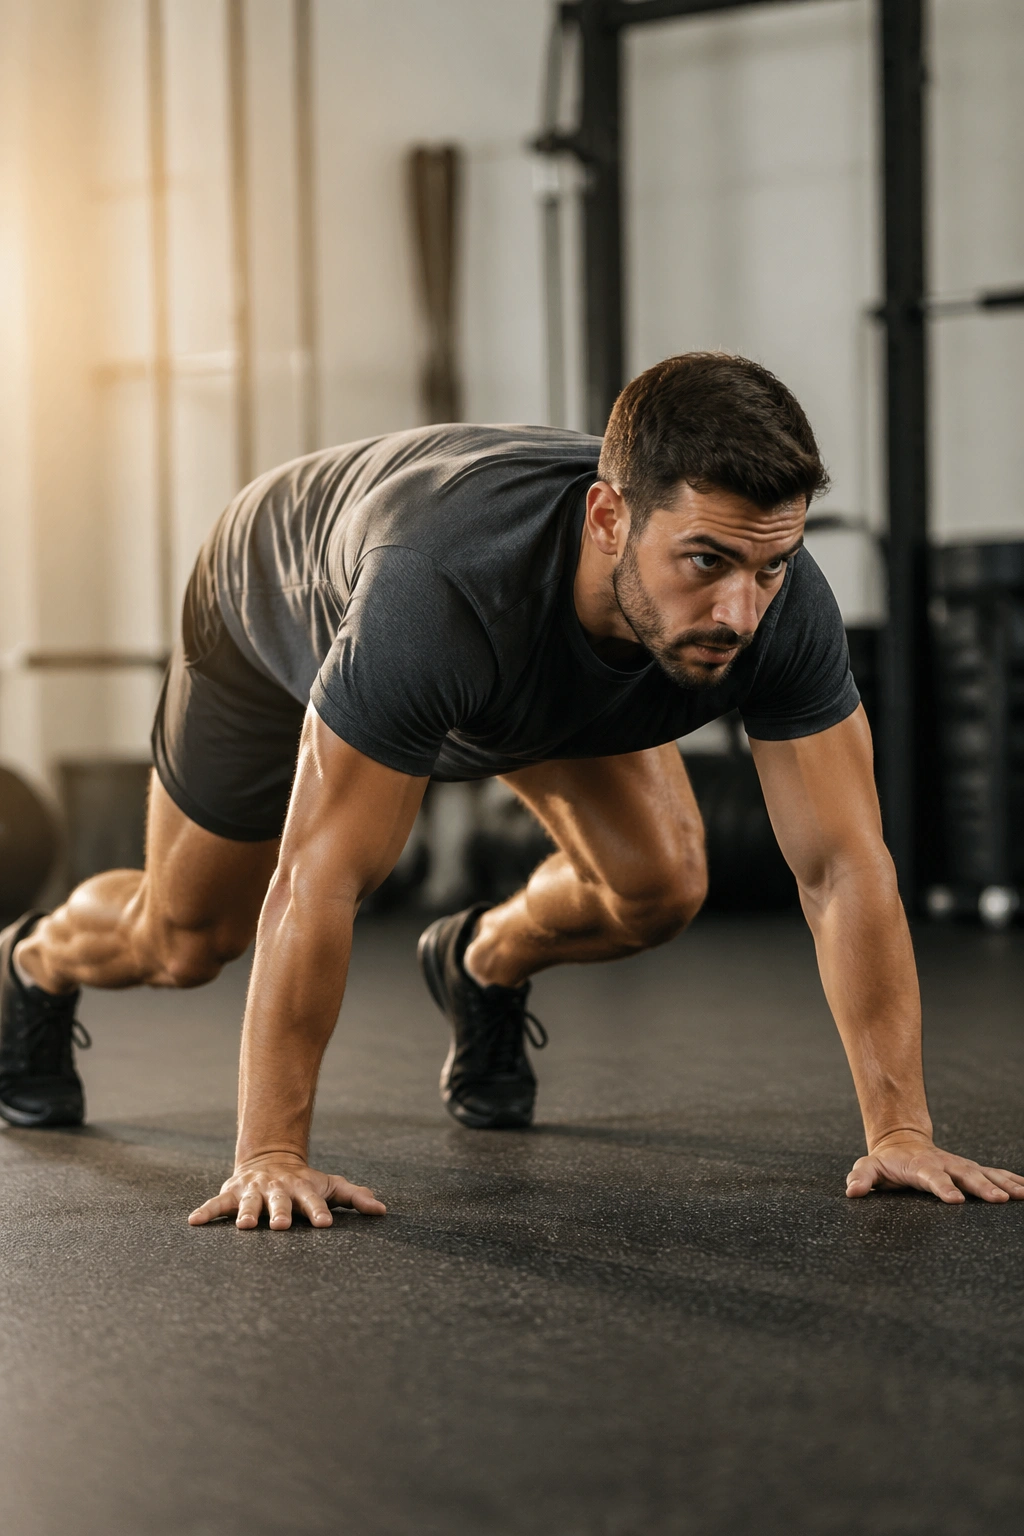
Bear crawls are ugly in the best way. They make the whole trunk work, and they expose weak shoulders, sleepy abs, and unstable hips in about five seconds.
Start on hands and toes with knees hovering 1 to 2 inches off the floor. Move the opposite hand and foot forward together, then keep crawling with short, controlled steps. Your back should stay flat, not sagging or piking. If the hips shoot up, the core is not doing its job.
Why it earns a spot
- It trains moving stability, not just stillness.
- It wakes up the shoulders, abs, and hips together.
- It works well in short bursts of 10 to 20 yards.
Use it as part of a circuit or as a warm-up if you want your midsection to wake up before harder work.
16. Stability Ball Rollout
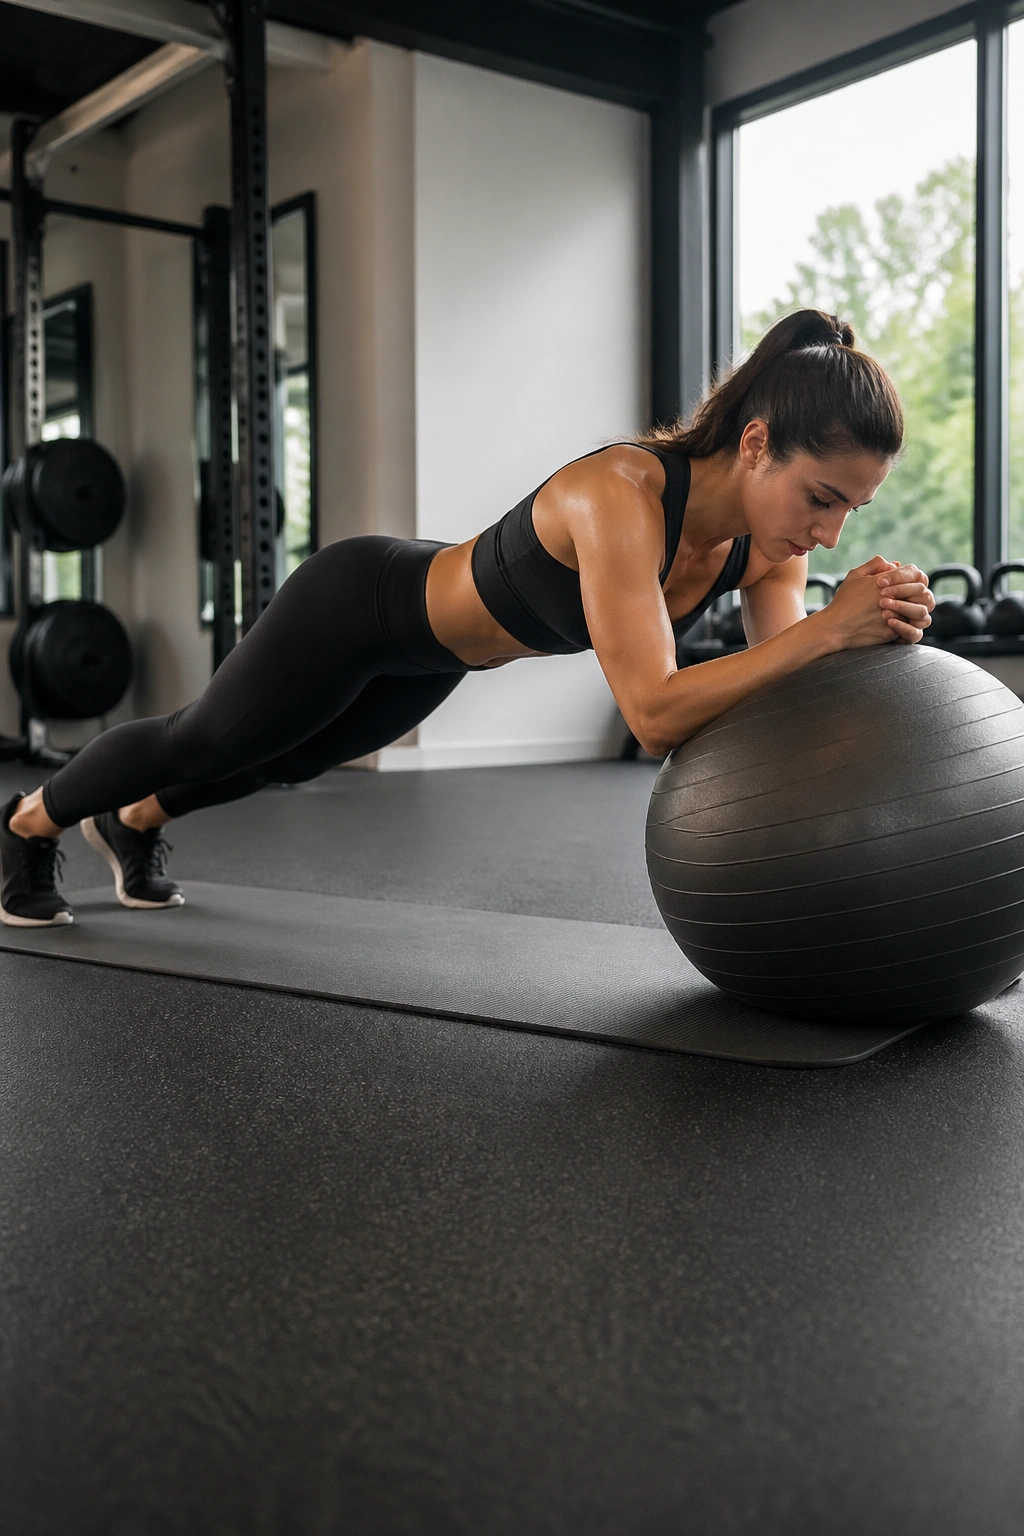
A stability ball rollout is one of the nicest ways to train anti-extension without diving straight into the ab wheel. It stretches the body into a longer line and asks the abs to stop your lower back from dropping.
Place your forearms on the ball, brace hard, and roll the ball forward a few inches at first. Keep the ribs down and the glutes on. If the ball gets too far away and your back arches, you went too far. Back off. That is the whole lesson.
How to scale it
- Start with short rolls only.
- Use a wall behind you if you want a built-in limit.
- Add range only after 8 to 12 clean reps feel controlled.
This move has a sneaky payoff. The abs do not just burn during the rollout; they also have to stop the body from collapsing on the way back.
17. Ab Wheel Rollout
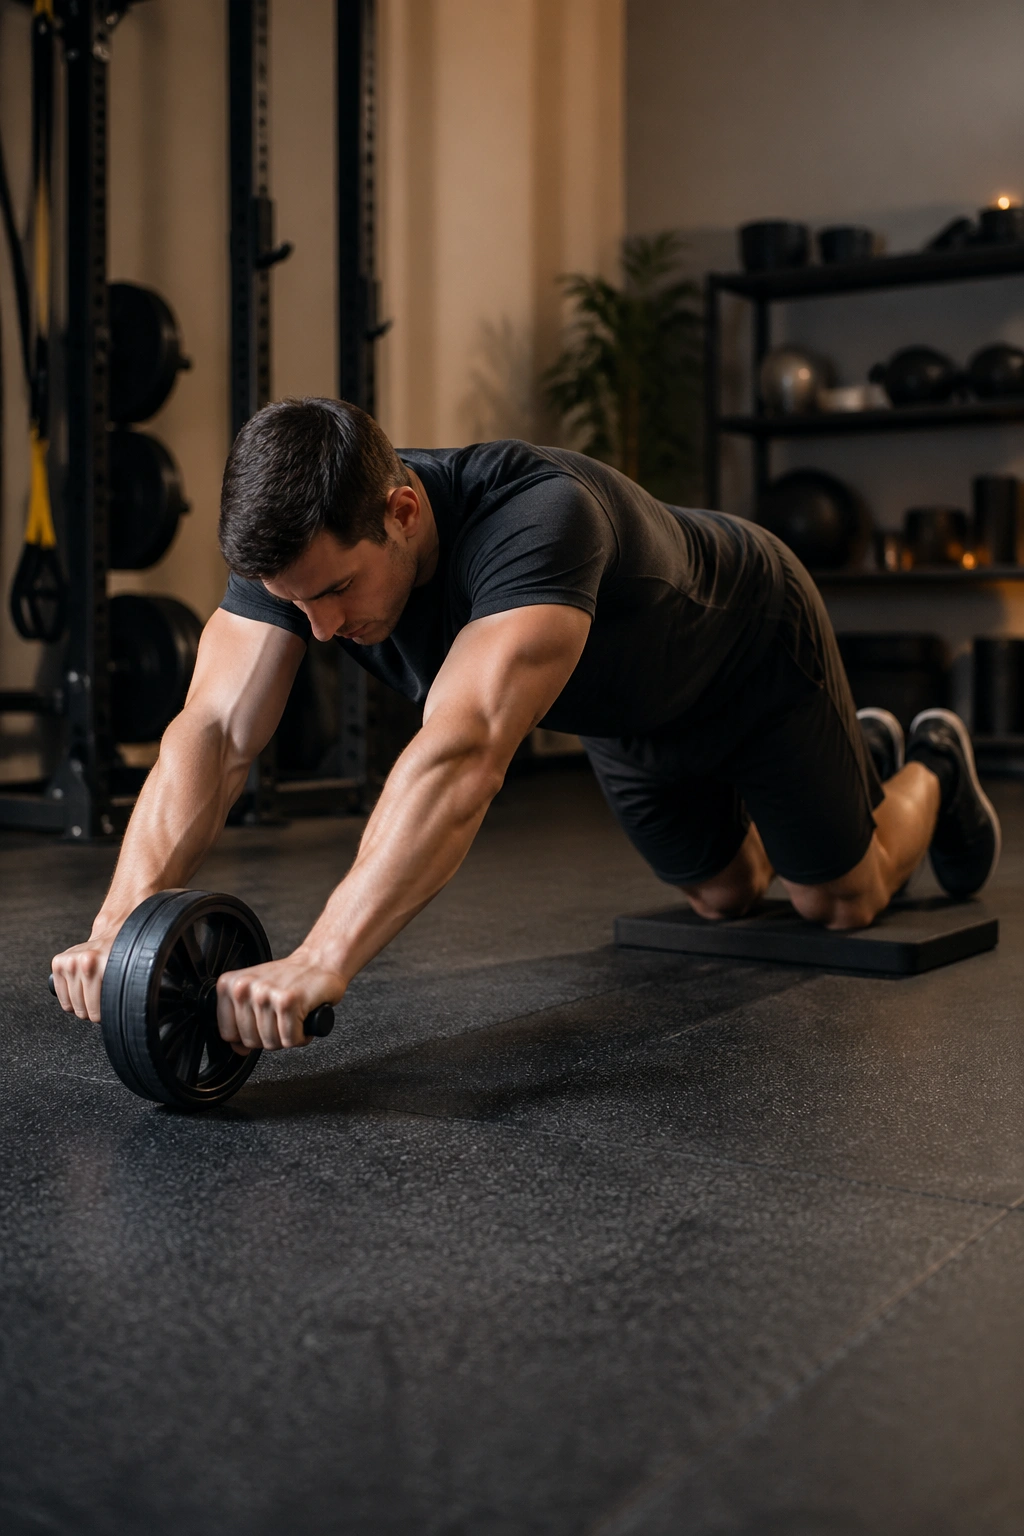
The ab wheel is not a toy. It is a small wheel with a big attitude problem, and it will humble anyone who rushes into it without a brace.
Kneel on a pad, grip the handles, and roll forward only as far as you can keep your ribs tucked and your lower back flat. Then pull yourself back with the abs, not a dramatic yank from the shoulders. The farther you go, the harder the anti-extension demand gets.
This is a hard move. Harder than people expect. Start short and stay honest.
If your lower back arches, stop the rep early. Use 5 to 8 reps and treat every inch of the rollout like a separate challenge. Once that feels strong, you can lengthen the range slowly.
18. Cable Crunch
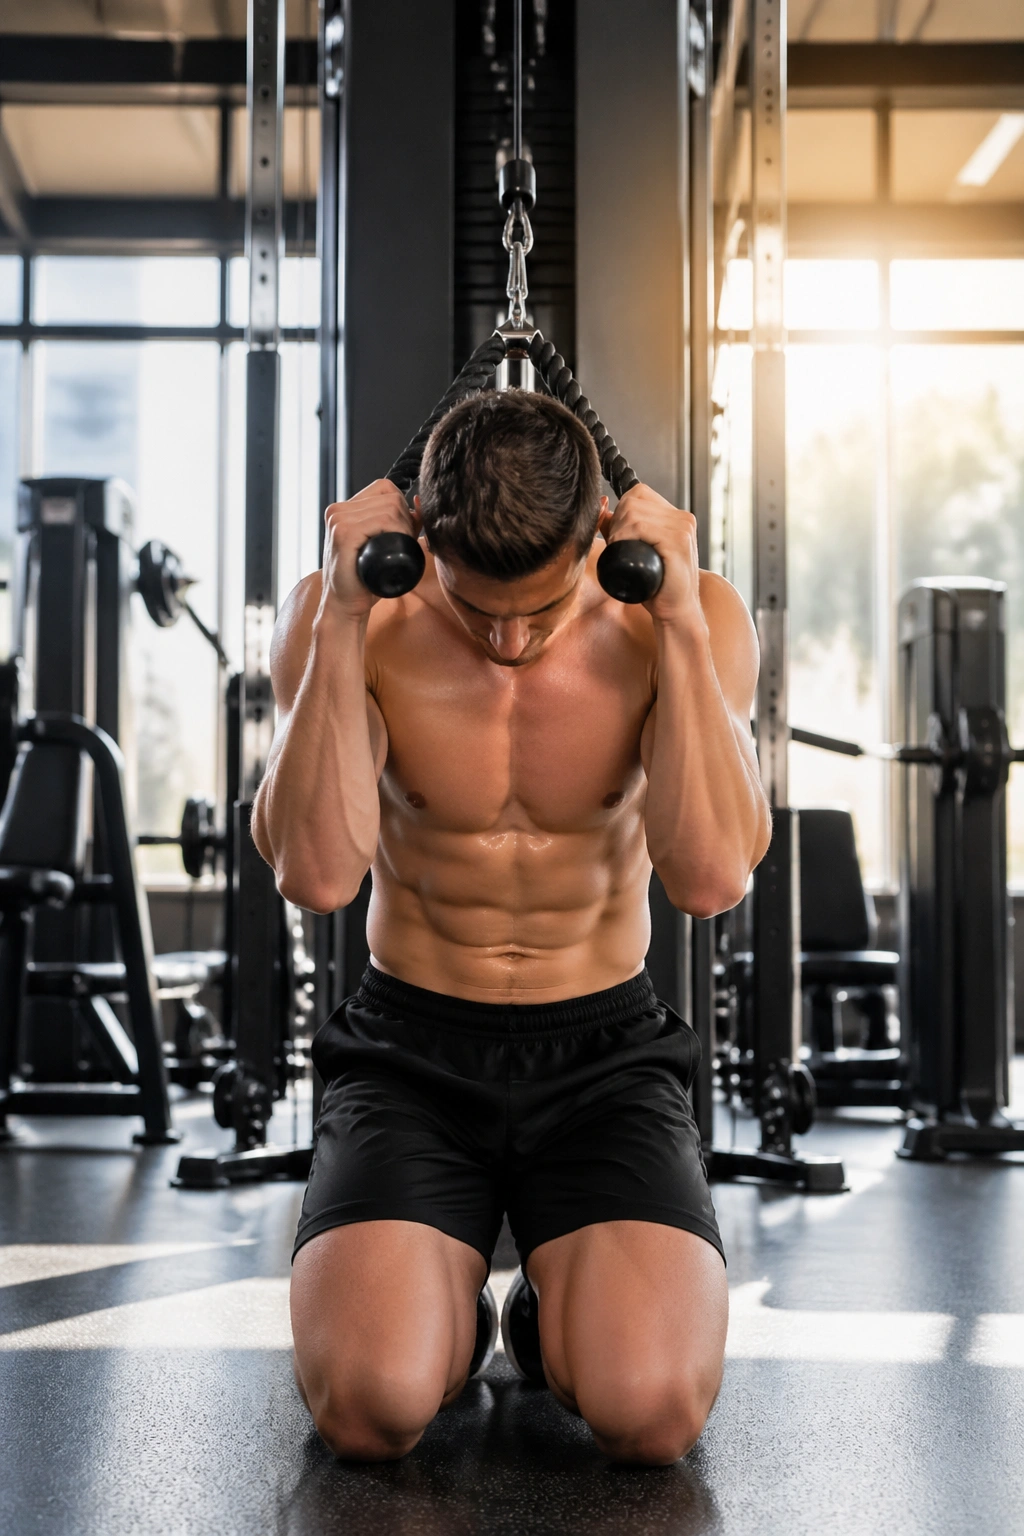
A weighted crunch has a job floor work cannot always do: it lets you load spinal flexion with precision. That matters if you want thicker-looking abs, not just better endurance.
Kneel in front of a high cable attachment with a rope handle, hold the rope by your temples, and curl your ribs toward your pelvis. The hips stay mostly still. The movement comes from the torso folding, not from pulling with the arms. Exhale hard at the bottom. That little exhale helps the abs shorten more cleanly.
What to watch for
- Do not turn it into a hip hinge.
- Do not pull with the arms.
- Use a weight that lets you keep 10 to 15 smooth reps.
This is one of my favorite direct ab builders. It is simple, loaded, and brutally honest when the form slips.
19. Pallof Press for Anti-Rotation Ab Workouts
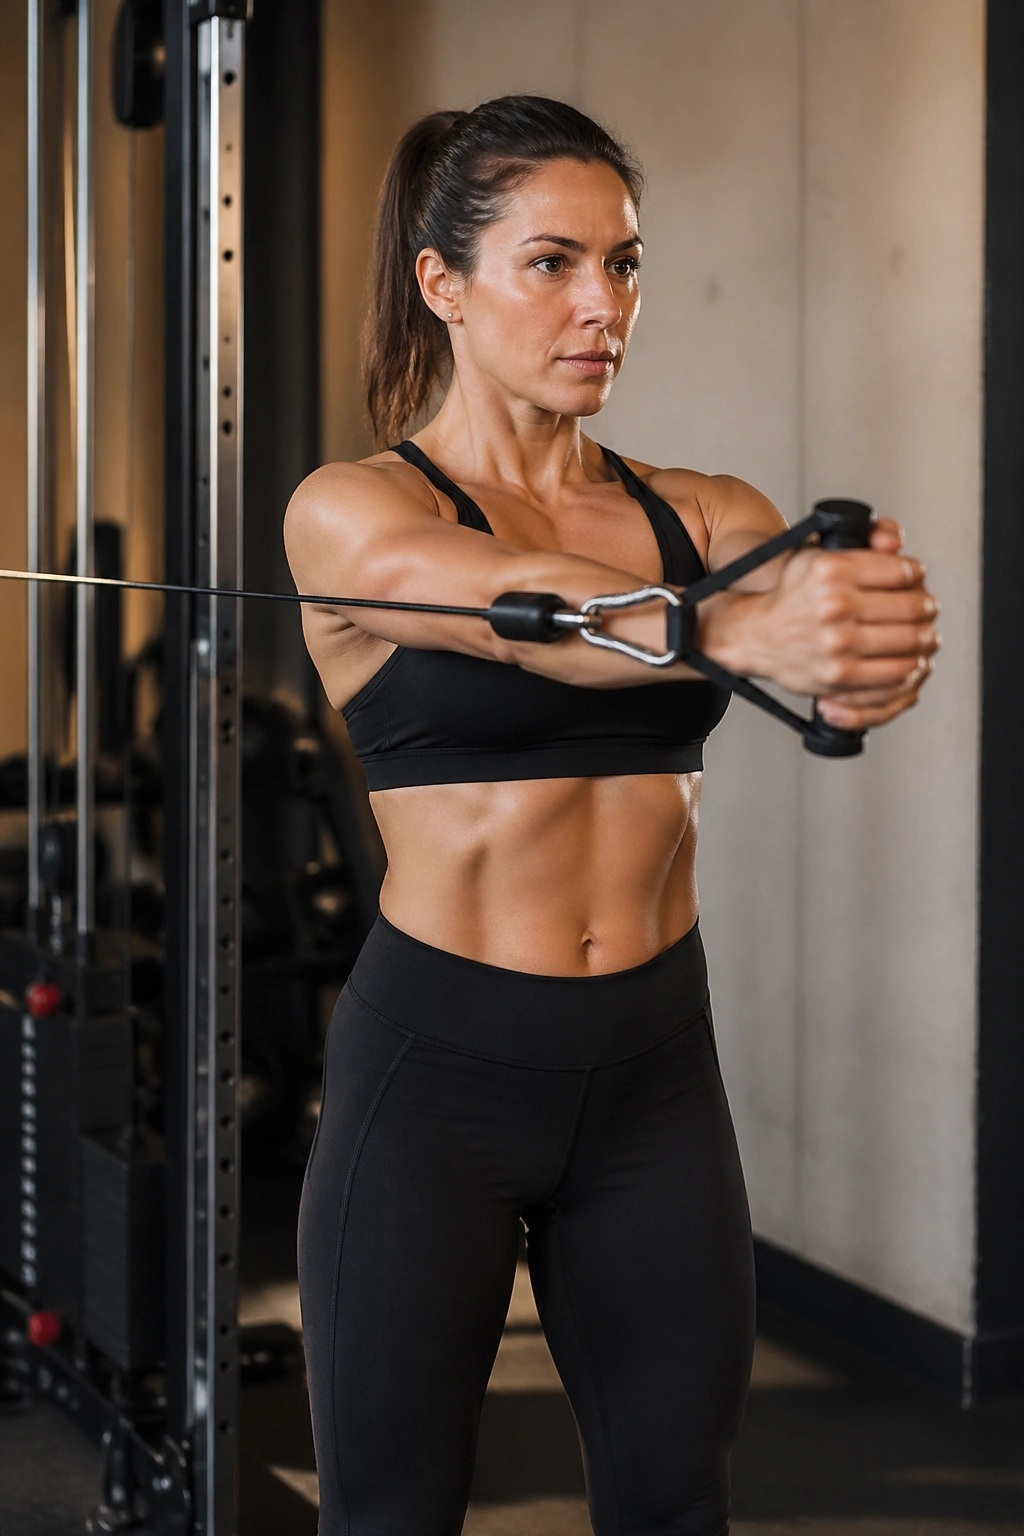
The Pallof press looks boring for about three seconds, then your core starts arguing with the cable or band. That is the point. The exercise trains your body to resist twisting, which carries over to sports, lifting, and just carrying things without leaning like a shopping cart with one bad wheel.
Set a cable or band at chest height, stand sideways to the anchor, and press the handle straight out in front of your chest. Hold for 1 to 2 seconds before bringing it back. Your hips should stay square. Your shoulders should stay level.
How to use it
- 8 to 12 presses per side.
- Stay tall through the ribs.
- Make the stance wider if you need more help.
Unlike twisting moves, this one teaches control without motion. That makes it a smart match for people who want a strong waistline and a calmer lower back.
20. Suitcase Carry
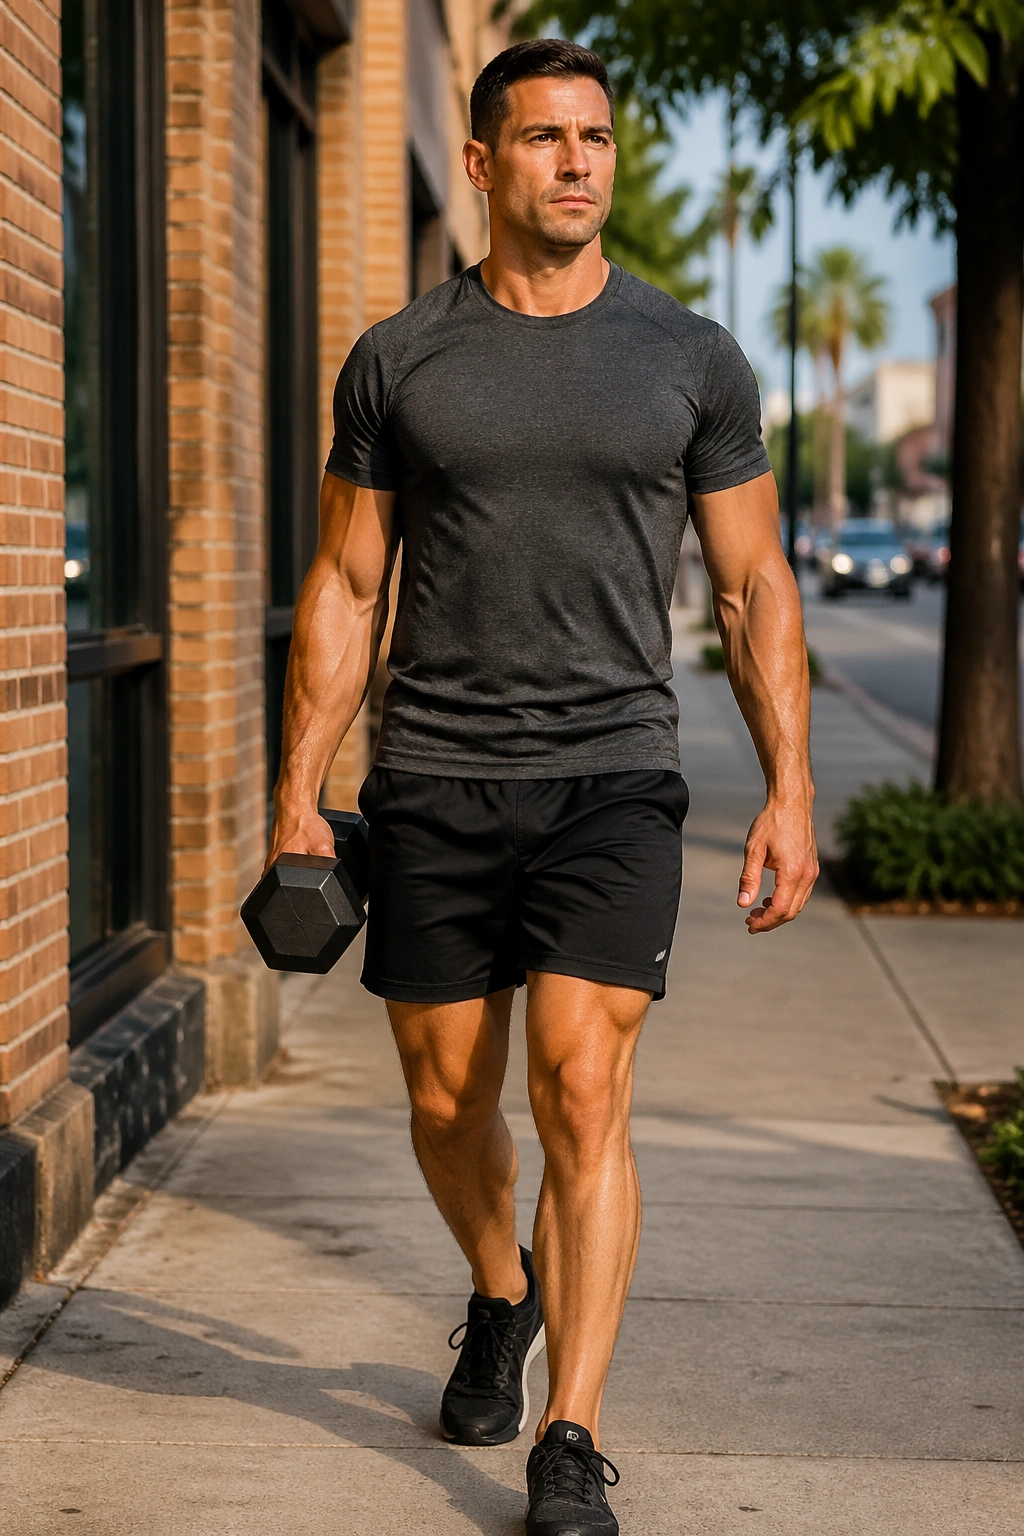
Pick up one heavy weight and walk. That’s the exercise. It sounds too plain to matter, and then your obliques light up halfway down the floor.
Hold a dumbbell or kettlebell in one hand, stand tall, and walk with short, steady steps. Do not lean toward the weight. Do not let the opposite shoulder hike up. The trunk has to fight side-bending the whole time, and that fight is exactly why the carry works.
This is one of the best “real life” core drills. Groceries. Suitcases. A child on one hip. The body keeps meeting this same problem.
Use 20 to 40 meters per side, or about 20 to 30 seconds of walking. Heavier is not always better. A weight that makes you wobble is too much.
21. Farmer’s Carry
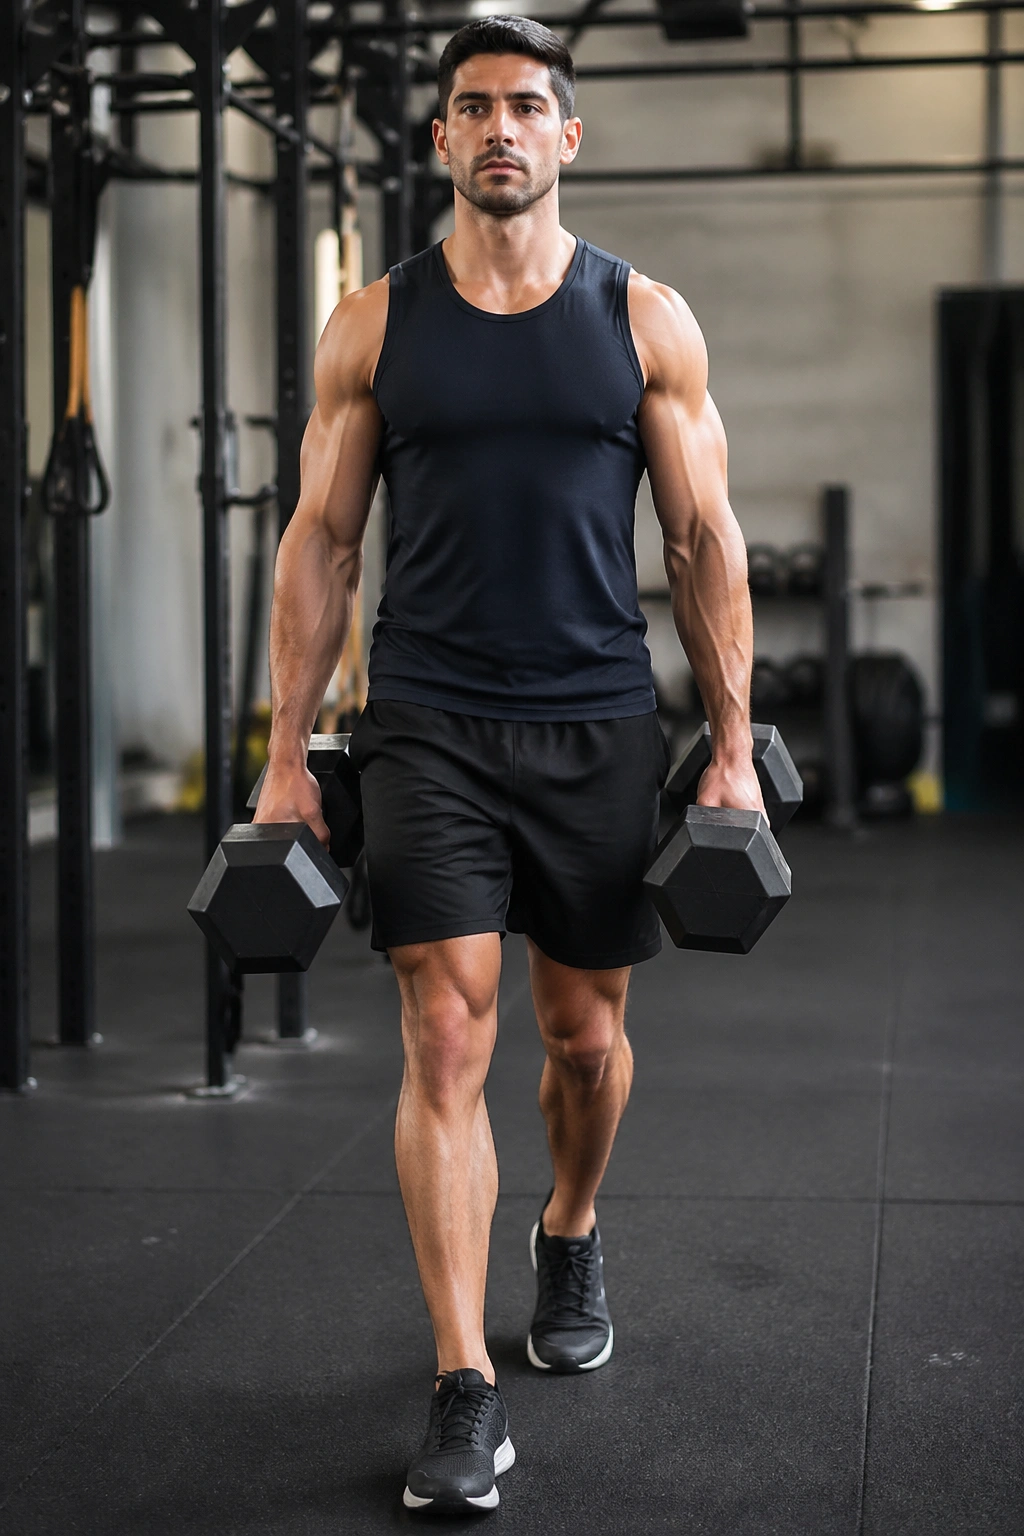
What’s better than one loaded side? Two. A farmer’s carry stacks load on both hands and makes the entire midsection brace like it means business.
Grab two dumbbells or kettlebells, stand up tall, and walk forward without shrugging. Keep the ribs down and the steps short. The temptation is to rush. Don’t. A clean farmer’s carry feels smooth and heavy, not frantic.
I like this one because it rewards posture right away. If you collapse through the ribs or let the lower back arch, you feel it within a few steps.
Use 20 to 60 seconds of walking, depending on the load. A good carry should make your forearms and core tired at the same time. That’s a useful combo.
22. Dragon Flag Progression
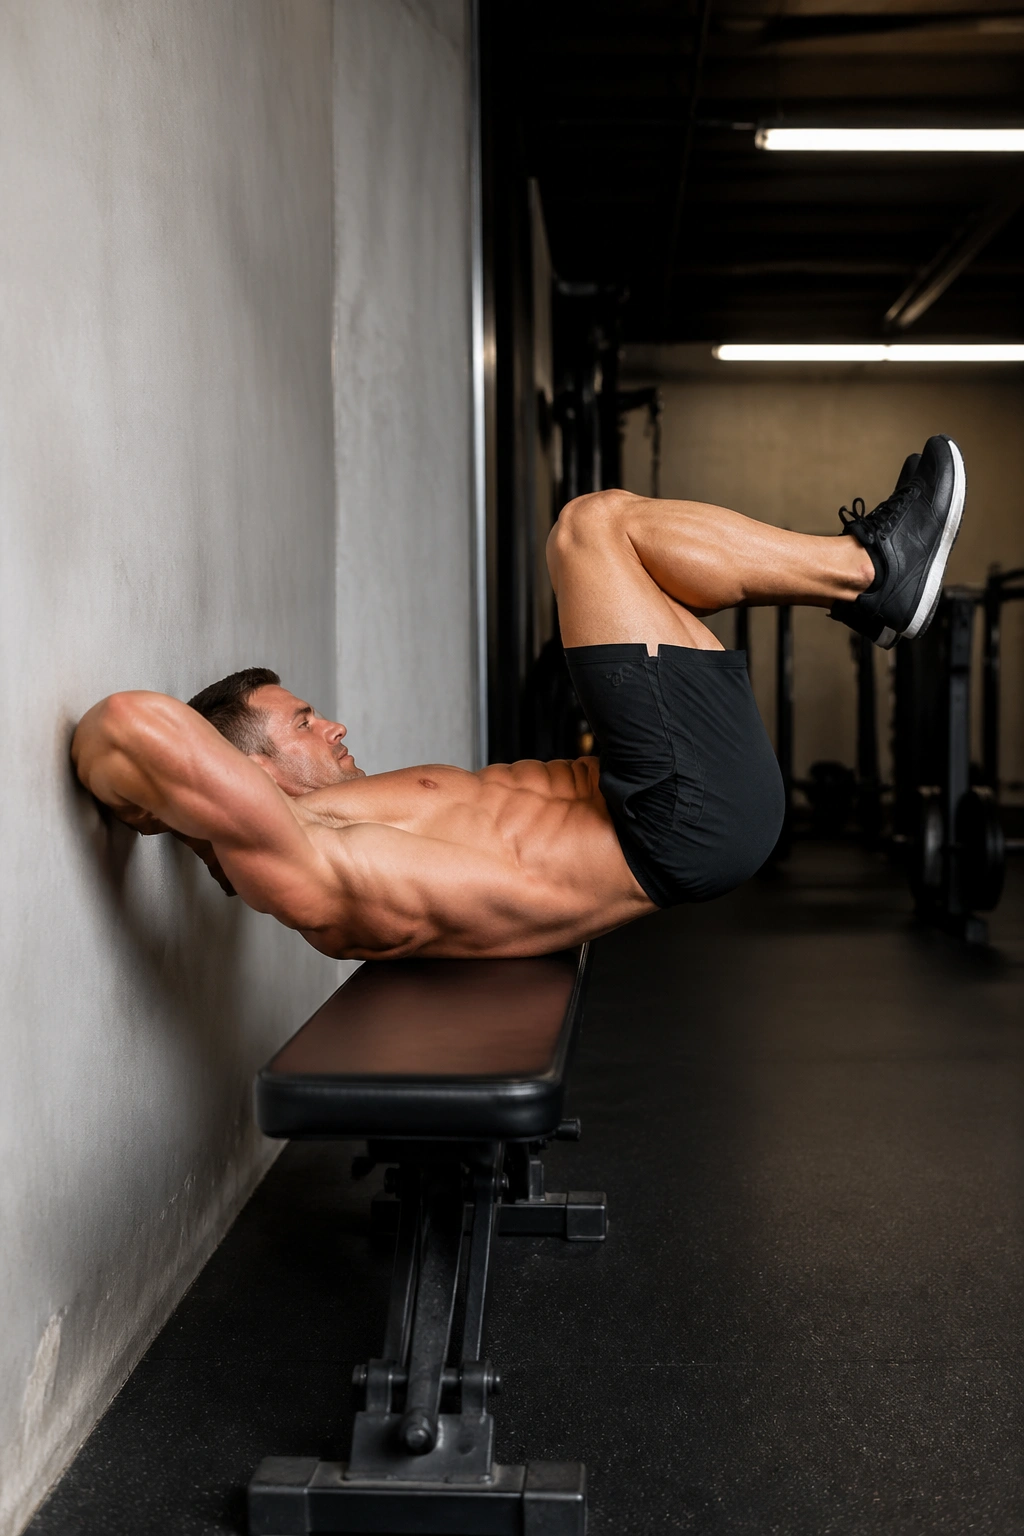
The dragon flag is not where you start. It is where you go after the simpler core moves stop being scary.
Lie on a bench, grip behind your head, and bring your body into a tight line. Beginners should start with tuck holds or slow lowering only, with the knees bent. The goal is to keep the torso rigid as you lower and raise the body under control. If the spine folds like a hinge, back up to an easier version.
This one demands patience. Lots of it. And a little humility.
How to scale it
- Tuck the knees instead of keeping the legs straight.
- Lower for 3 to 5 seconds.
- Stop before the lower back takes over.
The dragon flag is not a rep for ego. It is a rep for control.
23. Toe Touch Crunch
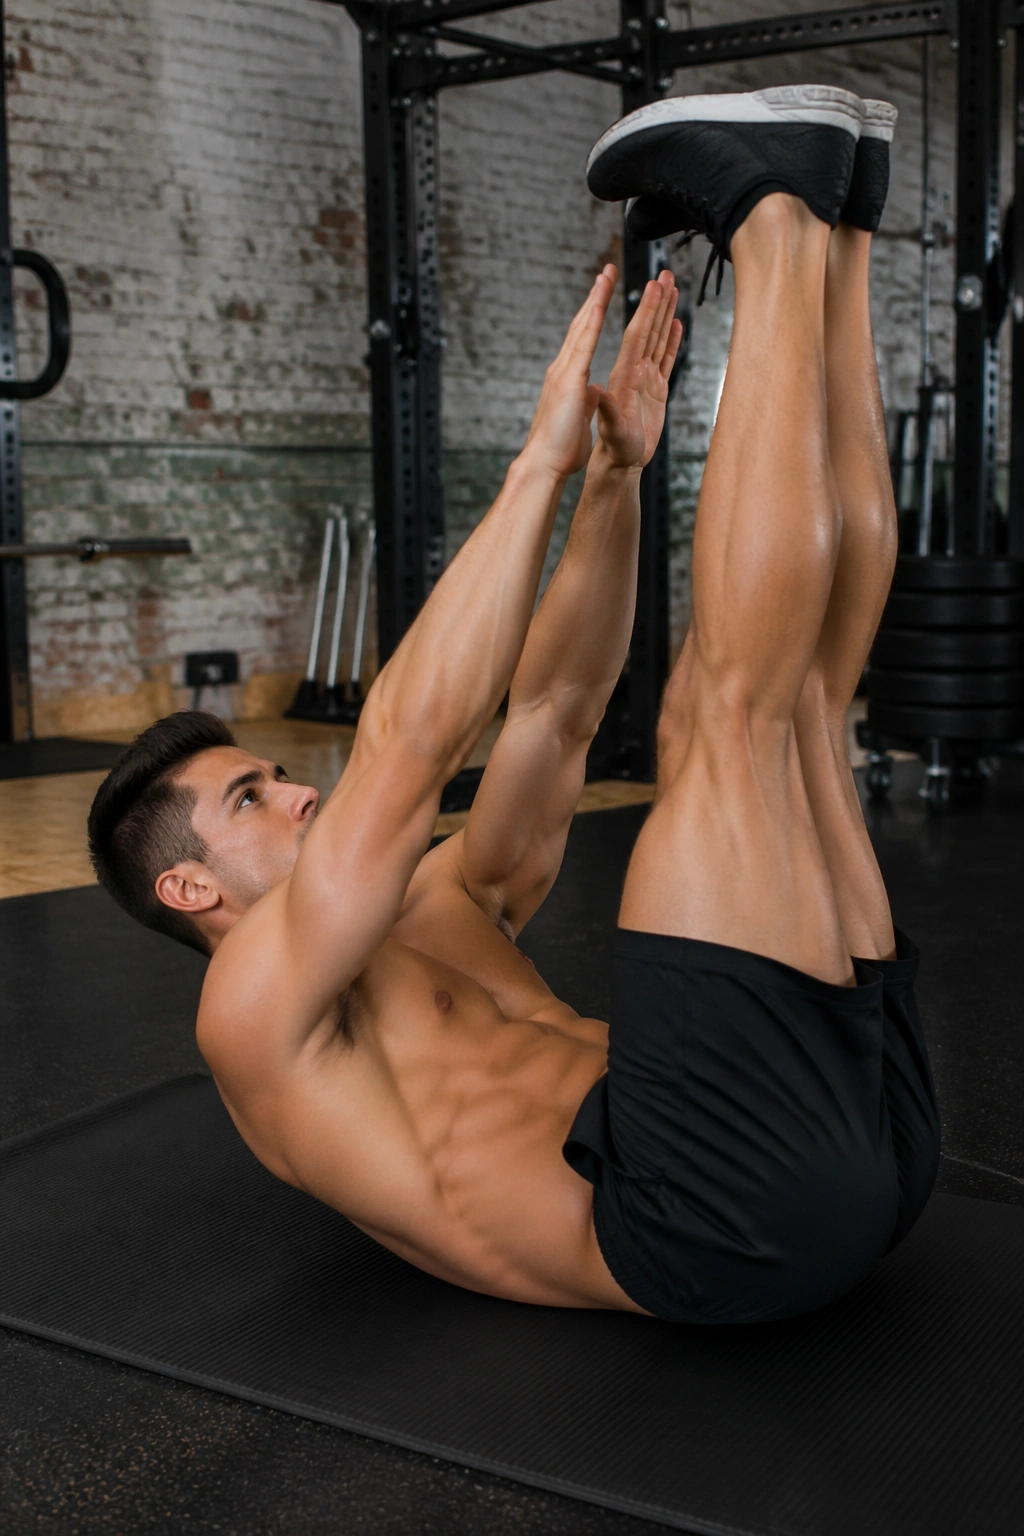
Toe touch crunches are straightforward, and that is part of their charm. They train spinal flexion with the legs up, which changes the angle enough to make the upper abs work hard without much setup.
Lie on your back, legs straight up, and reach toward your toes as you lift the shoulder blades off the floor. Keep the motion smooth. If your hamstrings are tight, bend the knees a little. That makes the rep cleaner and keeps the focus where it belongs.
A lot of people yank through these and end up flinging the head forward. That is a bad trade. The reach should come from the torso, not the neck.
Use 10 to 15 reps. Pause briefly at the top and let the abs do the work before lowering under control.
24. Flutter Kick
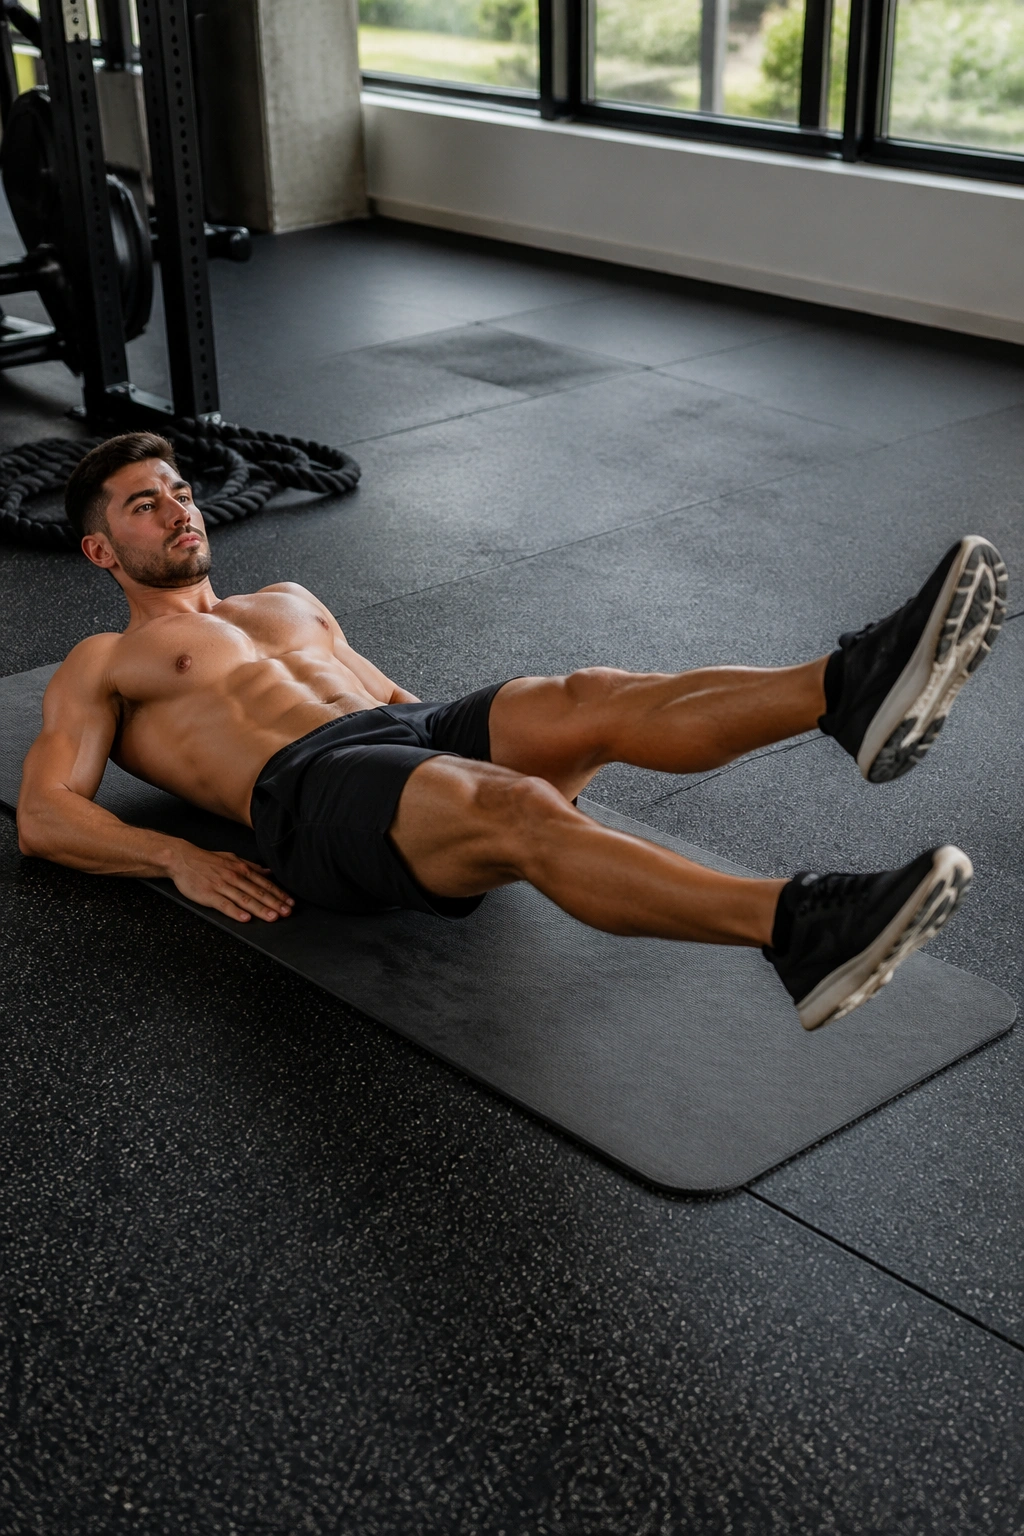
Flutter kicks feel small. They are not small.
Lie on your back, press your low back into the floor, and lift your heels a few inches. Kick one leg up as the other goes down, keeping the motion quick but controlled. If your back arches, raise the legs higher and shorten the kick. That tiny adjustment saves the whole exercise.
Why it works
The abs have to keep the pelvis from tipping forward while the legs keep moving. That makes the movement a sneaky test of lower-ab control, especially near the end of a workout when fatigue is already hanging around.
Use 20 to 40 seconds. If the hip flexors start screaming before the abs do, slow the kicks and tuck the pelvis harder.
25. Jackknife Sit-Up
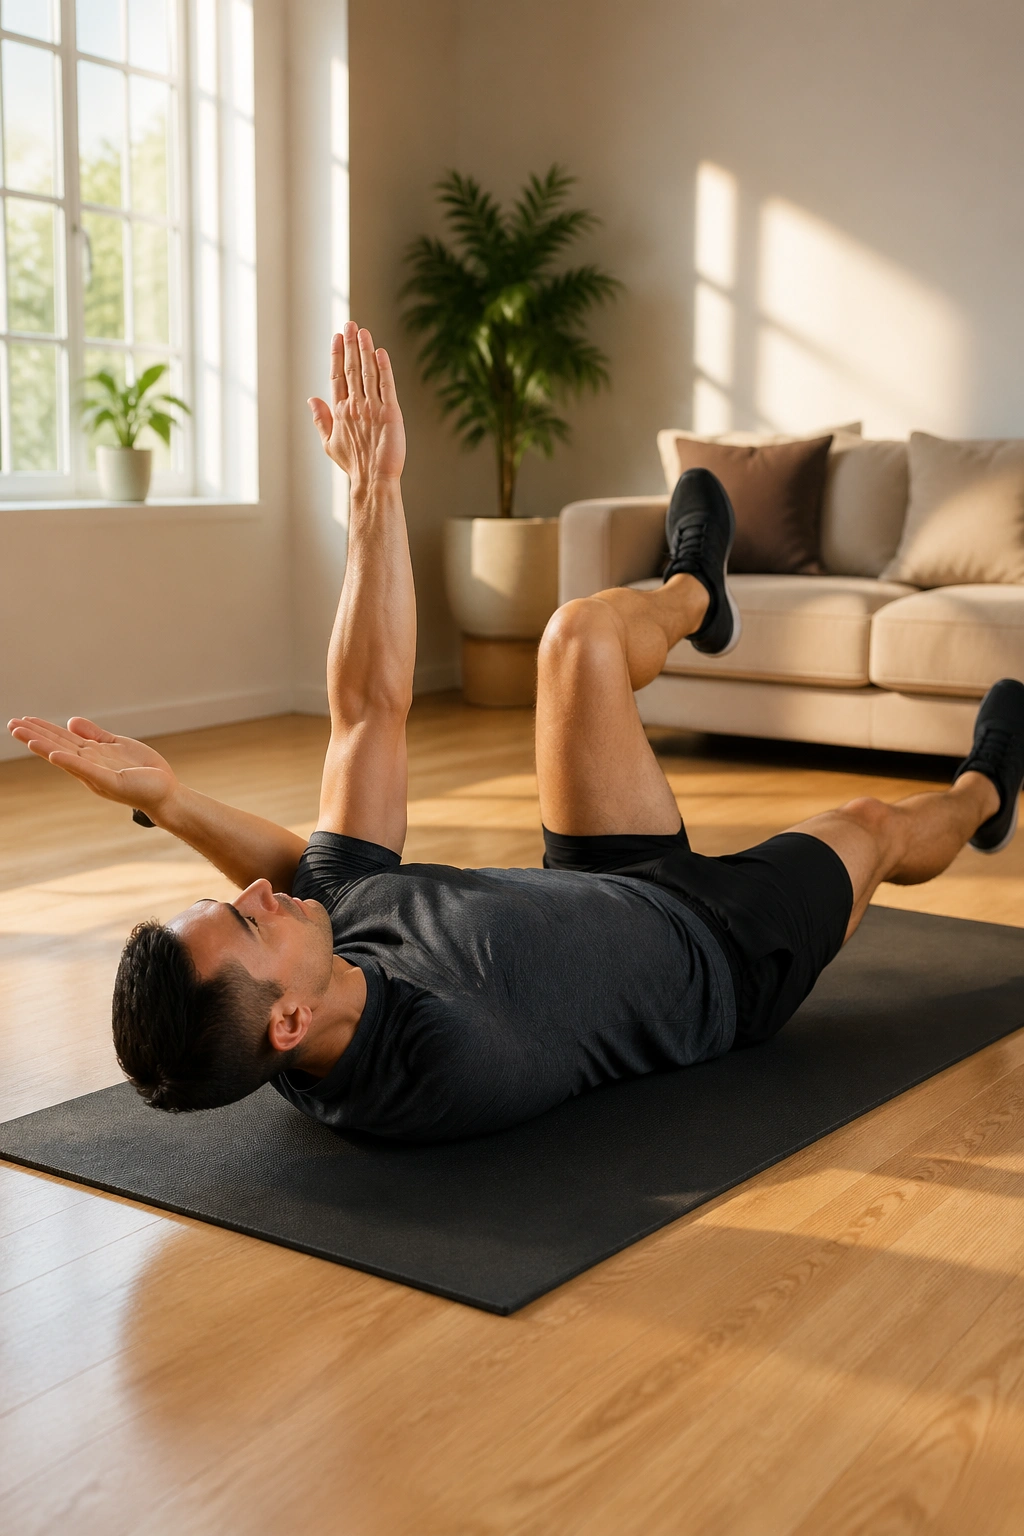
A jackknife sit-up is what happens when a crunch decides to become more athletic. It folds the torso and hips toward each other, and if you keep it strict, it hits the abs from a sharper angle than a plain crunch.
Start flat, lift the torso and legs together, and reach hands toward the shins or feet. Lower under control. If the full version feels too snappy, bend the knees a little or use one leg at a time. The shape matters more than the height of the rep.
This move works well when you want a little more power in the rep without abandoning control. That said, don’t whip through it. A sloppy jackknife is just momentum with a better name.
Use 8 to 12 reps, and keep the lowering phase slow.
26. Windshield Wiper
Windshield wipers are advanced for a reason. They ask the obliques to control a lot of side-to-side motion while the rest of the body hangs on for dear life.
You can do them from a hanging position or on the floor. Start with bent knees if needed. Slowly lower the legs to one side, bring them back through center, then go the other way. The movement should be smooth and controlled, not a drop and catch.
A hanging version makes the shoulders work harder too. The floor version is a little kinder and still useful.
What to keep in mind
- Do not rush the side-to-side transition.
- Keep the abs braced before every turn.
- 6 to 10 controlled reps is enough.
If your lower back feels sketchy, stay with bent knees or skip this one for now.
27. Spider Plank
A spider plank looks a little like a mountain climber’s more deliberate cousin. The knee drives toward the elbow on the same side, and the torso has to stay quiet while the leg moves.
Set up in a high plank, then bring one knee outside the same elbow. Return it to start and switch sides. Keep the hips low and the shoulders steady. If your body rocks hard from side to side, widen the feet and shorten the range.
This drill sneaks in oblique work, hip mobility, and serratus strength all at once. That sounds neat, but what matters is simple: it teaches you to stay braced while moving.
Use 6 to 10 reps per side. Slower reps usually work better here than faster ones.
28. Body Saw
The body saw is mean in a quiet way. You get into a forearm plank, place your feet on sliders or towels, and rock the body a few inches backward and forward. That tiny glide asks the abs to fight hard against extension.
Keep the ribs down and the glutes squeezed. The range is small. Smaller than most people expect. If you slide too far and your lower back arches, the point of the drill is gone. Pull the motion back and keep it tidy.
Best use
- 8 to 12 slow reps.
- Short range only.
- Perfect for finishing a core session when planks feel too easy.
If you want one exercise that makes a polished plank look a lot more honest, this is it.
Final Thoughts
You do not need all 28 moves in one session. Pick 4 to 6 that cover different jobs: one bracing drill, one flexion move, one anti-rotation exercise, and one loaded carry or rollout. That mix gives your core more to do than endless crunches ever will.
Progress comes from small upgrades. Add 5 seconds to a hold, 2 reps to a set, or a little more load on a cable or carry. Clean reps matter more than impressive-looking ones, and your lower back will thank you for taking that seriously.
If you want a stronger defined core, train the abs like they have a job. Because they do.
