



A strong midsection is not built on endless crunches. It comes from teaching your torso to brace, resist twist, and hold shape when your arms and legs are busy doing something else.
That sounds boring. It isn’t.
The best core exercises for a strong midsection train what the abs actually do in real life: keep the rib cage from flaring, stop the lower back from dumping into extension, and prevent your body from tipping, twisting, or folding when load shows up. If you’ve ever felt a plank in your shoulders, a hanging raise in your hip flexors, or a rollout in your lower back, you already know the difference between looking busy and training well.
The good stuff is usually less glamorous than the stuff people chase. A dead bug done with control will teach more useful trunk strength than fifty rushed sit-ups. A suitcase carry can humble a strong lifter in under a minute. Start there, and the rest of the list makes sense fast.
1. Dead Bug
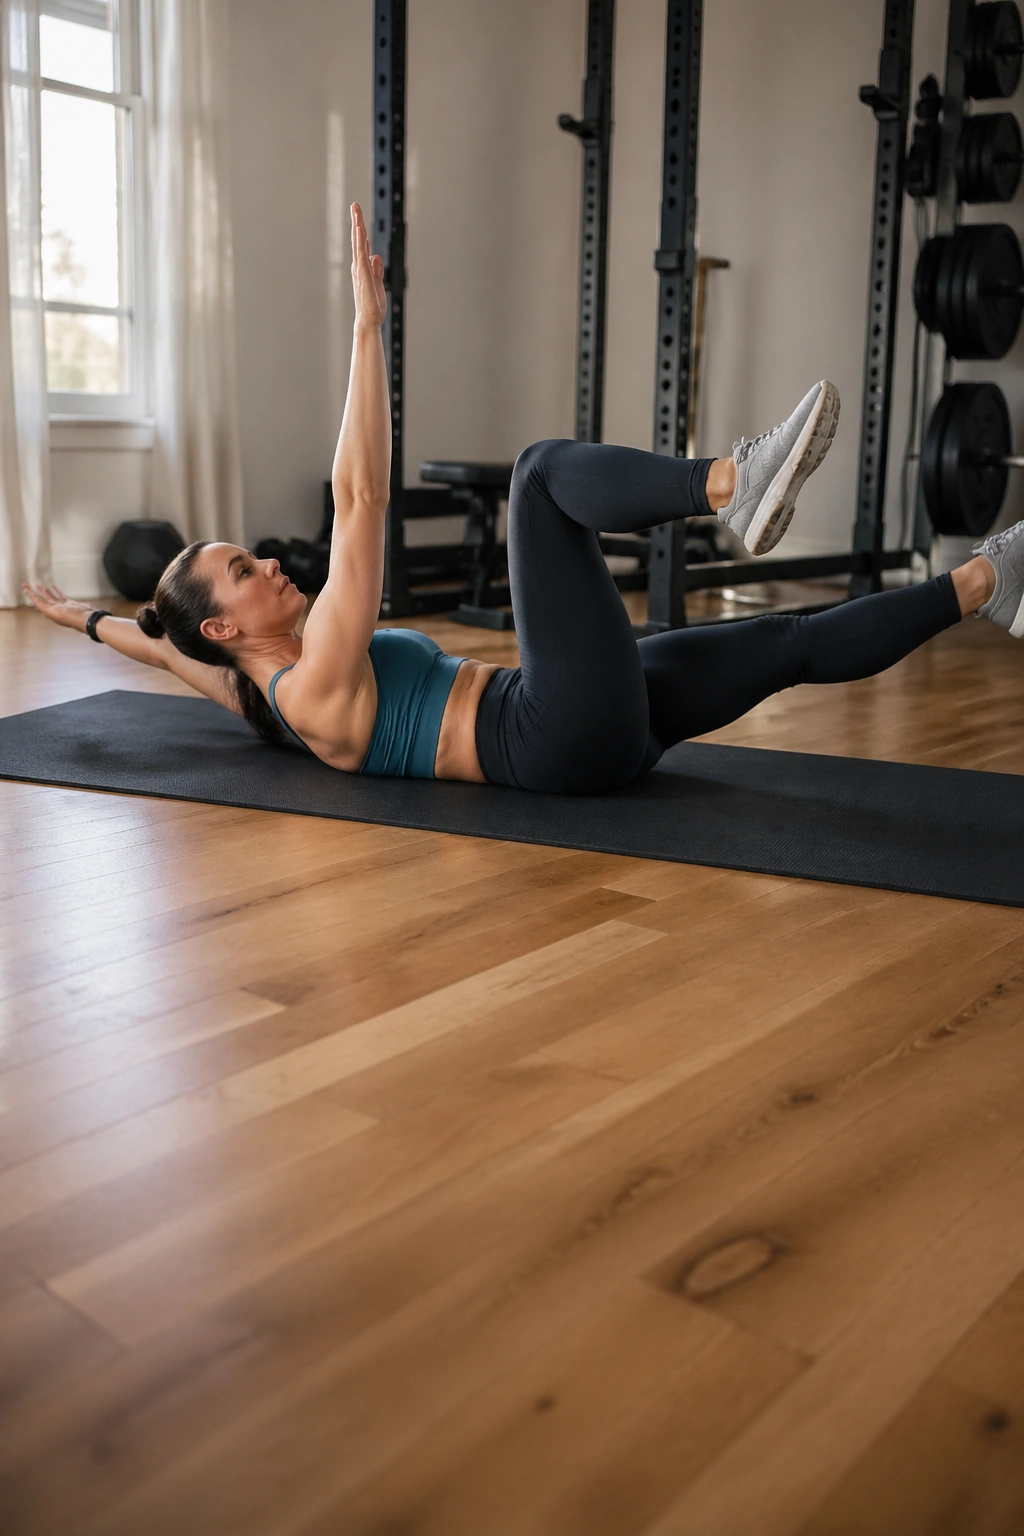
The dead bug is the exercise I’d hand to almost anyone who wants a stronger midsection without turning their lower back into the weak link. It looks gentle. Then you try to keep your spine still while your opposite arm and leg move, and the whole thing gets honest in a hurry.
What makes it work is the anti-extension demand. Your goal is to stop the low back from arching while you move your limbs, which is exactly the control most people lose during heavier lifts, running, and even basic daily stuff like reaching overhead or lifting a box. The floor gives you feedback. If your ribs pop up, you know it.
Why It Earns a Spot
The dead bug is good because it teaches the body position first, not the burn. That matters. A midsection can be tired and still be poorly trained. A dead bug makes you line up your ribs and pelvis, then hold that shape while the legs and arms move out of sync.
Use it early in a workout, when you still care about precision. Two or three sets of 6 to 8 reps per side is enough for most people. If you rush it, the exercise turns into a flailing mess. Slow wins here.
- Lie on your back with your arms straight up and knees bent at 90 degrees.
- Exhale fully so your ribs drop toward the floor.
- Move one arm and the opposite leg away from the center, keeping your low back quiet.
- Stop the range the moment your spine wants to arch.
- Return under control, then switch sides.
One clean rep beats five sloppy ones every time.
2. Front Plank
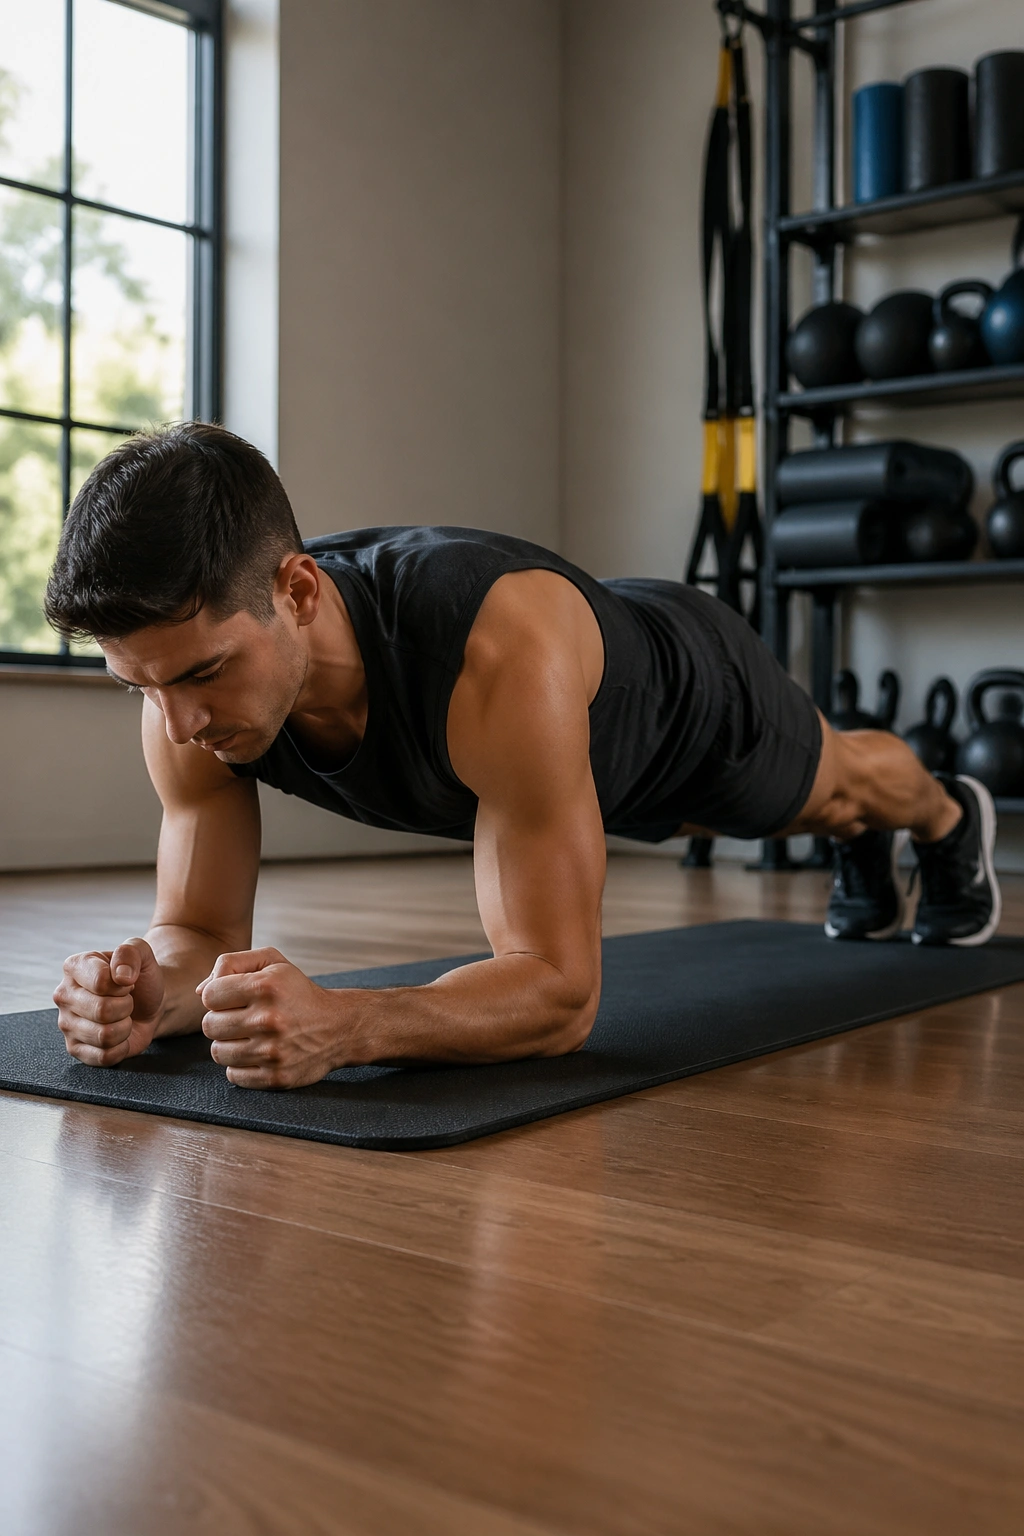
A plank only counts if your body stays honest. Ten seconds of perfect tension is worth more than a minute of sagging and squinting at a stopwatch.
The front plank trains anti-extension strength in a very direct way. Your job is to keep the ribs down, the glutes lightly on, and the floor pushed away without letting the hips drop or the shoulders collapse. That sounds simple. In practice, it exposes how well you can keep tension when nothing is moving.
What Most People Do Wrong
The common mistake is chasing time instead of position. Once the lower back starts dipping, the set is over. Hanging on longer does not make it better. It usually just teaches a bad shape.
Another problem is breath-holding for dear life. That creates tension, but not useful tension. Try short, controlled breaths through the nose or a slow inhale through the side ribs while the brace stays on. It feels awkward for a few tries. Then it starts to click.
How to Get More Out of It
Start with 3 sets of 20 to 30 seconds, not some heroic two-minute grind. If that feels easy, move to a long-lever plank with elbows slightly farther from the shoulders, or lift one foot for a few seconds at a time.
- Keep your elbows under your shoulders.
- Squeeze your glutes lightly.
- Pull the rib cage down.
- Push the floor away so the upper back does not sink.
- Stop the set the instant your low back takes over.
A good plank should feel like a whole-body brace, not a neck exercise. That difference matters.
3. Side Plank
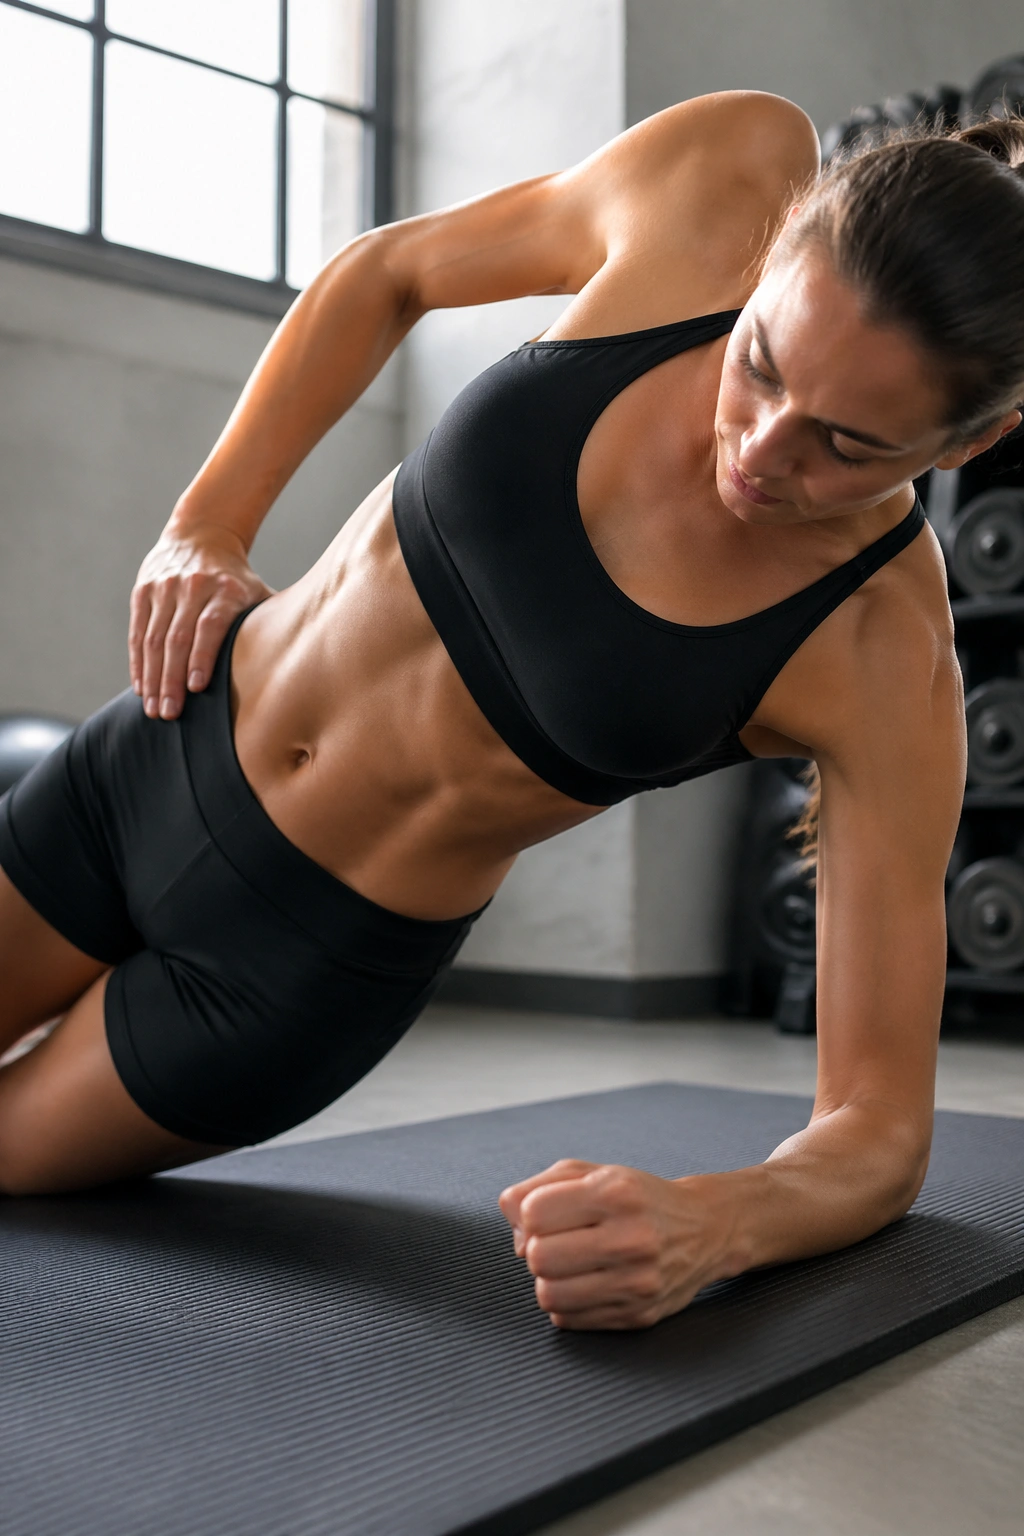
Why does the side plank matter so much? Because most people train forward-facing strength and forget that the torso also has to resist sideways collapse.
The side plank hits the obliques, glute medius, and deep lateral stabilizers in one shot. That matters for walking, running, carrying groceries, pressing overhead, and keeping your pelvis level when you load one side more than the other. If your midsection is strong but flimsy in the side-to-side direction, you’ll feel it sooner than you think.
How to Use It
Start with the bent-knee version if a full side plank feels shaky. Put the elbow under the shoulder, stack the knees, and lift the hips until the body forms a straight line from shoulder to knee. Hold for 15 to 20 seconds, then switch sides.
If that’s easy, straighten the legs and stack the feet. You can also raise the top arm to make the torso work harder without changing the base much. Short holds are fine. In fact, they’re usually better than grinding through bad shape.
What to Watch For
- The hip should not drift backward.
- The shoulder should stay packed, not shrugged.
- The head should stay in line with the spine.
- The set ends when the body starts to fold or rotate.
A clean side plank is one of the best ways to build that “solid through the middle” feeling people want from core work. It’s not flashy. It works.
4. Hollow Body Hold
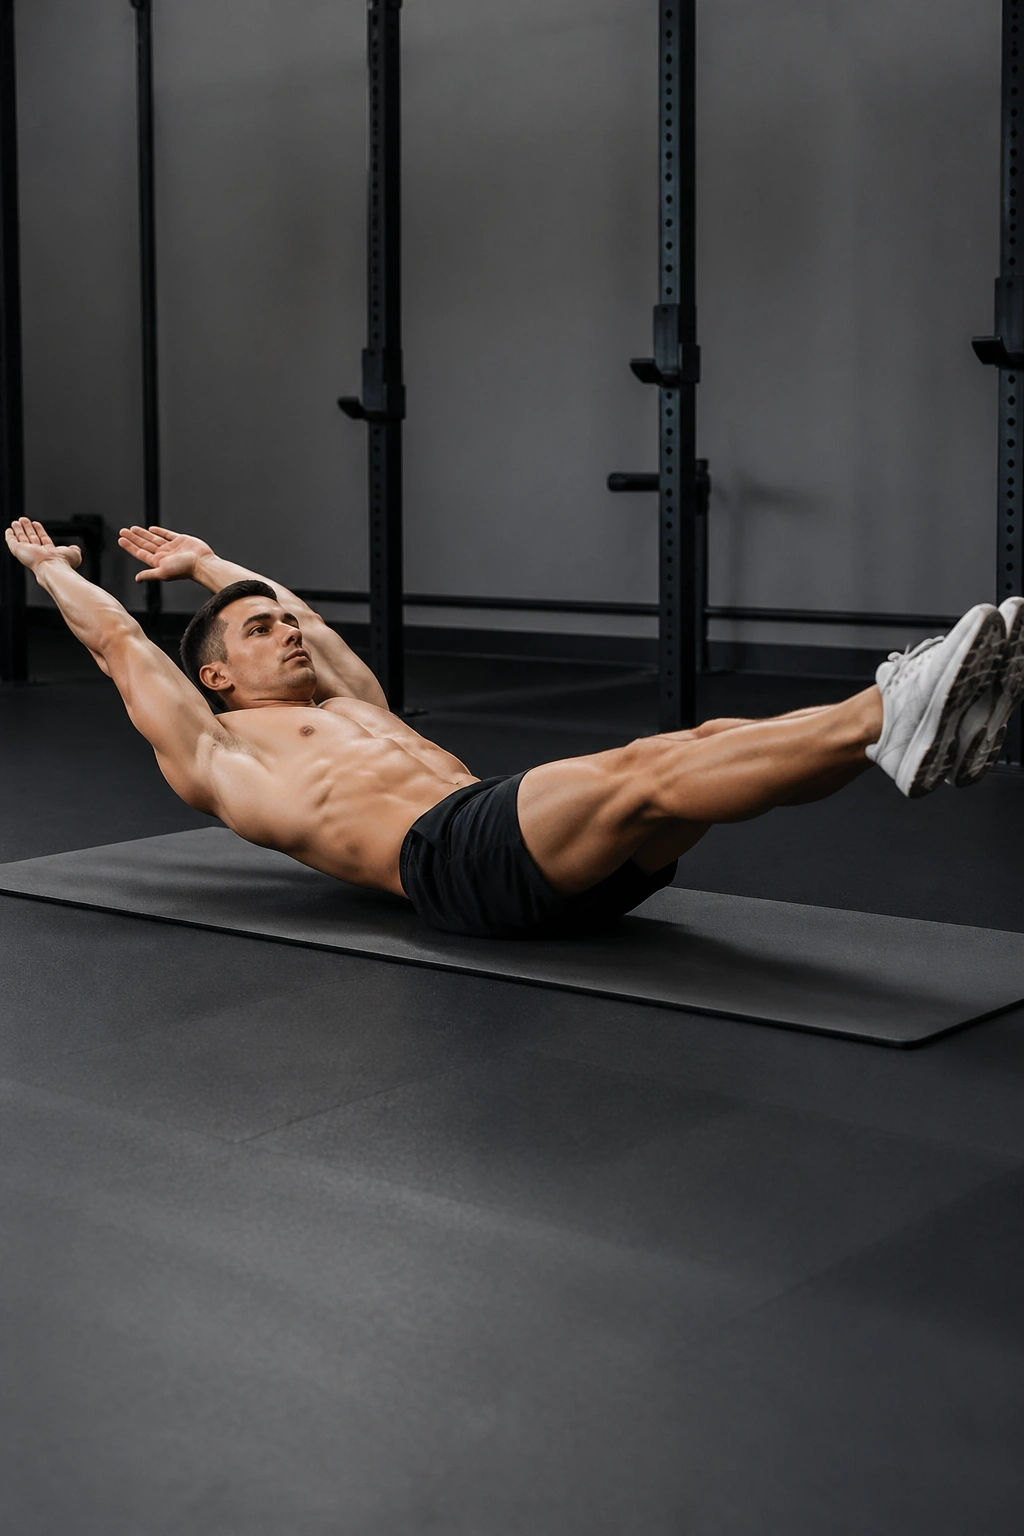
Gymnasts use the hollow body hold for a reason. It teaches the front side of the body to stay tight while the low back stays pressed down and the ribs stay contained.
This one is tough. It looks like lying on the floor and being miserable on purpose. That’s a fair description. The payoff is real, though, because the hollow hold trains full trunk tension instead of one small slice of it.
Progress It the Right Way
Start with the easiest version you can hold without losing your back position. One leg bent, one leg extended. Then both knees bent with arms overhead. Then both legs extended a few inches off the floor. Only after that should you think about hollow rocks.
A lot of people make the same mistake here: they lift the legs higher to make the hold feel easier. That changes the exercise into a different shape. Keep the legs low enough to challenge you, but not so low that your low back peels off the floor. That line is the whole game.
A Simple Progression Ladder
- Tuck hollow hold: 10 to 15 seconds
- One-leg-extended hollow hold: 10 to 15 seconds
- Full hollow hold: 10 to 20 seconds
- Hollow rock: 6 to 10 controlled rocks
Do 3 to 5 rounds with full rest between efforts. Quality falls apart quickly if you turn it into endurance theater.
The hollow hold is demanding, but it builds a kind of stiffness through the torso that carries over to pull-ups, gymnastics-style work, and any movement where you need to keep the body from folding in the middle.
5. Bird Dog
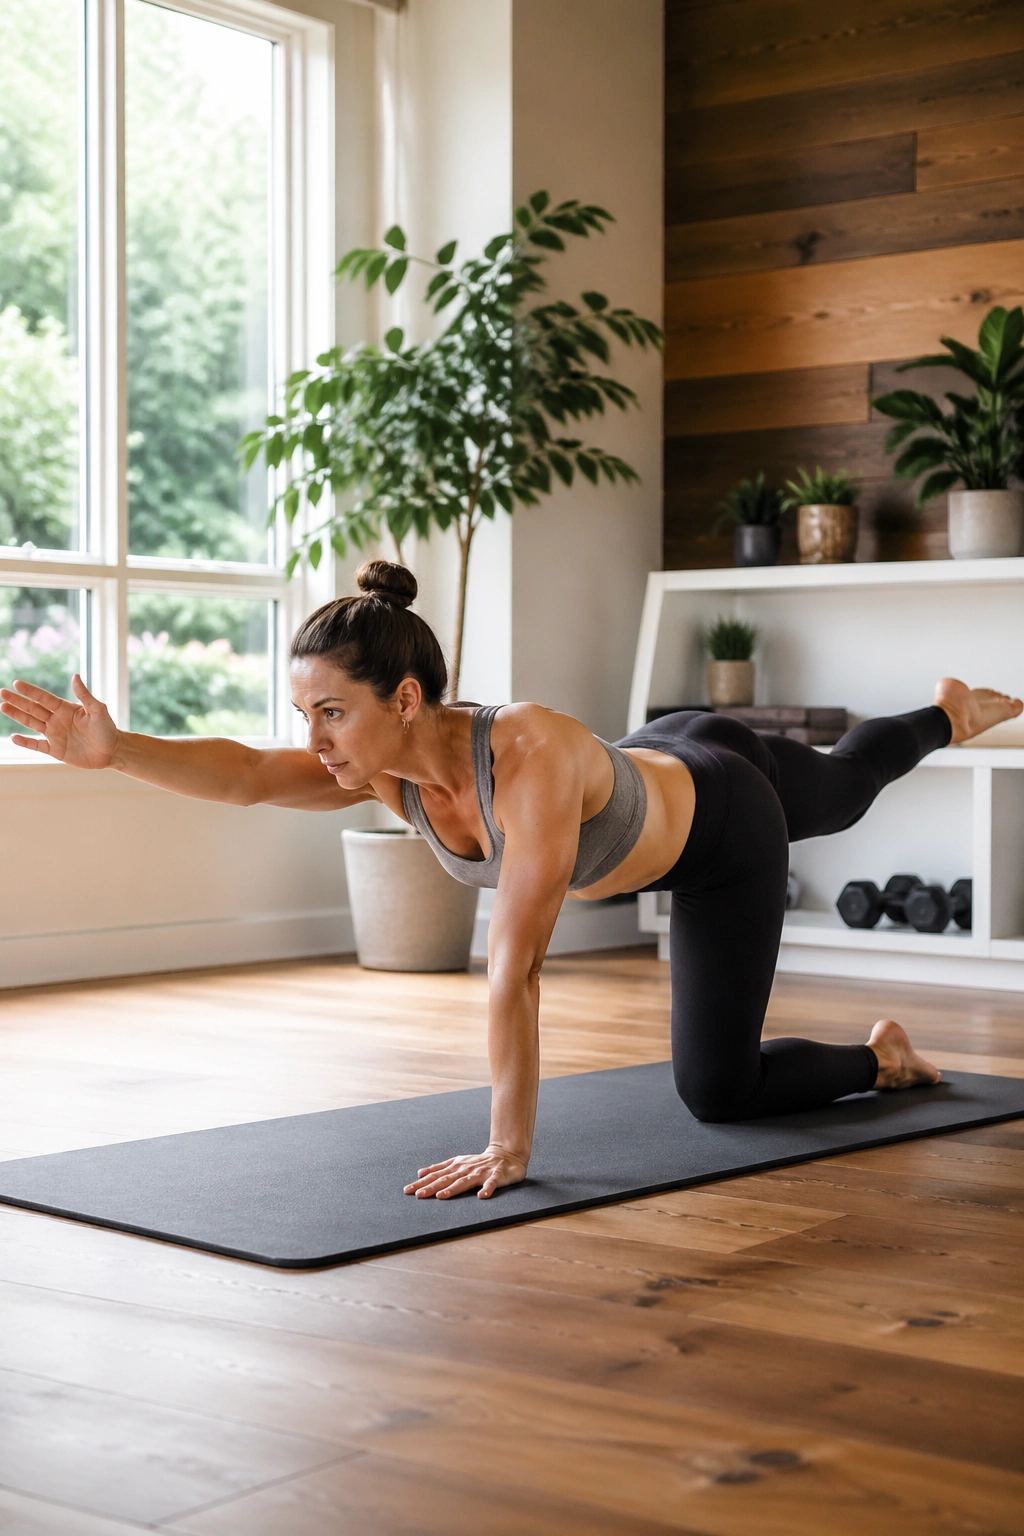
The bird dog is the exercise people skip because it looks too simple. That’s a mistake. Simple does not mean easy, and this one is excellent at showing whether your pelvis can stay level while your arms and legs reach in opposite directions.
What I like about the bird dog is the control it demands without beating you up. It teaches cross-body coordination and spinal stability at the same time. If your back gets cranky with harder abdominal work, this is one of the first drills I’d keep in the program.
Lie on all fours with hands under shoulders and knees under hips. Reach one leg back and the opposite arm forward, but do not let the pelvis twist open. The motion should look smooth and almost boring from the outside. Inside the body, there’s a lot going on.
A good bird dog starts with a small reach. You do not need a huge kick or a long stretch through the fingertips. You need a level pelvis, a quiet rib cage, and enough control to pause for a second at the end range. That pause matters more than most people realize.
Try 2 or 3 sets of 6 to 8 reps per side. Move slowly enough that you could balance a glass on your lower back if you had to. A flat spine beats a bigger reach. Every time.
6. Hanging Knee Raise
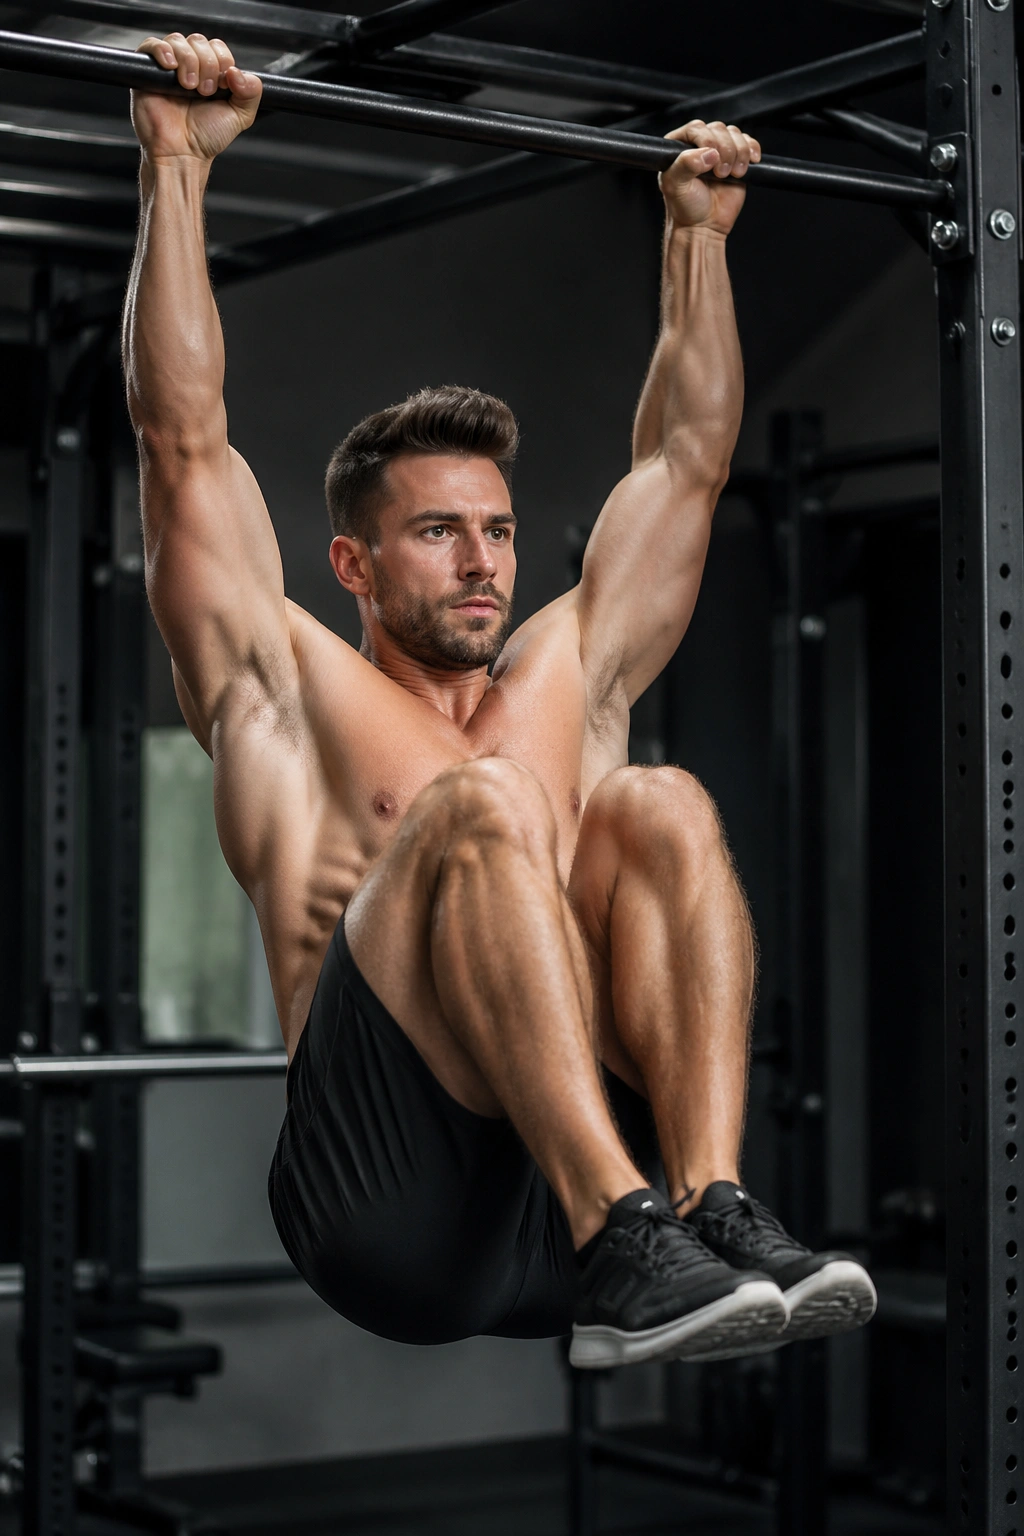
The hanging knee raise looks like an ab exercise, and it is. But it’s also a grip drill, a shoulder-position drill, and a test of whether your pelvis can tuck instead of swinging like a pendulum.
This is where a lot of people get fooled. They think the legs moving means the abs are working. Sometimes. If the body is swinging and the hips never curl, it’s mostly momentum and hip flexors doing their own thing. The real work comes from the posterior pelvic tilt at the top.
How to Make It Count
Start from a dead hang or an active hang if your shoulders need more support. Bring the knees up under control, then finish by curling the tailbone slightly toward the ribs. That little tuck is what brings the lower abs into the conversation.
If you can’t keep the swing down, slow the tempo. A two-second lift, one-second pause, and two-second lower is a good place to begin. Three sets of 6 to 10 reps is plenty. More isn’t better if the form falls apart.
Common Fixes
- Use a captain’s chair if the full hang is too loose.
- Keep the chest quiet.
- Stop chasing height; chase control.
- Lower the knees fully before the next rep.
- Avoid kicking backward to create momentum.
There’s a clean, hard feeling at the top of a good knee raise. You feel it under the ribs and deep in the lower abs. That’s the version worth keeping.
7. Pallof Press
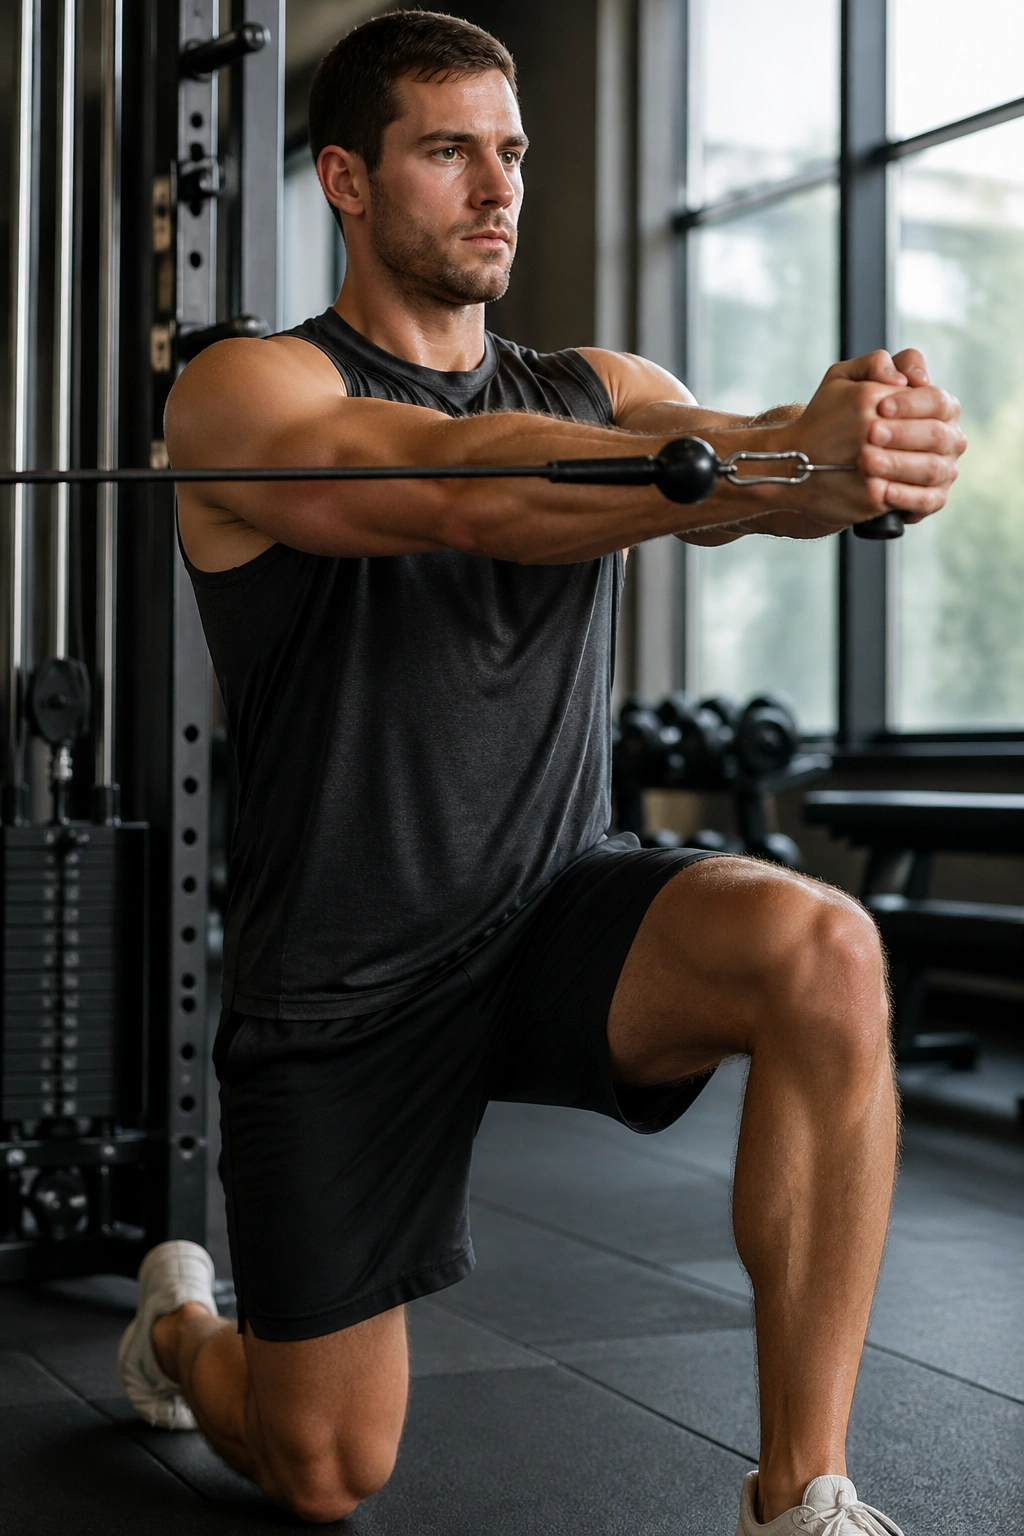
The Pallof press is one of those exercises that looks almost too plain to matter. Then you try to press the handle or band straight out in front of you while your torso wants to rotate, and the point becomes obvious.
It trains anti-rotation strength better than almost anything else on this list. That means your core learns to resist twisting force instead of creating movement. For golfers, lifters, runners, racket-sport players, and anyone who carries odd loads, that matters more than people tend to admit.
Set It Up Cleanly
Use a cable or resistance band at chest height. Stand sideways to the anchor, brace, then press the handle straight out from the sternum and hold for 1 to 2 seconds before bringing it back in. Your hips and shoulders should stay square the whole time.
The half-kneeling version is excellent because it strips away a little momentum and forces cleaner alignment. Tall-kneeling works too. If you want a harder version, step farther from the anchor or hold the press-out longer.
What It Feels Like When It’s Working
You’ll feel the torso fight the pull from the side. The obliques light up. The glutes help more than you expect. And the movement stays small, which is the whole trick.
- 2 to 4 sets per side
- 8 to 12 presses, or 10 to 20-second holds
- Breathe behind the brace
- Keep the rib cage from flaring
- Do not let the band twist your shoulders open
Pallof presses are not exciting. They are useful, and there’s a difference.
8. Ab Wheel Rollout
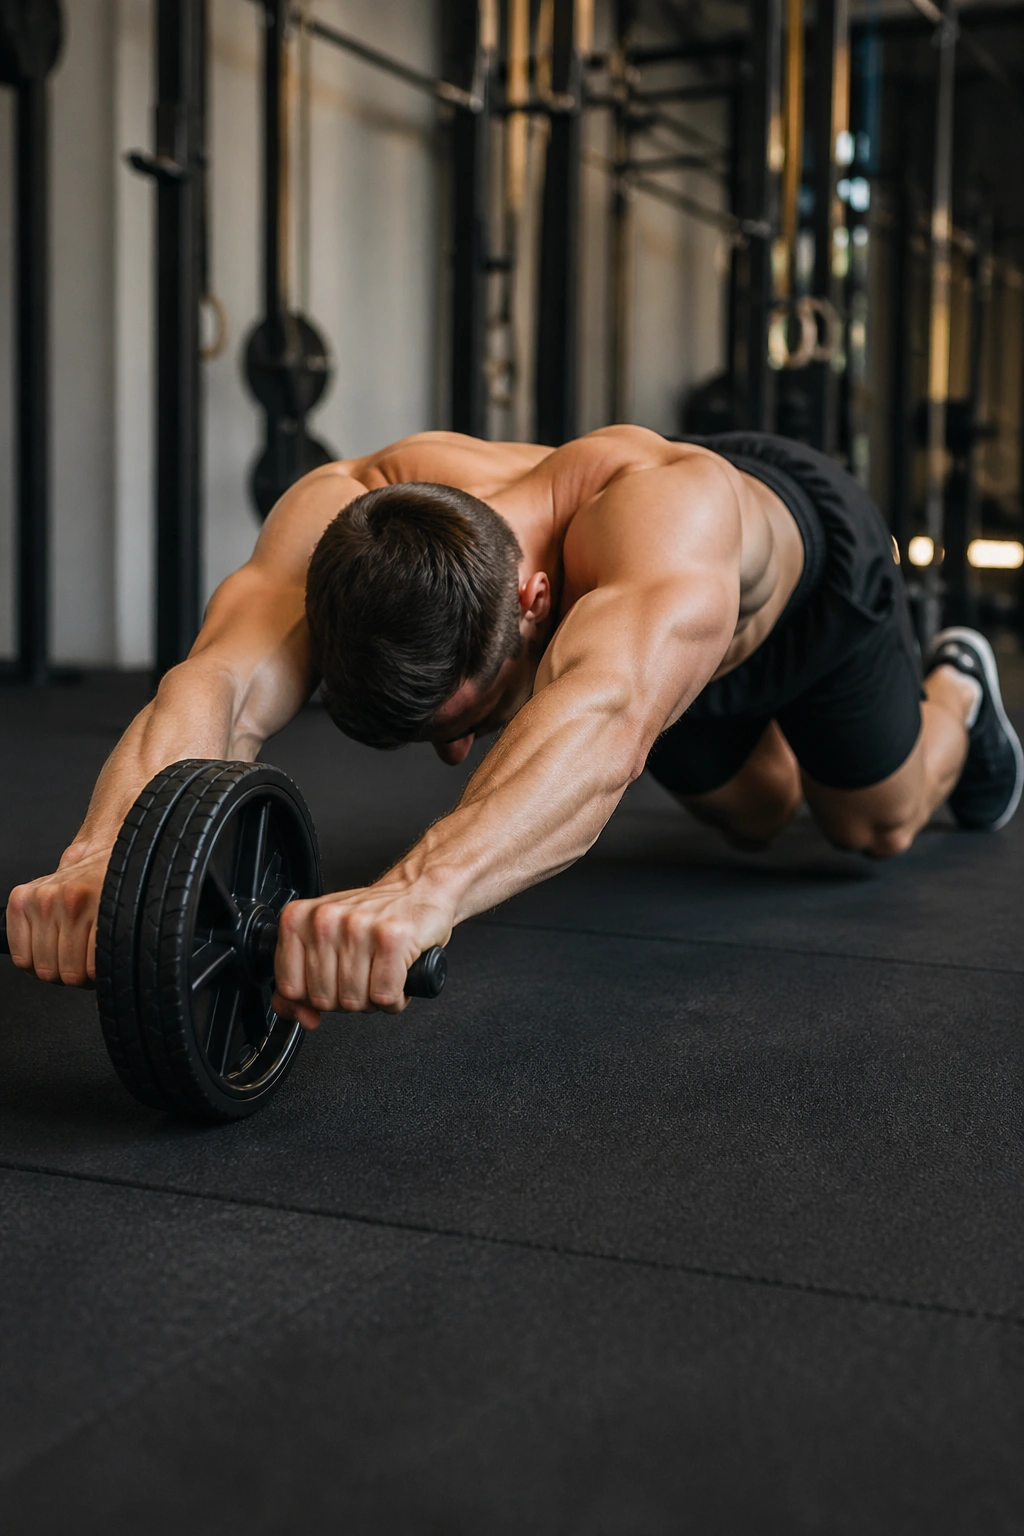
The ab wheel rollout is the exercise on this list most likely to humble people who think their core is already strong. It’s not subtle. If your midsection can’t keep the pelvis tucked and the ribs down, the low back will tell you immediately.
This is a serious anti-extension drill. The wheel pulls your body forward, and your job is to stop the lumbar spine from arching as you roll out and come back in. The farther you go, the harder that brace becomes. Small range counts.
Start Conservatively
Kneel on a pad, grip the wheel, and roll only as far as you can while keeping the torso locked in a long, strong line. If the lower back starts sagging, you went too far. That’s your ceiling for the day.
You can make this safer by rolling toward a wall or using a short range first. Some people start with an incline or place the wheel on a slightly raised surface. That is not cheating. It is smart.
The Progression Path
- Kneeling short-range rollout
- Kneeling full-range rollout
- Rollout to wall or stopper
- Standing rollout, only much later
Do 2 to 4 sets of 5 to 8 reps. Rest enough that each rep stays crisp. If the last two reps look like your spine is trying to fold in half, cut the set short.
This is one of the few exercises here where I’d rather see someone underdo it than chase volume. The wheel rewards control and punishes ego. Fair trade.
9. Slow Mountain Climbers
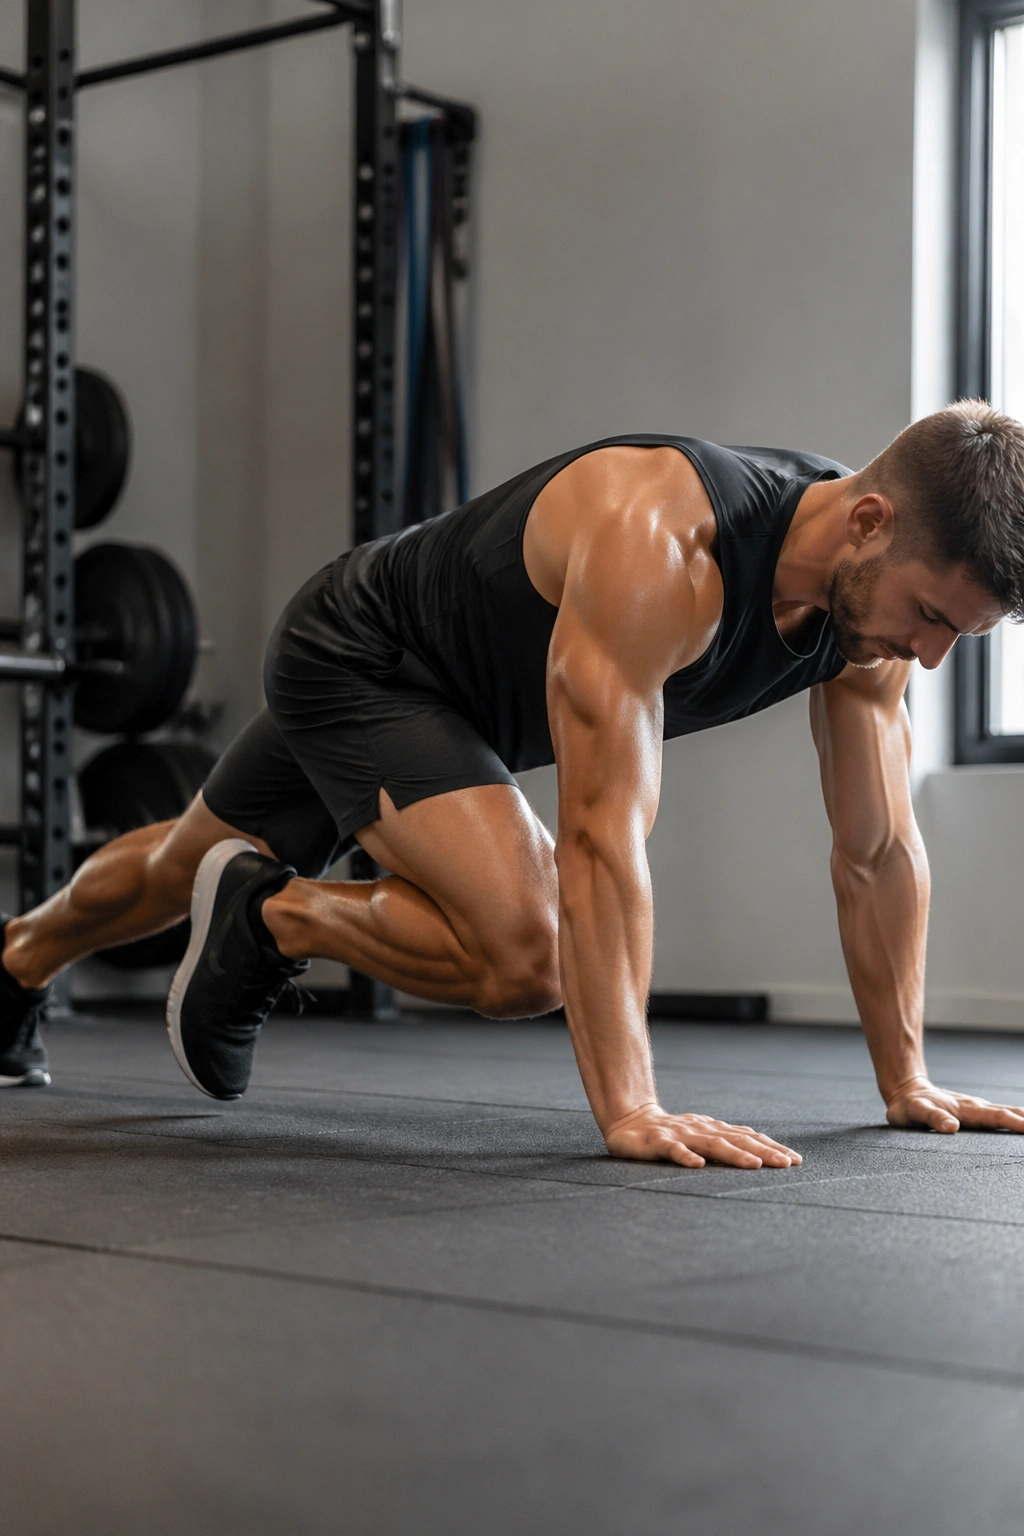
Most people treat mountain climbers like a cardio finisher. Fine. But the slow version is a different animal, and it deserves a place among the best core exercises for a strong midsection because it forces the trunk to stay quiet while the legs move underneath it.
That is harder than it sounds. Hands under shoulders, body in a plank, then bring one knee in slowly and return it slowly without bouncing through the hips. You can feel the abs, the hip flexors, and the shoulder stabilizers all trying to keep the frame together.
Why Slow Beats Fast Here
Fast mountain climbers turn into noise. Slow mountain climbers create control. The trunk has time to react, so you find out whether your brace actually holds when a leg comes off the floor and swings forward.
I like using them as a bridge between static core work and more dynamic training. They’re great after planks, dead bugs, or Pallof presses when the body already knows what “tight” feels like. Then you ask it to stay tight while the limbs move.
A Clean Tempo
- Start in a strong high plank
- Drive one knee toward the chest over 2 seconds
- Pause for a beat
- Return over 2 seconds
- Switch sides without rocking the hips
Do 2 to 4 rounds of 8 to 12 reps per side. If your hips bounce like a tennis ball, slow down more. If your shoulders melt, shorten the set.
The slow version is the one worth keeping. The fast version is fine if you want sweat. This one builds a midsection that can hold shape under movement.
10. Suitcase Carry
The suitcase carry is one of my favorite core exercises because it looks too easy until the weight gets heavy enough. Then your torso has to fight a side bend with every step, and the whole body gets organized fast.
Unlike crunches, which mainly flex the trunk, the suitcase carry trains you to stay tall under offset load. That means anti-lateral flexion strength. Translation: you resist being pulled to one side while you walk. It’s the kind of strength that shows up when you carry a grocery bag in one hand, drag luggage across a floor, or lift weights that do not sit evenly.
How to Do It Well
Pick one heavy dumbbell or kettlebell and hold it in one hand. Stand tall, ribs stacked over pelvis, and walk with short, controlled steps. Do not lean away from the weight. Do not hike the shoulder. Do not rush.
Start with 20 to 40 meters per side, or 20 to 45 seconds if space is tight. A heavier load with clean posture beats a lighter load that lets you wobble around. That wobble is the point only when you can control it.
Why It Works So Well
- It trains grip and trunk together.
- It exposes side-to-side weakness fast.
- It carries over to sport and daily lifting.
- It teaches the body to stay square while moving.
You can also use a suitcase carry as a warm-up for heavy lower-body lifting. Two or three short trips are usually enough to wake up the trunk without tiring it out.
If I had to pick one exercise here for plain old real-world usefulness, this would be near the top. It’s direct. It’s hard in a useful way. And it tells the truth about your midsection faster than most ab work ever will.
Pick three of these exercises and train them two or three times a week. Rotate one anti-extension move, one anti-rotation move, and one carry or dynamic drill, and your core work stops being random very quickly.
