



If you’re searching for yoga poses that target belly fat for women, the first thing worth saying is the least glamorous part: no pose can peel fat off your stomach on command. Spot reduction is a stubborn myth. What yoga can do—when you practice it like training, not like a once-in-a-while stretch—is strengthen the deep core, raise your heart rate in short bursts, help with posture, and take some pressure off stress-driven habits that often show up around the waist.
That matters even more for women, because the “belly fat” conversation is rarely only about fat. It is also about bloating, sleep debt, desk posture, pelvic floor weakness, pregnancy history, hormone shifts, and the way stress lands in the body. A softer midsection can come from stored fat, yes, but also from a rib cage that flares up, hips that stay tight all day, and abdominal muscles that do not fire well anymore.
I think women get bad advice on this topic. Too many plans throw 200 crunches at the problem and ignore breathing, walking, food, sleep, and strength. Yoga is not magic, and it will not outwork a chaotic routine by itself, but it is one of the better ways to build usable core strength—the kind that holds you upright, supports your back, and makes your whole middle feel tighter instead of just sore.
Use the poses below as a workout. Pick 6 to 8 poses, hold the static ones for 20 to 45 seconds, do the moving ones for 6 to 12 reps per side, and cycle through them 2 or 3 rounds. If you are pregnant, recently postpartum, dealing with diastasis recti, or you feel pelvic heaviness or leaking during exercise, get cleared by a clinician or pelvic floor physical therapist first. Then roll out the mat and start where your body is, not where your ego wants it to be.
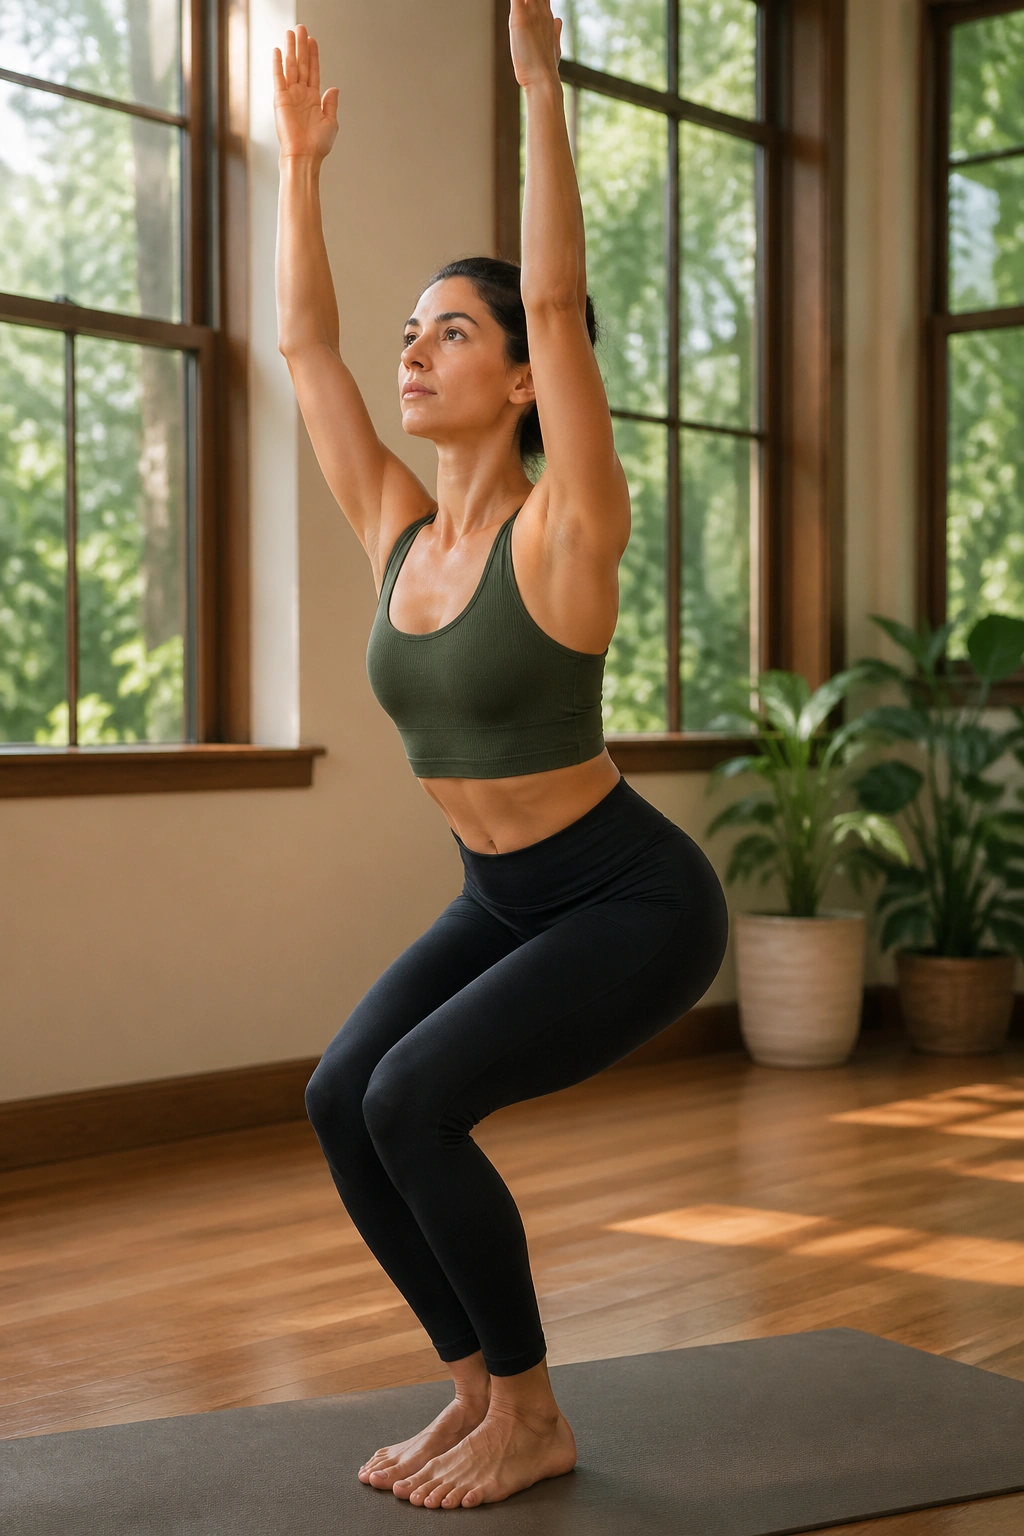
1. Chair Pose for Belly Heat
Take a squat, lift your arms, and stay there longer than you want to. Chair Pose (Utkatasana) looks simple from across the room. It is not simple when your thighs start burning and your ribs want to pop forward.
This pose earns its spot because it turns on more than your abs. Your quads, glutes, upper back, and deep core all work together to hold you upright. That full-body demand raises energy use more than a passive pose, and the steady exhale helps draw the lower belly in instead of letting it spill forward.
Why it works so well
When you sit your hips back and keep your chest lifted, the body has to resist folding in half. That resistance recruits the transverse abdominis—the corset-like muscle that wraps around your waist. If you have spent years standing with your ribs flared and your pelvis tipped forward, Chair Pose teaches a better stacked position.
Form cues that change the feel
- Stand with feet hip-width apart if your lower back feels pinchy or your pelvic floor needs more support.
- Bend your knees until your thighs are at about a 45-degree angle to the floor.
- Reach your arms up, but keep your lower ribs drawn in instead of thrusting them forward.
- Hold for 30 to 40 seconds, rest for 15 seconds, then repeat 2 or 3 times.
Best use: put Chair Pose near the start of your sequence, while your legs still have some life in them.
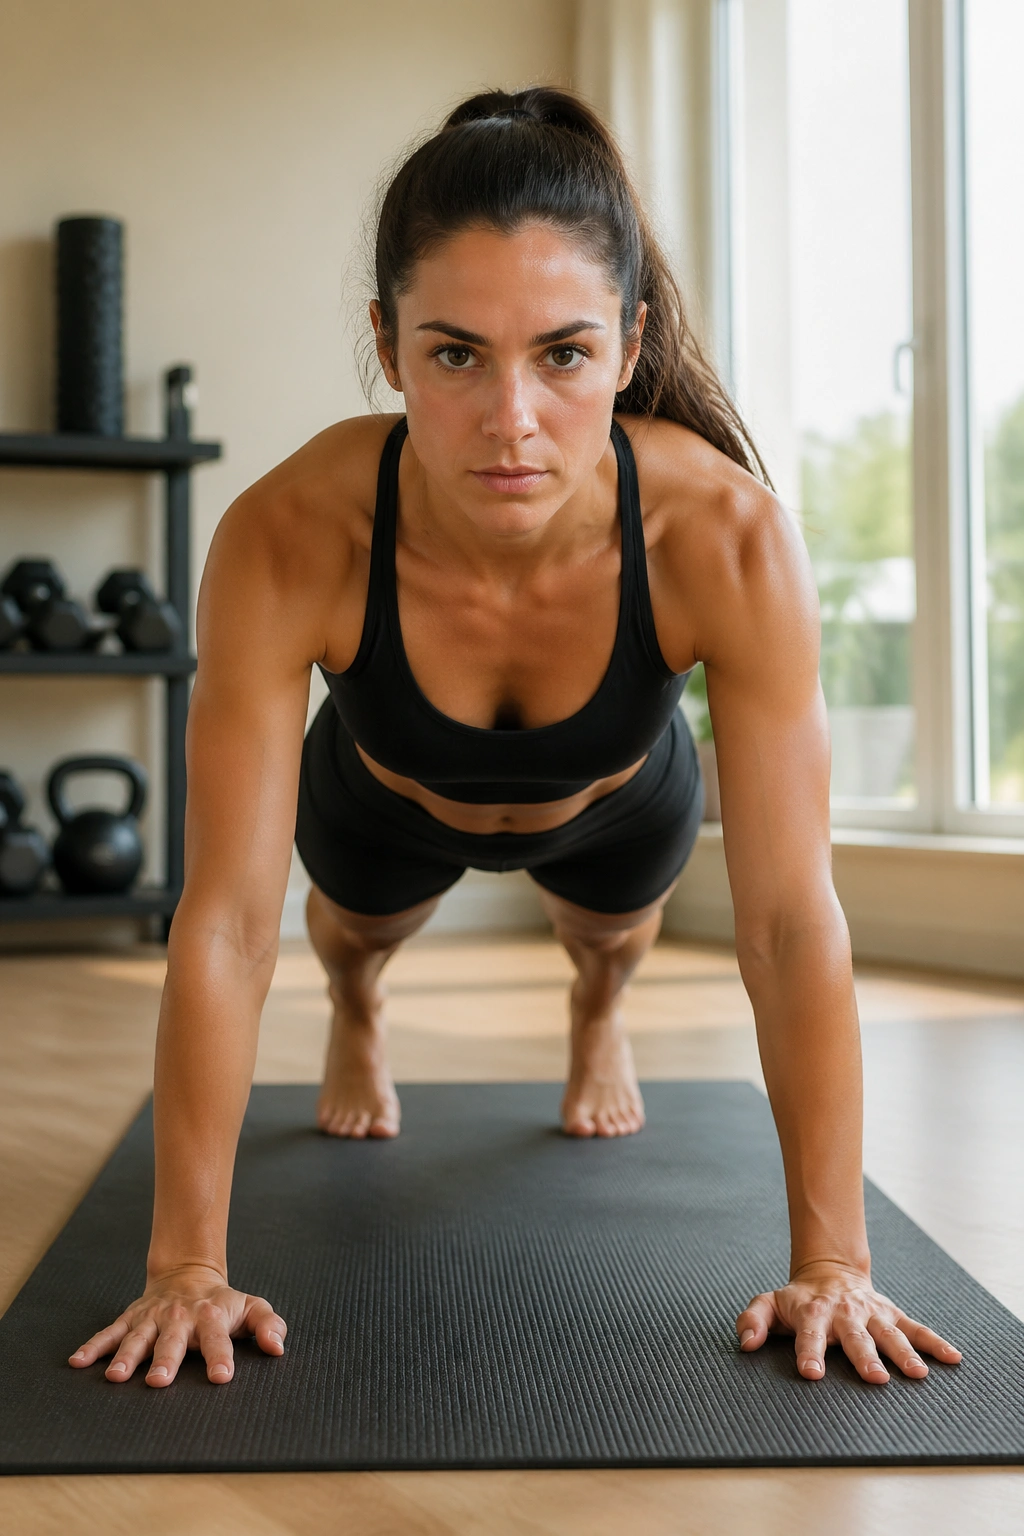
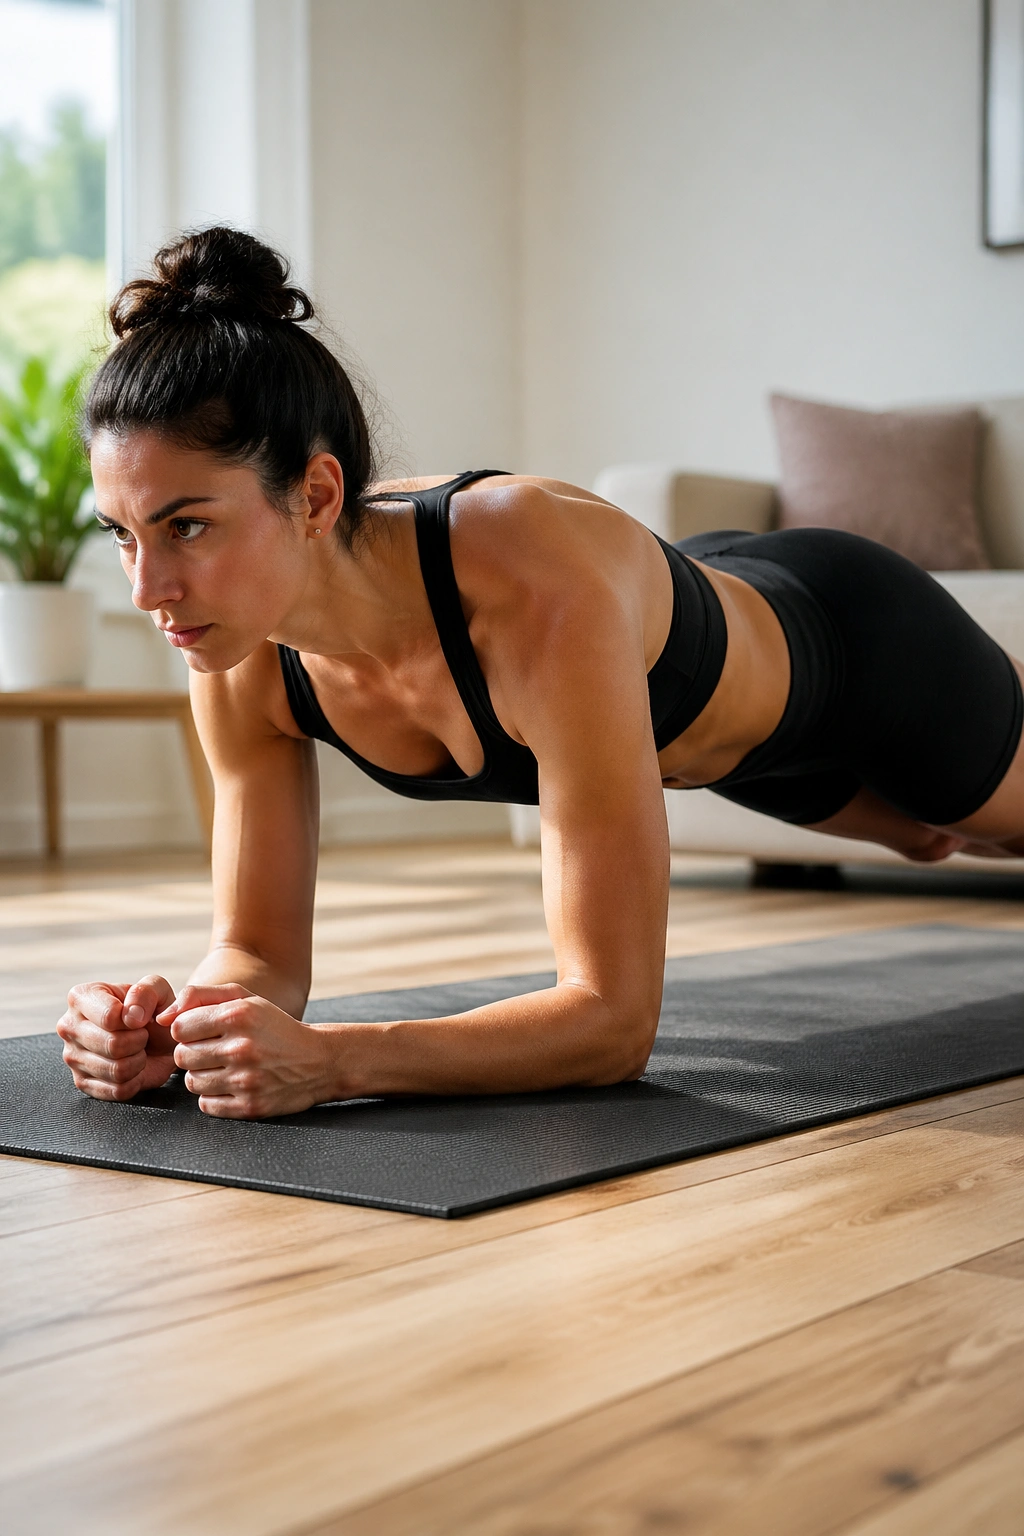
2. Plank Pose for Total-Core Tension
Plank Pose (Phalakasana) is one of the best belly-fat yoga poses because it trains the whole front side of the body at once. Not the glamorous answer. Still the right one.
A good plank is not a waiting game. It is active from head to heel. Press the floor away, spread your shoulder blades, squeeze your legs, and send your heels back. When those pieces lock in, your abs have no choice but to brace hard, especially on each slow exhale. That kind of full-body tension helps build muscle, and more muscle means your body uses more energy across the day—not only during the pose itself.
Most people miss the setup. They drop their hips, hang through the low back, and call it core work. That is a joint hang, not an abdominal drill. Aim for shoulders stacked over wrists, a straight line from ear to ankle, and a soft gaze a few inches ahead of your hands. Stay for 20 to 30 seconds with clean form. If you can still breathe smoothly, work up to 45 seconds.
One more thing. Plank is also honest. If your midsection is weak, the pose tells you fast.
3. Forearm Plank for Deep Core Endurance
Why does Forearm Plank feel harsher than regular plank for so many women? Because it takes away some of the wiggle room. Once you drop onto the forearms, you cannot lean on straight-arm structure the same way, and the deep abs usually have to do more.
Your base is lower, but the work is not lighter. In fact, many women feel their lower belly switch on faster here, especially when they lengthen the tailbone toward the heels and breathe out through pursed lips. That long exhale matters. It helps pull the ribs down and creates a stronger abdominal brace.
A cleaner way to hold it
Set your elbows under your shoulders and clasp your hands or keep the forearms parallel. Step the feet back until your body forms a long line. Then:
- Pull your elbows toward your toes without moving them.
- Tighten your thighs and glutes.
- Hold for 15 to 25 seconds the first round.
- Build toward 3 rounds with 20 seconds of rest between them.
If your back starts taking over, drop your knees and keep the same rib position. Knee-down forearm plank done well beats a sloppy full version every time.
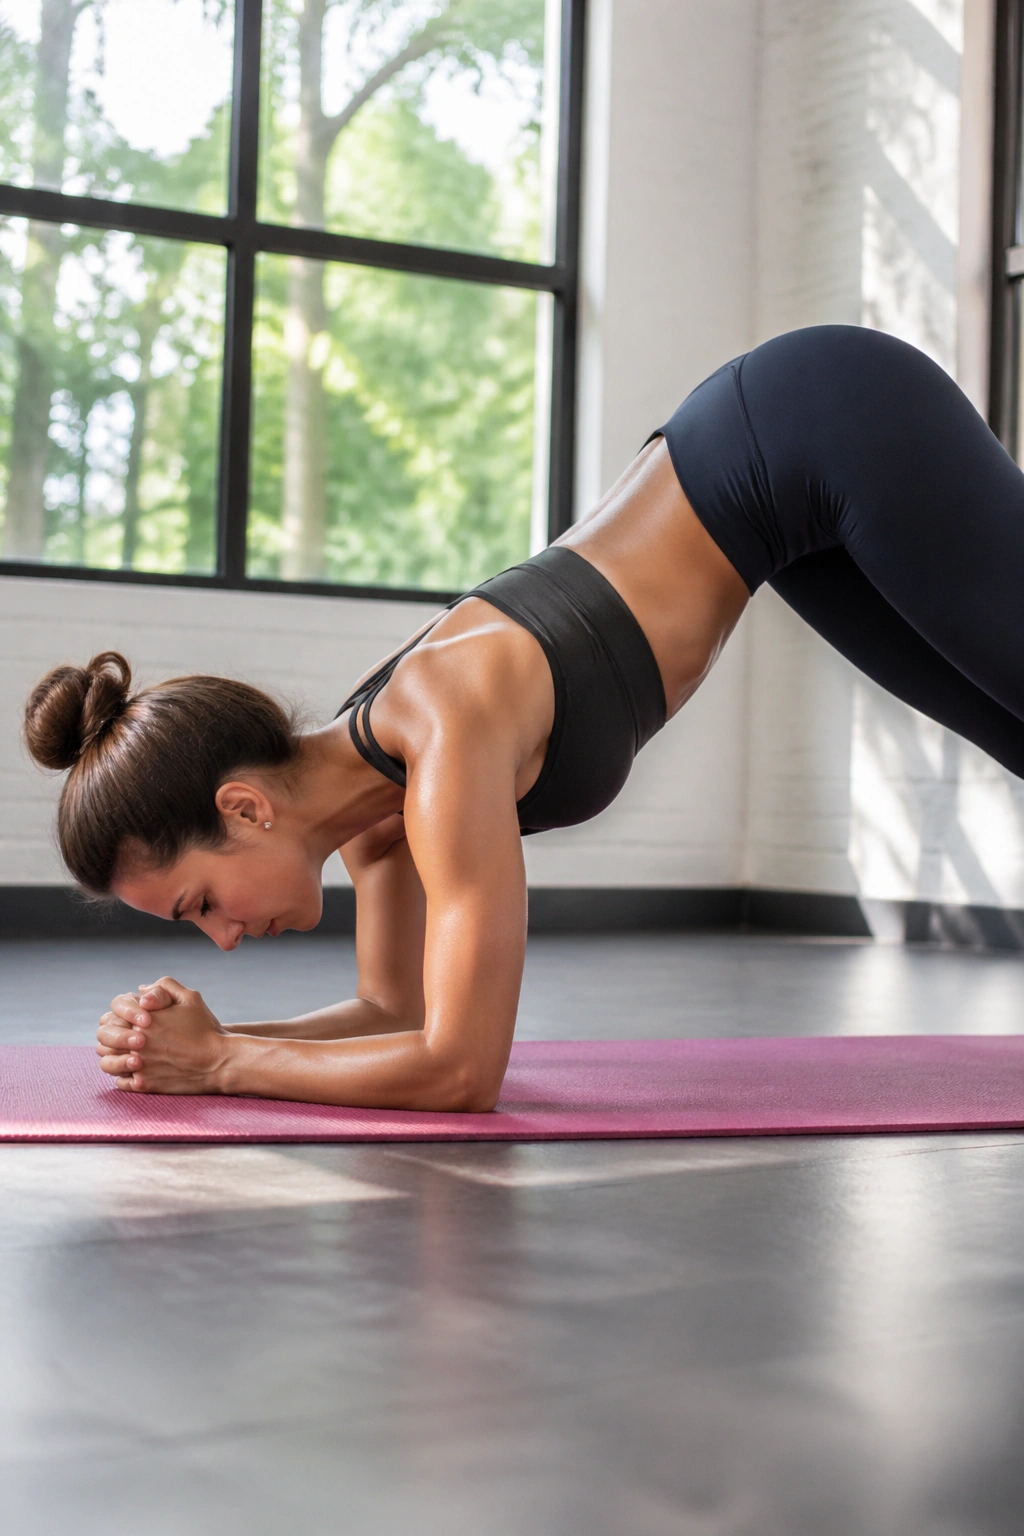
4. Dolphin Plank for Shoulder and Belly Strength
Most people meet Dolphin Plank and think it will feel like forearm plank with a tiny adjustment. Then they shift forward from Dolphin Pose, stack shoulders over elbows, and their whole upper body starts shaking.
That shake is useful. Dolphin Plank asks your shoulders and serratus muscles—the ones that help control the shoulder blades—to work hard while your abs keep the trunk from sagging. When the upper body gets stronger, your planks, side planks, and chaturanga work all improve, which makes the rest of a belly-focused yoga flow more effective.
Try moving between Dolphin Pose and Dolphin Plank for 6 to 8 slow reps. Move on an exhale as you glide forward, then inhale as you push the hips back. Keep the neck long. No chin jutting.
A few cues help a lot:
- Keep elbows shoulder-width apart, not splaying wide.
- Shift until your shoulders pass slightly in front of the elbows.
- Draw the lower belly in as if you are zipping up tight jeans.
- Stop the set when your low back starts dipping.
This one sneaks up on you.
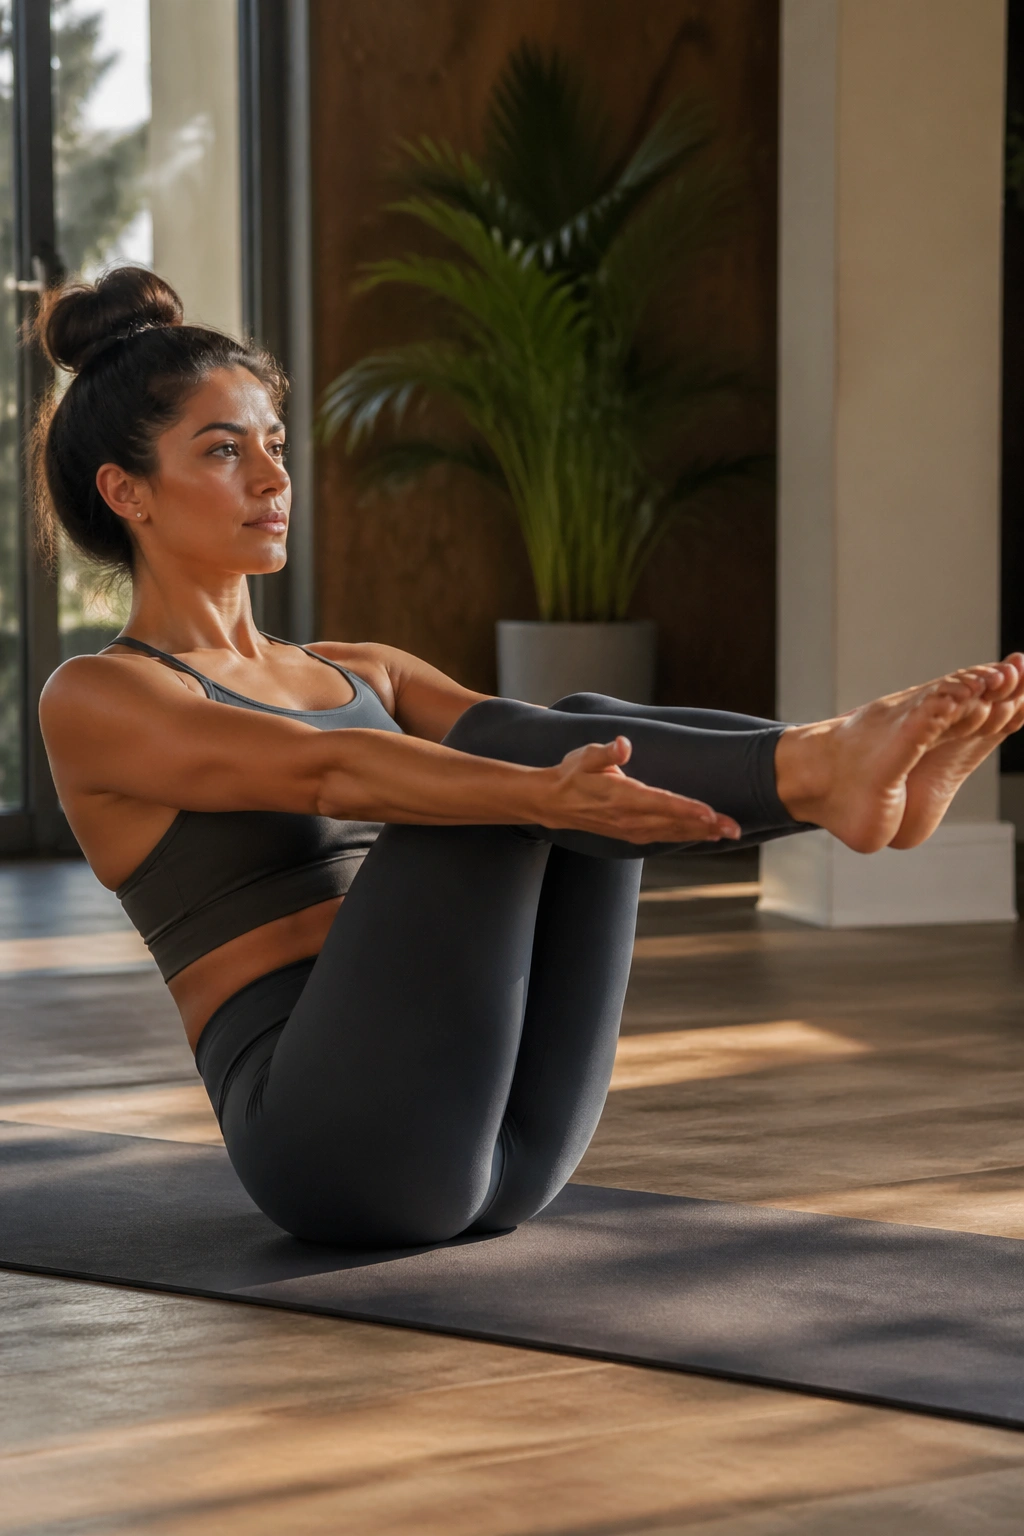
5. Boat Pose for Lower Belly Strength
If one pose has the strongest reputation for belly work, it is Boat Pose (Navasana). The reputation is earned. When you hold Boat correctly, your lower abs, hip flexors, and spinal stabilizers all light up at once.
The catch is that a lot of people do not hold it correctly. They collapse the chest, round the low back, and grab through the front of the hips. That version feels hard, but it is not the kind of hard you want. Start seated with your knees bent and feet on the floor. Lean back until you feel your abs engage, then lift one foot, then the other, until your shins are parallel to the floor. Stay there before you rush to straighten the legs.
Your breastbone should stay lifted. Your spine should feel long. If you start shaking after 15 seconds, good—that is often the sweet spot for clean work. Build to 25 or 30 seconds, breathe through the wobble, and rest fully before the next round.
I like Boat Pose most when it shows up after a standing section. Your heart rate is already up, your core is warm, and you do not spend the first rep negotiating with yourself.
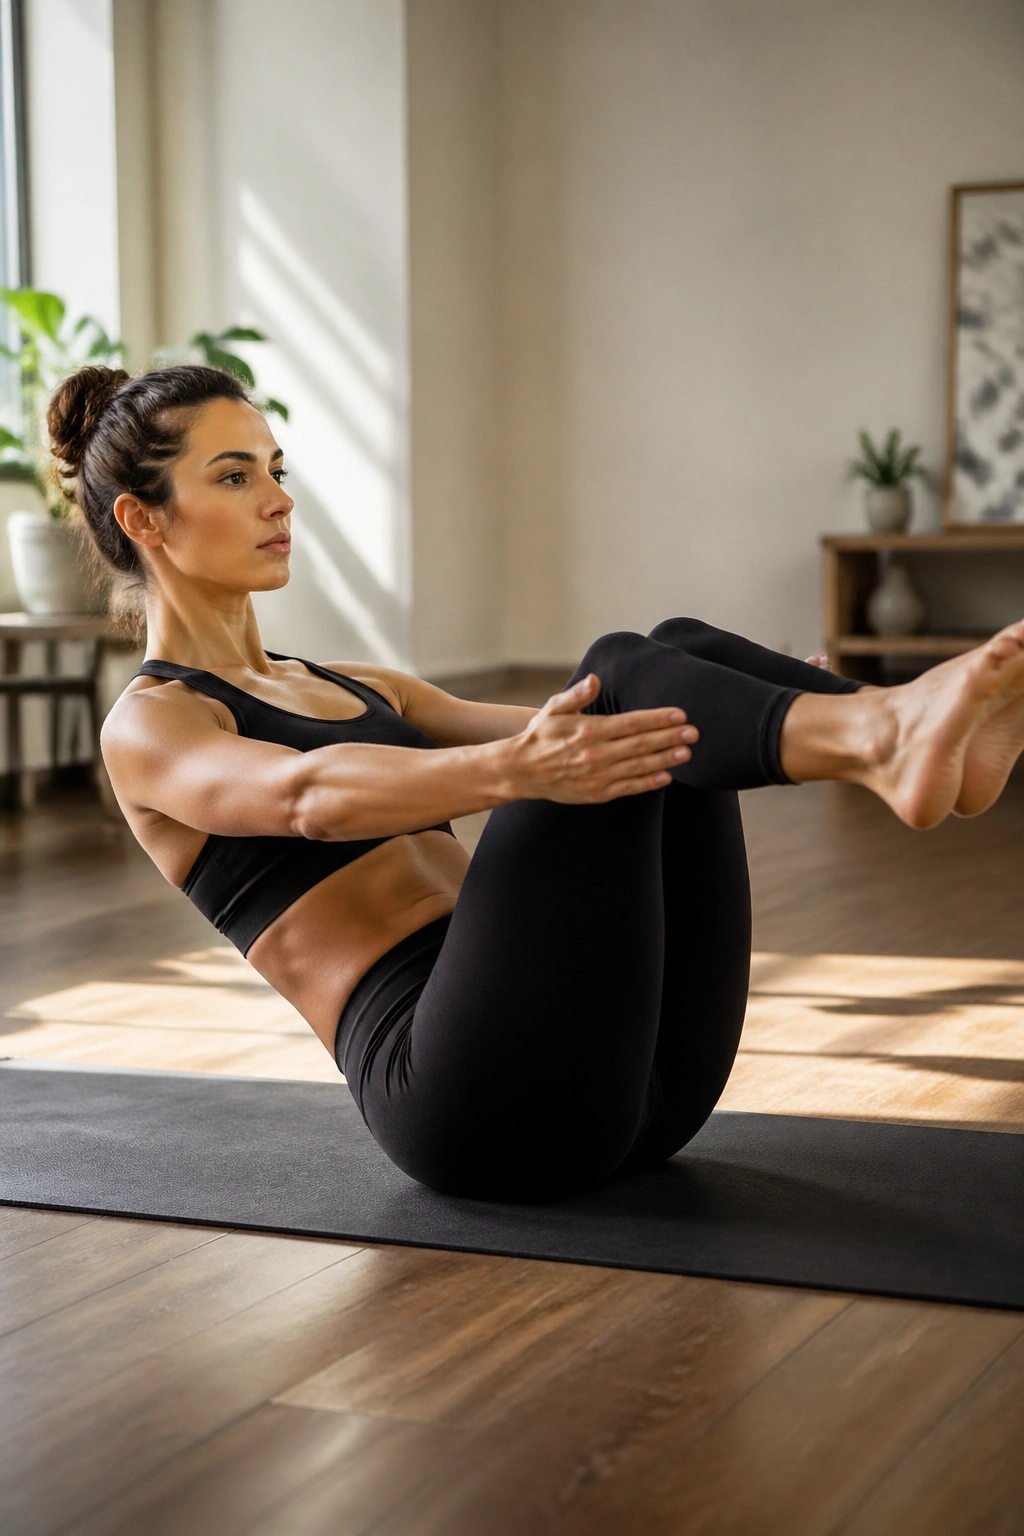
6. Half Boat Pose for Slow-Burn Abs
Unlike full Boat, Half Boat (Ardha Navasana) does not let you hide behind an upright chest and bent knees. You lean back more, your abs have to grip harder, and the lower belly often feels the work within a breath or two.
This is one of my favorite poses for women who say they “feel everything in the hip flexors.” Half Boat gives you room to find the abdominal brace first. Begin seated, hands behind the thighs. Roll down until your torso is at about a 45-degree angle from the floor. Keep the chest open, bend the knees, and lift the feet. From there, you can reach the arms forward or extend the legs partway.
Do not flatten yourself to the mat. That turns it into a different drill. Stay curled with control, low ribs tucked, and lower back long. Hold 15 to 20 seconds, rest 10 to 15 seconds, and repeat 3 times. Short rounds work better than one long, ugly struggle.
If your neck clenches, support the head lightly with one hand for a round and train the shape without losing position.
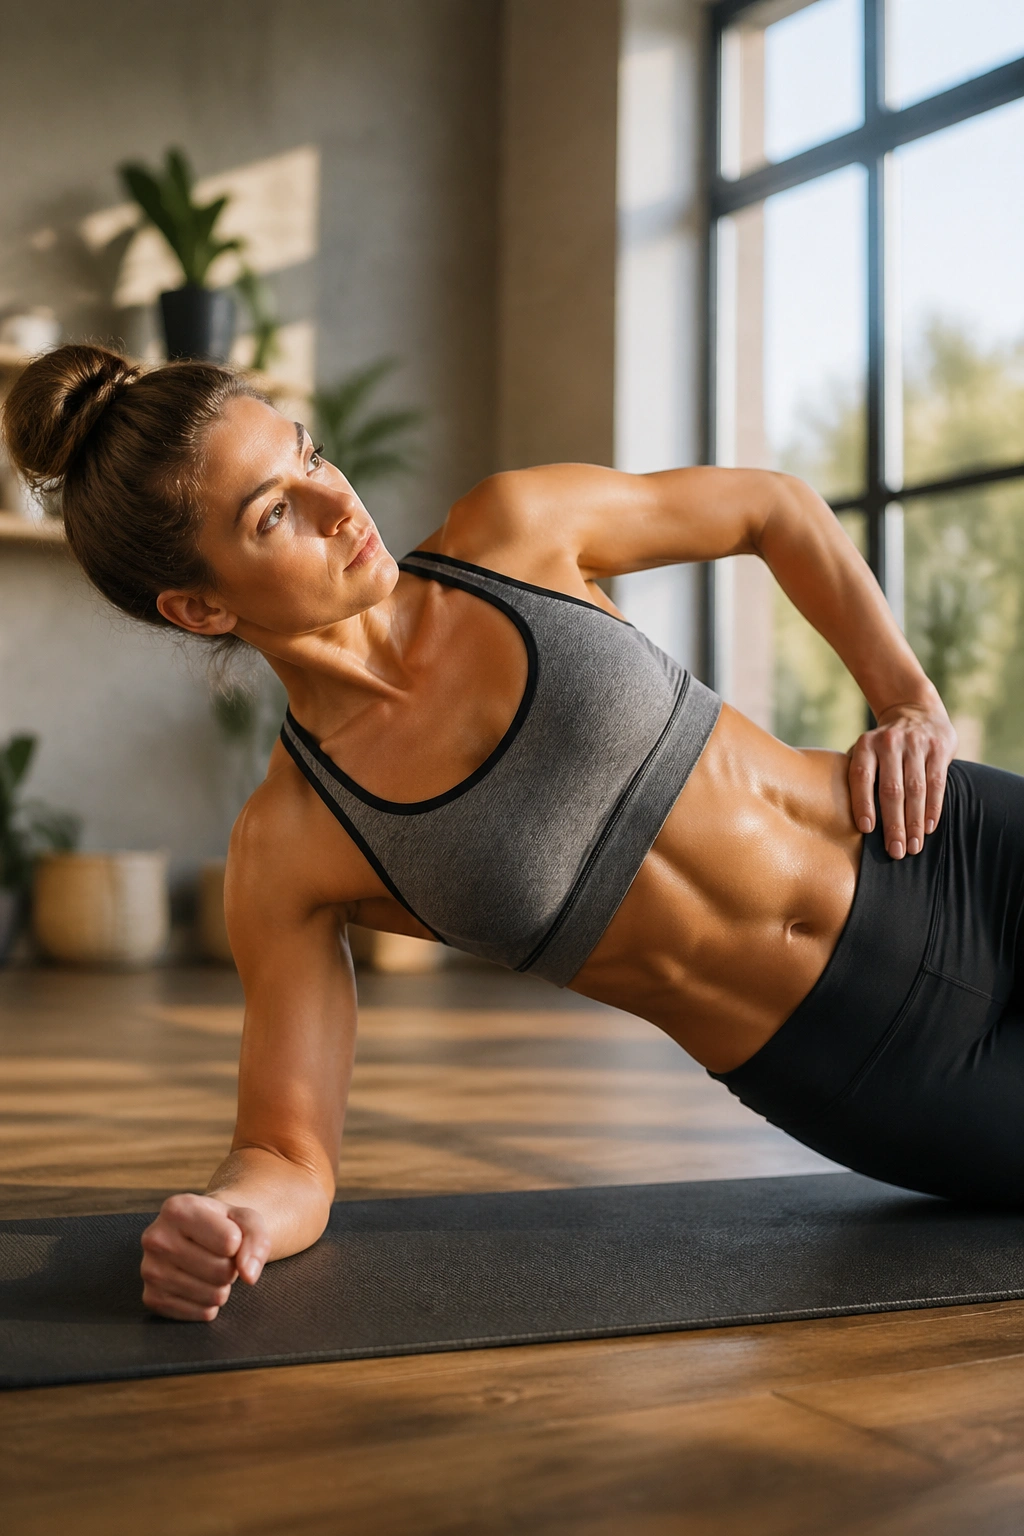
7. Side Plank for Waistline Work
If your goal is a stronger waist, Side Plank (Vasisthasana) deserves a spot near the top of the list. It trains the obliques, shoulder stabilizers, glutes, and side-body muscles that help pull the whole midsection inward and upward.
A lot of women skip side plank because it feels awkward at first. That is part of why it works. Balance is limited. Your body has to resist tipping, twisting, and collapsing. That anti-rotation job is gold for core strength and for everyday movement—carrying a child on one hip, hauling groceries, even walking fast without your torso flopping around.
Make it fit your body
There is no prize for stacking the feet on day one.
- Start with one knee down if the full version strains your wrist or shoulder.
- Press the floor away and lift the underside of the waist.
- Hold 15 to 25 seconds per side.
- Add a top-leg lift for more outer-hip work when the base version feels steady.
One sharp cue: think “lift from the bottom waist,” not “hang from the shoulder.”
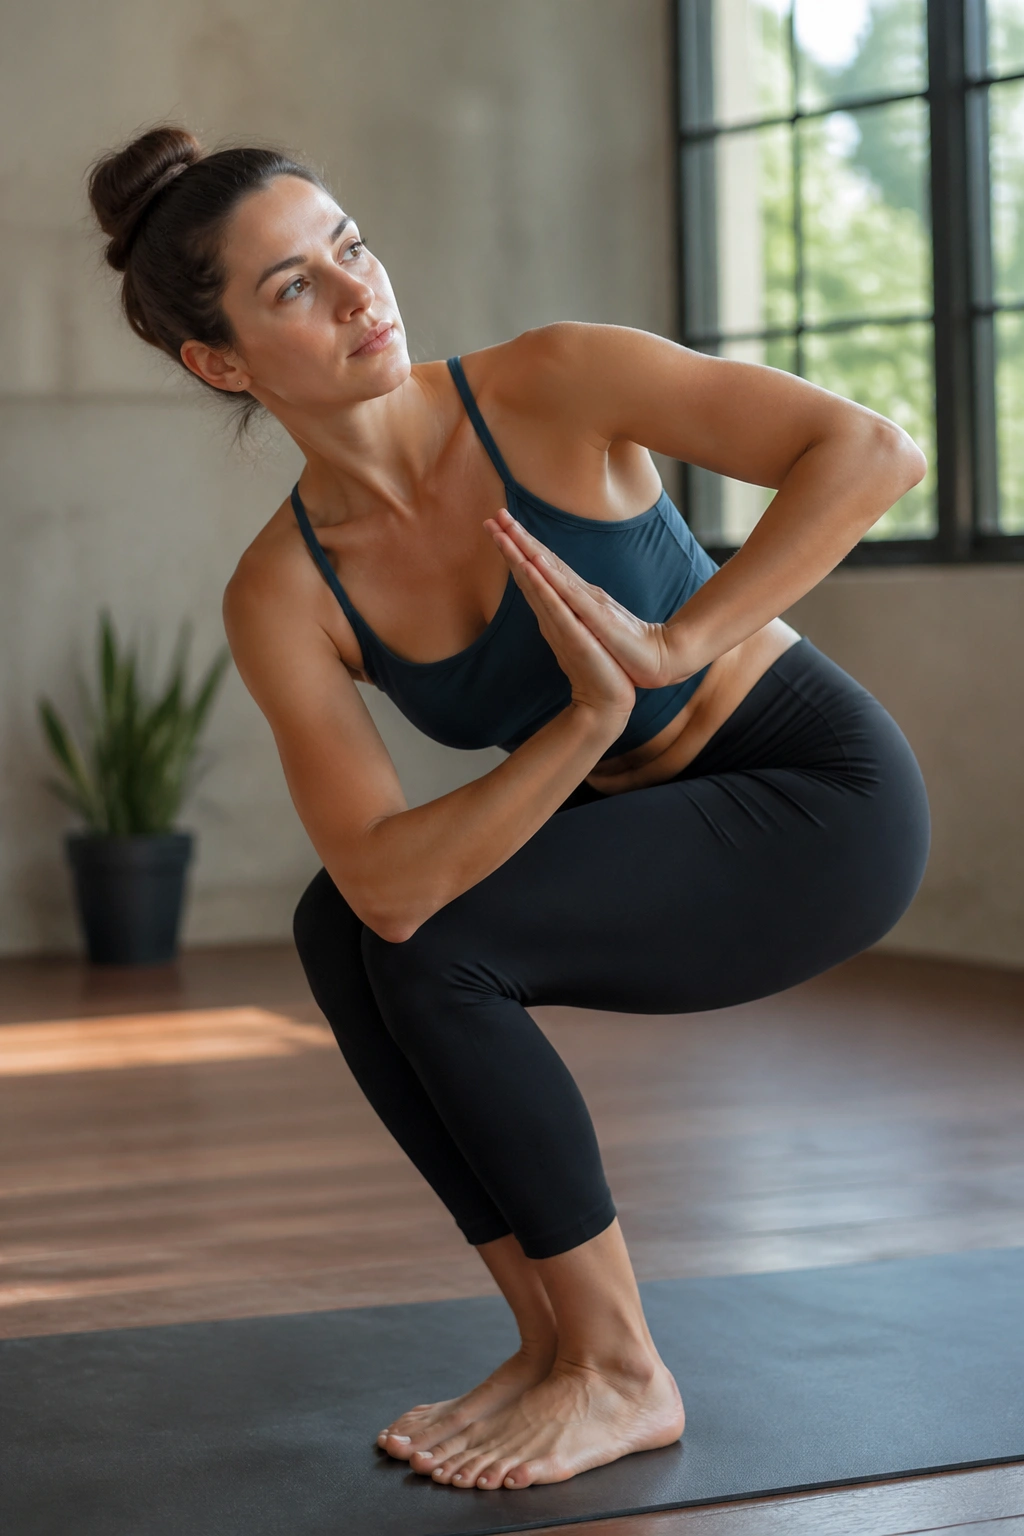
8. Revolved Chair Pose for Oblique Fire
Drop into Chair Pose, press your palms together, hook your elbow outside the opposite thigh, and Revolved Chair (Parivrtta Utkatasana) turns into a full-body argument. Legs are working. Breath is working. Obliques are working. Balance is making its own demands.
This pose targets the waist through rotation, but the twist should come from the mid and upper back, not from wrenching the knee line apart. Keep the knees even. If one knee shoots forward, back out of the twist until you can control both legs. Then exhale and turn a little deeper from the rib cage.
Stay for 4 to 6 breaths per side. On each inhale, lengthen the spine. On each exhale, draw the belly in and rotate a touch more. That breathing pattern matters because the exhale helps tighten the abdominal wall. You can feel it, especially around the side waist.
If your balance is shaky, separate the feet by 3 or 4 inches. Purists may grumble. Your joints will not.
9. Revolved Crescent Lunge for Rotation and Balance
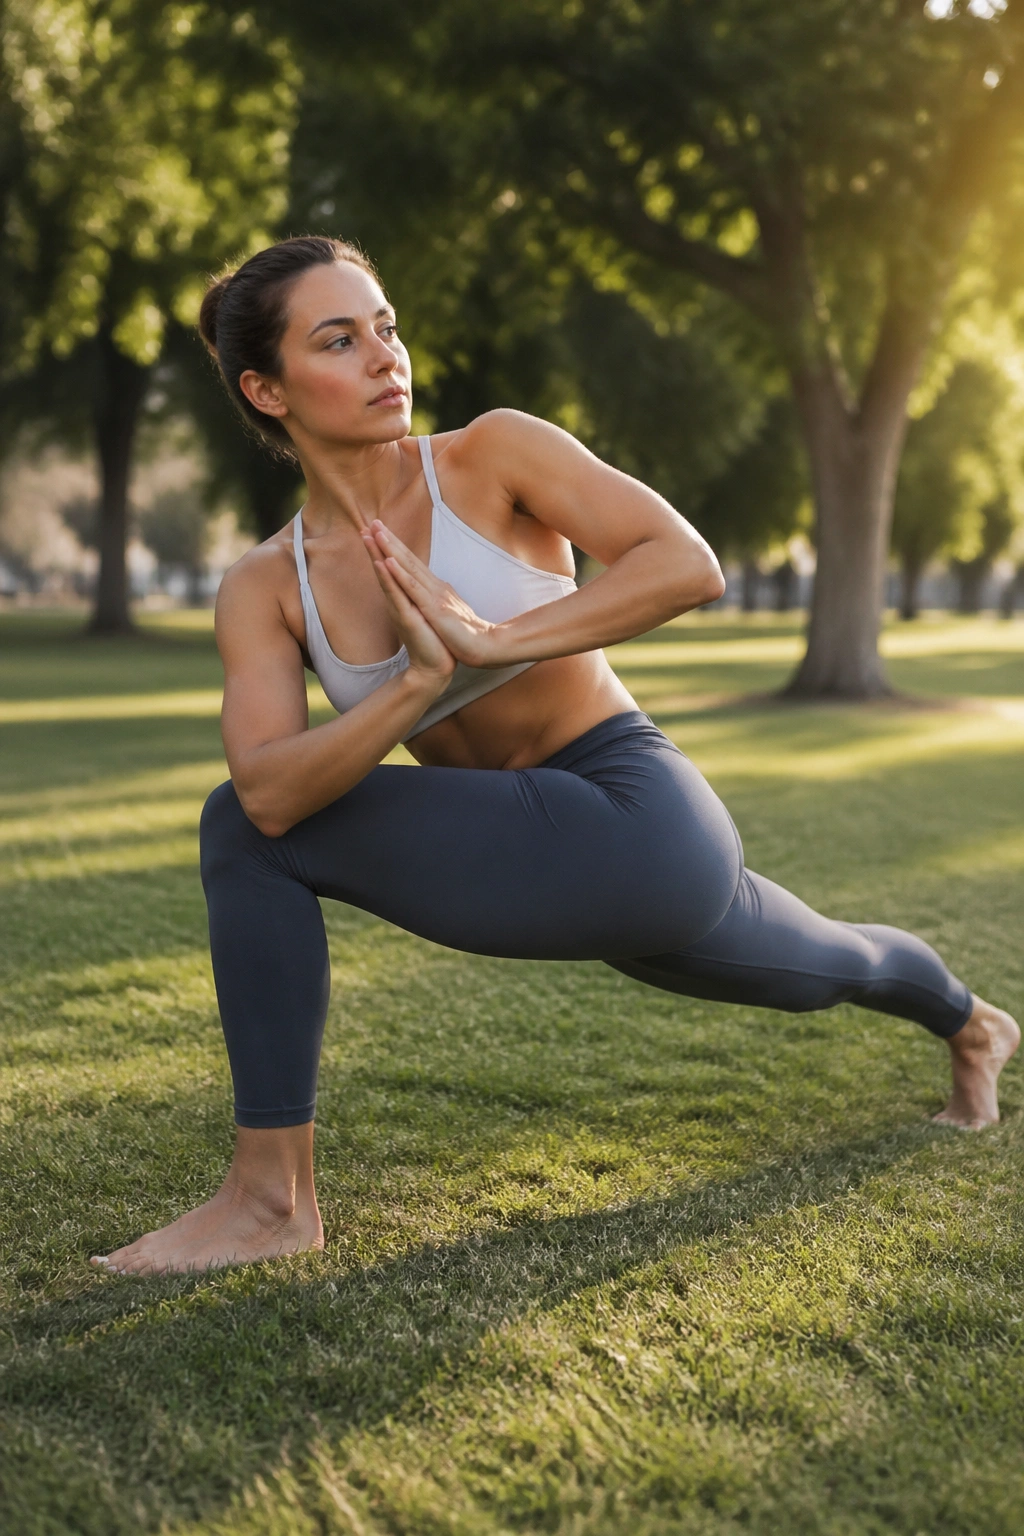
A standing twist with one heel lifted changes the game fast. Revolved Crescent Lunge asks your legs to stabilize while your trunk rotates, and that combination makes the belly work harder than the pose first suggests.
Start in a high lunge with the front knee bent about 90 degrees and the back leg long. Bring your hands to prayer at the chest, lean forward slightly, and twist toward the front leg. Some women can hook the opposite elbow outside the front thigh right away. Others need the back knee lowered first. Either route is fine if you keep the spine long.
The lower body payoff here is easy to miss. Your glutes and thighs have to fire hard to stop wobbling, and that added muscle work bumps the effort level up. Your core is not only twisting; it is also trying to keep you from toppling over. Stay for 20 to 30 seconds each side or 5 slow breaths.
You will get more out of this pose by doing less. A shorter twist with a stable pelvis beats a deep twist with a scrambled stance.
10. Warrior III for Standing Core Control
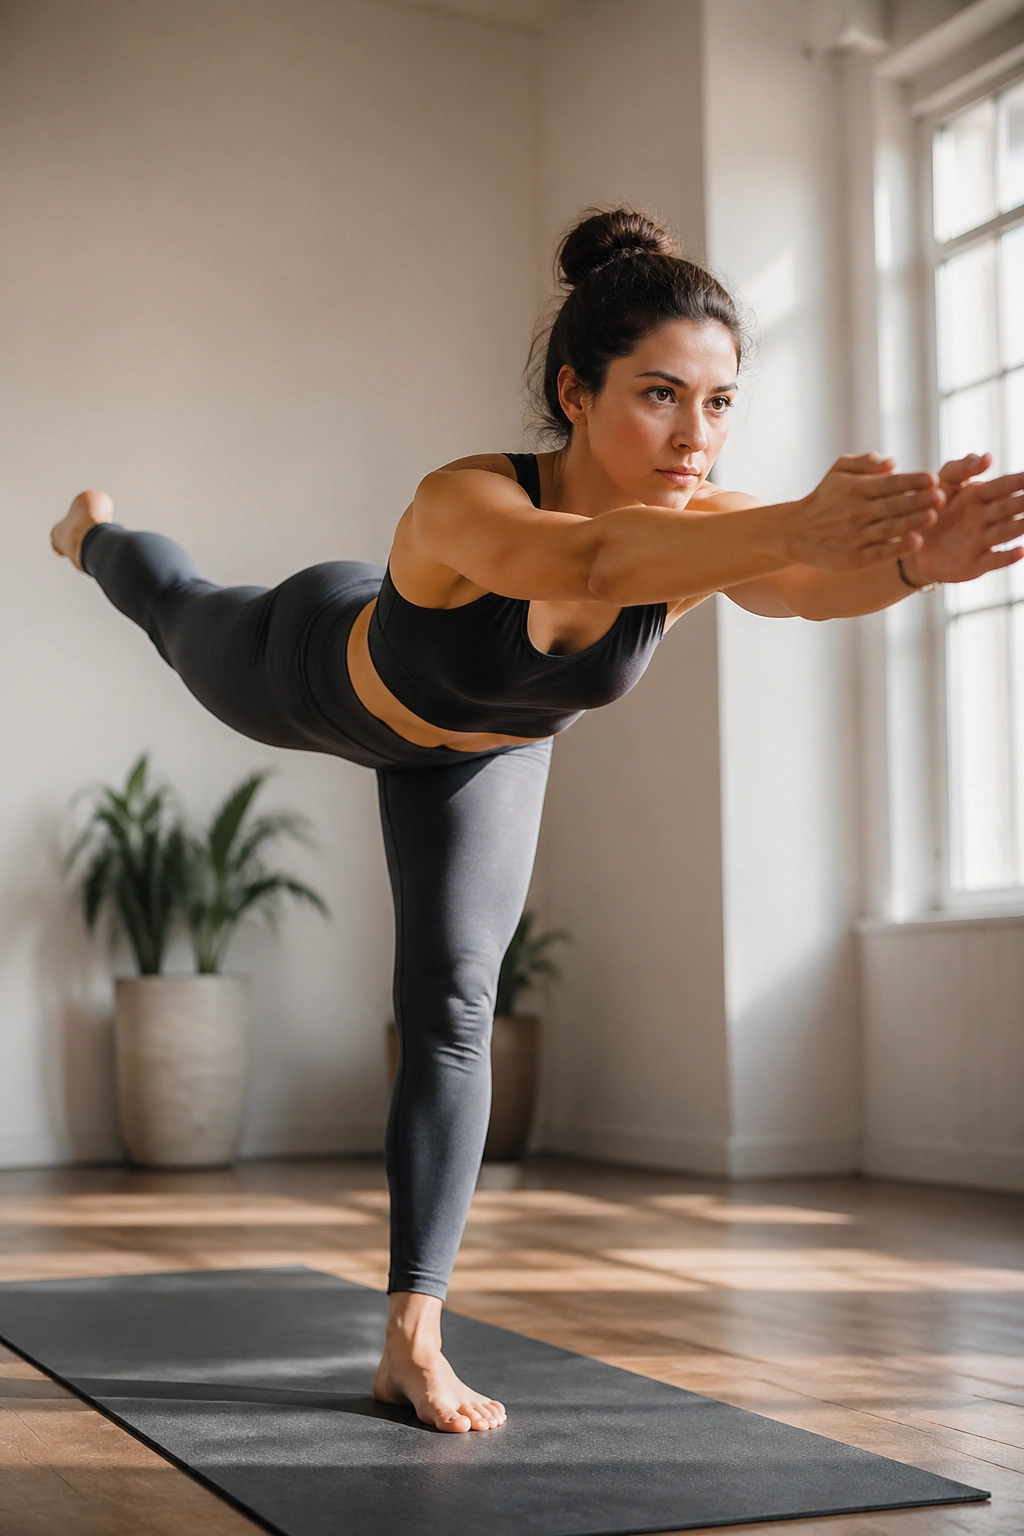
A balance pose for belly fat? Yes. Warrior III (Virabhadrasana III) is sneaky core training, because your abs have to brace to stop the torso from dropping, the hips from opening, and the whole shape from wobbling.
Stand on one leg, hinge forward, and extend the other leg back until your body forms a T-shape. Hands can stay at prayer, reach forward, or stretch back by your sides. The harder part is not lifting the back leg. The harder part is keeping the pelvis level while your standing foot deals with the floor.
Women who spend long hours sitting often find this pose humbling. One glute is weak, the side waist cannot stabilize, and the rib cage wants to flare. Good. That tells you what needs work. Hold 15 to 30 seconds each side and think about drawing the front ribs in as the back heel kicks long.
A yoga block under your hands is not cheating. It is a clean way to learn the alignment without turning the pose into a fall rehearsal.
11. Downward Dog to Knee-to-Nose for Moving Plank Power
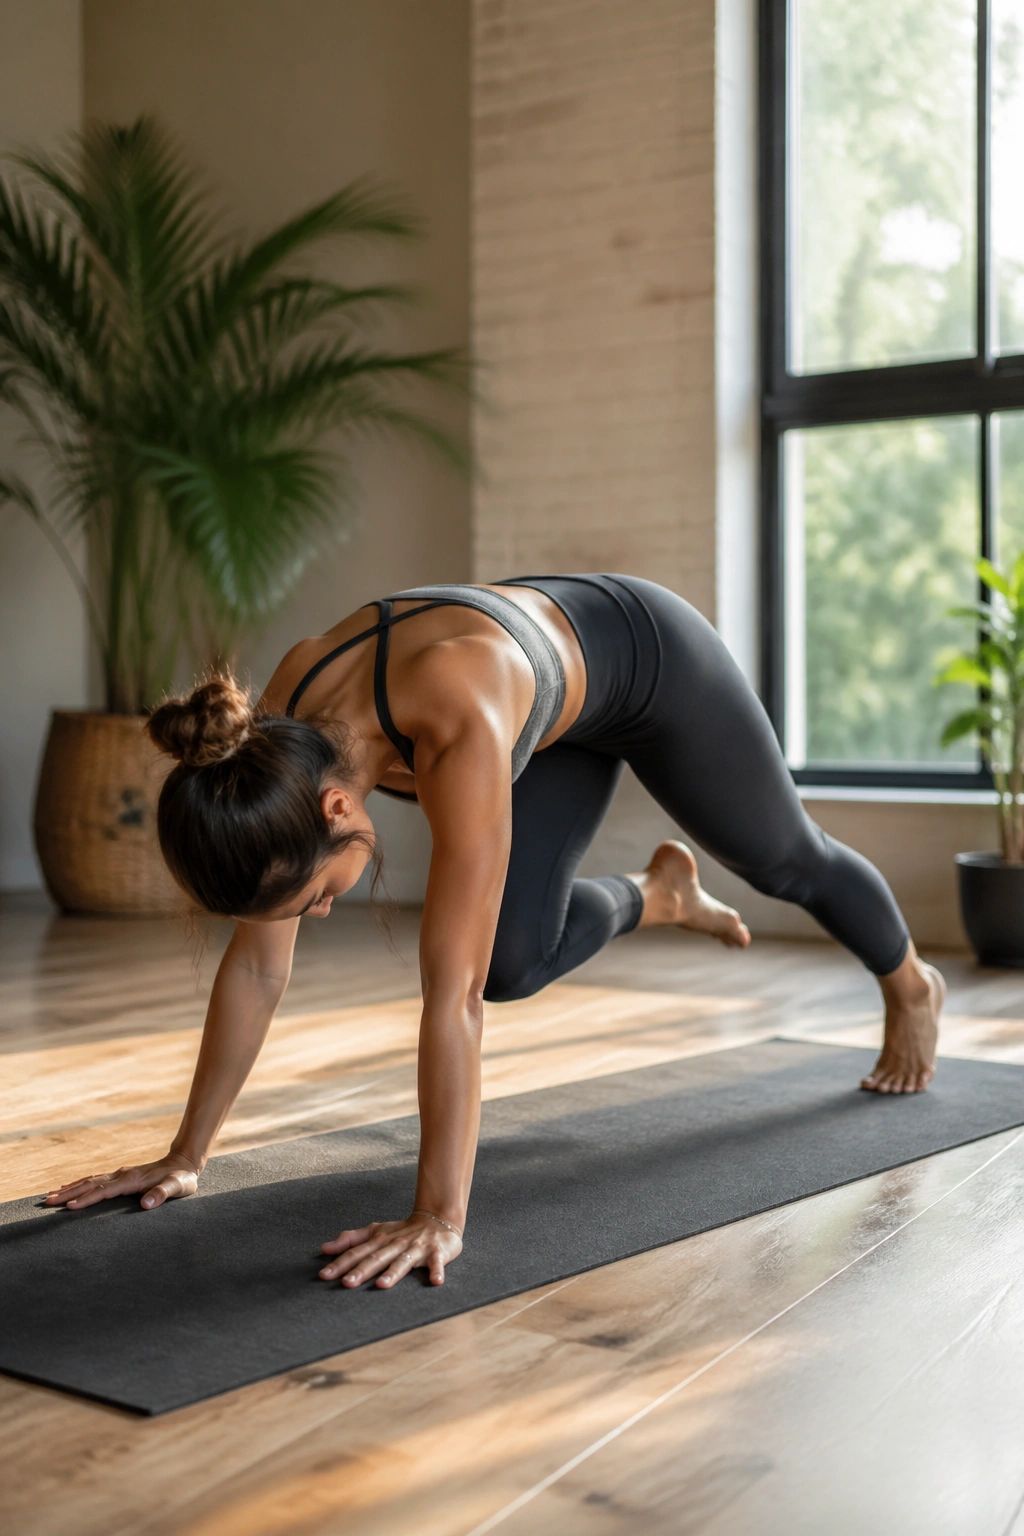
This one feels like yoga and conditioning at the same time. From Downward-Facing Dog, you shift forward into a plank shape and pull one knee toward your nose until your spine rounds. Then you send the leg back and return to Down Dog. Done with control, it is brutal in the best way.
The forward shift loads the shoulders and upper abs. The knee drive lights up the lower belly. The rounded spine adds a deep abdominal squeeze that many women miss in regular plank holds. String 8 to 10 reps per side together and your heart rate climbs fast.
How to make each rep count
Do not fling the leg forward. Move like you are dragging the knee through thick mud.
- Start in Down Dog with hands pressed firmly into the mat.
- Shift shoulders over wrists as you exhale.
- Round the upper back and pull the knee high toward the nose.
- Pause for 1 full second before sending the leg back.
Common miss: sagging the chest on the way forward. Keep the floor pushed away the whole time.
12. Cat-Cow for Belly Breathing and Posture
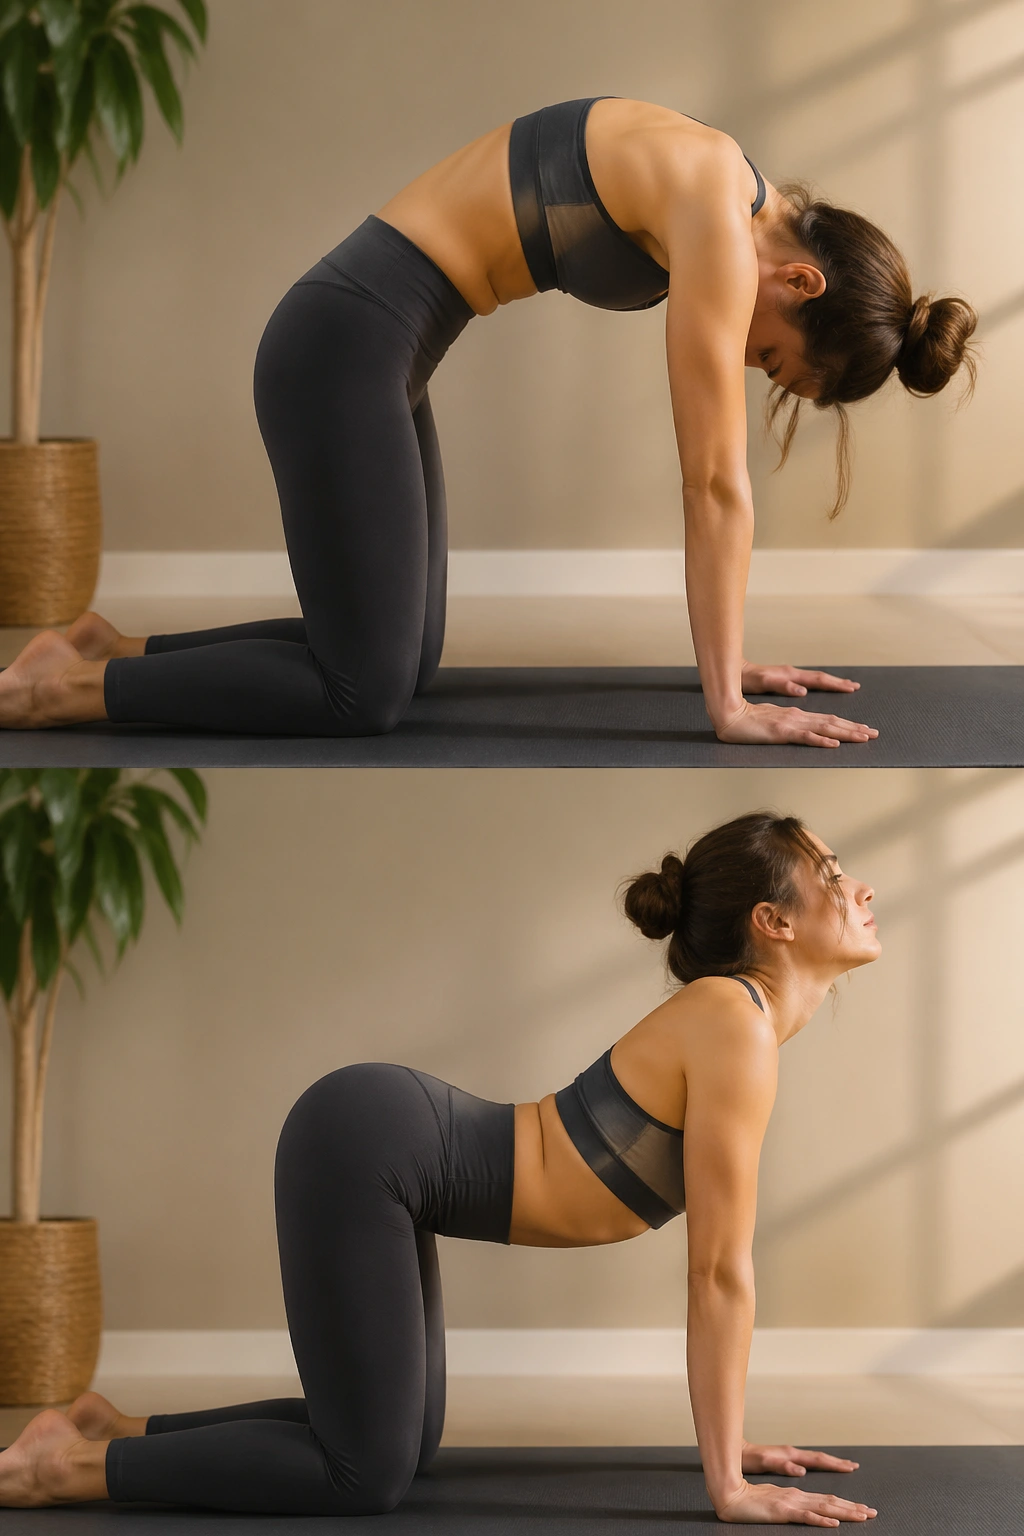
Yes, Cat-Cow belongs on this list.
Not because it burns a pile of calories. It does not. It belongs here because women with a chronically stuck-out rib cage, tight upper back, and shallow breathing often cannot access their abs well in harder poses. Cat-Cow helps fix the setup. That makes the stronger poses stronger.
In Cow, you open the chest and tip the sitting bones up. In Cat, you press the floor away, round the spine, and pull the belly in. The exhale in Cat is the whole point. Breathe out until you feel the front ribs knit down and the lower abs tighten. That is deep core training in a gentler package.
Move for 8 to 12 slow rounds. Spend 3 to 4 seconds on the inhale and 4 to 6 seconds on the exhale. If you rush it, you lose the part that matters. I often use Cat-Cow between harder drills because it resets the spine and gives the abs a cleaner signal the next time around.
13. Tiger Pose for Cross-Body Core Work
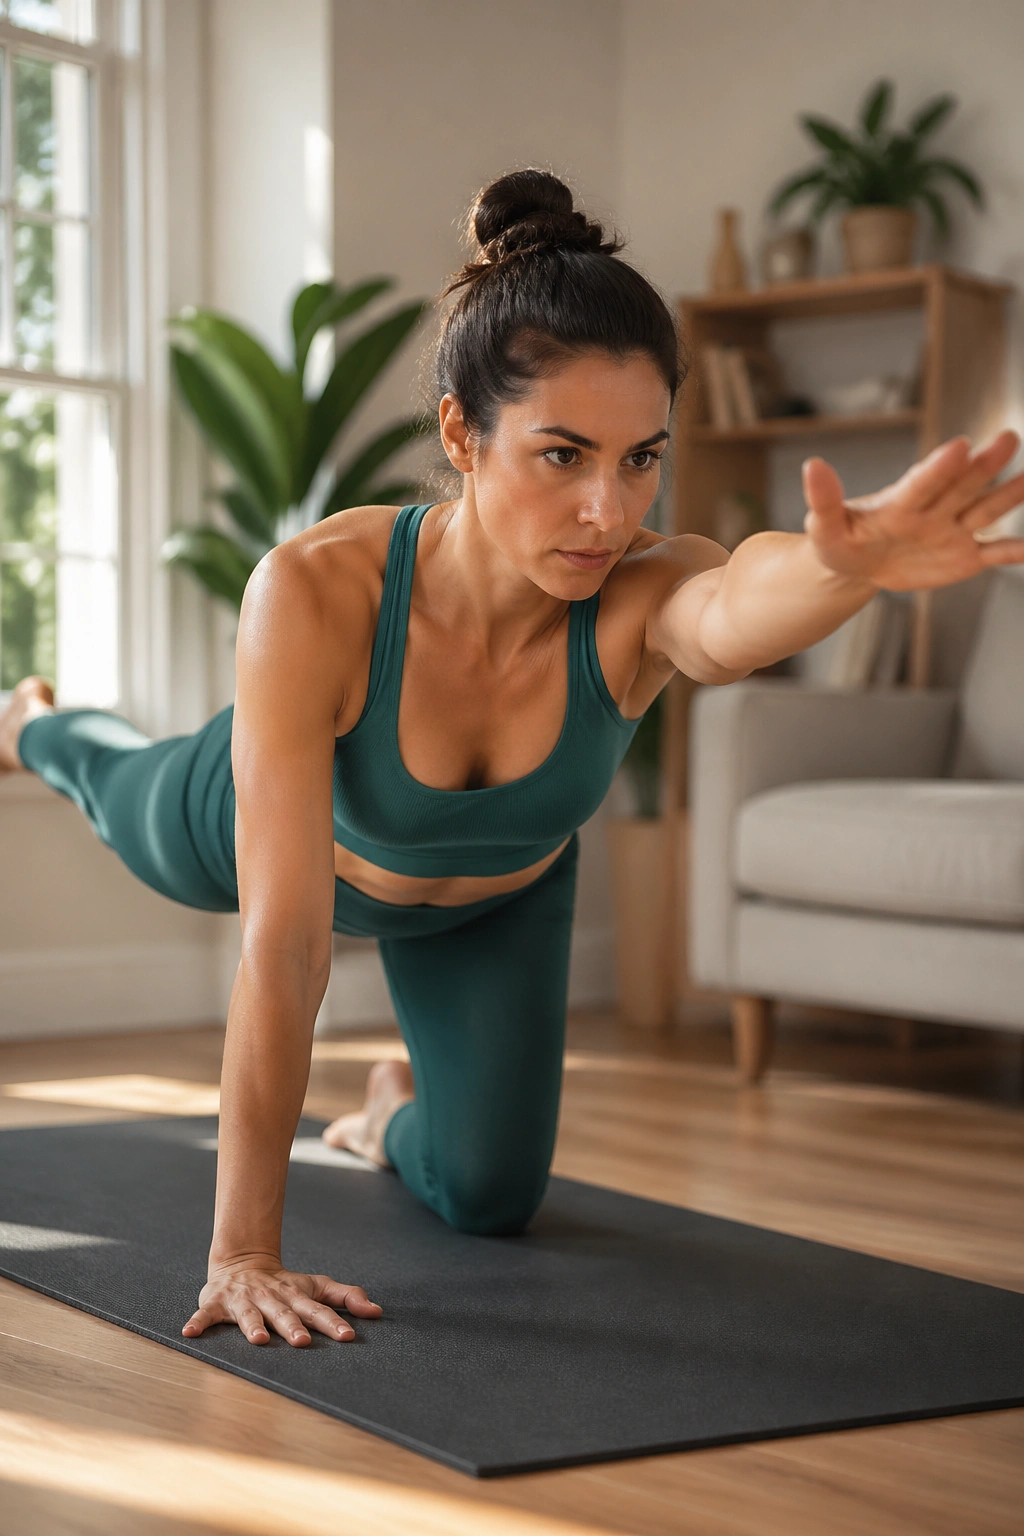
If Bird Dog feels like rehab homework, Tiger Pose gives you a more yoga-like version of the same cross-body challenge. From tabletop, you reach one arm forward and the opposite leg back. Then, on the exhale, you round in and bring elbow and knee toward each other under the body.
That crossing pattern matters. Your trunk has to resist rotation while the limbs move, and the abs have to pull the body back into center. It is one of the better ways to train coordination and core control without loading the wrists as hard as long planks do.
Use a slow tempo. Fast reps turn sloppy fast.
A strong setup
- Extend the arm and leg until both are in line with the torso.
- Exhale and round until elbow and knee nearly touch.
- Do 8 to 12 reps per side.
- Pause for 1 second in the curled position before reaching long again.
You should feel the front of the belly tighten and the standing hand press hard into the floor. If the low back is taking over, make the reach shorter.
14. Cobra Pose for Better Ab Tension
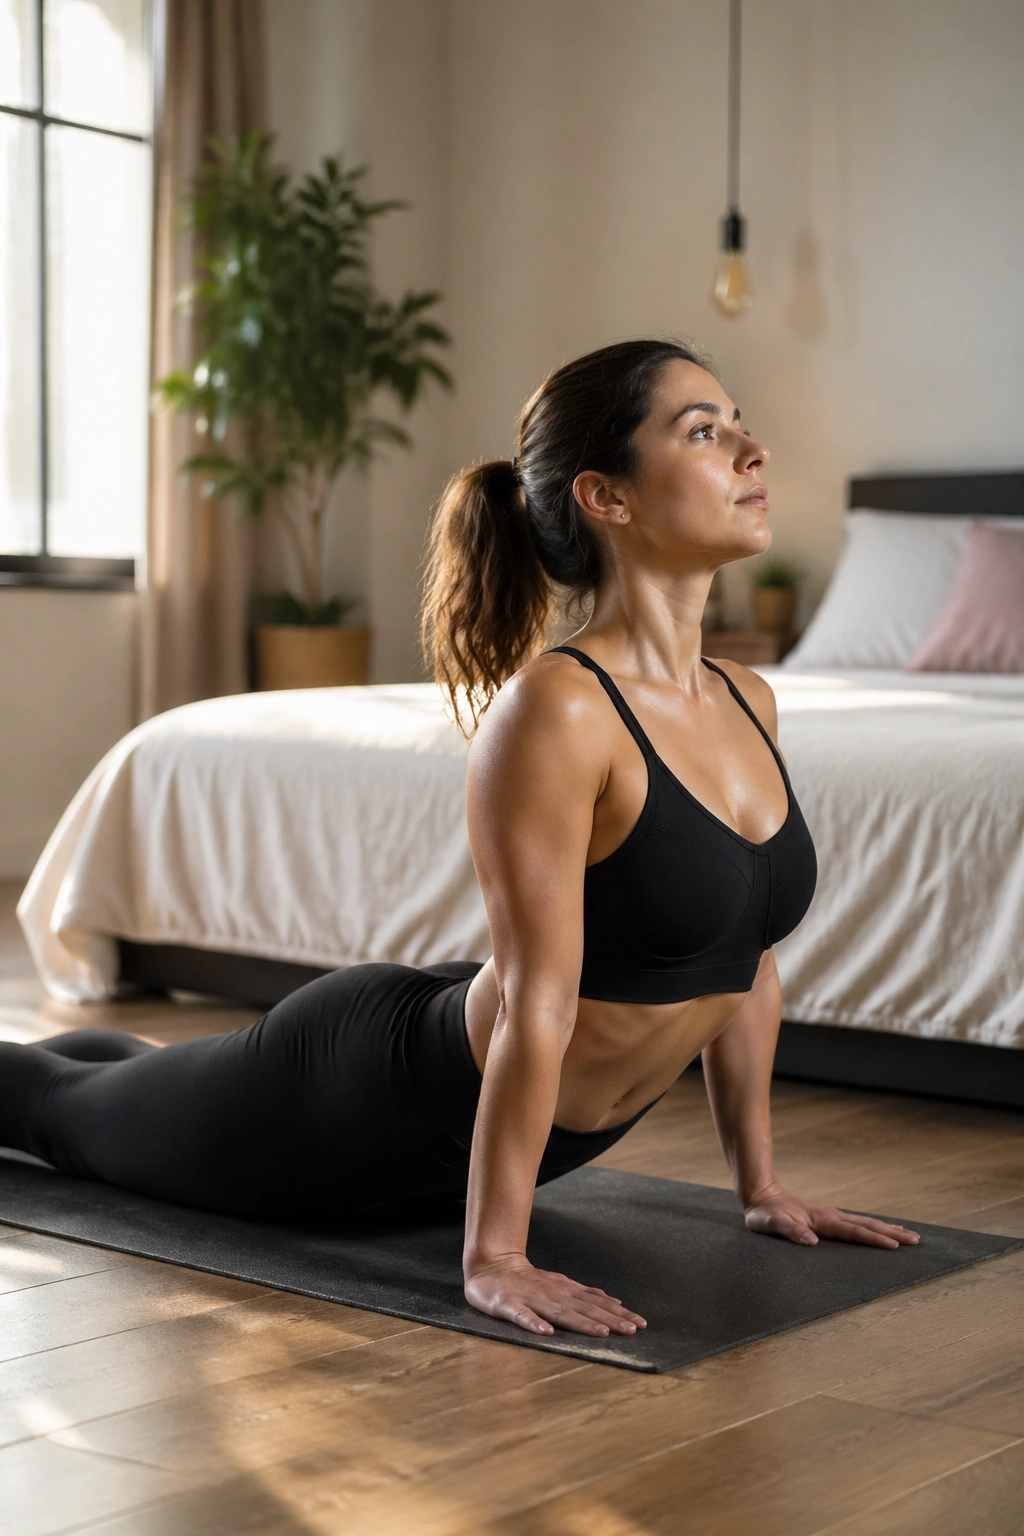
Cobra Pose (Bhujangasana) is not an ab burner, and I would not pretend it is. What it does do is open the front body, strengthen the upper back, and teach you how to lift the chest without dumping into the low back. That pays off when you go back to planks, boats, and twists.
Lie on your belly with hands under the shoulders. Press the tops of the feet down, lengthen the legs, and lift the chest using the back muscles first. Your hands can help a little, but not much. Think “long spine” before “high lift.” A low cobra done with clean form beats a giant, crunchy backbend.
Women who sit bent over laptops all day usually need this more than they think. When the chest opens and the shoulder blades start working again, the rib cage stacks better over the pelvis. Then the abs can do their job without fighting poor posture first.
Try 6 slow lifts, holding each one for 2 breaths, or stay up for 15 to 20 seconds. If your neck jams, lower the gaze and pull the back of the skull long.
15. Locust Pose for Back-Line Strength That Tightens the Midsection
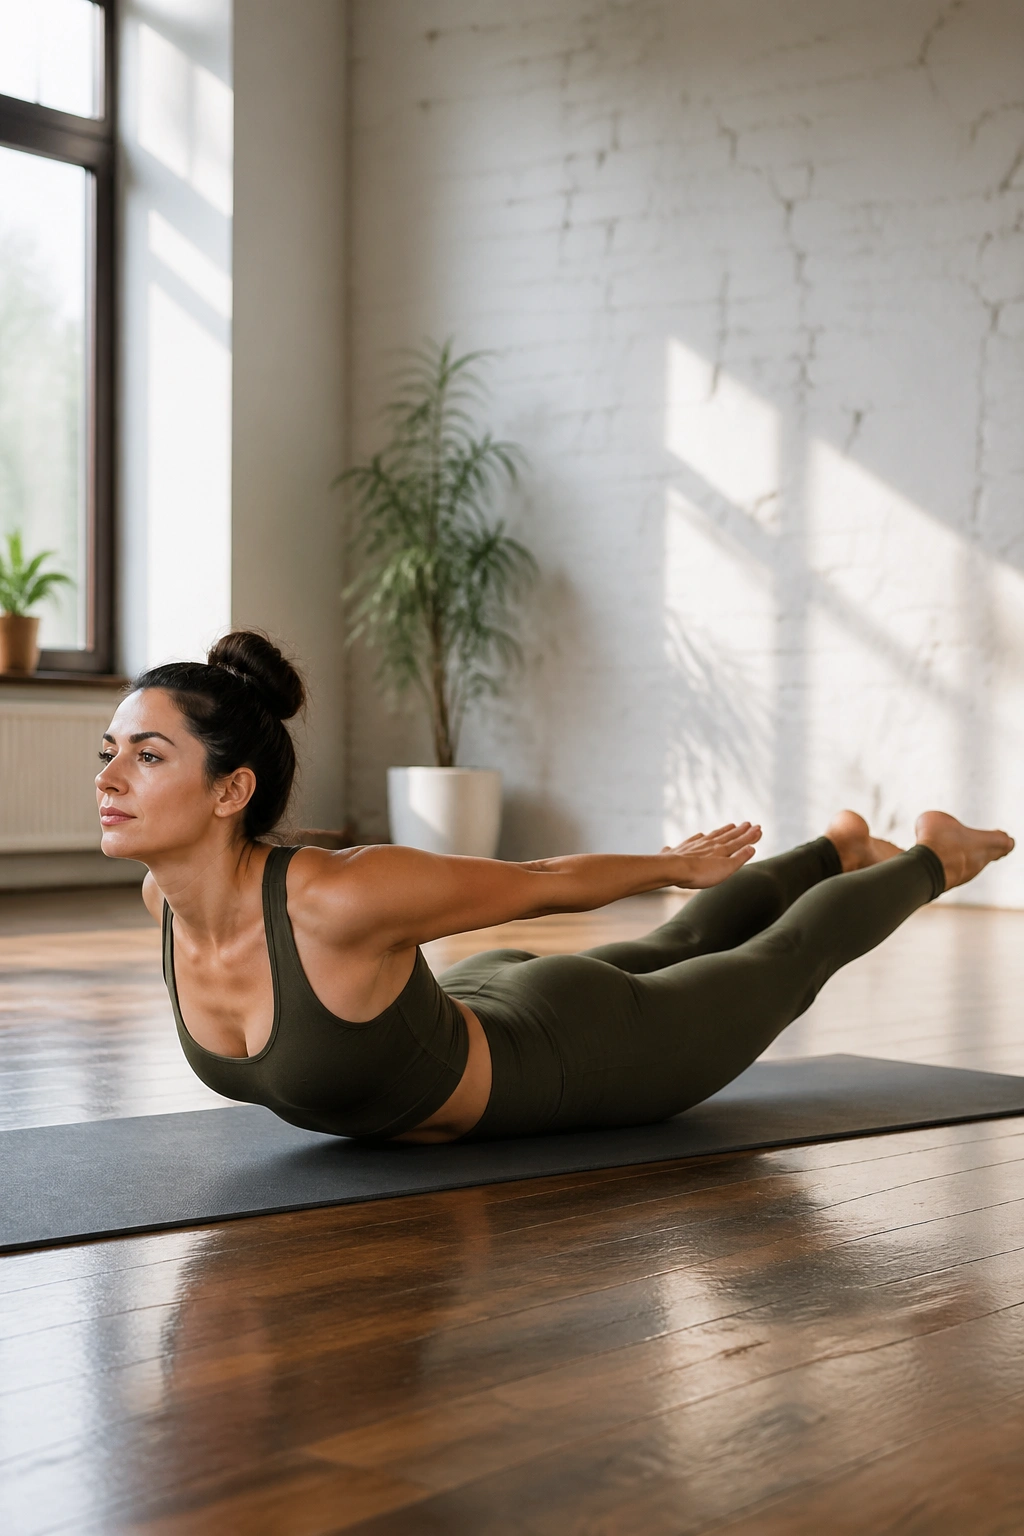
A flatter-looking stomach often starts on the back side of the body. That is why Locust Pose (Salabhasana) matters. It strengthens the glutes, spinal muscles, rear shoulders, and the whole posterior chain that keeps you from collapsing forward at the waist.
When those muscles are weak, your belly tends to push out—not only because of fat, but because posture falls apart. Locust teaches the opposite. You lie face down, lift the chest, arms, and legs, and create a long arc through the body. The abs still work here, but in a support role. They brace so the back can extend without crunching.
A few details change everything:
- Keep the back of the neck long and gaze down.
- Reach the fingertips toward the feet.
- Lift the thighs by tightening the glutes, not by yanking the low back.
- Hold for 15 to 25 seconds, then lower with control.
If both legs together feel too heavy, lift one leg at a time for 5 reps each. The full pose can wait. Your spine does not care about your impatience.
16. Bow Pose for Front-Body Stretch and Full-Body Effort
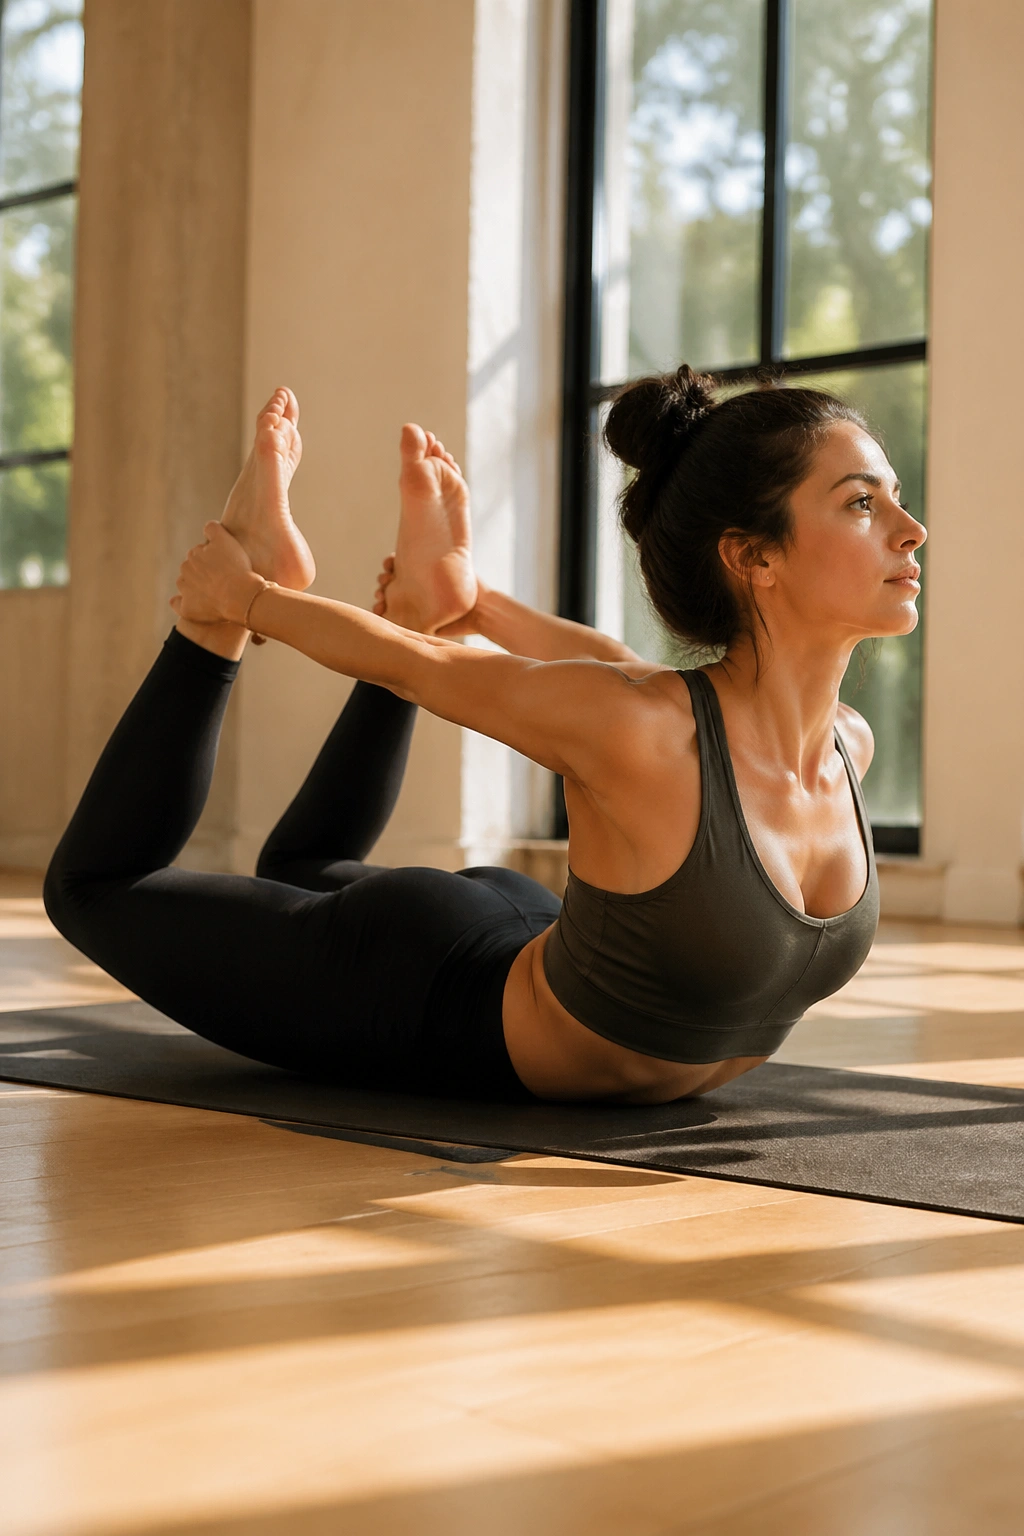
When Bow Pose (Dhanurasana) is set up well, the front of your body feels pulled open from the hip creases through the ribs, and your breath gets surprisingly demanding. That is part of the value. A tight front body can lock you into a posture that makes your waist feel compressed and inactive.
Lie on your belly, bend the knees, and catch the outer ankles. Kick the feet into the hands as the chest lifts. Done right, this is not only a backbend. It is a strong leg-driven pose that asks the abs to support the shape while the back body works hard. There is also a metabolic side to it: full-body poses that recruit large muscle groups cost more energy than tiny isolation drills.
Keep the knees about hip-width apart. If they fly wide, the pose turns messy fast. Hold 15 to 20 seconds, breathe into the ribs, then lower and rest fully. Two rounds are enough for most people.
Skip it if you feel sharp low-back pain or front-hip pinching. That is your body voting no.
17. Bridge Pose for Glutes, Pelvic Support, and Lower Abs
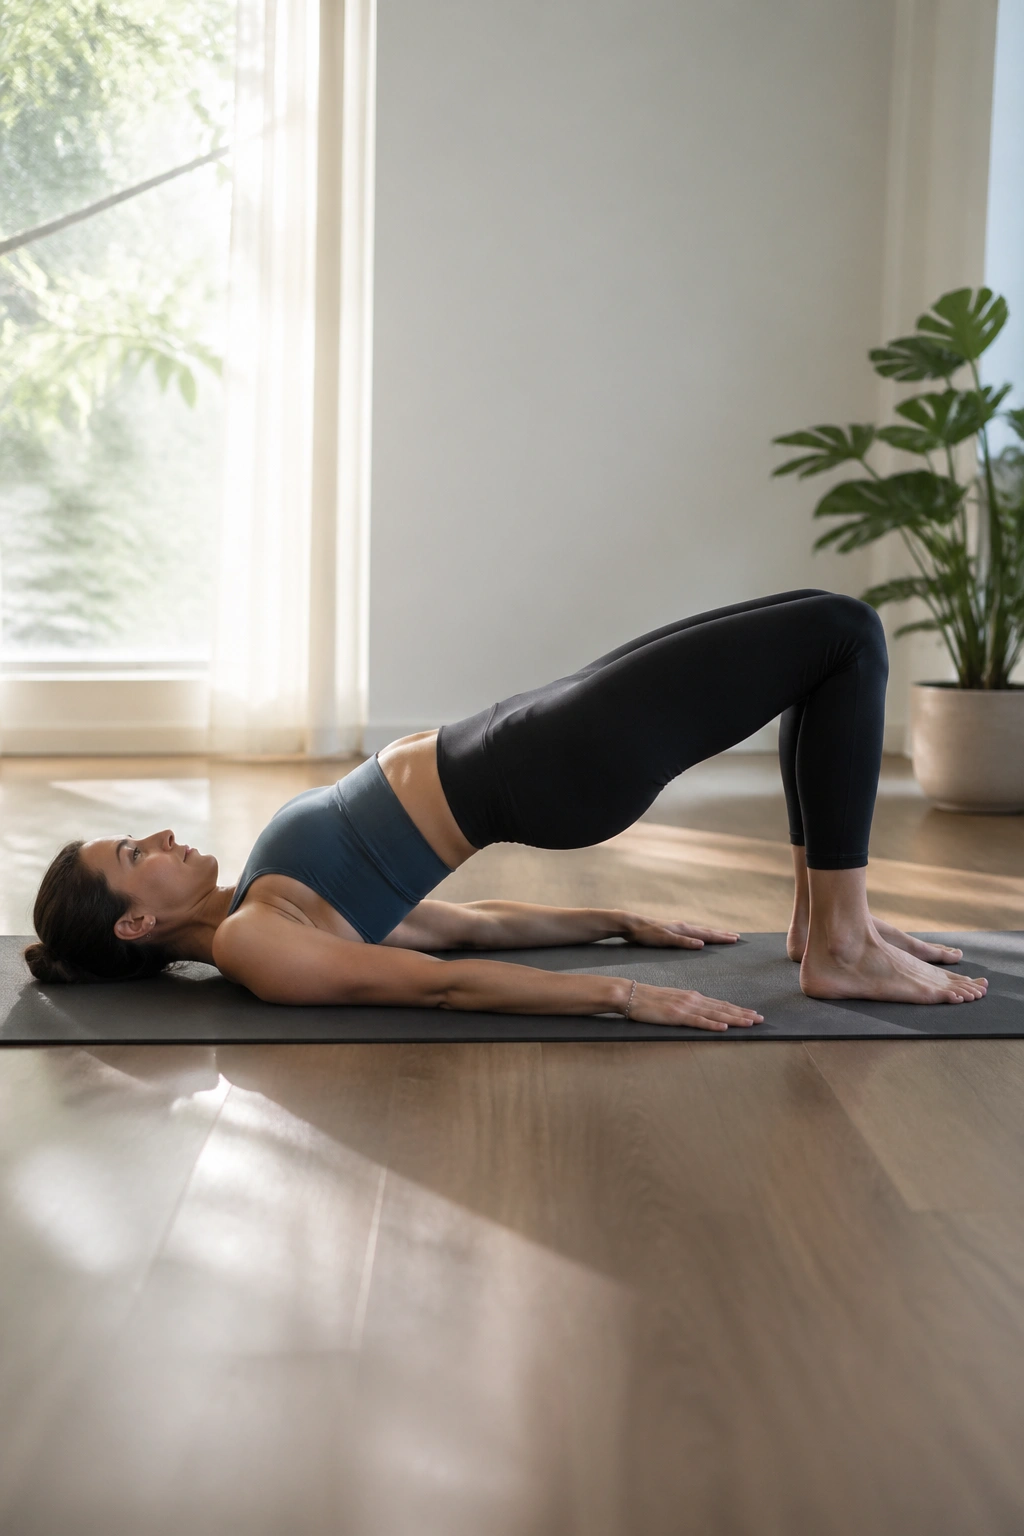
Bridge Pose is one of those movements women often underestimate because it looks calm. Then you do it with a slow exhale, ribs down, knees tracking straight, and your glutes and lower abs wake up all at once.
Lie on your back with knees bent and feet about 8 to 12 inches from your hips. Press through the heels and lift the pelvis until your body forms a gentle slope from shoulders to knees. Do not chase height. Chase shape. If your ribs flare and your low back grabs, lower a little and tuck the front ribs in.
I especially like Bridge for women who have had kids and feel disconnected from the midsection. With the feet grounded and the upper body supported by the floor, it is easier to feel the lower abs and pelvic floor work together. Add a 4-second exhale as you lift and the connection gets clearer.
Hold for 20 to 40 seconds, or do 10 slow reps with a pause at the top. A yoga block between the knees can help if your thighs want to roll outward.
18. Camel Pose for Upright Posture and Core Length
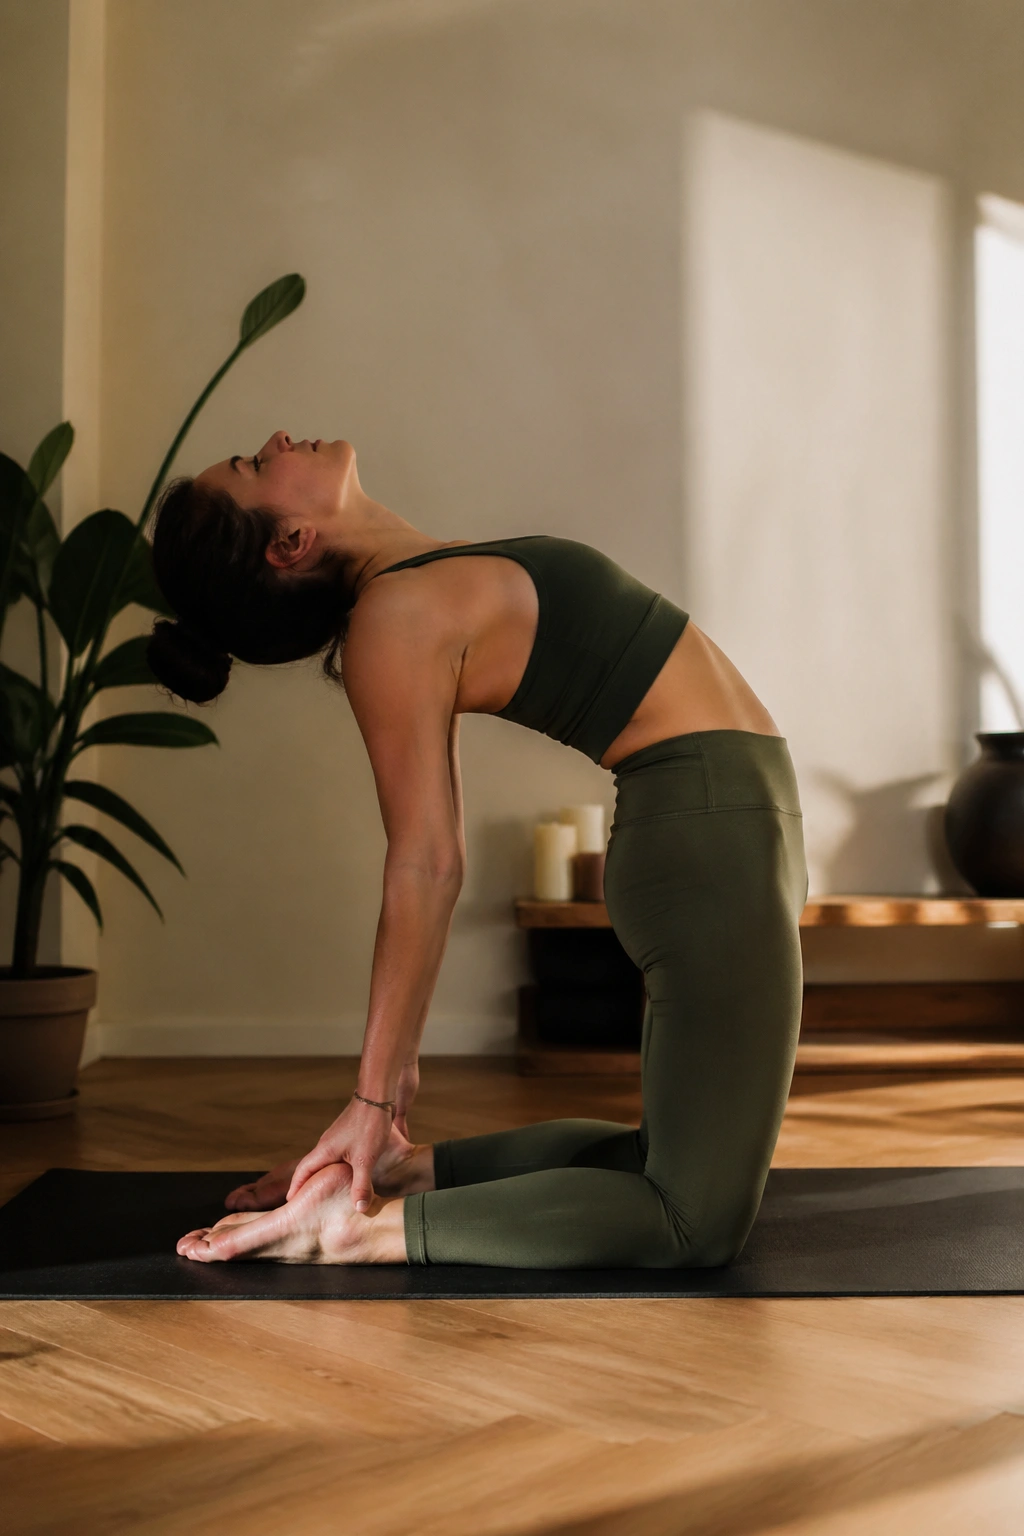
Backbends look like chest work, not belly work. Surface-level read. Camel Pose (Ustrasana) is one of the better poses for women who live in a folded posture and cannot figure out why their abs never seem to engage well standing up.
Kneel with knees hip-width apart and hands at the back of the pelvis. Lift the chest, press the hips forward slightly, and arc the upper back without letting the ribs explode upward. You may stay with hands on the sacrum or reach for the heels if your spine and shoulders allow it. The pose asks for glute support, thigh strength, and trunk control. Without those, it turns into a low-back dump fast.
Stay for 3 to 5 breaths. Come out slowly. Sit back on the heels and take a breath before moving on. This is not one to yank yourself into.
If you tend to feel dizzy in backbends, keep the chin slightly tucked and your hands on the pelvis. The pose still works.
19. Triangle Pose for Side-Body Strength and Waist Awareness
Triangle does not get marketed as a belly-fat pose, which is a shame. Triangle Pose (Trikonasana) is excellent for teaching length through the side waist while the legs and core stabilize the trunk.
Step the feet wide—about 3.5 to 4 feet for many women—turn one foot out, and hinge over the front leg. Rest your hand on the shin, a block, or the floor. The top arm reaches up if that feels good on the shoulder. Then the real work begins: keep both sides of the waist long and resist collapsing onto the lower hand.
What makes it useful
A long side body changes how the waist feels and functions. The obliques are not only “twisting muscles.” They also help manage side bending and trunk control. Triangle trains that in a calmer, more teachable way than some harder poses do.
Try these cues:
- Keep the front knee soft, not locked.
- Use a block if the lower side crunches.
- Stay for 5 slow breaths per side.
- Think about lifting the underside ribs away from the thigh.
That last cue can change the whole pose.
20. Revolved Triangle Pose for Slow Controlled Twisting
If regular Triangle teaches length, Revolved Triangle (Parivrtta Trikonasana) adds a demanding twist on top of it. This pose is less about range and more about control. Women who chase the deepest turn often miss the point and lose the stability that makes the abs work.
Take a shorter stance than you would in standard Triangle. That alone makes the pose more honest and less wobbly. Square the hips as much as you can, place one hand on a block inside or outside the front foot, and rotate the chest over the front leg. You should feel your legs gripping the floor while the waist rotates around a steady pelvis.
The abdominal payoff comes from that brace-before-you-turn action. Tighten the midsection first, then rotate from there. Stay for 3 to 5 breaths, reset, and switch sides. If your hamstrings are yanking you off line, shorten the stance again. A shorter, cleaner pose beats a heroic version with zero control.
This one asks for patience. I mean real patience, not the kind we claim while still forcing the twist.
21. Extended Side Angle Pose for Long Oblique Lines
Long lines matter. Extended Side Angle (Utthita Parsvakonasana) trains the waist in a stretched, loaded position, which feels different from crunchier core poses and often hits the side body in a cleaner way.
From a wide stance, bend the front knee to about 90 degrees and rest the forearm on the front thigh or place the hand on a block outside the foot. Reach the top arm overhead so the body forms one long diagonal line from back heel to fingertips. That long reach turns the pose from “lunge with a twist” into a serious side-body drill.
A few ways to get more from it:
- Press firmly through the outer edge of the back foot.
- Rotate the chest open without collapsing into the bottom shoulder.
- Hold 20 to 30 seconds per side.
- Use the exhale to draw the lower belly in.
If you want more work, hover the forearm off the thigh for the last 5 seconds. Small change. Big difference.
22. Garland Pose for Hip Mobility and Bloating Relief
Not every belly-focused pose has to feel punishing. Garland Pose (Malasana) is a deep squat that opens the hips, lengthens the lower back, and can ease the cramped, puffed-up feeling many women carry in the lower belly after long hours of sitting.
Stand with feet a little wider than hip-width, turn the toes out slightly, and sink into a squat. Bring the palms together and use the elbows to press the knees apart. If your heels lift or your lower back rounds hard, sit on a folded blanket or yoga block. That one tweak makes the pose available to far more bodies.
Garland does not strip body fat off the stomach. Let us be sane about it. What it can do is improve pelvic mobility, help you breathe lower into the torso, and reduce some of the pressure patterns that go with bloating and stiff hips. Stay for 5 to 10 breaths and let the belly soften as you inhale, then lightly draw it in on the exhale.
For some women, this pose feels like relief more than work. Relief has value too.
23. Wind-Relieving Pose for Lower Belly Comfort
The name is old-school and slightly goofy, but Wind-Relieving Pose (Apanasana) earns its keep. If your lower belly often feels swollen, tight, or uncomfortable, this pose can make the difference between “my stomach feels huge” and “okay, that is better.”
Lie on your back and draw one knee into the chest, then the other, or hug both knees in together. Rock side to side if that feels good on the low back. The gentle abdominal compression can help with gas and digestive sluggishness, and the back body gets a nice stretch at the same time.
There is also a breathing benefit here. When the thighs come toward the belly, your exhale tends to deepen. Use that. Breathe out for 4 to 6 seconds and feel the front body narrow. Hold 20 to 30 seconds or take 5 slow breaths, then release.
Do not jam the knees down if your stomach is full. Wait until your meal has settled. Your abdomen is allowed to have boundaries.
24. Supine Spinal Twist for Recovery and Waist Tension Release
Can a recovery pose help with a belly-fat routine? I think so. Supine Spinal Twist gives the trunk a chance to unwind after planks, boats, and standing twists, and that recovery piece often decides whether you can train again tomorrow with decent form.
Lie on your back, hug one knee in, then guide it across the body while the opposite shoulder stays grounded. You can extend the arms into a T or keep one hand on the top knee. The aim is not to crank yourself into the deepest twist. The aim is to breathe into the side ribs and let the waist soften around the work you already did.
Women who hold stress in the gut tend to like this pose for a reason. It encourages a longer exhale, and that can calm the whole system down a notch. Stay for 30 to 60 seconds per side. Put a pillow or block under the bent knee if it hangs in space. Supported twists are easier to relax into, and a relaxed body often breathes better.
Sometimes the pose that helps your next workout is the one that looks the least impressive.
25. Crow Pose for Advanced Belly Control
Crow Pose (Bakasana) is advanced, a little intimidating, and one of the clearest tests of true abdominal control in yoga. When it clicks, you feel the whole front body turn on at once.
Start in a squat with hands on the floor, shoulder-width apart. Bend the elbows slightly, place the knees high on the backs of the upper arms, and shift your weight forward until one foot lifts, then the other. The magic part—if we can call it that—is not arm strength alone. It is the rounded upper back and strong abdominal pull that keep you from face-planting.
A few details make it safer and sharper:
- Look 12 to 18 inches ahead of your hands, not straight down.
- Pull the heels toward the seat.
- Round the upper back as if you are doing a standing Cat Pose.
- Hold for 5 to 10 seconds, then step down and reset.
Put a folded blanket in front of you the first few tries. That is not pessimism. That is planning. If your wrists hate the shape, skip it and build through plank, side plank, and Boat until your base is stronger.
Final Thoughts
You do not need all 25 poses in one session. You need a smart mix done often enough to matter. If I were building a 20-minute yoga workout for belly fat, I would pull from Chair, Plank, Boat, Side Plank, Revolved Chair, Warrior III, Bridge, and Wind-Relieving Pose—then repeat the circuit two or three times with calm breathing.
The women who get the best results from yoga for the midsection usually do three things at once: they train the core with intention, they move outside the mat too, and they stop treating stress and sleep like background noise. Waist change is rarely about one heroic workout. It is about consistent work that your body can recover from.
Start with the poses you can own with clean form. Add harder ones when the easier shapes stop shaking you. Your stomach does not need punishment; it needs strength, breath, and repetition.
