



Stronger, more defined abs do not come from endless crunches alone.
Yoga trains the core in a way a lot of gym routines miss. You hold shapes, resist twisting, keep the ribs from flaring, and breathe when your midsection wants to quit. That combination matters. It builds the kind of strength that shows up when you reach for the floor, balance on one leg, or move from plank into a twist without sagging through the middle.
Yoga also has a reputation for being gentle, which is only half the story. A clean plank, a steady boat pose, or a controlled revolved triangle can light up the deep core fast — especially the transverse abdominis and obliques, the muscles that keep your torso from wobbling all over the place. And for anyone hoping for more defined abs, that control is the part people underestimate.
One honest note: visible abs are never only about exercise. Body fat levels, sleep, food, stress, and genetics all matter. Still, if you want abs that are stronger, tighter, and better able to hold shape under pressure, these poses earn their spot.
1. Plank Pose
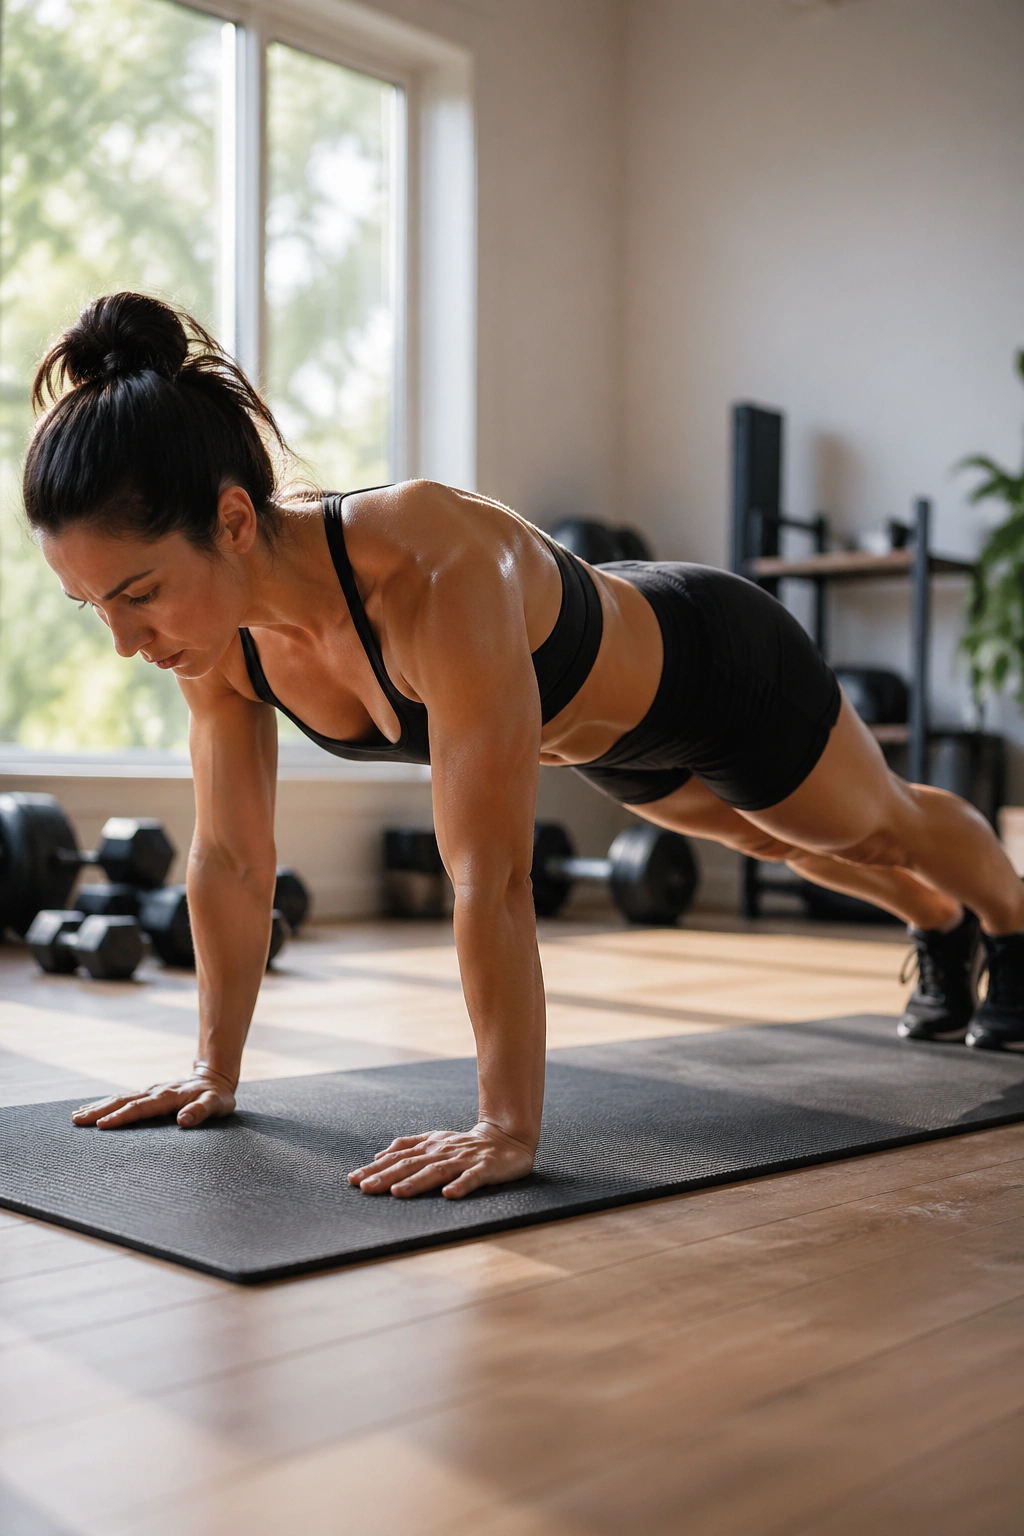
If you can only hold one pose well, make it plank. It looks simple, and that’s exactly why people cheat it so badly. Hips sag, shoulders dump forward, belly relaxes, and suddenly the pose is doing half the work for you.
Why Plank Works for Abs
Plank is all about anti-extension — keeping your lower back from collapsing while gravity pulls down. That is a deep-core job, not a crunch job. Your abs have to stay on while your glutes, legs, and shoulders help hold the shape.
A clean plank should feel steady, not flashy. Press the floor away, tuck the pelvis slightly, and keep your ribs from flaring like a popped umbrella.
What to Feel
- A firm line from the back of the head to the heels
- Light shaking in the belly after 15 to 30 seconds
- Shoulders working, but not shrugging up to the ears
- Glutes engaged enough to keep the low back quiet
Tip: If your low back feels pinched, shorten the hold and fix the shape first. A 20-second perfect plank beats a 60-second saggy one every time.
2. Forearm Plank
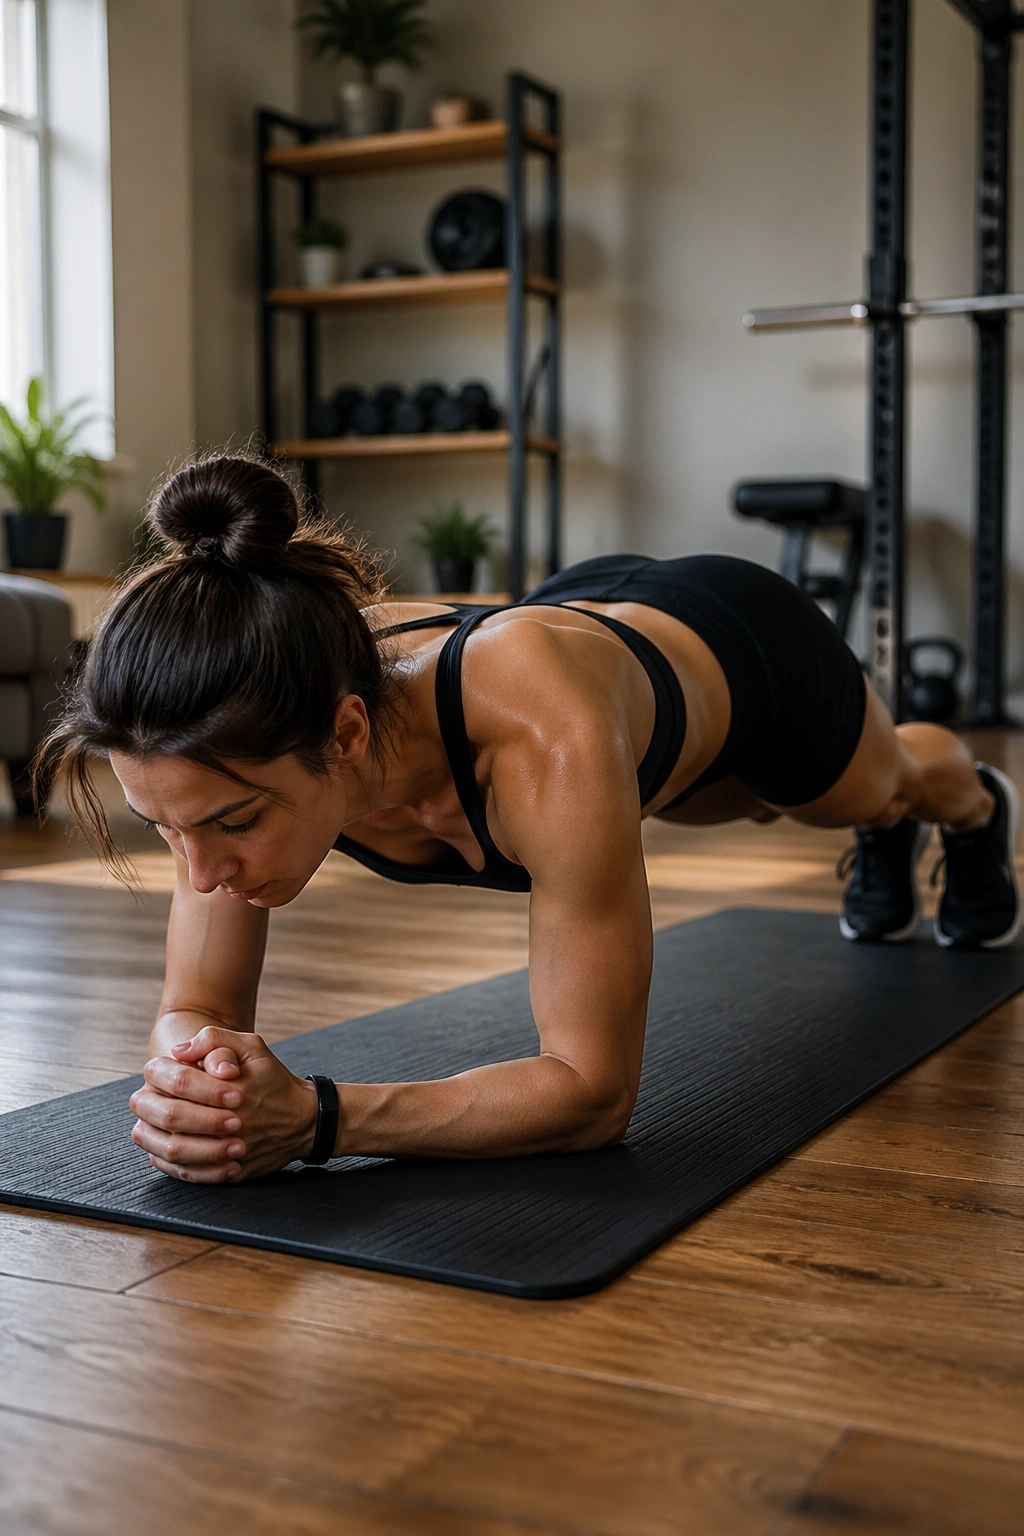
Forearm plank looks quieter than high plank, but it can be harder to fake. The shorter lever makes the core work a little more honestly, and it’s kinder if your wrists get cranky during long floor sessions.
The setup matters. Elbows should land under or just slightly ahead of the shoulders, forearms parallel, palms pressing down. If your hands drift together like a triangle, you’ll feel pressure in odd places and lose some of the core tension you came for.
One sentence is enough here: If your belly drops, the pose is gone.
Keep the thighs active and the tailbone long. You should feel your center line working to keep the spine from sinking between the shoulder blades. When you breathe, try to keep the ribs contained instead of puffing the chest up.
3. Side Plank
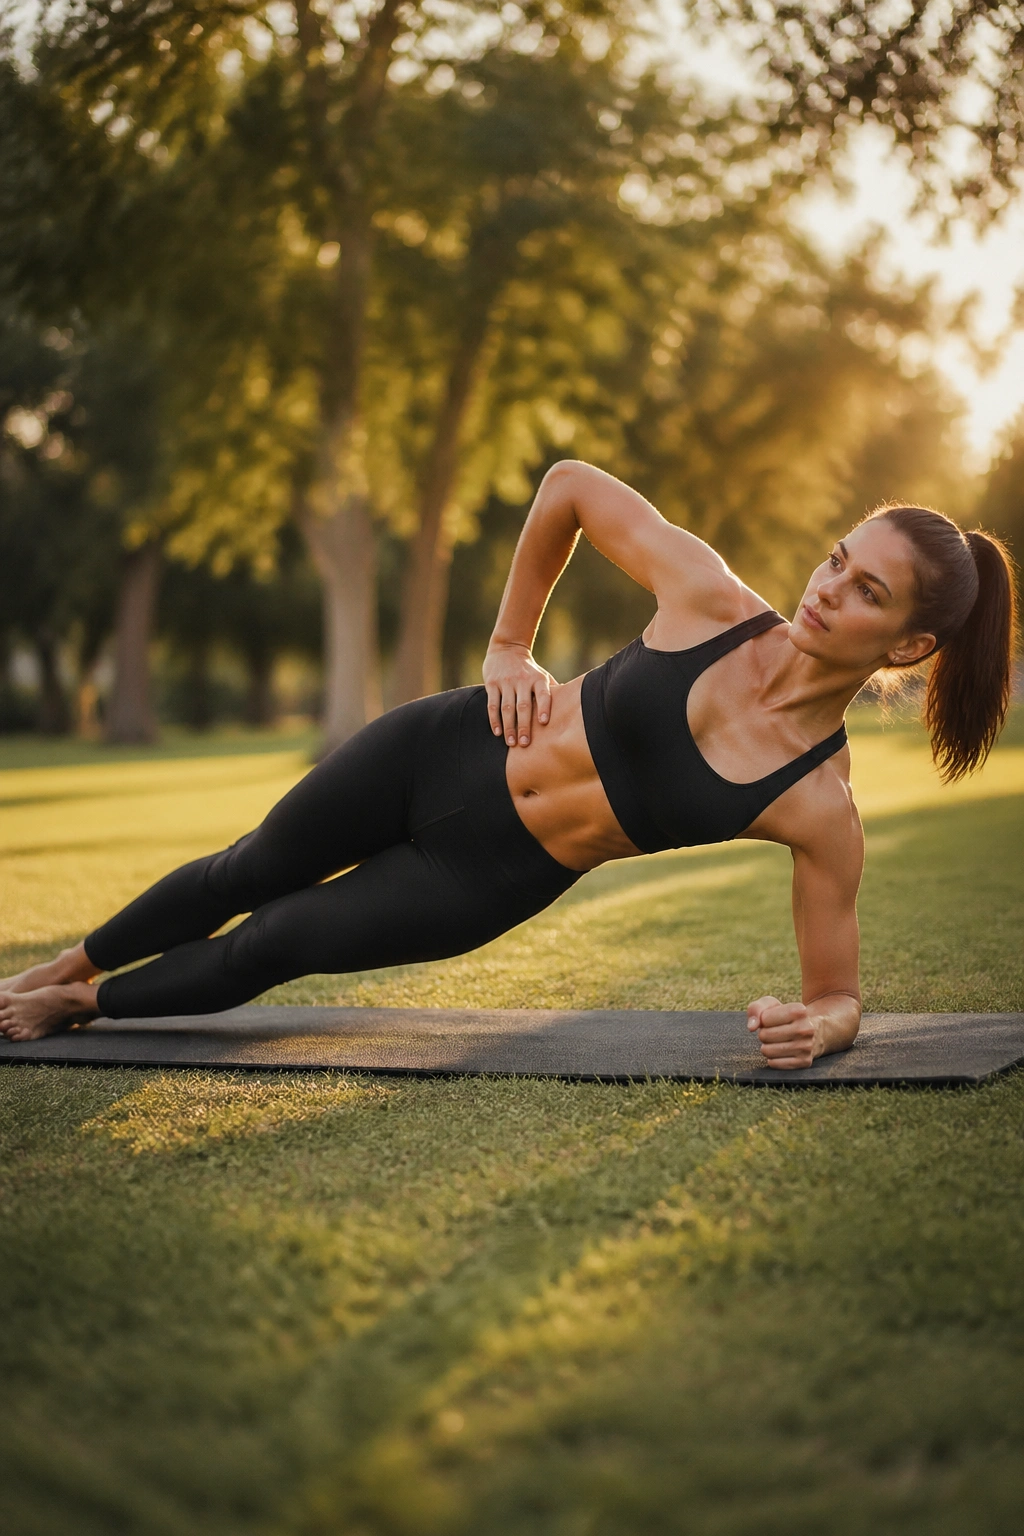
Side plank is where the waistline work shows up fast. It asks the obliques to keep the pelvis lifted while the body wants to fold toward the floor, which is exactly the kind of side-body strength most people don’t train enough.
Why It Hits the Obliques Hard
Your top hip wants to drift back. Your bottom shoulder wants to collapse. Your waist has to stop both from happening. That’s why side plank is so useful for stronger abs — it trains the core to resist sideways bending, not just front-to-back slumping.
How to Use It
- Hold for 3 to 5 breaths on each side
- Drop the bottom knee if the full version twists your torso
- Stack the top foot slightly ahead of the bottom foot for more balance
- Keep the top hip lifted, not rolling backward
A clean side plank should feel organized, almost neat. If it feels like a pile of joints fighting each other, reset it. The lift comes from the middle, not from jamming the shoulder harder into the floor.
4. Dolphin Pose
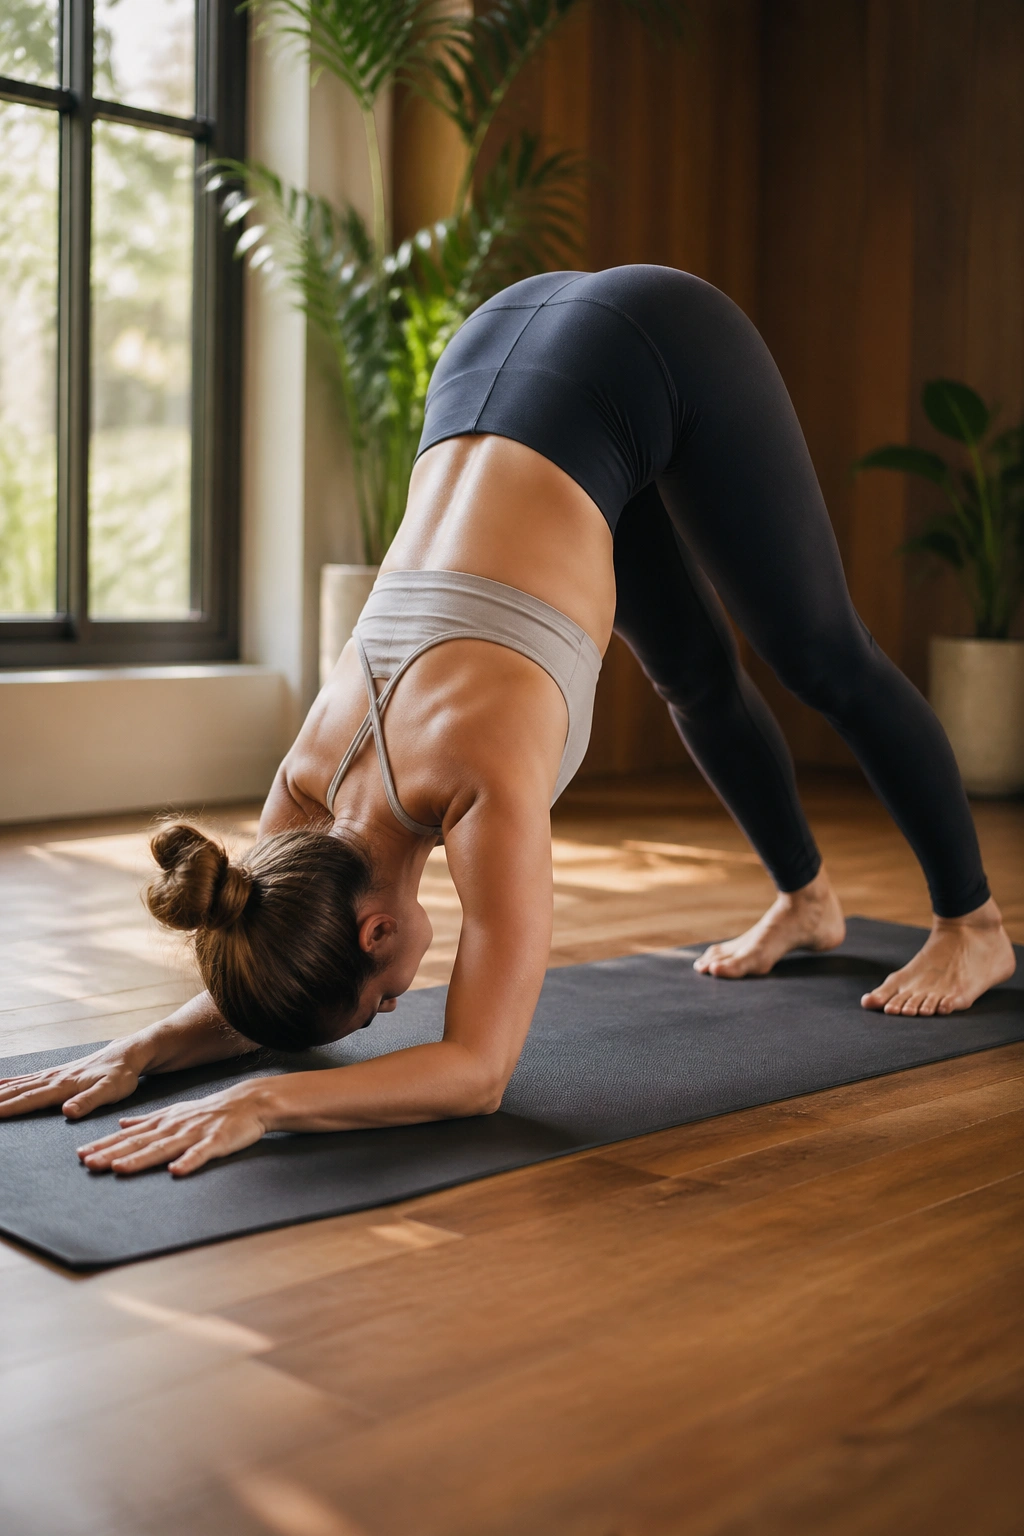
Drop to your forearms when your wrists start complaining. Dolphin pose gives you many of the same core and shoulder benefits as plank, but with a different load on the hands, and that changes the whole feel of the pose.
The real work happens when you keep the ribs from spilling toward the floor as the hips lift. People often treat dolphin like a resting shape. It isn’t. The belly still has to stay active, the shoulder blades still need space, and the legs still need to work to keep the shape clean.
A useful image to hold onto: the body should feel like one solid angle, not a loose fold.
- Press forearms down evenly
- Keep the head relaxed, not hanging heavy
- Walk the feet in only as far as you can keep control
- Breathe into the back ribs without letting the low back arch
Watch for this: if the neck tightens first, your shoulders are taking over and the core has checked out.
5. Boat Pose
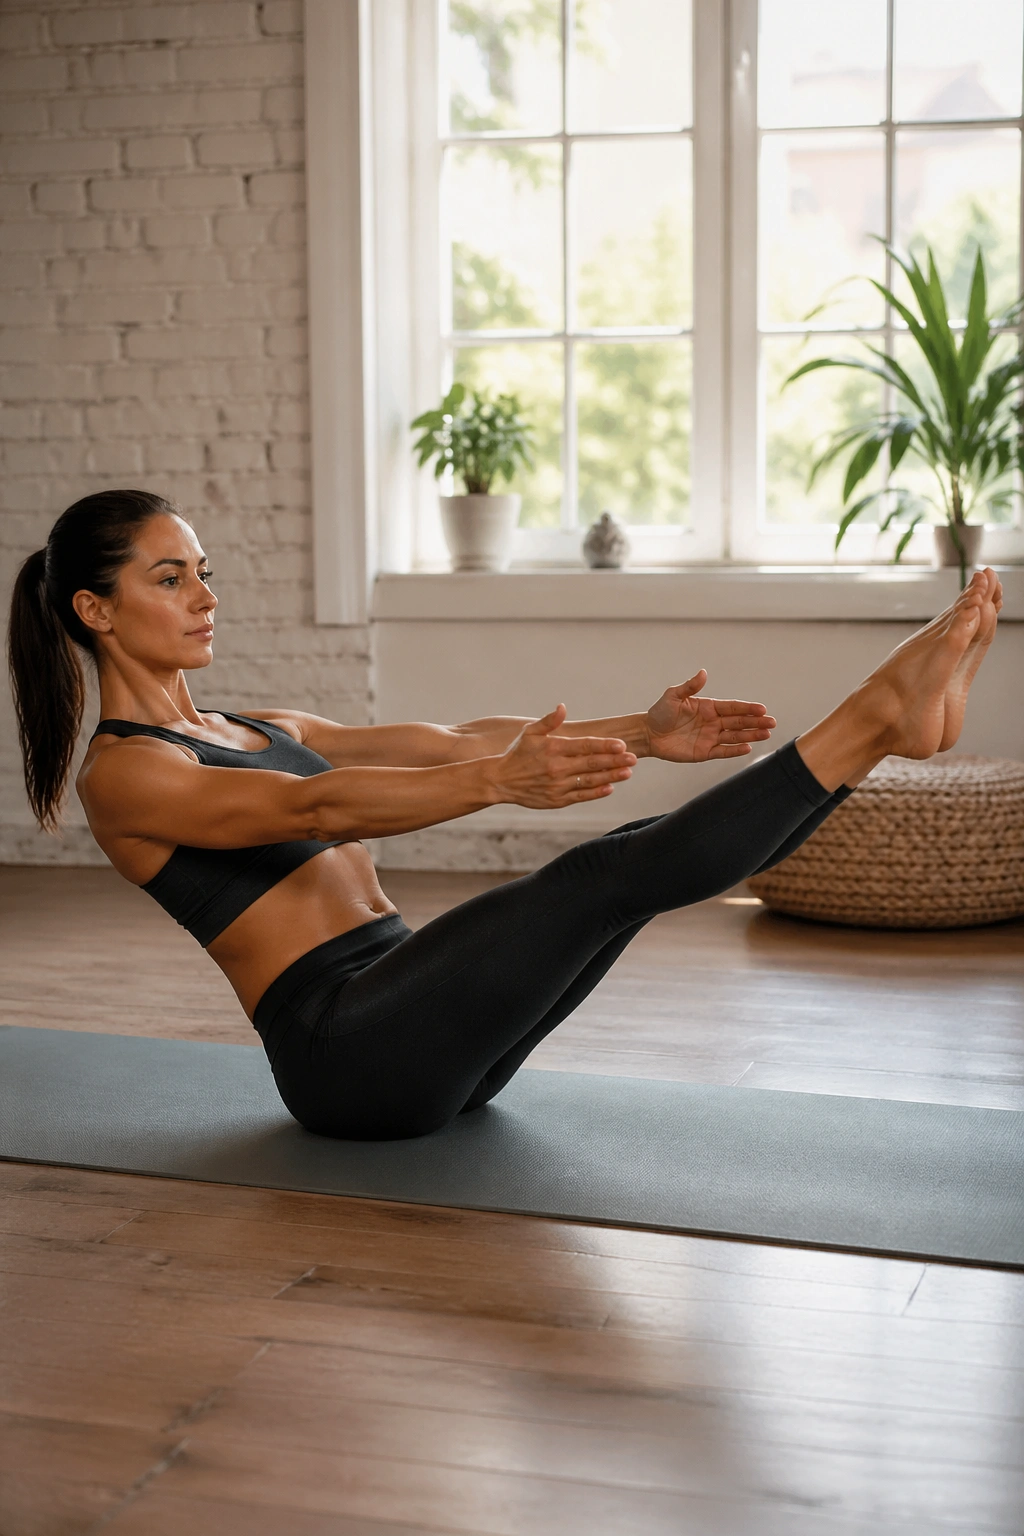
Boat pose is the one people love to hate. It’s honest. There’s nowhere to hide once the heels lift and the spine has to stay long at the same time.
What makes boat useful for abs is not the dramatic shake in the hip flexors. That part happens, sure, but the real job is holding the chest up while the lower belly keeps the pelvis from tipping backward. If you round into a ball, you’re making it easier on the core and harder on the spine.
Keep the chest broad and the lower ribs gently knit in. You do not need a giant V-shape to make the pose count. A smaller angle with clean form is often better, especially if your back rounds hard the moment the legs straighten.
Hold for 3 to 5 breaths, lower with control, and come back up if the low back stayed quiet. That last part matters more than people think.
6. Half Boat Pose
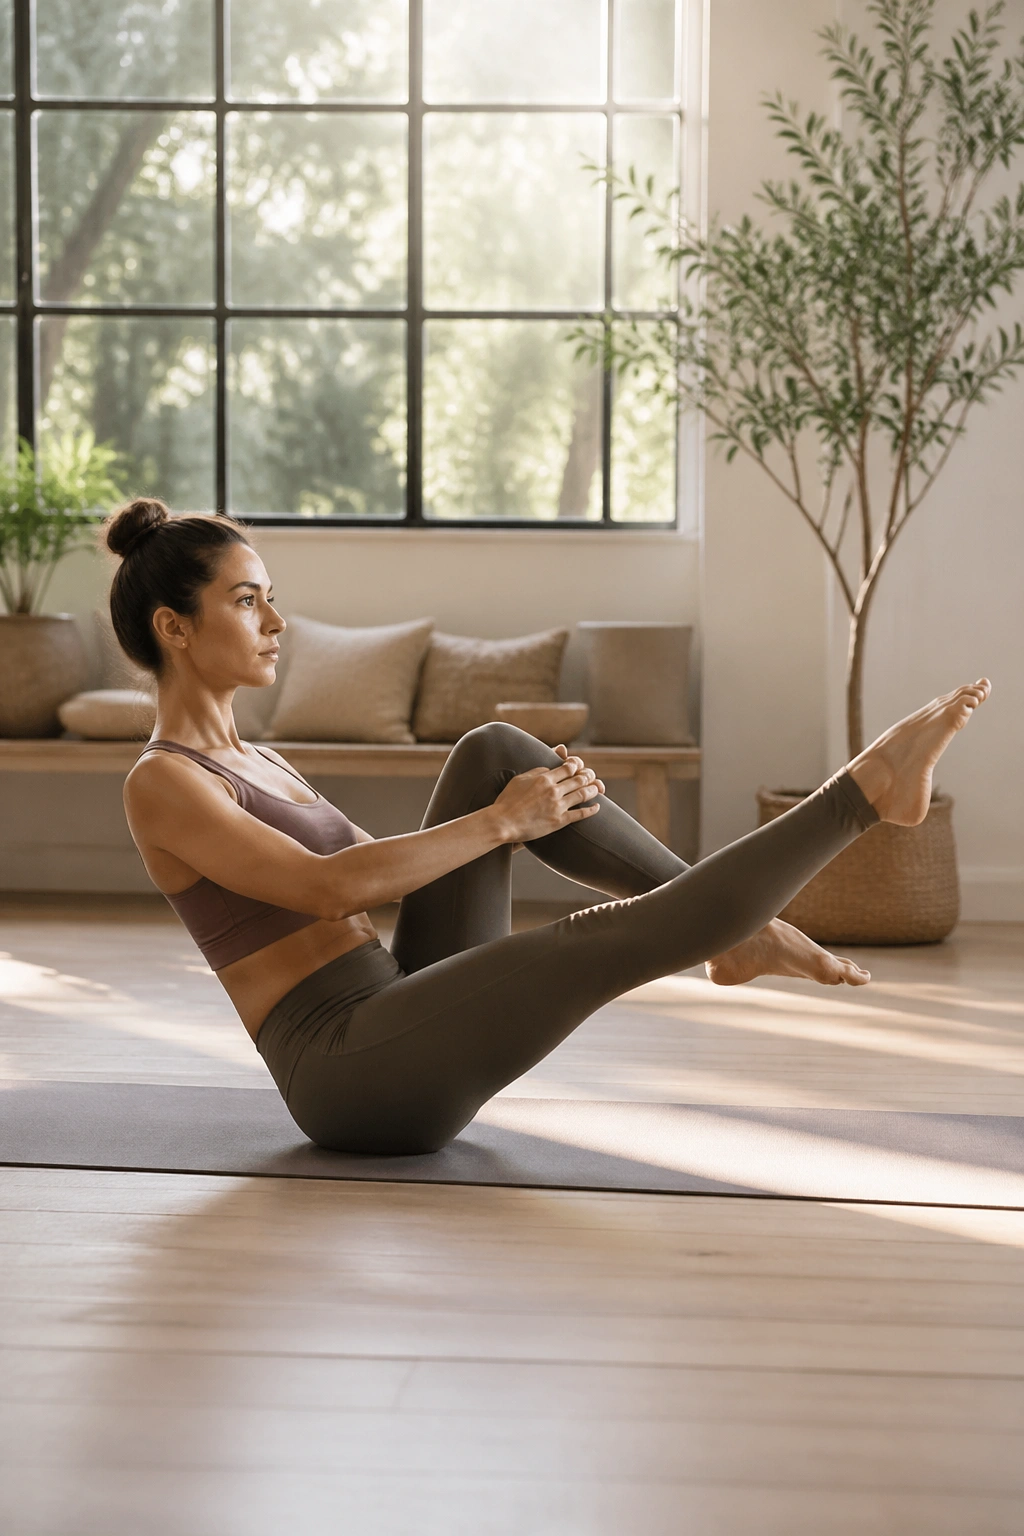
Half boat is the smarter place to start if your hip flexors cramp fast. One foot stays closer to the floor, or both knees stay bent, and that makes it easier to keep the pelvis steady while the abs do their part.
The point here is control, not drama. If you can keep your chest lifted and your low back long in half boat, you’re teaching the exact mechanics that make full boat more useful later. It’s a cleaner place to practice because there’s less wobble to fight through.
Good Signs
- Your breath stays smooth
- The neck stays soft
- The lower belly keeps drawing inward as the legs hover
- You can hold the shape for 20 to 30 seconds without collapsing
Half boat is also a good reminder that stronger abs do not always mean straighter legs. Sometimes the best version is the one you can control without the whole pose folding in on itself.
7. Low Boat Pose
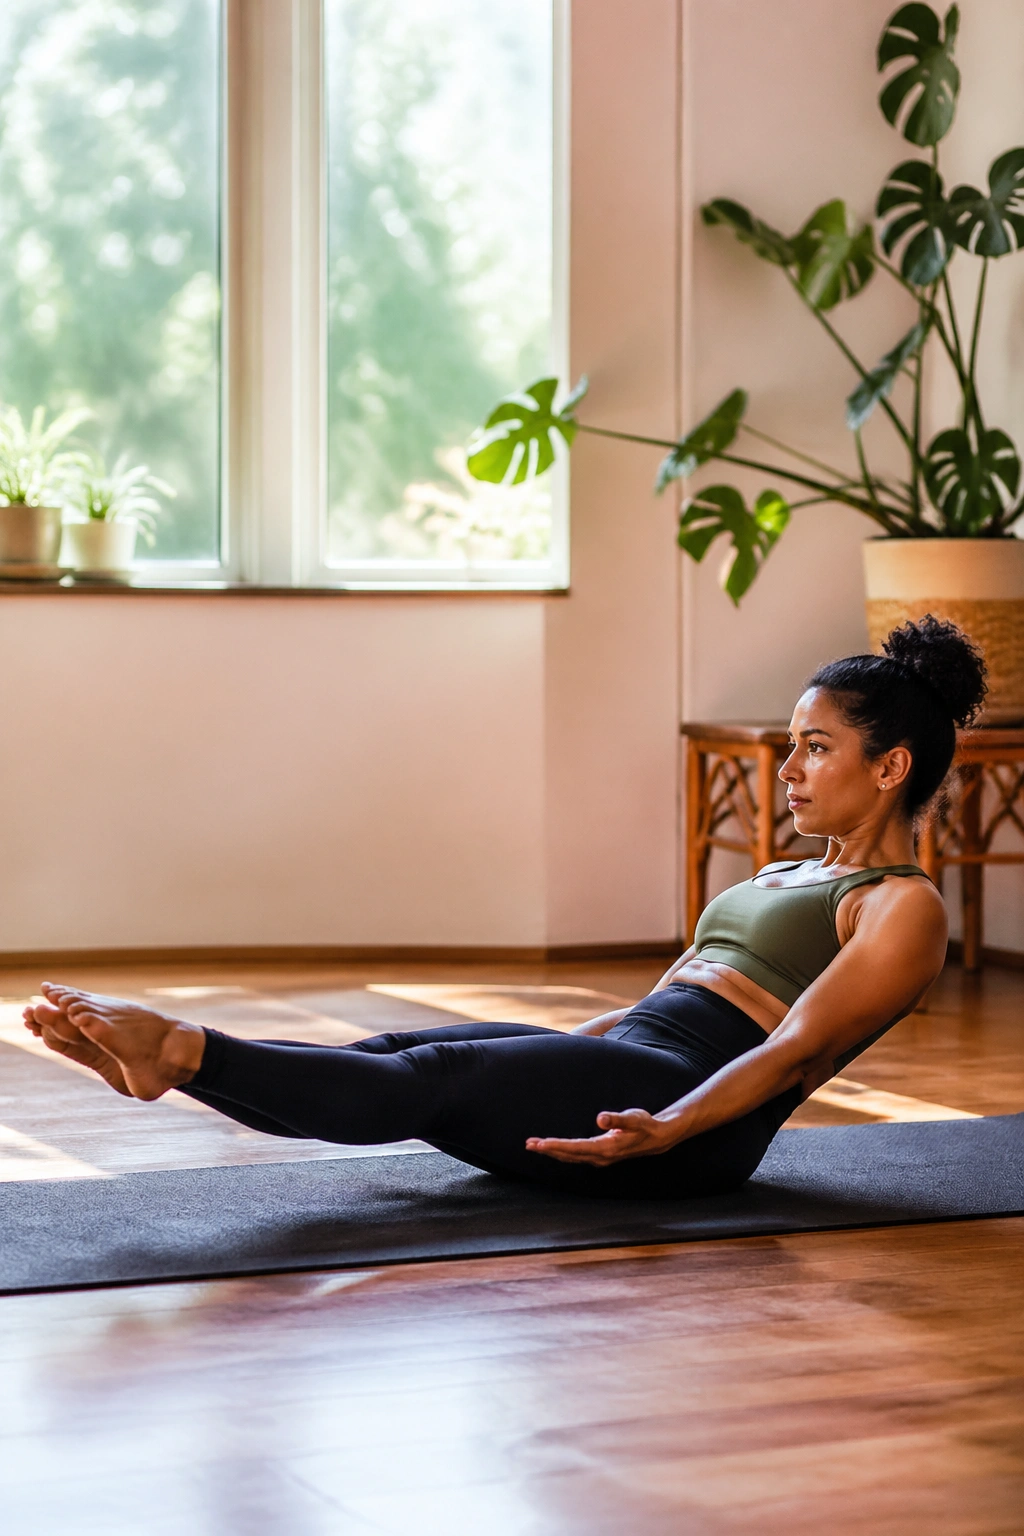
Low boat exposes sloppy core work fast. The closer your body gets to the floor, the more obvious it becomes whether your abs are holding or whether your back is doing the rescue work.
A lot of people drop too low too soon and then arch through the lumbar spine to save the pose. That’s the mistake. The better version is smaller and tighter: shoulders a few inches off the mat, legs lifted only as high as you can manage, and the belly pulling inward like you’re zipping up a snug jacket.
Keep the lower back long. If it presses hard into the floor and starts to ache, come up a little. Yes, a little. There’s no prize for hovering two inches from the ground if the pose turns into a strain.
8. Knee-to-Elbow Plank
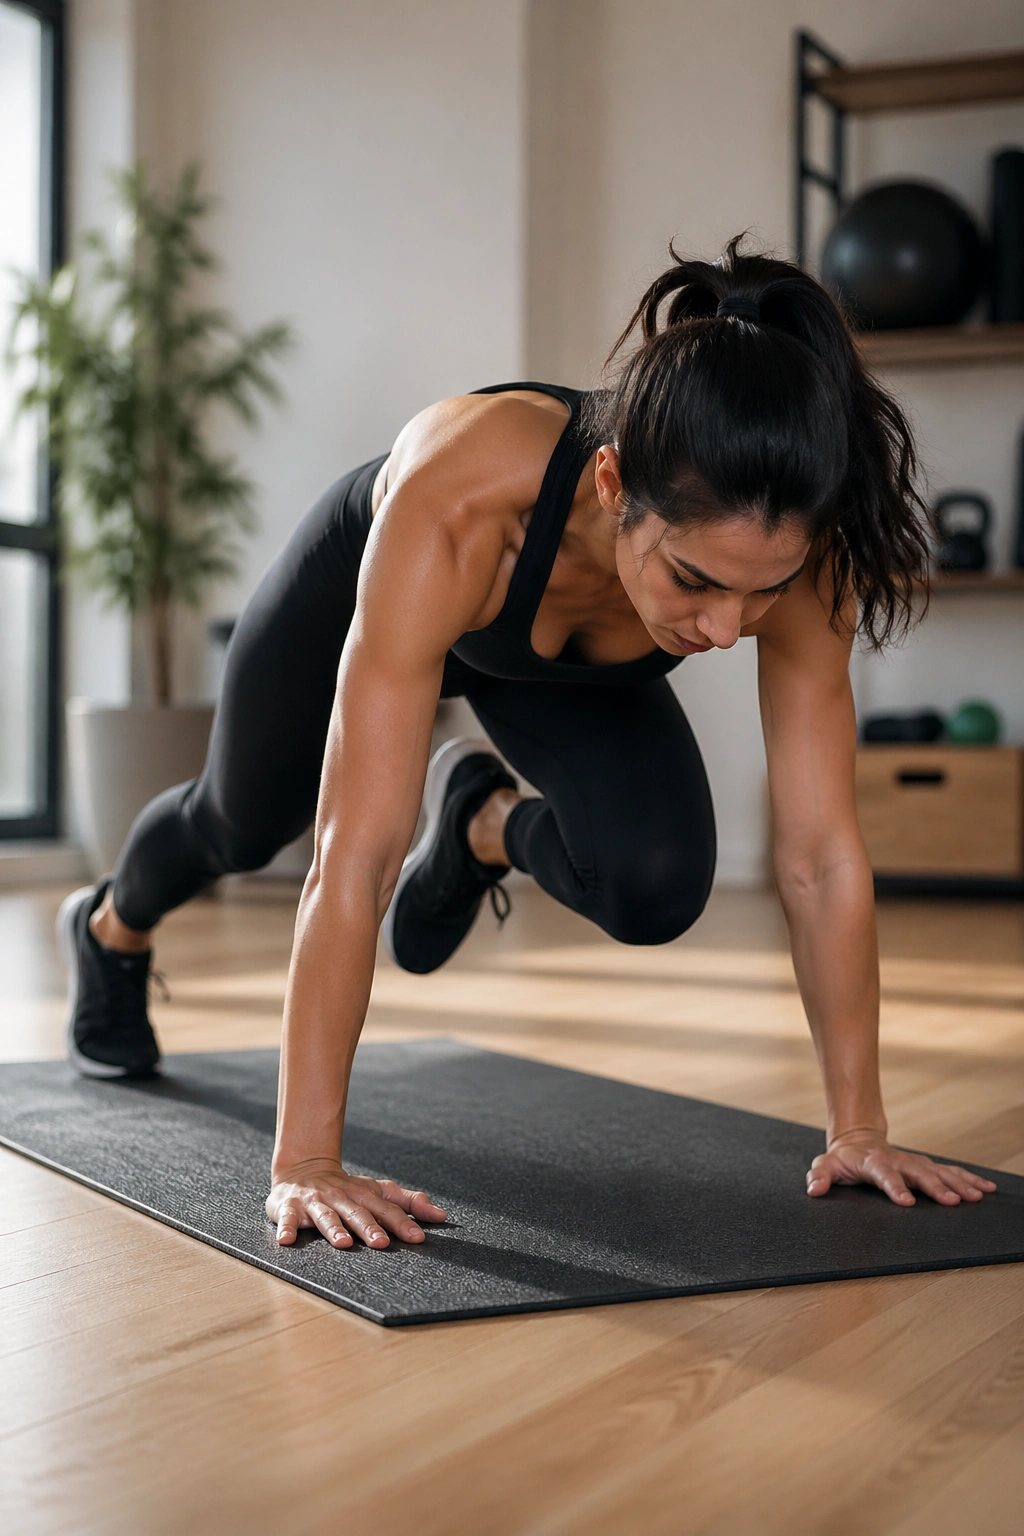
A knee-to-elbow plank feels like plank with a punch. You’re no longer just holding the body in place; you’re creating a short, controlled crunch while the shoulders keep everything stable.
What Makes It Harder
The moment one knee travels forward, the core has to prevent the torso from twisting. That means more oblique work, more lower-abdominal control, and more attention to the ribs. It’s a small movement, but it’s a sharp one.
Clean Form Cues
- Start in a strong high plank
- Exhale as the knee comes toward the same-side elbow
- Keep the hips as level as you can
- Step the foot back without slamming it down
A slower tempo makes the exercise far better. If you swing the knee through like a pendulum, you lose the point. Hold the shape for a beat before returning to plank, and the abs have to stay awake the whole time.
9. Chaturanga Dandasana
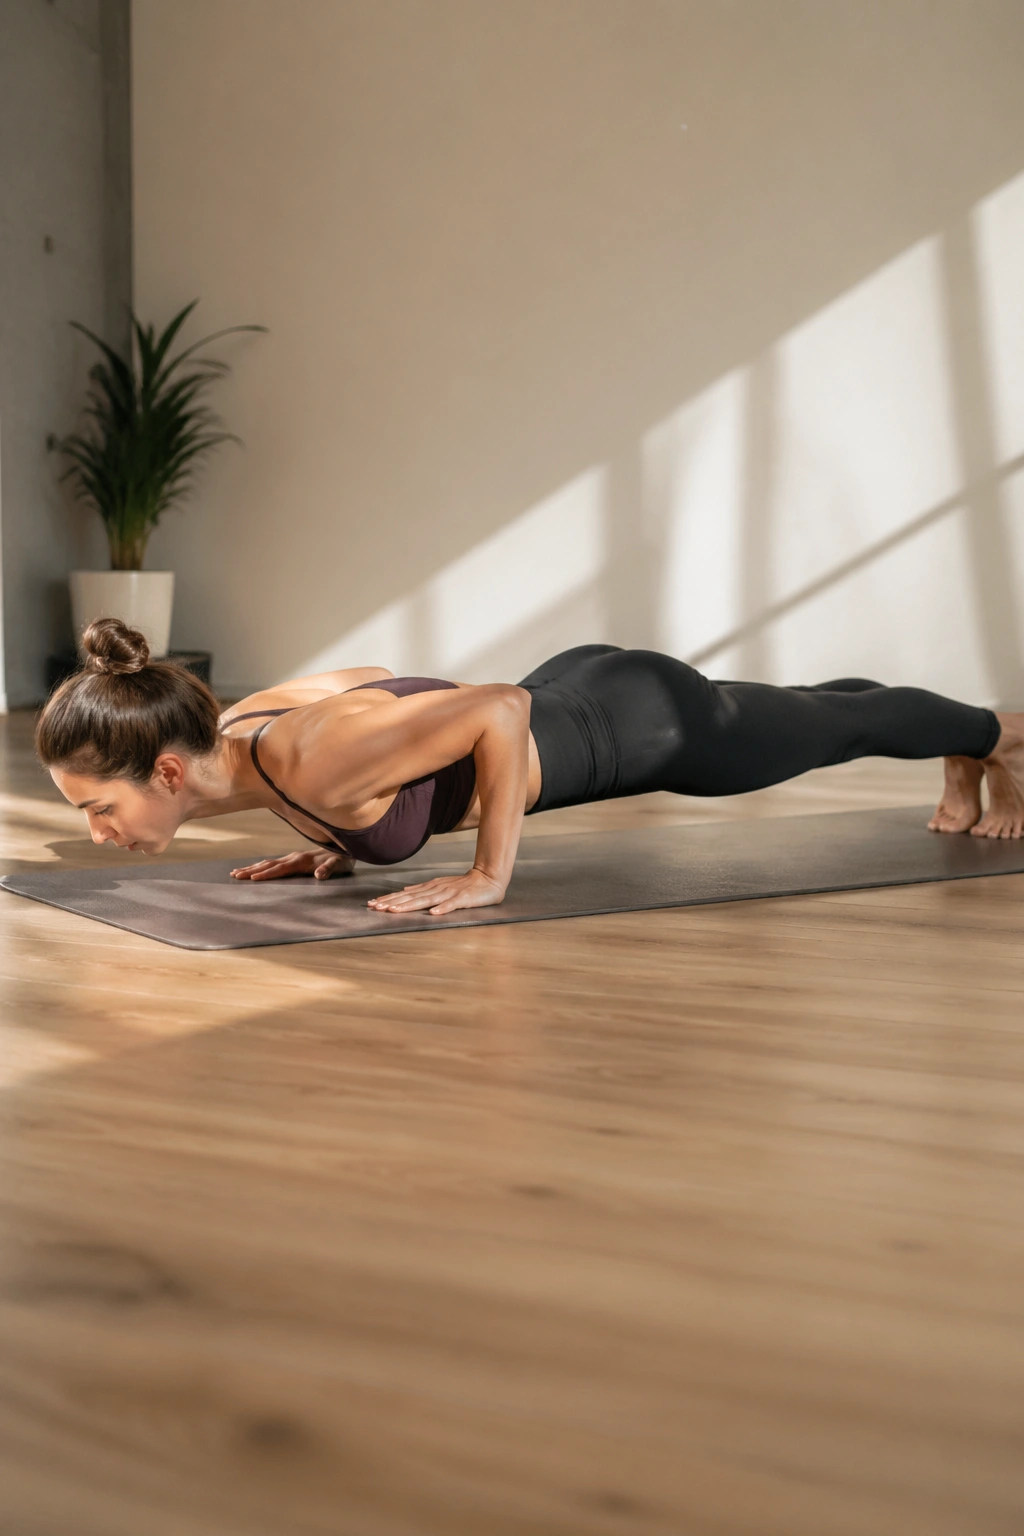
Chaturanga is not a push-up with yoga clothing on. It’s a controlled hover, and the control is what makes the abs work so hard.
The torso has to stay straight while the elbows bend close to the ribs. If the hips drop first, the belly goes soft. If the shoulders dive forward, the whole front line loses tension. The best chaturanga feels compact and deliberate, almost careful.
Use the descent slowly. Lower only as far as you can keep the shoulders in line with the elbows, and stop before the chest sinks below the shoulders unless you already have the strength for that range. A lot of injuries start with rushing this shape.
Best for: people who can already hold a steady plank and want a more demanding core challenge. If you’re new, lower to the floor with your knees down first. No shame there.
10. Crow Pose
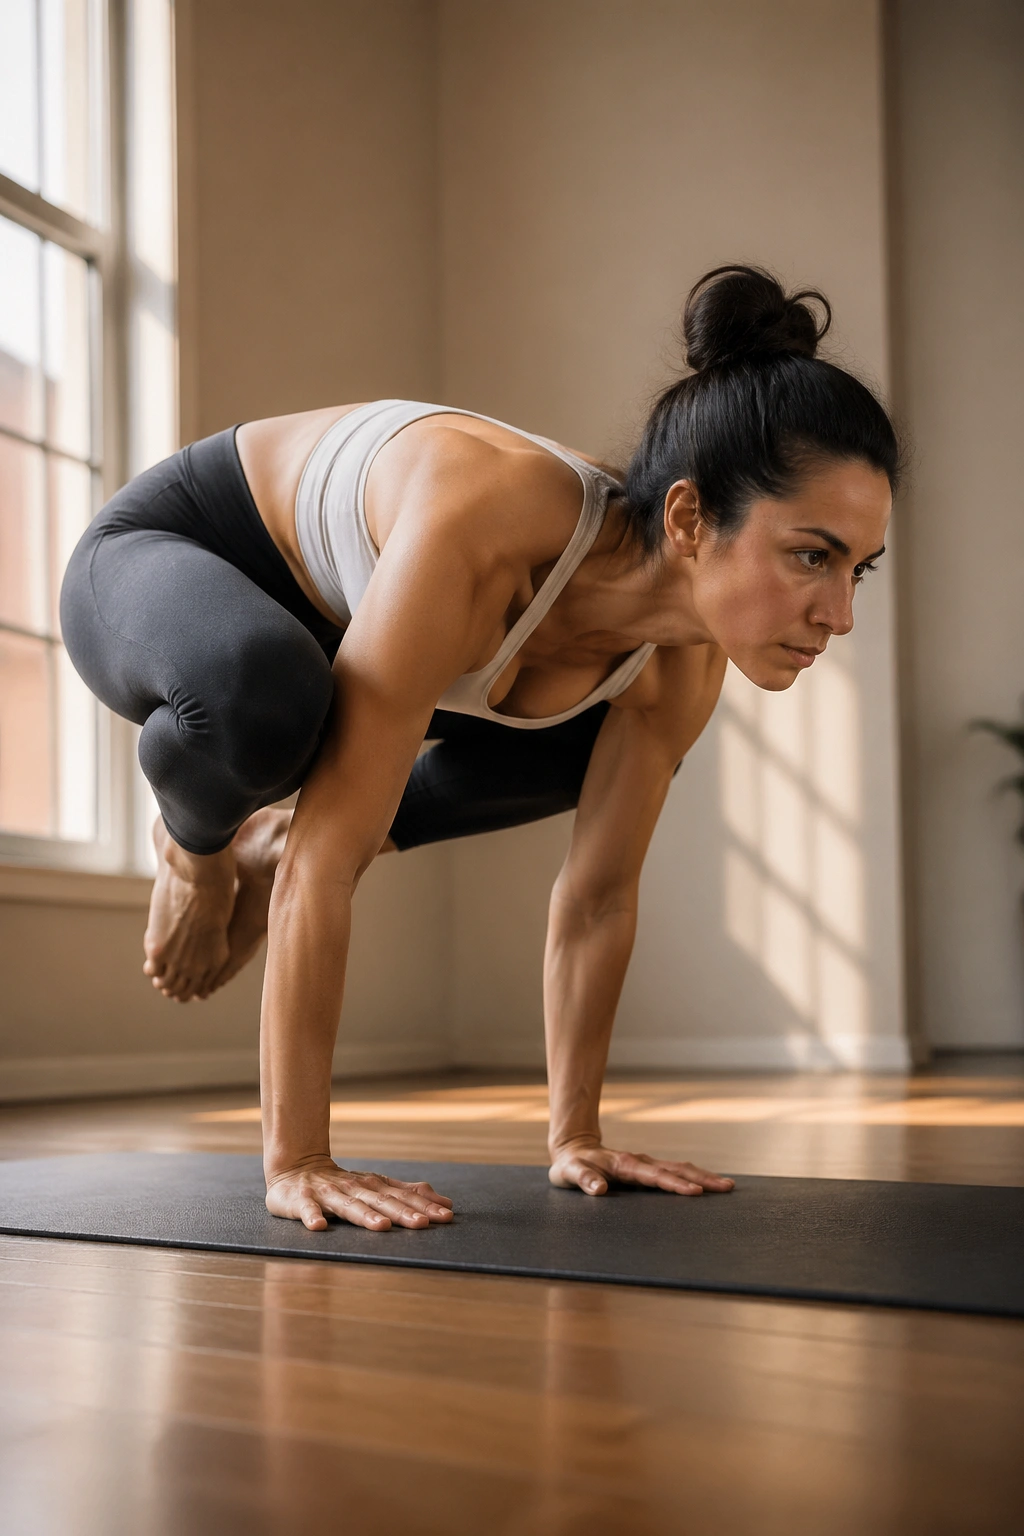
Crow pose rewards patience more than courage. People see the balance and assume it’s all wrists and bravery, but the real work starts in the belly, where the knees tuck in and the torso has to stay tight enough to stop the whole thing from tipping.
If you’ve ever felt your feet float for half a second and then crash right back down, you already know the difference. The lift is tiny. The control is everything.
How to Get the Most From It
- Keep the gaze a few inches in front of the hands
- Hug the knees close to the outer arms
- Round the upper back slightly without collapsing the chest
- Engage the lower belly before the feet leave the floor
A wall or a stacked blanket in front of you can make the first tries less stressful. Crow is one of those poses where a calm setup matters more than a fearless leap.
11. Chair Pose
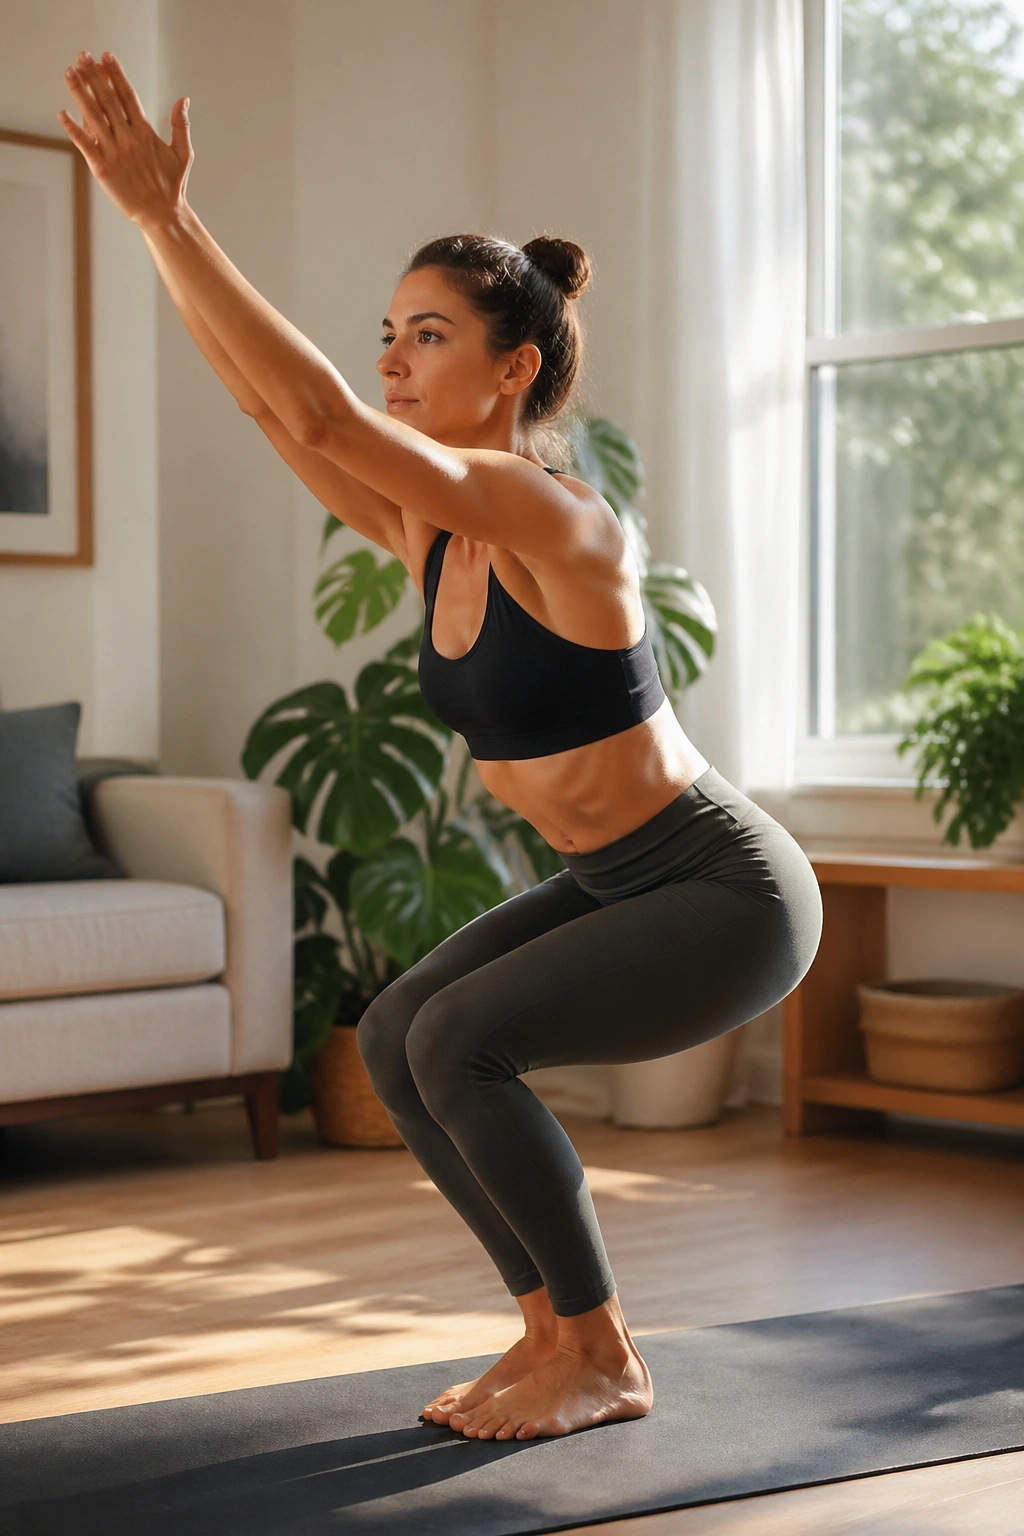
Chair pose looks harmless from across the room. Then you hold it for 30 seconds and discover that your thighs, glutes, and abs are all working at once.
The core job here is to keep the ribs stacked over the pelvis while the knees bend and the hips sit back. If the lower ribs jut forward, the low back arches. If you sink too deep and lose the lift through the chest, the whole shape turns heavy and dull.
A good chair feels lively. The weight stays in the heels, the tailbone lengthens, and the belly stays active enough that you can still breathe without puffing out your midsection. Arms overhead can make the core work harder, but only if the shoulders stay relaxed.
One sentence, because it matters: A clean chair should feel like you are holding yourself up from the center.
12. Revolved Chair Pose
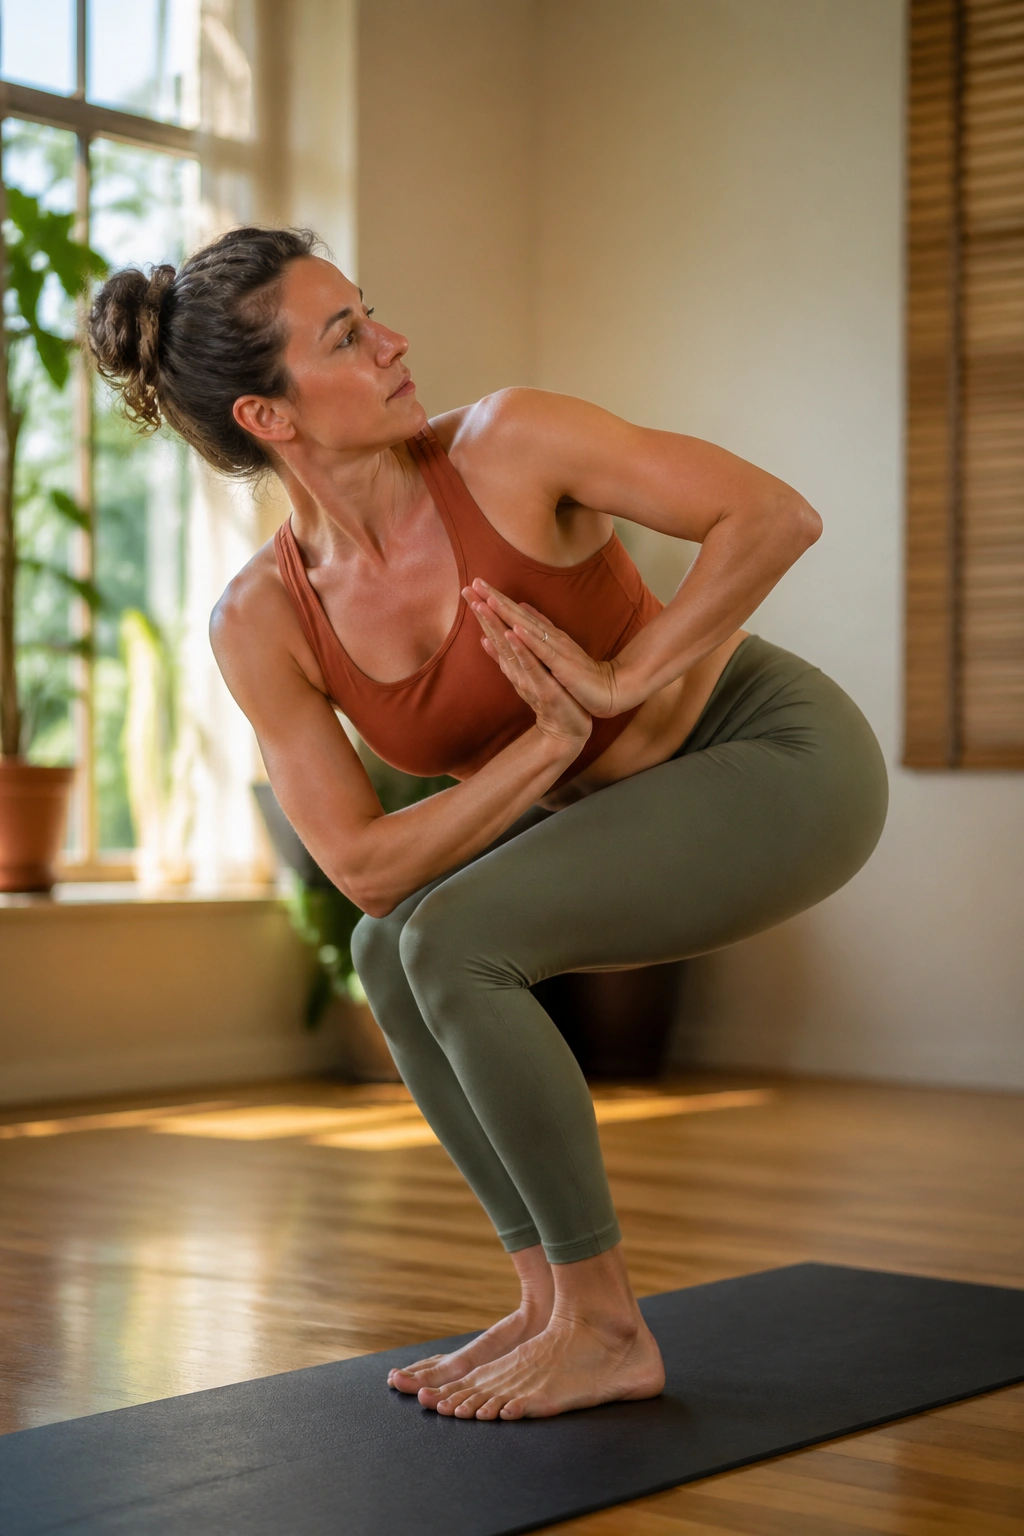
Revolved chair is where breath and balance start arguing. The legs are already busy, and then the torso turns, which means the core has to keep the knees, hips, and ribs from wandering into different directions.
The twist should come from the torso, not from yanking the arms across the body. If the knees collapse inward or the pelvis spins too far, the abs stop doing their job and the pose turns messy. Keep the thighs active and the spine long before you try to deepen the twist.
It helps to think of the pose as a firm wrap around the middle. The obliques shorten on one side while the outer hip stays stable on the other. That cross-body tension is exactly why it builds a tighter, more functional core.
13. Warrior III
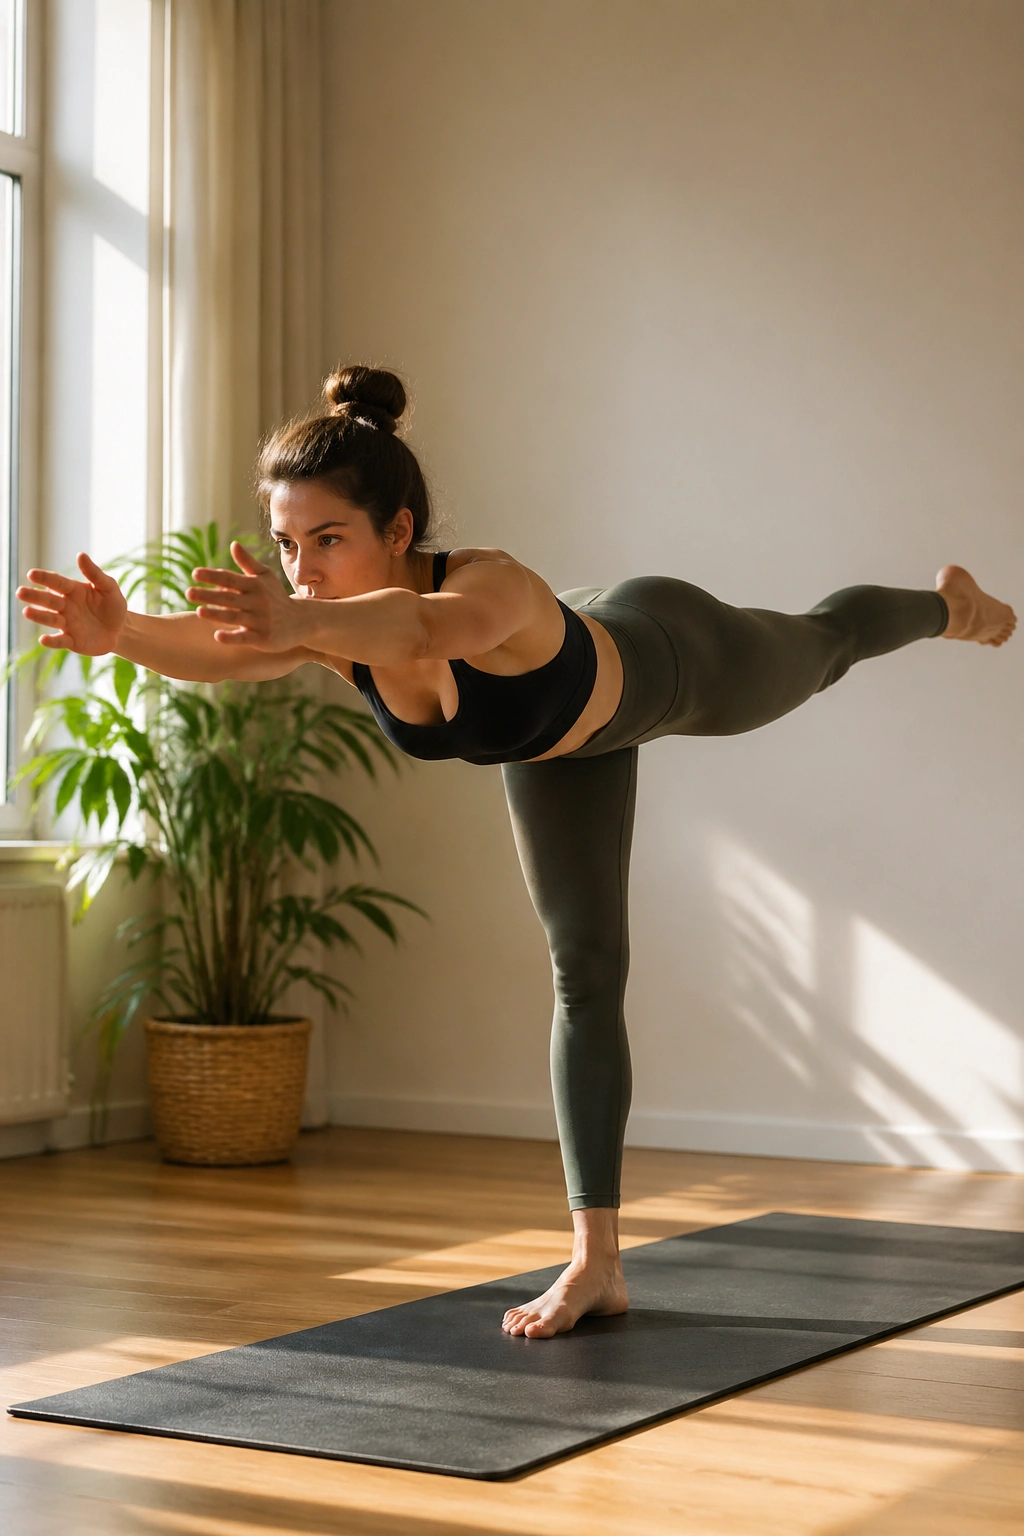
Warrior III asks for one thing: no wobbling. That sounds simple until the back leg floats up and the torso tips forward, because then every small shift shows up right away.
Why It Builds Core Control
Warrior III is a classic anti-rotation pose. Your standing leg has to hold the pelvis in place while the back leg reaches long and the torso stays level. The abs help keep the ribs from rotating open or dropping toward the floor.
What Helps
- Keep the hips square to the floor as long as you can
- Reach the crown of the head forward, not down
- Use a wall or fingertips on a chair if balance is shaky
- Press through the standing foot’s big toe mound
This pose is a little humbling. Good. Humbling poses usually teach more. Hold for 3 breaths, then switch sides without rushing the reset.
14. Standing Knee-to-Elbow Balance
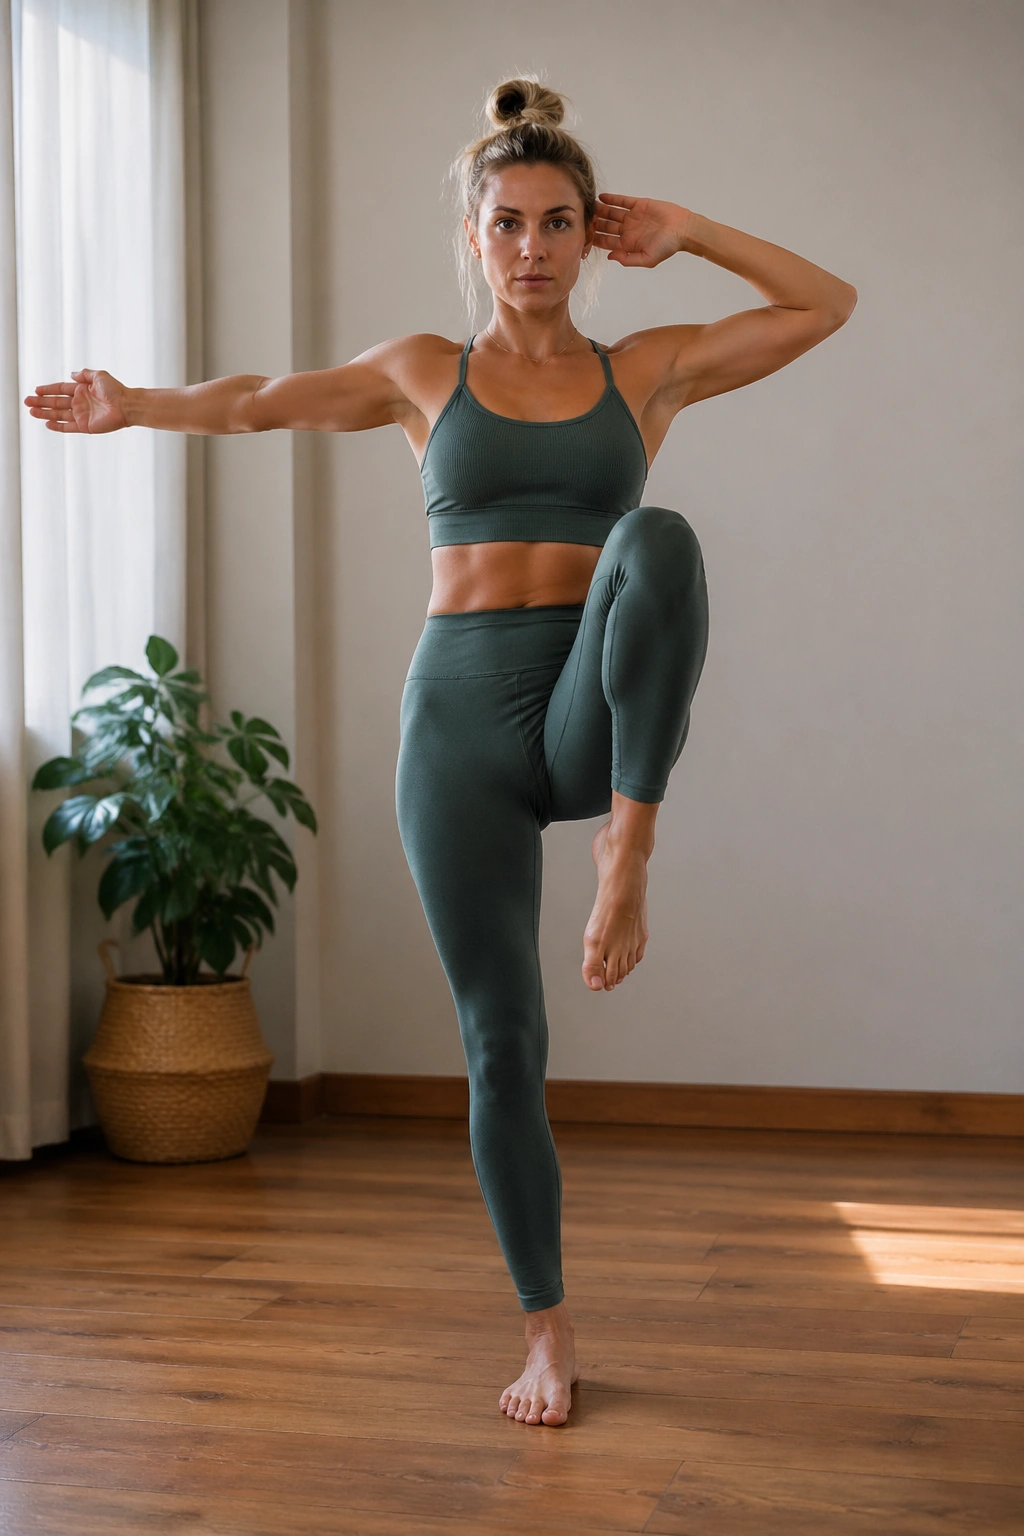
A standing knee-to-elbow balance is the kind of move that makes you notice every little cheat. If you lean back, the abs soften. If you grip the floor too hard with the standing foot, the whole body stiffens and the balance gets uglier.
The goal is to draw the knee upward while the torso stays tall. That upward squeeze lights up the lower belly and hip flexors, but only if the ribs stay tucked in and the standing leg remains alive. It’s a nice reminder that core work does not always happen on the floor.
Try moving slowly into the balance, holding for one full breath at the top, then lowering with equal control. Fast reps turn this into a momentum drill. Slow reps turn it into a core exercise.
15. Crescent Lunge with Twist
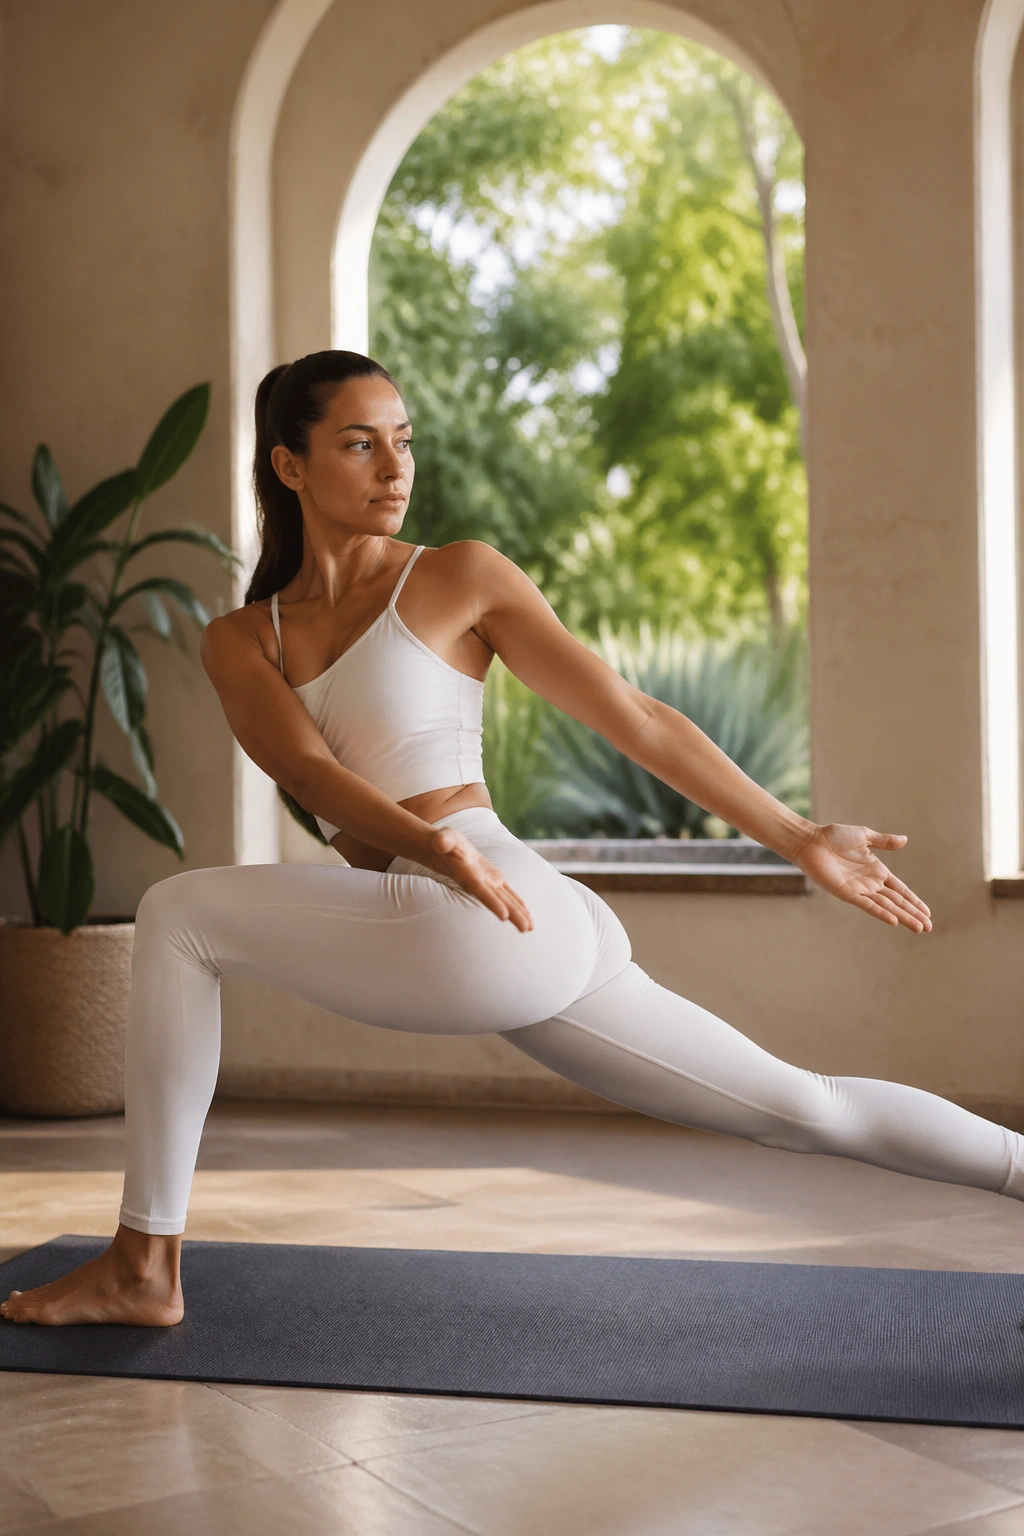
Compared with a regular crescent lunge, the twisted version asks more of your midsection. The legs already have to stabilize a split stance, and then the rib cage turns against that base.
That’s where the abs come in. They keep the pelvis from swiveling out with the twist, and they stop the spine from collapsing as you reach the elbow toward the opposite knee. If the back heel lifts wildly or the front knee wobbles inward, the twist is getting ahead of the strength.
Best for people who want a standing move that feels athletic but still looks like yoga. Keep the twist long, not crunched, and breathe on the exhale as you rotate. A short, tight twist with control beats a deep twist that dumps the low back.
16. Revolved Crescent Lunge
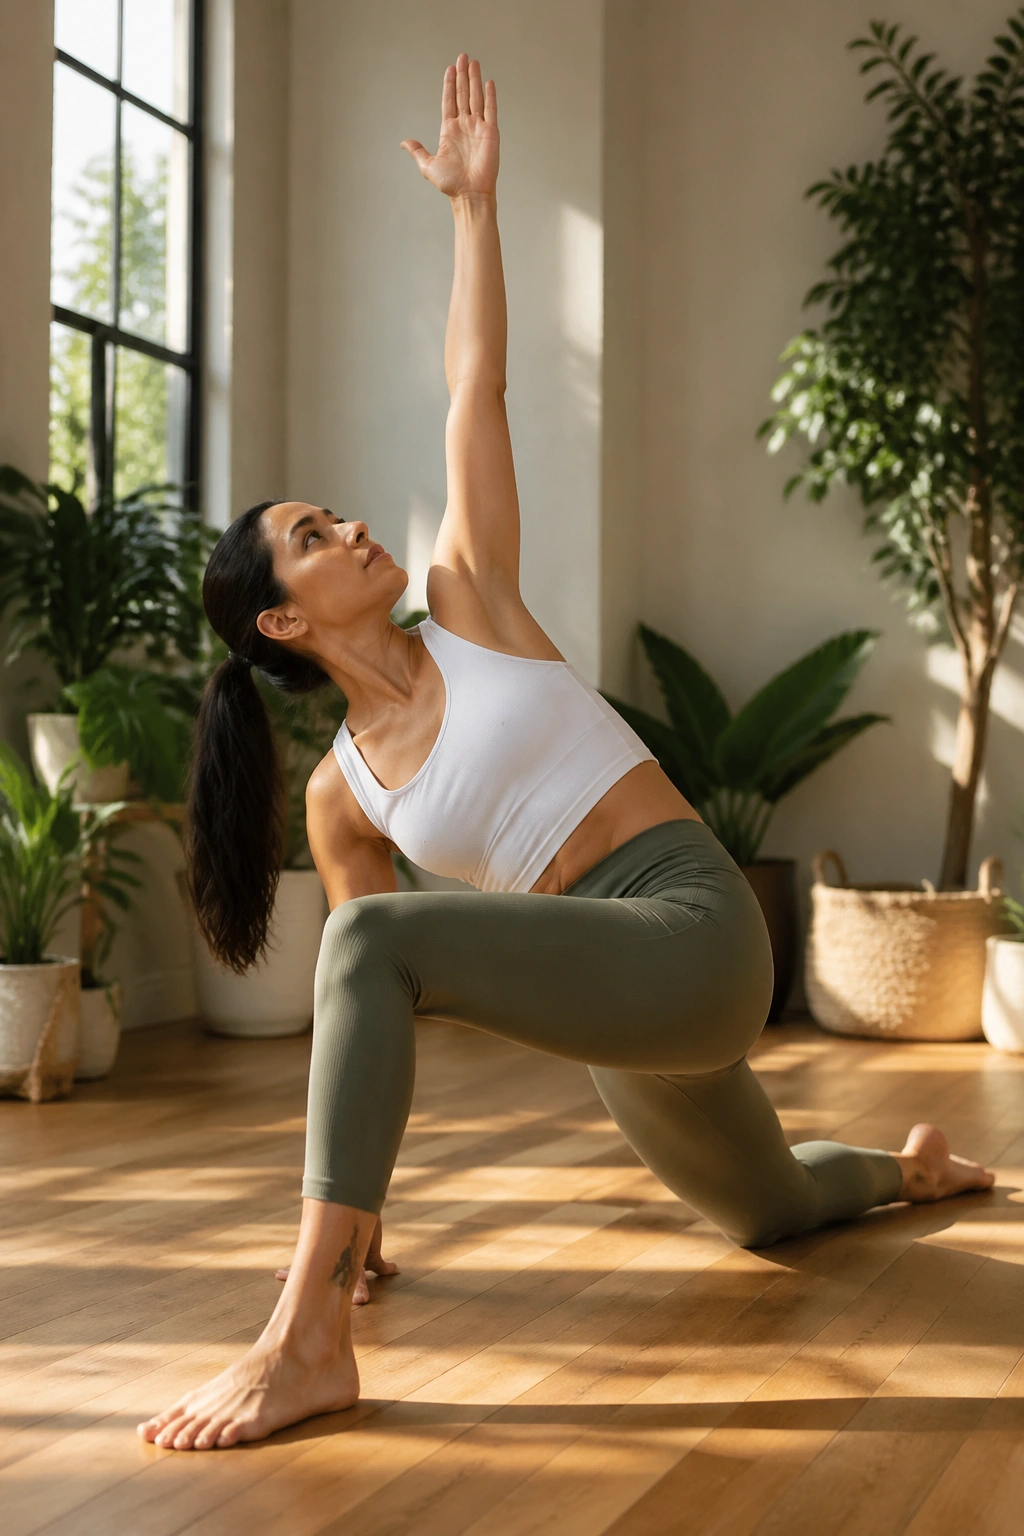
Revolved crescent lunge is awkward on purpose. The feet are asking for stability, the hips are asking for space, and the torso is trying to turn while staying tall. That’s a lot to manage, which is why the pose is so good for abs.
The lower belly helps keep the pelvis from tilting too far forward as you rotate. The obliques work to keep the ribs aligned over the hips. And the standing leg has to keep the whole shape from swaying side to side.
A back knee-down version is worth using if balance is the weak link. It lets you focus on the twist without spending all your energy on staying upright. Once the shape feels steady, lift the back knee and the core load goes up fast.
17. Revolved Triangle Pose
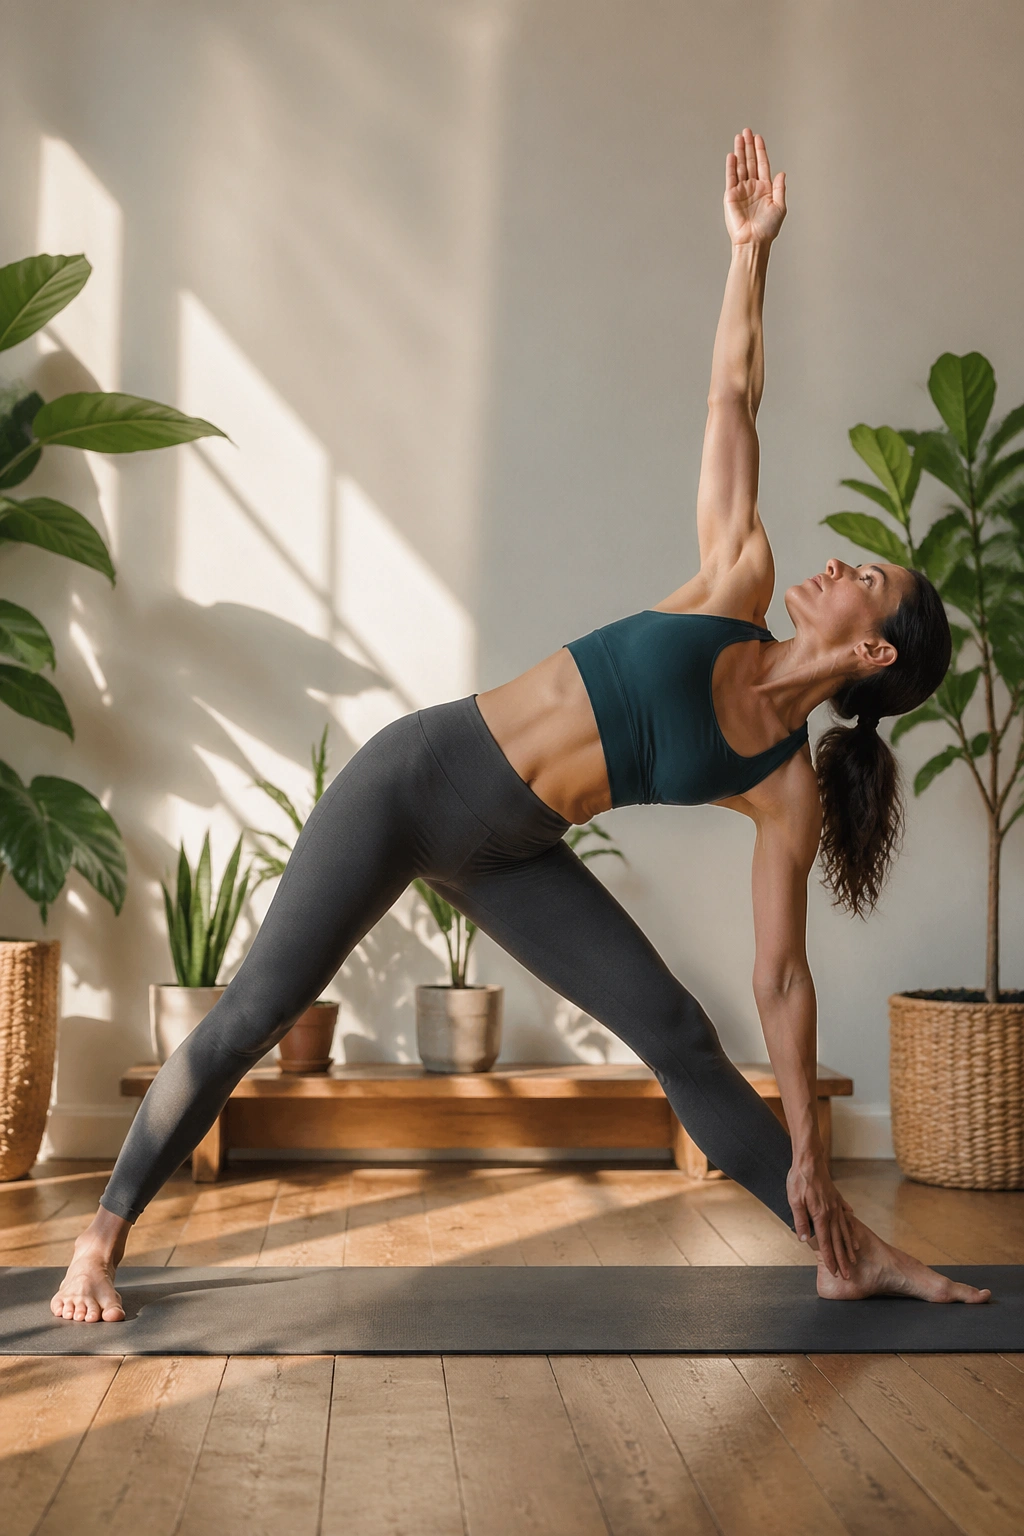
Why does revolved triangle feel so hard even when you can touch the floor? Because touching the floor is not the goal. Keeping the torso long while it rotates is the hard part.
The Twist You Want
The spine should lengthen before it turns. If you collapse the chest toward the front thigh, you steal work from the core and dump it into the hamstrings and low back. A block under the lower hand can make the shape cleaner right away.
How to Keep It Honest
- Place the block high enough to keep the spine long
- Press both feet down, especially the back heel
- Turn from the ribs, not from the shoulders alone
- Keep the gaze soft if looking up strains the neck
This pose can feel a little fierce. That’s normal. The obliques are doing real work here, and the torso has to stay organized while the legs and hips stay steady underneath.
18. Half Moon Pose
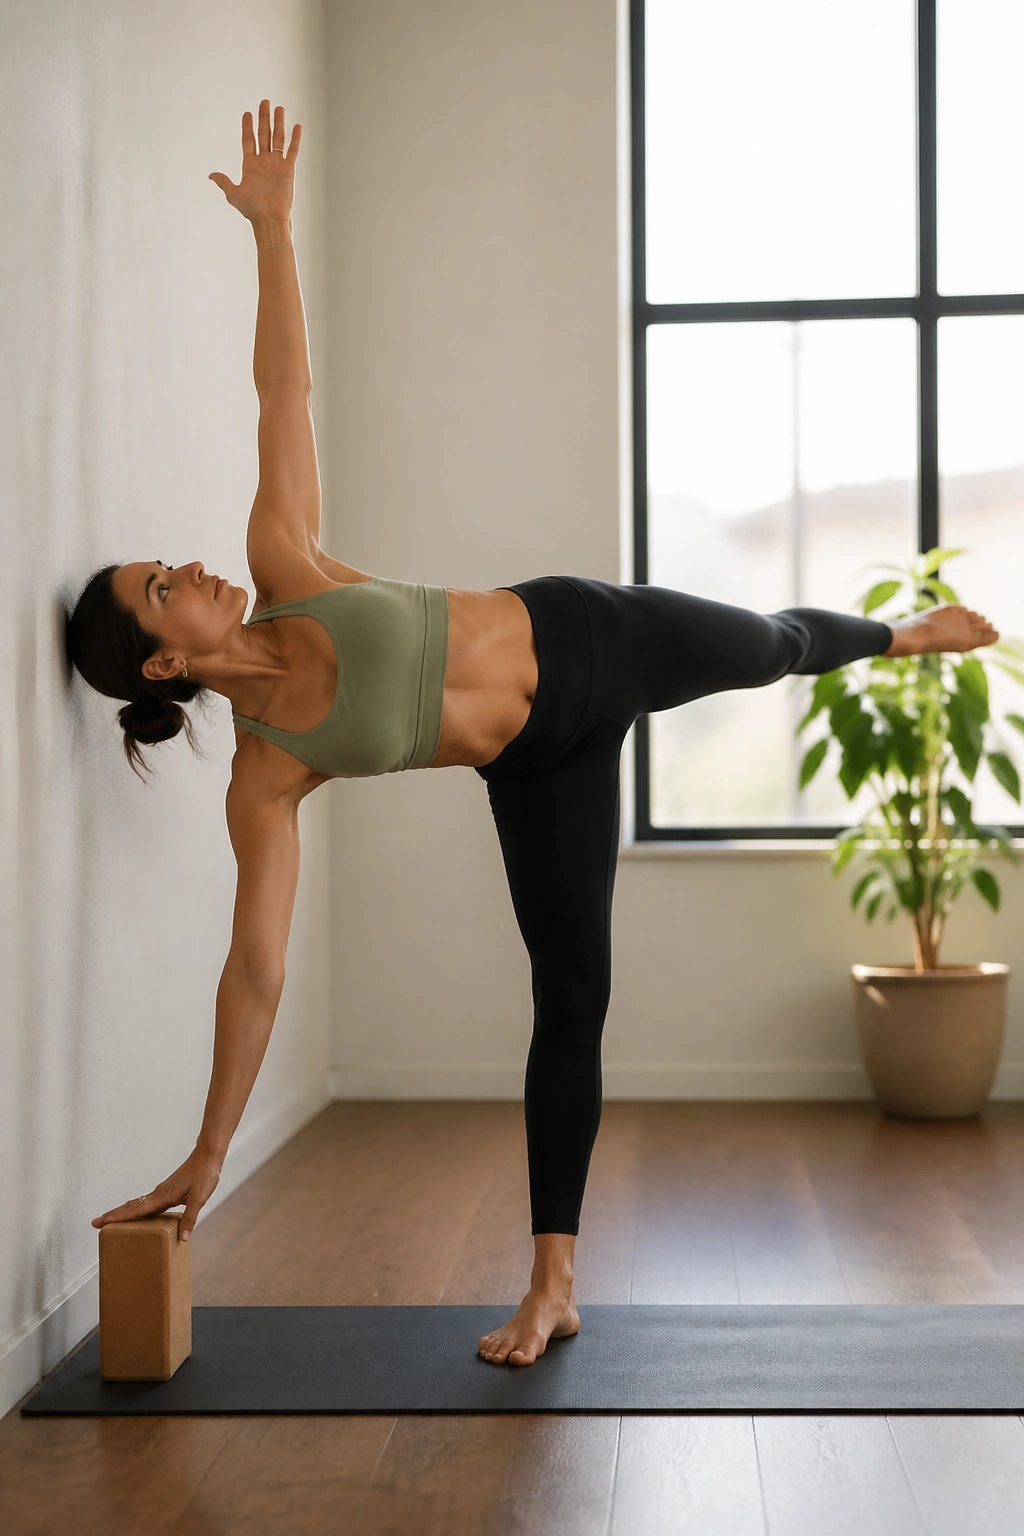
Half moon feels clean only when the standing leg does its share. The lifted leg is there to help with balance, but the real work sits in the standing hip and the side body that keeps the torso from collapsing open.
Use a Wall if You Need It
A wall is not a shortcut. It’s a tool. One fingertip on the wall can help you find the shape without turning the pose into a fight. That matters, because half moon is far better when you can breathe.
The abs work here in a sneaky way. They help keep the pelvis stacked, the lifted hip from rolling backward, and the rib cage from opening too much. Once that line is steady, the pose starts to feel light instead of wobbly.
- Press the standing foot firmly into the floor
- Keep the lifted foot active, not floppy
- Reach through the crown of the head and the heel at the same time
- Stop the rotation before it gets sloppy
19. Hand-to-Big-Toe Pose
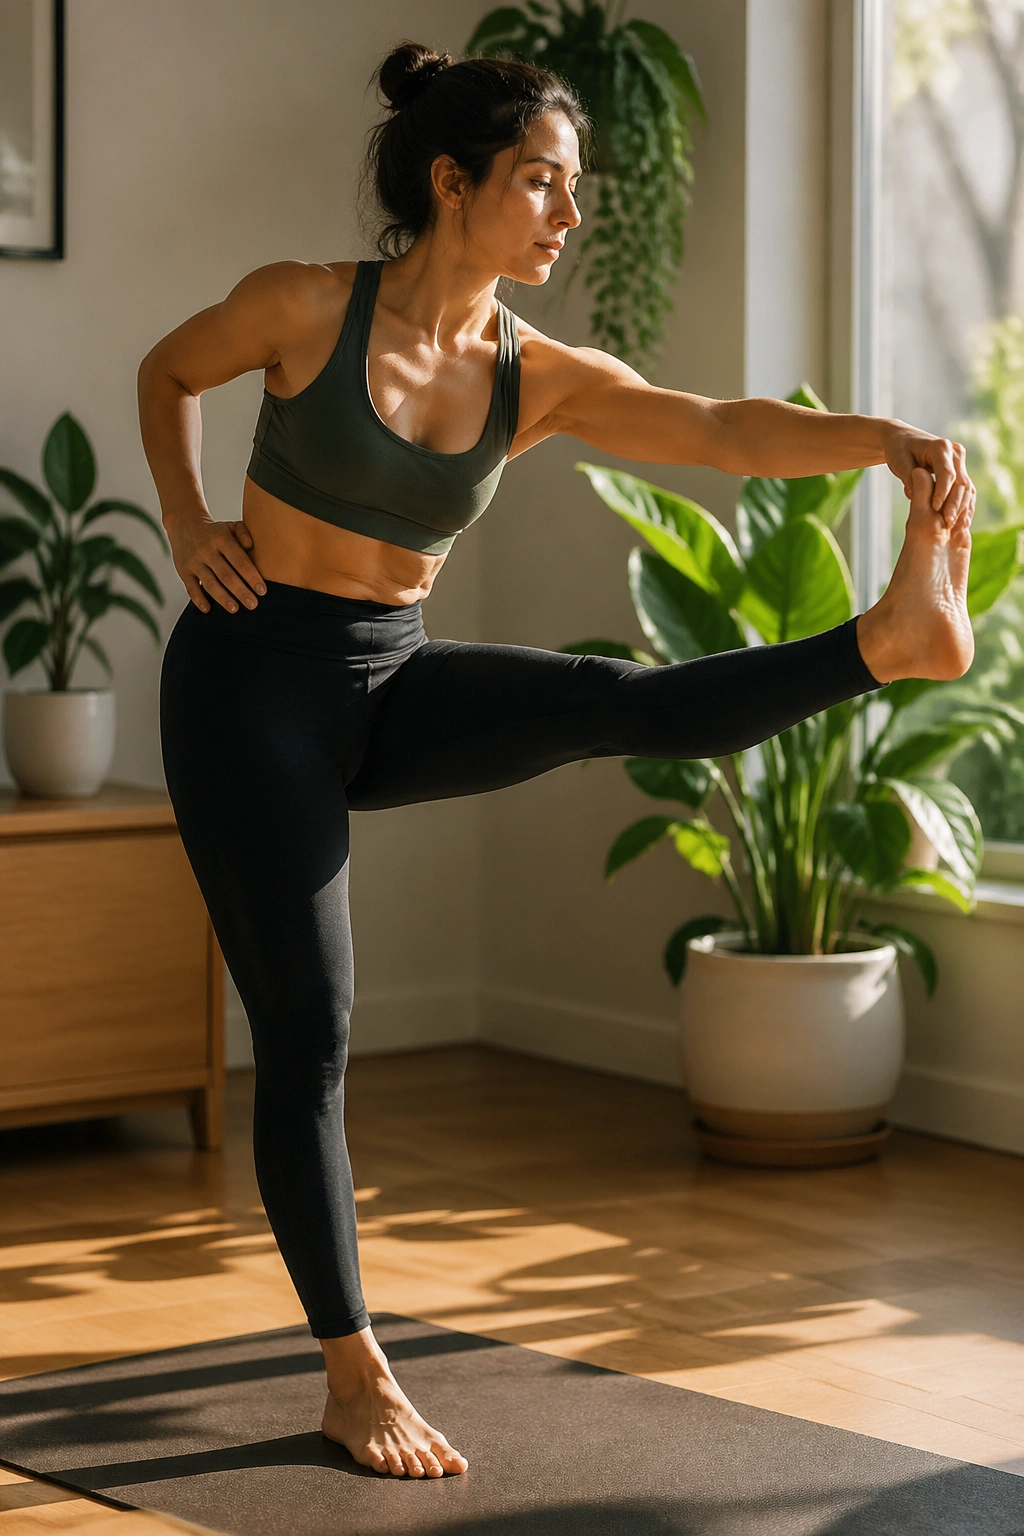
The long lever in hand-to-big-toe pose changes everything. One leg extends while the other stands, and the abs have to stop the pelvis from tipping or twisting as the leg reaches away.
A lot of people pull the leg out too fast and lose the center. Better to lift the knee first, find the standing balance, and only then extend the leg. The pose gets much more honest when you treat it like a balance drill instead of a hamstring stretch.
If the leg only straightens halfway, that is fine. Really. A bent knee with a stable torso is more useful than a locked knee and a torso that sways like a tree in wind. The core is training the line of the body, not chasing flexibility points.
20. Standing Figure-Four Balance
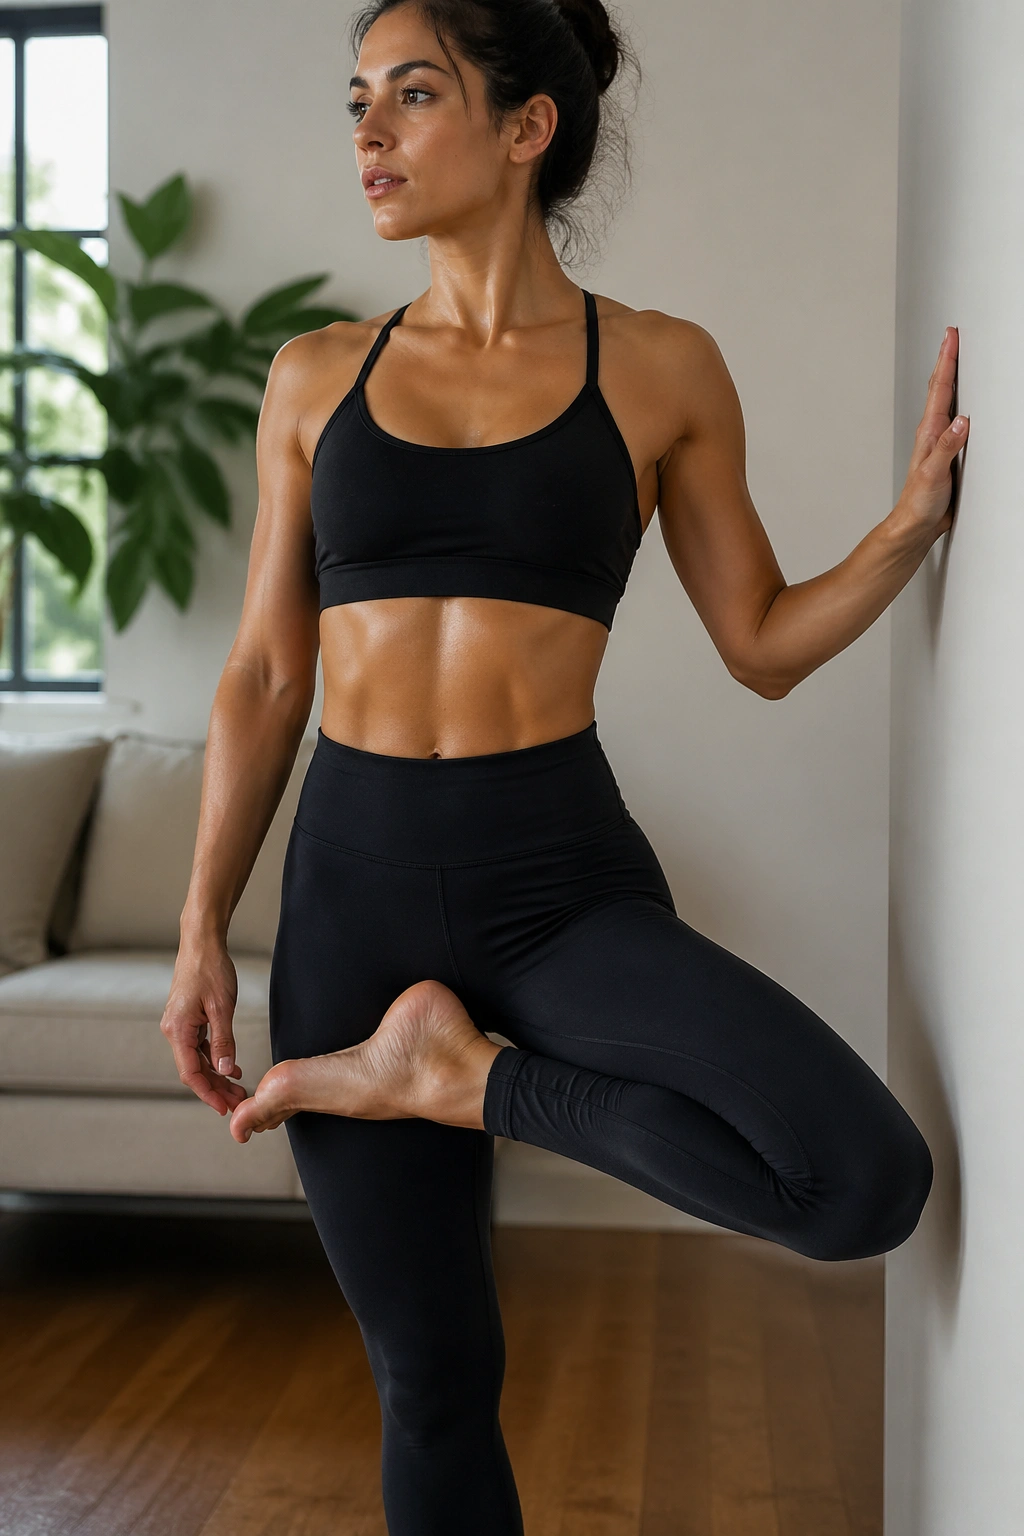
Standing figure-four balance is sneaky. The outer hip opens, the standing leg works hard, and the abs have to keep the pelvis from drifting while the body balances on one leg.
It’s a smart pose for people whose hips feel tight but who still want core work. The folded leg gives the body a place to go, which makes the balance feel less dramatic than a full standing split and a little more accessible. Still, the belly has to stay active or the chest will tip forward to save the pose.
Try using a wall lightly with one hand. That tiny bit of support lets you focus on keeping the standing knee soft and the pelvis level. If the lower back starts taking over, back out of the depth and hold the shape a little higher.
21. Three-Legged Downward Dog Knee-to-Nose
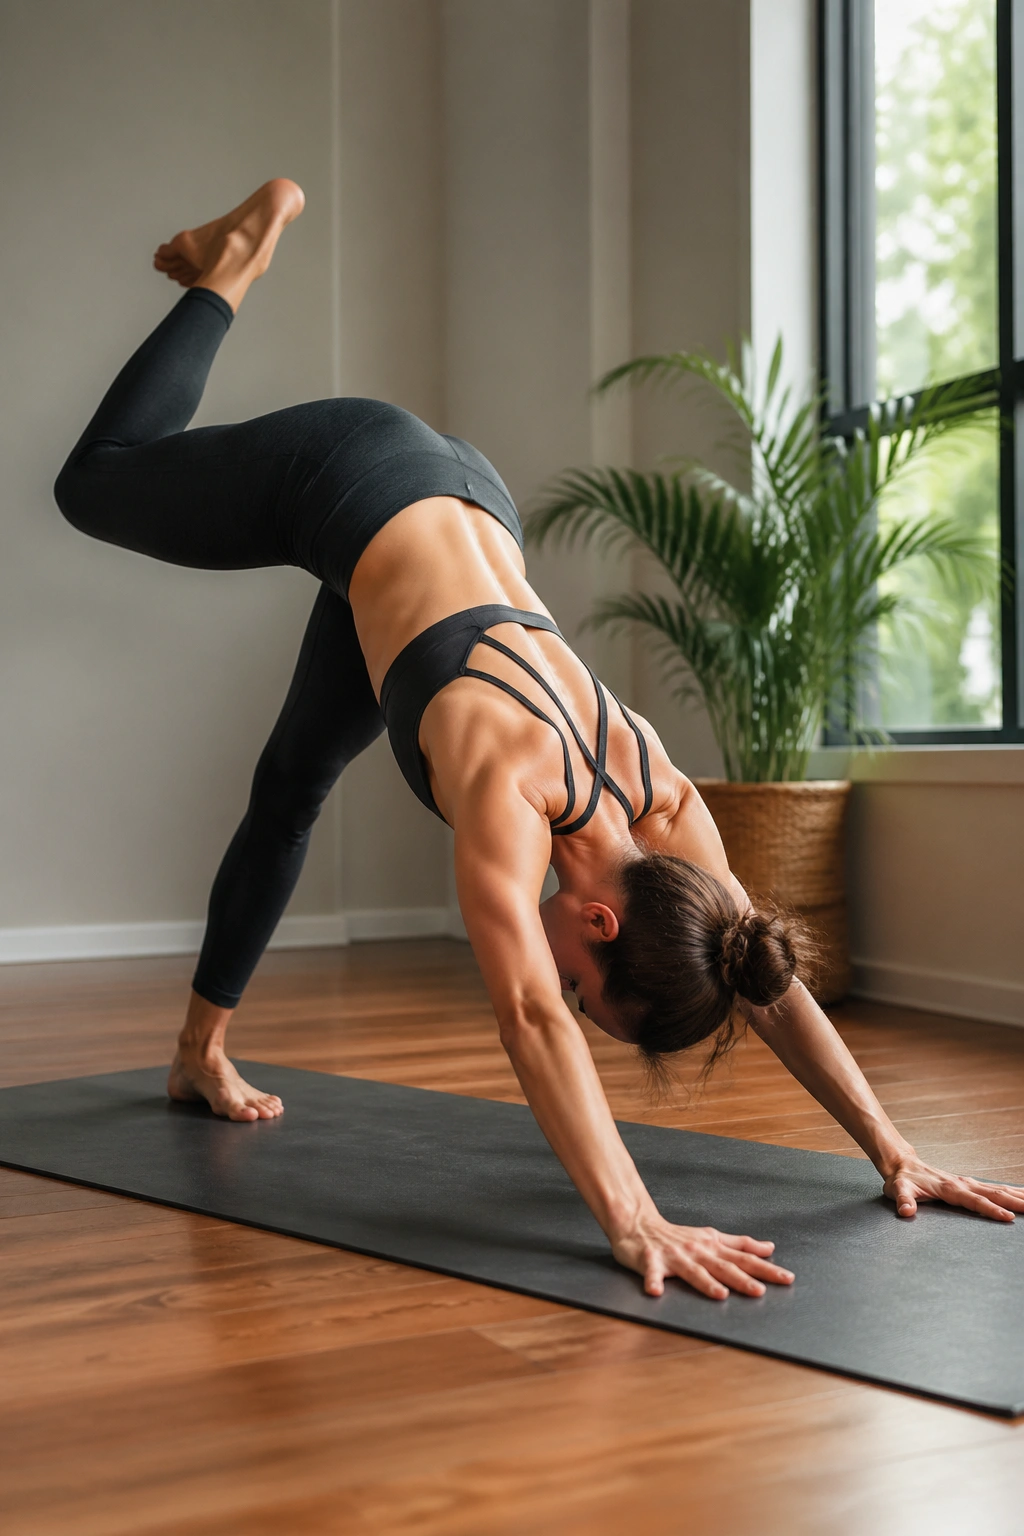
A knee-to-nose drive in down dog is basically a controlled crunch with your hands on the floor. The lifted leg gives you leverage, and the knee coming forward asks the whole torso to brace against motion.
The Clean Version
- Start in a solid three-legged downward dog
- Exhale as the knee moves toward the chest
- Round the upper back slightly without collapsing the shoulders
- Step the foot back with control, not a swing
The beauty of this move is that it hits the core without losing the full-body feel of a yoga flow. Your shoulders, arms, and planted leg all help, but the abs have to fire first or the pelvis will rock around too much.
It’s a great bridge between static holds and moving sequences. A few slow reps on each side can wake up the midsection fast.
22. Locust Pose
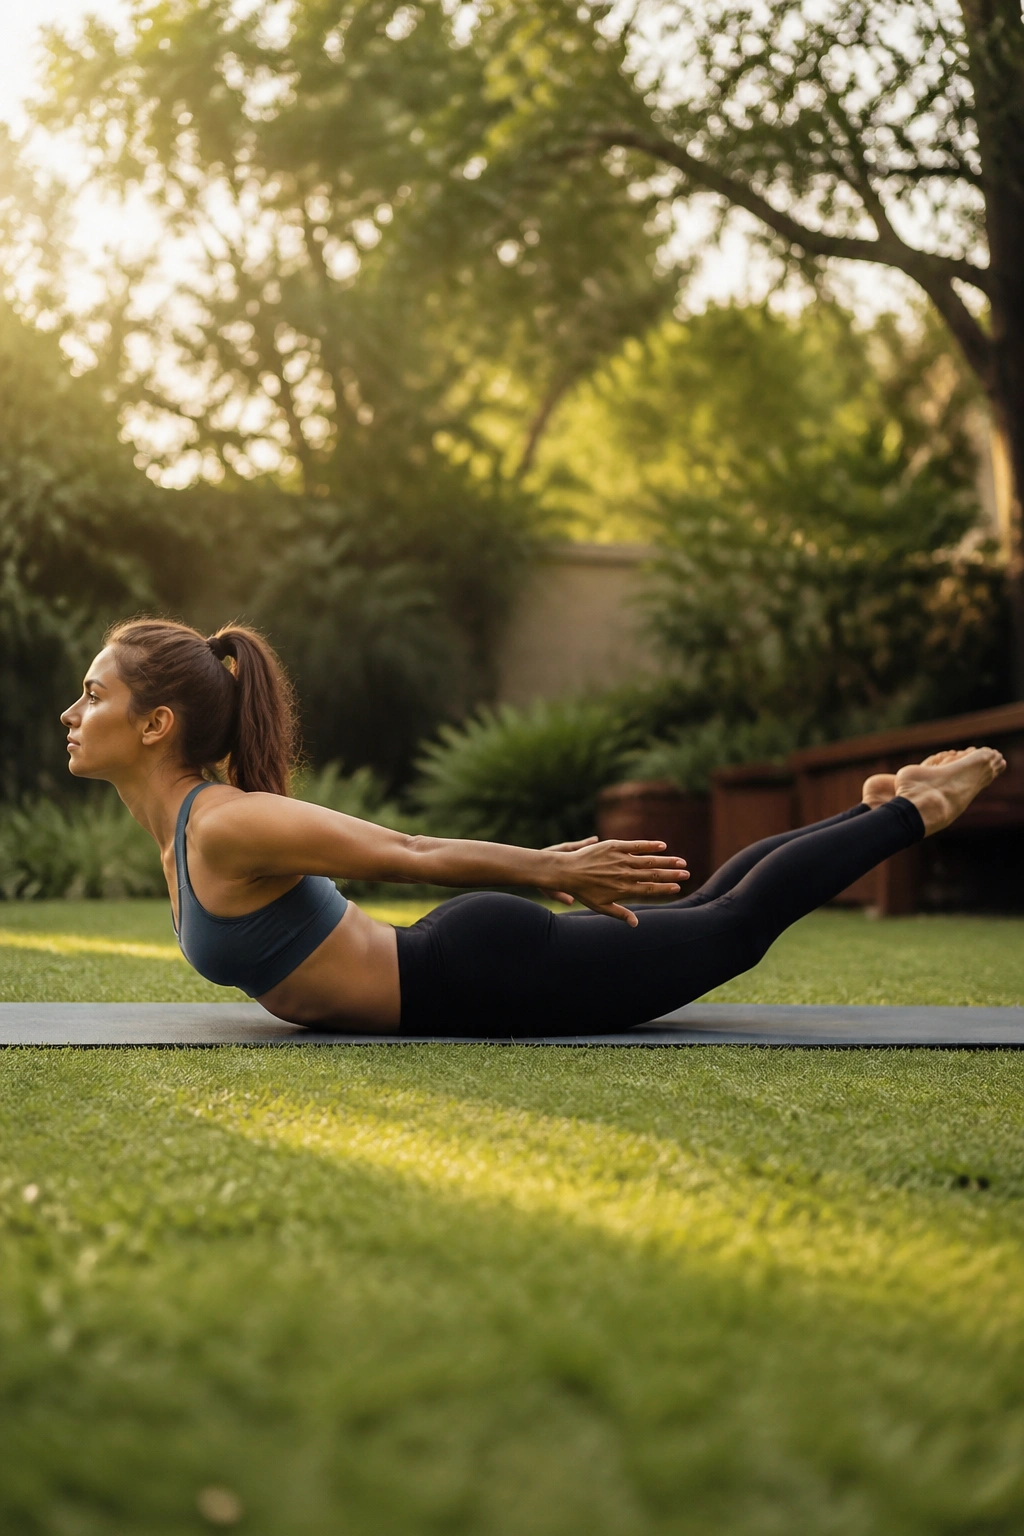
Locust pose is the pose people skip because it looks too simple. Then they lift the chest and legs for five breaths and realize how much the back body has to work to keep the front side from collapsing.
That matters for abs more than people think. A stable core is not only about curling inward; it’s also about giving the spine support from the back side so the front can stay long and organized. Locust helps build that support without the wrists or shoulders taking over.
Keep the pubic bone heavy, lift the legs only as much as you can maintain, and lengthen through the crown of the head. If the neck cramps, you’re lifting too high. The shape should feel strong, not jammed.
23. Bow Pose
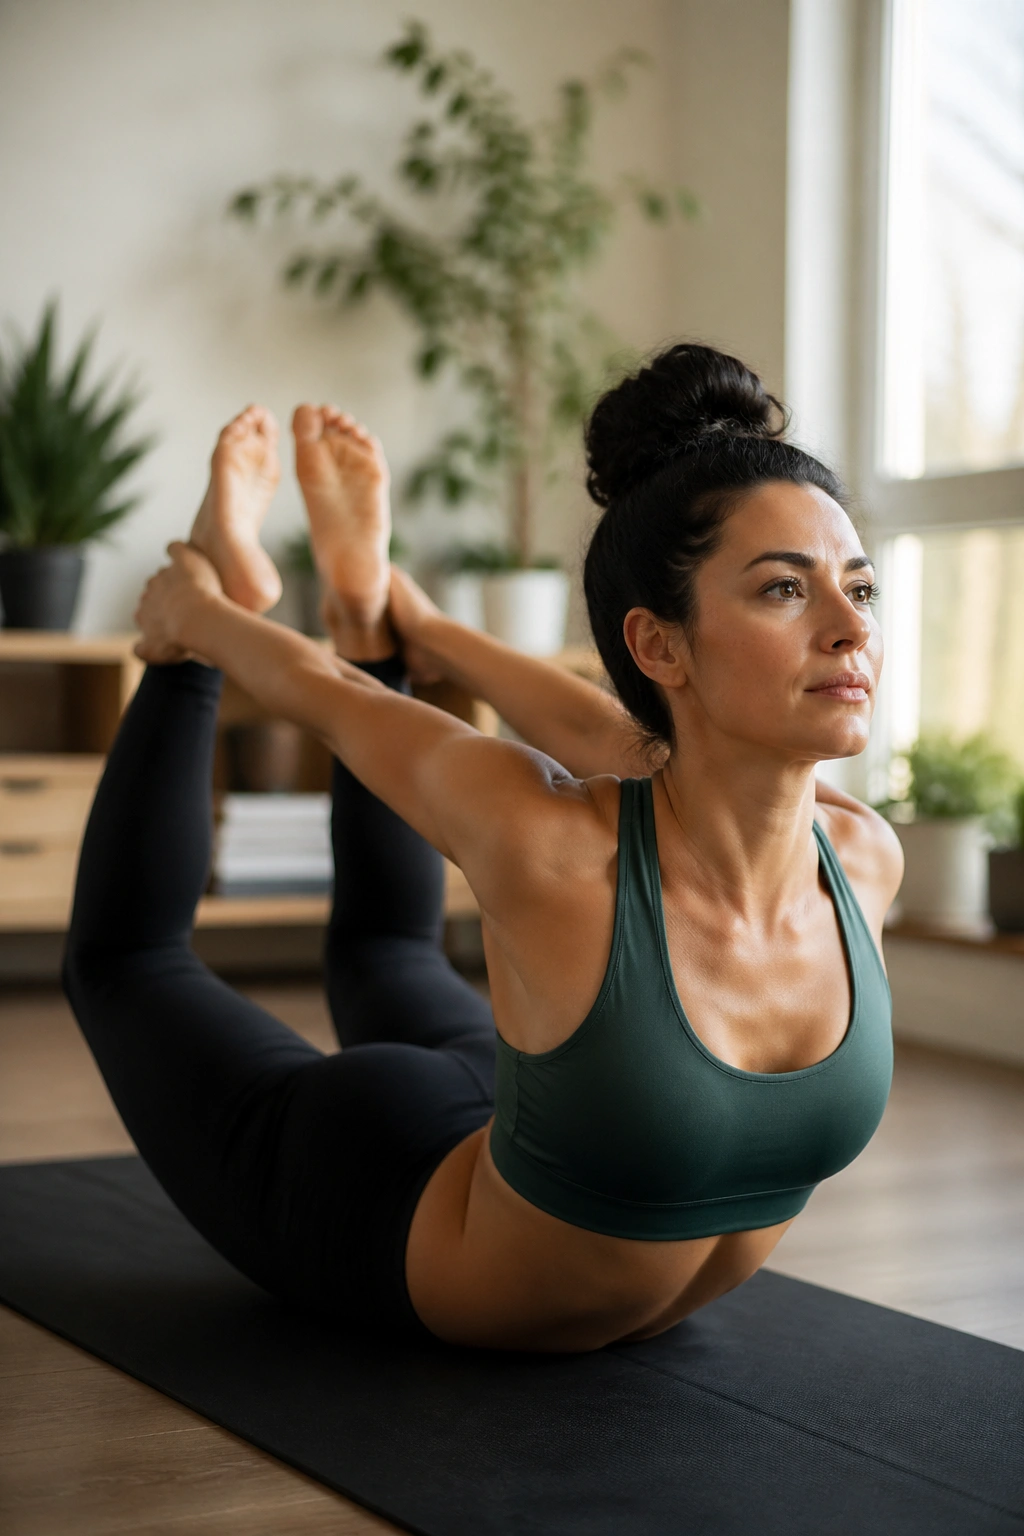
Bow pose is not about yanking your chest upward. It’s about controlled tension from end to end, which means the front body opens only as much as the back body can safely lift.
The core still has a job here. It keeps the low back from over-arching and helps organize the lift so the pose doesn’t become a hinge in the lumbar spine. If the knees spread too wide or the breath gets choppy fast, ease off. That’s the body asking for a smaller version.
A strap around the ankles can make the pose cleaner if reaching back feels sketchy. You’ll still get the belly work, just with less strain and more shape. That’s a trade worth making.
24. Bridge Pose with March
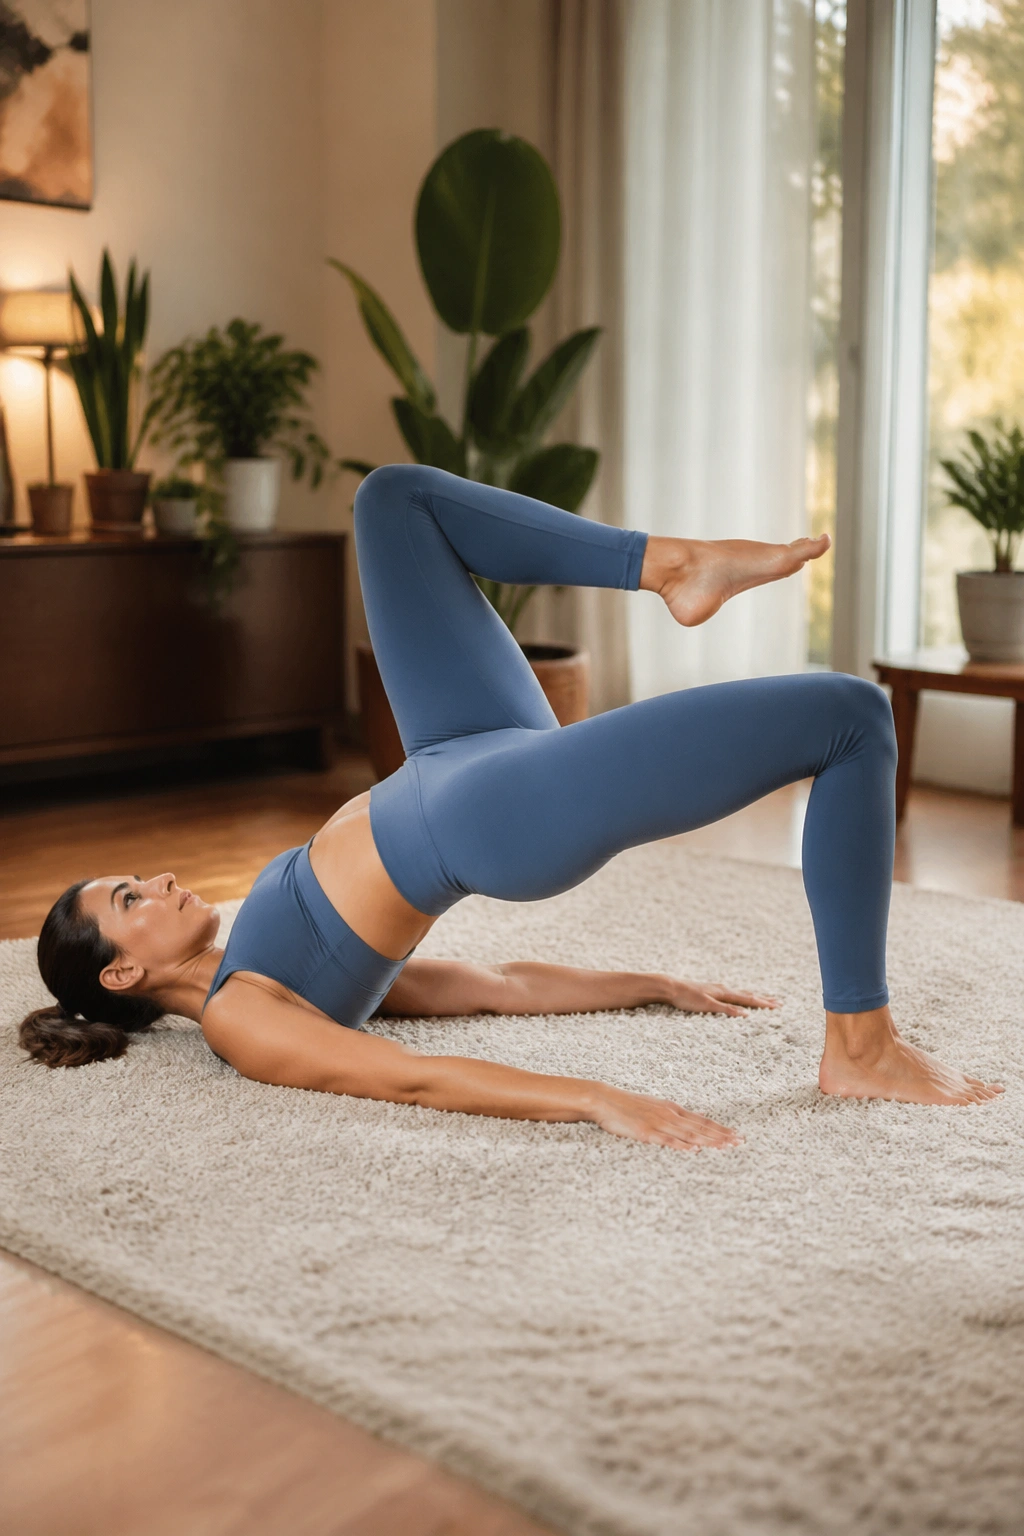
Bridge with a march looks mild until one hip wants to tip. Then you realize how much the abs have to do just to keep the pelvis level while one foot floats for a beat.
What to Watch For
- Start with feet hip-width apart
- Lift into bridge with the ribs contained
- March one knee toward the chest without dropping the hips
- Lower the foot slowly before switching sides
This is one of my favorite core drills for people who hate floor crunches. It builds control around the pelvis, and that control shows up everywhere else — in standing balances, in backbends, even in the way you walk.
If the lower back starts to arch hard, lower the hips a few inches and try again. A smaller bridge with a level pelvis is doing the work you want.
25. Upward Plank Pose
Upward plank is where the whole front line has to hold together. The chest opens, the shoulders support, the glutes lift, and the abs keep the ribs from flying apart as the body rises.
It’s a demanding shape because you’re working against both gravity and your own flexibility. If the wrists complain, shorten the hold. If the neck tightens, soften the gaze and keep the chin a little tucked. The goal is not a giant arch; the goal is a strong, level lift.
Try 3 rounds of 15 to 20 seconds. That’s plenty for most people, and the quality stays high. If you can hold the top without your hips sagging or your ribs popping up, you’ve got a pose that genuinely trains the deep core, not just the vanity muscles.
Final Thoughts
If you want stronger, more defined abs, the smartest yoga work is usually the least flashy. Plank shapes, balances, twists, and controlled lifts teach your midsection to hold pressure without falling apart. That is the real difference between flailing through a pose and training it well.
You do not need all 25 poses every day. Pick 5 or 6, hold each one for a few breaths, and repeat the circuit two or three times. Slow transitions matter more than speed here, and sloppy movement cancels out a lot of the benefit.
One last practical note: pair these poses with ordinary, consistent habits — enough sleep, decent protein, and regular movement outside the mat. The abs you can see are built with more than one tool, but yoga is a solid one when you use it with care.
