



Chronic inflammation often feels like a body that never quite cools down. The shoulders sit high, the gut gets touchy, and a normal day can leave you worn out before dinner. Yoga poses to calm chronic inflammation work best when they lower effort instead of piling on more of it.
The trick is not intensity. It’s downshifting. Long exhales, supported shapes, easy spinal movement, and slow transitions can take some of the edge off the stress response that likes to hang around when the body is already irritated.
That does not mean a yoga mat replaces medical care, medication, or a proper diagnosis. It means movement can be one part of the picture, especially when the practice is gentle enough that you finish feeling steadier, not scraped raw.
Hot joints want kindness, not heroics.
If a pose makes you brace, grimace, or hold your breath, it’s too much for that day. The poses below are the ones I come back to when the goal is less strain, more space, and a nervous system that stops acting like every hour is an emergency.
1. Child’s Pose With a Bolster Under the Chest
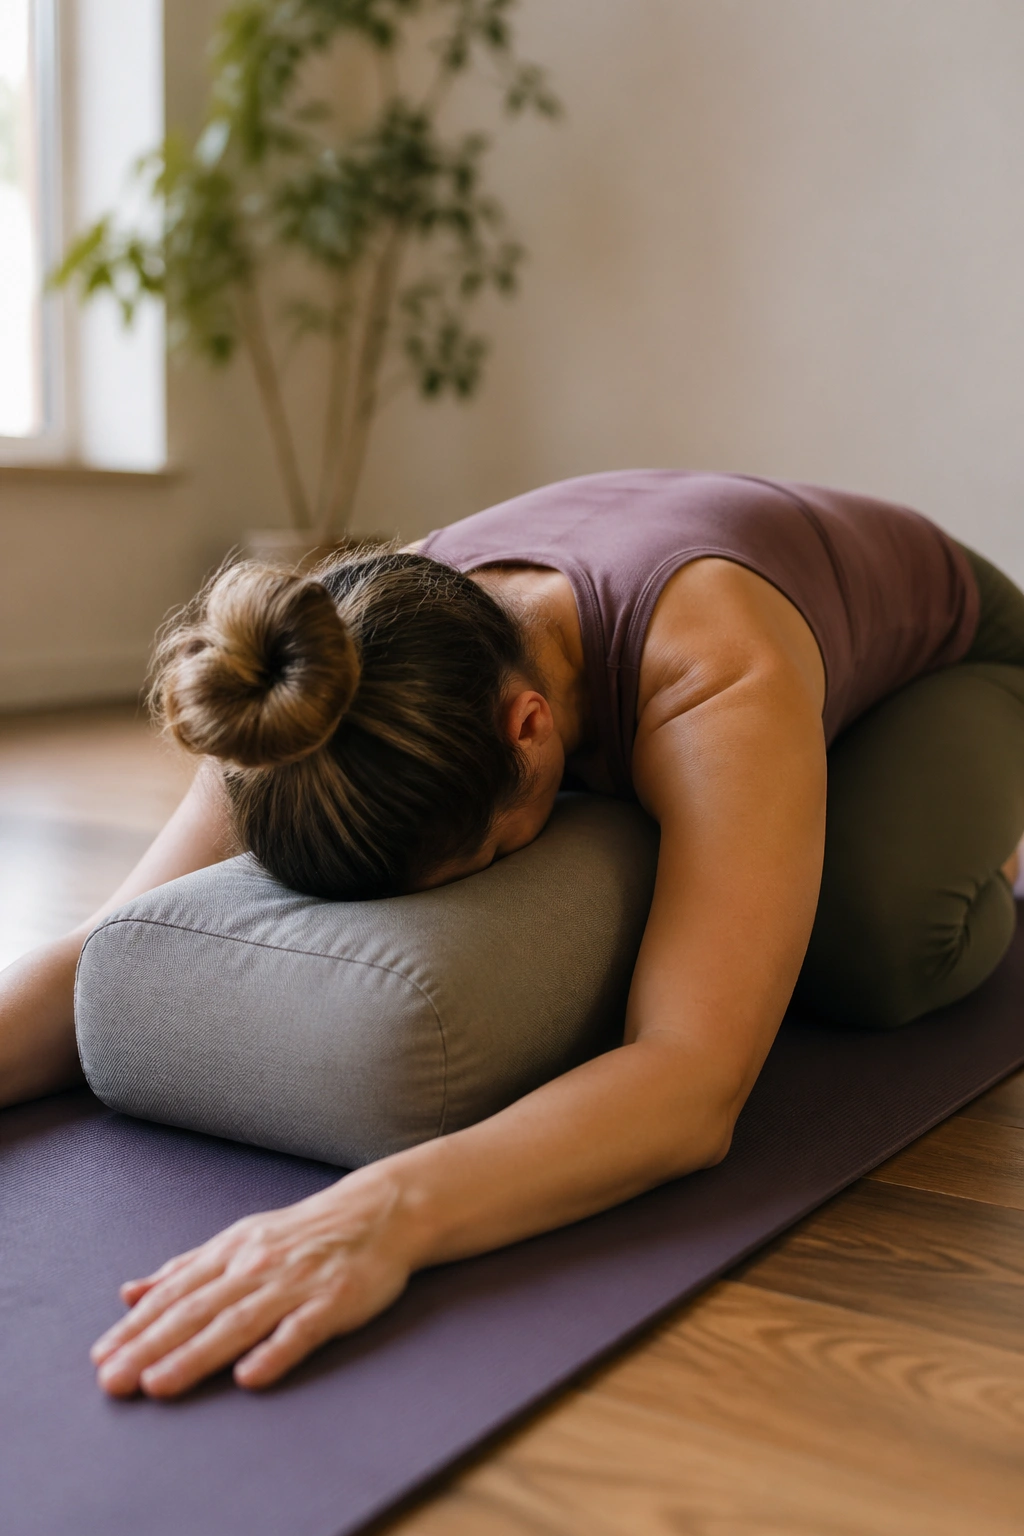
When the whole body feels braced, Child’s Pose is usually the first shape I reach for. It gives the front of the body permission to soften, and that alone can take the volume down a notch.
Why It Calms Things Down
The real magic is the long exhale. With your forehead supported and your rib cage resting on a bolster or folded blanket, the breath tends to get slower and lower. That can help shift you out of the “ready for trouble” mode that often rides alongside chronic inflammation.
How to Set It Up
- Kneel with your big toes touching and knees wide, or keep the knees closer if that feels better.
- Place a bolster, stack of blankets, or firm pillow under your chest and belly.
- Turn your head to one side, then switch halfway through.
- Stay for 6 to 10 slow breaths.
Best tip: if your knees complain, put a folded blanket behind them or skip the pose on hard-floor days. The point is relief, not proving anything.
2. Cat-Cow to Wake Up a Stiff Spine
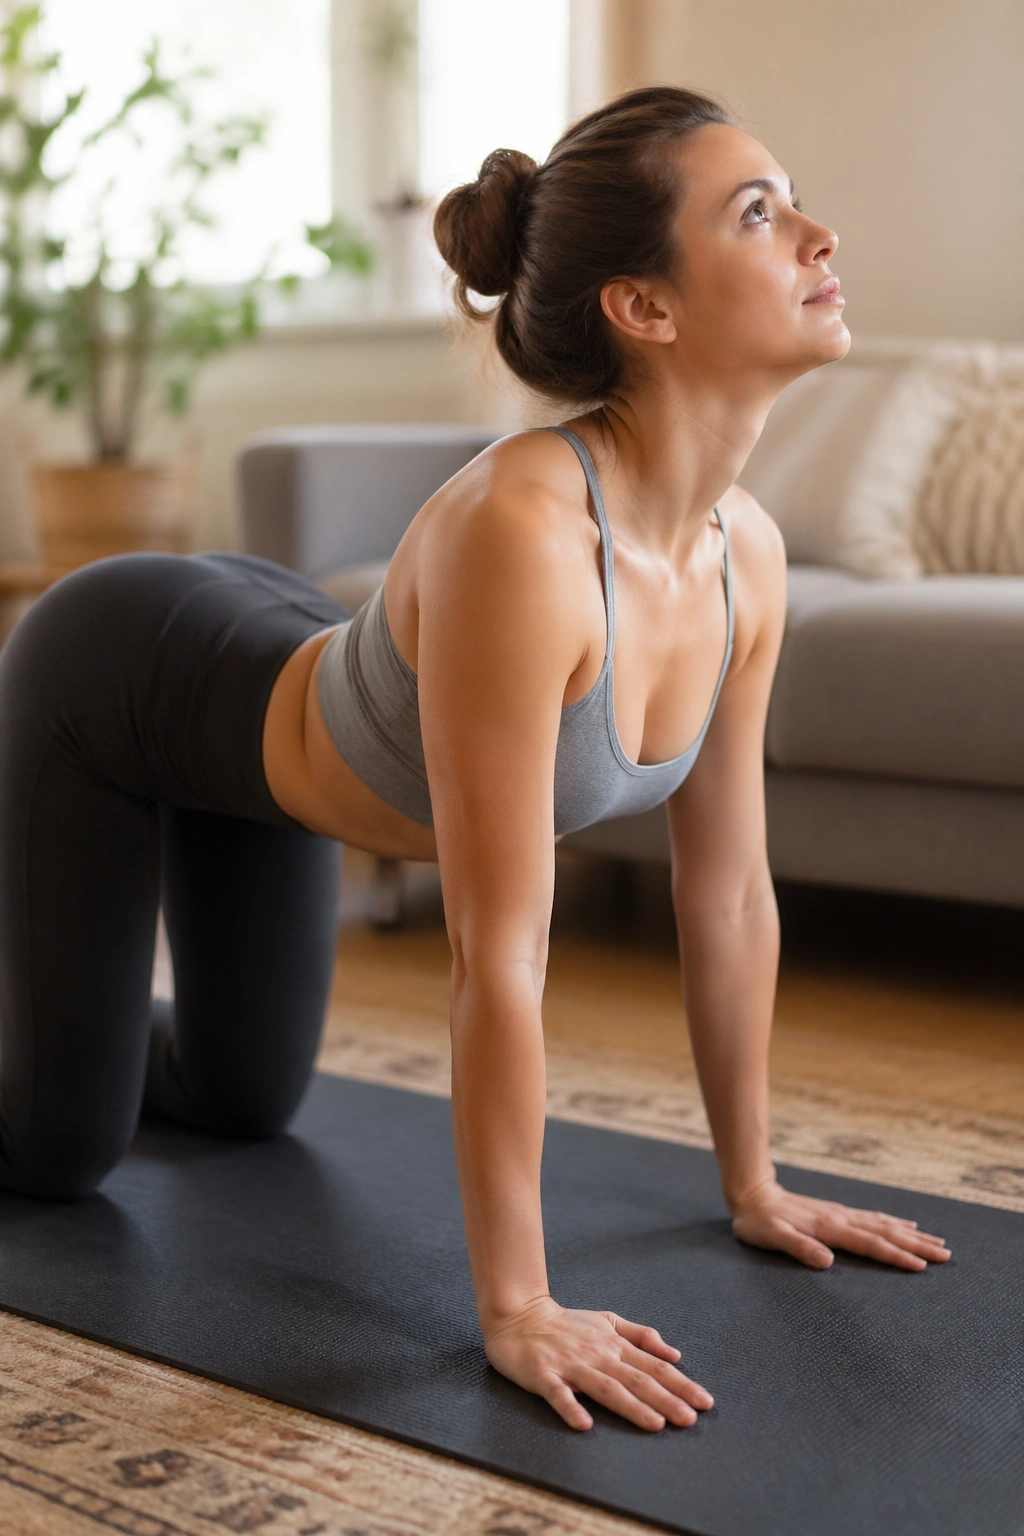
Cat-Cow earns its keep because it moves the spine without forcing the spine. That sounds basic, but basic is useful when your back feels rusty and your breath is shallow.
Four or six rounds are enough for most people. On the inhale, let the belly soften and the chest widen. On the exhale, round gently through the upper back and let the tailbone tuck. Keep the motion smooth, almost slow enough to feel like a pendulum. No cranking. No dropping into the low back.
I like this one for mornings when the body feels puffy and slow. It’s also a smart reset after sitting too long, because it gives the ribs a chance to move and the shoulders a place to land. If your wrists are tired, come onto fists or place your forearms on a chair seat and do the same wave through the spine there.
One quiet round is better than five rushed ones.
3. Thread the Needle for Shoulders That Feel Cemented
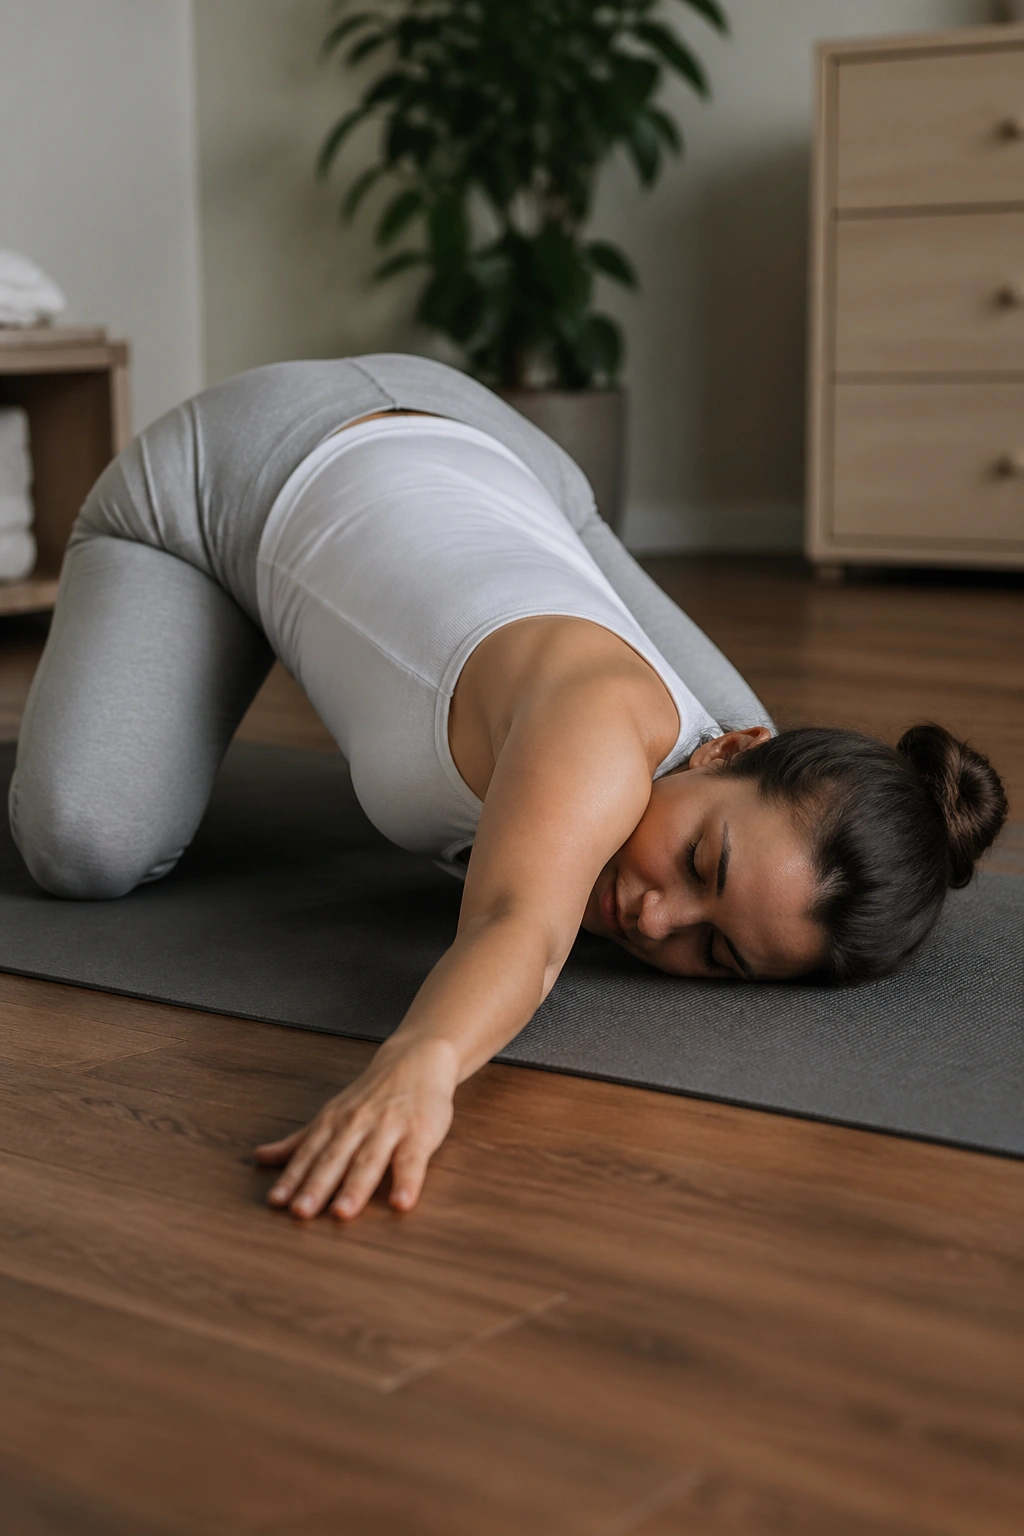
Why does Thread the Needle feel so good after a long day? Because it reaches the back of the shoulder blade and the upper spine without asking you to twist hard or hold a big shape.
Come to hands and knees. Slide one arm under the other, rest the shoulder and the side of the head on the mat or on a folded blanket, and keep the hips stacked above the knees if that feels steady. The top hand can stay planted for support, or you can reach it forward if the chest wants a little more length.
How to Use It
- Hold 5 to 8 breaths on each side.
- Place a pillow under the head if the neck gets cranky.
- Keep the bottom shoulder soft instead of jamming it down.
- Back out if the twist makes the low back pinch.
The release usually shows up in the spaces between the shoulder blades first. That’s the good part.
4. Low Lunge With the Back Knee on a Folded Blanket
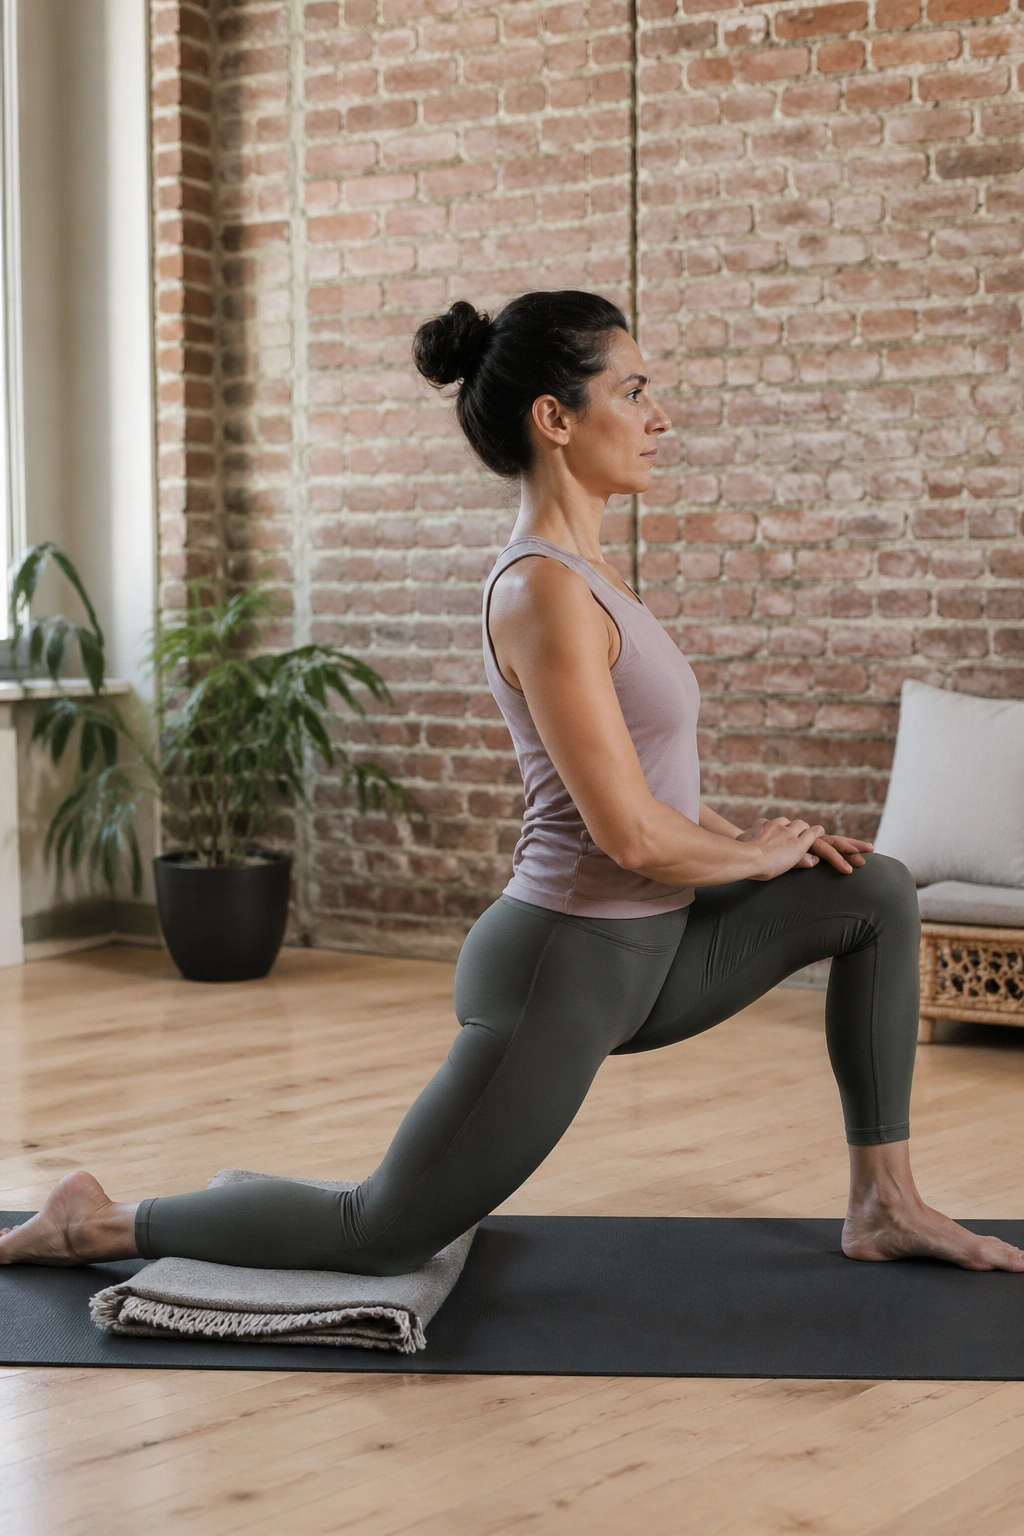
After a long drive or a desk day, the front of the hips can feel like they’ve been folded in half. Low Lunge fixes that feeling better than a hard stretch ever will, mostly because it lets the back leg open gradually instead of getting yanked.
Place the back knee on a folded blanket, keep the front foot under the front knee, and let the pelvis settle forward only a little. You should feel the front of the back thigh lengthen, not a stabbing pull in the groin. Keep the torso upright at first. If that feels fine, you can raise the arms for two or three breaths, then bring them back down.
- Use 4 to 6 breaths per side.
- Keep the front foot flat.
- Stack the front knee over the ankle.
- Pad the back knee generously.
The quiet version works better than the heroic one. Always.
5. Supported Bridge Pose on a Block
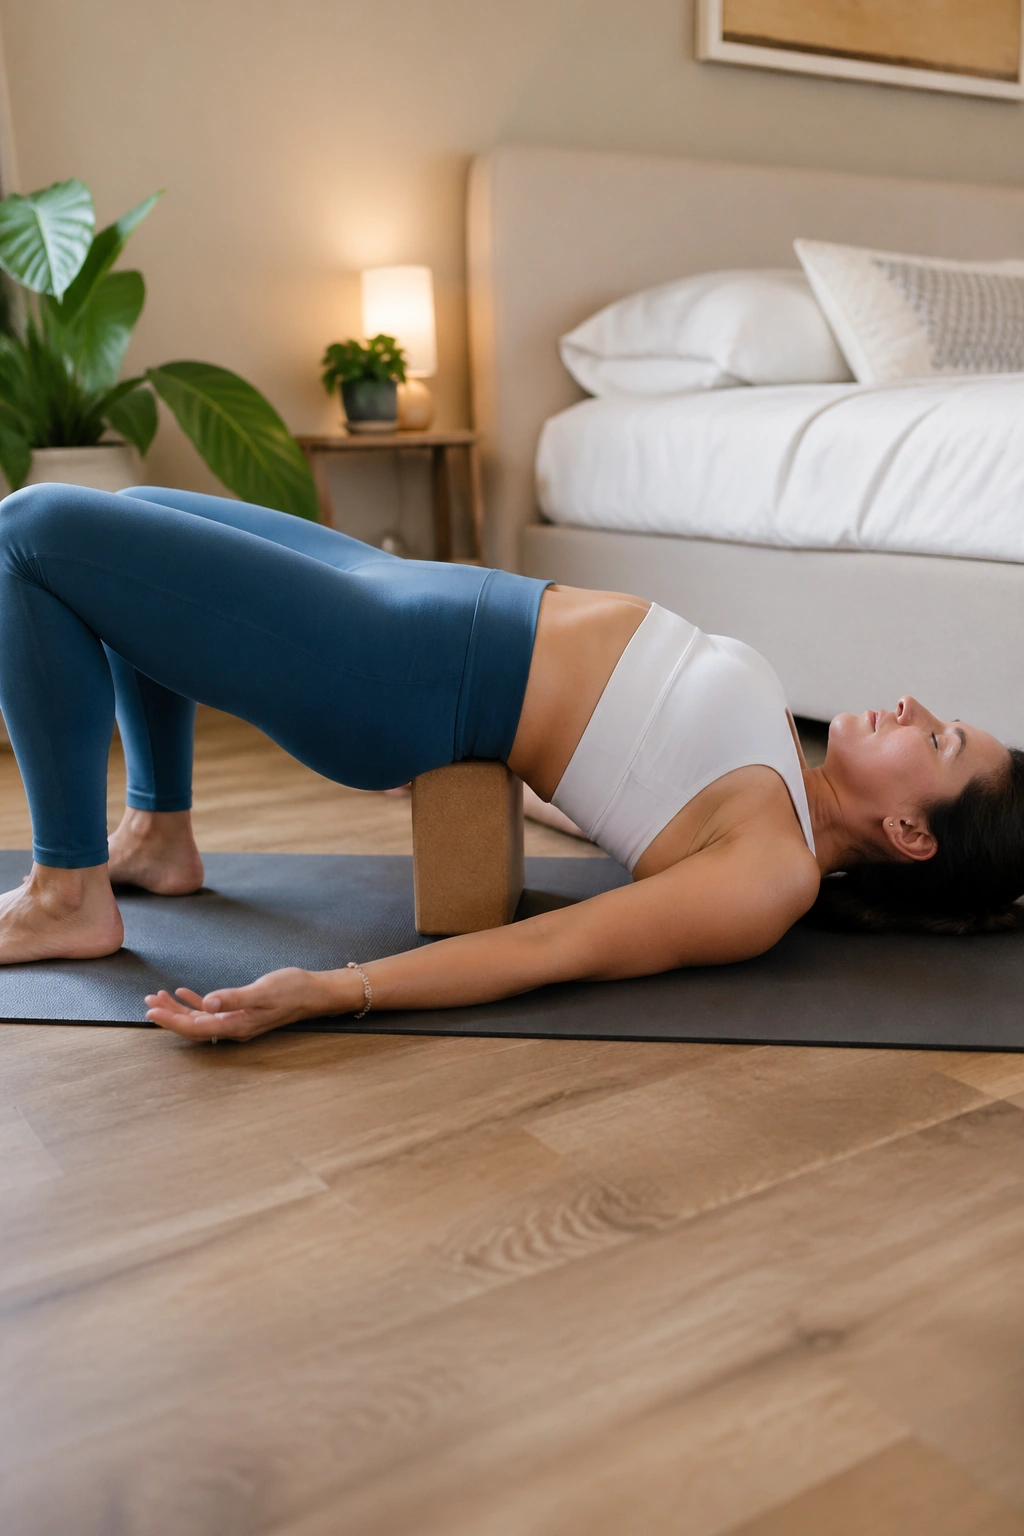
Supported Bridge is one of those poses that looks plain on paper and feels expensive in the body. The block under the sacrum takes the work out of the pose and lets the front body open without a lot of muscular effort.
Lie on your back, bend the knees, and plant the feet hip-width apart. Lift the hips just enough to slide a block under the sacrum at the lowest or middle height. Then let the weight settle. The glutes can stay soft. The low back should not be doing all the gripping. If you feel a pinch, lower the block or remove it altogether and stay in a simple knees-bent rest.
What I like here is the way the chest gets a quiet lift while the legs stop holding the whole day. That combination can be calming when inflammation is tied to stress and tension. It also gives the hip flexors a break, which matters more than people admit.
Stay for 30 to 60 seconds, breathe into the ribs, and come down slowly.
6. Legs-Up-the-Wall When Your Legs Feel Heavy
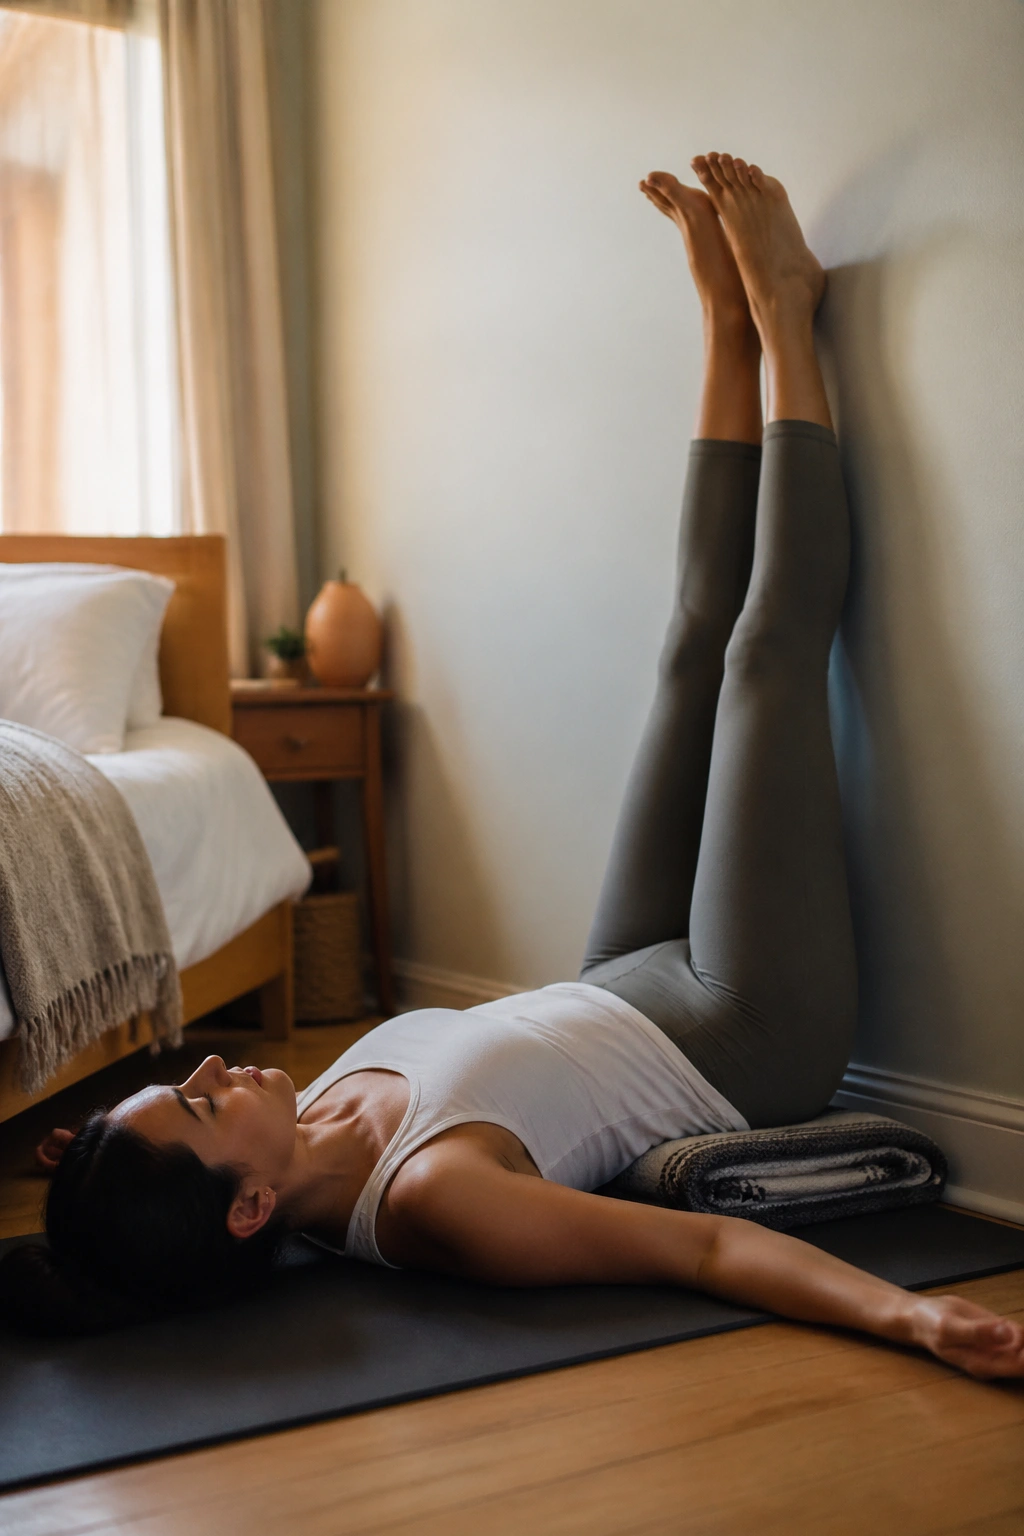
Unlike a hard hamstring stretch, Legs-Up-the-Wall asks for almost nothing. That’s why it works so well after standing, walking, travel, or any day when the legs feel thick and tired.
Lie on your back with the legs resting up a wall, or place the calves on a chair if the wall position makes your hamstrings argue. The lower back should feel long. If there’s a gap under the hips, tuck a folded blanket there. If the legs go numb or tingle, bend the knees a little and move the feet farther from the wall.
This is a recovery shape, not a performance. It is best when you want less effort, less heat, less noise. I also like it for evenings, because the stillness makes the breath slower almost by itself.
If you have low blood pressure, dizziness, or a headache that gets worse with inversion, keep the legs on a chair instead. Same calm effect. Less drama.
7. Sphinx Pose for a Gentle Front-Body Opening
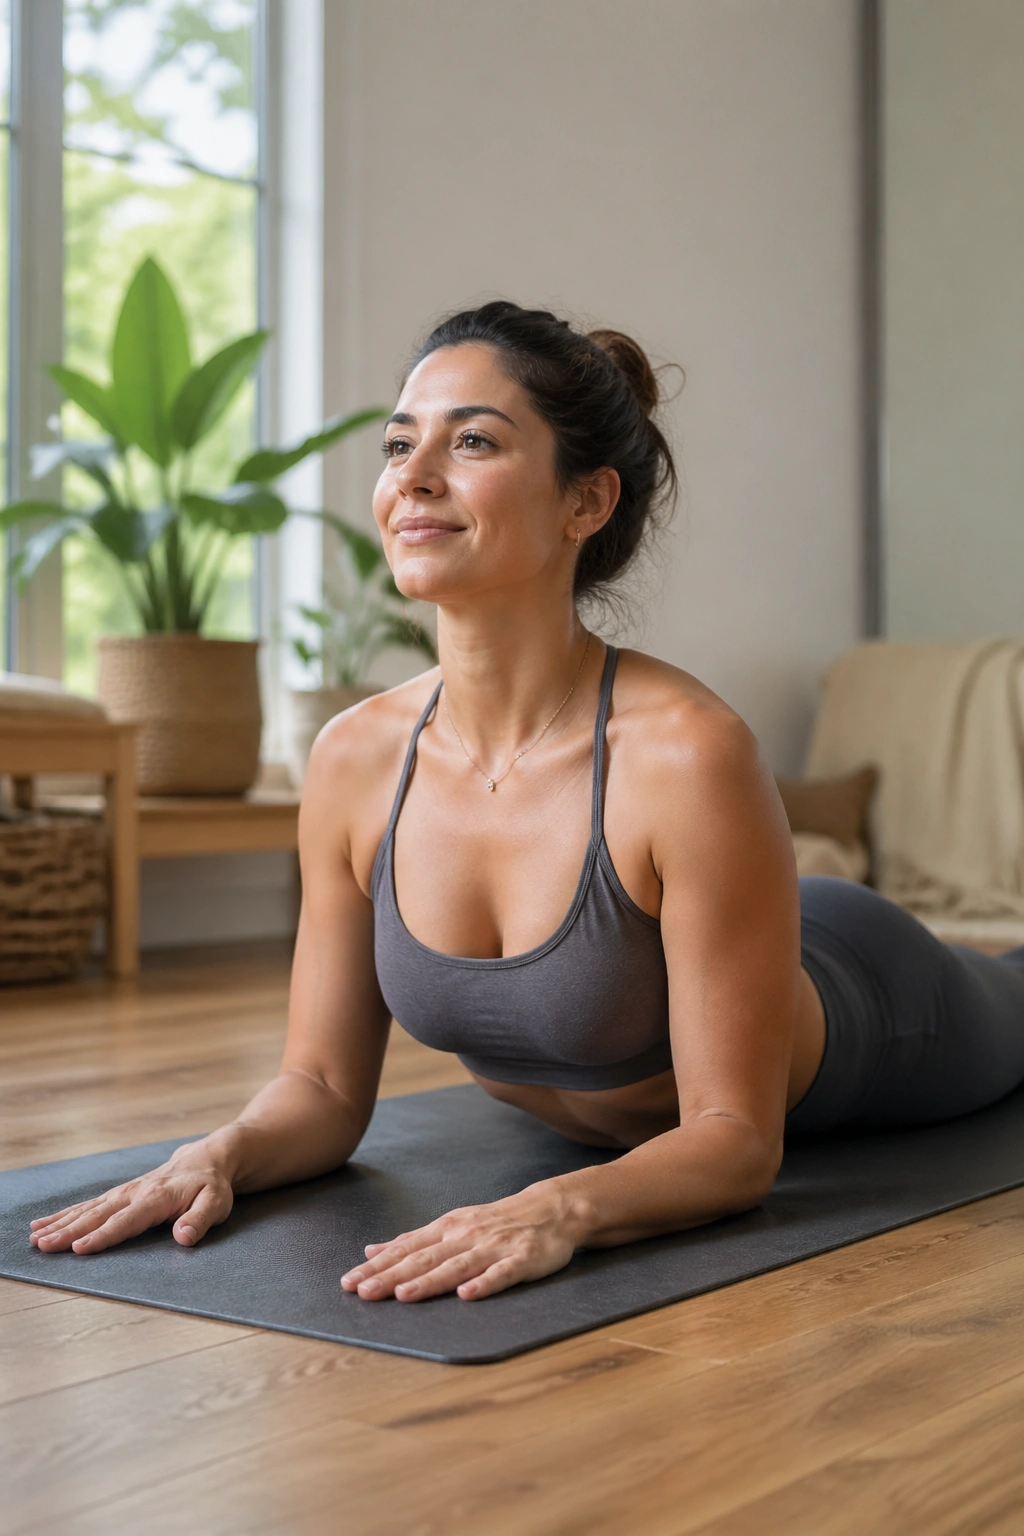
The belly stays on the mat, the chest lifts a little, and the spine gets a quiet wake-up. That’s Sphinx Pose in the simplest terms, and I like it because it opens the front body without the hard compression you can get in deeper backbends.
What Makes It Useful
- Elbows stay under the shoulders.
- Forearms press lightly into the floor.
- The pubic bone and tops of the thighs stay grounded.
- The low ribs stay soft instead of flaring up.
Hold it for 4 to 6 breaths, then come down and rest one cheek on the mat. If the low back feels pinchy, bring the elbows a little farther forward and lower the chest. That tiny change usually helps. If you want a little more support, place a folded blanket under the ribs so the back muscles don’t have to work quite so hard.
Best tip: think of length first, lift second. That order matters.
8. Reclined Bound Angle to Unclench the Hips
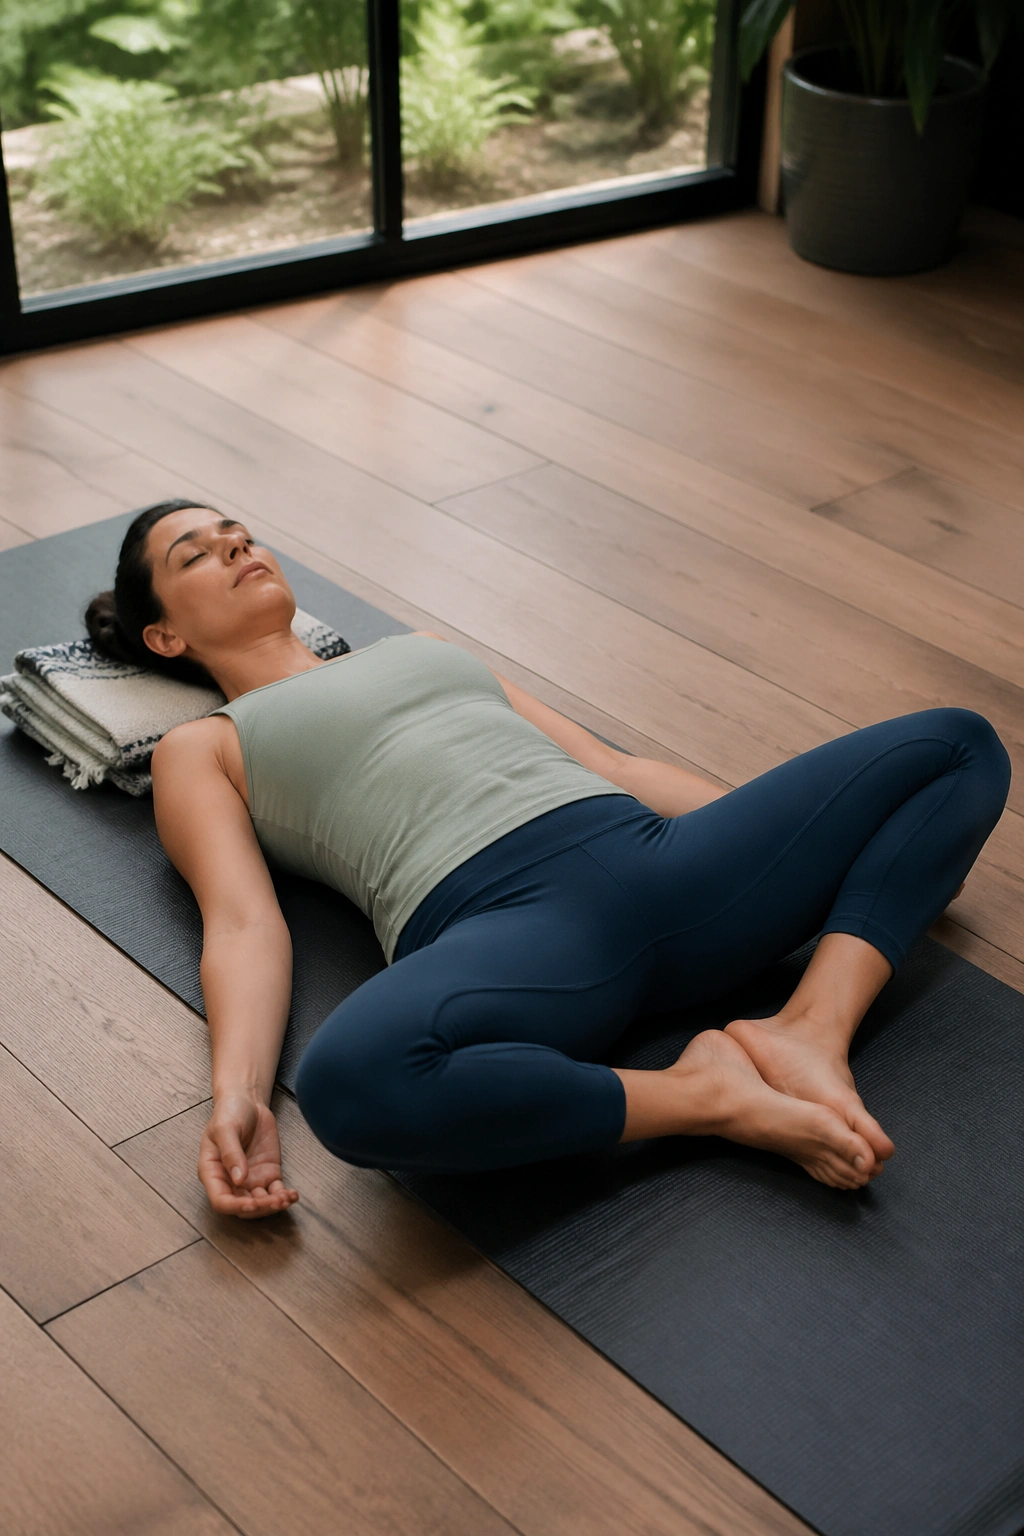
This is a rest pose with a long exhale built in. Reclined Bound Angle opens the inner thighs and lets the pelvis spread out a little, which can be a relief when the hips feel packed tight from sitting, guarding, or just plain fatigue.
Lie on your back, bring the soles of the feet together, and let the knees drop out to the sides. If the knees hang too low, slide blocks or pillows under the thighs. If the feet are too close to the pelvis, move them farther away. The shape should feel like support, not a contest.
I use this one when the body feels tight in more than one place. The breath often slows down here because the belly can move more freely. A folded blanket under the head helps if the neck is sensitive, and a second blanket over the torso can make the pose feel almost like a weighted pause.
Stay for a minute or two. Longer if it feels good. Shorter if the hips start to complain.
9. Seated Forward Fold With Bent Knees
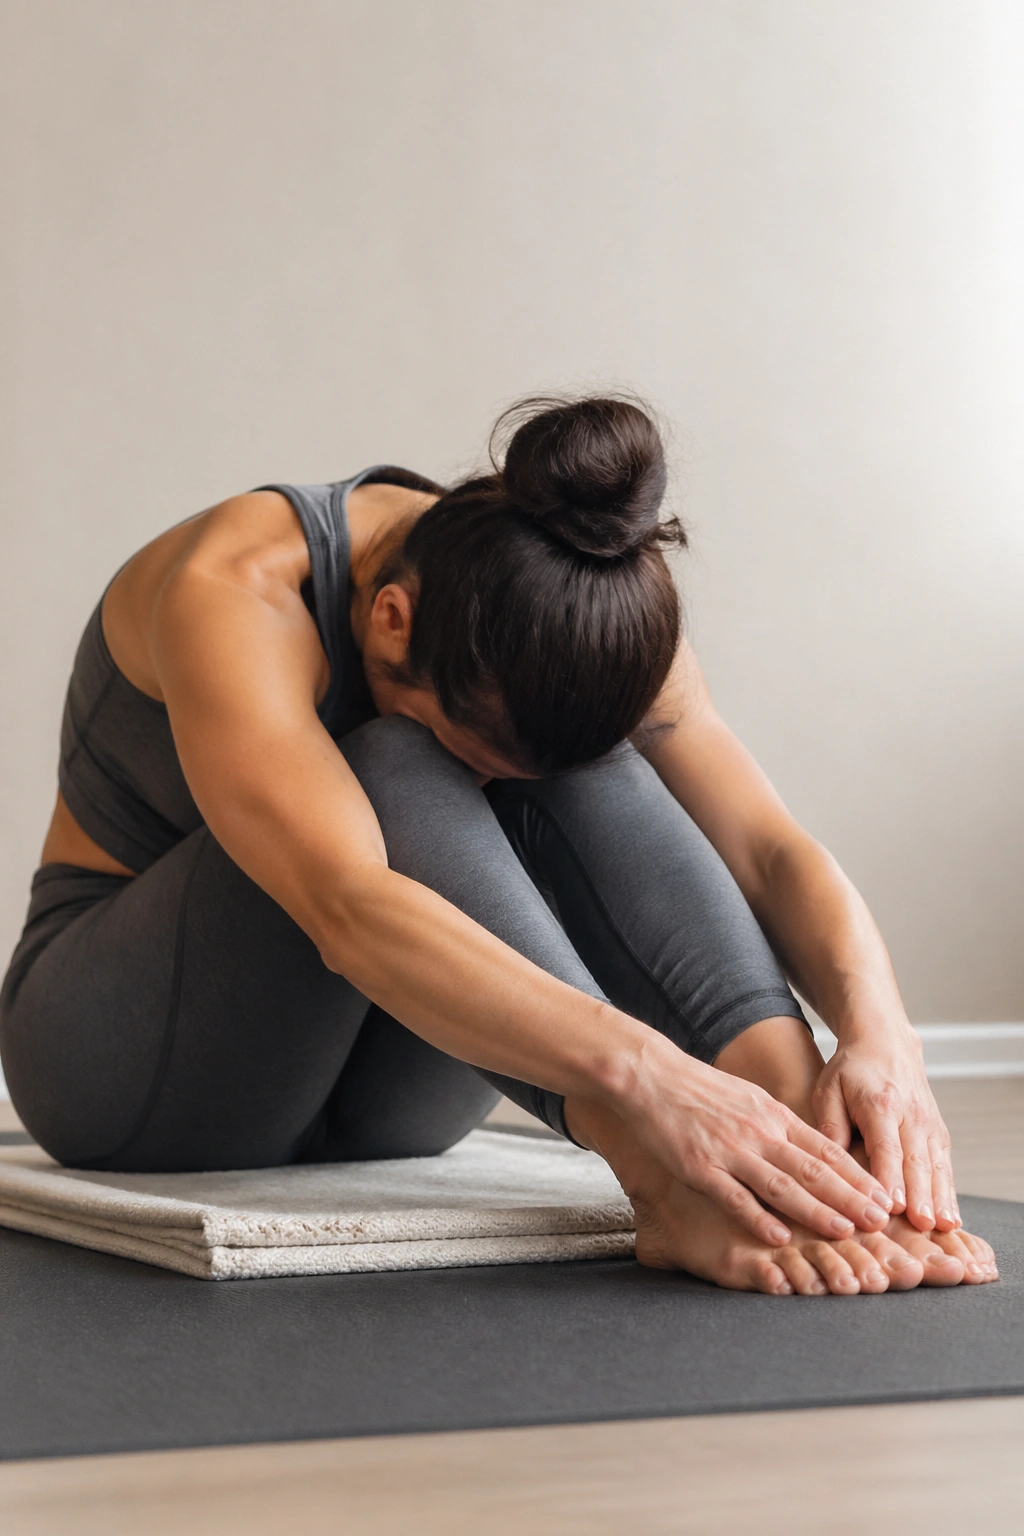
Can a forward fold help without yanking on your hamstrings? Yes, if you stop trying to straighten the legs and instead let the knees stay soft.
Sit on a folded blanket so the pelvis tips forward a little. Bend the knees as much as you need, hinge from the hips, and reach the hands toward the shins, ankles, or feet. The spine can round some. That’s fine. What matters more is that the breath stays even and the hamstrings don’t feel like they’re being dragged through a door.
How to Fold Without Fighting
- Keep the knees bent.
- Move the chest forward before you fold deeper.
- Rest the forehead on blocks or a bolster if needed.
- Hold for 5 slow breaths, then back out and reset.
This is a better shape for inflammation-prone days than a hard, straight-legged stretch. Gentle beats aggressive here. Every time.
10. Supine Twist to Ease the Lower Back
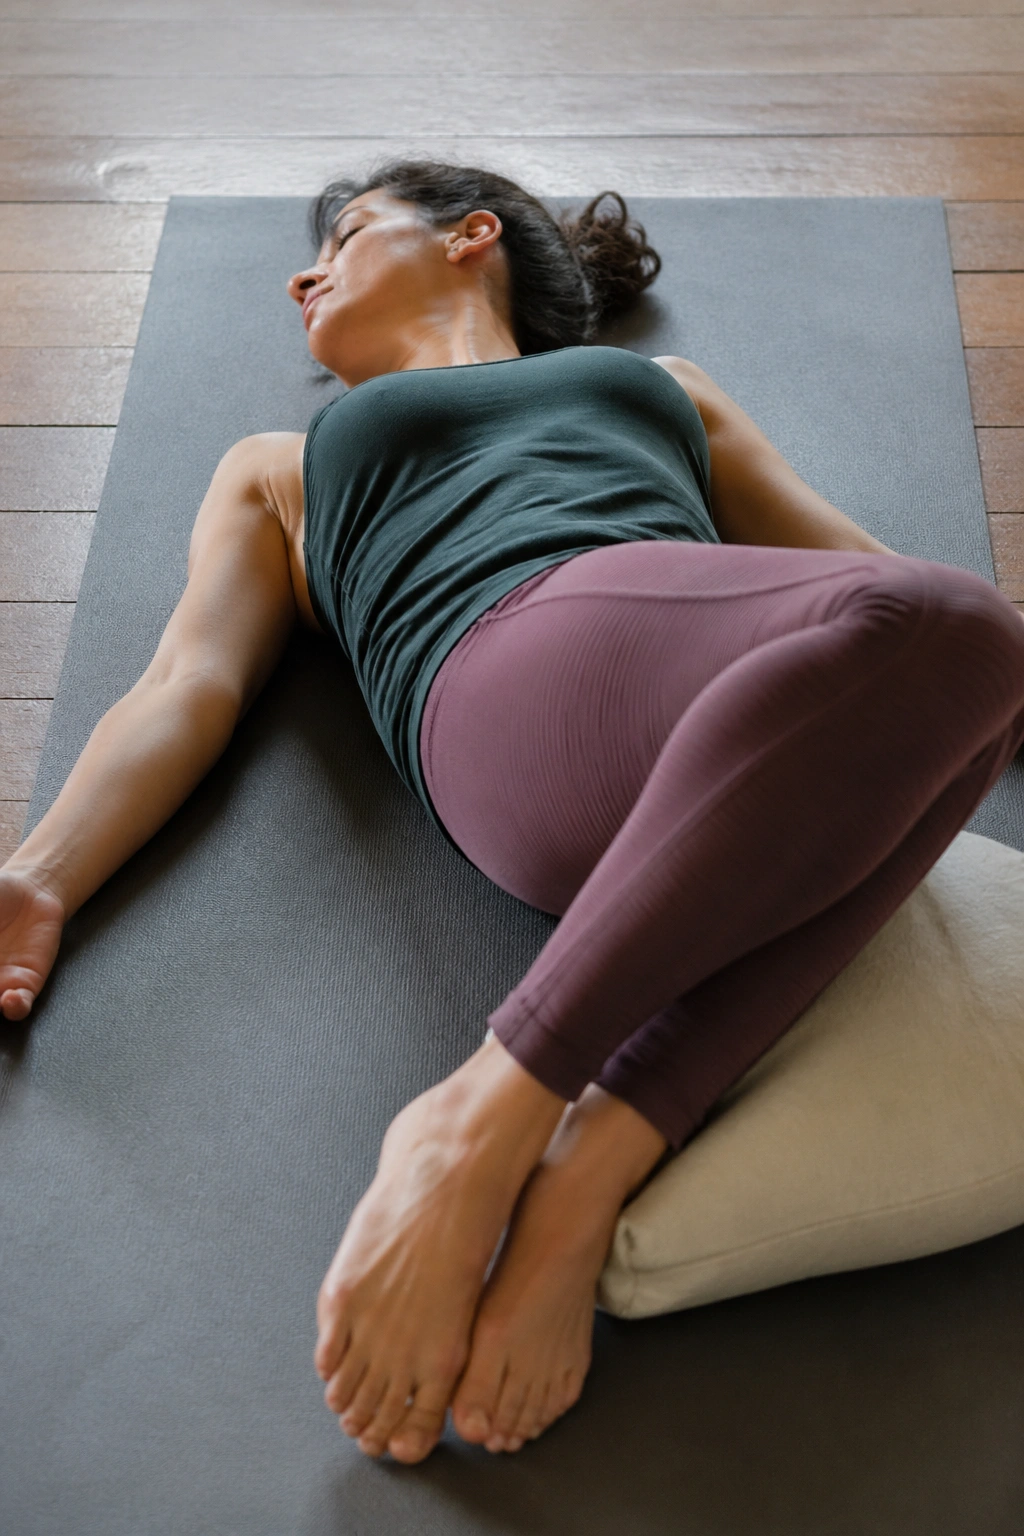
A twist on the floor can feel like someone finally loosened the lid on a tight jar. Supine Twist does that without loading the spine the way standing rotations sometimes do.
Lie on your back, draw one knee in, then guide it across the body only as far as the low back stays easy. Keep both shoulders heavy. If the top knee floats too high, place a pillow under it. If the neck strains, look straight up instead of turning the head away from the twist.
The twist should feel broad through the ribs and low back, not sharp in the sacrum. That’s the difference between useful and irritating. A slow exhale helps the torso settle, and I usually stay for 5 to 8 breaths on each side.
- Keep the twist small.
- Let the knee rest on support.
- Skip it if a disc issue or sharp back pain flares up.
- Come out slowly, one vertebra at a time.
The small version is often the best version.
11. Modified Extended Side Angle
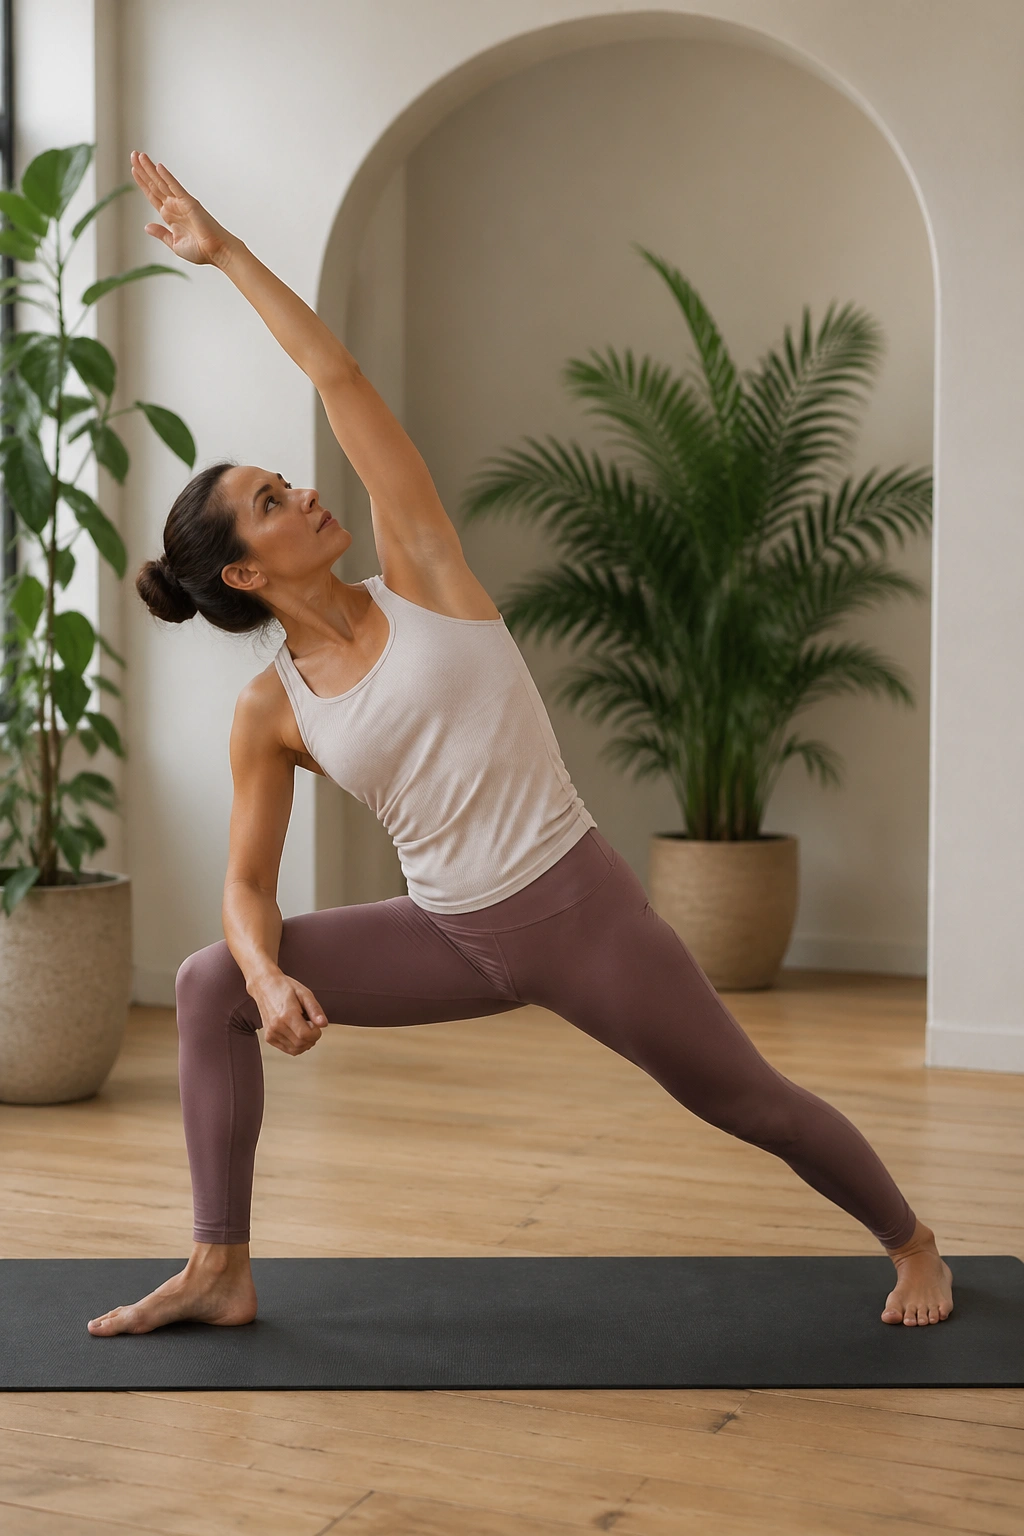
Side-body opening matters more than people think. When the ribs are cramped and the breath stays high in the chest, everything feels harder. Modified Extended Side Angle gives you room through the waist, the lat, and the intercostals without asking for a deep lunge.
Step into a short stance, bend the front knee, and rest the forearm on the thigh or on a block. Reach the top arm overhead only if the shoulder stays easy. Keep the chest open enough to breathe into the side ribs. That’s the whole point. You are not trying to fold in half. You’re making room.
This is a good choice on days when the hips feel stiff but you still want some standing strength. The back leg wakes up a little, the front glute works, and the side body gets that long line that makes breathing feel less crowded.
A block under the lower hand usually makes the shape better, not worse. Lower is often smarter.
12. Figure-Four Stretch Instead of Deep Pigeon
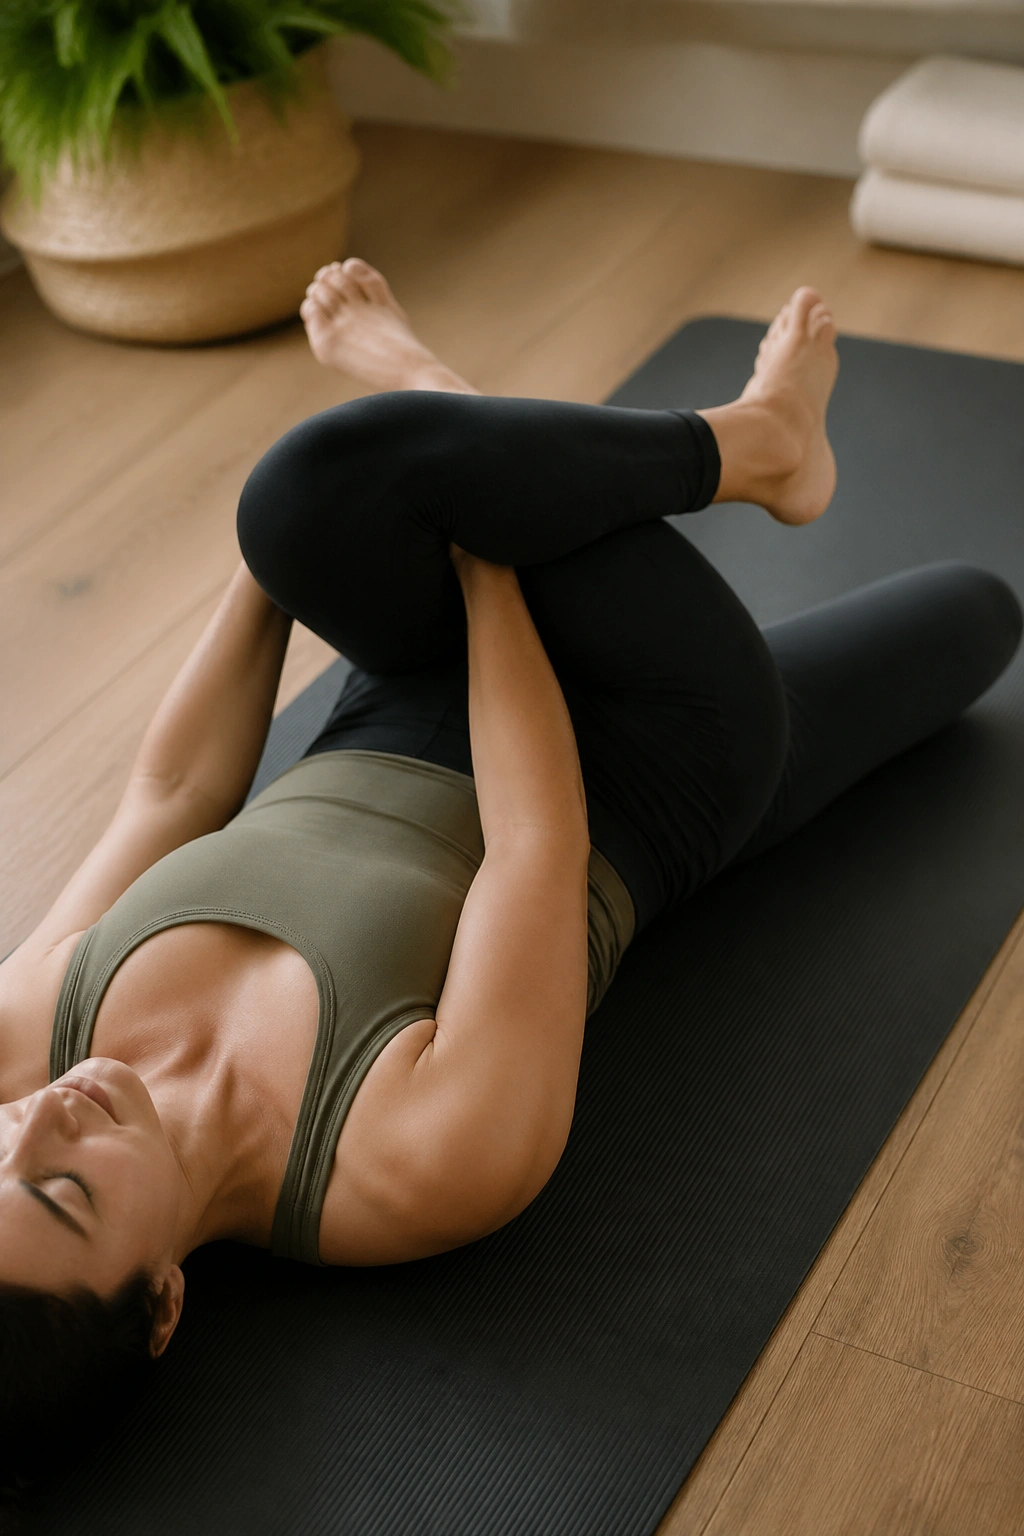
Pigeon Pose gets a lot of attention, but Figure-Four is the version I trust more when the knees are touchy or the low back is already irritated. It opens the outer hip with less strain and a lot less risk of turning one tight spot into three.
Lie on your back, cross one ankle over the opposite thigh, and keep the foot flexed. If the stretch feels mild, draw the uncrossed thigh closer. If it feels too intense, keep the foot on the floor and stay there. A strap behind the thigh can help if the arms are short or the hamstrings are grumpy.
This pose is best for people whose hips feel locked but who do not want deep external rotation. It’s also kinder on the body after long sitting, because you can control the depth very precisely. That control matters when inflammation makes tissues feel cranky and unpredictable.
If the knee on top starts to ache, back out. The stretch should sit in the outer hip, not the joint.
13. Wall Down Dog for Shoulders and Calves
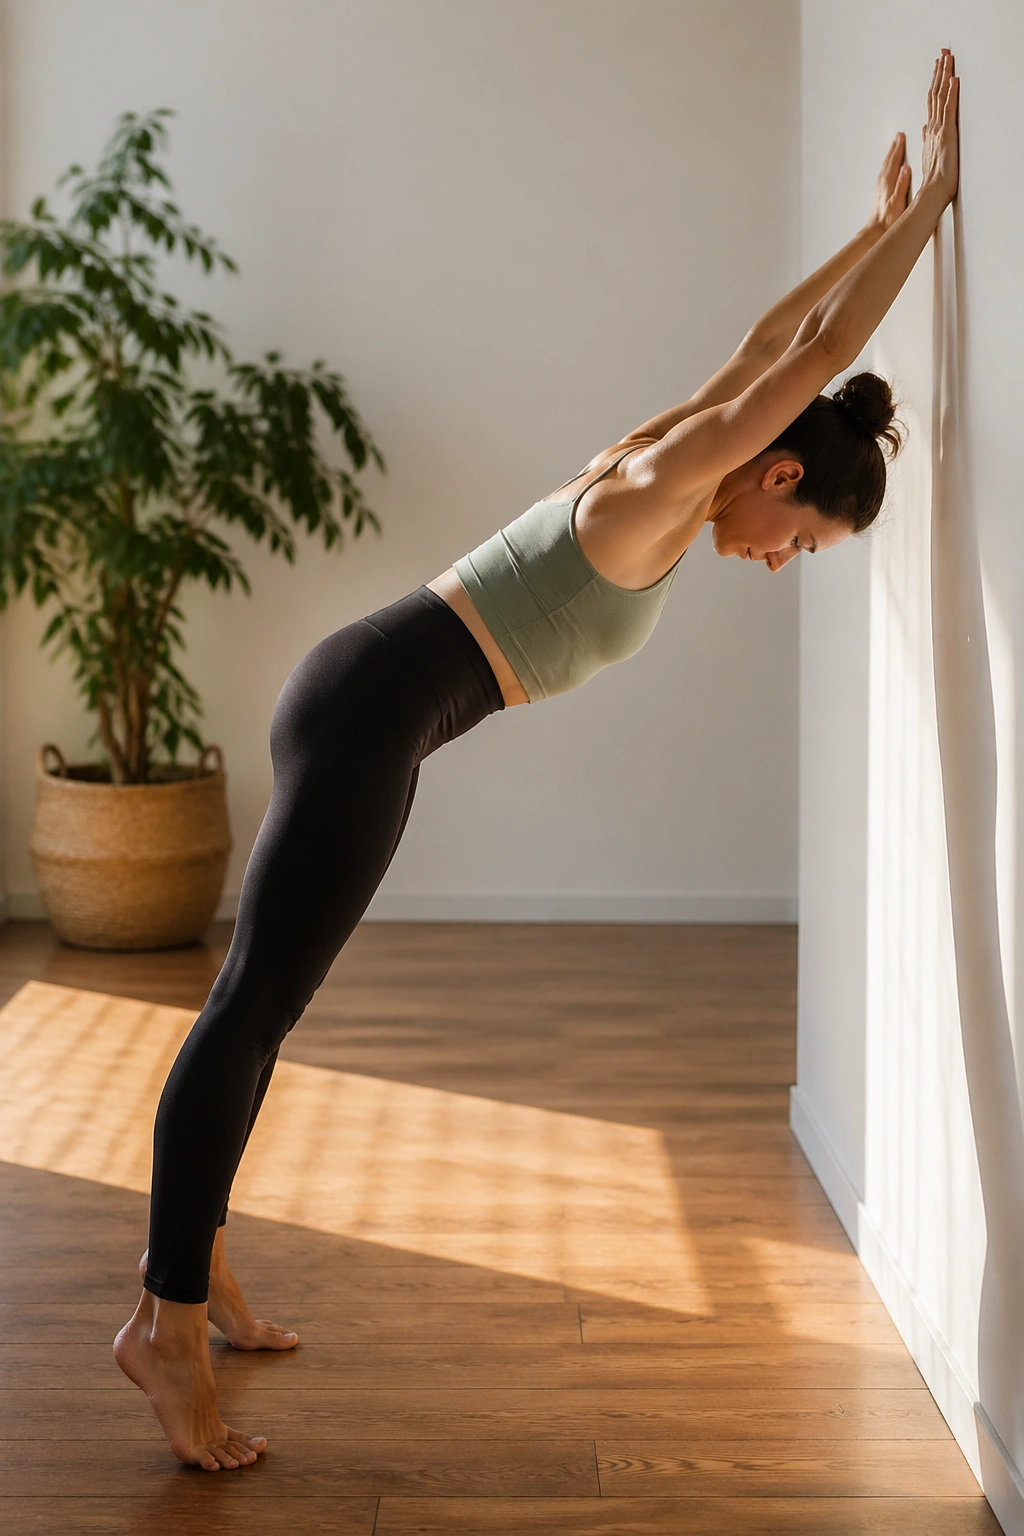
A wall version counts. In fact, some days it works better than the floor version because it removes a lot of wrist pressure and lets you stay in the shape longer.
Place your hands on a wall, walk the feet back, and hinge the hips so the torso makes a long diagonal line. Press the heels toward the floor if the calves want a stretch. Keep the neck neutral and the ribs from sagging. The shoulders should feel loaded but not jammed.
Why I Like the Wall Version
- Less wrist strain than floor Down Dog.
- Easier to keep the spine long.
- Better for tight calves and hamstrings.
- Easier to exit fast if your body starts to resist.
Stay for 3 to 5 breaths, then walk back in and stand upright. That short round-trip is enough. If you push this one too far, it stops being calming and starts being a workout, which is not the brief here.
14. Low Cobra for a Quiet Back Strengthener
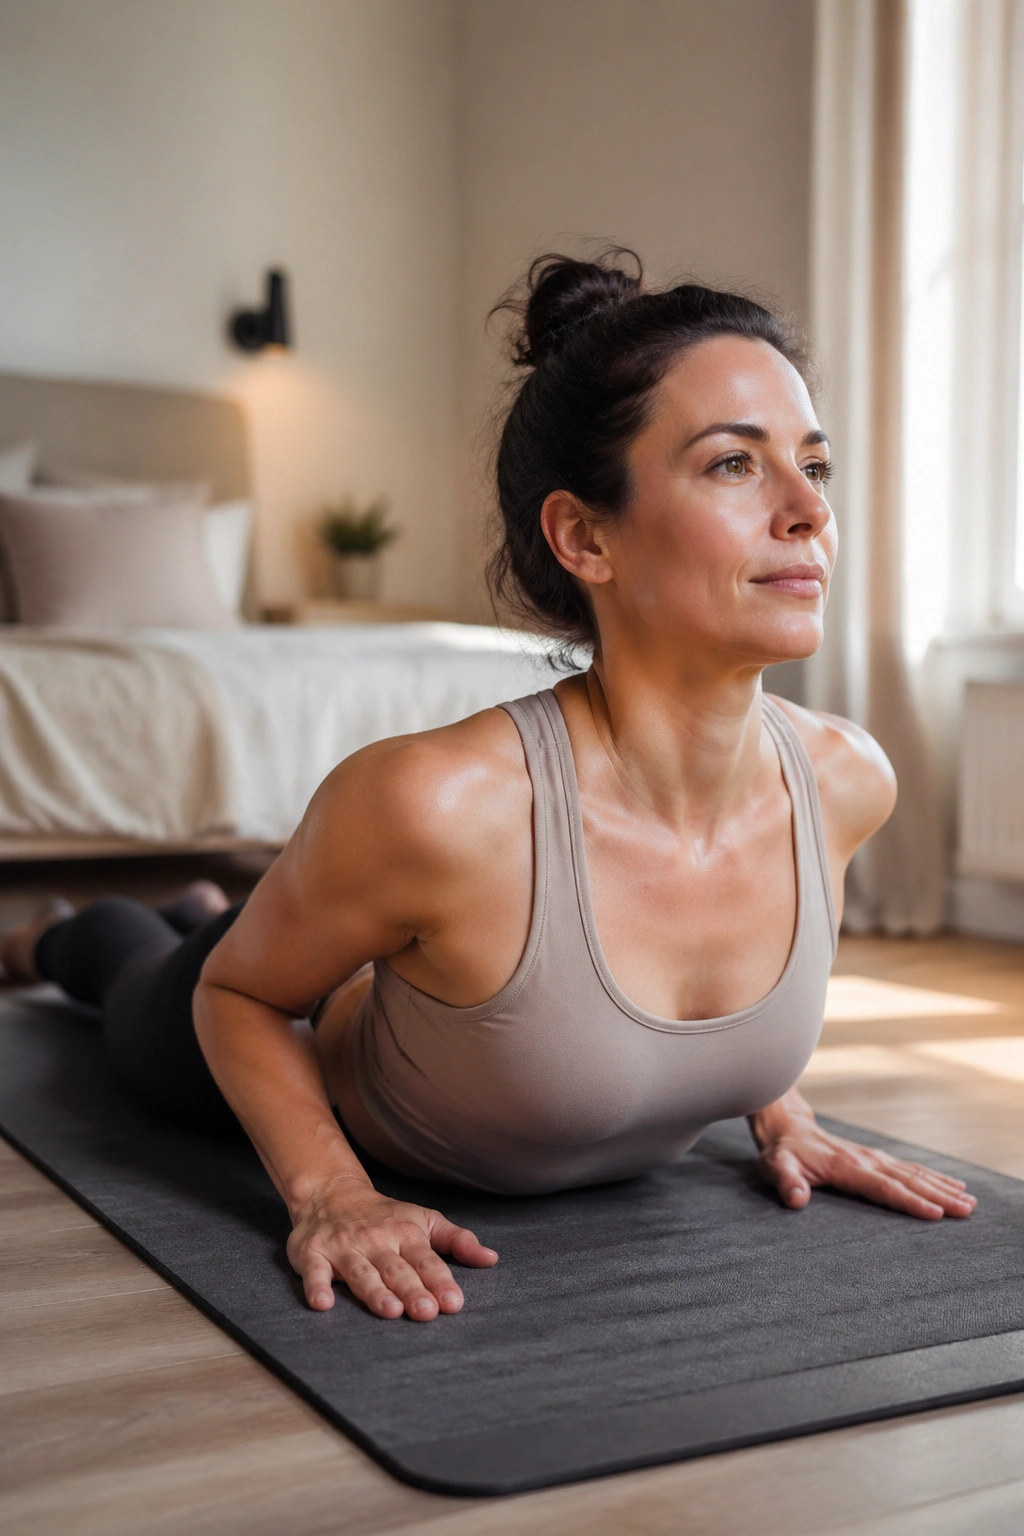
Low Cobra is the backbend I trust when the spine needs wakefulness without a big squeeze. It gives the back muscles some work, but not the kind that leaves you aching later.
Lie on your belly, place the palms under the shoulders or alongside the ribs, and lift the chest only a few inches. The pubic bone stays heavy. The elbows can stay bent and close to the body. If the neck wants to crane upward, lower the gaze a few inches in front of the mat. The lift should feel like length, not compression.
This is a useful counterbalance to long sitting and slumped posture, both of which seem to invite more stiffness than people expect. I like it best as a short hold: 2 to 4 breaths, lower down, rest, then repeat once or twice if it feels good.
One small lift is enough.
15. Supported Garland Pose With a Block Under You
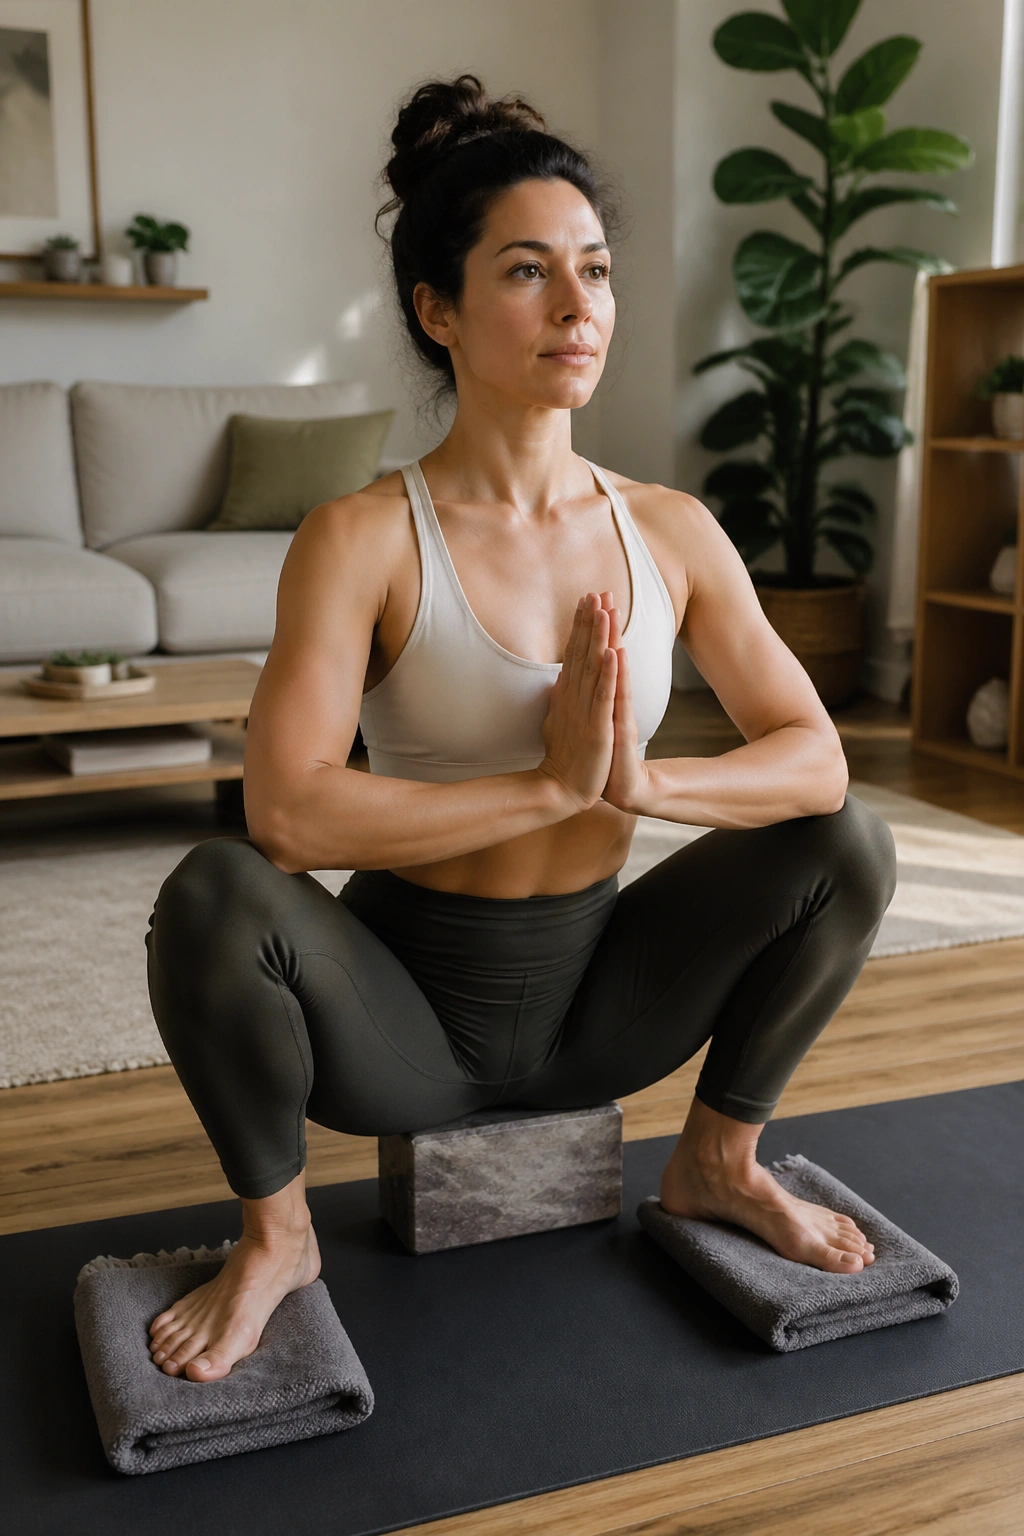
Why do hips and ankles get so stubborn in this pose? Because a squat asks the lower body to share load in a way chairs never do.
Come into a squat with the feet a little wider than hip-width. If the heels lift, place folded blankets under them or keep the toes turned out slightly. If the pelvis won’t settle, sit on a block. Hands can stay at the heart, press into the thighs, or rest on a chair in front of you. The goal is an open lower body, not a fight with gravity.
How to Make It Work
- Keep the spine long.
- Breathe into the low ribs.
- Do not force the heels down.
- Hold for 3 to 6 breaths.
This pose can be surprisingly calming because it works the hips, ankles, and pelvic floor in one shape. Still, it’s not the right choice if the knees are inflamed or the ankles are angry. On those days, skip the full squat and use a supported chair squat instead. Same idea. Less aggravation.
16. Happy Baby With Gentle Rocking
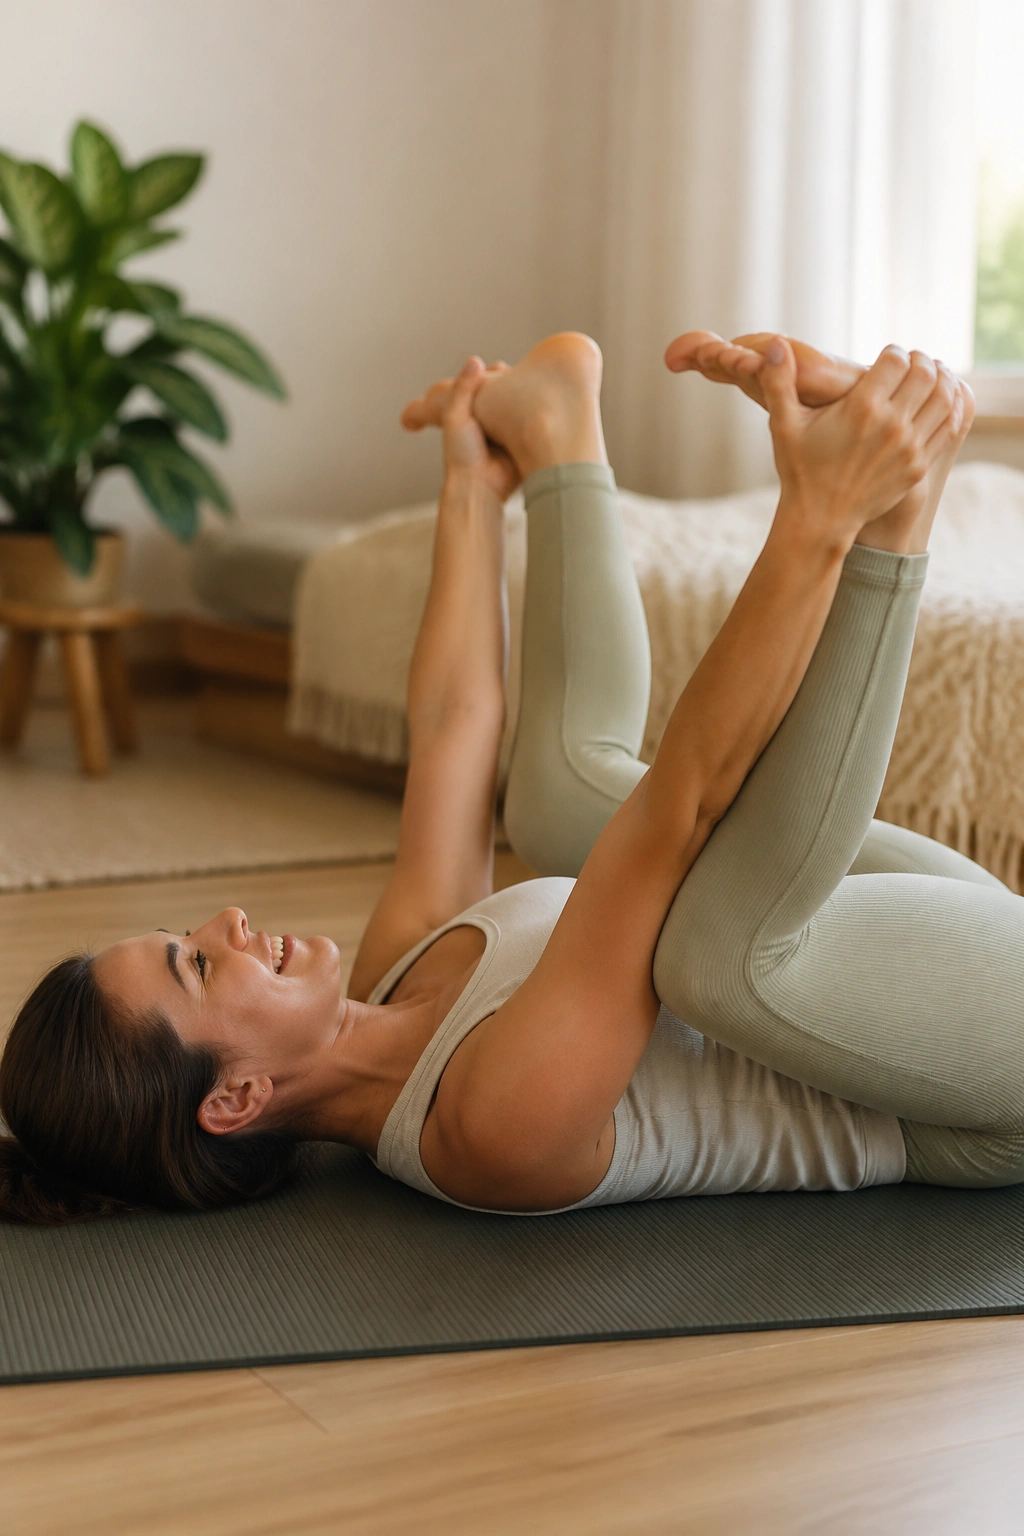
Happy Baby looks a little silly, and that’s part of why I love it. The pose brings the knees toward the ribs, releases the low back, and gives the pelvis a chance to stop gripping for a minute.
Lie on your back, bend the knees toward the armpits, and hold the outer edges of the feet or the backs of the thighs if the grip feels tight. Keep the tailbone heavy. A tiny side-to-side rock can be nice, but keep it slow. No yanking. No forcing the knees wider than they want to go.
I use this one when the back feels compressed and the hips are cranky at the same time. That combination shows up more often than people admit. The rocking can feel almost like a reset button for the sacrum, while the breath spreads into the sides of the waist.
If the neck tenses up, place a small folded towel under the head. If the hips pinch, hold behind the thighs and keep the feet higher. The pose should feel playful, not aggressive.
17. Standing Forward Fold With Soft Knees
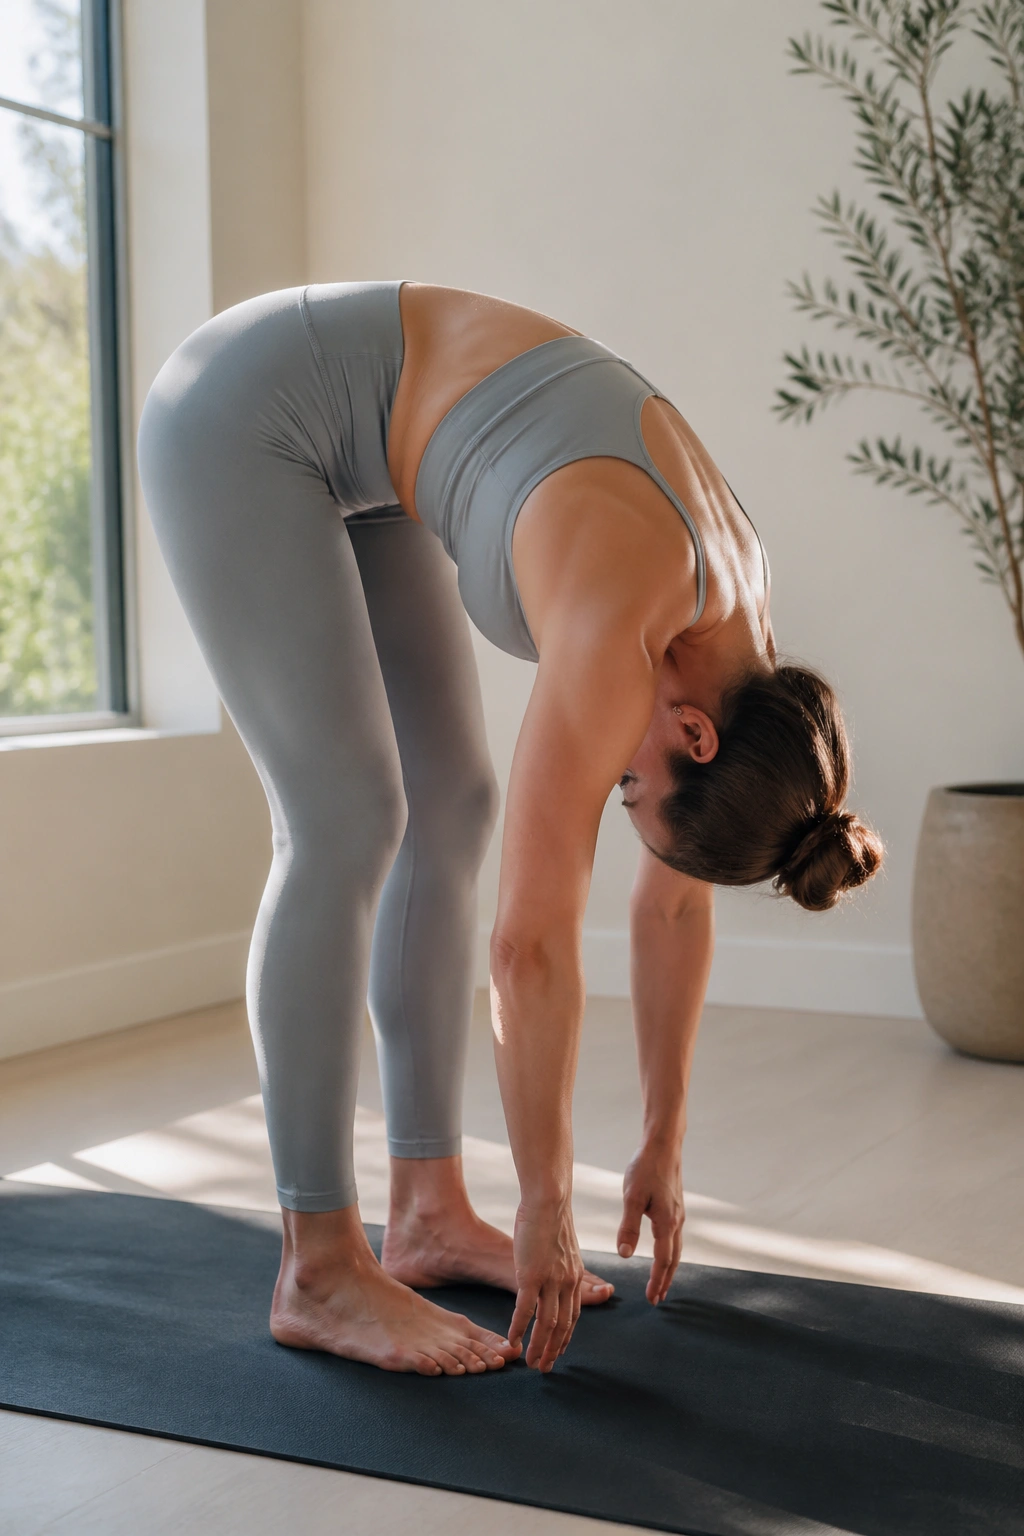
There’s a reason so many people flop into a forward fold and feel worse afterward. They lock the knees, round hard, and drag the hamstrings into the stretch whether the body wants it or not.
That’s not the move.
Stand with feet hip-width apart, bend the knees enough that the pelvis can tip forward, and let the arms hang. The head can drop, or it can rest on blocks. The weight should move into the feet, especially the heels and the outer edges of the feet. If the low back feels yanked, bend the knees more. If the neck is tender, keep the gaze soft and the chin slightly tucked.
This is a good standing reset when the body feels wired but not tired enough to lie down yet. It gives the back line of the body a long, easy shape and can help the shoulders stop clamping up.
Come up slowly, stacking the spine one piece at a time. Fast exits can make the head spin.
18. Eagle Arms to Unhook the Upper Back
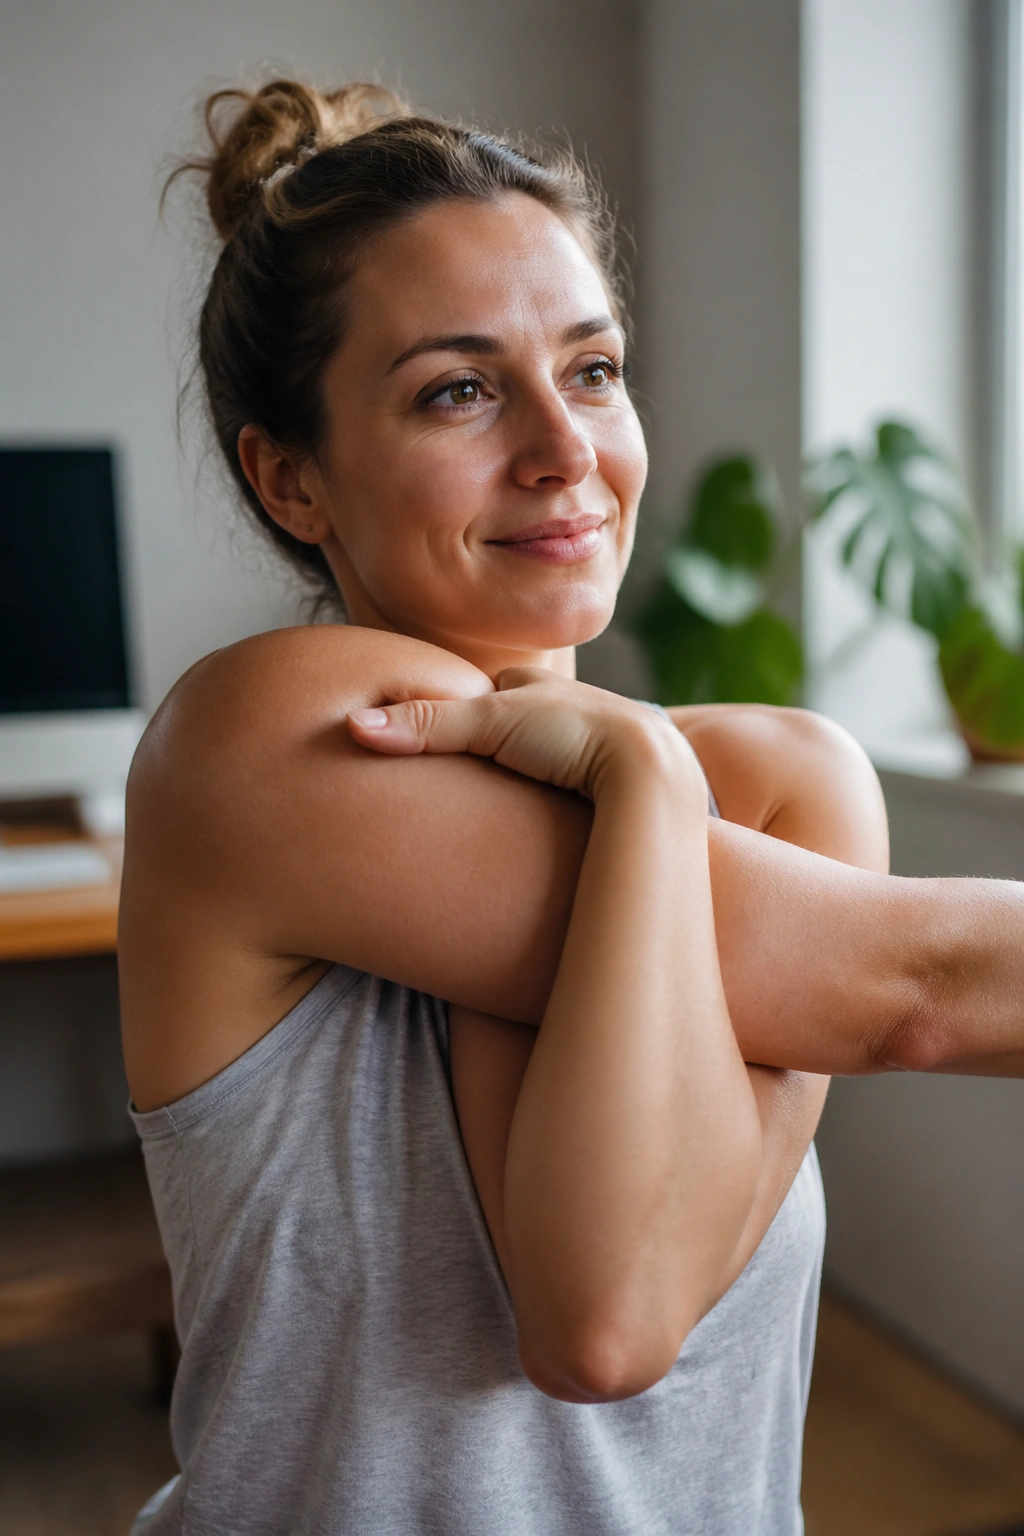
Eagle Arms are a sneaky good choice for desk shoulders. They don’t ask for much space, which is exactly why they work when the upper back feels knotted and tired.
Sit or stand tall, cross one arm under the other, and either press the backs of the hands together or wrap the forearms as far as they comfortably go. Lift the elbows a little and let the shoulder blades widen. Then breathe into the space across the upper back. If the arms do not wrap neatly, keep the hands on opposite shoulders and still do the same breath work. That counts.
Unlike big shoulder stretches, this one can be done in a chair, in line at the store, or between meetings. The shape is small enough to sneak in but strong enough to change how the upper body feels. I like holding it for 4 to 6 breaths and then switching sides without rushing.
Small shapes. Big payoff.
19. Knees-to-Chest Pose for a Quiet Low Back
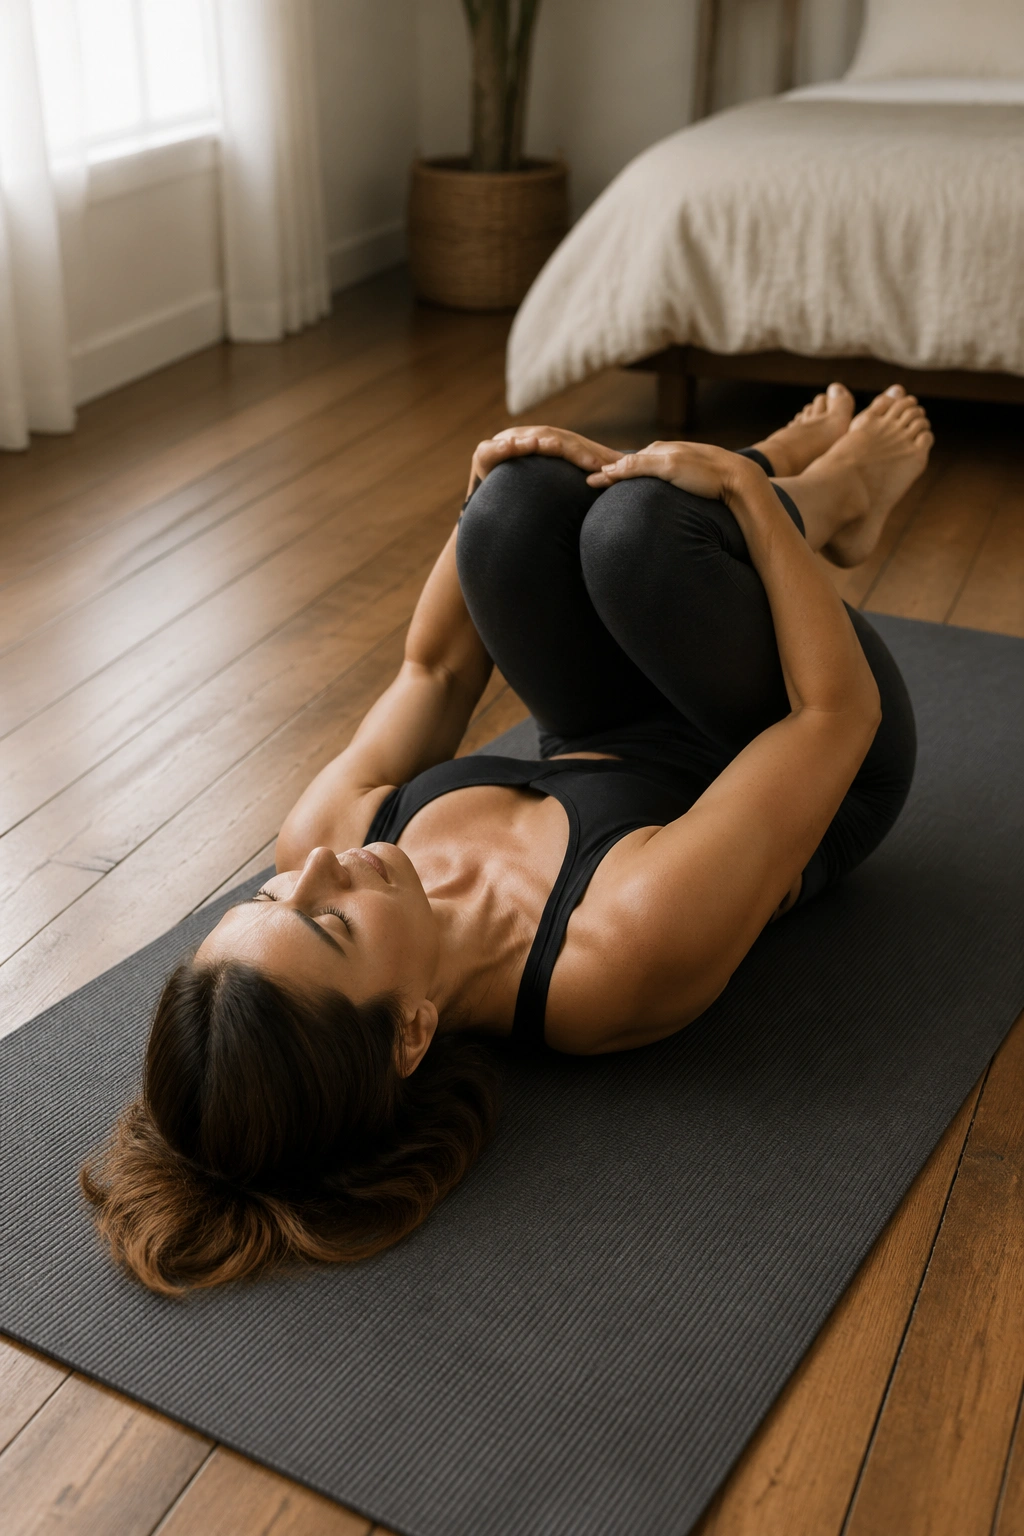
Knees-to-Chest is the pose I reach for when the low back wants to be left alone but still needs some relief. It’s simple, and that simplicity is the point.
Lie on your back, draw one knee in, then the other, and let the sacrum get heavy. You can hold behind the thighs, over the shins, or just rest the hands on top of the knees. If the belly feels tight, keep the feet on the floor and hug only one knee at a time. If the neck strains, place a folded towel under the head.
What to Feel
- A softening across the low back.
- Less gripping in the hip flexors.
- A gentle spread through the lower belly.
- A slower breath on the exhale.
Rocking a little side to side can feel good here, but keep it small. This is a settling pose, not a crunch. I often use it between stronger shapes, because it gives the nervous system a minute to catch up.
20. Supported Savasana to Let Everything Settle
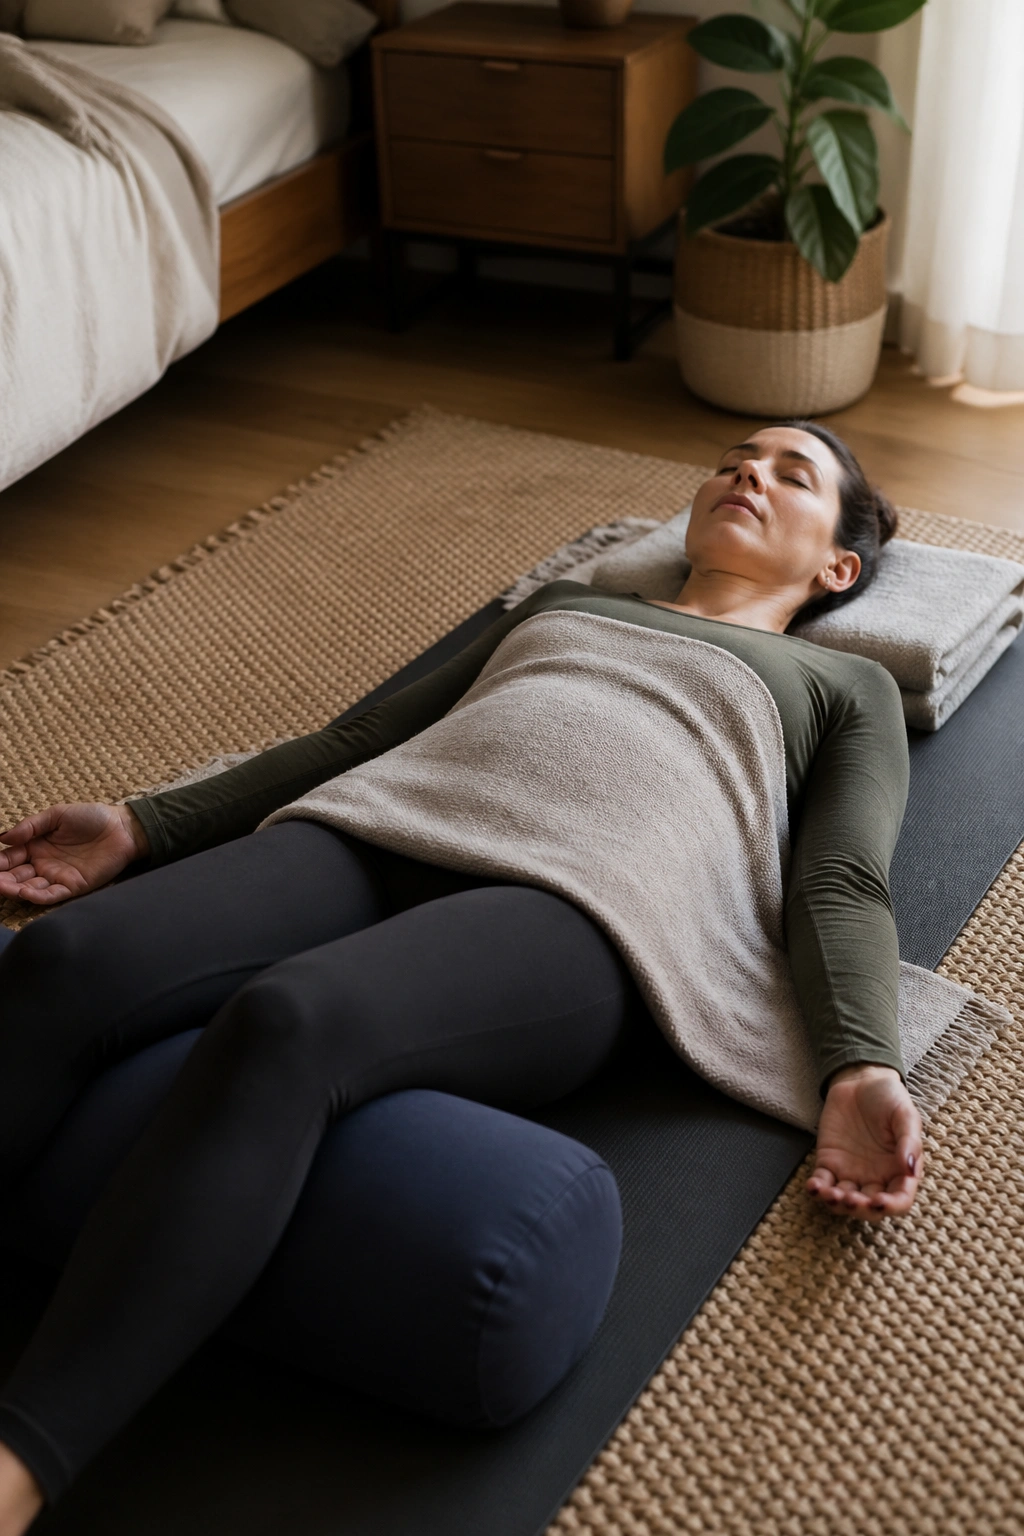
If one pose deserves a long, honest pause, it’s this one. Supported Savasana gives the entire body a chance to stop managing, which is useful when inflammation and stress have been trading notes all day.
Lie on your back with a bolster or rolled blanket under the knees, a folded towel under the head if needed, and maybe a light blanket over the belly or chest. Let the feet fall open. Let the hands be heavy. If the lower back likes more support, place the calves on a chair instead of lying flat. Then stay put for 5 to 15 minutes if your schedule allows it.
The job here is not to meditate perfectly. It’s to notice where the body still wants to hold on, and then not help it. That can be harder than it sounds. A simple breath count helps: inhale for 4, exhale for 6, repeat until the jaw softens and the shoulders sink a little farther.
If you only have room for one quiet practice on a rough day, make it this one. It doesn’t ask for range, strength, or flexibility. It asks for permission.
