



Most stiff backs don’t need a bigger bend. They need a cleaner one.
A smart backbend starts higher than people think — through the upper back, the front of the hips, and the breath — not by dumping everything into the low spine and hoping for the best. When a pose pinches, it’s often because the body skipped the warm-up work and went straight for shape. That’s not flexibility. That’s a negotiation with your lumbar vertebrae, and the lumbar spine usually loses.
A good open spine practice feels spacious, not forced. The chest has room, the neck stays quiet, and the front body lengthens enough that the back can actually arc. Strong backbends should feel active too. Legs wake up. Glutes work. Shoulders organize instead of collapsing. You’re not trying to fold yourself in half; you’re trying to give the spine a wider, better-supported curve.
There’s a reason backbends show up in so many yoga lineups. Gentle ones wake up the upper back after long hours in a chair. Stronger ones build shoulder strength, hip extension, and a little nerve. The trick is sequence. Start low, stay honest, and let the spine open from the floor upward — that’s where the useful stuff happens.
1. Sphinx Pose
Sphinx Pose is the quiet workhorse of yoga backbend poses. It doesn’t look dramatic, and that’s exactly why it matters. You get a clean, accessible spinal extension without asking the shoulders or wrists to hold a circus act.
Set your elbows under your shoulders or just a touch forward, then press the forearms down and let the chest drift forward. The low ribs should feel long, not jammed. If your lower back feels compressed, slide the elbows a little farther in front and lighten the lift. Less is usually better here.
What to Feel
- The front of the hips stays heavy on the floor.
- The sternum reaches forward before it lifts up.
- The neck stays long, with the gaze on the floor a few feet ahead.
- The breath moves into the side ribs, not only the belly.
Pro tip: If Sphinx feels too flat, place a folded blanket under the ribs or forearms. Small lift. Big difference.
Sphinx is also a smart checkpoint. If you can’t breathe comfortably here, you probably don’t need a deeper backbend yet. That sounds blunt because it is.
2. Baby Cobra Pose
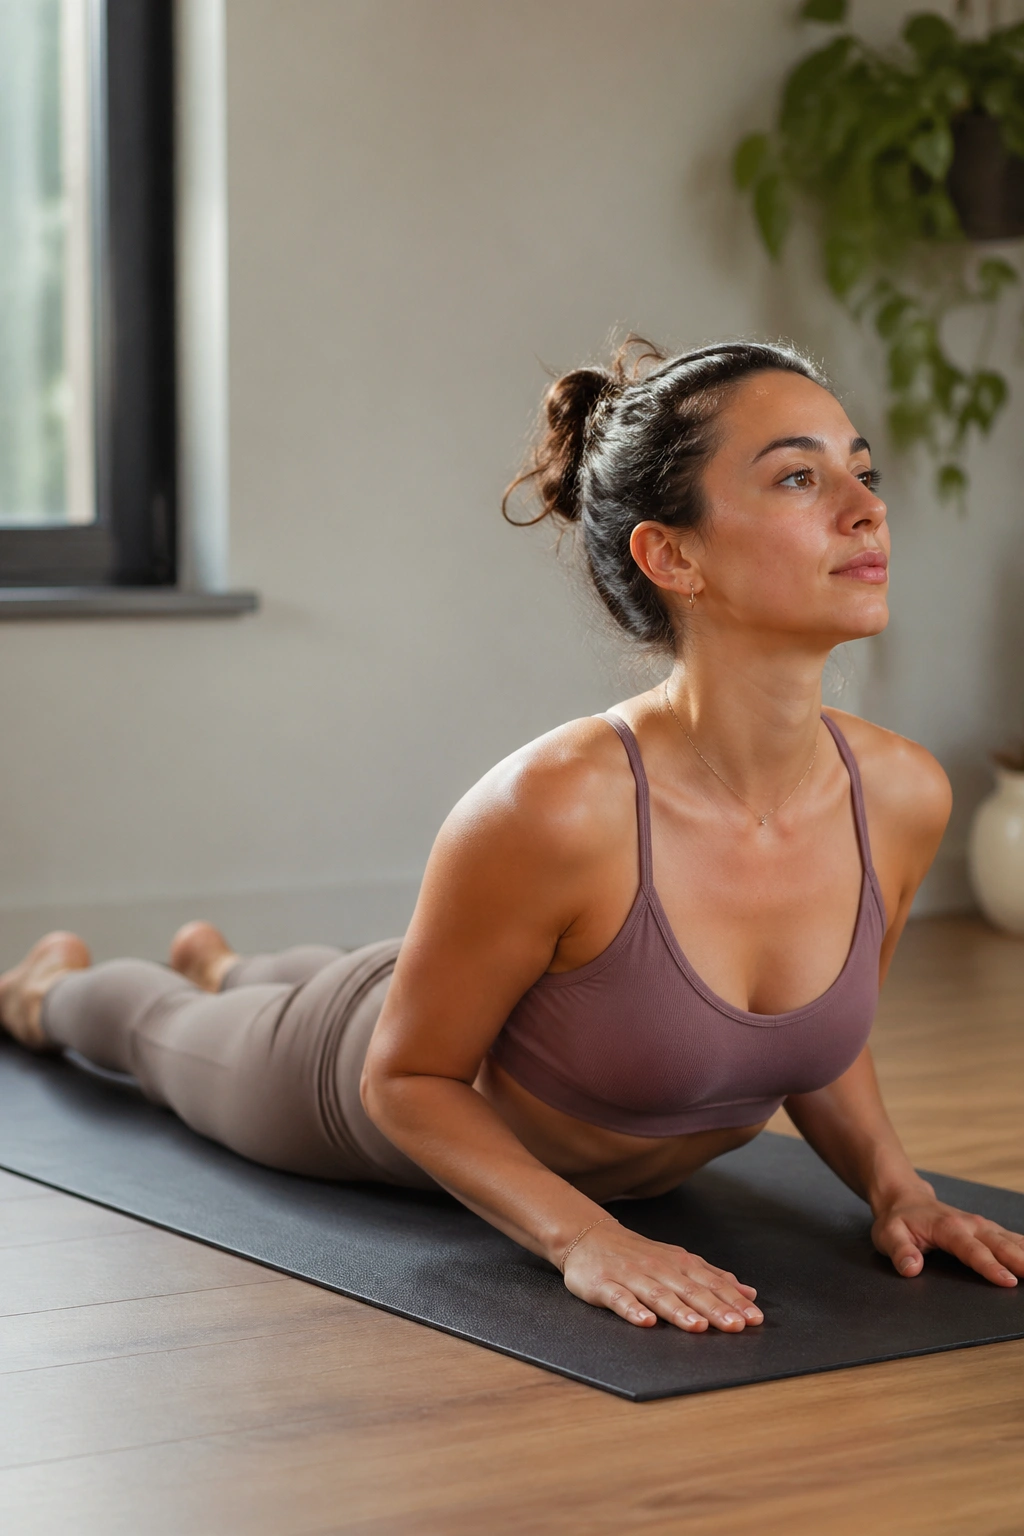
Baby Cobra is where many people learn the difference between lifting and hinging. A lot of new students try to rocket the chest as high as possible. That usually ends with the shoulders creeping toward the ears and the low back doing all the labor.
Keep the palms under the shoulders or just under the upper ribs, then press the tops of the feet down and peel the chest up only a few inches. The pubic bone stays grounded. The thighs stay active. If your hands are doing the heavy lifting, the pose has already drifted off course.
The real goal is a long spine and a broad collarbone. Not height.
How it should feel: the upper back works, the front of the body opens, and the glutes stay soft enough that the low back doesn’t clamp shut. If you come up too high, the shape gets sloppy fast. Go lower than you think.
Baby Cobra is one of those poses that looks small but teaches a lot. It’s especially good if you spend time in desk posture, because it asks the thoracic spine to do some honest work without turning the body into a stress test.
3. Cobra Pose
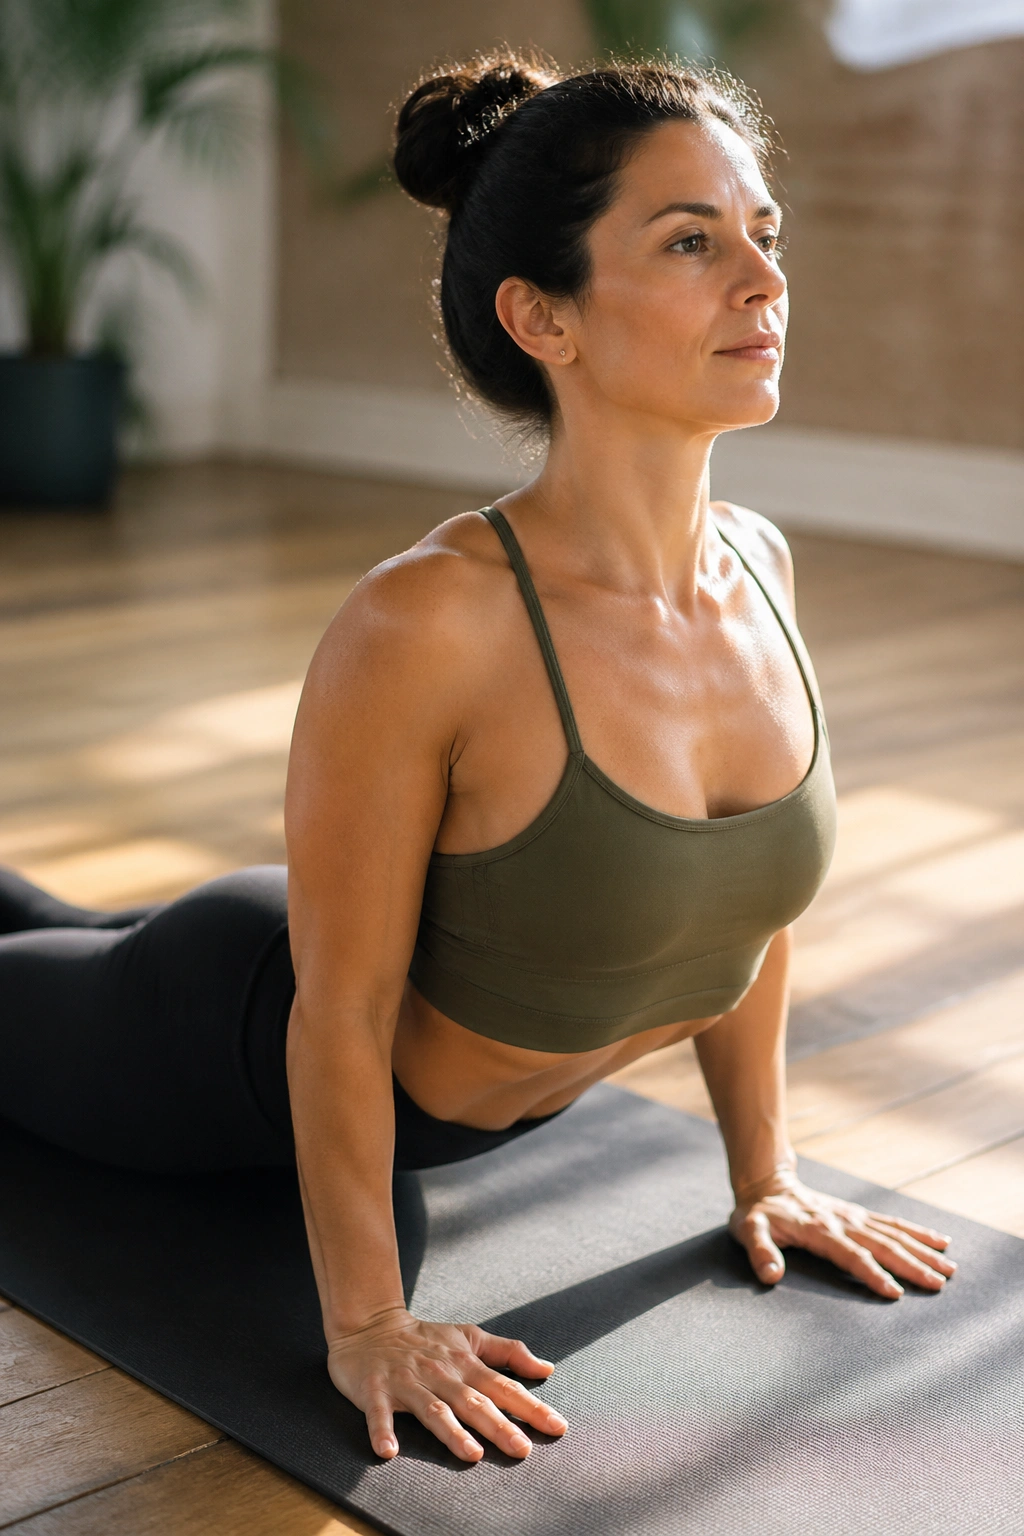
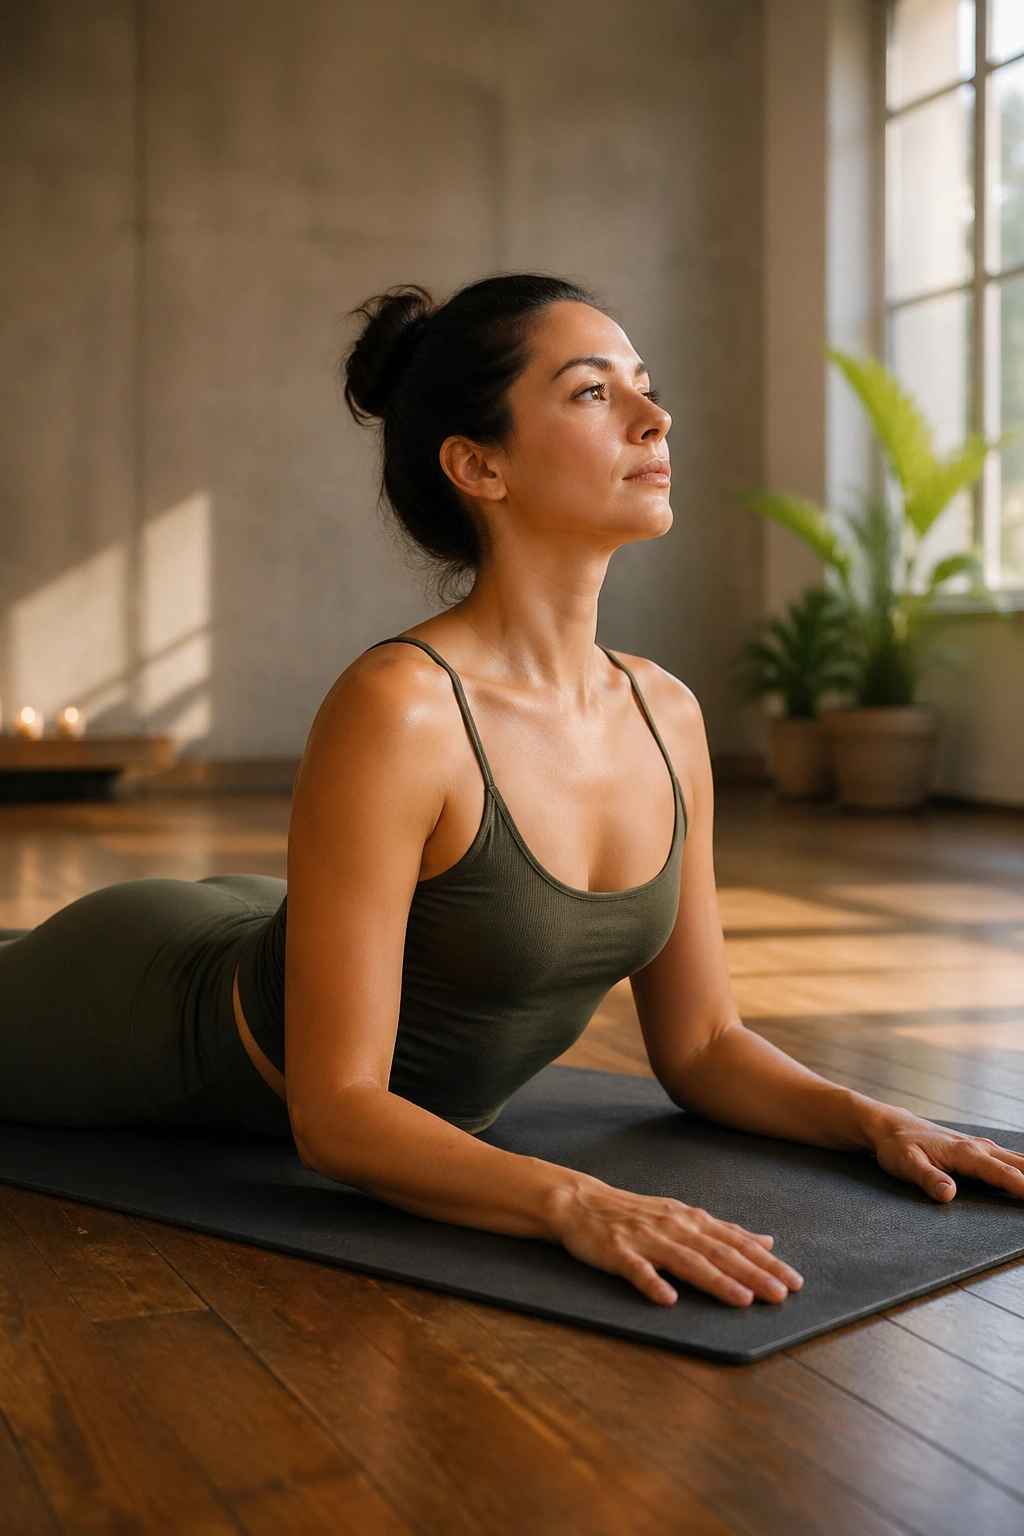
How much Cobra do you actually need? Less than most people try to do. A clean Cobra Pose is not about backbending heroics; it’s about creating even, distributed extension from the pelvis through the top of the sternum.
Lie on your belly, place the hands under the shoulders, and hug the elbows close. On an inhale, lengthen forward first, then lift the chest. The pelvis stays heavy. The thighs stay close to the floor. If the pubic bone peels up first, you’ve lost the line.
A few cues that help
- Press the tops of the feet down.
- Draw the shoulder blades down and slightly together.
- Keep the gaze down or forward, never cranked upward.
- Stop before the low back starts talking back.
Cobra gets overdone all the time. People want height, but what they really need is shape. A lower Cobra done well is more useful than a towering one that pinches and shortens the breath.
And yes, you can bend the elbows a little. That’s not cheating. That’s control.
4. Locust Pose
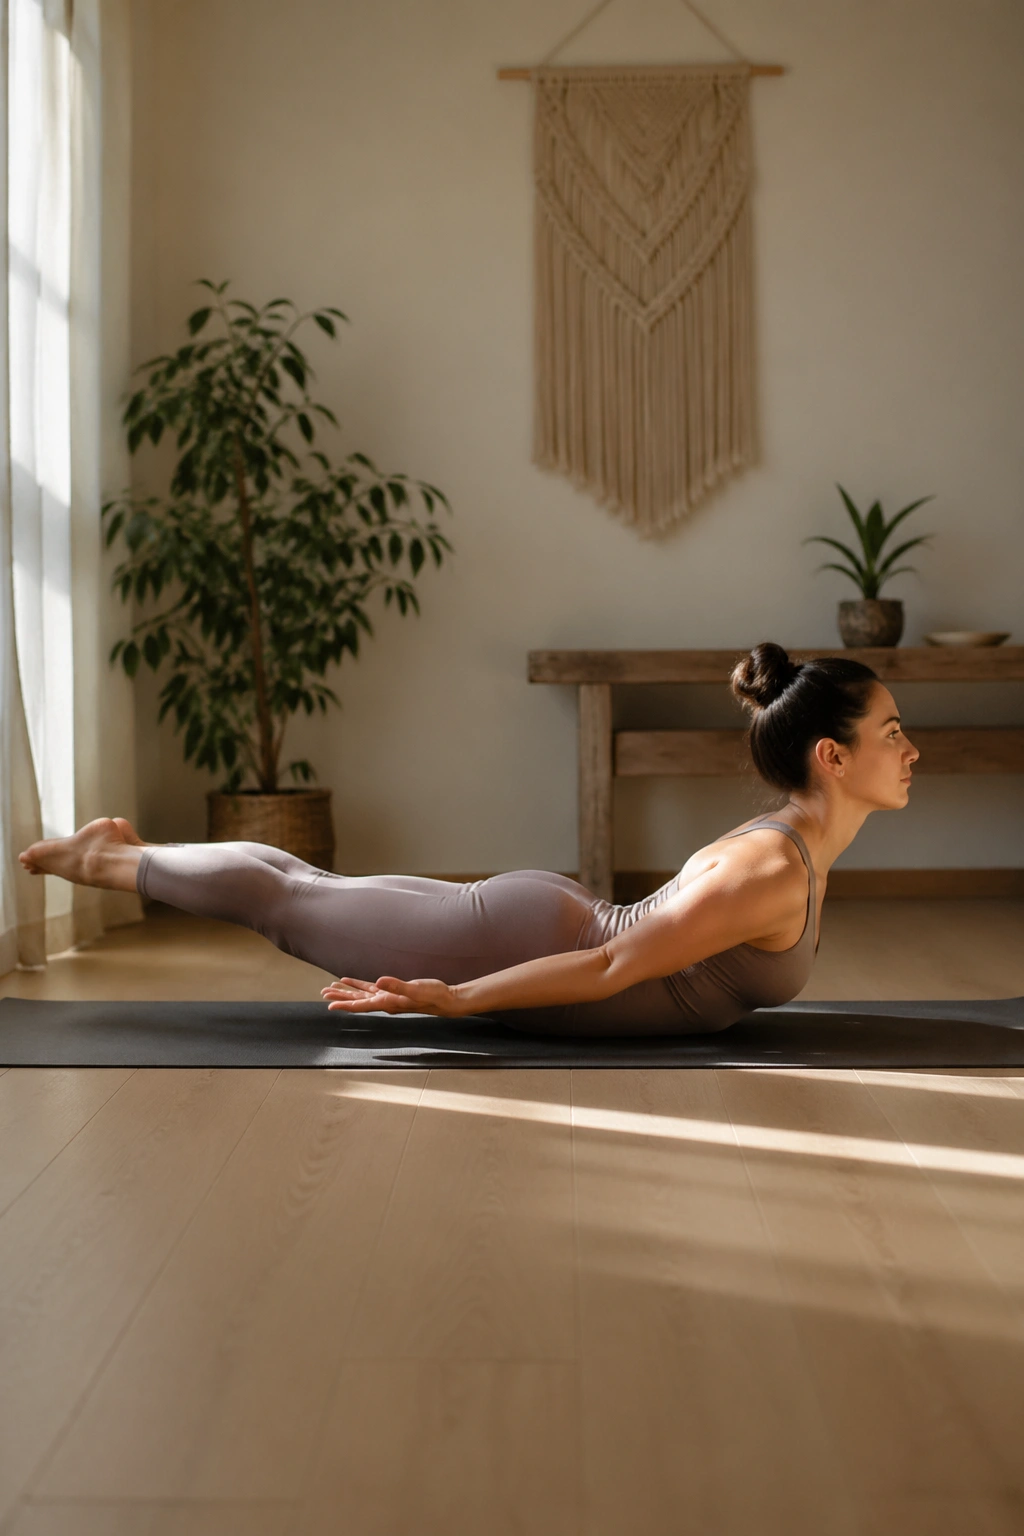
Locust Pose looks plain until you hold it for more than five breaths. Then it gets honest. Fast. The whole back line has to engage — glutes, hamstrings, mid-back, and the muscles that run between the shoulder blades.
Lie face down with the arms by your sides, palms facing in or down. On an inhale, lift the chest, legs, or both. You do not need to fling everything skyward at once. In fact, that’s usually the messiest version. Start with a low lift and keep the back of the neck long.
Why it belongs in a backbend practice
- It trains spinal extension without weight-bearing on the wrists.
- It strengthens the posterior chain, which supports deeper bends.
- It teaches you to lift from the back body instead of cranking the neck.
- It often reveals side-to-side differences you wouldn’t notice in standing poses.
Hold for 3 to 5 breaths, lower with control, and repeat if the shape stays clean. If the breath gets choppy or the low back grabs, reduce the lift. Harder is not better. Cleaner is better.
Locust has an old-school feel. No props, no fuss, no tricks. Just work.
5. Bridge Pose
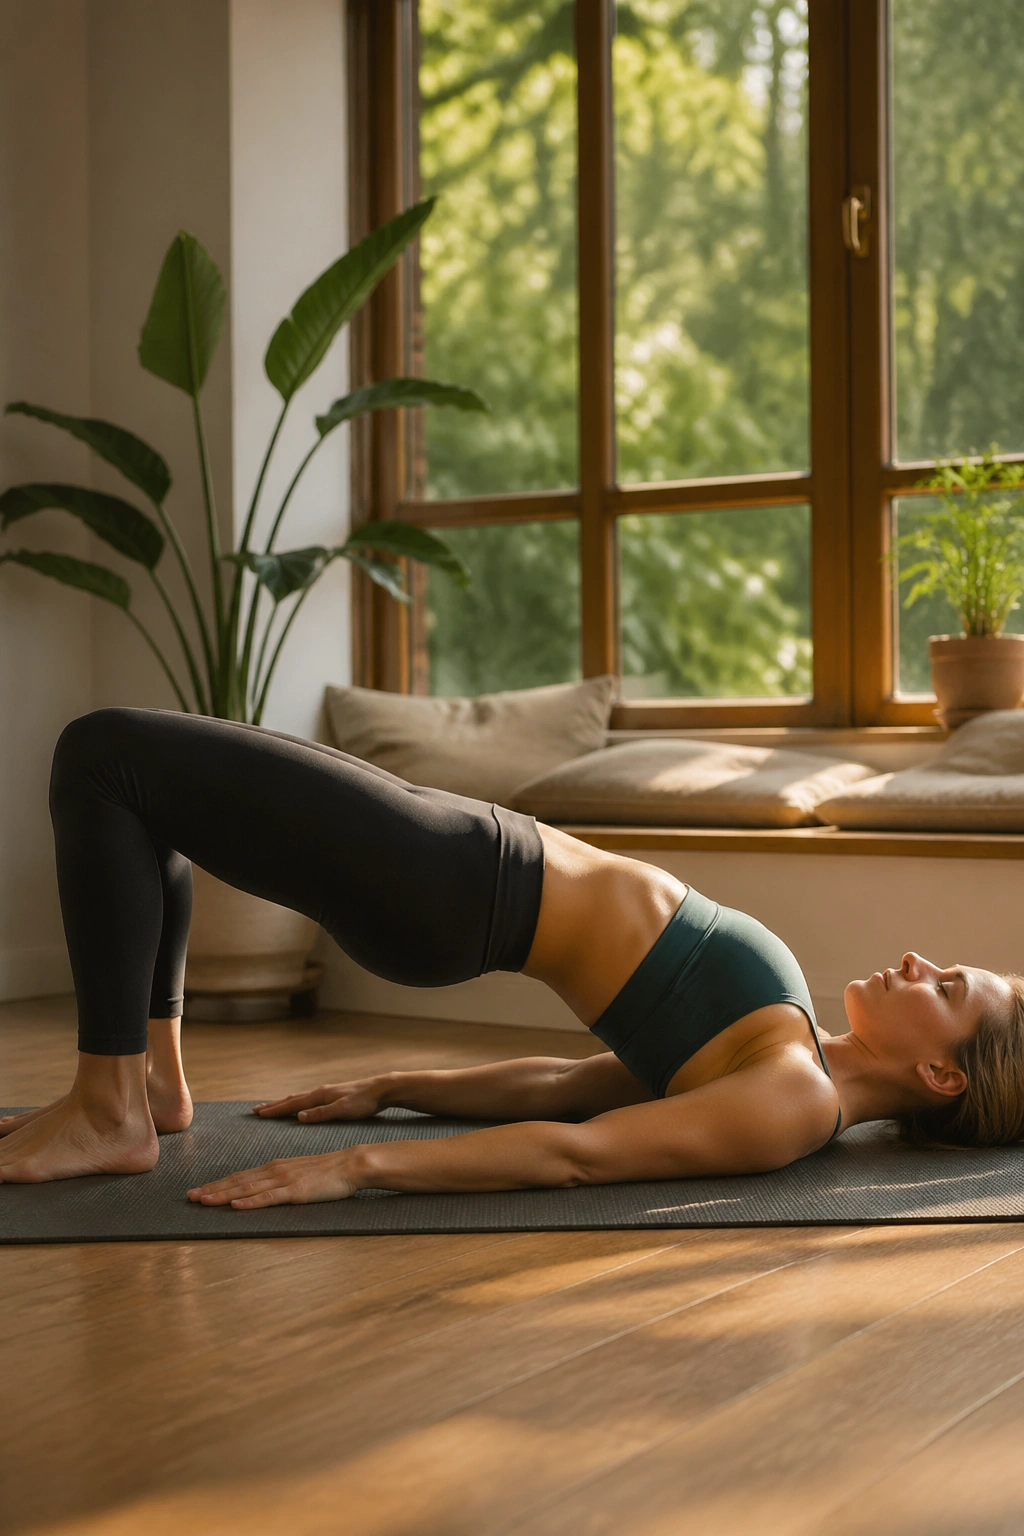
Bridge Pose gives you backbend work without asking the shoulders to do much at all, which is exactly why people keep coming back to it. It is one of the most useful shapes in an open spine practice because it blends spinal extension with glute and hamstring strength.
Lie on your back, bend the knees, and place the feet hip-width apart with the heels close enough that the fingertips can brush the backs of the heels. On an inhale, press the feet down and lift the hips. The knees track forward, not out to the sides. The chest stays broad.
A lot of students thrust the ribs upward and call it Bridge. That’s not the move. You want the tailbone to lengthen, the front thighs to stay active, and the shoulders to relax underneath you.
Clean setup cues
- Ankles under knees.
- Inner thighs parallel.
- Weight spread across the whole foot, not just the outer edges.
- Hands clasped only if the shoulders stay soft.
Bridge is friendly, but it still teaches precision. If you feel the low back compressing, lower the hips a little and hold the pose with more leg work. That usually fixes the shape faster than chasing a higher lift.
6. Supported Bridge Pose
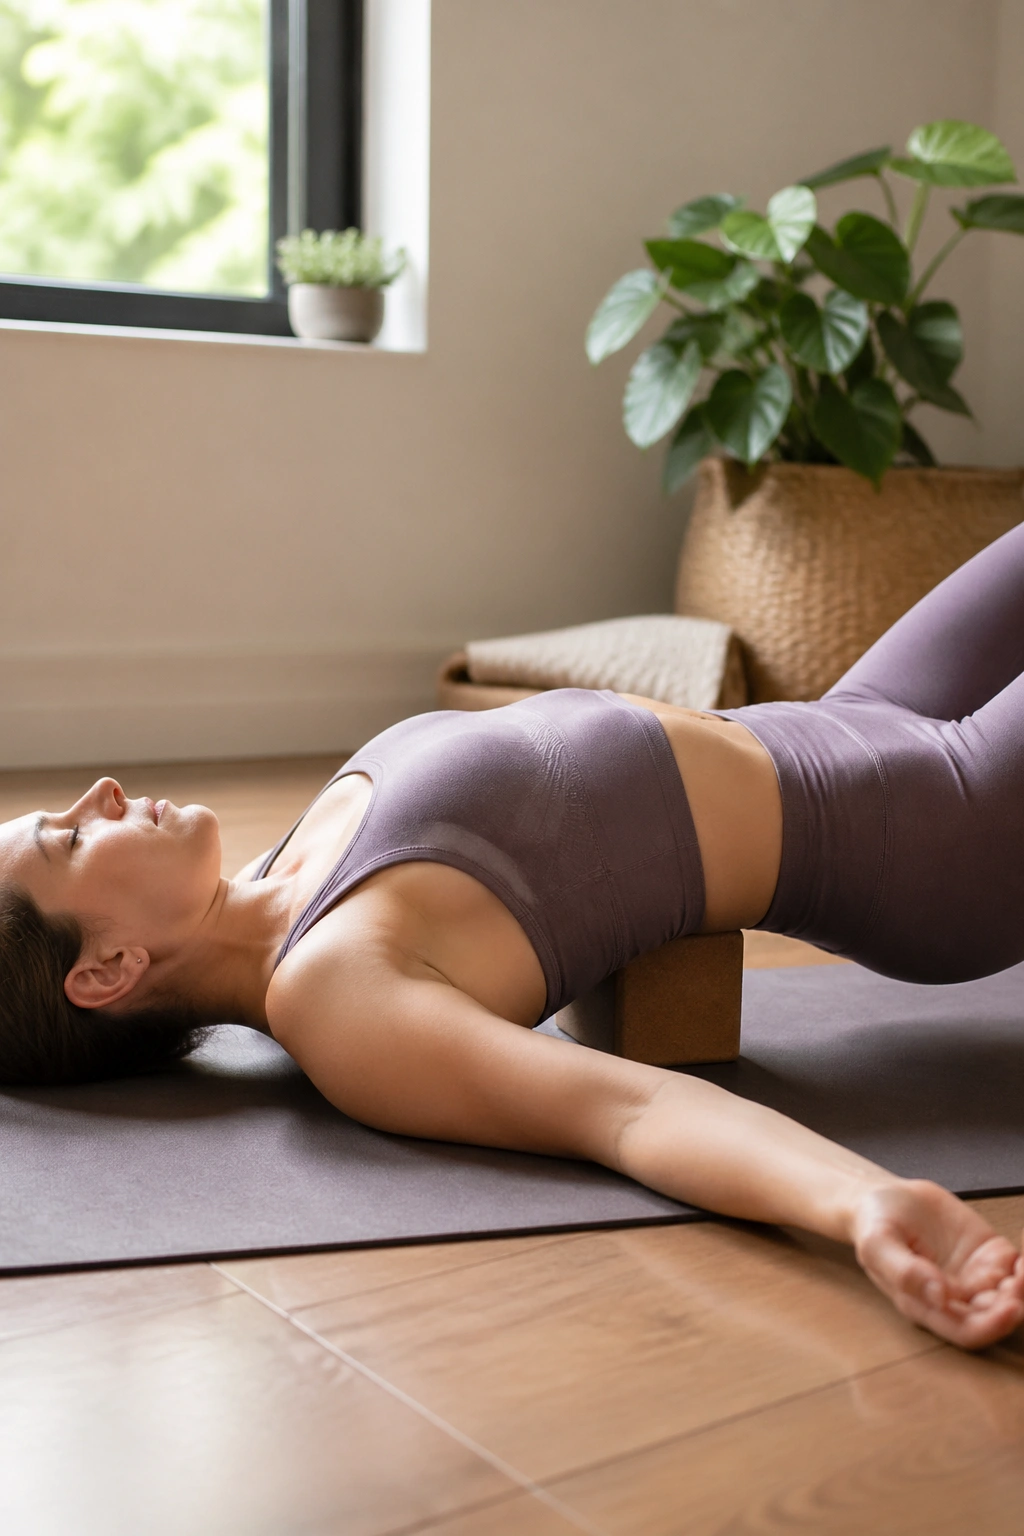
Supported Bridge is what I reach for when the body wants opening but not effort. It’s the restorative version of the same pattern, and the difference is huge. One version strengthens. The other lets the front body melt open while the spine takes a break.
Set up a block on its medium or lowest height under the sacrum, not under the low back. Your pelvis should be balanced on the block, and your weight should feel evenly distributed. Arms rest by the sides. Legs can stay bent, or you can extend them a little if that feels better. Stay for 1 to 3 minutes if the neck and lower back are happy.
A weird thing happens here: the less you do, the more you feel. The chest softens. The hip flexors ease. The breath slows down. And because the block carries some of the work, the nervous system usually backs off too.
If you’re already tired, this is the smarter Bridge. If you’re sore, it may be the only Bridge you need that day.
7. Upward-Facing Dog
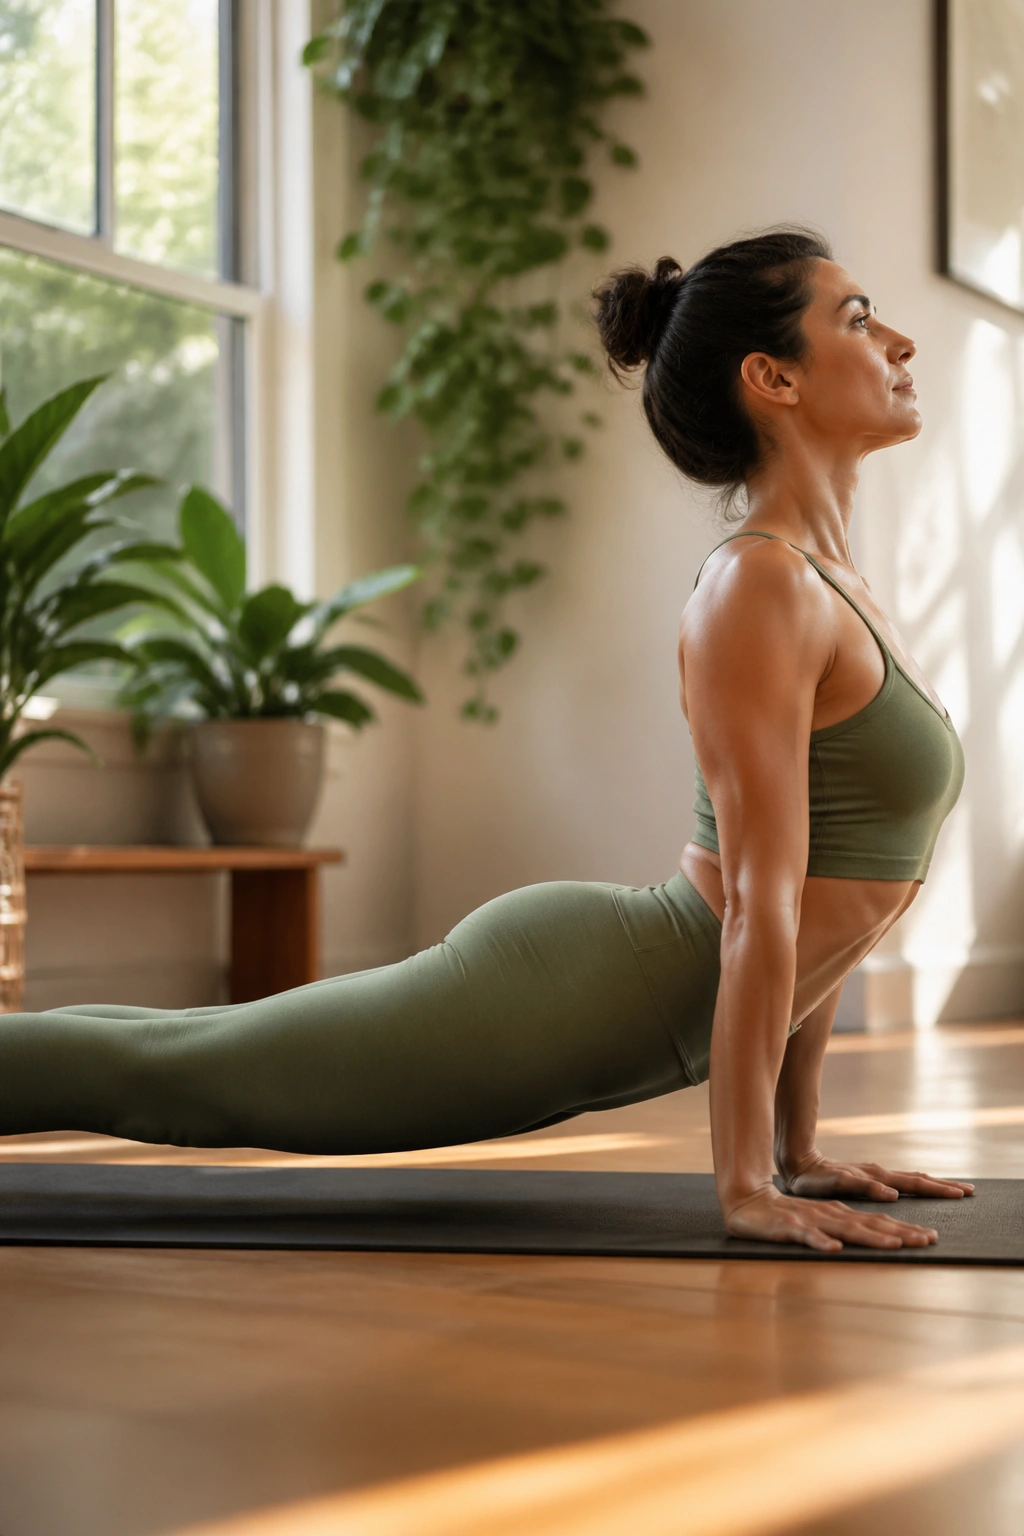
Upward-Facing Dog is not Cobra with straight arms. That’s the trap. The real difference is that the thighs lift away from the floor, the shoulders stack over the wrists, and the chest reaches forward before it rises.
From a prone position, press firmly into the tops of the feet and hands, straighten the arms, and lift the thighs off the floor. The pelvis hovers. The front of the chest moves through the arms. If your shoulders collapse forward or your lower back pinches, back out. You’re not proving anything to the room.
How to know you’re ready
- The wrists can bear weight without strain.
- The shoulders can move down and away from the ears.
- The thighs can stay active, not sagging toward the floor.
- The low back feels long, not compressed.
A lot of people need Cobra before Upward Dog. Some need Sphinx and Locust first. That’s fine. The spine does not care about yoga ego.
Upward Dog has a clean, lifted line when it works. When it doesn’t, it turns into a hinge in the low back and a shrug in the neck. Skip the shape if that’s what you get.
8. Low Lunge Backbend
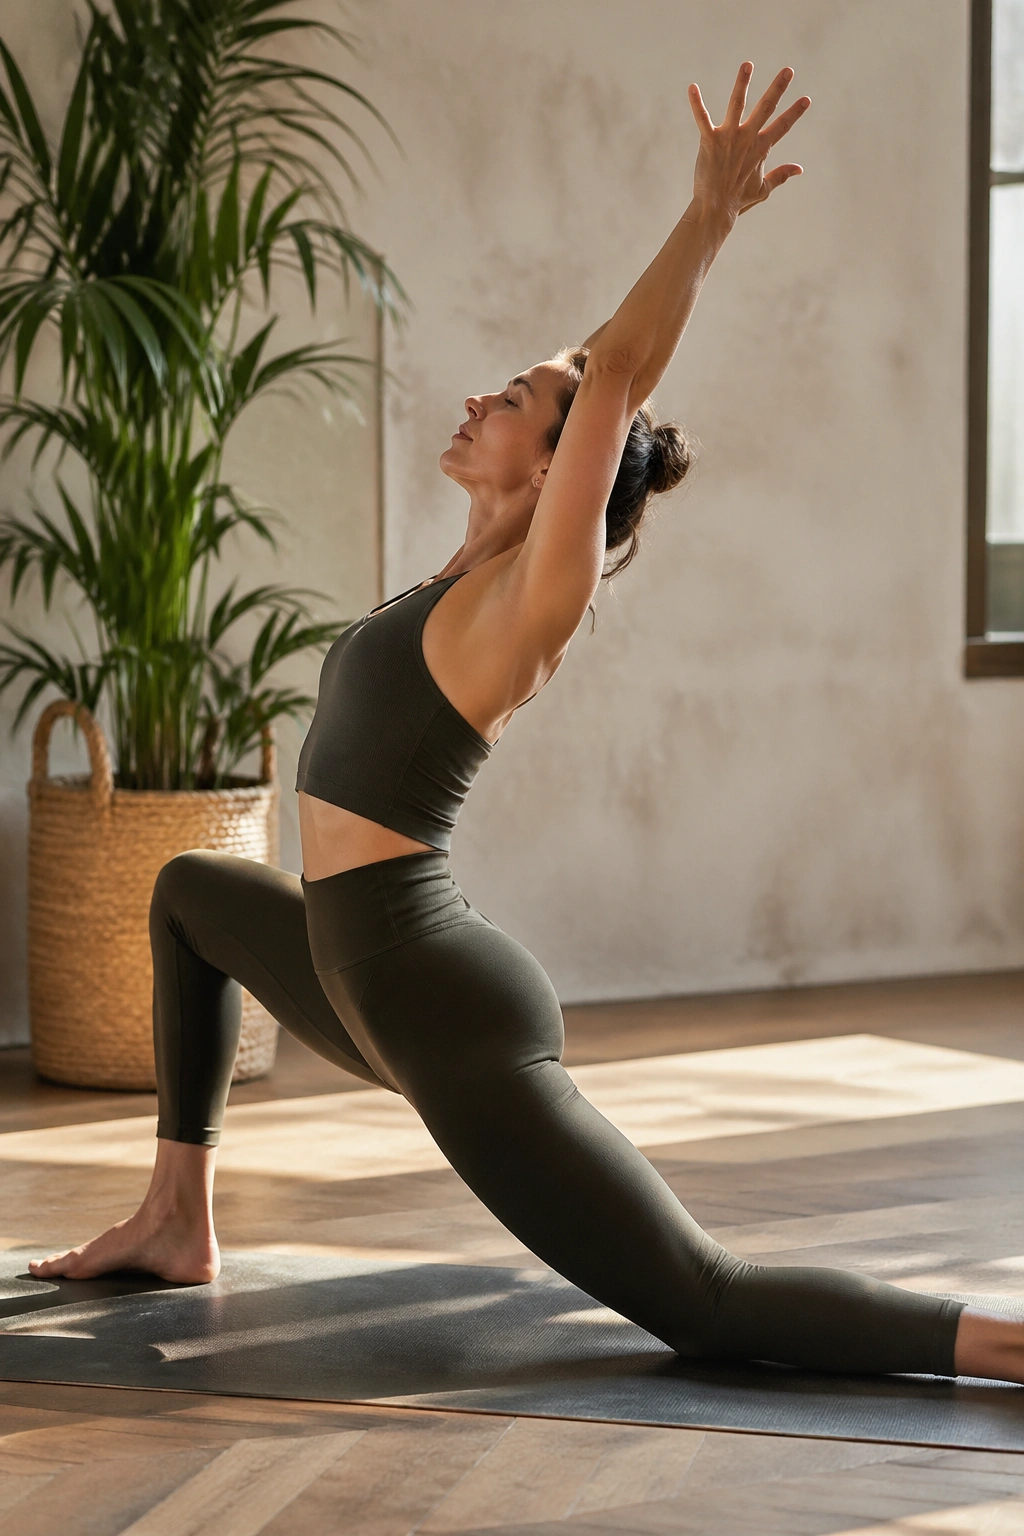
A low lunge backbend is one of the best ways to open the front body without making the spine feel trapped. It gets into the hip flexors, which is where many backbend problems begin anyway. Tight psoas and quadriceps can make every arc feel shorter and harsher.
Start in a low lunge with the back knee down on a blanket. Stack the front knee over the ankle. Tuck the tail slightly, press the back thigh forward, and lift the sternum before you lean back. Arms can reach overhead, open into a cactus shape, or stay on the front thigh if that feels cleaner.
The point here is not a giant arch. The point is creating room in the front of the hips and ribs so later backbends have somewhere to go.
Use this version when
- Your hip flexors feel stubborn after sitting.
- You want a standing-backbend feel without the standing part.
- Your low back prefers gradual opening.
- You need a bridge between floor work and deeper kneeling shapes.
If you go too far, the pelvis tips forward and the low back takes the hit. Keep the front ribs from blasting upward. That one cue saves a lot of people.
9. Camel Pose
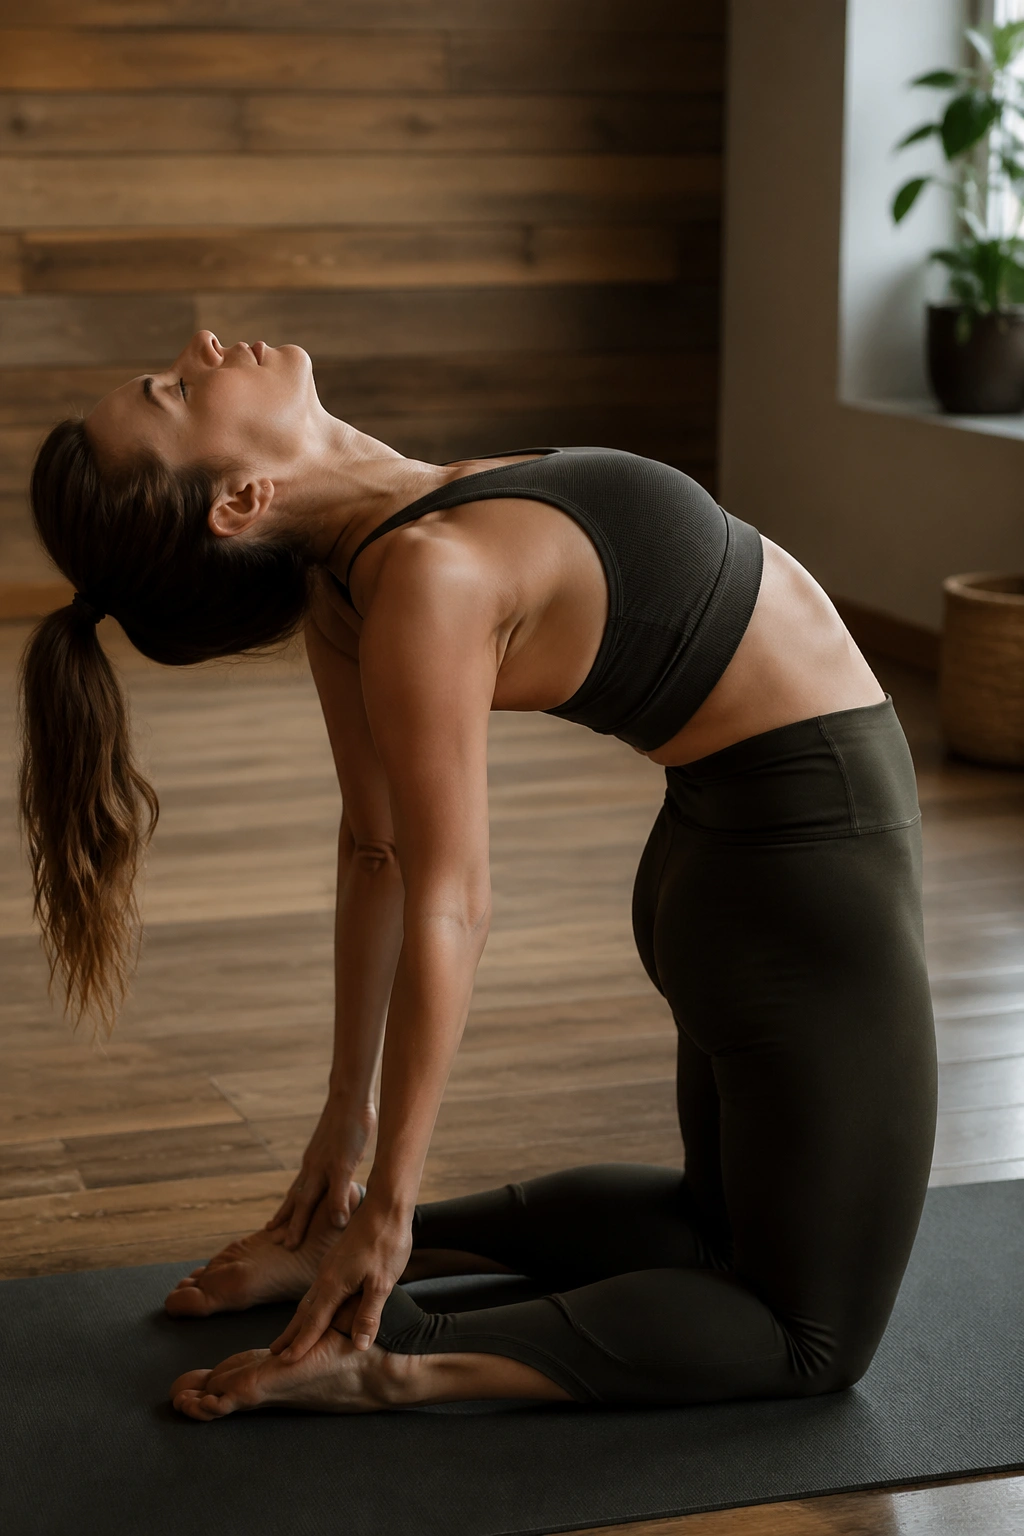
Camel Pose has a reputation for being intense, and for good reason. It asks the thighs, hips, chest, and shoulders to cooperate while you stay on your knees and keep your balance. There’s nowhere to hide, which is partly why it’s so useful.
Kneel with the knees hip-width apart and the thighs vertical. Press the shins down and lift the chest before reaching back. Hands can rest on the sacrum first. That’s not a beginner move. That’s the smart starting point. If the shape stays smooth and the breath keeps moving, you can reach for the heels one side at a time.
Do not dump into the low back. If the ribs flare and the neck jams, you’ve gone too far. Camel works best when the hips stay stacked over the knees and the upper back does some of the opening.
Safer hand options
- Hands on the sacrum.
- Fingers resting on the heels, one hand at a time.
- Toes tucked under for extra support.
- A block between the thighs if the knees splay outward.
Camel can be gorgeous when it’s honest. It can also be reckless when rushed. That’s not a pose to fake.
10. Bow Pose
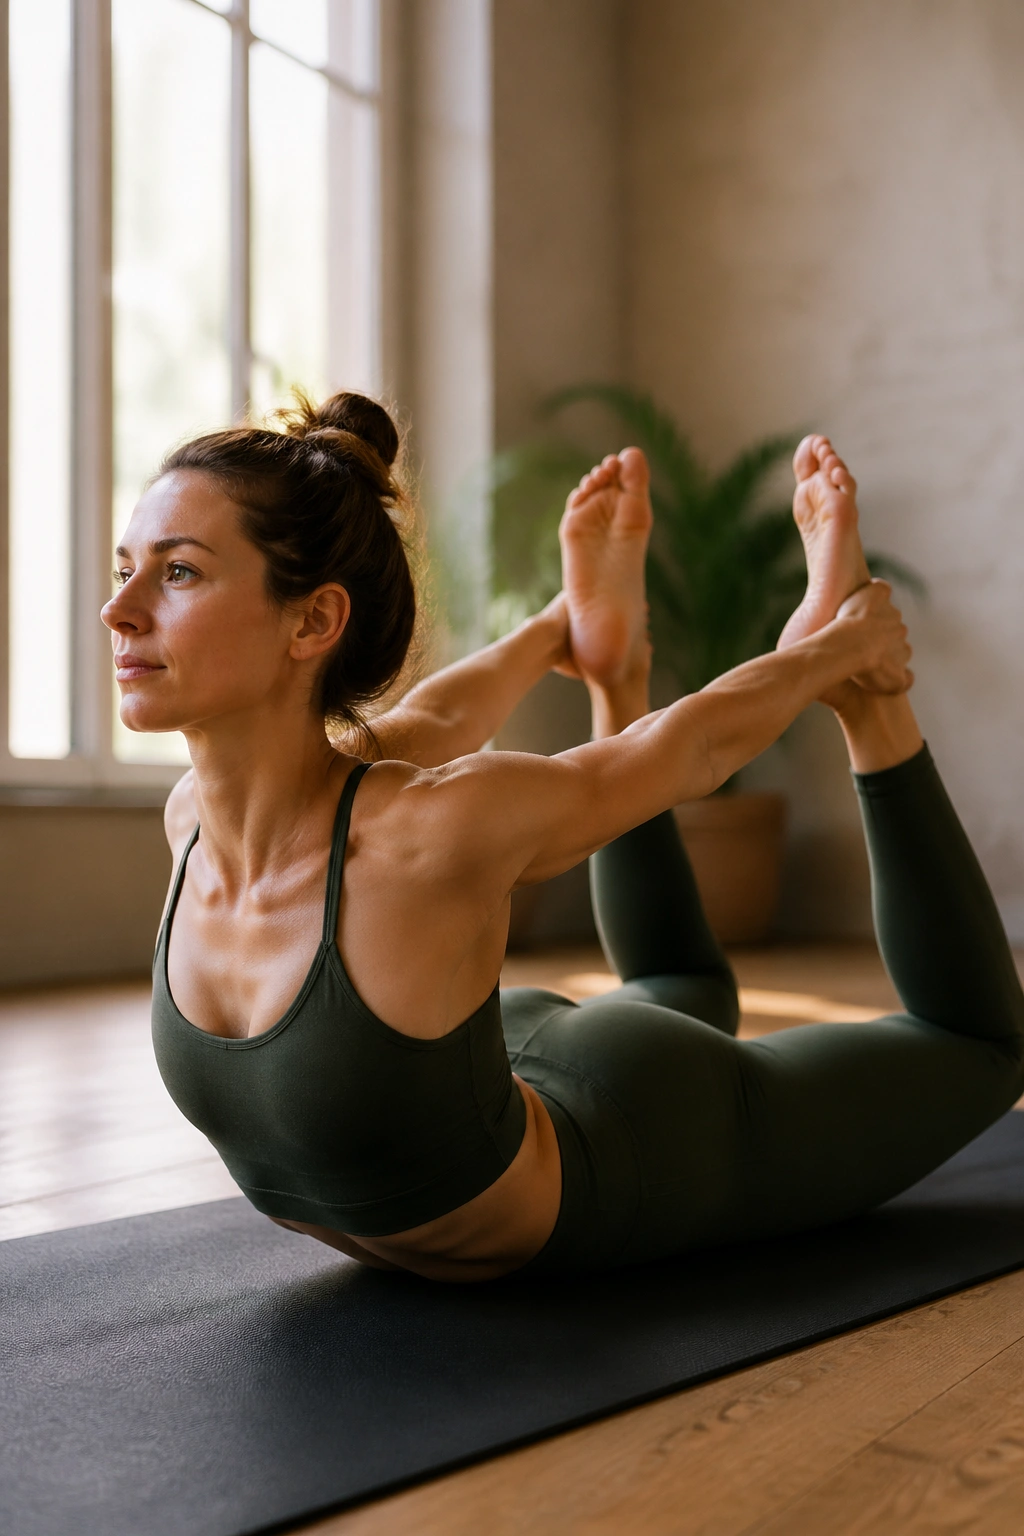
Bow Pose exposes habits fast. One side kicks harder, the chest lifts unevenly, and suddenly the whole shape twists. That’s normal. It also means the pose is giving you feedback whether you want it or not.
Lie on your belly, bend the knees, and reach back to hold the ankles or shins. On an inhale, kick the feet into the hands and lift the chest and thighs together. The knees stay about hip-width apart. If the knees drift wide, the low back usually loses stability.
This is one of the more aggressive backbends in the sequence, so the preparation matters. Sphinx, Cobra, Locust, and Bridge are not optional warm-ups here. They’re the groundwork.
What Bow should not feel like
- A sharp pinch in the lumbar spine.
- Neck strain from looking too far forward.
- Knee strain from yanking the feet.
- Breath held under pressure.
If you can’t reach both ankles comfortably, try one side at a time or switch to Half Bow first. Bow is powerful, but power without control is just noise.
11. Half Bow Pose
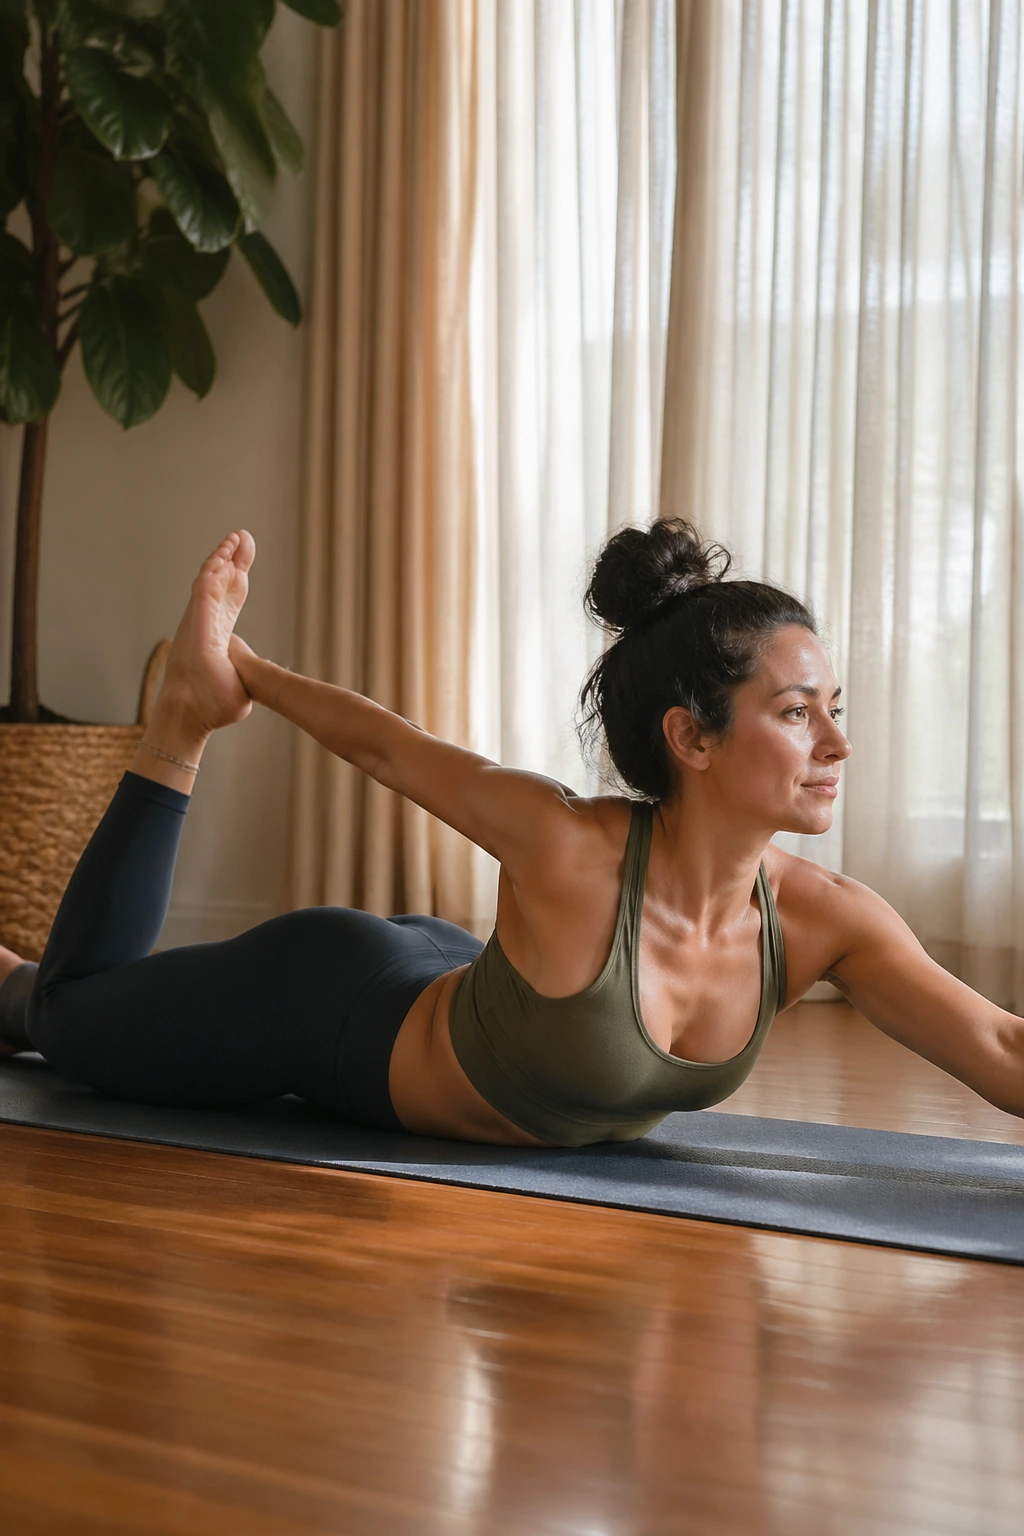
Half Bow is the version people often skip, which is a mistake. It teaches asymmetry control and lets you find one side of the body without the full weight of the second leg pulling the pose apart.
Lie on your belly, bend one knee, and reach the same-side hand back to hold the ankle. Kick the foot into the hand as the chest lifts slightly. The opposite arm can extend forward along the floor. Stay low enough that the breath remains smooth.
This pose is especially useful if one hip is tighter than the other. It gives you a chance to work each side separately, and that matters more than most people think. A lot of “back” issues are really uneven hip extension wearing a backbend costume.
The shape should feel active, not frantic. You’re looking for a steady arc and a clean line from the lifted foot through the sternum. If the shoulder shrugs or the neck jams, reduce the lift and keep the thigh grounded.
Half Bow is not a consolation prize. It’s a skill builder.
12. Wheel Pose
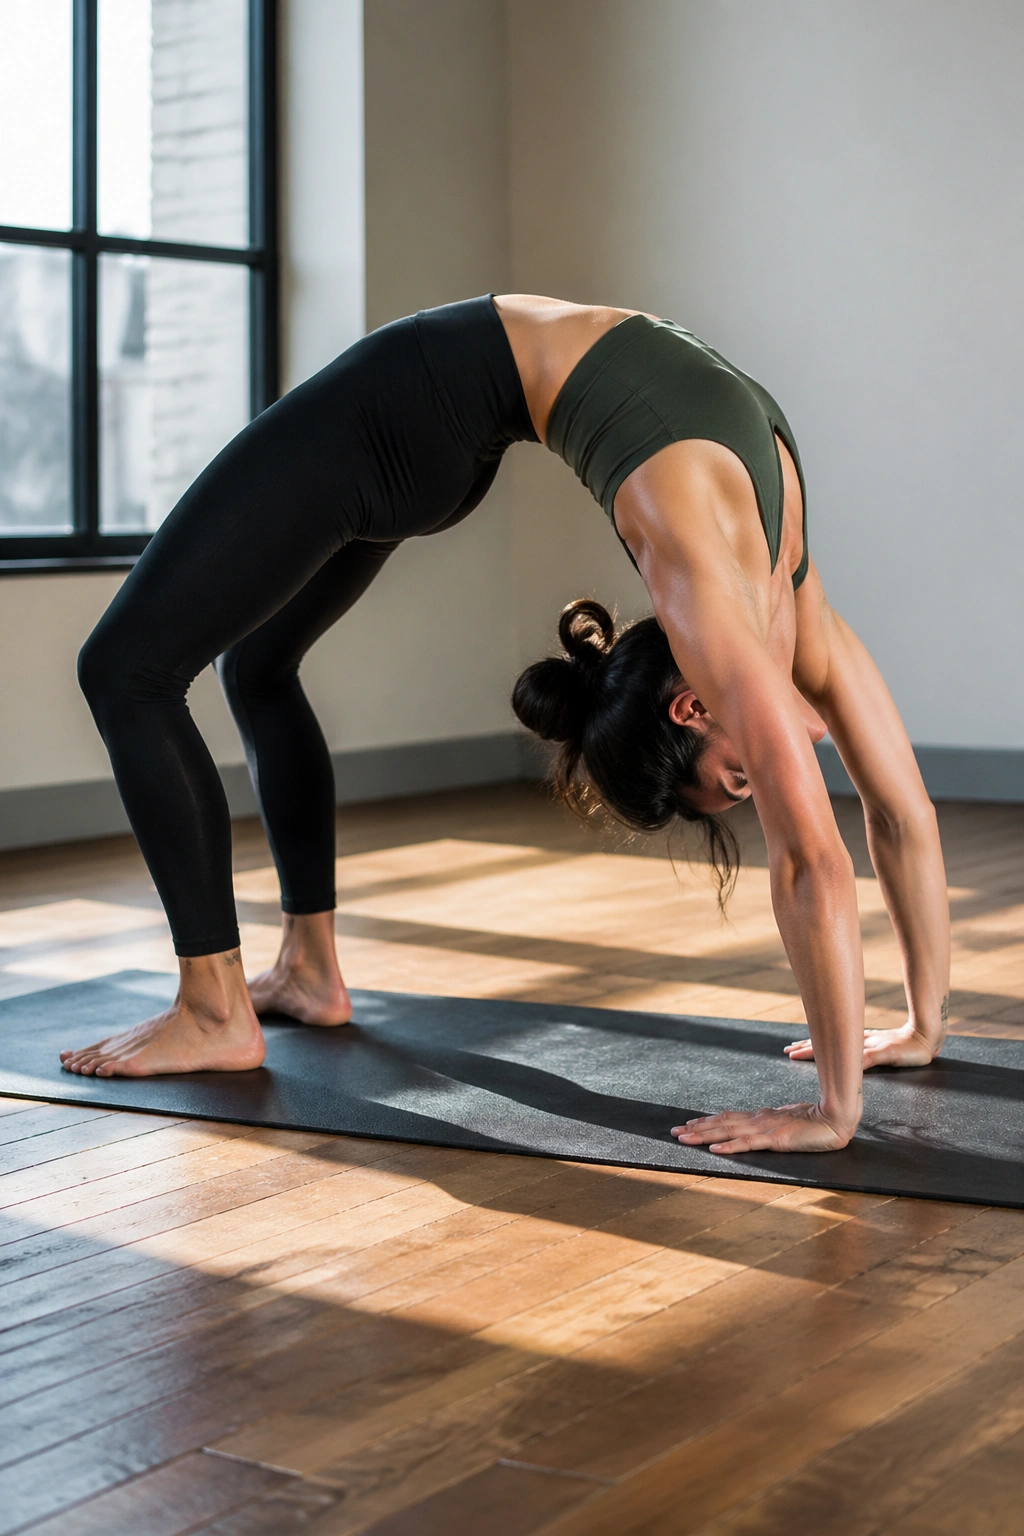
Wheel Pose is not a parade move. It’s a strength test with a lot of moving parts, and the setup matters more than the arch.
Lie on your back, bend the knees, and place the feet near the hips. Bend the elbows and set the hands by the ears with the fingers pointing toward the shoulders. On an exhale, press into the feet and hands and lift the pelvis, then the chest. Don’t rush the rise. Most bad Wheels come from throwing the hips up before the shoulders are ready.
Set-up that saves the pose
- Feet parallel, not turned out.
- Knees no wider than hip-width.
- Elbows pointing forward, not splaying open.
- Weight spread through the knuckles and the base of the fingers.
Wheel works best when the glutes, hamstrings, shoulders, and wrists all pull their weight. If one of those pieces drops out, the pose gets ugly fast. Sometimes the neck even starts to complain. That’s your cue to come down and build more slowly.
A block between the knees can help keep the legs honest. A wall behind the hands can give you a safer entry. Use both if you need them. Pride doesn’t count as a prop.
13. Wild Thing
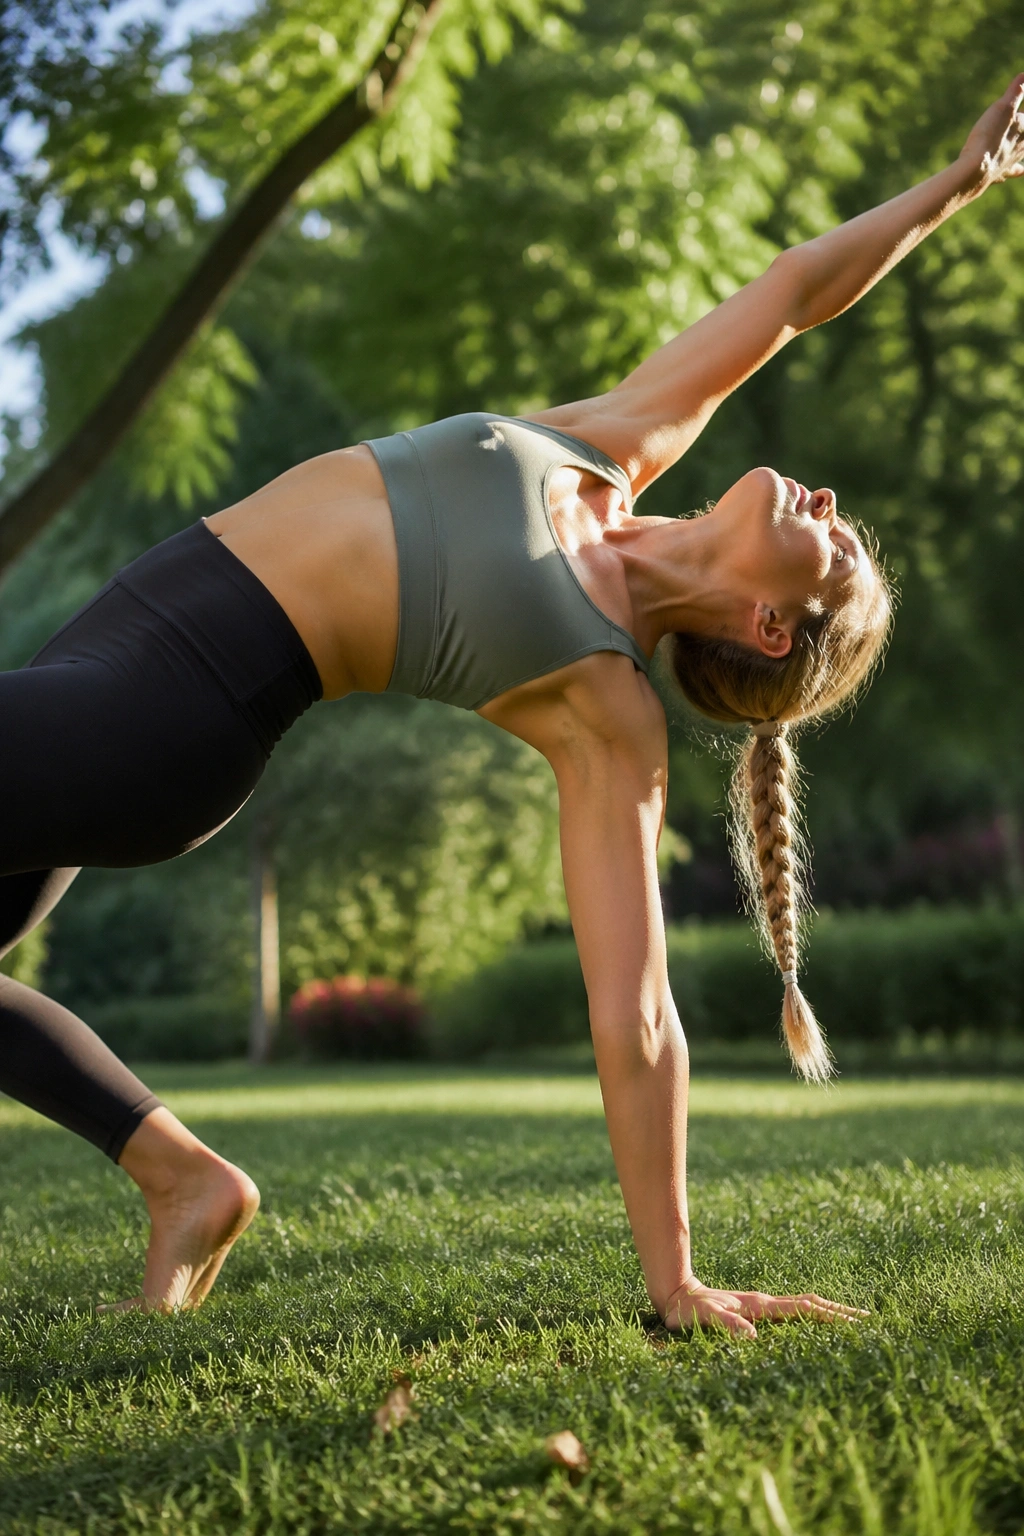
Wild Thing is the pose that convinces people yoga can be playful and demanding at the same time. It opens the chest, stretches the side body, and asks the shoulder girdle to stay steady while the hips rotate. That mix feels amazing when it works. It feels awkward when you rush it.
From Three-Legged Dog, bend the lifted knee, open the hip, and let the free foot step behind you so the toes land lightly on the floor. The supporting hand and foot need to stay rooted. The chest arcs up and sideways, not just back. If the shoulder feels dicey, skip it. Seriously.
Wild Thing is less about depth and more about orientation. You’re not chasing the biggest arch. You’re learning how the spine moves when it also has to rotate and stabilize.
A few useful details:
- Keep the supporting arm strong.
- Spread the lifted fingers.
- Let the bottom ribs widen.
- Exit slowly through Side Plank or Three-Legged Dog.
It’s a good pose for people who get bored with straight-line work. It’s also a pose that punishes sloppy shoulders, so there’s no point pretending.
14. Supported Fish Pose
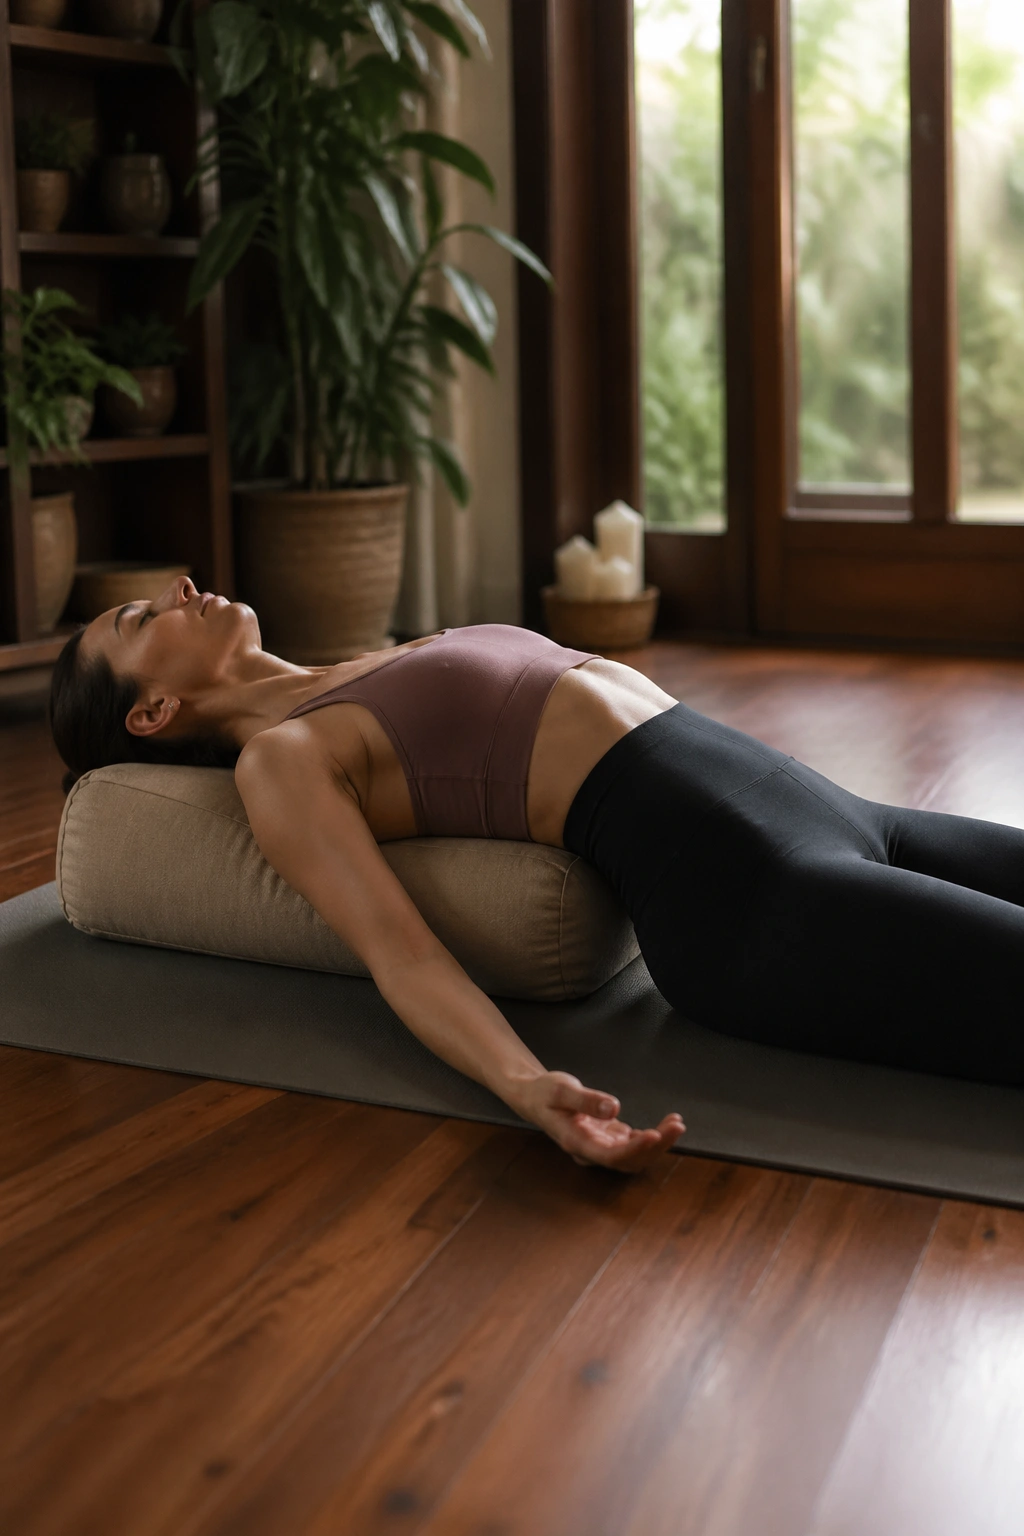
Supported Fish Pose is the one I’d keep if someone told me to choose a single chest opener for recovery days. It gives you a backbend without the muscular demand of the more athletic poses, and the props do the heavy lifting.
Place a bolster lengthwise along the spine, or use a rolled blanket under the upper back with another under the head if needed. Let the shoulder blades drape. The arms can rest out to the sides, palms up. Keep the legs relaxed. If the neck feels cranky, add more support under the head so the throat stays soft.
This pose opens the front body in a way that feels almost unfair. The ribs widen. The chest spreads. The breath gets deeper without effort. It is also a useful counter-shape after deeper work like Camel, Wheel, or Bow.
Best ways to prop it
- One block or bolster under the upper back.
- A folded blanket under the head if the chin tips too far up.
- Another blanket under the knees if the low back feels tugged.
- Stay for 2 to 5 minutes if the body settles.
Supported Fish is where a lot of practices should end, honestly. It gives the nervous system time to catch up.
15. Standing Dancer Pose
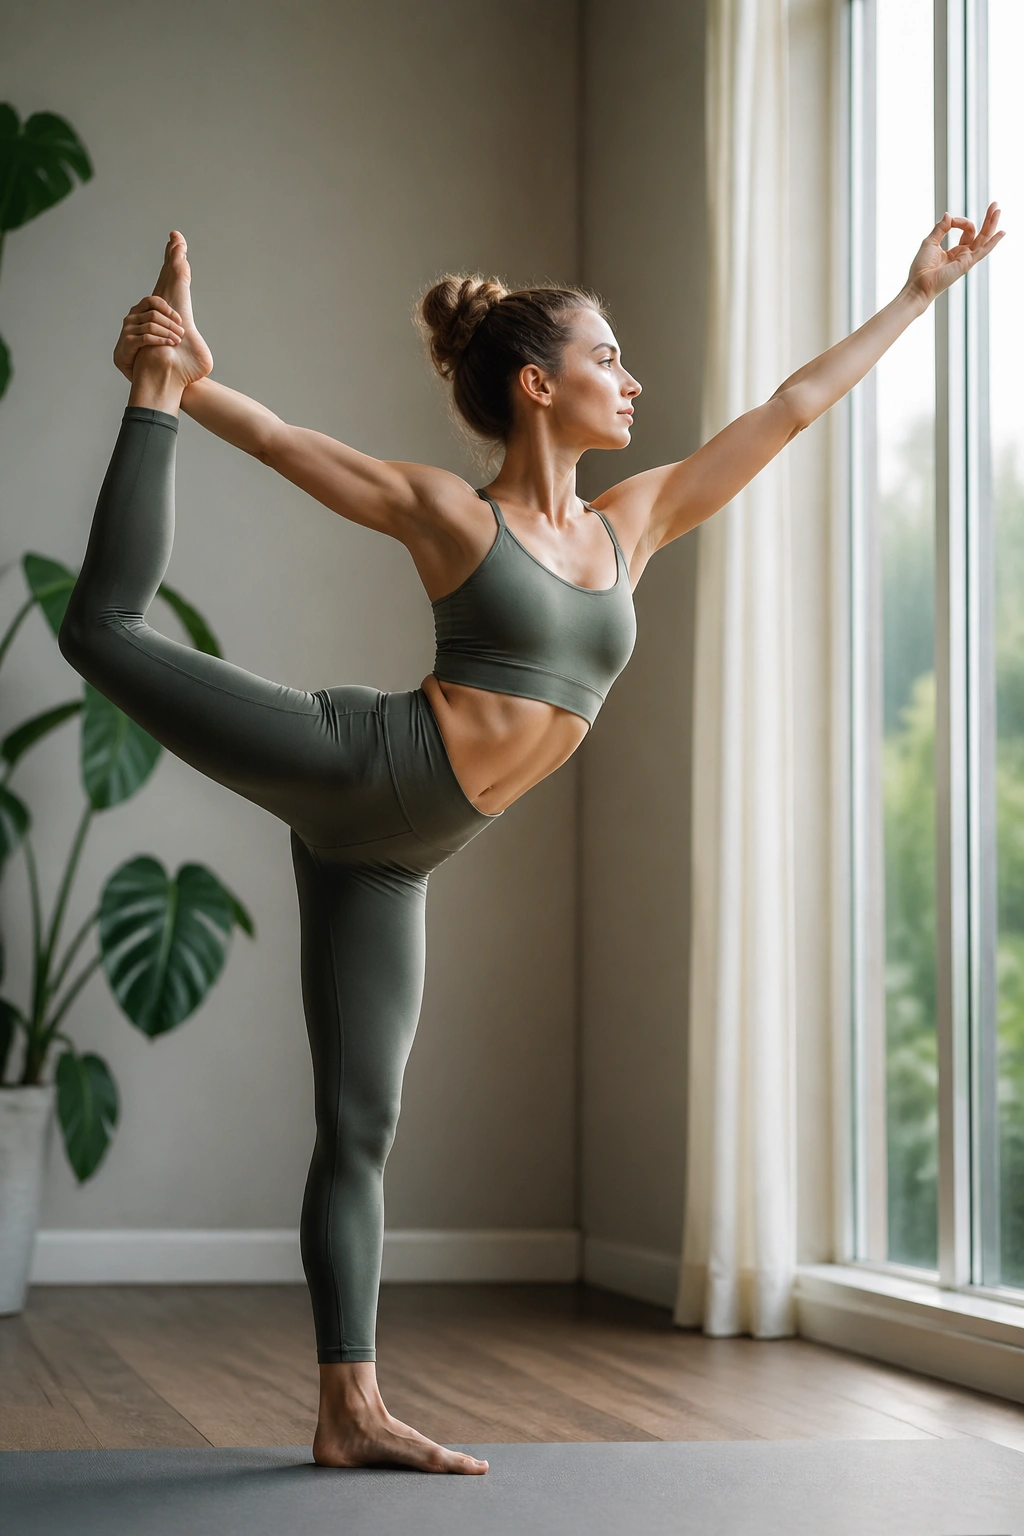
Standing Dancer Pose is a backbend with balance baked in, which means it will show you exactly how steady your hips and shoulders really are. There’s no floor to hide on. Just one leg, one hand, and a moving chest.
Stand tall, bend one knee, and catch the inside of the foot from behind with the same-side hand. Press the foot into the hand as you tip the torso forward and lift the back leg. The free arm can reach forward or out to the side for balance. A wall nearby is not weakness. It’s intelligence.
The best version of Dancer has a lifted chest and a long spine, not a collapsed rib cage and a wild kick of the foot. Keep the standing knee soft but stable. Let the pelvis stay square enough that the low back doesn’t twist into a fight.
This pose works well at the end of a sequence because it asks for all the things backbends need anyway: hip extension, shoulder opening, focus, and breath control. You’ll know pretty fast if your earlier poses did their job.
The Bottom Line
A strong open spine practice doesn’t start with the deepest pose. It starts with the cleanest one. Sphinx, Cobra, Locust, Bridge, and Supported Fish can teach more about backbending than a flashy Wheel done with sloppy form.
The main idea is simple. Let the thoracic spine move, keep the hips honest, and stop chasing shape when the breath gets tight. That alone fixes a lot.
If you string these poses together in a sensible order — floor first, then kneeling, then standing, then rest — the back usually responds better than it does to random stretching. And that’s the part people forget. The spine likes patience.
