



Pelvic strength is not about clenching harder. It’s about having enough control to lift, soften, stand, and move without that uneasy wobble low in the body. These yoga poses for pelvic strength and confidence work best when the breath, hips, glutes, and deep core stop fighting each other and start doing their jobs together.
A lot of people hear “pelvic floor” and think only of tiny muscle squeezes. That is a narrow view, and it misses the part that matters most in real life. If you want more steadiness when you walk up stairs, more control when you stand from the floor, or a little less panic in the lower belly when you brace for effort, the answer usually sits in a smarter mix of strength, mobility, and breath.
The pelvic floor is not isolated. It works with the diaphragm, the inner thighs, the lower belly, and the muscles around the hips. When one part overworks, another part tends to go quiet. That is why some people feel better from one well-done bridge, while others need a wider squat, a balance pose, or a long exhale on the floor.
Bridge Pose is where I start, and for good reason.
1. Bridge Pose for Pelvic Strength
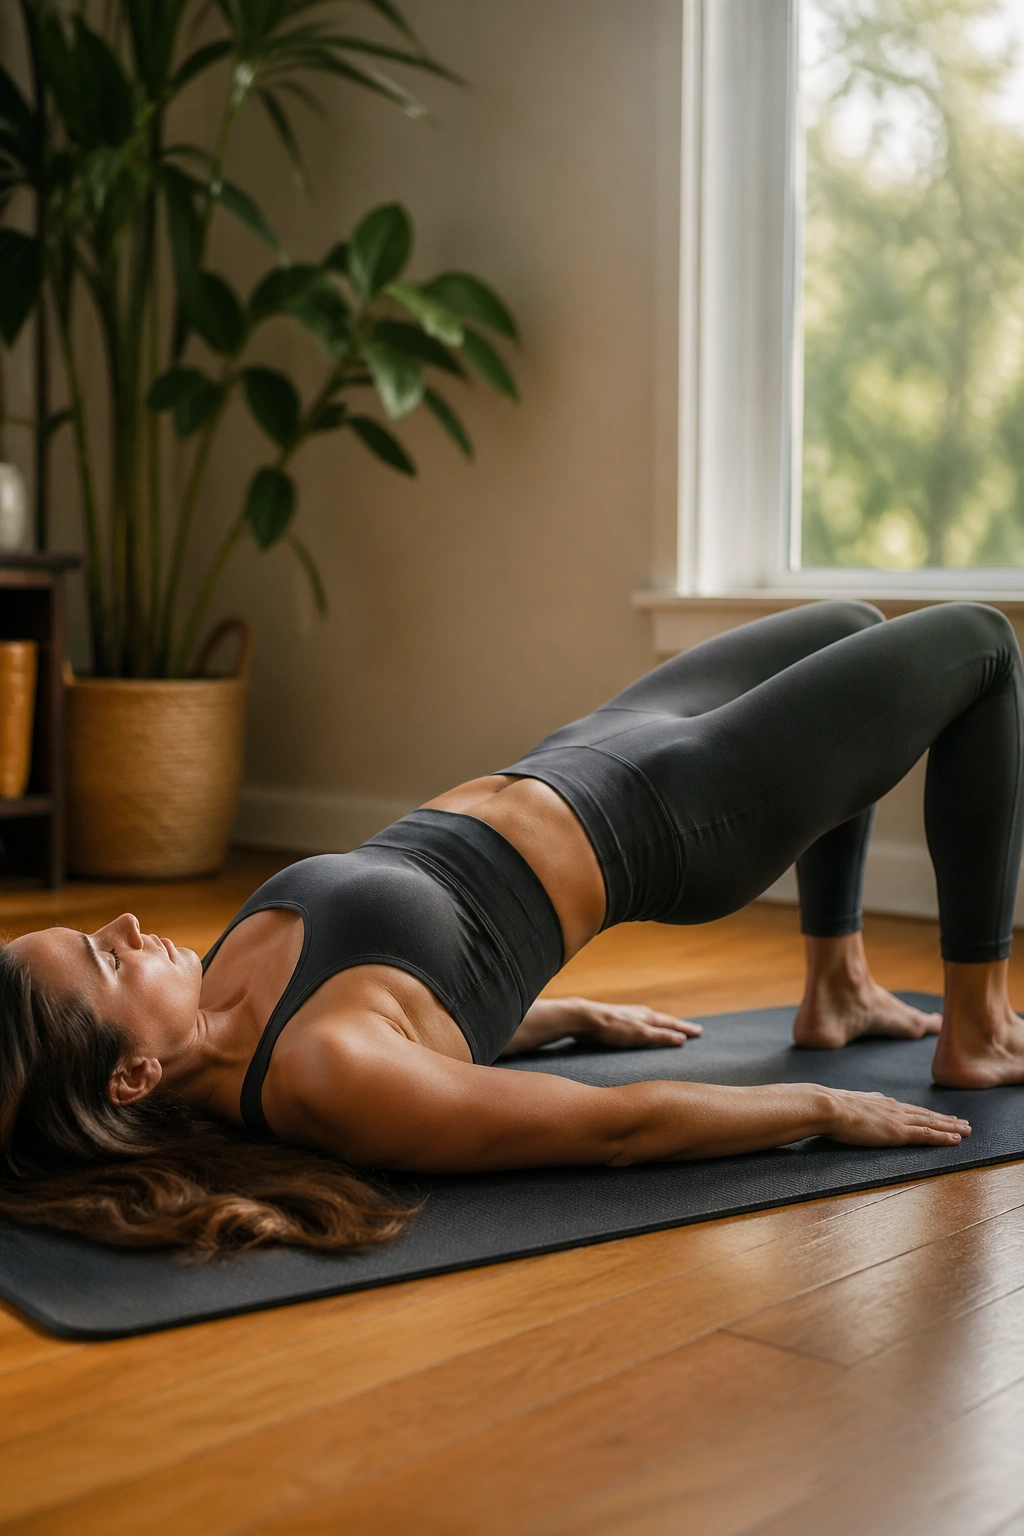
Bridge Pose looks plain at first glance, which is part of why people underestimate it. Lie down, bend your knees, press through your feet, and lift your hips — but do it with enough control that your lower back does not do all the work. The glutes should wake up. The hamstrings should help. The pelvic floor should feel like it is responding, not locking down for dear life.
That last part matters. A strong pelvic floor is responsive, not frozen. In Bridge Pose, you are training that response by coordinating a gentle lift on the exhale with a slow, deliberate lowering on the inhale. If you rush the lift, the pose turns into a backbend. If you jam the ribs up and squeeze the butt hard, you lose the subtle work that makes this pose useful.
Set your feet hip-width apart, close enough that your fingertips can just brush the heels. Press evenly through the big toe mound, little toe mound, and heel. Lift for 3 to 5 breaths, lower slowly, and repeat 3 rounds. If your low back pinches, bring your feet a little closer and reduce the height of the lift. Higher is not better here.
One clean bridge done with attention beats ten sloppy ones. Every time.
2. Chair Pose for Pelvic Strength and Confidence
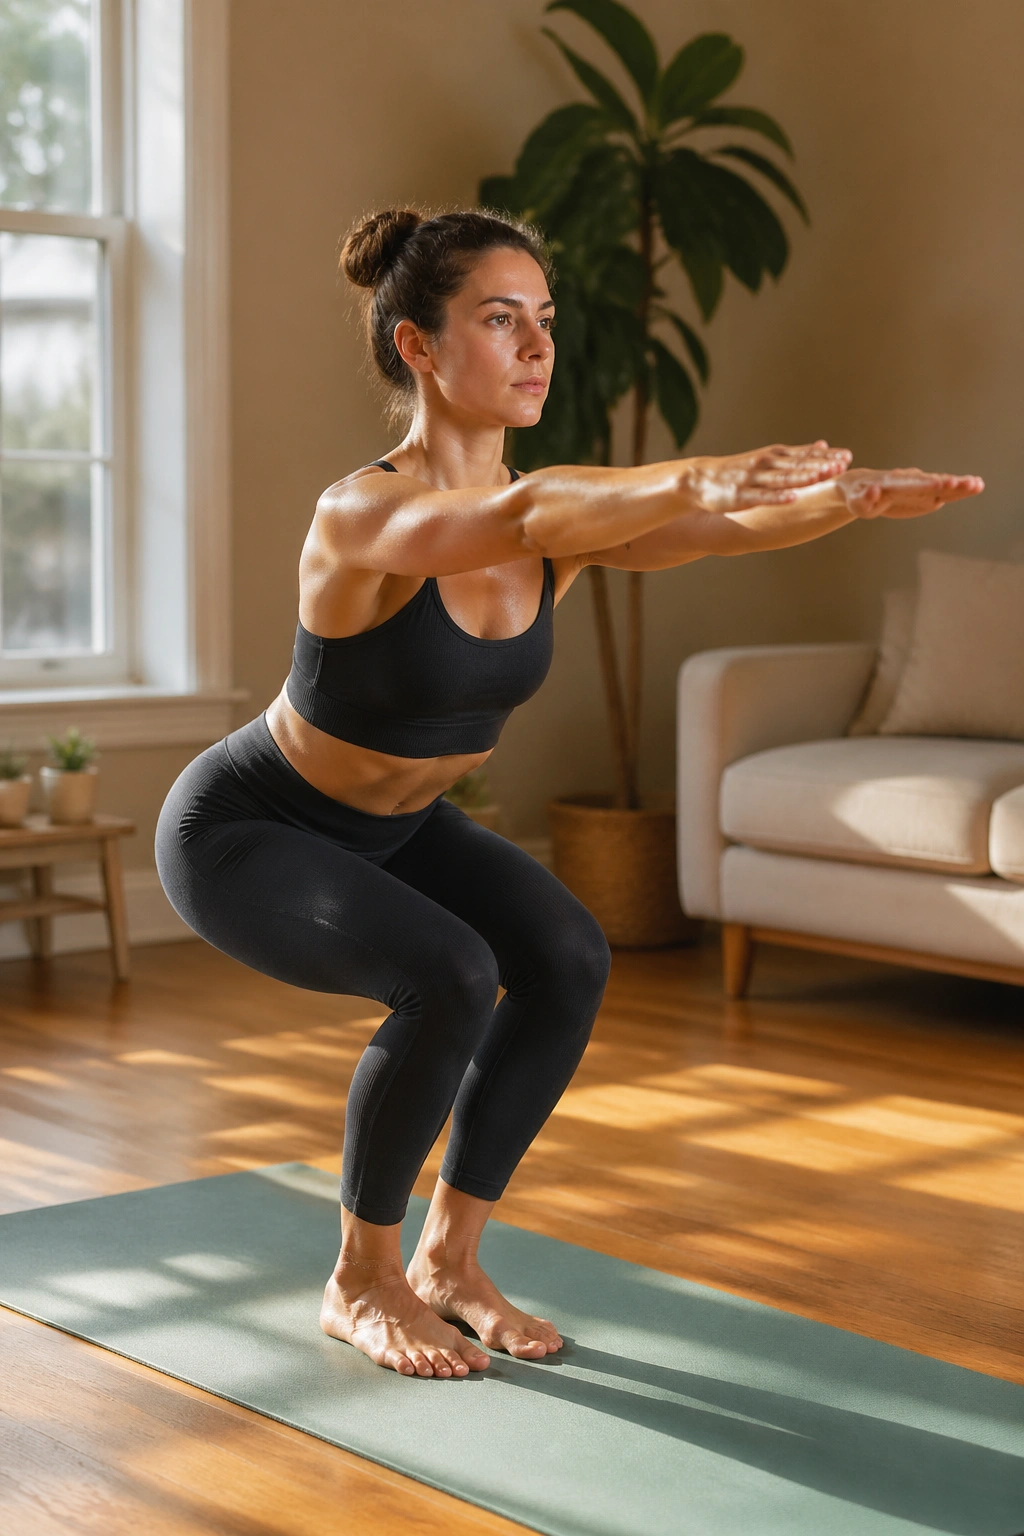
Why does Chair Pose show up so often in pelvic work? Because it teaches pressure control under load, and most people need more of that than they think.
Sit your hips back as if you’re reaching for a chair that keeps moving away. Keep your knees tracking over the second and third toes, not collapsing inward, and let your weight settle into the heels without peeling the toes off the mat. The pelvic floor gets a useful job here: stay awake while the thighs and glutes share the load.
What to Feel
Your ribs should stay stacked over your pelvis, not flaring forward. That’s the part many people miss. When the ribs pop up, the lower back takes over and the whole pose gets messy fast.
How to Practice It
- Hold for 20 to 30 seconds, then stand tall and reset.
- Repeat 3 times.
- On the exhale, feel a light lift through the lower belly and pelvic floor.
- Keep the jaw loose. If your face is grimacing, you’re probably gripping too hard.
Do not tuck the tailbone so aggressively that the lower back rounds like a turtle shell. A slight sit-back is enough. You want strength, not a collapsed spine.
Chair Pose is honest. It tells you exactly how much support you’re borrowing from the pelvis.
3. Goddess Pose for Pelvic Strength
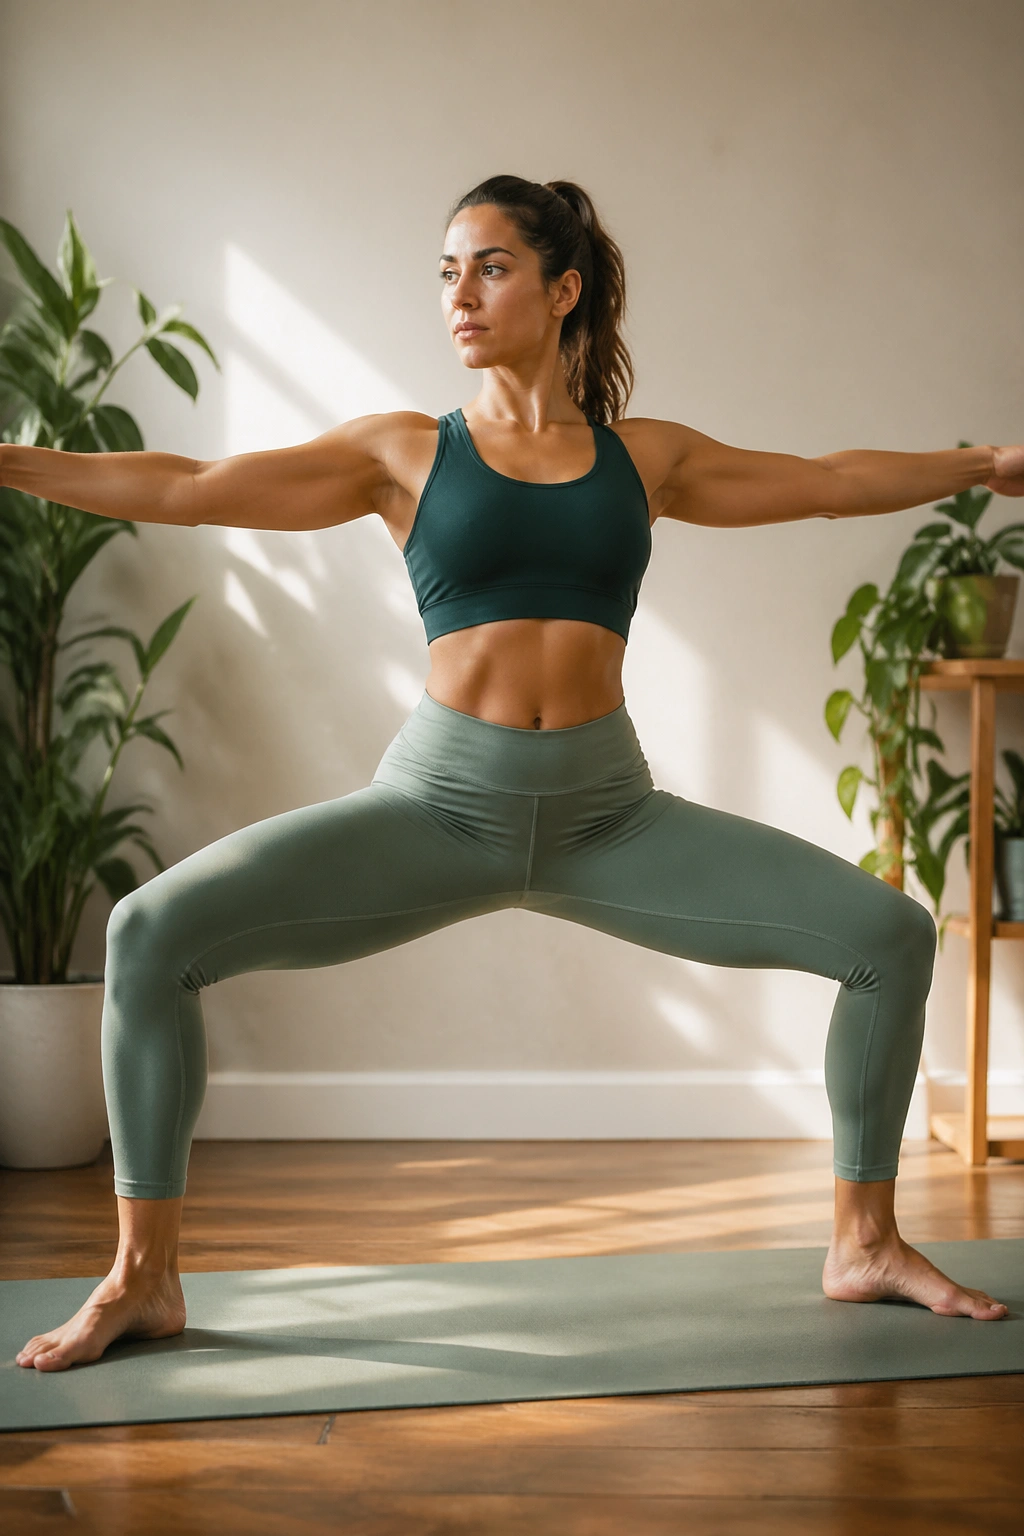
Goddess Pose feels a little more generous than Chair Pose, and I mean that in the best way. The wide stance gives your hips room to open while the thighs and inner legs still have to do real work. It is one of the clearest poses for people who want pelvic strength without the cramped feeling that some narrow stances create.
Stand with your feet wider than your hips, toes turned out about 45 degrees, and knees bent over the middle toes. Sink only as low as you can keep your pelvis steady. If your knees wobble or your lower back arches, come up a few inches. That is not failure. That is smart editing.
The inner thighs matter here. They help support the pelvis from the front and side, which is why this pose often feels grounding in a way that surprises people. Hold for 5 slow breaths, stand up, and repeat 4 to 6 times. If you want more challenge, pulse an inch down and up for 8 counts, then hold steady again.
A lot of people feel more confident in Goddess than in tight standing poses because the stance is wide enough to breathe in. That sounds small. It isn’t.
4. Malasana for Pelvic Strength and Mobility
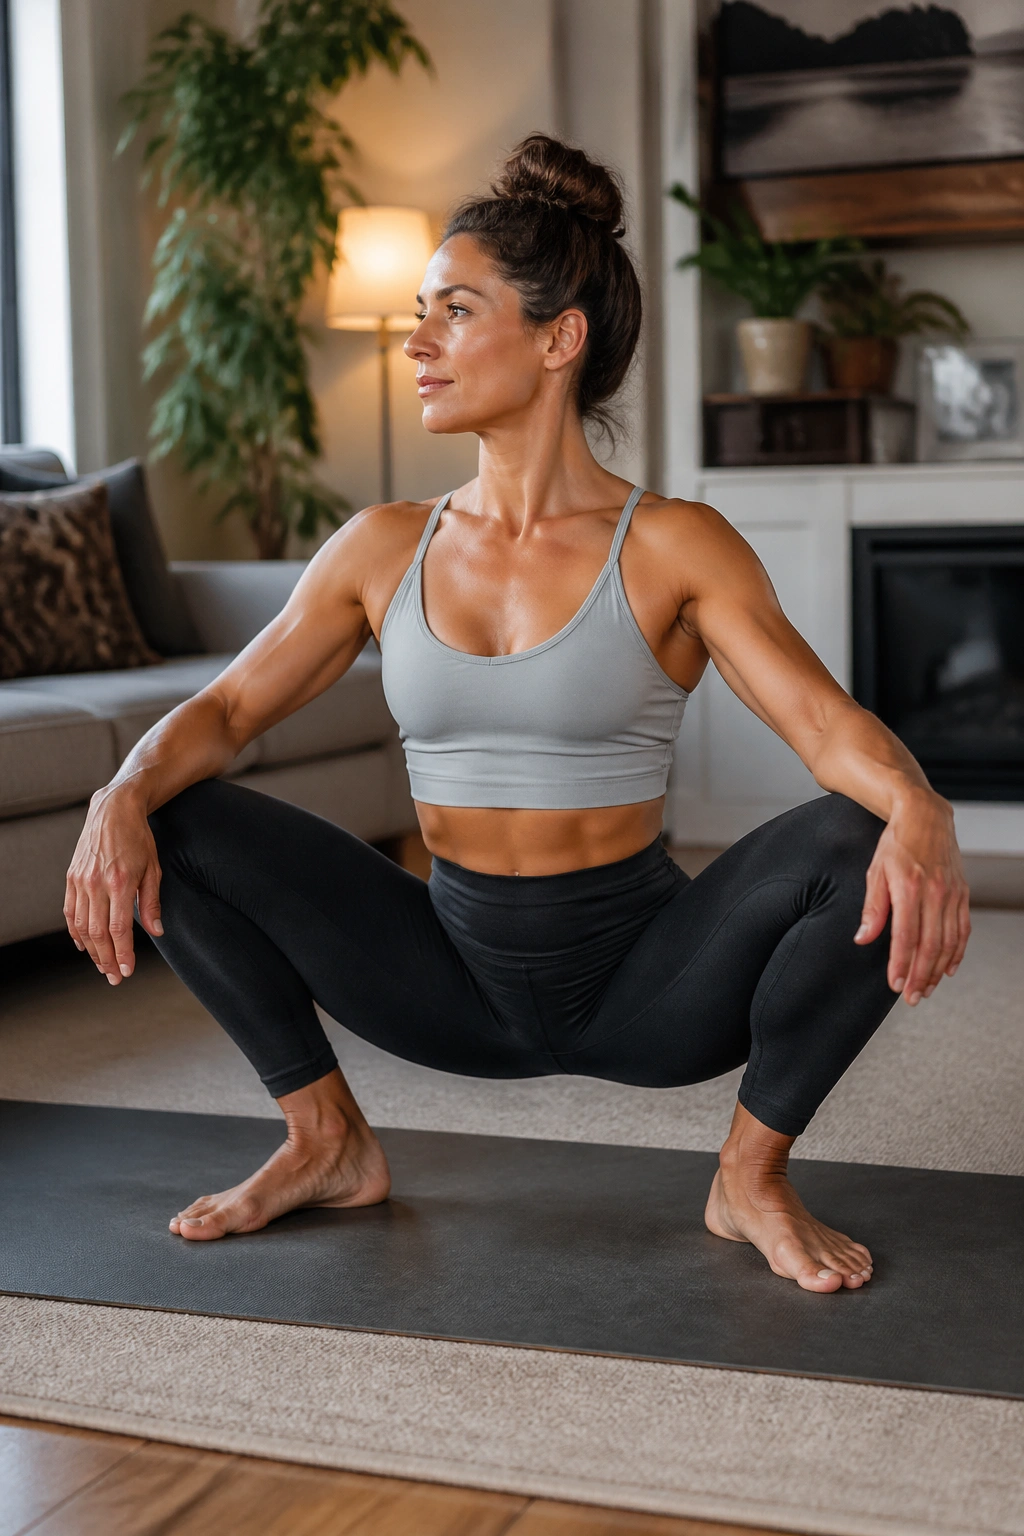
A deep squat is one of the most useful shapes a human body can learn, and Malasana gives you that pattern without the drama of a gym floor. It asks the hips to open, the ankles to soften, and the pelvic floor to lengthen and respond instead of bracing at the first sign of effort.
If your heels lift, place a folded blanket under them or keep a rolled mat nearby for support. Sit between the thighs, not on top of your heels, and let your spine stay long. Some people fold forward a little. Some stay upright with palms at the chest. Both versions count.
A good squat should feel like space, not strain. That is the point. When the pelvis can drop and rise through a full range, standing work tends to feel less awkward later. You also get a real test of whether your hips are helping or cheating.
A few clean cues help a lot:
- Press the knees gently apart with the upper arms.
- Keep the chest lifted enough that you can breathe through the ribs.
- Let the tailbone sink without collapsing the lower back.
- Exit slowly by pressing through the feet and lifting the chest first.
Malasana is not flashy. It is useful in the old-fashioned sense of the word.
5. Bound Angle Pose for Gentle Release and Inner Support
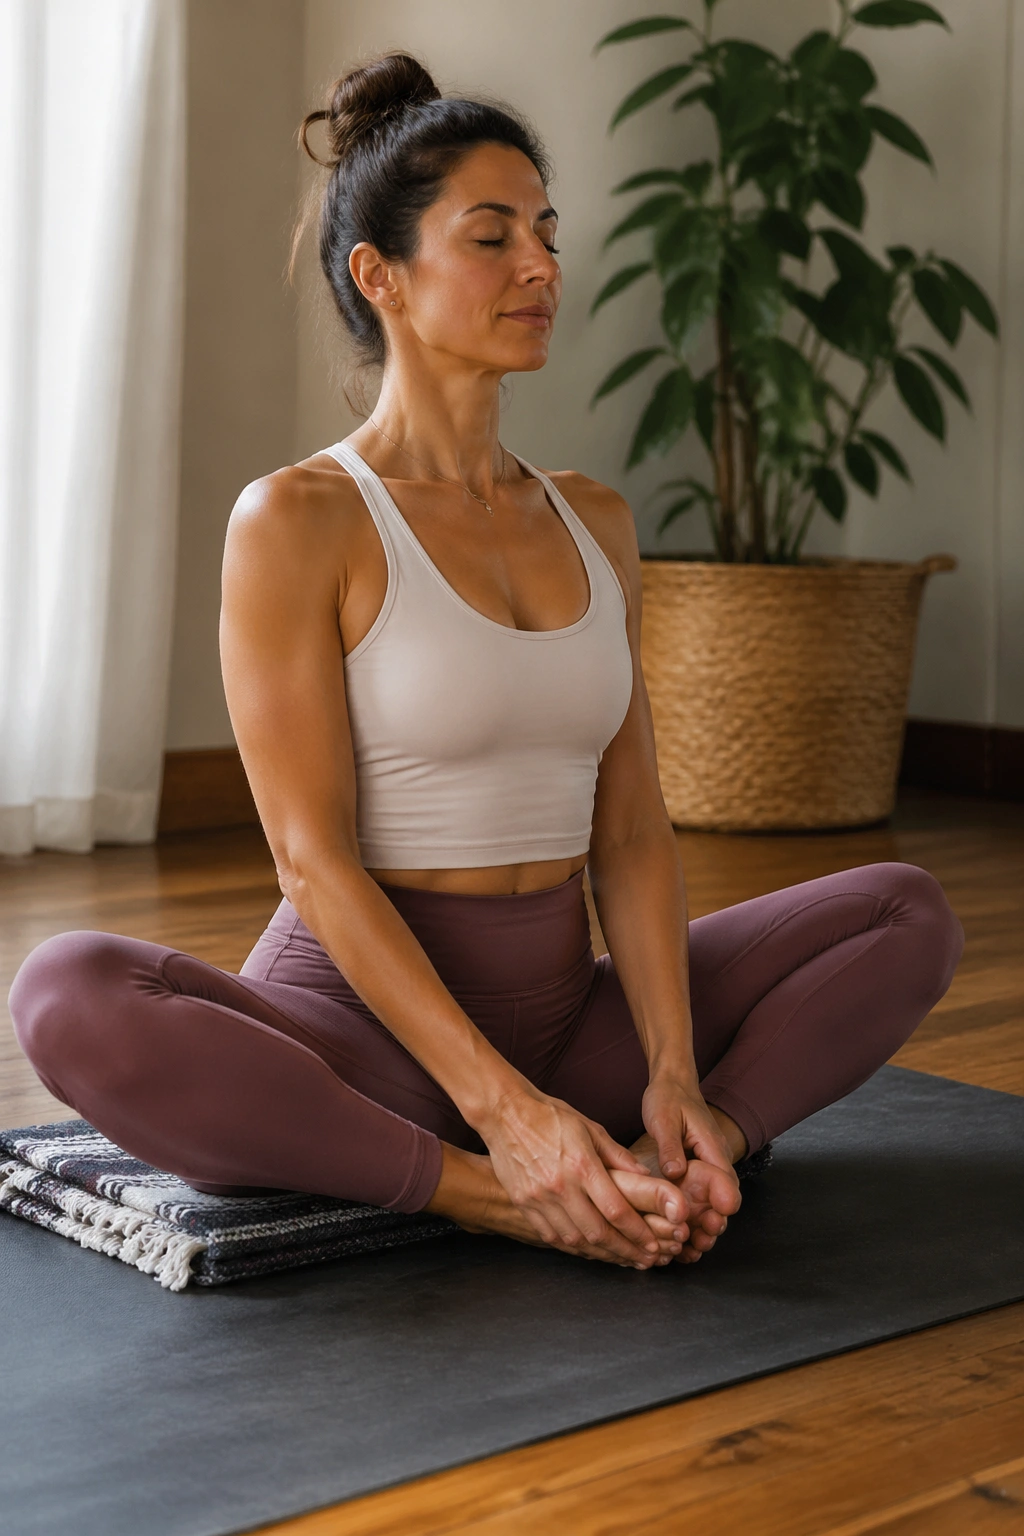
Bound Angle Pose looks restful, but don’t dismiss it too fast. The inner thighs and groins are part of the pelvic support system, and when they stay tight or sleepy for too long, the pelvis often feels off balance. This pose helps you find a middle ground between gripping and collapsing.
Sit on a folded blanket if your lower back rounds. Bring the soles of your feet together and let the knees fall open only as far as they can without strain. Hold the ankles or feet, then breathe into the sides and back of the ribs for 5 to 8 breaths. If you like a little more work, hinge forward from the hips with a long spine.
One useful detail: keep the feet a comfortable distance from the pelvis. When they sit too close, the knees can pull into the groin and make the whole shape tense. A few inches farther away often changes the whole experience.
This pose is a good reminder that confidence is not always loud. Sometimes it looks like sitting still, breathing well, and letting the body stop guarding itself for a minute.
6. Low Lunge for Hip Flexors and Pelvic Stability
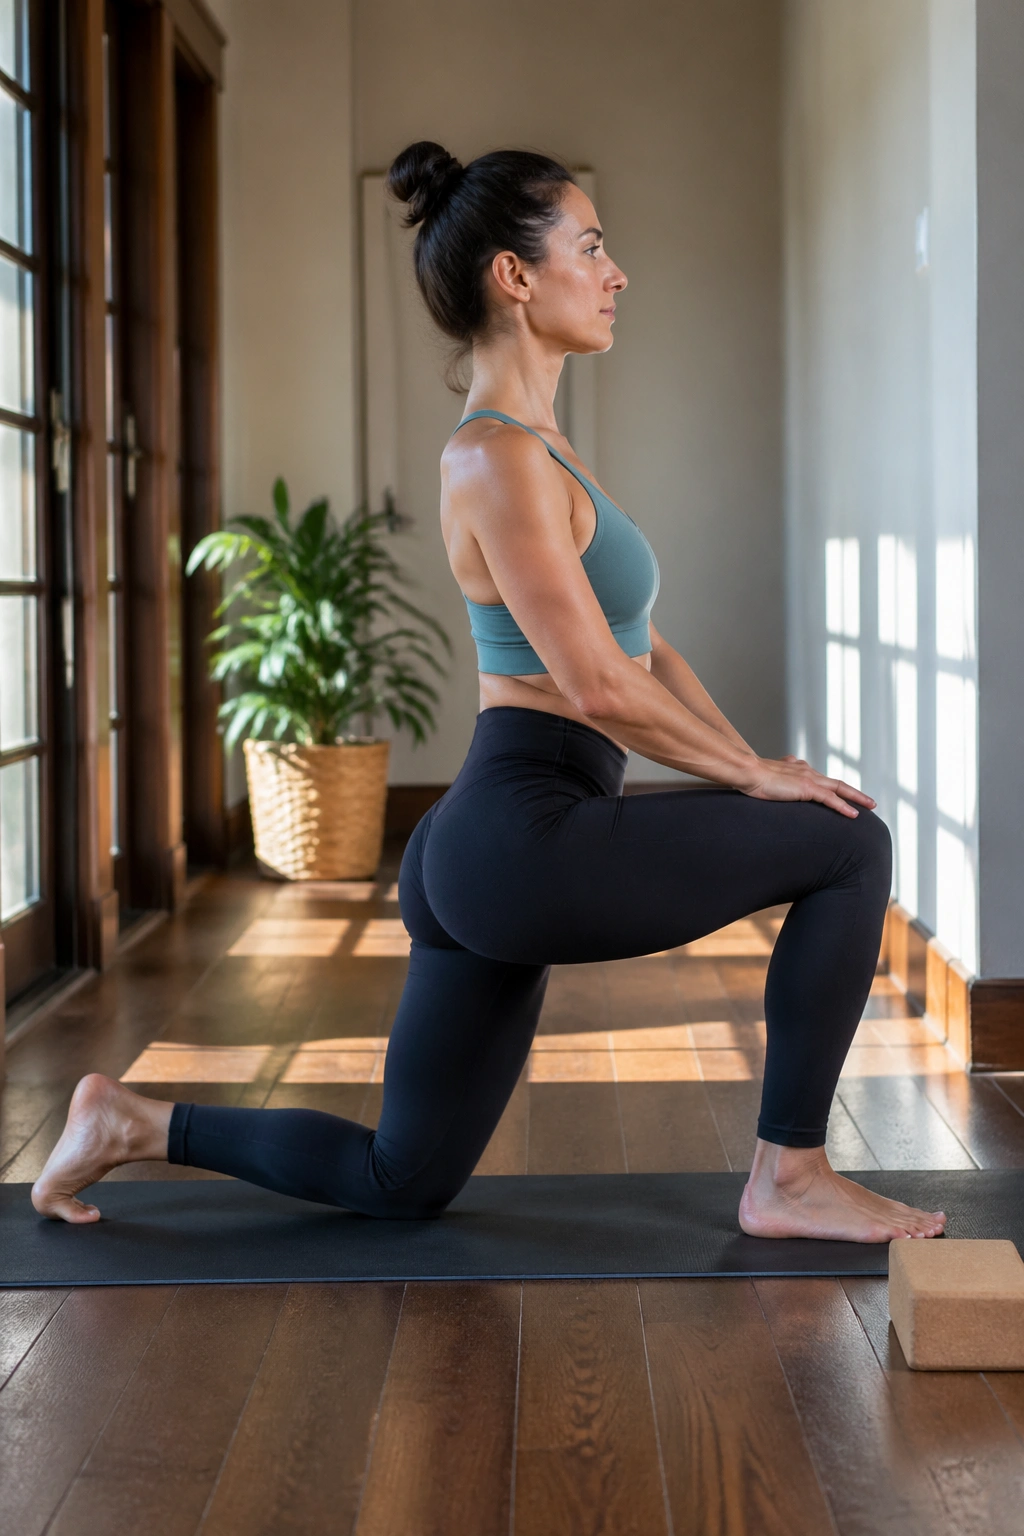
Why does a low lunge help pelvic strength? Because the hip flexors and the deep stabilizers around the pelvis have to negotiate with each other, and that negotiation shows up in almost every standing pose you do.
Drop the back knee to the floor, place both hands on blocks if the floor feels far away, and slide the front knee over the ankle. Keep the front heel planted and the back toes tucked under. Then do the part people skip: breathe. A long exhale lets the front of the pelvis soften while the back leg stays active.
How to Feel the Right Stretch
You should feel the stretch in the front of the back hip, not a hard pinch in the low spine. If the lower back compresses, tuck the back toes a little more, lift the torso, and reduce the depth of the lunge. A tiny adjustment often fixes what brute force cannot.
Useful Practice Notes
- Hold 5 to 8 breaths per side.
- Keep the front thigh steady instead of sinking inward.
- Press the back heel away to wake up the glute.
- Use blocks early. They make better form more likely.
Low Lunge is one of those poses that looks simple from a distance and gets humbling once you actually settle into it. That is a good sign.
7. Crescent Lunge for Balance and Pelvic Control
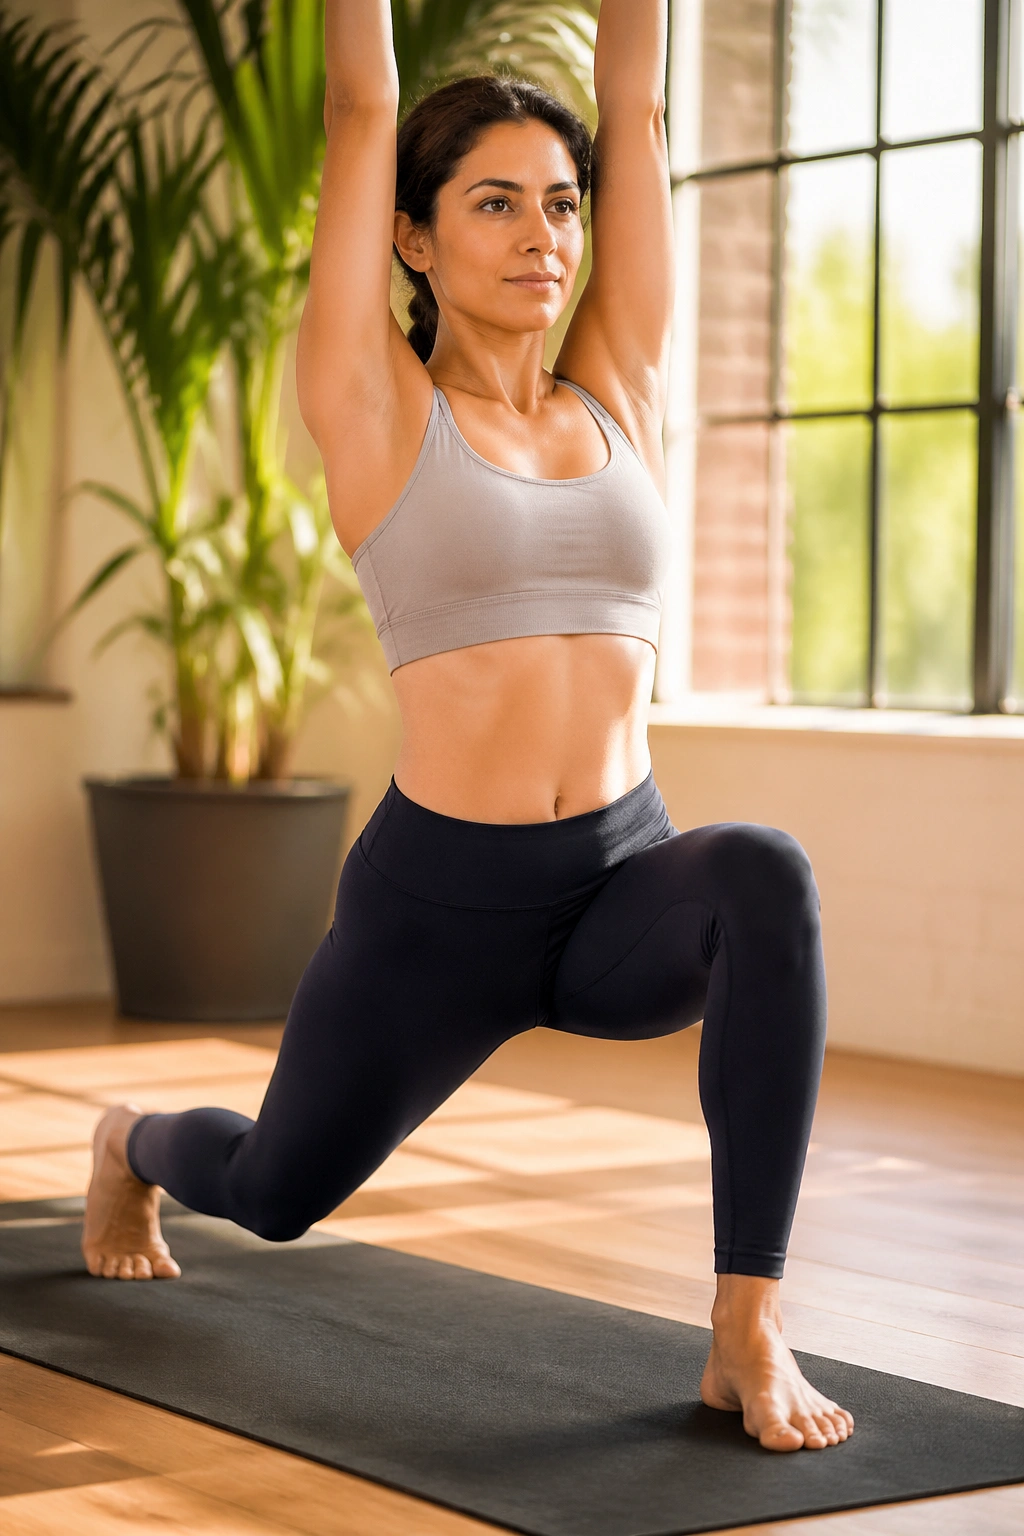
Crescent Lunge is where strength starts to feel athletic. One foot is grounded, the other leg reaches back, and the pelvis has to stay centered while the torso stays tall. That combination trains a kind of calm strength that carries over into walking, stair climbing, and even carrying groceries without twisting like a towel.
Start from Low Lunge, lift the back knee, and keep the feet on railroad tracks rather than a tight rope line. The front knee stays stacked over the ankle. The back leg reaches long, but the low back should not arch just to make the pose look bigger.
There’s a trap here. People often think more bend means more work. Not true. A cleaner, shorter stance with a stacked pelvis can challenge the core and pelvic floor more than a sloppy deep lunge.
Try this pattern:
- Hold for 4 breaths on each side.
- On the exhale, feel the lower belly draw in a little.
- Keep the front hip from rolling outward.
- Fix your gaze on one point ahead. It helps more than people admit.
Crescent Lunge teaches you to stay composed while one side of the body does the stabilizing. That is confidence training, plain and simple.
8. Warrior II for Grounded Strength
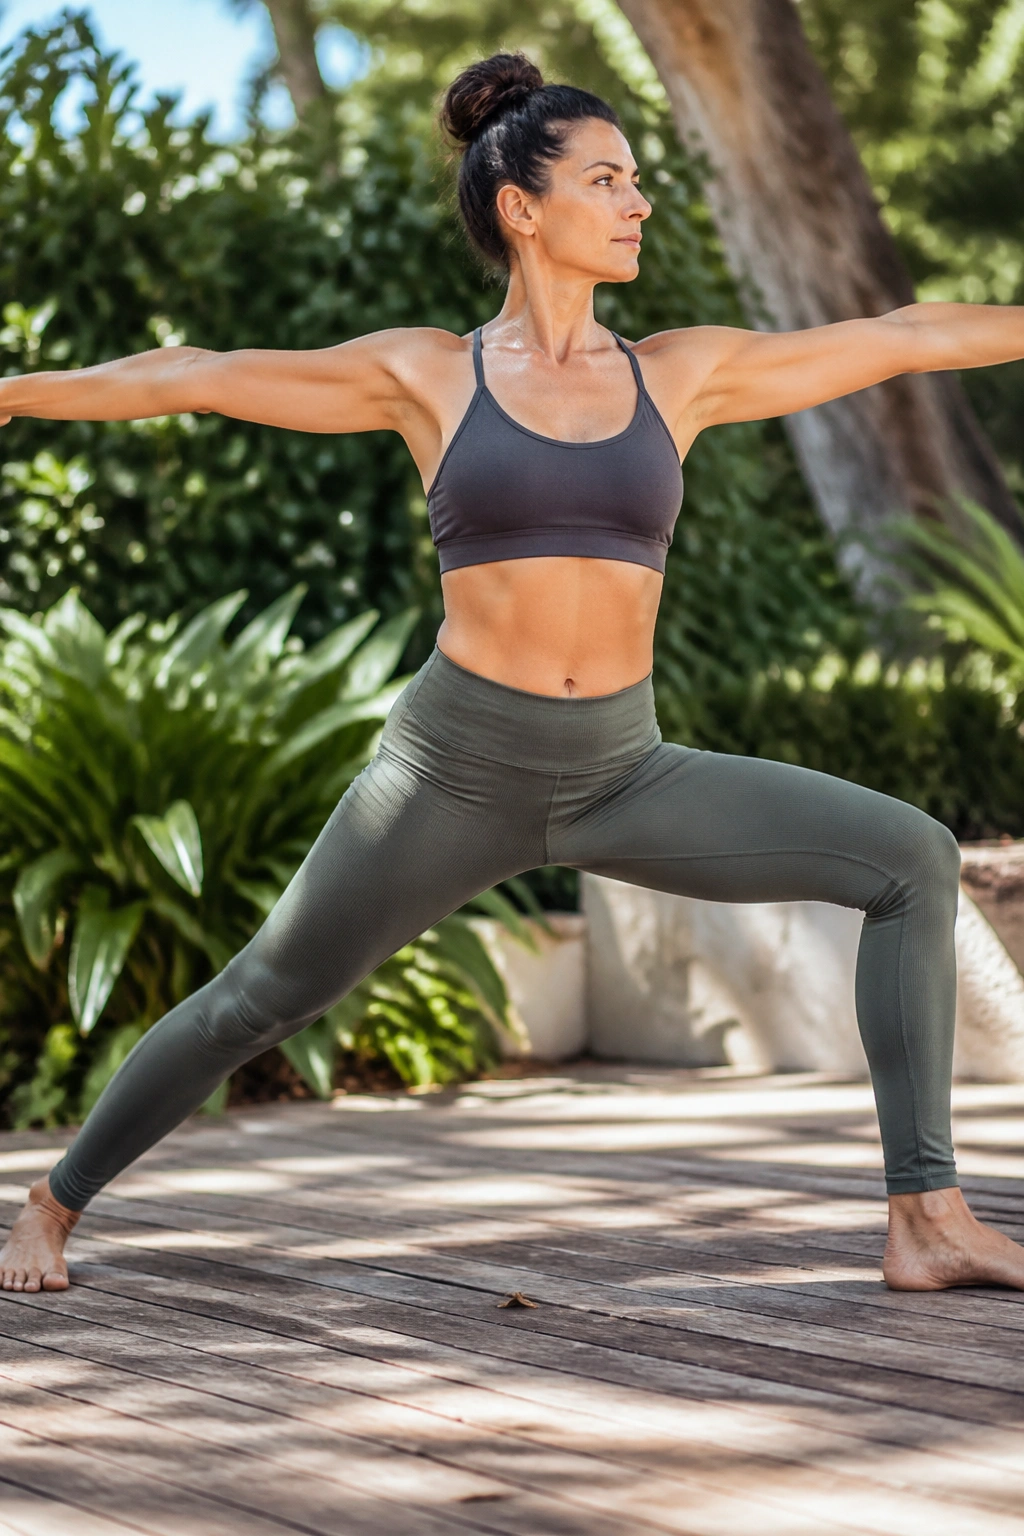
Warrior II is one of the best poses for learning how to spread effort across the whole body without overloading the pelvis. The front thigh works. The back leg works. The pelvis stays open but controlled. Nothing feels wasted.
Step the feet wide, turn the back foot slightly in, bend the front knee, and stretch the arms out at shoulder height. The front knee should track over the middle toes, and the front thigh should feel like it is carrying load without sinking inward. Keep the torso centered between the legs rather than dumping forward.
What I like about Warrior II is the honesty of the back foot. If you collapse that outer edge, the whole pose goes slack. Press it down. Feel the outer hip wake up. That little detail changes how the pelvis organizes itself.
Hold for 5 to 8 breaths, then straighten the front leg and switch sides. If your shoulders creep up toward your ears, soften them. If your lower back grabs, reduce the bend in the front knee. You do not need a giant lunge to get value from the pose.
Warrior II gives you the feeling of standing your ground without stiffening your body into a wall.
9. Side Angle Pose for the Side Body and Hips
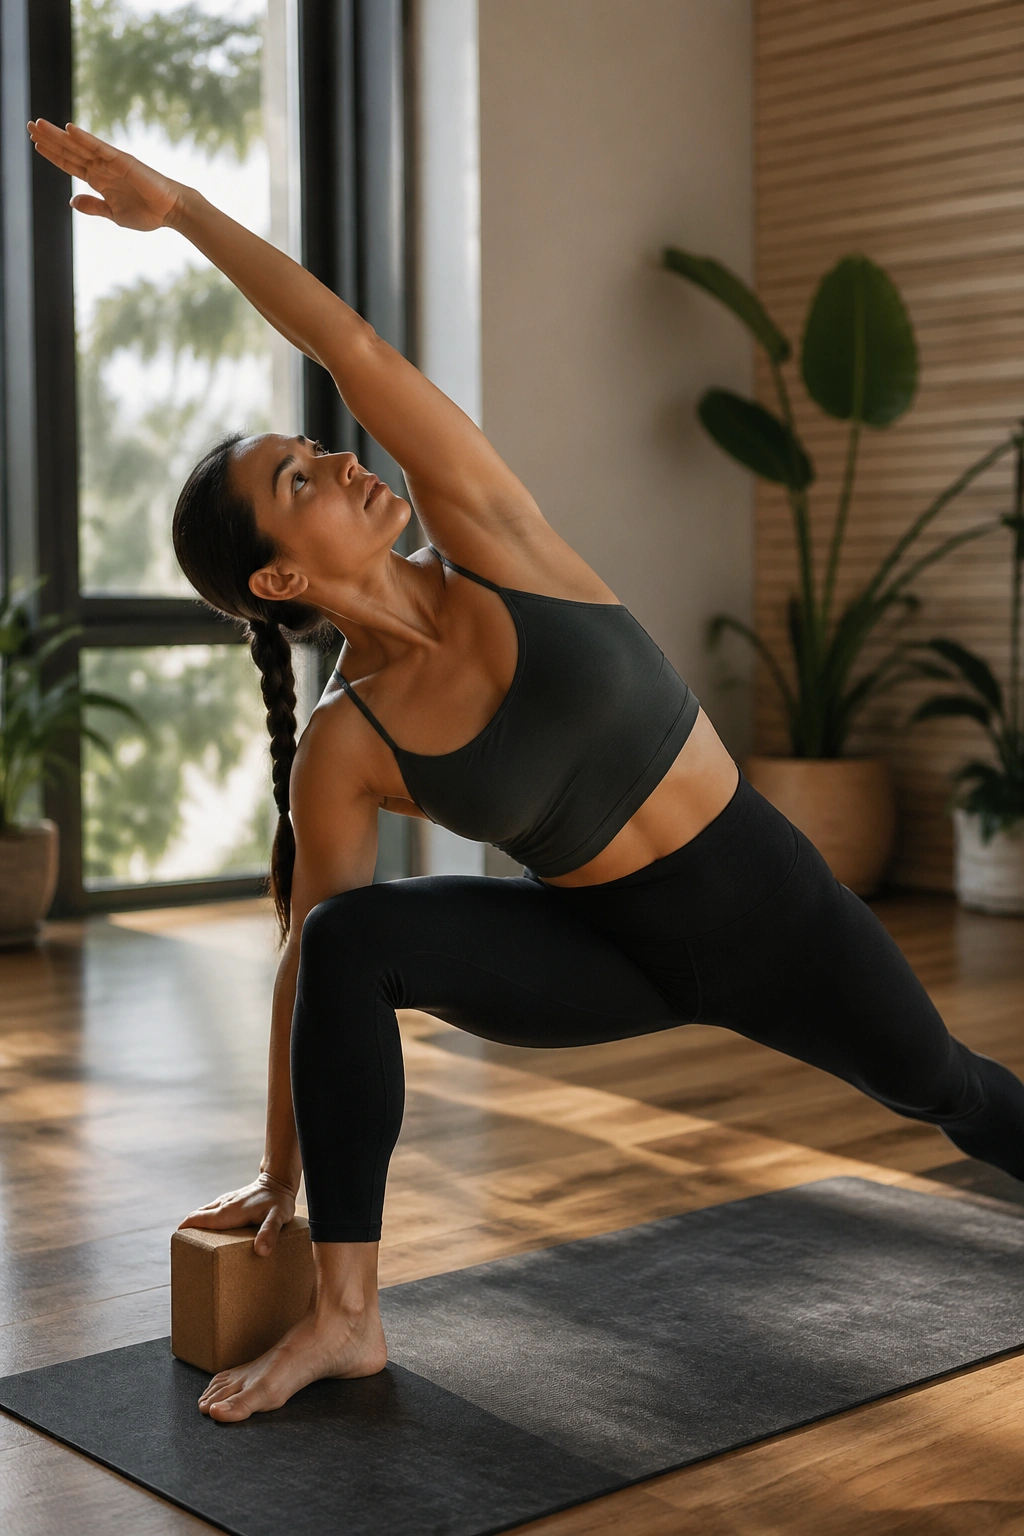
Side Angle Pose is a strong shape because it asks the pelvis to stay honest while the torso reaches in a different direction. That’s a fancy way of saying it is easy to cheat. Most people either collapse into the bottom hip or twist the chest open before the legs are ready.
Set up from Warrior II. Rest the forearm lightly on the front thigh or place the hand on a block outside the front foot. The back leg stays active, the top arm reaches long, and the front knee stays bent enough to feel stable. If you lose the front heel, come up higher.
The side body does a lot of work here. So do the adductors and obliques. When those muscles cooperate, the pelvis feels more centered, and that matters for walking and standing balance as much as it does for yoga.
A useful comparison: Warrior II spreads you wide; Side Angle asks you to keep that width while folding the body around it. That’s a different kind of control. More demanding, too.
Take your time with the exit. Press into the back foot, lift the torso, and reset the front leg before switching sides. Sloppy exits teach sloppy habits.
10. Tree Pose for Stable Pelvic Alignment
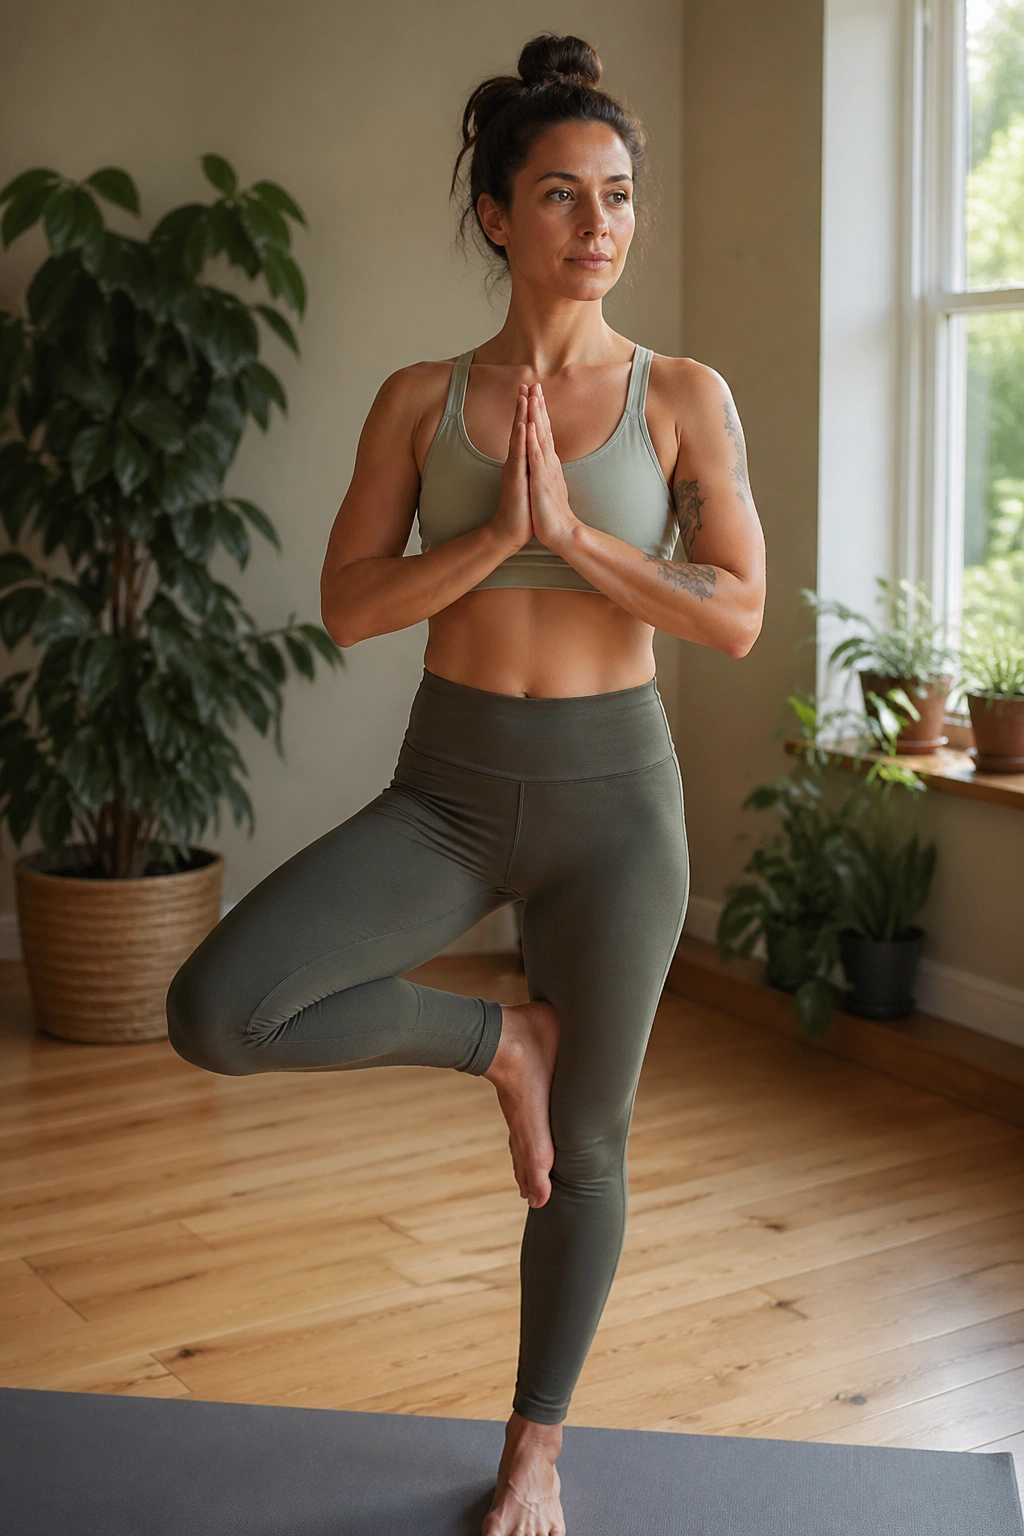
Tree Pose is not just a balance pose. It is a quiet test of whether the pelvis can stay level while one leg takes on the job of support. That matters more than the dramatic part people chase with the lifted knee.
Place the sole of the lifted foot on the standing ankle, calf, or inner thigh — never on the knee joint. Press the standing foot down in three points: big toe mound, little toe mound, and heel. Then let the lifted knee open just enough to keep the pelvis from tipping.
Wobble will happen. Fine. That’s part of it.
What to Watch
- Keep the standing hip from jutting out.
- Soften the ribs instead of flaring them.
- Pick one still point in front of you.
- Hold for 20 to 40 seconds, then switch sides.
The standing leg should feel alive, not locked. If the foot starts clawing the mat, back off and let the toes spread. Tiny corrections count here. This pose teaches patience as much as strength, and patience is a useful kind of confidence.
Tree Pose looks graceful only after it gets real.
11. Boat Pose for Deep Core Control
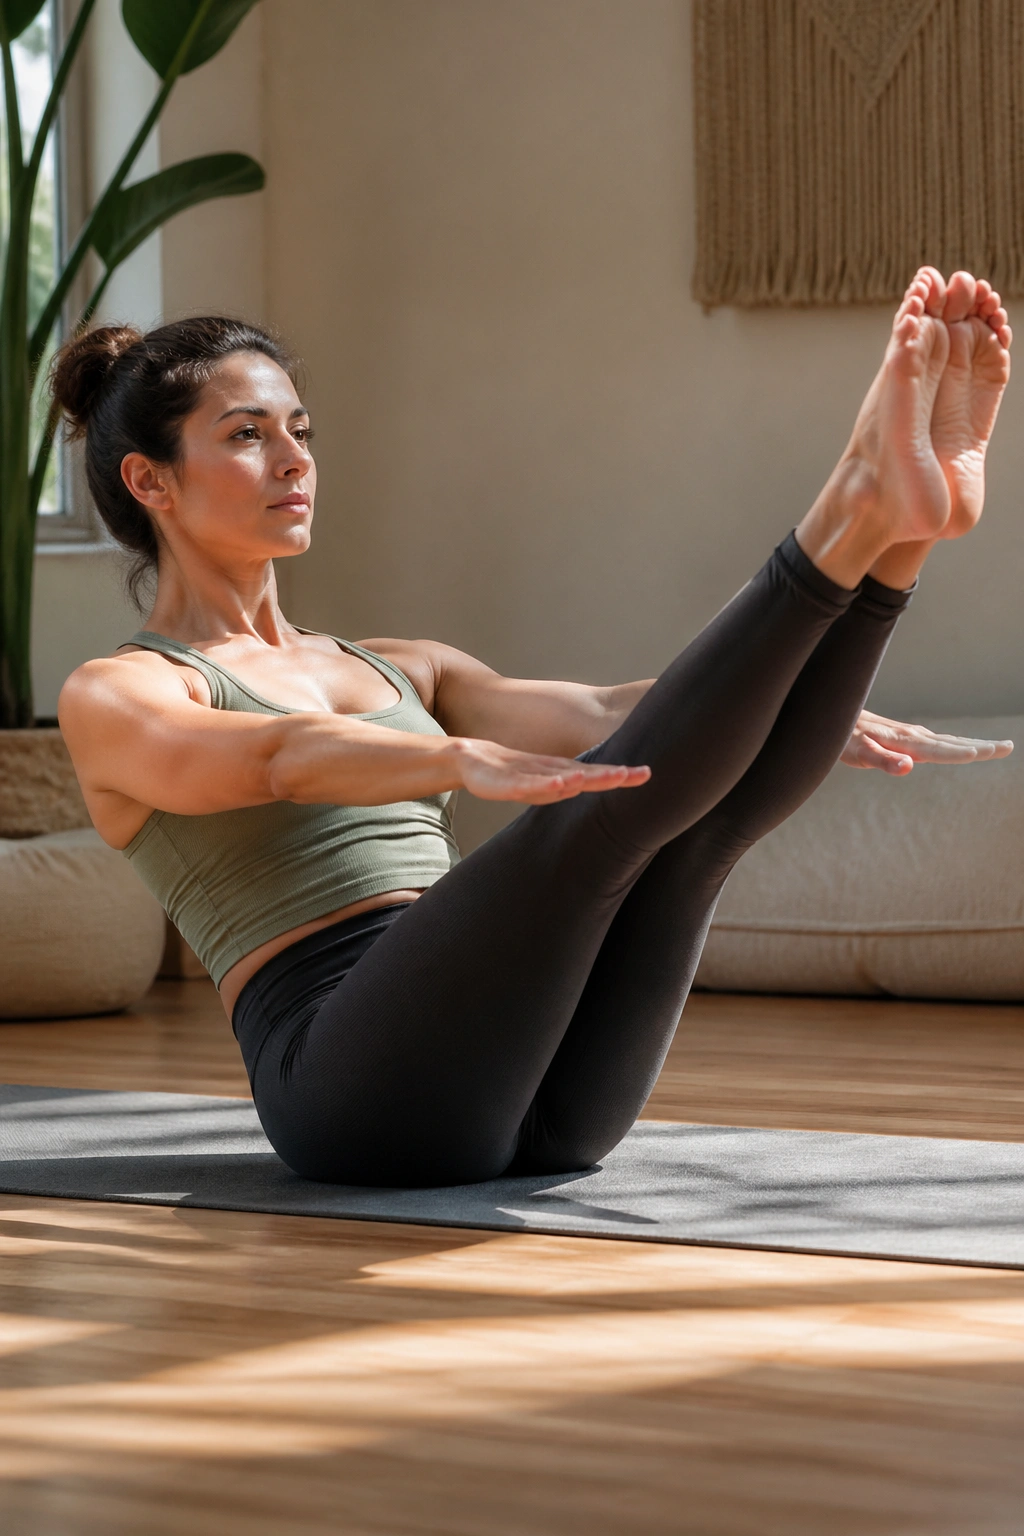
Boat Pose is where people find out whether their core and pelvic floor are working together or fighting for dominance. Done well, it asks for deep abdominal support without collapsing the low back. Done badly, it turns into a neck strain with a fancy name.
Sit on the mat, lean back slightly, and lift the feet with knees bent first. Keep the chest open and the spine long. If your lower back rounds hard, stay with bent knees. That version still counts, and for a lot of people it is the smarter version.
A lot of folks try to straighten the legs too soon because they think that is the “real” pose. It isn’t. The real pose is the one you can hold with the ribs quiet and the breath steady. You want the lower belly to support the shape without clamping down so hard that your face tightens.
A Cleaner Way In
- Start with 3 rounds of 15 to 20 seconds.
- Rest fully between rounds.
- Keep the shoulders away from the ears.
- Stop the moment the lower back starts complaining.
Boat Pose is useful because it teaches control under fatigue. That skill carries over farther than most people expect.
12. Plank Pose for Whole-Core Pressure Management
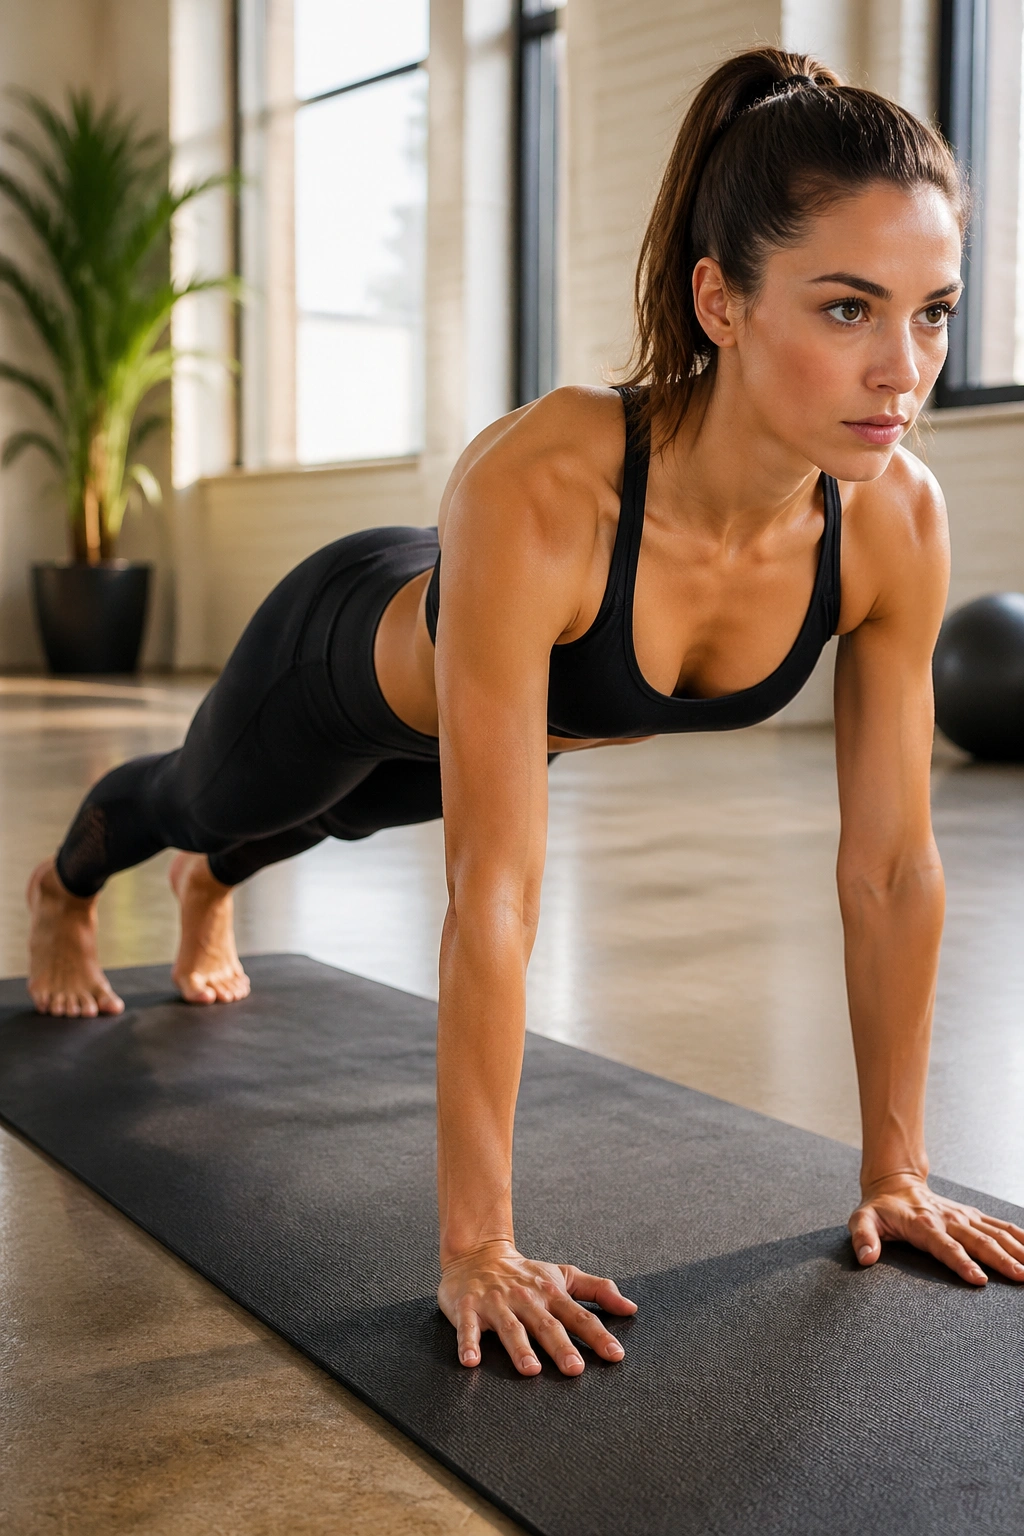
Plank Pose looks like an arm exercise until you hold it for more than a few breaths. Then it becomes a lesson in pressure management — how to keep the ribs, pelvis, and lower belly from dumping effort into the wrong places.
Line up the shoulders over the wrists, spread the fingers wide, and press the floor away. Squeeze the thighs lightly. Not hard. Just enough to keep the legs awake. Then breathe into the side ribs while the belly stays gently supported. If the low back sags, lift the hips a few inches and shorten the hold.
Longer is not the goal. Better shape is. A 15-second plank with clean alignment does more for pelvic stability than a one-minute slump. That is the honest truth, and it saves people a lot of pointless strain.
If wrist pressure bothers you, drop to the forearms. If the shoulders tire first, reduce the hold and repeat it more times. Three crisp rounds of 20 seconds can be more useful than one shaky hold that turns into a shake-fest.
Plank builds the kind of support you feel when you stand tall and do not need to grab at yourself from the inside.
13. Side Plank for Lateral Strength
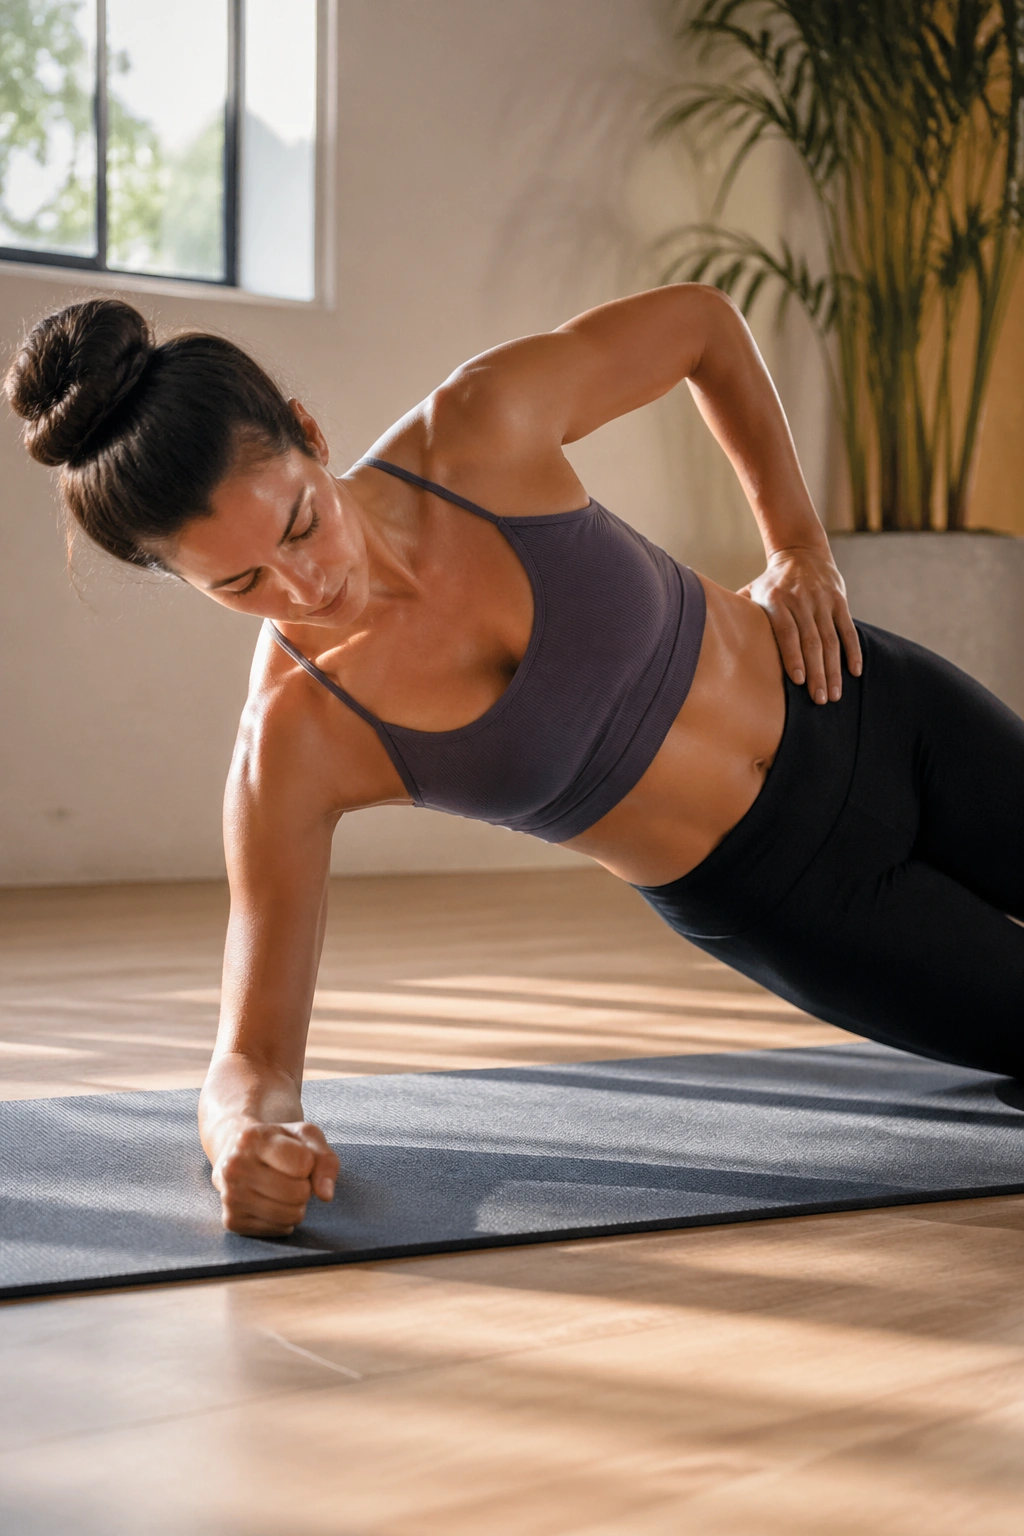
Side Plank earns its place because the pelvis does not live in a straight line. It has to resist side-to-side collapse all day long, whether you’re walking, lifting a bag, or shifting weight to one leg. Side Plank trains that exact pattern.
Start from a full plank or drop the bottom knee to the floor. Stack the shoulders, keep the side waist long, and lift the top hip without throwing the ribs forward. If the neck cranes up, lower the gaze slightly. If the wrist feels unhappy, come down to the forearm.
How to Keep It Clean
- Think of the bottom oblique lifting the pelvis.
- Keep both hip points facing forward as much as possible.
- Hold for 15 to 25 seconds per side.
- Use the knee-down version whenever form starts to wobble.
The interesting part is that Side Plank can make you feel less “pulled apart” through the pelvis after a few rounds. That is not magic. It is the side body learning to hold its line.
And yes, it is hard. Good. Hard is allowed.
14. Locust Pose for Back-Body Support
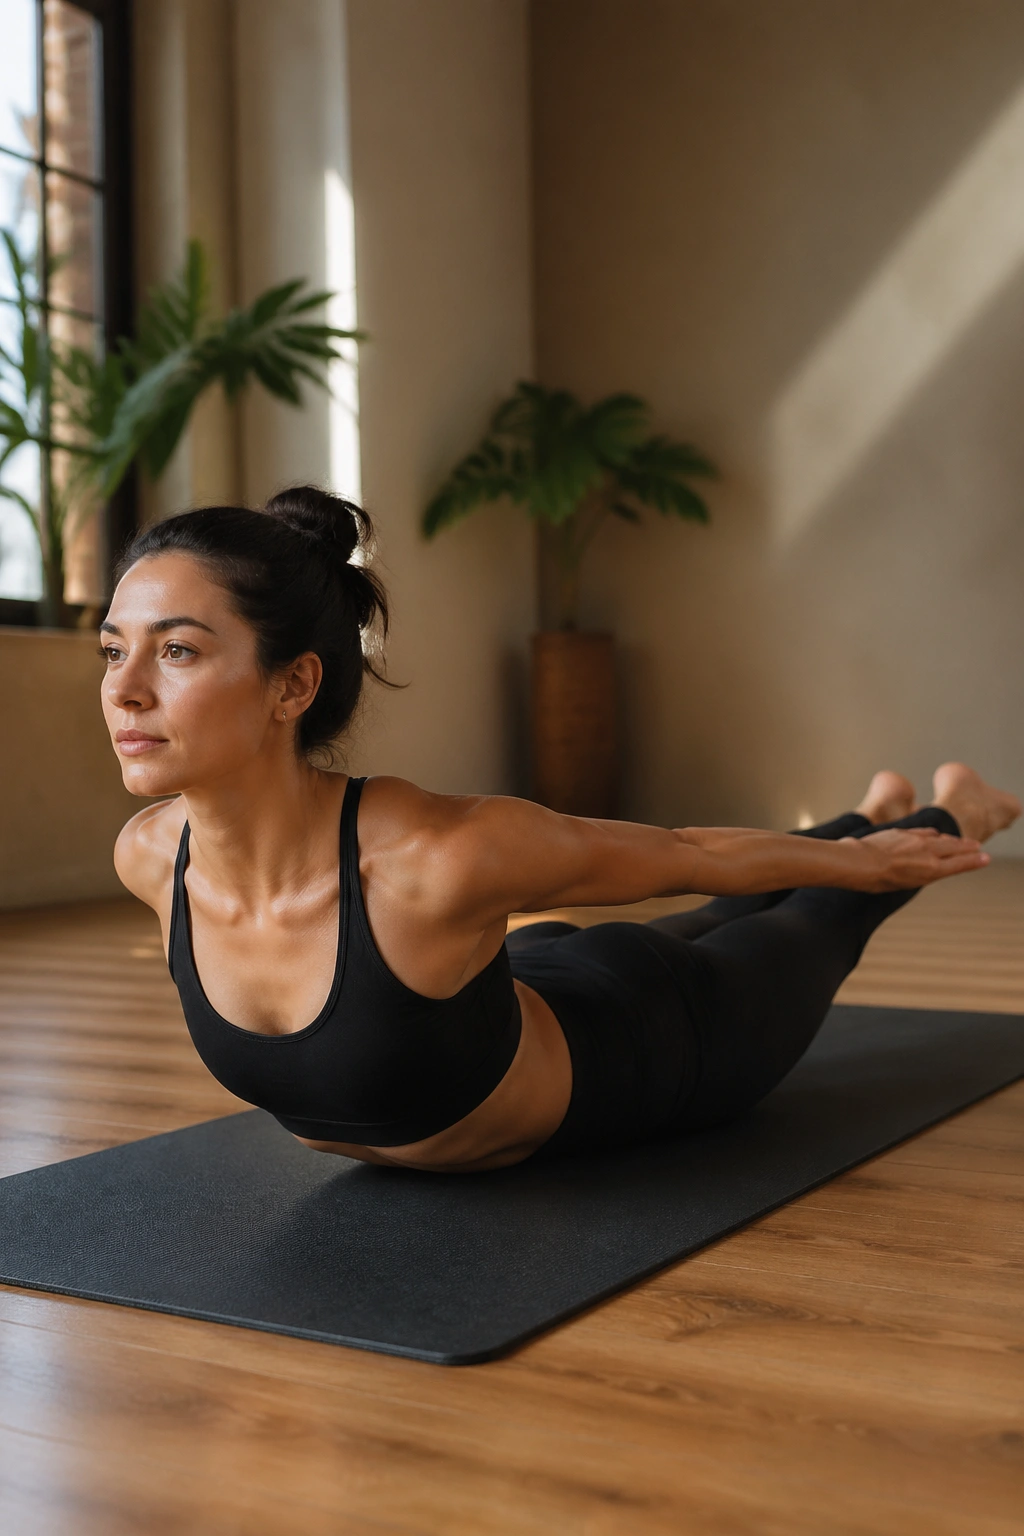
Most people spend too much time folding forward, sitting, or bracing from the front. Locust Pose fixes none of that by being polite. It wakes up the back body — glutes, hamstrings, spinal muscles — and that back-side support matters a lot when you want the pelvis to feel strong rather than jammed.
Lie face down with your arms by your sides, forehead on the mat, and lengthen the tailbone toward the heels. On an inhale, lift the chest, hands, and legs just a little. You do not need a giant backbend. In fact, a lower lift often works better because it keeps the neck and low back from taking over.
Three Ways to Approach It
- Lift chest only for 3 breaths.
- Lift chest and legs together for 3 breaths.
- Lift one side at a time if you want more control and less compression.
The back body is often the missing piece in pelvic strength work. When the glutes and spinal muscles help carry the load, the front of the pelvis does not have to do everything.
Locust feels a bit old-school. I like that. It gets the job done.
15. Legs-Up-the-Wall Pose for Recovery and Breath
Not every pose on this list is about effort. Some of the most useful work happens when the nervous system finally stops bracing and the pelvic floor gets permission to soften. Legs-Up-the-Wall Pose is excellent for that. It changes the angle of the pelvis, slows the breath, and gives the hips a break after standing work or balance work.
Scoot your hips close to a wall and swing the legs up. If the hamstrings feel tight, move farther away from the wall. If the lower back arches, place a folded blanket under the pelvis or slide a pillow under the knees. Stay for 5 to 10 minutes and breathe longer on the exhale than on the inhale.
That longer exhale matters. It tells the body that effort is over for the moment. The pelvic floor can then respond with a little less guarding, which often feels like the body has dropped 2 inches in a good way.
If you want a tiny practice recipe, use this:
- Inhale for 4 counts.
- Exhale for 6 to 8 counts.
- Let the jaw unclench.
- Let the shoulders melt away from the ears.
A lot of people chase strength and skip recovery. Bad trade. The body needs both, and the confidence you want usually shows up faster when you stop treating relaxation like wasted time.
