



A strong core in yoga doesn’t always look dramatic. Sometimes it is a still plank with steady ribs, or a tree pose that stops wobbling when the standing foot starts to sweat. The best yoga poses for a strong core train the body to hold shape when balance, breath, and effort all show up at once.
If your low back steals the work in boat pose, or your shoulders do all the talking in plank, that is a cue — not a failure. The fix is usually better alignment, a smaller range, and a little more patience with the deep muscles that do the quiet work.
A real core is more than the six-pack. It includes the muscles around the ribs, the waist, the pelvis, and the deep back that keeps the spine from folding like a cheap chair. When those pieces cooperate, poses feel steadier and breathing stays smoother.
Start on the floor, move into twists and balances, then finish with backbends that ask for control instead of collapse. That order matters more than people think, and the first pose makes the point fast.
1. Plank Pose
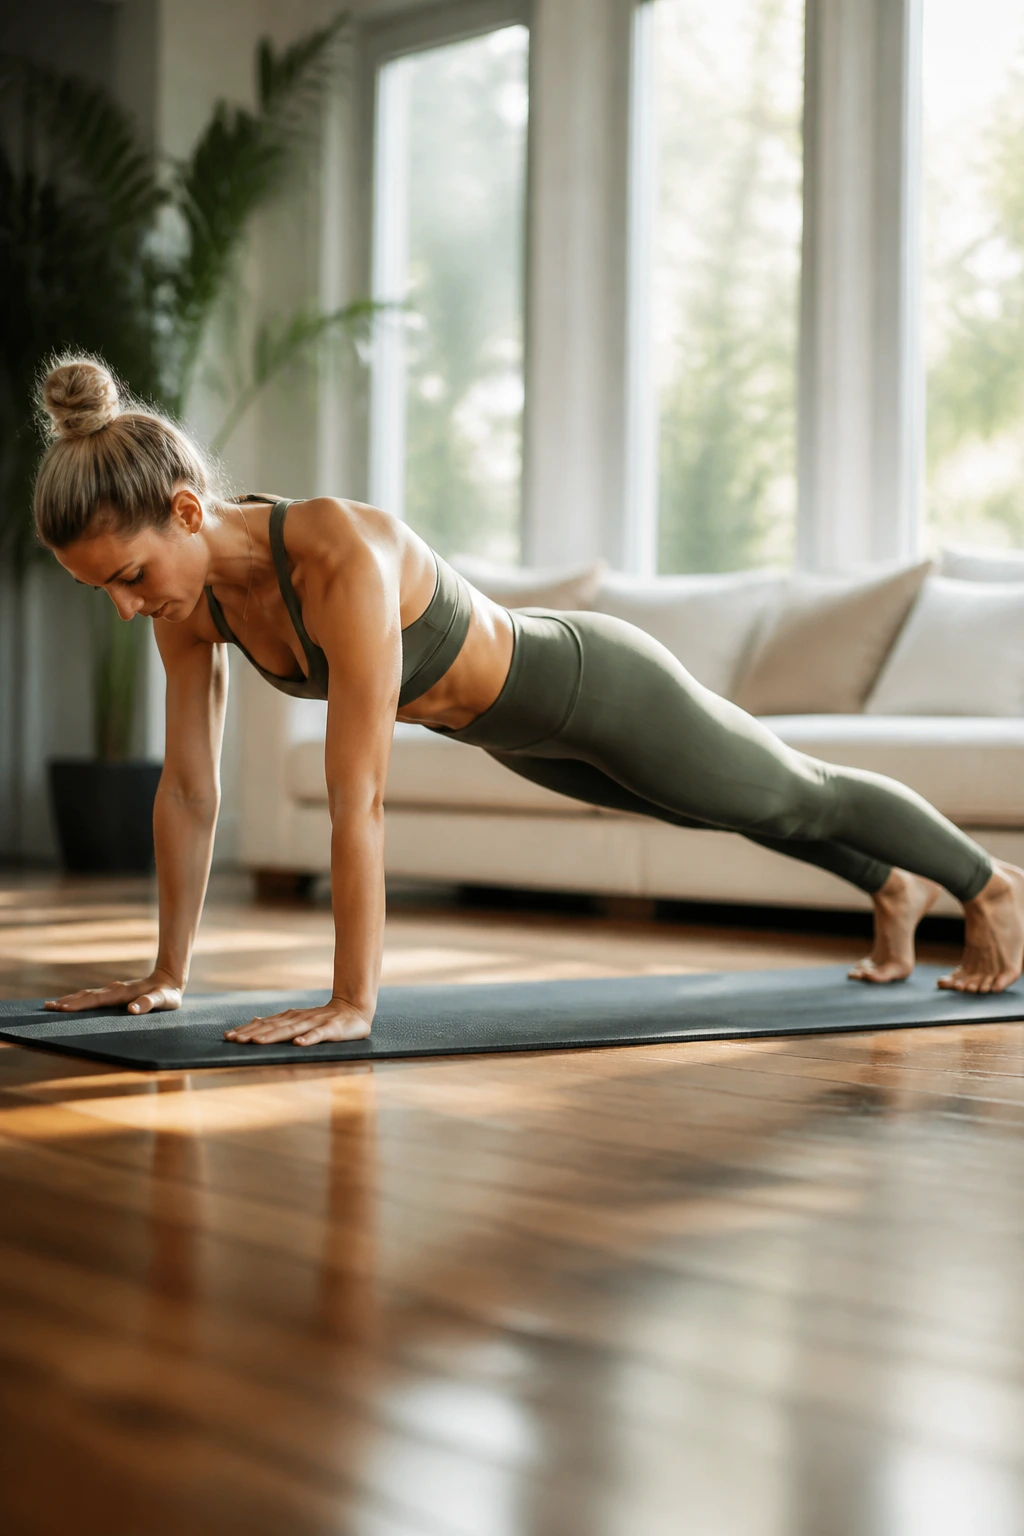
Plank looks plain, which is why people underestimate it. The pose is simple enough to teach in a minute, yet it exposes every weak link in the middle of the body, from flared ribs to sleepy glutes.
What to Feel in the Body
The goal is not to survive the hold. It’s to create a long, steady line from the crown of the head through the heels, while the lower belly gently firms and the ribs stop spilling forward.
- Hands under shoulders.
- Press the floor away.
- Reach the heels back.
- Keep the neck long and neutral.
Do not let the low back sag. That sag shifts the work out of the abs and into joints that did not ask for it.
A good plank feels active without being frantic. If your breath goes ragged after ten seconds, shorten the hold and keep the shape clean. Thirty seconds done well beats a full minute with the pelvis hanging low.
2. Forearm Plank
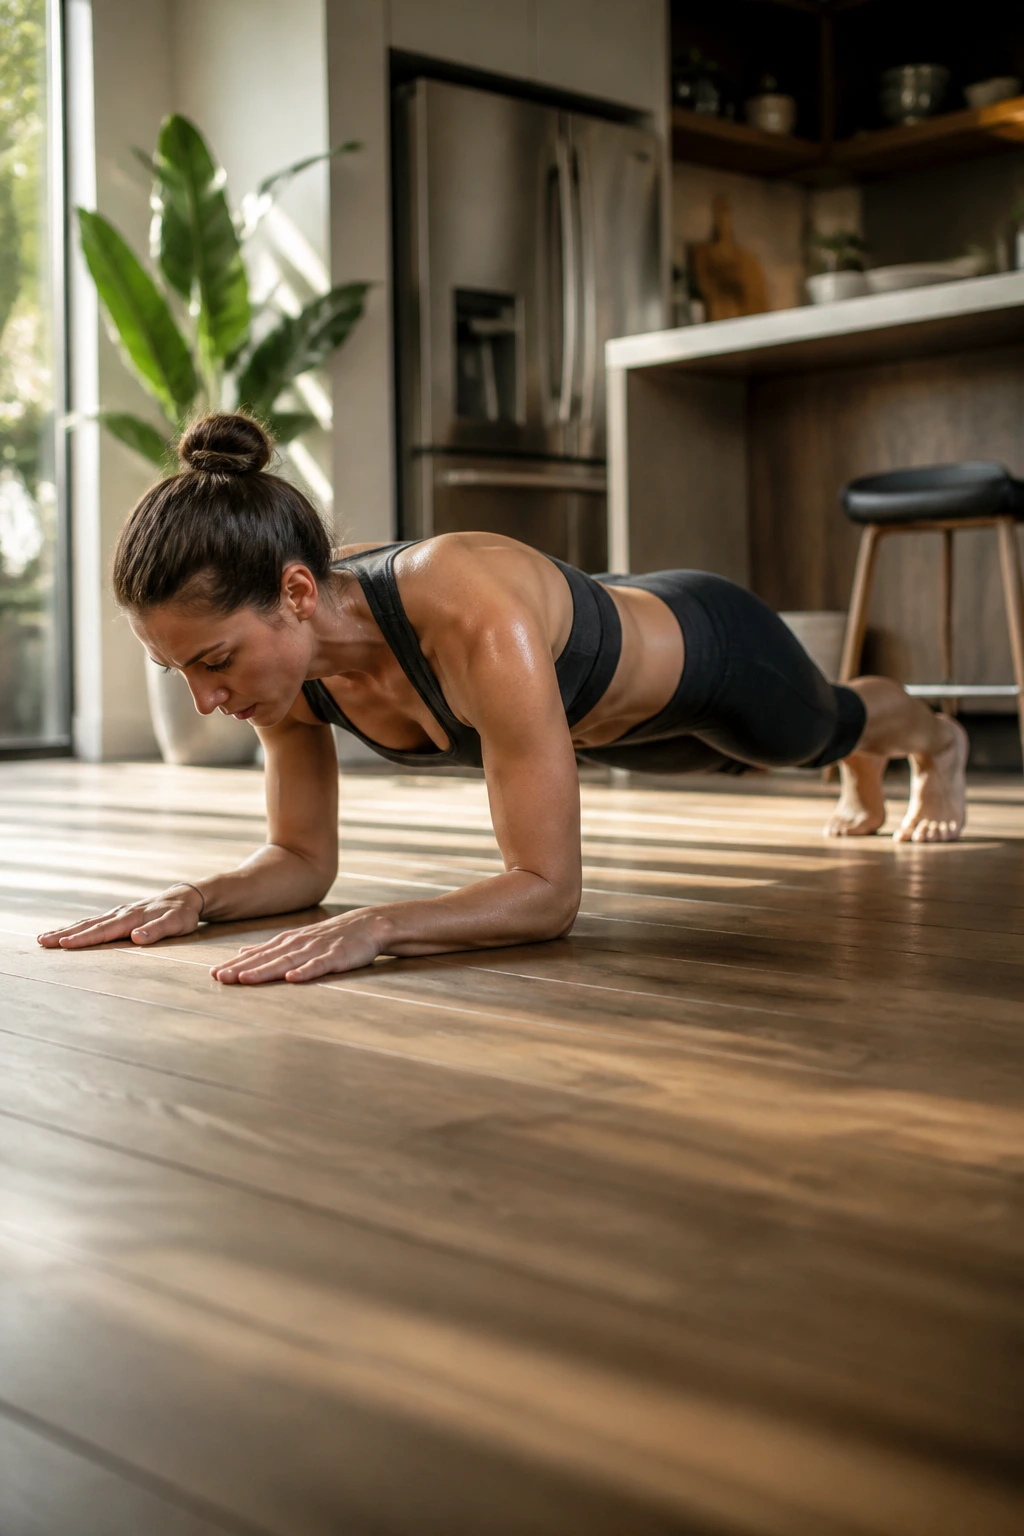
Forearm plank is where lazy form gets exposed. The lower arm position removes some wrist strain, but it also makes the trunk work harder to stop the ribs from dropping toward the mat.
The forearms should be parallel or close to it, elbows under the shoulders, and the hands either flat or lightly clasped. Push the forearms down and forward at the same time. That tiny forward pressure wakes up the front of the torso in a way many people miss.
I like this version for anyone who can hold a high plank but still feels the low back take over. It gives you a cleaner read on your brace. If the hips pike high, lower them a little. If the belly hangs, shorten the hold and reset.
3. Side Plank
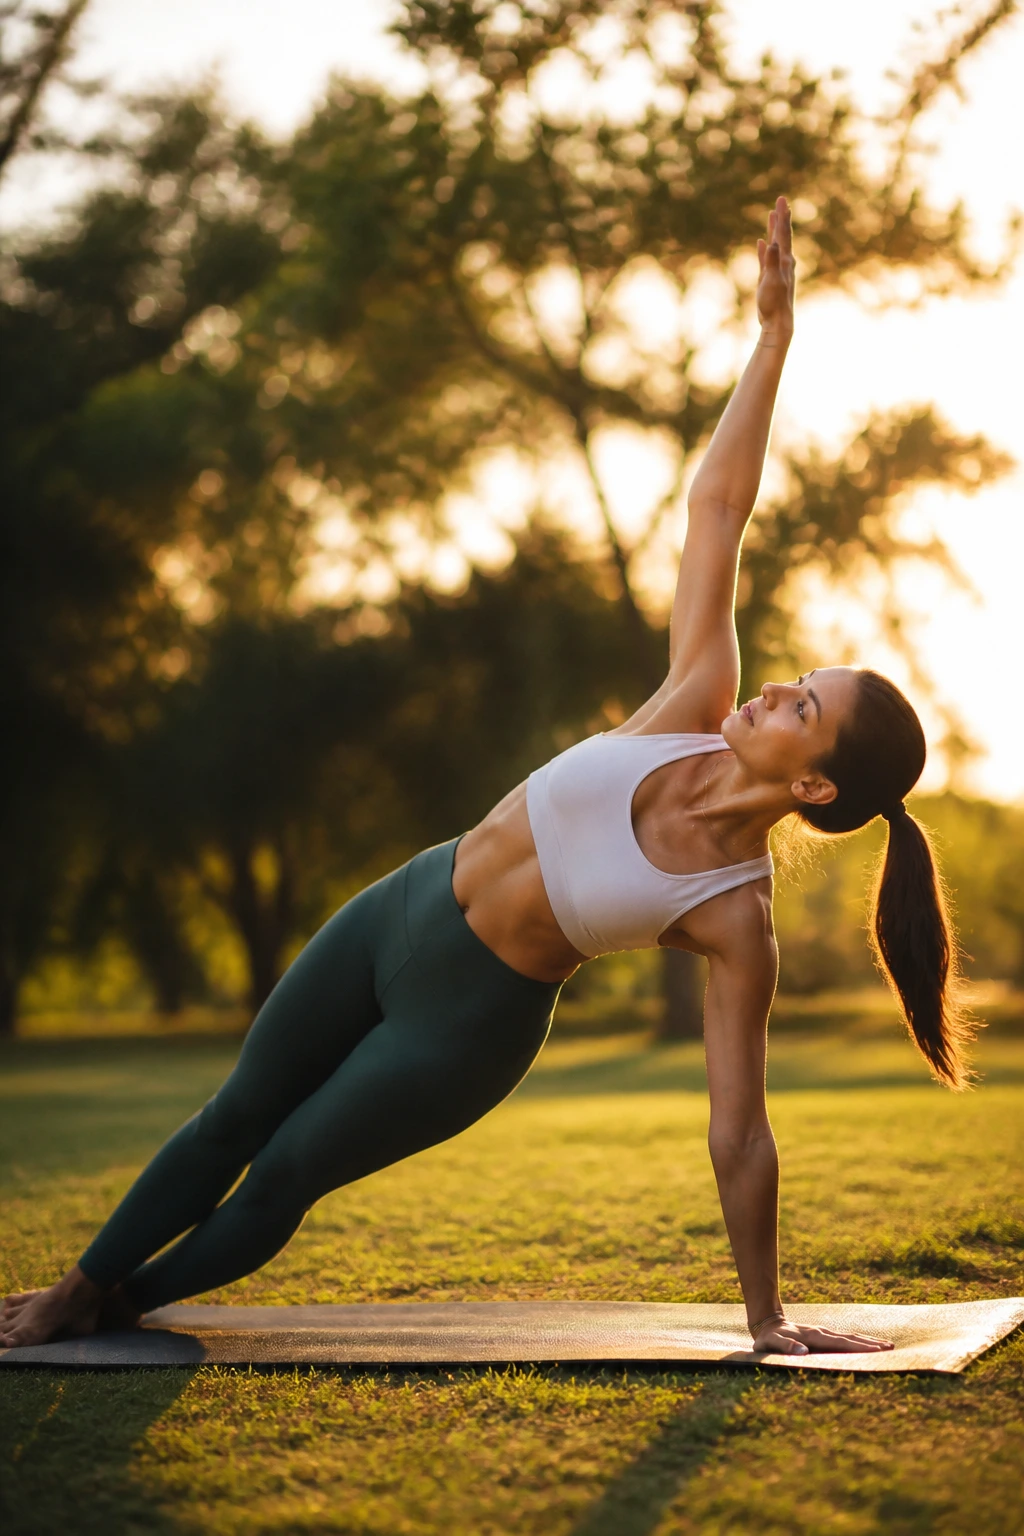
Why does side plank feel harder than it looks? Because the pose asks one side of the waist to keep the pelvis from sliding toward the floor while the shoulder does its own job overhead. That is a lot of work for a shape that looks almost casual.
The side body has to hold the line. Obliques, glute medius, and the small stabilizers around the shoulder all wake up at the same time, and there is no hiding once you start to shake.
Easy Ways to Scale It
- Drop the bottom knee to the floor.
- Stack the top foot in front of the bottom foot.
- Keep the top hand on the hip for balance.
- Hold for 10 to 20 seconds before adding time.
A lot of people make side plank harder by chasing a perfect stack too soon. Don’t. A slightly staggered base with a strong lift through the waist is more useful than a pretty wobble.
4. Three-Legged Plank
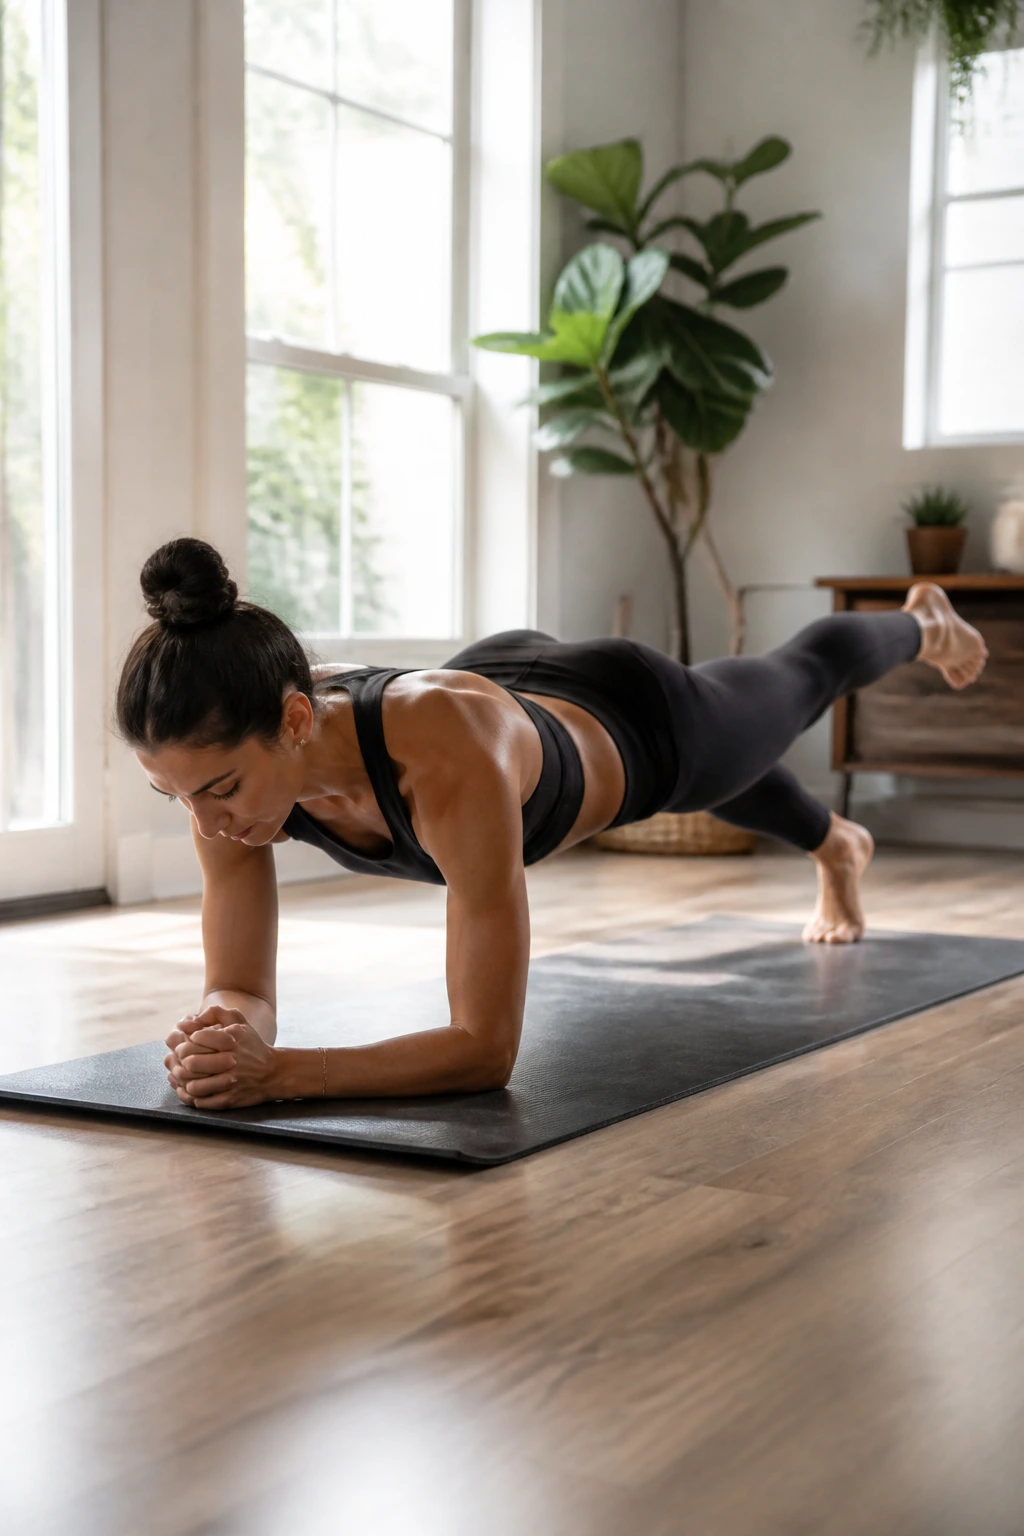
You lift one leg in plank and suddenly the pelvis wants to swing open. That’s the whole lesson. Three-legged plank trains anti-rotation, which is a plain way of saying the trunk has to stop the body from twisting like a wet towel.
Keep the lifted leg active and only raise it as high as the hip can stay level. A huge leg lift with a sagging low back is a bad trade. Two inches is enough if the shape stays honest.
What Makes It Worth Doing
- Keep the shoulders square to the mat.
- Squeeze the lifted glute lightly.
- Spread the toes of the standing foot.
- Breathe out before each shift.
Small movement, big demand. That’s the charm here. A tiny leg lift can light up the deep abs more cleanly than a flashy one.
5. Boat Pose
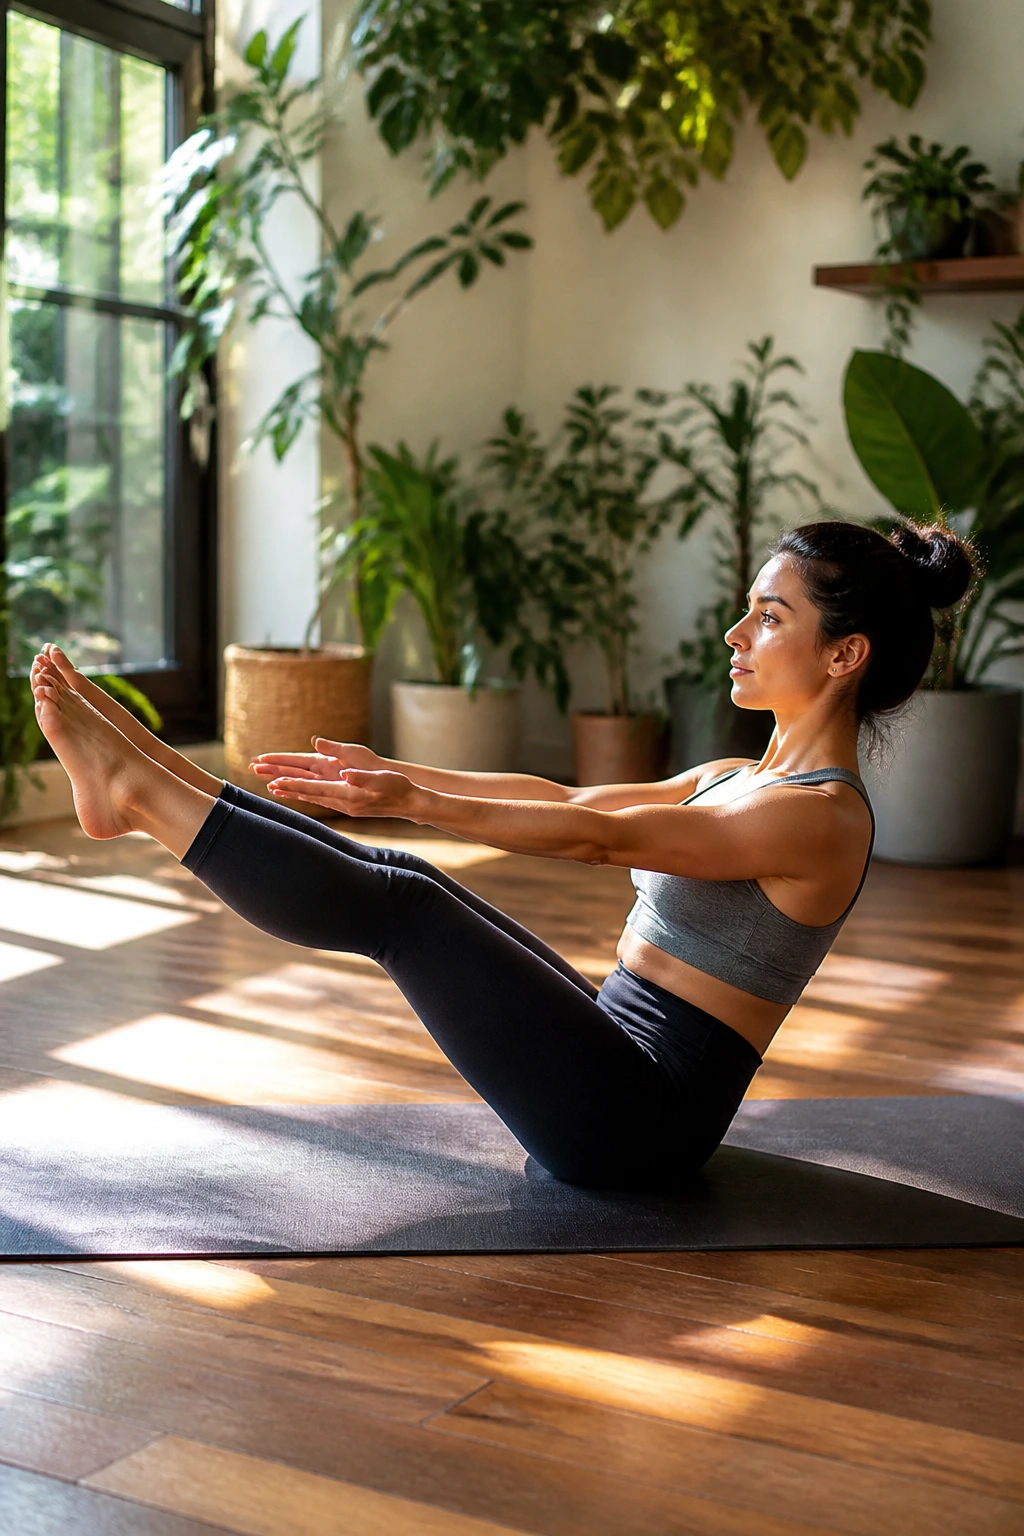
Boat pose is honest. Sit down, tip back, and the body tells the truth about who’s doing the work. If the hip flexors clamp first and the low back rounds hard, the pose needs a smaller shape, not more grit.
The best version starts with the chest lifted and the spine long, then the shins come up only as far as you can keep that shape. Straight legs are optional. They are not the point. The point is the front of the torso learning to stay broad while the belly firms against the pull of gravity.
A lot of people rush this one. Bad idea. Boat rewards patience because the deeper core muscles tend to show up a second after the surface muscles do. If you can hold half boat cleanly for 20 seconds, full boat gets much better later.
Breathe out through the hard part. That little exhale helps knit the ribs inward without crushing the chest.
6. Half Boat Pose
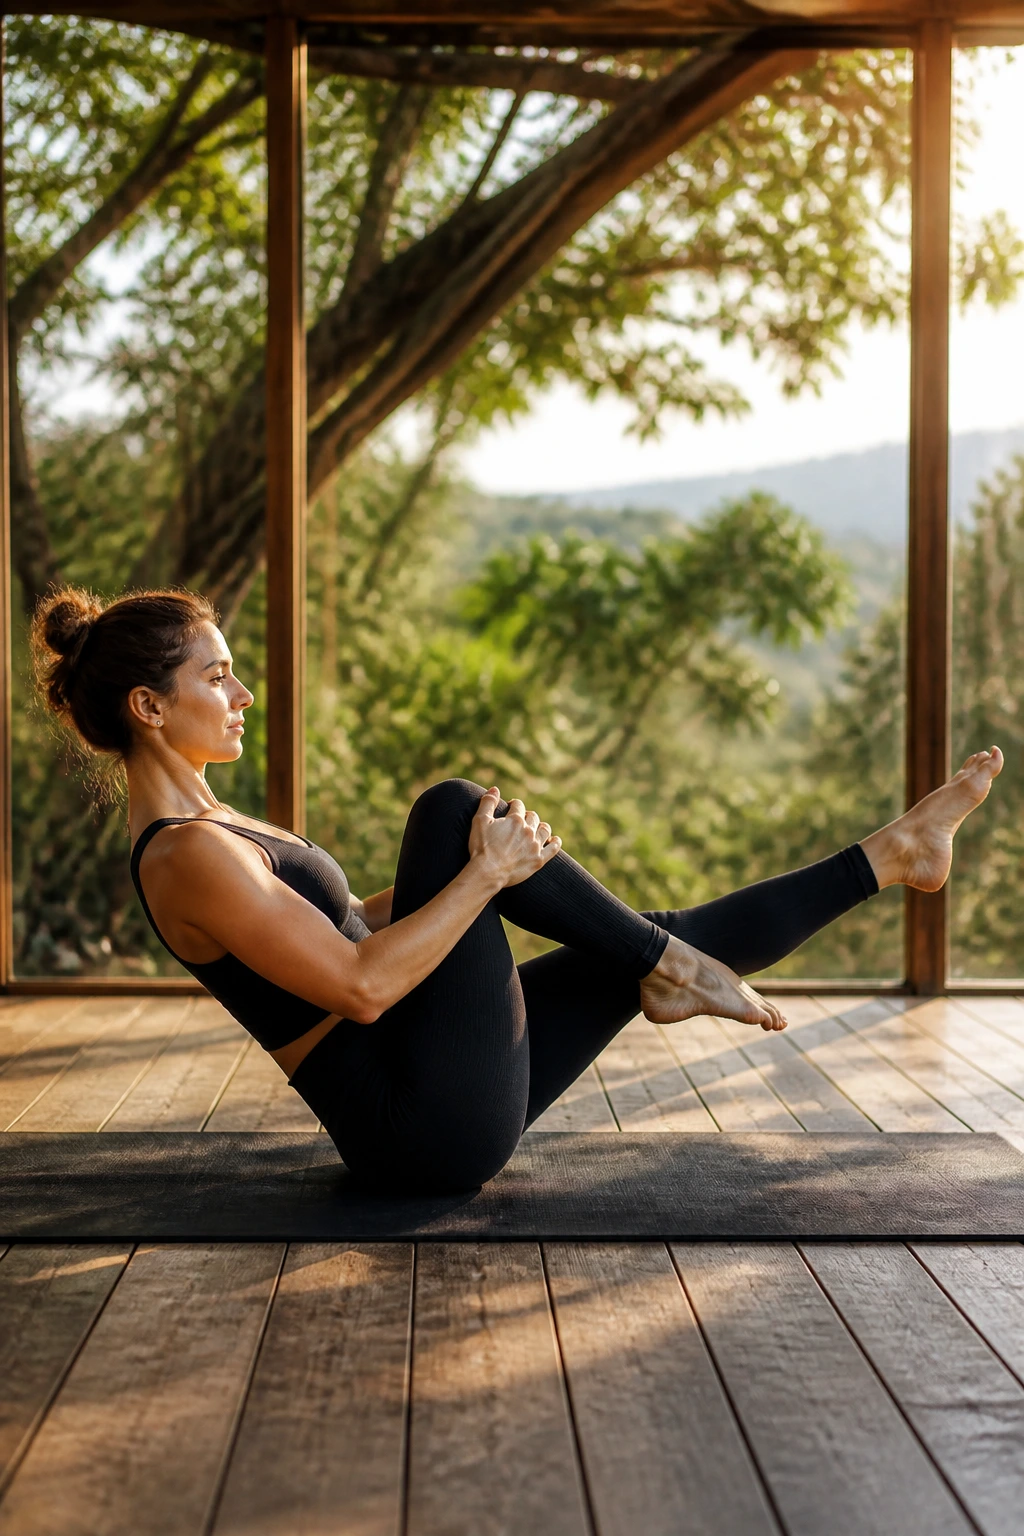
Half boat is the version people skip, and that’s a mistake. It strips away the ego part of the pose and leaves you with the part that actually matters: control over the rib cage and pelvis.
Unlike full boat, half boat keeps the knees bent and the torso at a lower angle, which makes it a smarter choice when the low back gets cranky. You still train the front line of the body, but the demand is easier to manage.
If full boat turns your neck tight or your hip flexors into concrete, practice half boat for 3 rounds of 15 to 25 seconds. Keep the lower back long, lower the feet a few inches if needed, and stop before the shape turns sloppy. That is enough work. More than enough, some days.
7. Chair Pose
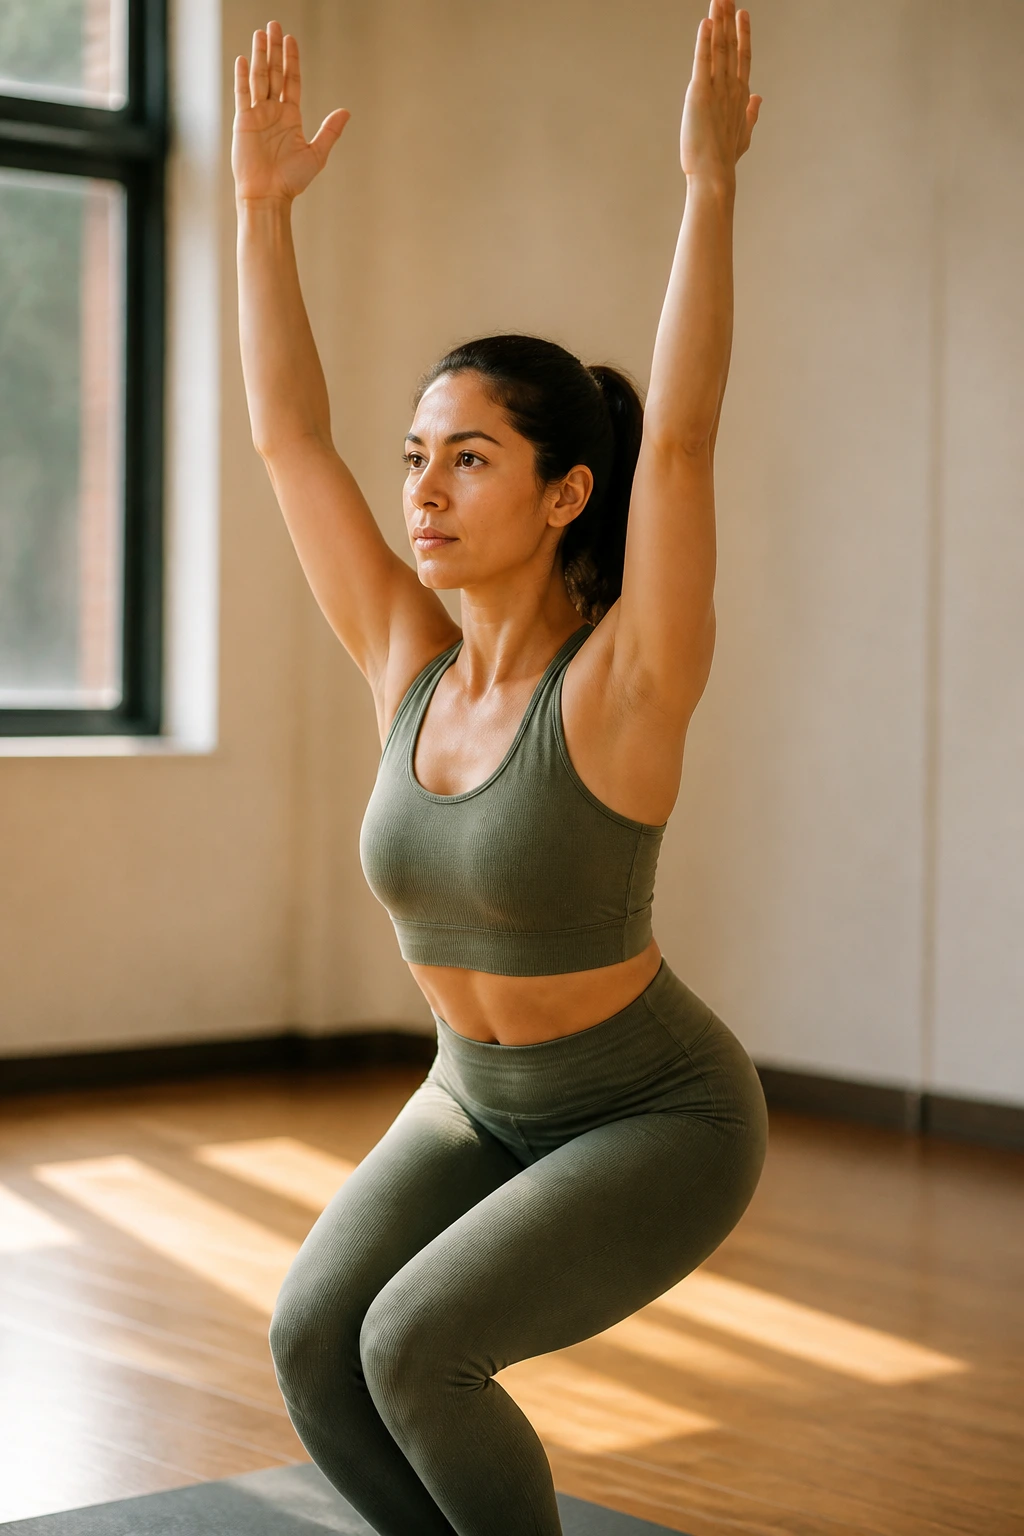
Ever notice how chair pose burns before the thighs do? That is the core waking up to keep the torso from folding forward when the knees bend and the hips sit back.
The trick is to send the hips rearward without throwing the ribs out. Arms can reach overhead, but if the lower back arches, the midsection is no longer helping. A small tuck of the tail and a firm exhale often fix that right away.
- Weight in the heels.
- Knees track over the middle toes.
- Ribs stay stacked over the pelvis.
- Reach the fingertips without shrugging.
This is one of those poses that looks mild from the outside and feels like a furnace from the inside. Good. That means you found the right place.
8. Revolved Chair Pose
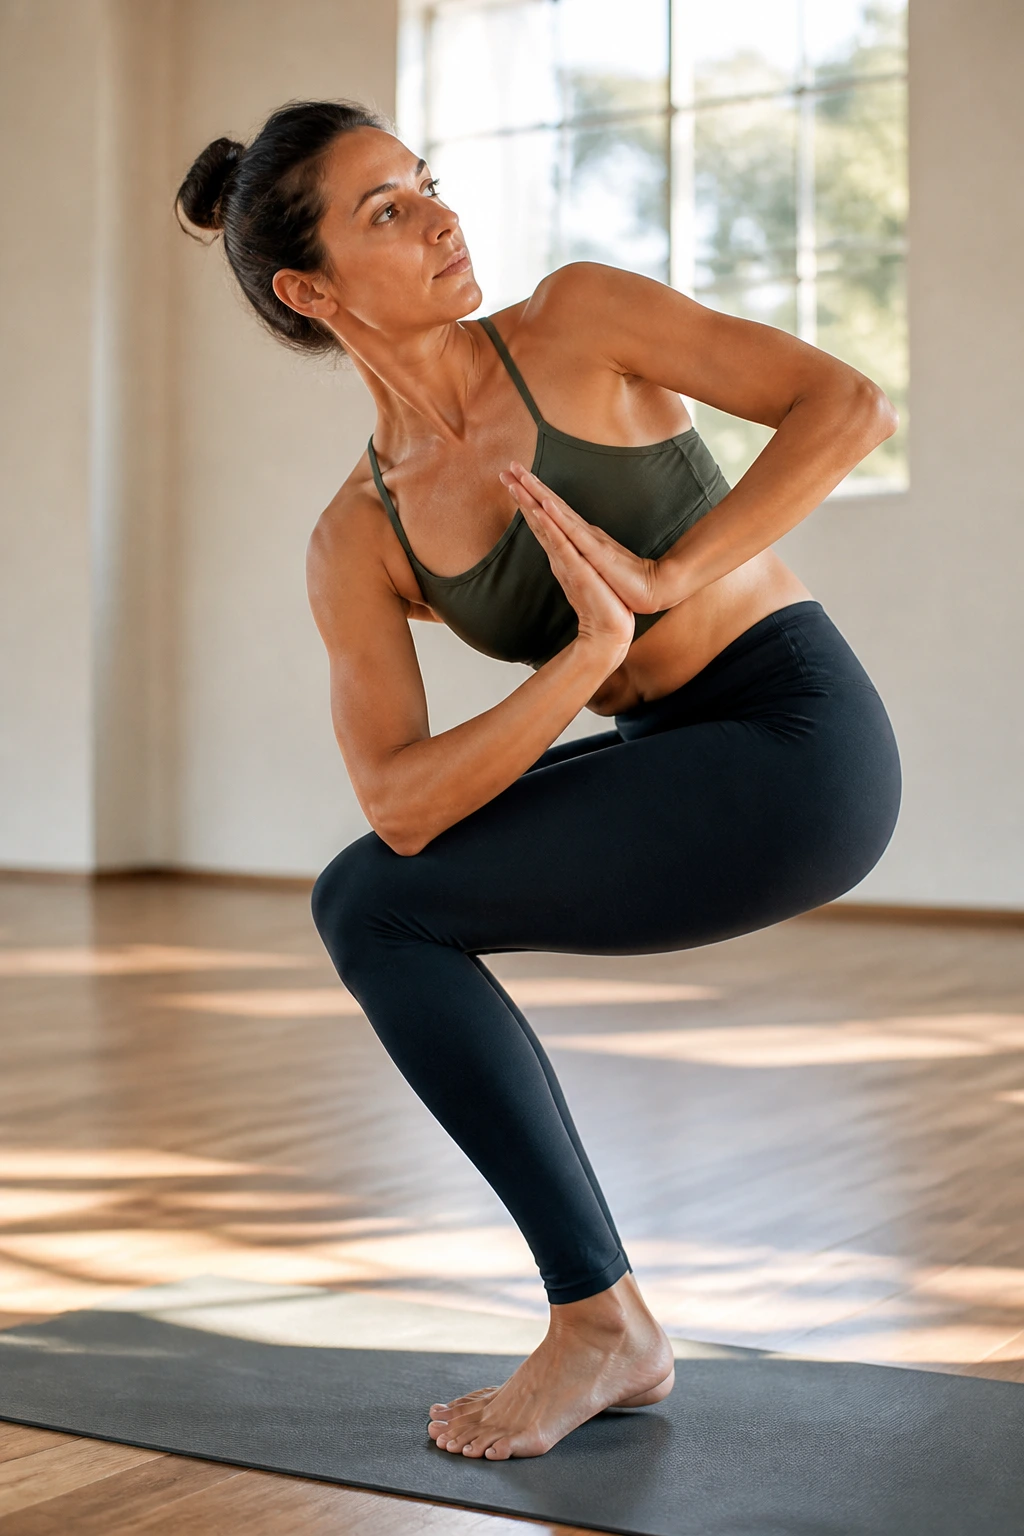
Twists are only useful when the pelvis stays quiet. Revolved chair asks the torso to turn while the legs keep you rooted, and that cross-pressure is exactly why it helps build a stronger center.
Start with feet together or hip-width apart, sink into chair, then bring the palms to prayer at the chest. Rotate from the ribs first, not the arms. The hands only follow the twist. If the knees collapse inward, widen your stance and try again.
A Cleaner Way to Enter
- Sit the hips back before turning.
- Lengthen the spine on the inhale.
- Twist on the exhale.
- Keep both heels heavy.
The pose should feel like a spiral, not a wrench. If your neck is doing all the turning, ease off and let the chest lead instead.
9. Warrior III
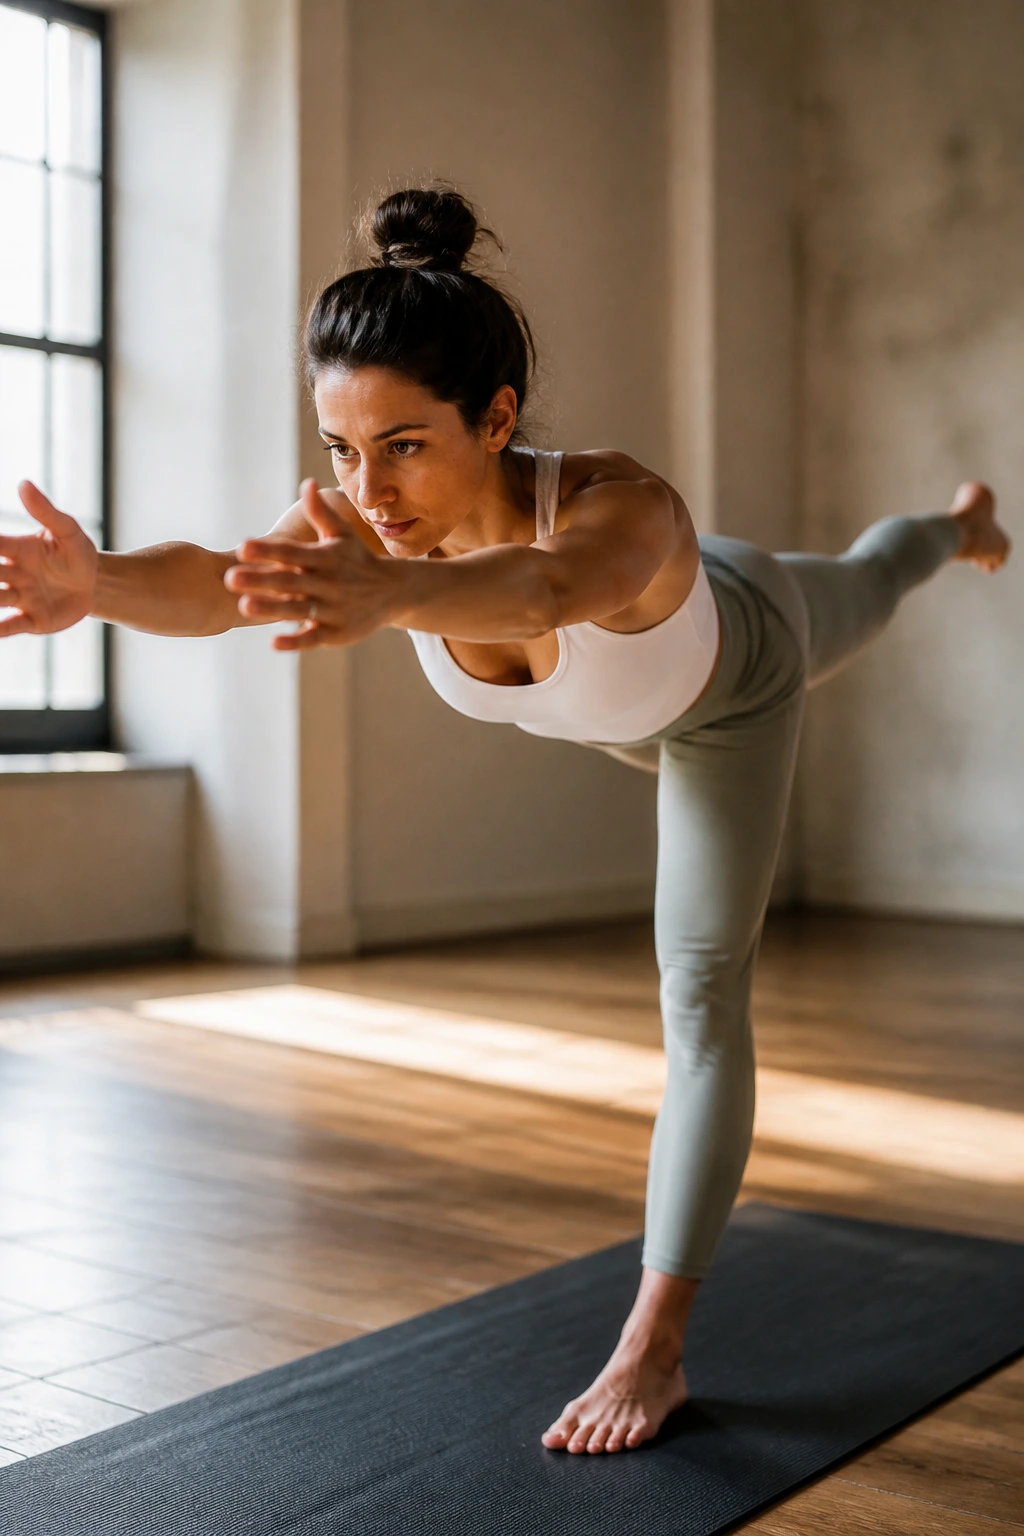
Warrior III is one of those poses that looks clean only after a lot of mess. The body has to hinge, balance, and stabilize at the same time, which is why it is such a good test of core control.
The standing leg and the lifted leg both matter. One supports, one reaches. The torso sits in the middle and prevents the whole thing from tipping forward or spinning open. Flex the back foot or point it with intention, but keep the hips level and the spine long.
A block under the hands can make a big difference when the hamstrings are tight. So can a soft bend in the standing knee. That bend gives you room to keep the pelvis square instead of clawing for a line you cannot hold yet.
Warrior III teaches patience in a loud way. You cannot bully it.
10. Half Moon Pose
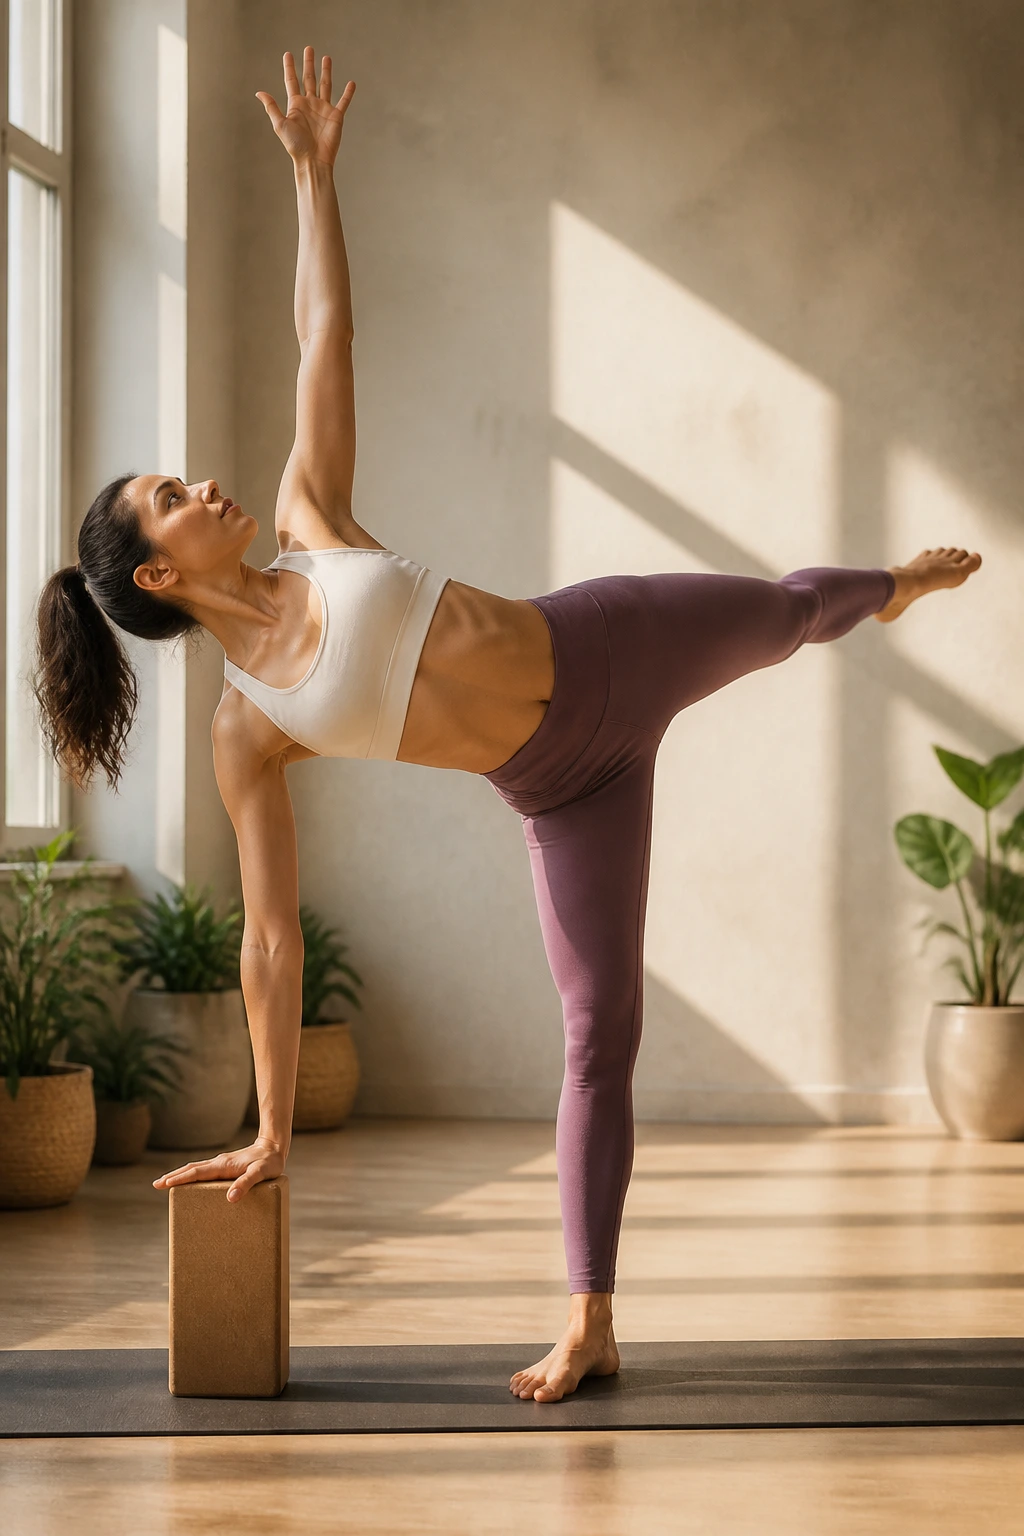
Unlike Warrior III, half moon opens the top hip and asks the trunk to keep the shape from drifting apart. That small difference changes the entire feel of the pose.
The bottom hand usually comes to a block. Use it. A higher floor makes the standing side work cleaner, especially if balance is shaky or the supporting hamstring feels short. The lifted leg should stay active, but the chest does not need to face the side wall like a photo shoot.
What matters here is control through the waist. The ribs want to rotate, the pelvis wants to follow, and the obliques have to decide who gets the final word. That back-and-forth is the work.
Best use: slow entries from triangle or crescent, 2 to 4 breaths per side, with a steady gaze and no rush to straighten everything.
11. Bird Dog Pose
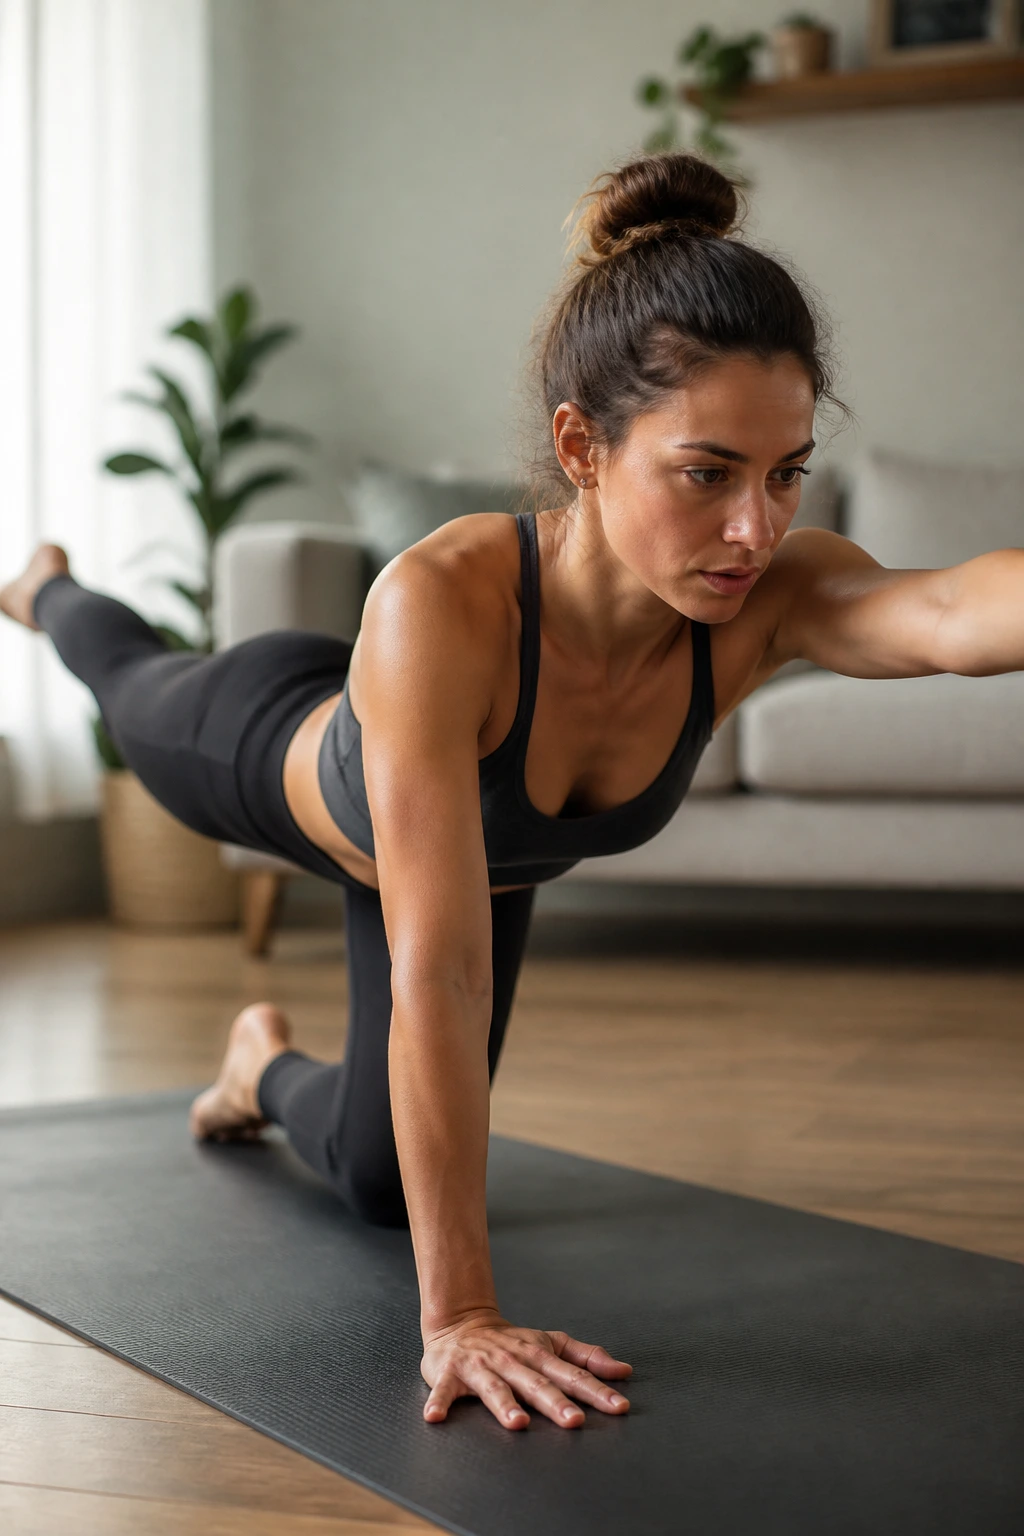
Bird dog looks calm. Then you try to keep the hips level while one arm and the opposite leg reach away, and the whole center starts talking back.
What to Watch For
- Wrists under shoulders, knees under hips.
- Reach long instead of high.
- Keep the low ribs from dropping.
- Stop the movement if the spine twists.
Bird dog is a gift for people whose backs dislike heavy flexion work. It strengthens the trunk by asking it not to wobble, which is a sneaky kind of strength that carries over to almost every standing pose.
How to Make It Harder
- Hold for 3 slow breaths.
- Add elbow-to-knee crunches after the reach.
- Hover the knee one inch off the floor before extending.
Clean beats big. Always.
12. Locust Pose
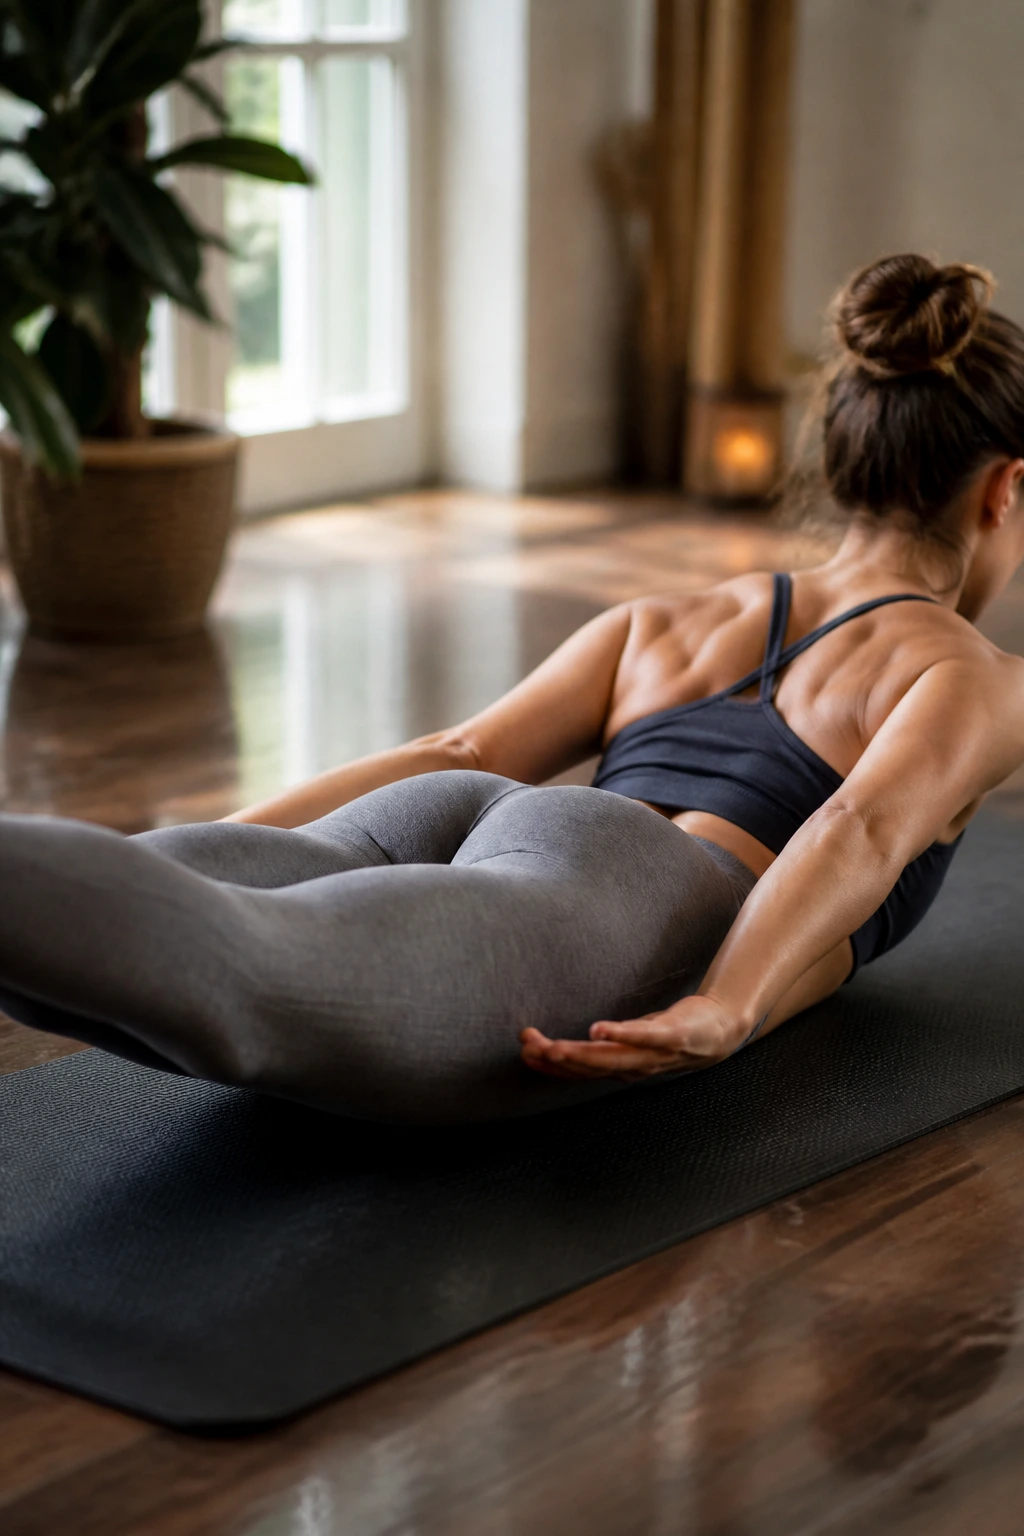
Locust is the pose that reminds you the back body counts. People often talk about abs as if core work lives only on the front side, but locust asks the spine, glutes, and upper back to help hold the whole frame together.
Lie face down, lengthen the arms beside the body, and lift the chest and legs only 2 to 4 inches. That small height is enough. If the legs kick too high, the low back compresses and the work gets messy fast.
The breath should stay smooth. A hard pinch in the lower spine is not the goal, and it usually means you lifted by yanking instead of reaching. Think long, not high.
Locust pairs well with plank and boat because it balances the front-loaded feeling those poses create. That balance matters more than people realize.
13. Bow Pose
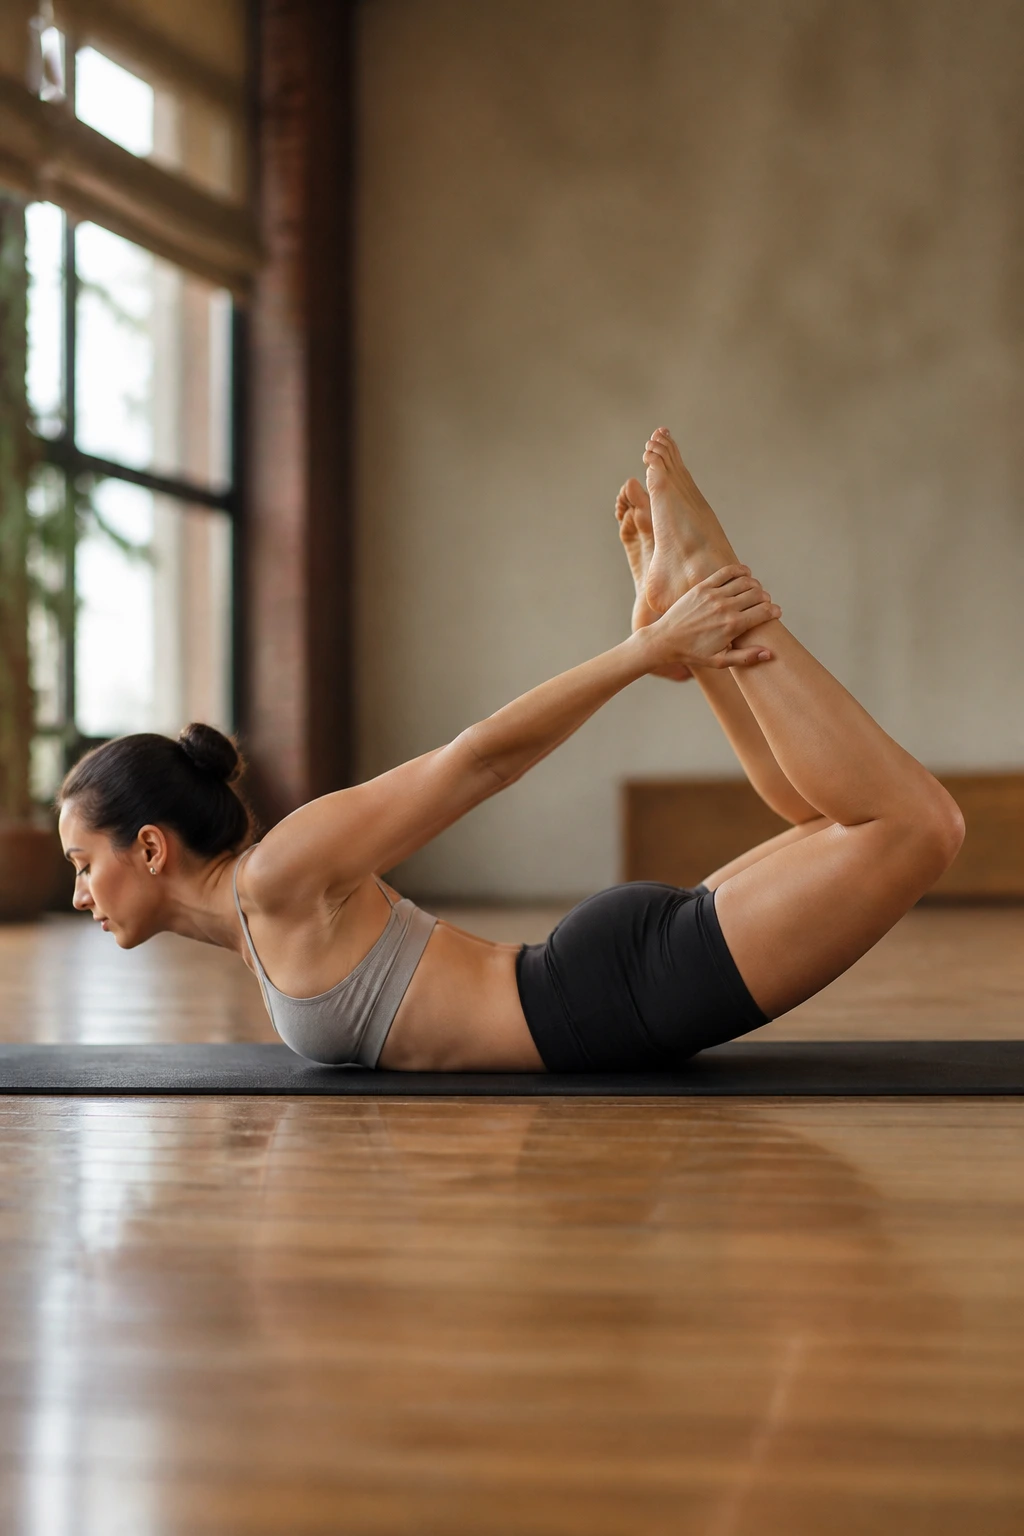
Can a backbend build core strength? Absolutely, if you keep the front body from spilling open. Bow pose asks the legs, glutes, and abdominal wall to stay connected while the chest lifts off the mat.
Reach back to hold the ankles, bend the knees, and kick the feet gently into the hands. The lift comes from the back body, but the center has to stay awake so the pose does not collapse into the low back. If the knees separate wide, shorten the hold and keep the thighs closer together.
Keep the Shape Honest
Hold for 3 to 5 breaths only at first. That is plenty. You want a lift that feels open through the chest and strong through the waist, not a cranked hinge through the lumbar spine.
Bow is not the pose to rush on a cold body. Give it time.
14. Dolphin Pose
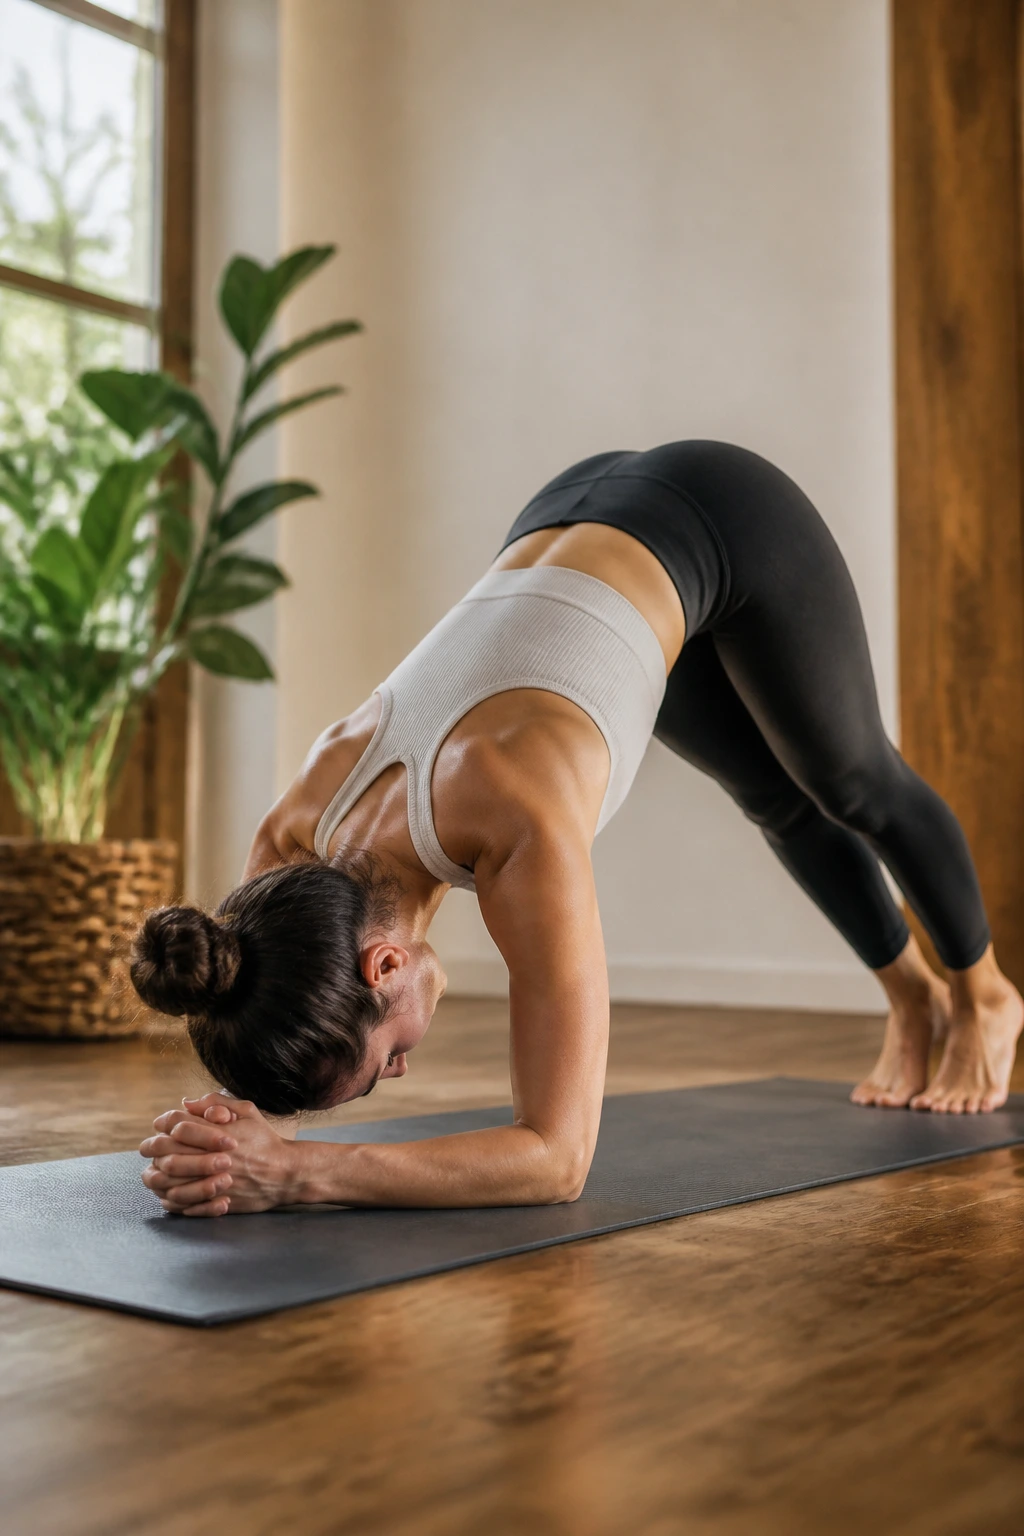
If plank irritates your wrists, dolphin gives you a shorter lever and a harder shoulder lesson. That’s a good trade for many bodies, especially when the forearms and upper back need a serious core challenge.
Set the forearms down, lift the hips, and walk the feet in until the pose feels strong but not cramped. The shoulders should stack roughly over the elbows, and the ribs should stay contained. If the head dumps toward the floor, back up a few inches.
Quick Checks
- Forearms parallel or slightly turned in.
- Neck relaxed.
- Heels can stay high.
- Belly firm, not sucked in hard.
Dolphin has a way of exposing hidden weakness without being flashy about it. It’s a workhorse.
15. Upward Plank Pose
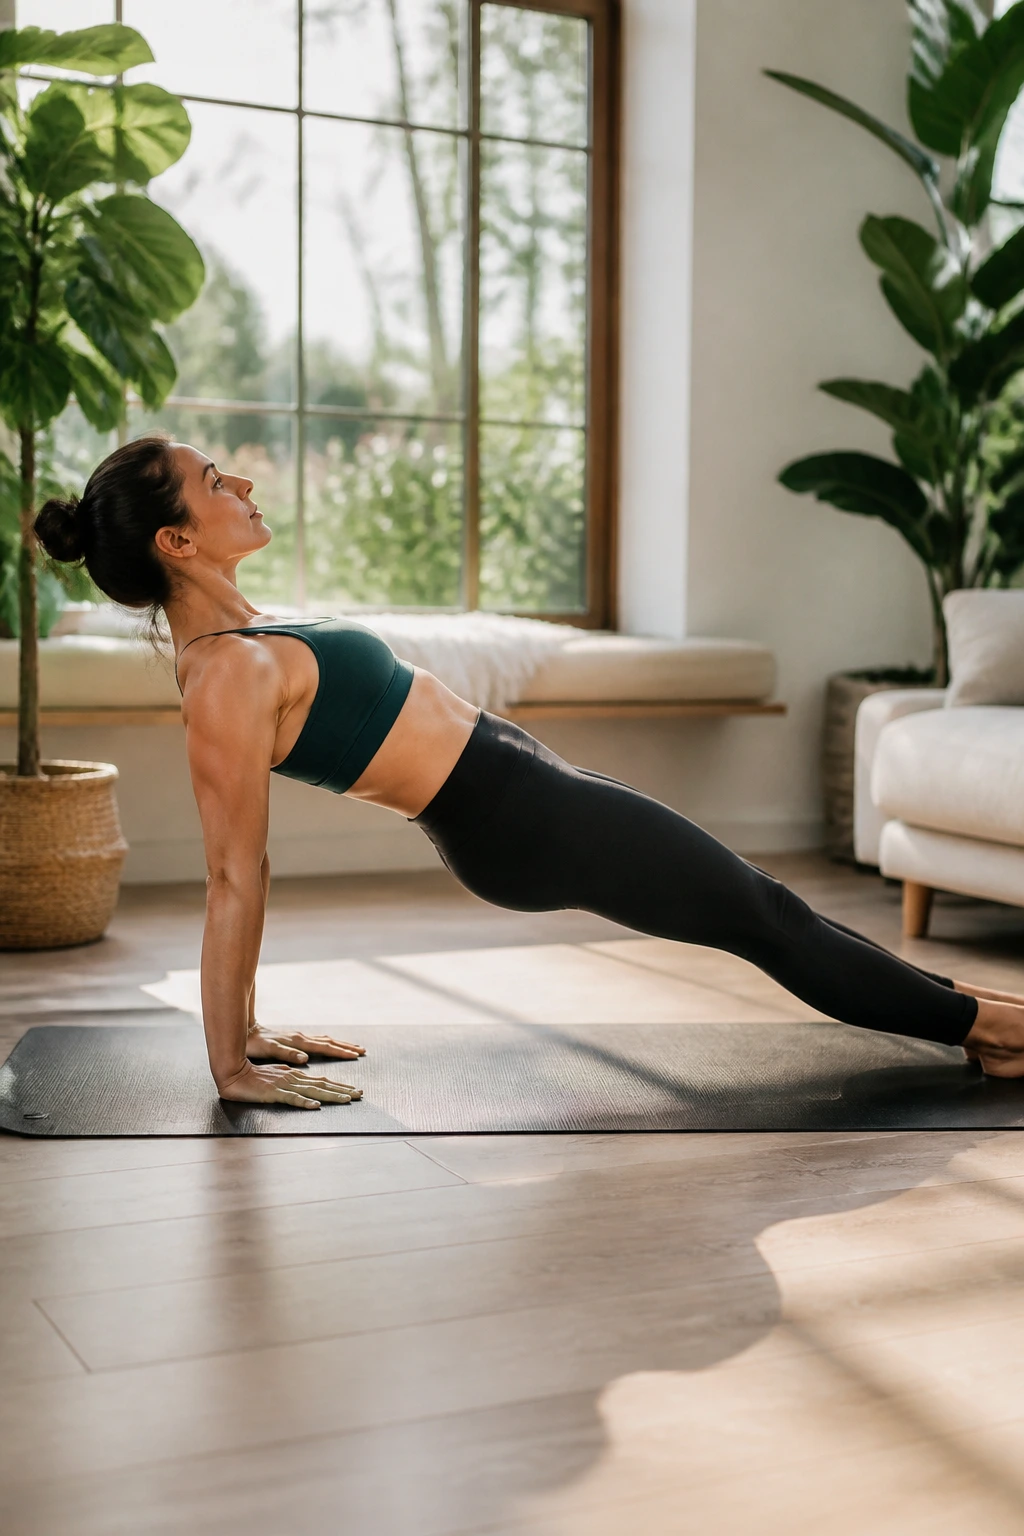
Upward plank does not get enough respect. People love bridge because it feels accessible, but the straight-arm version asks for more shoulder extension, more hamstring reach, and a steadier trunk to keep the hips from dropping.
Sit with legs long, hands behind the hips, fingers pointing toward the feet or slightly out to the sides if the wrists are tight. Lift the hips until the body makes a long diagonal. The chest opens, yes, but the center has to keep the ribs from flaring into a sloppy arch.
A bent-knee version works fine. So does a shorter hold. In fact, shorter holds tend to stay cleaner because the pose can get ugly fast when people chase height instead of alignment.
This one feels old-school, and I mean that in a good way. It is direct.
16. Crow Pose
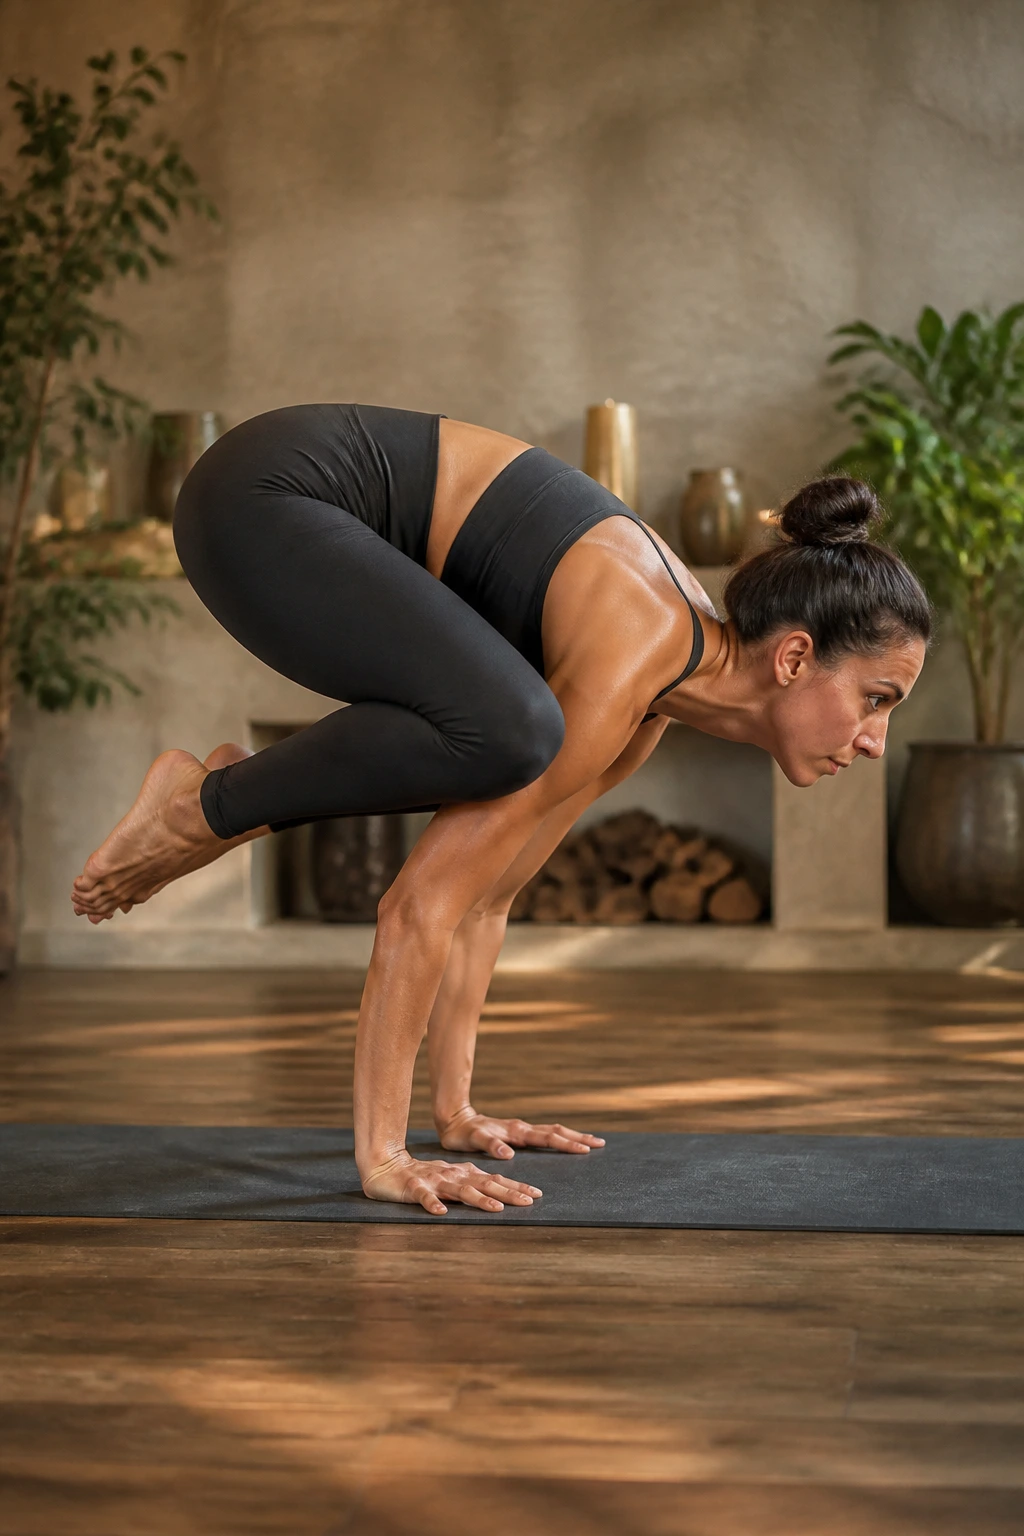
Unlike plank, crow asks you to move the knees onto the shelf of the triceps while keeping the upper back rounded and the belly active. That shift from horizontal support to arm balance is what makes it such a sharp core builder.
The hands need a steady base, fingers spread wide, with the elbows pointing back rather than out like chicken wings. Start with the toes on the floor and the hips high. Then tip forward just enough that one foot, then both feet, get light.
Getting In Without Rushing
- Place a folded blanket in front of the face if fear is the issue.
- Look slightly ahead, not straight down.
- Keep the elbows bent, not locked.
- Squeeze the knees into the upper arms.
Crow is not about hanging out in the air forever. Five to ten seconds done with focus is plenty.
17. Side Crow Pose
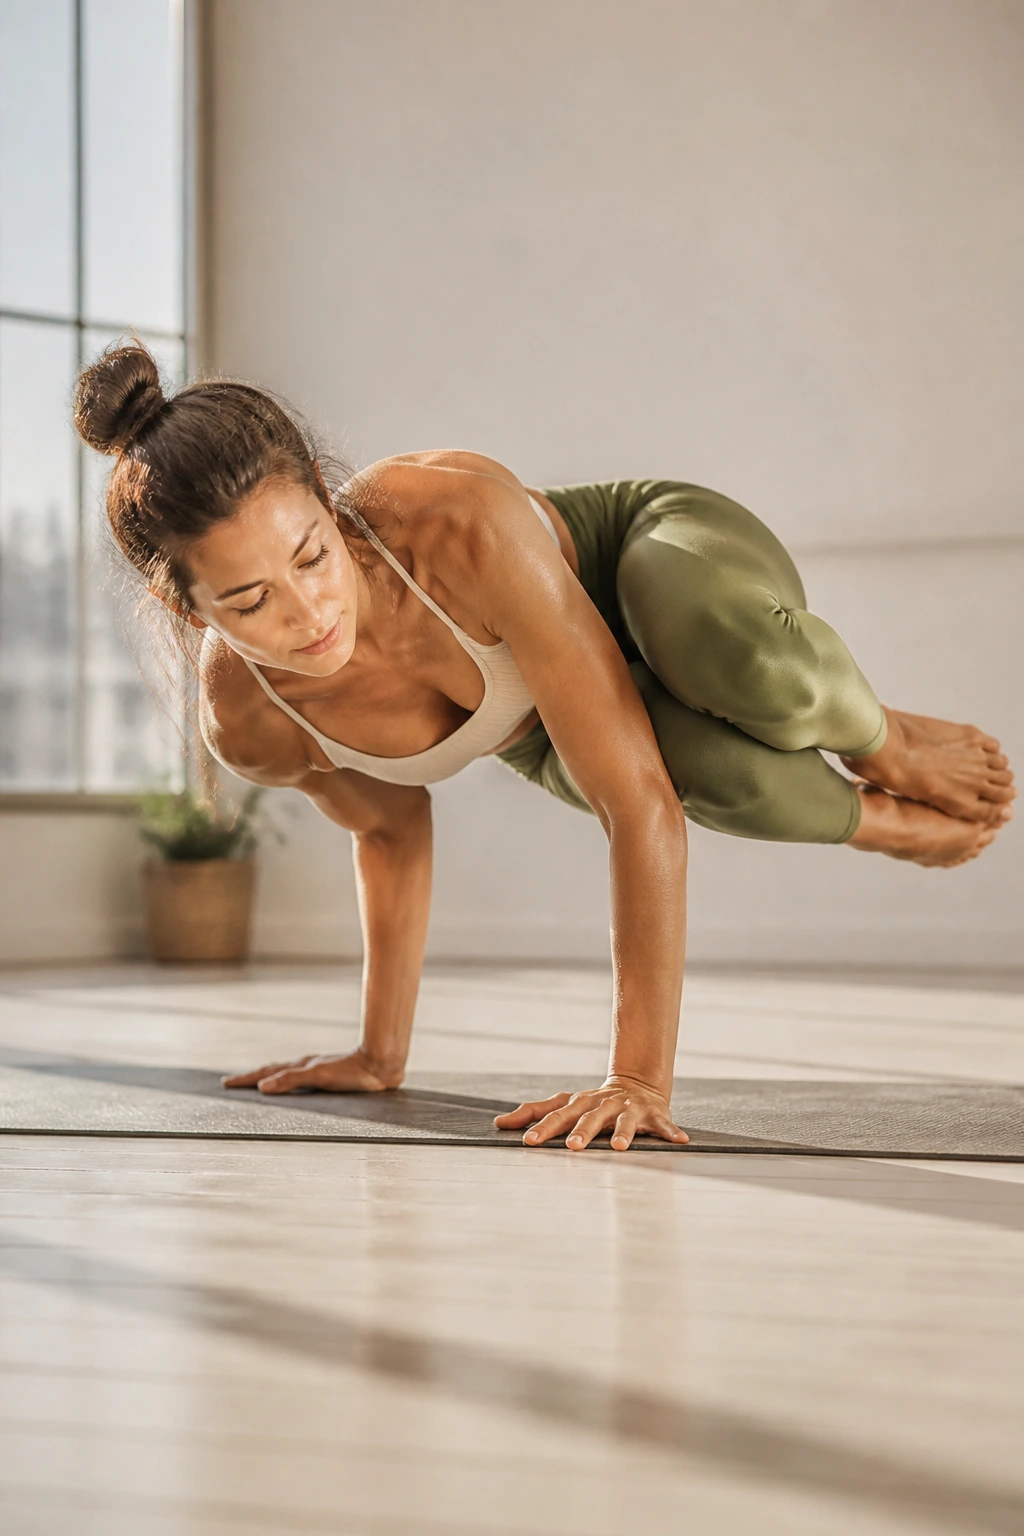
Side crow is where rotation stops being a theory. The torso has to twist, the arms have to bear weight, and the knees have to find a shelf that feels awkward until it suddenly doesn’t.
Enter from a low squat or a twist in chair pose. Plant the hands, then place the knees high on one triceps. The hips tip sideways, the feet lift, and the waist works hard to keep the body from dumping off the edge of the pose.
A lot of people make side crow harder by trying to straighten the legs too soon. Leave the knees bent. Keep the gaze steady. Build a shape you can repeat, not a shape you can barely survive once.
This pose rewards calm more than strength. That surprises people.
18. Wild Thing
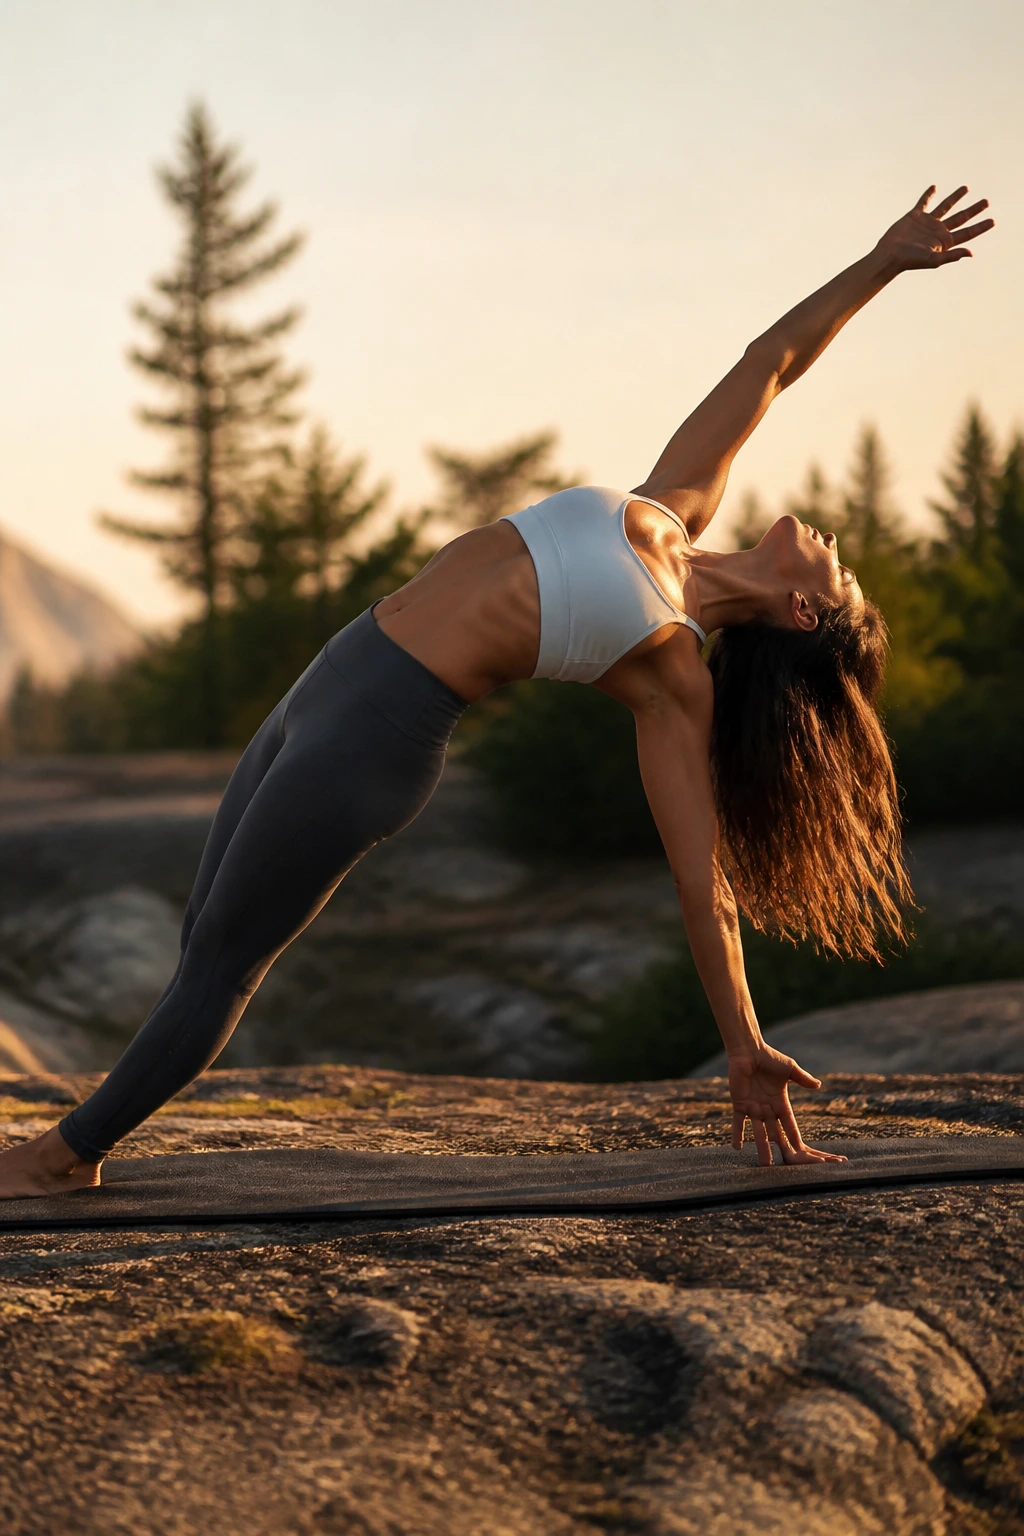
Wild Thing is not a core pose because it looks wild; it earns the name because the trunk has to keep the shoulders from spilling open while the hips stay lifted and the chest reaches back. Without that control, it turns into a flop.
Coming out of side plank, lower one foot behind you, plant it softly, and open the chest. The lifted arm can arc overhead if the shoulder likes it, but the ribs need to stay knitted enough to keep the low back from cranking.
This is one of those poses that can feel either playful or messy, and the difference is usually the exit from side plank. If the transition is rushed, the pose loses its shape before it starts. Slow down, place the back foot with intention, and let the twist unfold.
Shoulders that do not like deep extension should skip it. No drama there.
19. Revolved Triangle Pose
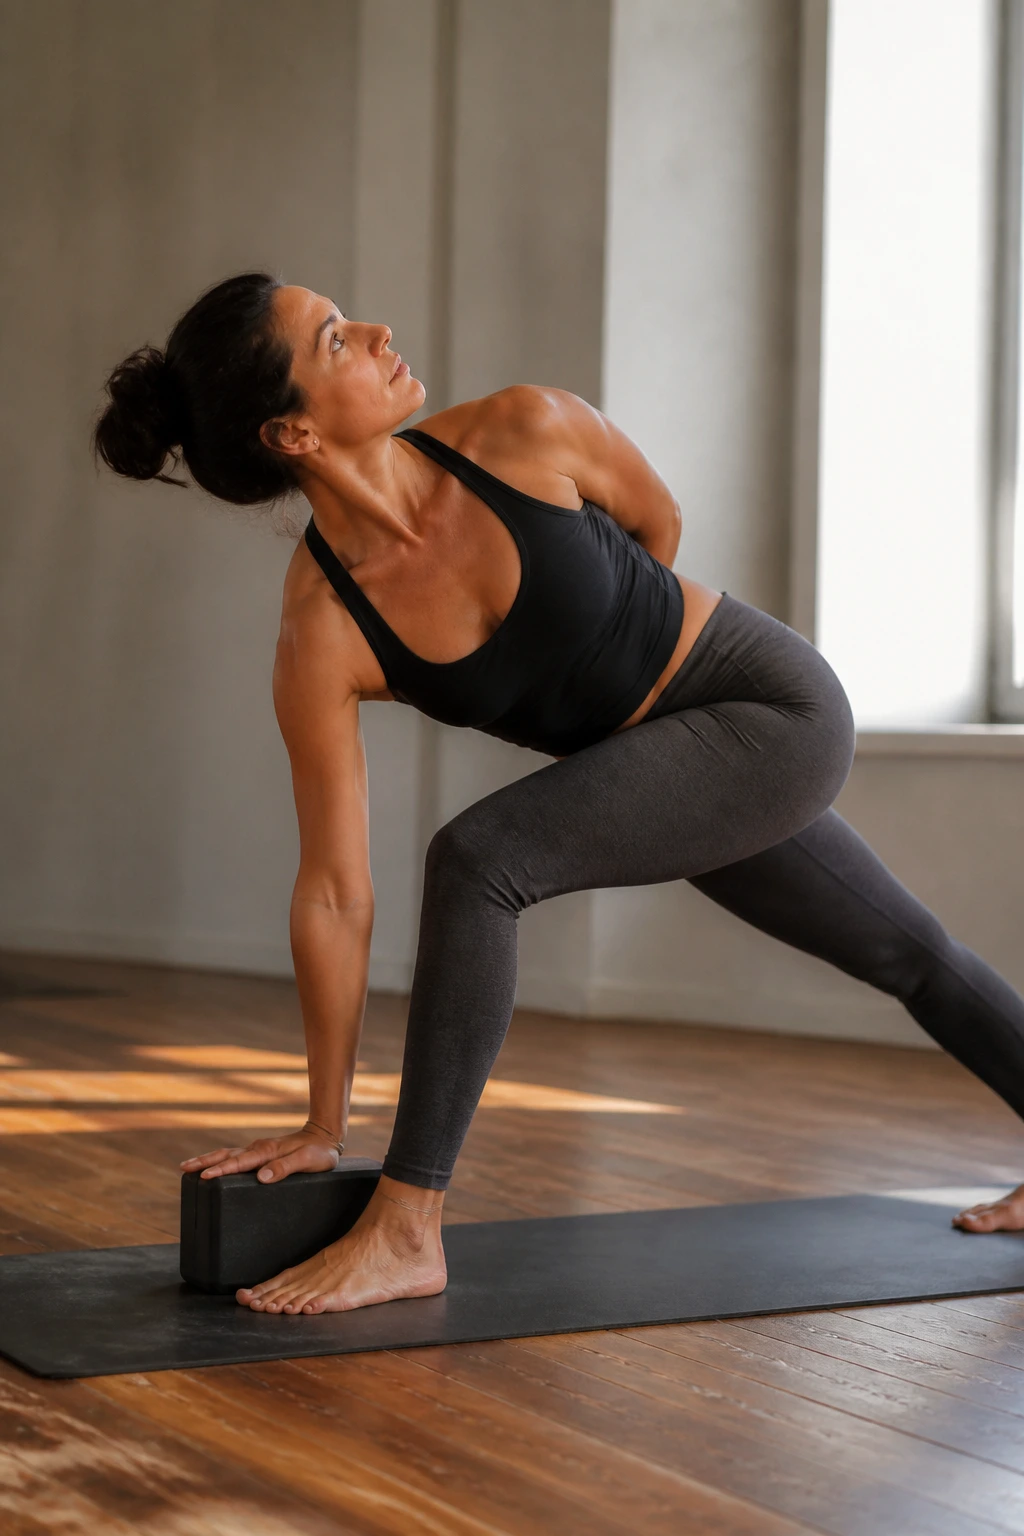
Why does a twist in a split stance feel so sneaky? Because the hips want one thing, the ribs want another, and the spine has to sort the argument out without losing balance.
Start with a long stance, hinge at the hips, and place the hand to the floor or a block outside the front foot. Before turning, lengthen the spine. Then rotate from the chest and keep the back heel rooted. A tiny bend in the front knee often makes the whole pose more honest.
Feet Before Twist
- Front toes point forward.
- Back foot turns in slightly.
- Hips stay level as much as possible.
- Twist only as far as you can breathe.
The core work here is subtle and relentless. You feel it around the waist, but also down through the standing leg and into the floor.
20. Revolved Side Angle Pose
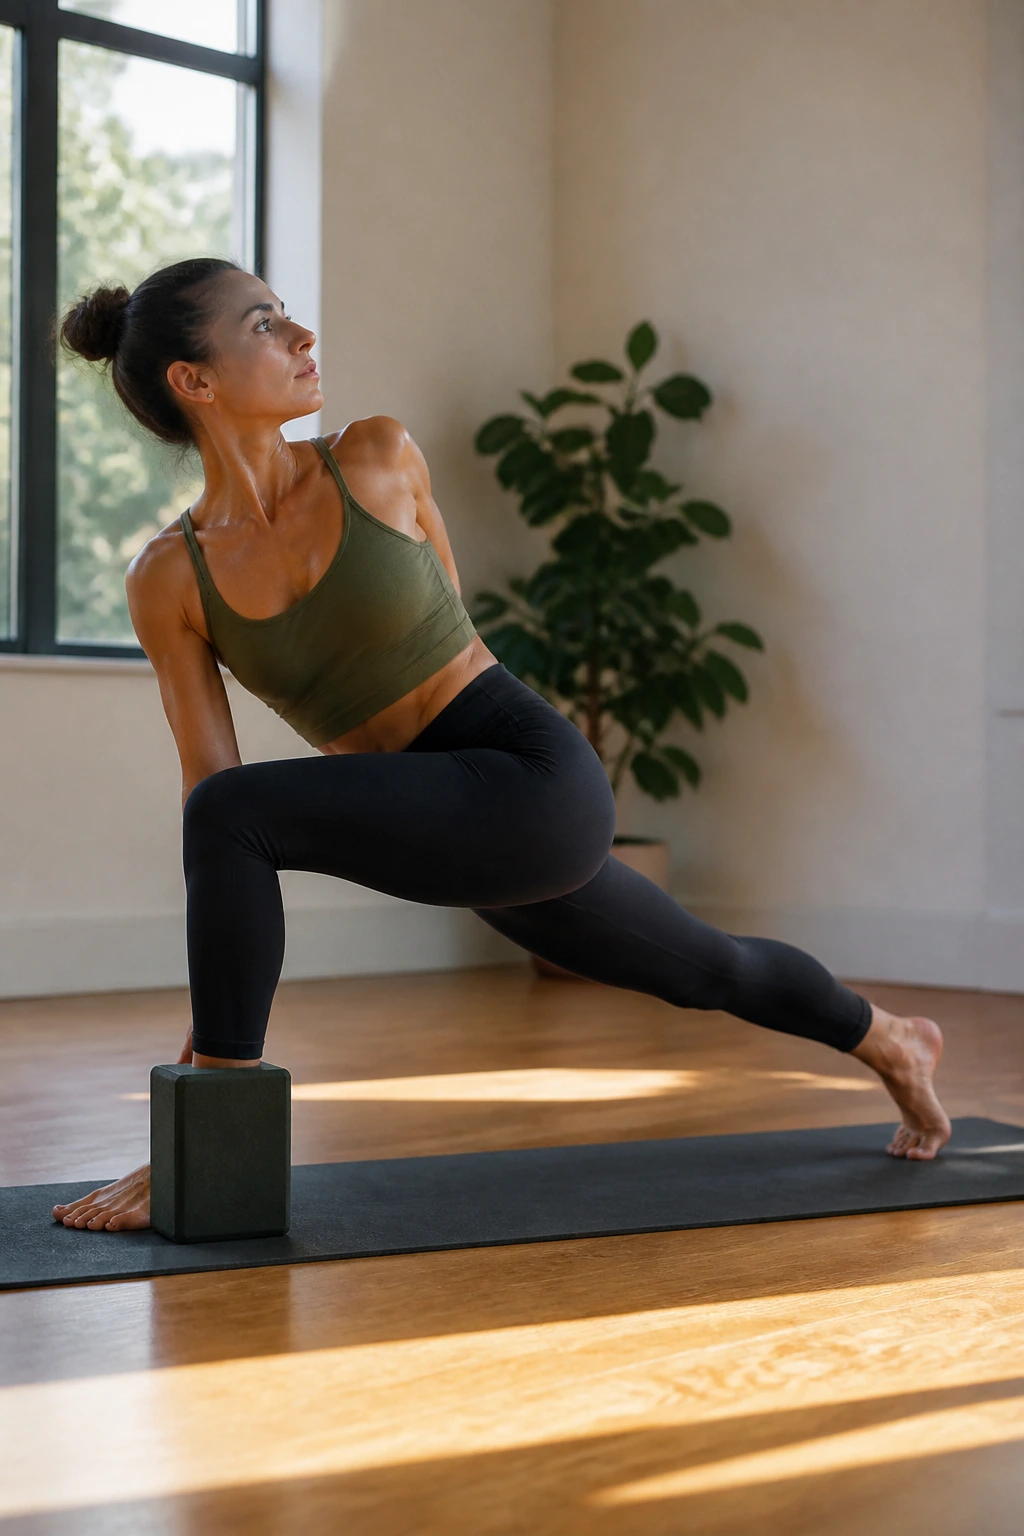
Take revolved triangle, drop into a lunge, and suddenly the obliques have to work against gravity and torque at the same time. Revolved side angle is a bigger ask, and it shows.
The back heel can stay lifted or grounded, depending on the variation. The front thigh does more of the supporting, the back leg reaches, and the torso turns inside the narrow frame of the legs. That narrow frame is what makes the pose useful. It leaves little room to cheat.
The chest does not need to force itself open. Keep the spine long first. If the lower back rounds hard, rise a little. If the shoulder jams against the knee, place the bottom hand on a block and create space.
This pose feels cleaner when you think about length before twist. Twist without length turns into a grind.
21. Standing Hand-to-Big-Toe Pose
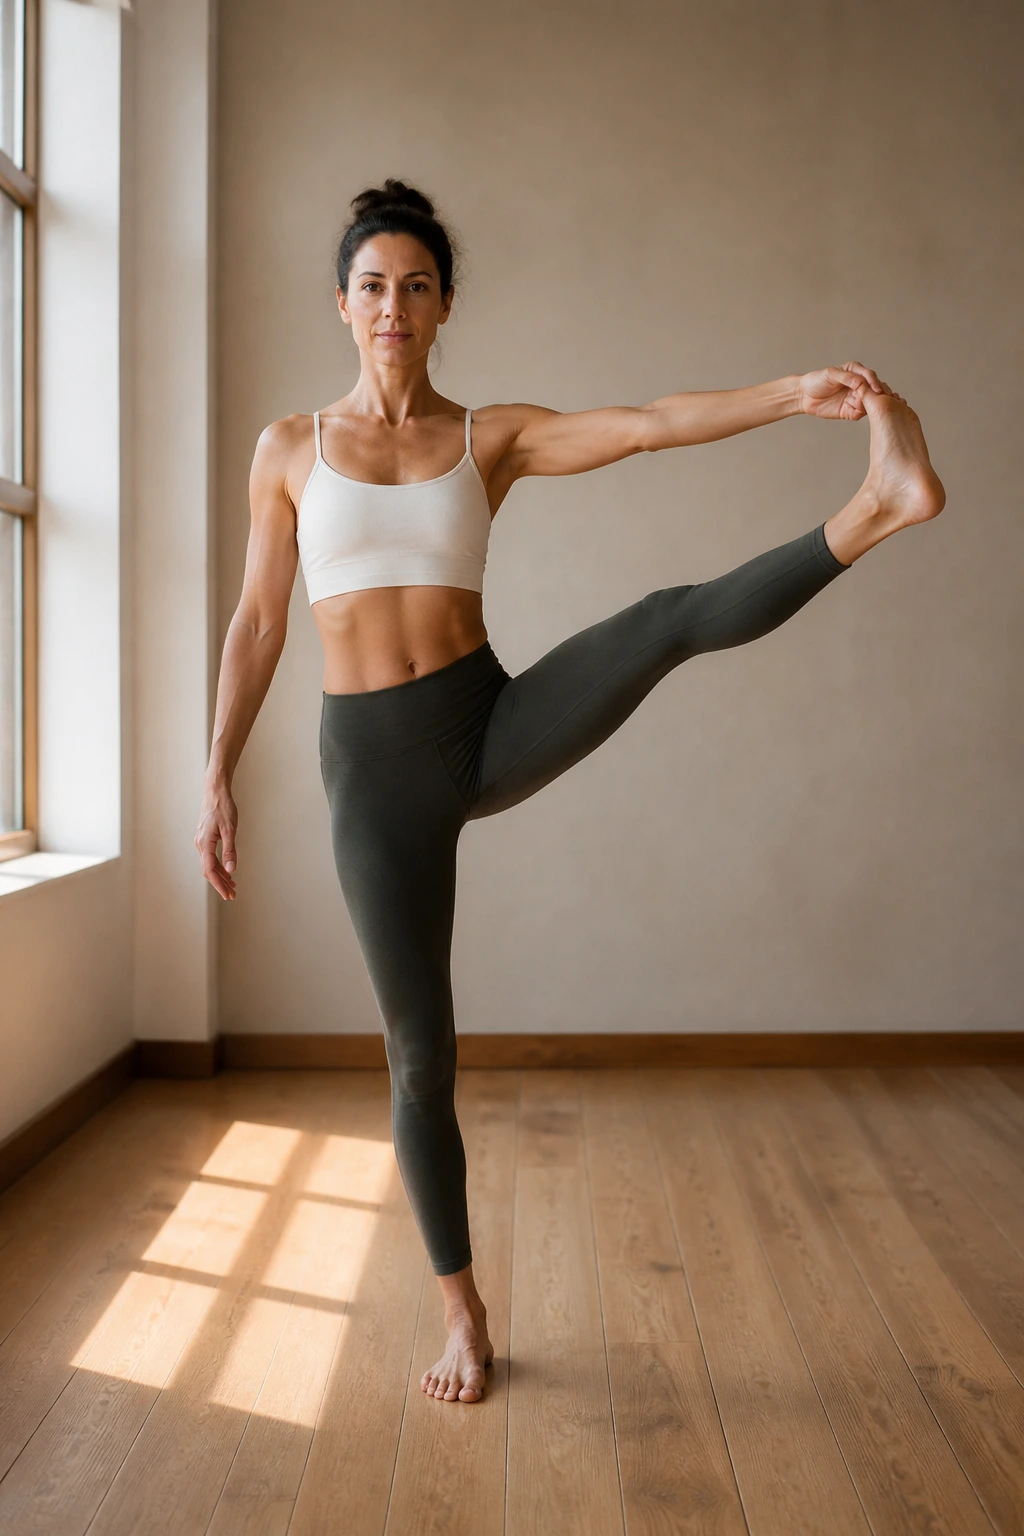
Standing hand-to-big-toe pose teaches balance in a blunt, practical way. One leg does the work, the lifted leg tests your mobility, and the center keeps the whole shape from wandering all over the room.
Hold the big toe or use a strap around the foot if the hamstring is tight. Lift the leg only as high as the pelvis can stay level. A lot of people kick the leg up and lose the trunk; that defeats the point.
The standing foot matters more than it gets credit for. Spread the toes, root through the big toe mound, and keep the standing hip from hiking up toward the ear. That tiny detail steadies the waist and makes the pose feel less like a fight.
If balance is shaky, keep one hand on a wall. That is not cheating. That is smart.
22. Tree Pose
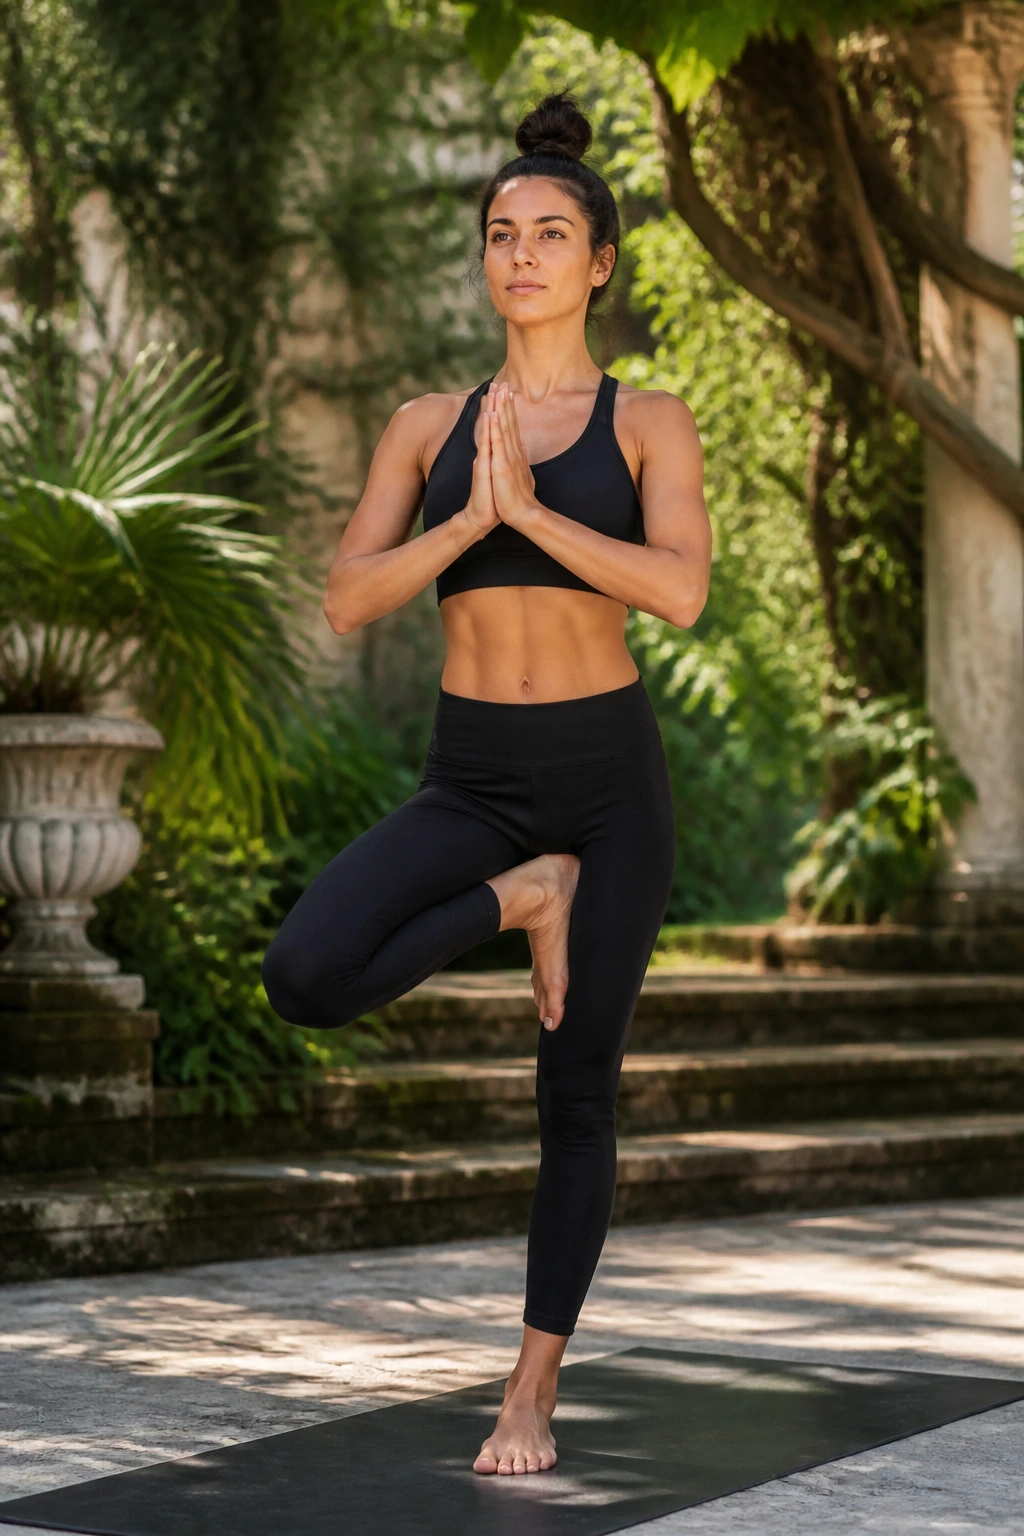
Tree seems gentle until the standing foot starts wobbling and the pelvis wants to tilt. Then you realize the pose is asking for quiet strength, not drama.
Unlike the bigger arm balances, tree trains the core through stillness. The lifted foot can rest at the ankle, calf, or inner thigh. Never press it into the knee. That’s not a yoga quirk; it keeps the joint safe while the trunk learns to stay upright.
A Better Way to Practice Tree
- Set the standing hip level first.
- Find one fixed point to look at.
- Keep the ribs stacked over the pelvis.
- Lower the lifted foot before the shape breaks.
Tree is one of the best places to learn patience with small adjustments. A milder version held cleanly is better than a high version held like a rescue mission.
23. Dancer Pose
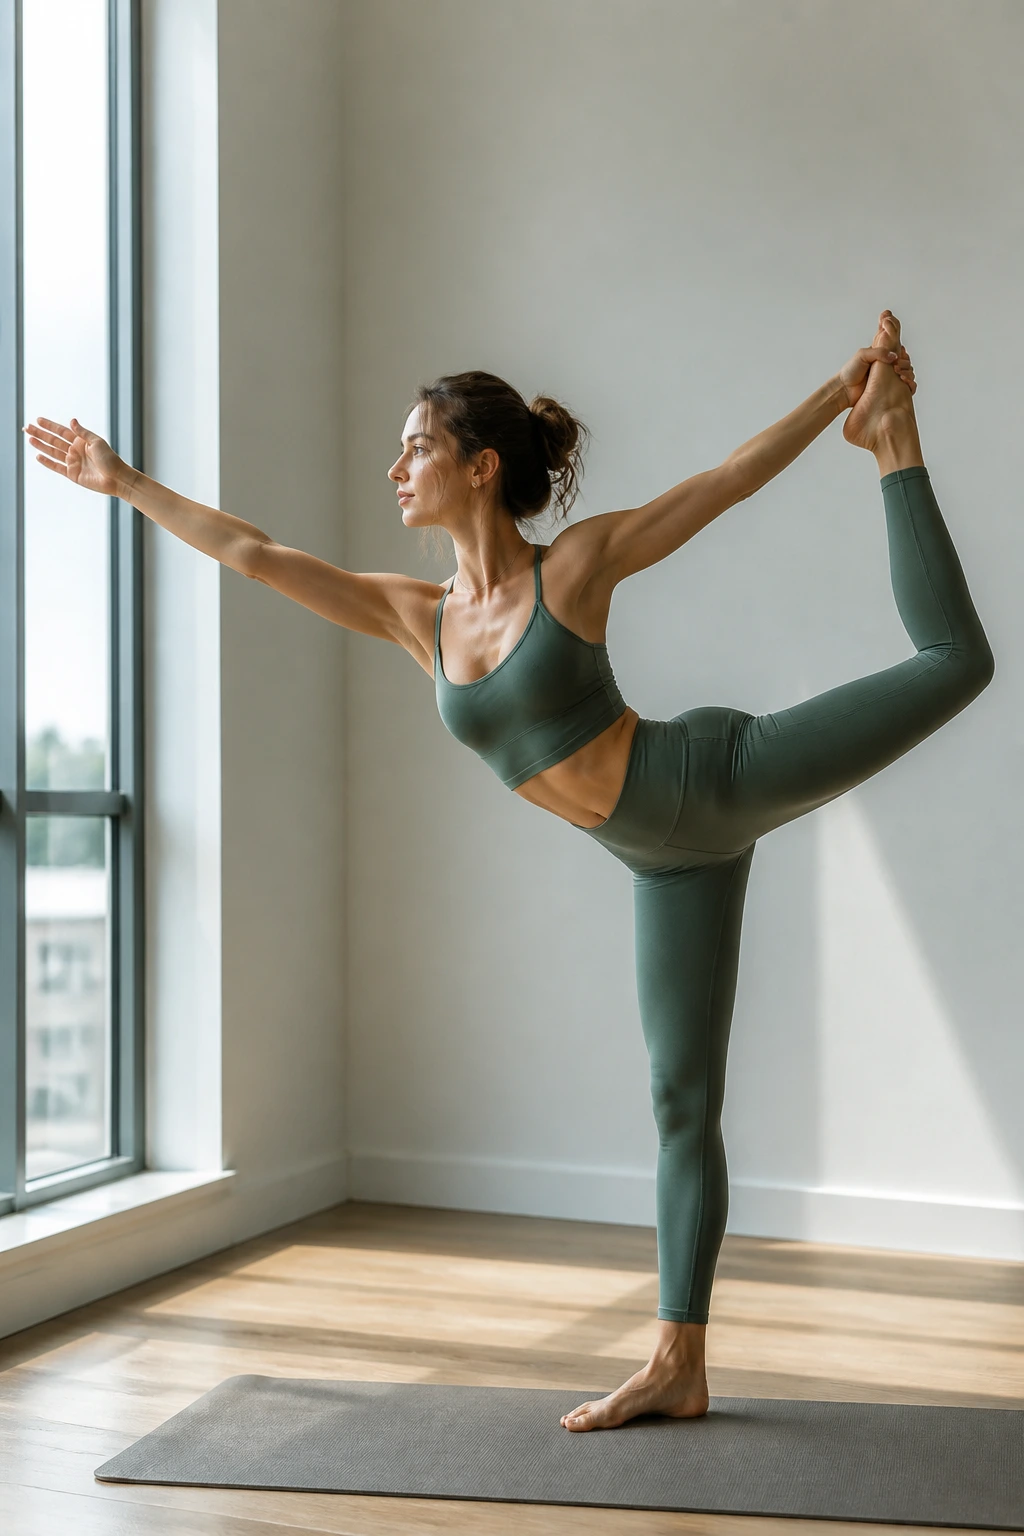
Dancer pose is part balance, part backbend, part ego check. The lifted leg pulls behind you, the chest opens, and the core has to keep the whole thing from turning into a dramatic lean.
The standing leg should feel grounded before you reach back. Grab the inside or outside of the lifted foot, tip the torso forward a touch, and kick the foot into the hand as the chest reaches ahead. That opposing action keeps the pose from folding at the low back.
What Helps Most
- Keep the standing knee soft.
- Aim the lifted knee down, not out.
- Reach forward before you reach up.
- Hold for 2 to 4 breaths, then switch sides.
Dancer is beautiful when it is controlled. When it is not, it becomes a wobbly backbend with a poor attitude.
24. Bridge Pose
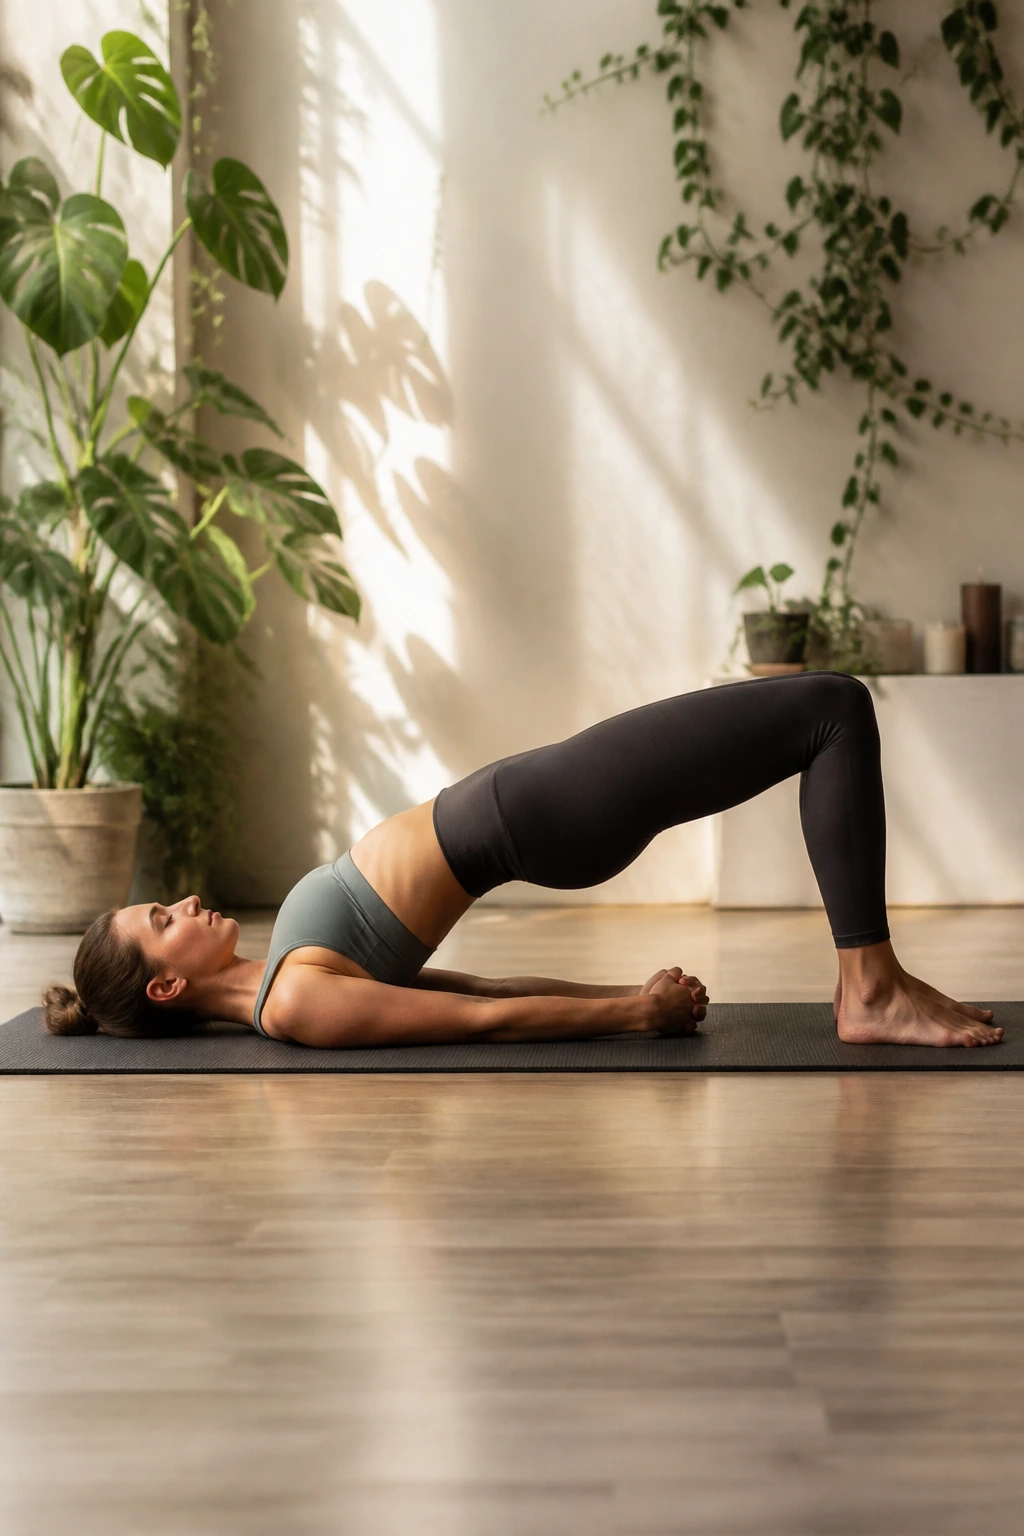
Bridge is underrated because people see glutes first and core second. That misses half the point. A clean bridge keeps the ribs from flaring, the pelvis from tilting too far, and the spine from cranking instead of lifting.
Plant the feet hip-width apart, knees forward, and press through the heels to lift the hips. The hands can stay by the sides or clasp under the body if the shoulders allow it. Keep the chin slightly tucked so the neck stays long.
A Few Useful Cues
- Inner thighs stay gently active.
- Ribs knit toward the belly.
- Lift from the tailbone, not the low back.
- Lower slowly, one vertebra at a time.
Bridge is a fine place to build endurance. It also sets up a lot of harder backbends later, which is why I never skip it when the spine feels stiff.
25. Wheel Pose
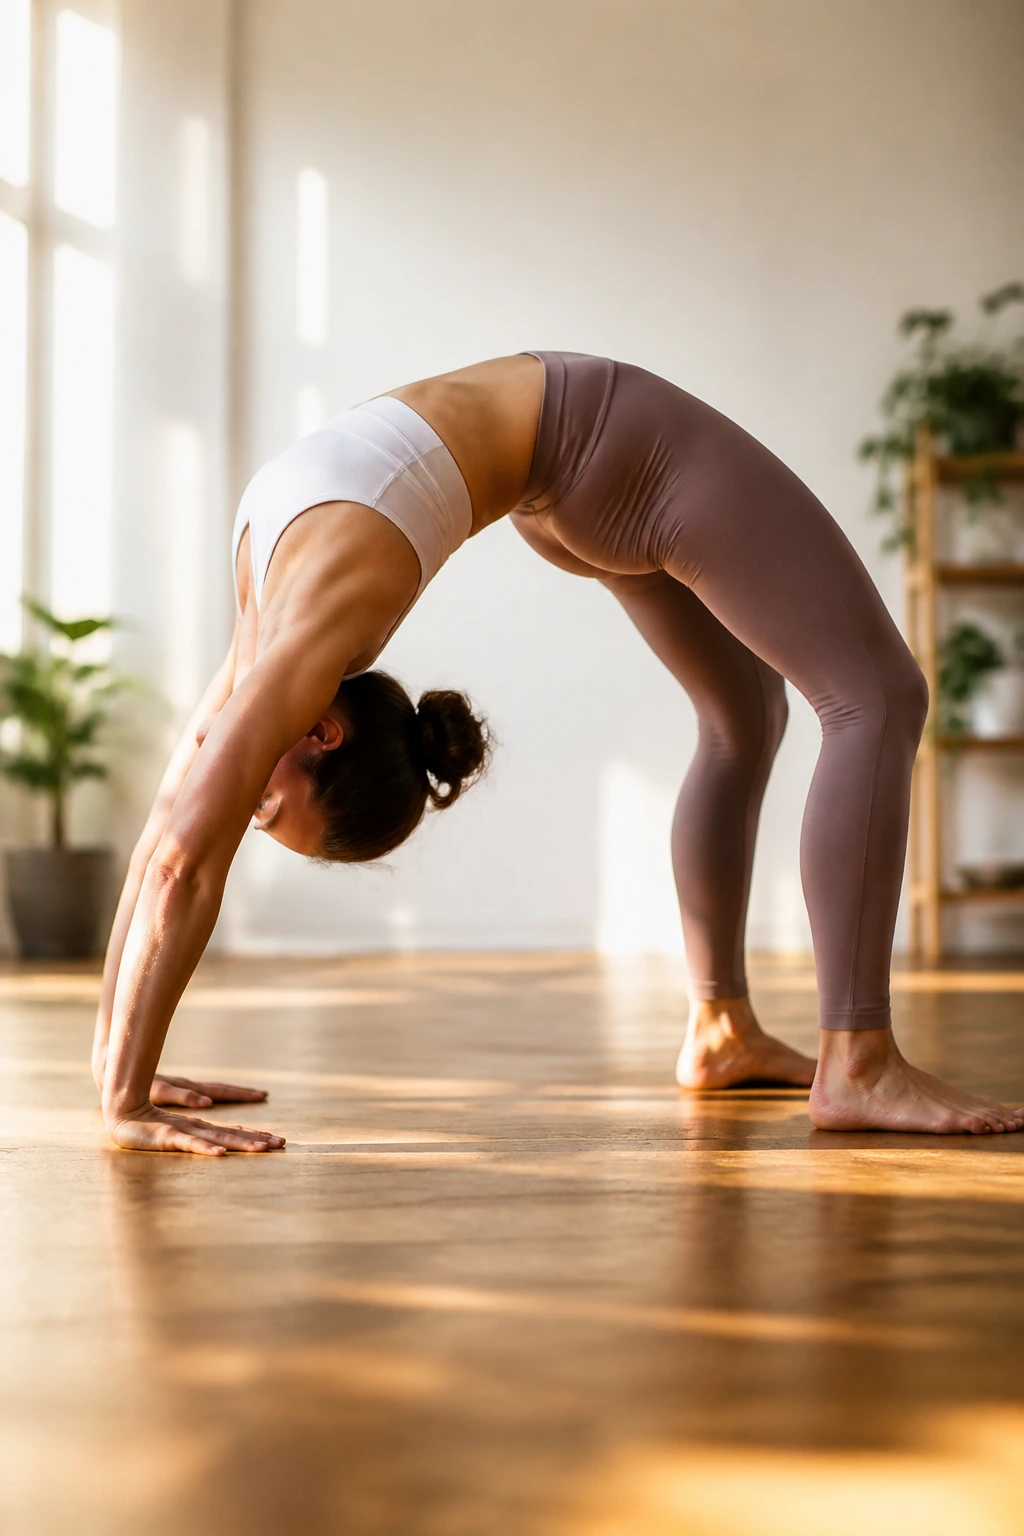
Wheel is the final boss only if you treat it like one. Done well, it is less about flinging yourself upward and more about distributing effort through the hands, feet, shoulders, and center so the spine can arc without getting crushed.
Lie on your back, bend the knees, and place the hands beside the ears with the fingers pointing toward the shoulders. Press up through the crown of the head first if needed, then straighten the arms only when the shoulders are ready. The feet should stay rooted, and the knees should track forward, not splay wide.
A good wheel feels broad across the chest and active through the belly, even though it looks like a big backbend from the outside. That inner support is the difference between a pose that opens you up and one that simply yanks on your lower spine.
If wheel feels like too much, stay with bridge, dolphin, and plank for a while longer. There’s no prize for rushing this one. The quiet strength you build in the earlier poses shows up here, and it shows up fast.
