



A blank wall is a brutally honest Pilates teacher. Stand against it for 10 seconds and it will tell you more about your posture than a mirror sometimes can: one shoulder higher than the other, ribs popping forward, chin drifting out, weight sunk into the heels.
That is why wall Pilates exercises for beginners work so well. You get constant feedback without a reformer, without springs, and without guessing whether your core is holding steady or your lower back is doing all the work. The wall gives you contact, and contact changes everything.
Most beginners hit the same roadblocks early. They hold their breath. They tuck the pelvis too hard. They move an arm or leg and the rib cage jumps with it. They press so much with the neck that the upper traps take over. A wall turns those fuzzy Pilates ideas into things you can feel right away.
Once you know what a quiet rib cage, heavy sacrum, soft jaw, and steady breath feel like, beginner Pilates stops feeling abstract. It starts feeling teachable.
Why the Wall Gives You Instant Form Feedback
The wall cuts down on guessing. If the back of your ribs lifts when your arms go overhead, you feel the loss of contact. If one hip twists forward during a standing leg move, the shift is harder to hide. That kind of feedback matters more than fancy equipment when you’re learning the basics.
It also slows you down—in a good way. Beginner Pilates falls apart fast when the movement gets quicker than the breath. A wall encourages smaller, cleaner reps, and small clean reps are where strength starts.
There’s another benefit people do not talk about enough: confidence. Floor work can feel awkward when you’re still learning pelvic position or core control. The wall gives you a fixed point, which makes balance drills, standing work, and even basic spinal movement feel less wobbly.
I like wall work for one more reason. It teaches restraint. If you can keep your ribs down, your shoulders wide, and your neck easy with a wall nearby, you’re building control that carries over to mat Pilates, strength training, and everyday posture too.
How to Set Up a Small Home Space for Beginner Wall Pilates
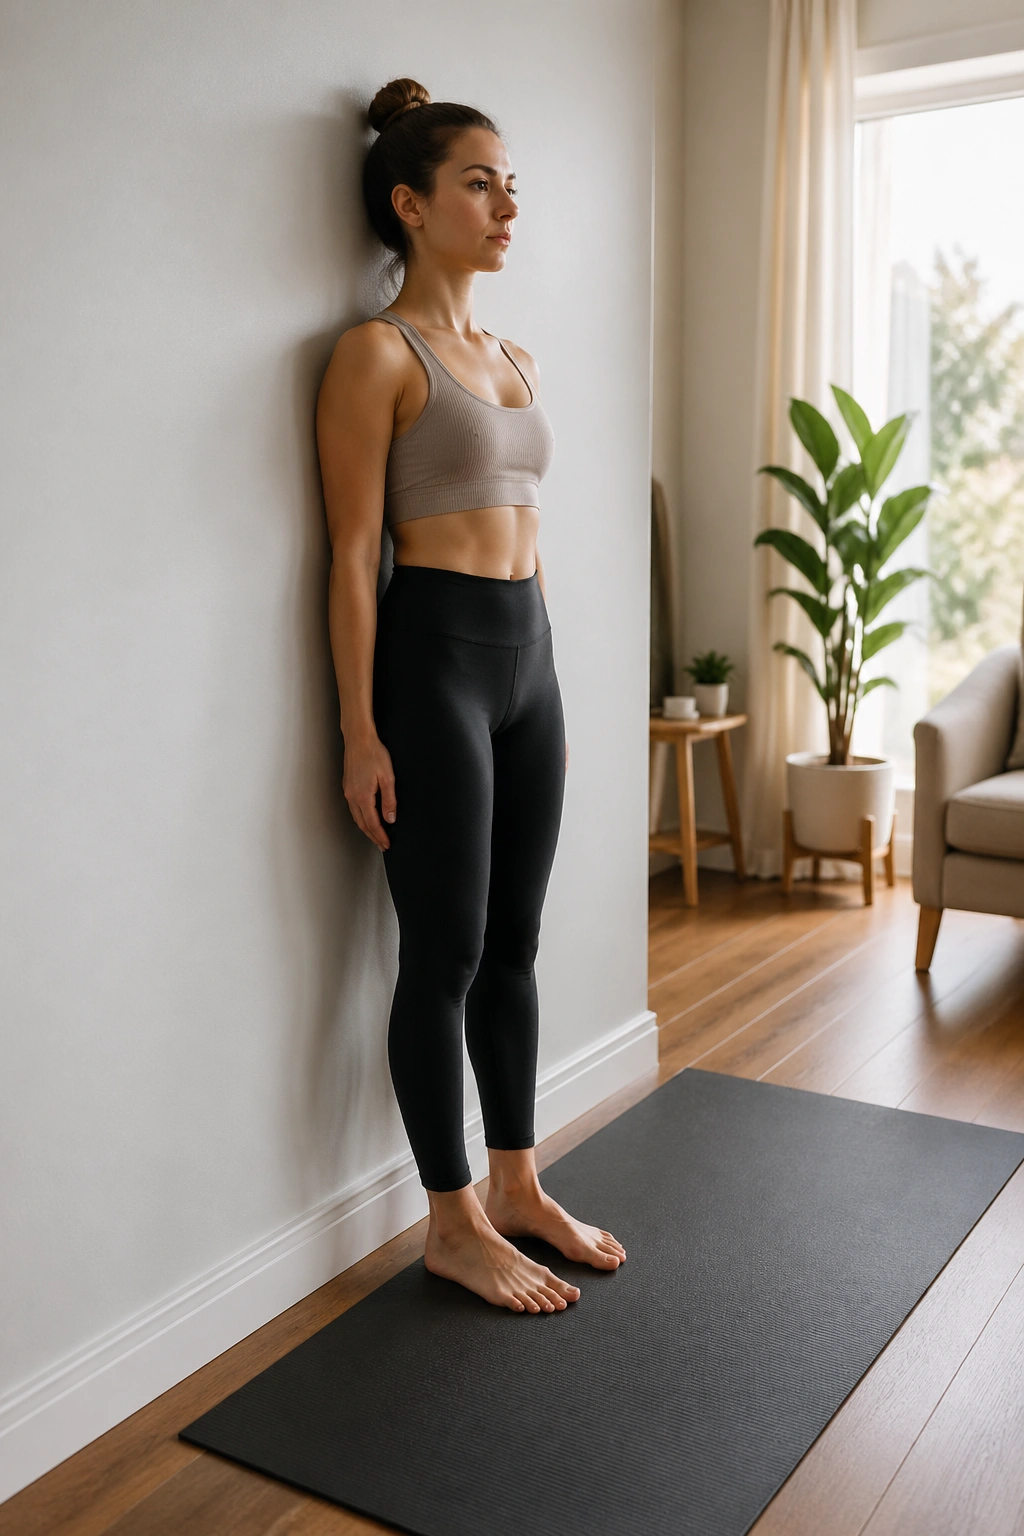
You do not need a studio corner. A patch of wall, a yoga mat, and enough floor space to lie down with your legs up the wall will do the job.
Shoes are optional, though I prefer bare feet or grippy socks for most wall Pilates sessions. Thick running shoes make it harder to feel your foot tripod—the base under the big toe, little toe, and heel. On hardwood, grippy socks help. On carpet, bare feet usually feel steadier.
A few setup details make a bigger difference than people expect:
- Place your mat so it will not slide when your feet press into the wall.
- Stand about 2 to 4 inches from the wall for posture drills unless the move says otherwise.
- If you have tight hamstrings, keep a folded towel nearby for head support during supine work.
- Use a wall section without frames, shelves, or baseboard heaters close to your head or feet.
- Sharp pain means stop. Muscle effort is fine; pinching in the back, hips, wrists, or neck is not.
One rule matters more than the rest: exhale during the hard part. In Pilates that usually means exhale as you curl, press, lift, or stabilize against movement. Inhale to prepare, widen the ribs, and reset.
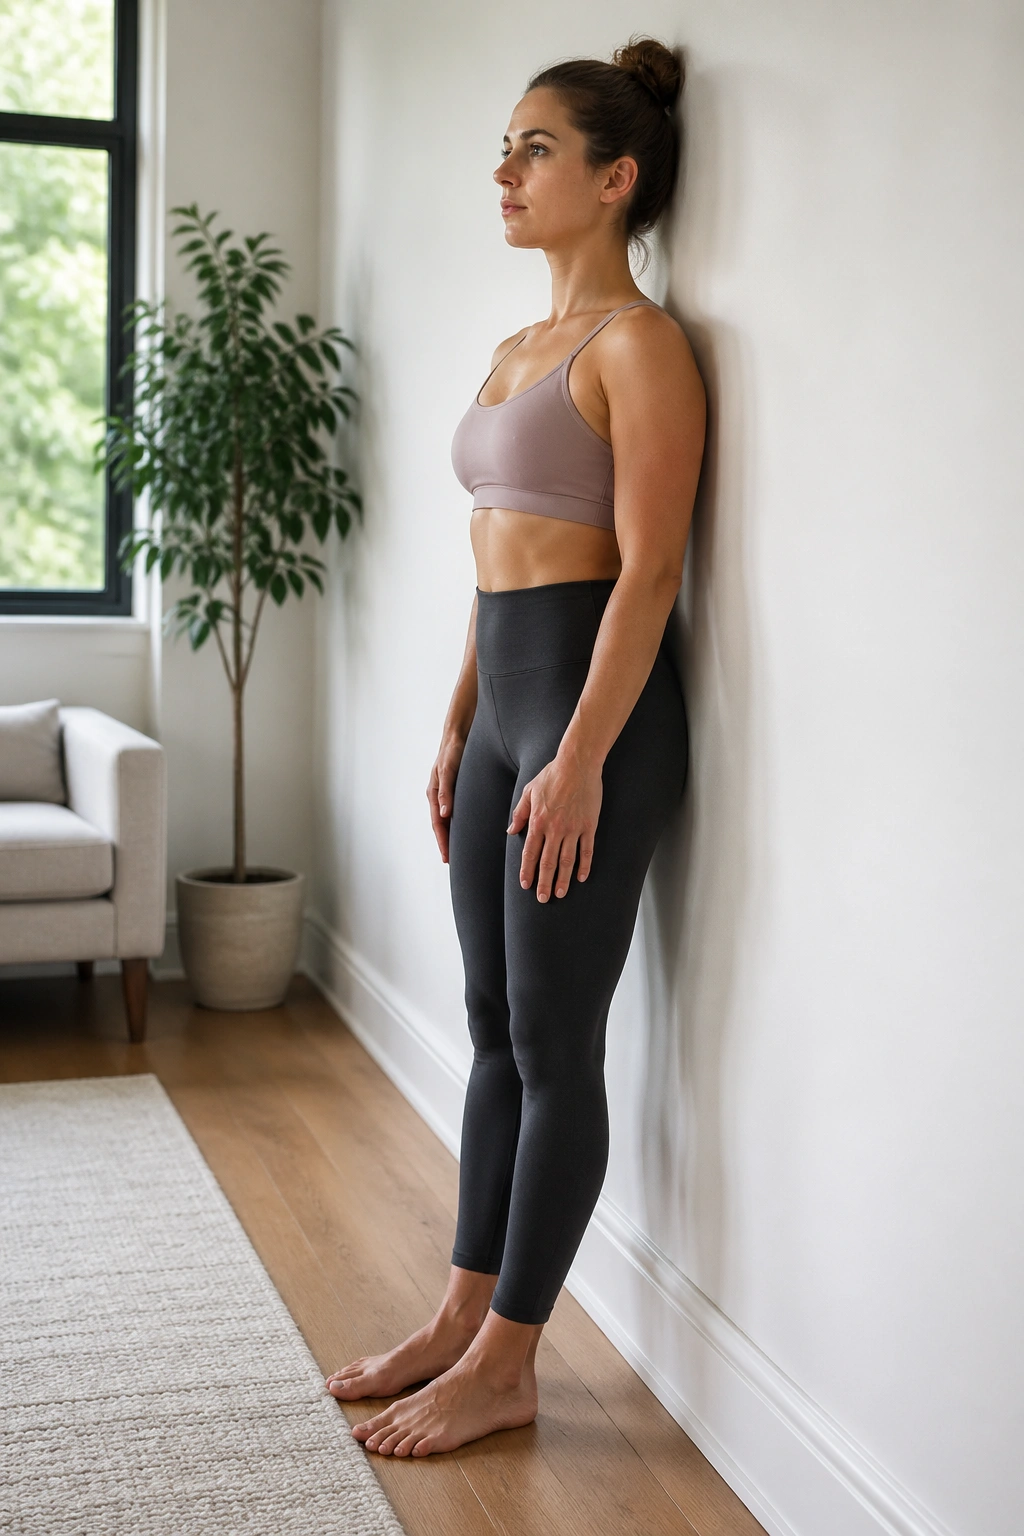
1. Wall Alignment Stand
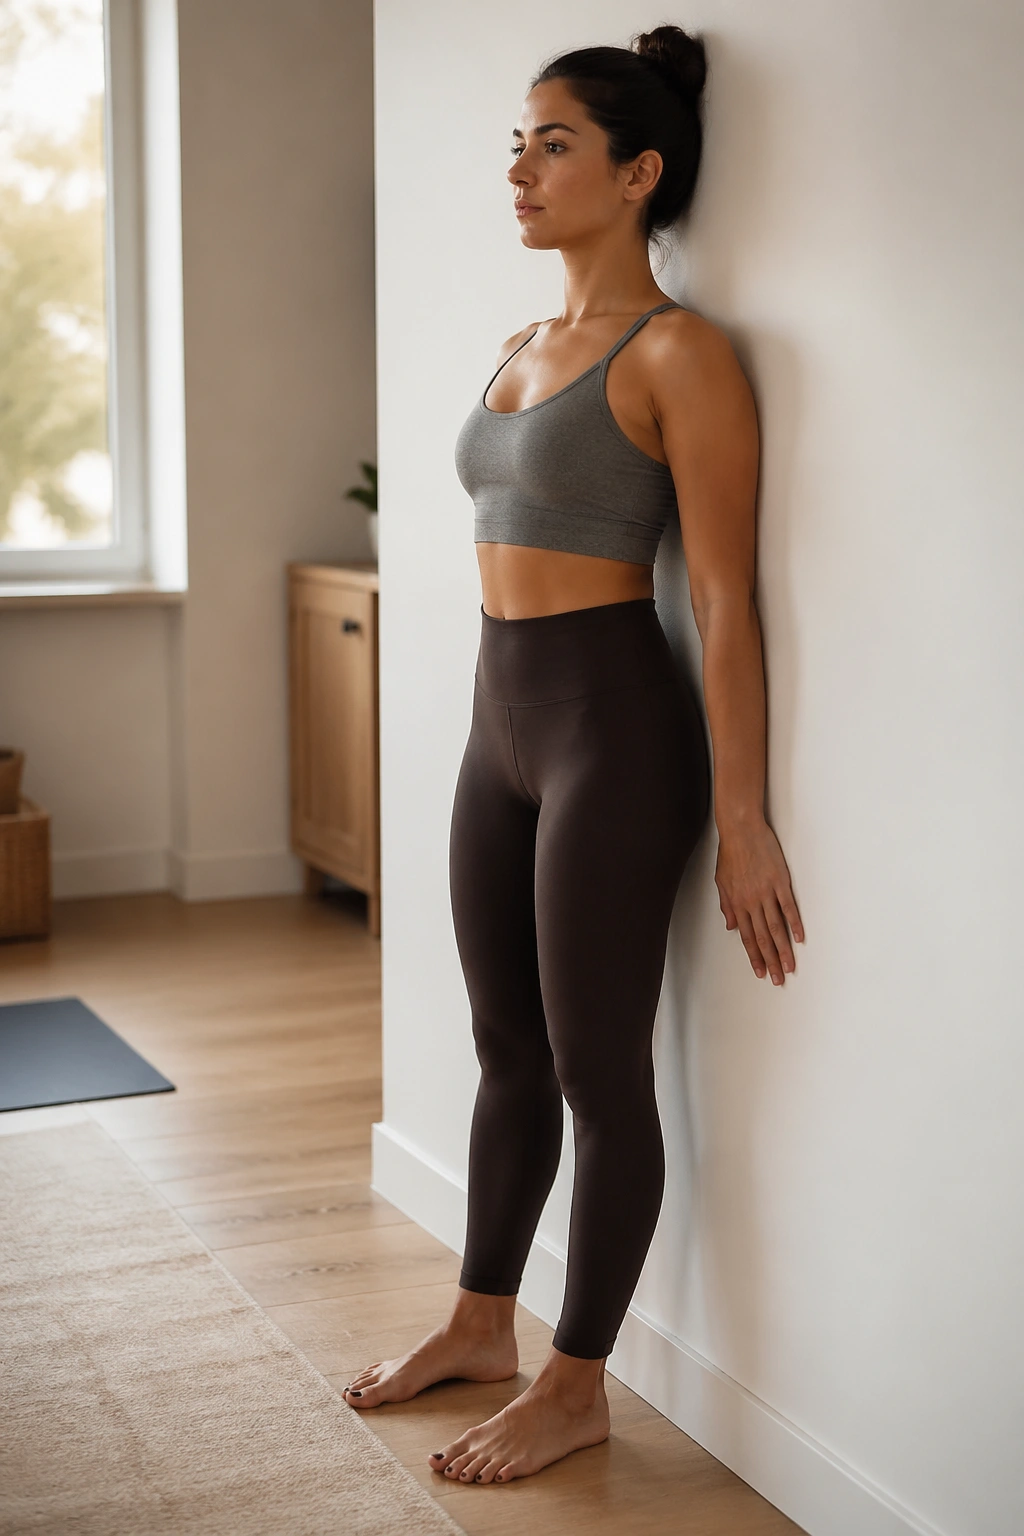
Boring? Maybe. Useful? Absolutely.
Stand with your back to the wall, feet hip-width apart, heels about 2 to 4 inches forward from the baseboard. Let the back of your pelvis, rib cage, and head meet the wall if that feels natural. Your low back should keep a small curve; do not mash it flat.
Stay there for 5 slow breaths. Notice where your body wants to cheat. A lot of people find one shoulder blade touches first, or the chin wants to lift, or the ribs nudge forward. That is the whole lesson.
What you’re learning here is neutral alignment, not military posture. Soften the knees. Let the breastbone settle. Keep the back of the neck long. I often tell beginners to think “tall and wide,” not “stiff and straight.”
Do 3 rounds before the rest of your workout. It makes the next 10 minutes cleaner.
2. Wall Roll Down
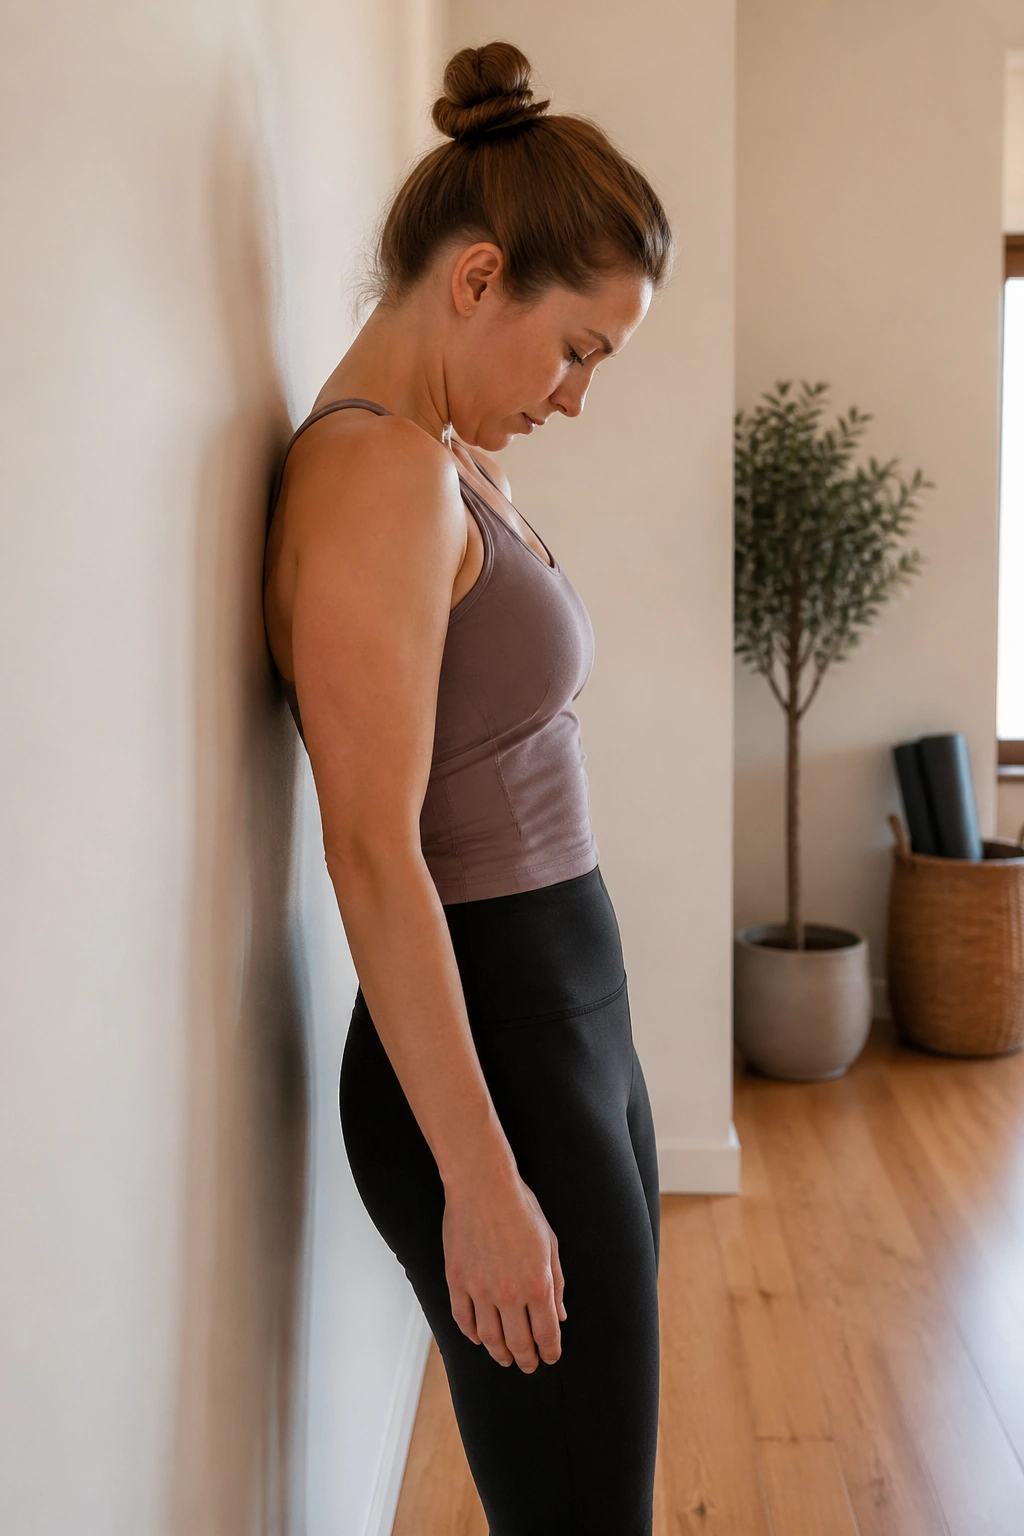
Want to know if you’re moving your spine segment by segment or hinging from one spot? This drill answers that fast.
Start in your wall alignment stand. Nod the chin slightly, then peel away from the wall one piece at a time—head, upper back, mid-back, then lower spine—until you’re hanging forward as far as you can go without pain. Bend the knees if your hamstrings tug hard. Pause for one inhale, then rebuild the spine against the wall on the way up.
Why this one works
A roll down teaches spinal articulation, which is Pilates language for moving the spine in small linked sections instead of one big chunk. Beginners often skip that and hinge from the hips. The wall makes that shortcut easier to catch.
Quick cues
- Exhale as you peel away from the wall.
- Keep the tail heavy until the last part of the descent.
- Let the head hang; do not hold it up.
- Come back up with the knees soft, not locked.
Try 5 to 6 reps. If dizziness shows up, rest after each one.
3. Wall Breathing Reach
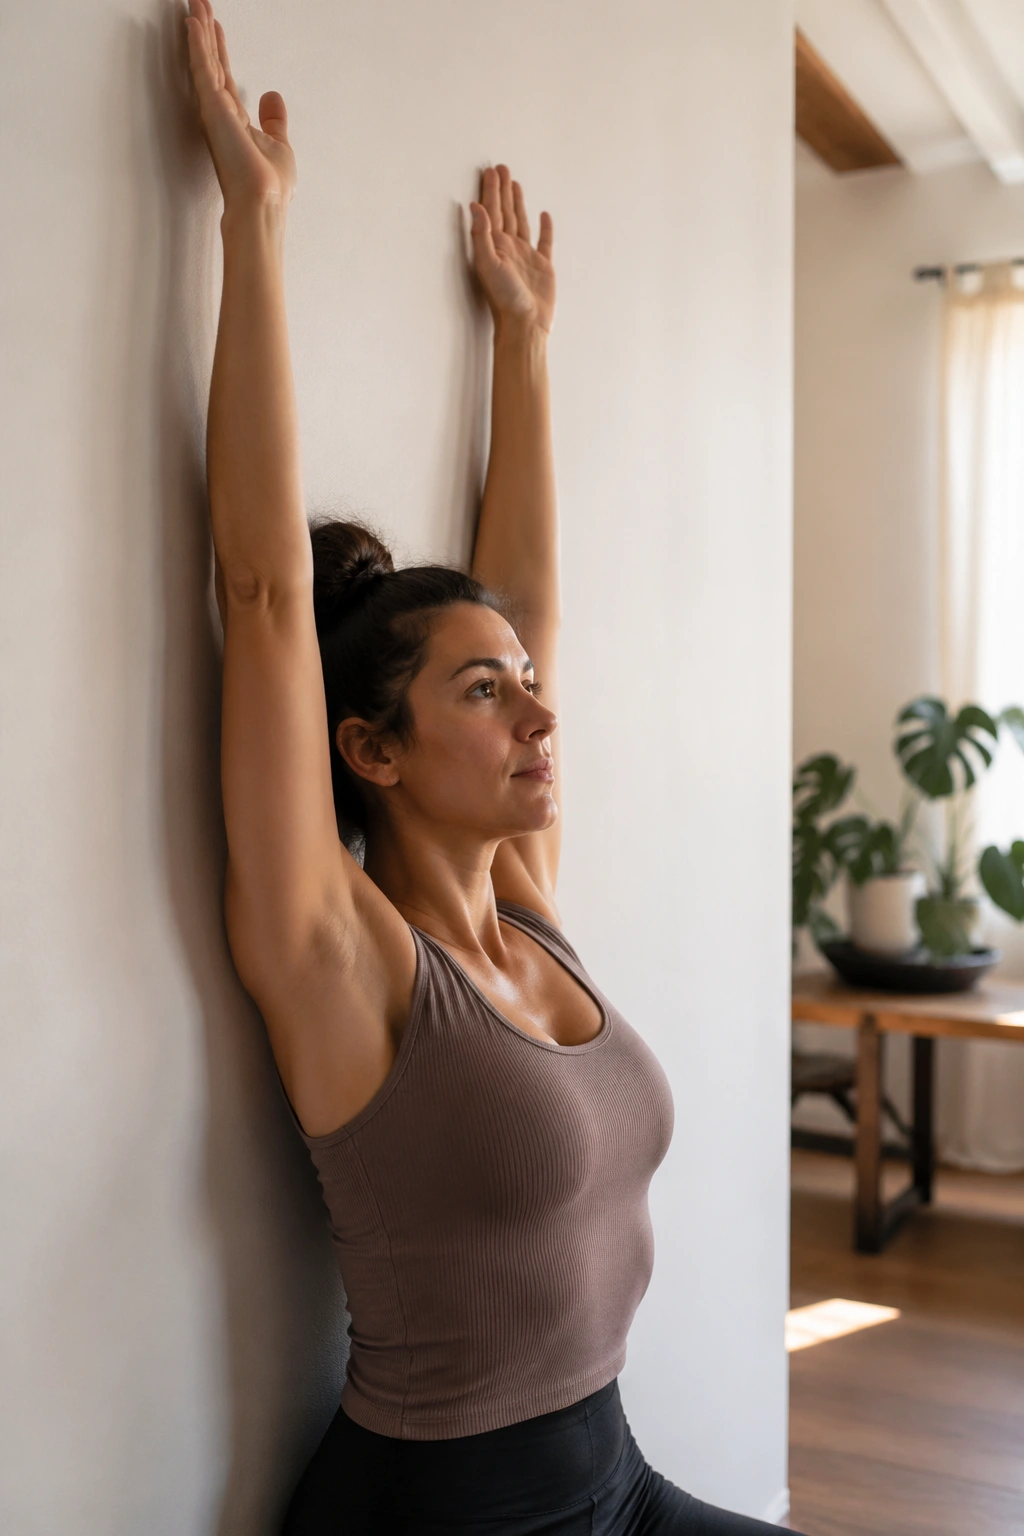
A lot of people think overhead arm work is about the shoulders. In Pilates, it’s also about the ribs.
Stand with your back to the wall and arms by your sides. Inhale and float both arms forward and up toward overhead only as far as you can go without your lower ribs popping off the wall. Exhale and lower the arms with control. That’s one rep.
The first time you do this, the range may be small. Good. A smaller arc with steady ribs is worth more than flinging your arms all the way up while your back arches and your neck tightens.
Try 6 to 8 reps. Feel the inhale spread into the sides and back of your rib cage—almost like your shirt is getting snug around the ribs—then use the exhale to knit the front ribs down. It sounds subtle. It is. And it matters more than it looks like it should.
4. Wall Angel
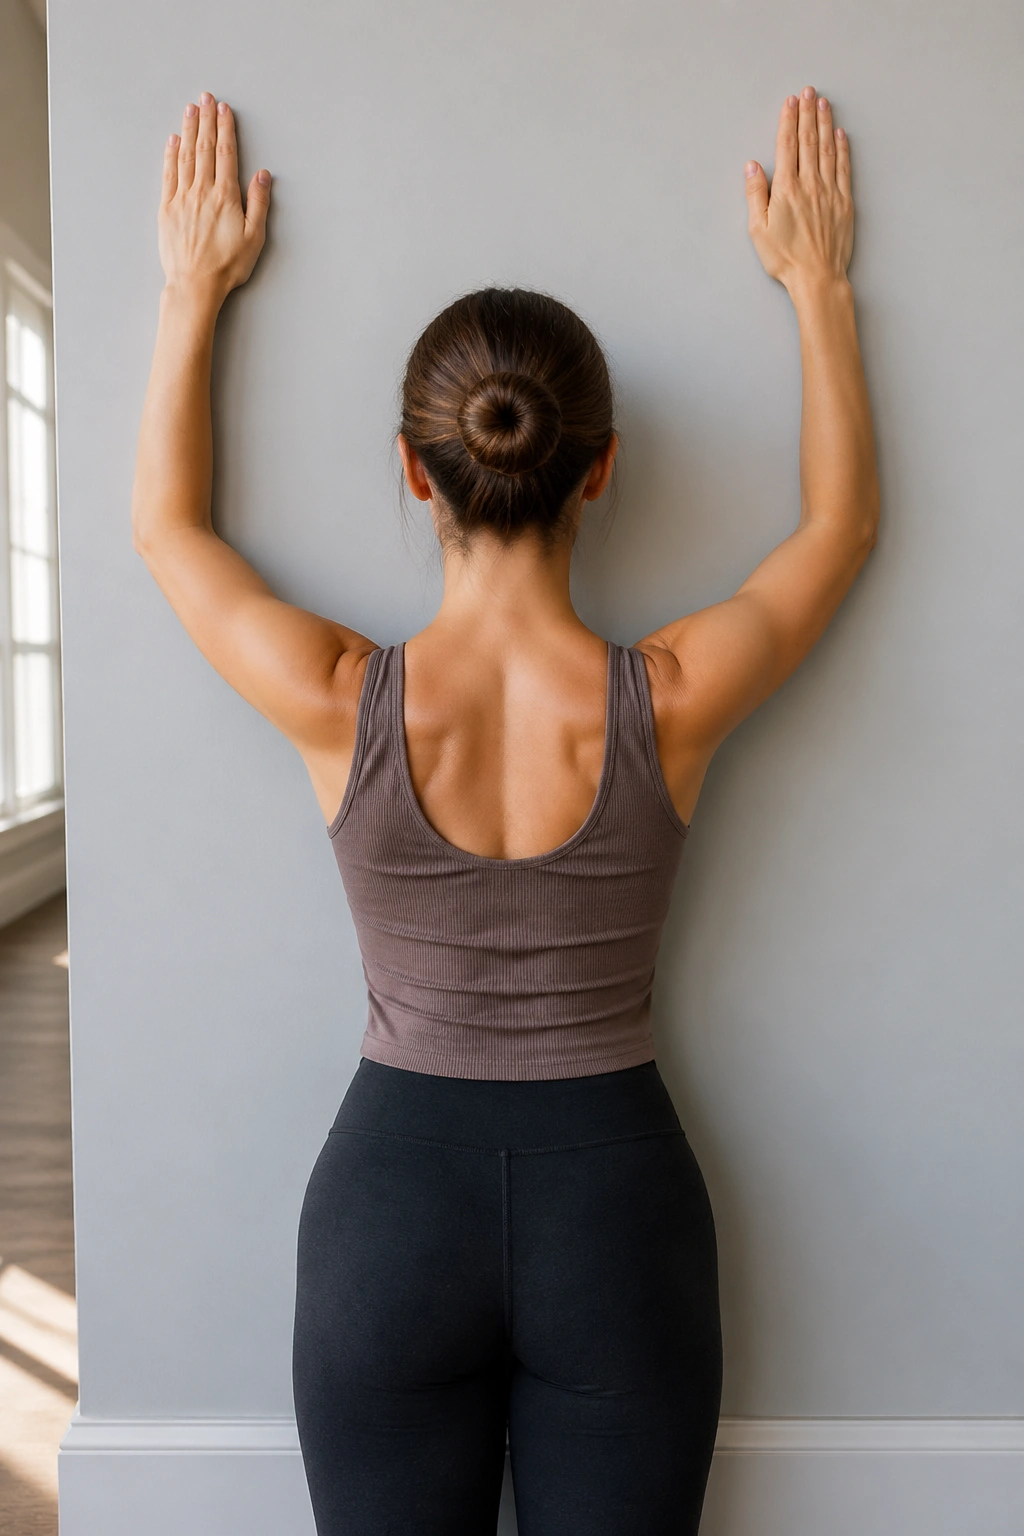
This one tells the truth about your upper back.
Set up with your head, upper back, and pelvis against the wall. Bring your arms into a goalpost shape, elbows bent about 90 degrees, wrists near the wall if possible. Slide the arms upward as far as you can without the ribs thrusting forward or the lower back arching. Lower back down.
People love to force the wrists flat. I don’t. If your shoulders are tight, let the hands hover a bit. The target is scapular control and thoracic mobility, not cranking the shoulder joint into a position it cannot own.
A clean wall angel should feel like work between the shoulder blades and under the armpits, with the neck staying quiet. If you feel pinching at the front of the shoulder, shorten the range and widen the elbows a touch.
Do 6 to 10 slow reps. I keep this early in a session because it wakes up desk-tired posture fast.
5. Wall Push-Up
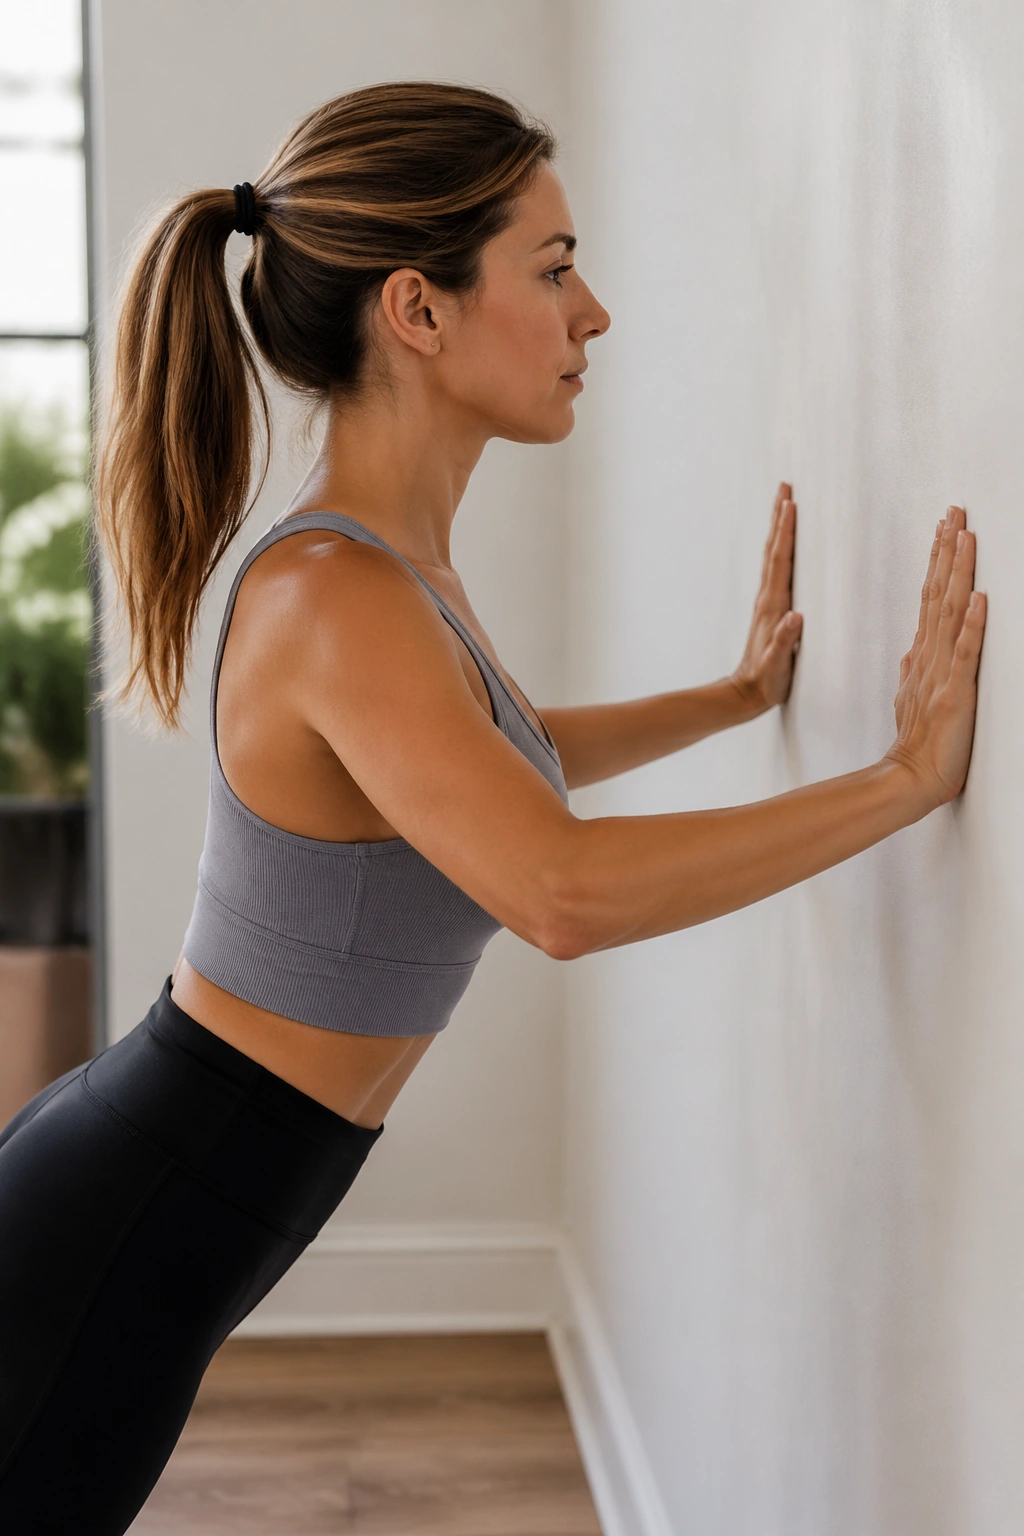
Most beginners avoid push-ups because floor push-ups feel harsh on the wrists, shoulders, or ego. Start on the wall and none of that matters much.
Face the wall with your hands at chest height, a little wider than shoulder-width. Walk your feet back until your body forms a straight diagonal line from head to heels. Bend the elbows and lower your chest toward the wall, then press back out on an exhale. Keep the elbows angled about 30 to 45 degrees from the ribs, not flared straight out.
Distance changes difficulty. The farther your feet are from the wall, the harder the exercise gets. If you want a gentle version, stand closer. If you want more load without losing form, step back 6 inches.
Watch your ribs. They love to dive forward here. Think long spine, light chin tuck, heels pressing into the floor. Aim for 8 to 12 reps with smooth control rather than a big number done sloppily.
6. Wall Push-Up Plus
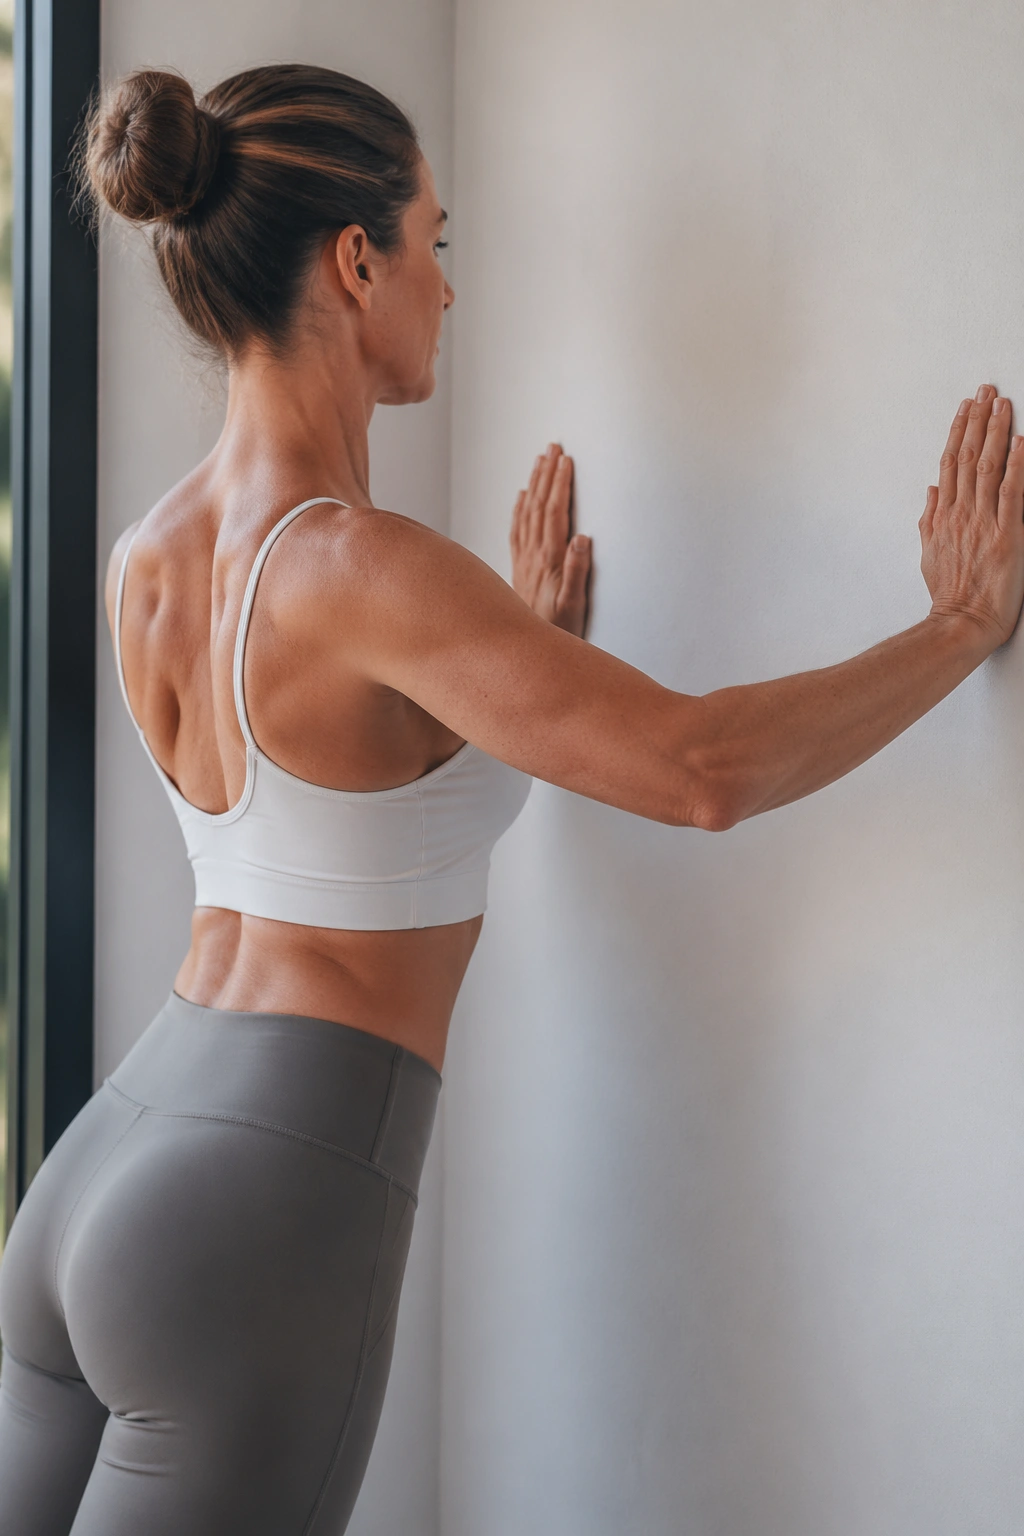
This looks like a tiny add-on. It is not tiny when you do it right.
Take the same setup as the wall push-up, but keep the elbows straight the whole time. Without bending the arms, let the chest move a little toward the wall as the shoulder blades come together. Then press the floor away through your hands and round the upper back slightly so the shoulder blades spread apart. That last part—the plus—trains the serratus anterior, a key muscle for shoulder stability.
A good rep feels like the upper back is gliding, not shrugging. Your neck should stay soft. If your ears creep toward your shoulders, reset and make the range smaller.
Use it like this
- Do 8 to 10 reps after wall push-ups.
- Pause for 1 second in the protracted position, when the shoulder blades spread.
- Exhale as you press away from the wall.
Shoulder discomfort during pressing often improves when this muscle gets stronger. It will not fix every shoulder issue, no exercise will, but it can clean up the mechanics fast.
7. Wall Squat Hold
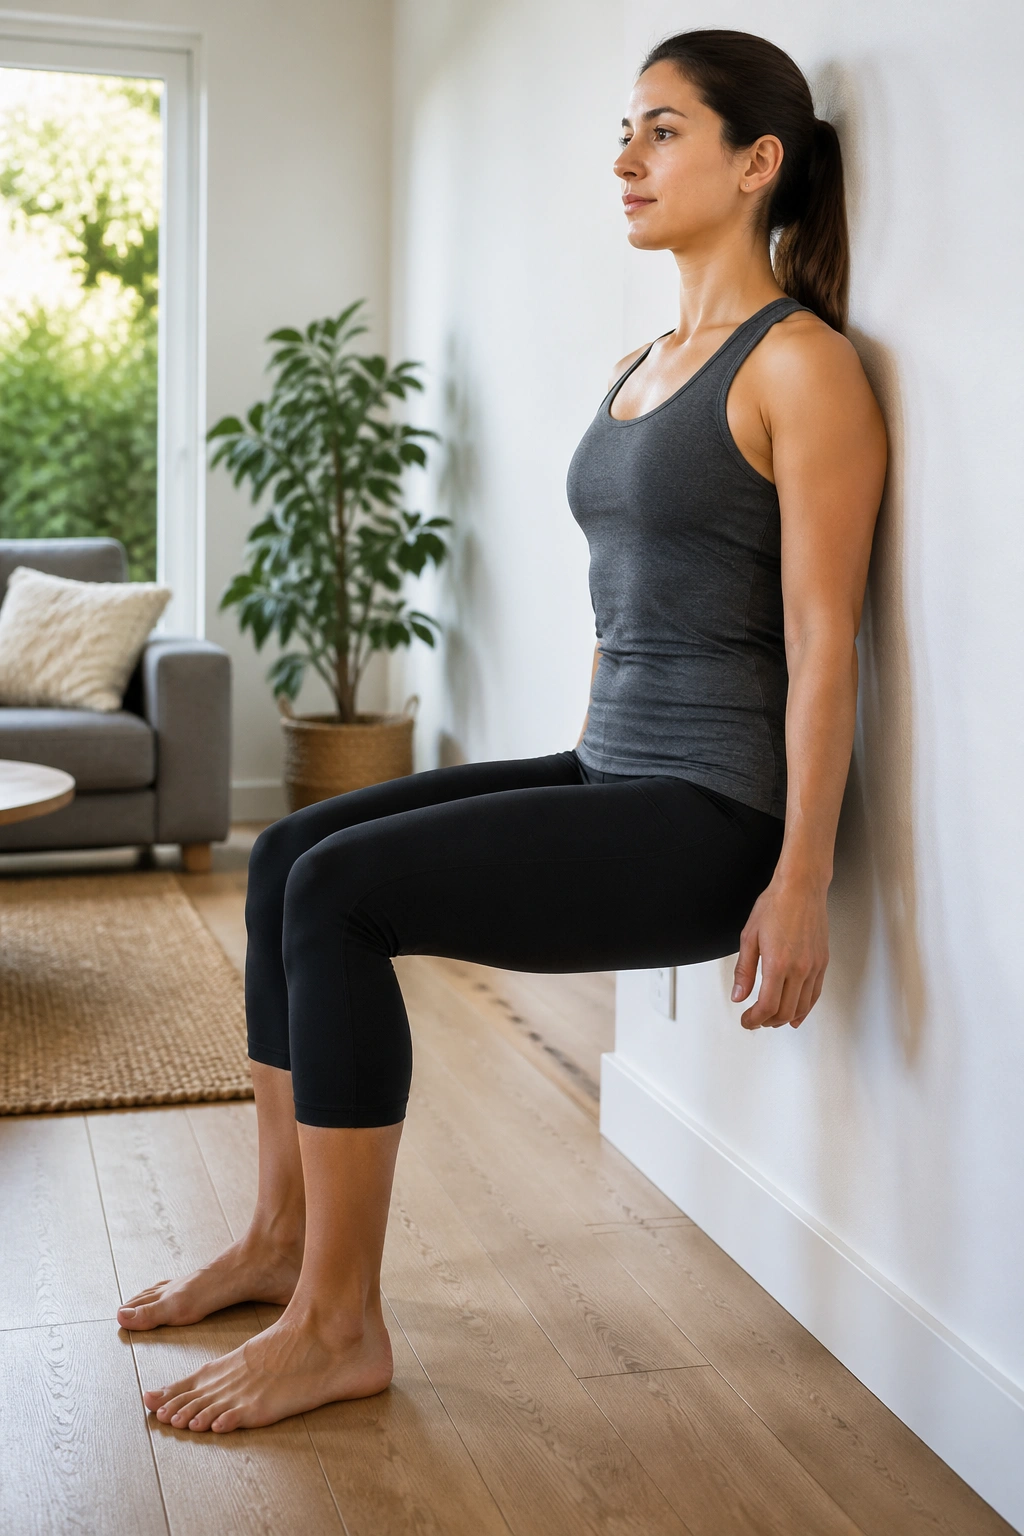
The burn arrives early on this one.
Stand with your back against the wall and walk your feet forward about 12 to 18 inches. Slide down until your knees are bent to a depth that feels strong and stable—often not as low as people think. You do not need a deep 90-degree squat here. Hold the position for 20 to 30 seconds while breathing steadily.
This move teaches you how to stack ribs over pelvis while the legs work. Beginners often push the belly forward or arch the back to escape the thigh effort. Do the opposite. Keep the back of the ribs heavy and the pelvis neutral.
If your knees complain, slide up a few inches. If you feel nothing in the legs, slide lower or add a slow exhale through pursed lips every few breaths to light up the deep core more. Two or three holds is plenty.
8. Wall Calf Raise
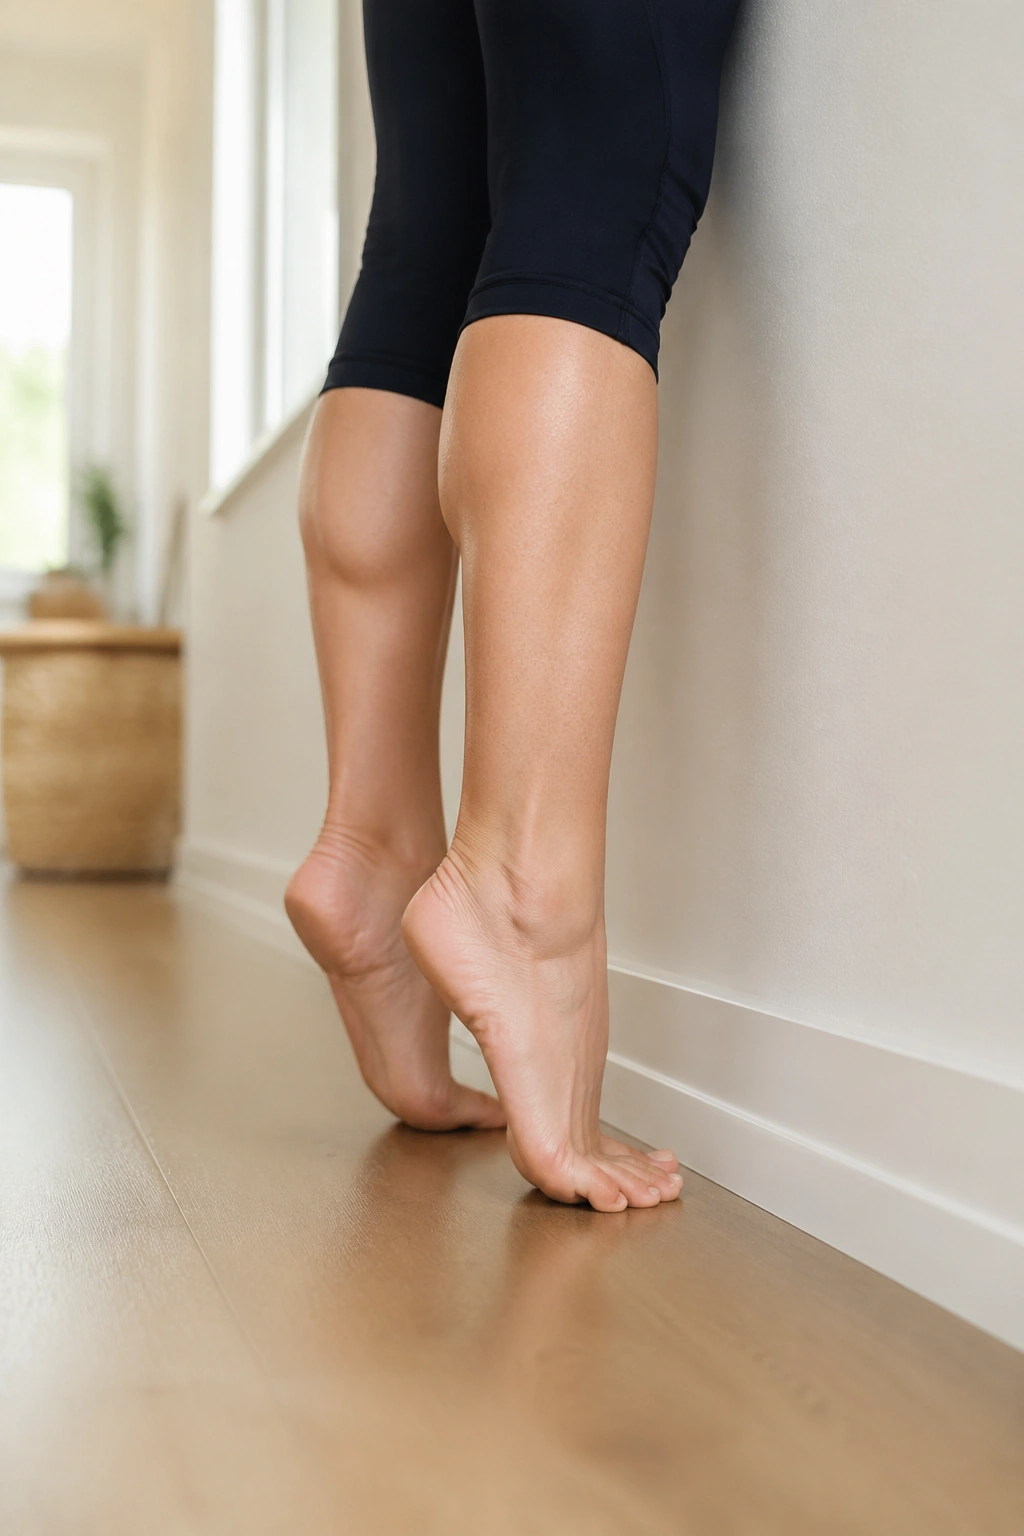
Three slow calf raises can expose balance issues that 20 sloppy ones never will.
Stand facing the wall, fingertips resting on it for light support. Place your feet hip-width apart and line up the second toe straight ahead. Rise onto the balls of your feet for 2 seconds, pause at the top, then lower for 3 seconds.
The Pilates part is not the lift alone. It is the way you keep the body organized while the ankles move. No swaying ribs. No clenched jaw. No rolling to the outer edge of the foot. Press evenly through the base of the big toe and second toe.
What to watch for
- Ankles wobbling inward
- Toes gripping the floor
- Weight drifting into the little toes
- Shoulders tensing toward the ears
Try 10 to 15 reps. Your calves will feel it, though the better lesson is often in the feet.
9. Wall Standing March
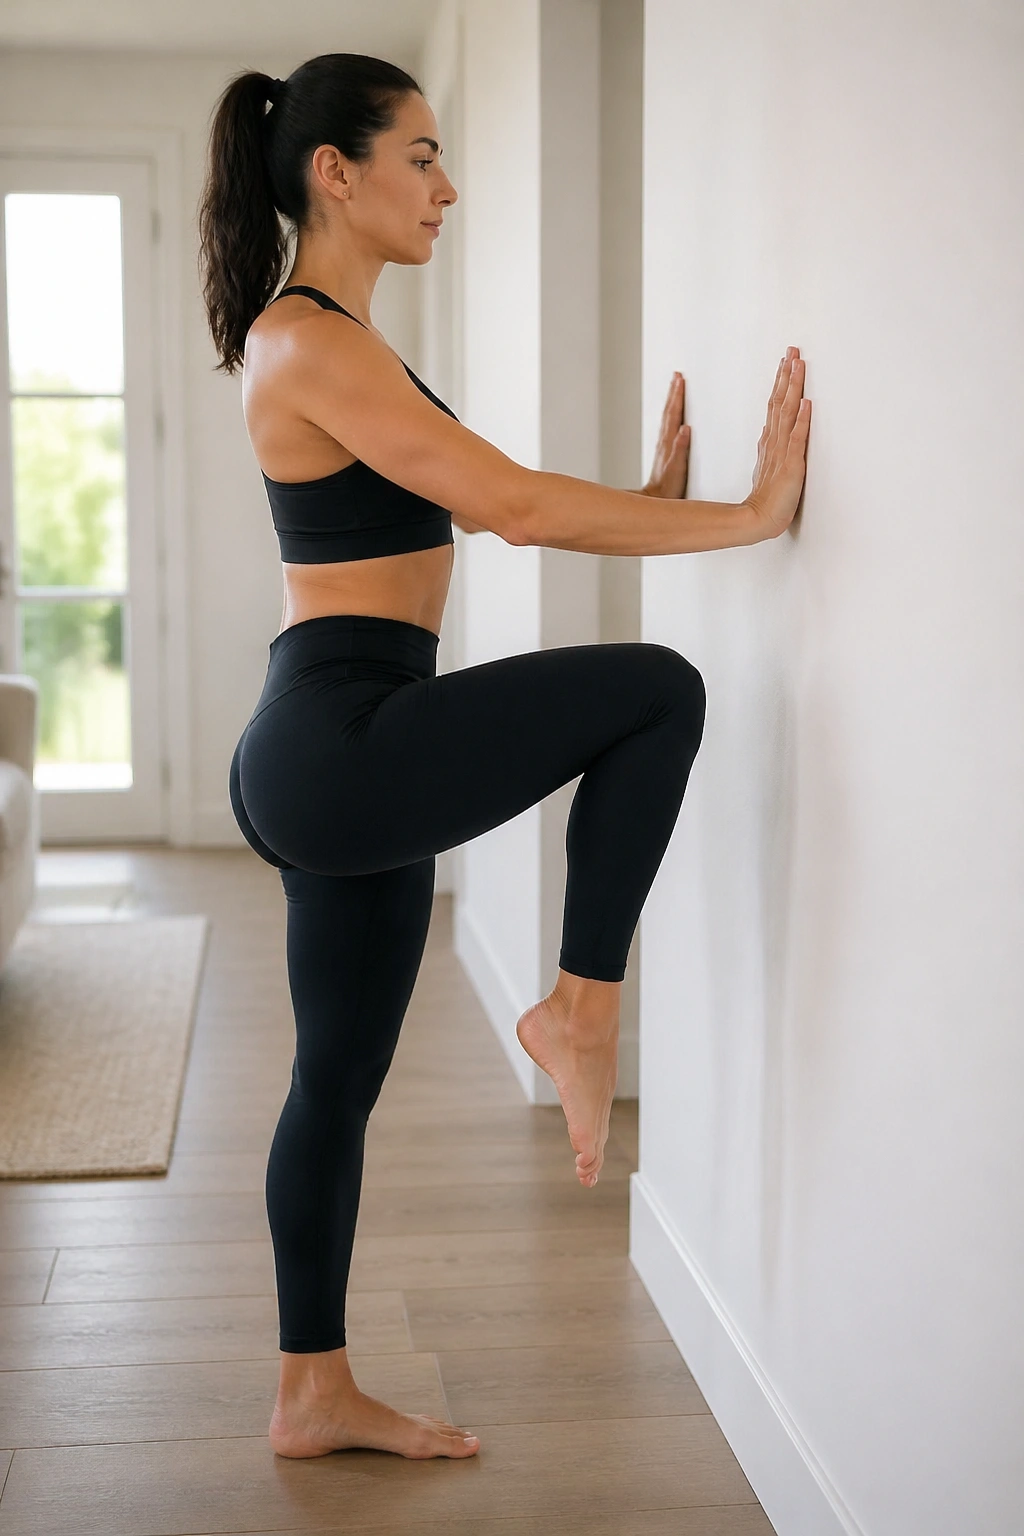
A standing march sounds too easy until you stop letting the torso wiggle.
Face the wall and place both palms on it. Step back until your arms are straight but not locked. Exhale and lift one knee to hip height—or lower if hip flexors are tight—without leaning back or hiking the standing hip. Set the foot down and switch sides.
This is a beginner-friendly way to train single-leg stability and core control. The wall keeps your upper body honest, and that matters because most people shift, twist, or rib-flare the second one foot leaves the floor.
Use a slow count: lift for 1, hold for 1, lower for 2. Do 8 marches per side. If the standing glute starts working harder than the leg that’s moving, you’re doing it right.
10. Wall Single-Leg Balance Reach
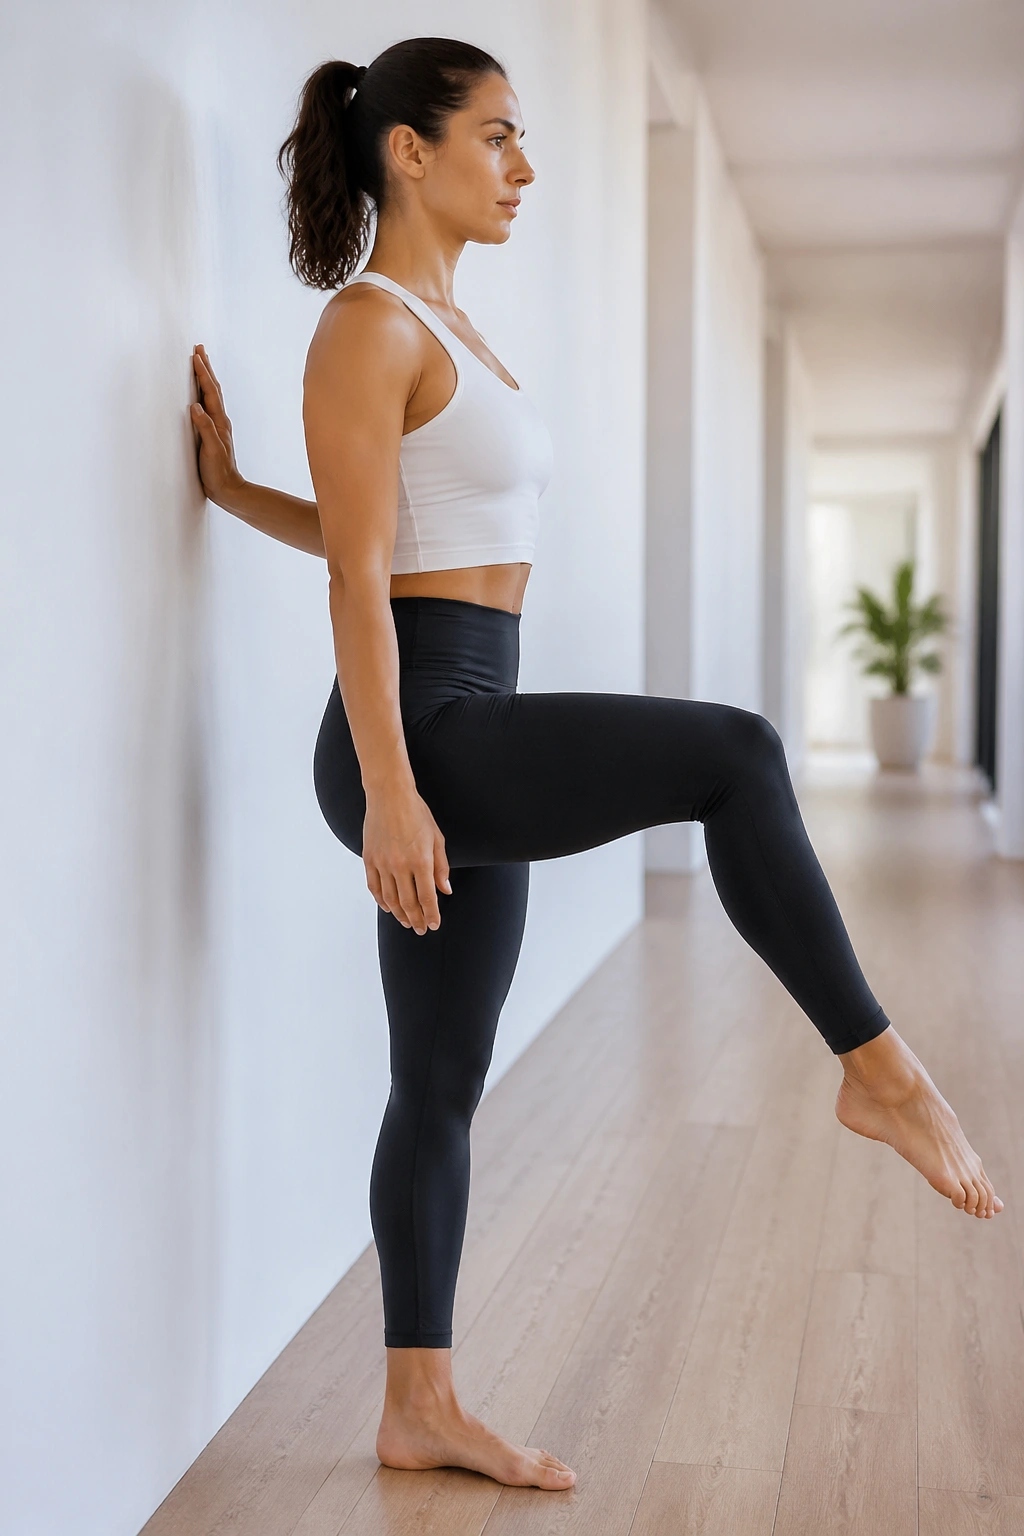
Balance work gets less intimidating when one hand has a home base.
Stand sideways to the wall with the hand closest to it resting lightly for support. Shift onto the inside leg and float the outside knee up. From there, reach the lifted leg forward, then bring it back to the bent-knee start. That’s one version. You can also tap the toes lightly in front of you and return.
The trick is keeping the pelvis level. People love to tip the hip or collapse into the standing side. Think of the standing leg as a tall pillar and the crown of the head lifting away from it.
Light touch only. If you grip the wall, the exercise turns into leaning practice. Shoot for 6 to 8 reaches per side. The standing foot should stay active, with the arch lifted but not rigid.
11. Wall Side Leg Lift
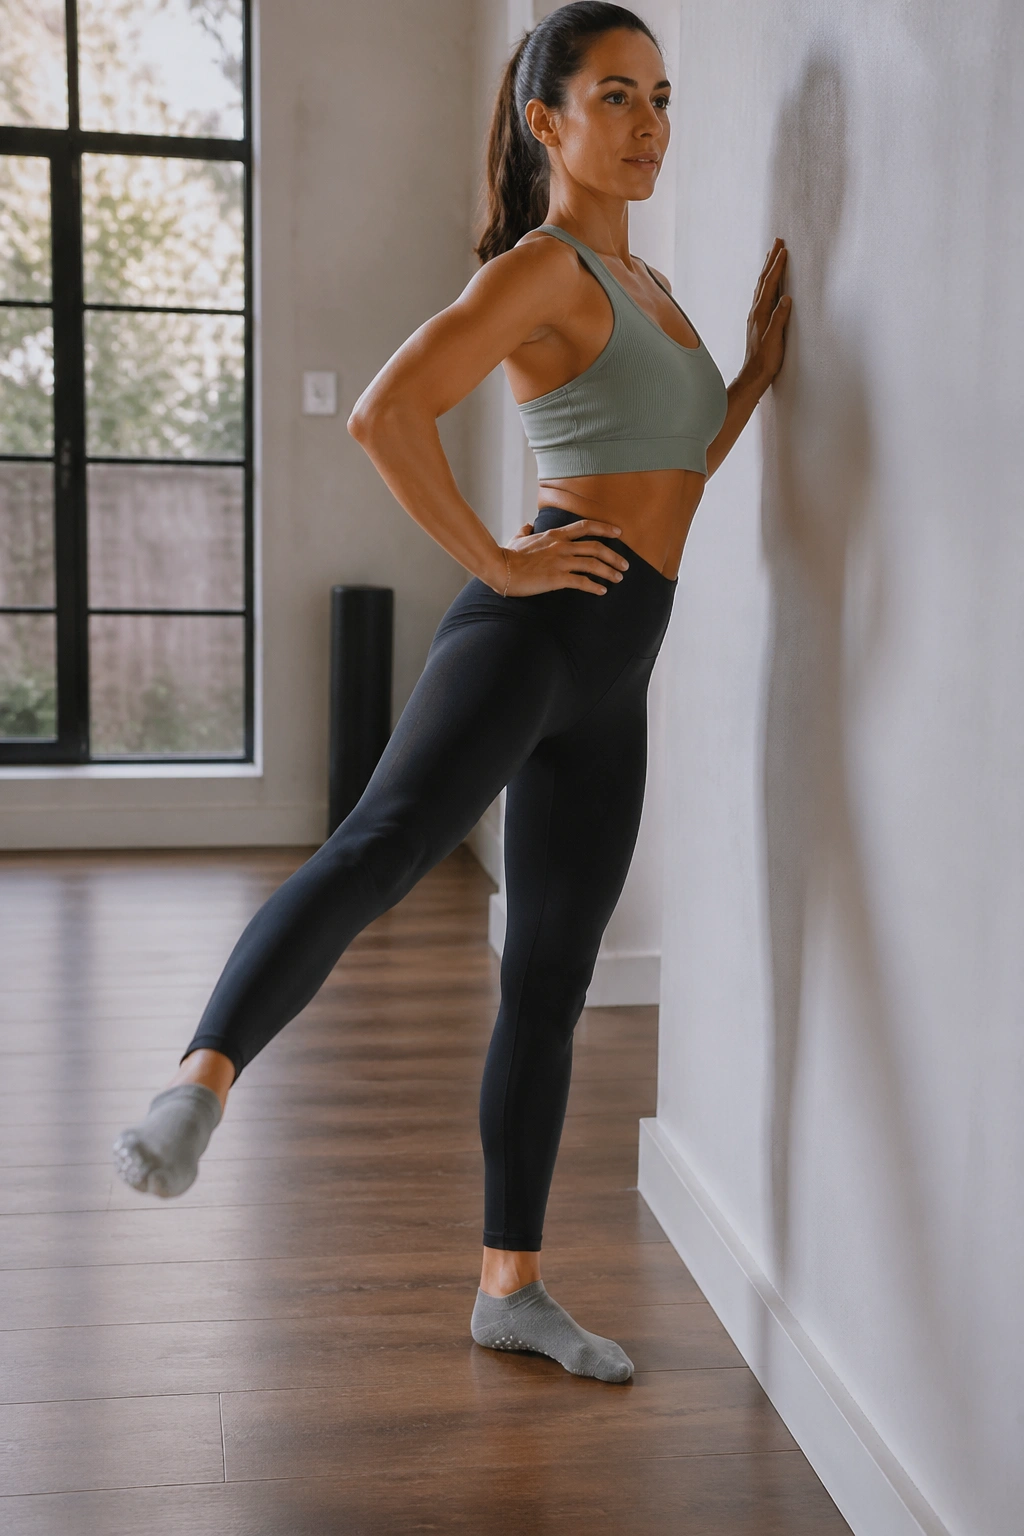
This one is small. Make peace with that.
Stand sideways to the wall and rest the near hand against it. Bring the outside leg a few inches away from the standing leg, toes pointing forward, not turned up to the ceiling. Exhale and lift that outside leg 6 to 12 inches, then lower with control without dropping your waist or swaying the torso.
People often chase height and miss the glute medius—the side-butt muscle this move is famous for. If your foot turns out, your hip hikes, or your body leans the other way, the range is too big. Make it smaller and cleaner.
You should feel work along the outer hip of the moving leg and deep support in the standing side. Try 10 to 12 reps each leg. On the last 3 reps, hold the lift for 2 seconds before lowering.
12. Wall Standing Clamshell
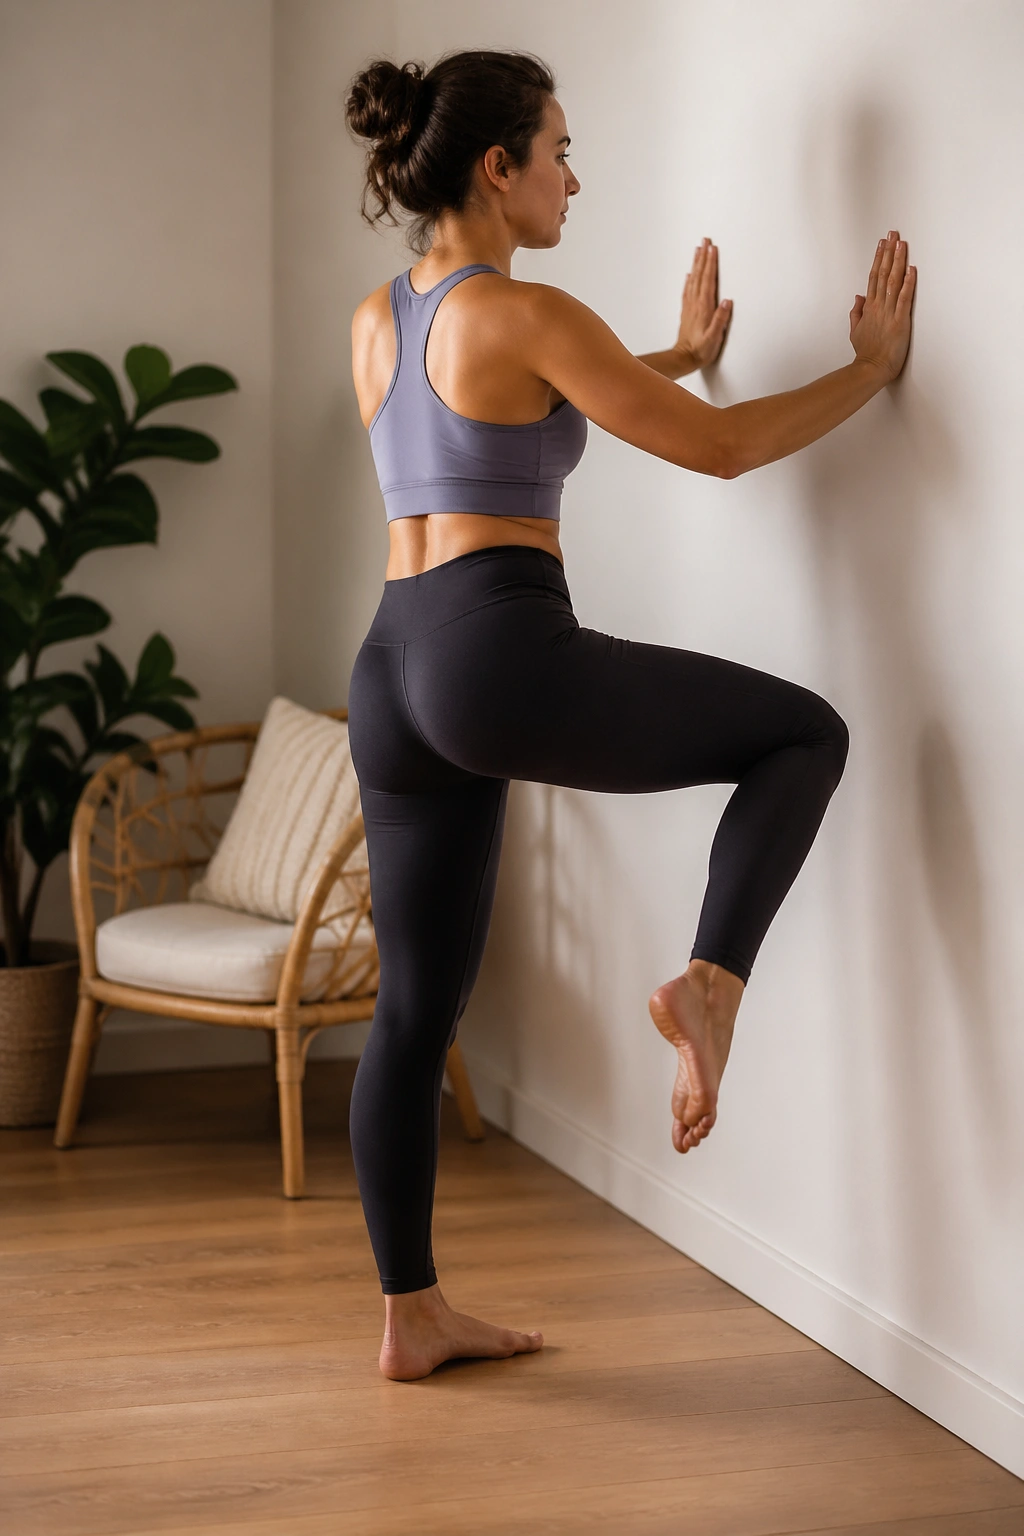
Unlike the side leg lift, this move targets hip rotation more than straight abduction.
Face the wall with both hands on it and shift your weight onto one leg. Bend the opposite knee to about 90 degrees so the thigh stays pointing down. Keeping your knees close together at the start, rotate the lifted leg outward from the hip, like a standing clamshell opening, then return.
It is a sneaky drill for the small deep hip rotators. Those muscles help the pelvis stay steady during walking, stairs, and single-leg work. When they’re asleep, the knee tends to cave inward and the hip gets messy.
Go slow. If the whole pelvis swings open, you have lost the point. Think thigh bone turning in the socket while the front of the hips keeps facing the wall. Do 8 to 10 reps per side.
13. Supine Pelvic Tilt With Feet on the Wall
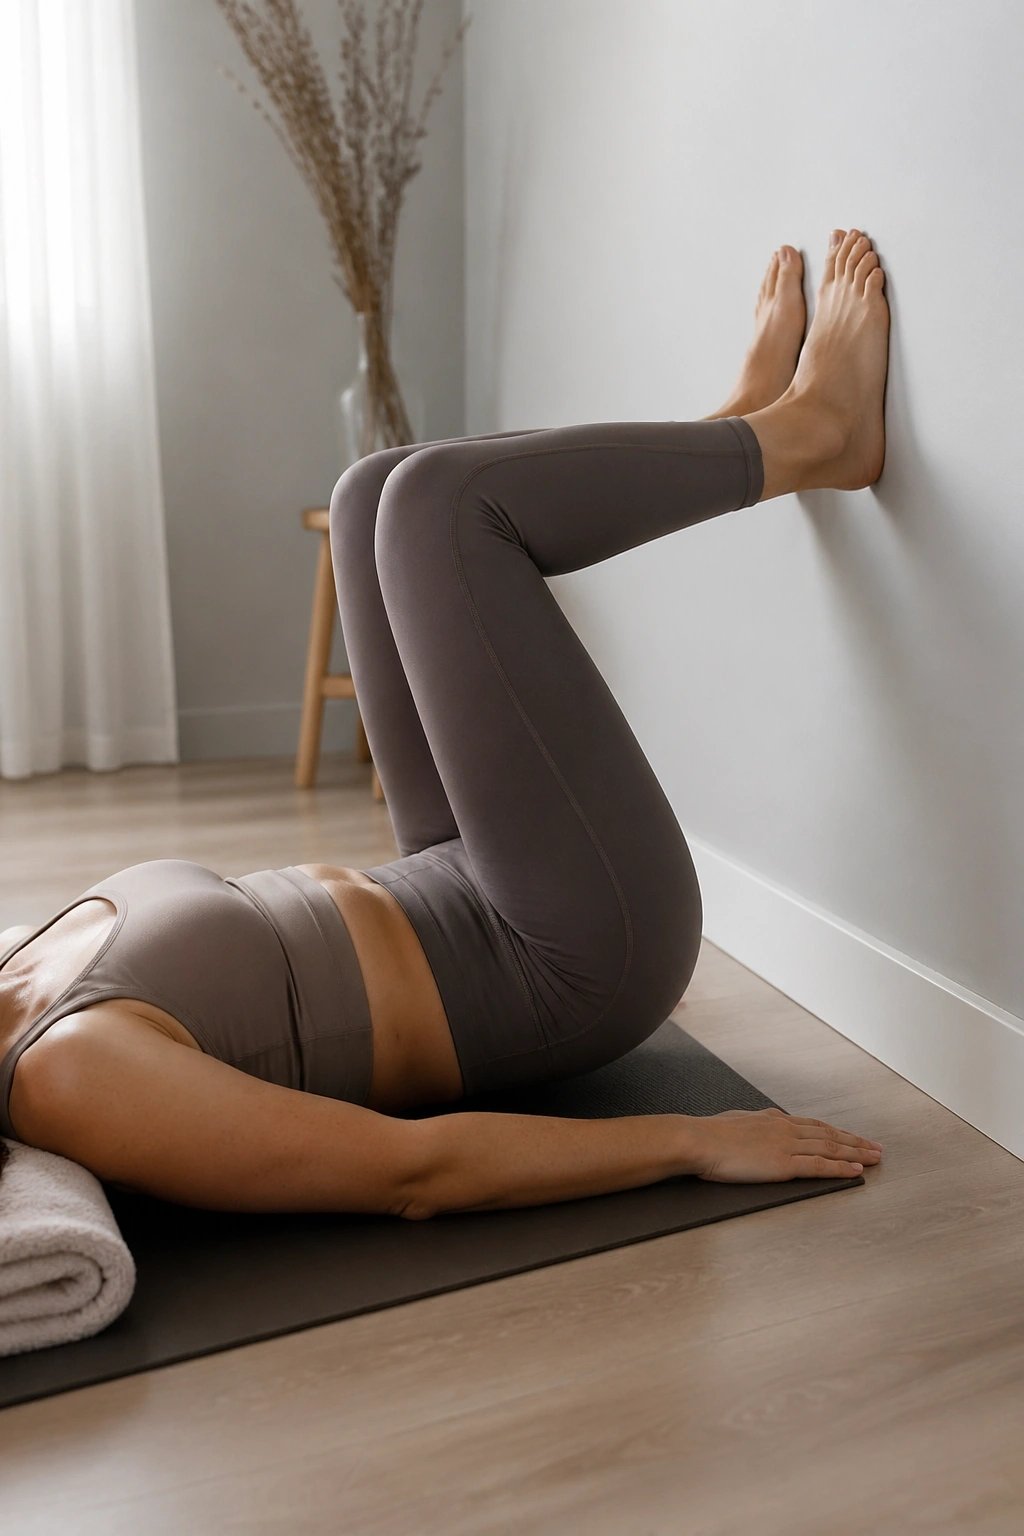
Lie on your back with your feet flat on the wall, knees bent about 90 degrees, shins parallel to the floor if your setup allows. A folded towel under the head is fine if your chin tips up.
Exhale and gently tip the pelvis so the low back moves closer to the mat. Inhale back to neutral with a small natural curve under the low back. The motion is tiny. Tiny is enough.
Why beginners need this
Pelvic position is where a lot of mat Pilates either clicks or falls apart. This drill teaches the difference between neutral pelvis and a posterior tilt without the legs having to do much. Because your feet are on the wall, you can feel how little force is required.
A better cue
Do not shove your back flat. Think of the pubic bone rolling toward the ribs, then unwinding. Do 8 to 10 reps with slow exhales.
14. Wall Bridge
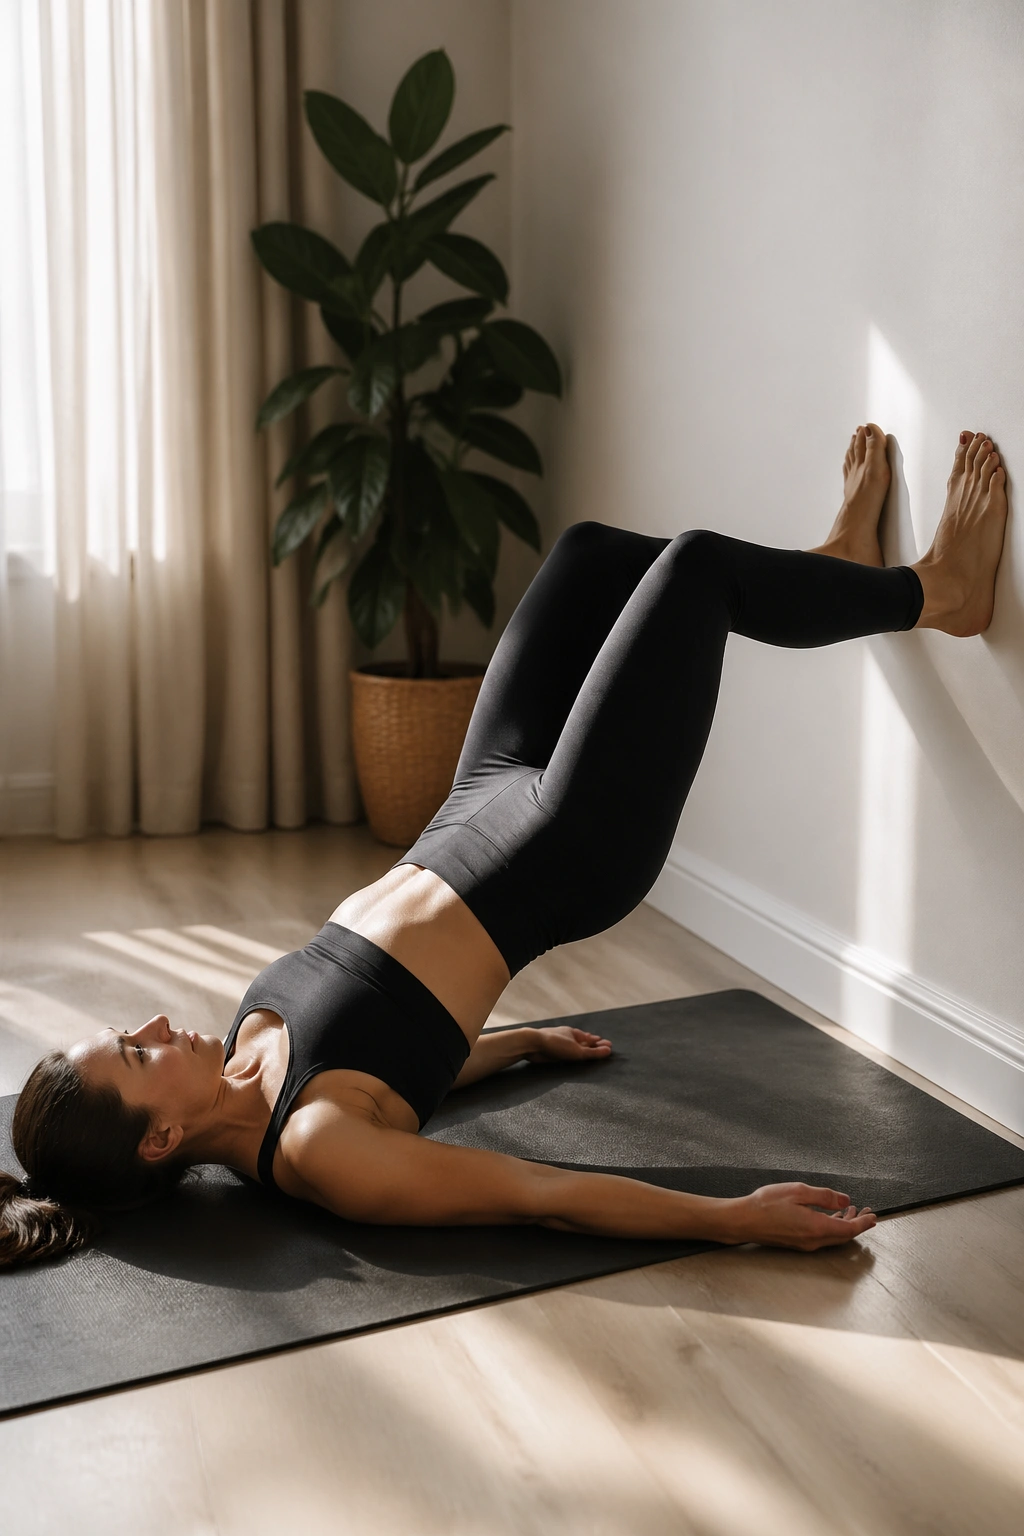
If your hamstrings dominate regular bridges, putting your feet on the wall can help you find the glutes faster.
Stay on your back with both feet planted into the wall, knees bent. Exhale, press through the whole foot, and peel the pelvis off the mat until you form a diagonal line from shoulders to knees. Inhale at the top. Lower down one bone at a time.
A good bridge should feel firm through the back of the hips, not crampy in the low back. If your ribs pop up or your neck presses hard into the floor, come down and reset. The lift does not need to be huge.
I like 8 to 12 reps here. Pause for 2 breaths at the top on the last rep. You’ll get more from that hold than from racing through 20 half-finished bridges.
15. Wall Bridge March
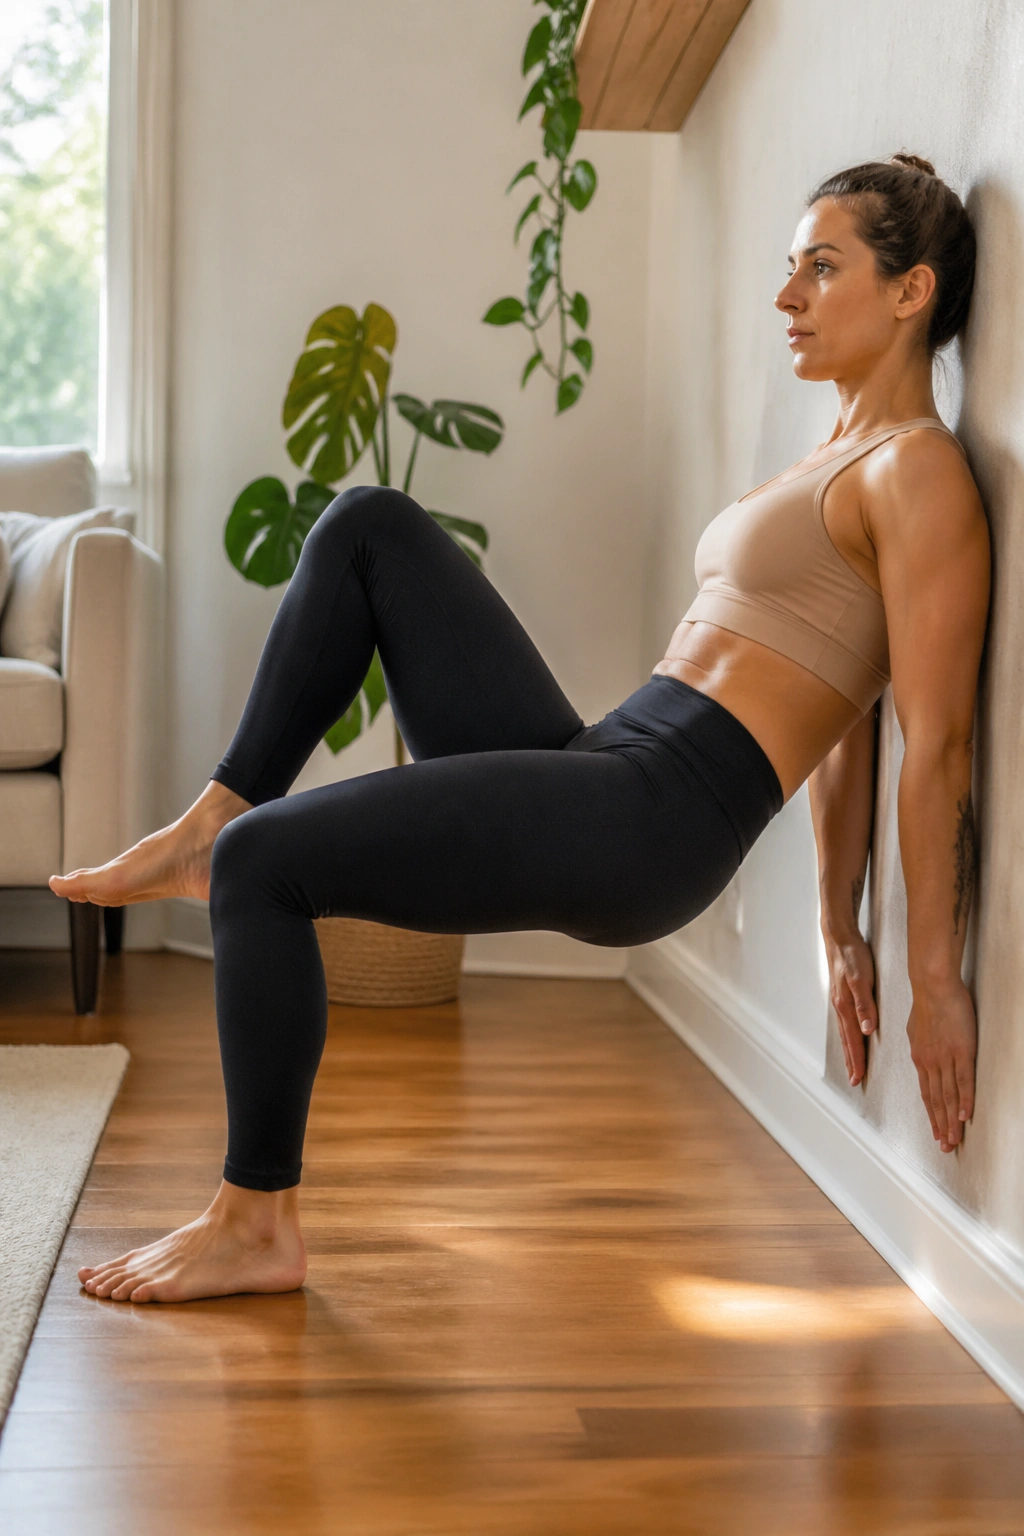
Here’s where the bridge starts asking for honesty.
Lift into your wall bridge and hold. Without letting the pelvis drop or twist, lighten one foot and peel it off the wall for a small march. Replace it and switch sides. The lifted foot only needs to come away an inch or two at first.
This progression challenges anti-rotation control, which is Pilates-speak for keeping the trunk steady while one limb moves. You will feel that in the glutes, lower abs, and the back of the standing leg.
Make it workable
- Start with 6 marches per side.
- Keep the knees level with each other.
- Press the supporting foot firmly into the wall.
- If the hips wobble, go back to a regular bridge.
That wobble is useful feedback, not failure. It tells you where the work is.
16. Wall Toe Taps
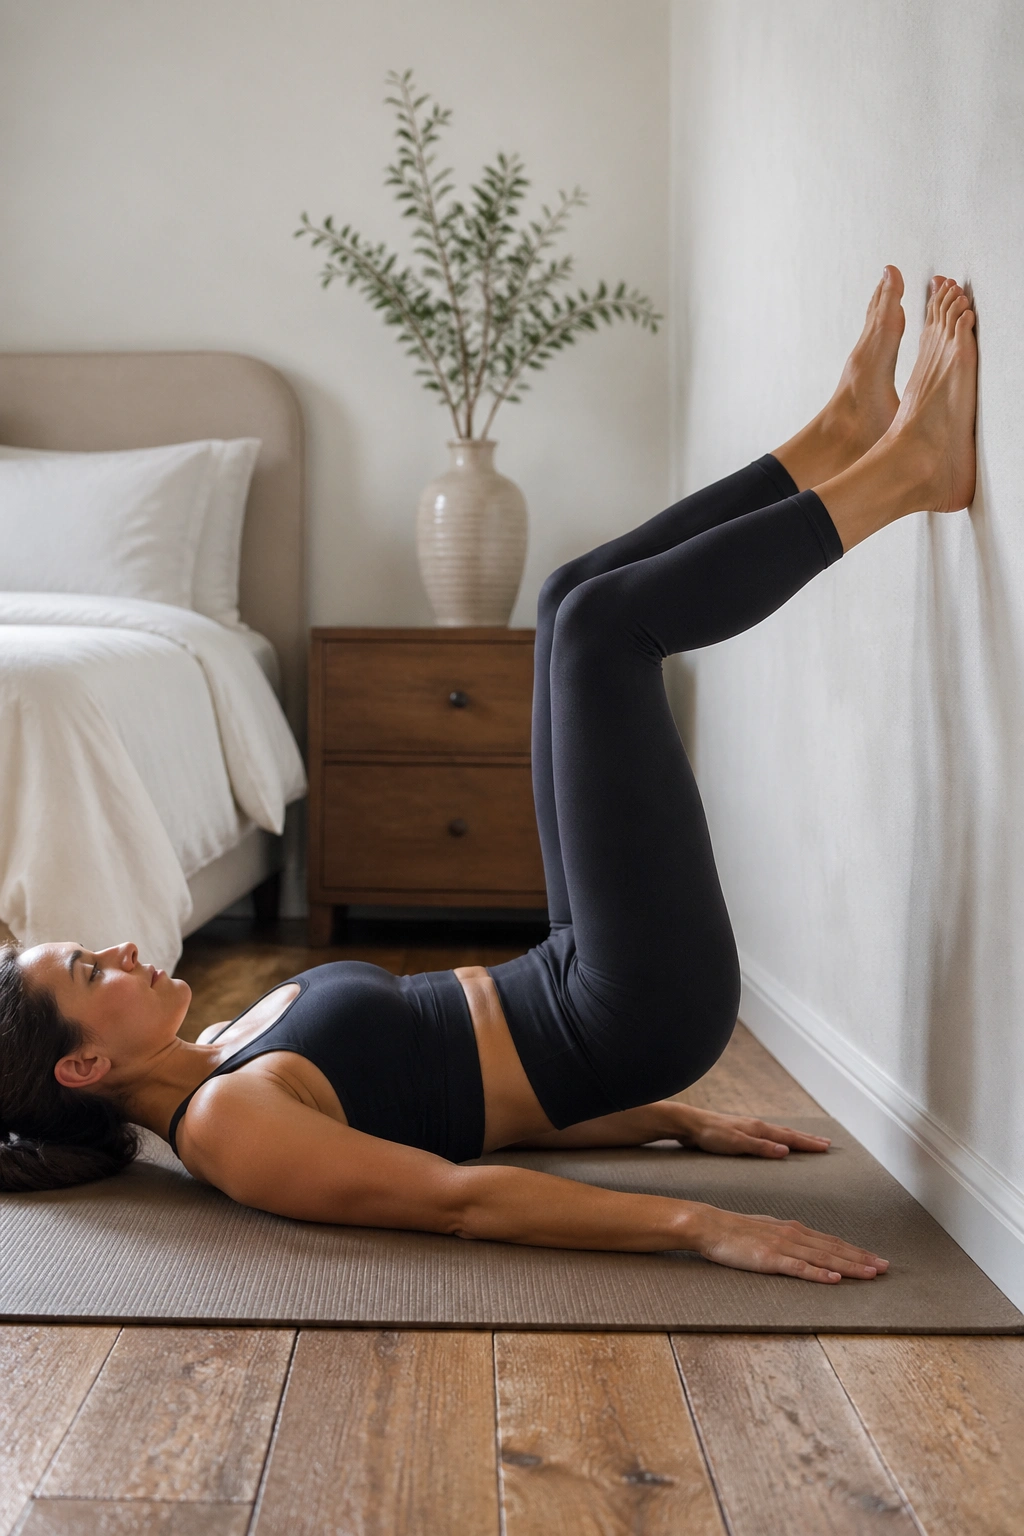
This is one of the cleanest ways to learn lower-ab control without turning the neck into a rock.
Lie on your back with your hips and knees bent to 90 degrees and both feet pressing lightly into the wall. Find neutral pelvis first. Exhale and take one foot off the wall, lowering the toes toward the mat without changing your back position. Tap lightly if you can keep control, then return the foot to the wall and switch sides.
The wall gives the resting leg something to organize against. That makes it easier to notice when the pelvis tips or the ribs spring open.
Do 8 to 10 taps per side. Put one hand on the lower ribs if that helps. When the hand starts lifting, shorten the leg range. Less movement, more control.
17. Wall Dead Bug Press
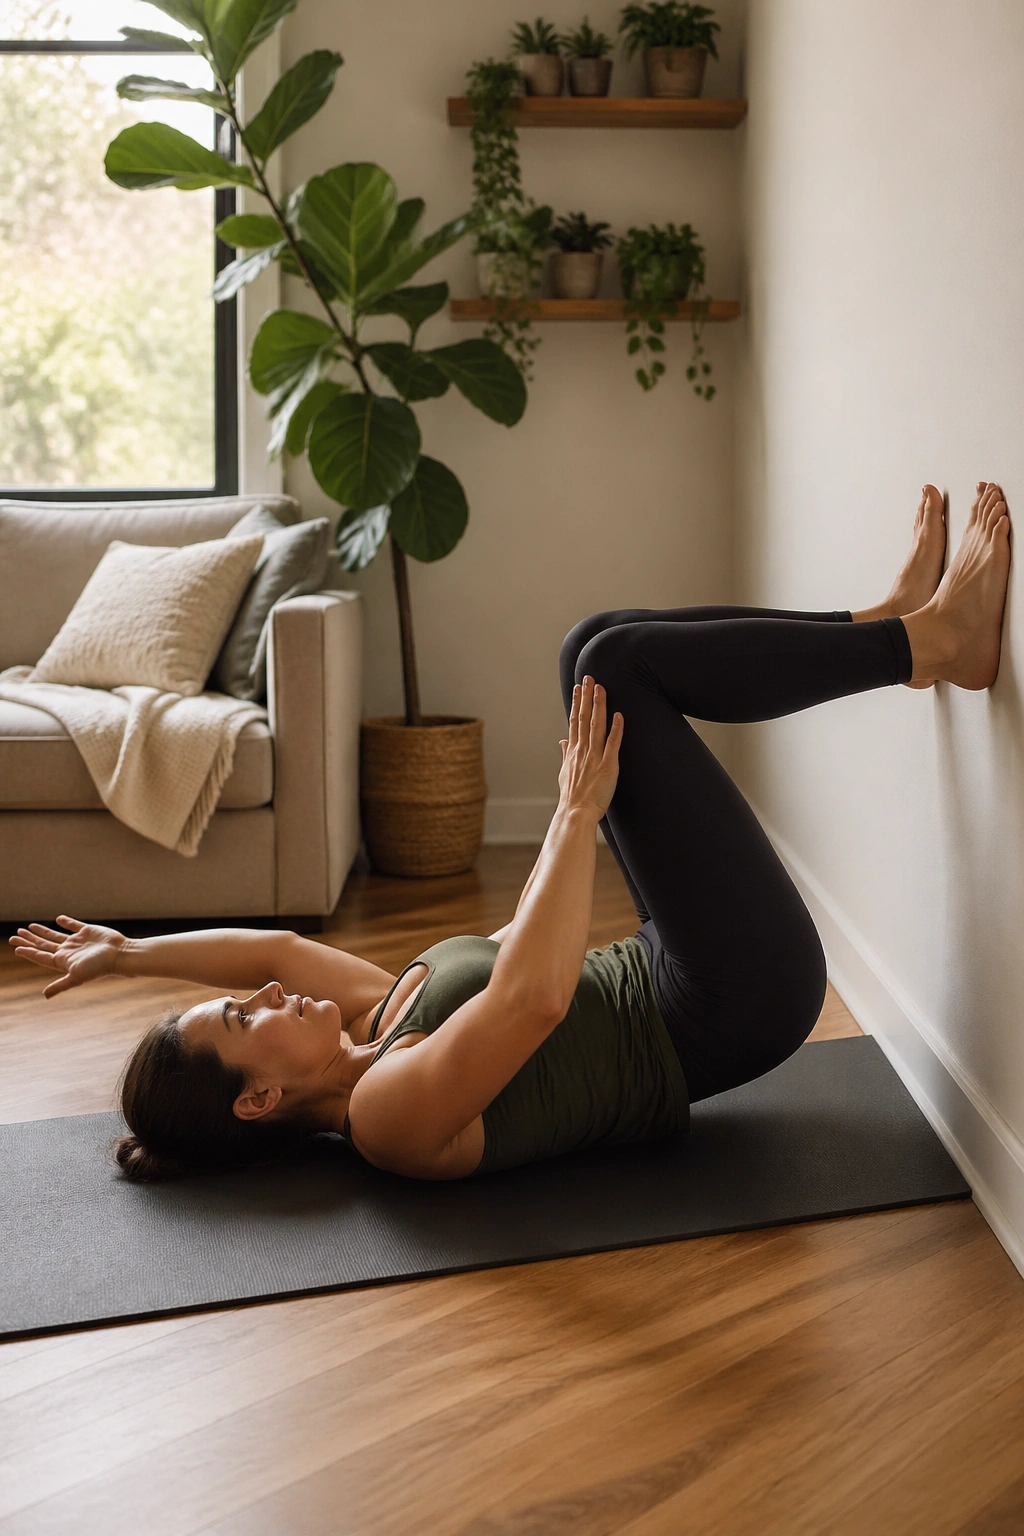
This is a favorite of mine because it teaches full-body tension without drama.
Set up on your back with both feet on the wall and knees bent to 90 degrees. Press your palms into your thighs while the thighs press back into the hands. You’ve created an isometric hold already. From there, keep that pressure and slowly reach one arm overhead or one heel a few inches down the wall, then return. Alternate sides.
The point is not limb height. The point is keeping the trunk still while opposite ends of the body ask for movement. If the belly bulges upward or the lower back yanks off the mat, reduce the range and press hands to thighs a touch more.
Try 6 to 8 reps per side. Exhale on the reach. The whole thing should feel steady, almost quiet, except for the deep work around the center of the body.
18. Wall Leg Slides
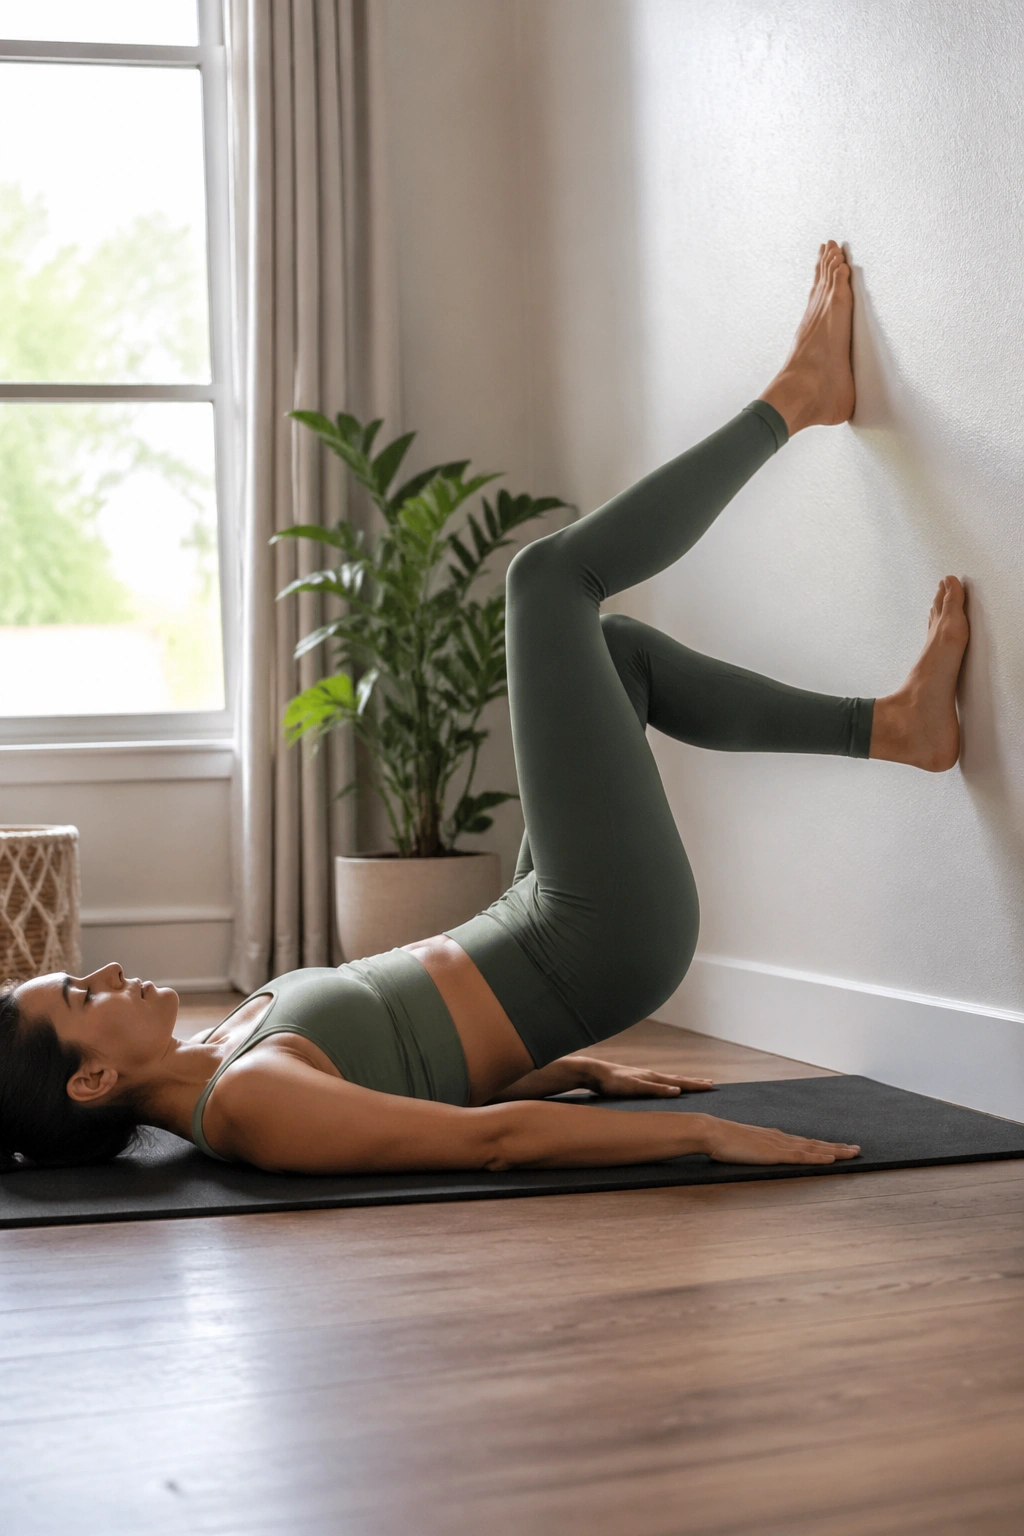
Some beginner core drills are too abstract. This one is hard to misunderstand.
Lie on your back with both feet on the wall, knees bent. Exhale and slide one foot slowly down the wall, lengthening that leg as far as you can without the pelvis rocking. Inhale to bring it back up. Alternate legs.
The sliding contact helps in two ways. It supports the weight of the leg, and it gives you a path to follow, which keeps the movement smooth instead of jerky. Smooth matters. Jerky leg slides usually mean the hip flexors have taken over.
Quick form check
- Keep both hip bones facing the ceiling.
- Press the non-moving foot into the wall.
- Stop before the low back changes shape.
- Move slower on the way down than on the way up.
Aim for 8 slides each side. Your abs should feel braced but not clenched.
19. Wall Frog Press
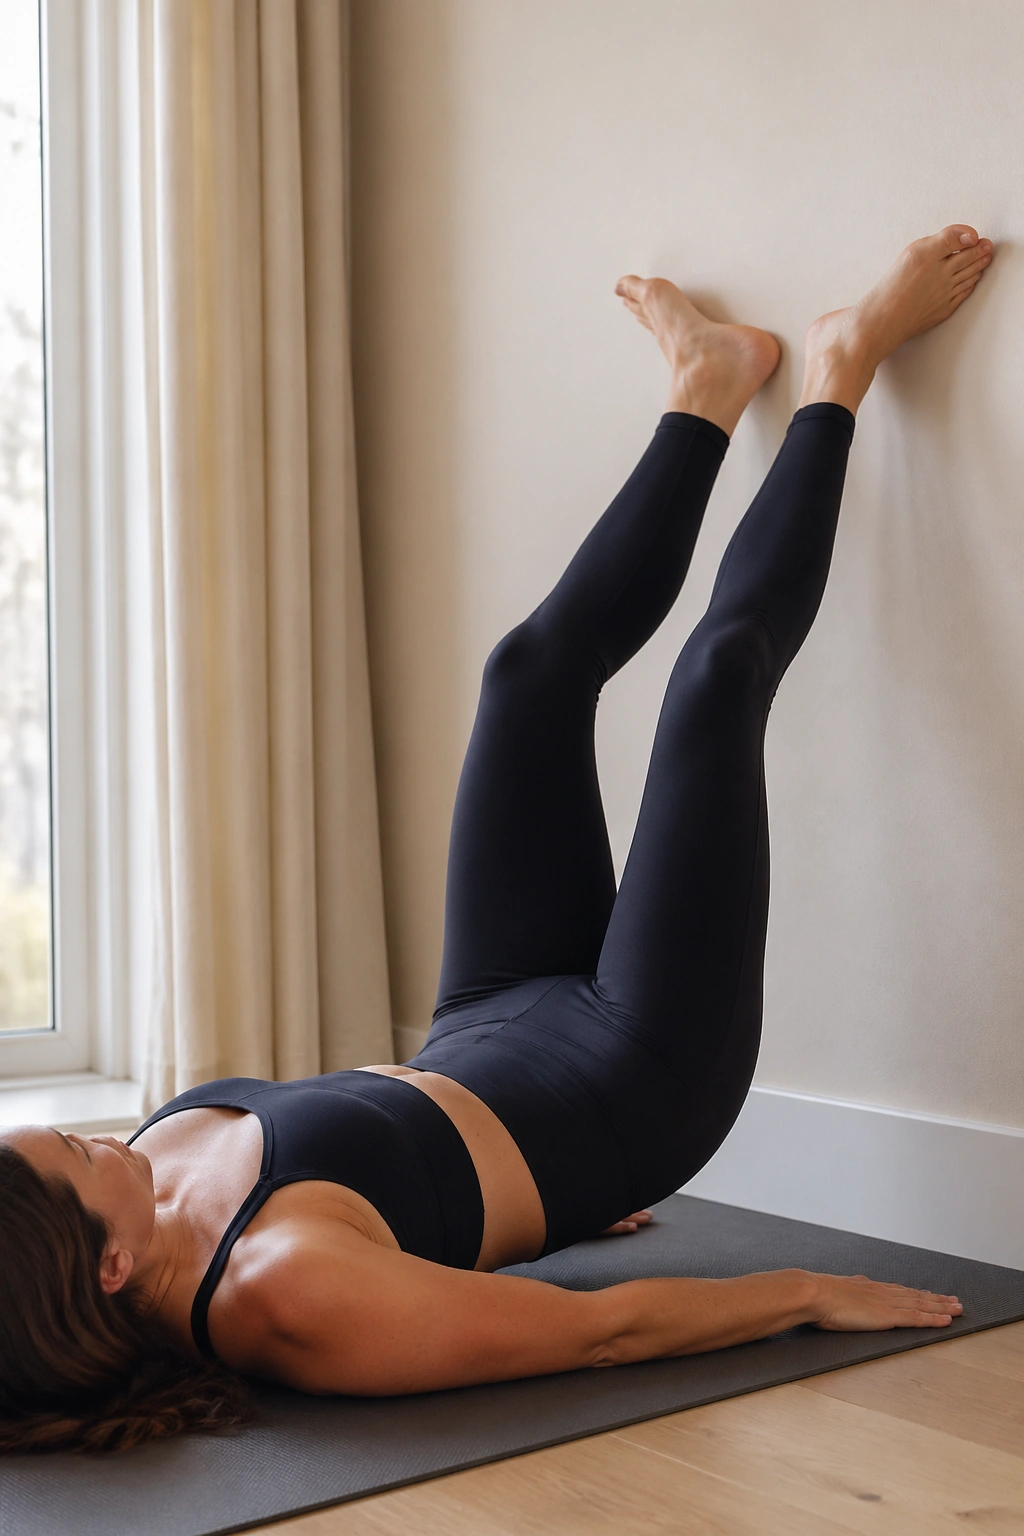
This one borrows the shape of a classic Pilates frog and makes it beginner-friendly.
Lie on your back close enough to place your feet on the wall with your knees bent and turned out, heels together, toes apart in a small V shape. Exhale and press both feet into the wall as the legs lengthen upward on a diagonal. Inhale and bend back in with control.
You do not need a ballet turnout. A modest turnout from the hips is enough. If the knees feel strained, narrow the angle or place the feet parallel instead. Comfort in the hips comes first.
What I like here is the connection between inner thighs, low abs, and pelvic control. Done well, the legs extend while the front ribs stay quiet and the pelvis stays heavy. Try 8 to 10 reps.
20. Legs-Up-the-Wall Heel Lowers
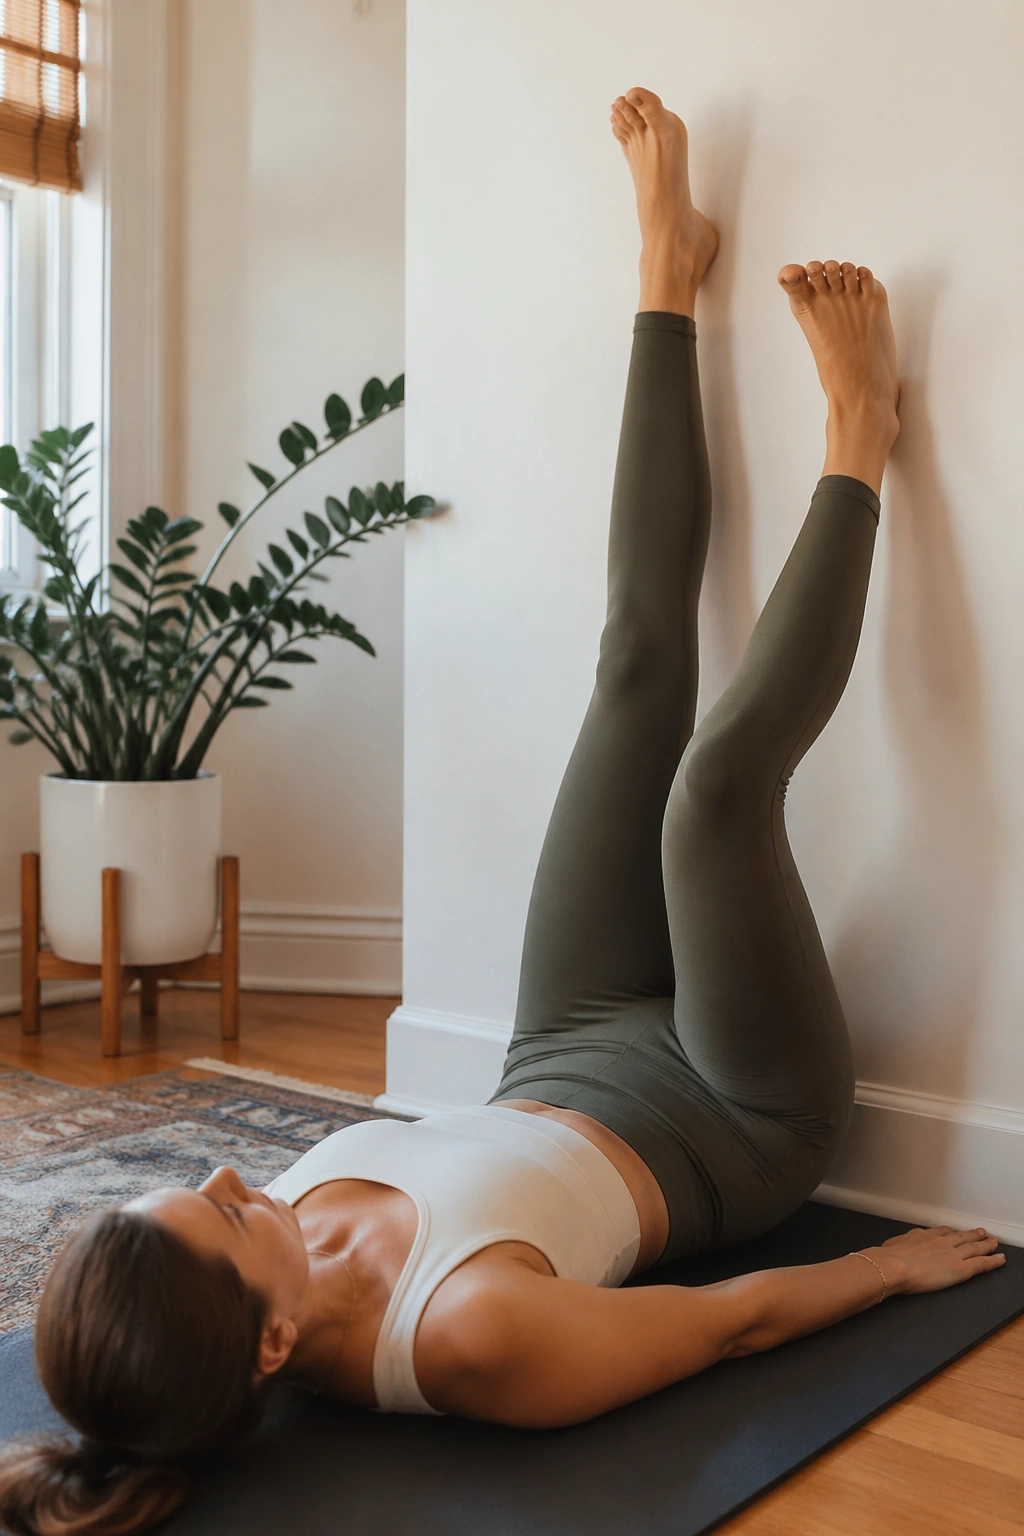
Put both legs up the wall and you’ve already made the exercise more approachable than a free-hanging leg lower.
Scoot close enough to the wall that your legs can rest straight up it, or keep a soft bend in the knees if hamstrings are tight. Flex the feet. Exhale and lower one heel a few inches down the wall while the other leg stays still. Slide it back up and switch.
Because the wall supports the legs, you can focus on the trunk. The lower abs should hold the pelvis steady while the legs move from the hip sockets. If the tail starts curling off the mat, the range is too ambitious.
This is also a sneaky hamstring opener. Try 8 lowers per side with slow control. If the neck feels strained, place a towel under the head and move a little farther from the wall.
21. Wall Roll-Up Assist
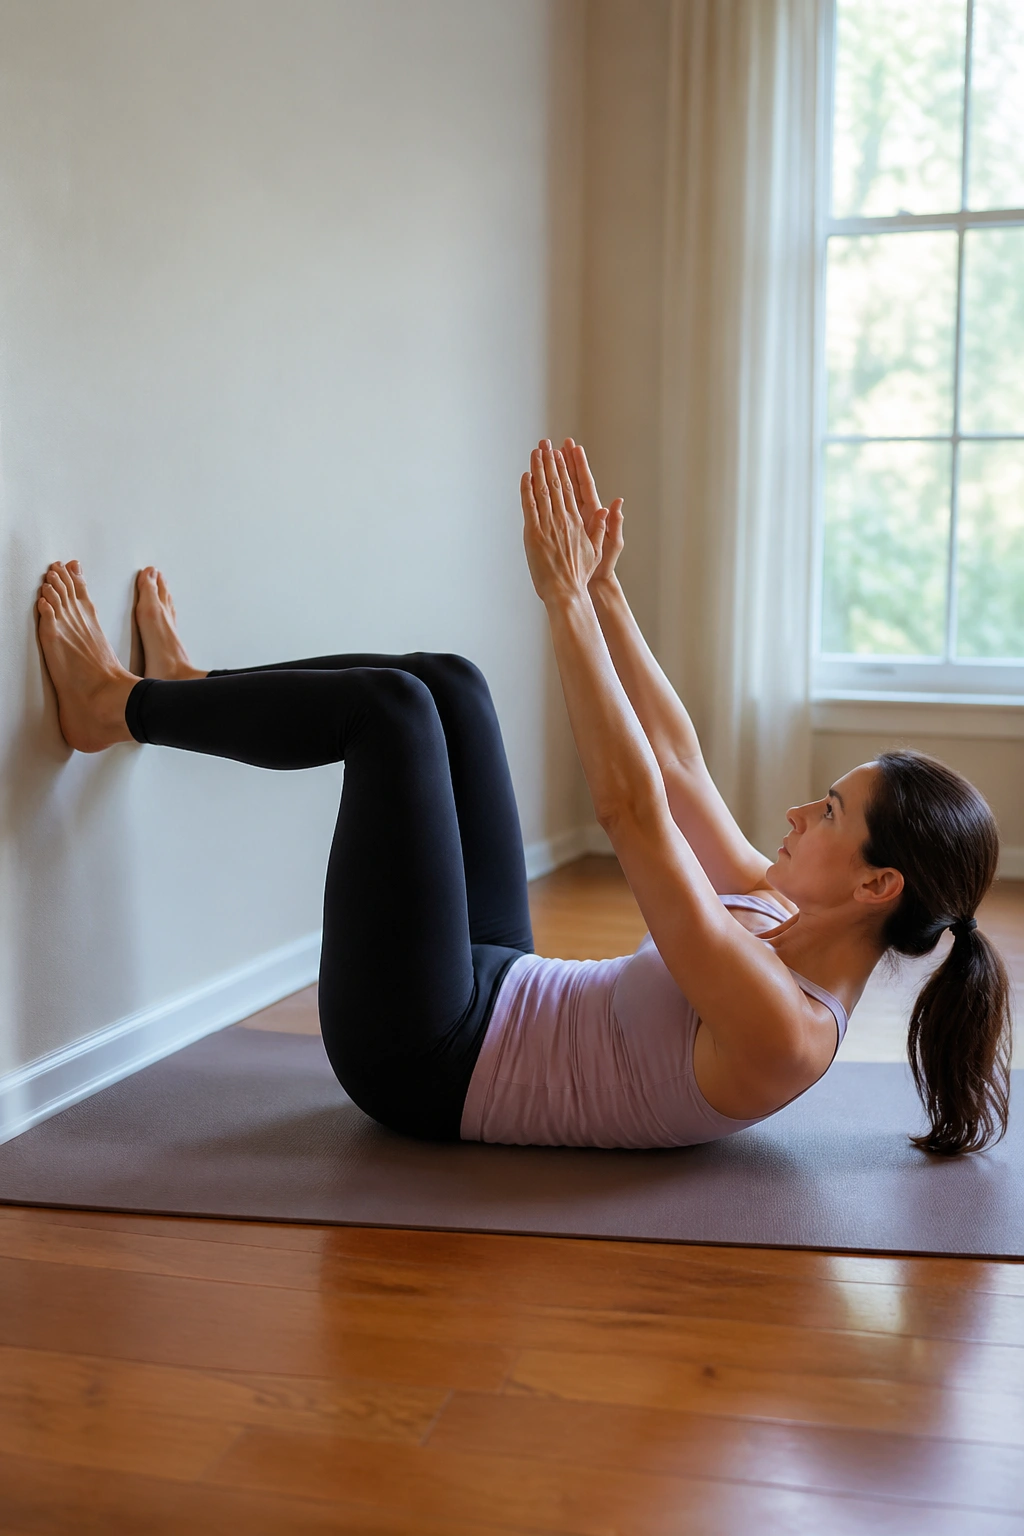
A full Pilates roll-up is hard for beginners. Most people either yank with the neck or fling themselves up. The wall-assisted version fixes a lot of that.
Lie on your back with your feet flat on the wall, knees bent. Reach both arms toward the ceiling. Exhale, nod the chin, and curl your head and shoulders up. Keep going, pressing lightly into the wall with the feet as you continue rolling toward sitting. Inhale at the top, then exhale to roll back down with control.
The foot pressure helps anchor the lower body so the abdominals can work through the curl. It also keeps the movement smoother on the way down, which is where people usually collapse.
Do 5 to 8 reps. If you get stuck halfway, pause there for one breath. That sticky middle range is where the exercise starts paying rent.
22. Wall Hamstring Stretch
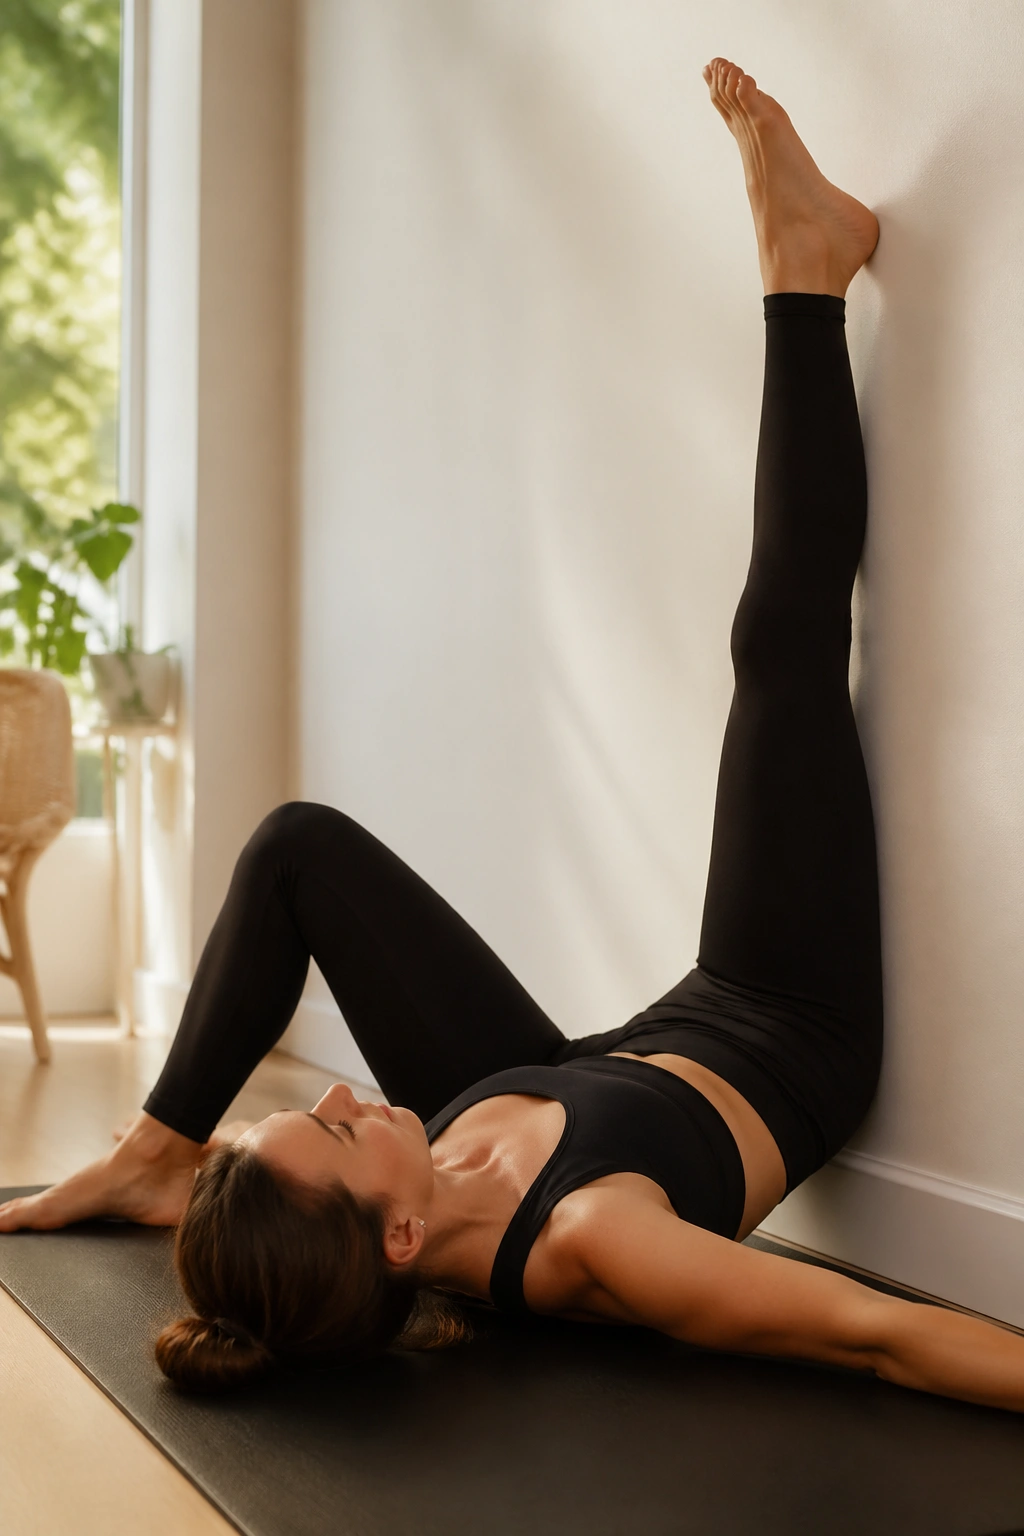
This is recovery work, but in beginner Pilates it’s also skill work.
Lie on your back and place one heel up the wall with the leg as straight as you can manage. The other leg can stay bent with the foot on the floor or extended long on the mat if your back stays comfortable. Flex the raised foot and breathe into the back of the thigh for 20 to 30 seconds.
Do not force the knee flat. A soft bend is fine. What you want is a steady stretch along the hamstring without the pelvis twisting or the low back gripping.
I prefer this over aggressive standing toe touches for beginners because the floor and wall support the body. That support lets you relax the jaw, breathe, and stretch the target area instead of wrestling for range.
23. Wall Figure Four Stretch
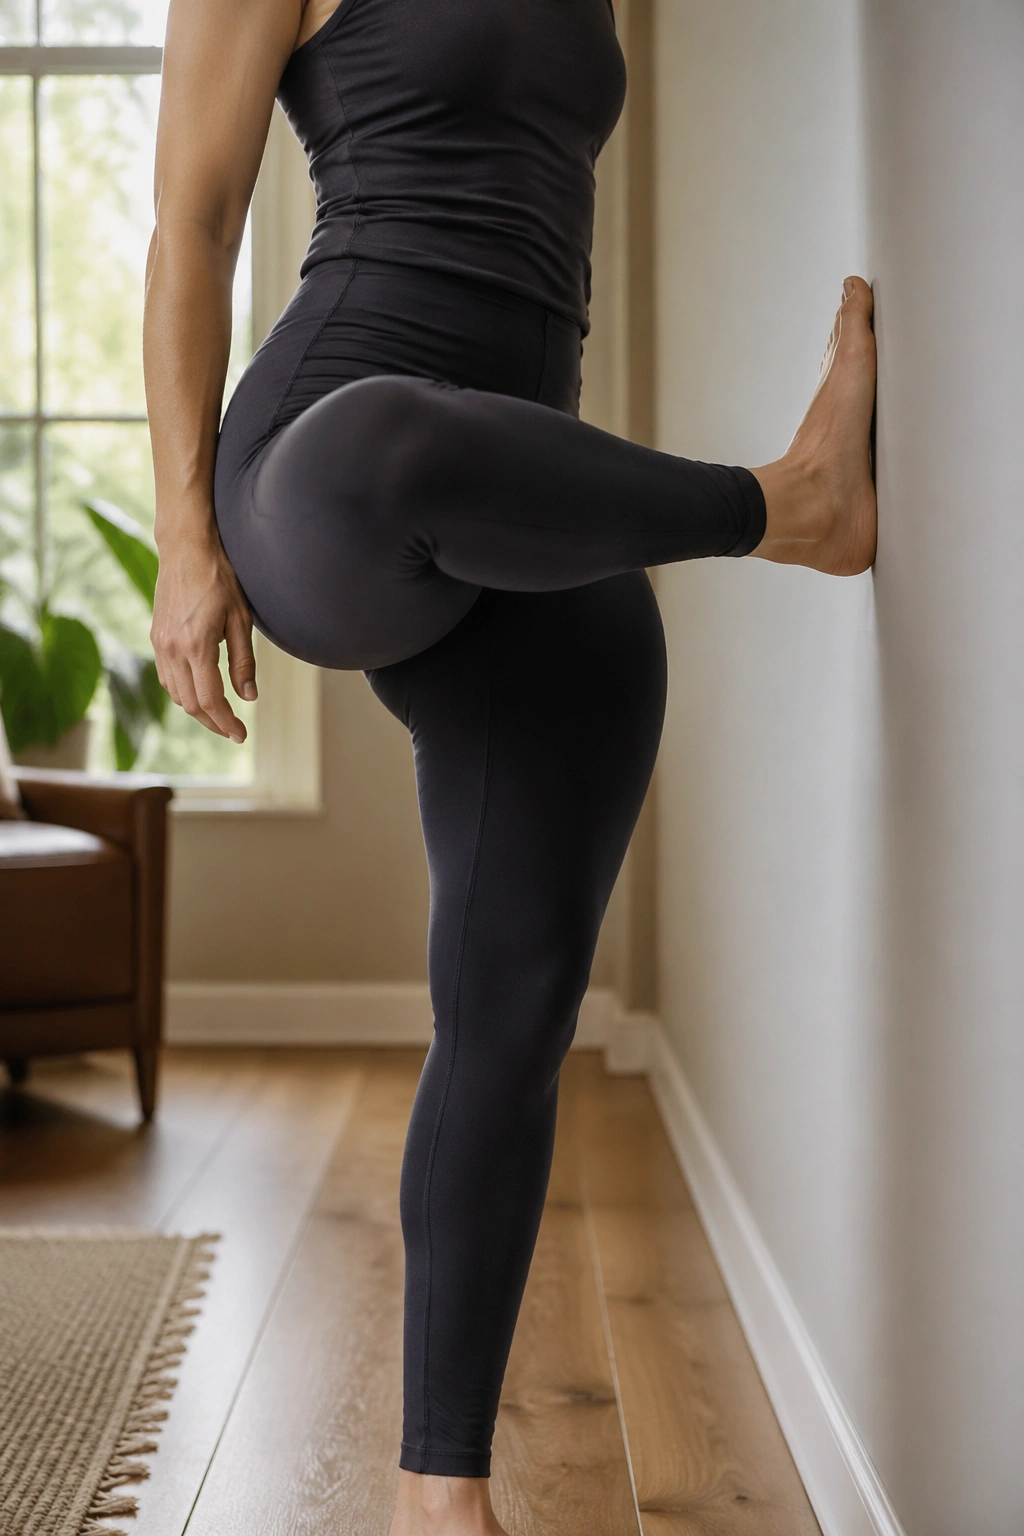
Tight hips can ruin bridges, standing balance, and almost any seated posture drill. This stretch helps, and it usually feels good fast.
Lie on your back with both feet on the wall, knees bent. Cross one ankle over the opposite thigh to make a figure four. Keep the bottom foot on the wall and gently press that wall away to deepen the stretch in the outer hip of the crossed leg. Stay for 20 to 30 seconds, then switch.
The crossed foot should stay flexed to protect the knee. If the hips are extra stiff, scoot a little farther from the wall so the bend is less sharp.
You’re looking for a stretch in the glute and deep hip rotators, not a twist in the lower back. If the pelvis starts rolling, back off a notch. Quiet hips, steady breath, slow release.
24. Wall Spine Twist
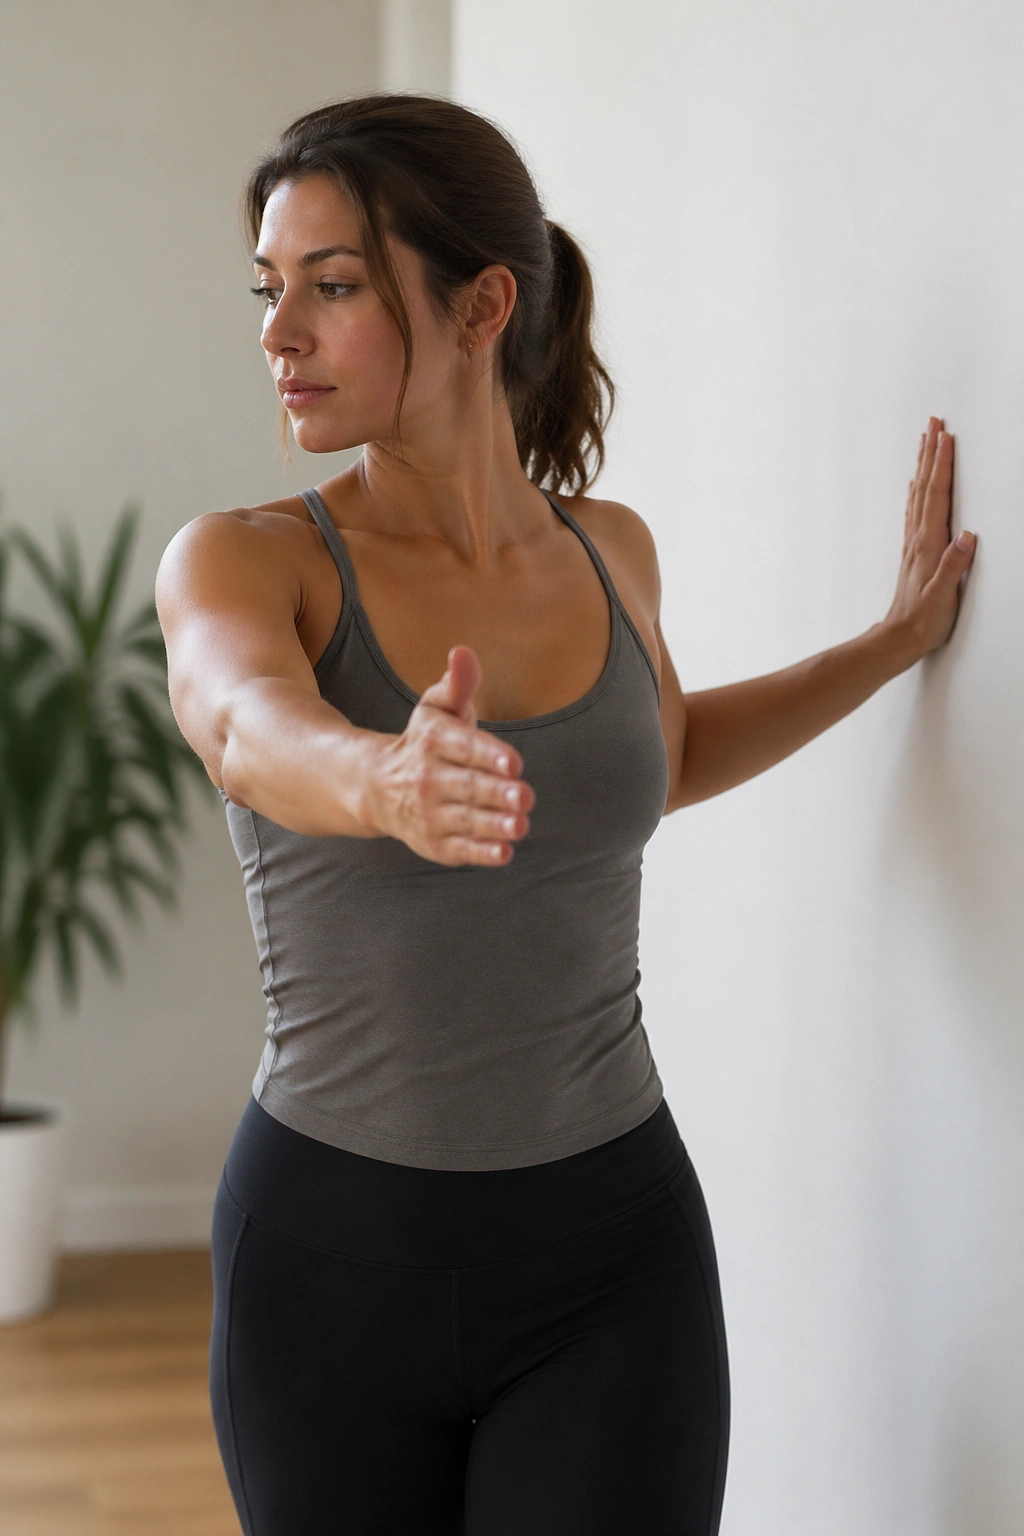
Pilates is not only abs and glutes. Rotation matters.
Stand sideways to the wall with your feet hip-width apart and your inside hand lightly touching it. Bring both arms straight out in front of your chest. Exhale and rotate your rib cage away from the wall, keeping the hips facing forward. Inhale back to center, then repeat before switching sides.
This teaches you to separate thoracic rotation—movement through the upper and mid-back—from pelvic twisting. Beginners often move the hips with the ribs and miss the spinal part entirely.
Small range, better result
- Rotate only as far as the pelvis can stay quiet.
- Keep both feet evenly weighted.
- Let the breath lead the turn.
- Do 6 to 8 reps each side.
The move should feel wringing through the rib cage, not pinching in the lower back.
25. Wall Plank Hold
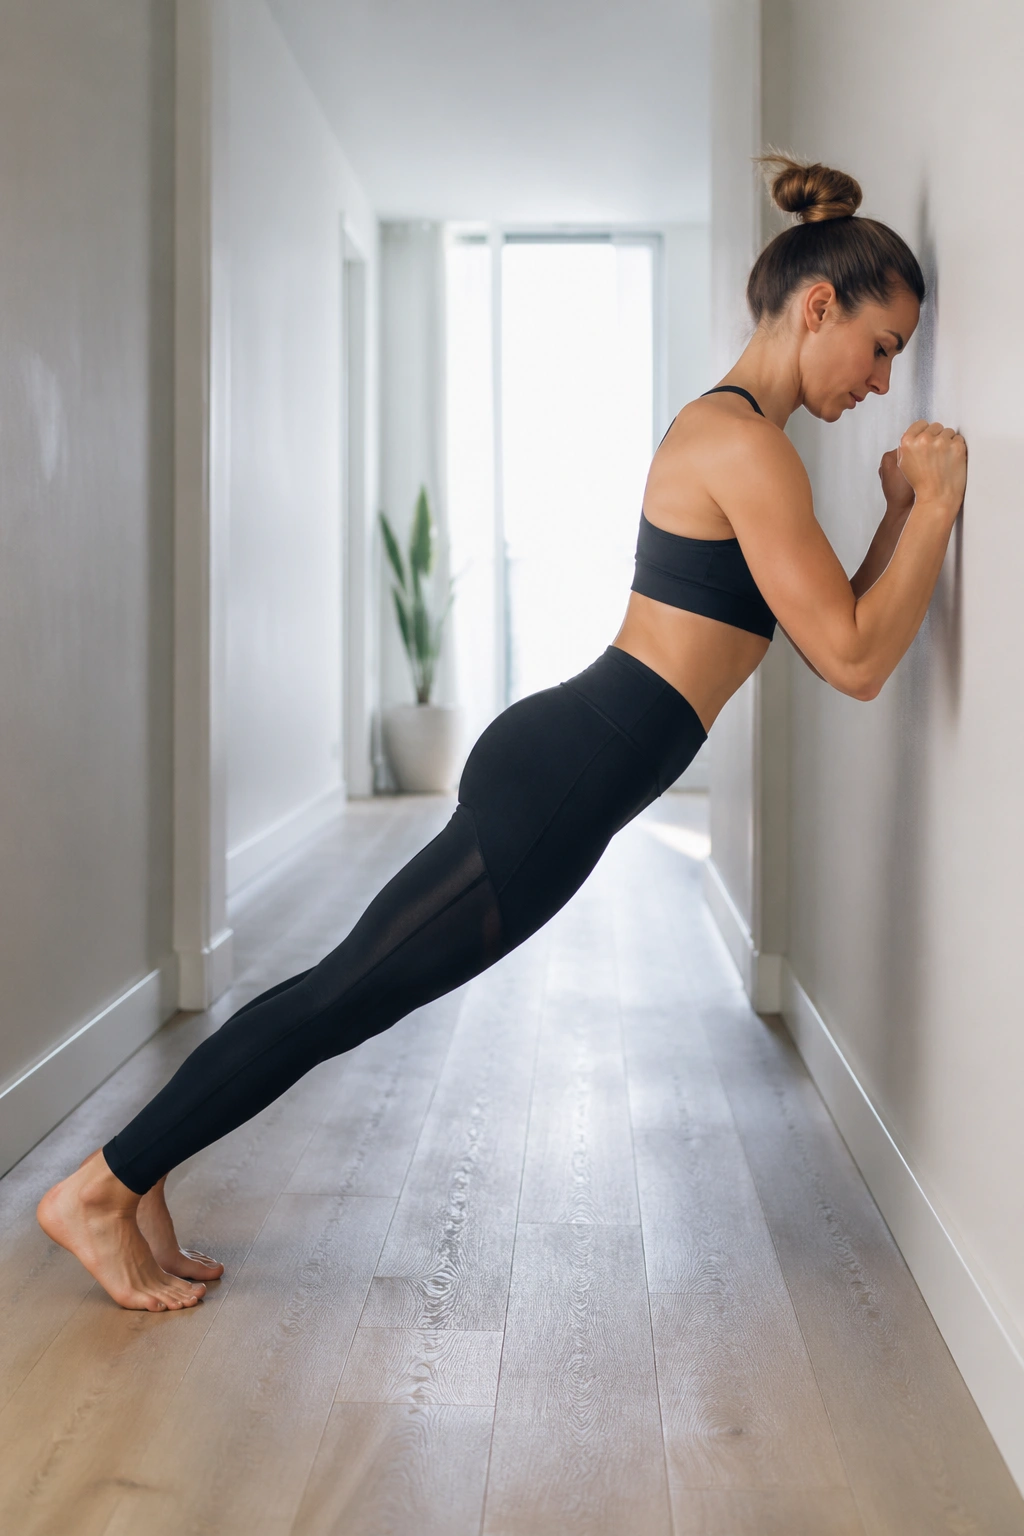
Let’s finish with one that looks simple from across the room and feels long by second 15.
Face the wall and place your forearms or palms on it at shoulder height. Walk your feet back until your body forms a straight line. Draw the ribs in, lengthen through the heels, and hold for 20 to 40 seconds while breathing steadily.
The wall plank is kinder on the wrists and shoulders than a floor plank, but it still teaches the same big lesson: resist gravity without collapsing anywhere. No sagging low back. No rounded shoulders. No head jutting forward.
If this feels too easy, step farther back. If it feels messy, step in closer and own the shape first. I would rather see a strong 20-second wall plank than a shaky floor plank that turns into survival mode.
A 15-Minute Starter Sequence Using Eight of These Moves
If 25 exercises feel like too much choice, use this short sequence for a few weeks. It hits posture, upper body, core, glutes, and a little mobility without running long.
Try this order:
- Wall Alignment Stand — 3 rounds of 5 breaths
- Wall Breathing Reach — 8 reps
- Wall Angel — 8 reps
- Wall Squat Hold — 2 holds of 25 seconds
- Wall Side Leg Lift — 10 reps each side
- Supine Pelvic Tilt With Feet on the Wall — 10 reps
- Wall Bridge — 10 reps
- Wall Dead Bug Press — 6 reps each side
- Wall Hamstring Stretch — 20 seconds each side
Move from one exercise to the next with about 15 to 30 seconds between them. That is enough time to reset your position and breathe without letting the session drift.
Do the sequence 2 to 4 times per week. If your form starts fading, stop there. Beginner Pilates goes sideways when fatigue turns careful movement into rushed movement. A shorter session with clean reps beats a longer one where your ribs, neck, and hip flexors hijack every drill.
And if you only have 7 minutes? Use the first, fourth, sixth, seventh, and eighth exercises. That little stack covers more ground than people expect.
Final Thoughts
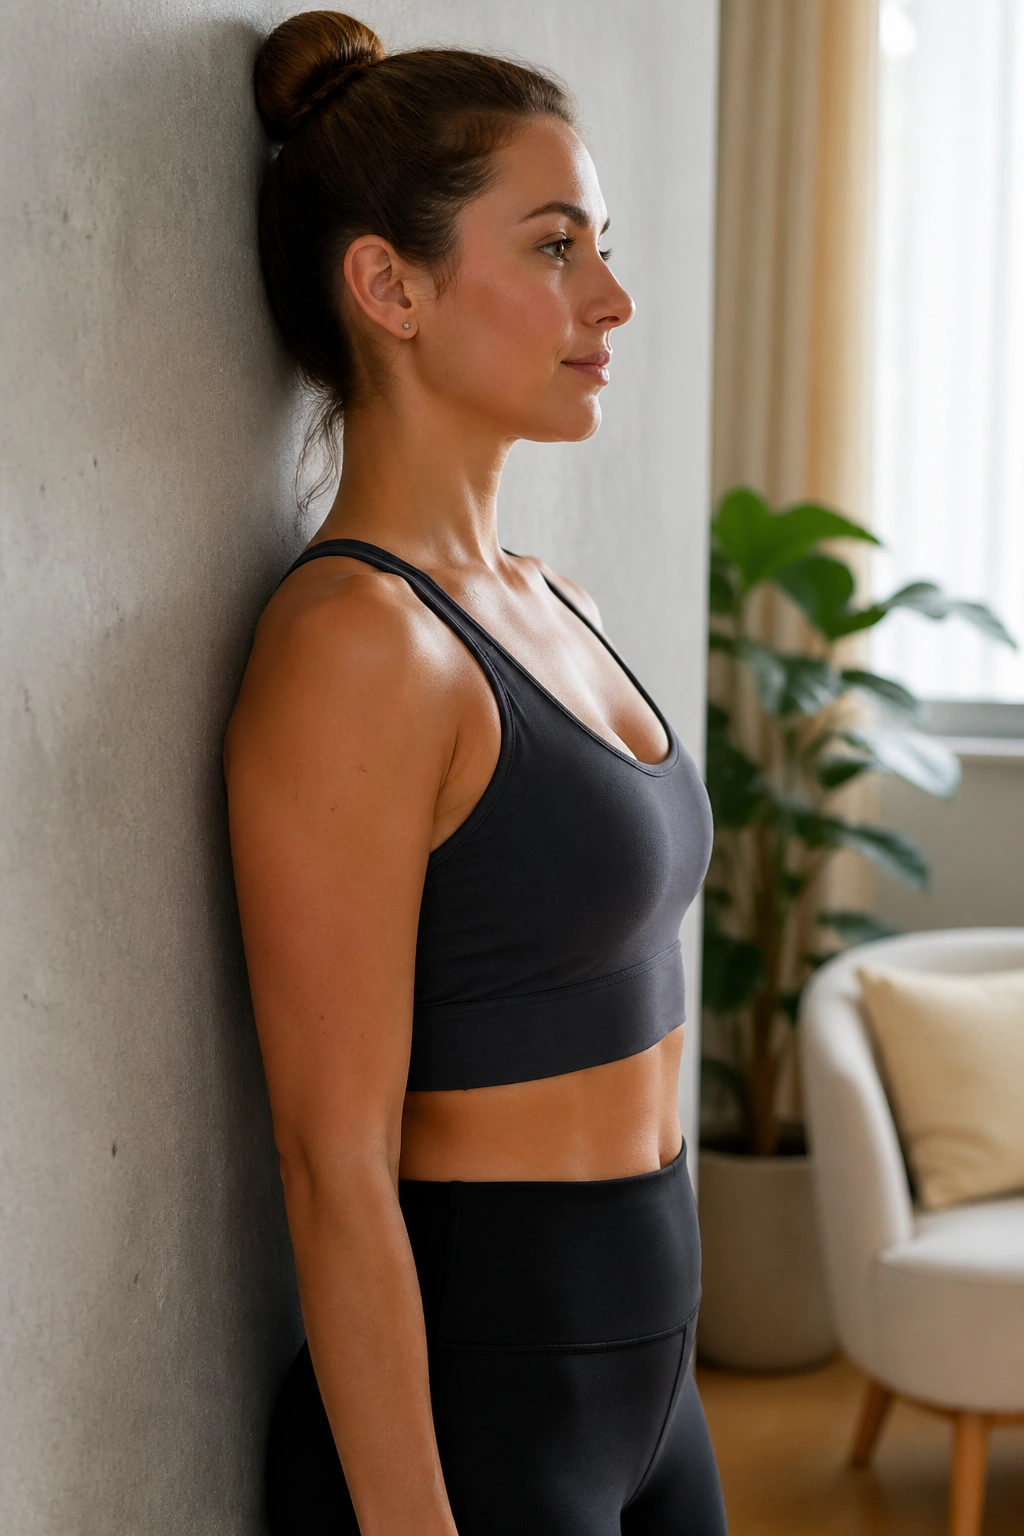
The best beginner wall Pilates moves are not the flashiest ones. They’re the ones that teach you where your ribs are, how your pelvis moves, how to breathe under effort, and how to move a leg without the rest of your body throwing a party.
Start with 8 to 10 exercises, not all 25 at once. Repeat them long enough that the positions begin to feel familiar. Familiarity is where control starts, and control is the whole point of Pilates.
A plain wall can do a lot of teaching if you let it. Use it well, and your mat work gets smoother, your posture gets less fussy, and your body stops hiding from the basics.
