



The best Pilates moves for more flexibility rarely look flashy. Half the time, you’re rolling down, reaching long through your heels, or breathing into the back of your ribs while some stubborn patch of tightness starts to let go. That’s one reason Pilates works so well for people who feel stiff but hate long, passive stretching sessions.
A lot of stretching fails for one simple reason: your body does not trust the range you’re asking for. When a hip feels pinched, or your hamstrings grab the second you hinge forward, the answer is often better control, not more force. Pilates has a knack for that. You build strength at the edges of a movement, and that gives your nervous system a reason to stop slamming on the brakes.
That idea shows up in research, too. Reviews in movement and rehab journals have linked Pilates practice with gains in hamstring flexibility, spinal mobility, posture, and body awareness. On the mat, that translates into something you can feel fast: rolling up from the floor gets easier, twisting behind you in the car feels less awkward, and reaching overhead stops tugging through the ribs and low back.
One note before you start. Aim for a stretch that eases as you breathe, not a pinch, zing, or sharp pull. A folded towel, yoga block, or strap can make half of these moves better. Slow beats deep here, every time.
1. Standing Roll Down
Nothing exposes stiff hamstrings and a locked mid-back faster than a standing roll down. In a few seconds, you can tell whether your spine is moving in segments or folding like one solid plank.
Why this move works
The magic is in spinal articulation. When you tuck your chin, soften your breastbone, and peel down one vertebra at a time, the whole back line gets a chance to lengthen—from the neck to the calves. Because you control the descent with your abs, you also avoid dumping your weight into the low back.
Start with your feet hip-width apart and your knees soft, not bent like a squat. Exhale, nod the head, and roll down slowly until you feel a clean stretch through the back of the legs. Pause for one breath at the bottom, then exhale as you stack back up from the pelvis.
Quick form notes
- Keep your weight over the middle of the feet, not drifting onto the heels.
- Let the arms hang so the shoulders and jaw can release.
- Stop when the stretch turns sharp or your hips slide backward.
- On the way up, think tailbone heavy, crown of the head rising last.
Best cue: move as though each vertebra has to wait its turn.
2. Pelvic Curl
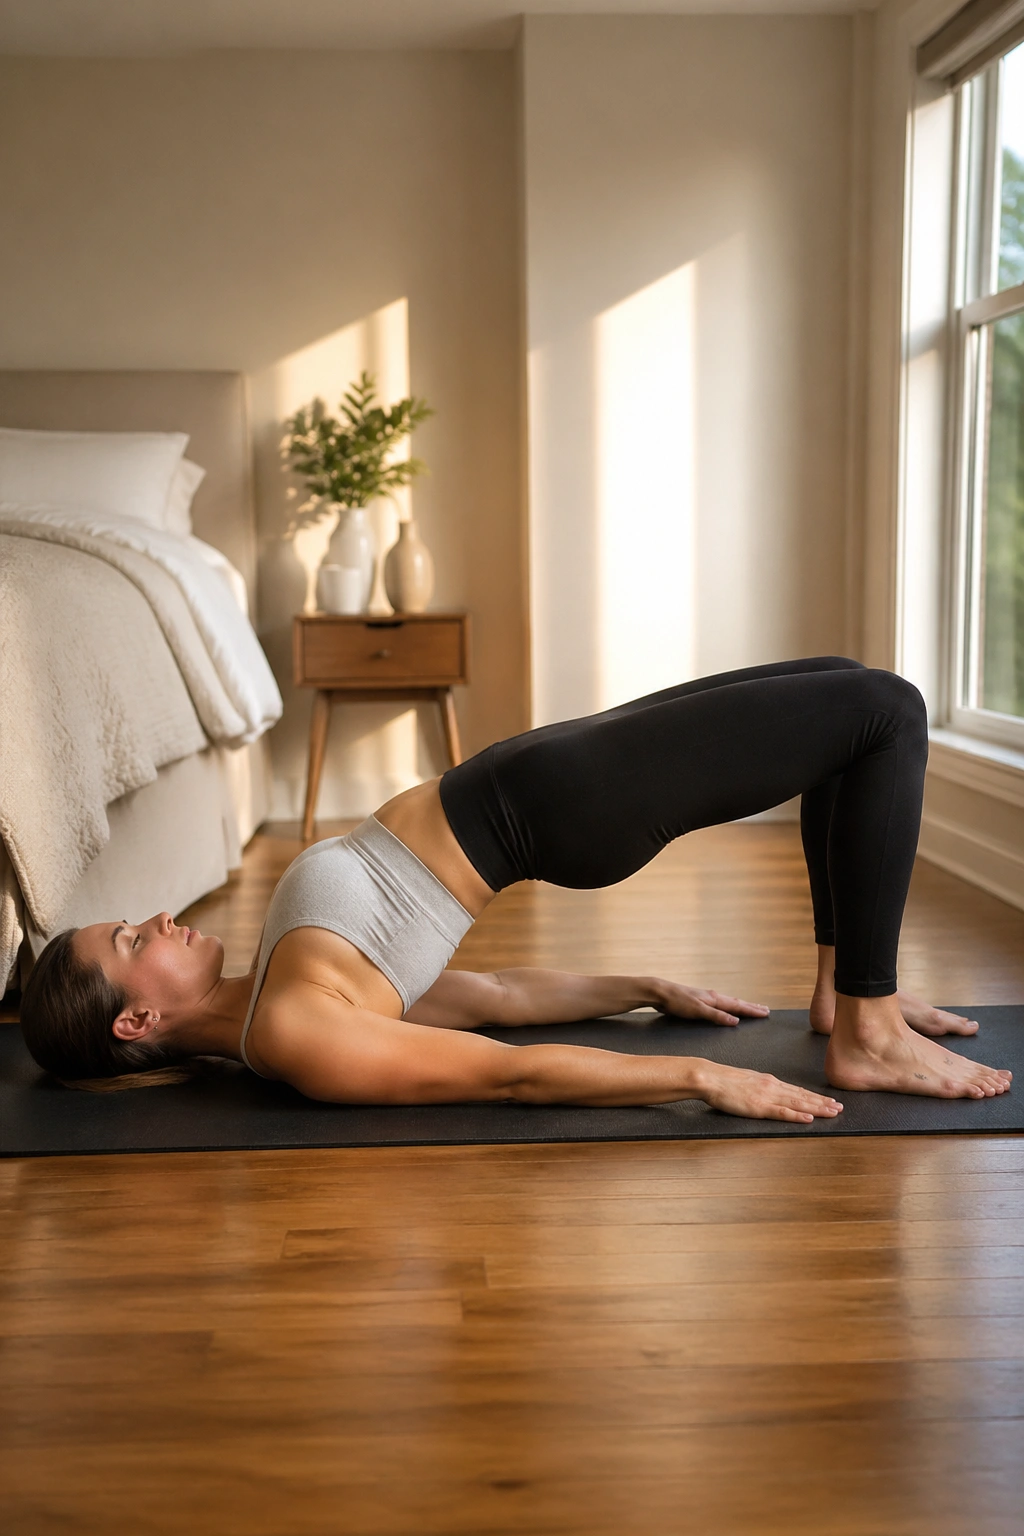
Tight hips are often weak hips in disguise. That’s why the pelvic curl earns a spot early in any Pilates flexibility routine.
Lie on your back with your knees bent and feet about sit-bone width apart. On the exhale, tip the pelvis so the tailbone curls up, then peel the spine off the mat until you’re resting between the shoulder blades. Inhale at the top. Exhale again and lower one section at a time—upper back, ribs, waist, sacrum.
What makes this move useful for flexibility is the pairing of glute strength and front-body opening. When the glutes do their share, the hip flexors stop hanging on for dear life. That can make standing, walking, and split-stance stretches feel smoother within a few sessions.
Keep the ribs soft at the top. Push through the full foot, with a little extra awareness in the heels. Six to eight reps is plenty. More than that, and people start chasing height instead of clean movement—which is where the low back starts to take over.
3. Cat Stretch
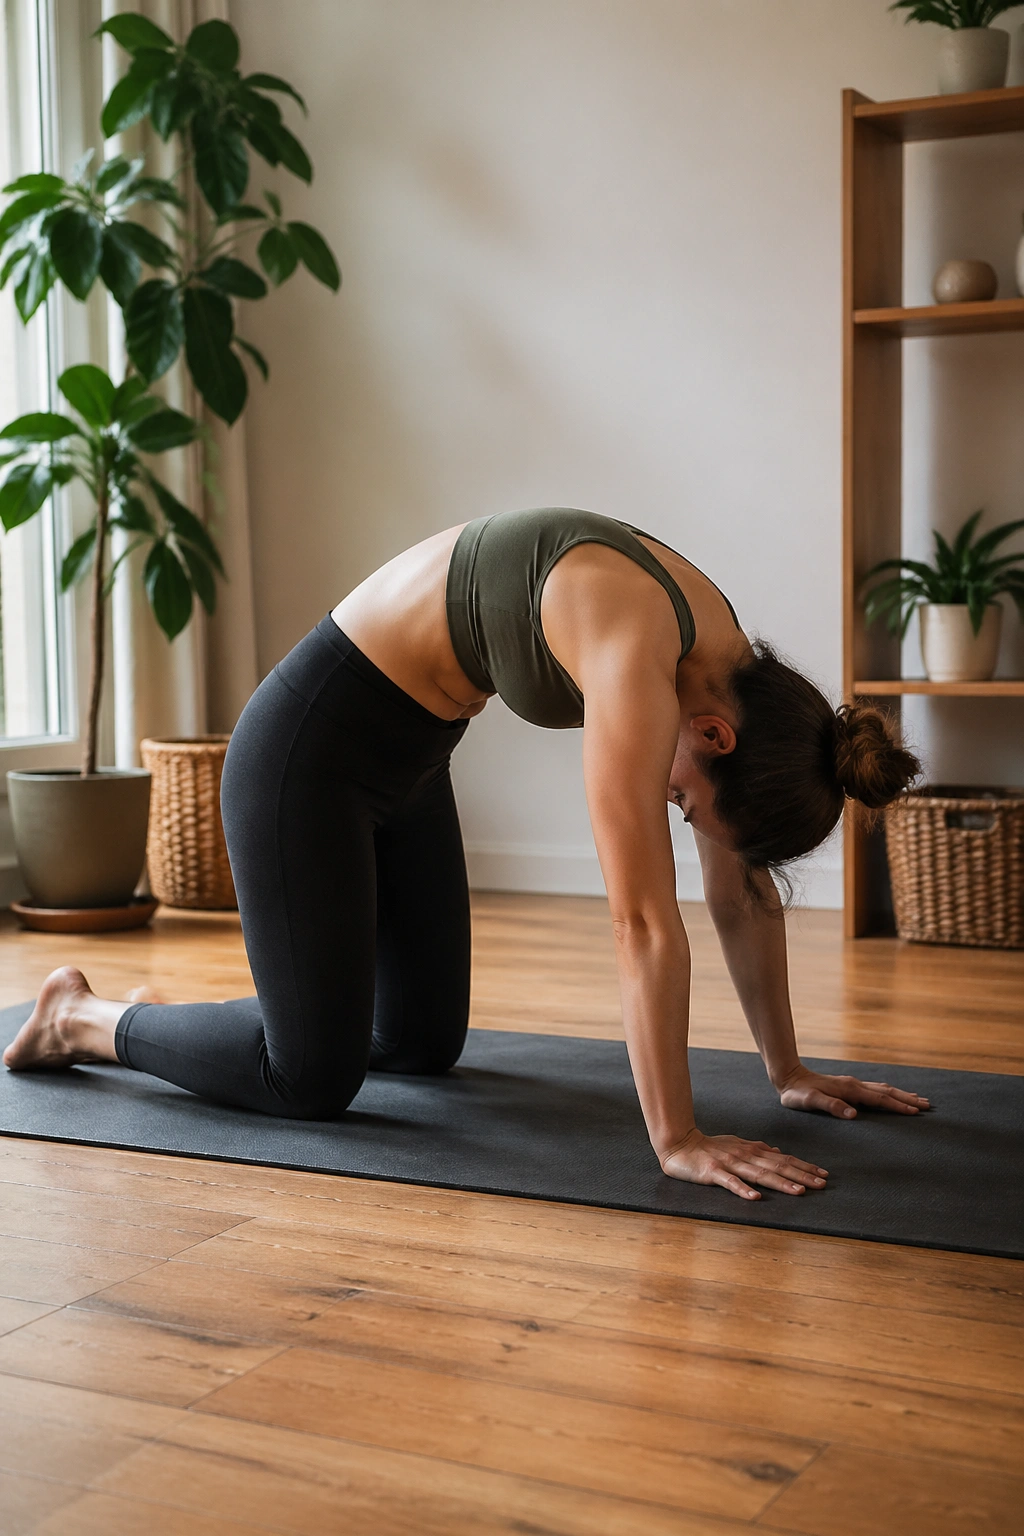
Why does cat stretch feel like it loosens the whole back so fast?
Because it gives you both ends of the job: flexion and extension. You round the spine, then lengthen it back out, and the motion travels through the neck, ribs, waist, and pelvis instead of getting trapped in one cranky spot. When you match it to breath, the rib cage starts moving better too, which matters more than people think.
Set up on all fours with wrists under shoulders and knees under hips. Exhale to curl the tail under, draw the belly up, and push the floor away until the back rounds. Inhale as you return through a long neutral spine. You can add a small extension, though I’d keep it modest if your low back already feels compressed.
How to use it well
Go slow enough that you can tell where the sticky parts are. Mid-back not moving? Spend an extra breath there. Wrists unhappy? Make fists, drop to forearms, or place your hands on yoga blocks. Six to ten smooth cycles usually does the trick.
And yes, the breath matters. A lazy inhale makes this feel like a warm-up. A full exhale makes it feel like a reset.
4. Half Roll Back
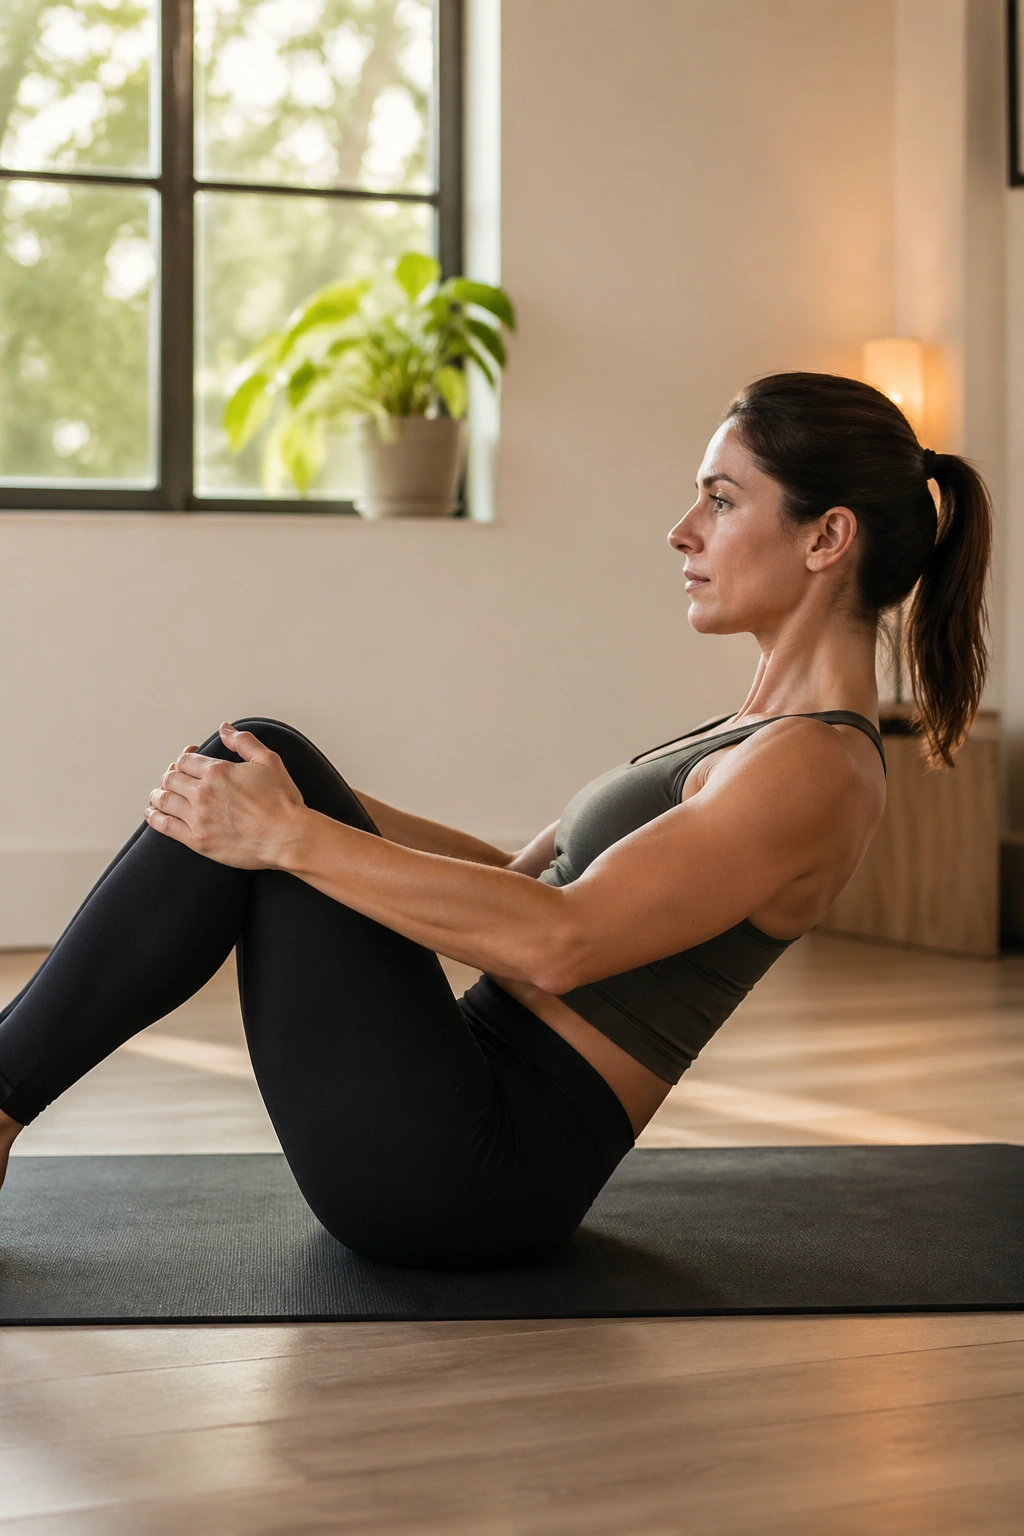
Sit on the mat with your knees bent and your hands behind your thighs. Already shaking a bit? Good. That means the half roll back is getting into the deep support muscles that help your spine move without bracing like concrete.
This move improves flexibility in a sneaky way. You’re not yanking on a muscle. You’re teaching the pelvis and lumbar spine to tilt and round with control, which can make forward bends, seated stretches, and even squats feel less blocked.
Here’s the setup that works best for most people:
- Sit tall on your sit bones, with the chest lifted.
- Exhale and roll the pelvis backward into a C-curve, keeping the shoulders soft.
- Pause before the feet want to lift or the low back collapses.
- Inhale there, then exhale to come back upright.
A range of 4 to 6 reps is enough. If your hip flexors grab, scoot your feet closer to your hips and hold higher on the thighs. If your hamstrings stop you from sitting tall, fold a blanket under your hips. Small adjustment, big difference.
5. Spine Stretch Forward
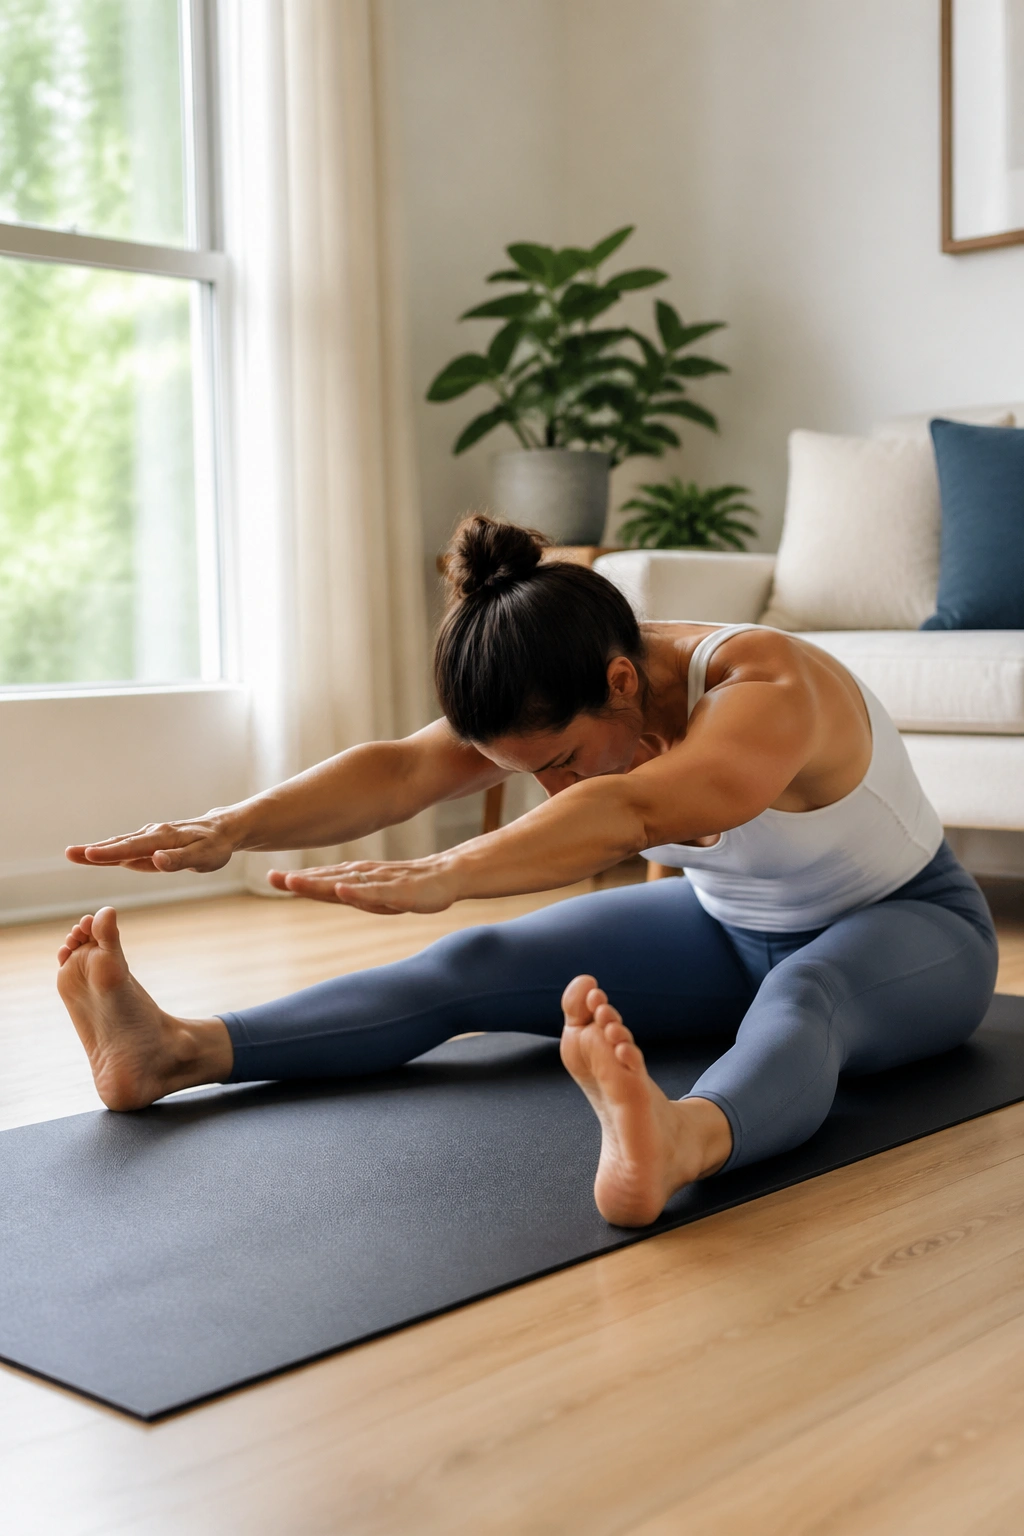
This one looks like a seated hamstring stretch, though that description sells it short. Spine Stretch Forward is one of the cleanest ways to work on hamstrings, calves, and the back of the rib cage at the same time.
Sit with your legs wider than hip-width, feet flexed, and arms reaching forward at shoulder height. The first challenge is upright posture. Plenty of people cannot sit tall here without the pelvis tipping backward. No shame in that—sit on a folded towel or low block so the spine has a fair shot.
From there, inhale to lengthen through the crown of the head. Exhale, nod the chin, and round forward as though you’re draping over a large beach ball. Reach the fingertips forward, pull the waist back, and keep the heels pressing away from you. Inhale into the back ribs. Exhale to stack up again.
The mistake I see most often is folding from the hips and dropping the chest toward the floor. That turns the move into a generic toe reach. Pilates wants length through the spine first, then flexion. You should feel space opening between the shoulder blades and a broad stretch down the whole back line, not a jam in the front of the hips.
Three to five reps, done with patience, work better than hanging out for a minute and losing the shape.
6. Saw
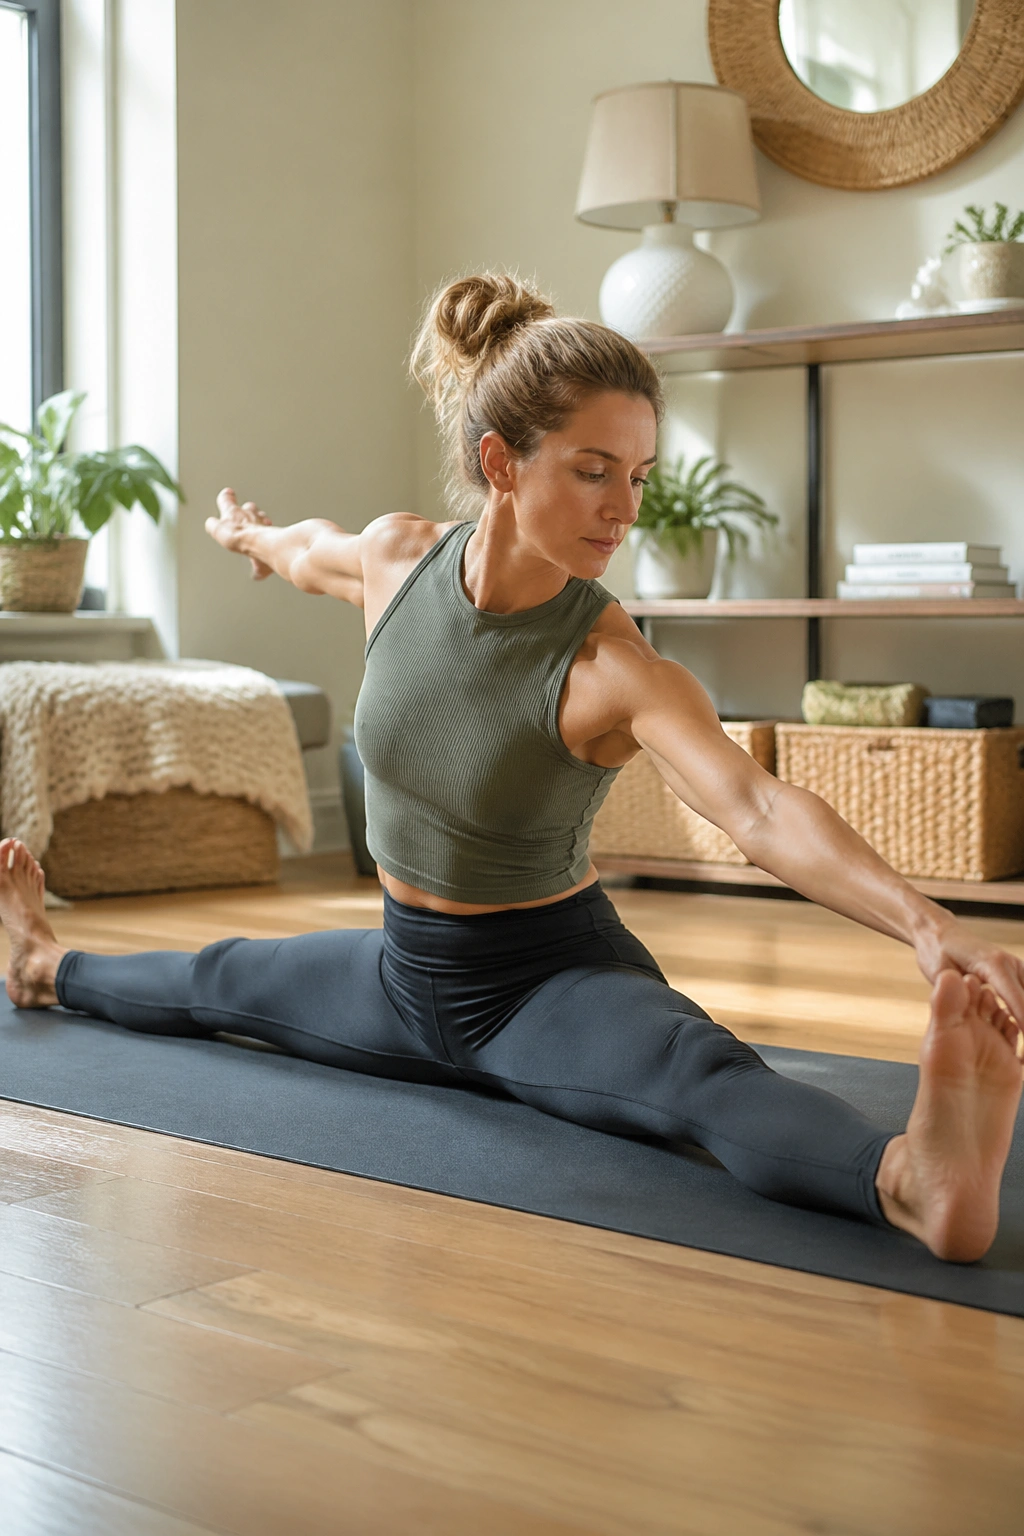
Unlike a plain seated forward fold, the Saw adds rotation—and rotation changes everything. The stretch shifts from “hamstrings only” to a fuller pattern that reaches into the waist, outer hips, and thoracic spine.
Sit with your legs wide and your arms extended to the sides. Twist your torso to the right, then reach your left hand toward the outside of the right foot while the right arm stretches back. Come up through center, then switch sides. The image I use is simple: one arm reaches toward the little toe, the other reaches back like it wants the far wall.
The beauty of Saw is that it asks for length before depth. You grow taller on the twist, then fold. That order matters. Skip it, and the movement collapses into the low back.
Who benefits most? People who sit at desks, row, cycle, lift, or spend hours rounded forward. Their hamstrings may be tight, sure, though the bigger issue is often a stiff rib cage sitting on top of a stiff pelvis. Saw gets both talking to each other again.
My favorite prescription is 4 reps per side, slow enough that you can hold the end range for one full breath.
7. Mermaid Stretch
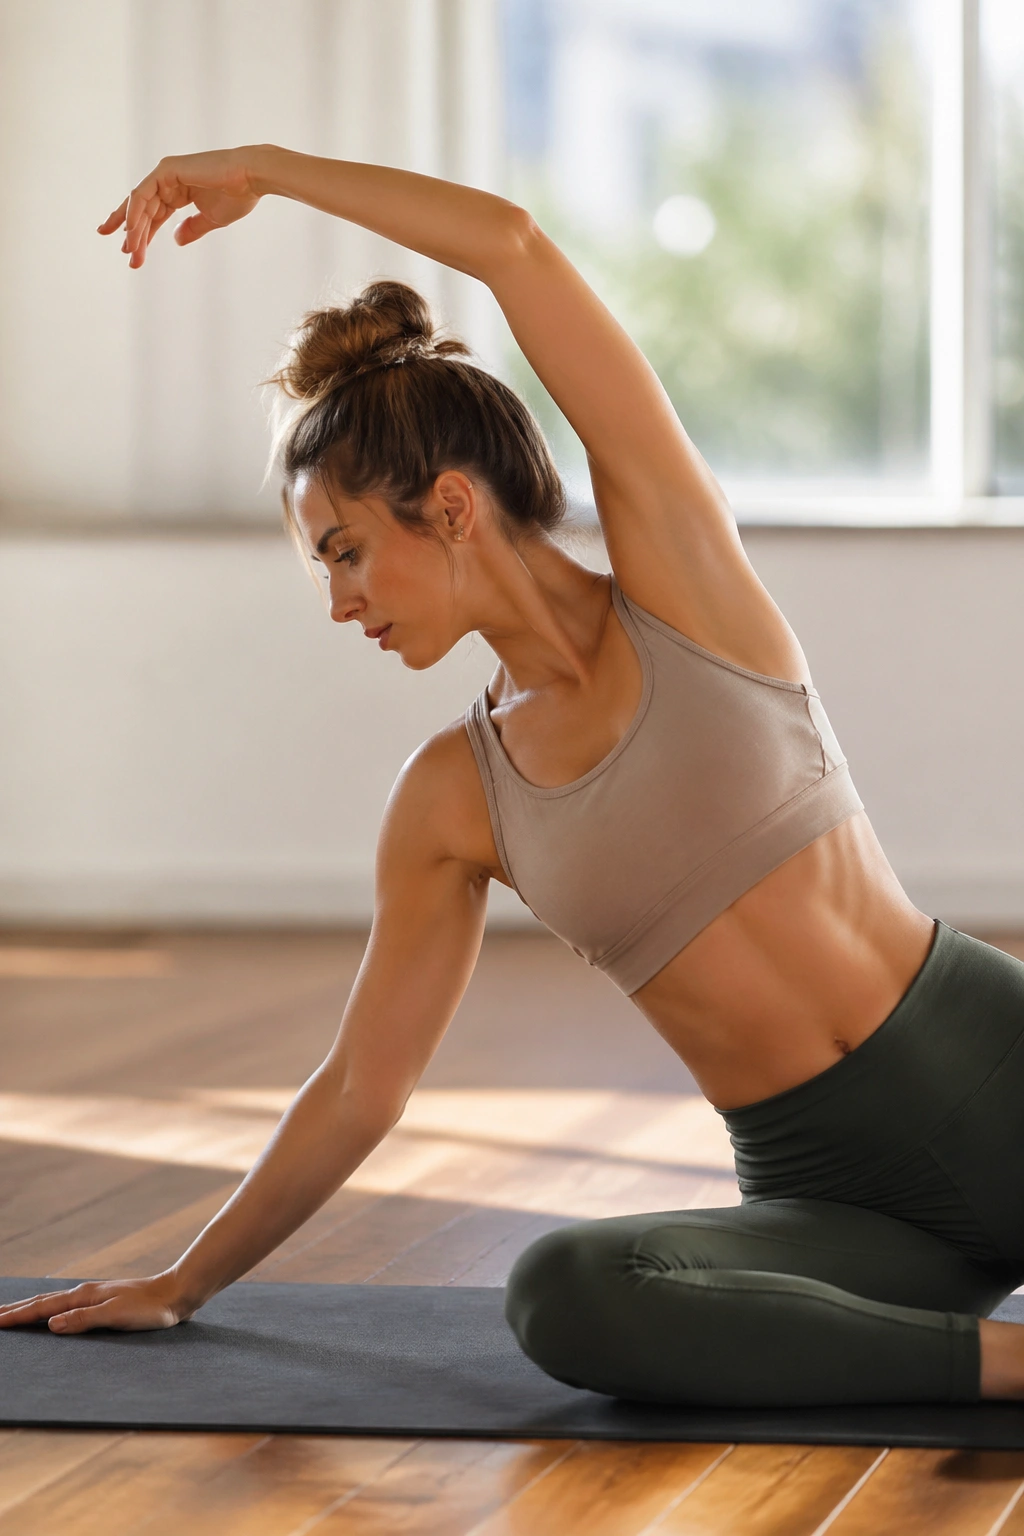
Few moves open the side body as cleanly as the Mermaid Stretch. You feel it along the ribs, through the lats, and often into the outer hip of the folded-leg side.
What makes Mermaid different
A lot of people think flexibility means forward bending or touching toes. Then they try Mermaid and realize how much tension they carry in lateral flexion—the ability to bend side to side without collapsing. That matters for overhead reach, walking, breathing, and anything that asks your rib cage to move well.
Set yourself up in a comfortable side-sit. One shin can fold in front, the other to the side, though plenty of bodies prefer cross-legged or a block under the hips. Reach one arm out and up, then arc over to the side while keeping the opposite sit bone anchored if possible. Hold for 2 to 3 breaths, then come back with control.
Form cues that help
- Keep the lower shoulder away from the ear.
- Think up and over, not down and sideways.
- Let the ribs expand into the stretch on the inhale.
- Switch your leg position when you change sides.
Best cue: imagine creating space between every rib, like an accordion opening.
8. Side Bend
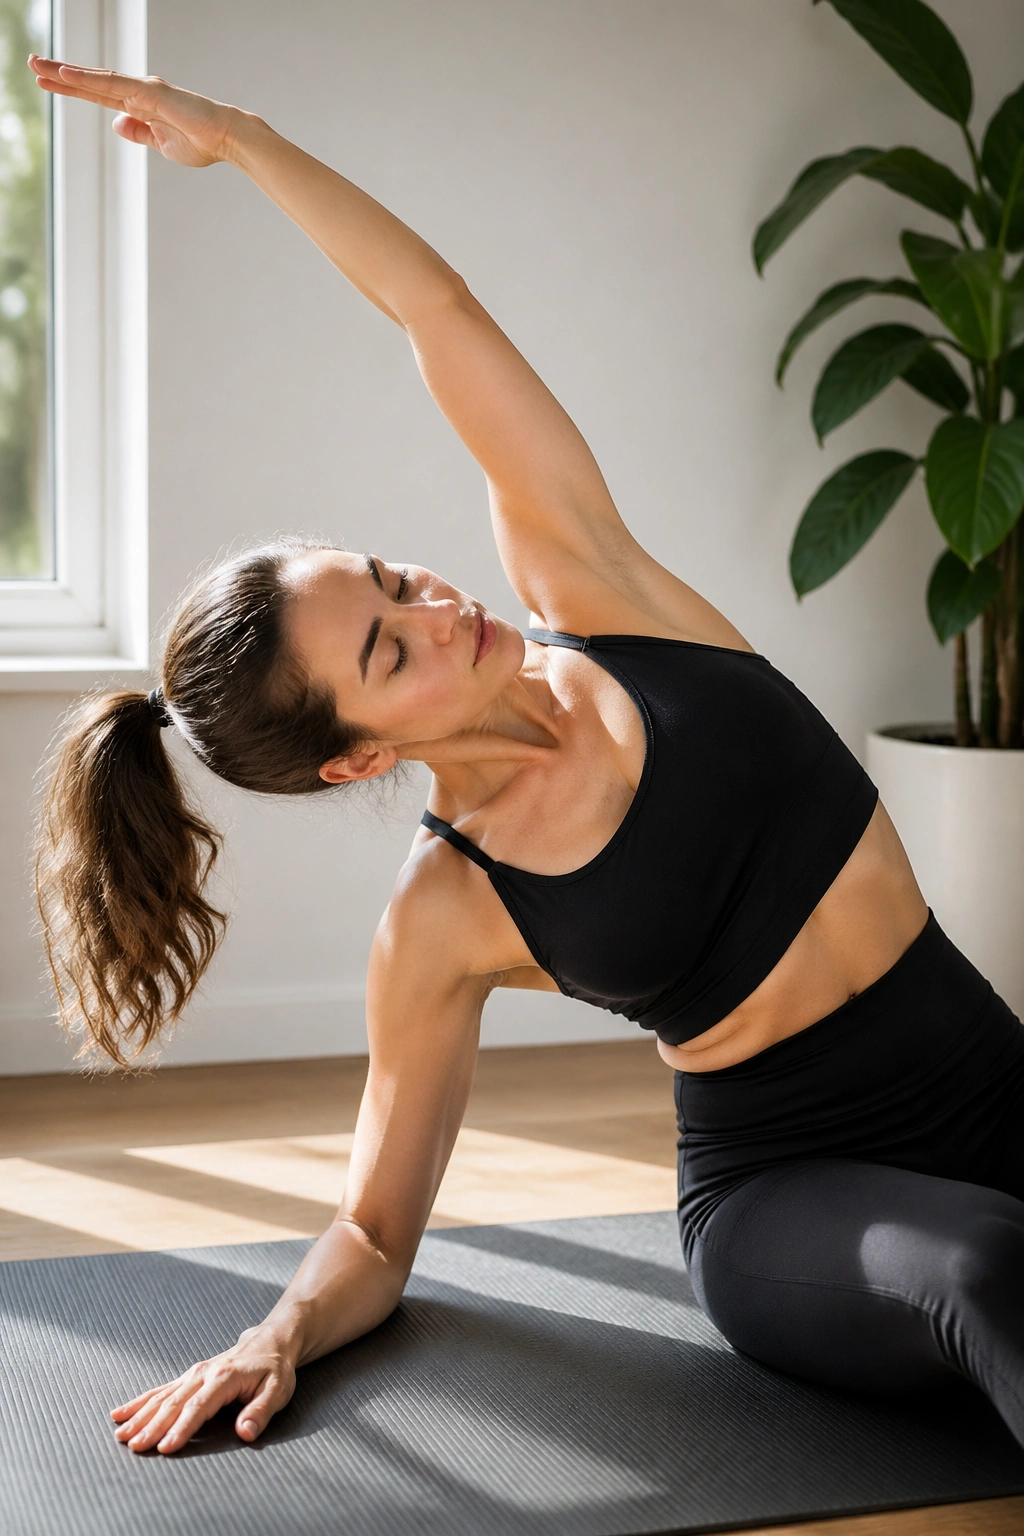
Most flexibility routines ignore side bending. That’s a mistake, because a stiff waist can make everything else feel tighter than it is.
The Pilates Side Bend is part stretch, part strength move, and that combination is exactly why it works. When the obliques, glutes, and shoulder stabilizers support the position, the side body can lengthen without that panicky, pinched feeling people get in looser, unsupported shapes. You’re teaching your body that side range is safe.
There are a few versions. The full classical move from a side-sit with lifted hips is no joke. A more useful entry point for most people is to prop on one forearm or hand with both knees bent, then lift the hips and arc the top arm overhead. Lower down with control. Start with 3 to 5 reps per side.
You should feel a stretch through the underside waist and a long line from the grounded hand to the top fingertips. You should not feel all the pressure crammed into the lower shoulder or wrist. If that happens, bring the floor closer with a yoga block, or switch to a kneeling side bend until the support catches up.
9. Swan Prep
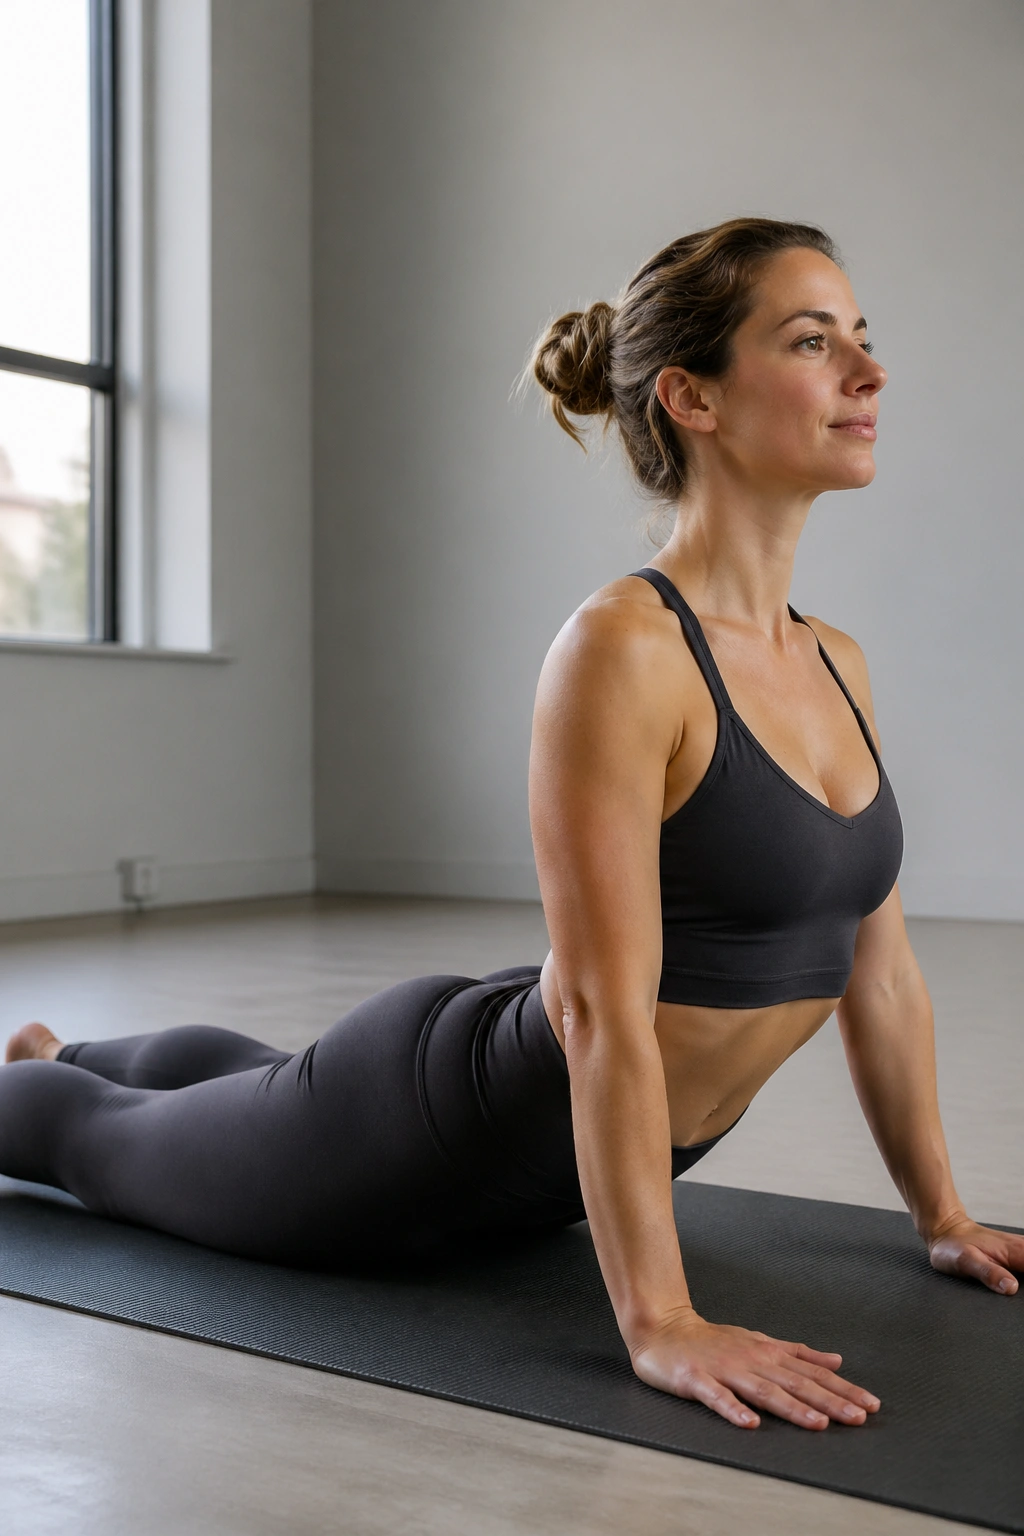
Spend enough hours looking down at a phone or laptop and your body starts forgetting extension. Swan Prep teaches it again.
A tight front body can masquerade as hamstring stiffness, shoulder stiffness, even breathing stiffness. When the chest, abdominals, and hip flexors live in a shortened position all day, any attempt to stand tall or reach overhead feels harder than it should. Swan Prep restores some of that missing extension without throwing you into a huge backbend.
Lie on your stomach with your legs long behind you and your hands under your shoulders or slightly in front. Press the tops of the feet into the mat. Inhale to lengthen the breastbone forward and up, lifting into a small arc. Exhale to lower with control. The move should feel like the spine is growing, not crunching.
How to make it help instead of annoy your back
Keep the pubic bone heavy on the mat and the back of the neck long. Lift lower than your ego wants. Most people get more from a 3-inch lift with clean abdominal support than a high push-up-style press that jams the low back.
Five or six reps is enough. At the top, your collarbones should feel wide and the front of the chest open—almost as though someone is gently pulling your sternum forward.
10. Single Straight Leg Stretch
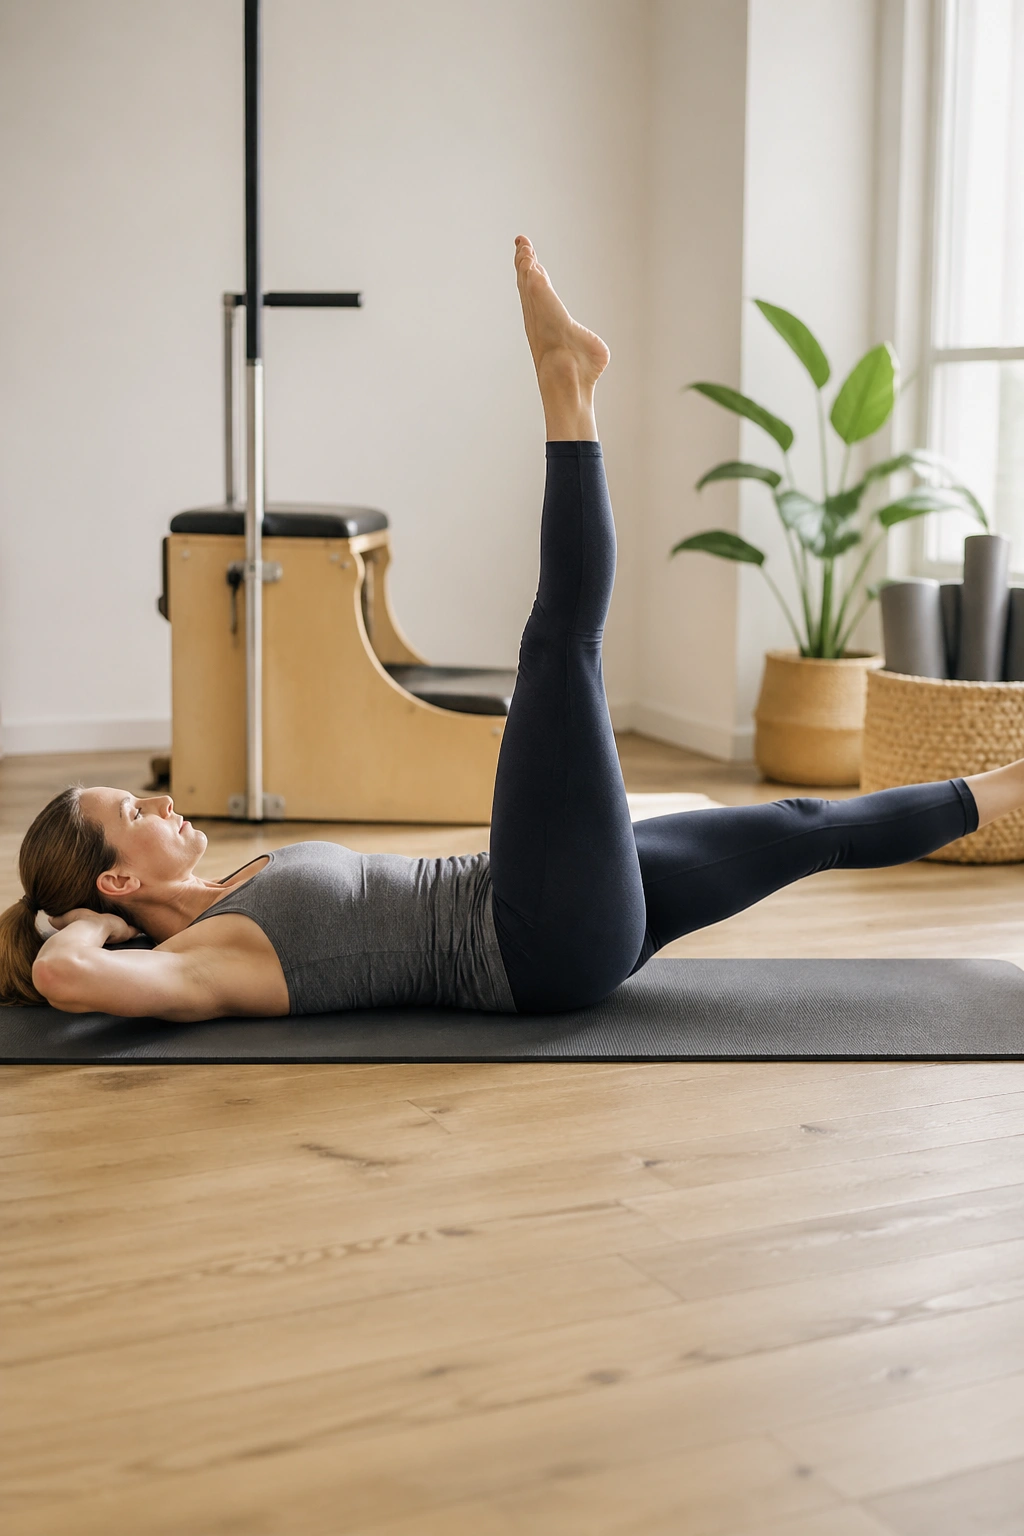
Picture the back of one leg pulling skyward while your abs hold the pelvis steady. That’s the charm of Single Straight Leg Stretch: it turns a hamstring stretch into active mobility.
Lie on your back, lift both legs, and hold one ankle or calf while the other leg reaches away from you at about a 45-degree angle. Lift the head and shoulders if your neck allows, pulse the top leg toward you twice, then switch. The top leg does not need to hit your nose. Chasing that shape usually wrecks the pelvis.
Why it works:
- You get dynamic hamstring lengthening instead of a passive tug.
- The lower leg opening away builds front-body strength and hip control.
- The abs keep the pelvis from tilting all over the place.
- The move also teaches the difference between hip movement and spinal movement.
Go for 6 to 10 switches per side. Neck bothered? Keep your head down. Tight hamstrings? Bend the bottom leg more and hold behind the thigh instead of the calf. Smooth rhythm matters more than how high the leg goes.
11. Supine Leg Circles
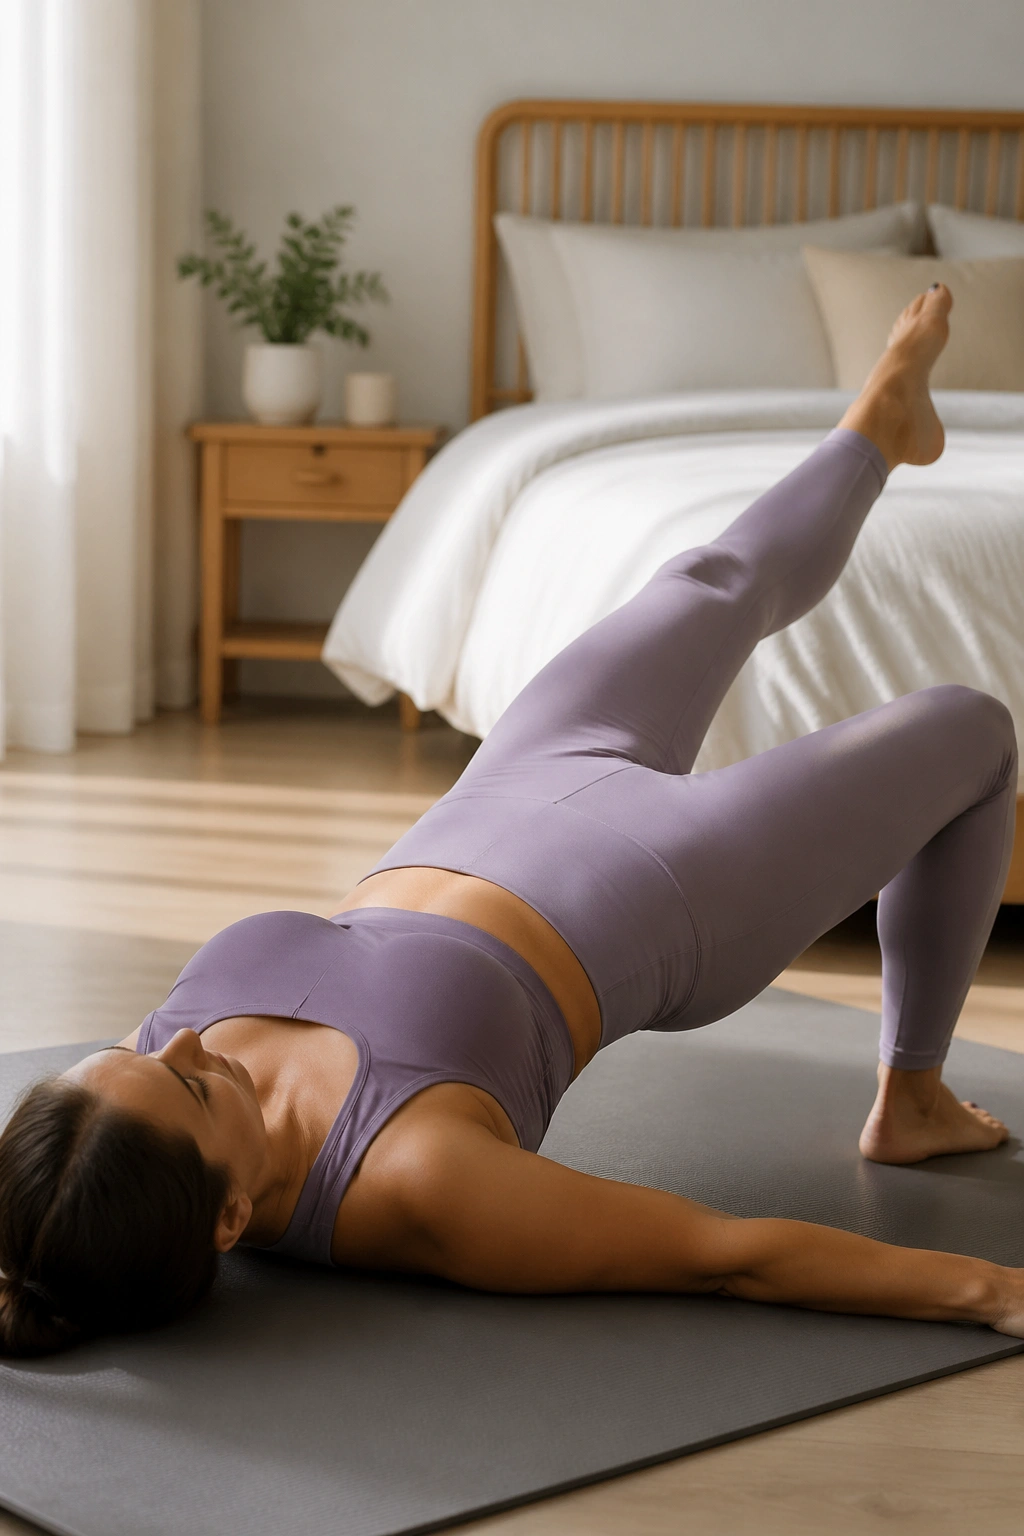
Leg circles are one of those Pilates basics that people rush past. They shouldn’t. Supine Leg Circles can free up a sticky hip joint faster than a dozen random stretches, provided you keep the movement honest.
Lie on your back with one leg long on the mat and the other reaching up. Circle the raised leg across the body, down, around, and back to the start. Then reverse it. The circle can begin tiny—coffee mug size, not dinner plate size. If the pelvis starts rocking, the circle is too big.
That small range is where the work lives. You’re teaching the femur to move inside the hip socket while the pelvis stays calm. People who feel “tight hips” often lack that separation. Everything moves at once, which makes the hips feel crowded and the low back jump in.
A few clean circles can reveal a lot. One direction may feel smooth, the other jerky. One hip may pop. A soft click without pain usually means the joint is adjusting to motion; pain is your signal to shrink the range, bend the knee, or skip the move for the day.
Try 5 circles each direction per leg. Keep your ribs heavy and your breathing easy. No drama. Precision is enough.
12. Figure Four Stretch
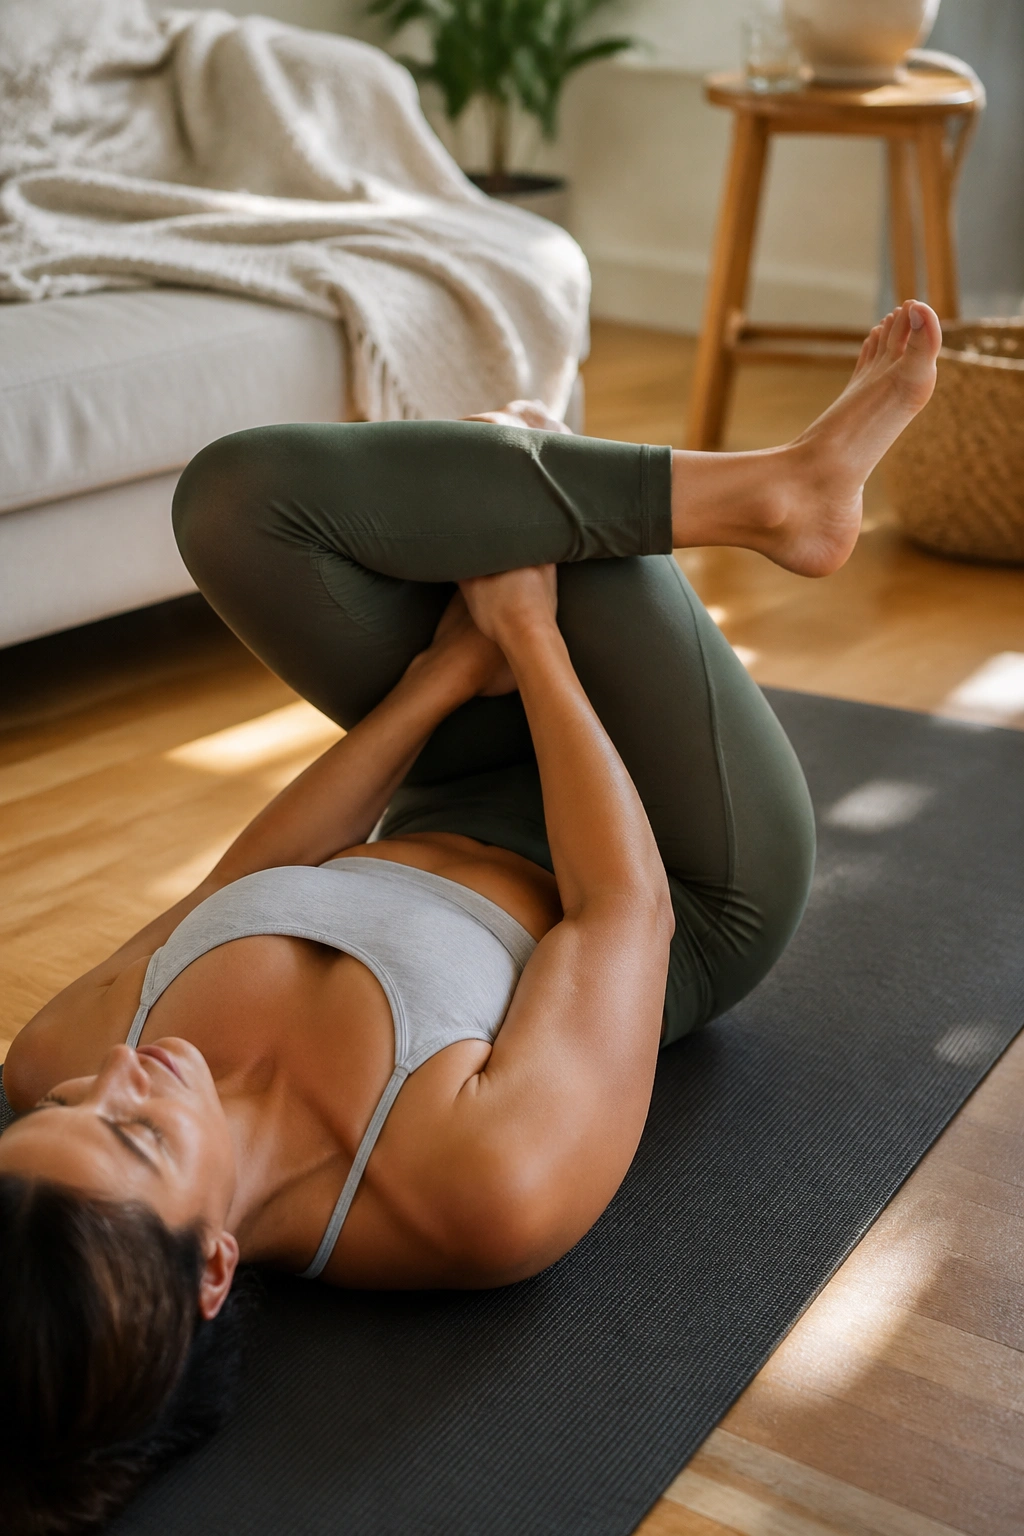
Unlike a passive pigeon-style stretch where you collapse and hope for the best, the Figure Four gives you control. That makes it one of my first picks for people whose outer hips feel wound up from sitting, running, or heavy leg training.
Lie on your back and cross one ankle over the opposite thigh, keeping the top foot flexed. Lift the bottom leg and thread your hands behind the hamstring. Pull the shape toward you until you feel the stretch in the glute and deep hip of the crossed-leg side. Hold for 3 to 5 breaths, then switch.
The flexed foot matters. Without it, the knee can feel sloppy and the stretch loses focus. I also like to cue a tiny tailbone reach away from the chest, which keeps the low back from rounding too much and shifts the work into the hip where it belongs.
Who is this for? Anyone whose hips feel blocked during squats, lunges, seated twists, or long walks. Who should go easy? People with fresh knee irritation on the crossed-leg side. In that case, cross lower on the thigh or stay with a gentler version using a strap behind the bottom leg.
13. Kneeling Hip Flexor Stretch
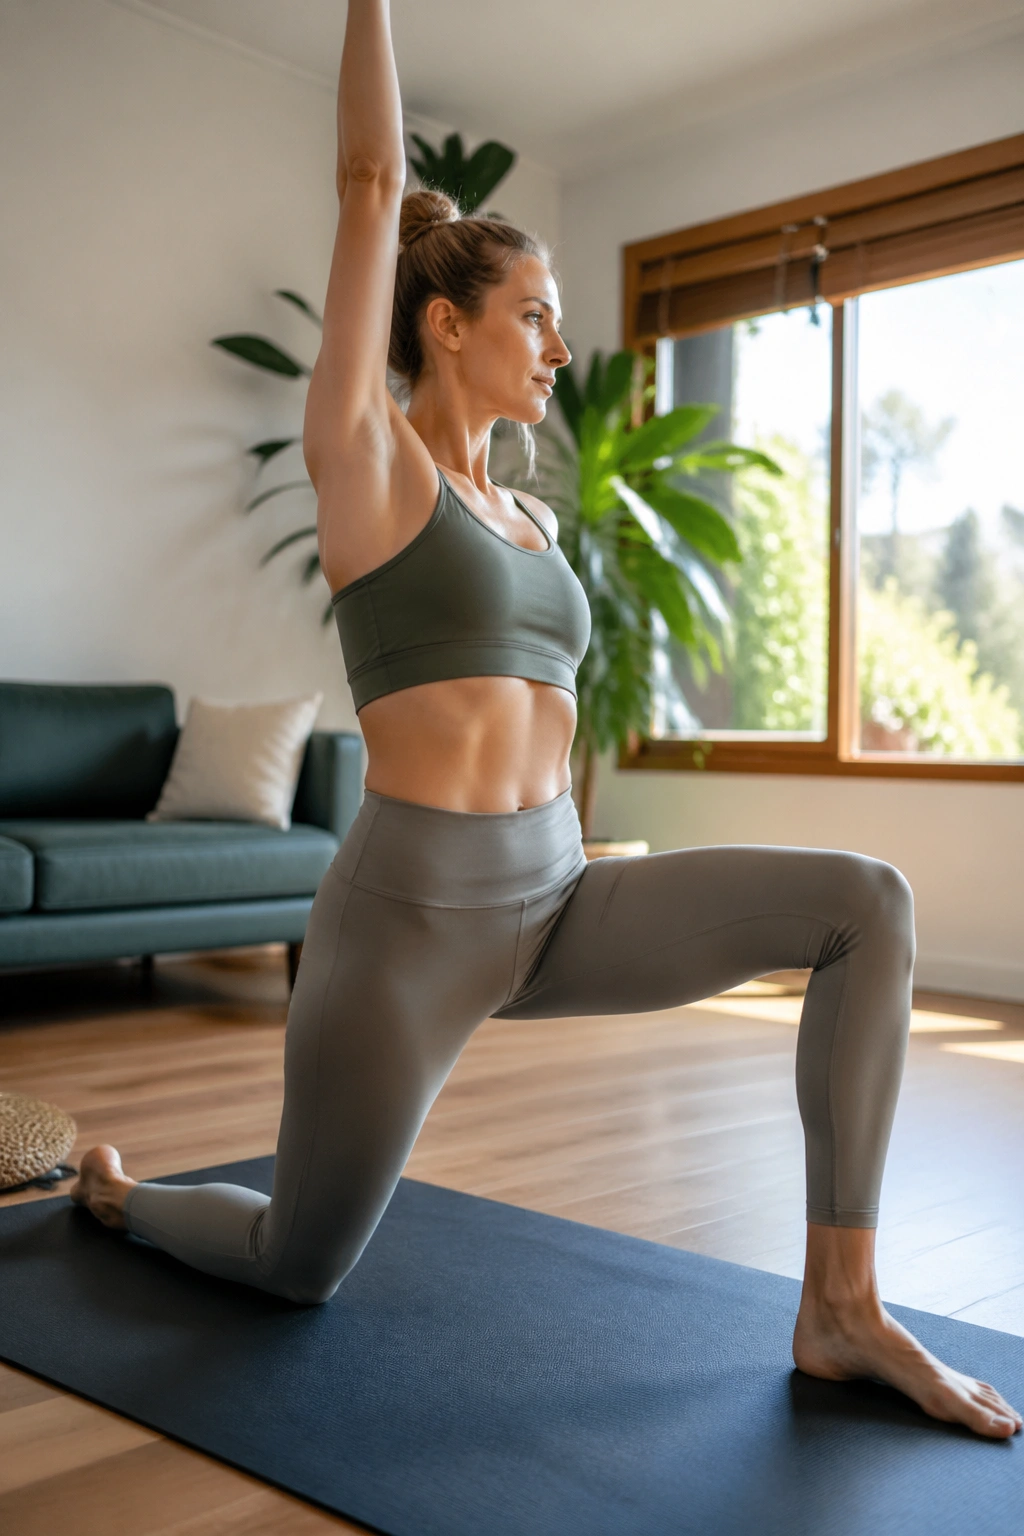
Desk hips. Runner hips. Cyclist hips. The kneeling hip flexor stretch is for all of them.
Why this one earns its place
A lot of hip flexor stretches miss the target because the body cheats. The low back arches, the ribs flare, and the stretch lands in the front of the spine instead of the front of the hip. Pilates cues clean that up fast. The move becomes smaller, though far more effective.
Set up in a half-kneeling lunge with one knee padded on the mat and the other foot planted in front. Tuck the pelvis slightly—think tailbone down—and squeeze the glute of the kneeling leg. Then shift forward an inch or two. That’s often enough. Add the same-side arm overhead for a stronger line through the front body.
Quick checkpoints
- Keep the front knee stacked over the ankle.
- Maintain a light pelvic tuck, not a giant crunch.
- Think glute first, then shift forward.
- Stay tall through the ribs instead of leaning back.
Best cue: if you feel it in your low back first, reset and make the movement smaller.
14. Open-Leg Rocker Prep
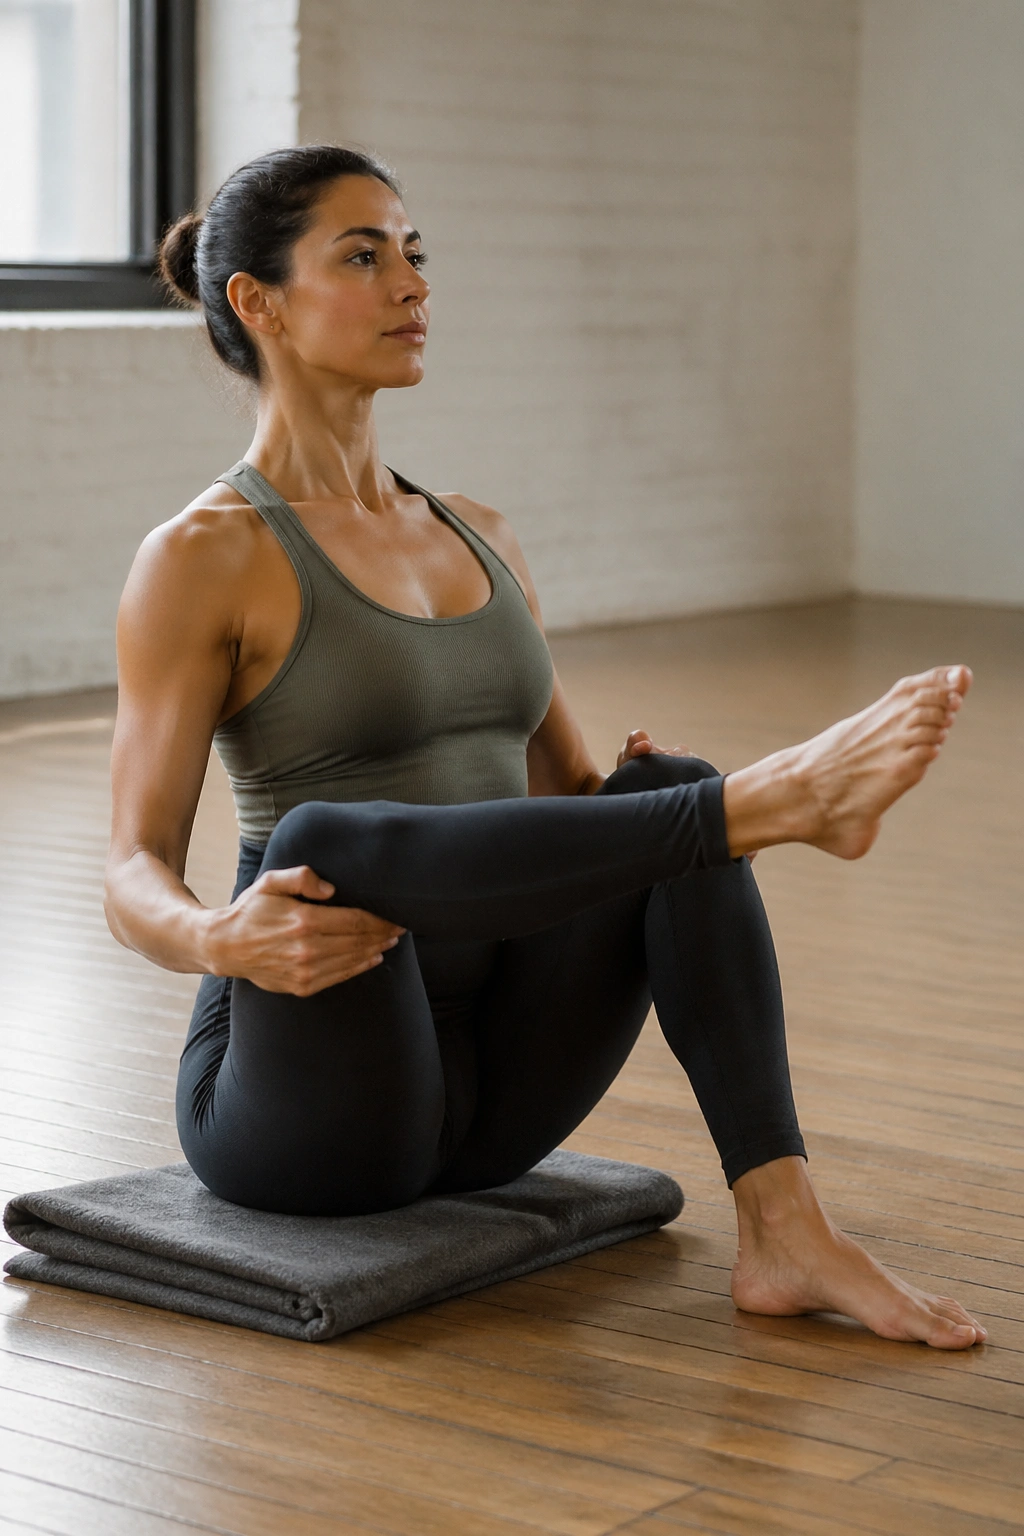
Hamstring flexibility without trunk control tends to disappear the second life gets messy. Open-Leg Rocker Prep fixes that by asking your core and spine to hold shape while the legs lengthen.
Sit tall with your knees bent and hands behind the thighs or on the calves. Lift one foot, then the other, balancing behind the sit bones. From there, you can stay tucked or begin to open the knees a little, reaching the legs toward straighter lines while keeping the chest lifted. No need to rock yet. The prep alone is enough for most people.
This move exposes a common pattern: the second the legs start to straighten, the pelvis tucks and the spine collapses. That tells you the hamstrings and core are not sharing the load well. Sit on a folded blanket, keep the knees more bent, and work there. The shape should feel challenging, not doomed.
Three to five breath holds work well here. You’re looking for active length—hamstrings stretching while the spine stays tall. That kind of flexibility carries over better to standing hinges, deadlifts, and everyday bending than a limp seated toe touch ever will.
15. Seated Spine Twist
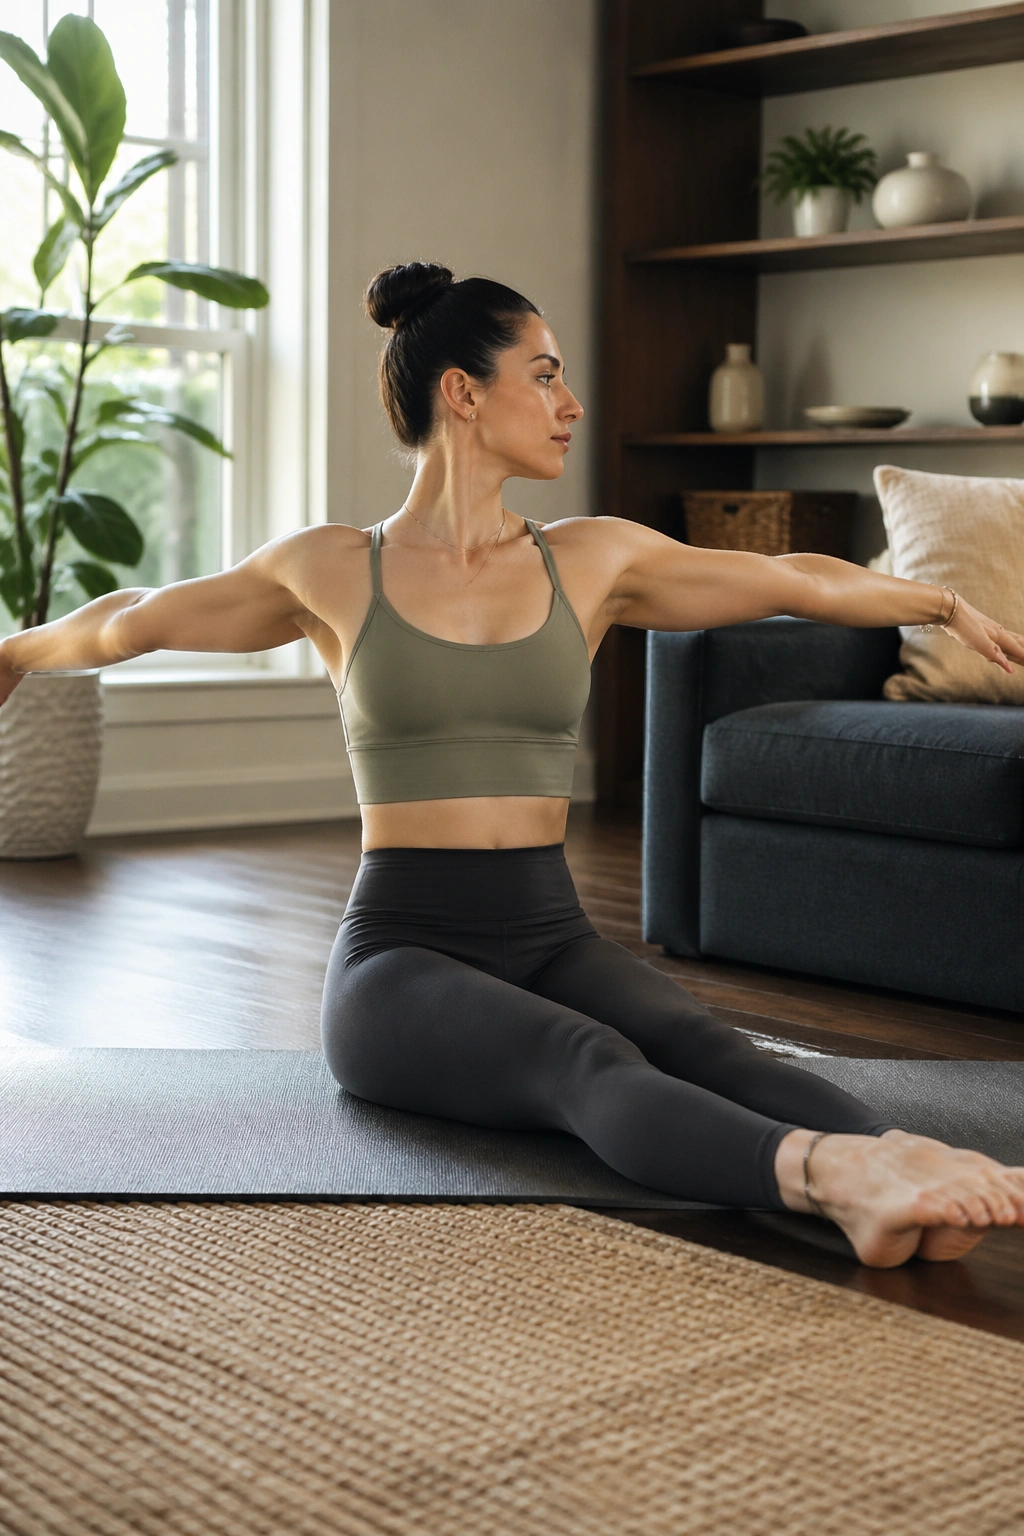
Rotation has a way of disappearing without much warning. One day you back the car out and notice your upper body moves like a refrigerator. Seated Spine Twist is the tidy fix.
Sit tall with the legs extended and either together or slightly apart. Arms reach out to the sides at shoulder height. Inhale to grow taller. Exhale and twist from the ribs to one side, keeping the pelvis steady. In Pilates, you can add a small pulse-pulse at the end of the twist, then return through center and switch sides.
How to get more out of it
The goal is thoracic rotation, not swinging the arms and calling it done. Picture the breastbone turning while the hips stay anchored. If sitting tall with straight legs is a battle, bend the knees a little or sit on a folded blanket. That one change often turns the move from stiff and frustrating into clean and useful.
Try 4 to 6 twists per side. Breathe wide into the back and sides of the ribs. When the rib cage moves better, the shoulders and neck usually calm down too.
16. Scissors
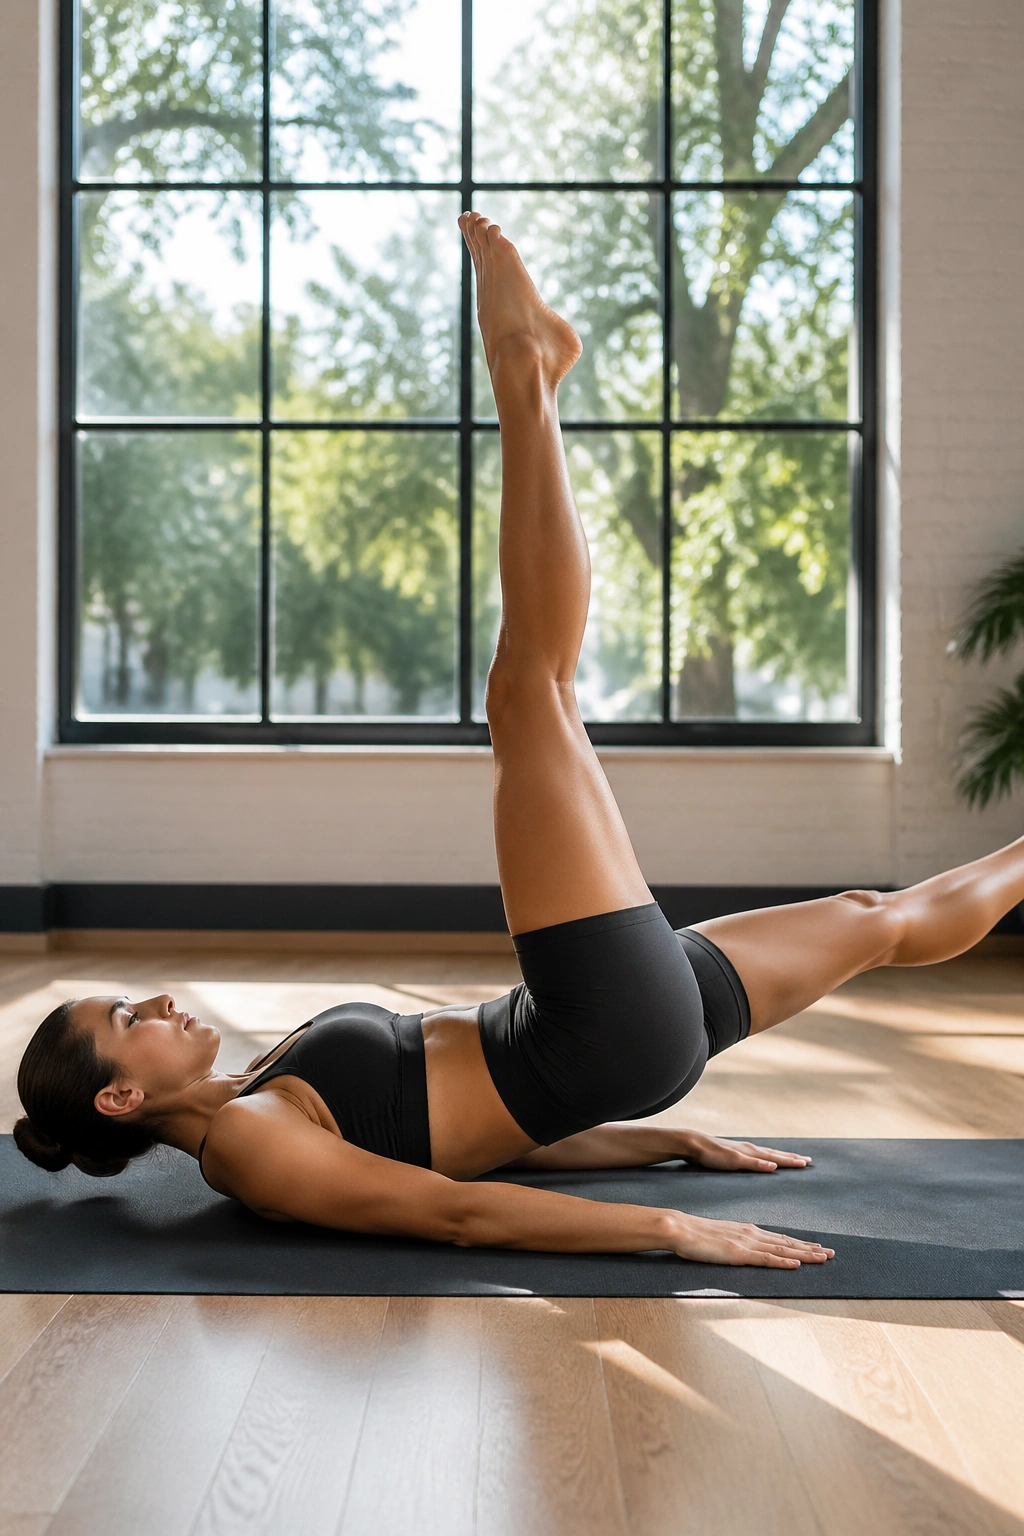
One leg reaches up. The other reaches away. Your abs are working, your hamstrings are lengthening, and your pelvis is trying to stay quiet. Scissors is a lot of information in one move.
In a Pilates mat setting, this can show up in a more advanced form with the hips lifted. For flexibility work, I prefer a safer version on the back: one leg reaches toward the ceiling while the other hovers lower, then you switch with control. You can add a light hold behind the top thigh if your hamstrings need a clearer stretch.
A few details matter here:
- Keep the sacrum heavy unless you’re trained in the advanced variation.
- Lower the bottom leg only as far as the ribs can stay down.
- Move on an exhale to keep the front body engaged.
- Bend both knees a bit if the hamstrings start yanking the pelvis around.
This move earns its place because it ties together hip flexion, hip extension, abdominal control, and breath. Do 6 to 8 switches per side. Slow scissor beats fast flailing every single time.
17. Rest Position
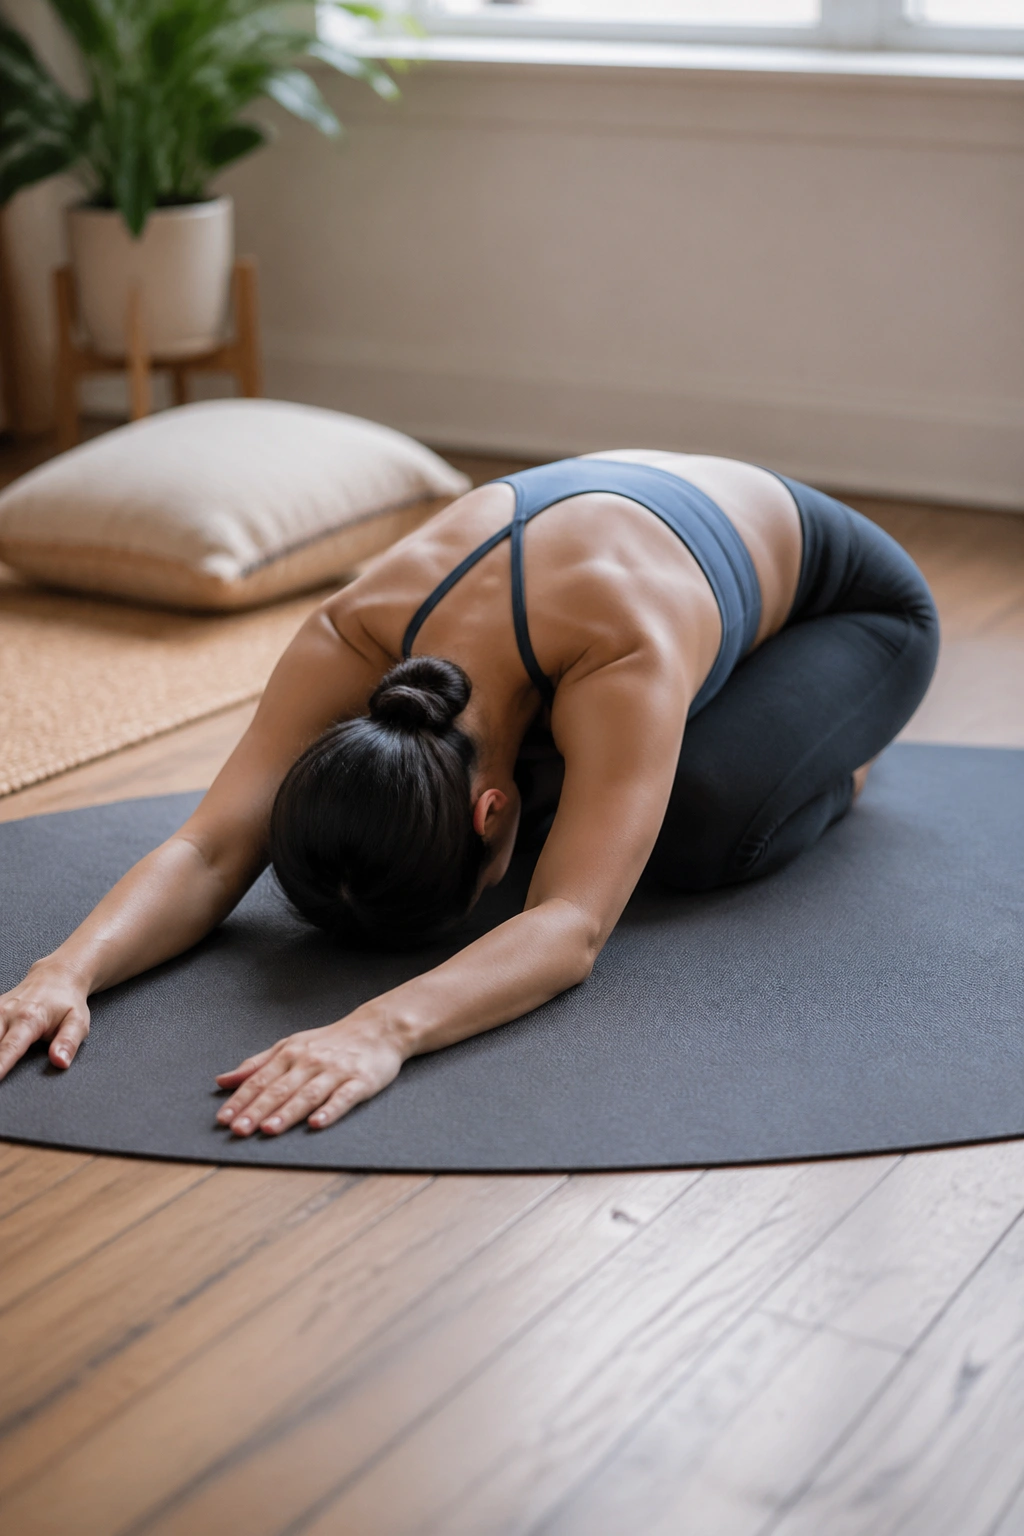
Sometimes the move that helps flexibility most is the one that tells your body to stop guarding. Rest Position—Pilates’ version of a folded child’s pose—does that beautifully.
Kneel back toward your heels, round forward over your thighs, and let your arms rest long in front of you or by your sides. If your knees dislike deep flexion, place a rolled towel behind them or widen them apart. If your hips do not reach your heels, stack a cushion between calves and thighs.
The stretch lands softly through the low back, outer hips, and lats. More than that, it changes your breathing. When you inhale into the back ribs here, you can feel the breath spread against the mat, which helps unwind tension around the spine that people often mistake for pure muscle tightness.
Use it between stronger moves like Swan Prep, Side Bend, or Scissors. Hold for 3 to 6 slow breaths.
Short pause. Big payoff.
18. Wall-Assisted Roll Down
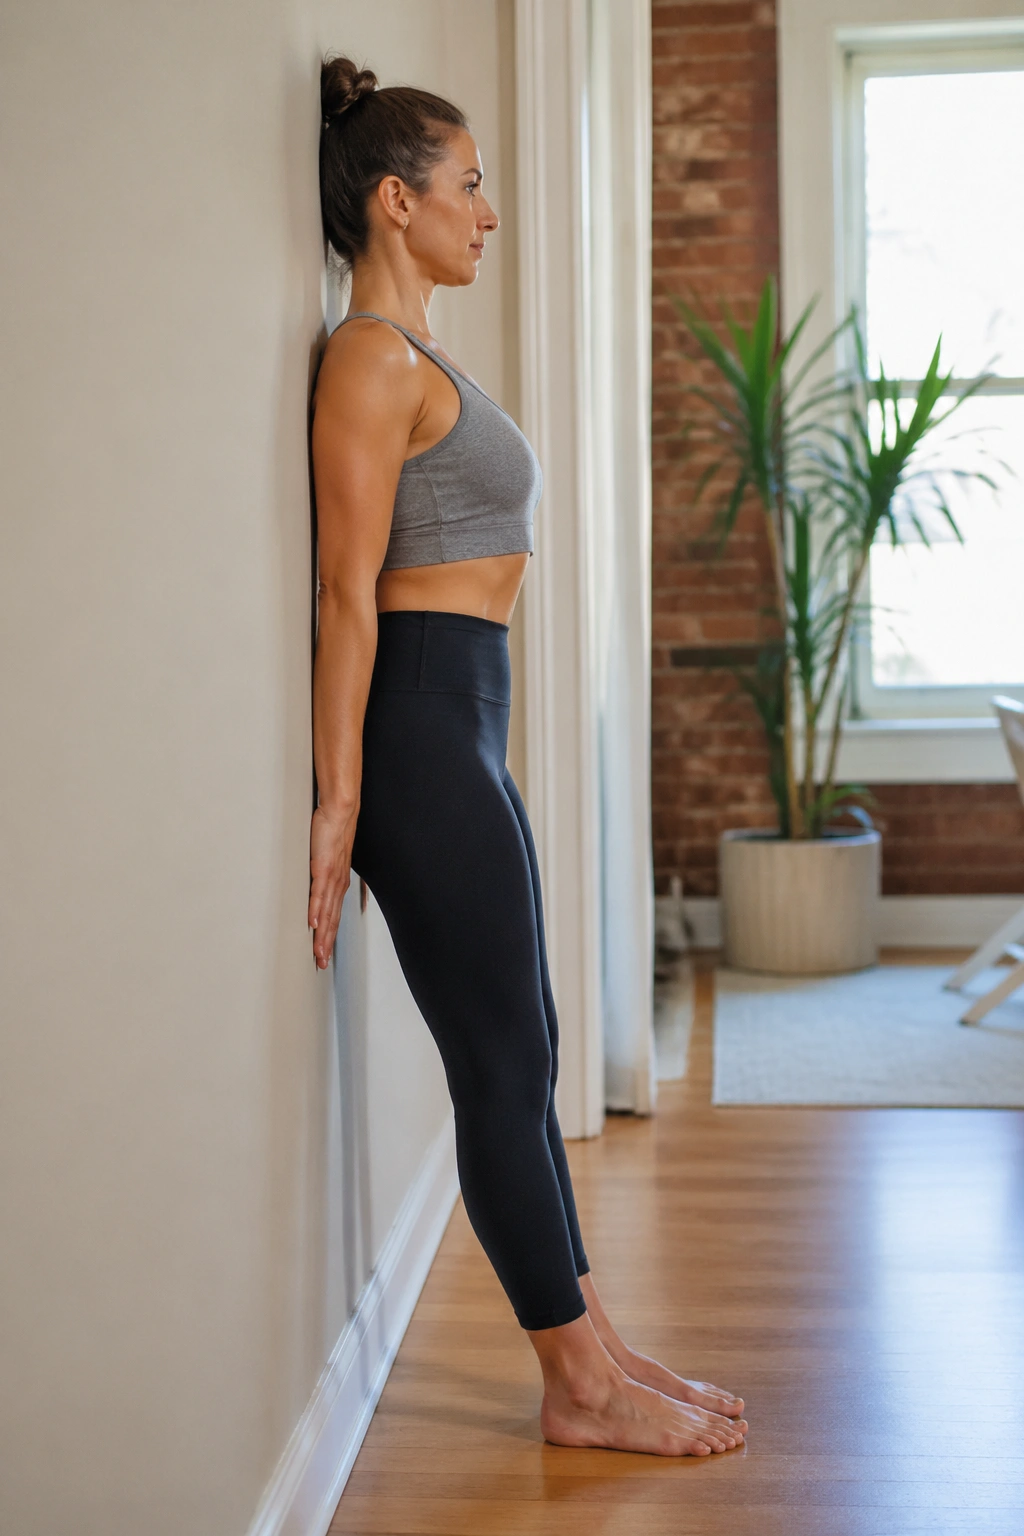
Unlike a free-standing roll down, the wall-assisted version gives you feedback you cannot ignore. The wall tells you when the ribs are popping, when the pelvis is slipping, and when you’re skipping over the stiff parts of the spine.
Stand with your back against a wall, heels a few inches forward, knees soft. Start with the back of the head, upper ribs, and pelvis touching. Exhale and peel away from the wall one section at a time until you’re hanging forward. Then roll back up and reconnect to the wall from pelvis to ribs to head.
That contact changes the drill. People who rush through a normal roll down often discover they’ve been throwing the whole torso forward instead of articulating the spine. The wall slows them down and makes the sequencing cleaner.
Who gets the most from this? Beginners, office workers with stiff thoracic spines, and anyone who feels “tight everywhere” without knowing where to start. I also like it for people who think they have short hamstrings when the larger issue is spinal stiffness and poor pelvic control.
Do 4 to 6 reps. Pause each time a new part of your back meets the wall on the way up. That’s the money spot.
Final Thoughts
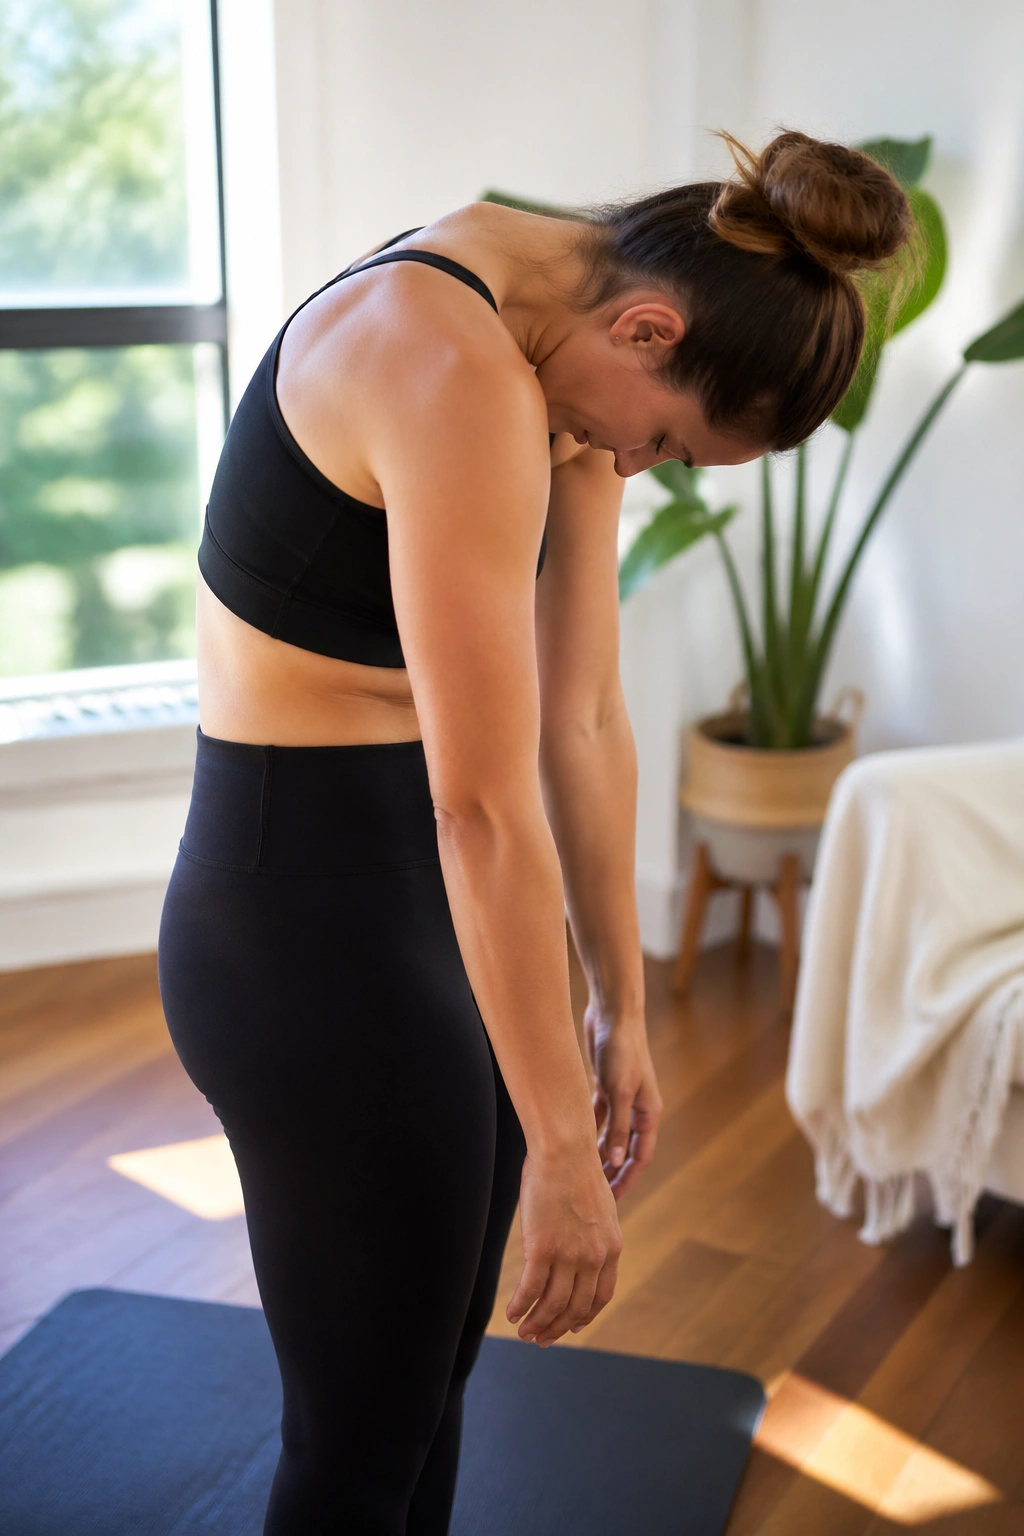
If you want more flexibility from Pilates, don’t race through all 18 moves in one go and call it done. Pick 6 to 8 moves that match your tight spots, then practice them three or four times a week with enough patience that your breath stays steady. A short routine you repeat wins.
My favorite starter sequence looks like this: standing roll down, pelvic curl, cat stretch, spine stretch forward, mermaid, swan prep, kneeling hip flexor stretch, rest position. That takes about 15 to 20 minutes and covers the spine in every direction without beating you up.
One last thing. Flexibility that lasts does not feel dramatic while you’re building it. It feels controlled, a little humbling, and oddly precise. Then one day you twist farther, hinge easier, or stand taller without the usual tugging—and that’s when you know the work is landing.
