



Strength training for seniors at home does not need a bench, a cable machine, or a room full of gear. A sturdy chair, a wall, and a pair of light dumbbells — or even two soup cans — can cover far more ground than most people expect.
The body still responds to resistance at any age. The CDC recommends muscle-strengthening work at least 2 days a week, and the National Institute on Aging keeps circling back to the same practical moves for a reason: sit-to-stands, pushes, pulls, carries, and balance work map neatly onto real life. Getting off the couch. Climbing stairs. Carrying groceries. Catching yourself before a wobble turns into a fall.
That last part matters.
If you have osteoporosis, recent surgery, chest pain with exercise, or a history of fainting, get clearance from a clinician before you start. If balance is shaky, keep one hand on a counter. If the floor is a problem, use chair-based or wall-based versions first. Muscle burn is fine. Sharp pain is not.
The sweet spot is usually boring in the best way: 2 to 3 sets, 6 to 15 reps, a slow lowering phase, and enough rest to keep your form clean. Start there, and let the routine feel almost too easy for the first week or two. That restraint pays off fast.
1. Chair Squat to Stand
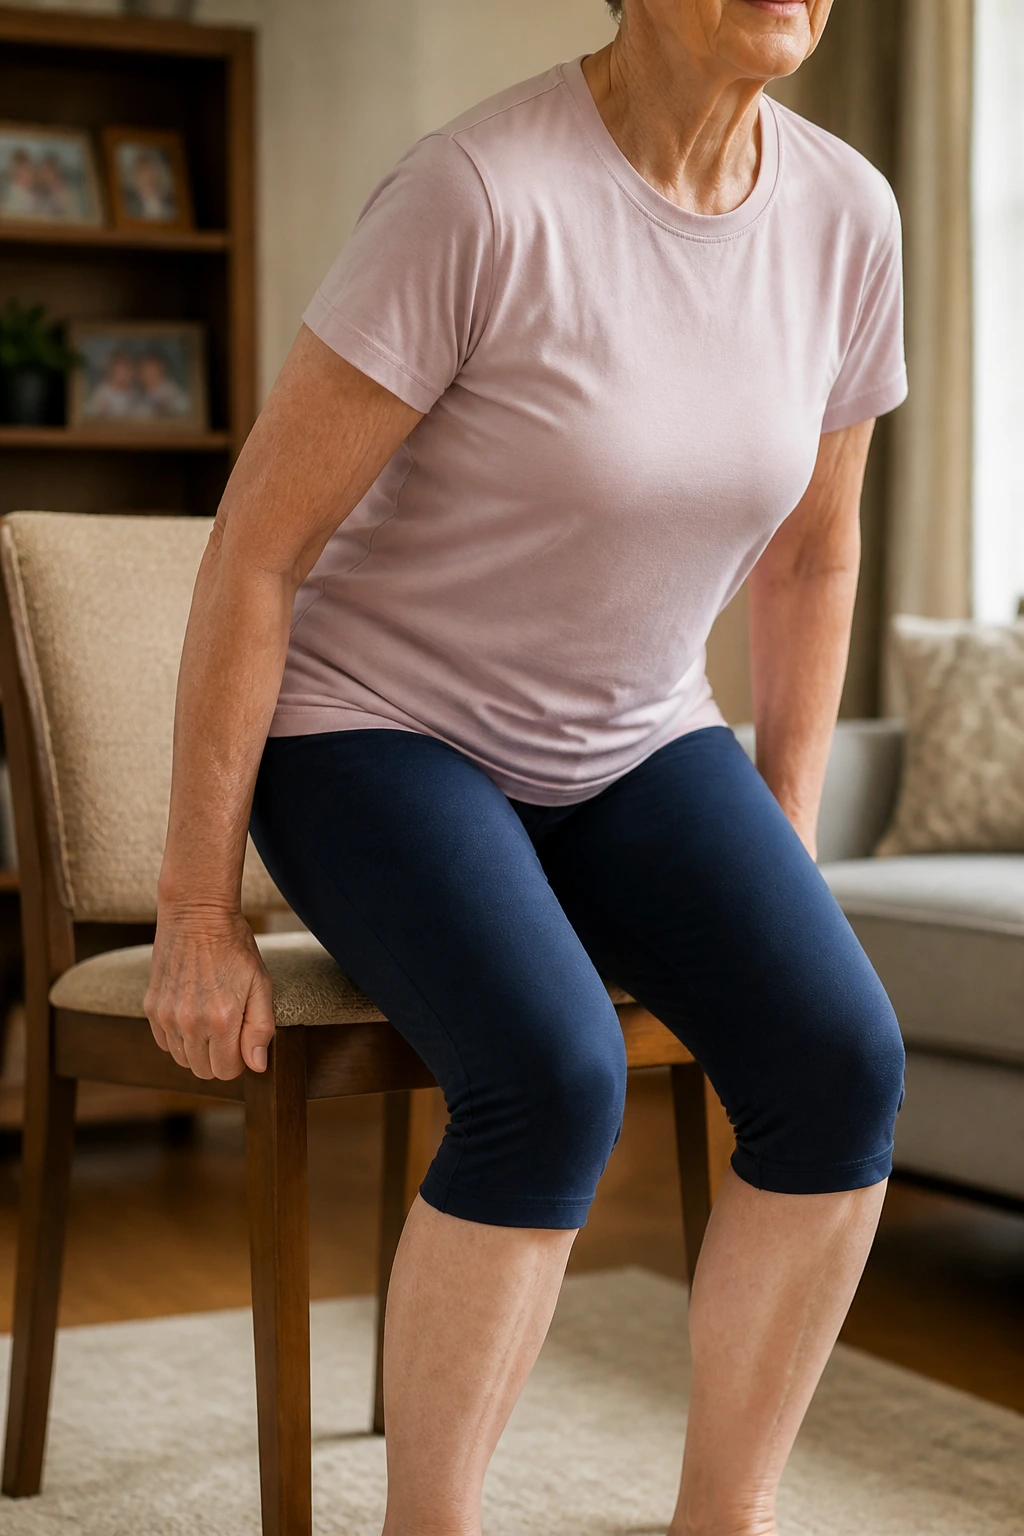
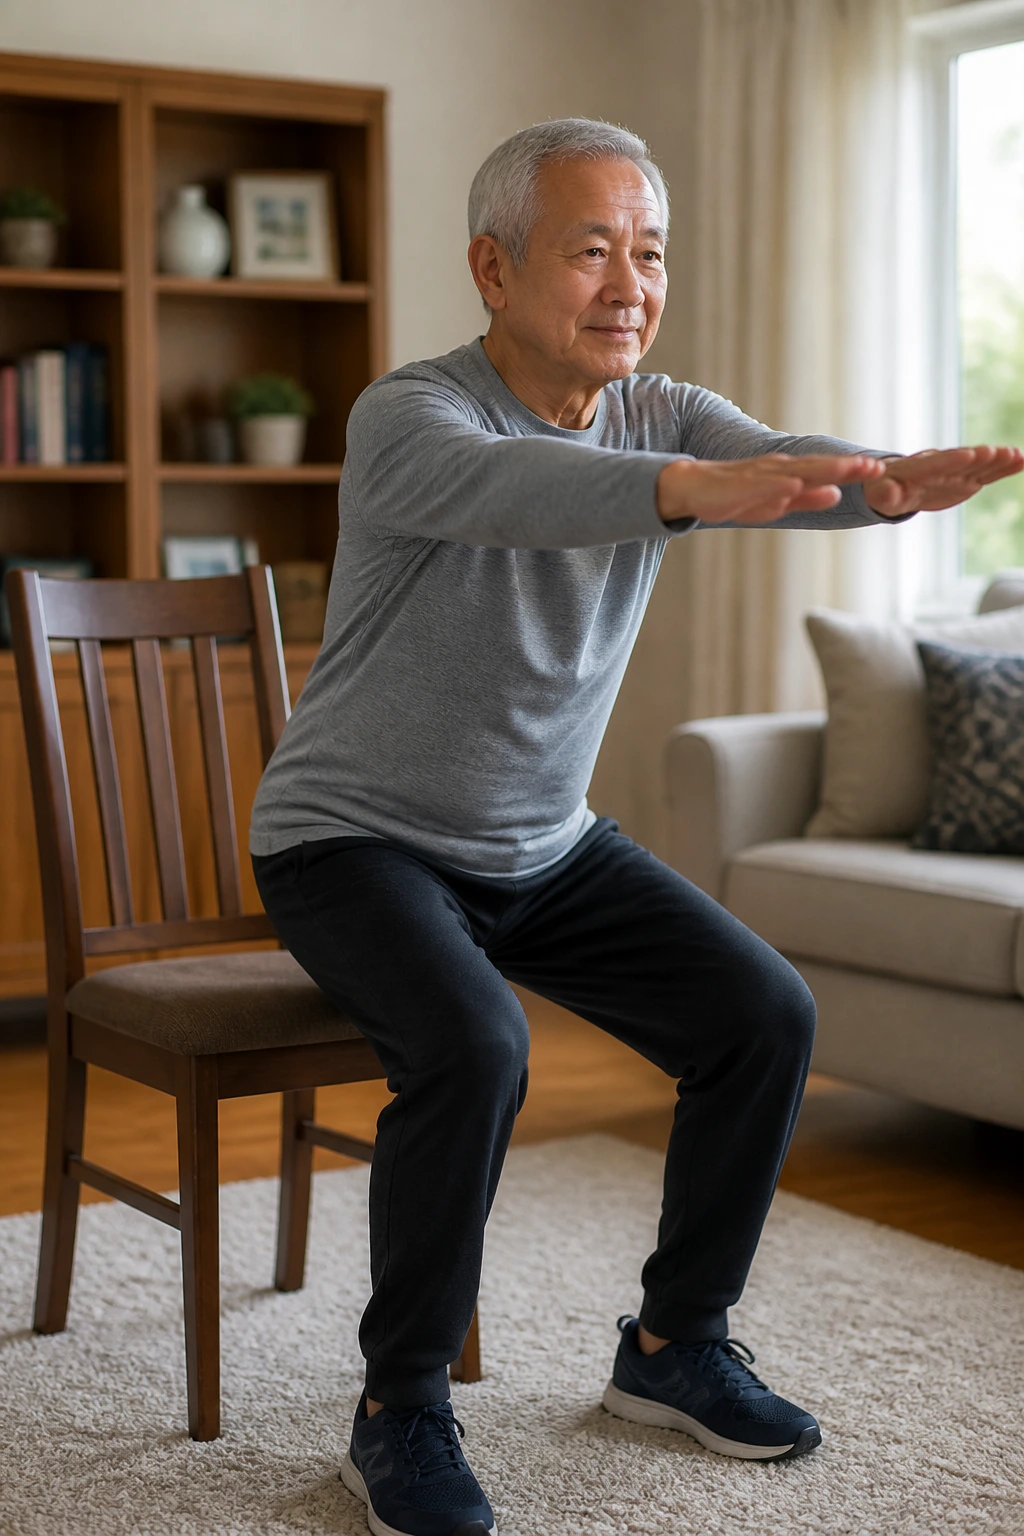
If you only pick one lower-body move, make it this one. The chair squat trains the legs and hips in the exact pattern you use when getting up from a seat, and that makes it one of the most useful home exercises for older adults.
Why It Earns a Spot
Sit near the front of a sturdy chair, feet flat and about hip-width apart. Lean forward a little, stand up, and lower back down with control until you lightly touch the seat. Do 2 to 3 sets of 8 to 12 reps.
A higher chair makes it easier. A lower chair makes it harder. That tiny change in seat height is more useful than chasing flashy variations, because you can match the load to your current strength without guessing.
Quick Cues That Help
- Keep your chest up, but don’t arch your back hard.
- Press through the whole foot, not just the toes.
- Let your knees track in line with your toes.
- Use your hands on the chair arms only if you need a little help.
Stop the descent before you collapse onto the seat. The controlled tap is the point.
2. Wall Push-Up Ladder
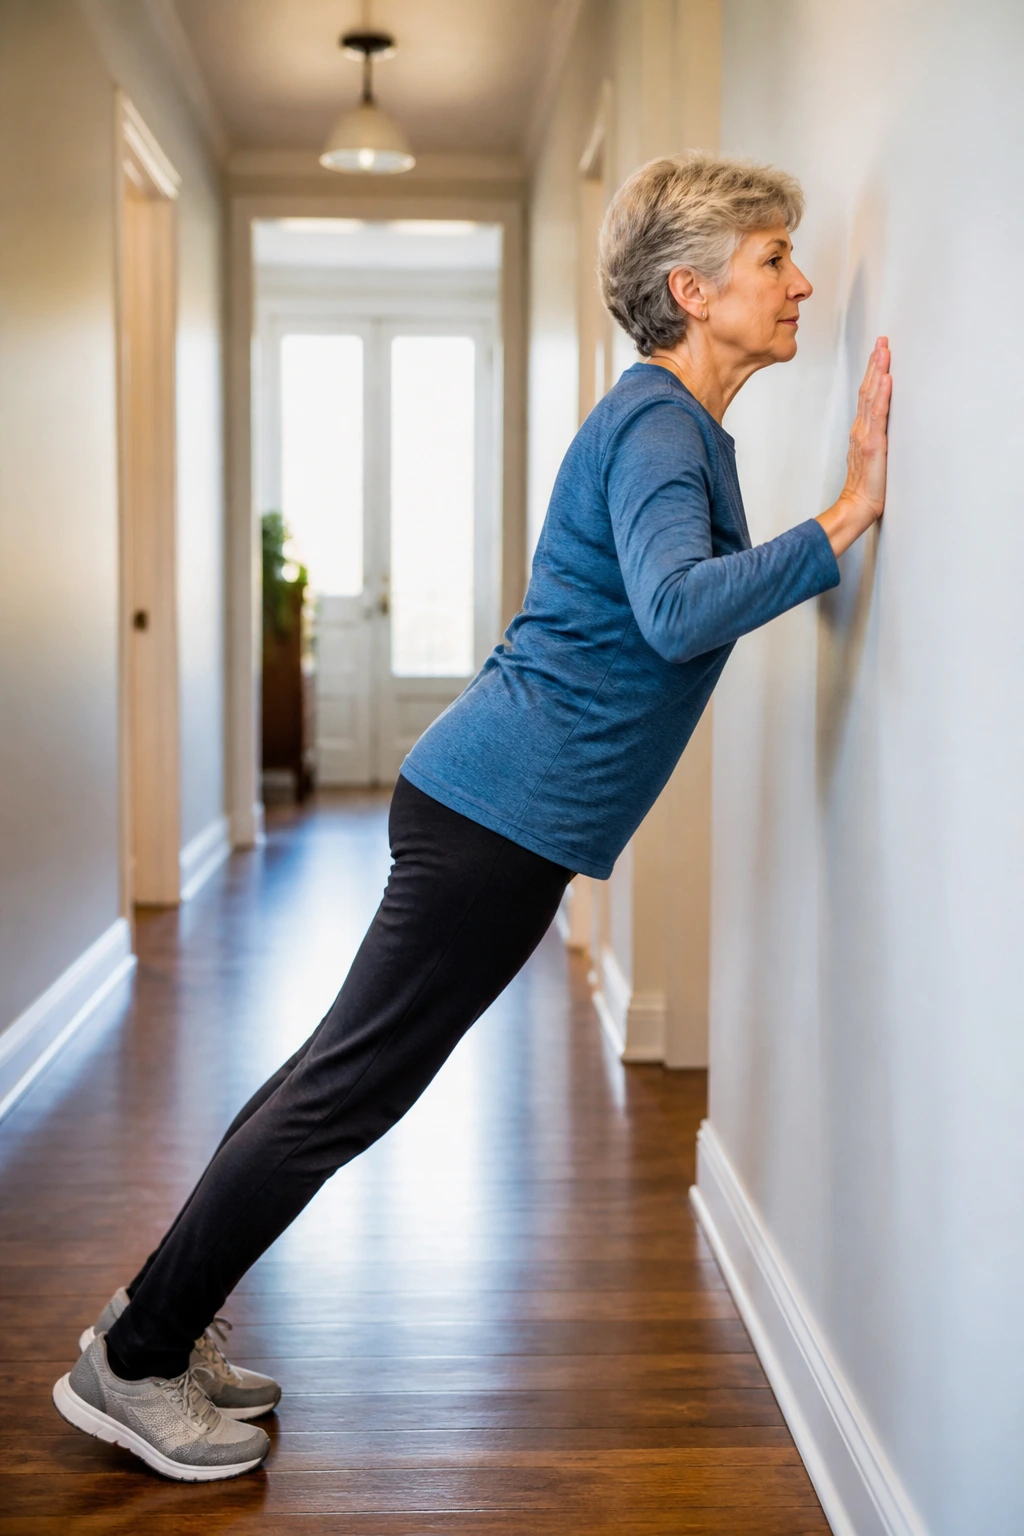
Can a wall push-up count as real strength work? Absolutely. The wall takes pressure off the wrists and shoulders while still asking the chest, triceps, and front of the shoulders to do their share.
Stand about 1 to 2 feet from a wall, place your hands at chest height, and keep your body in a straight line from head to heels. Bend your elbows, bring your chest toward the wall, then press back out. Start with 2 sets of 6 to 10 reps and build toward 15.
The farther your feet are from the wall, the harder it gets. That one change is more honest than piling on reps with sloppy form.
If your wrists complain, turn your hands slightly outward or use a countertop instead of a wall. If your shoulders feel pinchy, shorten the range and keep the elbows a little closer to the ribs. Small adjustments like that keep the exercise useful instead of irritating.
3. Glute Bridge With a Pause
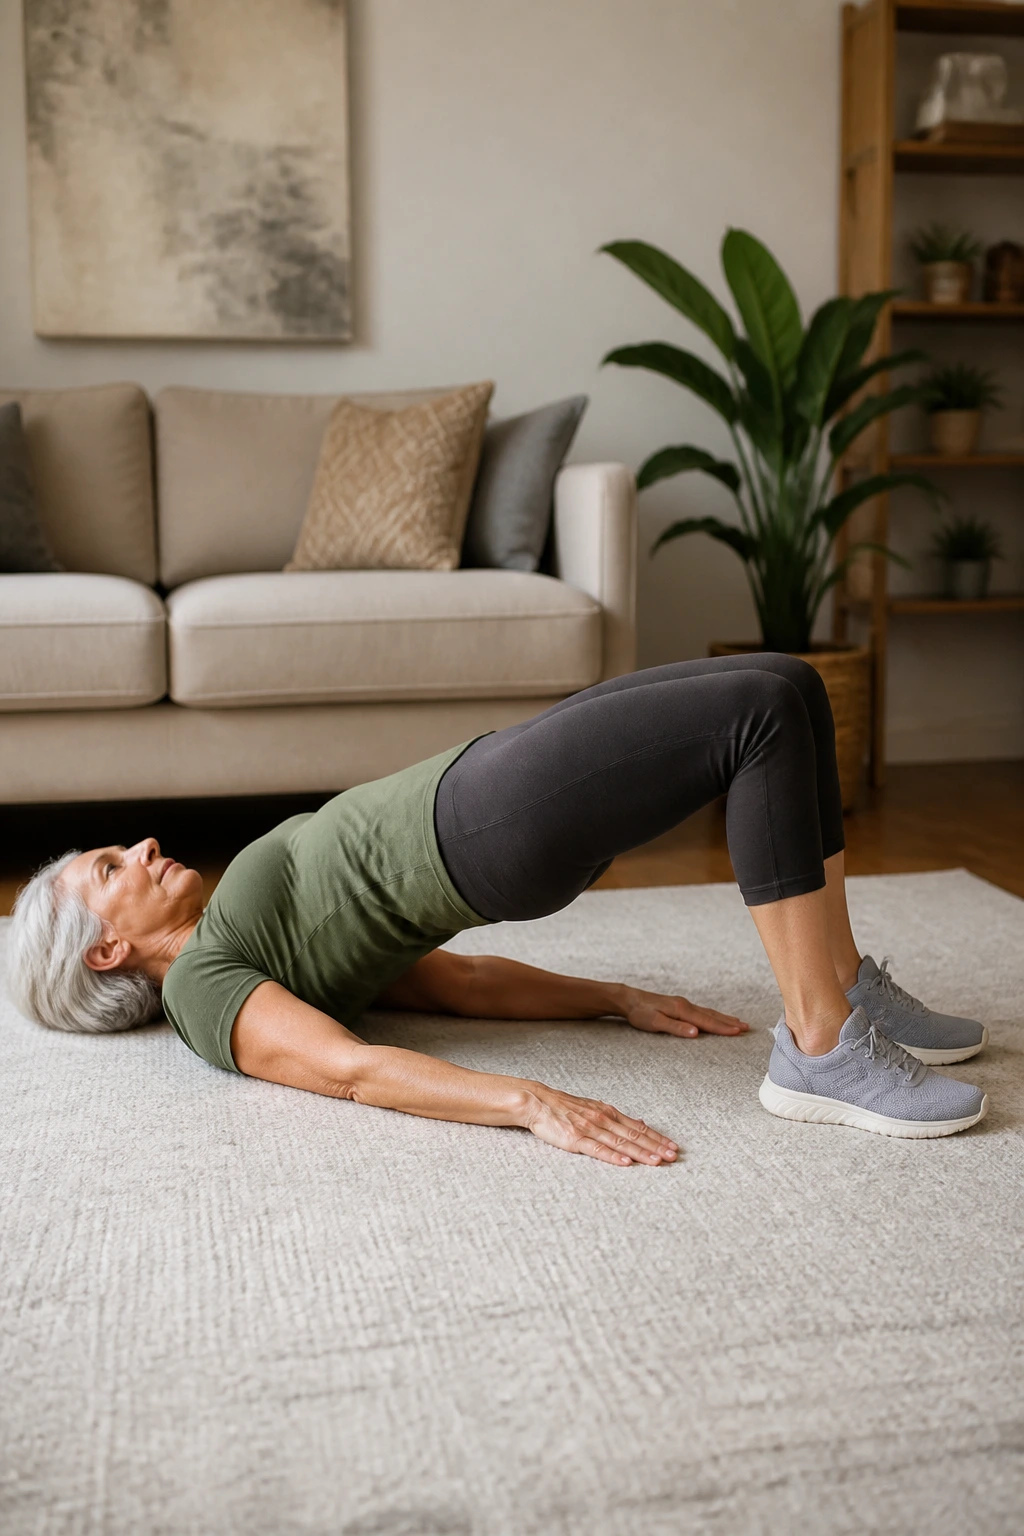
If getting down to the floor feels clunky, glute bridges are a clean fix. They wake up the hips without asking you to balance, bend deeply, or handle any equipment.
Lie on your back with your knees bent and feet flat, about a hand’s length from your hips. Brace lightly, squeeze your glutes, and lift your hips until your body forms a straight line from shoulders to knees. Hold for 2 seconds, lower slowly, and aim for 8 to 12 reps.
What You Should Feel
You should feel this mostly in the glutes and the back of the hips, not in the low back. If your lower back takes over, bring your feet a little closer and shorten the lift.
A nice progression is to add a 10-second hold on the last rep of each set. That sounds tiny. It is not.
4. Seated Band Row
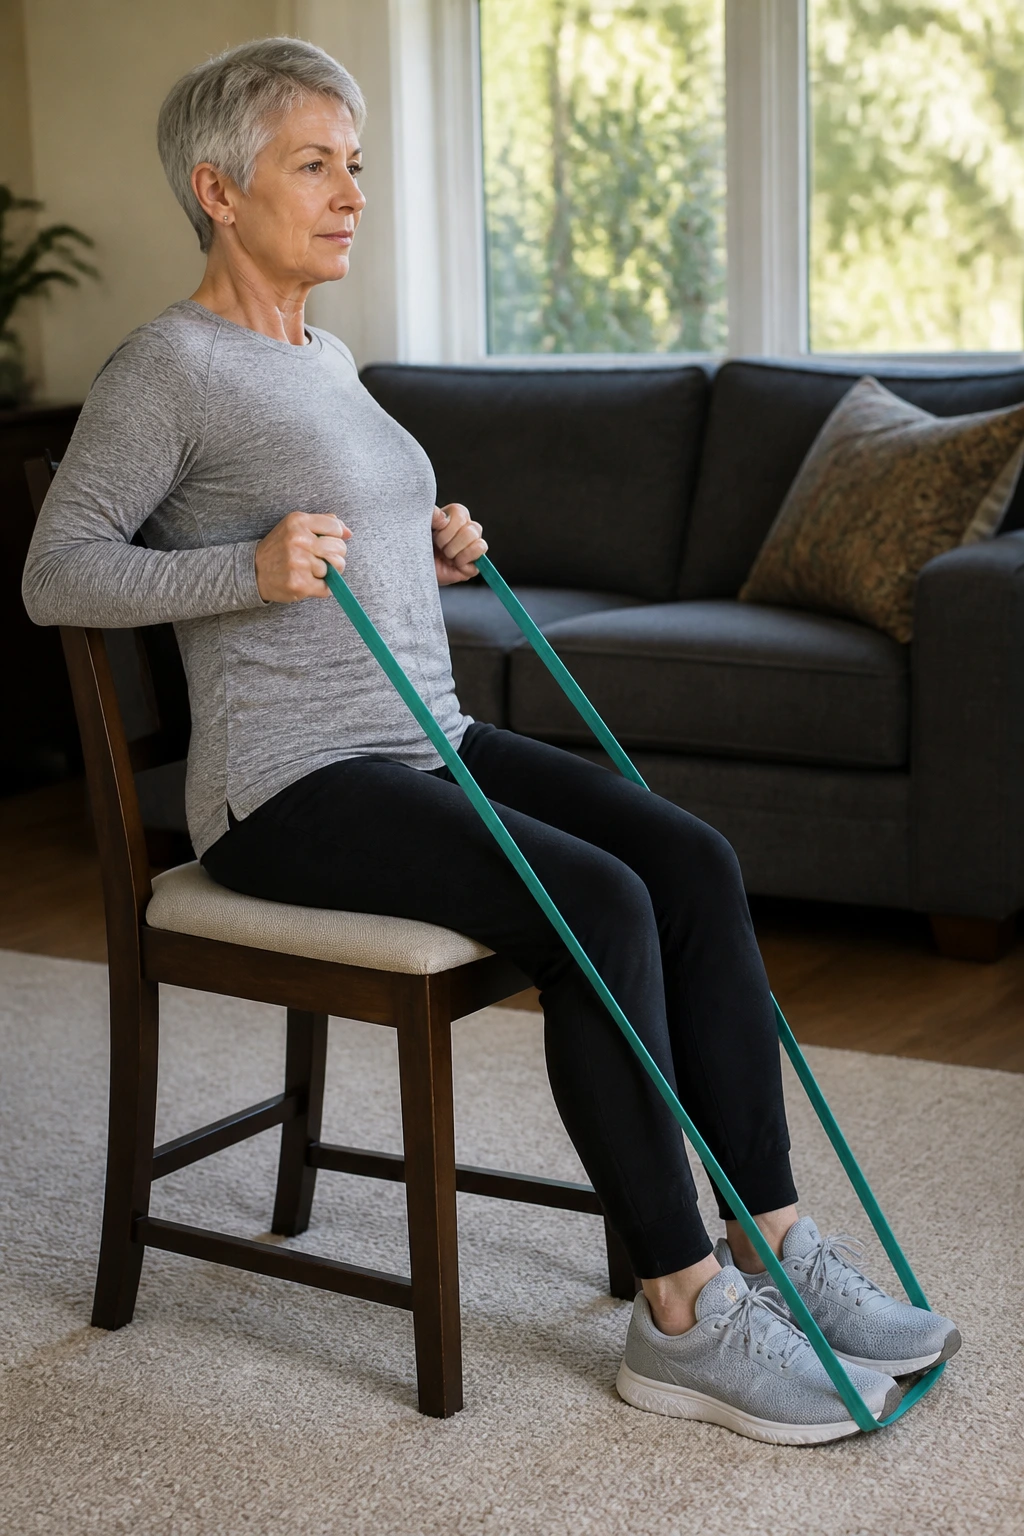
A seated row is posture work disguised as strength training. It helps counter the rounded-shoulder look that creeps in when you sit, drive, knit, read, or stare at a phone for too long.
Loop a resistance band around your feet, sit tall on a firm chair, and pull the handles or band ends toward your ribs. Pause for one second with your shoulder blades gently squeezed together, then return with control. Try 2 to 3 sets of 10 to 15 reps.
A towel can work in a pinch if you don’t have a band. It won’t give the same resistance, but it still teaches the pulling motion and the habit of standing tall.
- Keep your neck long.
- Don’t yank with the hands.
- Let the elbows travel back, not out to the sides.
- Stop before your shoulders creep up toward your ears.
That last cue saves a lot of neck tension.
5. Countertop Incline Push-Up
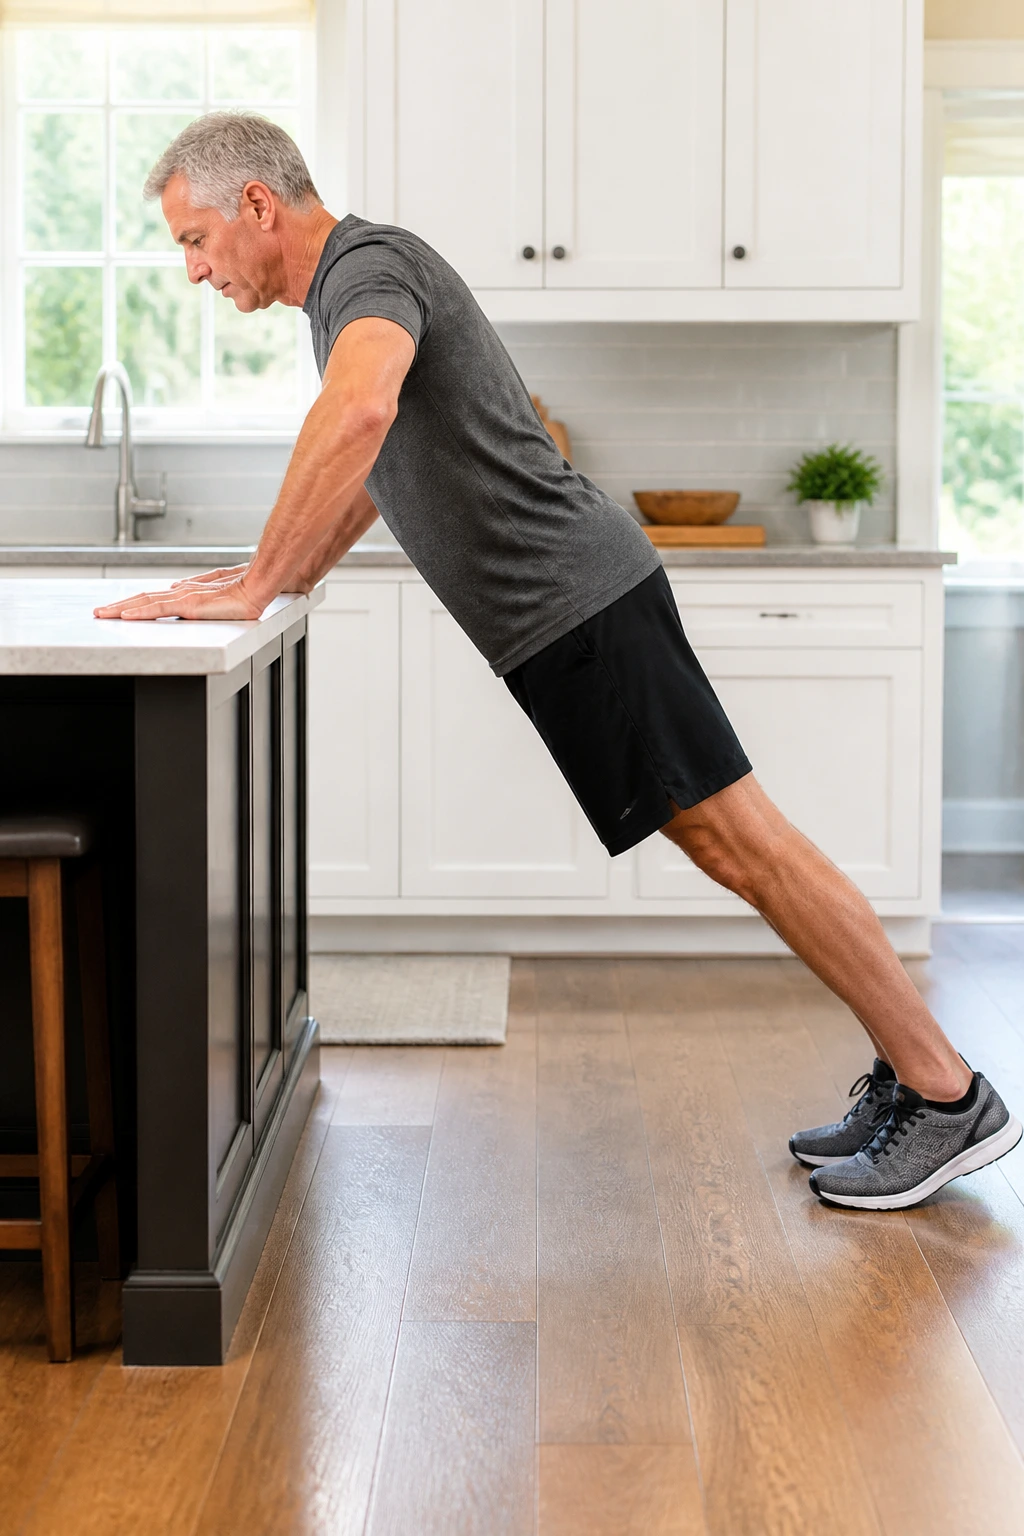
Your chest and triceps will notice a countertop push-up by the sixth rep. It looks mild from across the room, but the angle makes it harder than a wall push-up and easier to control than a floor push-up.
Use a sturdy, dry countertop or kitchen island, place your hands shoulder-width apart, and walk your feet back until your body forms one long line. Lower your chest toward the edge of the counter, then press away. Start with 2 to 4 sets of 6 to 10 reps.
A lower surface makes it tougher. A higher surface makes it easier. That’s the whole trick.
If the counter is slick or your palms slide, move to a wall or use a firmer surface. Safety beats ego here. It is not worth fighting the kitchen.
6. Hip Hinge With a Broom
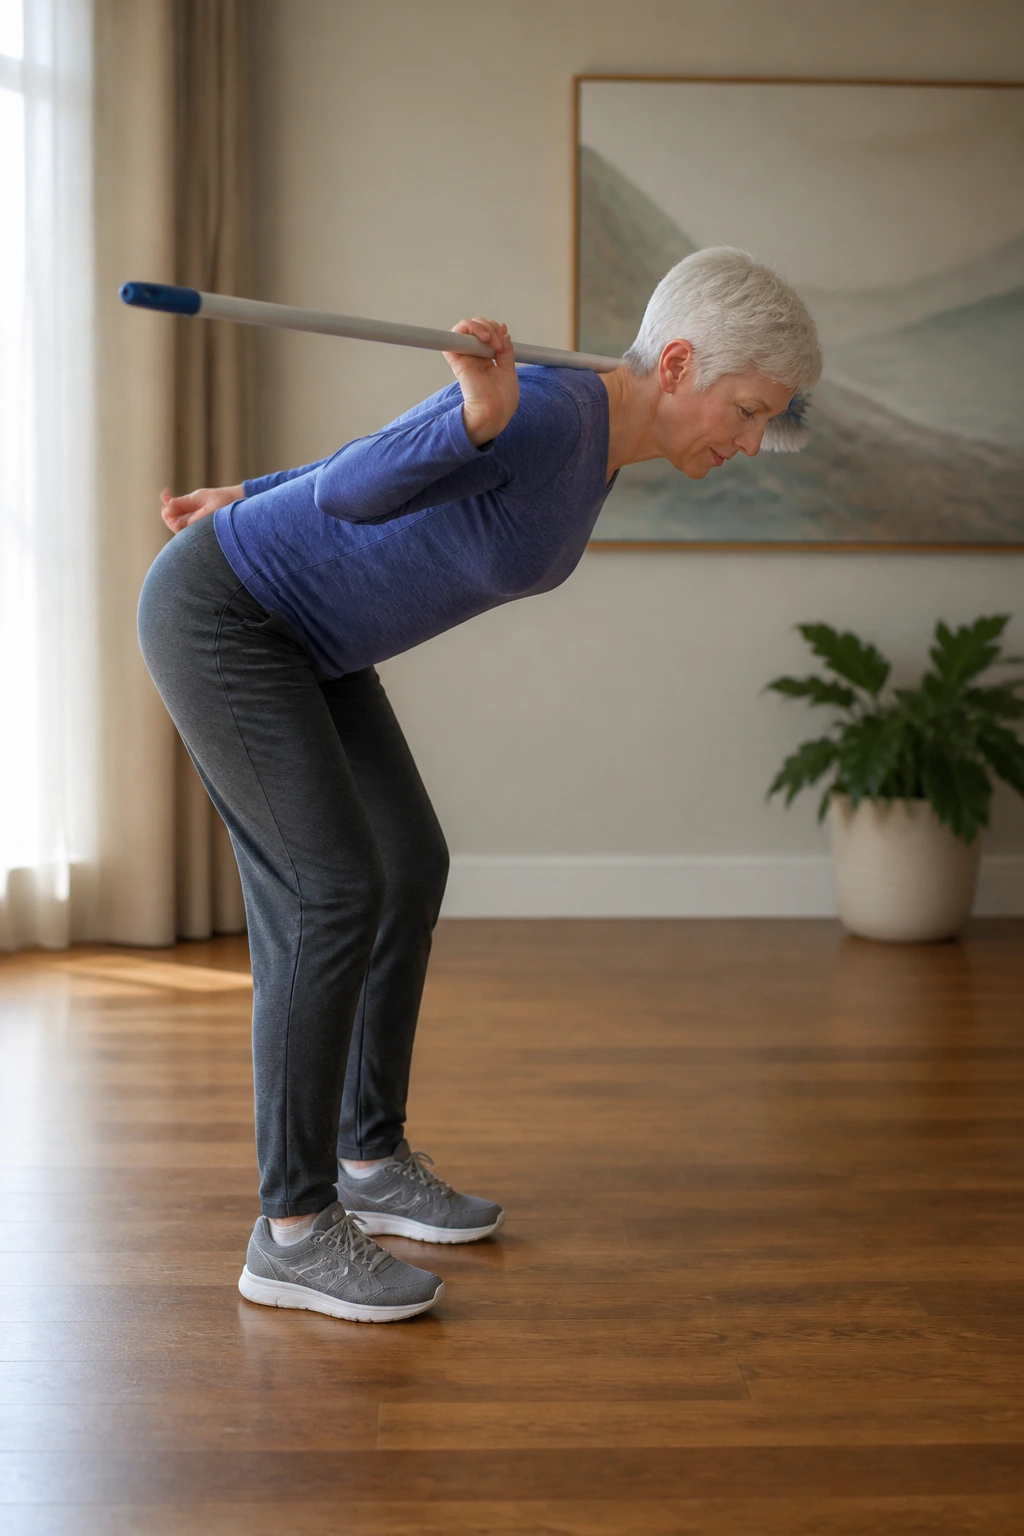
The hip hinge looks boring. It isn’t. It teaches you how to bend at the hips without folding your spine like a lawn chair, which matters every time you pick up laundry, reach for a pan, or lift a grocery bag.
Hold a broomstick against your head, upper back, and tailbone. Keep those three contact points in place while you soften your knees and send your hips backward. Then stand back up by squeezing the glutes. Do 2 sets of 8 to 10 slow reps.
Why It Helps
The point is not depth. The point is control. If the broom leaves your head or tailbone, you’re probably rounding or over-arching.
That feedback is gold. It shows you exactly where your body cheats.
Once the pattern feels stable, you can do the same movement with a light dumbbell or a gallon jug held close to the body. Start small. Hinge well first. Load later.
7. Step-Ups on a Low Stair
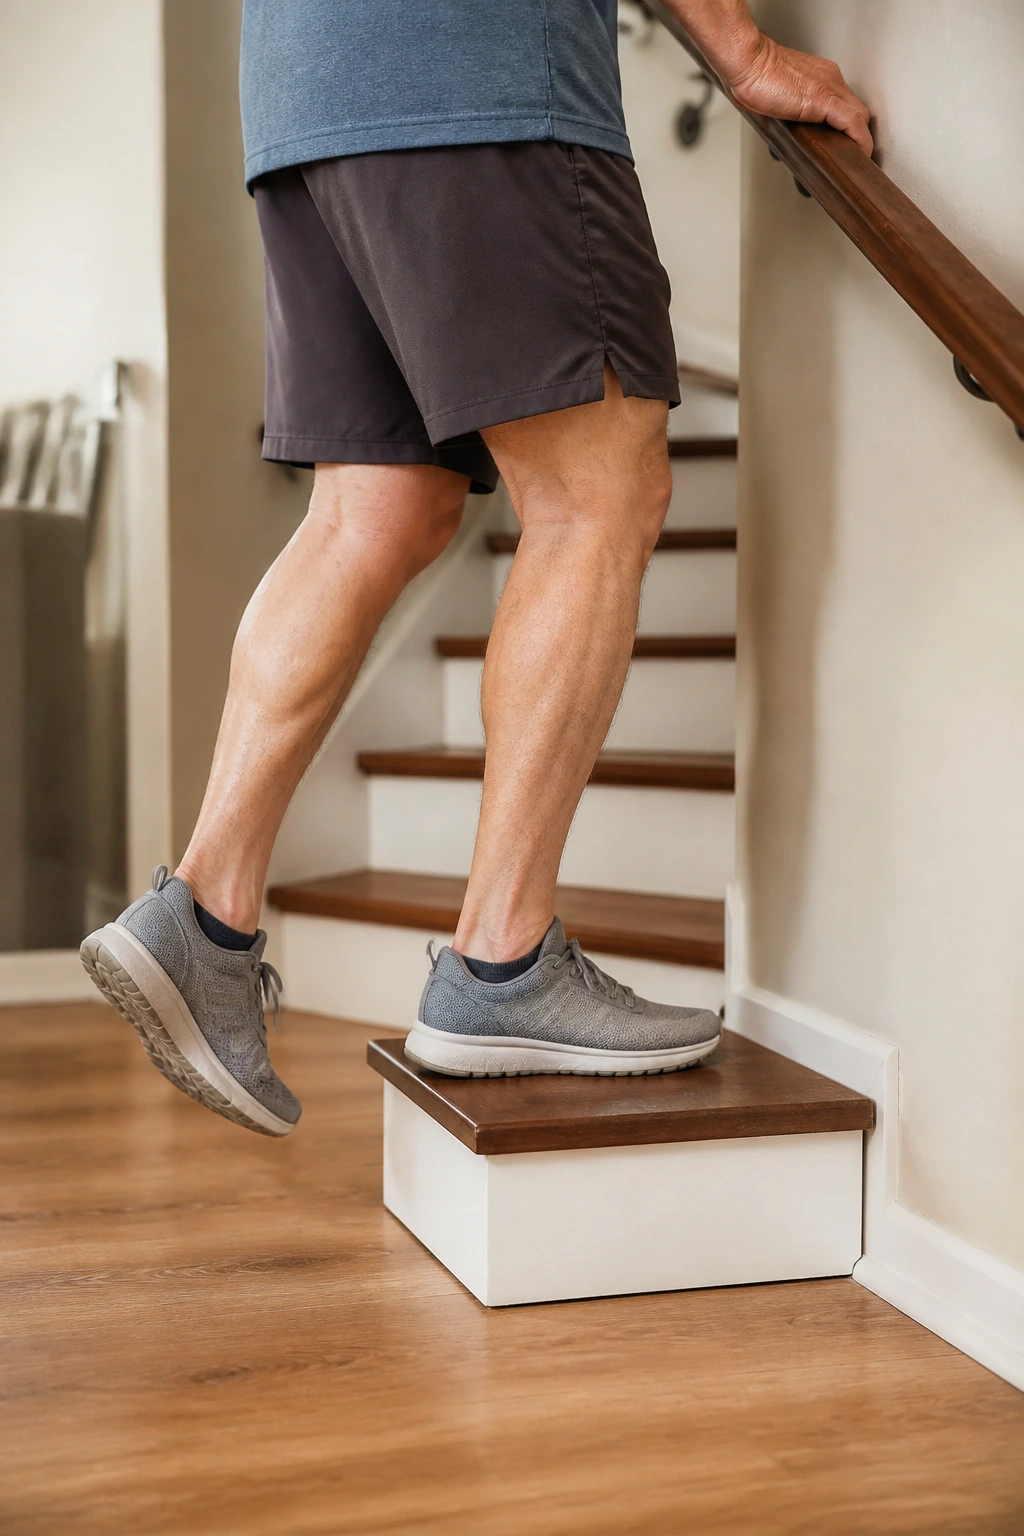
Stairs are honest. They tell you right away whether one leg is doing more work than the other, and they make that difference easy to feel.
Use a low, sturdy step — often 4 to 8 inches is plenty to start — and hold a rail or wall if you need support. Step up with one foot, bring the other foot up, then step back down with the same control. Try 2 to 3 sets of 6 to 10 reps per leg.
Make It Safer
- Keep your whole foot on the step.
- Drive through the heel of the working leg.
- Move slowly on the way down.
- Keep the step surface dry and uncluttered.
A higher step is not automatically better. A clean, steady step-up on a low stair will do more for you than a wobbly climb onto something too tall.
8. Farmer Carry Through the House
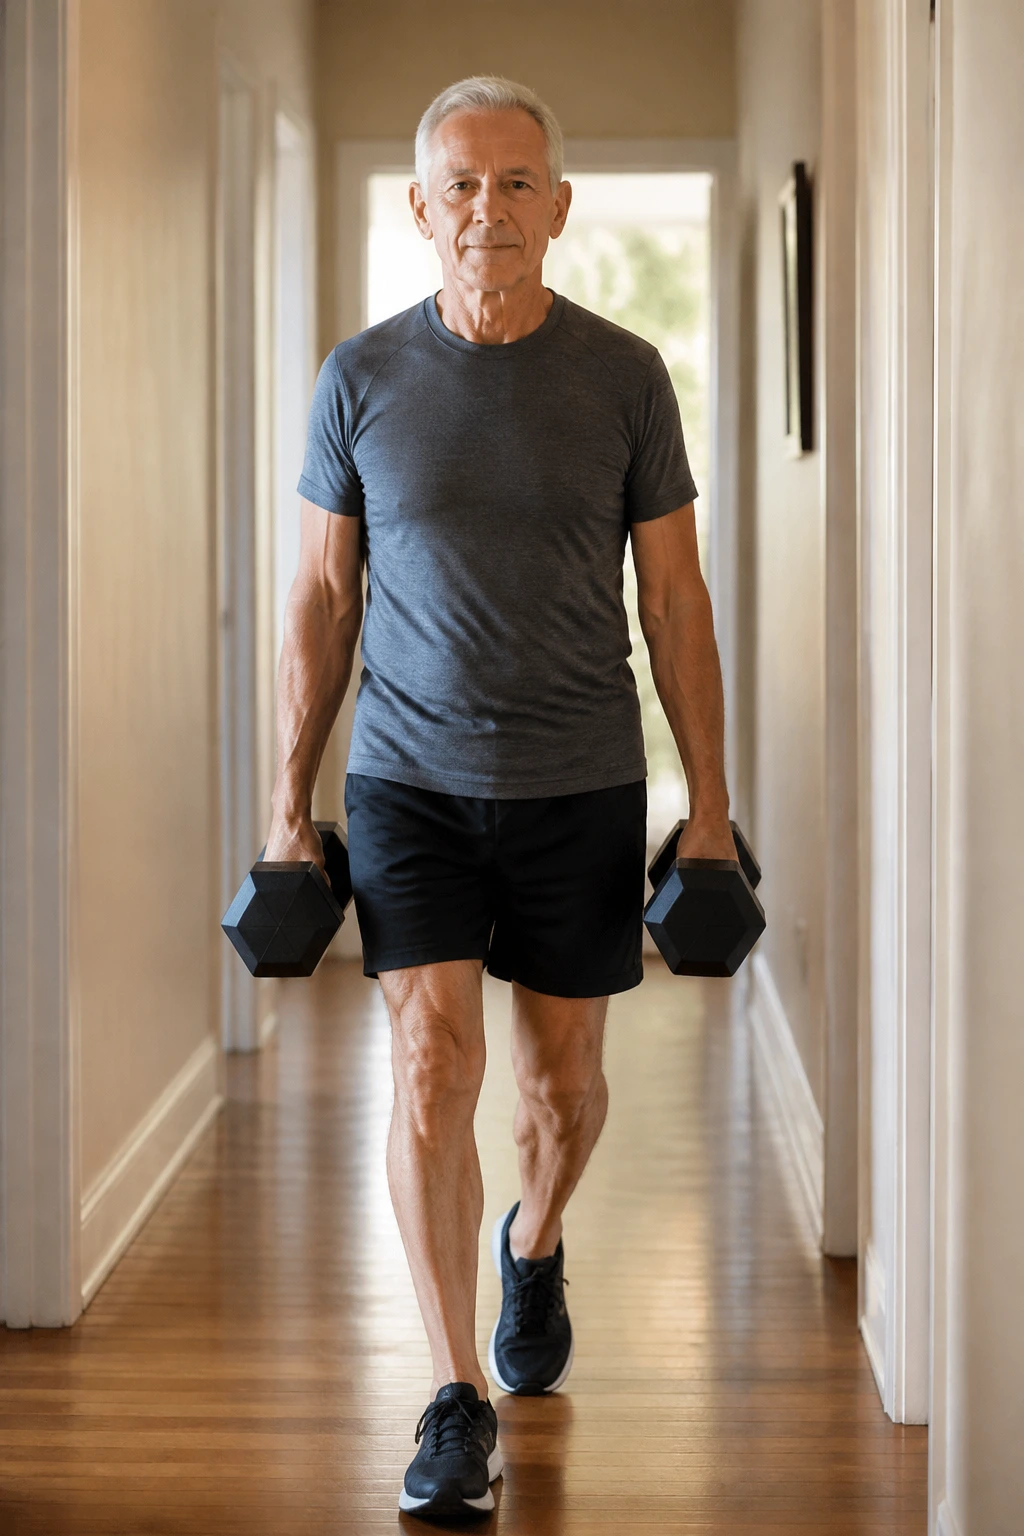
Ever walked across the house with two grocery bags and felt your sides wake up? That’s the farmer carry, and it’s one of the best home moves for grip, posture, and core strength.
Hold two equal weights — dumbbells, water jugs, or bags with handles — and walk for 20 to 60 seconds at a steady pace. Stand tall, keep your ribs stacked over your hips, and avoid shrugging the shoulders. Rest, then repeat for 2 to 4 rounds.
This is one of those exercises I like more than people expect. It looks too plain to matter. Then you try it with enough load, and your whole torso pays attention.
If your grip gives out before your legs do, that’s useful information. It tells you exactly what needs work.
9. Heel Raises and Toe Raises
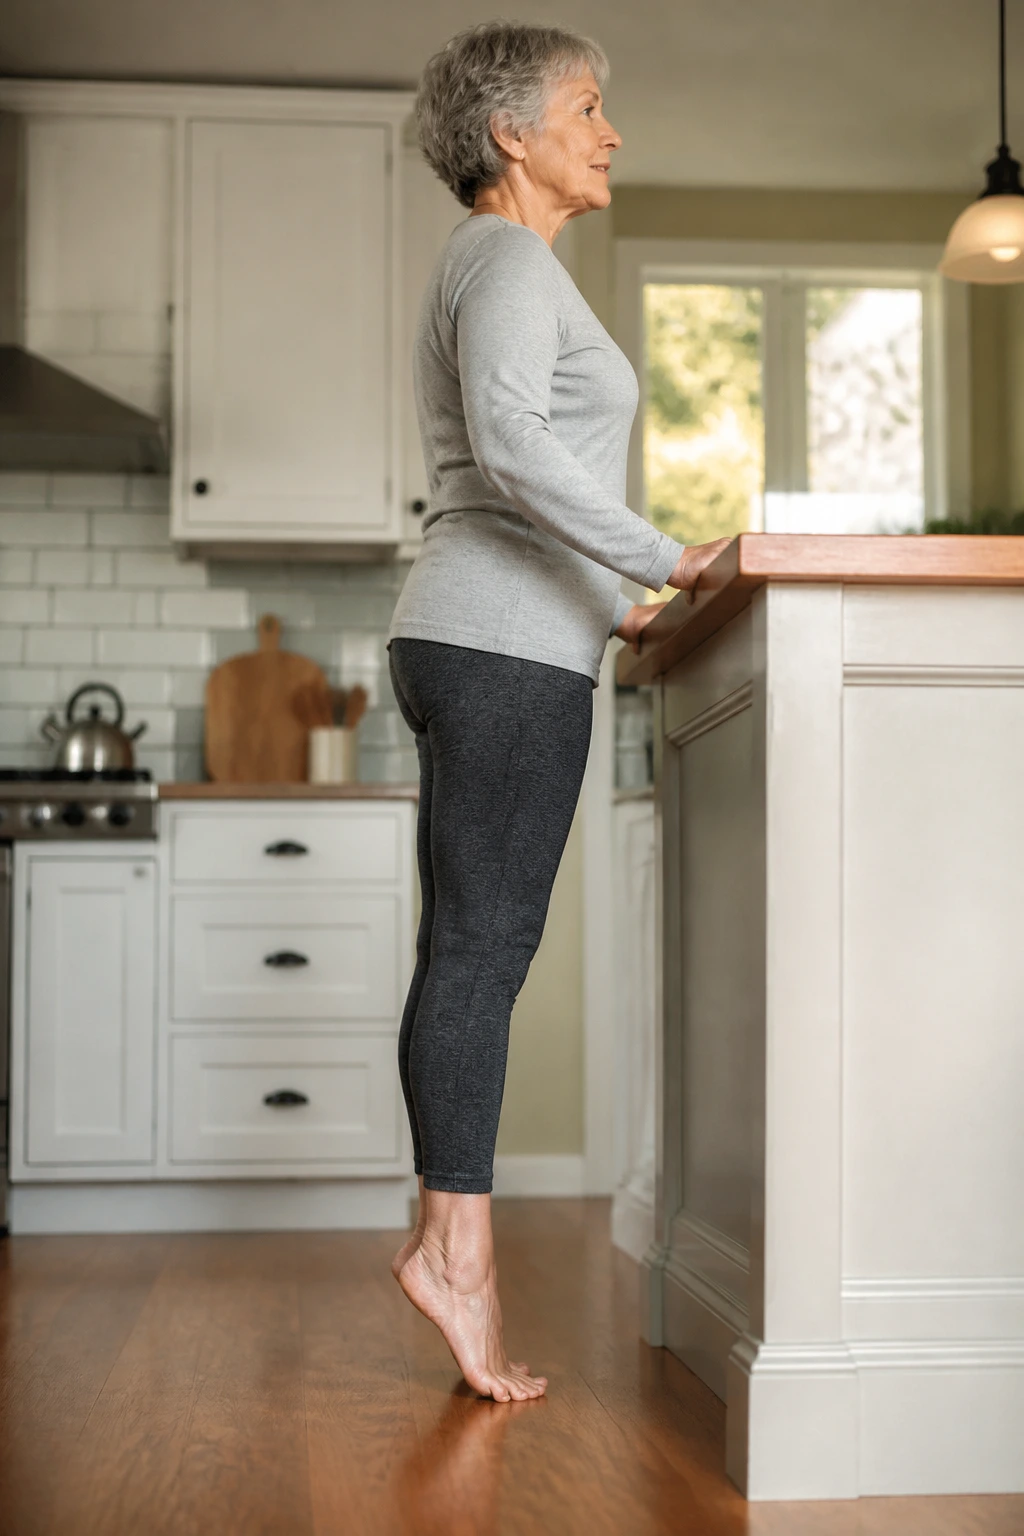
Calves matter more than most people think. They help with walking, stairs, and the small adjustments that keep you upright when the floor changes or your balance shifts.
Stand near a wall or counter. Rise onto your toes for a calf raise, pause for a second, then lower slowly. After a set of 15 to 20 reps, rock back on your heels and lift the front of your feet for toe raises, which work the shin muscles. Aim for 2 rounds of each.
Why Both Matter
The calves help with push-off. The shins help with foot clearance. That combination can make walking feel steadier, especially on uneven ground.
If both moves feel too easy, try doing them one foot at a time while one hand rests on a counter. Tiny movements. Big payoff.
10. Curl to Press With Light Weights
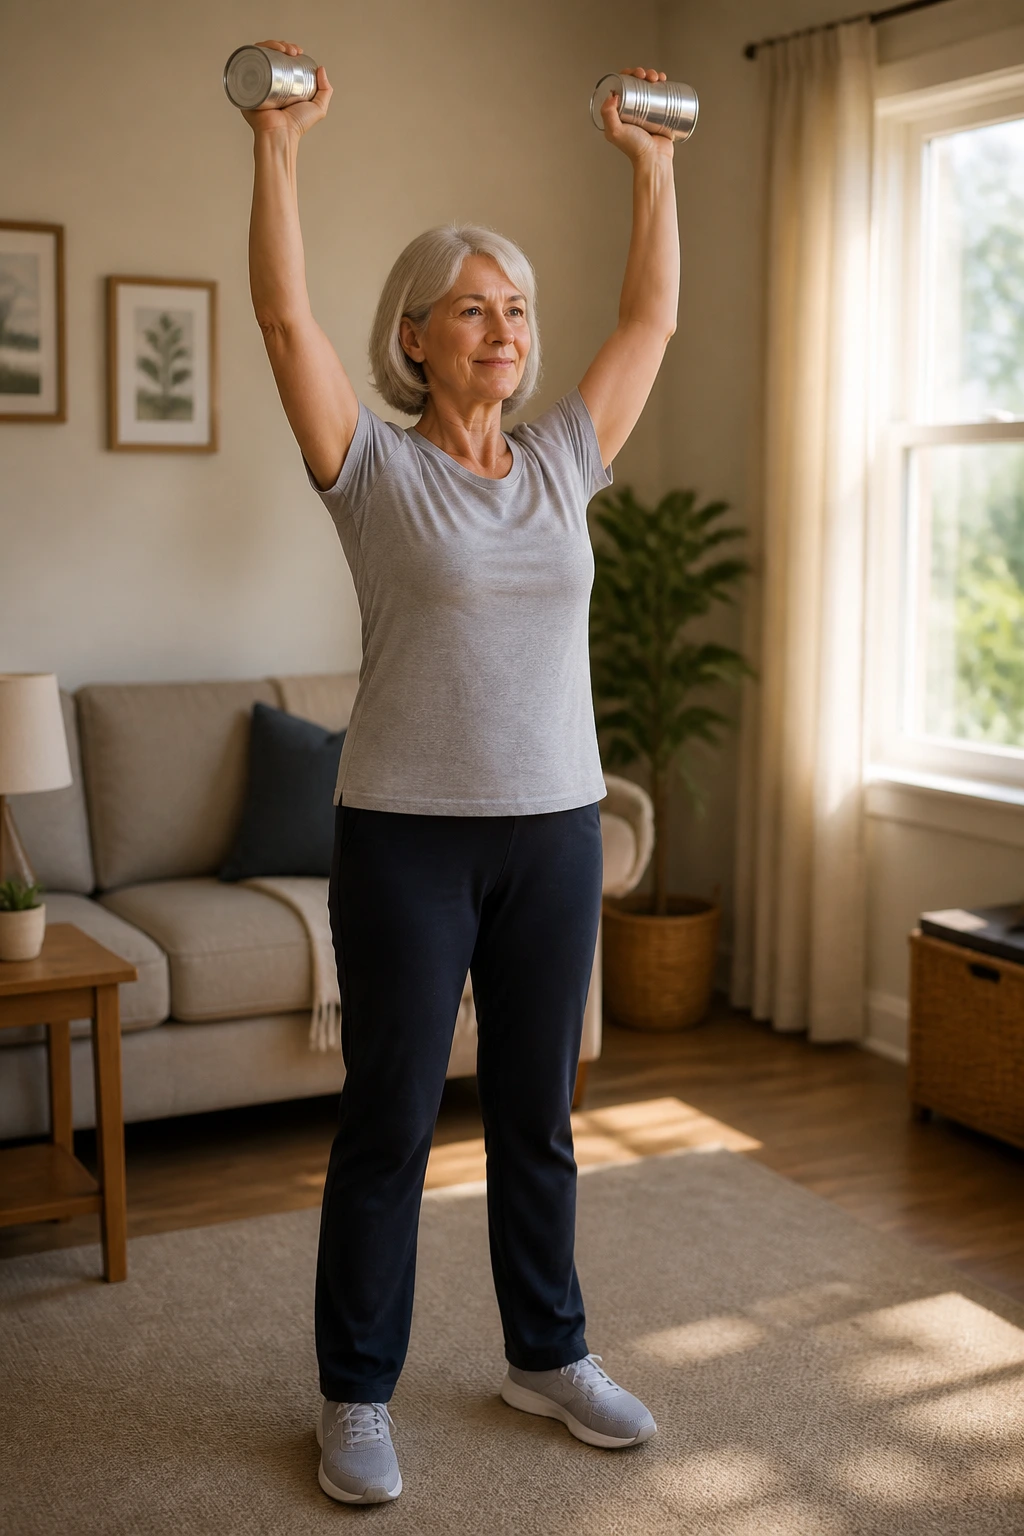
A pair of soup cans is enough here. Really.
Start with your arms at your sides, curl the weights up to your shoulders, then press them overhead if your shoulders tolerate it. Lower with control. Do 2 to 3 sets of 8 to 10 reps.
The curl trains the biceps for carrying and lifting. The press trains the shoulders and triceps for getting things overhead. Together, they cover a lot of daily life without asking for much space.
If overhead pressing bothers your shoulders, skip the press and keep the curl. Or press only partway, stopping around eye level. Painful overhead work is not a badge of honor.
11. Side-Lying Clamshells
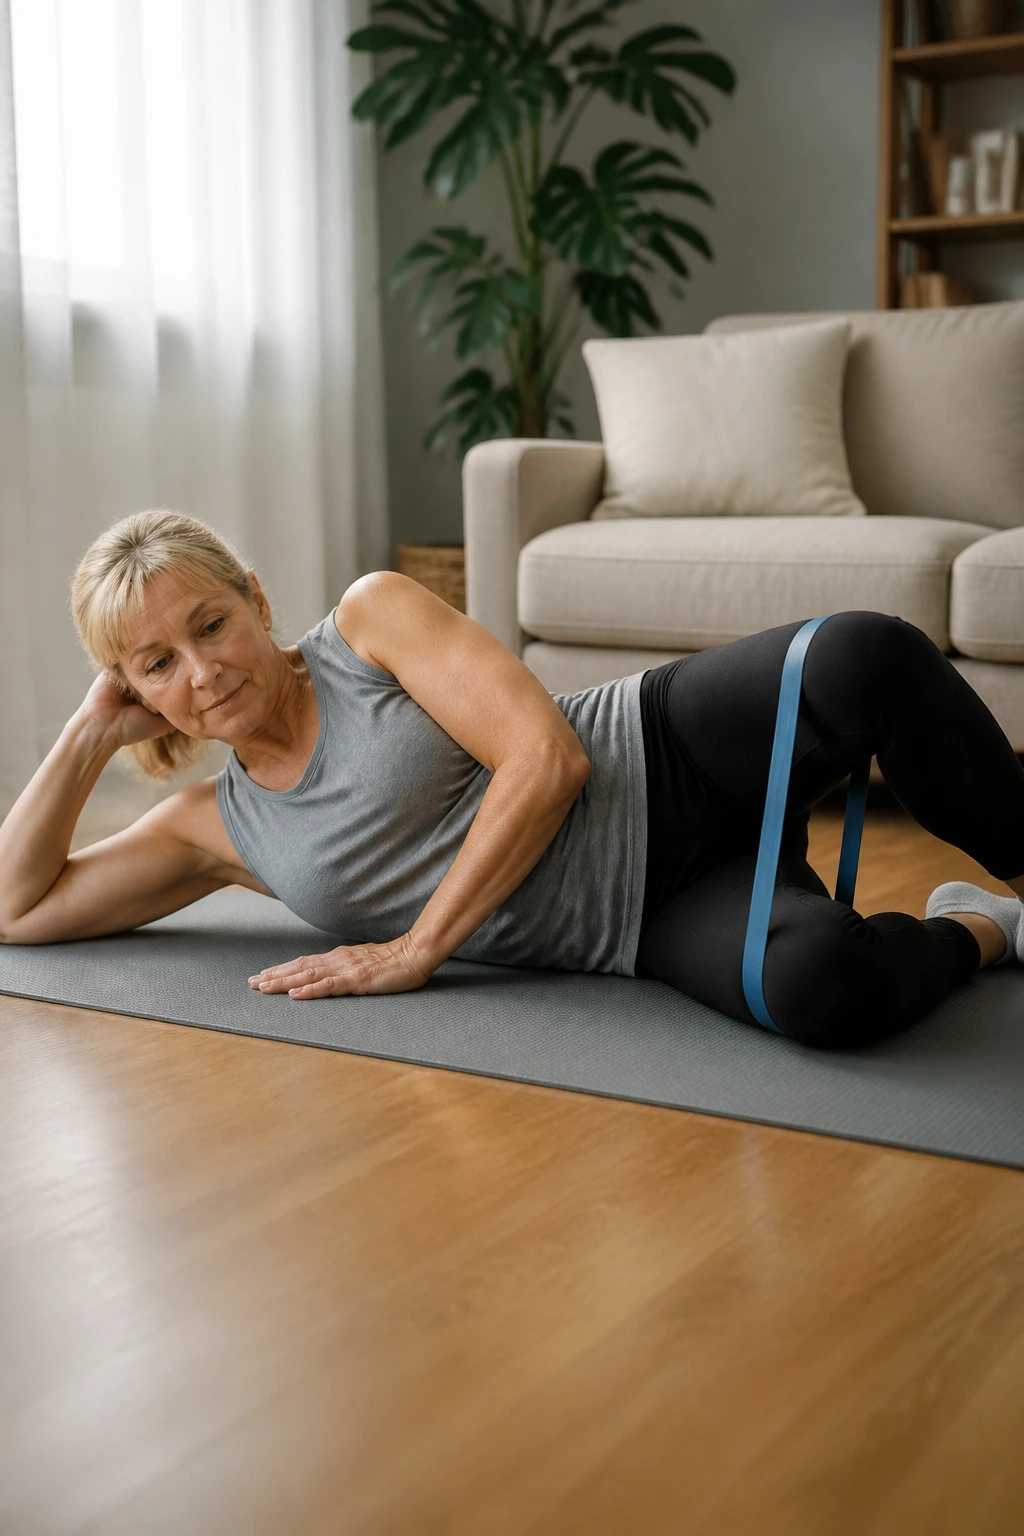
The outside of your hip should start to burn. That is the clue you’re in the right place.
Lie on your side with your knees bent and feet together. Keeping your pelvis still, lift the top knee like opening a clam, then lower it slowly. Add a mini-band above the knees if you want more resistance. Use 12 to 15 reps per side.
This move is small, but it helps the glute muscles that stabilize your pelvis when you walk or stand on one leg. That can matter more than people realize, especially if one knee or hip tends to drift inward.
If your lower back rolls around, you’re going too fast. Slow down and keep the movement tiny.
12. Bird Dog Reaches
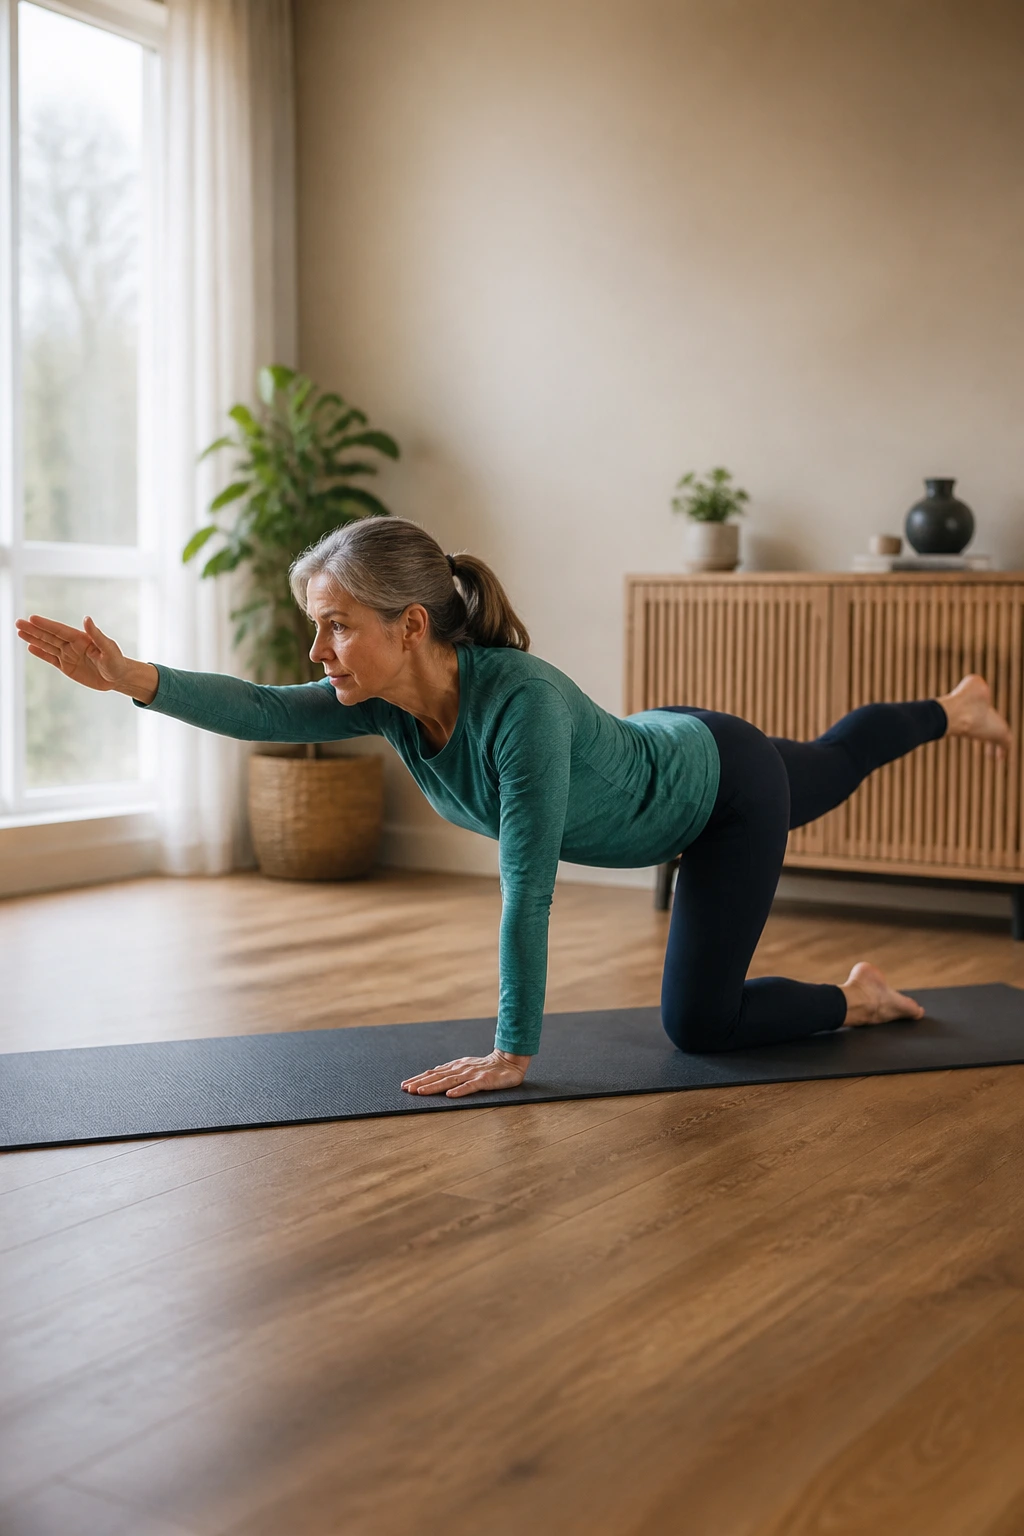
Why does the bird dog show up in so many rehab rooms? Because it teaches control, not just movement.
Start on hands and knees, with hands under shoulders and knees under hips. Reach one arm forward while extending the opposite leg back. Keep your hips level, hold for 3 seconds, then return and switch sides. Try 6 to 8 reps per side.
What to Watch For
- Don’t let the low back sag.
- Don’t swing the leg high.
- Don’t twist to the side.
- Keep the reach long, not aggressive.
If the floor is too much, do it with your hands on a counter and your feet on the floor. The shape is the same, just higher up. That version is often the smart starting point.
13. Towel Pull-Apart Sets
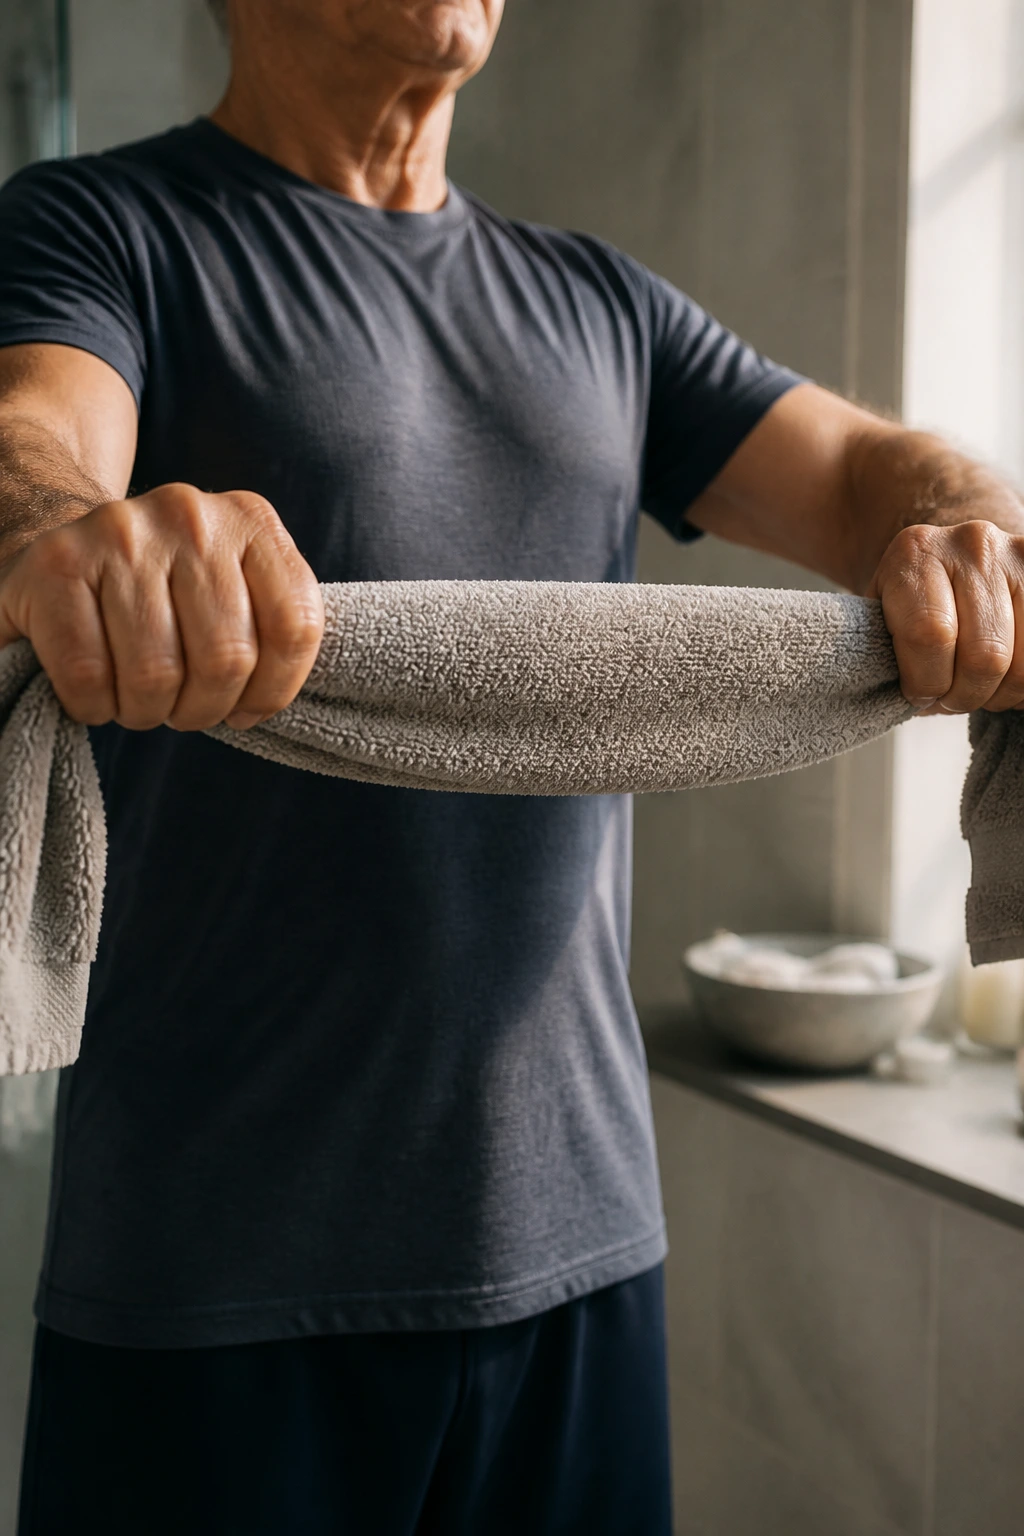
You do not need a fancy band to work your upper back. A bath towel held tight can do the job.
Hold the towel at chest height with both hands and pull outward as if you were trying to stretch it wide. Keep the shoulders down, squeeze between the shoulder blades, and release slowly. Do 2 to 3 sets of 10 to 15 reps.
A towel pull-apart is a good choice when the shoulders feel stiff but not painful. It gives you the pulling pattern without much load, which makes it a nice warm-up before rows or carries.
If your hands slip, dry the towel first. That sounds obvious, but there it is.
14. Timed Sit-to-Stand Intervals
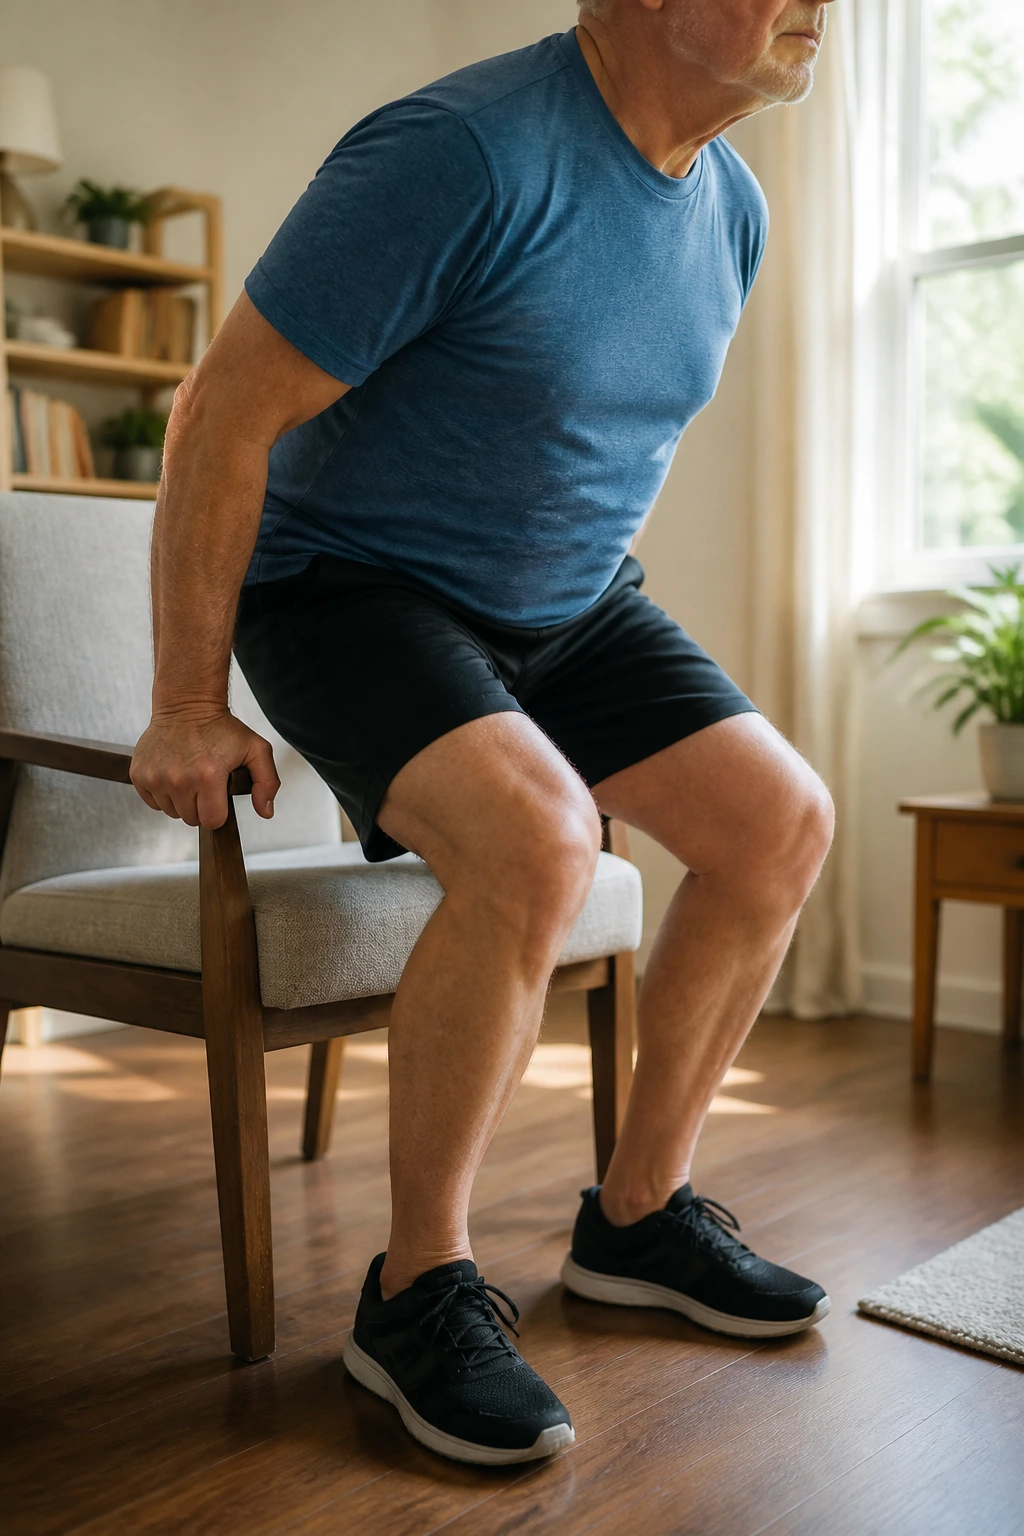
Thirty seconds can feel long when every rep counts.
Set a timer for 30 seconds of work and a rest period of 30 to 60 seconds. Stand up from a chair, sit down, and repeat at a steady pace. Use your hands if you need them, then try one round without hand support when you’re ready. Do 4 to 6 rounds.
This is part strength work, part stamina work. It’s plain, and it’s honest. The faster your chair speed improves, the easier ordinary tasks tend to feel.
A higher chair makes the intervals friendlier. A lower chair makes them more demanding. Don’t chase speed if your knees start knocking inward.
15. Seated Overhead Press
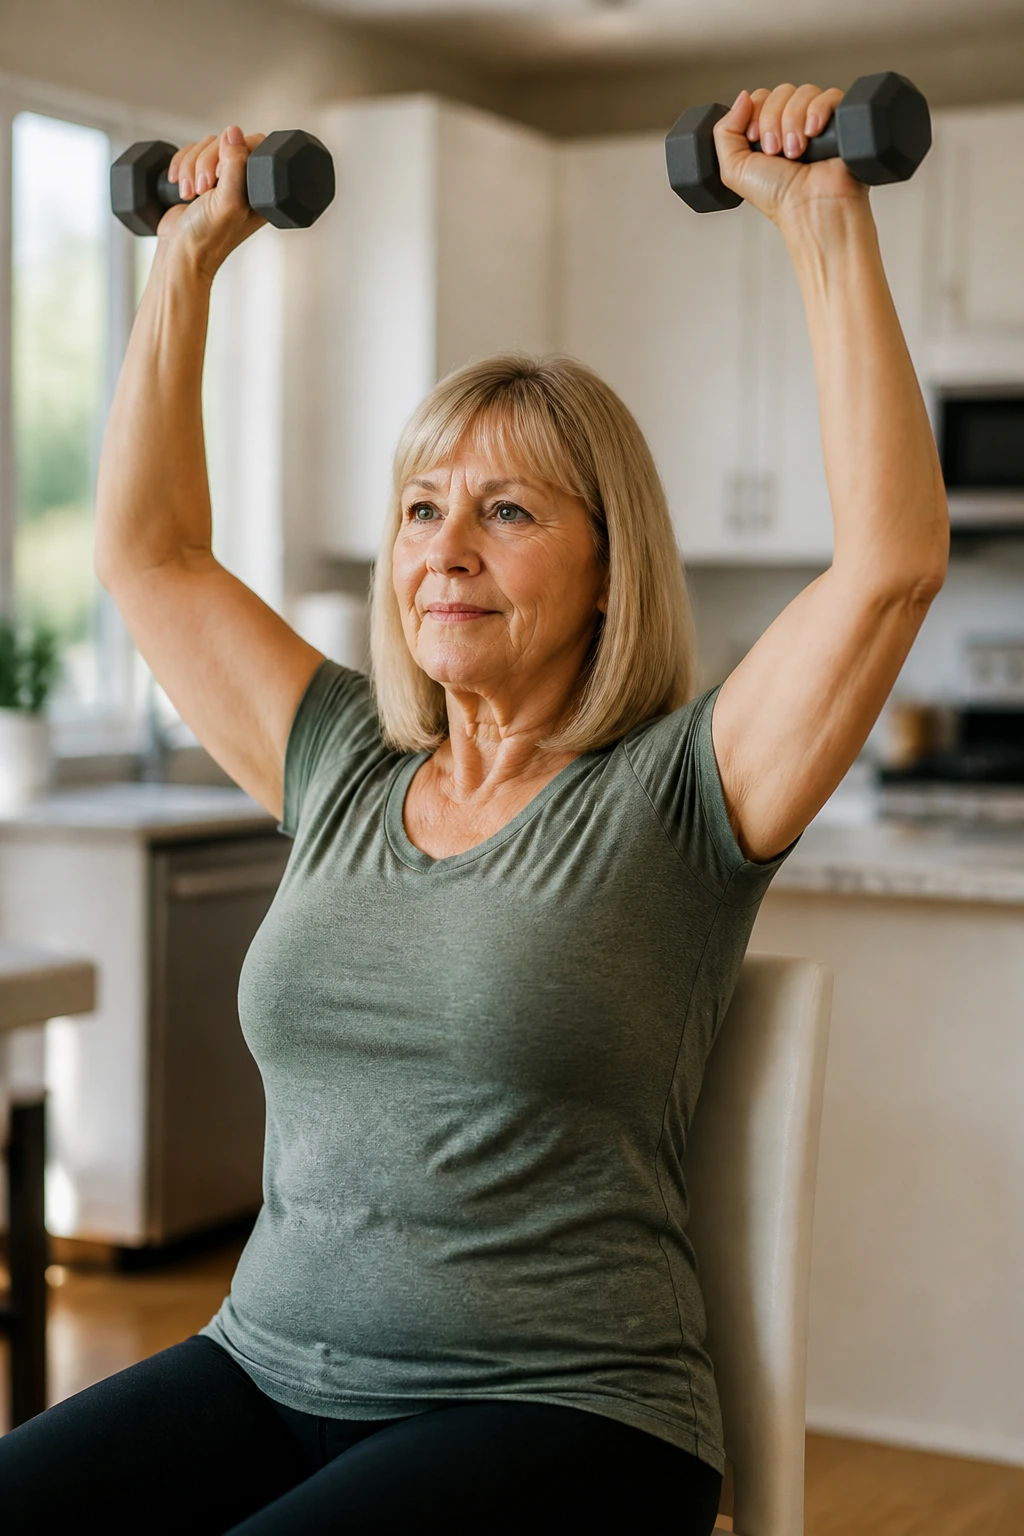
Overhead pressing still belongs in a home routine, as long as you keep the load light and the range honest. Sitting down removes some of the sway and makes the movement easier to control.
Hold a pair of light dumbbells or bottles at shoulder height, palms facing forward or inward, and press them up until your arms are straight but not locked. Lower slowly. Start with 2 sets of 6 to 8 reps.
If your shoulders prefer a neutral grip — palms facing each other — use that. It often feels kinder on cranky joints.
This is not a move to rush. Smooth reps beat heavy reps here, every time.
16. Supported Split Squats
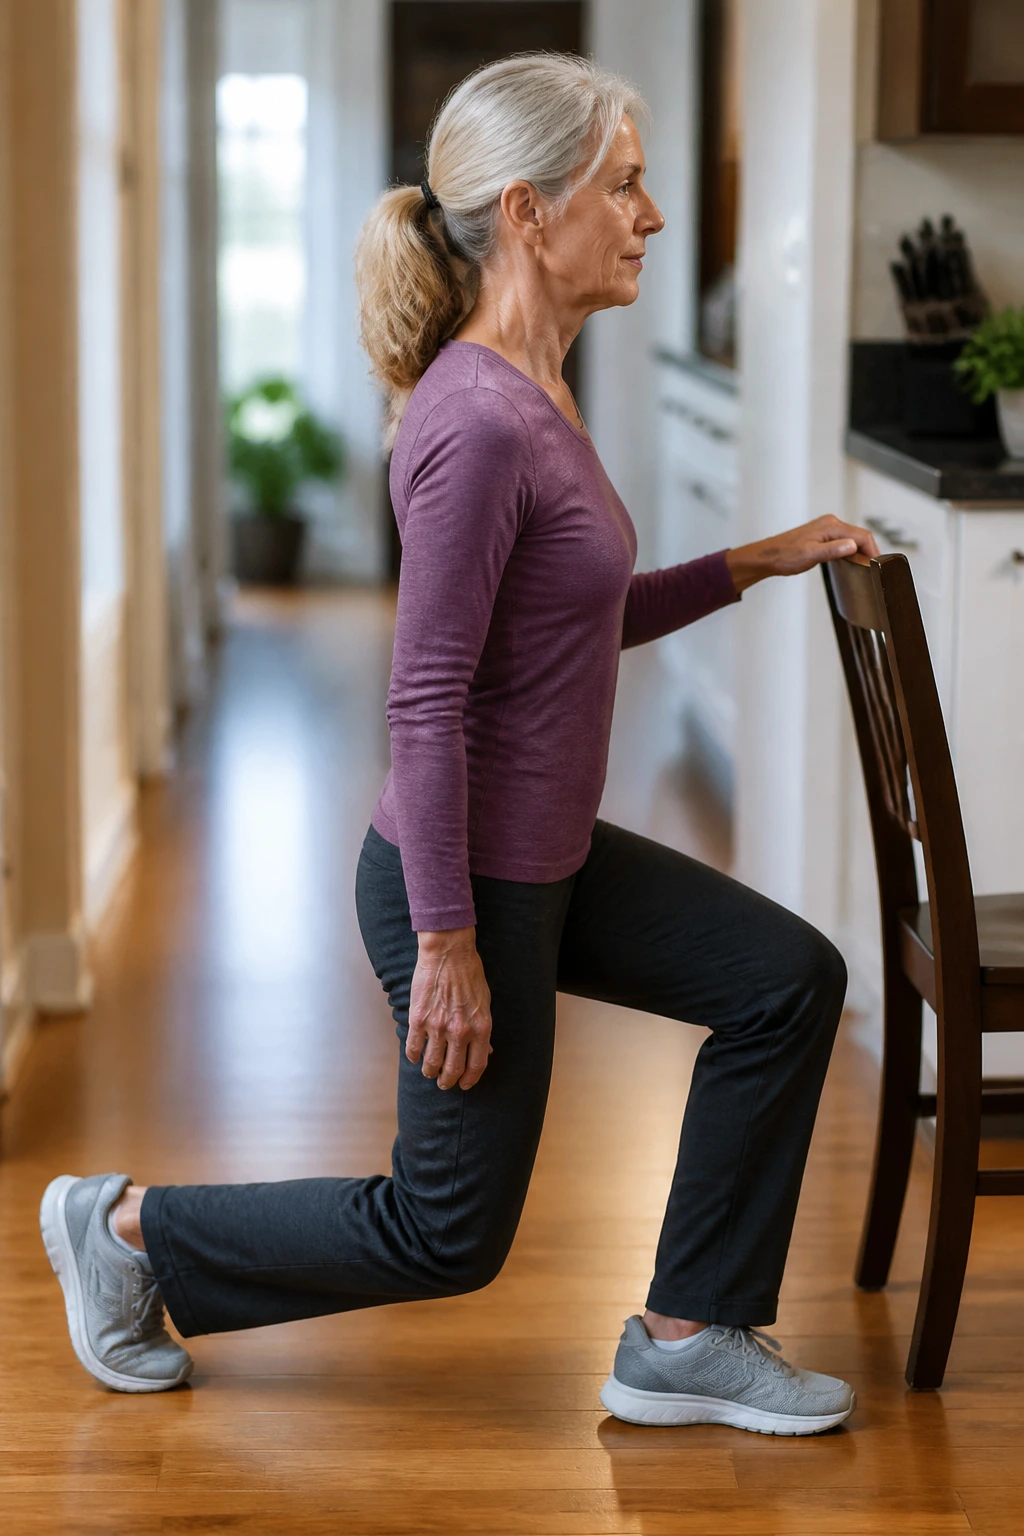
What if a split squat feels wobbly? Hold the chair and shorten the stance.
Place one foot forward and one back, keeping enough space that you can bend both knees comfortably. Lower a few inches, then rise back up. Use a countertop or sturdy chair for balance, and start with 6 to 8 reps per side.
The front leg gets most of the work, which is exactly why this exercise helps with stairs and rising from a low seat. It also exposes side-to-side differences fast. That’s useful, even when it’s a little humbling.
If the rear knee bothers you, shorten the range. You do not need to sink deeply to get value from the pattern.
17. Wall Sit With Arm Reach
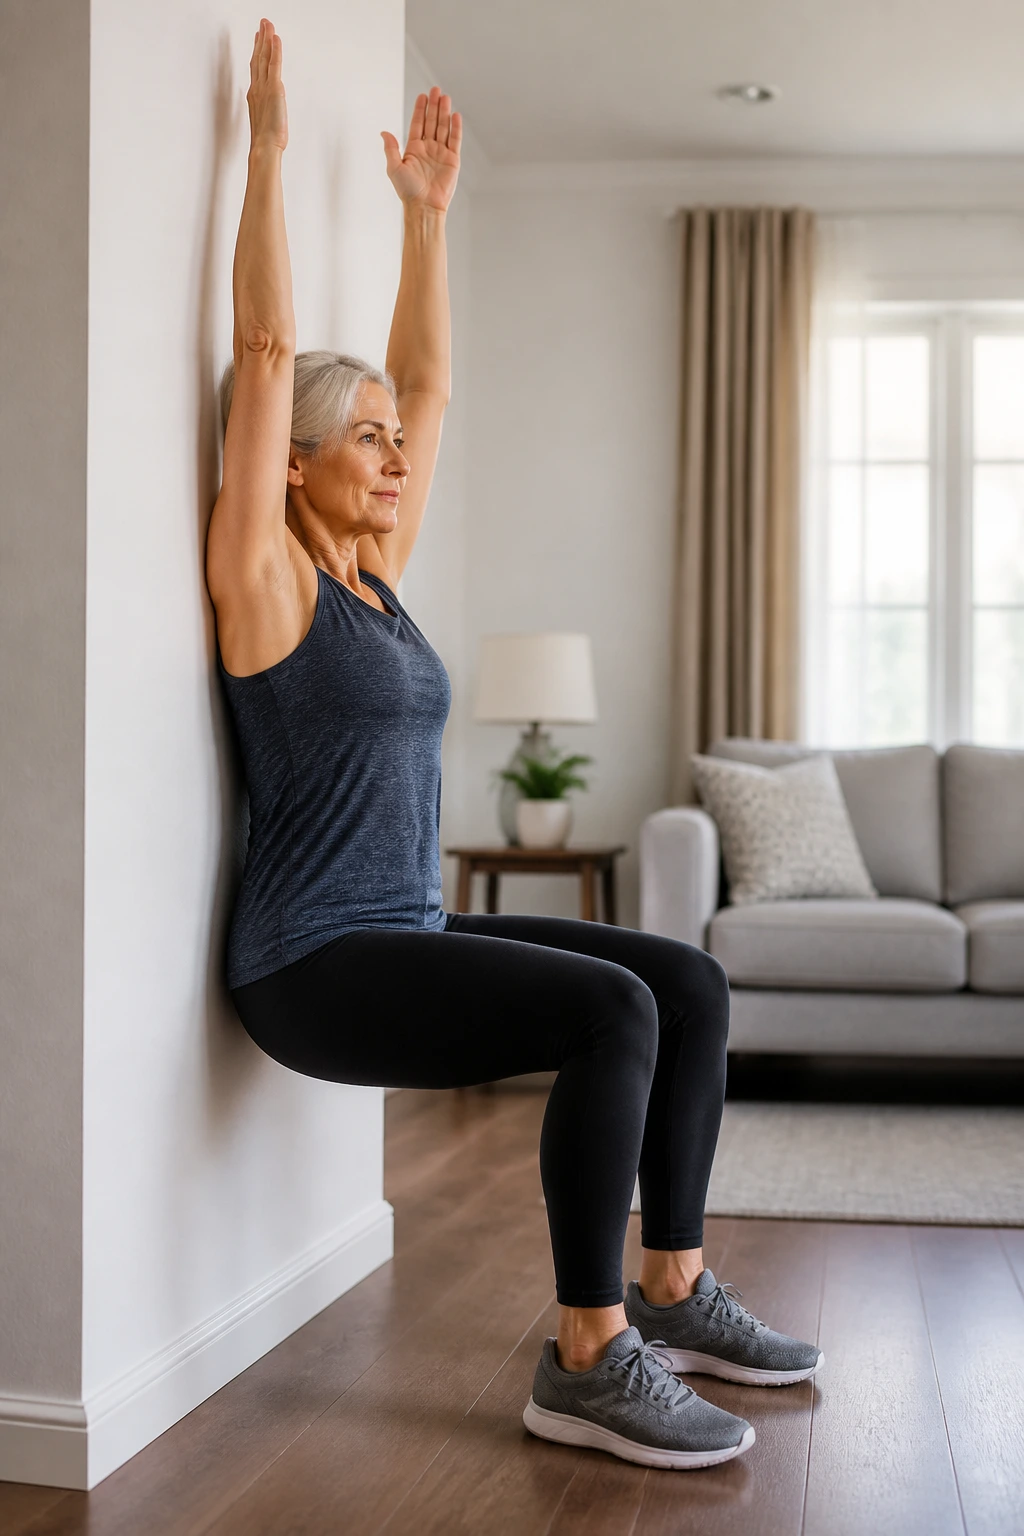
Wall sits aren’t glamorous, and that is exactly why they work.
Slide down a wall until your thighs are at a comfortable angle — not necessarily parallel to the floor — and hold for 20 to 45 seconds. To make it a little more interesting, reach your arms overhead or hold light weights while you keep the back flat against the wall.
This is a leg endurance drill more than a pure strength move, but older adults often need both. The thighs learn to stay on task without the lower back stealing the show.
If your knees complain, slide up a little higher. Tiny changes in angle matter more than toughness here.
18. Triceps Kickbacks
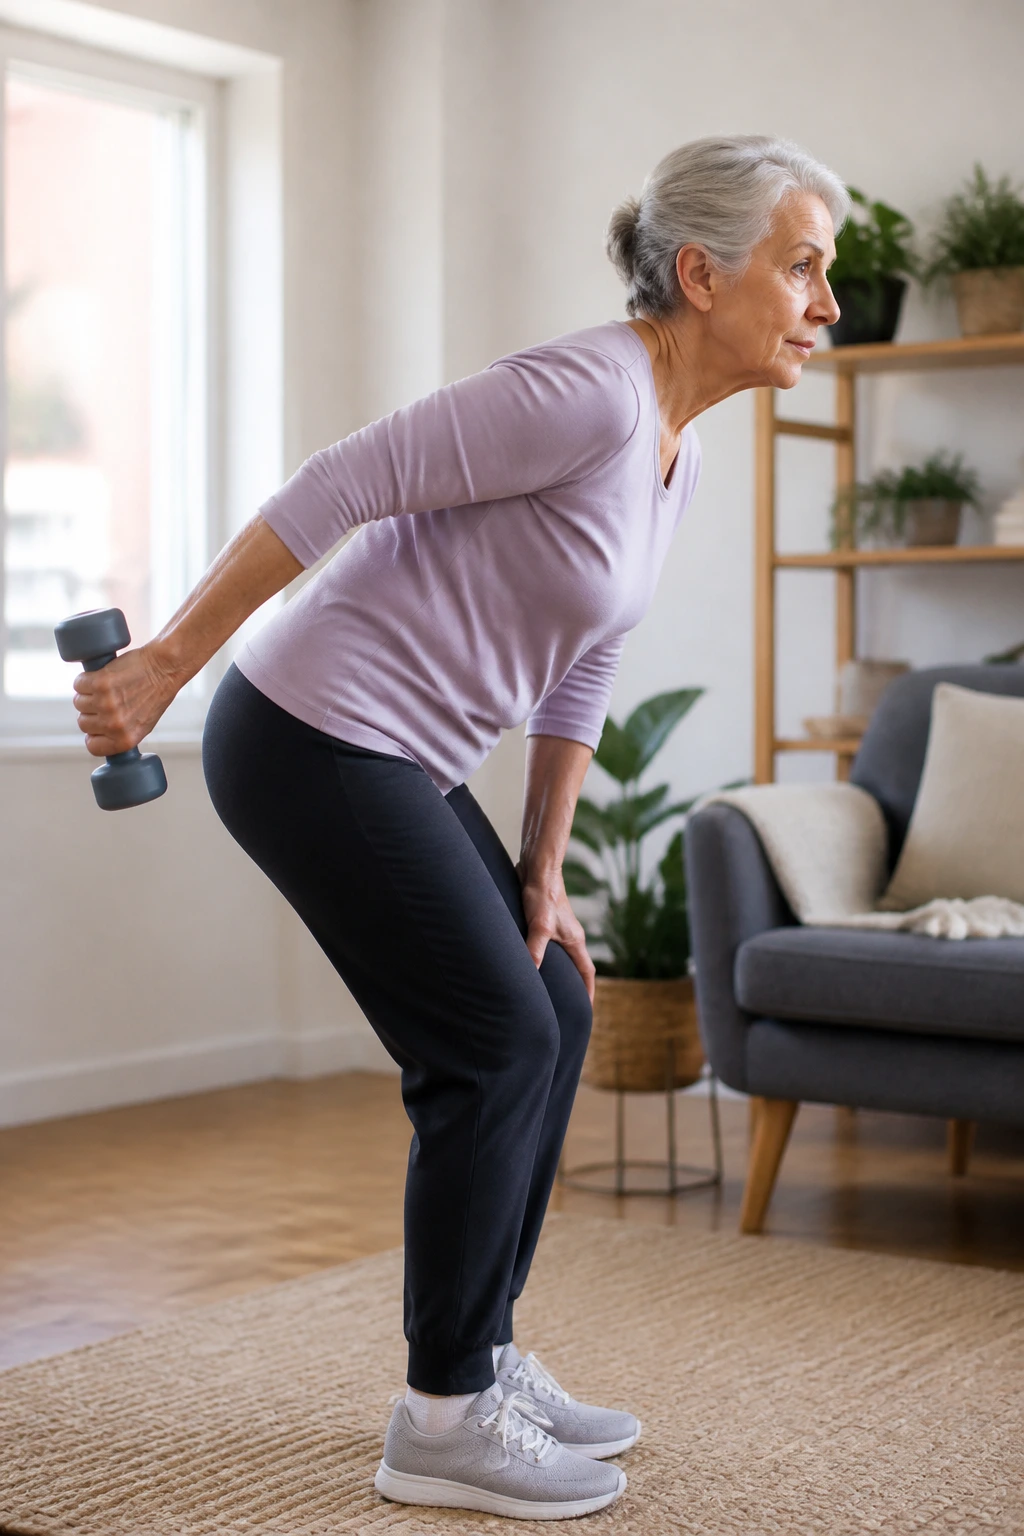
If chair push-ups never bother your wrists, triceps work is easy to add. Kickbacks are a clean option because they let you focus on the back of the arm without much setup.
Lean one hand on a chair or table, keep your back flat, and bend the working elbow so the upper arm stays close to your side. Straighten the elbow until the arm is long, then bend it again. Use a light dumbbell or water bottle and aim for 10 to 12 reps per side.
The mistake is using too much weight and turning it into a shoulder swing. Keep it small and controlled.
The triceps help with pushing yourself up from a seat and with certain reaching tasks. They are easy to neglect, and then you miss them when you need them.
19. Dead Bug Heel Taps
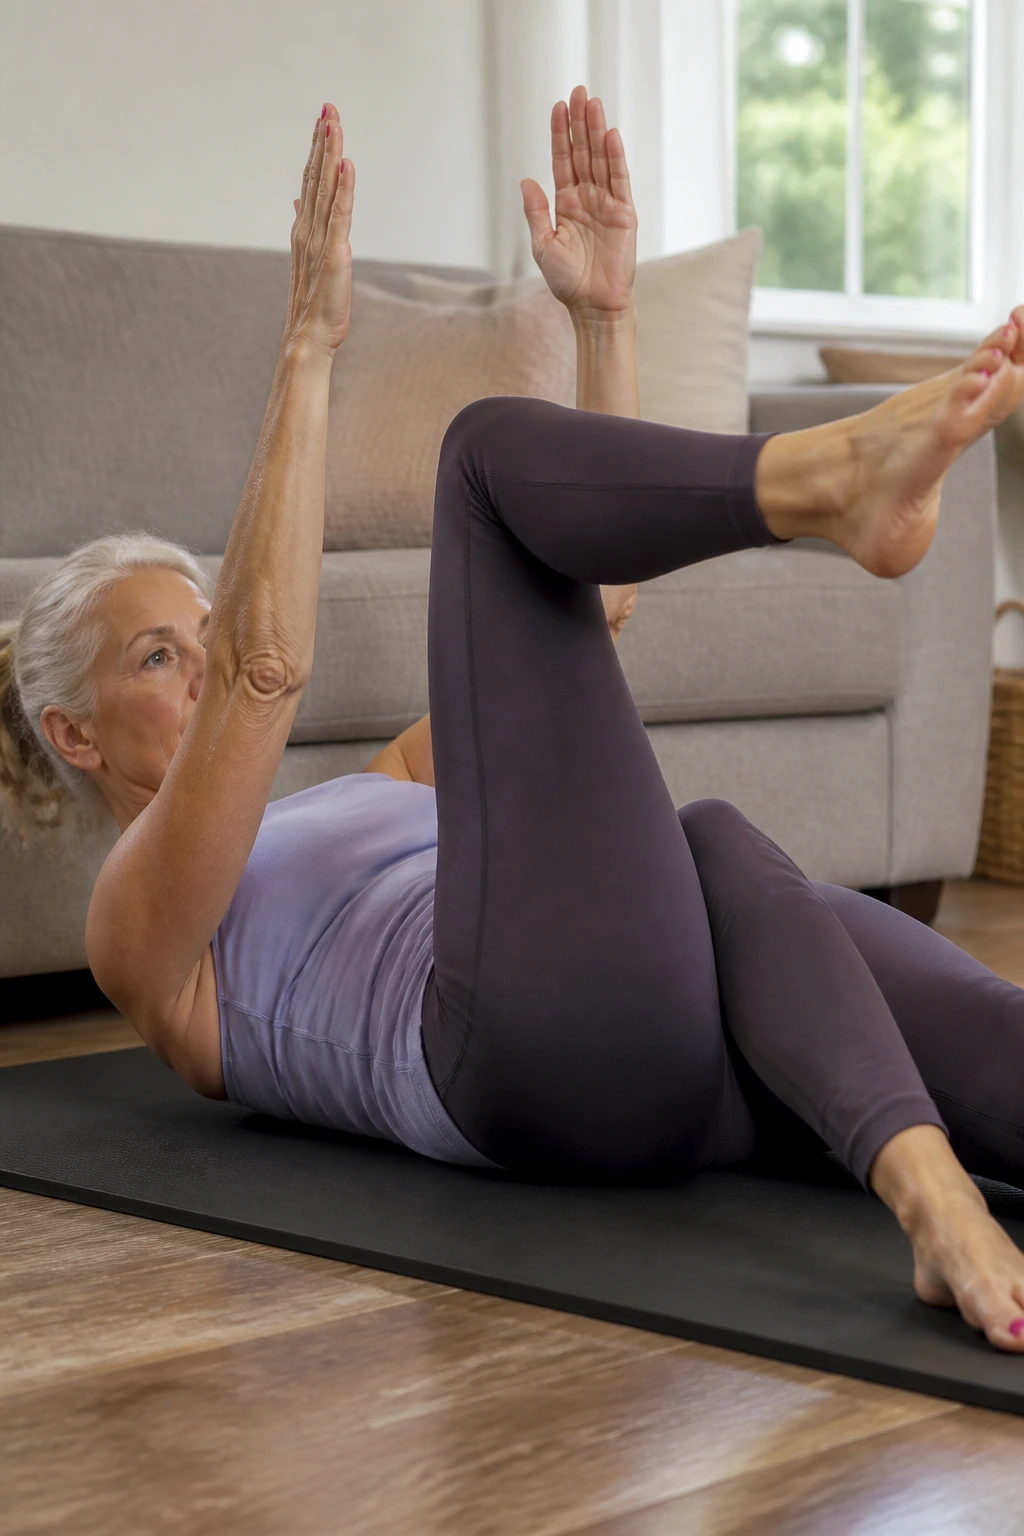
Can core work be gentle and still matter? Yes. The dead bug is proof.
Lie on your back with your knees over your hips and arms pointed toward the ceiling. Brace lightly, lower one heel toward the floor, tap lightly, then return. Switch sides and keep your lower back from arching. Do 6 to 10 taps per side.
A bed or firm couch can make this easier if the floor is hard to get to. The motion should stay slow and clean. If your back lifts off the floor, shorten the range.
This one looks quiet. It is. But a quiet core often means better balance, steadier walking, and fewer surprise twinges when you reach or twist.
20. Reverse Flys With Light Weights
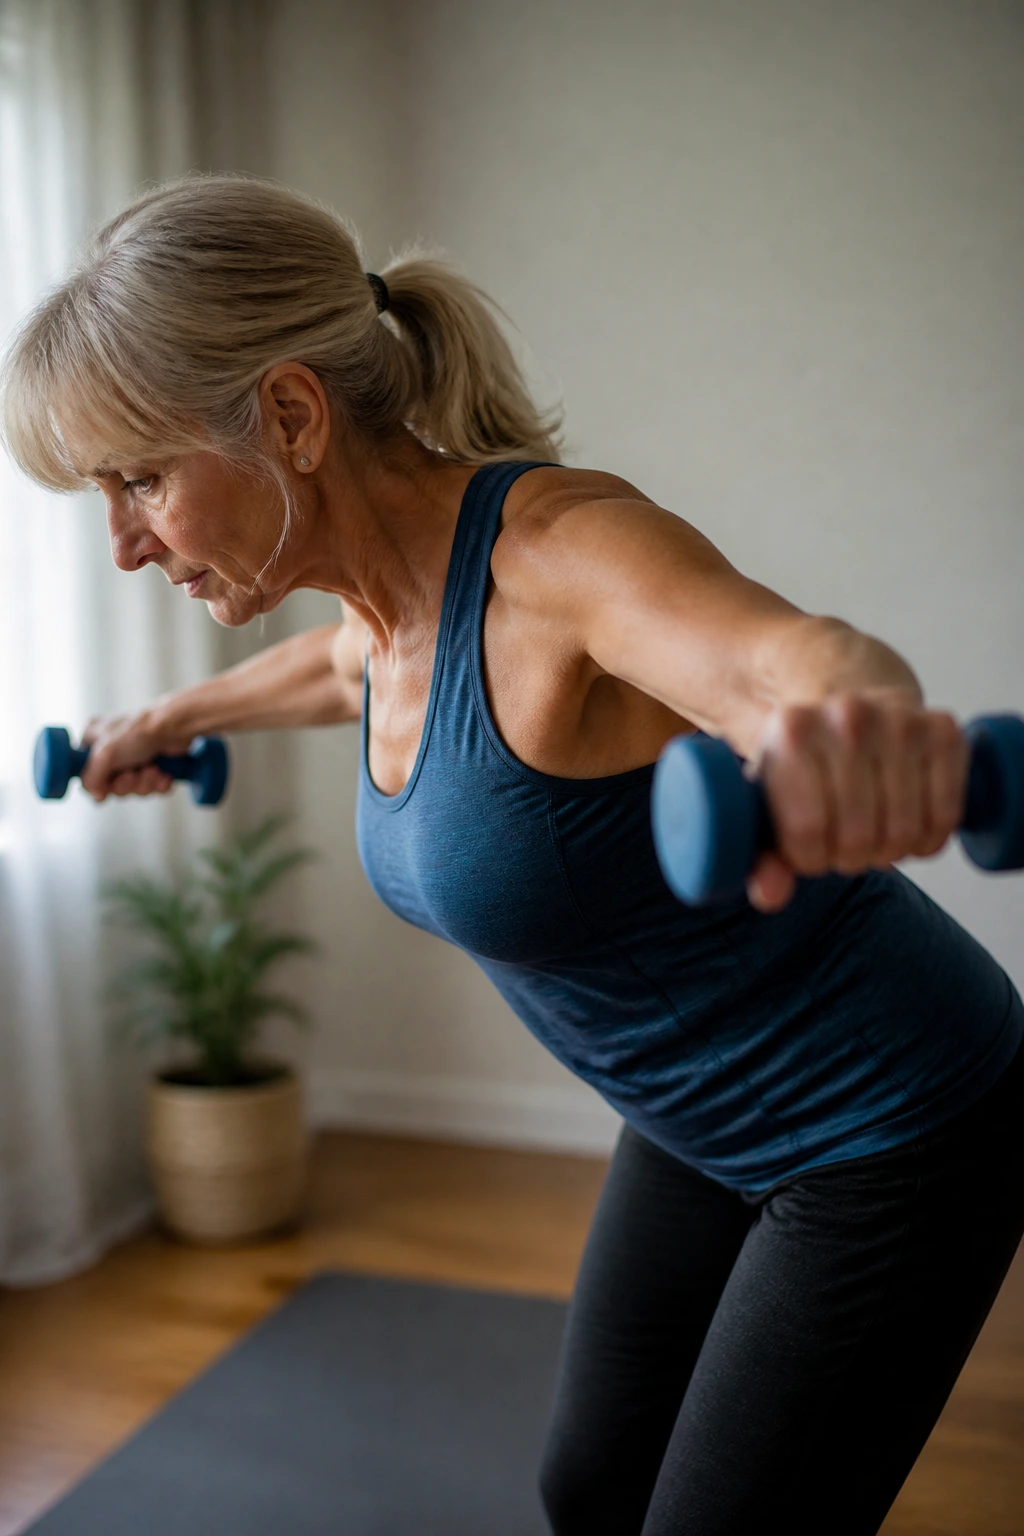
Tiny movements can still be hard. Reverse flys prove it.
Hinge forward slightly with a flat back, or sit tall with a light bend in the elbows. Raise both arms out to the sides until your shoulder blades gently squeeze together, then lower them slowly. Use very light weights — often 1 to 3 pounds is enough to start — and do 8 to 12 reps.
This works the rear shoulders and upper back, which are the parts that keep you from living in a rounded shape all day. If you shrug, the neck takes over. If you swing, the weights are too heavy.
Stay light. This is one place where ego ruins the set fast.
21. Mini-Band Side Steps
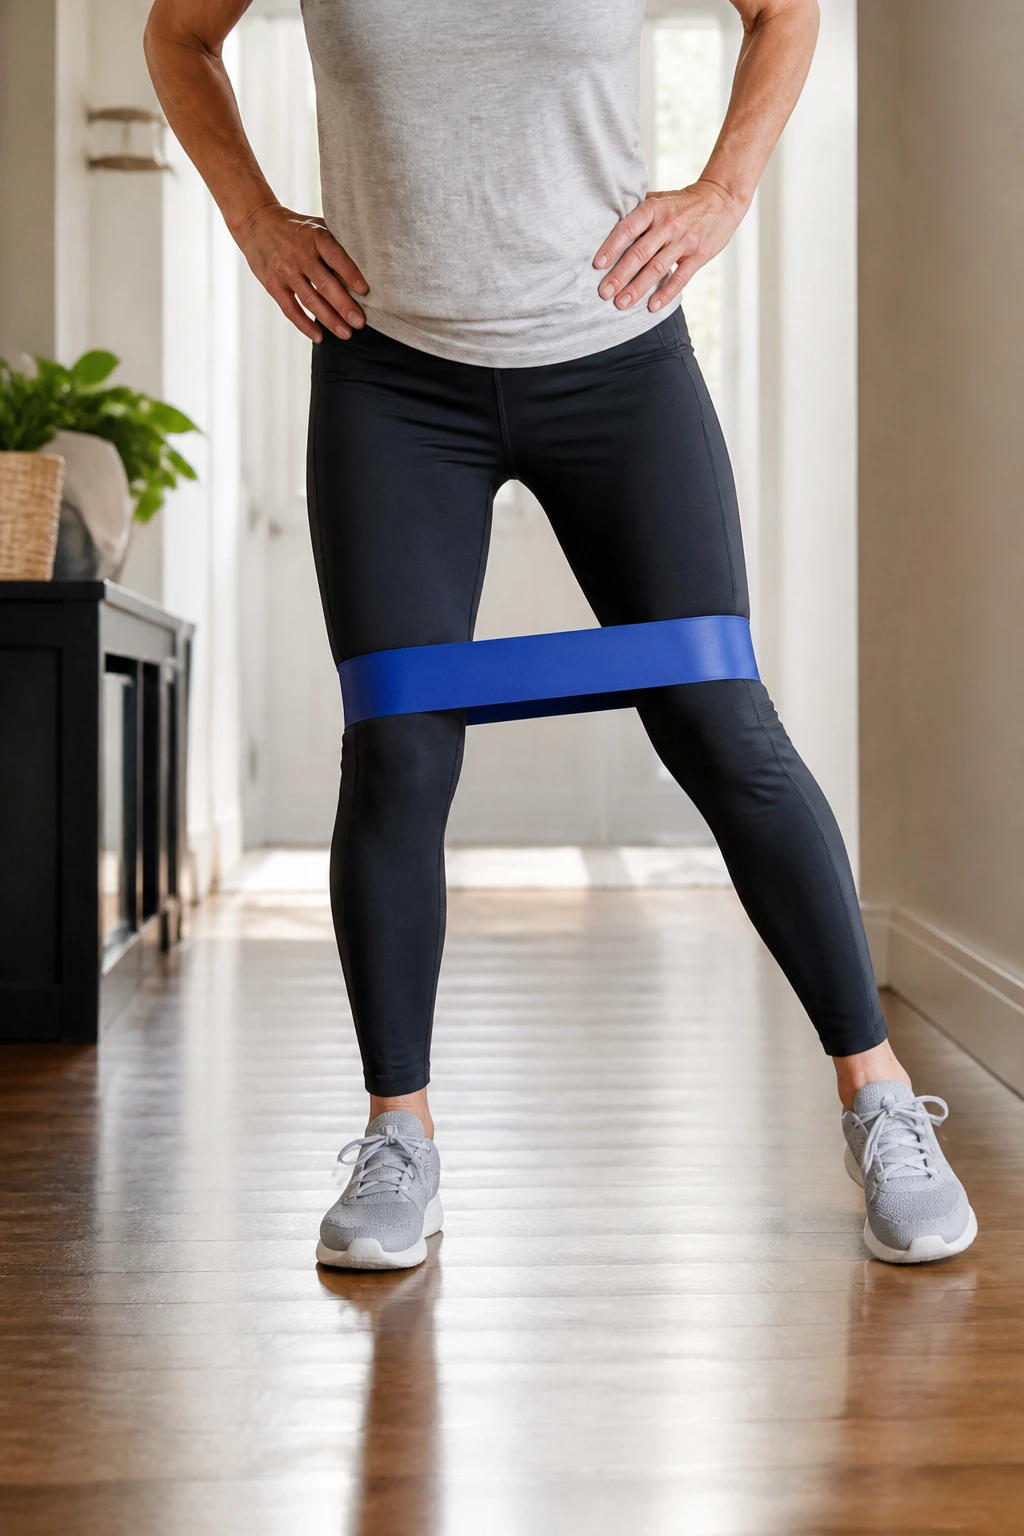
Put a band around the thighs and the whole movement changes.
Stand with a slight bend in the knees, hips back a little, and feet pointing forward. Step to the side under tension, then bring the trailing foot in without letting the band go slack. Take 8 to 12 steps each way for 2 to 3 rounds.
What Makes It Work
The band forces the outer hips to stay engaged the entire time. That’s useful for knee tracking, pelvic stability, and general steadiness when you walk.
Keep the steps small. Big side steps often turn into a sway, and sway is not the goal.
If the band rides up or feels too tight on the knees, move it higher on the thighs or switch to a lighter band.
22. Suitcase Carry
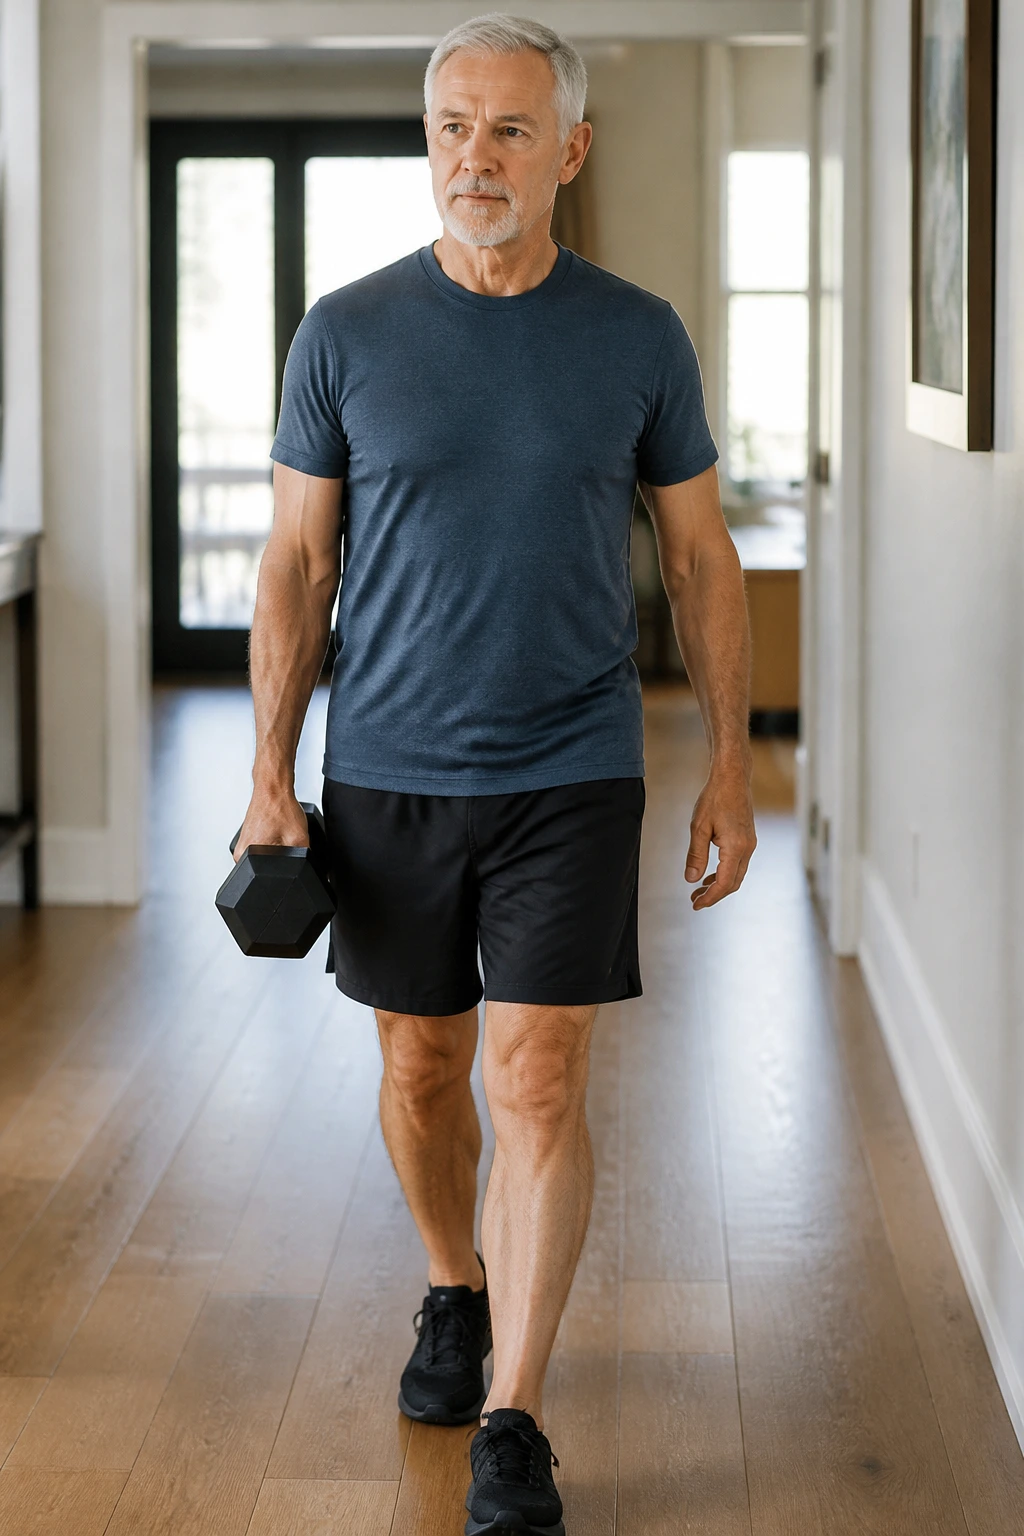
Why carry one weight instead of two? Because your torso has to fight the lean.
Hold a dumbbell, jug, or bag in one hand and walk for 20 to 40 seconds while keeping your shoulders level and your body upright. Switch sides and repeat. Do 2 to 4 rounds per side.
This move hits the obliques, grip, and hip stabilizers in a way that feels very real. Life is uneven. Loads are uneven. The suitcase carry prepares you for that.
If you lean toward the weight, it’s too heavy. If your shoulder creeps upward, it’s too heavy. The right load feels challenging without making you collapse sideways.
23. Floor-to-Chair Transfer Practice
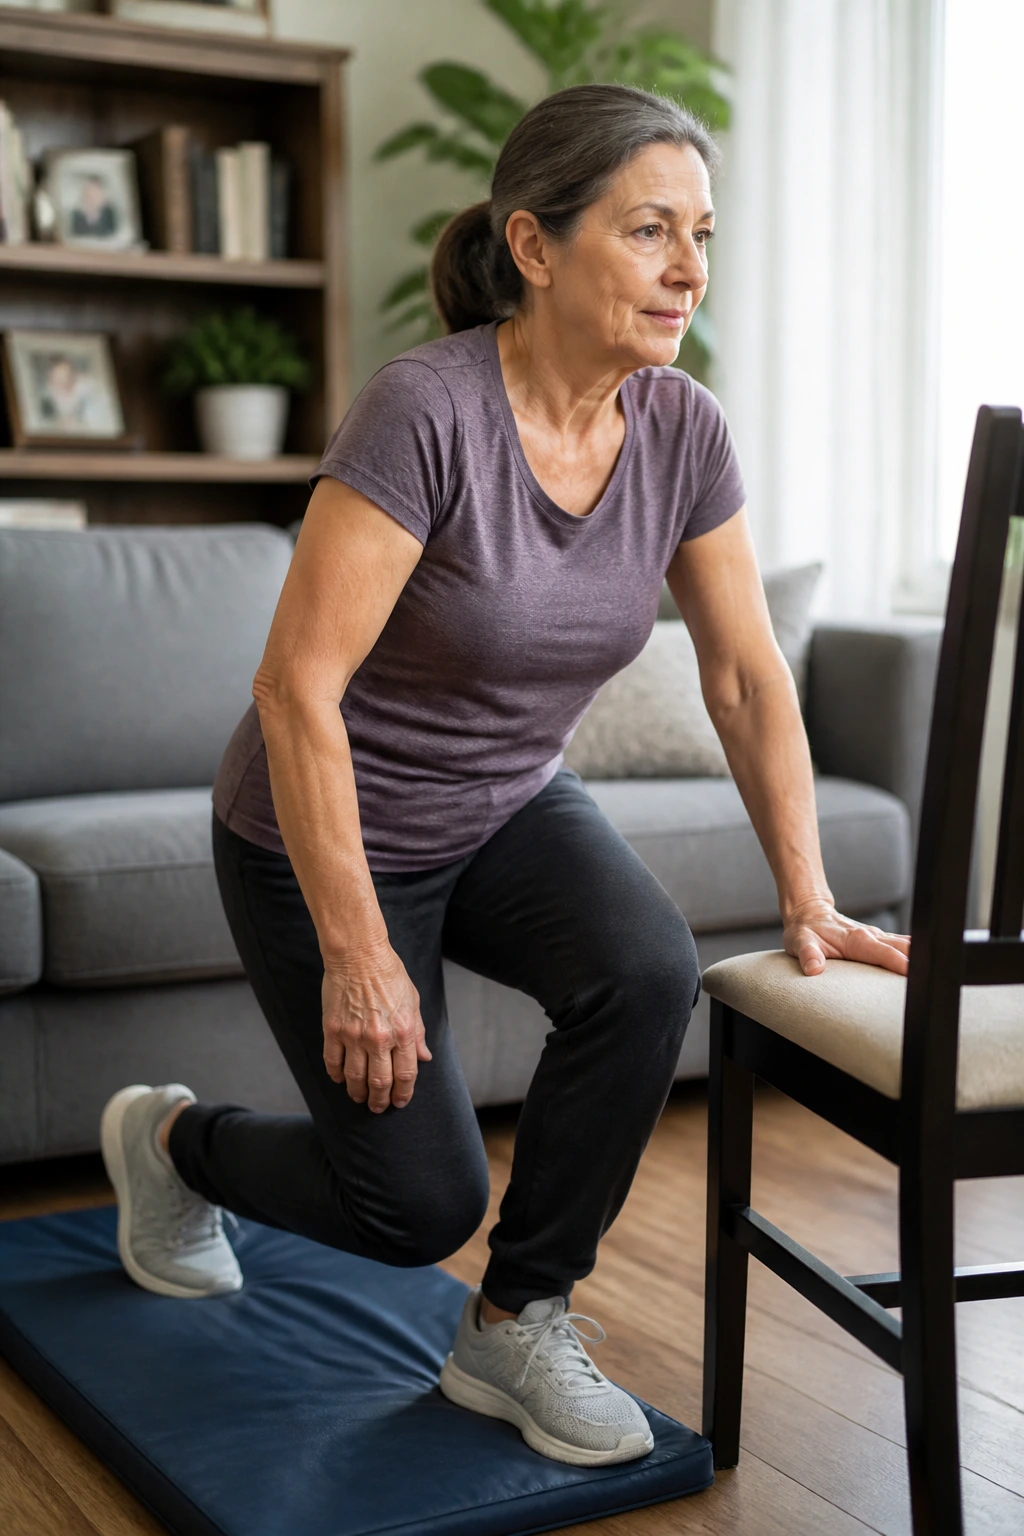
The first time you stand from the floor without using your hands, it feels like a small victory.
Use a padded mat and place a chair nearby for support. Start by kneeling, then practice getting down and up in the safest sequence you can manage — maybe side-sit, maybe half-kneel, maybe using the chair for one hand. Do 3 to 5 controlled practice reps, resting as needed.
This is not a flashy workout. It is a life skill. The floor gets involved in falls, play with grandchildren, cleaning, stretching, and the occasional dropped object. Being able to get down and back up matters.
If the floor is not appropriate for you, keep this one out and choose chair-based strength instead. There is no prize for forcing a transfer you cannot control.
24. Single-Leg Calf Raise Holds
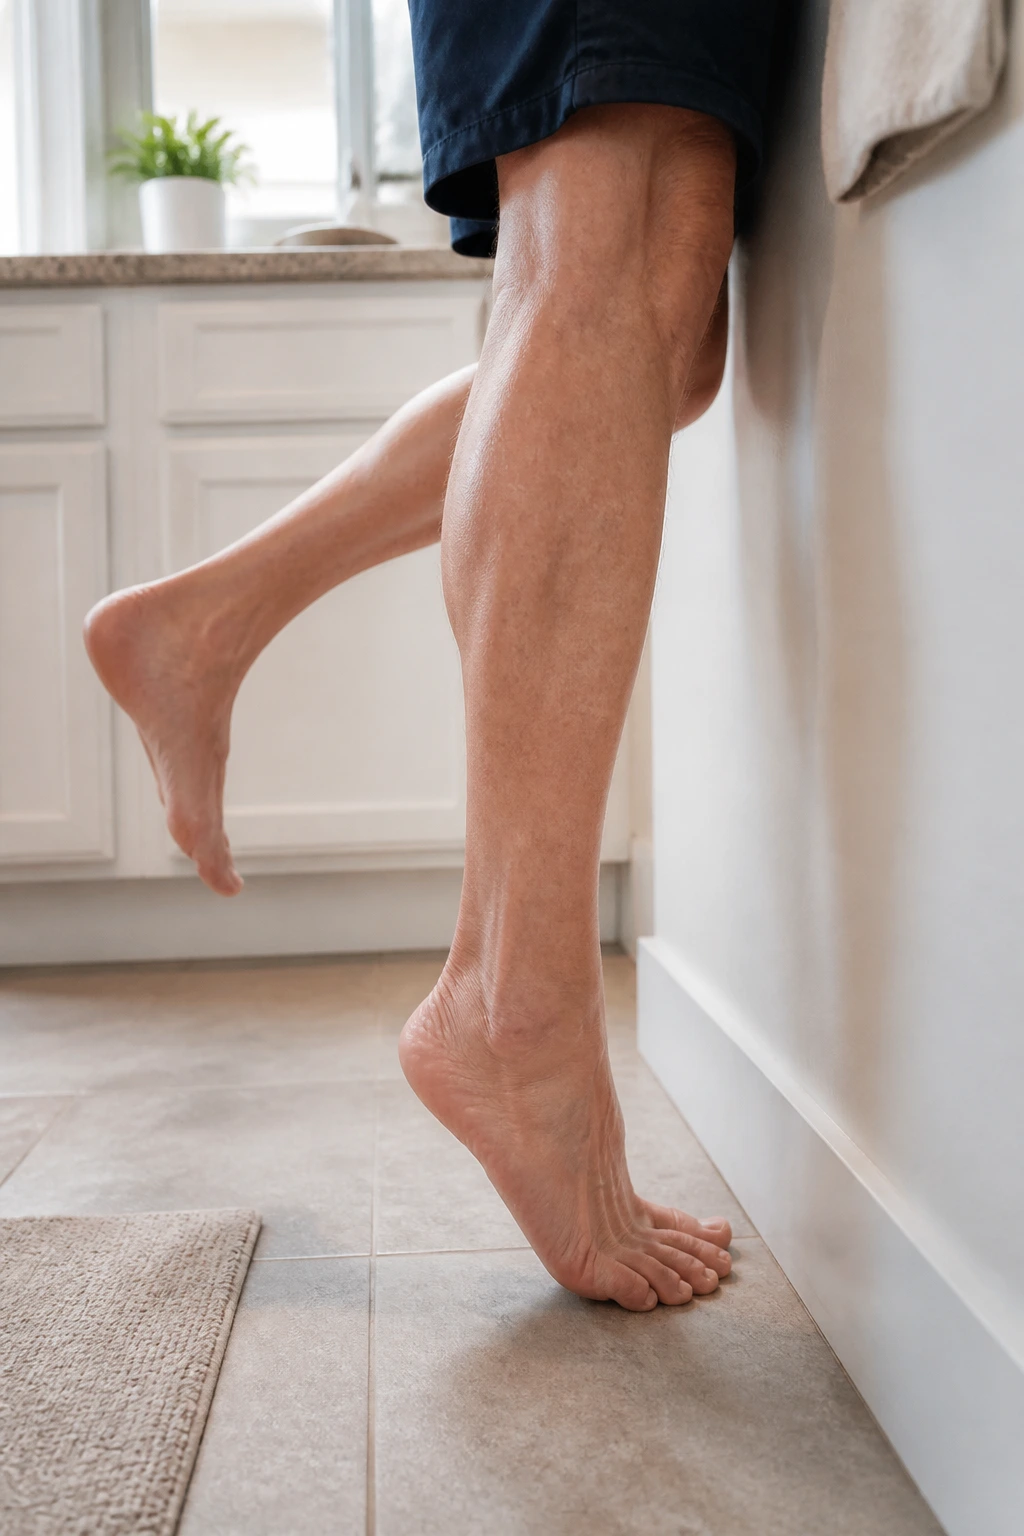
Calf raises are one of the most underrated balance drills. When you move to one leg, the ankle, foot, and hip all have to pay attention.
Stand near a wall or counter, rise onto both toes, then shift more weight onto one foot and hold for a few seconds before lowering. Work up to 8 to 10 reps per side, with a 5 to 10 second hold near the top if balance allows.
How to Make It Safer
- Keep one or two fingers on the wall.
- Press through the big toe, little toe, and heel base.
- Stop if the ankle rolls outward.
- Use a slower descent than rise.
This move is small enough to fit next to the sink while the kettle heats. That’s the kind of practicality I like.
25. Four-Move Home Circuit
If you want one repeatable routine, keep it short and plain. A simple circuit often beats a complicated plan that sits on paper and never gets used.
A Clean 8- to 12-Minute Loop
- Chair Squat to Stand: 8 reps
- Seated Band Row: 12 reps
- Wall Push-Up: 8 to 10 reps
- Farmer Carry: 30 seconds
Rest for 60 to 90 seconds, then repeat for 2 to 3 rounds.
This covers legs, back, chest, grip, and posture in one pass. It is also easy to scale: add a round when it feels comfortable, add a little weight when the reps get easy, or slow the lowering phase to make each rep count more.
I’d keep this as the default on busy days. It is not fancy. It works.
Final Thoughts
The best home strength routine for older adults is the one that feels plain enough to repeat next week. Not the one that leaves you flattened. Not the one that needs perfect motivation. Plain wins because plain gets done.
If you want a simple place to start, pick one squat pattern, one push, one pull, and one carry. Do them twice a week, keep the reps smooth, and let the challenge creep up slowly. That’s how a chair, a wall, and a couple of light weights turn into something useful.
And if a movement feels awkward the first time, that does not mean it’s wrong. It usually means your body is learning a new shape. Give it a little time, stay honest about pain versus effort, and keep the routine close to the life you actually live.
