



A stability ball looks friendly until your core has to keep it honest. That is why stability ball workouts for core strength work so well: the ball keeps asking your body to stop wobbling, and stopping wobble is where real trunk strength lives.
A lot of people treat core training like it’s only about crunches. That’s a pretty small view. The better stuff shows up when your torso has to resist motion — not just bend and straighten, but stay stacked, stay steady, and keep your ribs from flaring when your arms or legs start moving away from center.
The ball makes that harder in a useful way. A slightly softer inflation gives more give and more instability, which is why a roll-out on an overinflated ball can feel almost easy compared with one that has a little squish. Small detail. Big difference.
You’ll also notice fast whether your form is honest. If your lower back pinches, your shoulders shrug up, or your hips drift around like a shopping cart with one bad wheel, the ball is telling on you. That feedback is the whole point. It turns core work into a conversation, and the honest answer usually comes from the abs, the obliques, the glutes, and a lot of controlled breathing.
1. Forearm Plank on the Stability Ball
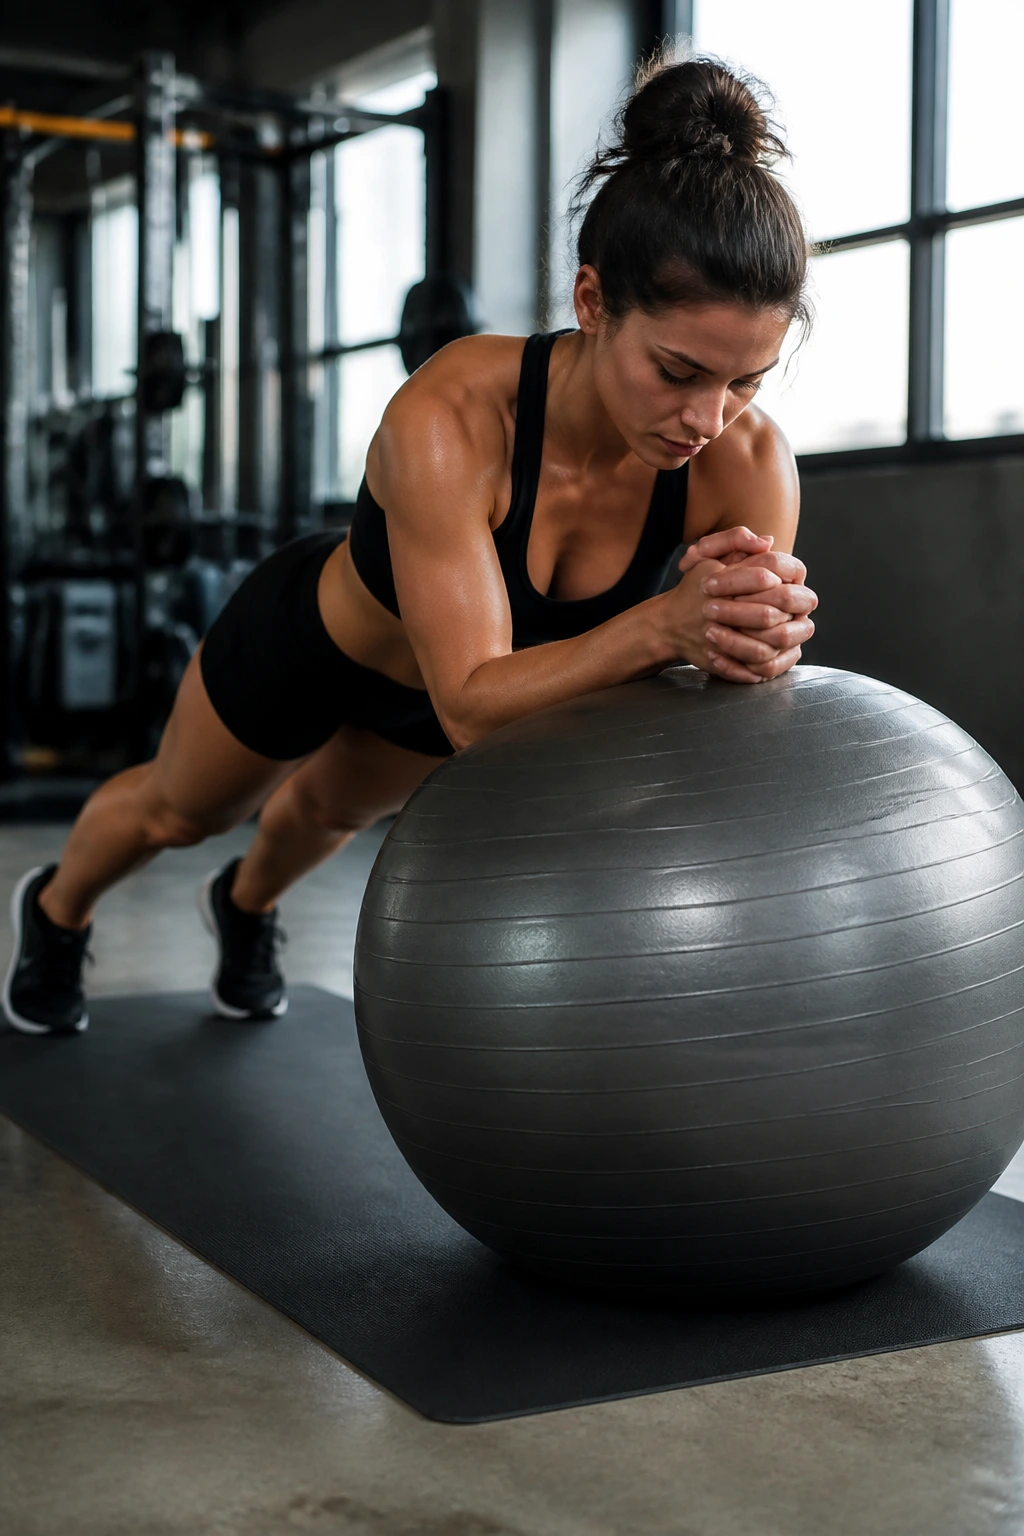
This is the place to start if you want the ball to feel awkward in the best possible way. A forearm plank on the stability ball lights up the deep brace muscles fast because your body has to stop tiny shifts before they turn into big ones.
How to Set It Up
Place your forearms on the ball, step your feet back, and spread them a little wider than hip-width at first. Your shoulders should sit right over your elbows, not drift behind them. If the ball feels too lively, take a wider stance and shorten the hold.
Hold for 20 to 40 seconds and aim for 3 rounds. If your ribs pop forward or your low back sags, stop the set right there. That’s not a failure. That’s information.
- Keep your glutes squeezed.
- Press your forearms down as if you’re trying to flatten the ball.
- Breathe through your nose if you can.
- End the set when your form gets shaky, not when your pride does.
Tiny note: a clean 25-second hold beats a sloppy minute every time.
2. Stir-the-Pot
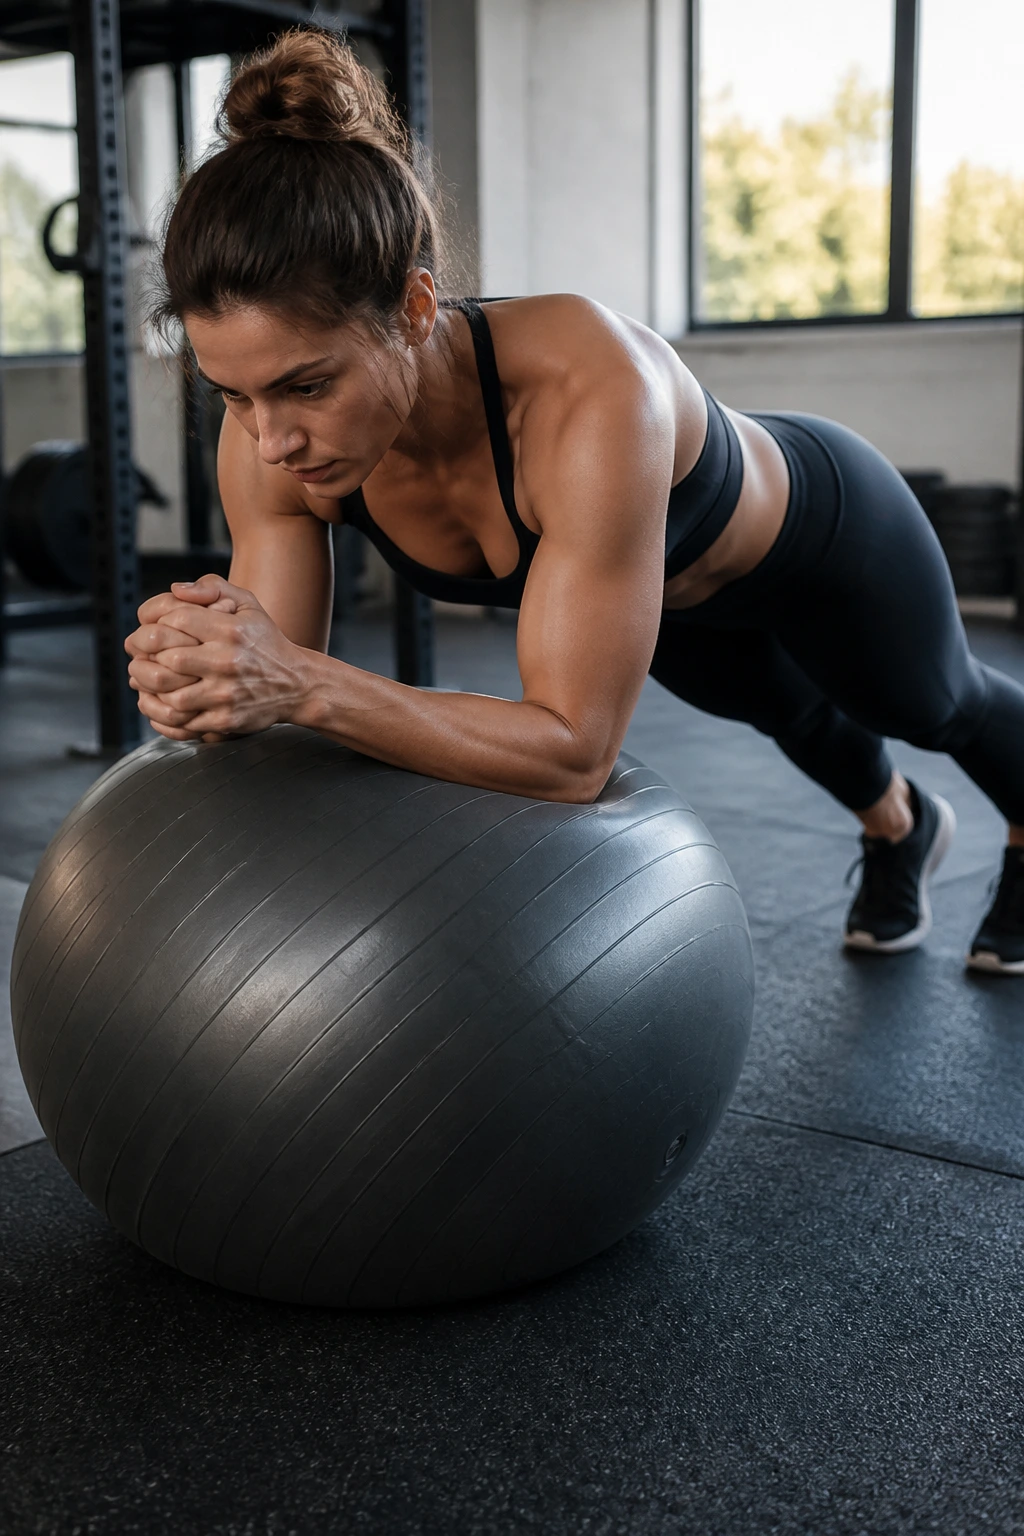
If you only pick one stability ball drill, this is the mean one. Stir-the-pot takes a plank and adds a slow circle, which means your core has to stop the body from spinning while your forearms draw tiny loops.
Set up in a forearm plank with your elbows on the ball, then make circles about the size of a dinner plate. Keep them small. If the circles get big, your shoulders take over and the abs clock out early. That usually looks tougher than it is.
I like 3 sets of 8 circles each direction or 20 to 30 seconds of continuous work. The burn shows up in the front of the abdomen, but the side walls get involved too, especially when you slow the movement down. Fast circles turn this into noise. Slow circles turn it into work.
Brutal, in the best way.
3. Stability Ball Rollout
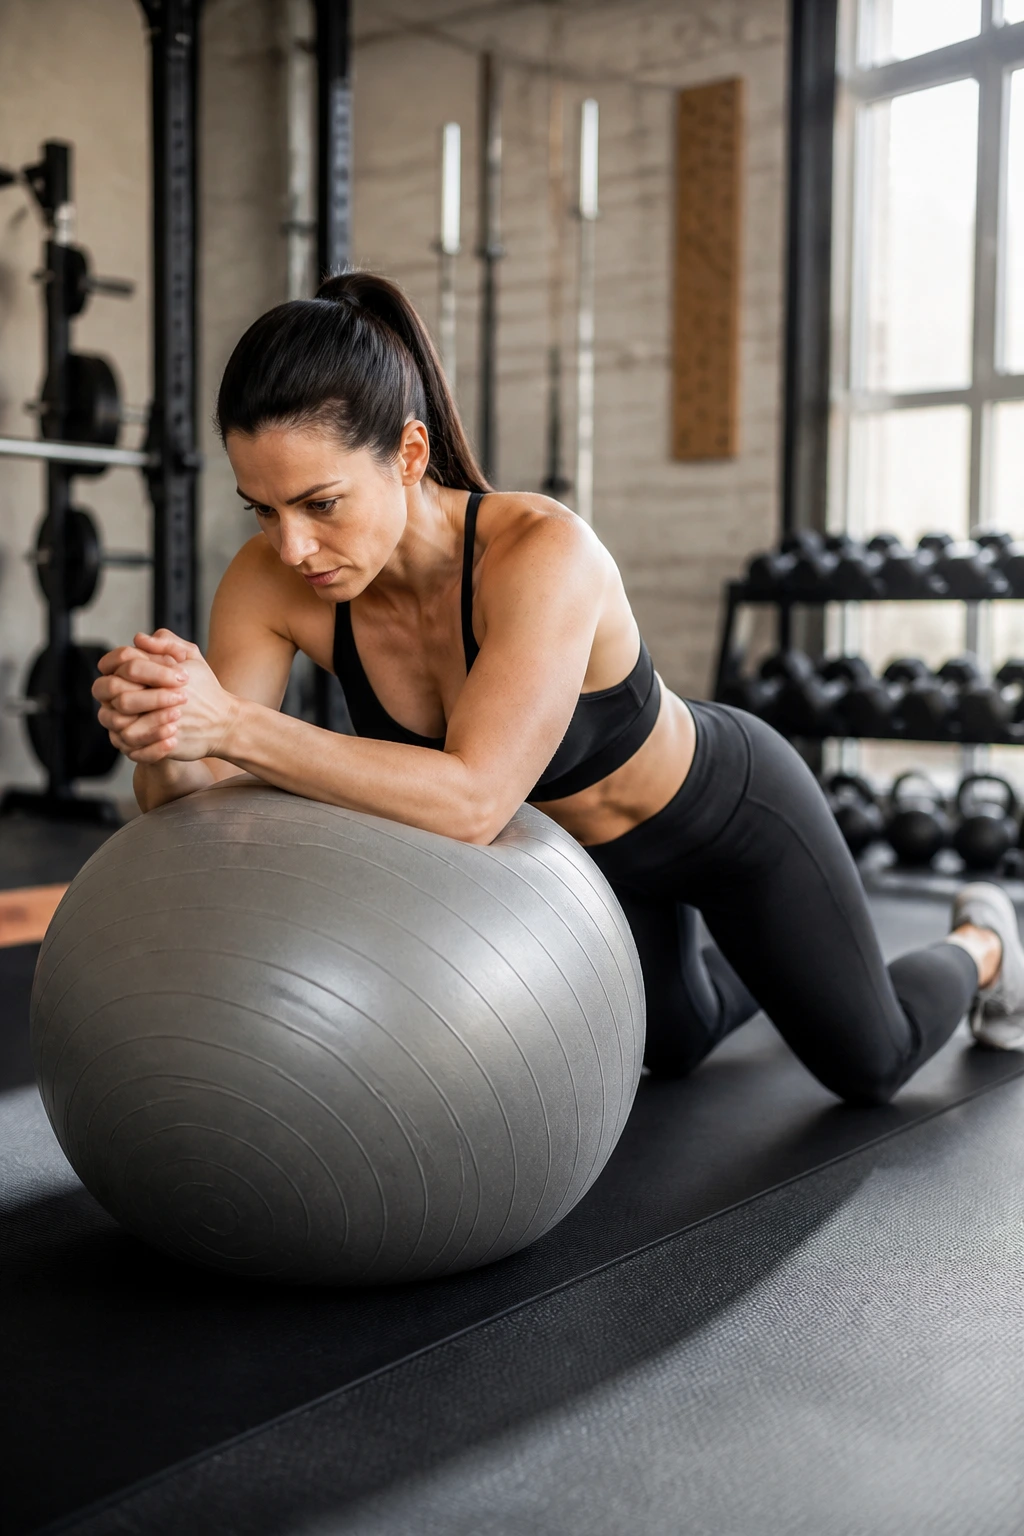
Why does a rollout feel harder than a regular plank? Because your arms are moving out in front of you while your torso tries not to collapse into extension. That long lever changes everything.
Kneel behind the ball, rest your forearms or hands on it, and roll it forward only as far as you can keep your ribs down and your pelvis quiet. Then pull it back using your abs, not a hip snap. The return should feel controlled, almost stubborn.
What You Should Feel
You want a deep pull across the front of the body, not a pinch in the low back. If your shoulders are doing all the work, shorten the range. If your lower back starts to arch, stop the descent sooner.
Try 6 to 10 slow reps for 2 to 4 sets. Use a pause of one full second at the farthest point you can control. That pause matters. It exposes bad bracing fast.
4. Stability Ball Pike
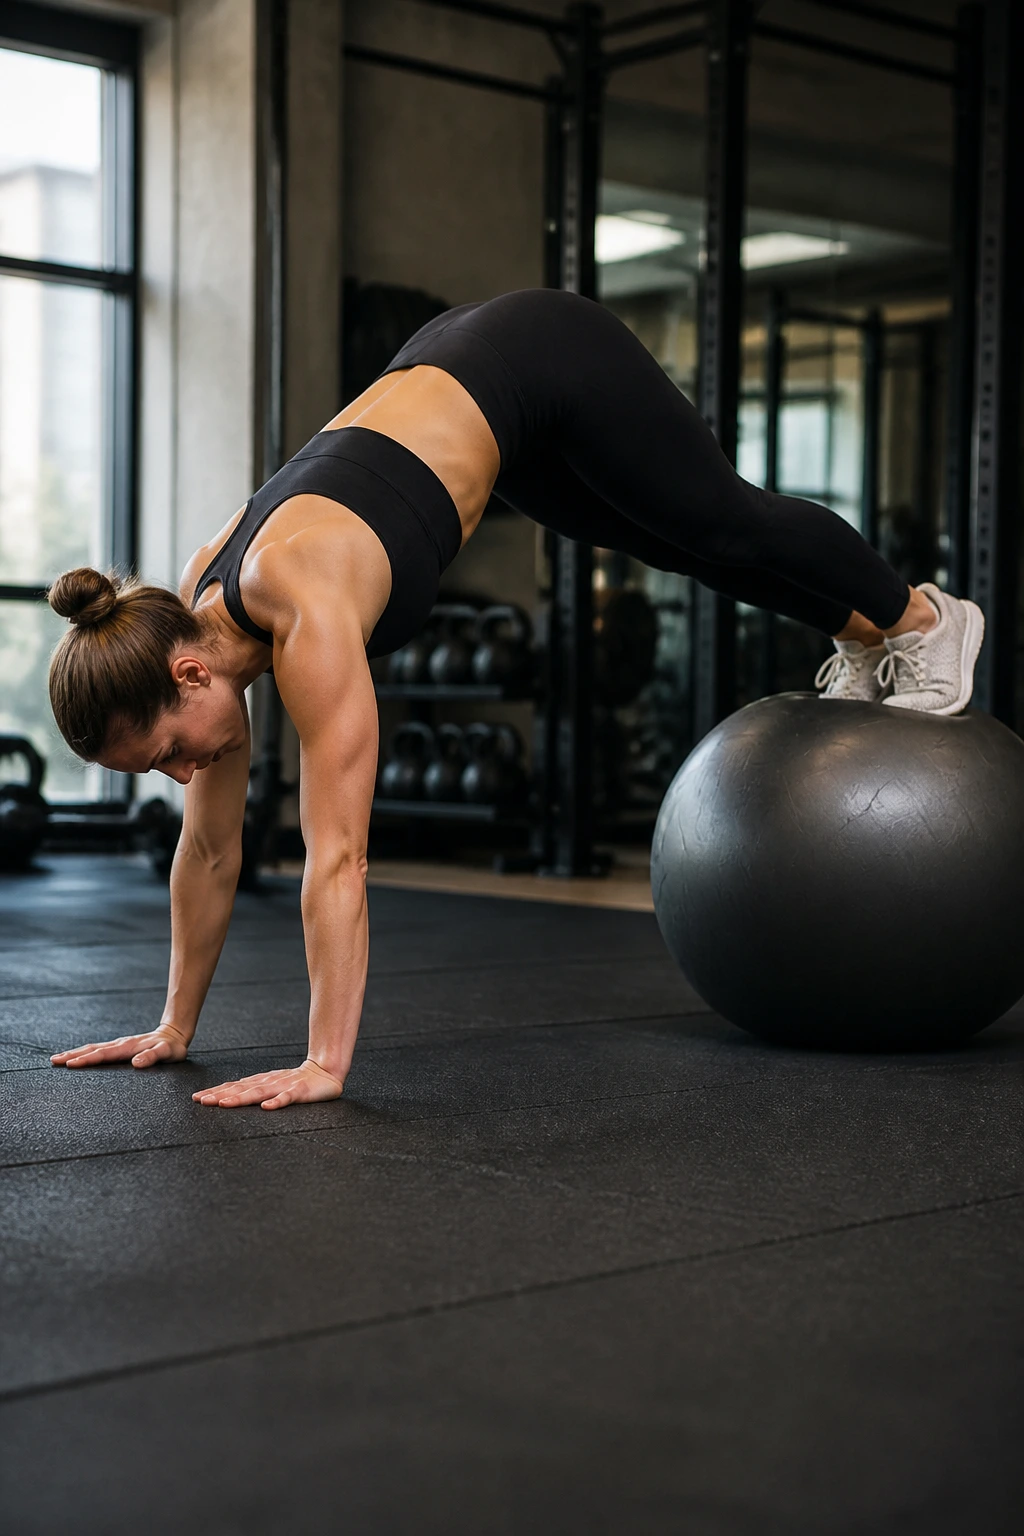
If the rollout is the warm-up, the pike is the attitude problem. The ball starts under your shins or feet, and your job is to lift your hips high enough that your body makes a sharp upside-down V.
Plant your hands on the floor and begin in a high plank. Then pull the ball inward as your hips rise. The movement should feel like your stomach is folding, not like your shoulders are yanking you around. Keep your knees nearly straight and move with a calm tempo.
- Start with 5 to 8 reps.
- Keep your shoulders stacked over your wrists at the start.
- Don’t rush the return to plank.
- Stop if your lower back takes over.
This one teaches hard-core body control. It also exposes weak shoulder stability fast, which is annoying until you realize that’s exactly why it works.
5. Stability Ball Knee Tuck
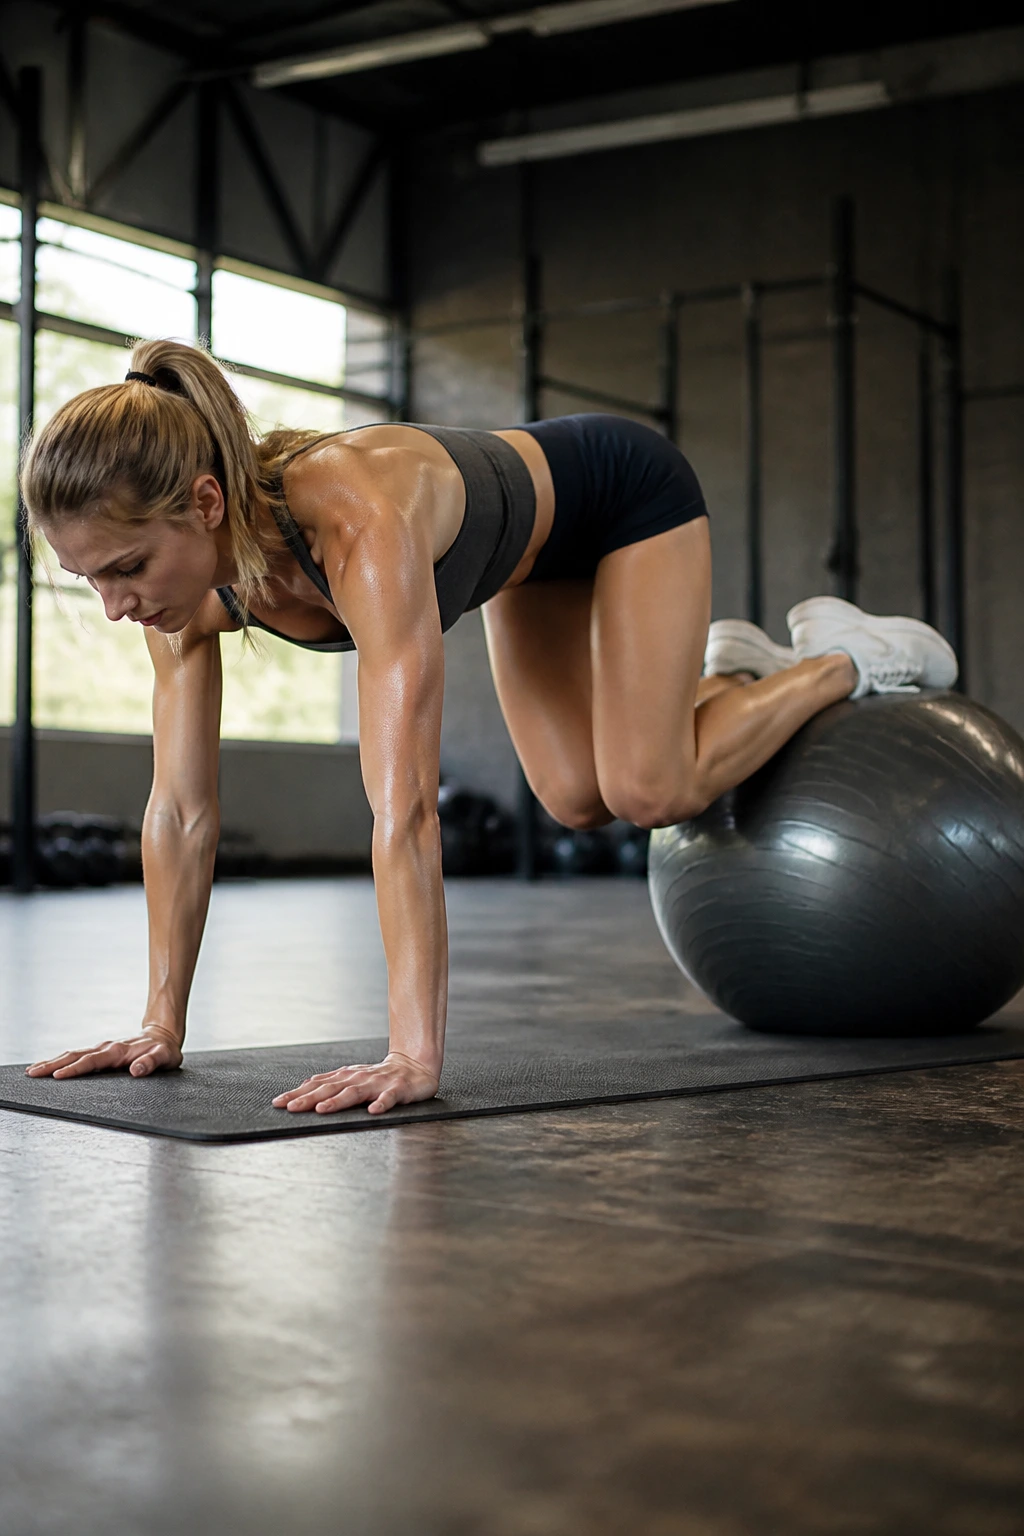
A knee tuck looks simple from across the room. Then you try to keep your hips from sagging while your knees travel in and out, and suddenly it feels like your midsection signed up for overtime.
Start in a high plank with your shins on the ball. Pull both knees toward your chest, pause for a beat, then roll the ball back out until your body is long again. The pause is the key. Without it, the movement gets sloppy and the ball starts winning.
Most people feel this in the lower abs first, then the hip flexors, then the shoulders if the set runs too long. That’s normal. What you do not want is a hard arch in the low back. If that shows up, make the range shorter and slow down the return.
Good target: 2 to 3 sets of 8 to 12 reps. Clean reps matter more than max reps here. Every time.
6. Stability Ball Jackknife
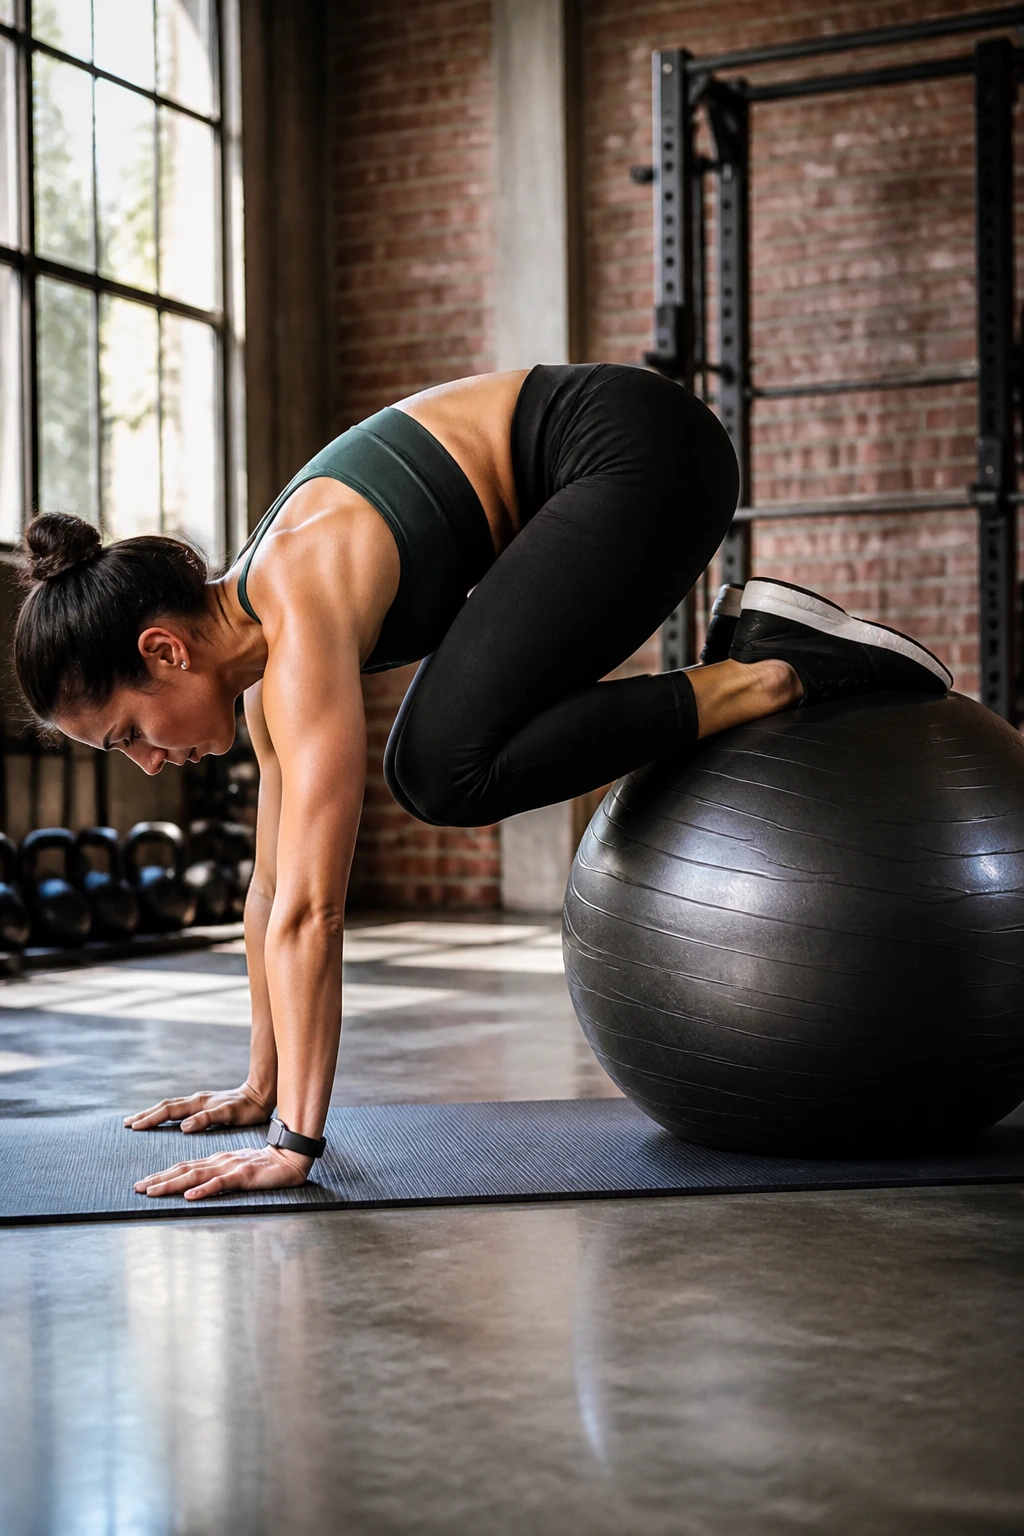
Unlike the knee tuck, the jackknife asks for a longer fold and a little more nerve. Your body stays straighter for longer, then snaps into a tighter shape as the ball comes in.
Set up in a plank with the ball under your shins or feet. Keep your legs long as you pull the ball forward, then lift your hips so your body closes at the middle. Think of it as a controlled compression, not a jump.
The nicest part? You get a clear feedback loop. If the movement feels smooth and the ball comes in close without your knees bending too much, you’re doing it right. If your shoulders cave or your neck cranes, the set is too ambitious.
Try 6 to 10 reps and rest 45 to 60 seconds between rounds. This is one of those exercises where form falls apart in a hurry once fatigue kicks in, so cut the set before the last rep turns into a scramble.
7. Stability Ball Dead Bug Press
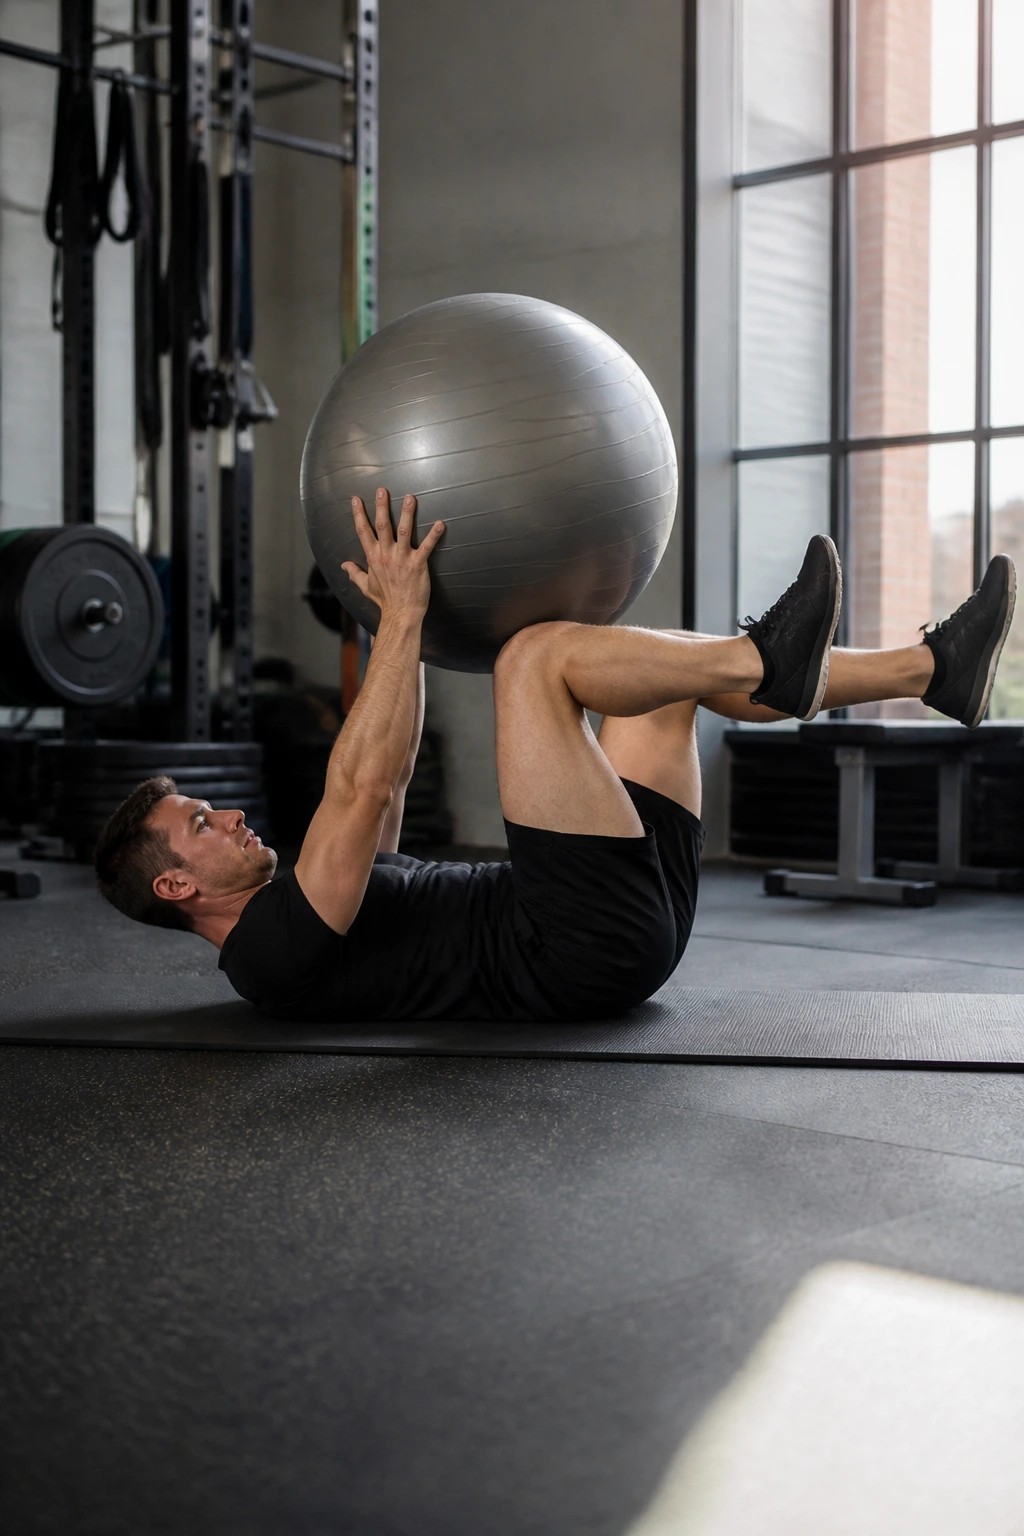
The dead bug on a stability ball is sneaky. You’re not rolling around or throwing your body at the ground. You’re pressing the ball into your hands or lower back and trying to keep the torso quiet while opposite limbs move.
Lie on your back with the ball between your hands and knees, or press your lower back lightly into the ball if you’re using it as a support point. Extend one leg and the opposite arm, then switch sides without letting the ball wobble. The body wants to rotate. Your job is to say no.
Why It Works
This is pure anti-rotation work. The abs brace, the obliques stabilize, and the deep core muscles have to keep the spine from swaying side to side. That makes it useful for people who do a lot of walking, lifting, running, or just sitting too long and then wondering why their back feels cranky.
Use 8 reps per side and keep each reach slow enough that you could stop it at any moment. If your lower back lifts, shorten the leg extension. Simple fix. Better set.
8. Stability Ball Hamstring Curl
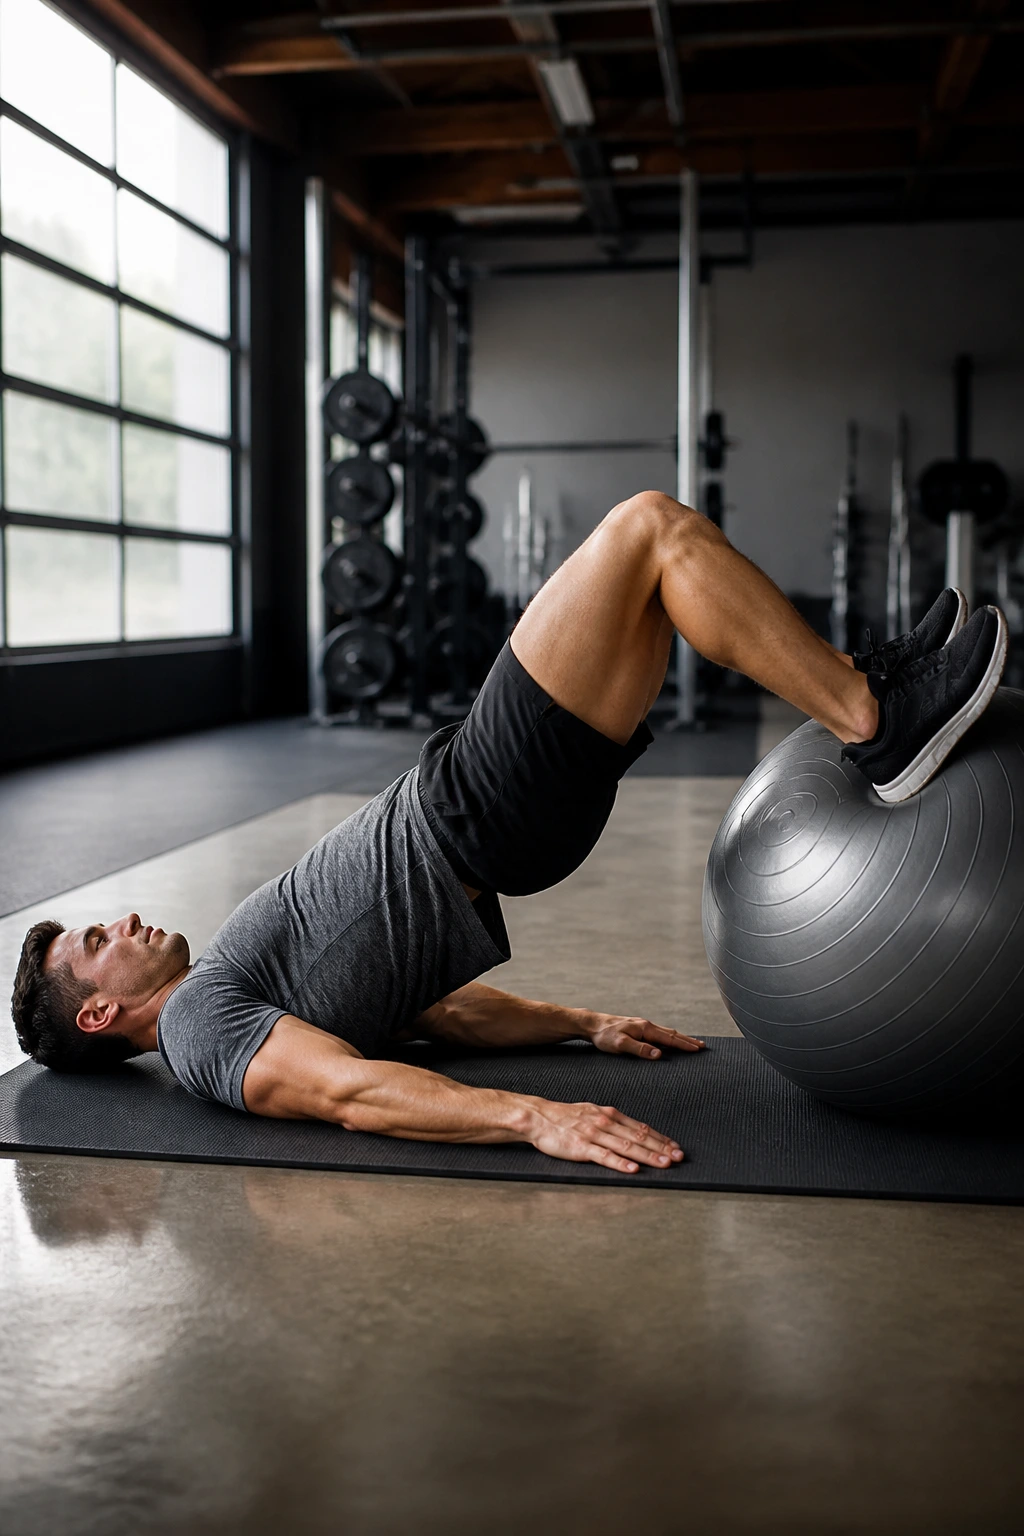
A lot of people think this is a leg move. It isn’t only a leg move. Once the ball starts sliding, your hamstrings and glutes have to keep the pelvis from dropping, and the low abs join the party too.
Lie on your back with your heels on the ball, hips lifted. Pull the ball toward your glutes by bending your knees, then roll it away under control. Keep your hips high the whole time. If the hips sag, the exercise turns into a halfhearted slide instead of a real strength drill.
The clean version feels tight through the back of the legs and lower abdomen. The sloppy version feels like a mess. You’ll know the difference.
Best range: 10 to 15 reps for 2 to 4 sets. If full two-leg curls are rough, start with shorter sets and keep the bridge position strong. No rush.
9. Side Plank on the Stability Ball
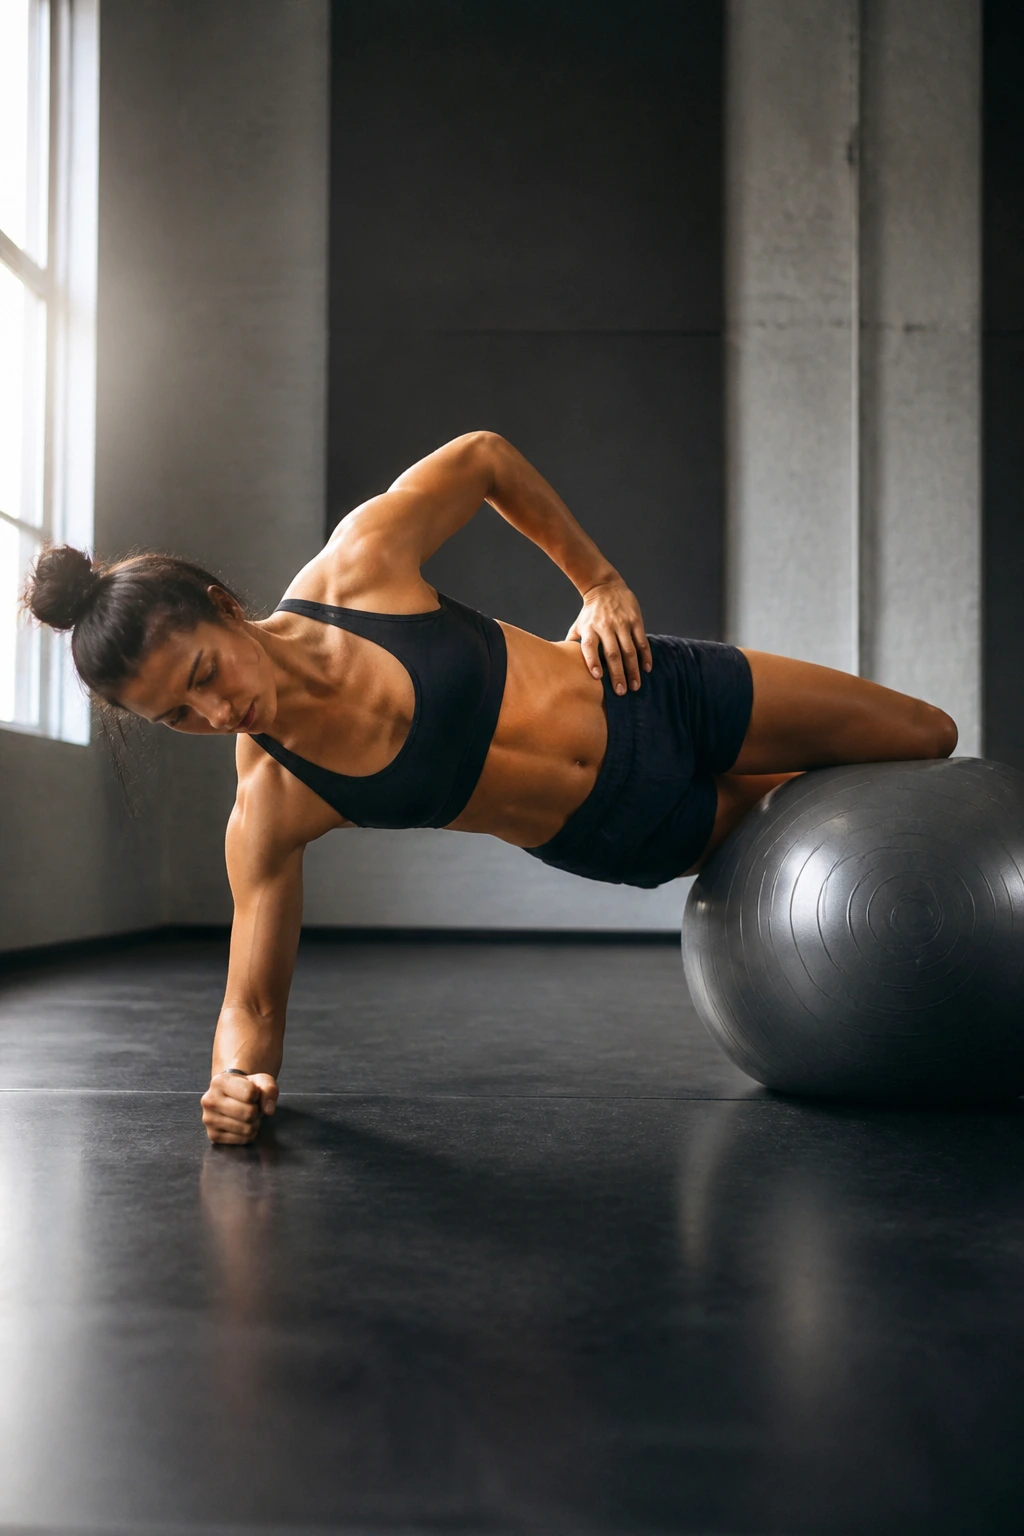
Can a side plank feel worse on purpose? Absolutely.
Place one forearm on the floor and rest the lower leg or both feet on the ball, depending on your level. Lift the hips and hold the body in one straight line from head to heel. The ball tries to roll away, which forces the side body to do the real work instead of just hanging there.
What you should notice is a deep burn along the obliques and the outer hip. If your shoulders twist forward, reset. If your top hip rolls backward, shorten the lever by separating your feet a little more. The setup should feel demanding but not chaotic.
How to Use It
Hold for 15 to 30 seconds per side. Two or three rounds is plenty. If you want more challenge, lift the top leg for the last five seconds. That tiny change can turn a decent set into a serious one.
10. Stability Ball Crunch
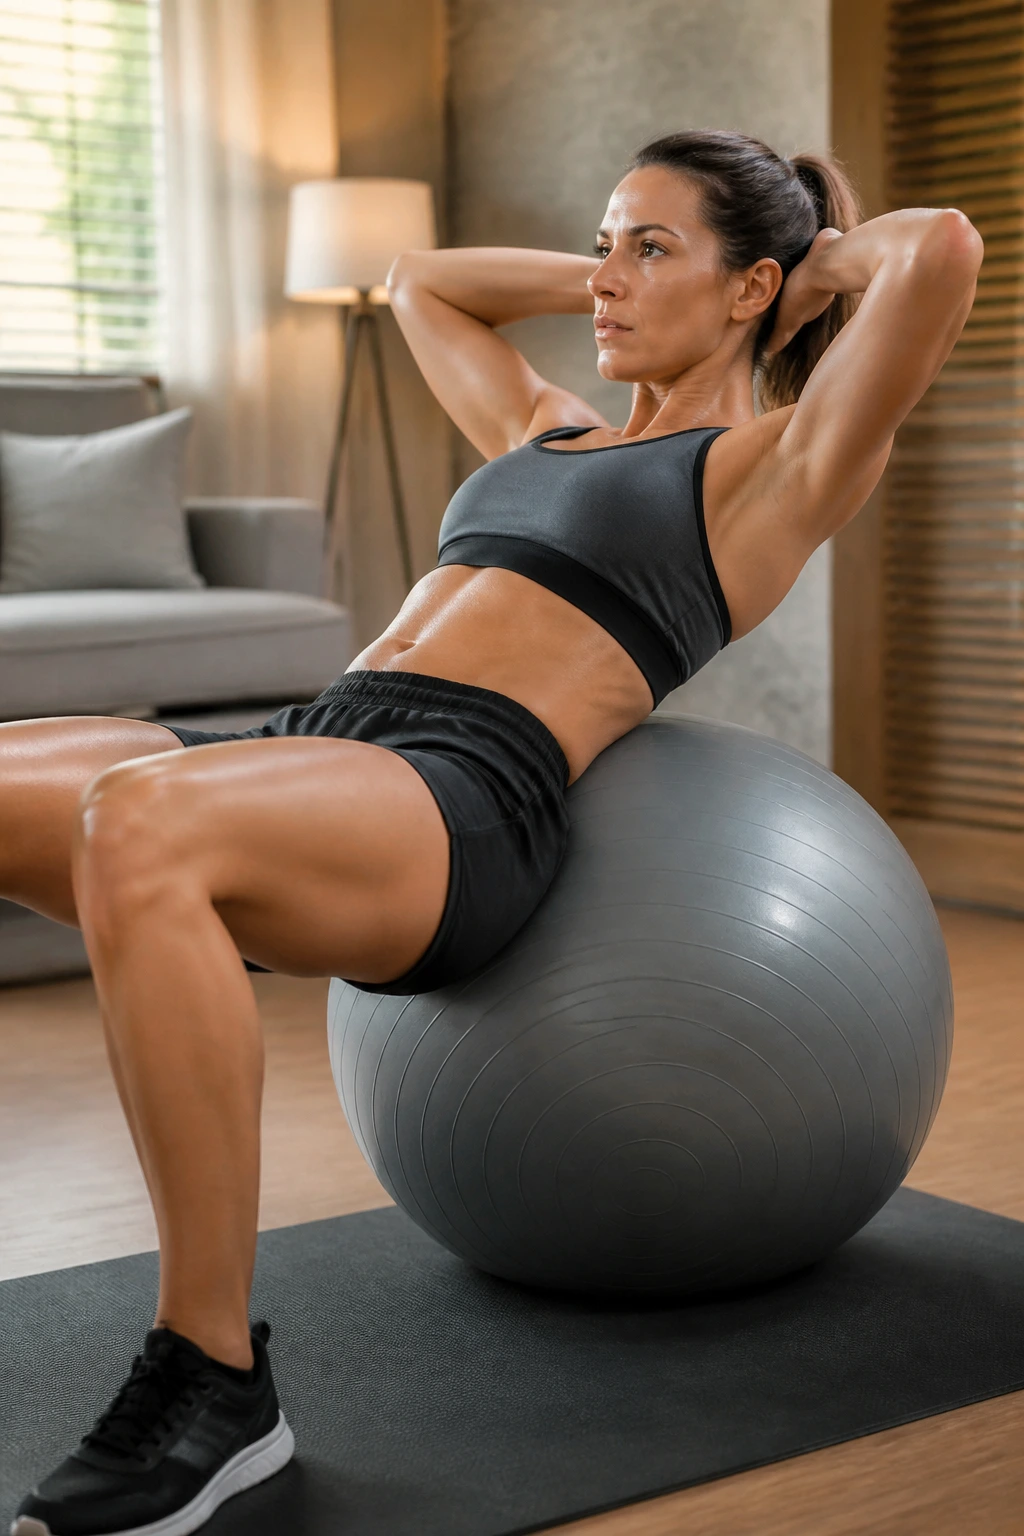
A stability ball crunch is not a sit-up with a prettier name. The ball lets your spine move through a longer range, which means the abs work from a stretched position and have to finish the curl instead of getting lazy halfway up.
Sit on the ball, walk your feet out until your lower back is supported, and let your upper back drape over the curve. Crunch up by curling the ribs toward the pelvis, then lower slowly until the shoulder blades are almost back on the ball. Almost. Don’t flop all the way back.
The best version feels controlled, not yanked. You should be able to pause at the top and hold the ribs down instead of flaring them open.
Try 12 to 15 reps for 2 to 4 sets. If your neck starts helping too much, place a hand lightly at the side of the head and keep the movement smaller. The goal is abdominal tension, not a neck workout wearing a disguise.
11. Stability Ball Russian Twist
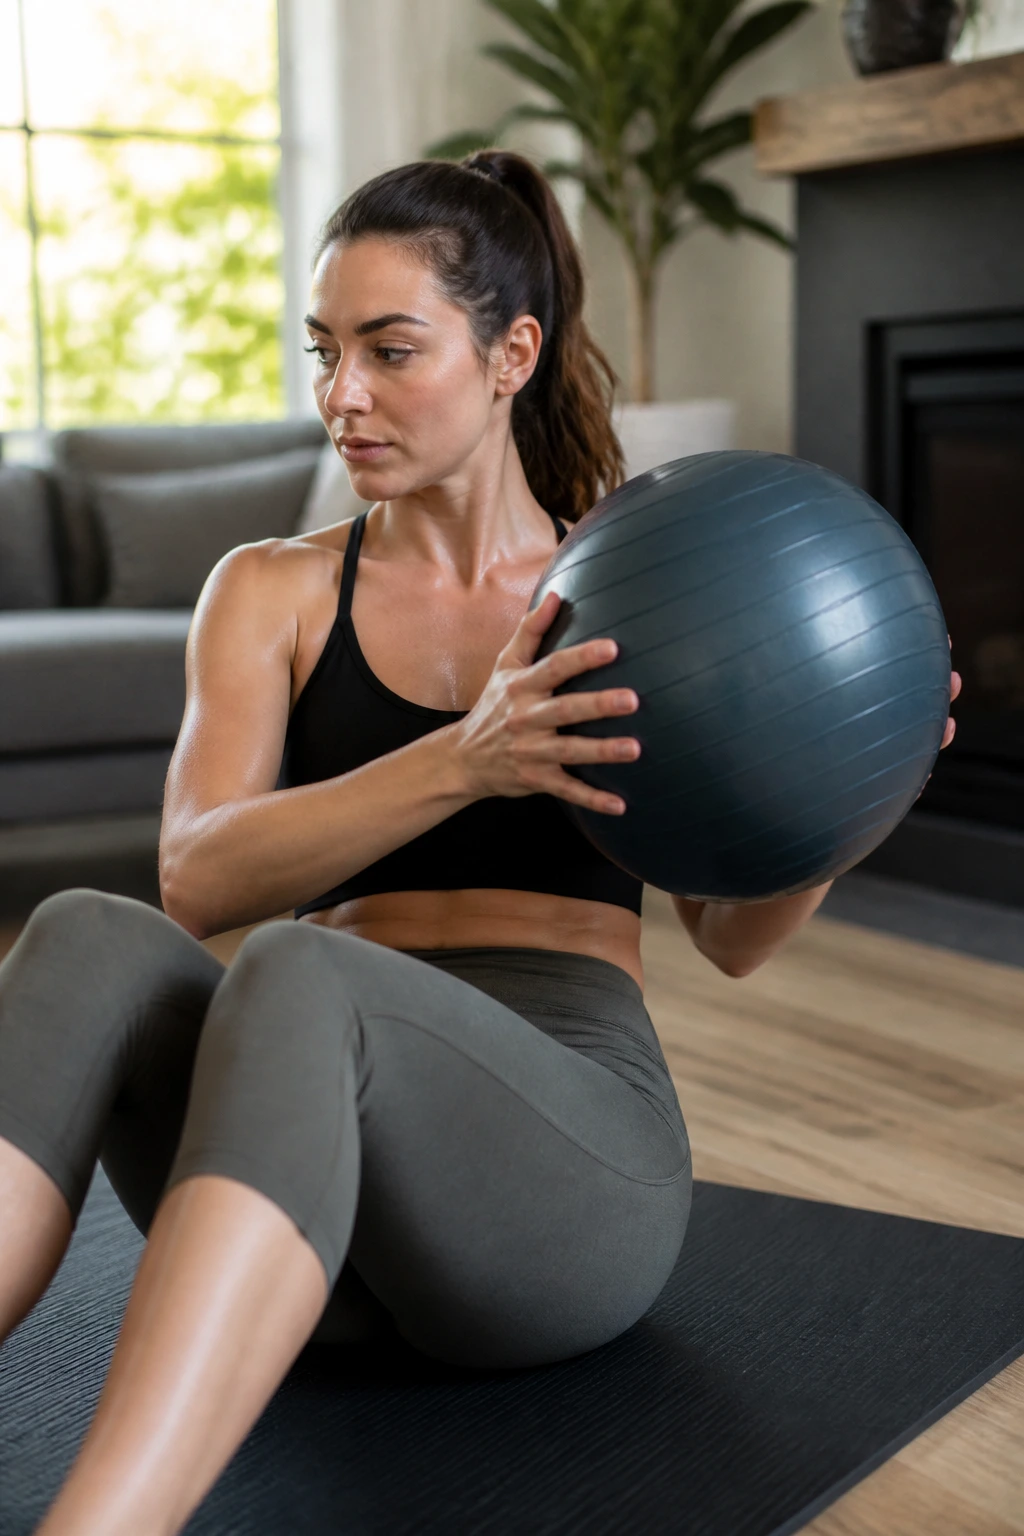
A seated twist with a stability ball in your hands is one of those moves that gets rushed a lot. Bad idea. If you swing the ball around fast, the hips and shoulders move together and the exercise loses the thing that makes it useful.
Sit tall with your feet planted and hold the ball at chest level. Rotate the ribcage side to side while the pelvis stays mostly quiet. The movement does not need to be huge. In fact, smaller twists usually hit the obliques better because you’re not cheating with momentum.
After a few clean reps, you should feel the side walls of the torso wake up. If your low back complains, shorten the range and keep the chest lifted.
Useful dose: 10 to 12 twists per side. Slow enough that the ball feels a little heavy in your hands. Fast enough to keep attention. That balance matters more than people think.
12. Stability Ball Pass-Through
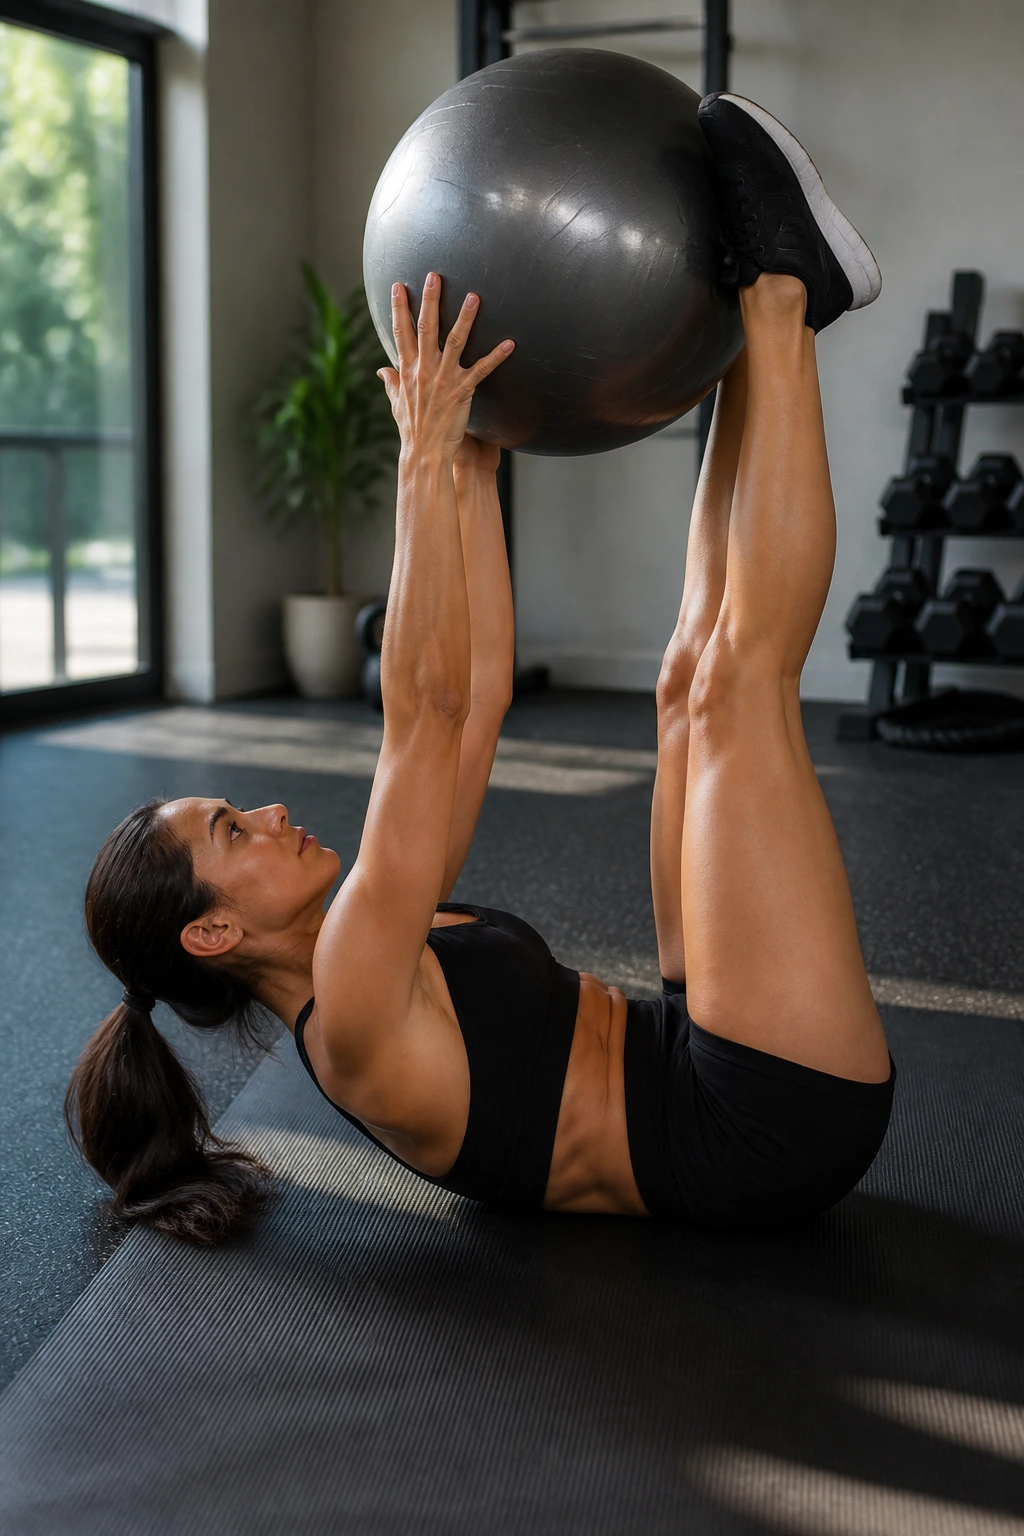
This one looks a little odd, which is why people skip it. They shouldn’t. The pass-through forces the trunk to stay fixed while the arms and legs do a coordinated transfer, and that demands real control.
Lie on your back and hold the stability ball overhead. Lift your legs and torso slightly, then pass the ball from your hands to your feet, lower it toward the floor, and bring it back the other way. The body wants to rock. Try to stop that. Keep the motion clean and the transfer smooth.
Unlike crunches, this asks for coordination under tension. You feel the abs, sure, but you also get the deep brace muscles that keep the ribs from popping and the pelvis from tipping.
A good start is 6 to 8 passes total. Keep the reps slow and controlled. If the transfer gets sloppy, use one foot at a time or keep your shoulders down more between passes.
13. Stability Ball Back Extension
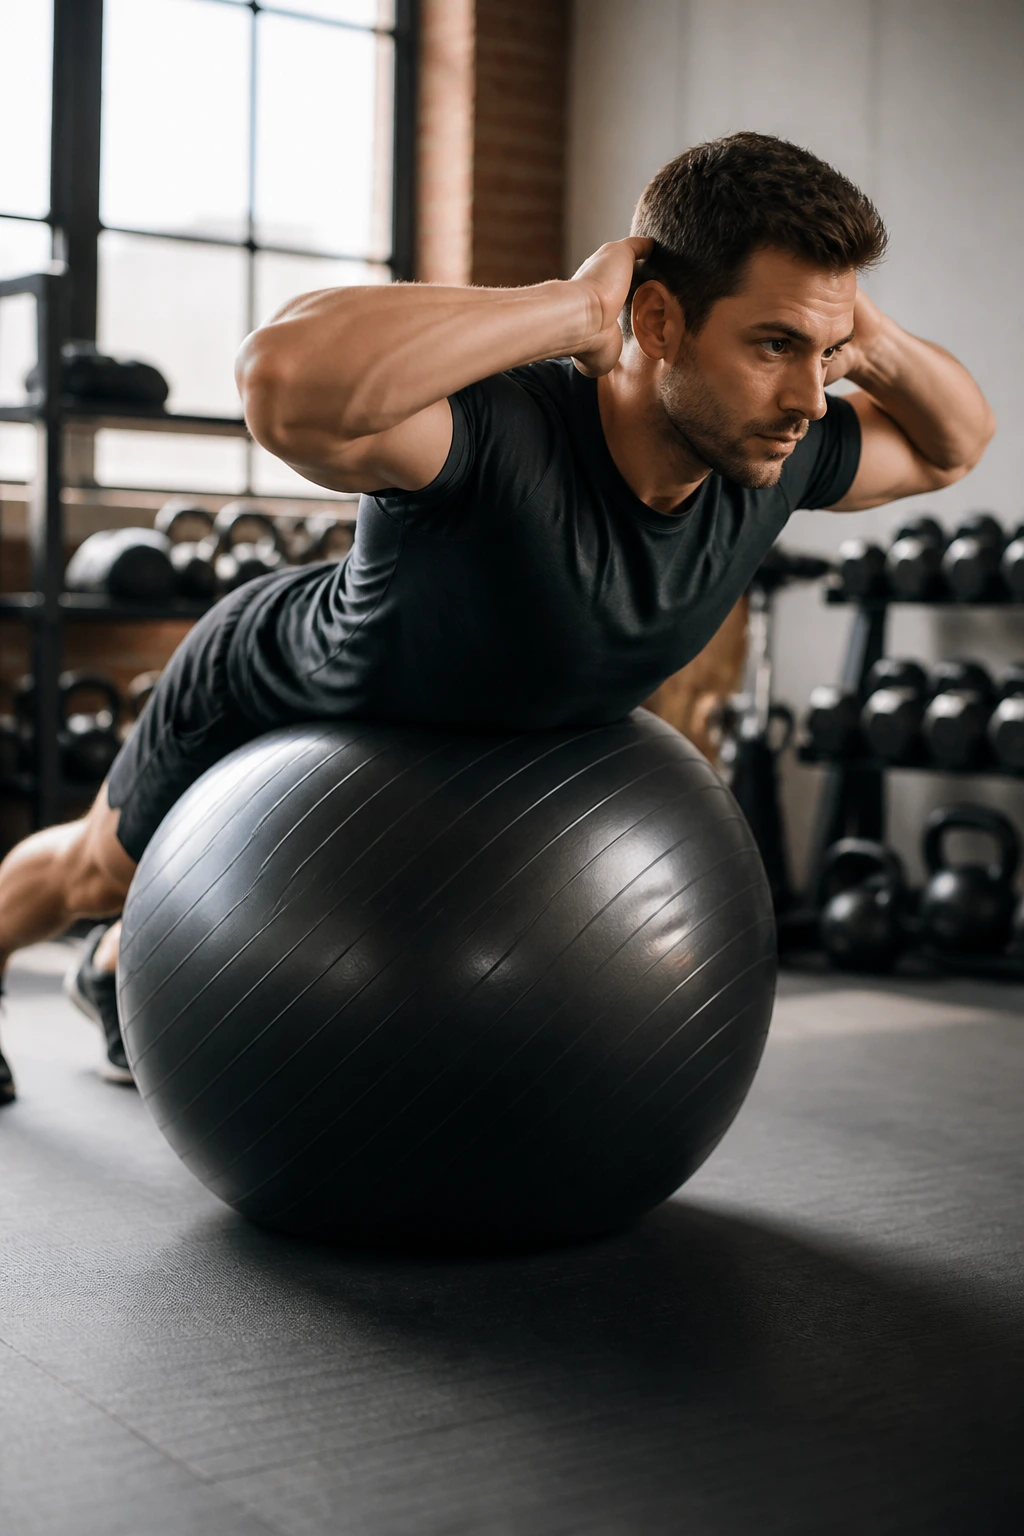
People hear “core” and forget the back side. That’s a mistake. A strong torso needs the spinal erectors, glutes, and upper-back muscles working together, and the stability ball back extension trains that chain in a clean, obvious way.
Lie face down over the ball with your feet anchored and your hips supported. Hinge up through the chest until your body makes a long line, then lower under control until your torso hangs just enough to stretch. Don’t fling yourself upward. That’s how the low back steals the set.
What to Watch For
- Keep your neck neutral.
- Squeeze the glutes at the top.
- Rise until the body is long, not overarched.
- Stop if you feel a pinchy compression in the spine.
Use 8 to 12 controlled reps. The top position should feel strong, not jammed. That distinction matters more than the number on the page.
14. Stability Ball Bird Dog
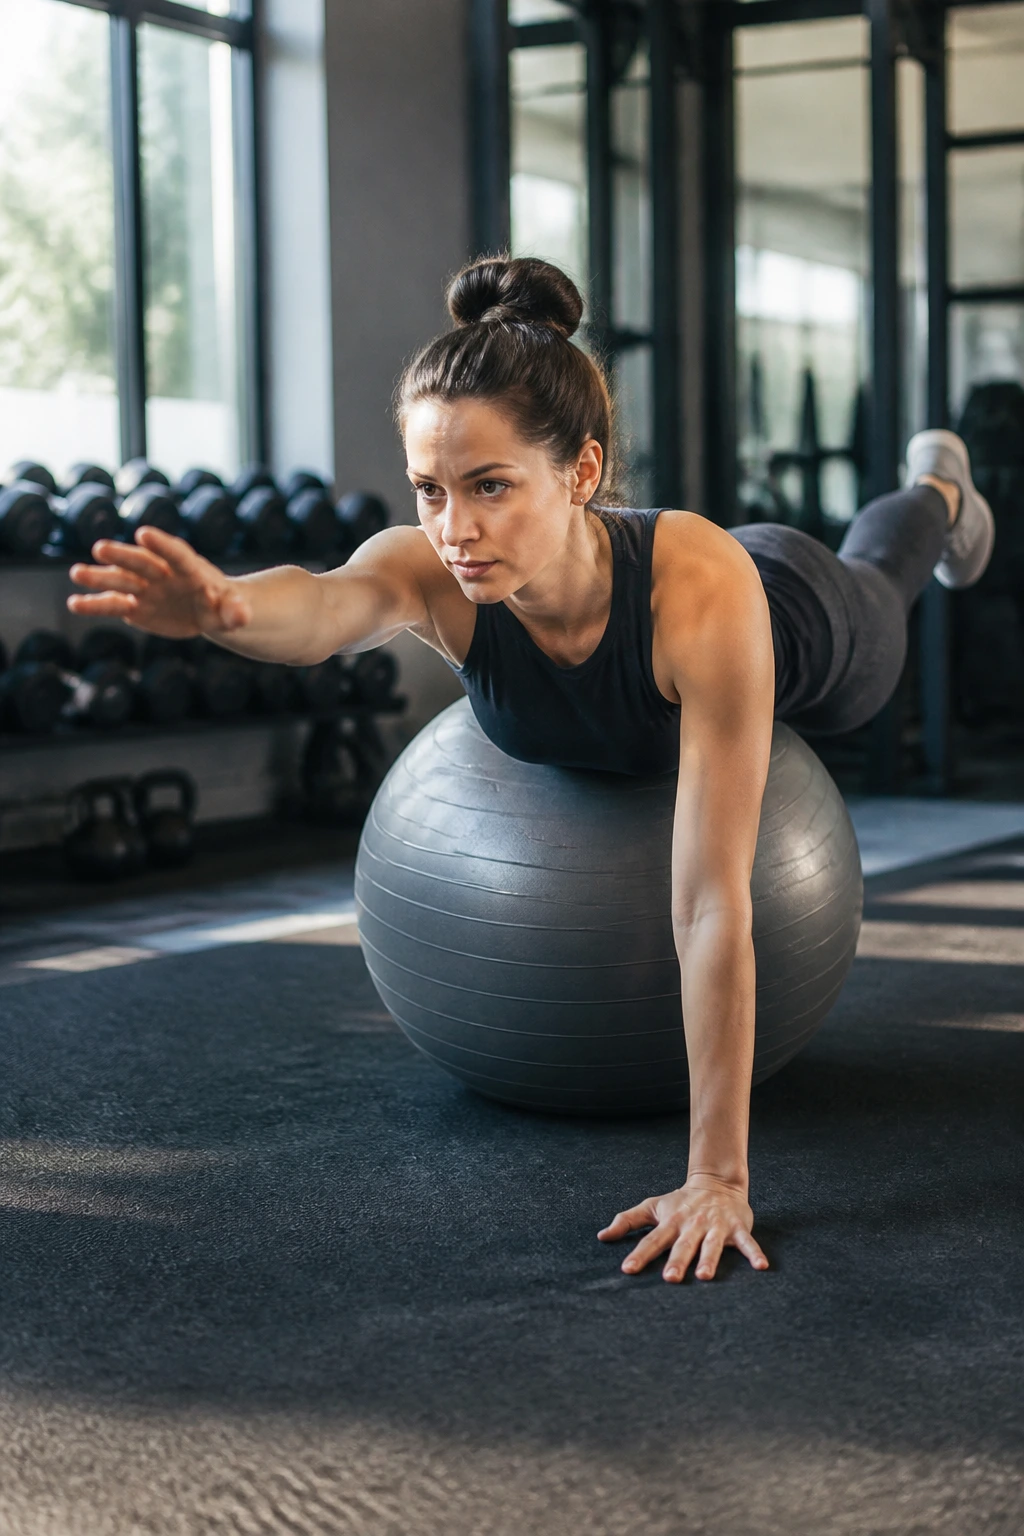
The bird dog on a stability ball is the least flashy drill here, and one of the smartest. Put your stomach and hips on the ball, hands on the floor, then extend one arm and the opposite leg until your body stops swaying.
The ball makes the setup less forgiving, which is exactly why it works. The trunk has to keep the pelvis level while the limbs reach away from center. If your torso rolls hard to one side, cut the reach shorter and slow the return.
This is a quiet exercise. No drama. No bounce. Just careful control.
How to Get It Right
Hold each extension for 2 to 3 seconds and do 6 to 8 reps per side. You should feel the lower abs, glutes, and the long muscles beside the spine working together. If your low back feels like it’s doing all the lifting, your range is too big.
15. Wall Squat with the Stability Ball
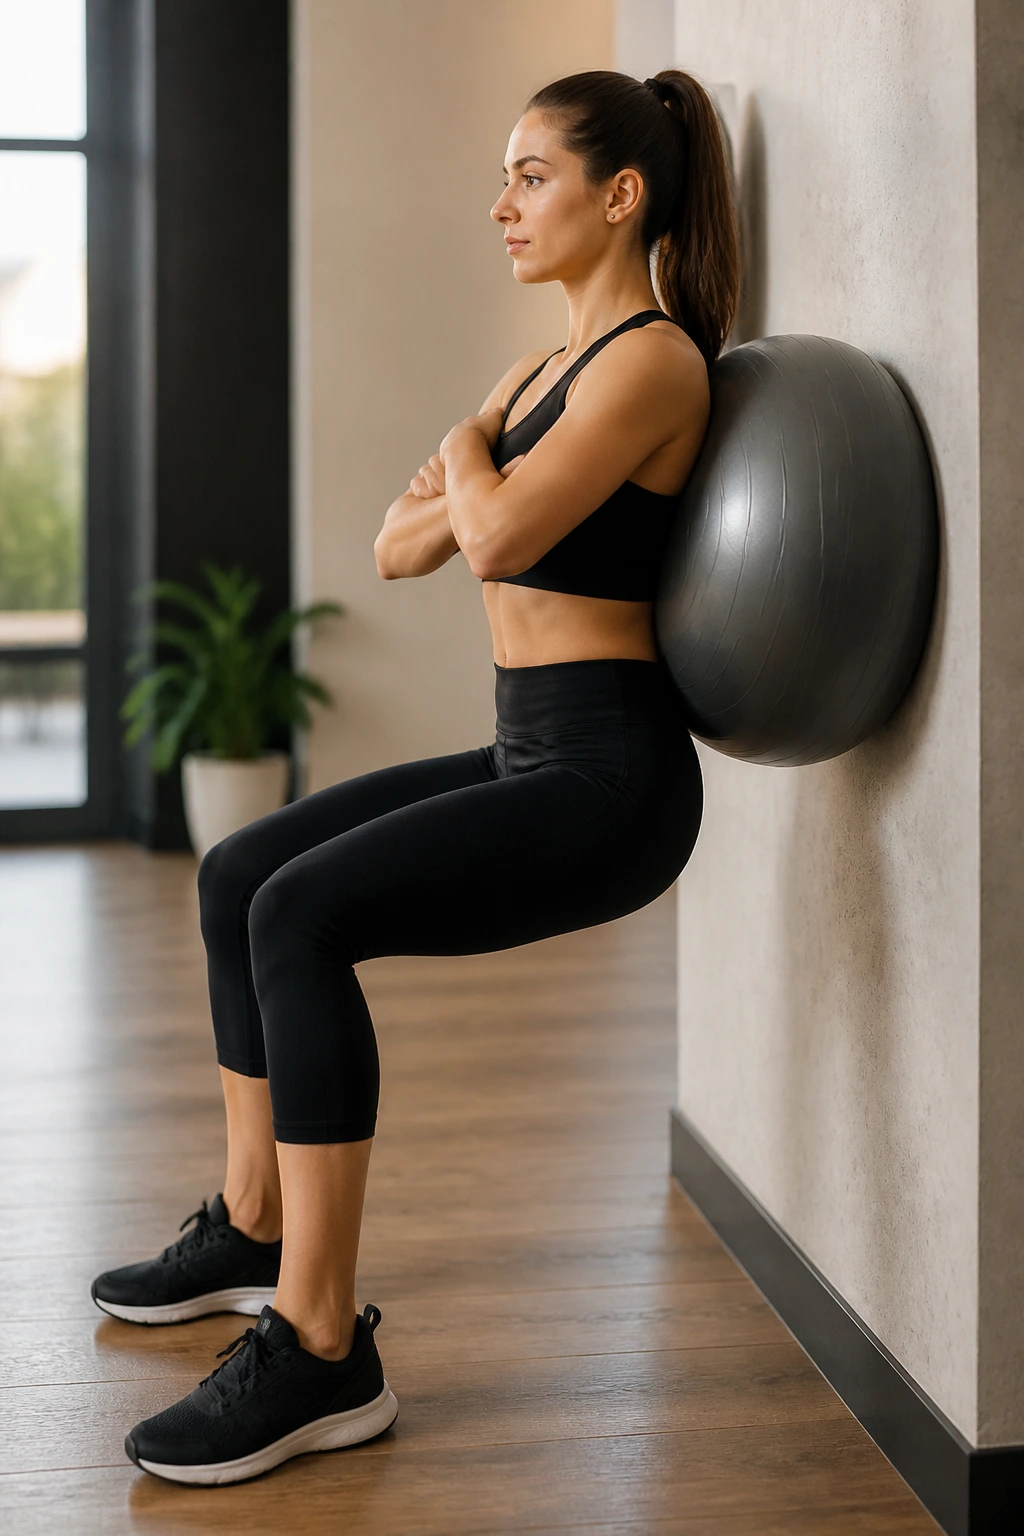
Why put a stability ball between you and the wall? Because the ball gives you feedback that a plain air squat never will. It forces you to keep your ribs stacked, your feet grounded, and your torso honest while the legs bend and straighten.
Lean the ball into a wall, rest your lower back against it, and sink into a squat. Hold the bottom for a second or two, then stand back up. You can also keep it as an isometric hold if you want more core demand and less leg burn. Both versions work.
The core job here is not dramatic, but it’s real. Your trunk has to stop the chest from folding and the pelvis from dumping forward. The ball makes that easier to feel.
Try 8 to 12 slow reps or 20 to 45-second holds. Keep your feet about shoulder-width apart. If your knees cave inward, reset the stance and lower only as far as you can stay organized.
16. Stability Ball Plank Shoulder Tap
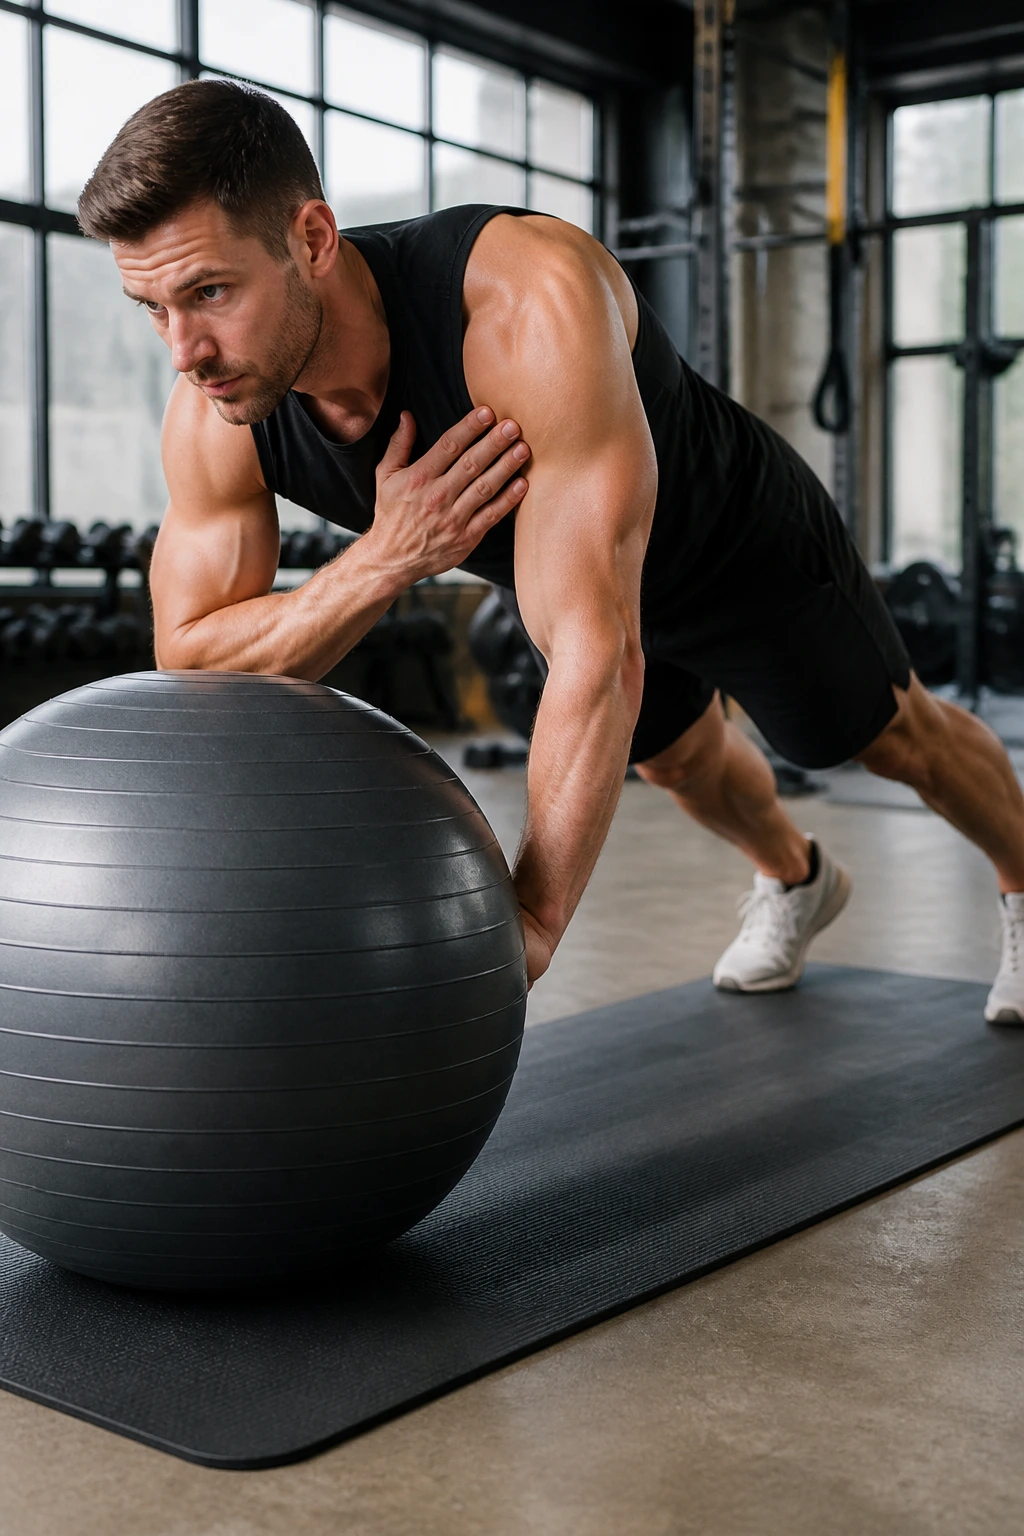
A high plank with your hands on a stability ball turns a simple shoulder tap into a balancing act. Every time one hand leaves the surface, the whole body wants to shift. That’s the point.
Set your hands on the ball, walk your feet back, and tap one shoulder with the opposite hand. Alternate sides slowly. If your hips sway, widen your stance before you do anything else. A small stance change often saves the set.
The move teaches anti-rotation in a very direct way. The working side of the trunk has to stop the body from twisting while the tap happens. That’s useful for real life, where most reaching and lifting tasks are done off-center.
Good target: 6 to 10 taps per side. Keep the taps quiet and the body level. If you can slap the shoulder like you’re late for a bus, you’re moving too fast.
17. Oblique Rollout
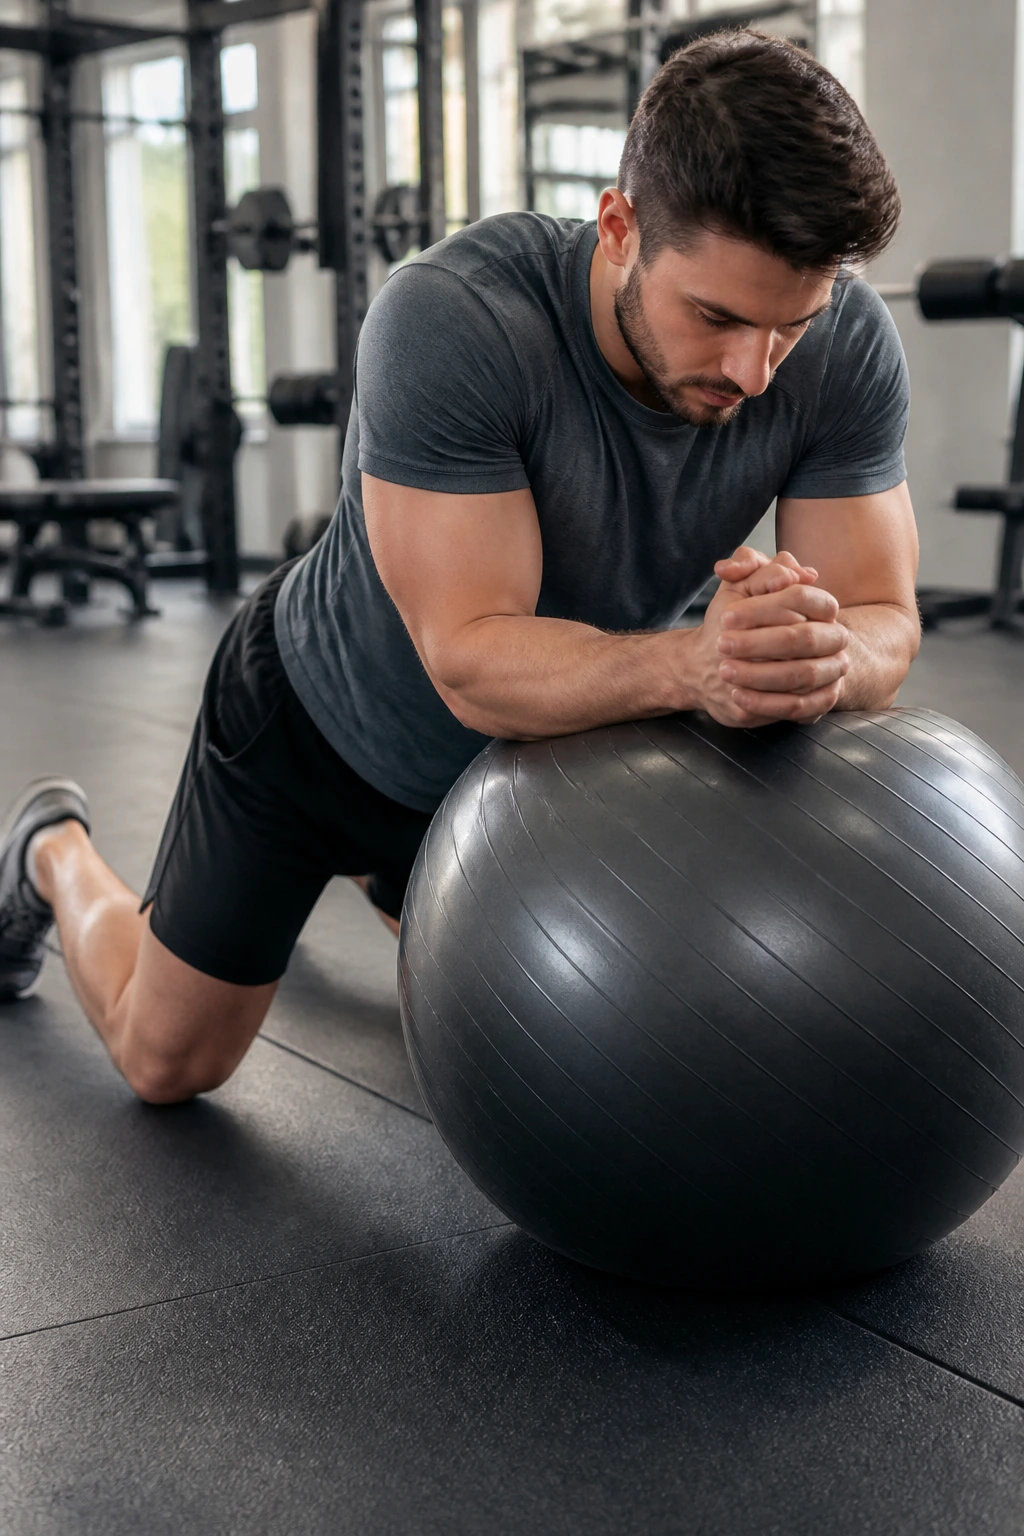
A straight rollout is hard. A diagonal rollout is meaner. That angle shifts more load into the obliques because the torso has to resist side bending while still controlling the forward reach.
Kneel with your forearms or hands on the ball and roll it slightly to the right, then bring it back. Repeat to the left. The body should stay square to the floor while the ball drifts just enough to challenge the side wall of the torso.
The trick is not distance. It’s control. A short diagonal rollout done cleanly beats a giant reach with a back arch every time.
What You Should Feel
- Tension on the side of the waist.
- The front abs keeping the ribs down.
- Hips staying as level as possible.
- A slow return that feels stronger than the push out.
Try 5 to 8 reps per side. This is one of the better drills for people who need oblique work without a lot of twisting.
18. Stability Ball Hip Lift
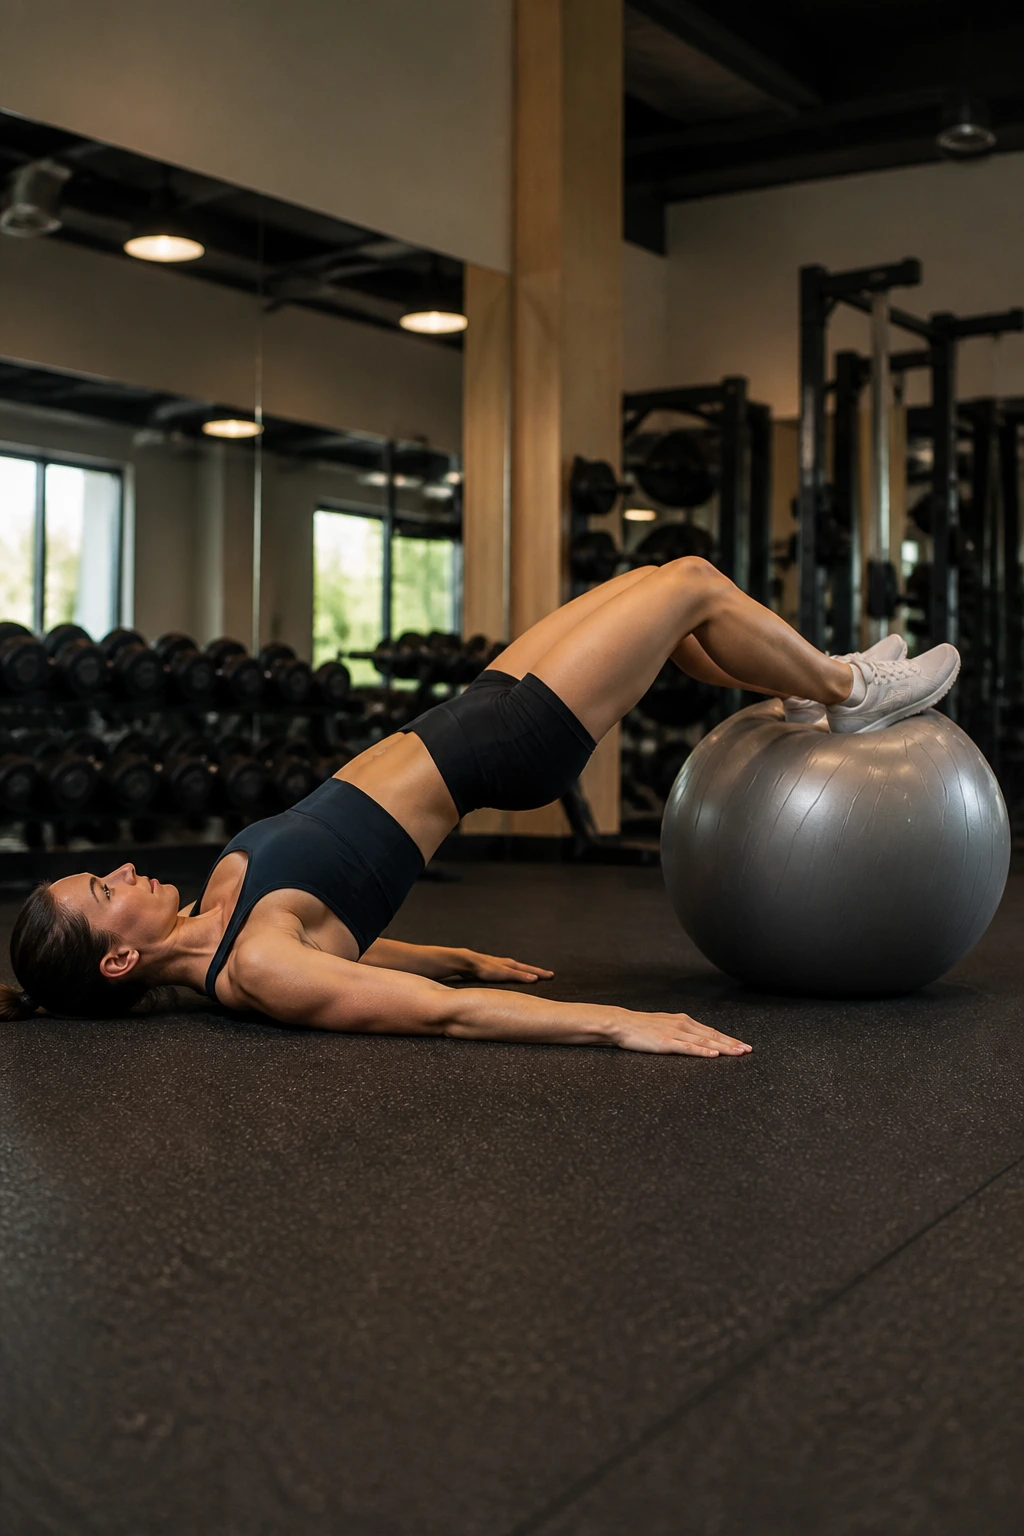
This is not a glute bridge with a party trick. The hip lift on a stability ball asks the hamstrings and lower abs to join the bridge so the pelvis stays organized while the ball moves.
Lie on your back with your feet on the ball. Lift your hips into a bridge, then gently curl the ball toward you by pulling with the heels. Pause at the top, lower with control, and repeat. The hips should stay high until the final descent.
The back side of the body works hard here, but the front side is not sleeping. If you feel your hamstrings cramp, shorten the range and keep the toes pulled slightly upward. Cramping usually means the set got too long or the ball rolled too far.
Best use: 10 to 12 reps for 2 to 3 sets. Clean bridge height matters more than speed. Keep it smooth.
19. Reverse Plank on the Stability Ball
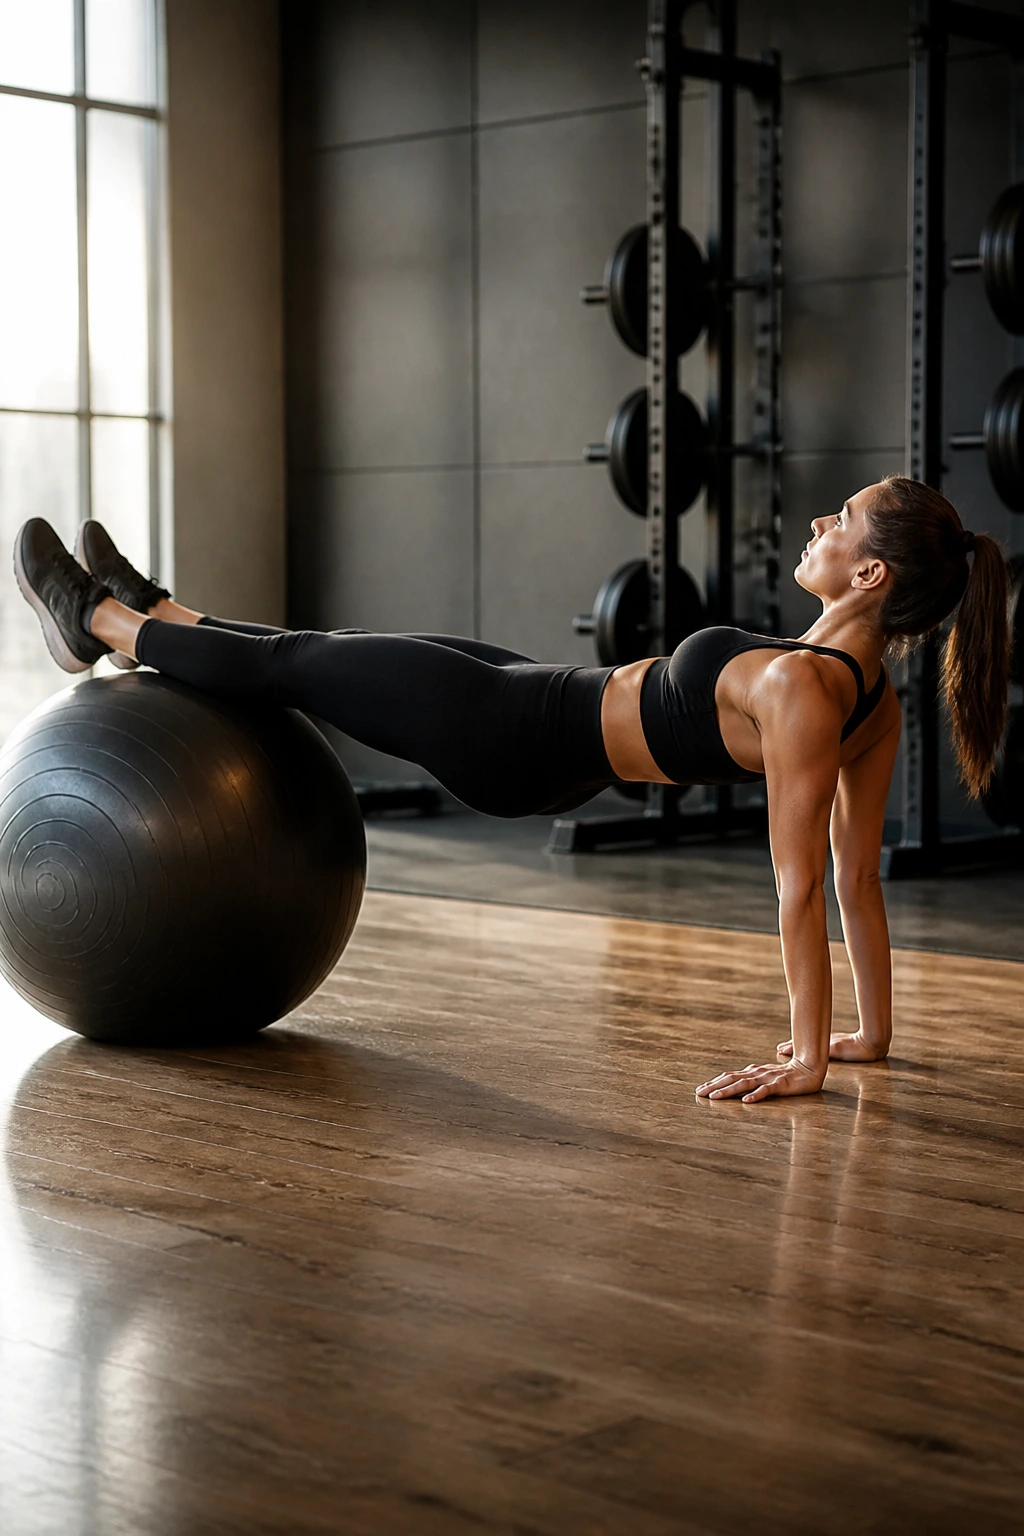
This one feels elegant right up until you try to hold it. Place your calves or heels on the ball, hands on the floor behind you, and lift the hips into a reverse plank. The chest opens, the glutes lock in, and the whole back line has to stay awake.
How to Set the Shape
Think long body, not high body. You want the hips lifted enough that the torso stays straight, but not so high that the neck cranes or the shoulders jam upward. If the ball rolls around, move it a little closer to the body and widen the hands for support.
The reverse plank trains posterior chain strength in a way that pairs well with front-side core work. That balance matters. Too much front-only training leaves people folded over. Too much back work without bracing leaves them loose.
Hold for 15 to 25 seconds. Two or three holds is enough for most people. The setup looks calm. The work does not.
20. Stability Ball Mountain Climber
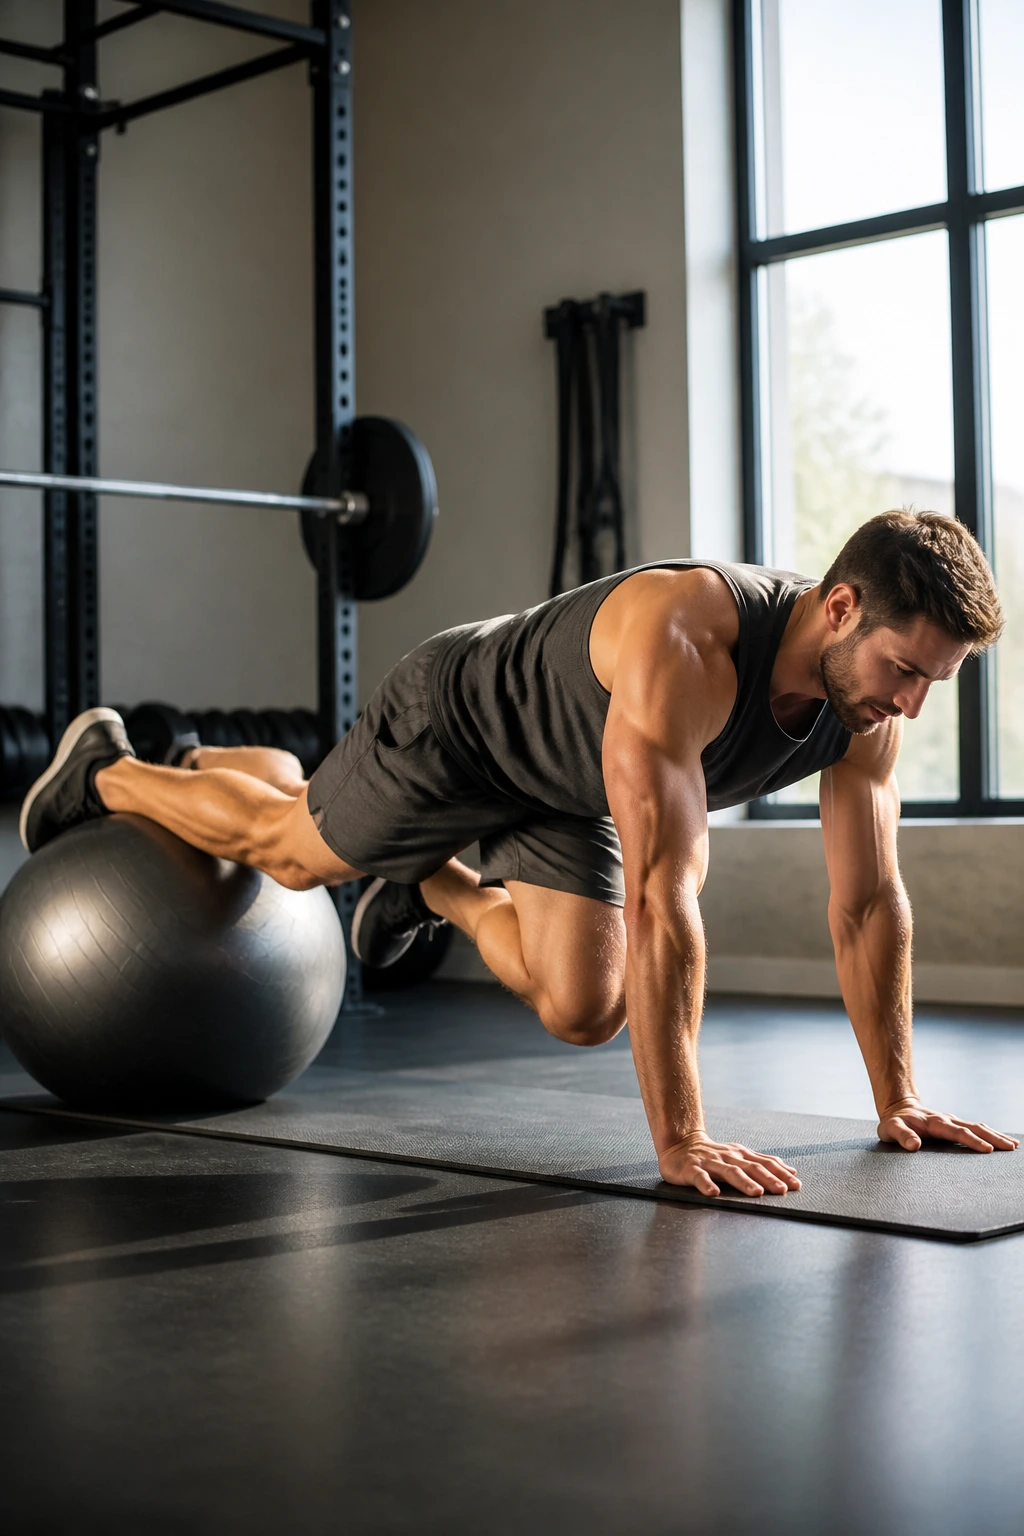
This is the faster drill in the pile, but speed is not the goal. A mountain climber on a stability ball should still look controlled, with the shoulders steady and the core tight while the knees drive in one at a time.
Put your shins or feet on the ball and take a high plank. Pull one knee in, switch sides, and keep the motion smooth. If the hips bounce all over the place, slow down. The ball punishes sloppy rhythm immediately, which is why this drill works so well for endurance.
You’ll feel the abs, sure, but also the shoulders and the hip flexors. That’s normal. The trick is staying braced enough that those muscles help instead of hijacking the set.
Try 20 to 30 seconds of steady work or 10 to 16 total drives. Keep the breathing even. If you start holding your breath, the quality falls off fast.
21. Stability Ball Body Saw
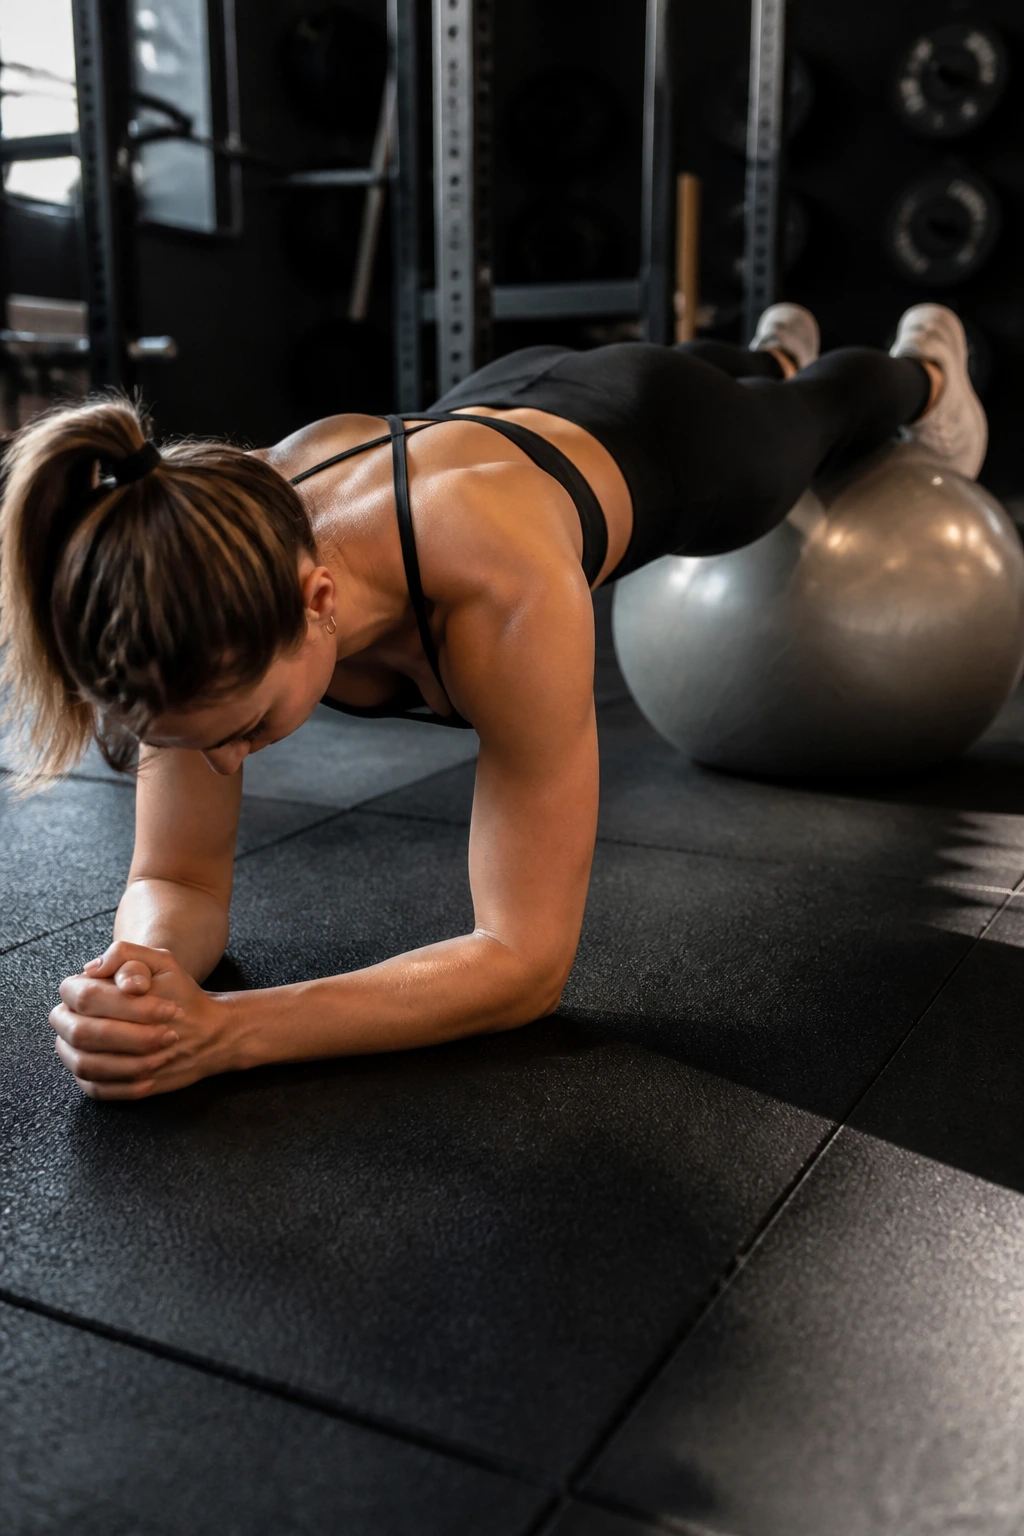
Want a plank that punishes lazy bracing? The body saw gets the job done.
Set your forearms on the floor and place your feet or shins on the ball. Then slide your body a few inches backward and forward. The movement is tiny. Tiny on purpose. The farther you move, the more the hips and lower back start cheating.
Keep the Motion Tiny
Your ribs should stay down, and the pelvis should not dump forward as you rock. If the shoulders feel pinched, shorten the range. If the ball keeps shooting away, widen the feet a little or use a slower pace.
This drill is excellent for anyone who wants longer-duration core tension without endless crunches. It’s a hold and a slide at the same time, which is a sneaky little insult to your abs.
Use 8 to 12 slow rocks or 20-second sets. The back should work hard, but it should not feel compressed. That’s the line.
22. Around-the-World on the Stability Ball
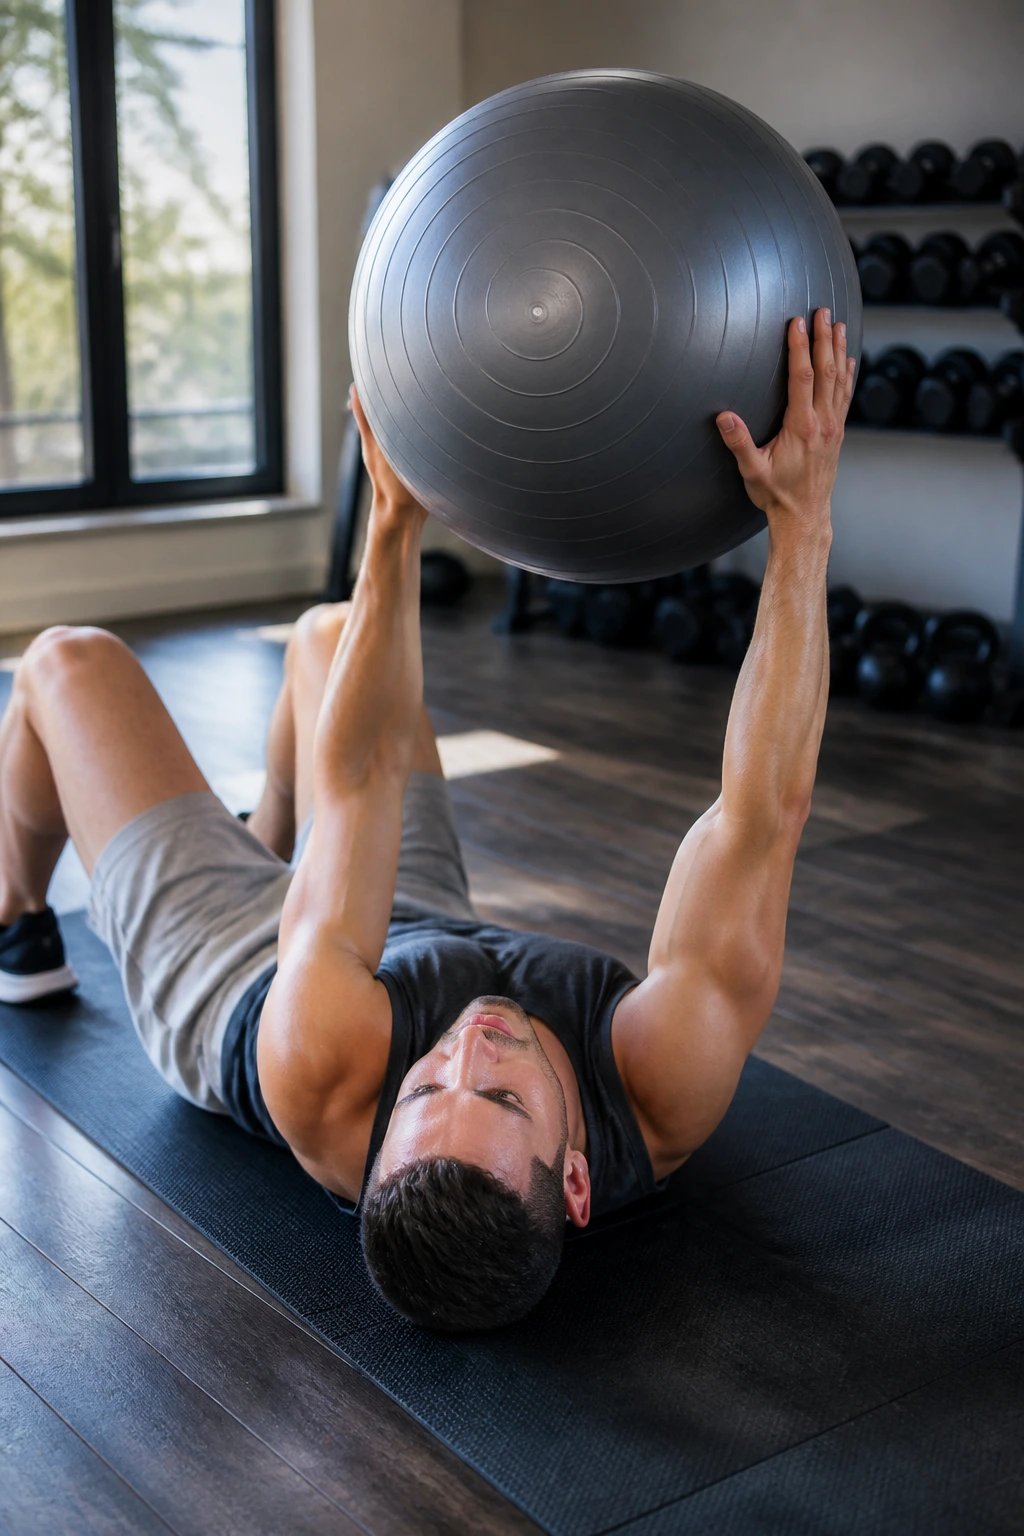
This movement looks like a toy exercise until you try to keep your torso from tilting with every pass. Hold the ball overhead or in front of your chest, then circle it around your body in one direction and back the other way.
Lie on your back for more challenge, or sit tall for a slightly easier version. The goal is to keep the trunk from rocking while the arms move the ball in a smooth loop. That loop can be tight and controlled. It should be.
A lot of people rush this one and turn it into shoulder windmills. That misses the point. The core job is to brace against the shifting load while the ball traces the circle.
Try this: 5 circles each direction for 2 or 3 rounds. Keep your ribs calm and your lower back in contact with the floor if you’re lying down. Simple setup. Harder than it looks.
23. Single-Leg Hamstring Curl on the Stability Ball
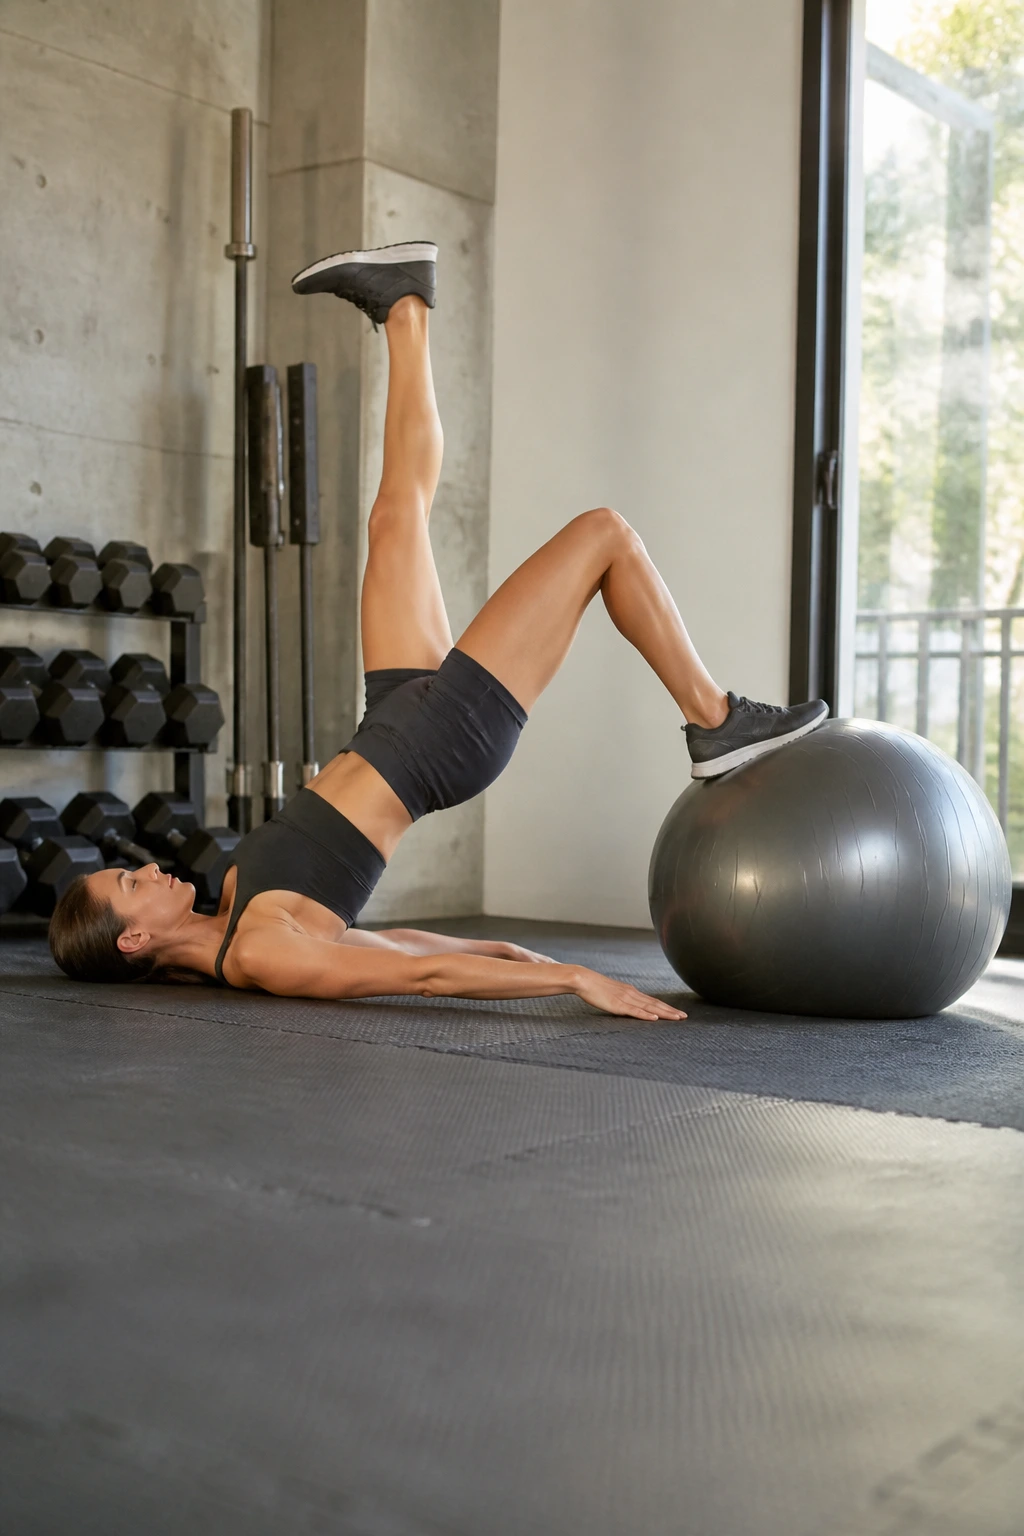
The two-leg hamstring curl is plenty tough. Drop one leg and the whole thing turns into a stricter balance-and-strength test.
Lie on your back with one heel on the ball and the other leg lifted. Bridge up, then curl the ball toward you using the working leg only. Keep the hips as level as you can. That level pelvis is the whole story here. If it dips hard to one side, reduce the range and slow the return.
This drill shows you immediately where your asymmetries live. One side may cramp sooner. One side may shake more. Good. That’s useful. It means the ball is doing its job and giving you a clean read on what needs work.
Use 6 to 8 reps per side. Slow eccentrics help a lot here — about 3 seconds on the return is a solid target. The back of the leg should feel loaded, not rushed.
24. Seated Balance March on the Stability Ball
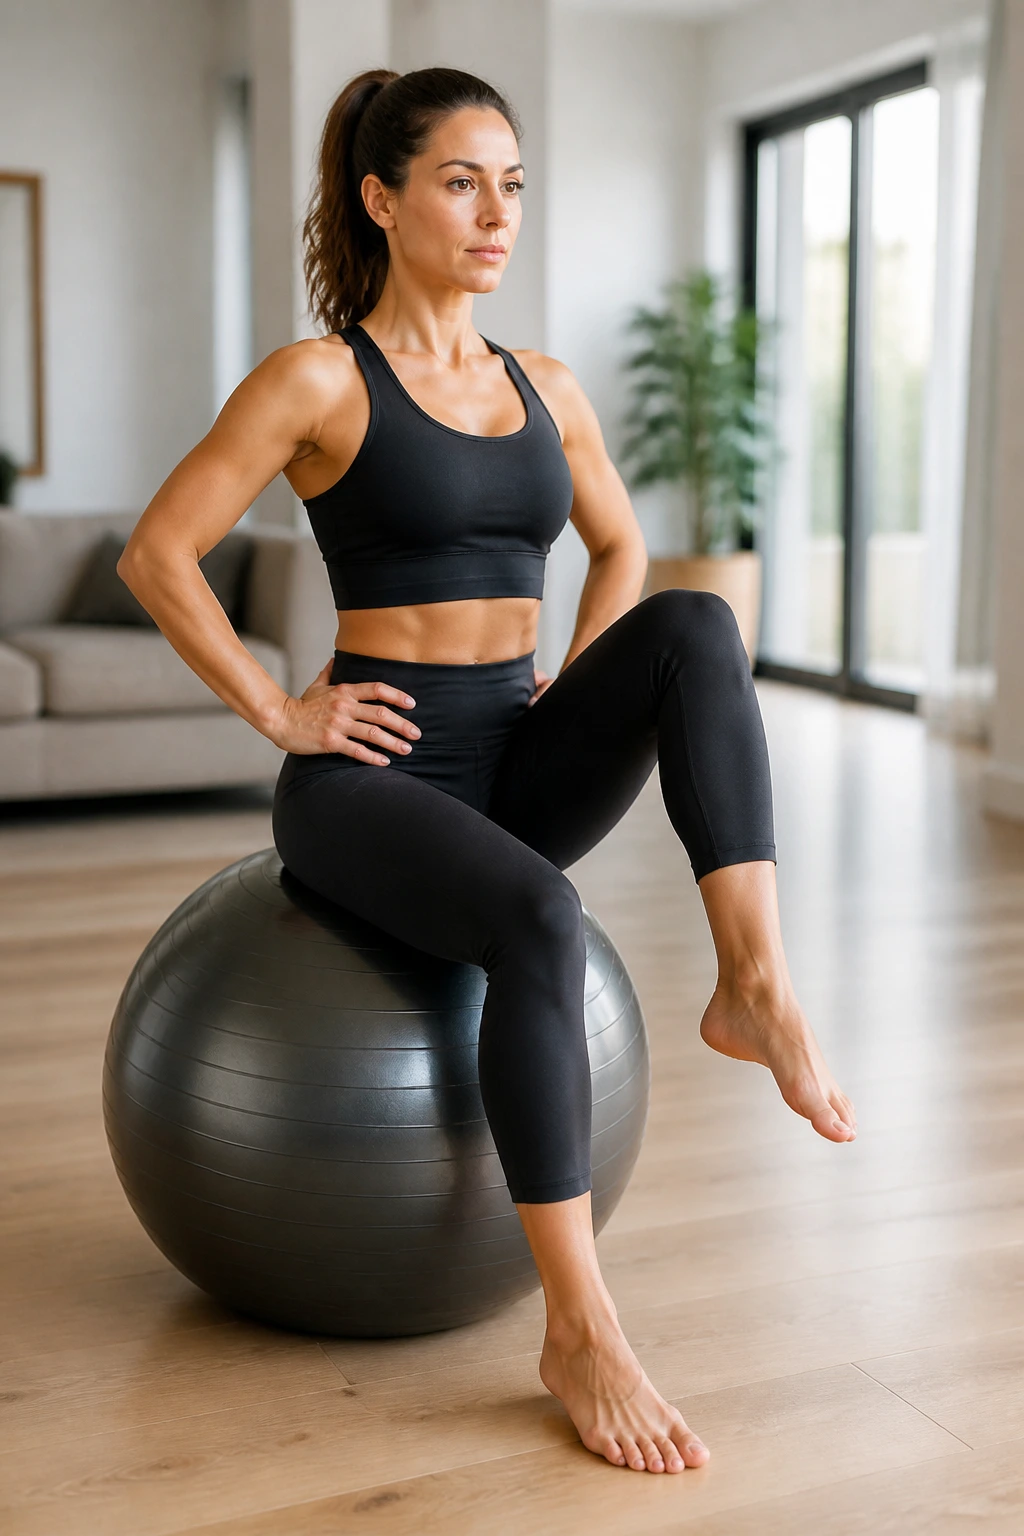
Unlike a hard bench, the ball makes every hip shift visible. Sit tall on the stability ball with feet flat, spine long, and hands on your hips or out to the sides for balance. Then lift one foot an inch or two, set it down, and switch sides in a slow march.
The movement is simple. The demand isn’t. Your trunk has to stay tall while the pelvis tries to tip from side to side. That makes this a great drill for beginners who need core control without getting thrown into full plank territory right away.
You can make it harder by lifting the knee a little higher or pausing for a second at the top of each march. Just don’t turn it into a bounce. Bouncing is cheap balance.
Good starting dose: 30 to 45 seconds of marching, rest, then repeat for 2 to 4 rounds. If your feet keep sliding, check your footwear or move to a grippier floor.
25. Stability Ball Core Circuit Finisher
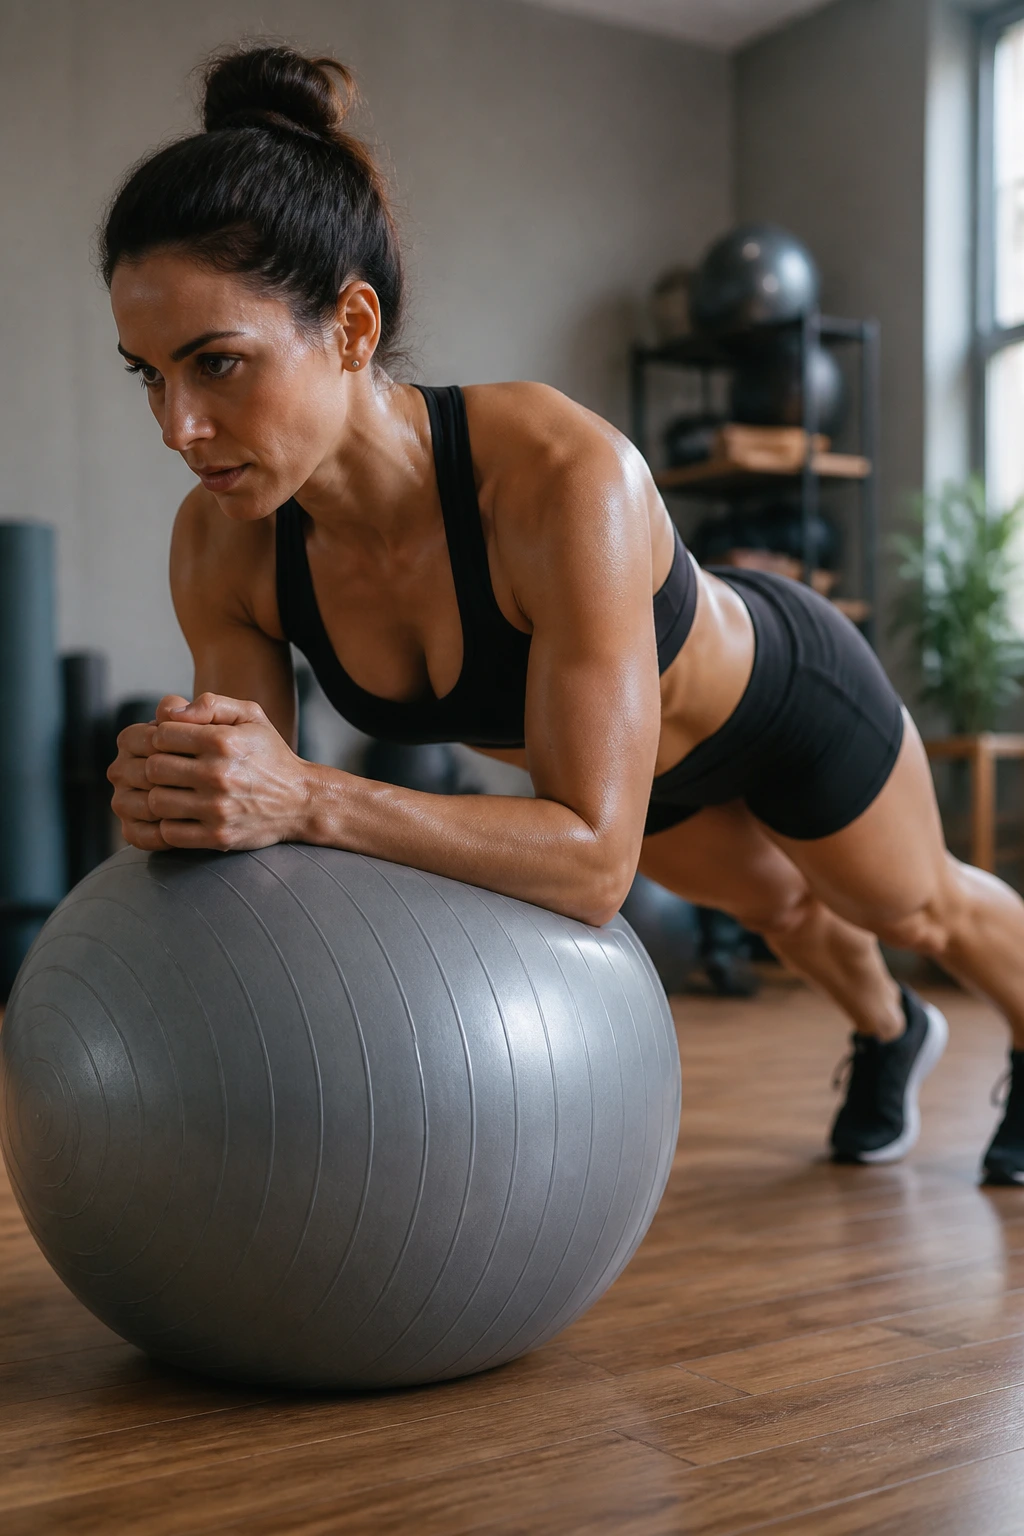
If you want a short session that ties the whole thing together, build a circuit from the best stability ball core moves and keep the rest honest. A simple mix of plank, rollout, hamstring curl, and side plank can cover the front, back, and sides of the trunk in one pass.
Here’s the part people ignore: the circuit should end before form falls apart. That means 20 seconds of work per move, 15 to 20 seconds of rest, then one to three rounds. The ball makes fatigue show up early, so chasing long sets often turns into sloppy compensating. Not worth it.
A clean finisher might look like this:
- Forearm plank on the ball
- Stability ball rollout
- Stability ball hamstring curl
- Side plank on the ball
Use one move from each core category if you can: anti-extension, anti-rotation, flexion, and posterior chain. That balance gives the trunk a more complete workout than endless crunches ever will. And if you only have time for two drills, pick a rollout and a side plank. That’s a hard pairing to beat.
The ball rewards patience. It also rewards clean reps, quiet breathing, and a little humility. If the session leaves your midsection tired but your back feels fine, that’s a good sign. If the back is barking, make the range smaller and stop pretending the extra wobble is a badge of honor.
