



Pregnancy safe workouts at home do not need a studio mirror, a treadmill, or a heroic mood. A hallway, a wall, a sturdy chair, and ten minutes are enough for a solid session.
The best prenatal exercise sessions usually look plain on paper. They keep your breathing steady, your joints happy, and your muscles awake without turning the whole thing into a strain.
A common target in prenatal care is about 150 minutes of moderate activity a week, and that can be broken into short blocks if that fits your day better. If your obstetric clinician has given you restrictions, those rules win. Full stop.
What you do not want is bouncing, breath-holding, or anything that leaves you dizzy, with pelvic pressure, bleeding, chest pain, or a weird sharp pull that lingers. The moves below stay on the low-impact side and use the stuff most homes already have: a wall, a chair, a mat, maybe a light band or two.
Start with the first one that feels doable. The point is to keep moving without making your body negotiate with you afterward.
1. Indoor Walking Loops Through the Hallway
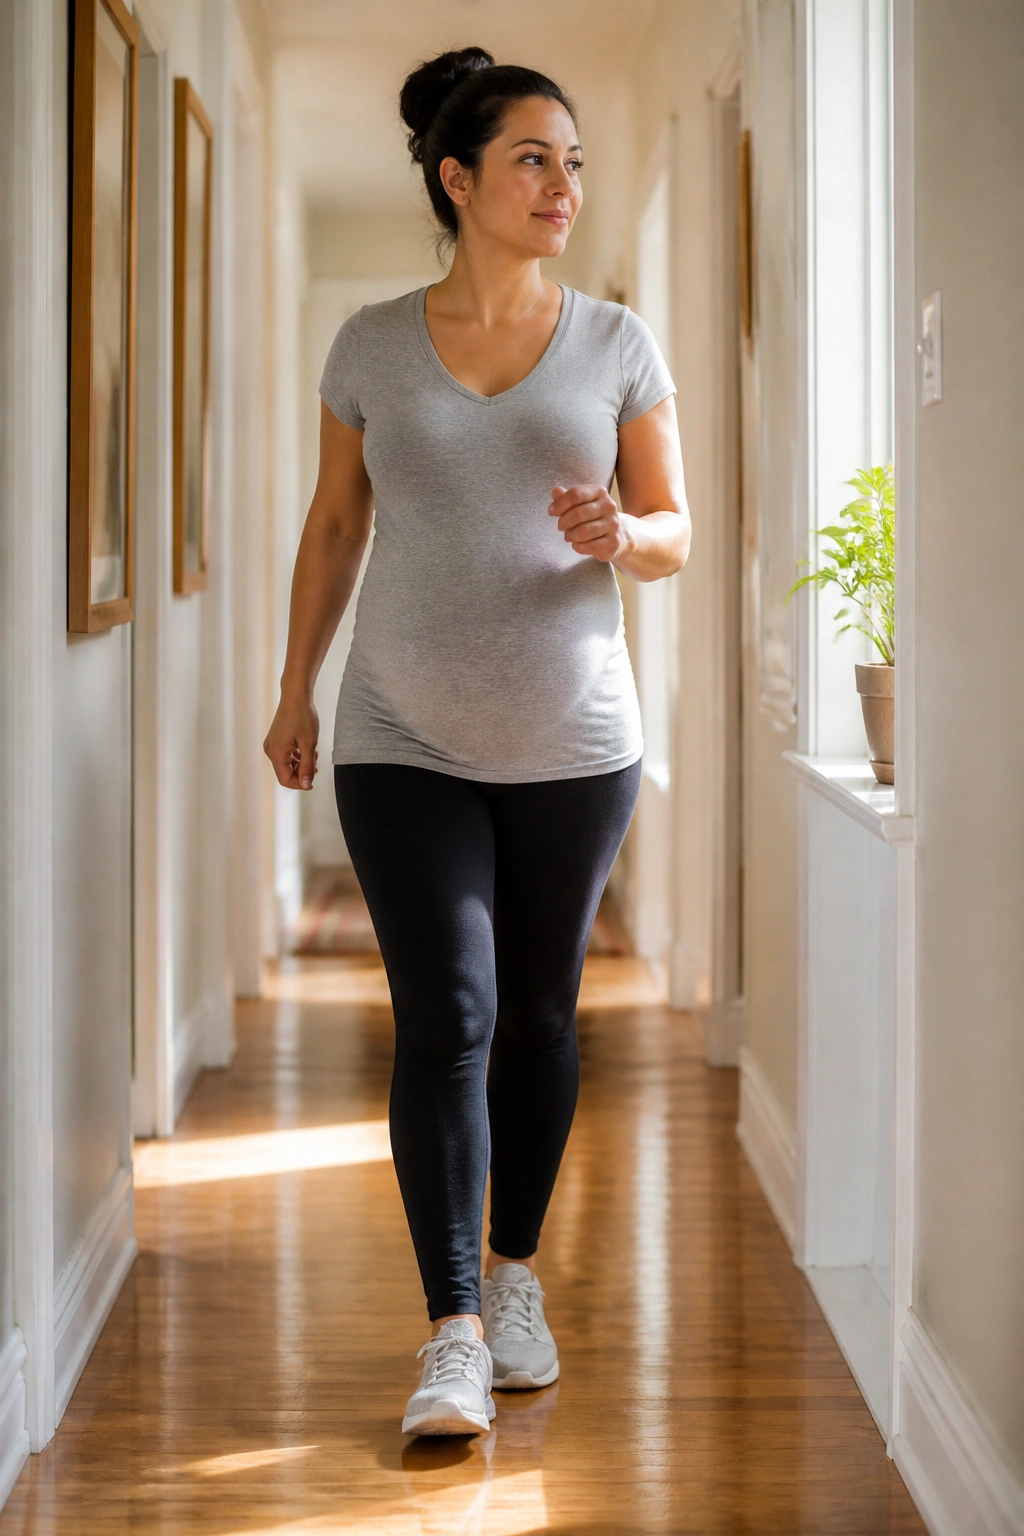
The simplest cardio is still the one people skip. Indoor walking loops look almost too easy, but they do a lot of quiet work: they warm up your legs, nudge circulation, and give you a way to move without pounding your joints.
Walk the hallway, circle the kitchen island, or pace a living room oval for 10 to 15 minutes. Your breathing should stay even enough that you could speak in full sentences, though you may not want to sing. That is the sweet spot for a prenatal walk.
Why It Works
- Low impact matters when your hips, ankles, and pelvis are already carrying extra load.
- Small spaces still count if you keep the pace steady and the turns controlled.
- Arm swing helps your upper body stay loose, but your shoulders should stay soft.
- A simple timer works better than trying to “feel done” and then quitting too early.
Tip: If your pelvis feels heavy, shorten the stride before you slow the pace. That tiny adjustment often helps more than stopping altogether.
2. Marching in Place With Big Arm Swings
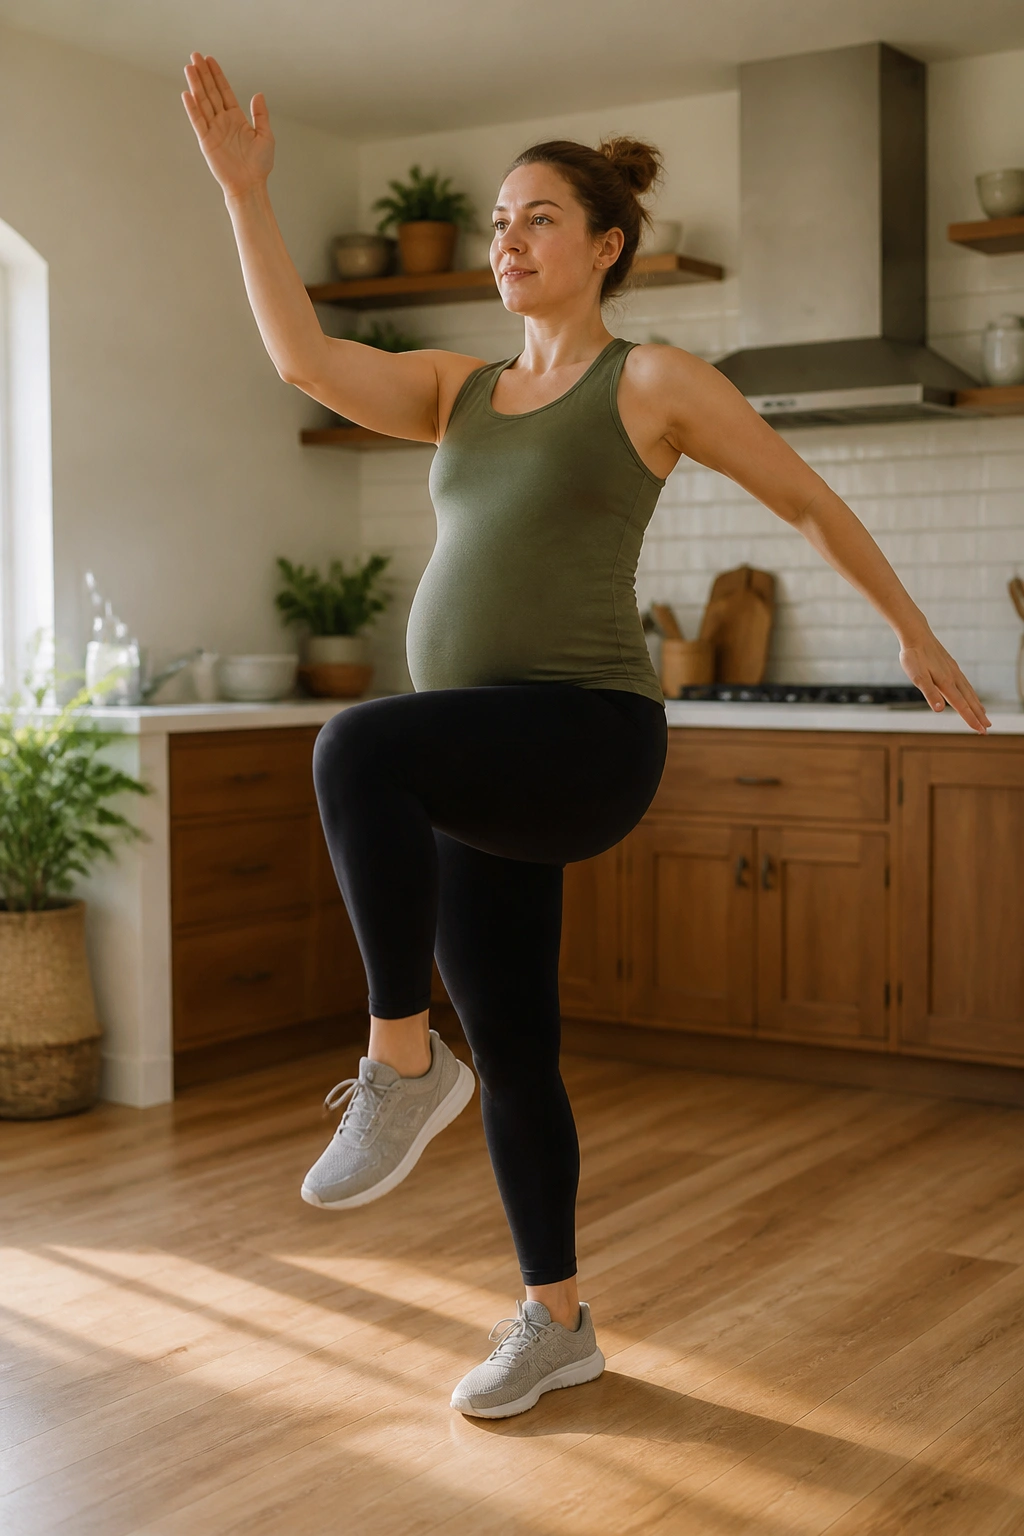
Marching beats trying to fake a high-intensity class in a small kitchen. It is a clean little cardio move: one foot lifts, the other supports, and your heart rate climbs without the jarring thud of jumping.
Keep the knees comfortable, not dramatic. A knee lift to mid-shin or mid-calf height is enough, especially later in pregnancy when balance changes and the lower back starts talking back. Add easy arm swings if your shoulders want a little extra motion.
Try 30 seconds at a relaxed pace, then 30 seconds a touch quicker. Repeat that cycle for 5 to 10 minutes. If you start puffing in a way that makes conversation awkward, back off a notch. The goal is a warm, steady effort, not a race against the floor tiles.
3. Wall Push-Ups at the Kitchen Counter
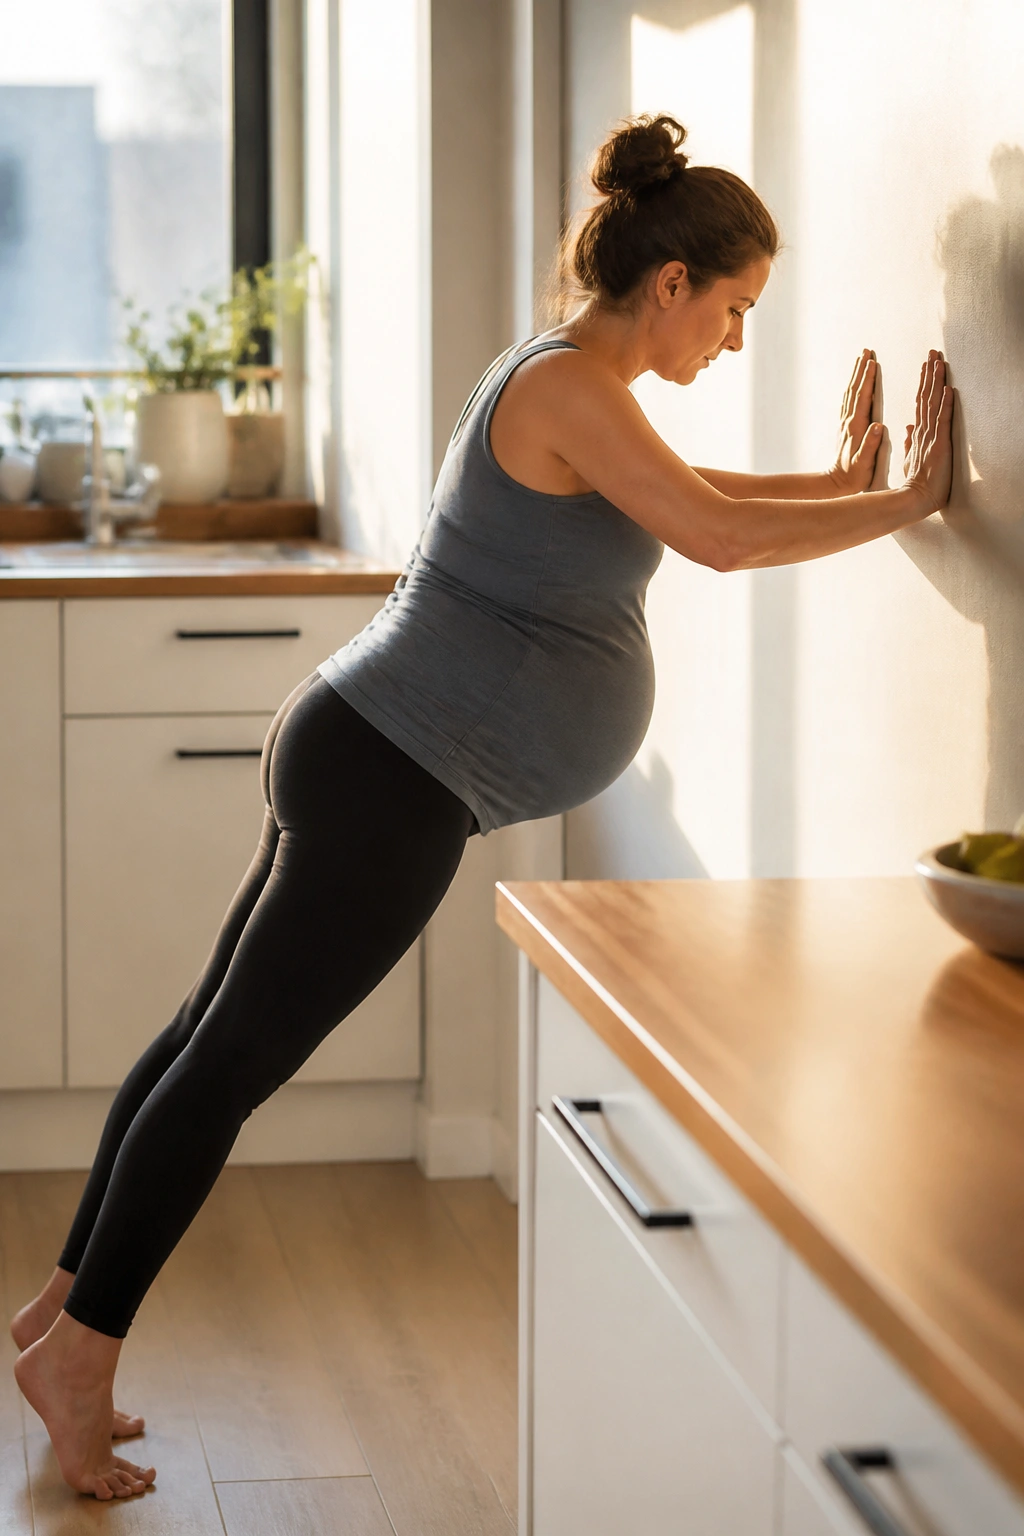
Need upper-body work without getting on the floor? Wall push-ups are the answer most people overlook. They train the chest, arms, and shoulders while keeping the load light and the setup simple.
Stand facing a wall or the edge of a sturdy counter, hands shoulder-width apart, elbows angled back at roughly 45 degrees. The farther your feet are from the wall, the harder it gets. That little detail matters more than people think.
How to Scale It
- Wall version: Best for days when you want the gentlest option.
- Counter version: A smart middle ground with a little more load.
- Couch-back version: Use only if the surface is solid and does not slide.
- Reps: Start with 6 to 10 slow push-ups, then build to 2 or 3 sets.
If you feel pressure in the belly or see your back arching hard, move your feet closer to the wall. Easy fix. No drama.
4. Chair Squats From the Sofa Edge
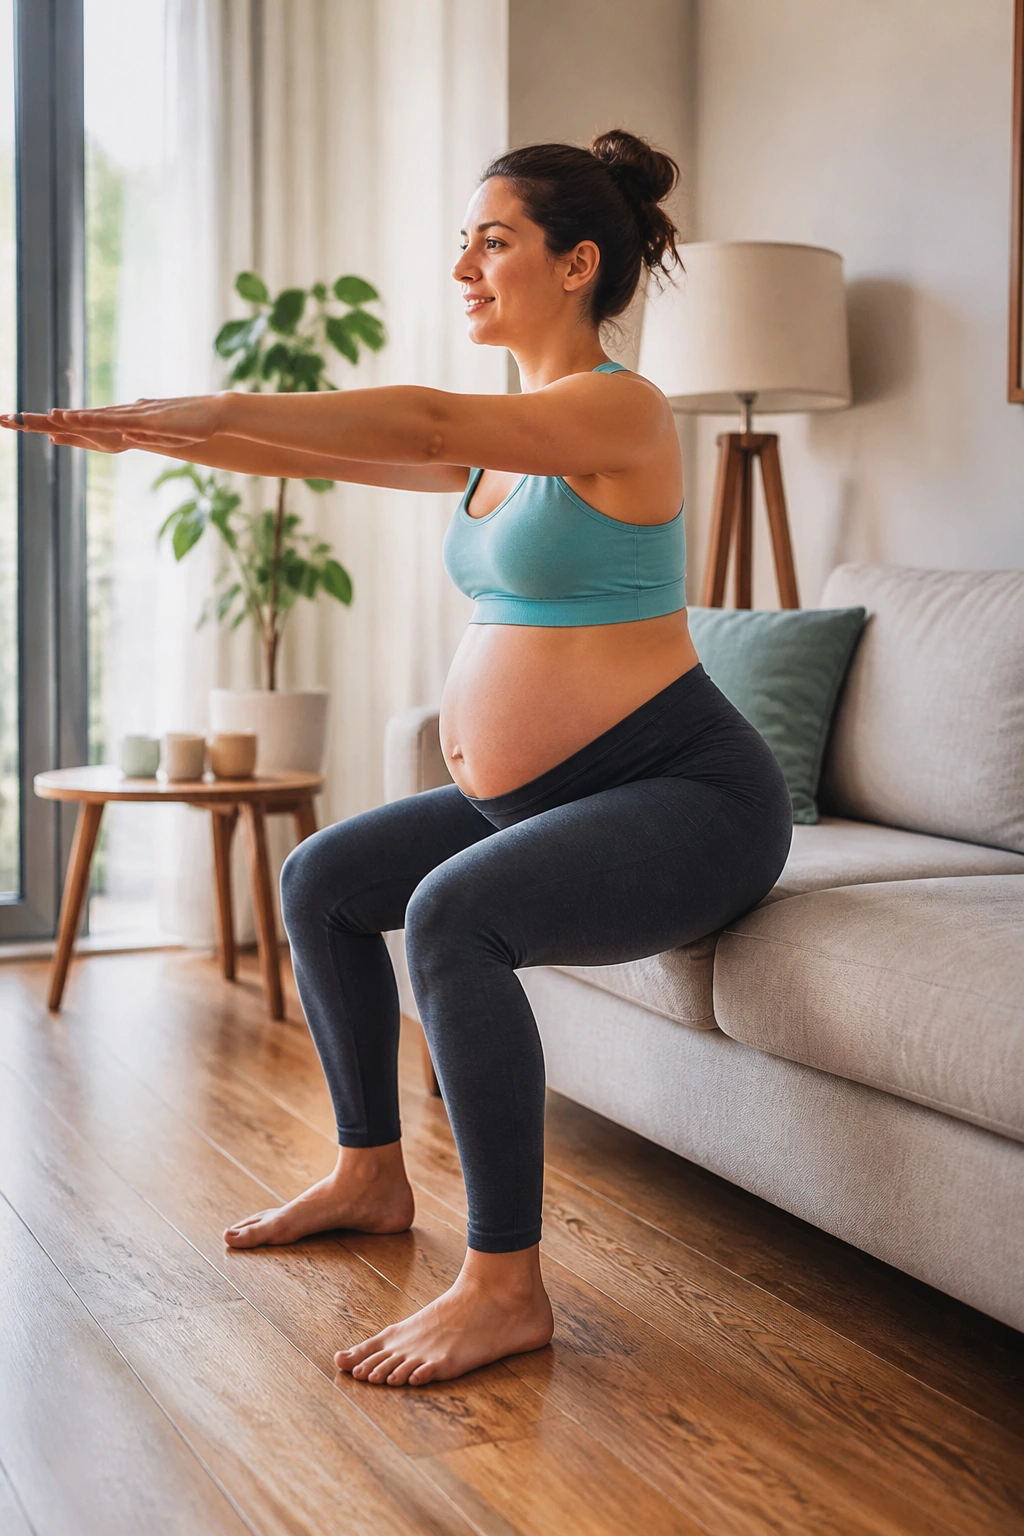
If you have ever stood up from a low couch and thought, that took effort, you already understand chair squats. They build the legs, wake up the glutes, and practice the same sit-to-stand pattern you use all day.
Set a chair or sofa behind you, feet about hip-width apart. Sit back until you barely tap the seat, then stand again without collapsing into the chair. The move should look controlled, not like you are dropping into a landing zone.
- Keep your chest tall.
- Press through the whole foot, not just the toes.
- Exhale as you stand.
- Use a slightly higher seat if your knees complain.
A lot of people squat too low and then wonder why their knees feel cranky. Use the range that feels smooth. Deeper is not automatically better.
5. Mini-Band Side Steps Across the Living Room
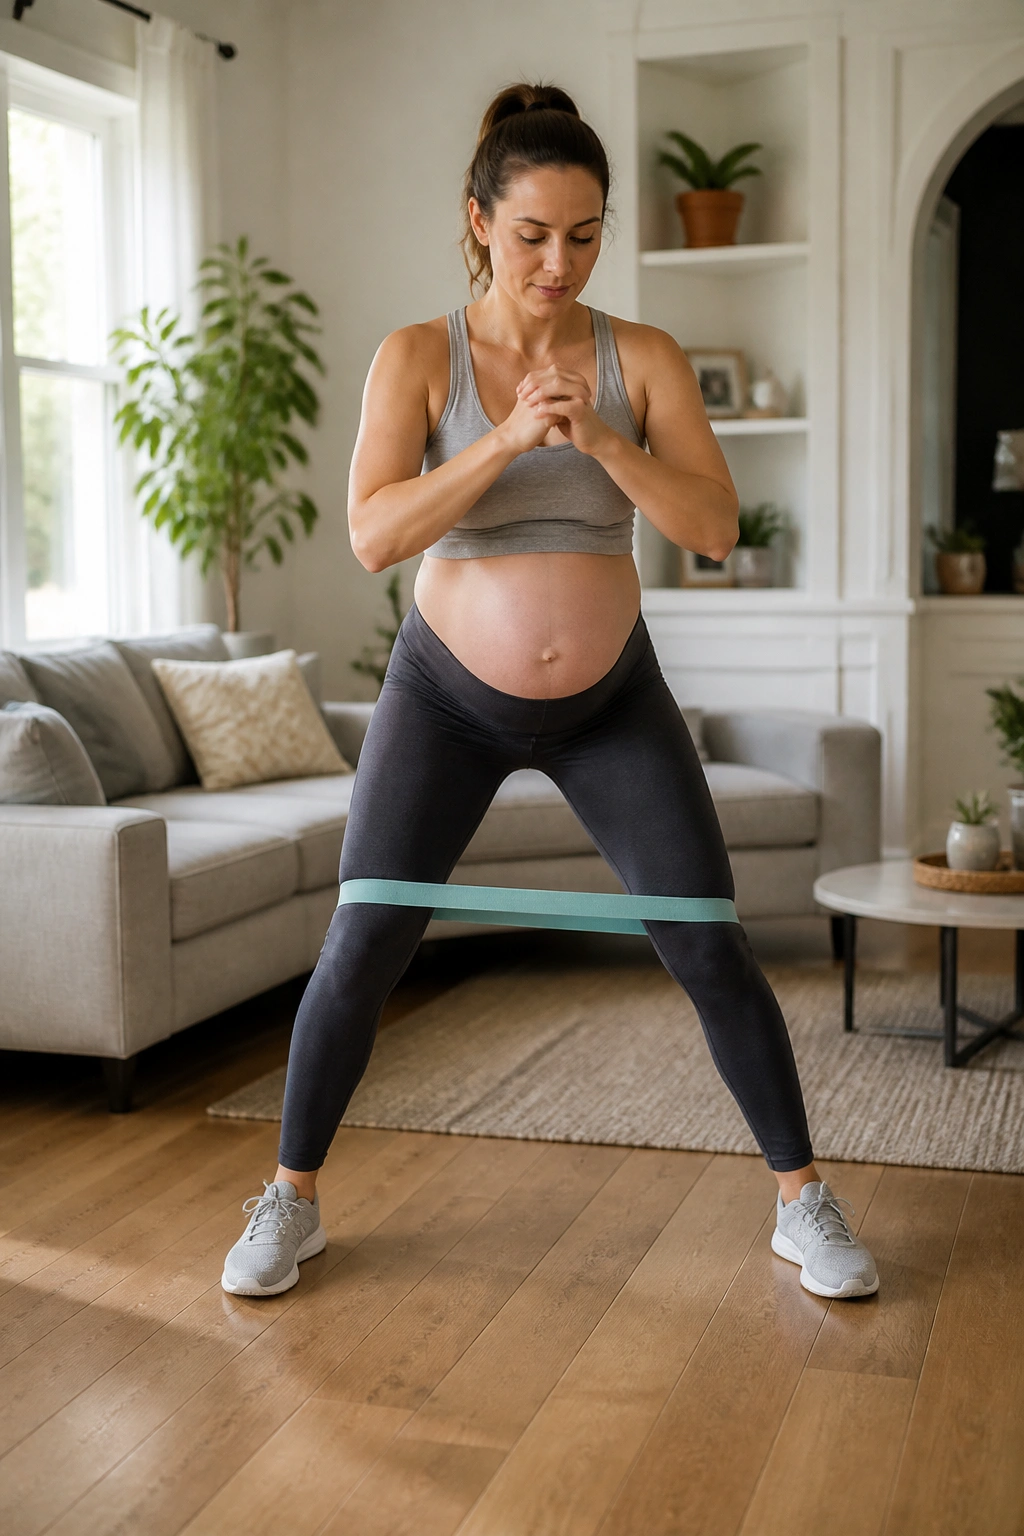
Mini-band side steps are one of those exercises that look tiny and then leave the outside of your hips on notice. They hit the glute medius, which helps with pelvic stability and keeps the knees from caving inward when you walk or climb stairs.
Place a light resistance band above the knees or around the ankles if that feels fine. Step to the side with one foot, then follow with the other without letting the band drag your knees together. The movement is short. That’s the point.
Do 8 to 12 steps each direction, rest, then repeat once or twice. Keep your toes pointing forward and your torso still. If you sway like a wind sock, the band is probably too heavy.
A good band step should feel like work in the side hip, not strain in the lower back. If you feel it in your knees first, lighten the band and shorten the step.
6. Cat-Cow Rocking on Hands and Knees
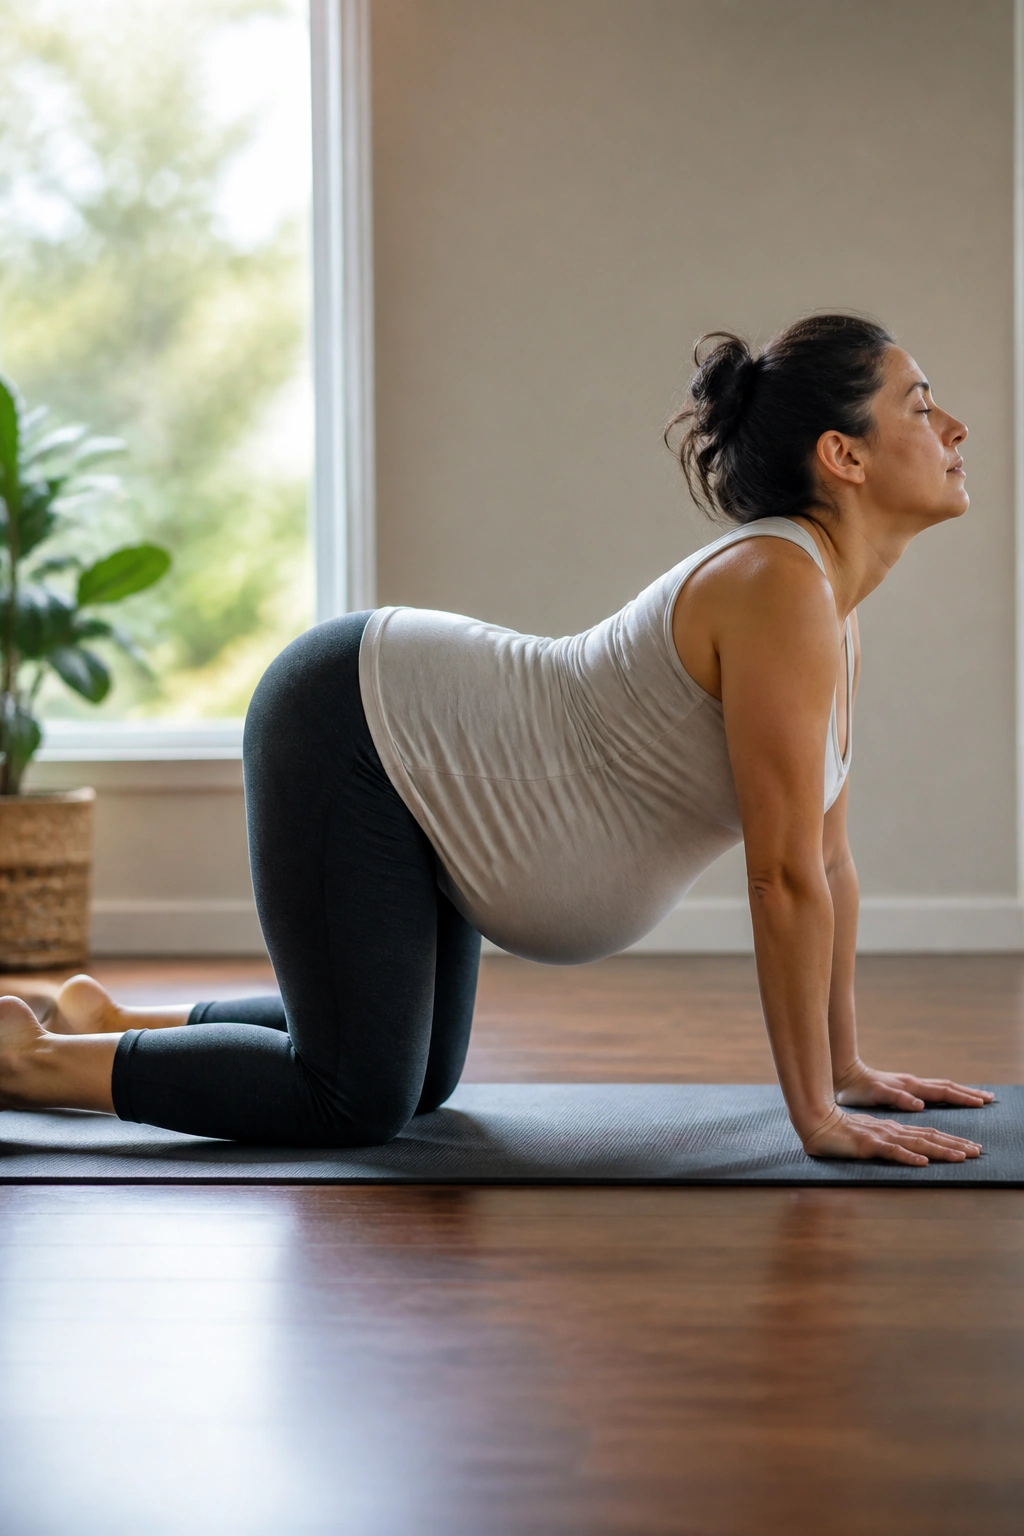
Unlike a sweaty cardio circuit, cat-cow is the move I keep when the back has been complaining all day. It gives the spine some motion, opens the chest, and takes a little pressure off the low back without asking for much.
Come onto hands and knees on a mat, wrists under shoulders and knees under hips. On the inhale, let the belly relax slightly and lift the chest. On the exhale, round the back gently and let the chin follow the curve. No forced arching. No hard tucking.
What Makes It Different
Cat-cow is less about stretching one big muscle and more about teaching the ribs, spine, and pelvis to move together again. That matters when your posture keeps changing and your back starts doing extra work to compensate.
Use 6 to 8 slow rounds, or keep going for a full minute if it feels soothing. If your wrists dislike the position, drop to forearms or place your hands on a bench. The shape can change. The idea stays the same.
7. Bird-Dog Holds for a Steady Core
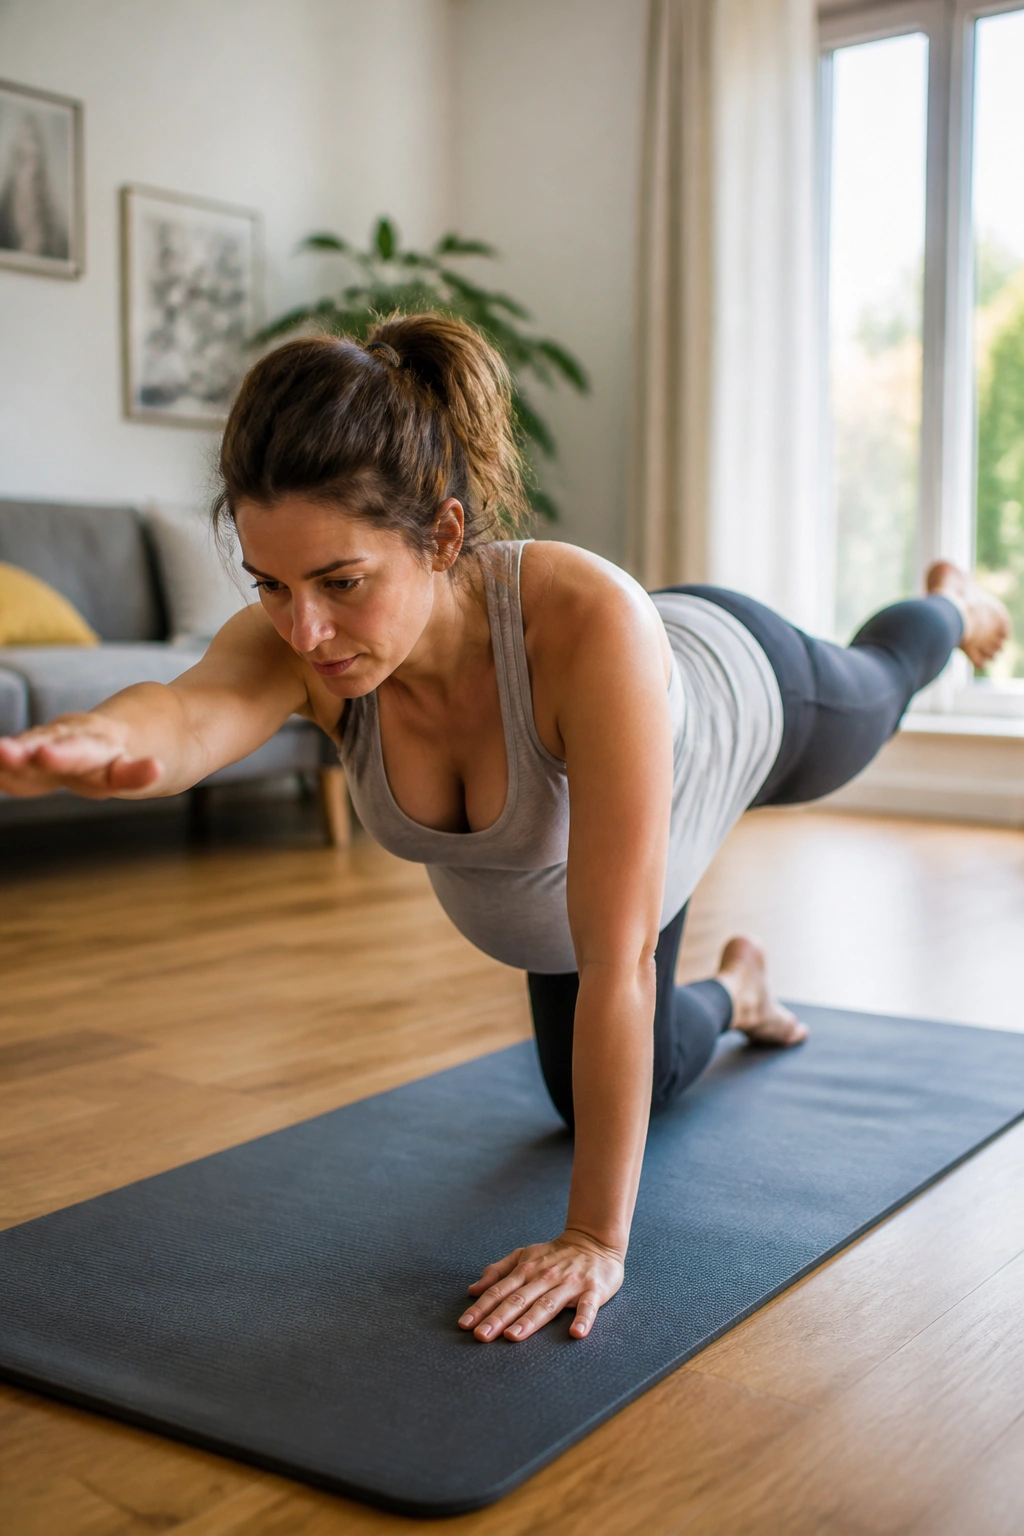
Bird-dog looks almost too easy until your hips start wanting to wobble. It trains core stability without crunching the belly, and that is one reason it earns a place in so many prenatal routines.
Start on hands and knees. Reach one leg back and the opposite arm forward, but only as far as you can keep your hips level and your back quiet. A small reach done well beats a big reach with a wobble.
What to Watch For
- Keep the belly from doming by shortening the reach.
- Hold for 3 to 5 seconds before returning to center.
- Alternate sides slowly so the trunk does not swing.
- Use toe taps first if the full reach feels unstable.
Tip: If your lower back starts pinching, stop trying to lift higher. The fix is usually less range, not more effort.
8. Wall Pelvic Tilts and Rib Breathing
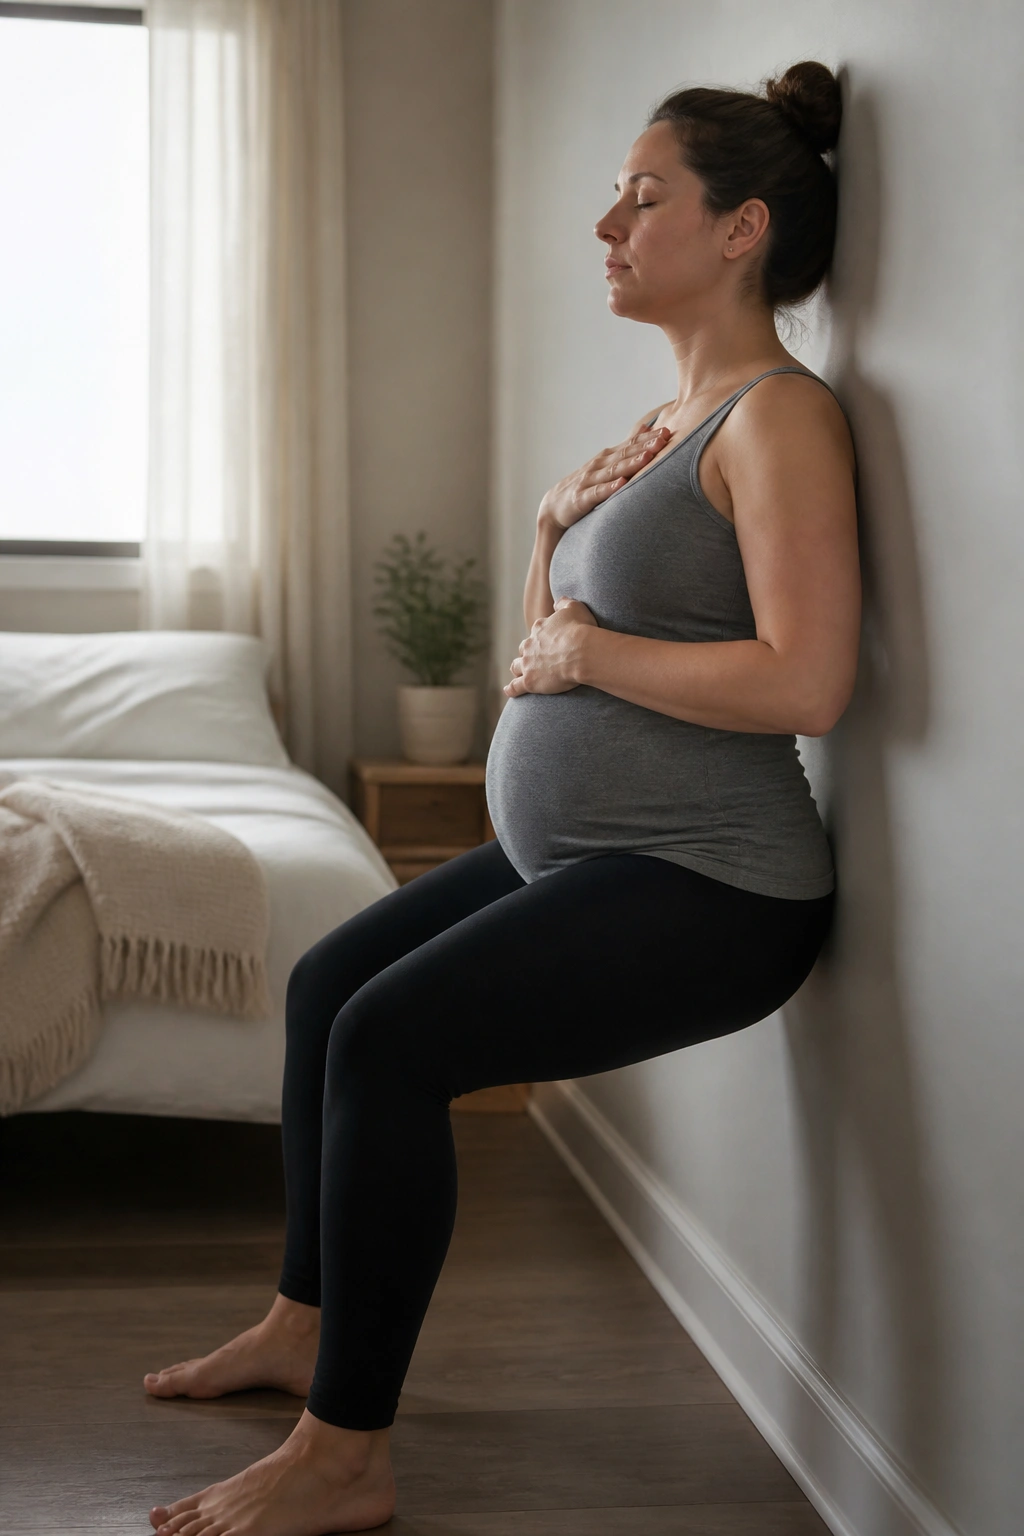
Breathing with your ribs and pelvis can make a long sitting day feel less crunchy. Wall pelvic tilts are tiny, but they give you a useful reset for the low back and the areas around it.
Stand with your back against a wall, feet a few inches forward. Exhale and gently flatten the small of your back toward the wall. Inhale and let the ribs widen without forcing the belly forward. The movement should be subtle enough that no one across the room would notice.
Five slow breaths, then a short rest, then another round. That is enough. You do not need to chase a burn here. You are teaching the trunk to let go of unnecessary tension, which can matter more than hard reps on days when your posture feels off.
If you notice yourself gripping the glutes or upper abs, soften them. The goal is control, not a military stand at the wall.
9. Side-Lying Clamshells on a Firm Mat
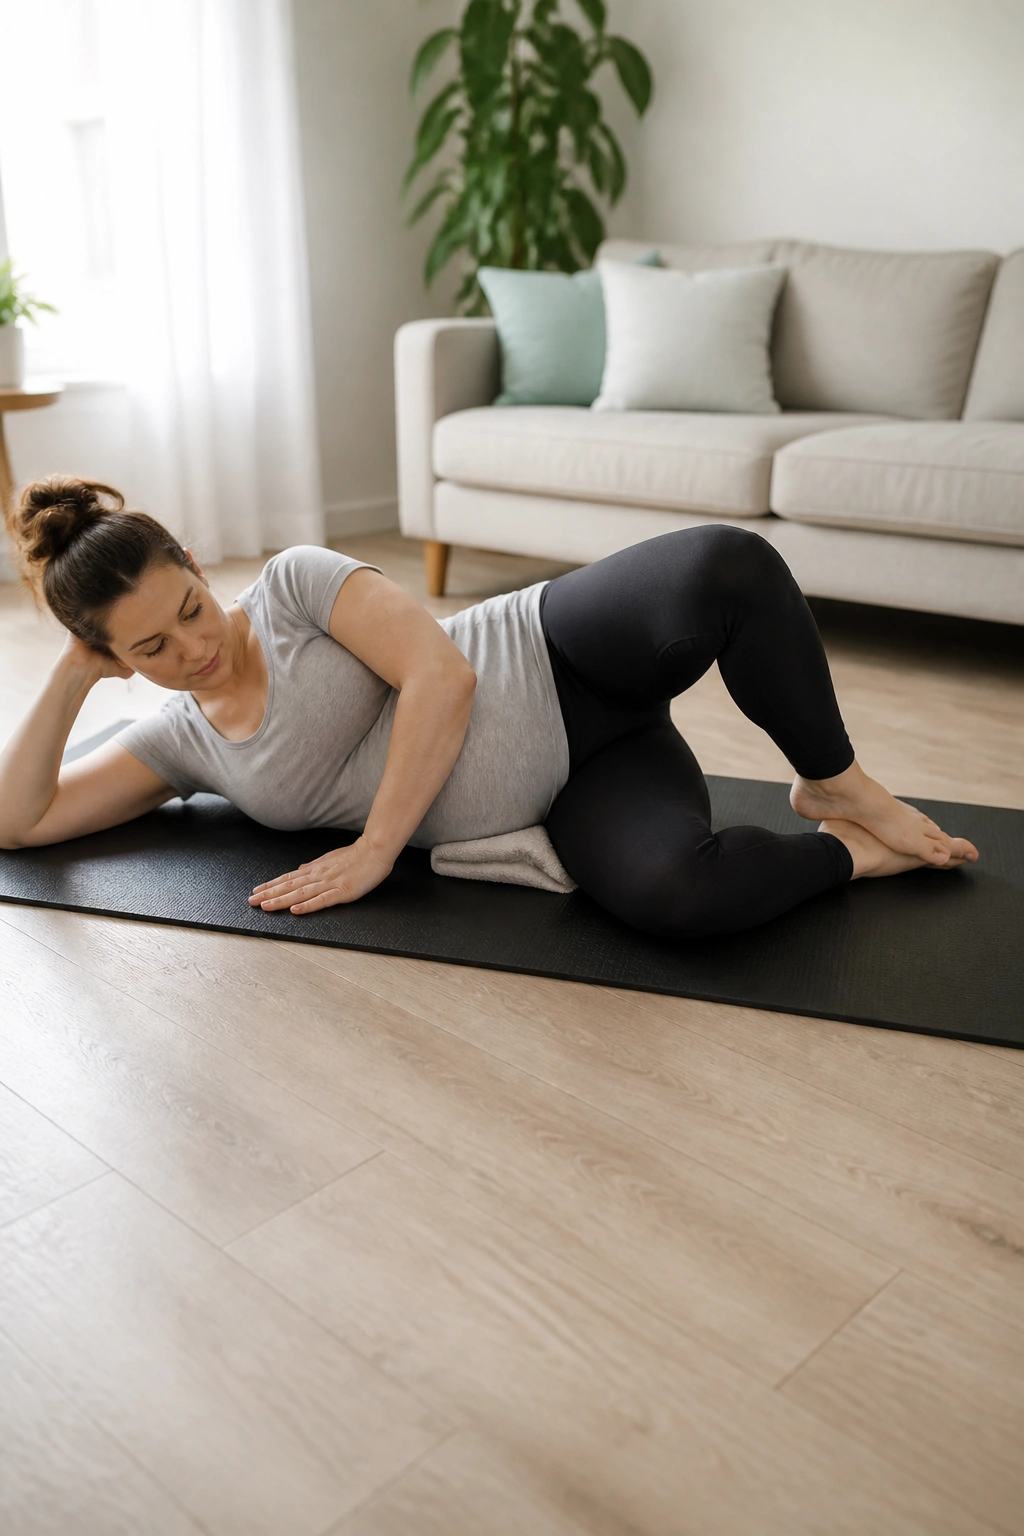
Why do tiny hip exercises matter? Because the muscles around the hips do a lot of behind-the-scenes work when you are pregnant, and clamshells target them without loading the spine much.
Lie on your side with knees bent and feet stacked. Keeping the feet together, lift the top knee only as high as you can without rolling your pelvis backward. That tiny opening should feel like the side of the hip doing the work.
How to Scale It
A light loop band above the knees makes it harder, but bodyweight is fine if you are just starting. Ten to 15 reps per side is a sensible place to begin, and 2 sets is plenty for most days.
If lying on your side irritates your ribs or hip bones, slide a folded towel under the waist or use a pillow for support. Small comfort tweaks keep this exercise useful instead of annoying.
10. Standing Glute Kickbacks by the Counter
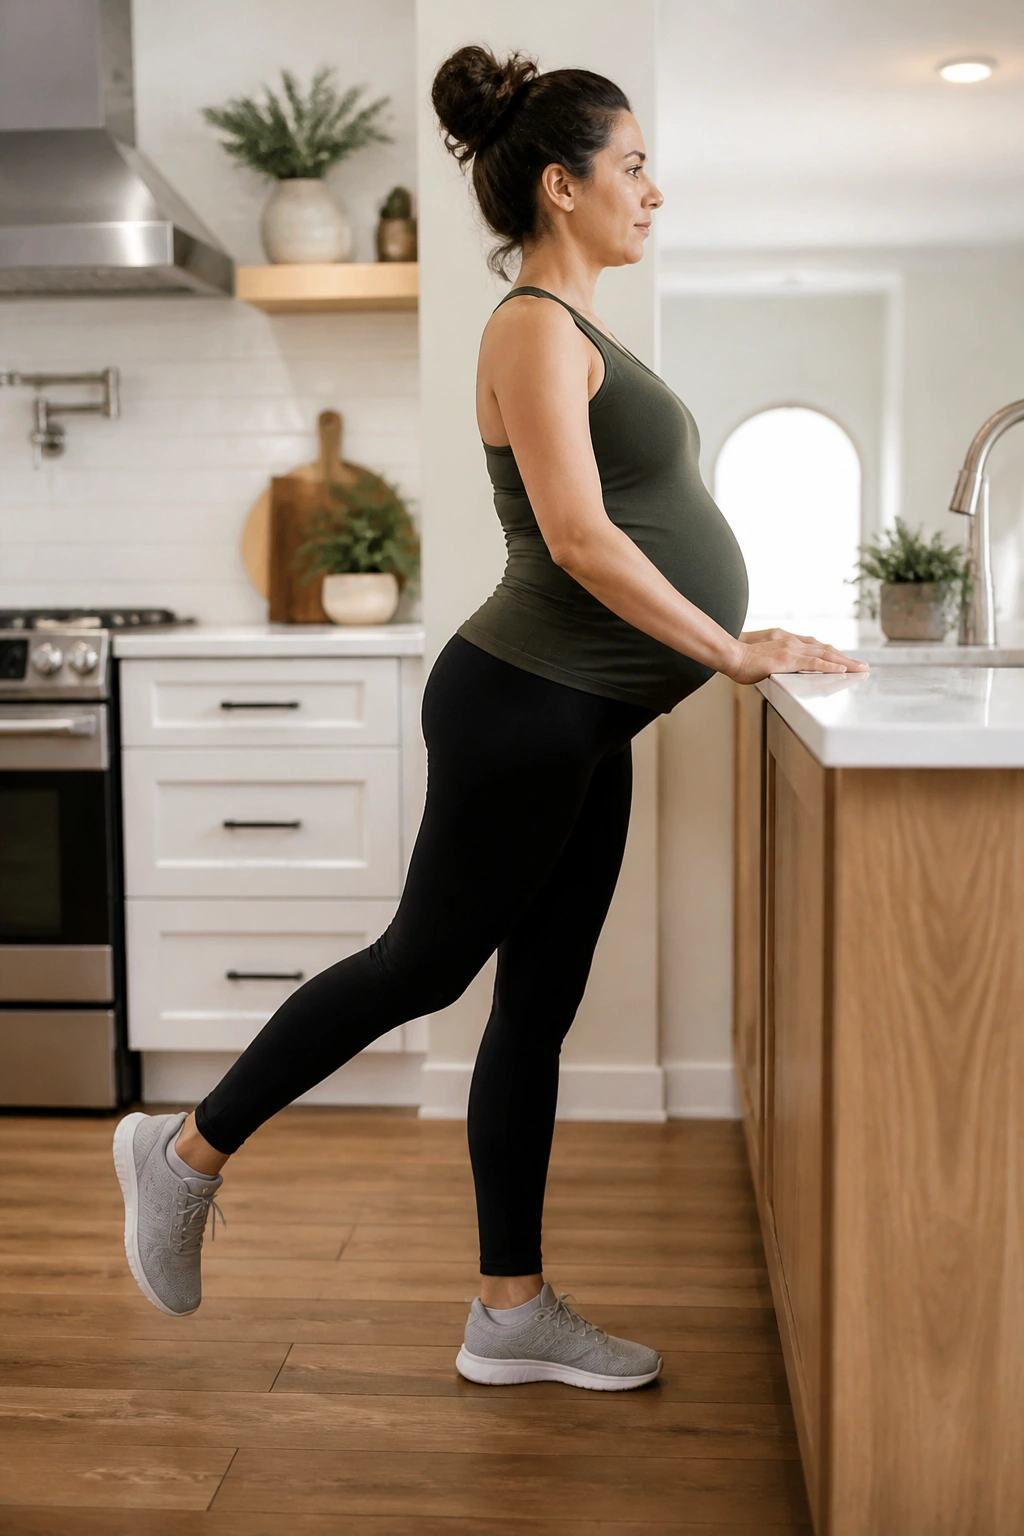
The move looks almost absurdly small, which is exactly why people skip it. Standing glute kickbacks are steady, safe, and good for the muscles that help you walk without your lower back taking over.
Hold a counter or chair with one hand, stand tall, and send one heel back without leaning your torso forward. The leg does not need to rise high. A clean squeeze in the glute is the only finish line that matters.
- Keep the supporting knee soft.
- Point the toes mostly forward.
- Lift from the hip, not the low back.
- Do 10 to 12 reps per side.
If you feel the standing leg working too hard, give yourself a wider stance and slow down. Balance gets touchy for a lot of people, and there is no prize for doing this while wobbling.
11. Seated Dumbbell Overhead Press
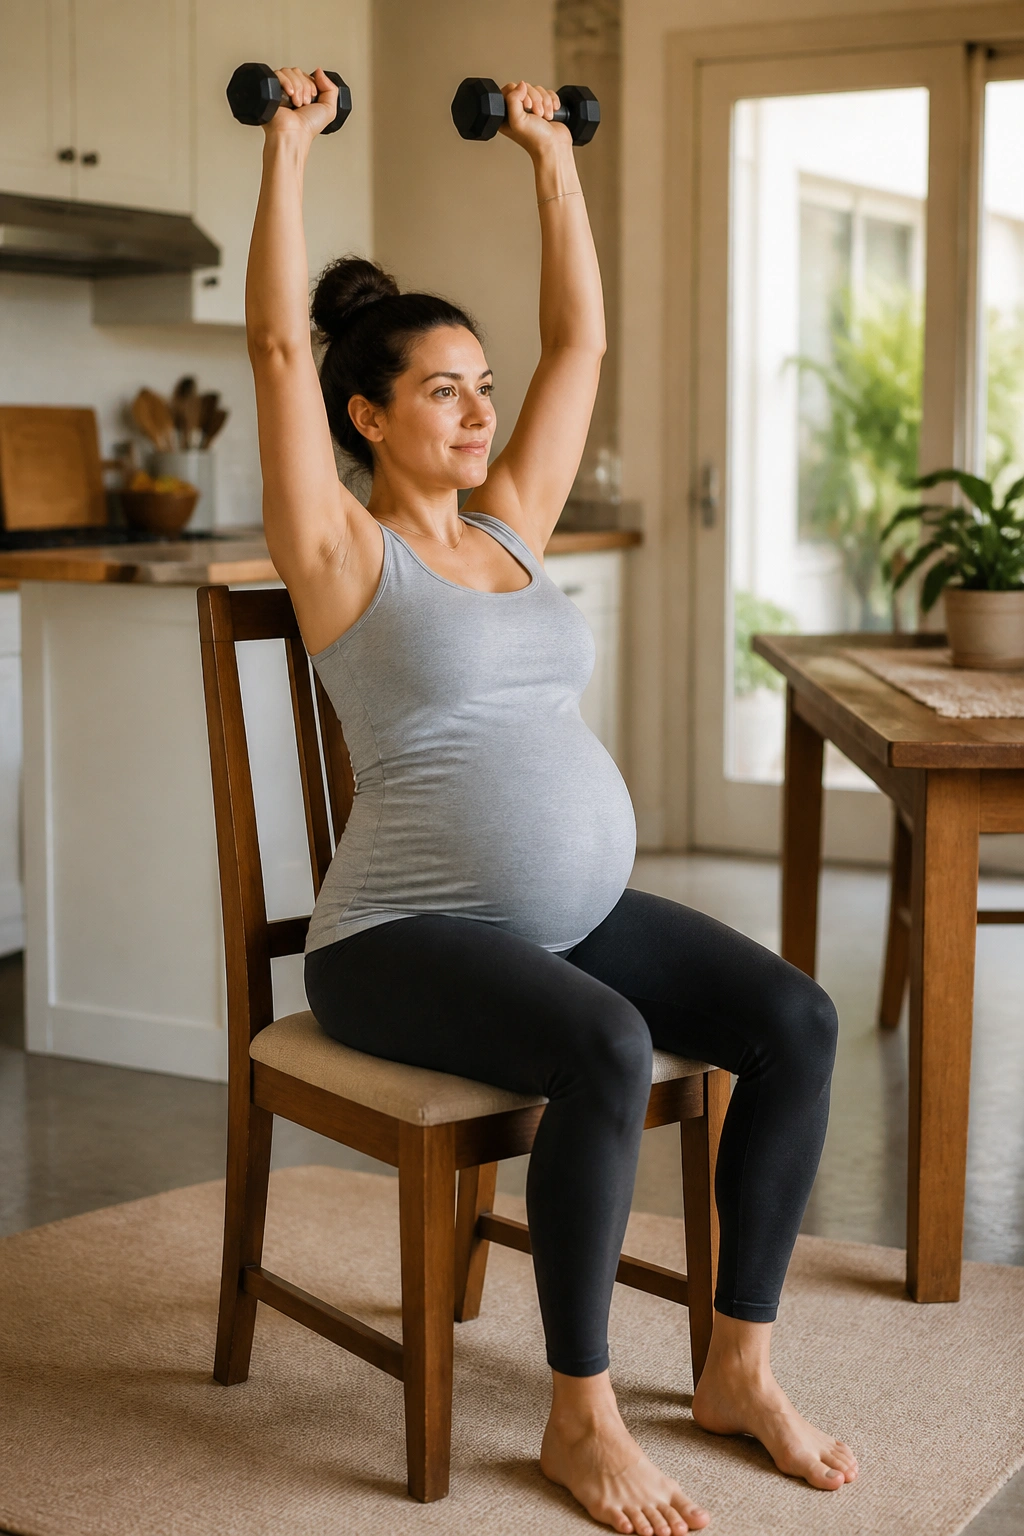
Seated overhead presses are a smart way to keep shoulder strength in the picture without adding balance demands. A chair gives you a stable base, which matters more as your center of gravity changes.
Use light dumbbells, or even water bottles if that is what you have. Start with your elbows slightly in front of your shoulders, press the weights up, then lower them with control. Keep the ribs from flaring hard; if your back arches a lot, the weight is too much.
A set of 8 to 10 presses is usually enough to feel useful. More is not automatically better. If the shoulders pinch or the motion feels awkward, switch to a shoulder-height press and stay there for a while. Clean form beats a bigger lift every single time.
12. Resistance Band Rows With Elbows Close
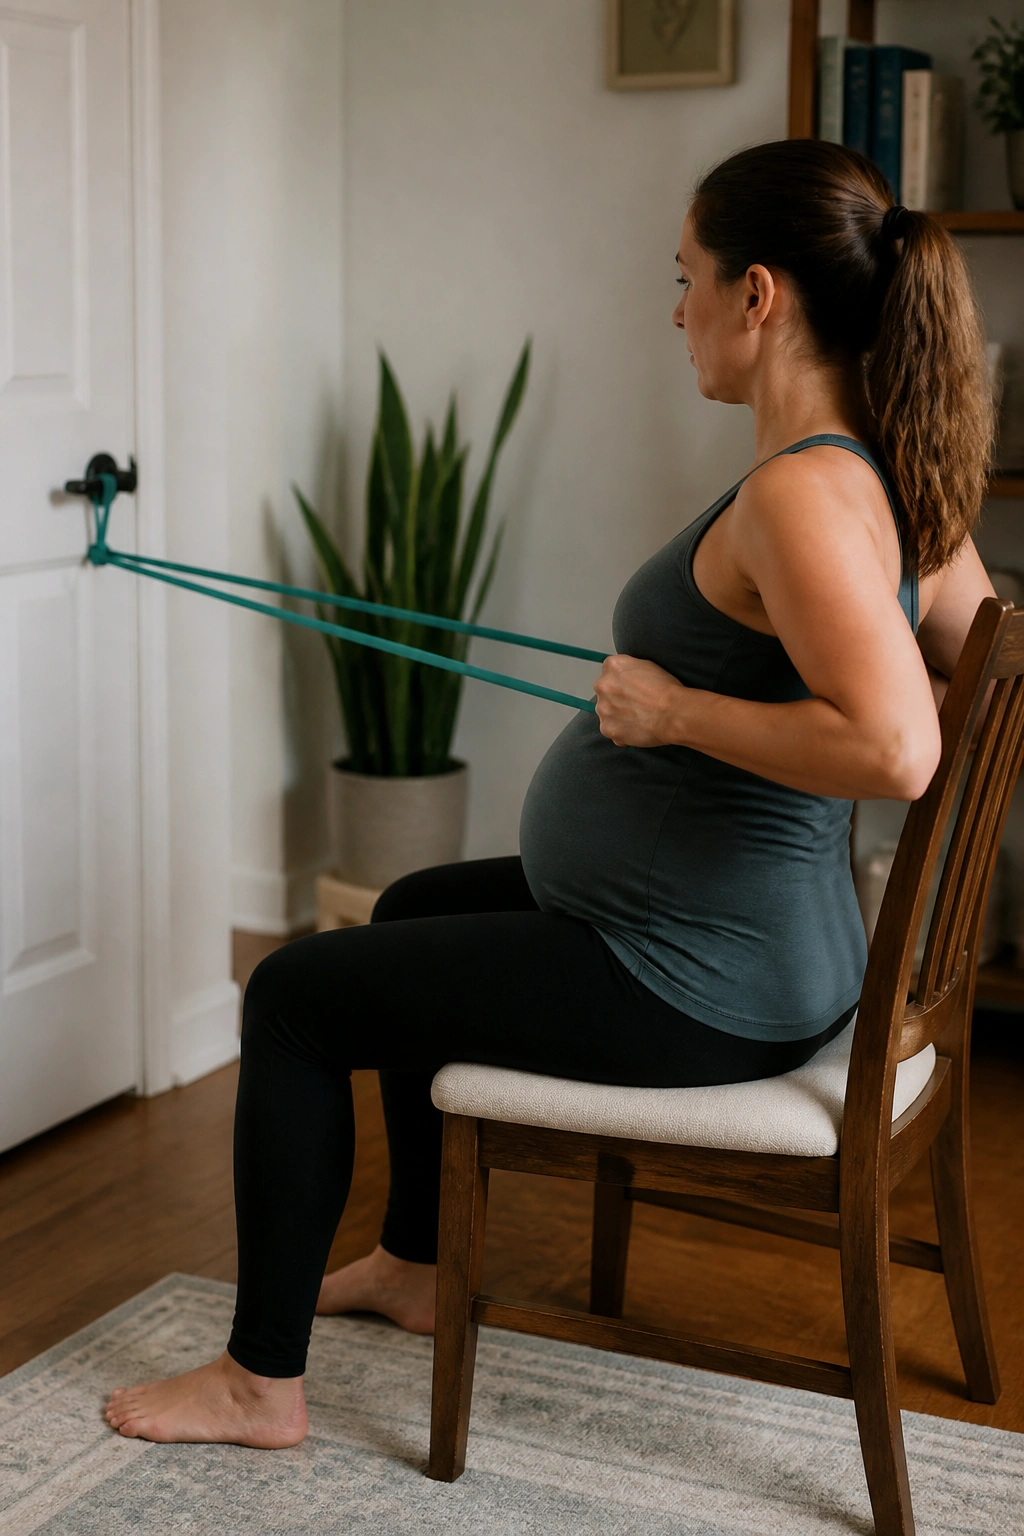
Unlike curls or presses, rows train the upper back that starts to grumble when your chest feels pulled forward. That makes them a quiet hero move for pregnancy posture.
Anchor a light resistance band around a sturdy door anchor or loop it around your feet while seated. Pull the band toward your ribs with elbows close to your sides, then pause for a second before letting it slide forward again. That pause matters. It keeps the shoulder blades honest.
Who Gets the Most Out of It
Rows are especially helpful if you sit a lot, carry tension in the neck, or notice your shoulders creeping toward your ears. They also balance out all the front-loaded work from daily life.
Two or three sets of 10 to 15 reps is usually enough. If you start shrugging on every pull, the band is too heavy or your grip is doing too much. Lighten it. Keep the neck long.
13. Seated Biceps Curls With Light Weights
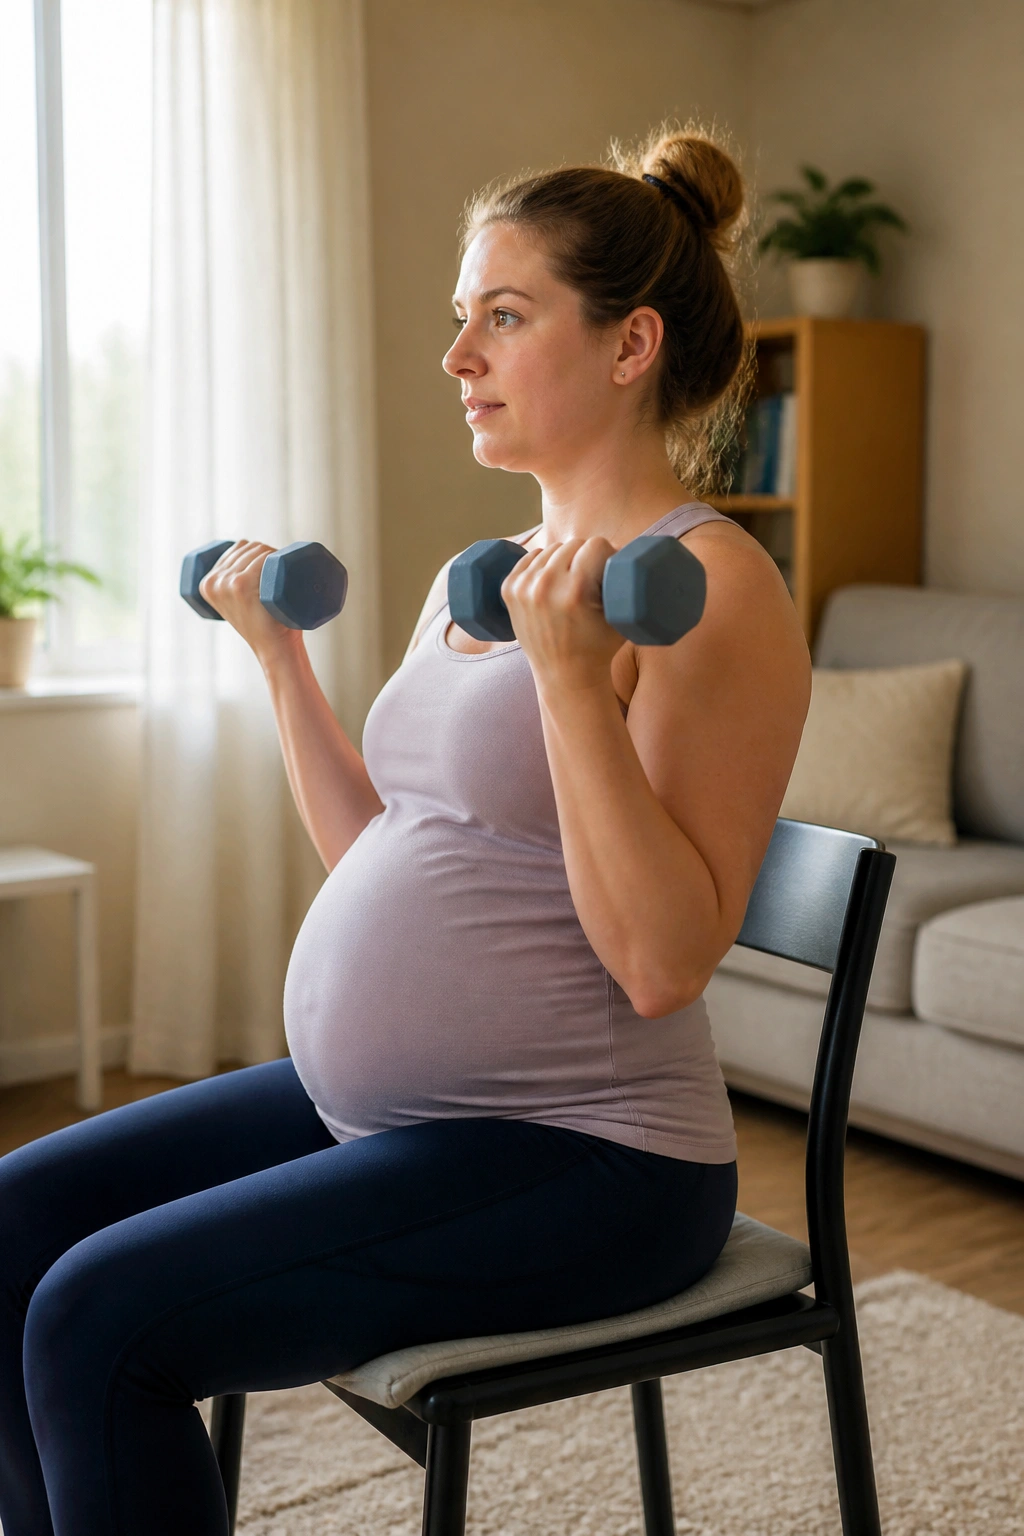
Tiny weights can still wake up tired arms. Seated curls are simple, but they earn their place because they let you train the arms without worrying about balance or lower-body fatigue.
Sit tall, elbows tucked near your ribs, and curl the weights up without swinging them. Lower them slowly for 2 to 3 seconds. That slow return is where a lot of the work lives, and people skip it all the time.
Why It Feels Better Than It Looks
- Neutral or slightly turned-in palms can feel better on the wrists.
- Eight to 12 reps is a solid start.
- A lighter load with clean control usually beats heavier weights with momentum.
- Resting the back against a chair can help if standing feels tiring.
One good set can be enough on a low-energy day. If you can do three and still feel smooth, fine. If not, stop earlier and call it a win.
14. Standing Calf Raises Beside a Chair
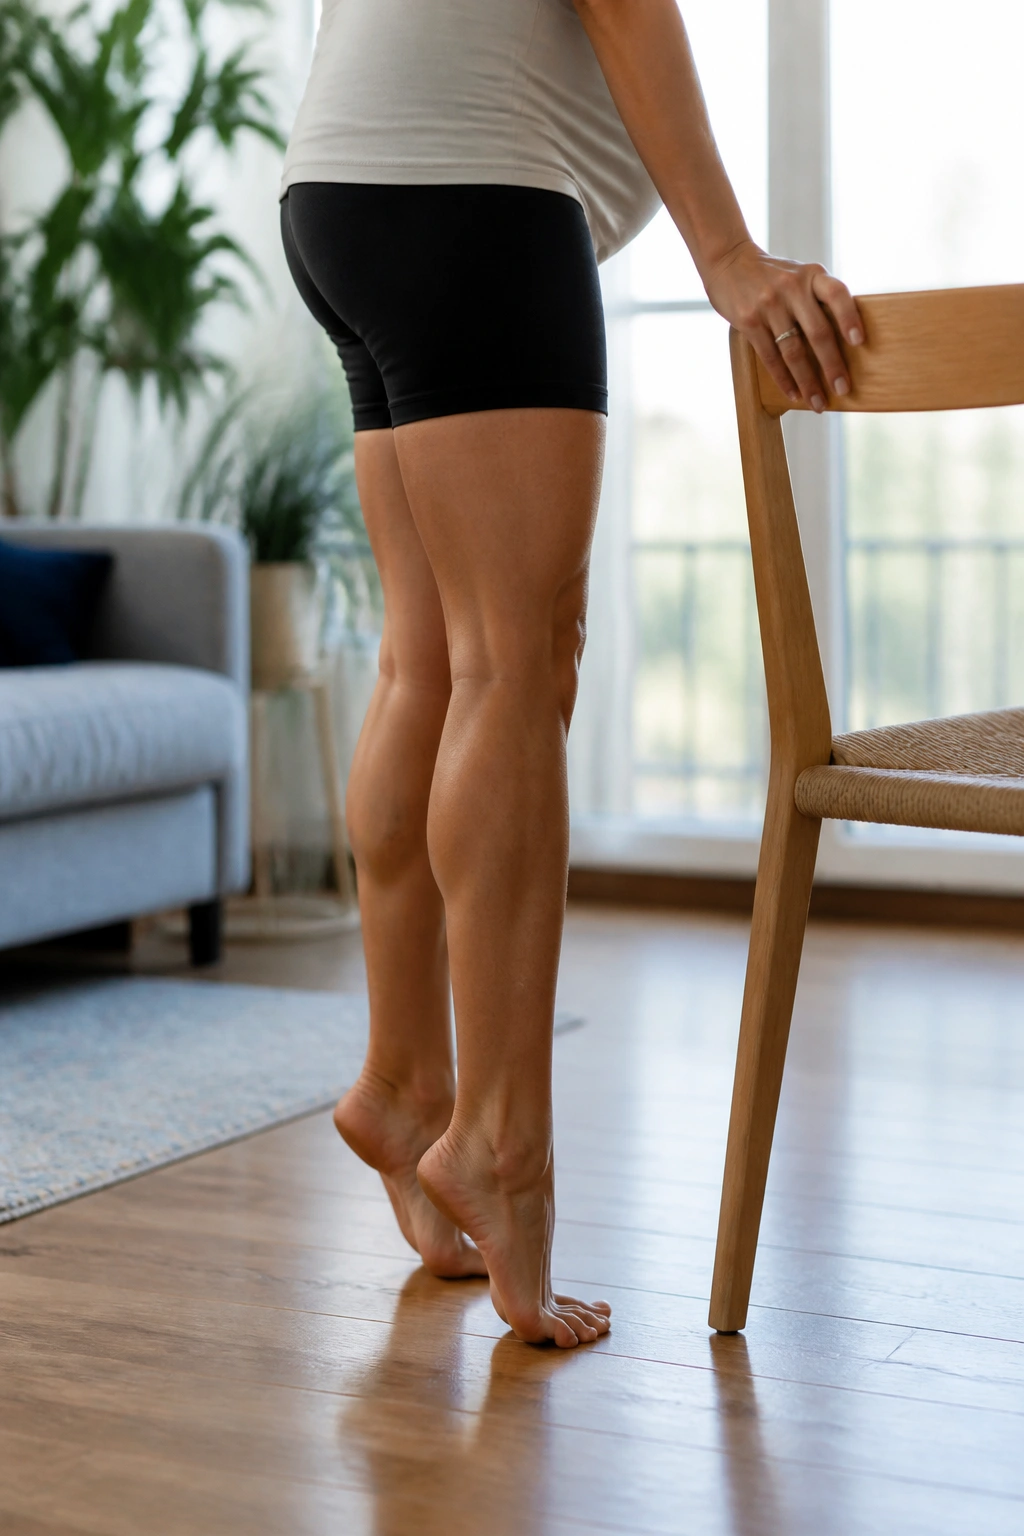
Calf raises are boring in the best possible way. They support circulation, wake up the ankles, and give the lower legs a little strength work without needing much space.
Stand near a chair or countertop and lift both heels until you are on the balls of your feet. Pause for a beat at the top, then lower slowly until the heels kiss the floor again. The slow lower matters more than people think.
- Use both feet first.
- Try one leg only if balance feels solid.
- Aim for 15 to 20 smooth reps.
- Keep the knees soft, not locked.
If your feet are swelling or feeling heavy, this can be a nice reset. It is small work, but the lower legs tend to appreciate small work.
15. Heel-to-Toe Balance Holds Near a Wall
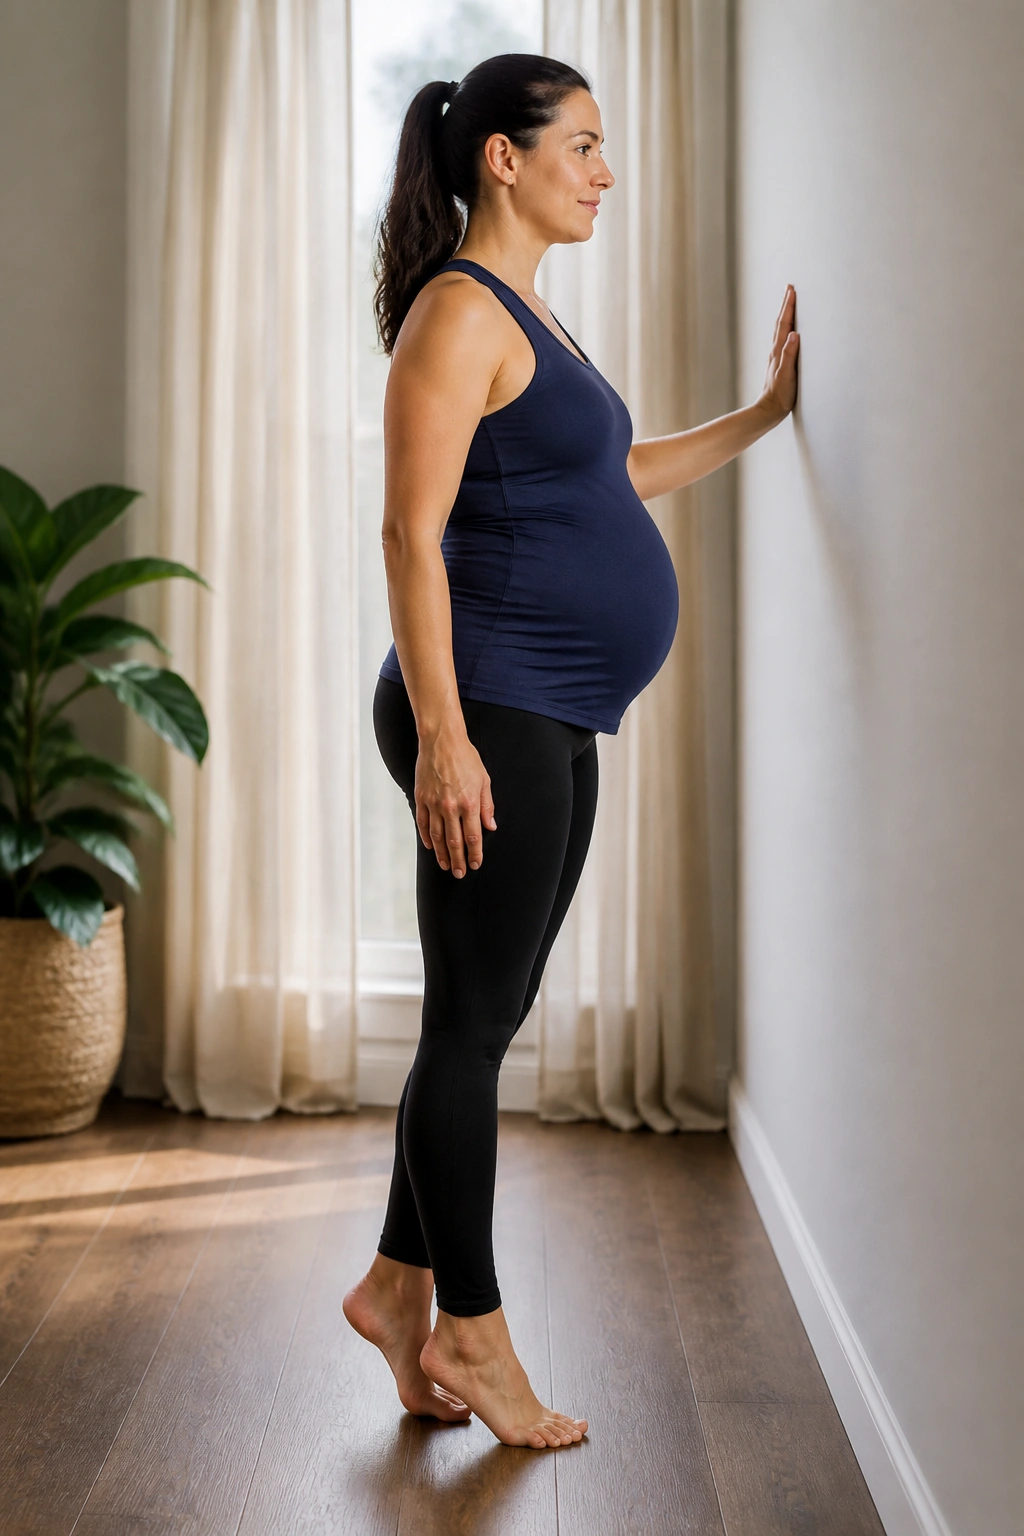
Balance changes during pregnancy, so practicing it in a safe setup is smart. Heel-to-toe holds look simple, but they teach your body how to find steadiness when your center shifts.
Place one foot directly in front of the other, heel touching or nearly touching the toes of the back foot. Hold a wall or countertop lightly, then let go for a few seconds if you feel steady. The goal is not to wobble less than a gymnast. It is to stand there calmly.
How to Scale It
Start with the feet a few inches apart instead of a perfect line. Hold for 10 to 20 seconds, switch sides, and repeat three times. If that feels easy, narrow the stance.
Use a non-slip floor. Seriously. A patterned tile or a rug with a curl at the edge can make this feel much harder than it should.
16. Modified Side Plank From the Knees
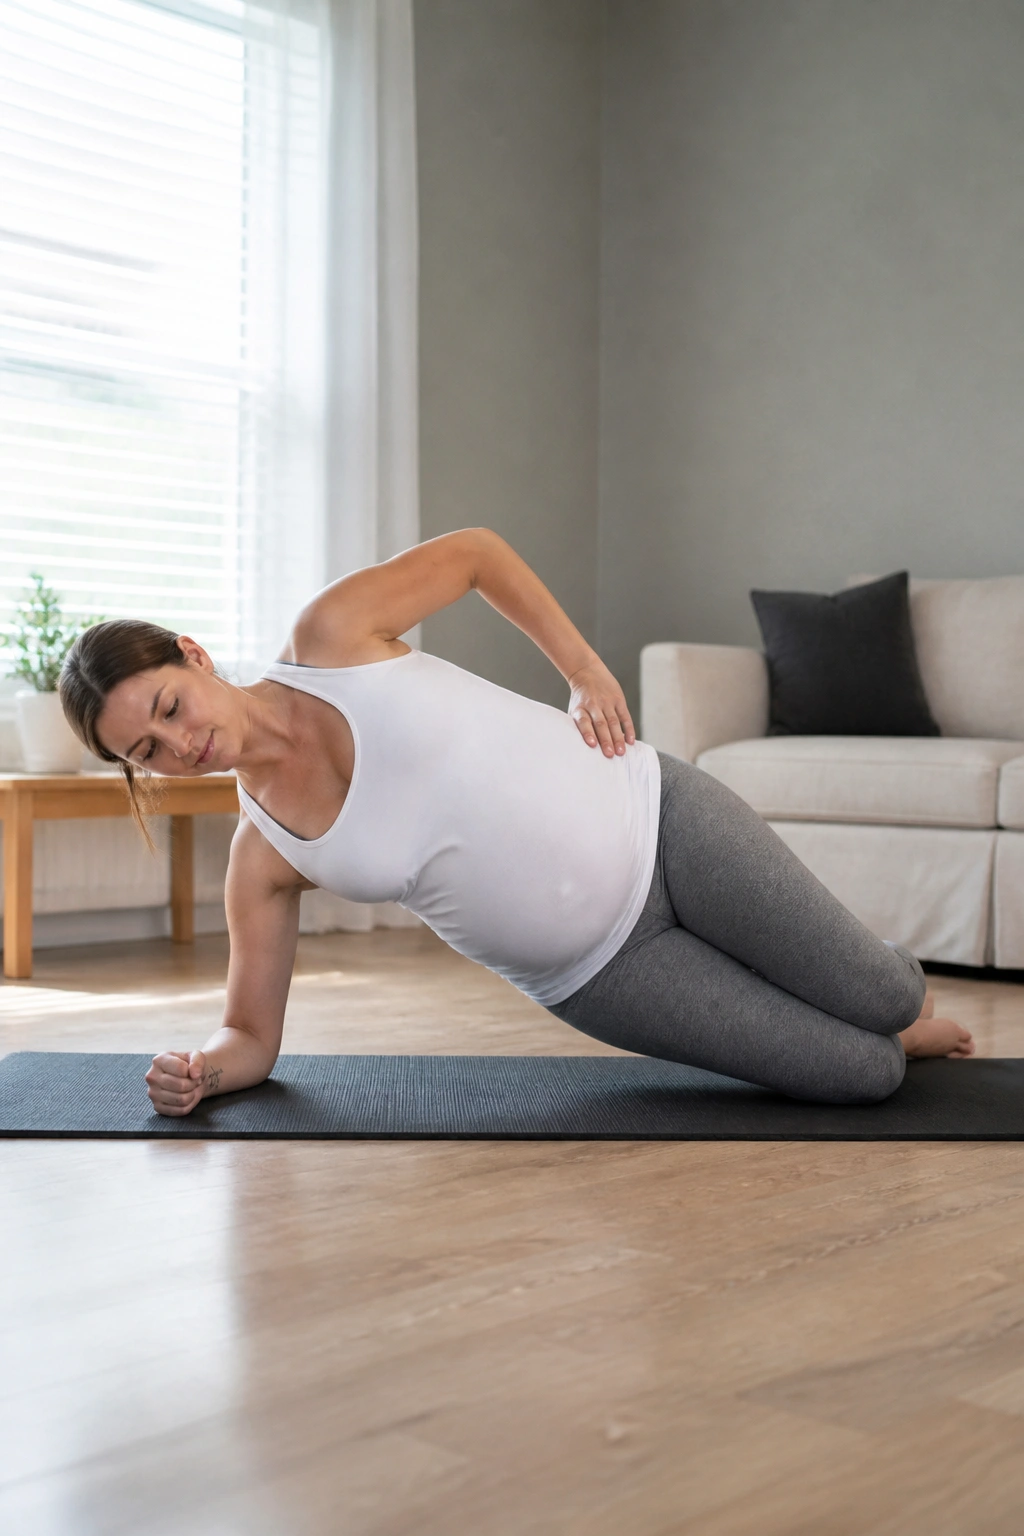
A full side plank is a bad deal if your body does not want it. The kneeling version is the smart swap, because it builds side-body strength without forcing a max effort hold.
Set one forearm on the floor with the elbow under the shoulder, bend both knees, and lift the hips only as high as you can keep the line steady. The lower knee stays on the mat. That support changes everything.
- Hold for 10 to 20 seconds.
- Keep the neck long and relaxed.
- Stop if the shoulder shrugs upward.
- Switch sides before fatigue ruins the shape.
If the floor feels too low, do this with your forearm on a sofa cushion or a bench. It is still a real exercise. No points are lost for using a better setup.
17. One-Stair Step-Ups at an Easy Pace
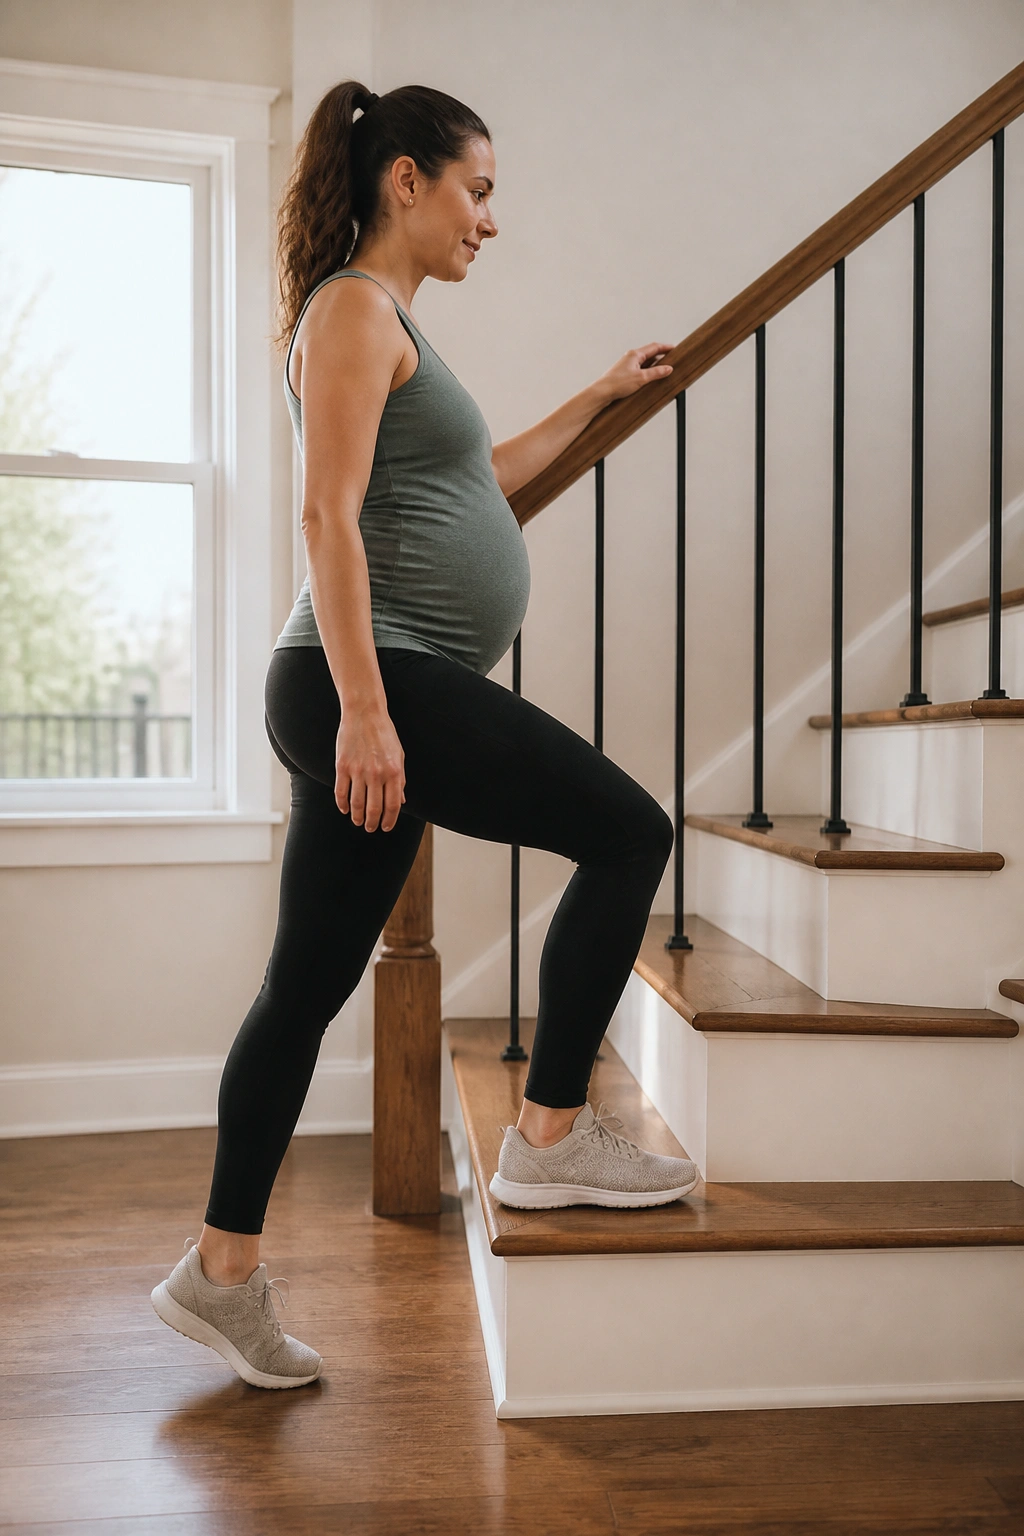
A staircase can be a solid cardio tool if you treat it like walking, not a race. One low step is enough for most people, especially if the goal is to keep the legs strong and the heart rate gently up.
Step one foot onto the stair, press through the heel, bring the other foot up, then step back down with control. Use the rail. That is not cheating. That is smart setup.
The movement should feel smooth through the glutes and quads, not clunky through the knees. Start with 8 to 10 step-ups on one side, then switch. If the step is high or your balance feels off, go slower and use fewer reps. A lower step often works better than people expect.
18. Wall Angels for Open Shoulders
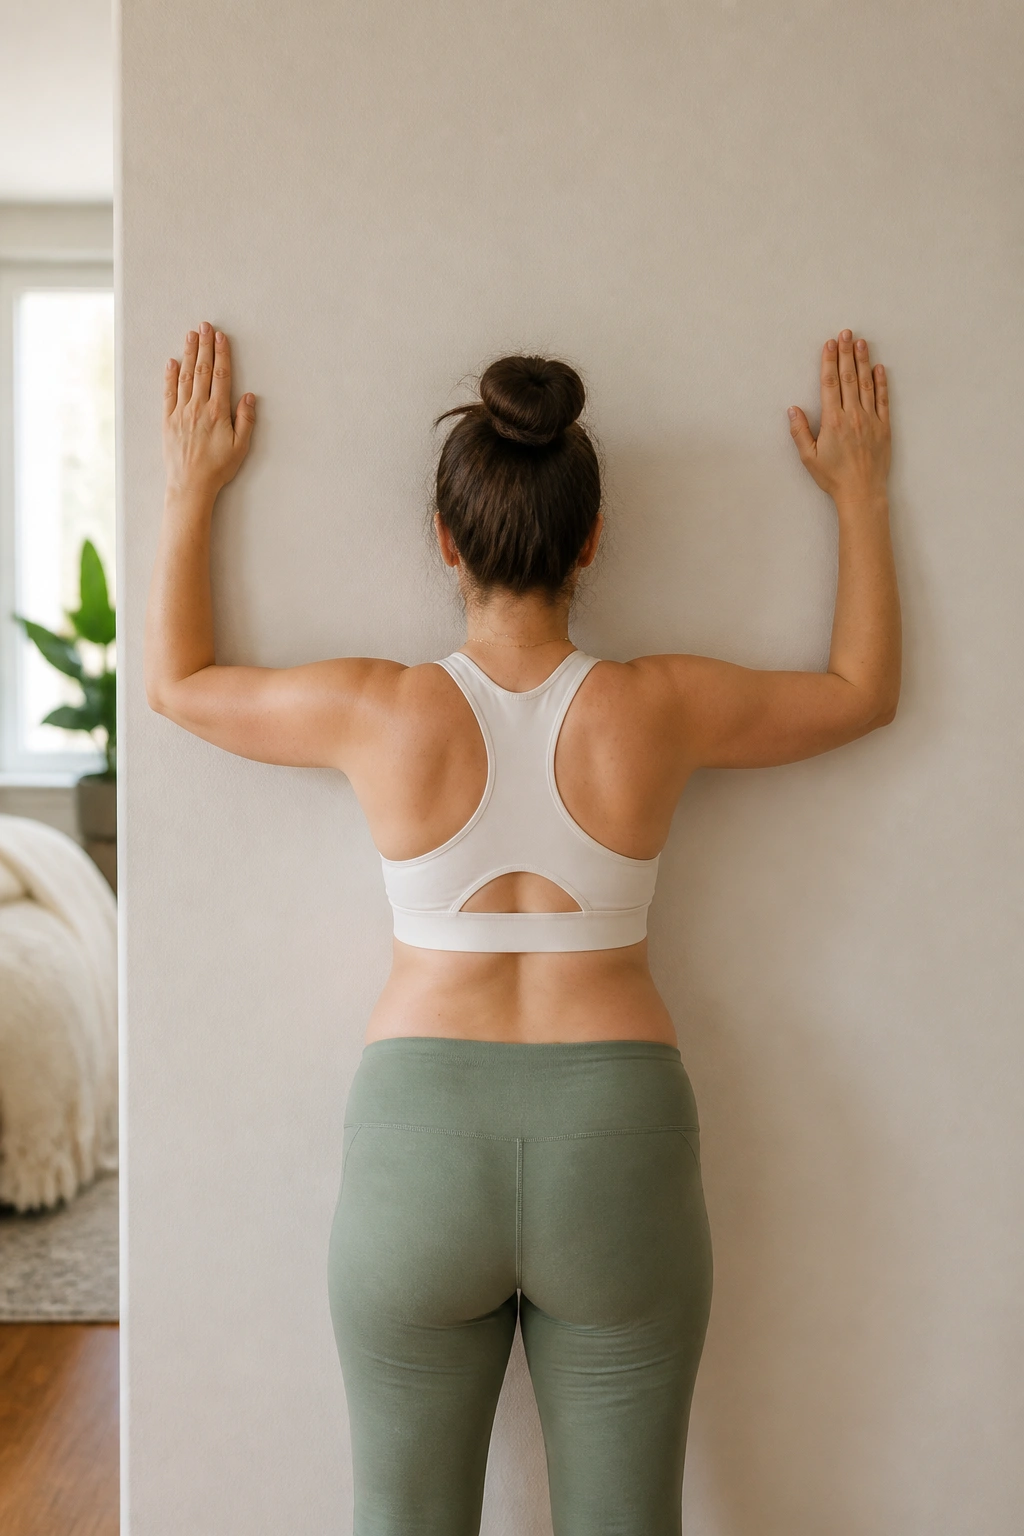
Unlike a floor stretch, wall angels train posture while the ribs stay easy to control. They ask the shoulders to glide upward and downward without the neck taking over, which is useful when your upper back starts rounding from sitting or carrying.
Stand with your back against a wall, feet a little forward, and press your arms into a goalpost shape if that feels possible. Slide the arms up and down slowly, keeping as much contact with the wall as you comfortably can.
What Makes Them Worth Keeping
Wall angels are best for the days when your neck is tight, your shoulders feel boxed in, or your upper body wants a break from heavier work. They are not flashy. They do not need to be.
Six to eight slow reps is enough. If your wrists or elbows refuse to touch the wall, leave them a little off the surface and focus on smooth motion instead of perfect form.
19. A Gentle Prenatal Yoga Flow on a Mat
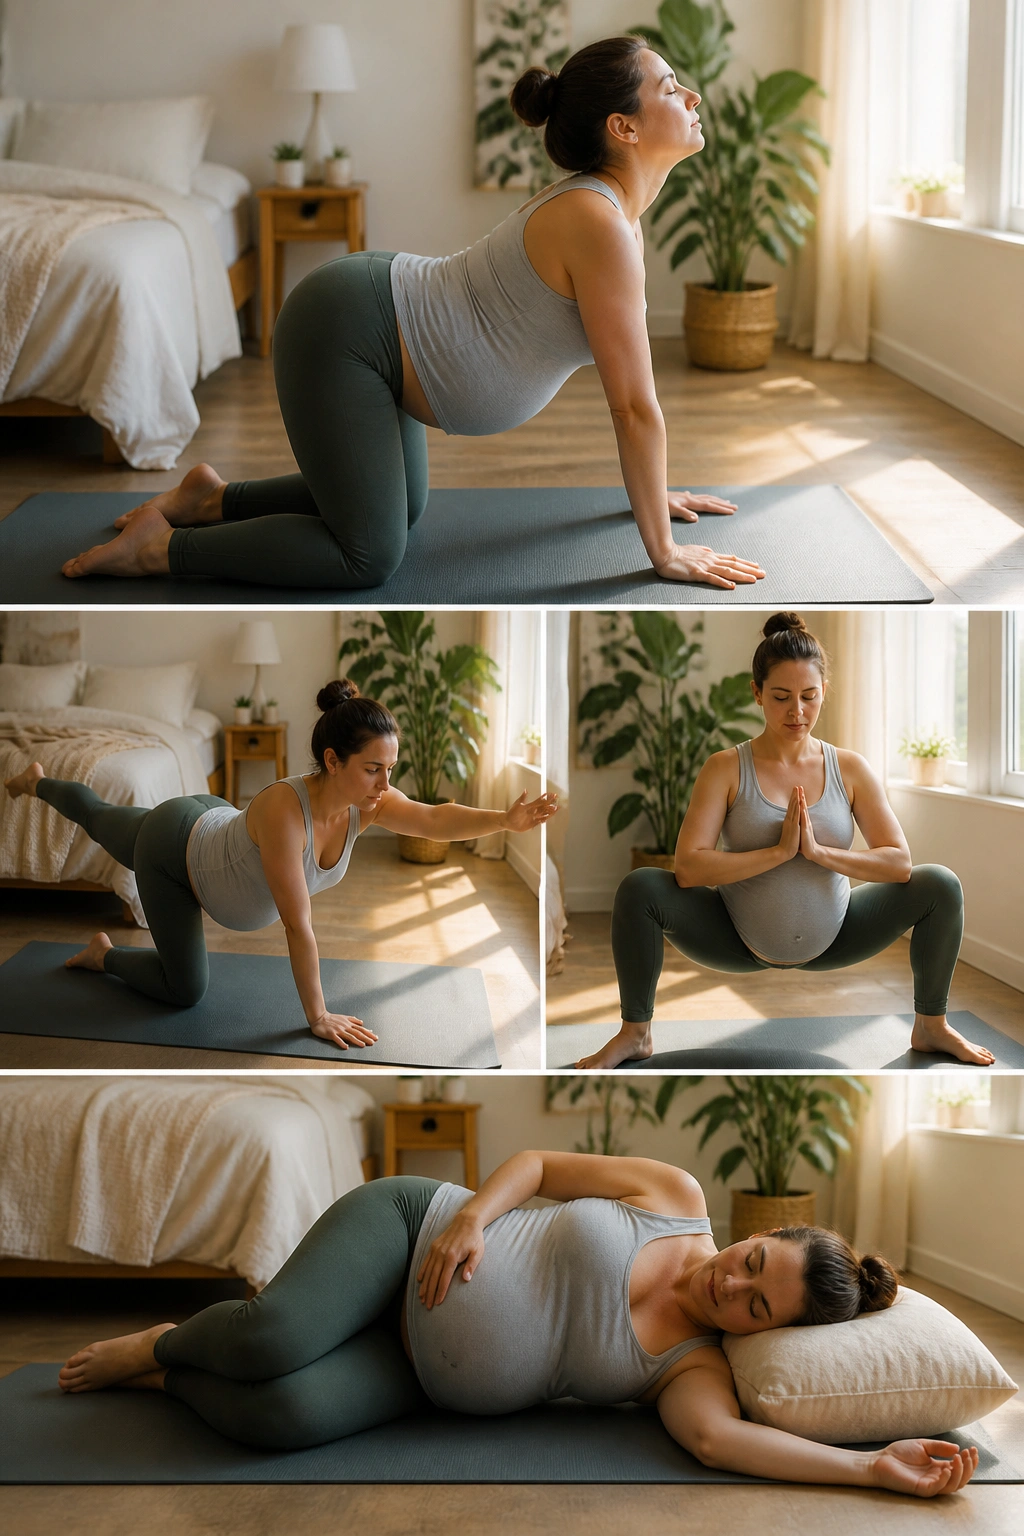
A prenatal yoga flow does not need to be fancy. A good one feels like a reset: a little spine movement, a little hip space, a little breathing room.
Keep it short and calm. Cat-cow, bird-dog reach, a supported wide-knee squat holding a chair, and a side-lying rest are enough for one session. If hands-and-knees work irritates your wrists, do the same rhythm standing with one hand on a wall.
A Simple Flow That Fits Most Homes
- 4 rounds of cat-cow
- 5 bird-dog reaches per side
- 3 slow supported squats
- 3 to 5 long exhales while standing or seated
Skip deep twists and stay away from any position that makes your belly feel compressed or your breath feel trapped. If lying flat bothers you, turn the flow into a standing sequence. The shape changes. The calm part should stay.
20. Low-Impact Dance Cardio in the Kitchen
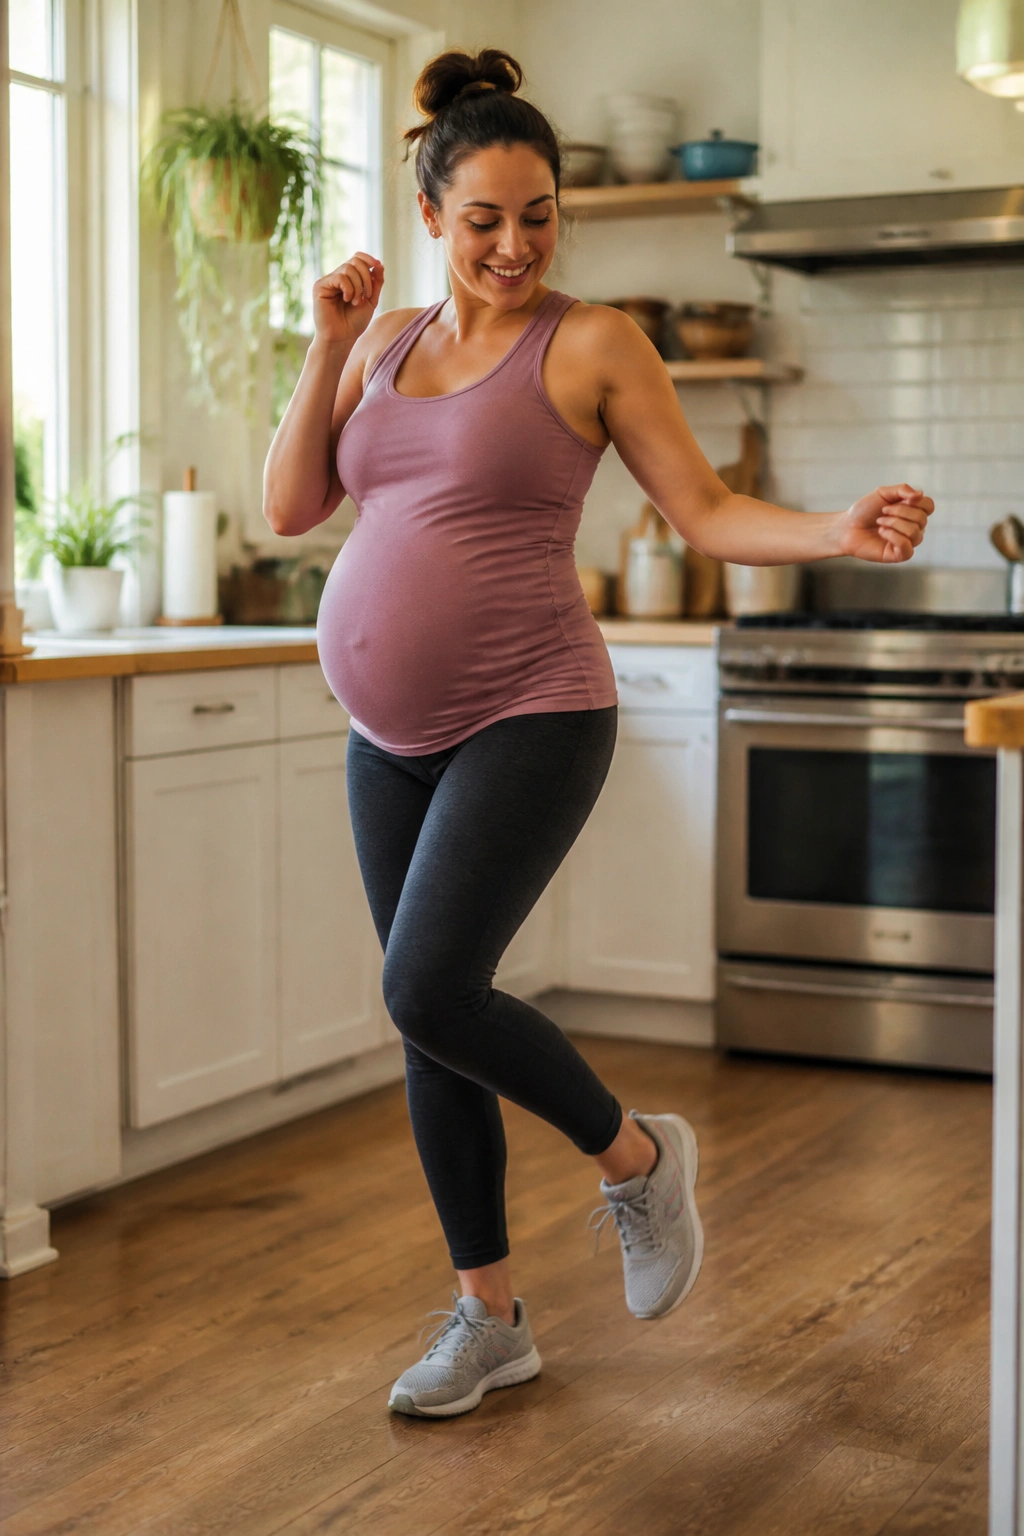
If the goal is to keep moving on a day when you do not want to “work out,” dance wins. It is low-pressure, easy to shorten, and hard to take too seriously, which can be a relief.
Use step-touches, toe taps, side reaches, and small grapevines without crossing your feet too tightly. Keep the jumps out of it. Let the music carry the tempo, but keep your feet close to the ground and your turns tiny.
Three songs can be enough for a session. Two if the day is rough. If you want a rough guide, aim for a level where you are breathing harder but still in control. The kitchen is fine. The living room is fine. The exact room does not matter much.
21. Shadow Boxing Without the Bounce
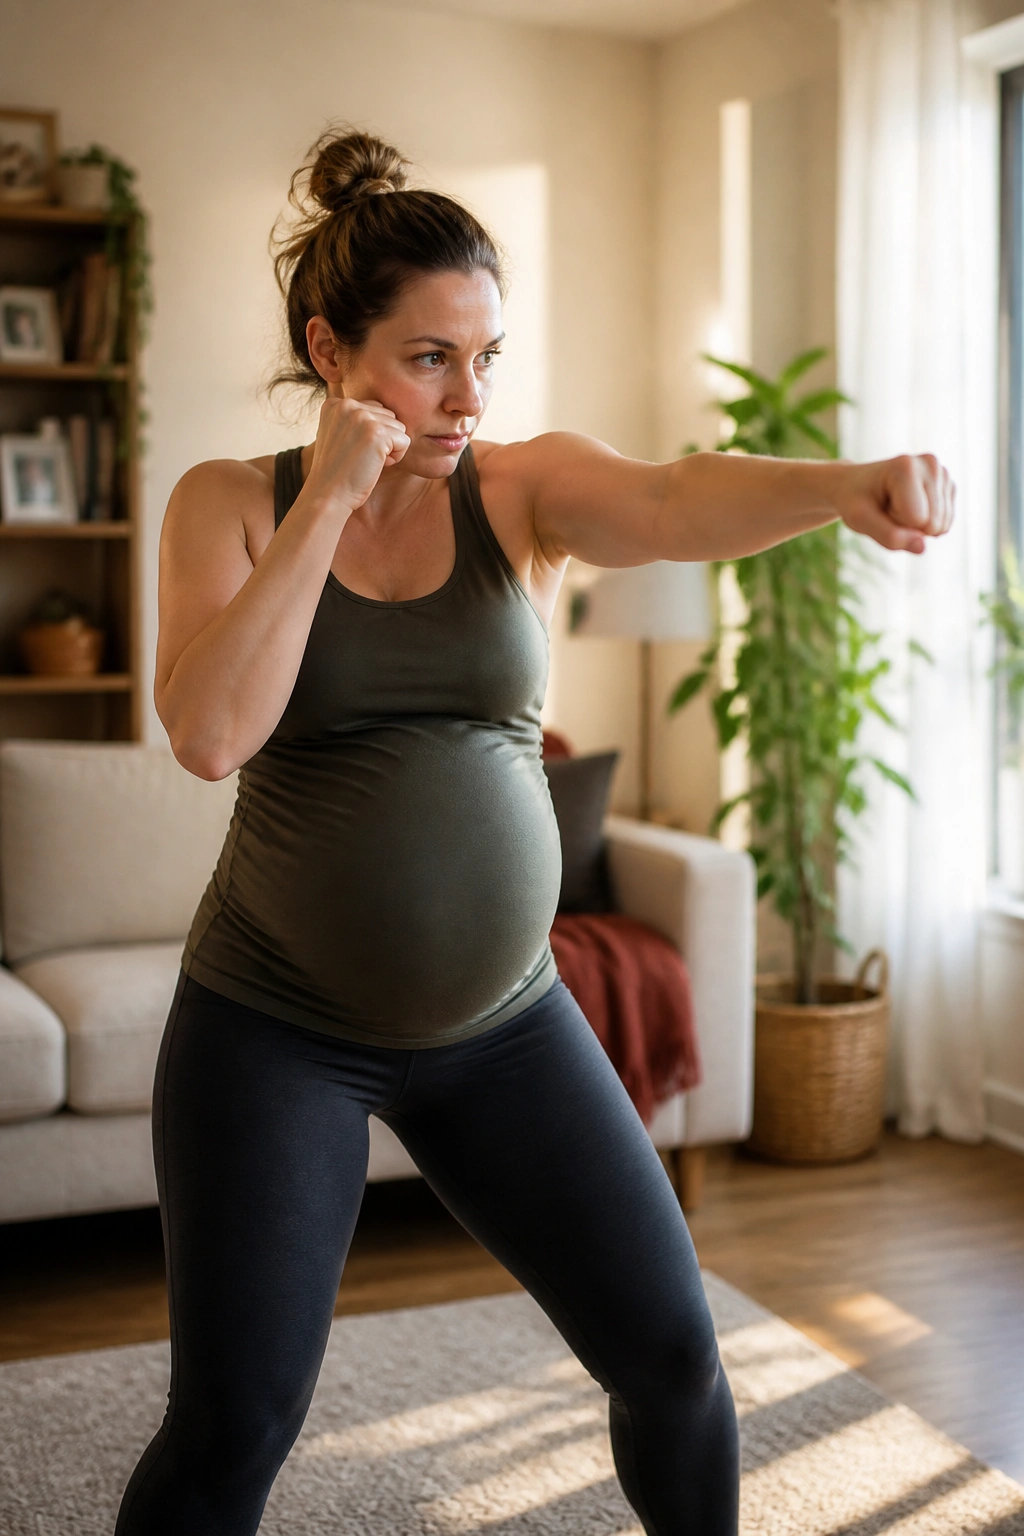
Need a workout that feels a little more alive? Shadow boxing gives you upper-body movement and light cardio without needing equipment or a huge space.
Stand with feet planted hip-width apart, hands up near the cheeks, and throw soft jabs and crosses at chest height. Keep the torso rotation small and controlled. You are not trying to twist hard; you are just asking the shoulders, arms, and core to stay awake.
How to Use It
Work in 30 to 45 second rounds, then rest for the same amount of time. If the shoulders start to burn before your breathing does, shorten the punches and keep going a bit longer. That usually feels better than forcing the range.
If your wrists are sensitive, keep the fists loose. If your bump feels like it gets tugged by twisting, square up more and cut the rotation down. The move should feel snappy, not aggressive.
22. Stair Walking Intervals at a Talkable Pace
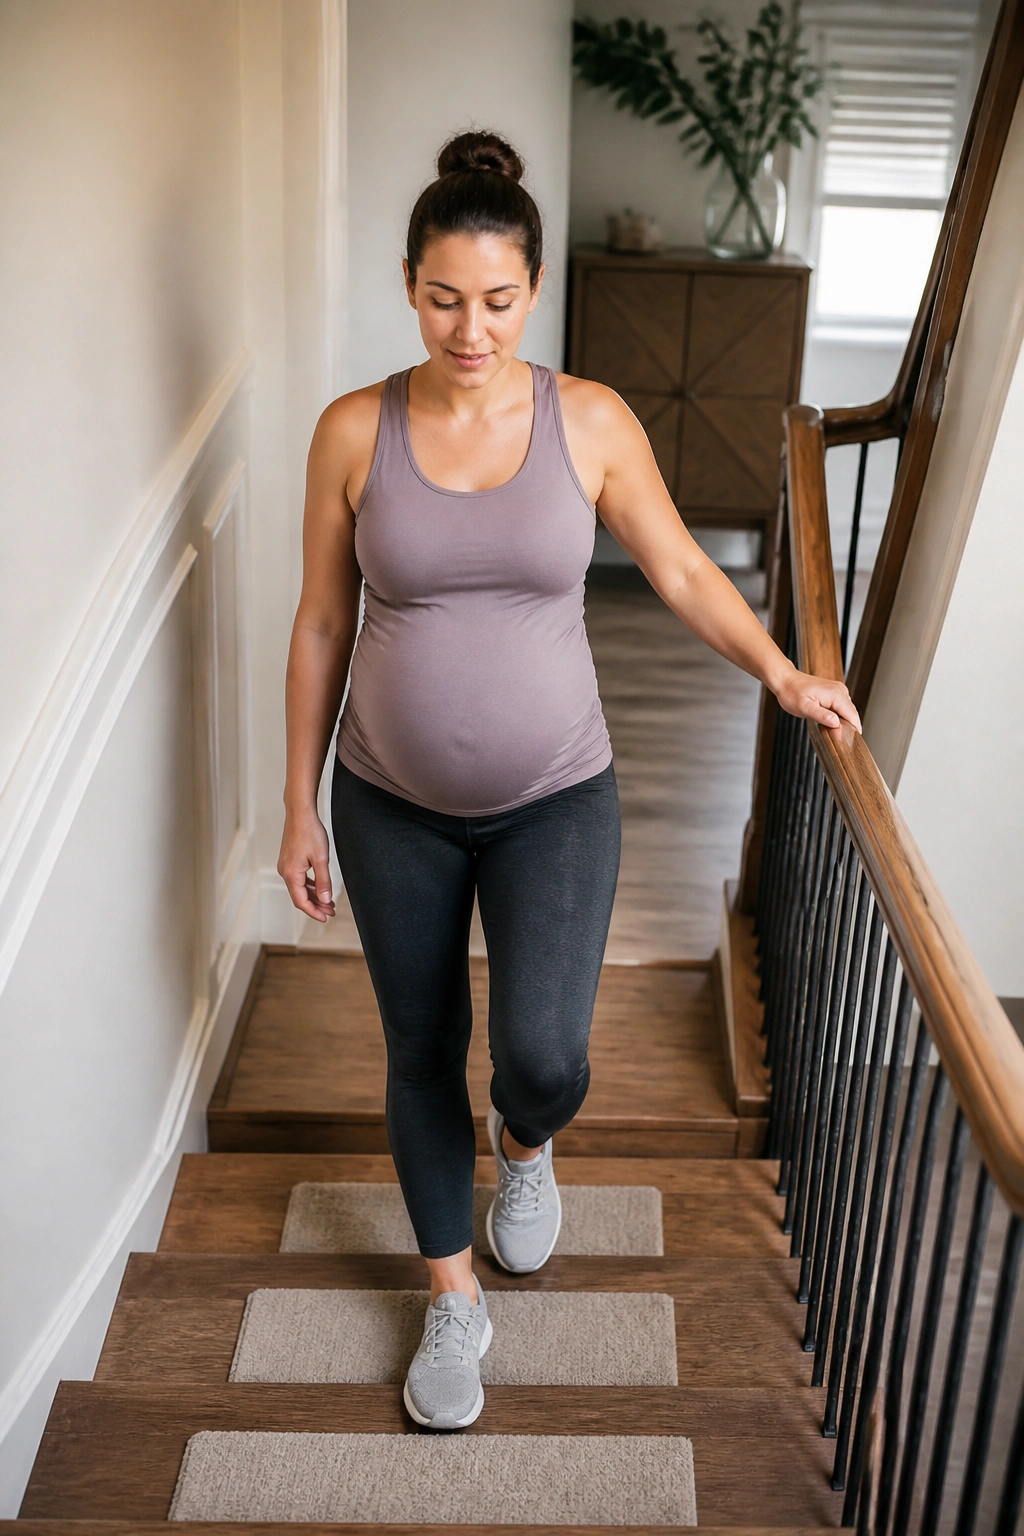
A staircase can be a solid cardio tool if you treat it like walking, not a challenge. That distinction matters. The right pace is steady and controlled, with the rail there to help, not to prove anything.
Walk one flight up, turn around, and walk down carefully. Rest at the bottom if you need to. Repeat for 4 to 6 rounds, or stop sooner if your breathing gets too ragged or your knees start arguing.
- Keep one hand near the rail.
- Step fully onto each tread.
- Avoid rushing the descent.
- Stop if you feel lightheaded.
A low staircase works better than a steep one. If stairs have never been your friend, skip this and go back to hallway walking. No loss.
23. Squat-to-Calf-Raise Combos for Legs
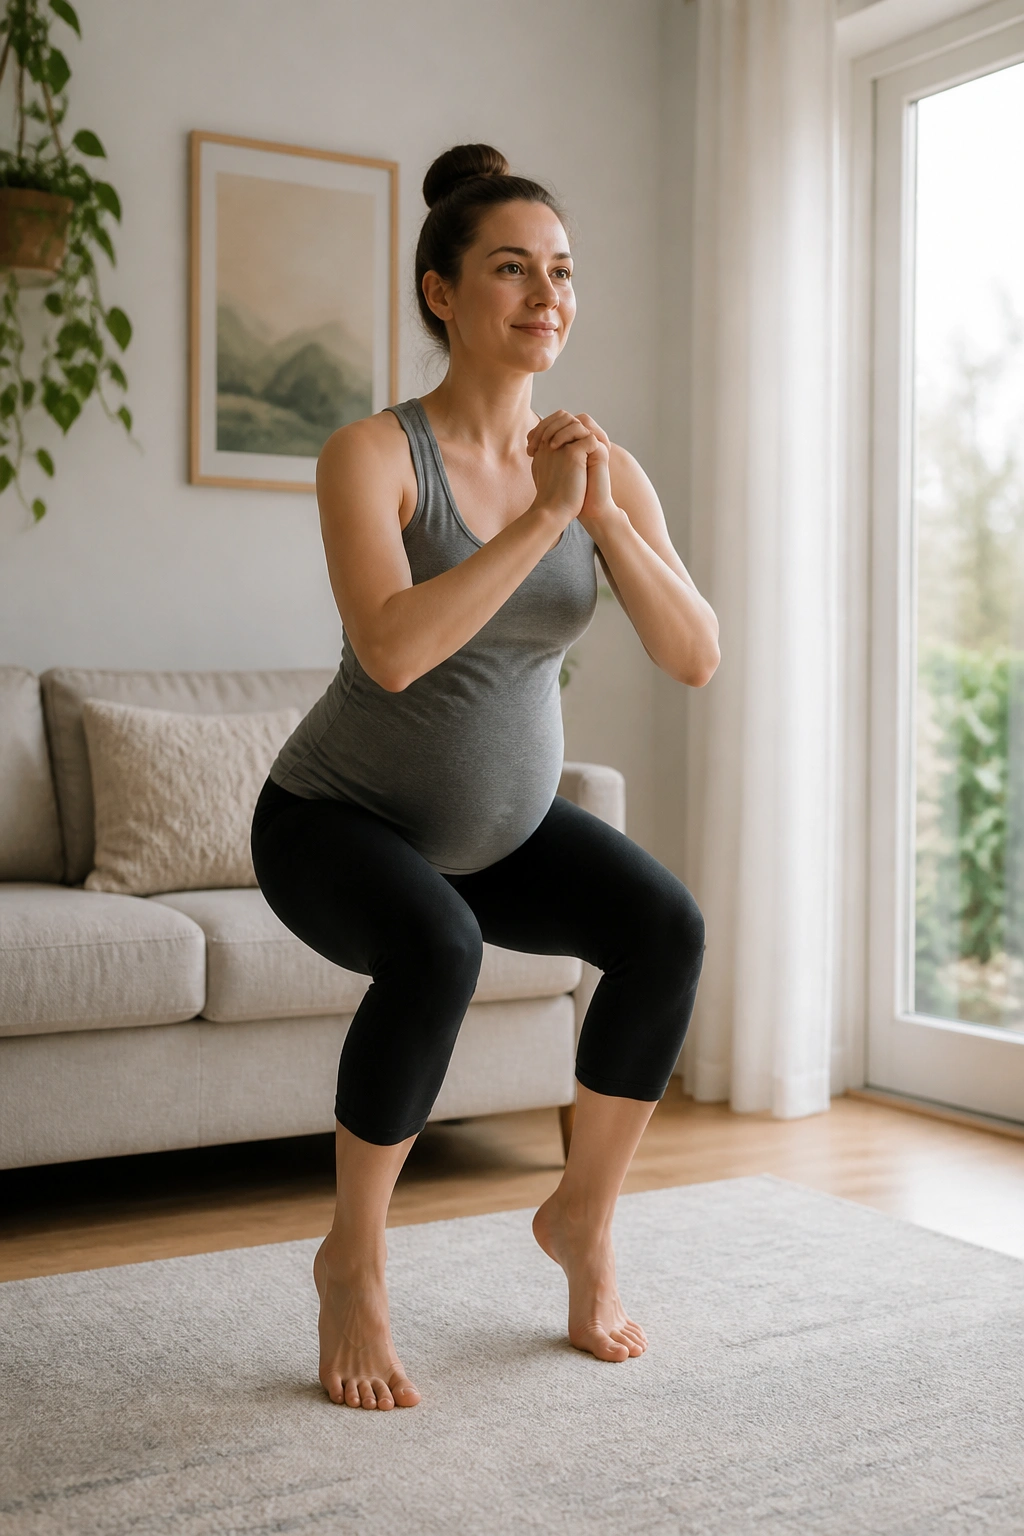
This combo looks simple, and it is simple, but it gives you a useful mix of leg strength and balance work in one pass. The squat wakes up the thighs and glutes. The calf raise finishes the lower leg.
Lower into a chair squat, stand tall, then rise onto the balls of your feet at the top. Hold for a second, then lower both heels with control. The sequence feels smooth when you keep it slow. Fast reps turn it into a wobble.
A set of 8 to 10 controlled reps is usually enough. If the combo feels too busy, split it into two separate moves first and come back later. That is not a step backward. It is a cleaner way to learn it.
I like this one on days when I do not want a long workout but still want to feel that the legs did something useful.
24. Resistance Band Pull-Aparts at Chest Height
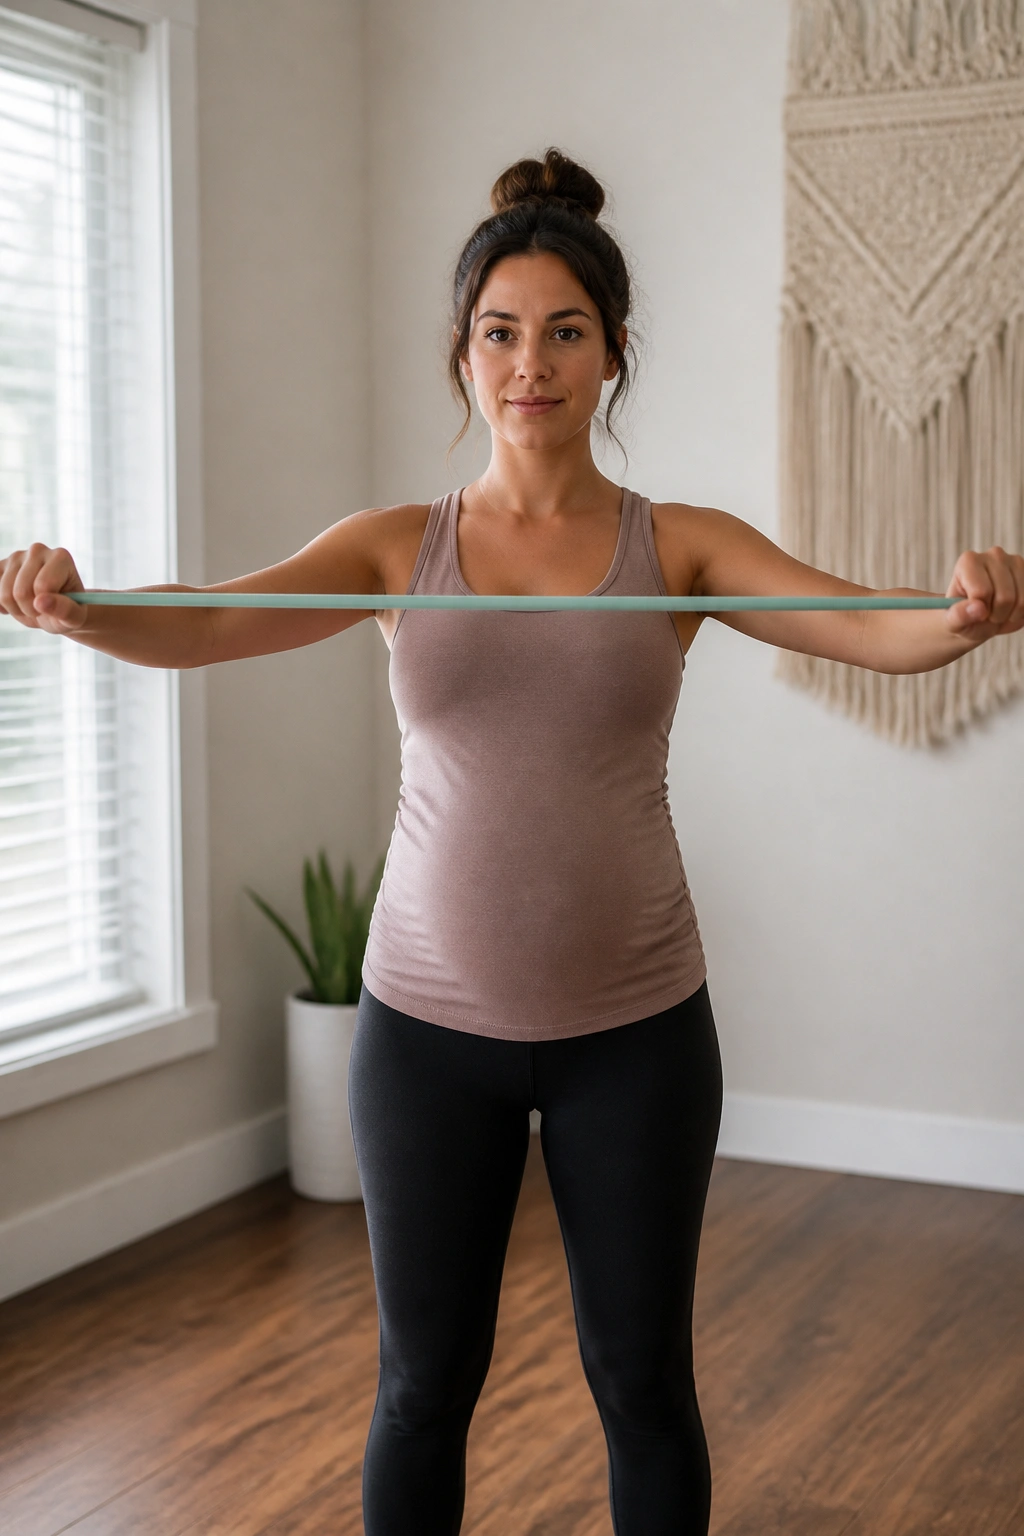
Unlike rows, pull-aparts hit the upper back from a wider angle, which is handy when shoulders start rounding forward and the chest feels tight. It is a small move with a big posture payoff.
Hold a light band at chest height with arms straight but not locked. Pull the band apart until your hands move out to the sides, then return with control. Keep the shoulders down. If they creep toward your ears, the band is too heavy or the range is too aggressive.
What to Pay Attention To
Pull-aparts work best when the motion comes from the shoulder blades, not from shrugging or leaning back. Think “wide collarbones,” not “big yank.” Twelve to 15 slow reps is a solid target.
If your hands go numb or the neck starts loading up, take a longer rest and lighten the band. This one is supposed to clean up tension, not add to it.
25. A Short Cooldown Walk and Breathing Reset
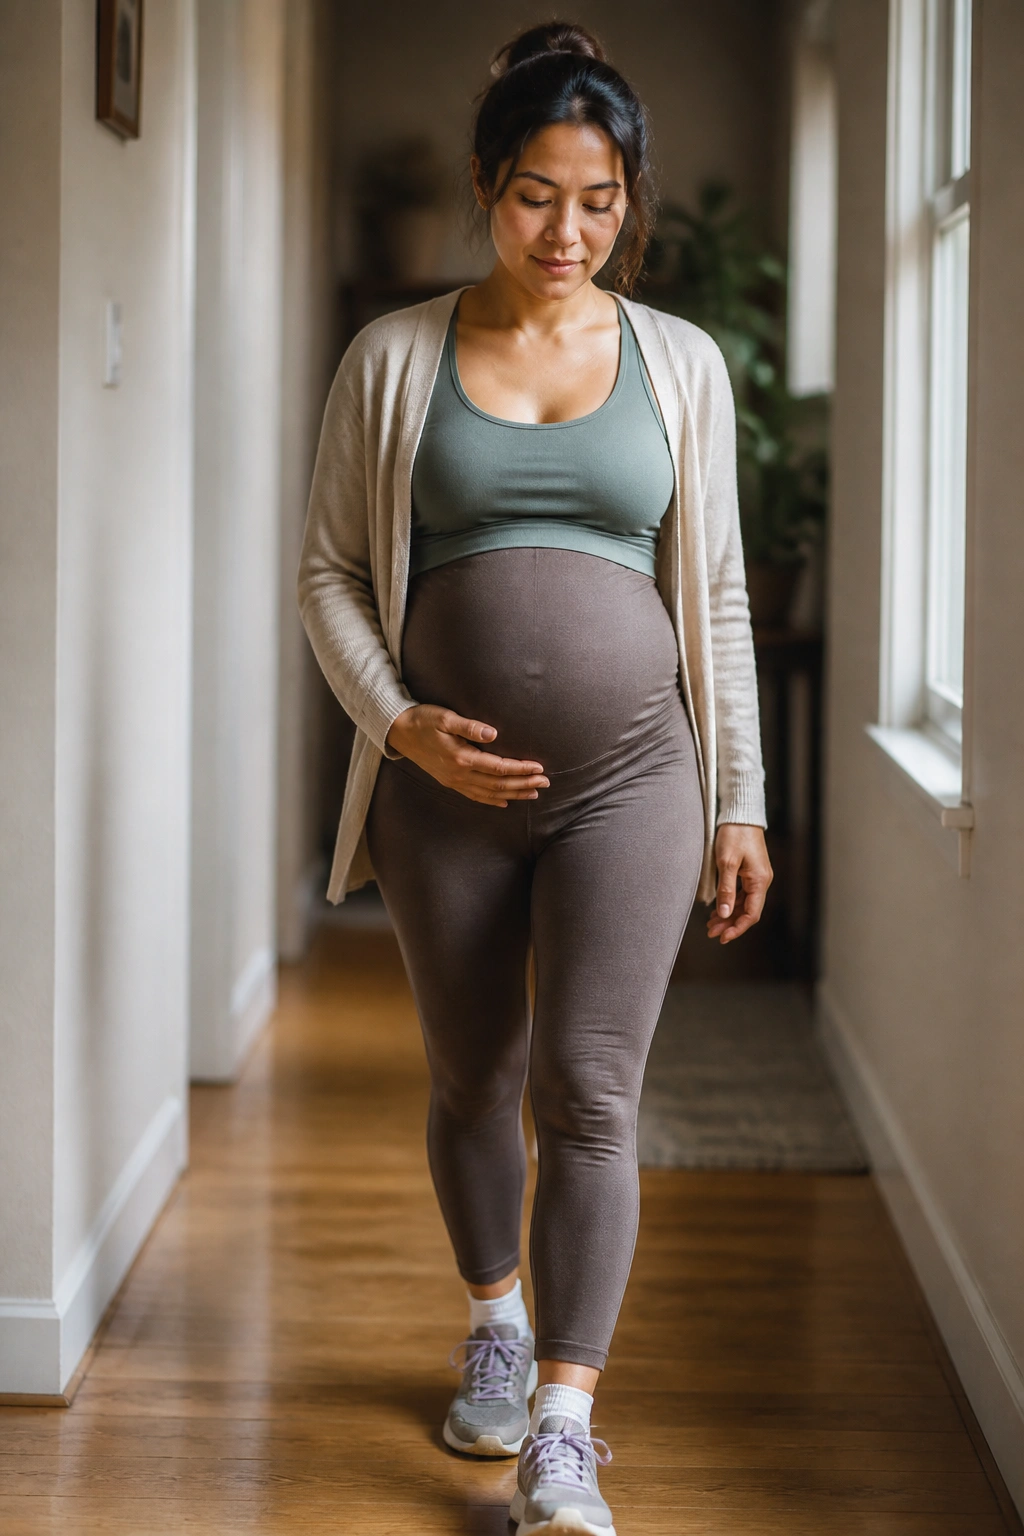
A cool-down is not extra fluff. It is the part that helps your body notice the work is over, which can matter when you are pregnant and already carrying enough tension around.
Walk slowly for 3 to 5 minutes, then stand still and take a few long exhales. Let the shoulders drop. Unclench the hands. If you have room, do a gentle calf stretch or a soft side bend while holding a wall. Nothing deep. Nothing forced.
If the rest of the list feels like too much on a tired day, this is the one to keep. A quiet walk around the house, a few steady breaths, and a little shoulder release can leave you feeling more settled than a harder session would. That counts.
