



Leg day does not need dumbbells to light up your thighs.
A smart yoga flow can load the quads, hamstrings, glutes, calves, and inner thighs in ways that feel sneaky at first and then very honest about 30 seconds later. The trick is time under tension: slower transitions, longer holds, bent-knee balance work, and enough repetition that your legs have nowhere to hide. That is where toned sculpted legs come from in a yoga practice — not from speed, not from flinging yourself through a fast sequence, and not from pretending a stretch is the same thing as strength.
I like yoga for legs because it gives you two things at once: muscle work and joint control. A good flow asks your ankles to stabilize, your knees to track cleanly, your hips to stay square, and your feet to do some quiet work they usually get away with skipping. If your knees are touchy, shorter stances and a smaller range of motion go a long way. If your balance is shaky, use a wall. That is not cheating. That is smart.
Run one flow as a finisher, or string four or five together for a solid lower-body session. Keep the breath steady. Keep the pace slow enough that you can feel the standing leg waking up, because that feeling is the point. The first one looks simple. It is not.
1. Chair Pose Pulse Ladder for Toned Sculpted Legs
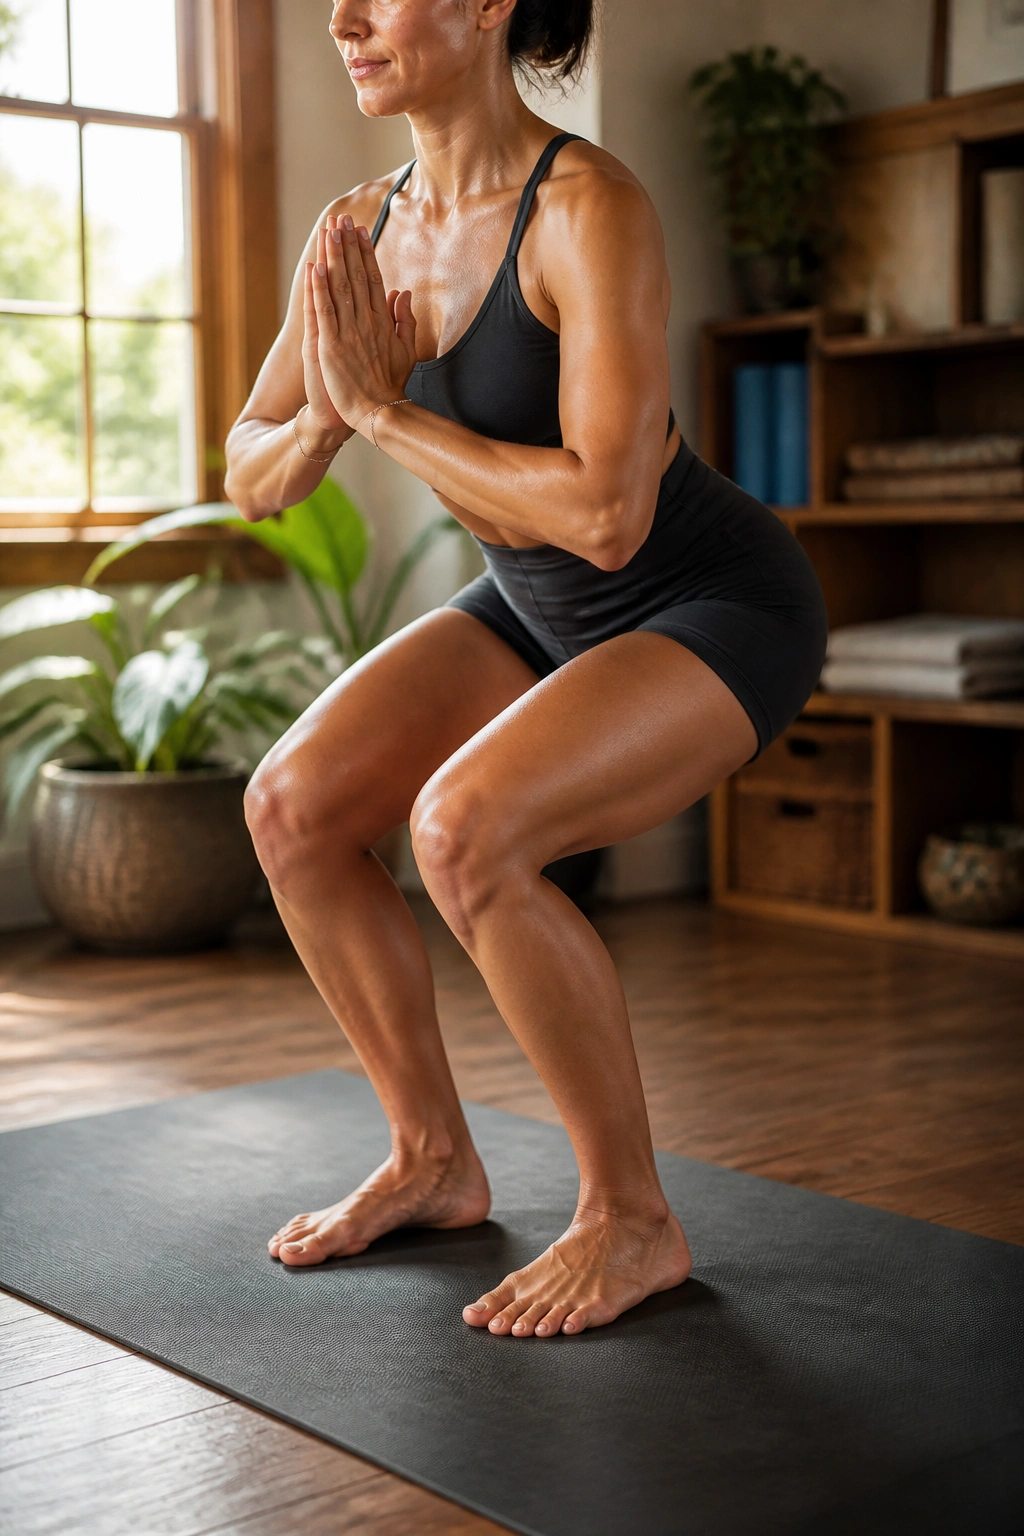
Chair pose is rude.
It looks modest from the outside, then your quads start firing and your calves start asking questions. I reach for this flow when I want a fast leg burn without a lot of choreography. The magic is in the hold. Stay low, keep the ribs stacked over the pelvis, and let tiny pulses do the annoying work.
Why It Works
Chair pose loads the front of the thighs in a way that feels more like a long, grumpy squat than a stretch. Add pulses, and you get a clean hit of isometric strength plus a little extra fatigue from the repeated lowering. That combination is gold if you want toned sculpted legs and you do not want to leave your mat looking bored.
How to use it:
- Sink into chair pose for 5 slow breaths.
- Pulse 10 times, moving only 1 to 2 inches.
- Hold for 5 breaths again.
- Repeat the pulse ladder 2 to 4 rounds.
- Finish with a forward fold and let the quads release.
Key cue: keep the weight in the heels and the big-toe mounds. If your toes start clawing the mat, you have gone too far forward.
A tiny tilt of the pelvis can save your lower back. So can a shorter stance. That little adjustment makes the flow feel cleaner, and cleaner work usually means better work.
2. Warrior II to Reverse Warrior Flow for Outer Hips and Thighs
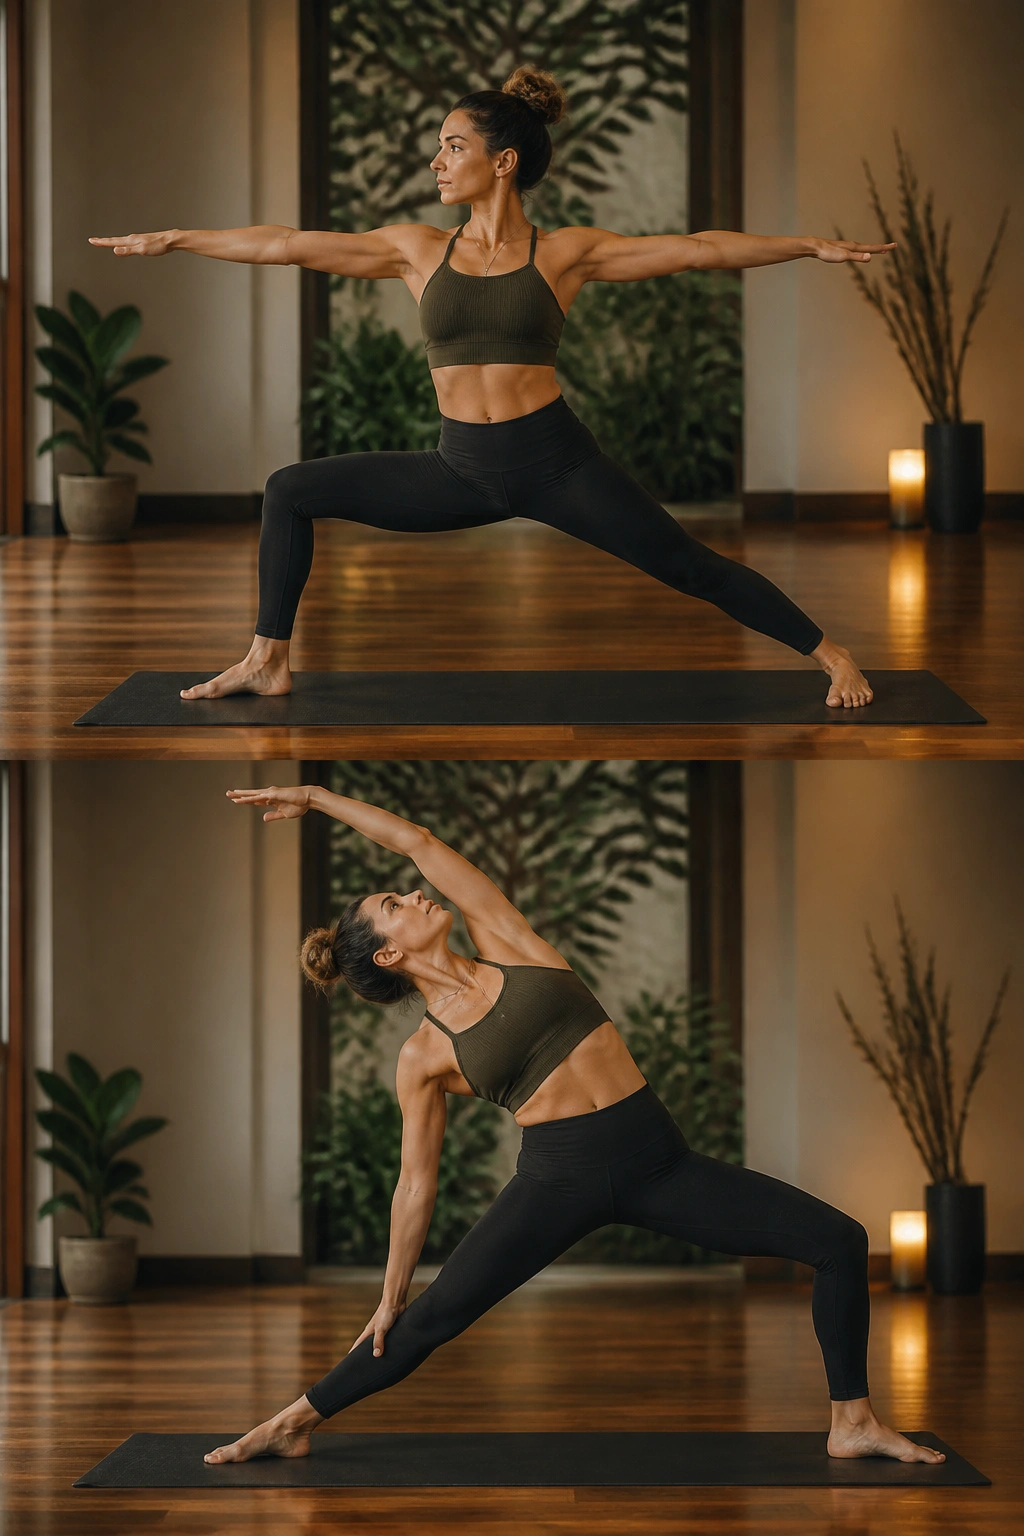
This is one of the most dependable leg sequences in yoga, and I do not say that lightly.
Warrior II gives you a long, grounded stance that wakes up the front thigh and outer hip on the bent-leg side. Reverse warrior changes the angle without letting the standing structure collapse, so the leg keeps working while the torso opens. That back-and-forth is where the burn lives. The legs never get a full break, which is exactly why this flow earns a place in a sculpting routine.
The front knee should track over the second toe, not drift inward. The back leg stays straight and active, with the outer edge of the foot pressing down. If the front thigh starts shaking, good. That usually means you are near the edge of productive effort, not injury.
Run the two shapes together for 5 breaths each. Do 3 rounds on each side, and move slowly when you transition. Rushing the step-through is how people miss the work. I prefer to pause in Warrior II for one breath before reversing. That tiny pause lets the standing leg reset and then load again.
3. Crescent Lunge Hover Flow That Works the Front Leg Hard
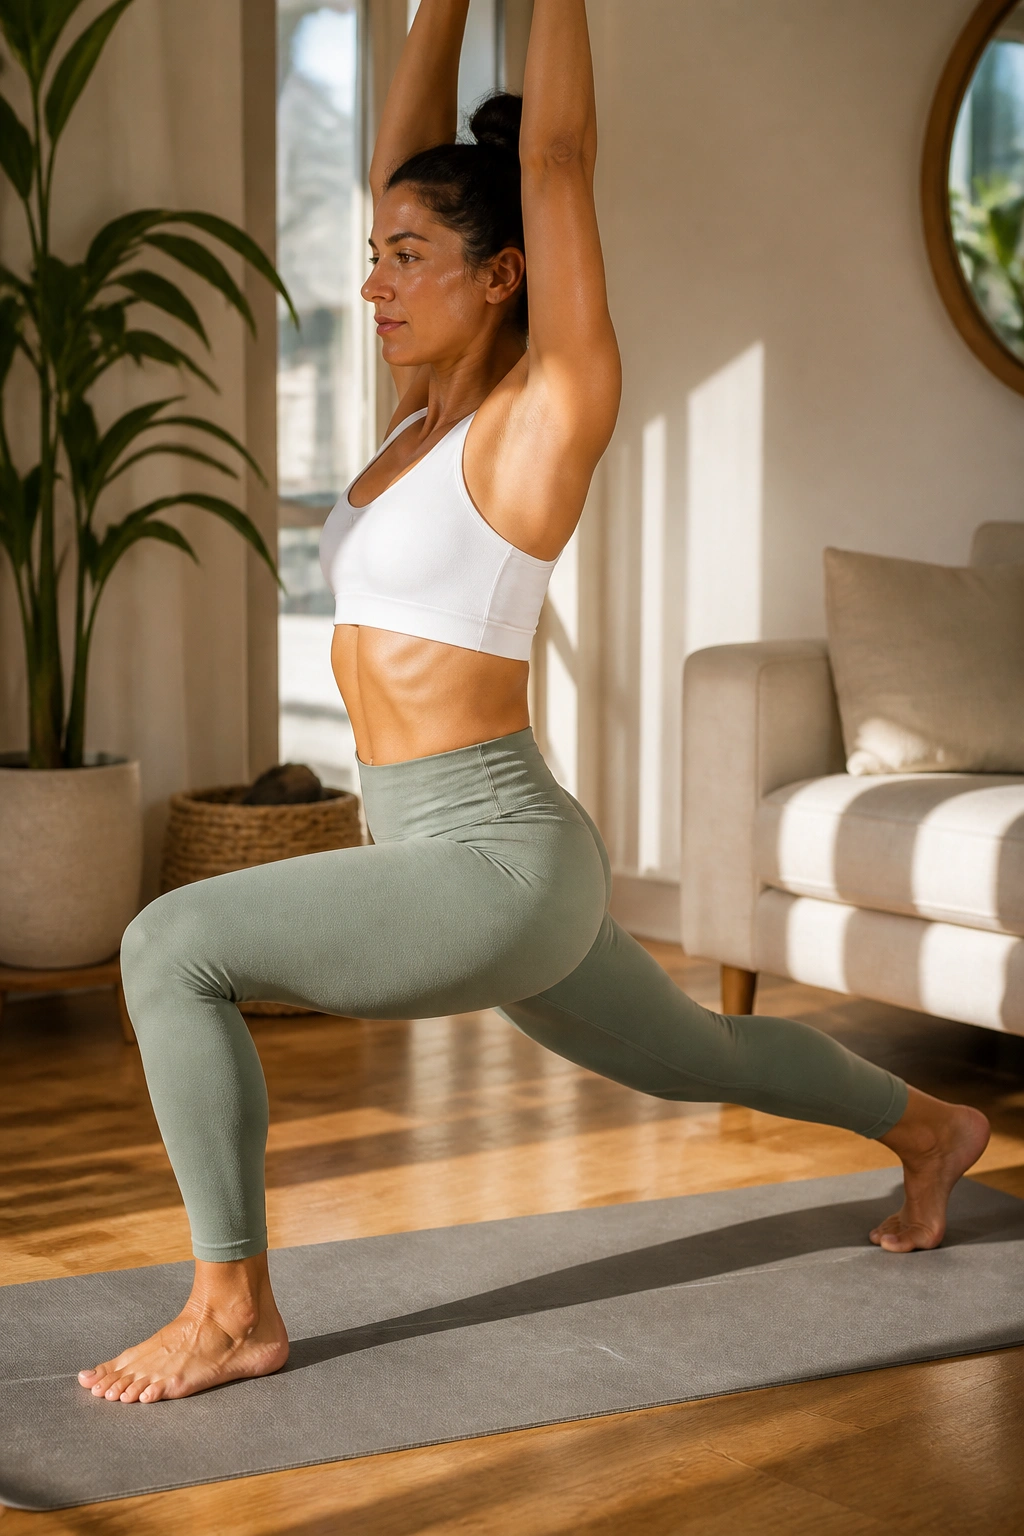
Want the front thigh to catch fire fast? Hover it.
Crescent lunge by itself already asks a lot from the quads, glutes, and ankles. The hover version takes away the easy resting point, so the front leg stays under load longer. A lifted back knee keeps the whole line honest, and the result is a very specific kind of leg fatigue that feels more athletic than dramatic.
How to Set It Up
Start in a deep crescent lunge with the back heel lifted and the torso tall. Then lower the back knee to an inch above the mat, not all the way down. Hold for 3 breaths. Lift back up. Repeat 6 to 10 times on one side before switching.
The front foot should feel planted. The heel stays heavy, the knee stacks over the ankle, and the back leg keeps reaching back even while it hovers. If your front knee caves inward, widen the feet a little and slow down. That small correction matters more than people think.
Watch for this: the lower you go, the easier it is to dump into the hip flexors. Keep a tiny lift through the belly and think about drawing the front thigh upward as you sink.
4. Skater Step Flow for Glutes, Quads, and Balance
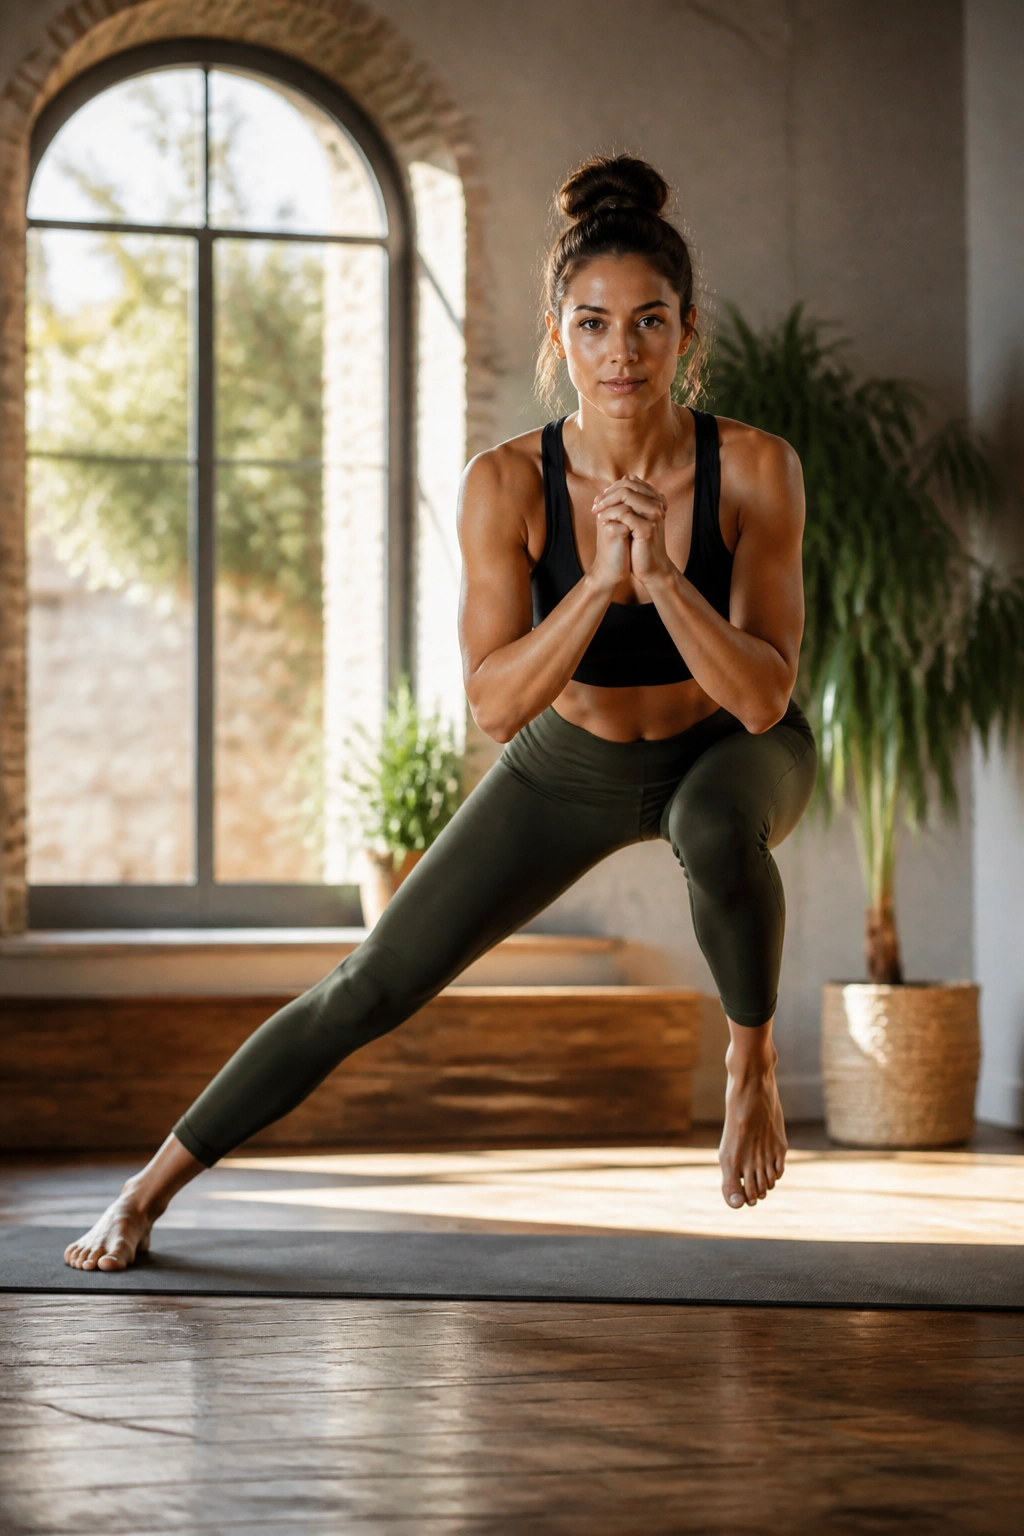
Picture stepping sideways into a room that is too crowded for a normal stride.
That sideways reach, followed by a controlled sink, is what makes this flow so useful for legs. It trains the outer glutes, inner thighs, and quads at the same time, and balance work sneaks in without making the sequence feel fussy. I like it when a flow does more than one job.
Start standing. Step wide to the right, bend the right knee, and sweep the hips back as if you were about to sit into a low side lunge. Bring the left foot in lightly, then step out again on the other side. Keep the chest lifted and the spine long. The goal is not speed. The goal is control.
A good skater-style flow will leave the standing leg warm all the way down to the ankle. If you want more load, pause for 2 seconds each time you land. That pause is where the work grows teeth.
- Step wide and lower 8 times on each side.
- Add a knee lift after each return to center.
- Keep the landing soft, not sloppy.
- Hold the side lunge for 3 breaths if you want a bigger hit.
5. Goddess Squat and Heel Lift Flow for Inner Thigh Endurance
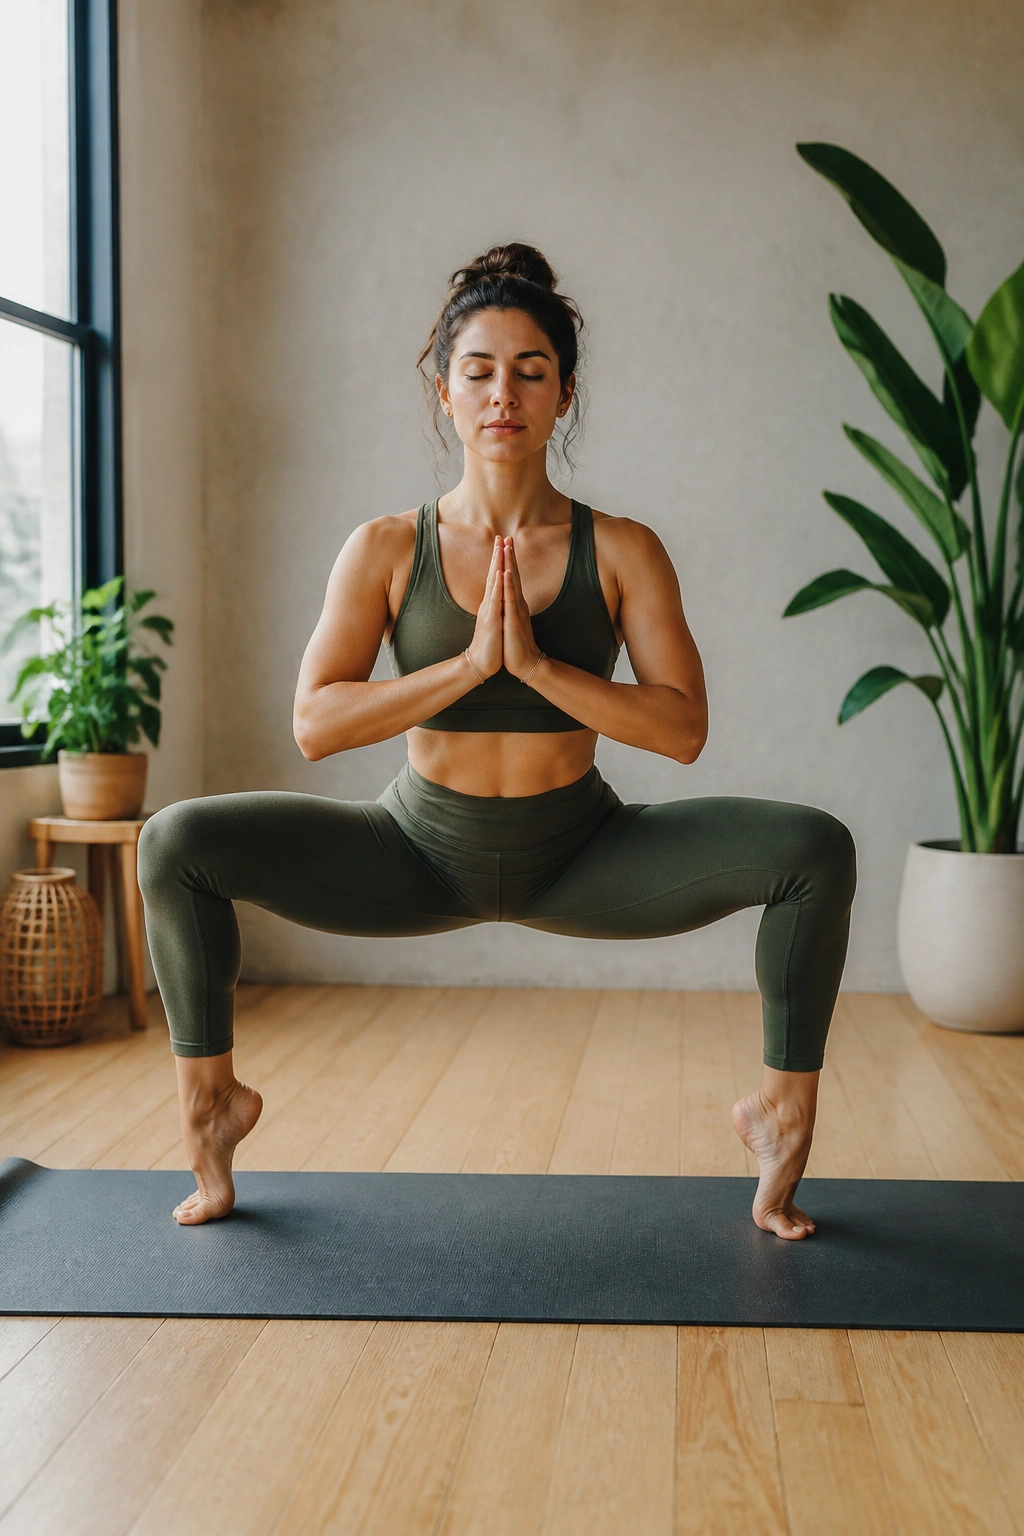
Goddess pose looks friendly until the second minute.
The wide stance turns the adductors — the inner thighs — into the main event, and the heel lifts add a calf challenge that makes the whole lower body pay attention. This flow is one of my favorites for people who want a strong leg line without a lot of stepping around. It is compact, direct, and sneaky in the best way.
Turn the toes out about 45 degrees and bend the knees over the middle toes. Keep the pelvis tucked just enough that your lower back does not arch like a drawbridge. Then lift the heels one inch, lower them slowly, and repeat. The movement should feel small and controlled. If it turns into a bounce, you have gone too fast.
Three rounds of 10 heel lifts, with a 20-second hold in the squat between rounds, is plenty for most people. If the knees complain, reduce the depth of the squat before you change anything else. Depth is not the prize. Clean tracking is.
And yes, the inside of the thighs will shake. Good. That shaking usually means the muscles are working through the full range instead of coasting.
6. Half Split to Low Lunge Hamstring Flow
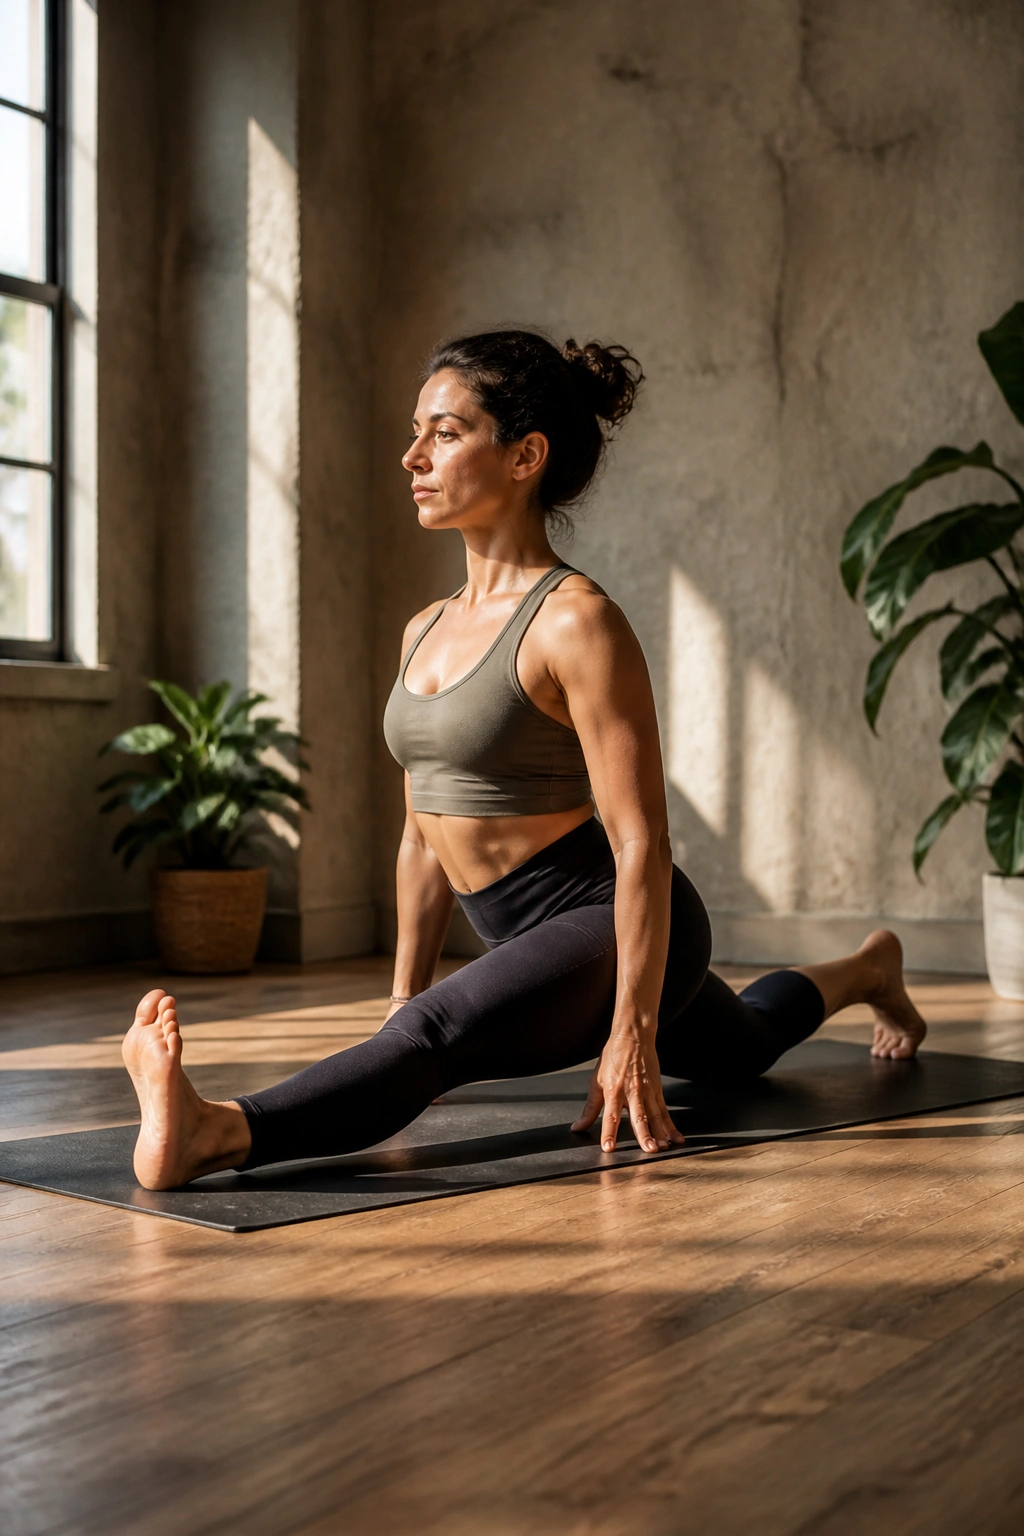
Unlike a deep hamstring stretch that asks the back of the leg to relax, this flow asks it to keep working while it lengthens.
That is a useful distinction. Half split shifts the hips back and lengthens the hamstring, while low lunge re-bends the front knee and loads the front leg again. Moving between the two gives you a stretch-and-strength pattern that feels especially nice after sitting all day, or after any workout where the legs feel a little flat.
Start in low lunge, then straighten the front leg into half split. Keep both hips as square as you can manage. Flex the front foot so the toes pull back toward the shin, then hinge forward only as far as you can keep the spine long. Return to low lunge and press the front foot into the mat to wake up the quad again.
The beauty here is subtle. The hamstring gets lengthened, but it is not allowed to go soft. That is why the leg work feels so clean. Do 5 slow transitions on each side and stay with the breath. If you rush, you lose the whole point.
7. Warrior III Balance Flow for Standing Leg Strength
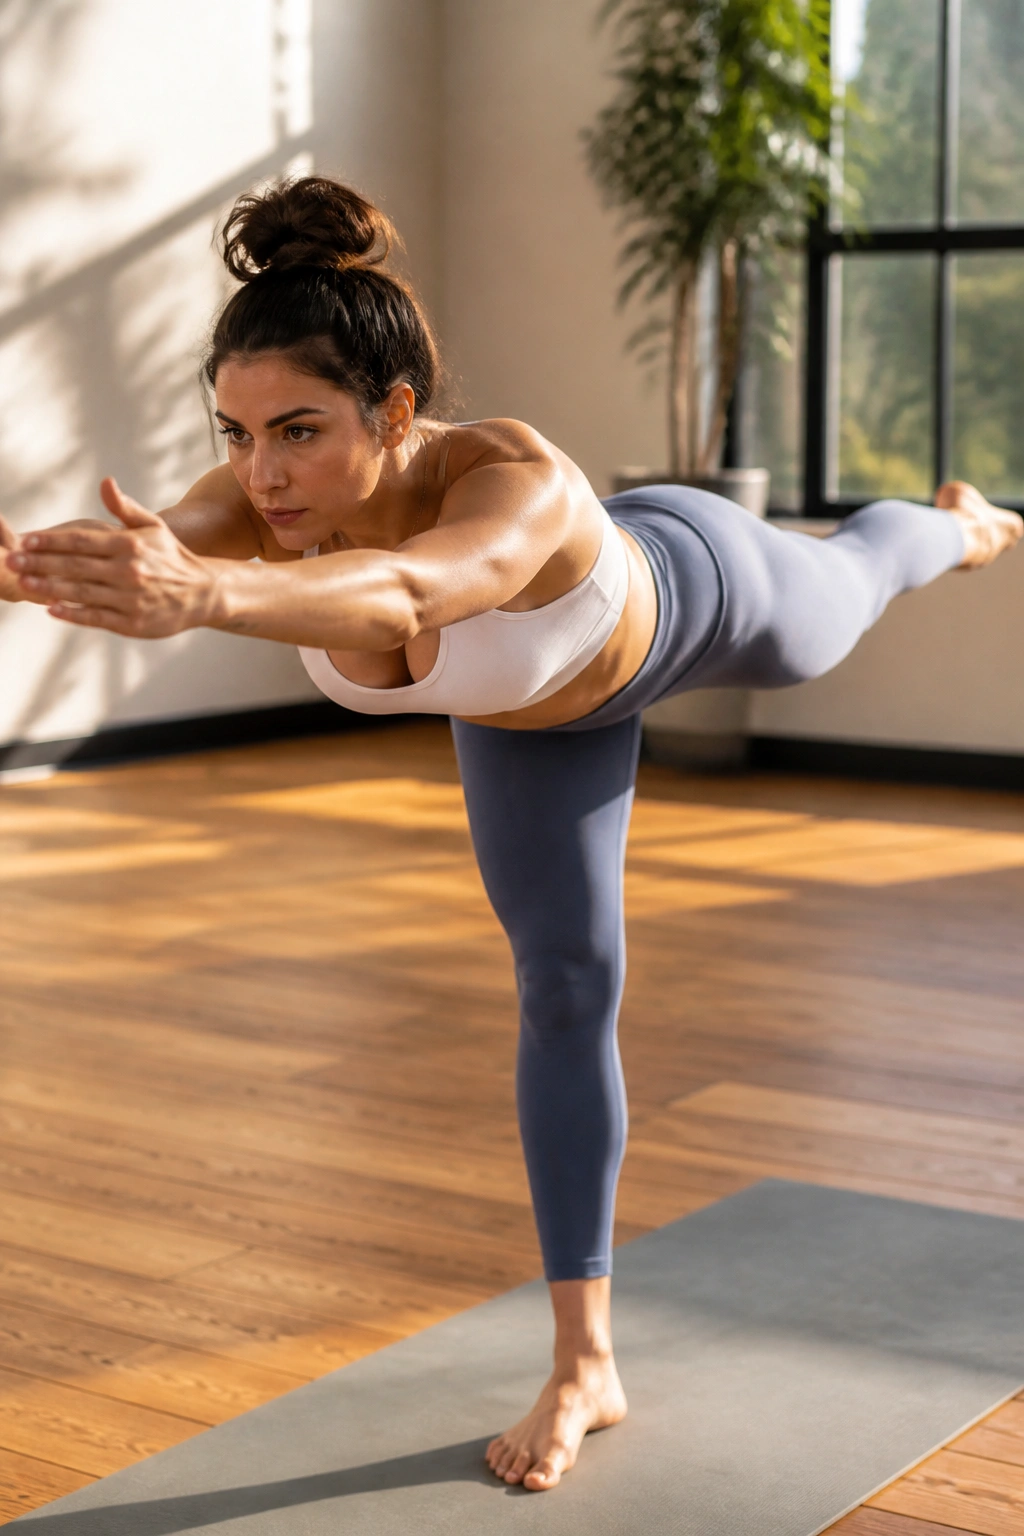
Warrior III is a straight-up test of what your standing leg can do.
The lifted leg gets the attention, sure, but the real work lives in the foot, ankle, quad, and glute of the standing side. If your ankle is weak or your hip collapses, Warrior III tells on you fast. That honesty is one reason I love it for sculpted legs. There is nowhere to hide.
The Detail That Matters
Shift your weight forward only until the standing foot feels like a tripod: big toe mound, little toe mound, heel. Then hinge at the hips and send the back leg long, not high. A leg at hip height is plenty. Higher is not better if the pelvis twists.
Hold for 3 to 5 breaths. Return with control, not a flop. Repeat 3 times per side. If the standing knee locks hard, soften it a little. That tiny bend keeps the muscles awake and helps your balance, which helps everything else.
Use a wall if you need it. Really. A fingertip on the wall lets you stay in the shape long enough to get real work out of the standing leg.
8. Side Angle to Half Moon Flow for Hip Stability
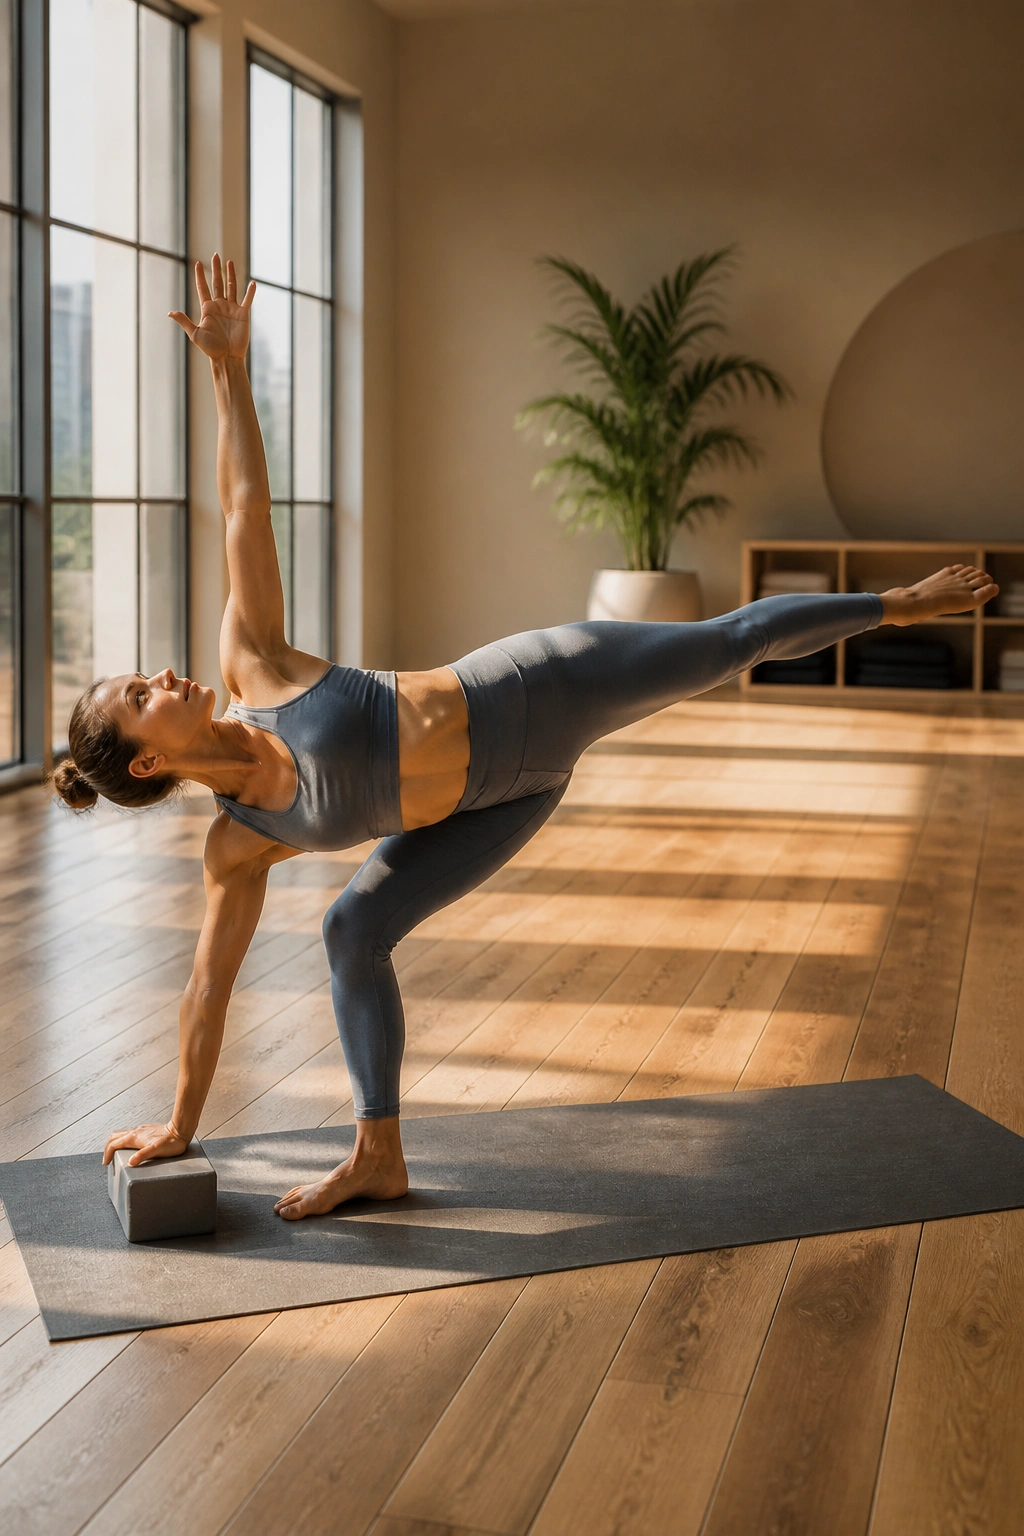
What makes this combo so good is the shift from grounded to floating.
Side angle loads the front leg in a low, stable position. Half moon takes away one point of contact and asks the outer hip to keep the whole shape from tipping. That change is brutal in a useful way. The standing leg has to hold the pelvis steady while the lifted leg stays active, and that is a strong recipe for better leg definition over time.
How to Keep the Standing Leg Honest
Begin in a wide stance. Bend the front knee for side angle, then place a hand to the floor or a block. From there, shift into half moon by lifting the back leg and opening the chest. Move slowly enough that the standing hip does not roll backward.
- Keep a block under the lower hand if the floor pulls you off balance.
- Press the standing foot down hard through the big toe mound.
- Reach the lifted heel straight back, not up and behind you.
- Stay for 2 to 4 breaths before returning to side angle.
The front thigh should feel busy, not crushed. If it feels pinchy in the hip joint, shorten the stance a little and take less twist out of the torso. Clean shape beats aggressive shape every time.
9. Bridge Pose Marching Flow for Glutes and Hamstrings
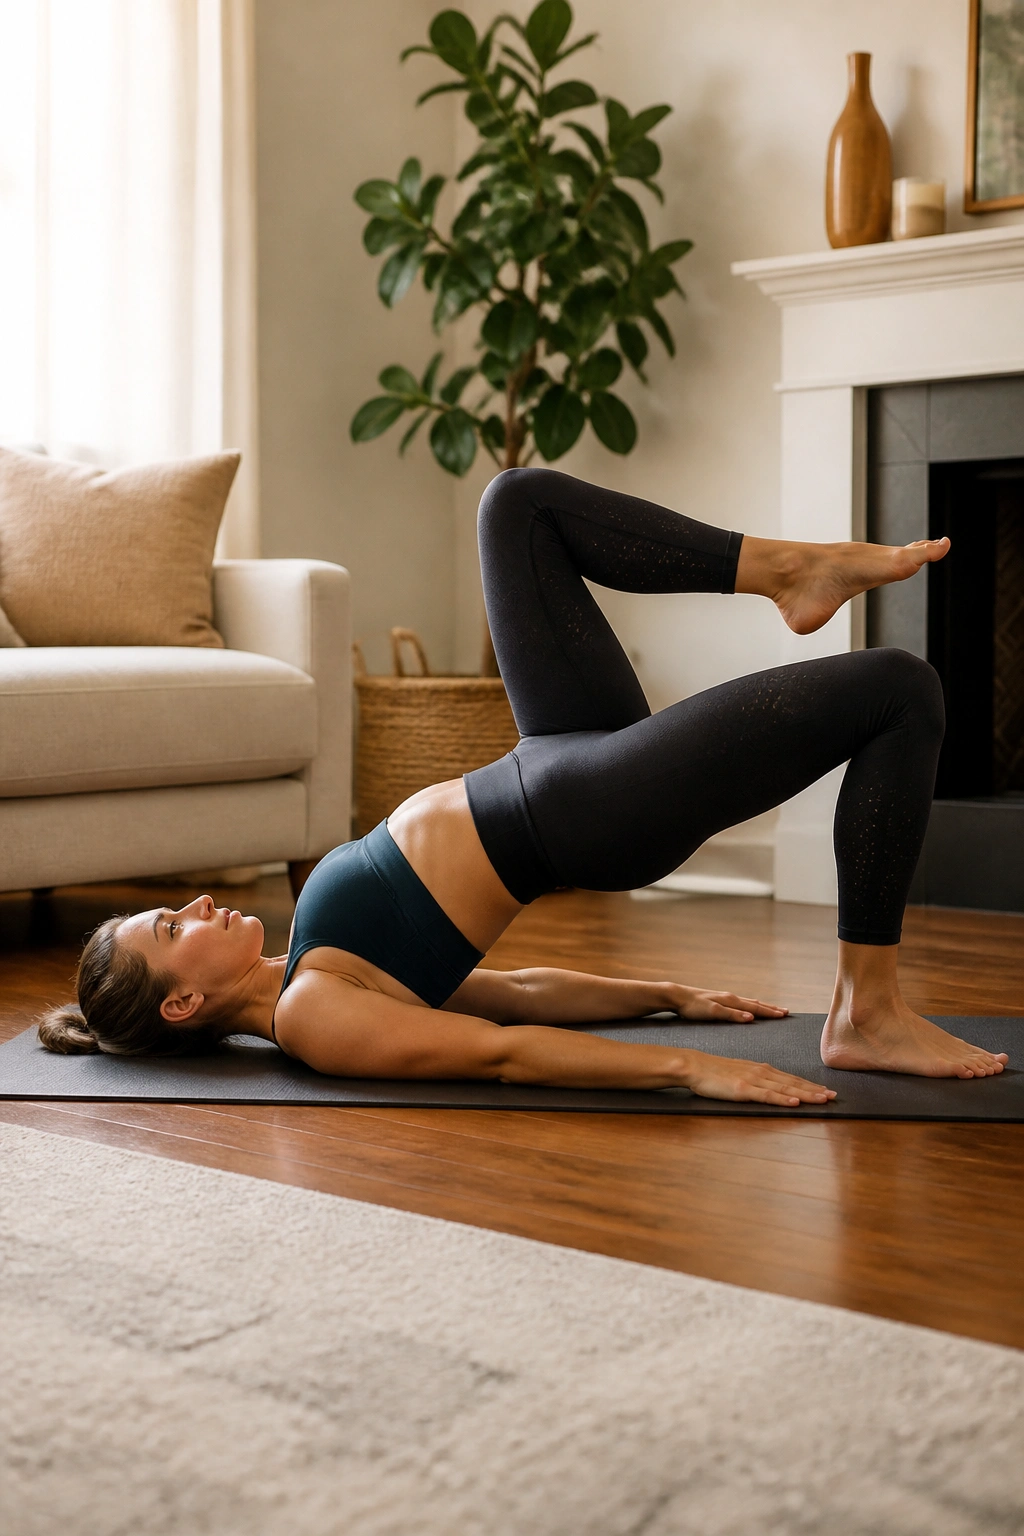
Bridge pose is one of those moves people underestimate because it happens on the floor.
That is a mistake. The glutes have to fire hard to keep the pelvis lifted while one knee lifts at a time, and the hamstrings join in to stop the hips from wobbling. You also get a tidy little hit of core stability, because marching in bridge is only possible if the middle of the body stays quiet.
Lie on your back with your knees bent and feet hip-width apart. Lift into bridge, then float one knee toward your chest without letting the hips drop. Put it back down and switch sides. Keep the pelvis level, or as level as you can make it. That is the part that matters.
Slow marching for 8 to 12 reps per side is enough to make the legs work without turning the neck or lower back into the main story. If the hamstrings cramp, move the feet a little closer to the glutes and lower the lift by an inch. Small adjustments fix a lot here.
A strong bridge should feel like the back of the body is saying, “Fine, I’ll do it.”
10. Lizard Lunge Flow for Deep Hip Openers and Back-Leg Strength
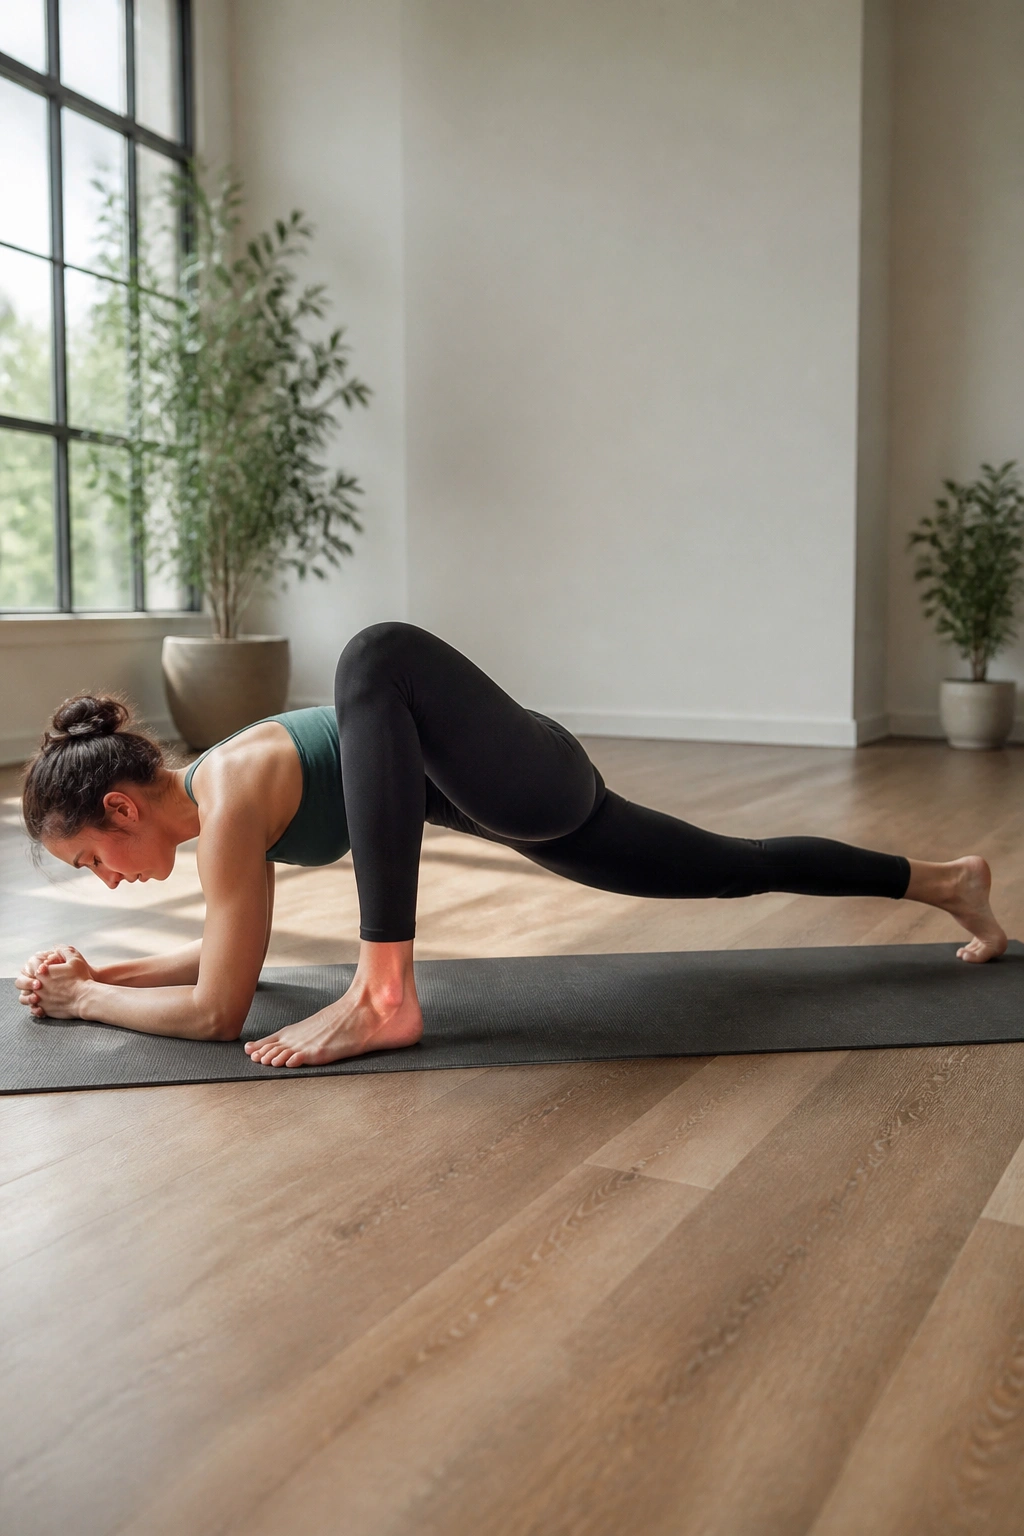
Lizard pose is not only a stretch. Done well, it is also a strength drill.
The front leg gets loaded in a deep bend, while the back leg keeps reaching and stabilizing through the hip. If you lower onto forearms, the stretch feels deeper, but the work does not disappear. It shifts. That is why this flow belongs in a lower-body sequence for toned sculpted legs instead of sitting in the “mobility only” corner.
What to Watch For
Keep the front foot far enough forward that the knee is not jammed past the ankle. The back toes can stay tucked or untucked, depending on how your hips feel. I prefer tucked toes when I want more leg engagement, because the back thigh stays more active.
Use a slow rock: forward into the front heel, back into the rear leg, then forward again. Five to eight rocks per side is plenty. If you want more challenge, add a brief hold at the bottom and keep the ribs from collapsing toward the floor.
- Front knee stays comfortable, not forced.
- Back leg reaches long and active.
- Hips stay as level as possible.
- Stop if you feel sharp pressure in the knee joint.
11. Malasana and Wide-Leg Fold Flow for Ankles and Adductors
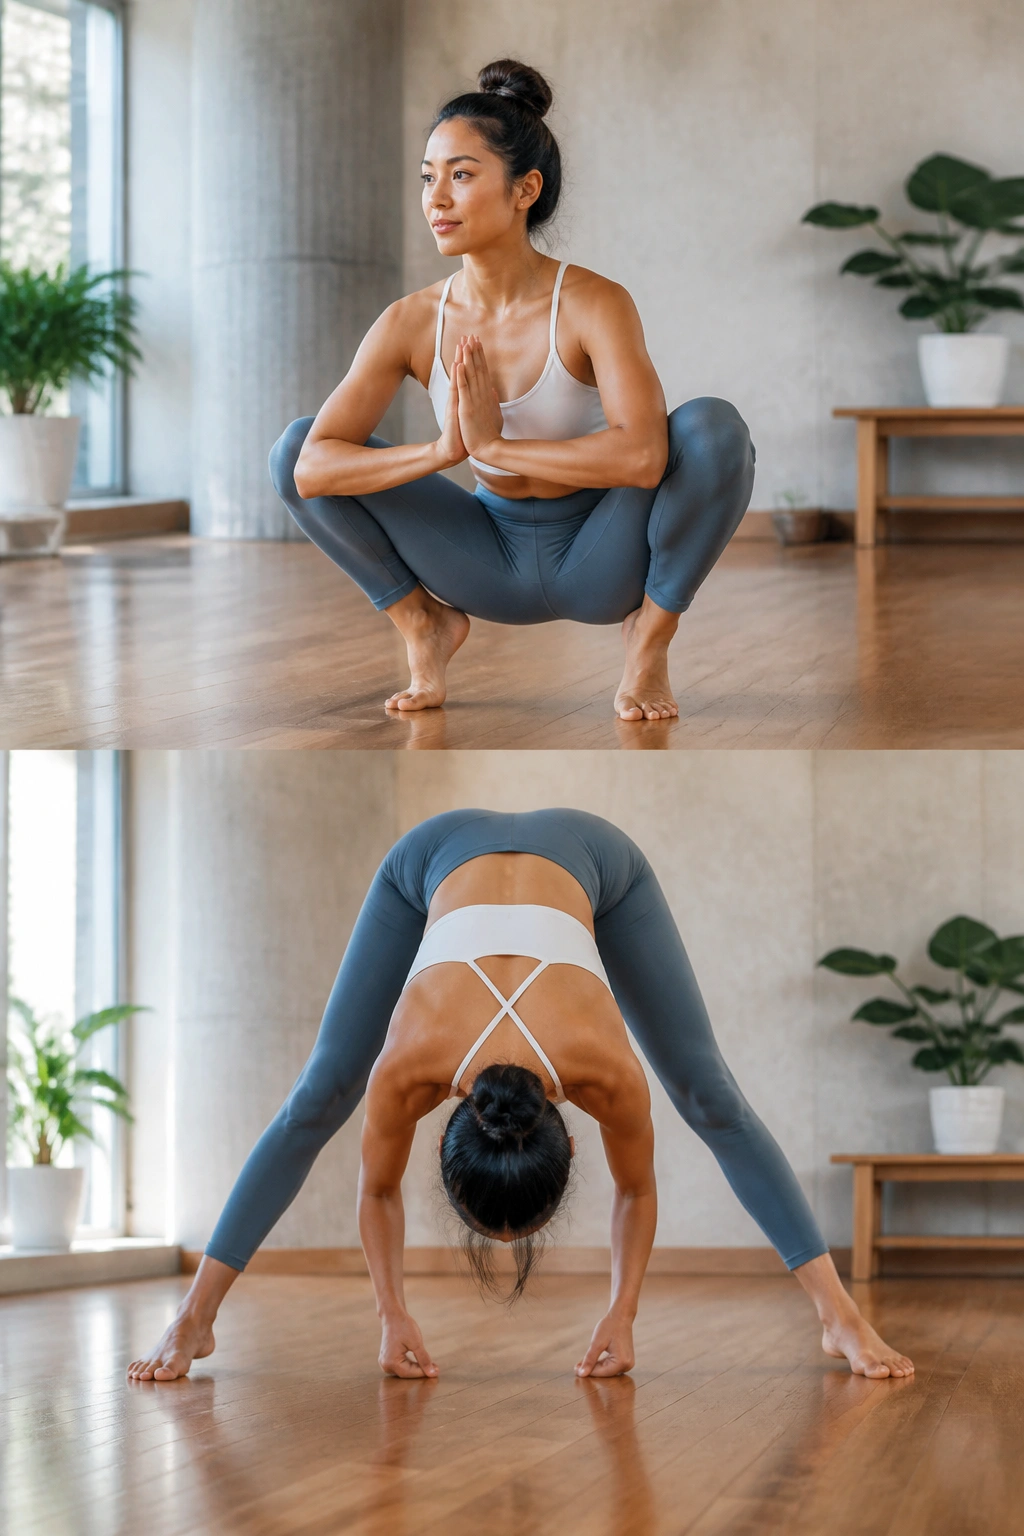
This one is quieter than chair pose, and that is exactly why I like it.
Malasana, or yogi squat, opens the ankles and inner thighs while asking the feet to stay grounded. Wide-leg fold then changes the angle and lets the hamstrings and adductors stretch under load. It is a nice mix if your legs feel stiff in a “my hips are glued shut” kind of way.
The squat should be supported if your heels lift. A block under the sit bones turns the shape into something you can actually hold for a few breaths without your form falling apart. Then shift into a wide fold, keeping the knees soft and the spine long on the way down. The hinge matters more than the depth.
I find this combo works best as a reset between stronger flows. It gives the calves, ankles, and inner thighs a chance to breathe while still asking the muscles to stay active. Not every leg flow needs to be a furnace. Sometimes the smartest thing you can do is restore range, then come back and load it again later.
12. Standing Figure Four Flow for Glute Medius Fire
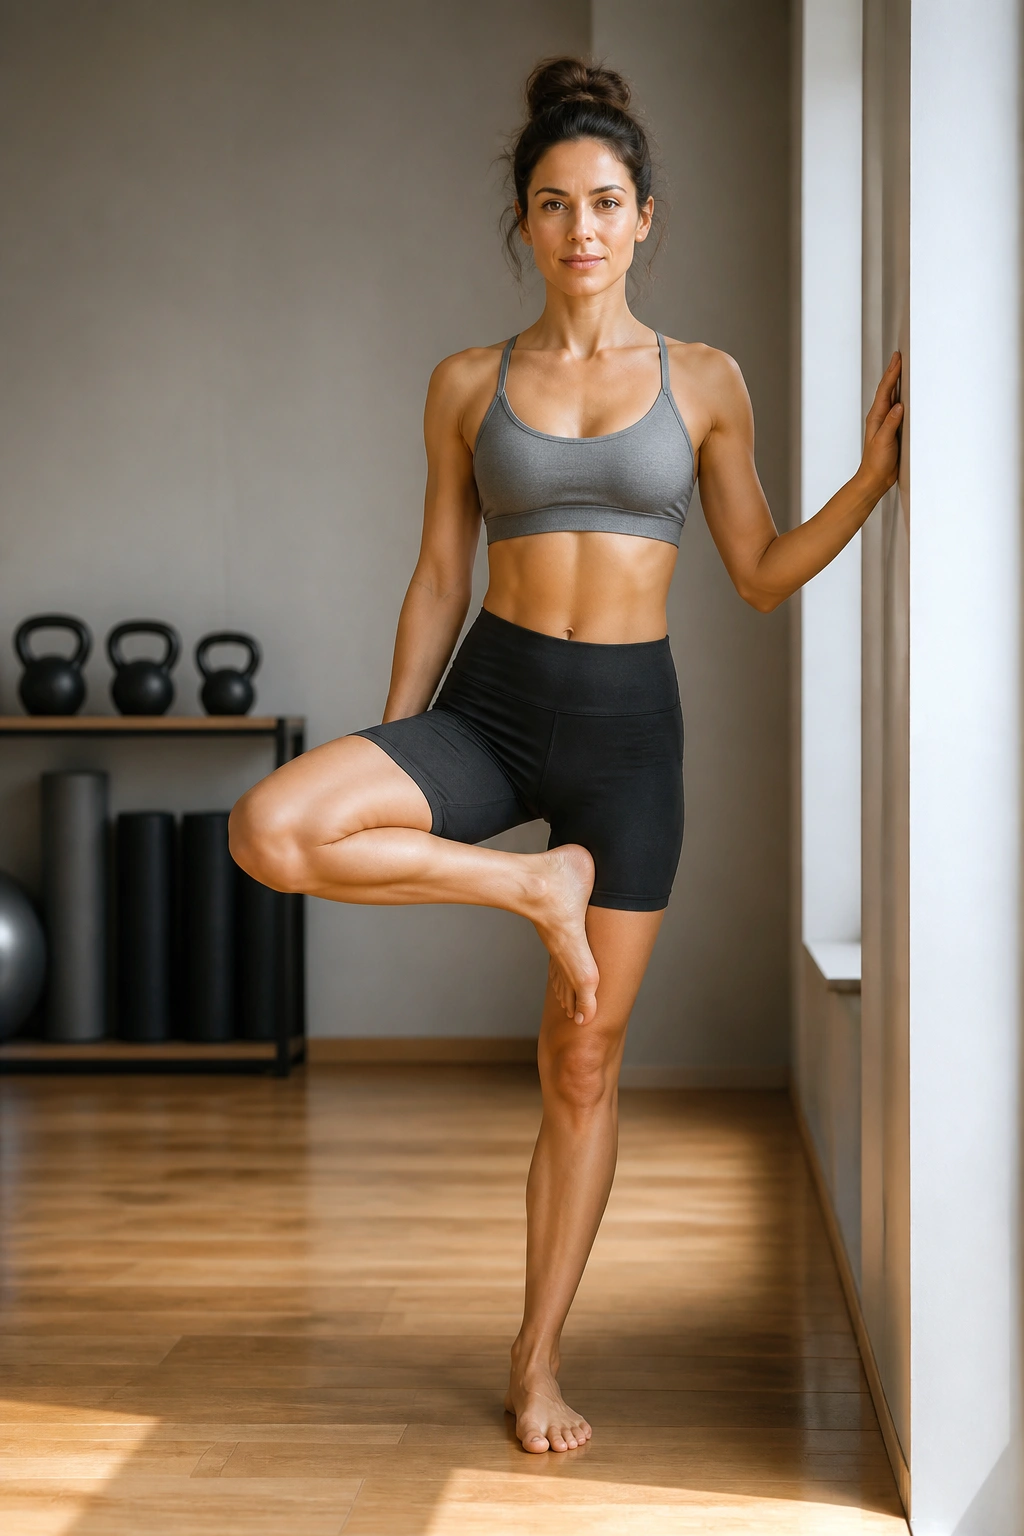
If you sit a lot, this one bites in the exact place you need it to.
Standing figure four wakes up the outer hip and glute medius on the standing side, which helps with hip stability and gives the leg line a cleaner, stronger feel over time. It also improves balance without the drama of a full one-legged pose. That makes it a useful bridge between stretching and strengthening.
Cross one ankle over the opposite thigh, then sit back into a mini-chair. Keep the standing knee in line with the toes and the torso tall. Hold for 3 breaths, then pulse 5 times. Switch sides. If the standing heel starts to peel up, you are probably sitting too deep. Back out an inch.
- Stay upright if you want more balance work.
- Fold forward only if the hips allow it without strain.
- Press the crossed knee gently open, not hard.
- Use a wall the first few times if the ankle feels wobbly.
Best part: the standing leg does not get a break. That is the whole reason the pose earns its place here.
13. Crescent Twist Flow for Core and Front-Leg Stability
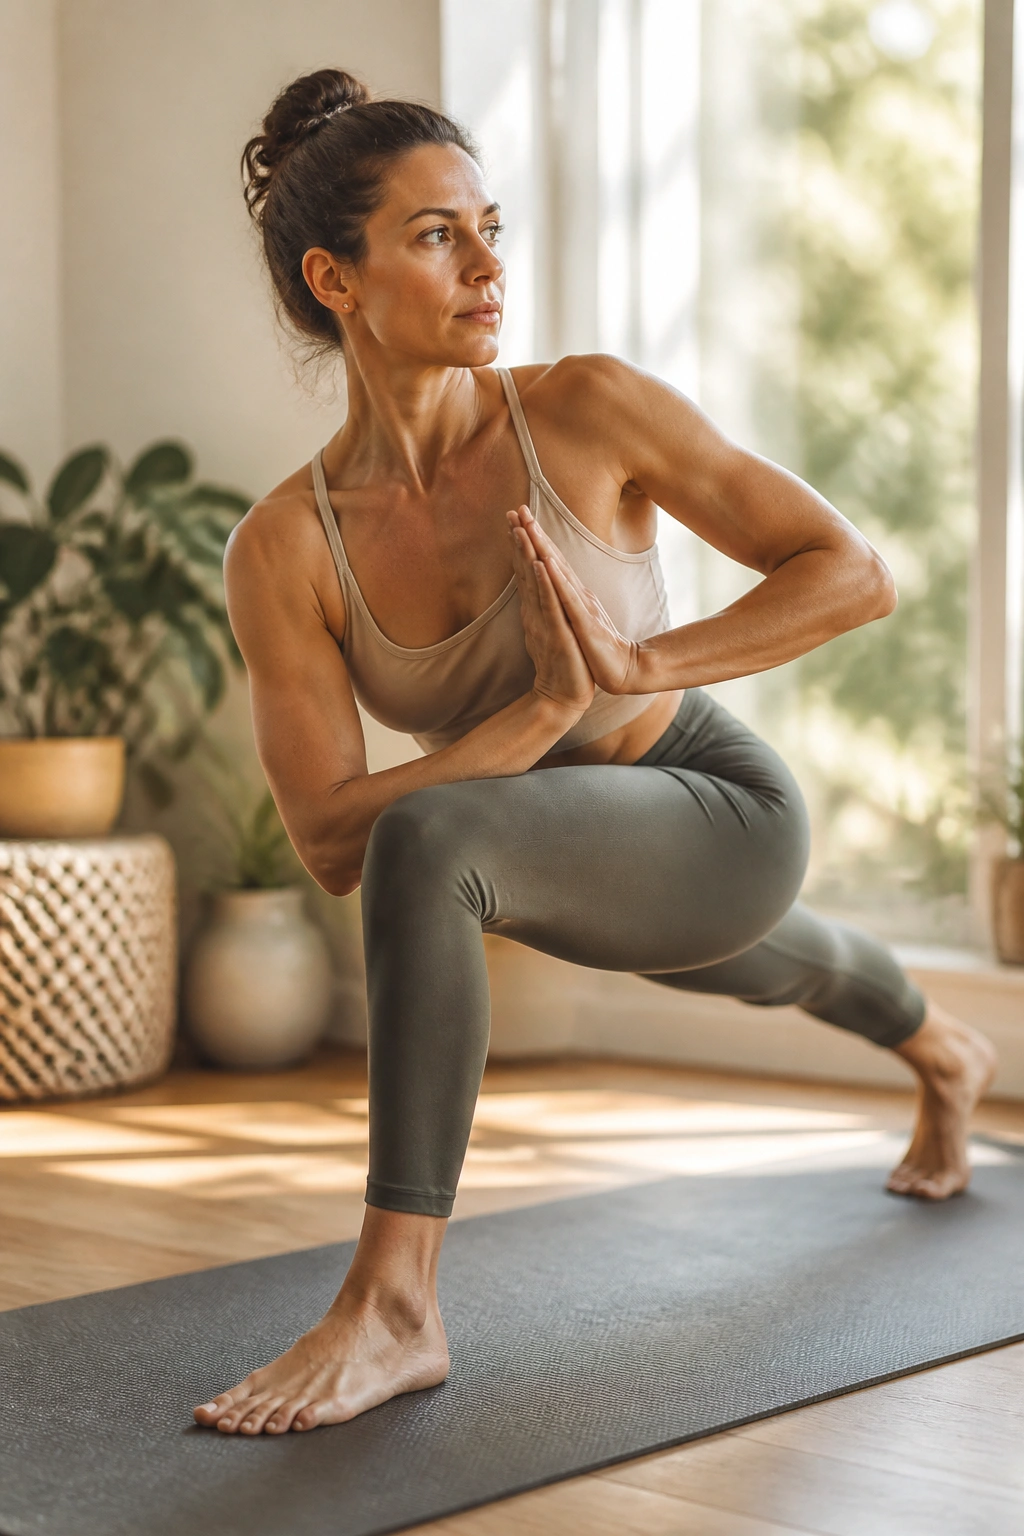
Can a twist work the legs? Absolutely, if the stance is deep enough.
Crescent twist keeps the front thigh loaded while the torso rotates against the pelvis, which forces the standing leg to stabilize instead of wandering around. The twist is not the main event. The steady front leg is. That is why this shape belongs in a leg-focused yoga sequence, even though people tend to think of it as a core pose.
Start in crescent lunge. Bring the hands to prayer at the chest and twist toward the front knee, keeping the pelvis mostly forward. Sink the front knee just a little deeper while the back heel stays lifted. Hold for 3 to 5 breaths, then unwind slowly. If the torso turns more than the hips can handle, you lose the leg work and start borrowing from momentum.
How to Breathe Through It
Exhale as you twist. Inhale as you lengthen the spine. That pattern keeps the chest open and stops the shoulders from bunching up near the ears.
A block under the bottom hand can make the whole shape steadier if prayer twist feels like a wrestling match. I would rather see a clean, supported twist than a wobbly one with heroic intentions.
14. Wall-Assisted Chair Pulses for Sculpted Legs
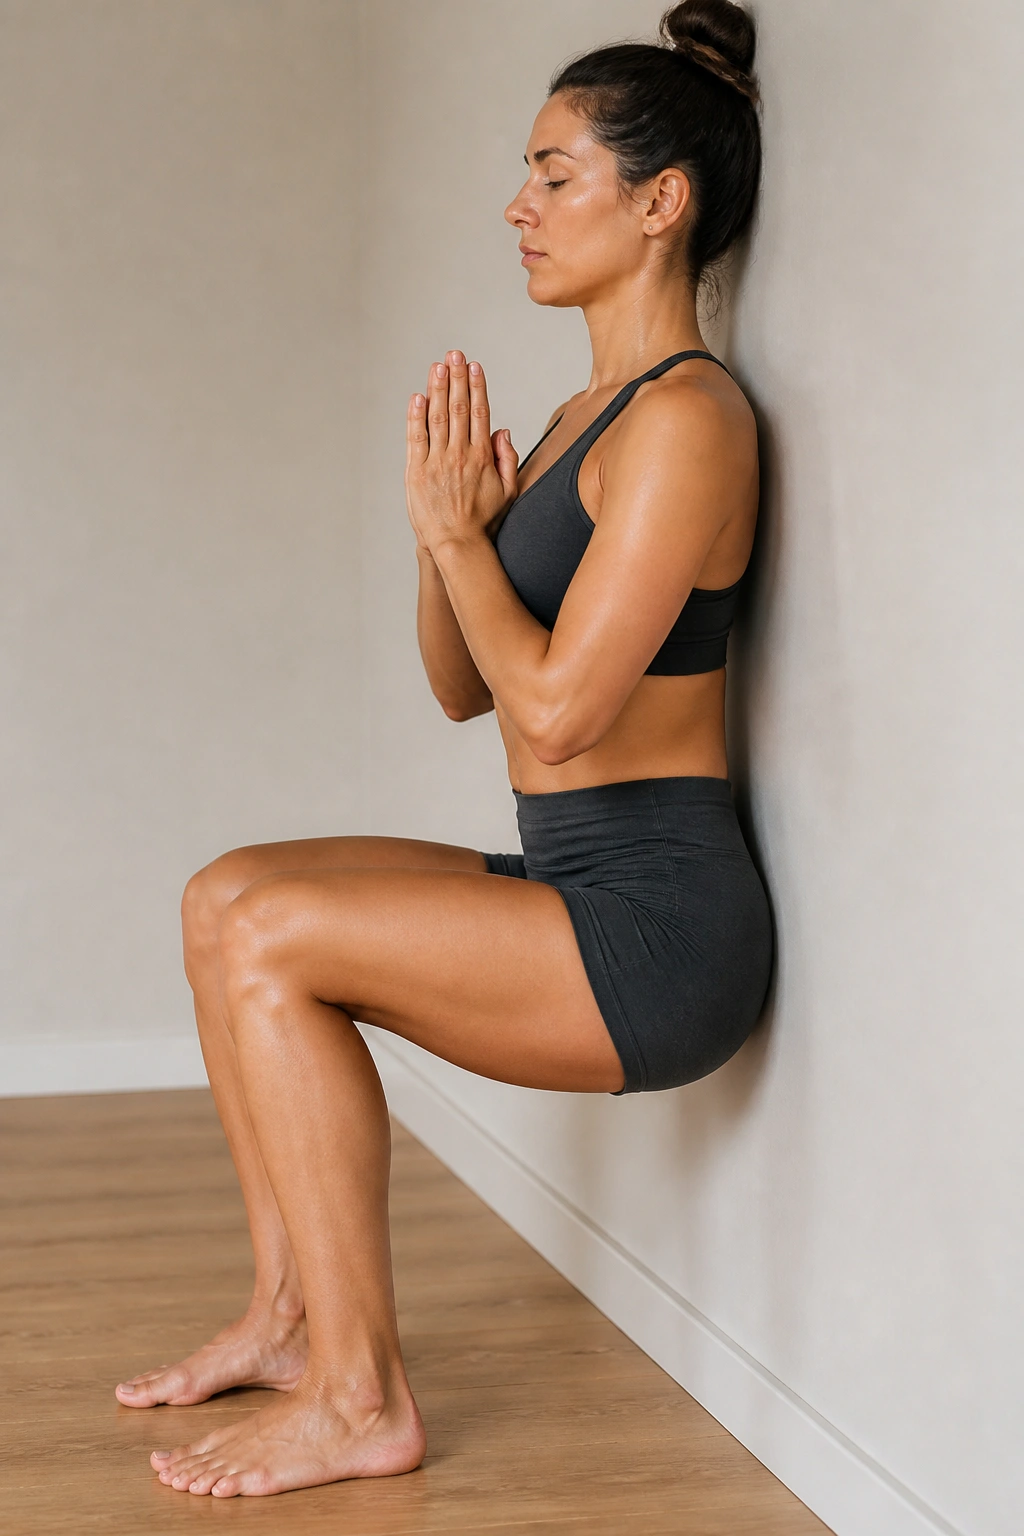
The wall changes everything, and I mean that in a good way.
Stand with your back a few inches from the wall, then slide down into chair pose until the thighs are working hard but the lower back stays comfortable. The wall gives you feedback, which makes it easier to keep the spine neutral and the knees from drifting. From there, tiny pulses turn the front of the thighs into the main event.
This version is especially useful if you are still learning how to load your legs without dumping into the low back. It also lets you stay in the pose longer, because the wall removes some of the balance noise. And that matters. Quiet balance means more honest work.
- Slide down until the knees are bent about 90 degrees.
- Keep the feet 6 to 10 inches away from the wall.
- Pulse 12 to 15 times with a 1-inch range.
- Hold for 20 to 30 seconds between rounds.
If your knees ache, move the feet a little farther forward and reduce the depth. The burn should live in the muscles, not in the joints.
15. Frog-to-Flow Transition for Inner Thighs
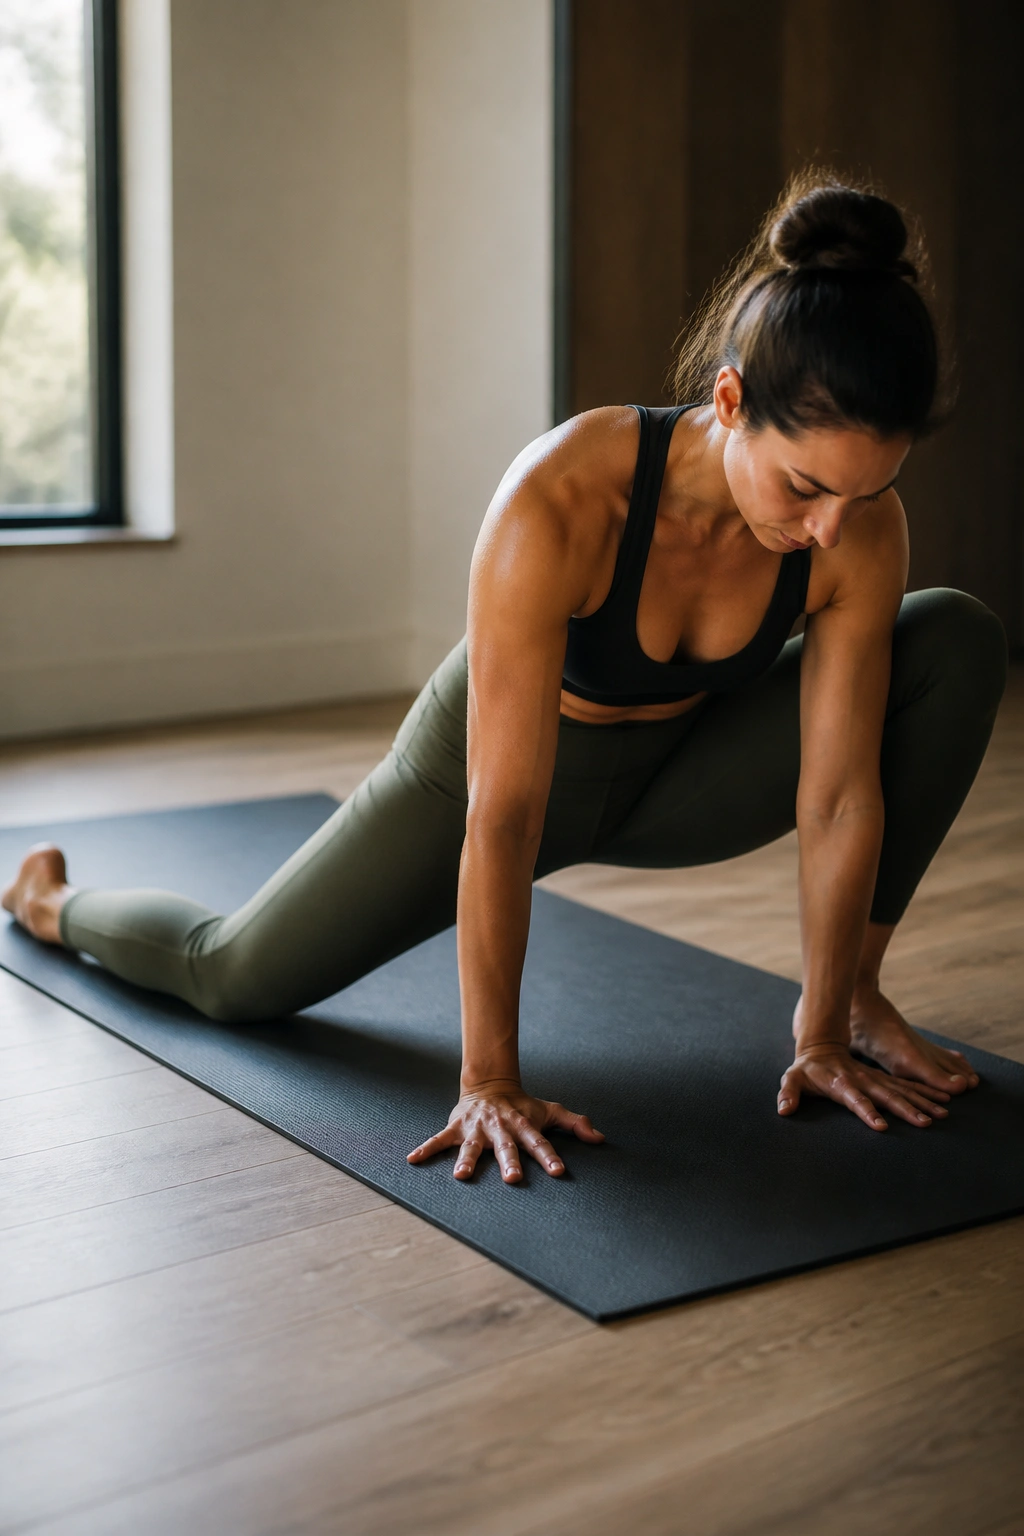
Frog pose is not glamorous. It is effective, and that is better.
The wide-kneed position opens the inner thighs in a way that feels direct, then a smooth transition into standing or low lunge asks those same muscles to stabilize under load. That contrast — deep opening, then immediate control — is what gives this flow its value for leg shape and movement quality.
Start on hands and knees, widen the knees, and slide the heels out until you feel a stretch through the groin and inner thighs. Stay for 3 breaths, then shift back into a low lunge or a squat, keeping the legs alive instead of floppy. Move slowly. Fast exits from frog tend to yank the knees, and there is no prize for that.
A short hold is enough. Even 20 seconds can wake up muscles that have been asleep all day. If the knees protest, pad them with a folded towel and reduce the width. This is one of those flows where a small change makes it usable, and usable is what matters.
16. Standing Calf Raise Flow for Lower-Leg Definition
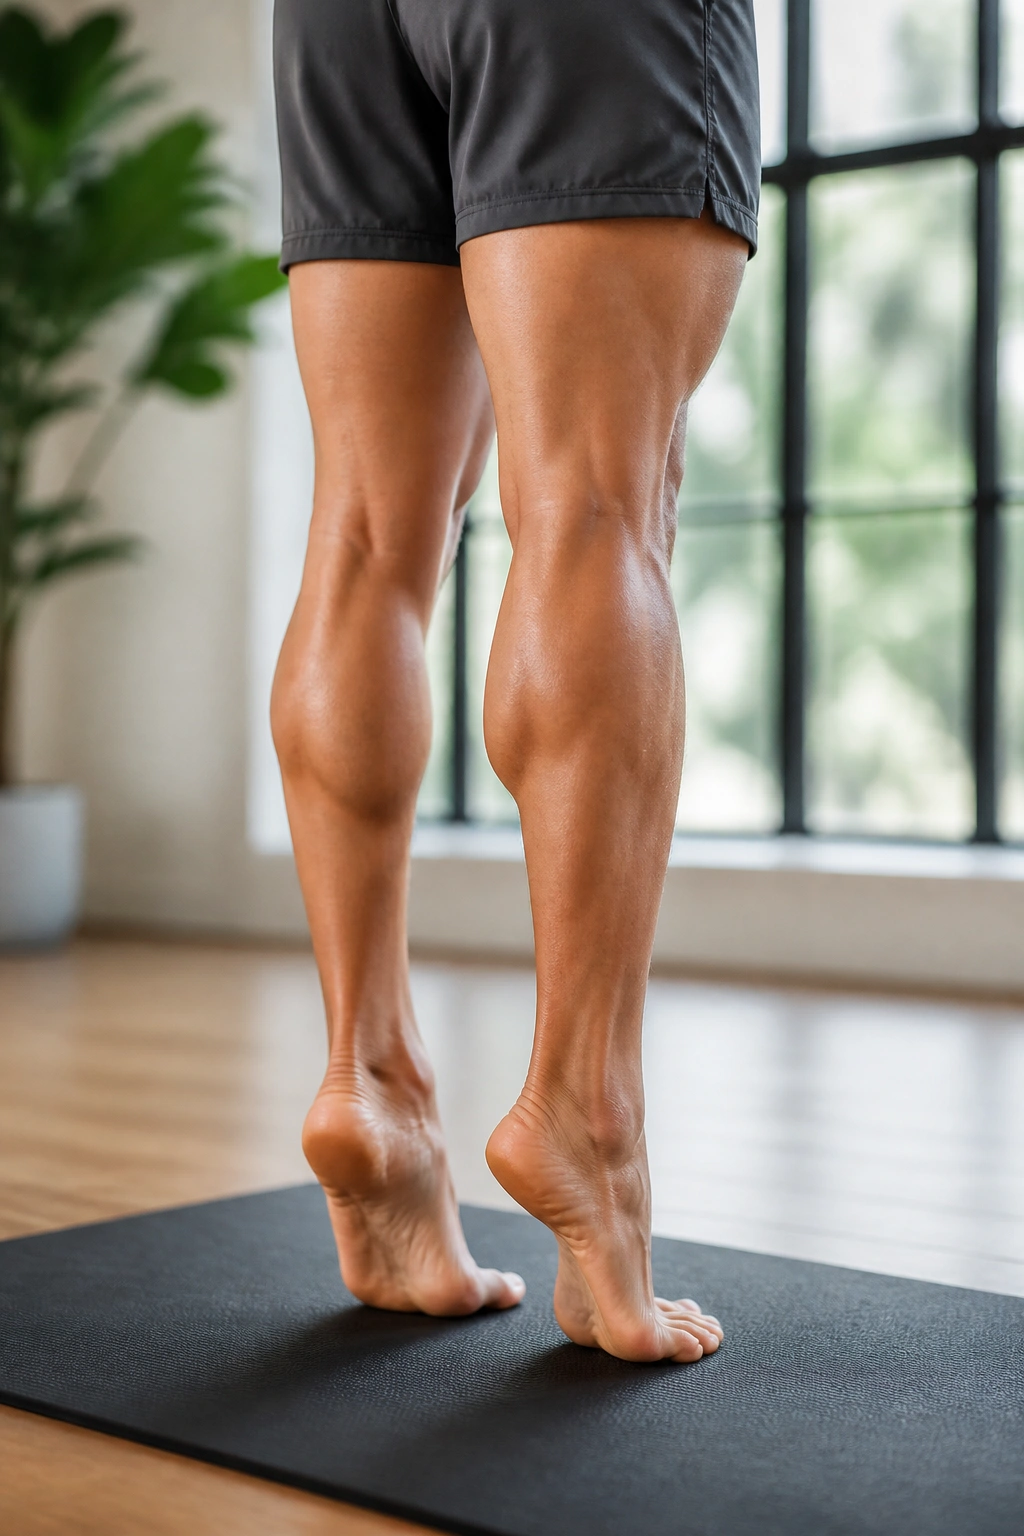
Standing calf work gets ignored all the time, which is odd because calves do a lot of the daily heavy lifting.
Unlike seated calf raises, which focus more on the soleus, standing calf raises hit the gastrocnemius more directly. That gives the lower leg a fuller workout and helps the ankle feel stronger in all the standing flows that come before and after it. I like to think of this as the small detail that makes the whole leg plan feel complete.
How to Feel It
Stand with feet hip-width apart and rise onto the balls of the feet slowly, then lower for a 3-count. Do 15 to 20 reps. If you want more work, hold the top for 2 seconds and keep the ankles from rolling outward.
The movement should feel smooth, not bouncy. If the toes grip the floor, spread them out and try again. If you are stable enough, do one side at a time with a fingertip on the wall. Single-leg calf raises show side-to-side differences fast, which is useful information when you are building stronger legs.
A lot of people skip calves because they seem small. They are not small when you are balancing in Warrior III.
17. Down Dog Pedal and Plank Knee Drive Flow
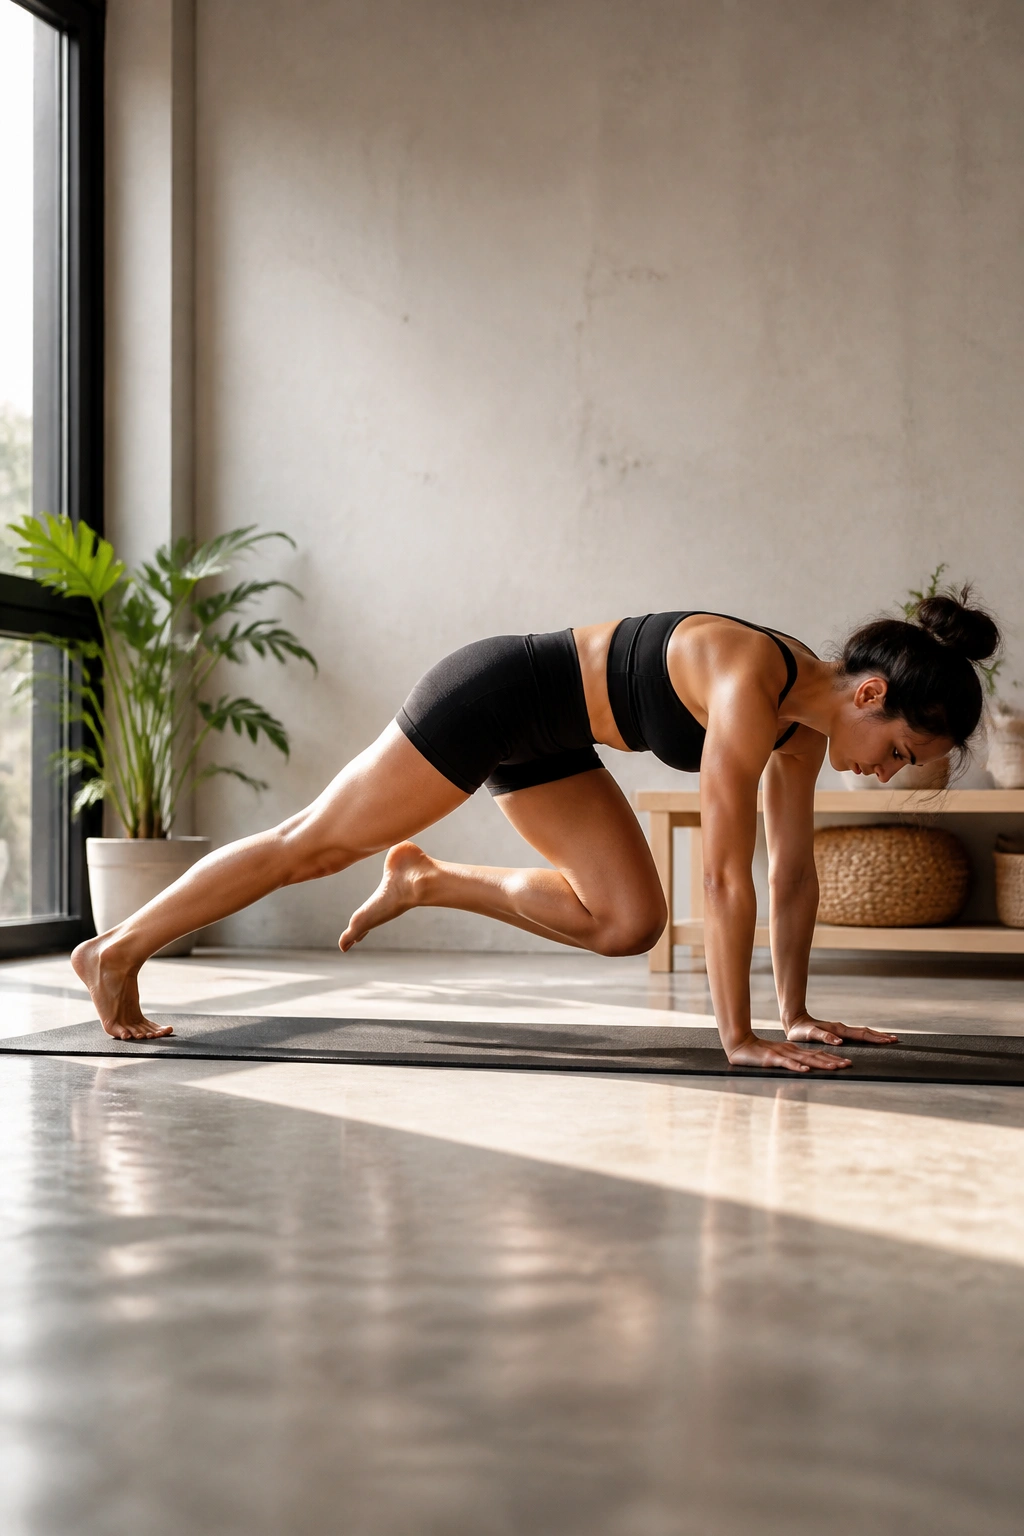
What makes this flow so useful is the blend of loading and release.
Downward dog lengthens the calves and hamstrings while the arms and shoulders stay active. Add pedal-ing through the heels, then move into plank knee drives, and suddenly the lower body has to stabilize under changing angles. That is a nice bridge between mobility and strength, and it feels more athletic than a static stretch.
Start in downward dog and pedal the heels for 8 slow counts. Shift to plank. Drive one knee toward the chest, set it back down, and switch sides. Keep the hips level and avoid rushing the drive. If the hips sway like a boat in choppy water, slow down and shorten the movement.
- 8 heel pedals in down dog.
- 6 to 10 knee drives per side.
- Hold plank for 3 breaths after the last drive.
- Return to down dog and repeat 2 to 3 rounds.
This is not the flashiest leg flow on the list, but it builds a lot of control in the ankles, calves, and upper legs. That control shows up everywhere else.
18. Slow Finisher Flow for Recovery and Long-Term Leg Shape
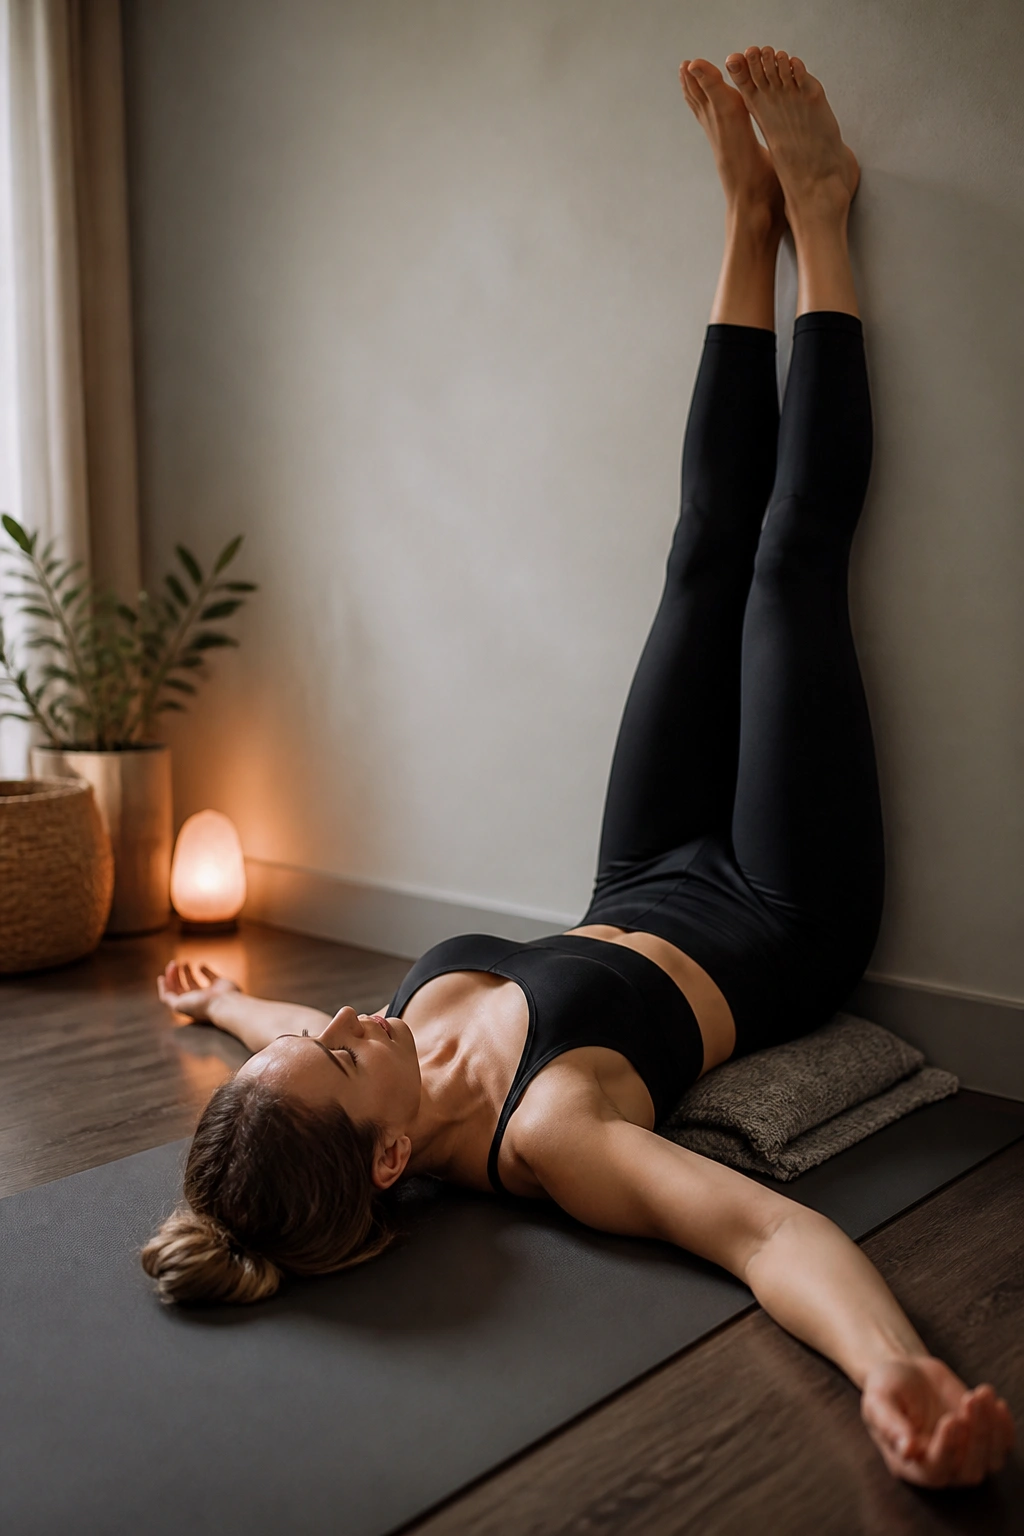
The last flow is the one people skip, which is a shame.
A slow finisher matters because tired muscles recover better when you give them a little movement after the hard work. Think gentle forward folds, low lunges, supine hamstring stretches, and a short legs-up-the-wall hold. Nothing fancy. The point is to downshift the nervous system, flush some of the stiffness out of the legs, and leave the session with your joints feeling open instead of jammed.
I like 1 minute in a low lunge each side, 1 minute in a hamstring stretch, then 3 to 5 minutes with the legs up the wall. If the calves feel tight, point and flex the feet a few times. If the quads are angry, lie on your side and let the top leg drape behind you for a quieter release. Small choices. Big difference.
This is also where the longer-term shape part happens. Recovery keeps you consistent, and consistency is what makes all the other flows matter. Strong legs do not come from one heroic session. They come from repeating the work, letting it settle, then coming back with better form next time.
