



A postpartum belly that domes when you sit up is not a sign that you failed. It usually means your core wants a different kind of work, not harder work.
The right postpartum ab workouts for diastasis recti are often quieter than people expect. Breathing. Pressure control. Small movements that teach the midline to stay calm when your arms and legs start doing real jobs again.
That calm matters. The American College of Obstetricians and Gynecologists advises getting the go-ahead before returning to exercise after birth, especially after a cesarean birth, heavy bleeding, tearing, dizziness, or pain, and pelvic floor therapists tend to start with the same idea: manage pressure first, then add load.
A two-finger gap is not the whole story. A narrow gap with poor tension can feel worse than a wider one that holds firm. So if you’ve been staring at your stomach and wondering why crunches feel wrong, the answer is probably simpler than you think. Start with control. Really start there.
1. 360-Degree Breathing for Diastasis Recti
Breathing is not the warm-up. It’s the workout.
When you inhale, let the ribs expand side to side and into the back, not just the chest. On the exhale, let the lower ribs soften down and feel the deep belly gently gather inward without sucking hard. That small pressure shift is what helps the linea alba do less fighting and more stabilizing.
How to feel it
Place one hand on your lower ribs and one on your belly. Breathe in through your nose for 3 to 4 counts, then exhale through your mouth for 5 to 7 counts like you’re fogging a mirror softly. Do 5 to 8 breaths.
- Your shoulders stay quiet.
- Your neck stays soft.
- The belly should move with the breath, not brace like stone.
- If your chest is doing all the work, slow down.
Best cue: think “wide on the inhale, quieter on the exhale.” That’s enough. No dramatic sucking in.
2. Pelvic Tilts on the Floor
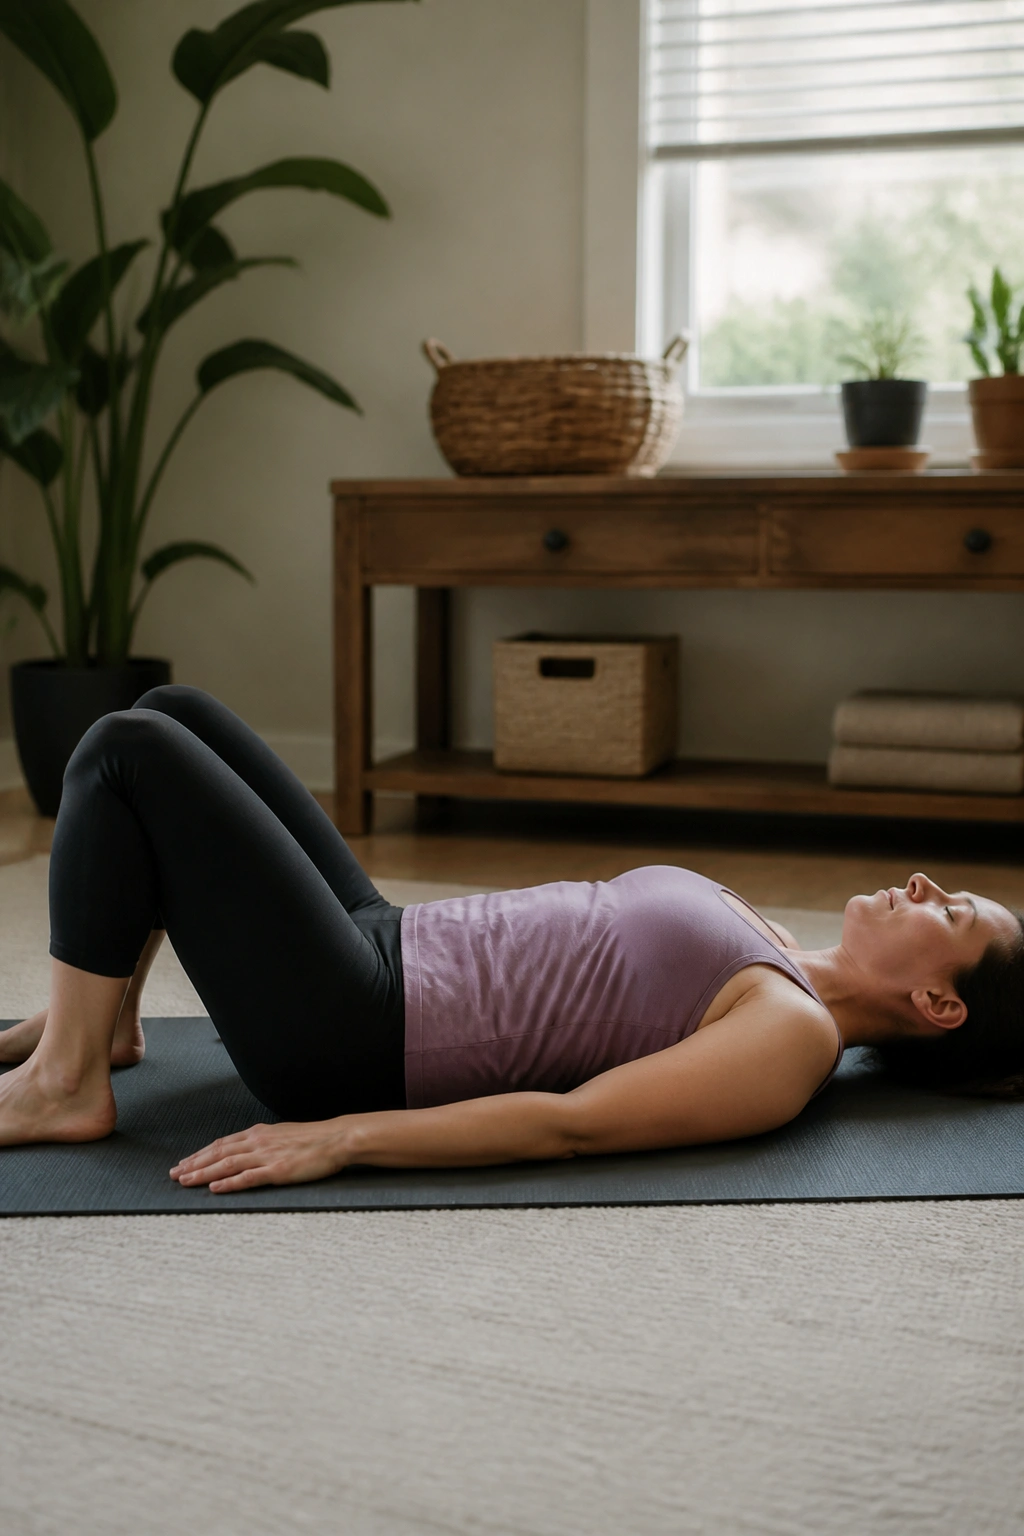
This one looks tiny. It matters anyway.
A pelvic tilt teaches your pelvis to move without yanking the belly wall forward. Lie on your back with knees bent, feet flat, and gently flatten the low back into the floor as you exhale. Then let it return to neutral on the inhale. Do 8 to 12 reps, slowly.
The point is not to crush your spine into the mat. The point is to find the middle. If you move too hard, the abs kick out and the rib cage flares. If you keep it smooth, you’ll feel the lower abdomen wake up without the usual bulge.
A lot of people rush this because it feels too easy. Don’t.
3. Supine TVA Brace with Fingertip Feedback
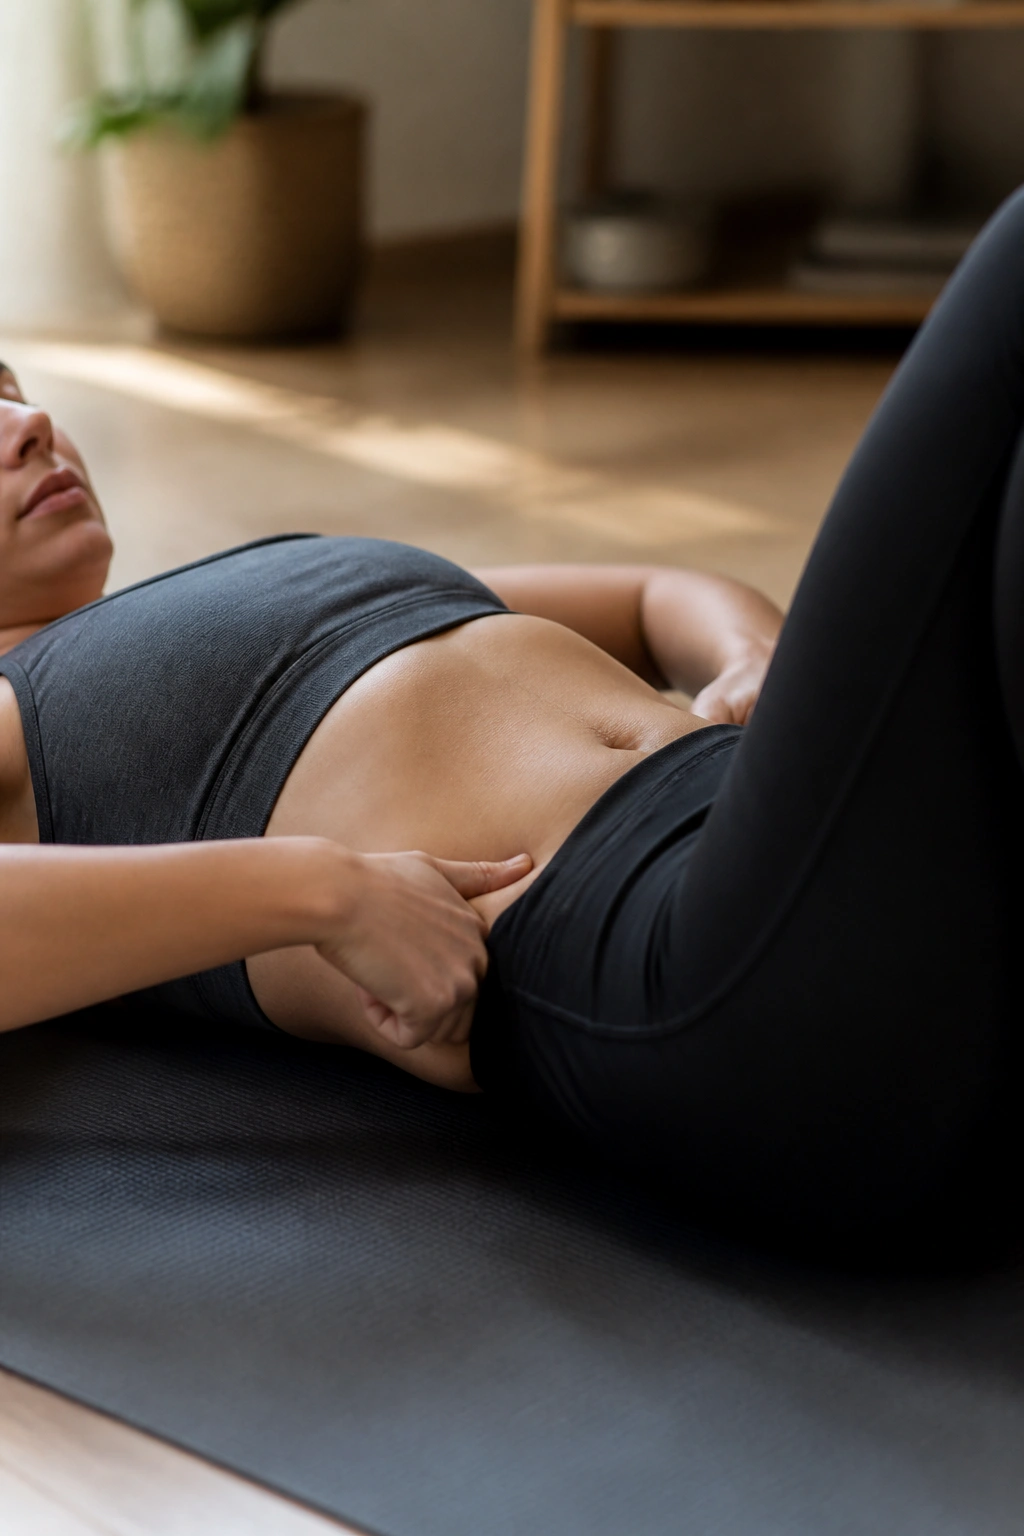
A hard brace is the wrong goal here.
Lie on your back, knees bent. Place two fingertips just inside your hip bones, then exhale and gently draw the lower belly inward and upward, as if you’re tightening a pair of soft jeans by one notch. Hold for 3 seconds, then release fully. Repeat 6 to 8 times.
What the brace should feel like
It should feel like light tension, not a shove. You should still be able to breathe. If you’re holding your breath, overdoing it, or seeing the midline poke out, the brace is too aggressive.
That’s the trap with a lot of core advice. People think stronger means tighter. Here, stronger means more coordinated.
Watch for: the lower ribs popping up or the belly doming. If either one shows up, cut the effort in half.
4. Heel Slides
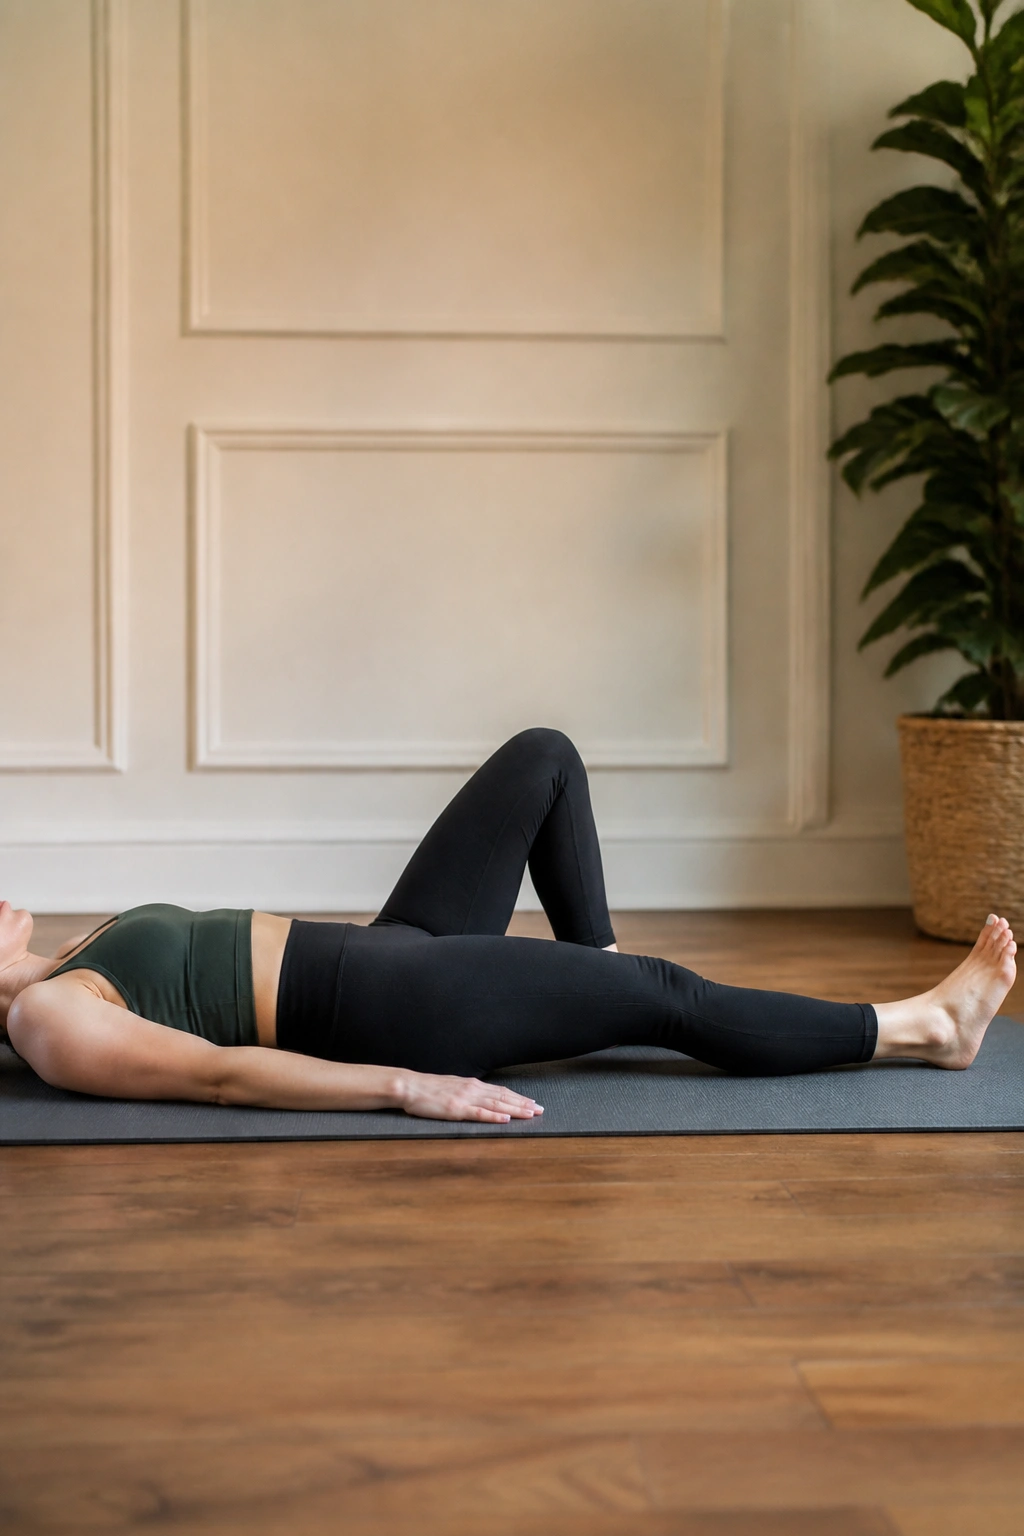
If one leg moving makes your midline react, that’s useful information.
Start on your back with knees bent. Exhale, gently brace, and slide one heel away until the leg is almost straight. Keep the pelvis still. Then slide it back in while you inhale. Alternate sides for 6 to 10 reps each.
Heel slides are sneaky. They train the abs to control the pelvis while the leg is in motion, which is where a lot of daily life lives anyway. Walking. Getting out of bed. Reaching a foot into pants. None of that looks like a crunch, and that’s the point.
If you see coning, make the slide shorter. If you feel your back arching, go slower. The best version is the one you can keep clean.
5. Marching in Hooklying
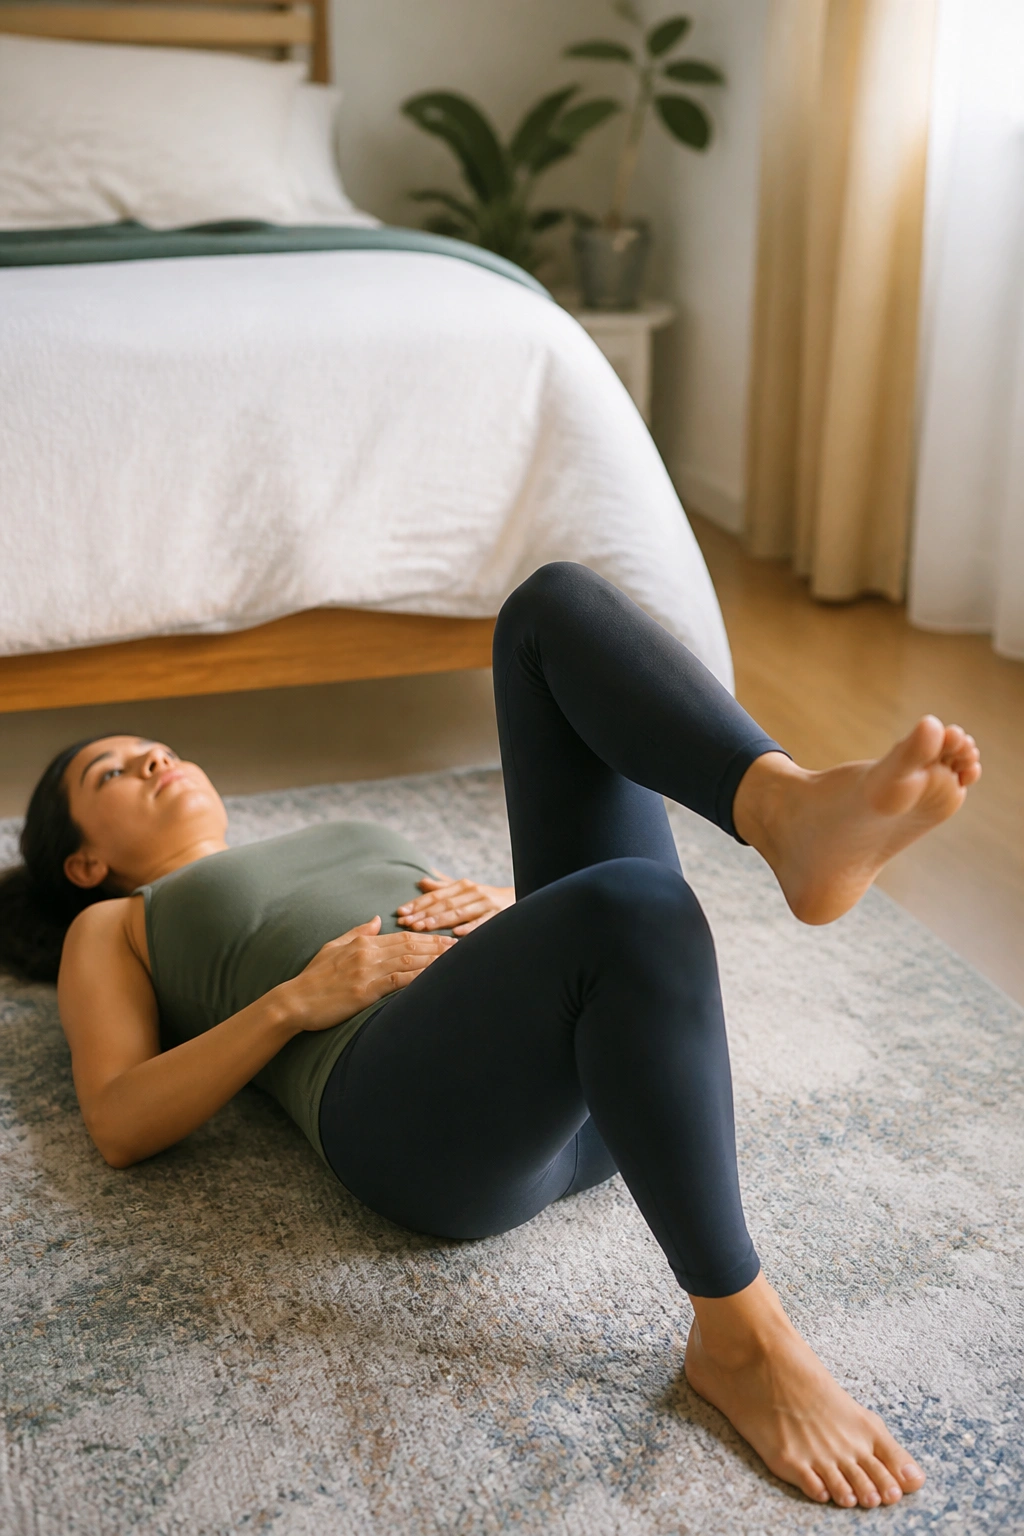
This is where control starts to feel useful in real life.
Lying on your back with knees bent, lift one foot a few inches off the floor while you exhale, then set it down with the same care. Keep the pelvis heavy and the ribs settled. Do 6 to 10 marches per side.
The movement is small. The demand is not. Each march asks your deep core to stop the torso from wobbling while one leg leaves the ground. That is exactly the kind of job that shows up when you carry a diaper bag, a baby, or a grocery tote in one hand.
Slow wins here. If the lower back arches, shrink the lift. If the belly line tents, pause and go back to breathing for a round.
6. Bent-Knee Fallout
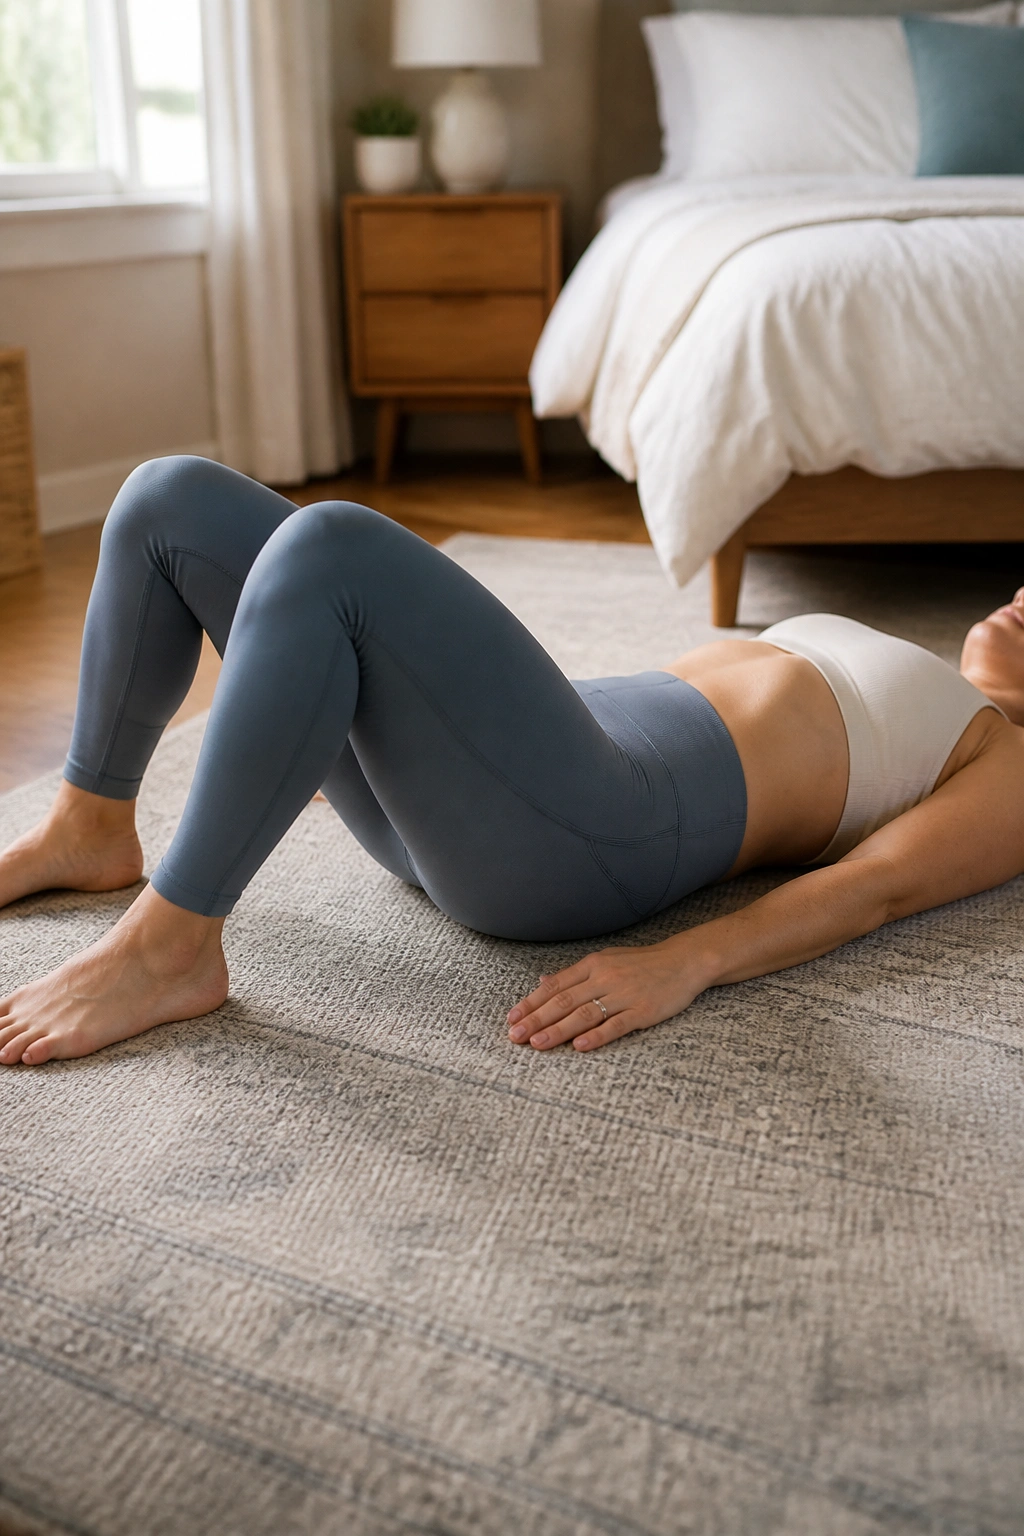
This looks like a hip drill. It isn’t only that.
With knees bent and feet flat, let one knee open out to the side a few inches while the opposite side of the pelvis stays still. Exhale on the way out, inhale on the return. Eight reps per side is plenty to start.
The reason this works is simple: the torso has to resist rotation. That’s a huge part of postpartum core recovery, because daily life rarely hands you perfect symmetry. You’re twisting, reaching, and shifting all the time.
Form check
- Keep the feet planted.
- Don’t let the ribs flare.
- The moving knee only goes as far as you can control.
- Stop if the belly ridge appears.
A small range done well beats a big range done sloppily. Every time.
7. Toe Taps with the Head Down
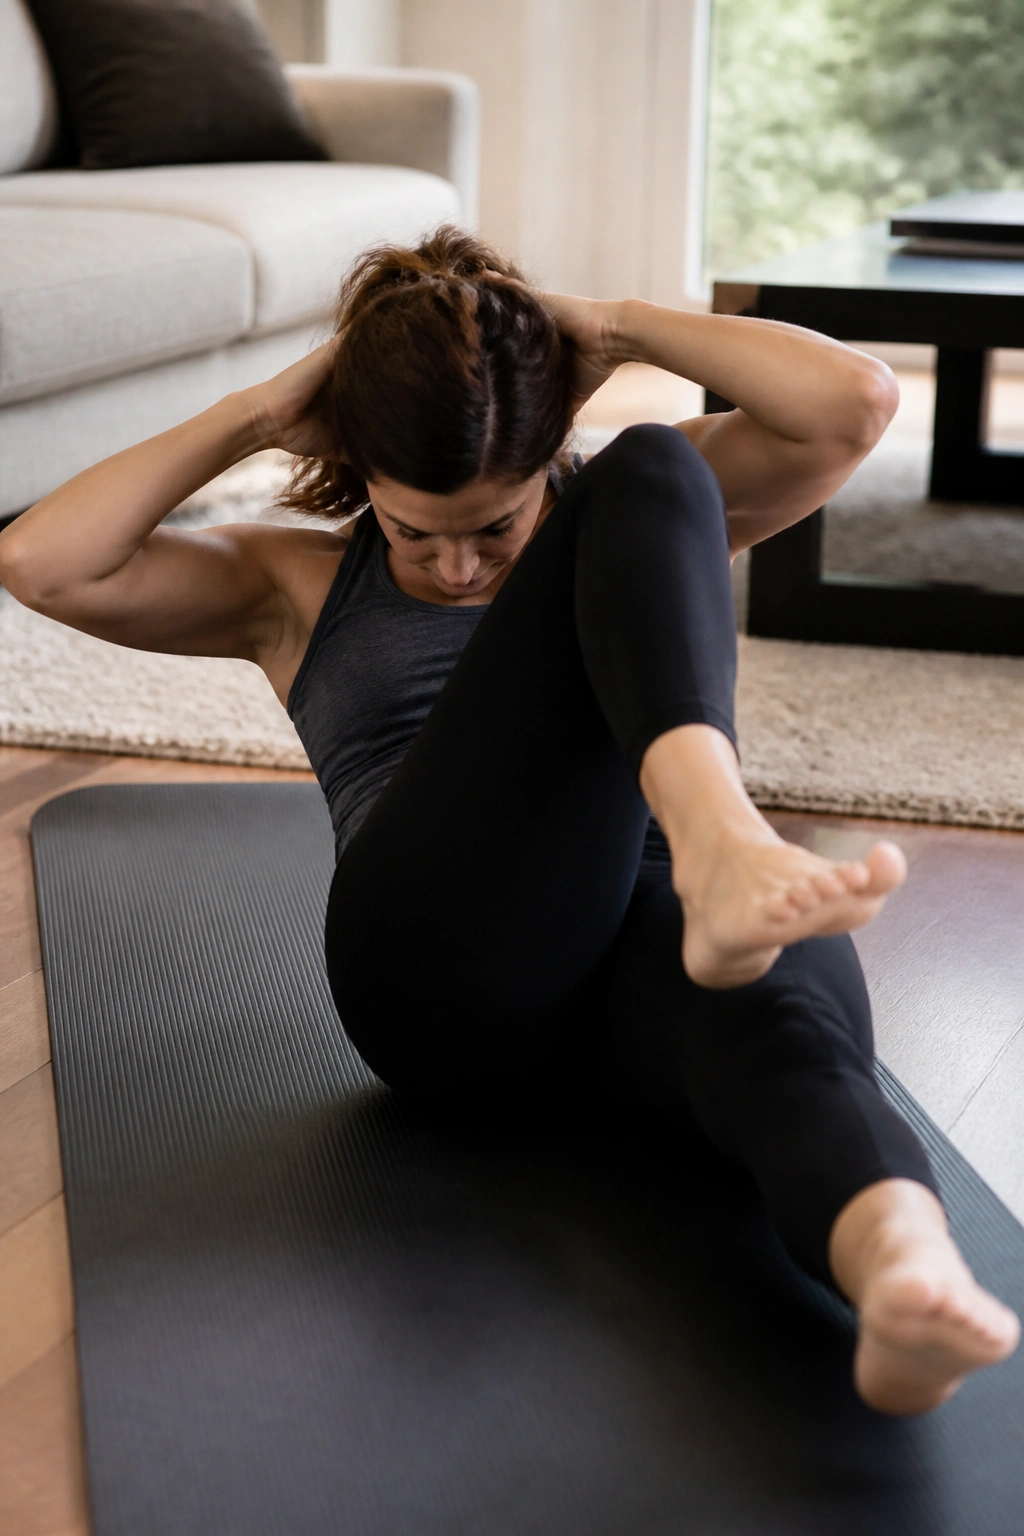
Toe taps tell the truth fast.
Start with both legs in tabletop, or keep one foot on the floor if that’s where you are. Lower one toe toward the ground as you exhale, then bring it back up without letting the spine peel off the mat. Do 5 to 8 taps each side.
What to watch for
If your neck starts doing the work, lower the legs less. If your low back loses contact, you’ve gone too far. If the middle of the abdomen rises into a little ridge, the movement is outrunning your control.
This is a useful place to be honest with yourself. Not every person is ready for dead bugs the way they look on social media. Fine. Use a smaller version. That is not a failure; it’s good coaching.
Tip: keep the exhale long. The longer exhale usually calms the pressure better than a quick puff.
8. Glute Bridges
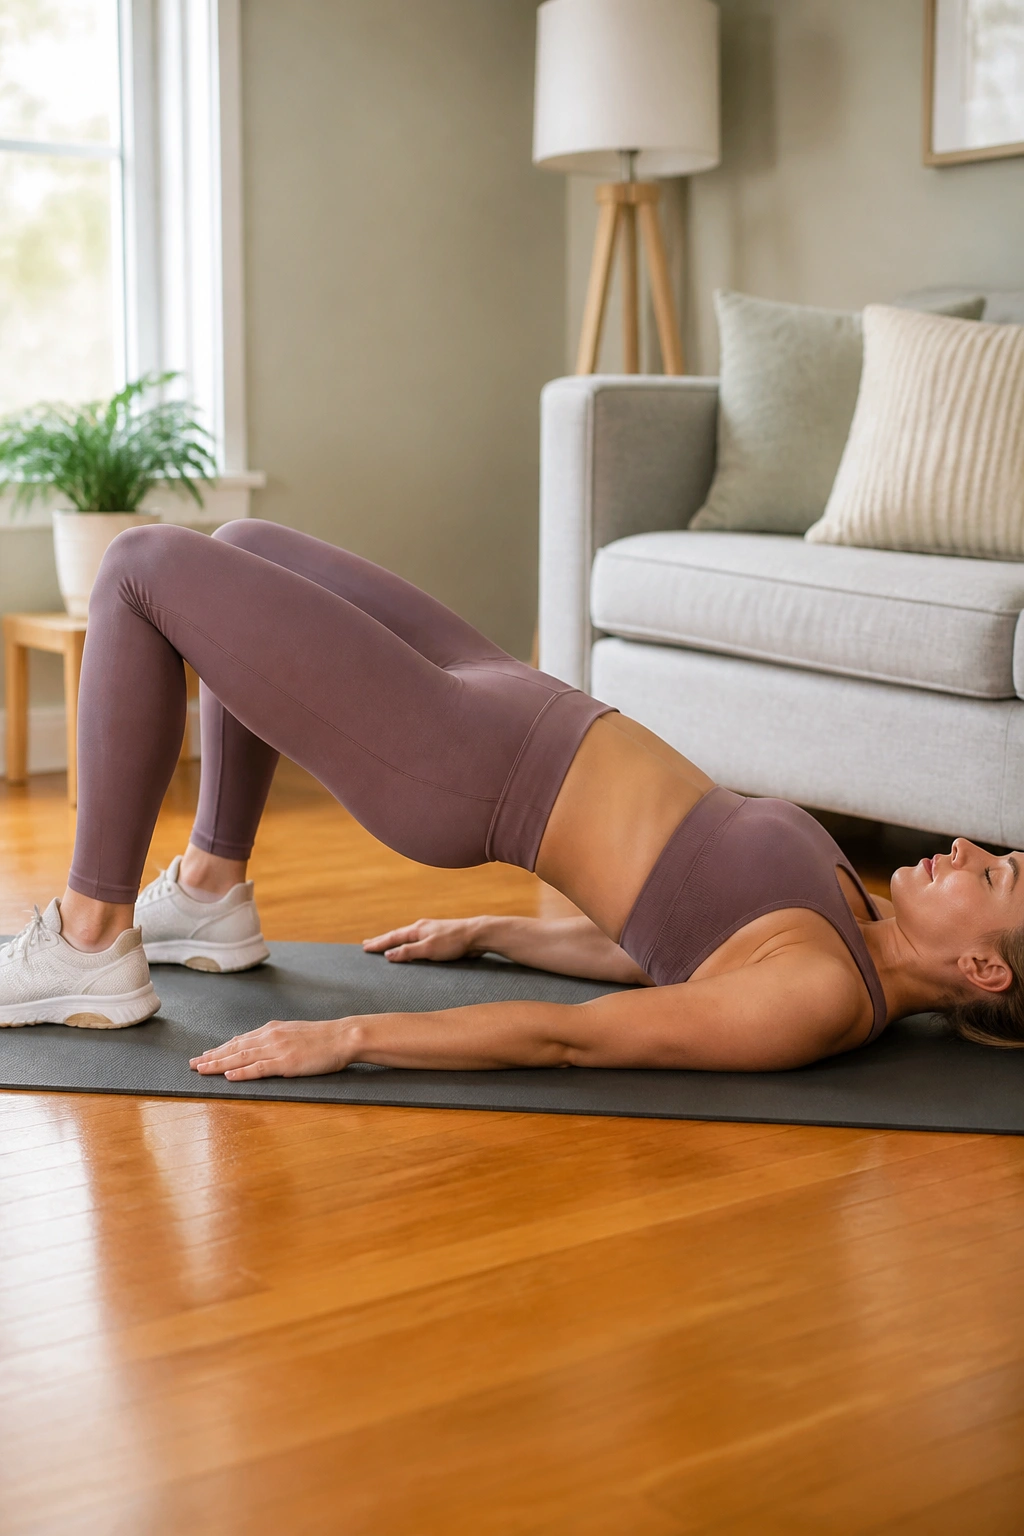
A bridge is not an ab workout by accident. It asks your core and pelvis to work together.
Lie on your back, feet about hip-width apart. Exhale, tuck the tailbone just a hair, and lift the hips until the body forms a straight line from knees to shoulders. Pause for a second, then lower with control. Six to 10 reps is a solid start.
You should feel the glutes do the heavy lifting. If the low back is taking over, you’re probably arching too much at the top. Keep the ribs down, press through the heels, and stop the lift before your back starts to pinch.
The best bridge feels firm and clean. No wobble. No rib flare. No jammed lumbar spine.
9. Bridge Holds with Exhale
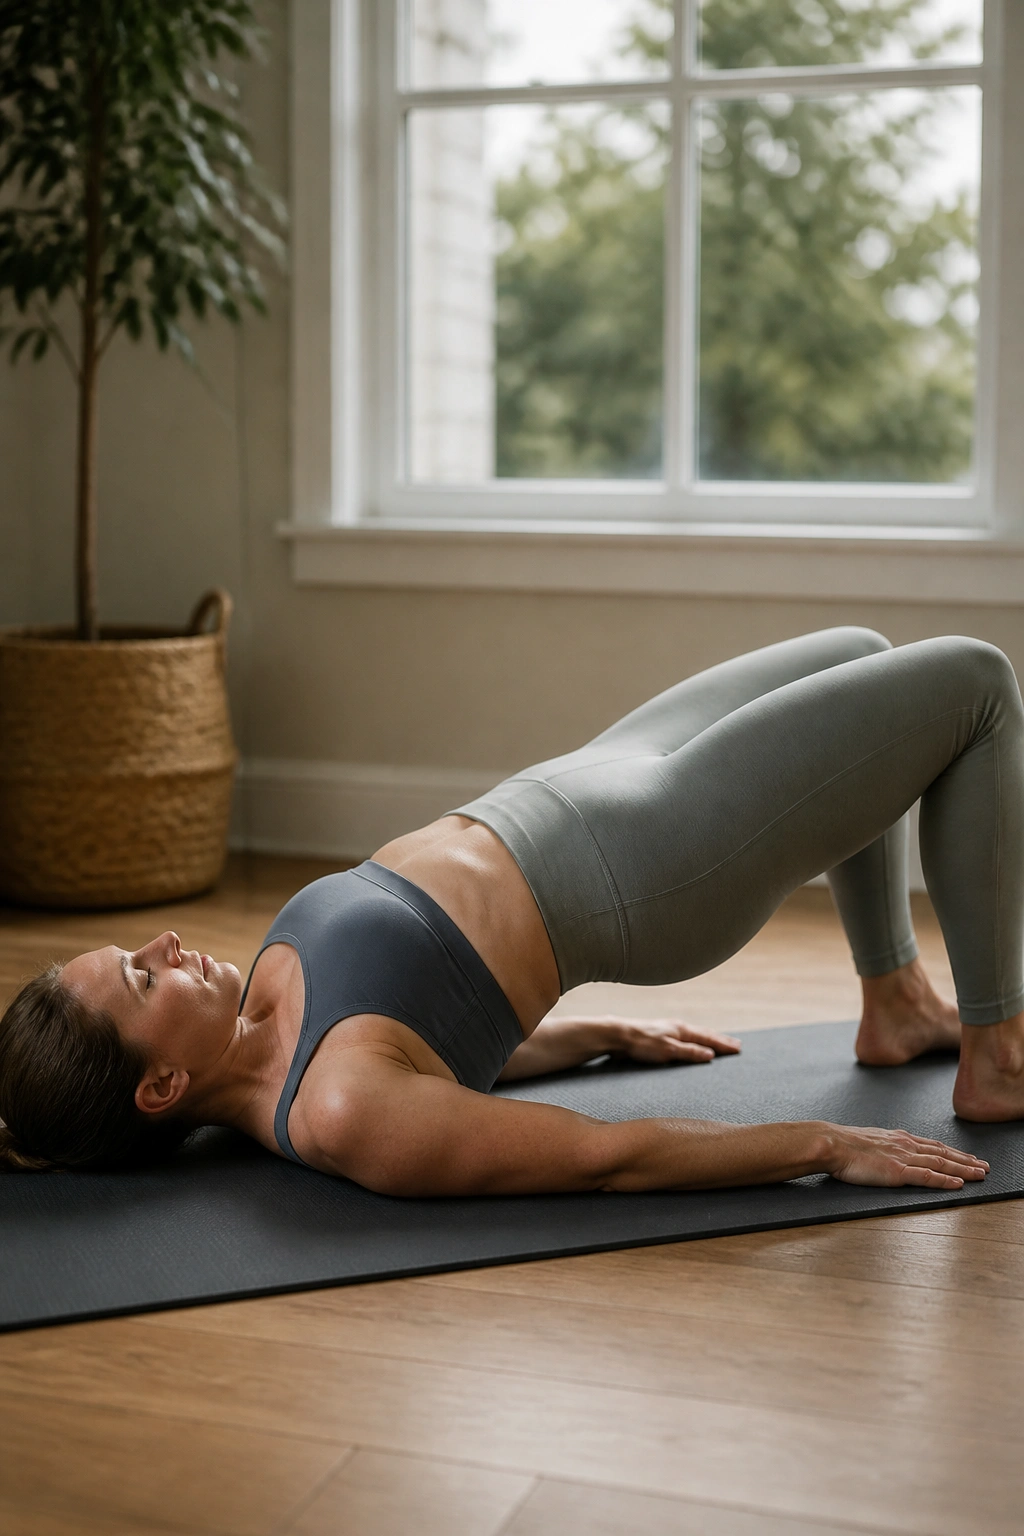
Static work can teach better control than fast reps.
Set up in bridge position, lift the hips, and hold for 5 to 10 seconds while taking two slow breaths. Lower fully, rest, then repeat 4 to 6 times. That brief hold gives you time to notice whether the belly wants to bulge or the ribs want to open.
What I like about this variation is the honesty. You cannot rush through it. If the hold is too hard, you will know within seconds. If it feels steady, you’re building endurance in the back line and the deep core at the same time.
Don’t chase height. Chase quiet. A lower bridge with clean pressure beats a big bridge that looks strong and feels messy.
10. Quadruped Rock Backs
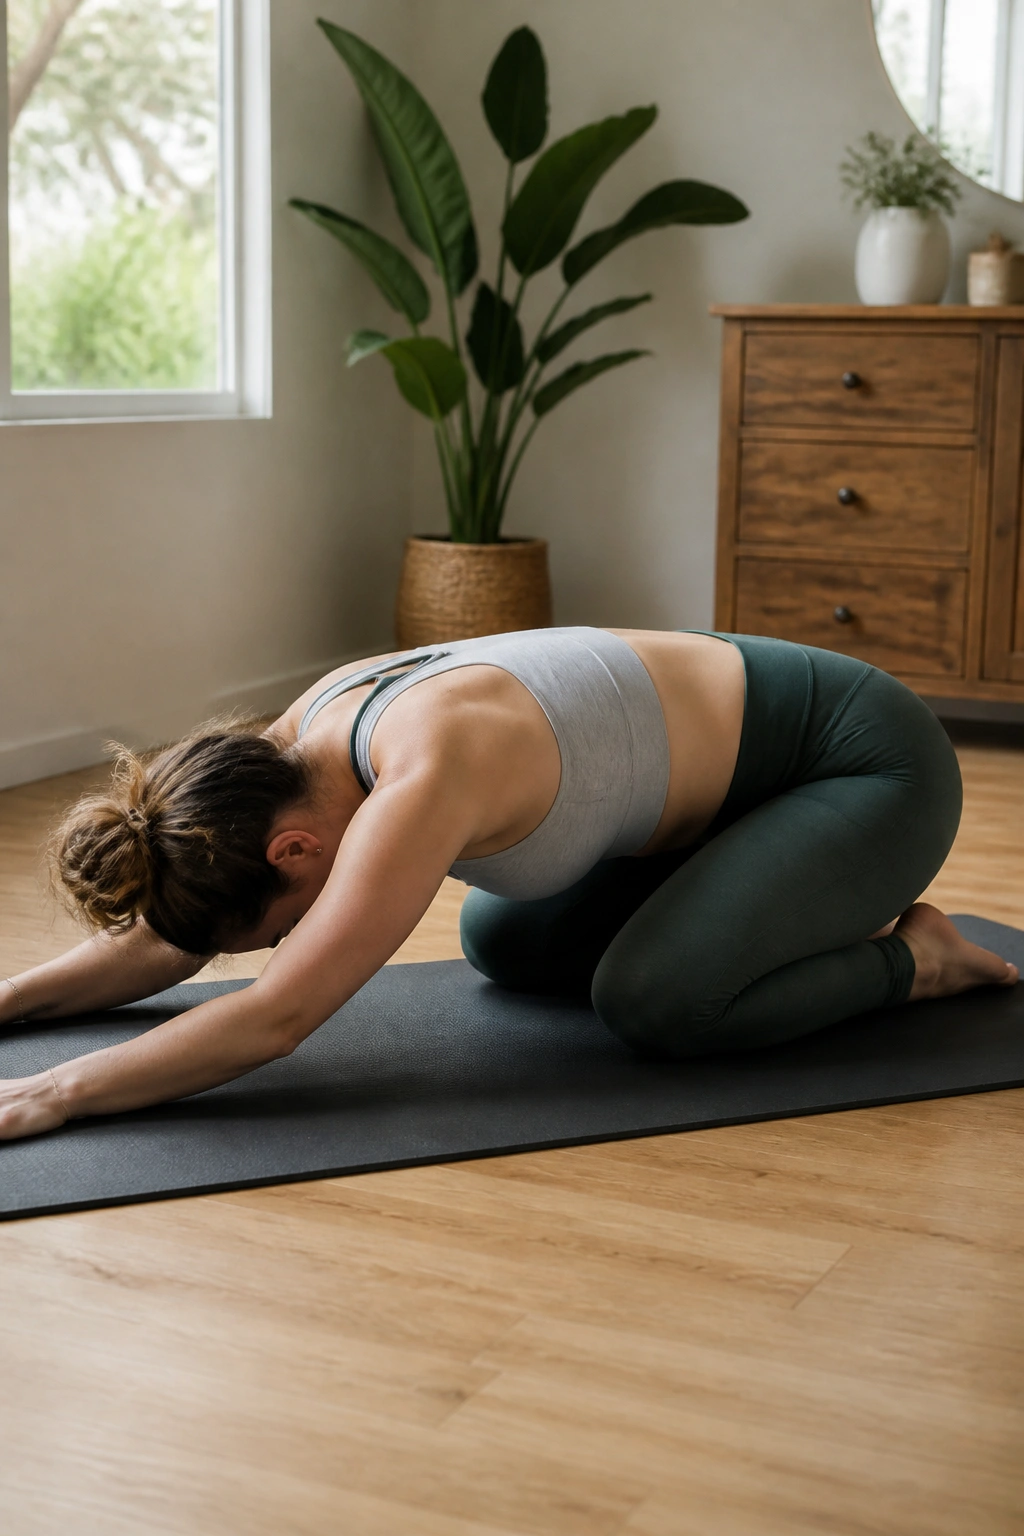
Get on hands and knees and rock your hips toward your heels, then forward again.
That’s the whole move, and it’s more useful than it sounds. The position takes load off the abdominal wall while teaching the ribs and pelvis to stack more naturally. Exhale as you rock back, inhale as you come forward. Eight to 10 smooth reps usually does the job.
If wrists bother you, drop to forearms. If knees complain, pad them with a folded towel. There’s no prize for suffering through the setup.
The nice thing about rock backs is that they often feel good right away. Good sign. Your body usually tells you pretty quickly if it likes a position.
11. Cat-Cow with Rib Exhale
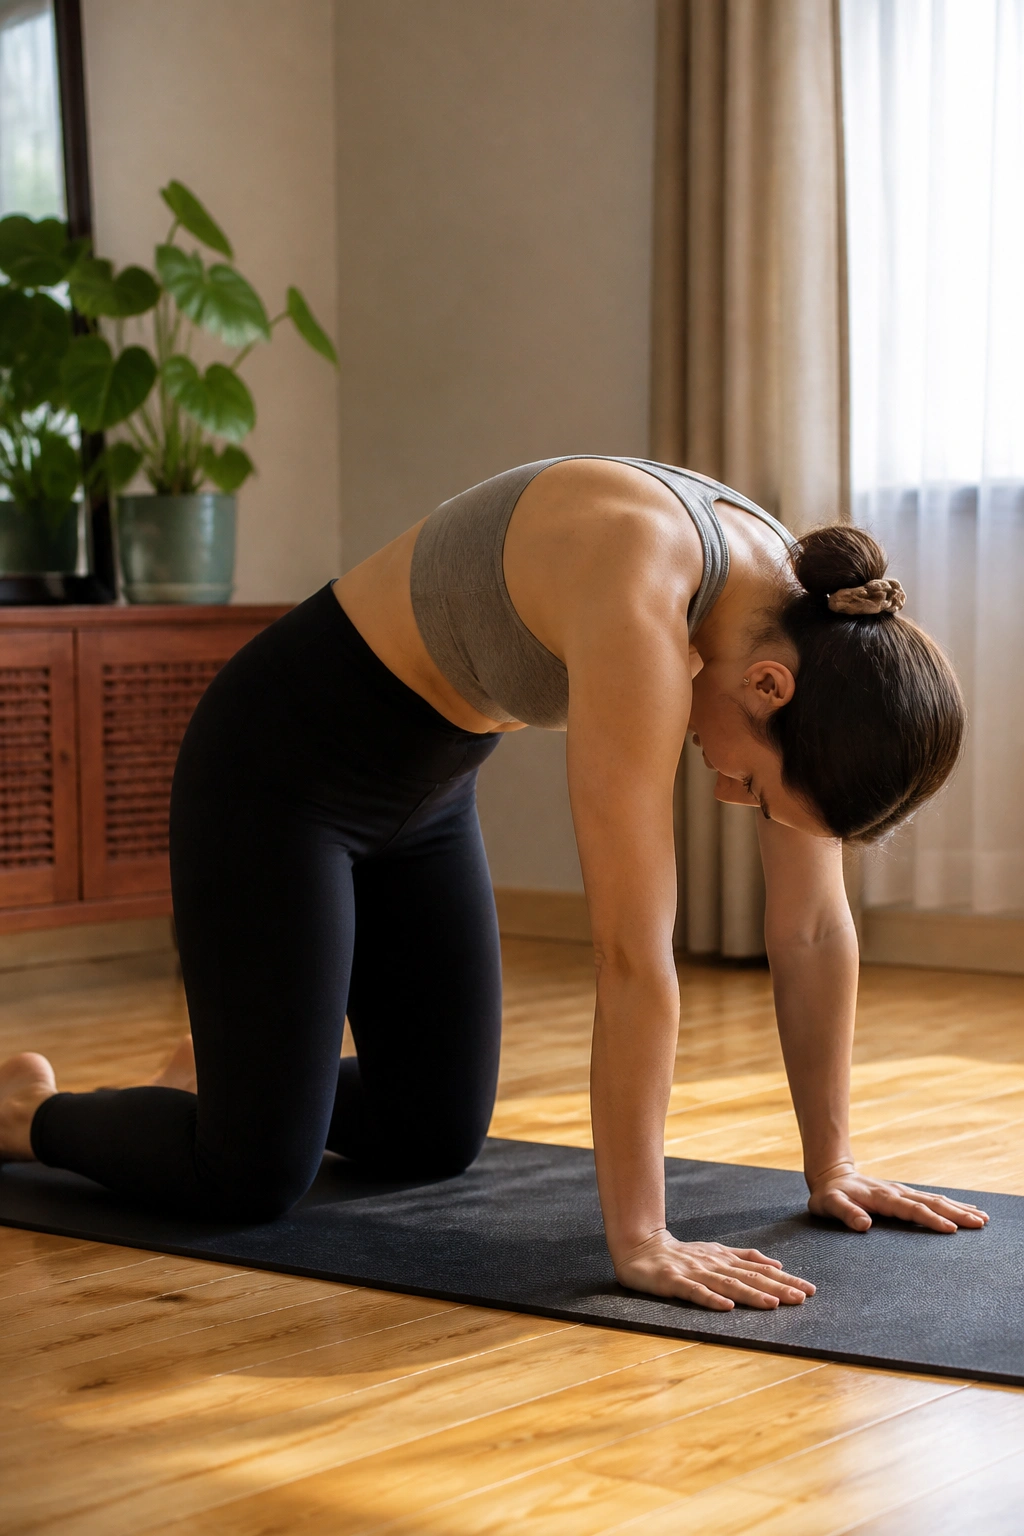
Cat-cow is not magic, but it earns its place.
Move between a gentle round spine and a gentle arch while on hands and knees. On the rounding phase, let the exhale help the ribs slide down and the belly gather in. On the arching phase, inhale and let the chest open without dumping into the low back.
Why it helps
The goal is not flexibility for its own sake. The goal is to reconnect breath with spinal motion so your core stops feeling like a stiff belt. That matters when you’re picking things up from the floor, turning in bed, or reaching across a crib.
Small range. That’s the part people skip. Keep it small enough that the midline stays smooth, and do 6 to 8 slow cycles. If the movement starts to feel loose and sloppy, cut it down again.
12. Bird Dog
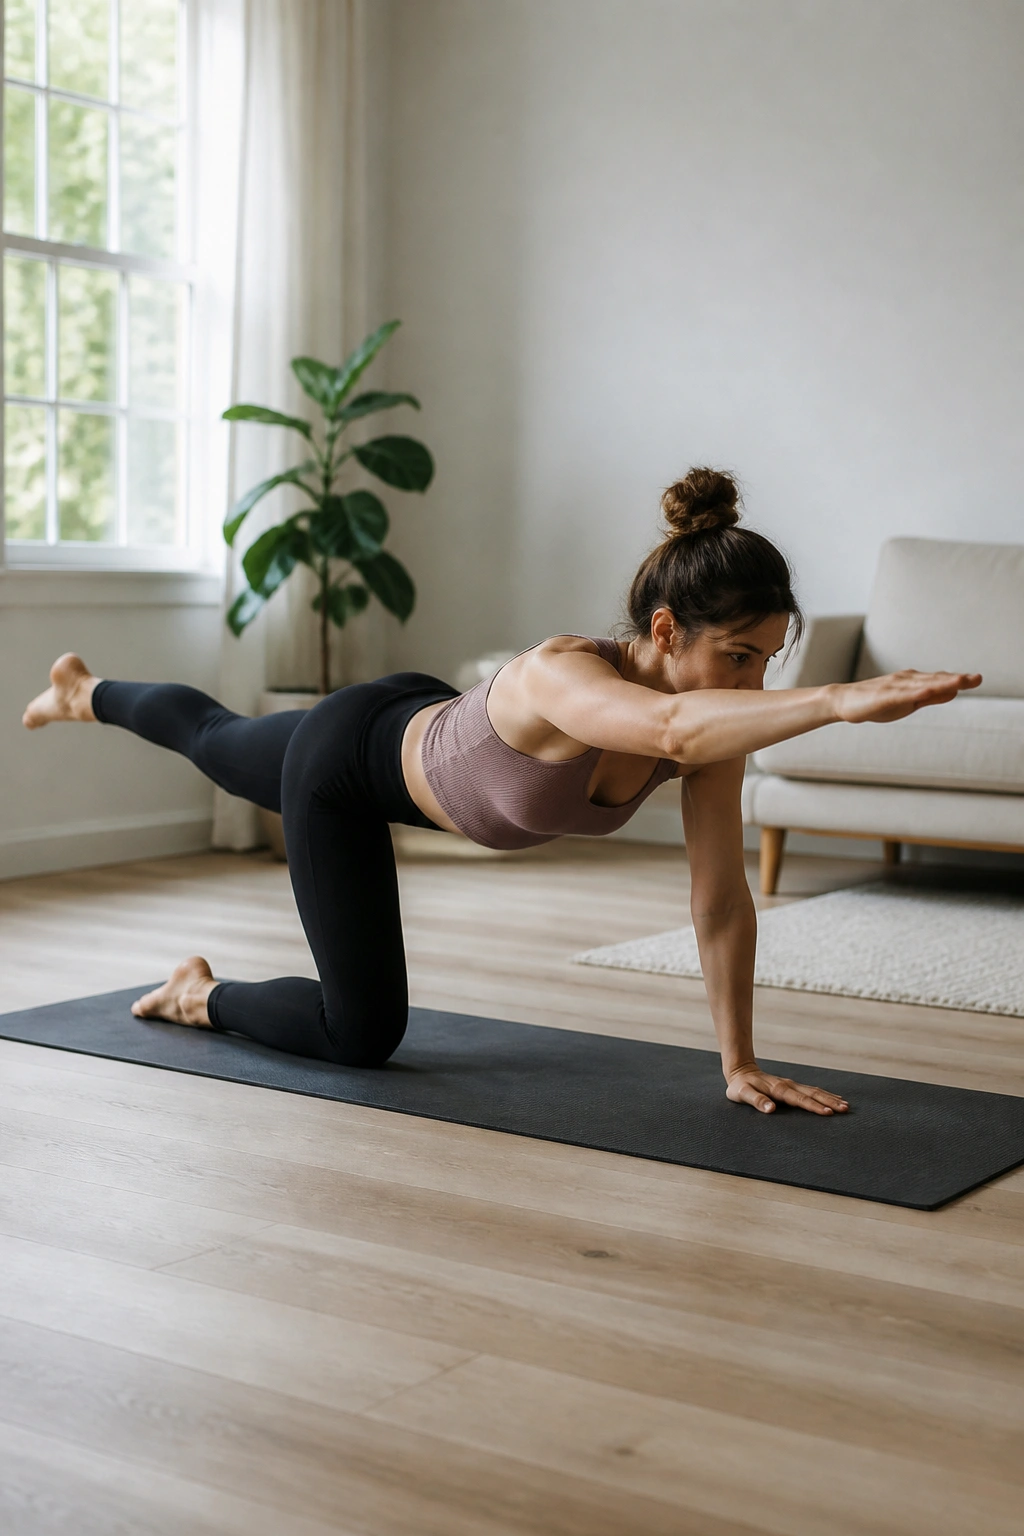
Most people throw the leg too far back.
That’s the mistake. The bird dog is not about showing off range. Start on hands and knees, extend one leg back and the opposite arm forward, and stop the moment your hips start to sway. Hold for 2 to 3 breaths, then switch sides. Four to six reps per side is plenty.
How to keep the line quiet
- Reach long, don’t lift high.
- Keep the gaze down.
- Think “level table,” not “higher is better.”
- Exhale before the reach, not after.
A clean bird dog can feel strangely hard the first few times. Good. That means the trunk is working without a lot of extra motion. If you feel pressure at the midline, shorten the reach and keep your toes on the floor.
13. Wall Push-Aways
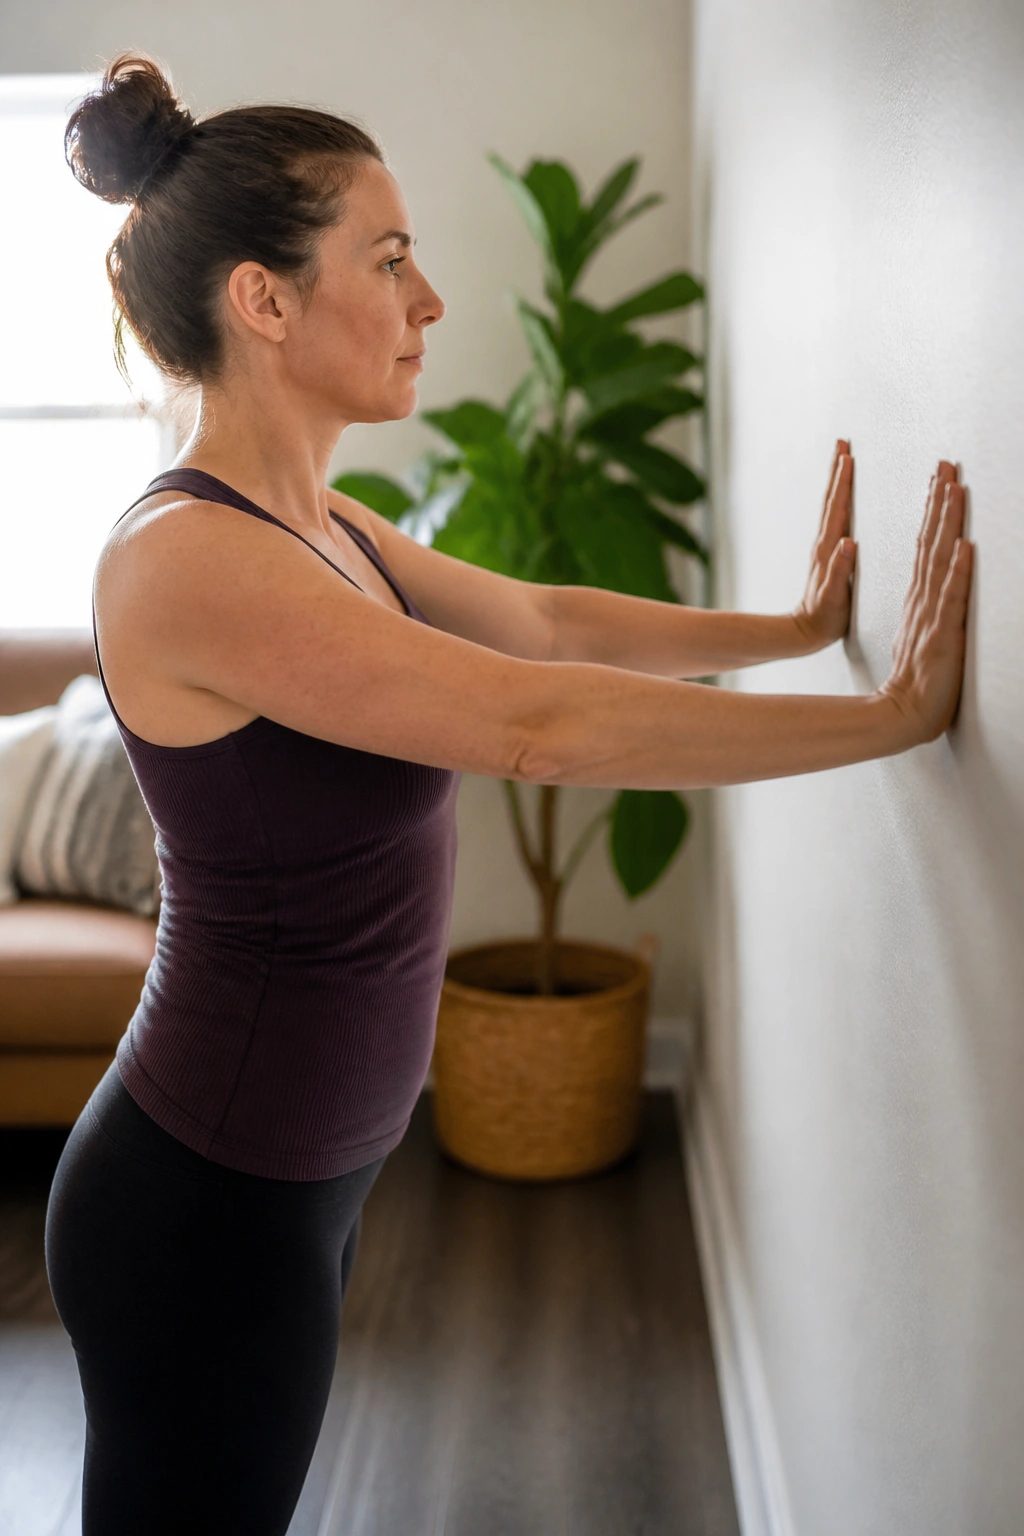
You do not need to get on the floor for every core drill.
Stand facing a wall, feet about a foot away. Place both palms on the wall at chest height and gently push the wall away as you exhale, letting the shoulder blades slide a little apart. Hold for 3 seconds, then release. Do 8 to 10 reps.
This is a favorite because it sneaks in core work while your body is upright. The wall gives feedback, the arms create resistance, and the trunk has to stay stacked. If you’ve been living in a lot of carrying and feeding positions, that upright reset can feel like a relief.
Good for: early return to exercise, people who hate floor work, and anyone whose wrists or incision still get grumpy.
14. Wall Slides with Core Brace
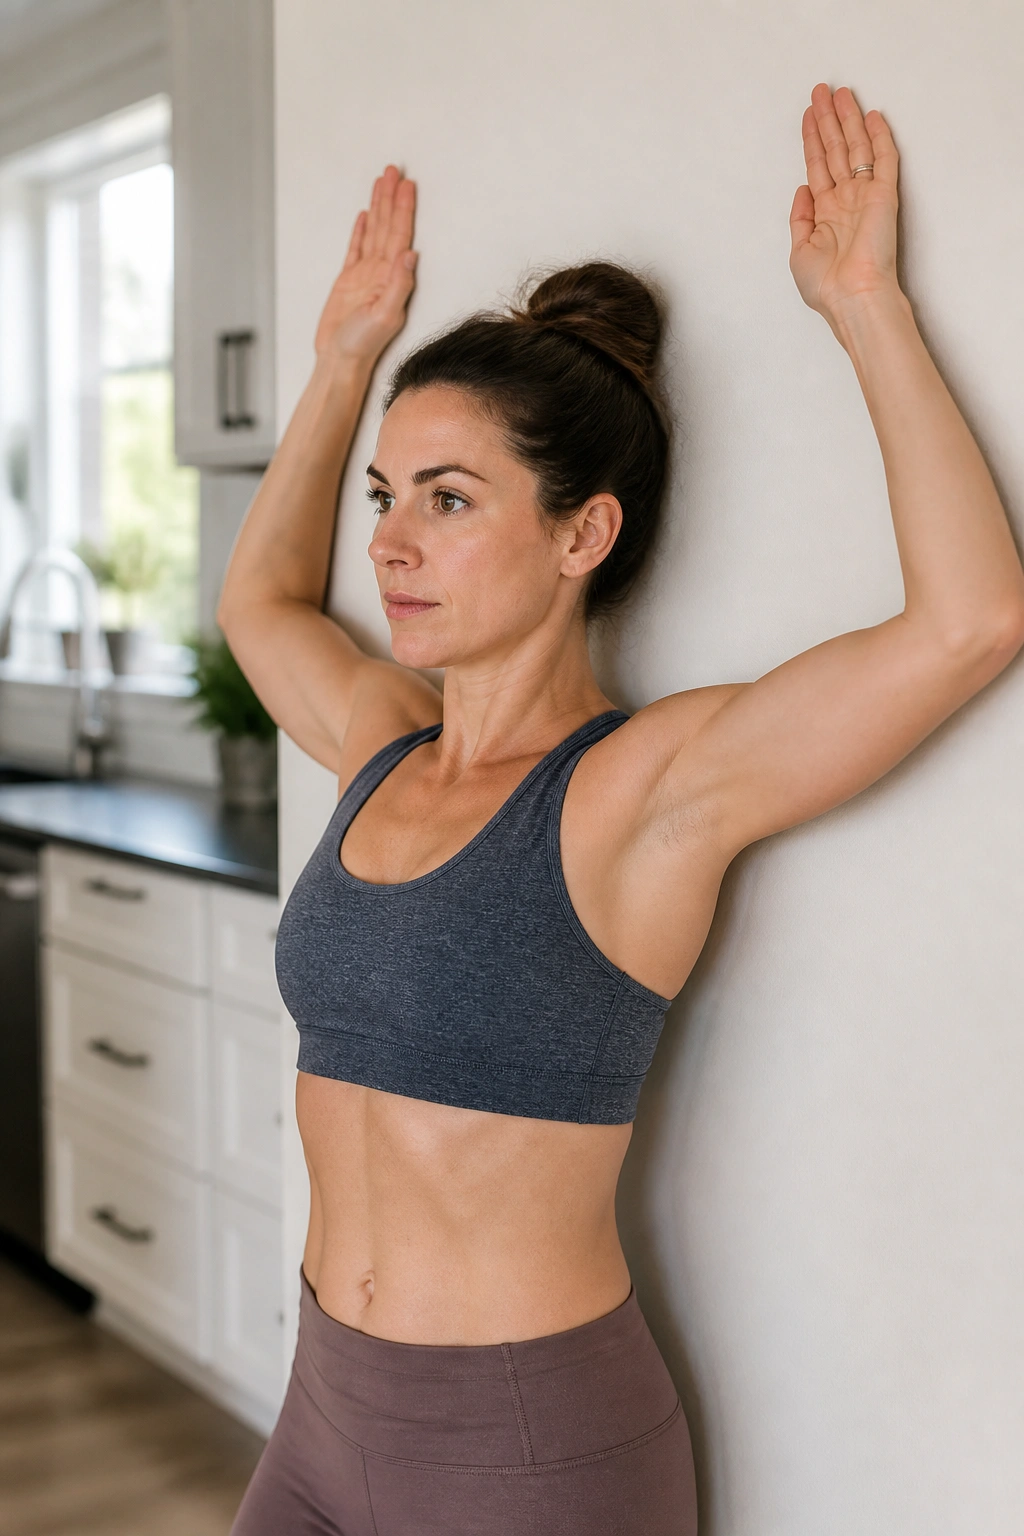
Overhead work shows rib flare fast.
Stand with your back near a wall, ribs soft, and elbows bent. Exhale while sliding the arms upward as far as you can keep the lower ribs from popping forward. Return with control. Six to eight reps is enough to start.
A lot of postpartum movement lives above the shoulders. Putting dishes away. Lifting a baby. Getting a sweater on. Wall slides train the trunk to stay stacked while the arms travel, which is a much better test than doing endless floor crunches.
If your lower back arches or your rib cage flares, stop the slide lower. You’re not aiming for perfect range. You’re aiming for a clean one.
15. Standing Marches at the Wall
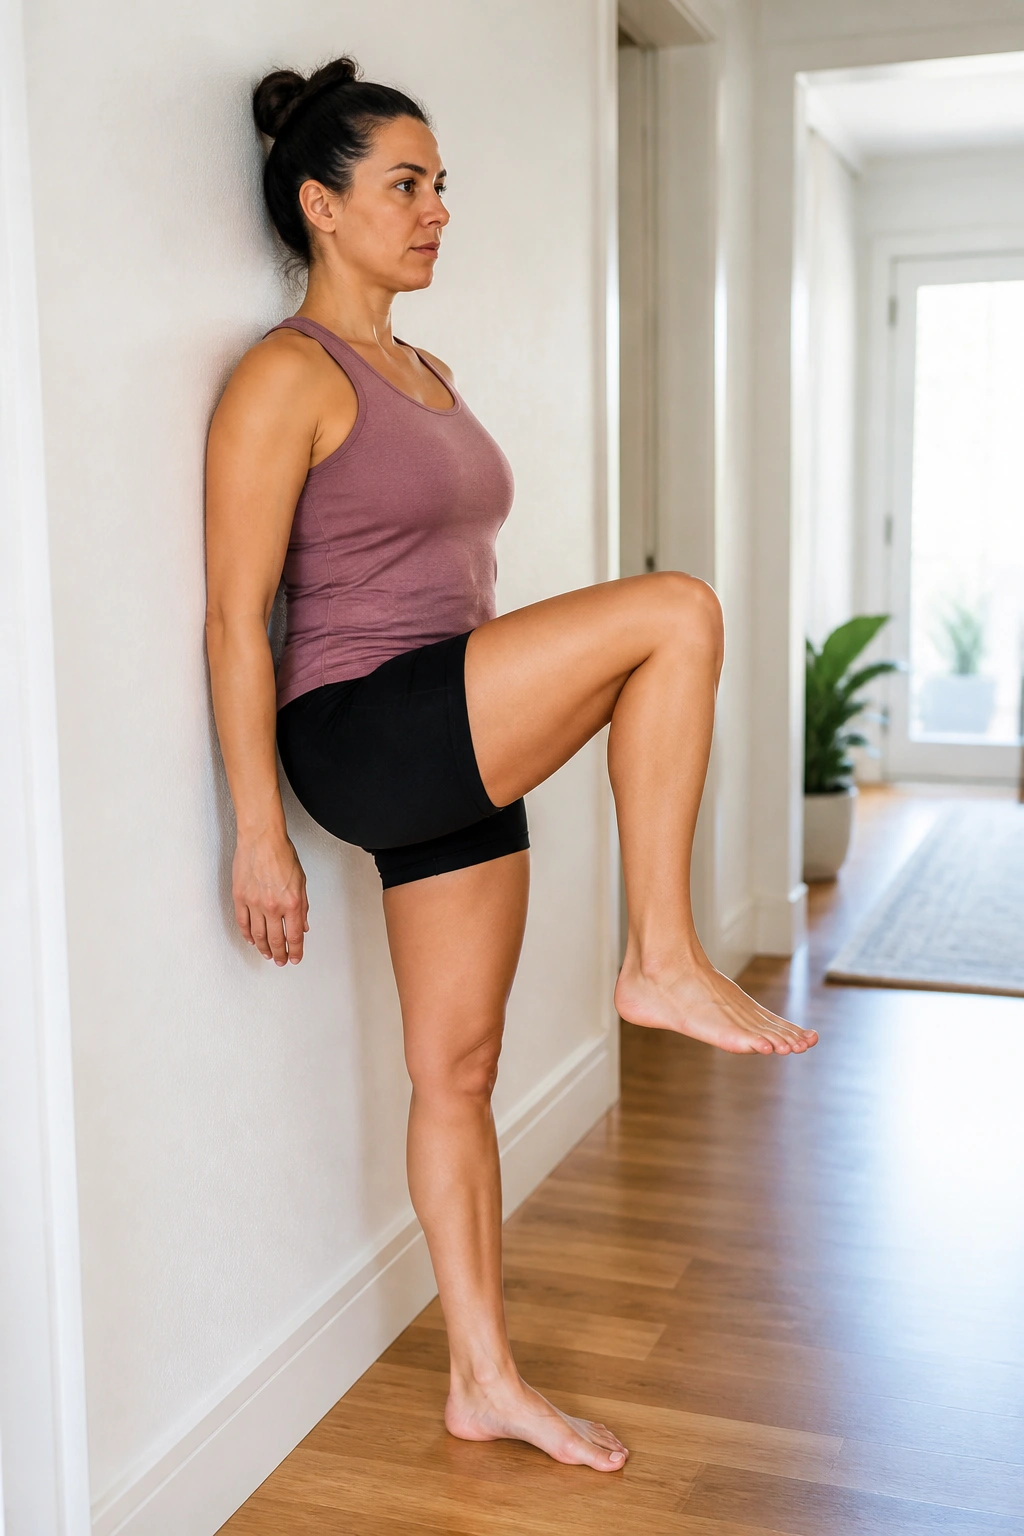
This is a simple drill, and it carries over fast.
Stand with your back lightly against a wall, then lift one knee to hip height while you exhale. Set it down, switch sides, and keep the torso still. Ten to 12 total marches is a good dose.
Quick cues
- Keep the standing foot heavy.
- Don’t shove the low back into the wall.
- Think tall through the crown of the head.
- Breathe before each lift.
The wall keeps you honest. It shows you when you’re leaning, twisting, or dumping into your ribs. I like this one for people who are back to walking but still feel wobbly when one foot leaves the ground. That “wobbly” feeling is worth paying attention to.
One clean march is more useful than ten messy ones.
16. Side-Lying Clamshells
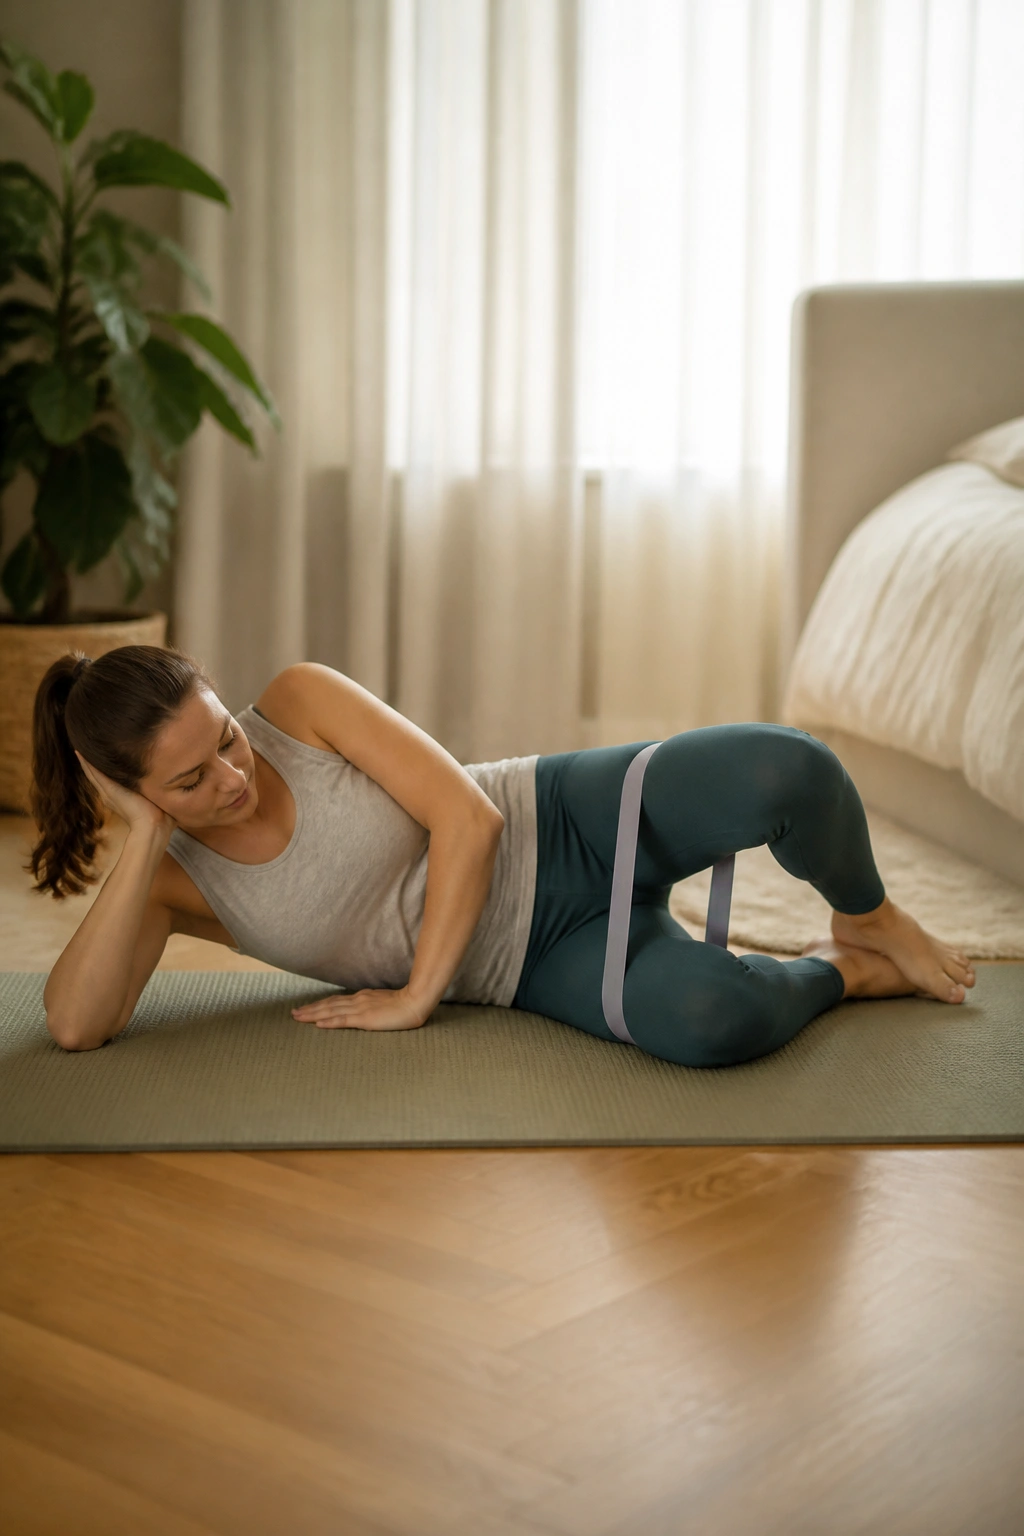
Yes, hips count.
Lie on your side with knees bent and feet together. Keeping the pelvis stacked, open the top knee like a clamshell, then lower it slowly. Ten to 15 reps per side is reasonable, and a light band above the knees can make it harder if you’re ready.
Why is a hip move here? Because the pelvis and the core are partners. When the glutes help stabilize the pelvis, the abdominal wall doesn’t have to grab as hard to keep you from tipping over. That matters in walking, stairs, and all the one-sided chaos of parenting.
If you feel the low back rolling or the top hip hiking backward, reset. Small range again. Always small range if it keeps the form tidy.
17. Dead Bug Arms Only
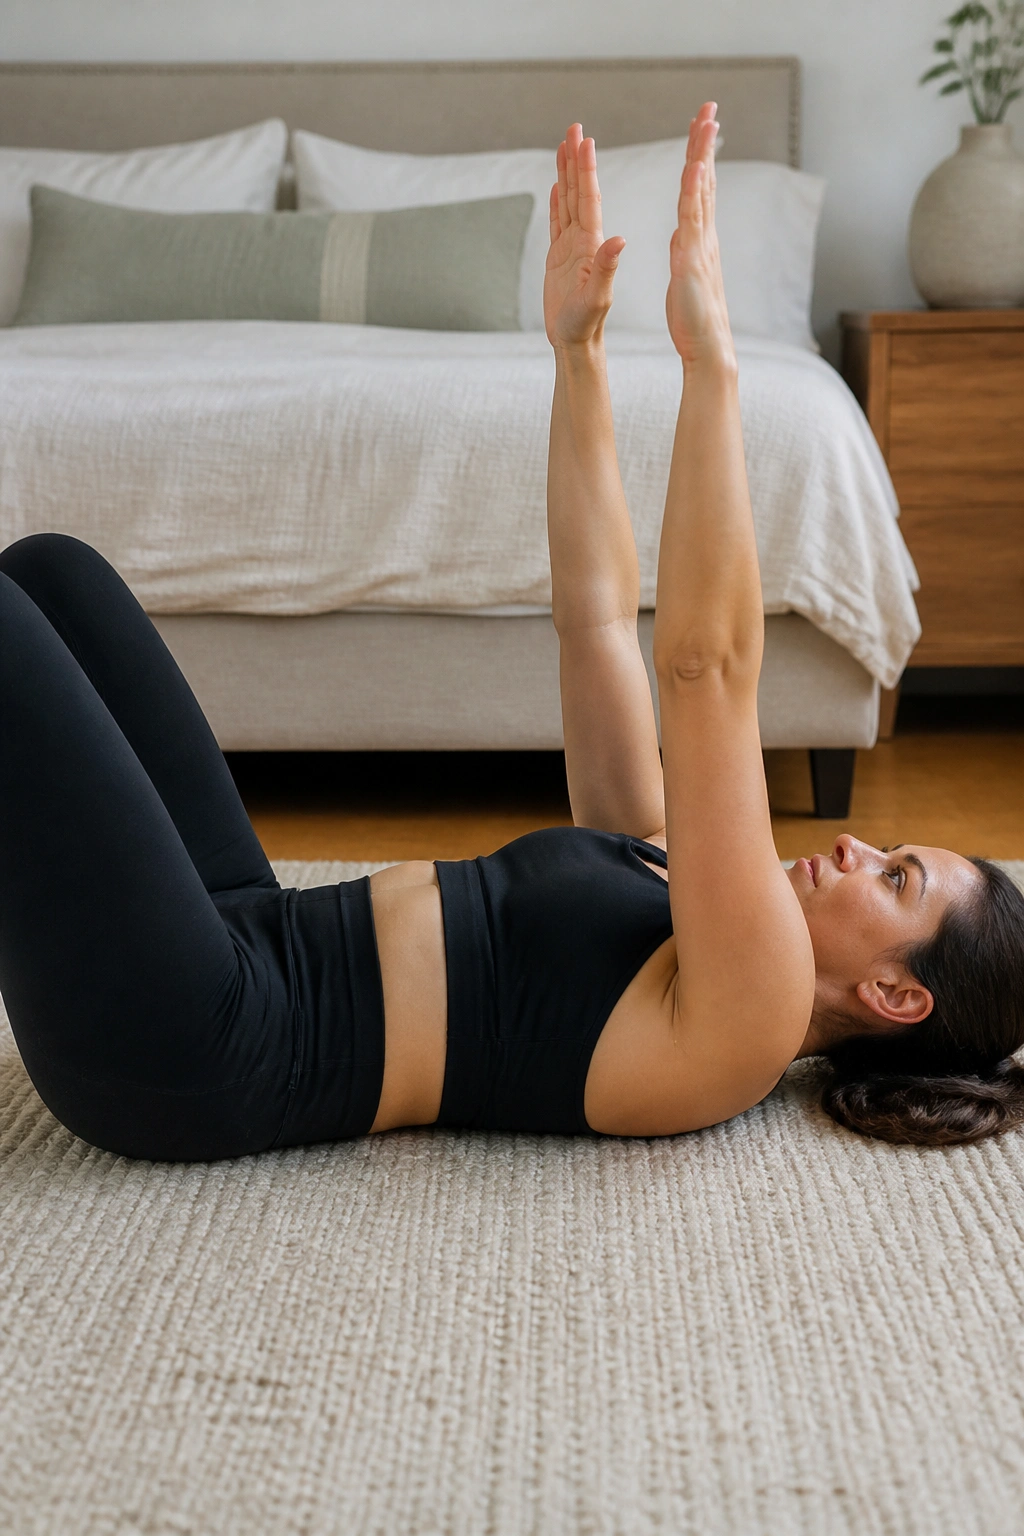
If full dead bugs make your stomach feel like it’s under siege, strip the legs out of it.
Lie on your back with knees bent or feet on the floor. Reach both arms toward the ceiling, then lower one arm overhead while you exhale, keeping the ribs from flaring. Bring it back, then switch sides. Six to eight reps each side is enough.
How to scale up
Once that feels stable, lower both arms together. Then add a small leg march. Then, much later, add the full dead bug version. There’s no rush. The point is to teach the torso to stay quiet while the limbs move.
This is one of those exercises that looks too easy until you do it properly. Properly is the whole game.
18. Dead Bug Heel Taps
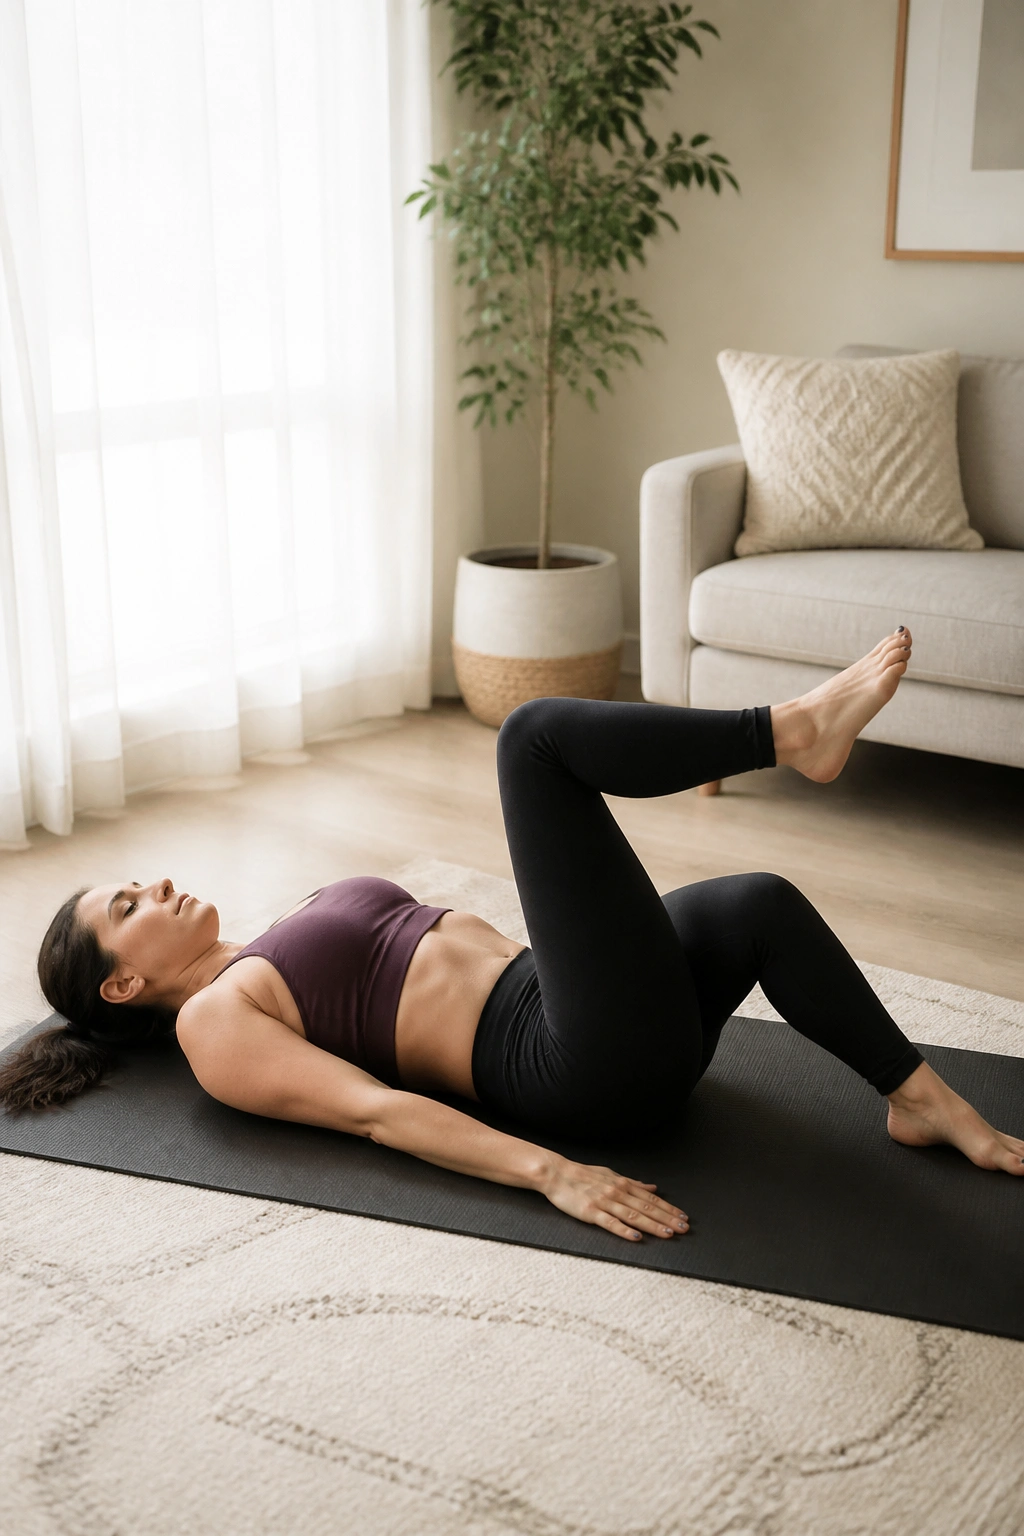
Heel taps are the middle ground between tiny marches and full-length dead bugs.
Start with legs in tabletop or one knee bent a little more if needed. Lower one heel toward the floor, tap lightly, then bring it back up while exhaling. Keep the low back heavy and the ribs softened. Six taps per side is a nice start.
If you notice the belly ridge appearing, reduce the drop. If your back starts to arch, make the tap smaller or keep one foot on the floor. The exercise still counts. That part matters.
The goal is pressure control under movement. Not drama. Not a six-pack burn. Just better timing between your breath, deep core, and legs.
19. Pallof Press Holds
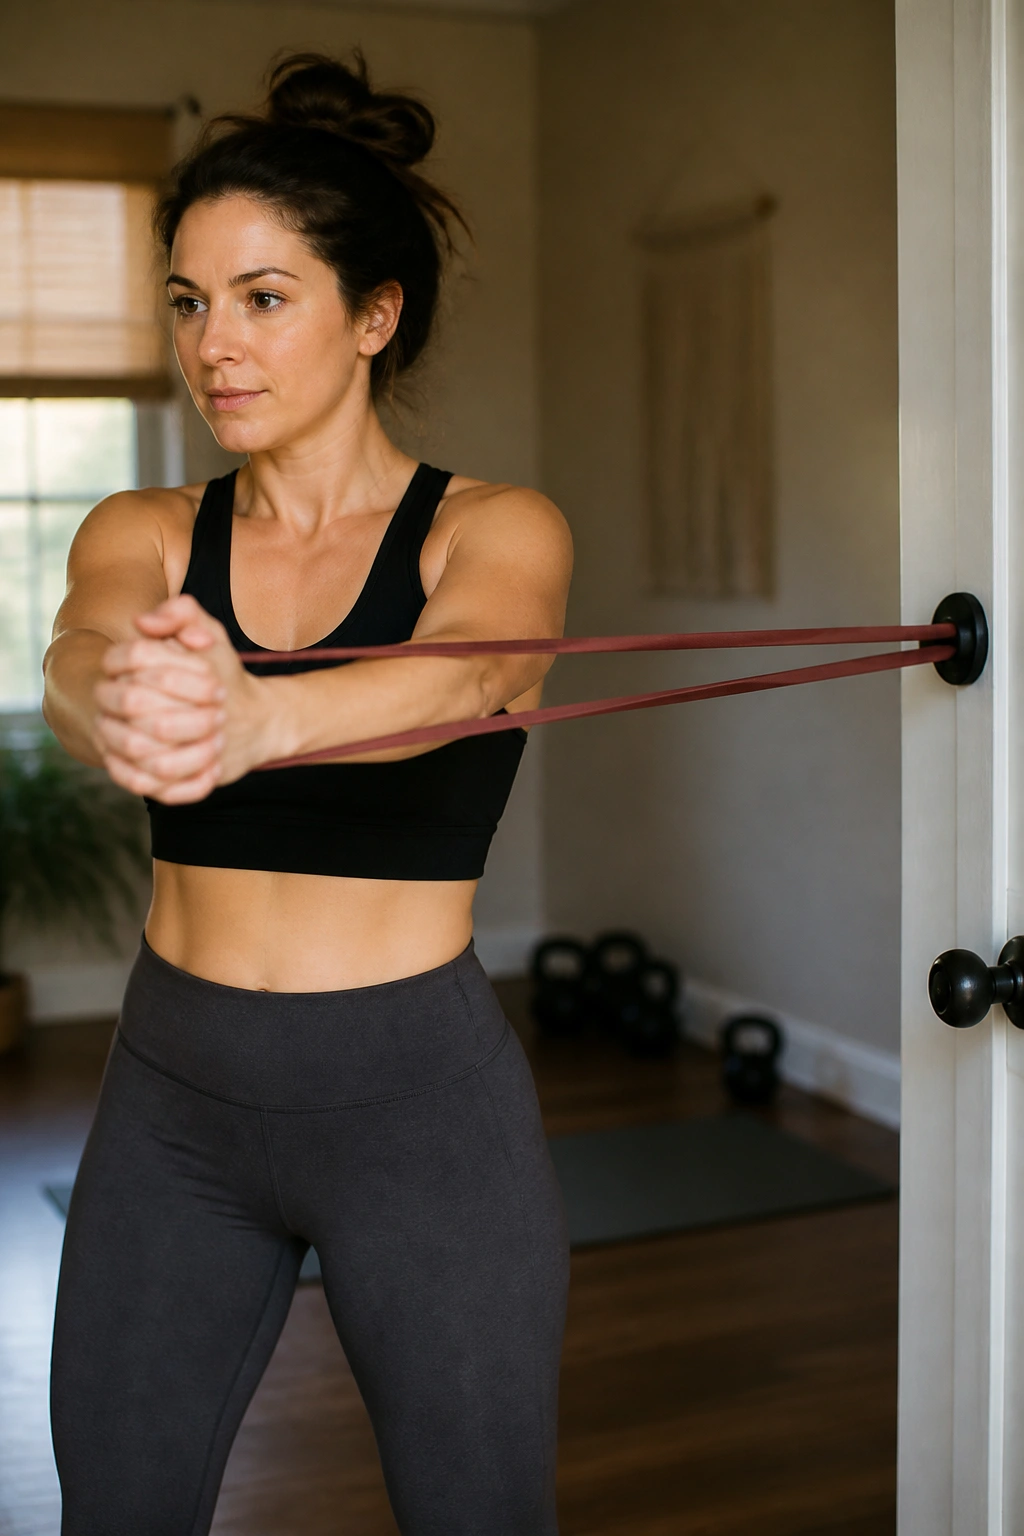
Rotation control matters more than crunches when life keeps pulling you sideways.
Attach a resistance band at chest height and stand sideways to the anchor. Hold the band at your chest, press it straight out, and resist the twist. Hold for 5 seconds, bring it back, and repeat 6 to 8 times per side.
Why it earns a spot
The Pallof press trains the core to stop rotation. That’s what happens when you carry a car seat on one hip, open a heavy door, or reach for a toddler who’s leaning away from you. A lot of “ab work” never touches that skill.
Start with a light band. If your body rotates or your ribs flare, step closer to the anchor. The best version feels firm but not frantic.
20. Incline Plank on a Bench
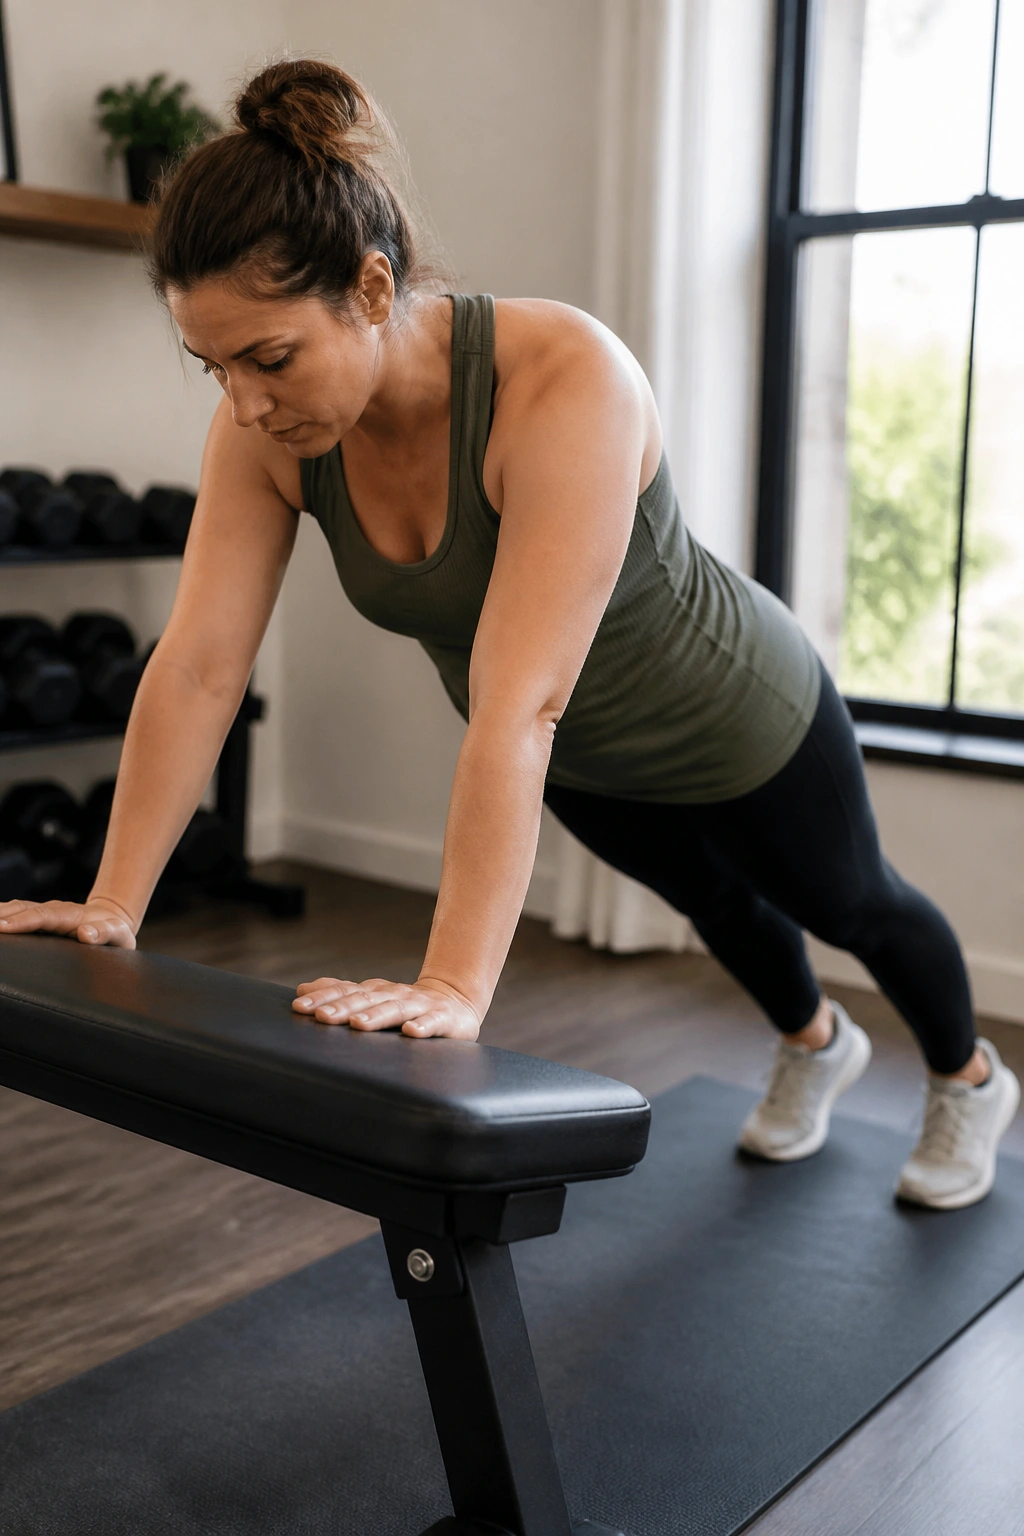
A bench plank is not a cheat. It’s a smart bridge.
Place your hands on a bench, counter, or sturdy table and walk your feet back until your body forms a straight line. Exhale, gently draw the lower ribs in, and hold for 10 to 20 seconds. Repeat 3 to 5 times.
This is later-stage work for a lot of postpartum bodies, and it deserves respect. If the midline domes, the shoulders collapse, or the low back takes over, the angle is still too steep. Raise the hands higher. Use the wall if needed.
I like the incline because it teaches plank mechanics without dumping the full load on the abdominal wall. That makes it a much better starting point than going straight to the floor and hoping for the best.
21. Wall Plank with Posterior Tilt
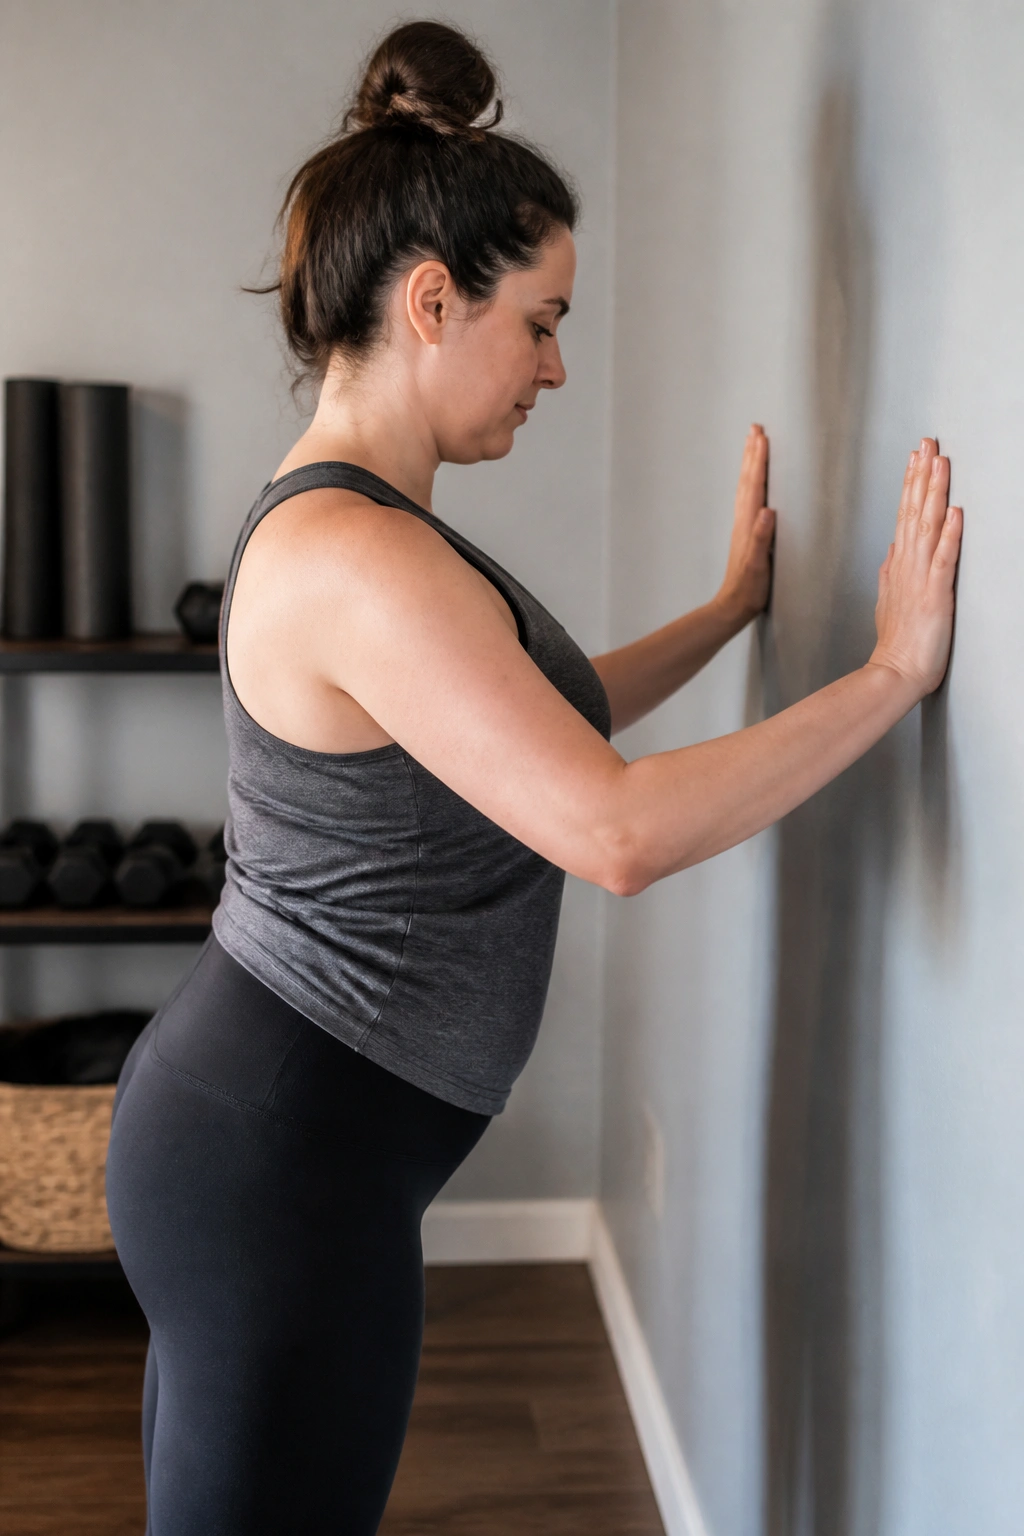
A wall plank looks almost too mild until you do it correctly.
Stand facing a wall, hands planted on it, then step back a bit and tuck the pelvis gently so the tailbone points down. Press the wall away and hold for 15 to 20 seconds while keeping the ribs from flaring. Do 3 rounds.
That small posterior tilt changes everything. It helps the lower abs come online without a hard crunch or a big pressure spike. You should feel the front of the body working, yes, but not in a strained, breathless way.
If the wrists are tired or the belly feels pushy, this is the place to stop and stay. There’s no shame in the wall. The wall is useful.
22. Side Plank from Knees
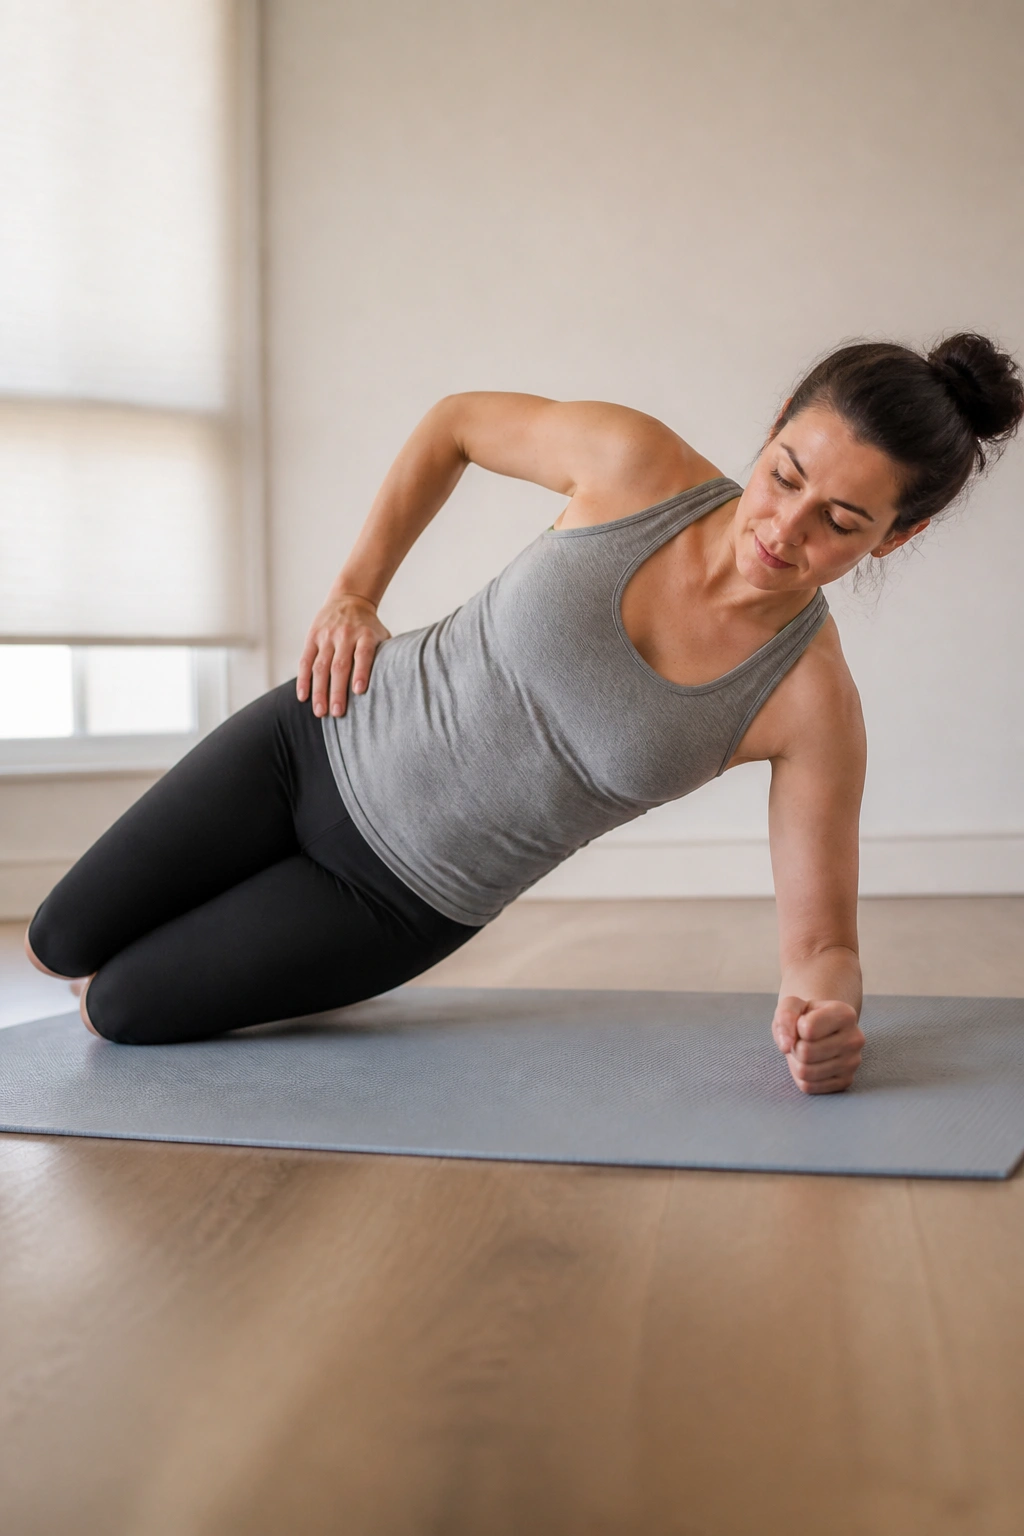
Side planks ask for honesty.
Set up on one forearm with knees bent and stacked. Lift the hips a few inches, hold for 5 to 10 seconds, and lower. Four to six holds per side is enough at first.
This exercise is later in the list for a reason. It creates more side-body tension than the earlier drills, and that can be too much if your core control is still shaky. But if you can keep the ribs stacked and the midline quiet, it’s excellent for the obliques and the deeper stabilizers around the waist.
Keep the hold short. I’m serious about that. Short holds done well will help more than one long hold that turns into a fight.
23. Suitcase Carry
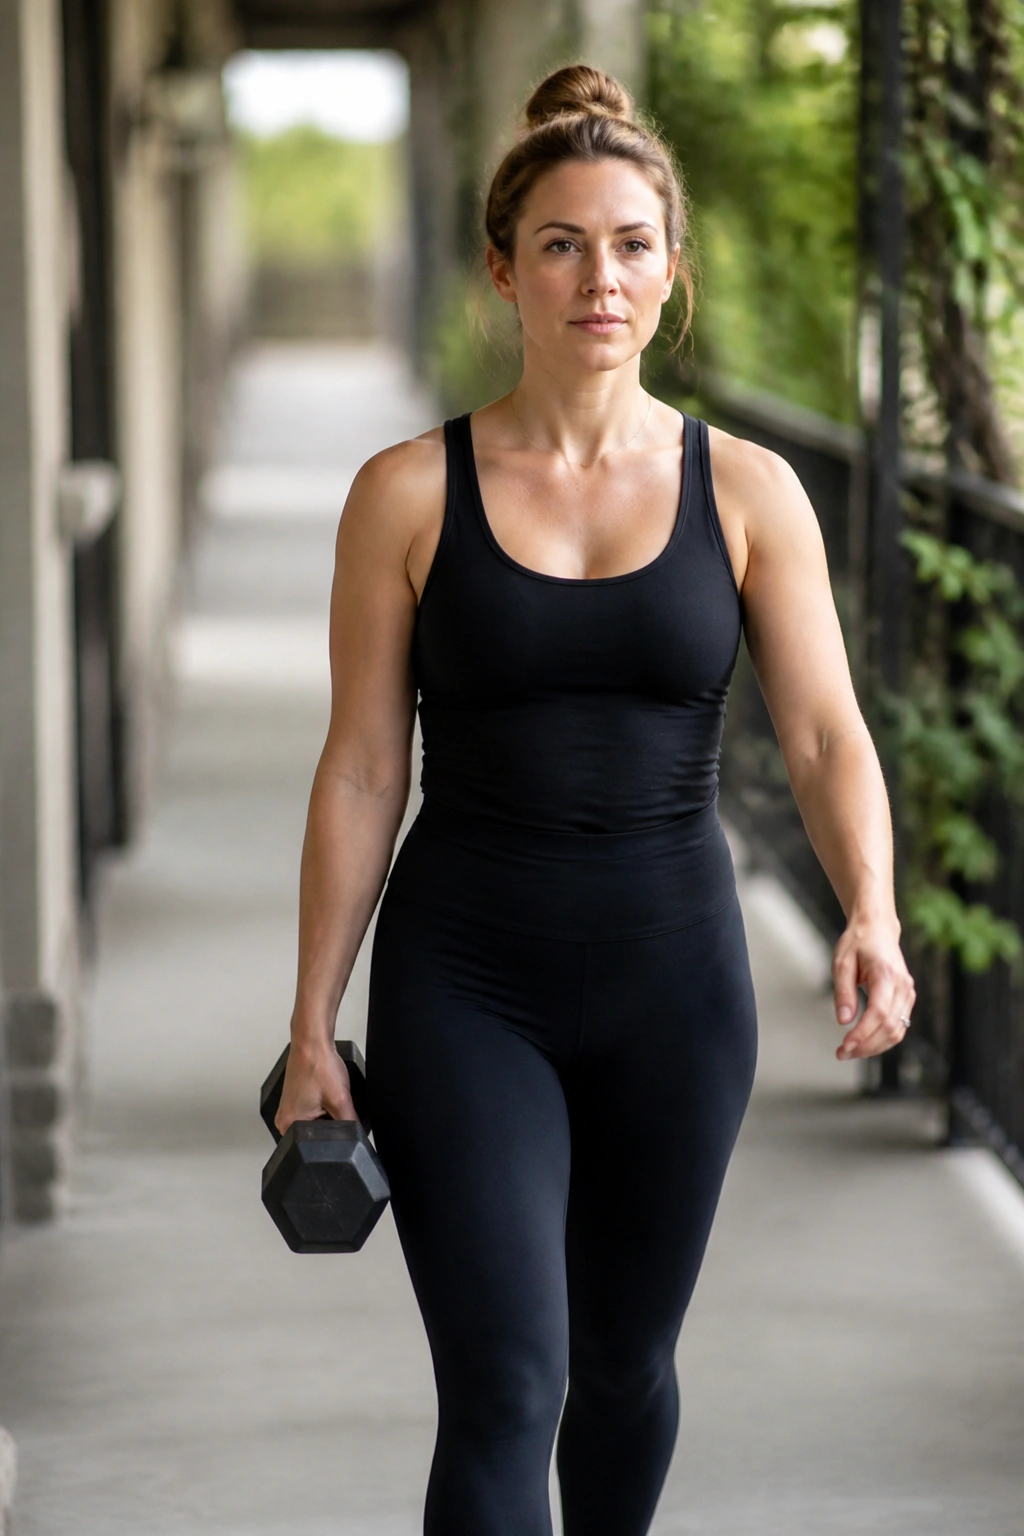
Carry something heavy in one hand and walk.
That’s the exercise.
Use a dumbbell, kettlebell, or even a loaded grocery bag, hold it in one hand, and walk 20 to 40 steps without leaning toward the weight. Switch sides and repeat for 2 to 4 rounds. The trunk has to resist side bending and rotation, which is exactly what the core does in real life.
What makes this one useful is how normal it feels. No mat. No weird setup. Just walking with purpose. If you lean, shorten the distance or lighten the load. Your torso should stay tall, not crooked.
This is one of the best ways to translate rehab into living.
24. Half-Kneeling Band Chop
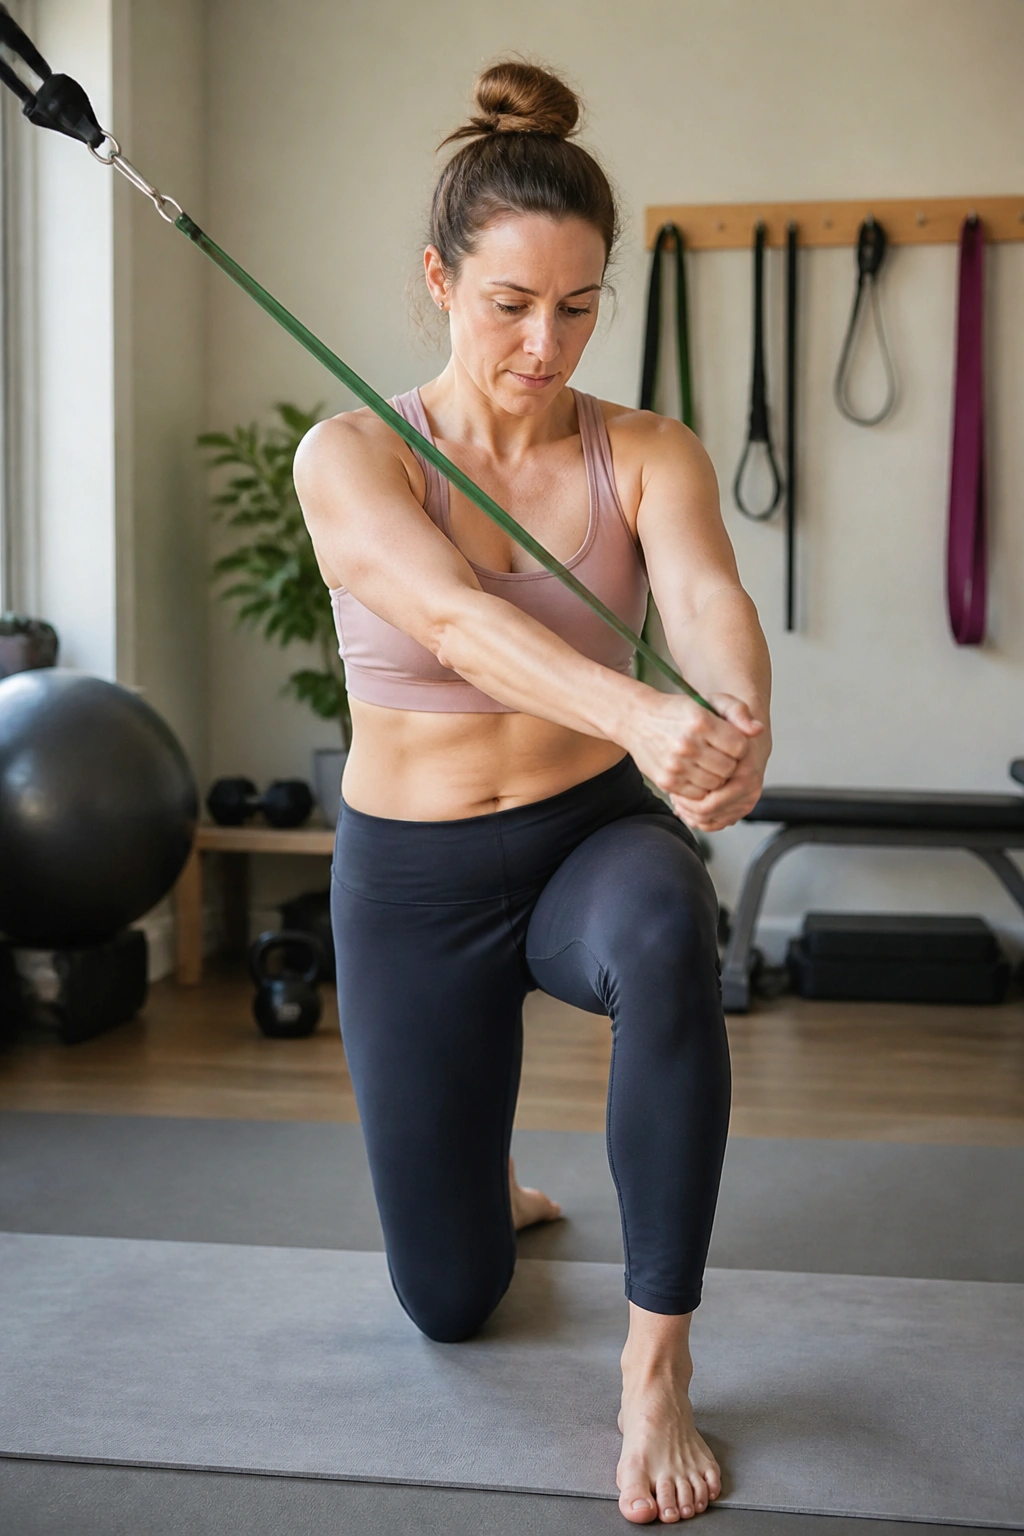
Half-kneeling makes cheating harder, which is why I like it.
Kneel with one knee down and the other foot planted. Hold a band or cable high on one side, then pull it diagonally across your body while you exhale and keep the ribs from twisting open. Return slowly. Six to eight reps per side works well.
What makes it different
The half-kneeling position narrows your options. You can’t sway as much. You can’t lean as much. So the core has to do the real work of resisting rotation while the arms move across the body.
A few cues help:
- Keep the hips level.
- Don’t let the front knee collapse inward.
- Move the hands, not the whole torso.
- Stop before the belly starts to tent.
It’s a tidy exercise, and I mean that in the best way. Clean setup, clean pressure, clean payoff.
25. Standing Cross-Body Reaches for Diastasis Recti
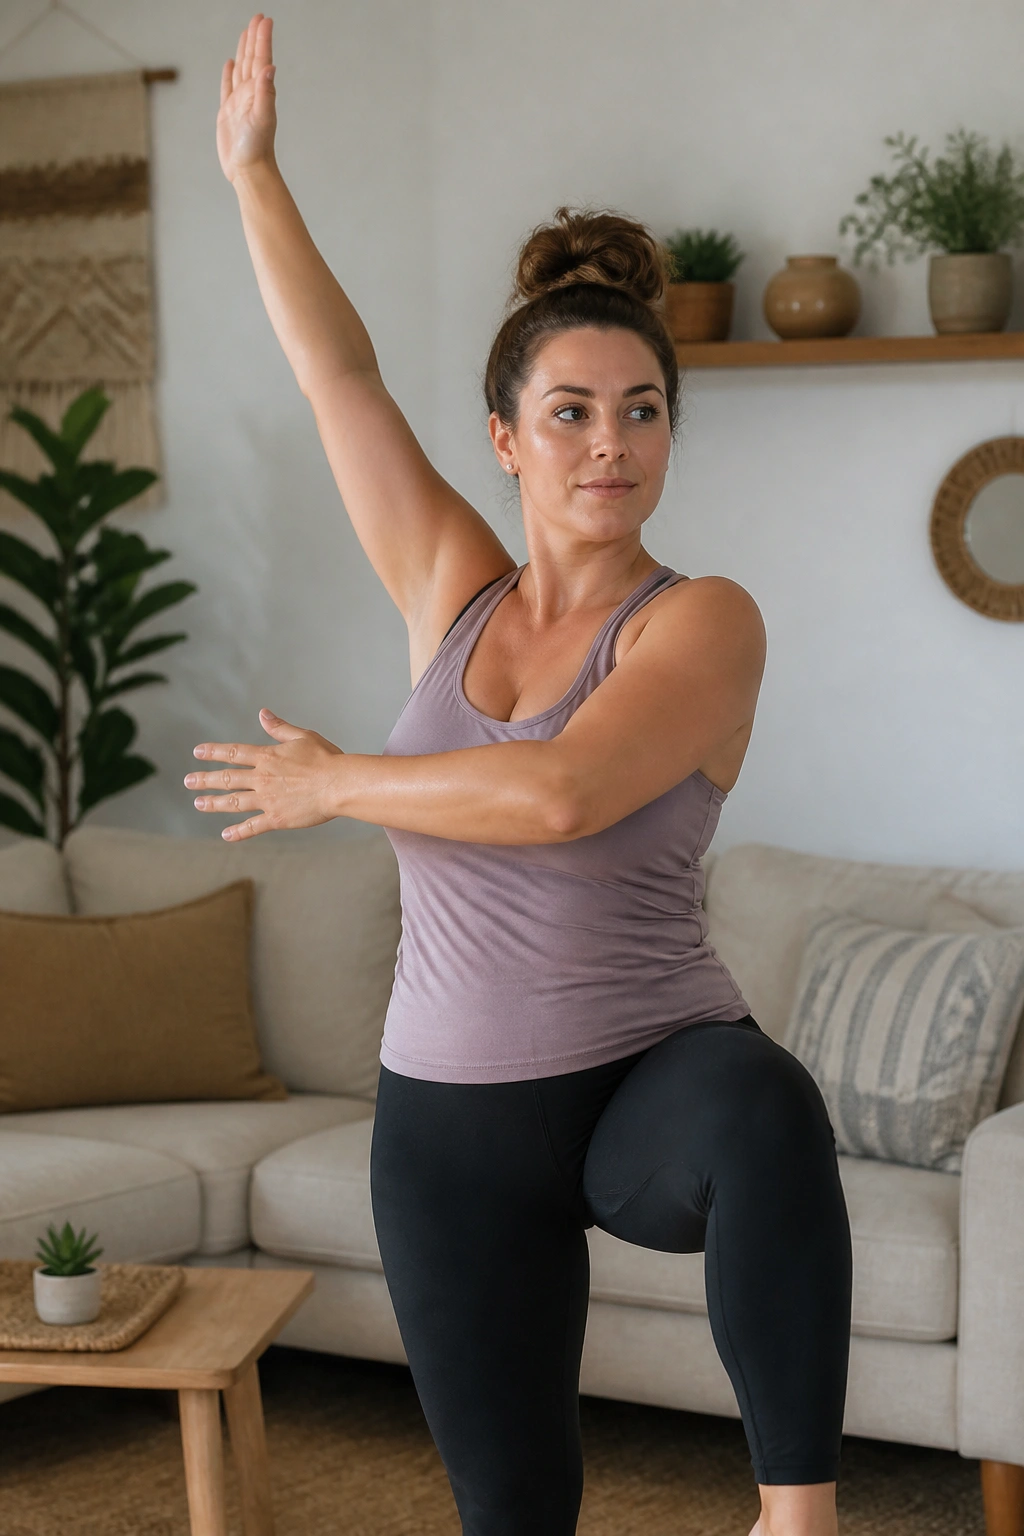
The real test happens when life gets messy.
Stand tall and reach one arm across your body and overhead, then return to center with a slow exhale. Add a small knee lift on the same side if you want more challenge, but only if the midline stays smooth. Do 6 to 8 reps per side.
This is the kind of move that connects all the earlier work to daily life. You are not just training a muscle; you are teaching your body to reach, twist, and balance without that familiar ridge down the middle. That matters when you are loading a car seat, grabbing a toy from under the couch, or wrangling a sleeping baby with one free hand.
If this feels easy and clean, good. That means the calmer drills are paying off. If it doesn’t, there’s nothing wrong with going back to heel slides or wall work for a while.
Final Thoughts
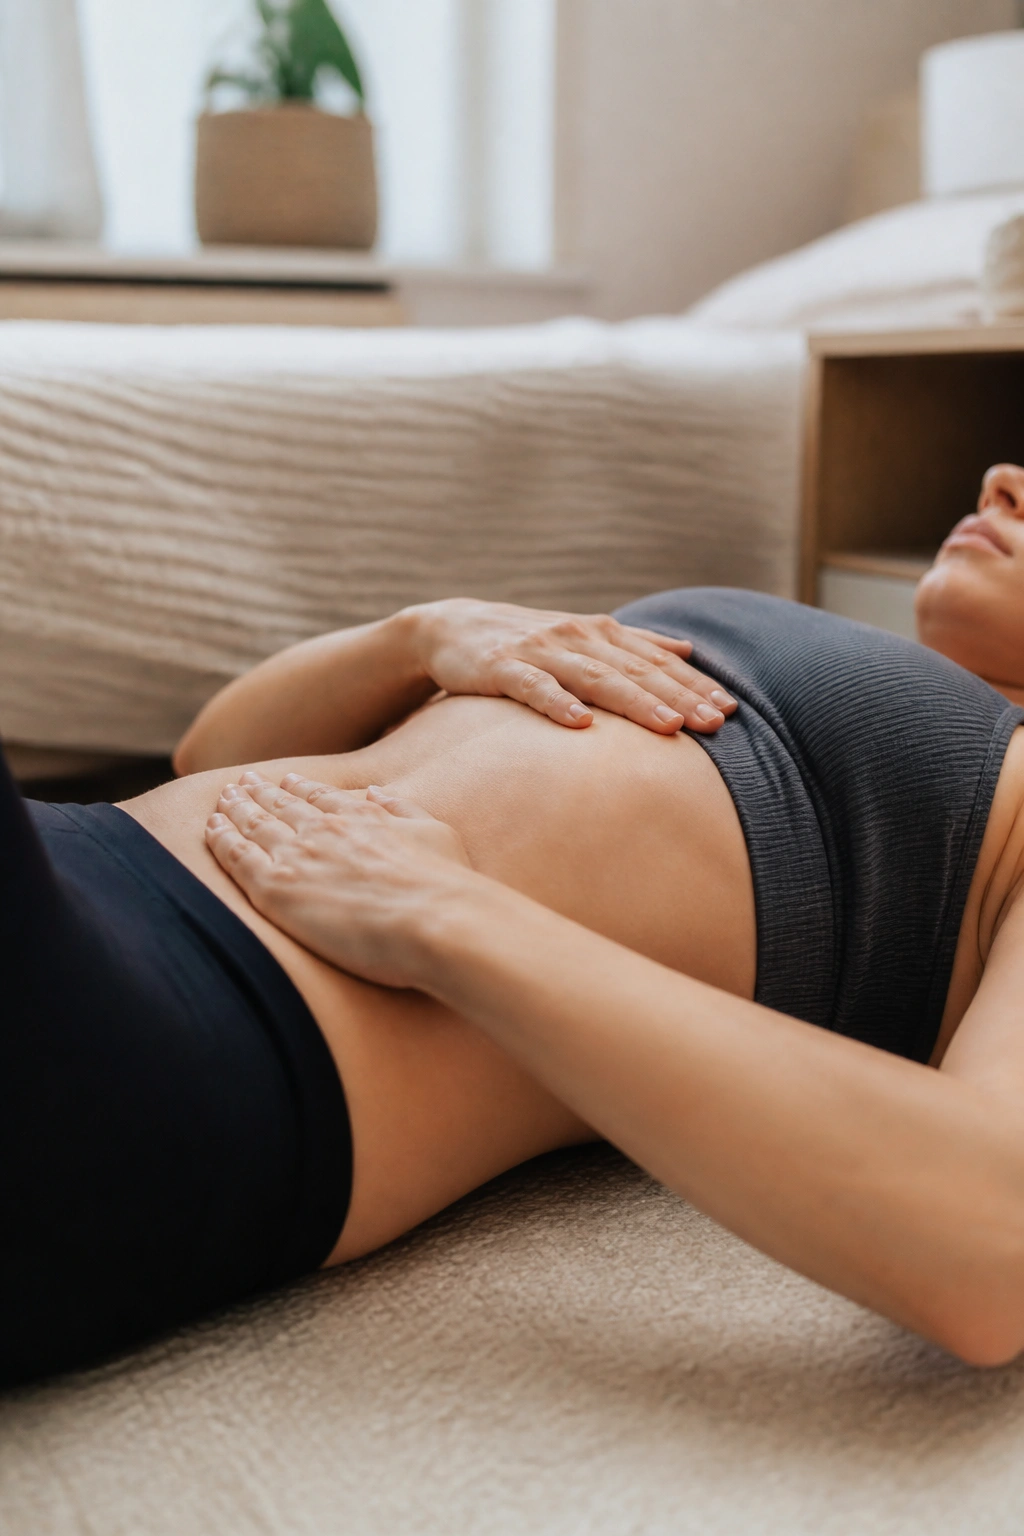
The best postpartum ab work for diastasis recti does not start with intensity. It starts with pressure that feels calm, breath that keeps moving, and exercises that don’t make the midline fight for space.
Some days that means heel slides. Other days it means a wall plank, a suitcase carry, or nothing more glamorous than five slow breaths on your back. Boring is fine. Boring is often what works.
If an exercise makes the belly dome, the ribs flare, or the low back steal the show, cut the range or move back a step. That is not backing up. That is training with your eyes open.
