



A postpartum belly rarely needs punishment. It needs better pressure control. The smartest postpartum workouts for a tighter belly are usually the quiet ones — breathing drills, unloaded carries, and leg work that teaches the trunk to stop leaking effort.
During pregnancy, the abdominal wall stretches, the ribs often flare, and the deep core learns a load it was never built to carry all at once. After birth, that can show up as softness, a little doming through the middle, or a waistline that feels wider than it used to. Not always fat. Not always lack of effort. Sometimes it’s just tissue that has not fully re-learned how to hold tension.
Crunches too early can make that worse. If you notice a ridge down the center, a heavy feeling in the pelvis, leaking, pain, or a pulling sensation around a C-section scar, that’s your body telling you to back off and simplify. Clearance from your clinician matters after a complicated birth, and so does common sense.
Start smaller. Rebuild the rib cage, the pelvic floor, the glutes, and the deep abdominal wall in a way that feels almost boring at first. Boring is underrated. Boring is often where the real change starts.
1. 360 Breathing to Reset Rib Flare
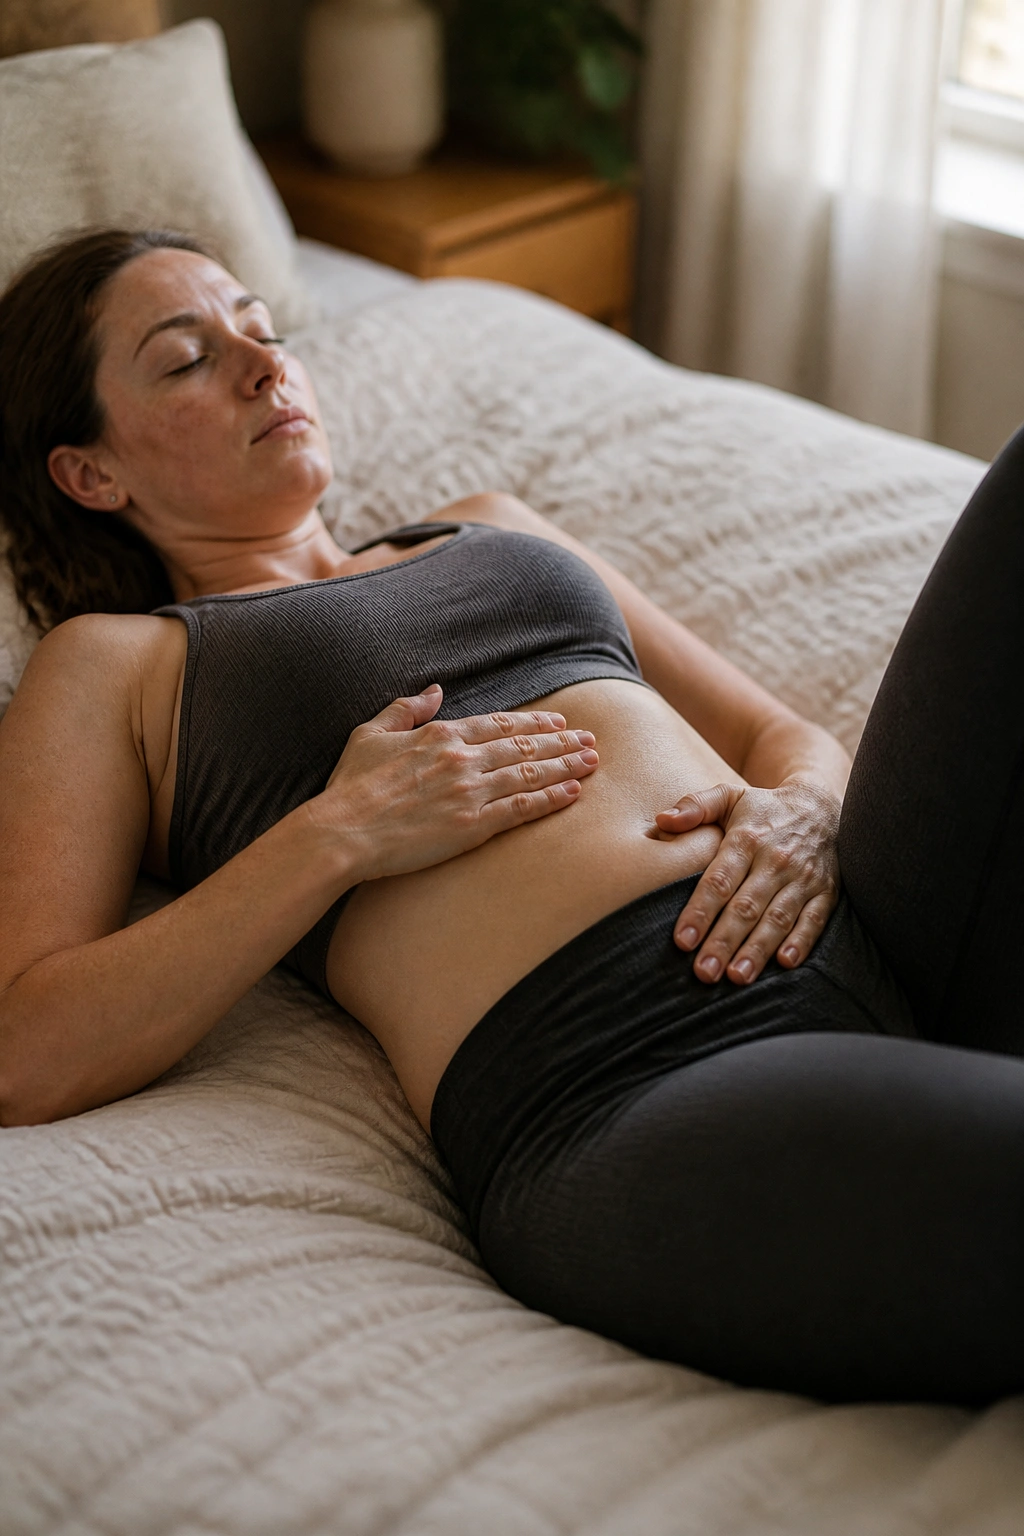
If your ribs stay lifted, your belly has to work harder than it should. That’s why I keep coming back to 360 breathing for early postpartum core work. It teaches the diaphragm, pelvic floor, and deep abs to share the job again instead of letting the front of the waist do all the work.
Lie on your back with your knees bent and your feet flat. One hand can rest on your ribs, the other on your lower belly. Inhale through your nose for about 4 counts and feel the breath spread into the sides of your rib cage and the back of your body, not just the chest.
What to Feel
- Your lower ribs gently widen on the inhale.
- Your belly stays soft, not pushed outward.
- On the exhale, your ribs soften down and your pelvic floor feels like it lightly lifts.
- Your neck and shoulders stay quiet.
Do 5 slow breaths, rest, then repeat for 2 rounds. That’s enough. More is not automatically better here.
Tip: If you can keep your jaw loose, your midsection usually relaxes better too. Tiny thing. Big payoff.
2. Pelvic Tilts That Wake Up the Lower Abs
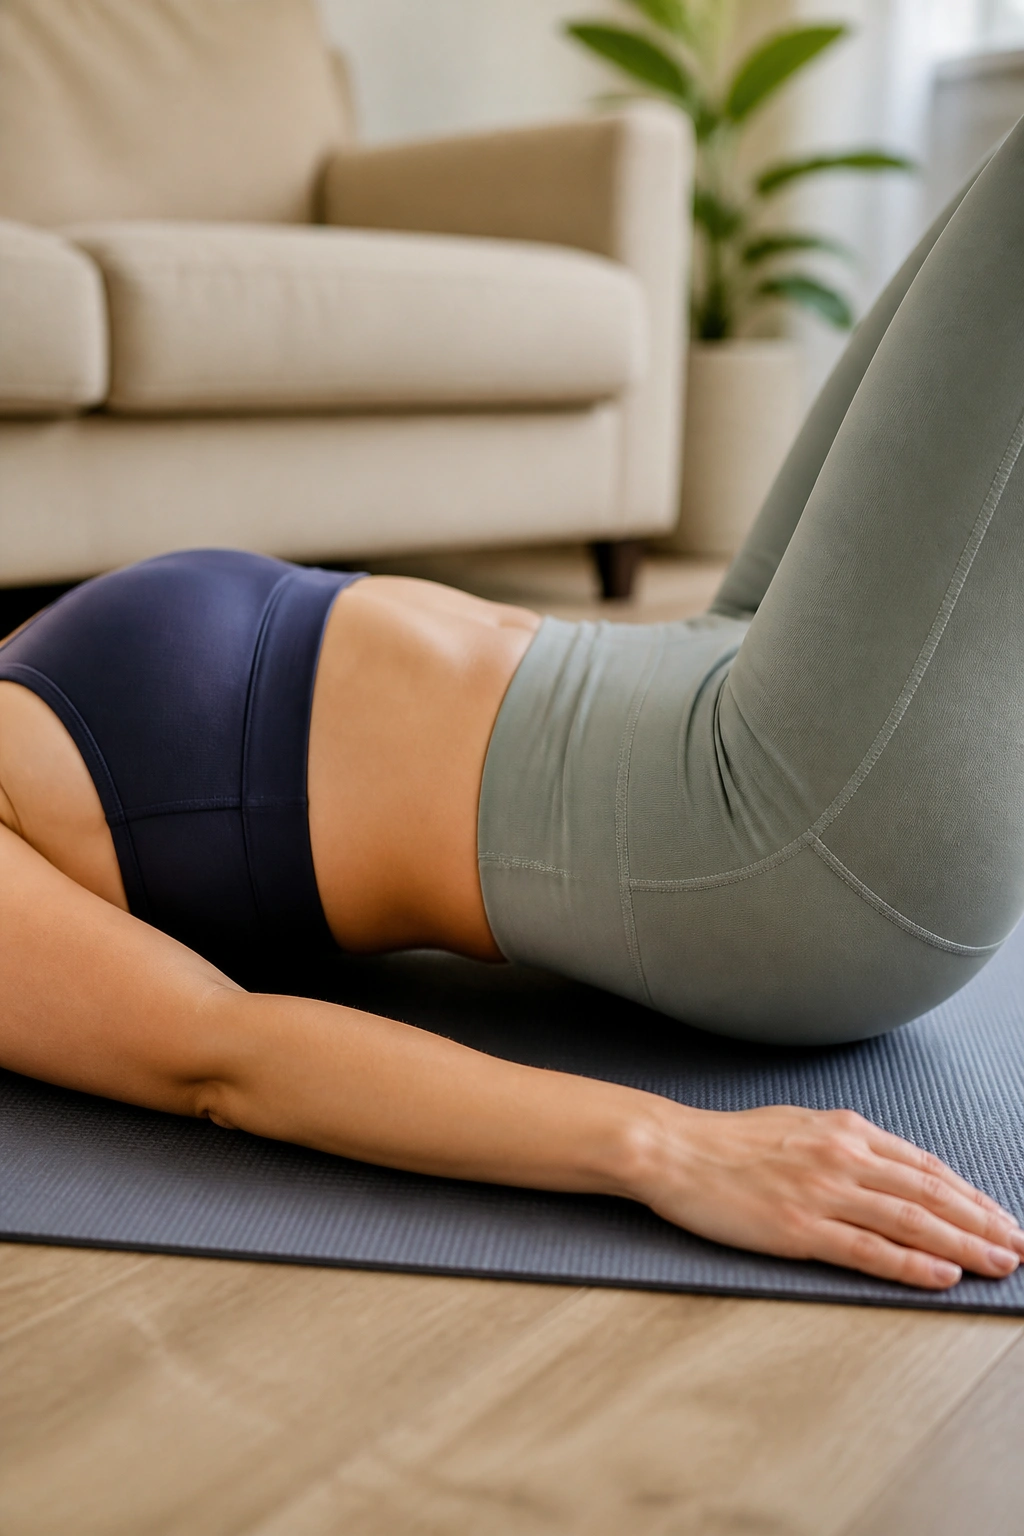
A small flatten-and-release motion can do more for a postpartum tummy than another round of fast sit-ups. Pelvic tilts look almost too simple, which is probably why so many people skip them. I wouldn’t.
Lie on your back with your knees bent. As you exhale, gently tip your pelvis so your lower back presses into the mat. As you inhale, release back to neutral. The movement should be tiny. Think of it like rocking a bowl of water without spilling it.
Do 8 to 10 reps for 2 sets. If the motion is so big that your hips are rolling or your chest is helping, it’s too much. The goal is control, not drama.
If you had a C-section, this can still be fine once your clinician has cleared basic movement, but keep it soft. No forcing, no bracing hard, and no trying to “flatten” the stomach by shoving the spine into the floor. That’s not the point. You want the lower abs to wake up and the pelvis to learn how to stack under the ribs again.
One-sentence truth: Tiny movements teach better control than big ones.
3. Heel Slides for Gentle Core Control
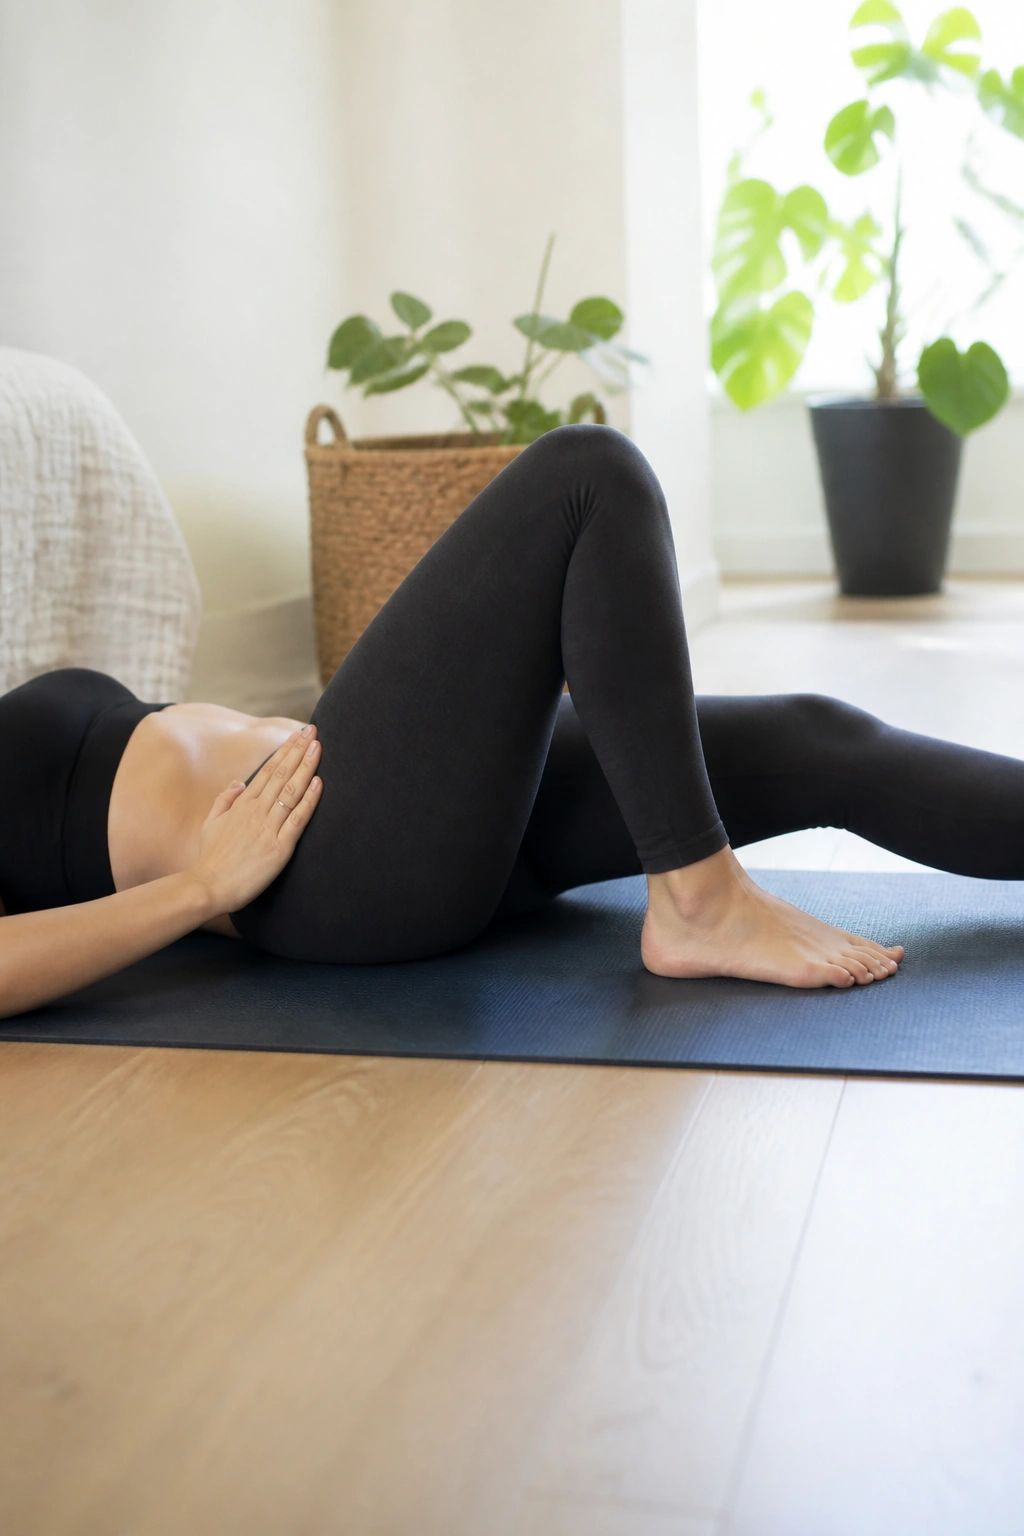
Why do heel slides show up in postpartum rehab so often? Because they teach the trunk to stay calm while one leg moves. That matters more than it sounds. When the leg slides out, the belly wants to pop forward or dome; when the movement is done well, the deep core learns to hold steady.
Start on your back with knees bent. Exhale first. Then slide one heel slowly away from you until the leg is almost straight, or only as far as you can keep the lower belly flat and quiet. Inhale as you bring it back in. Switch sides.
How to Keep the Belly from Doming
- Keep the movement small.
- Slow the slide down.
- Stop before the lower back arches.
- If the center line tents, shorten the range immediately.
- Put your heel on a towel or sock if the floor is sticky.
Do 6 to 8 slides per side for 2 rounds. If that feels easy, don’t rush to make it harder. Make it smoother first. Then make it longer.
A lot of people try to “feel the burn” here. Wrong target. You’re looking for control, a steady breath, and a belly that stays flat instead of pushing outward like a little hill.
4. Bird Dogs for Cross-Body Stability
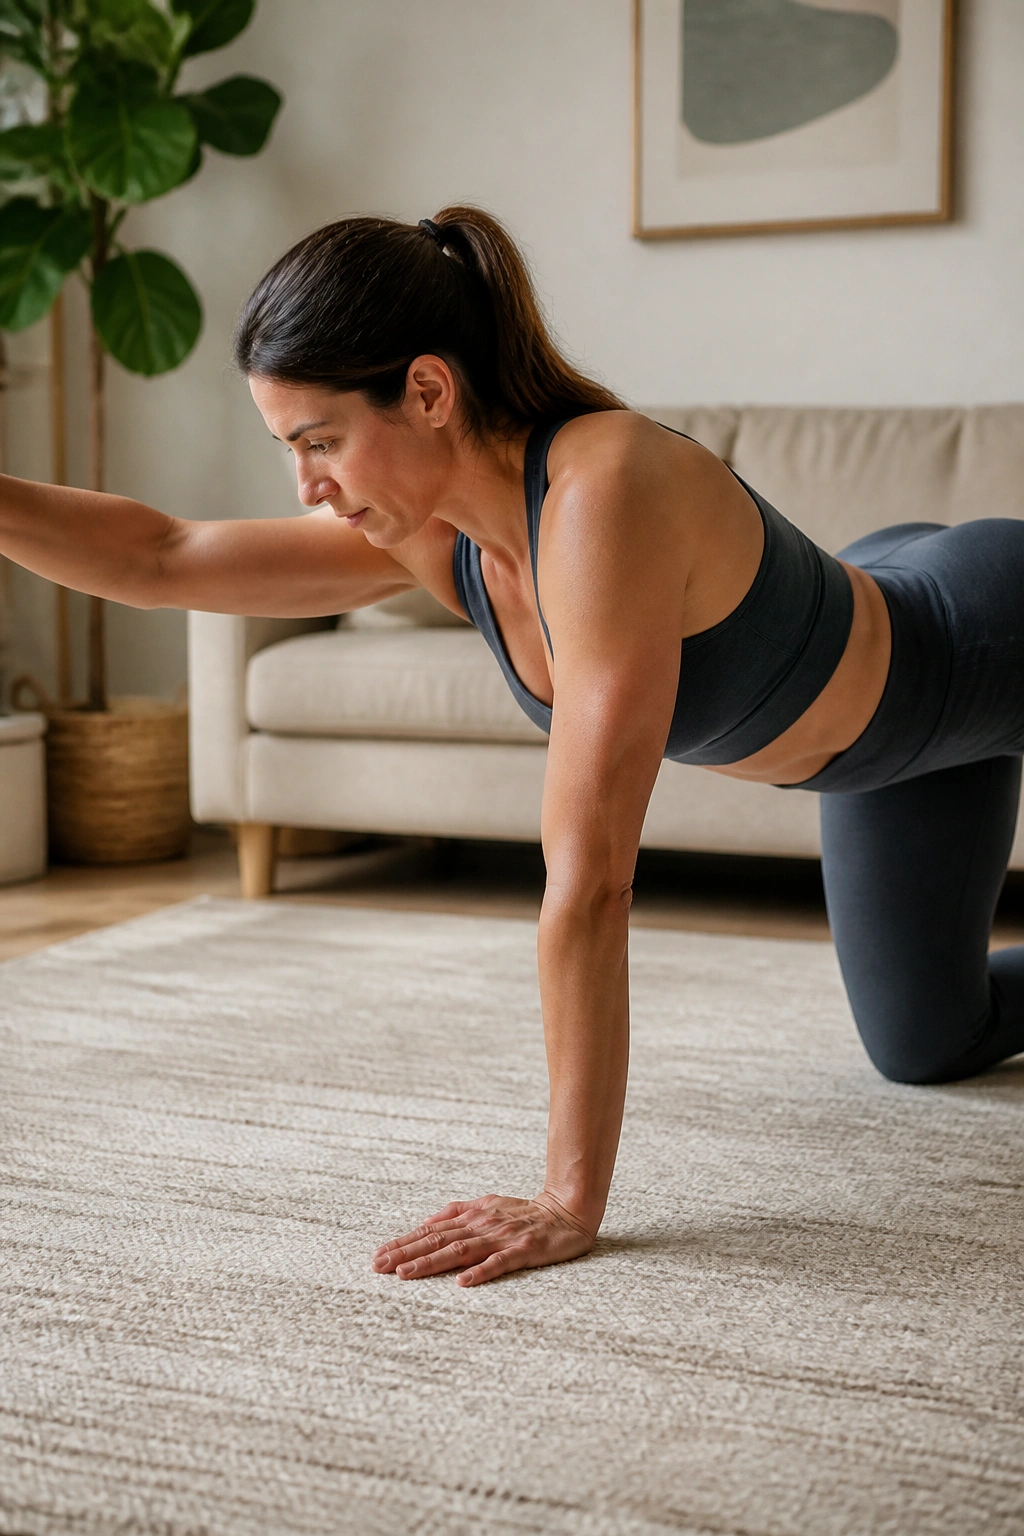
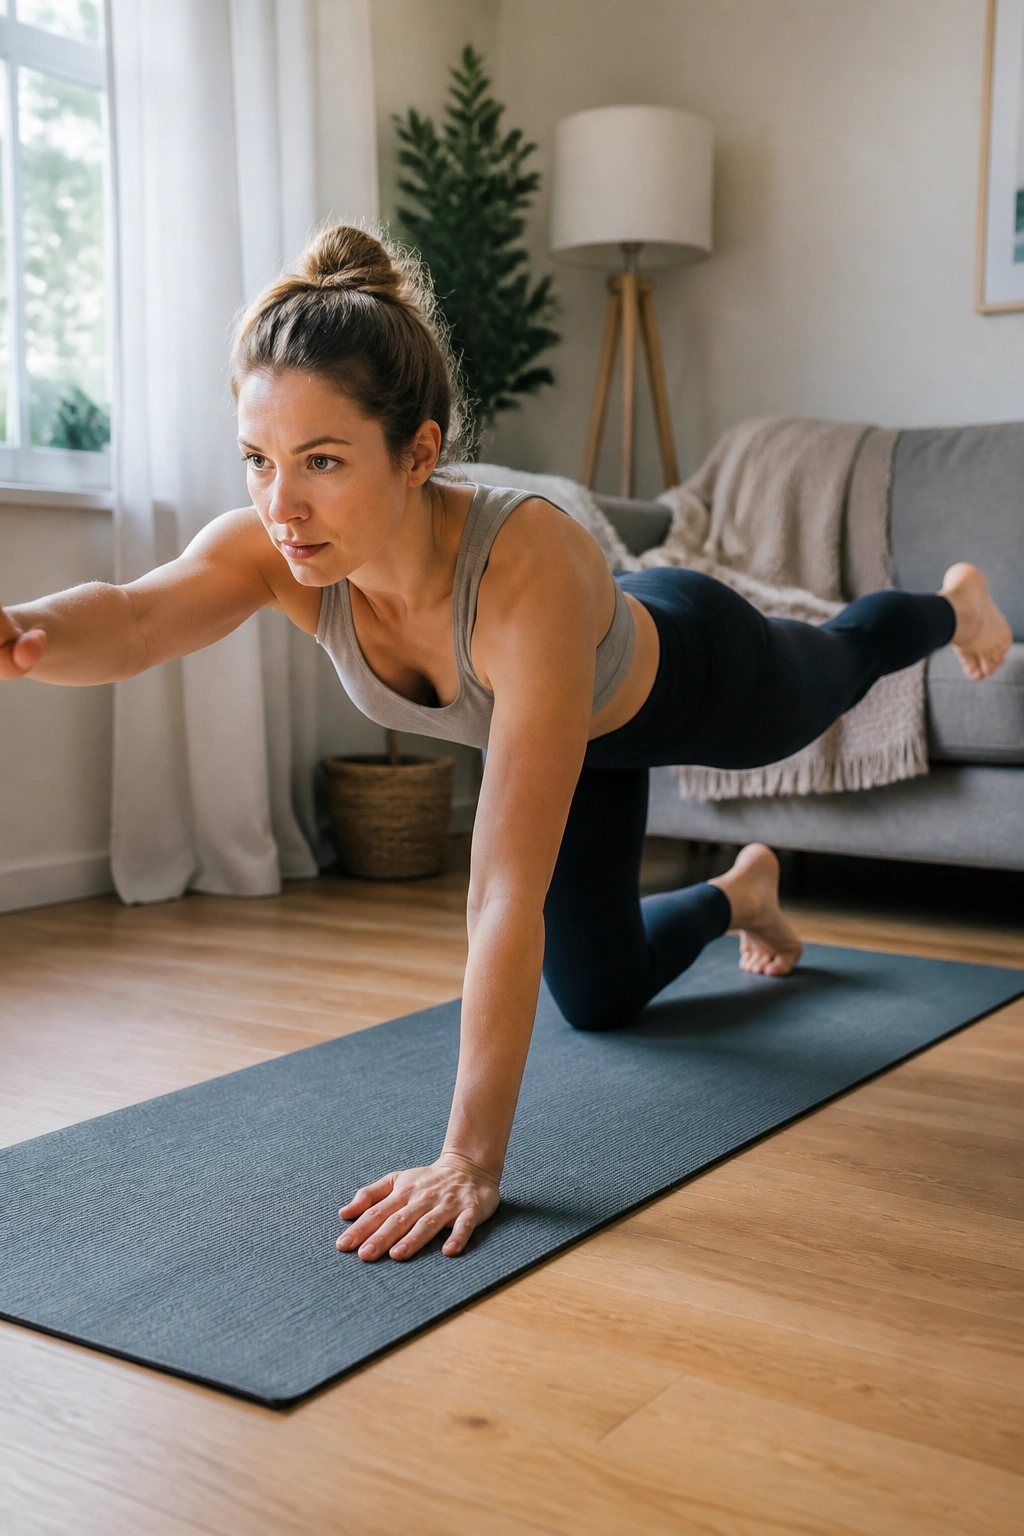
Picture reaching down to pick up a toy while a toddler leans on your hip. That weird twisting load is part of real life now. Bird dogs train your trunk to handle it without spilling everything forward.
Get on hands and knees with wrists under shoulders and knees under hips. Reach one arm forward as the opposite leg extends back. Don’t lift high. Reach long. Hold for 2 to 5 seconds, then return with control and switch sides.
- Keep your hips level.
- Keep your ribs from swinging open.
- Use a small range if your low back tries to take over.
- Start with 5 reps per side.
If one side feels shakier, that’s normal. One side often does. The trick is to avoid turning it into a back exercise. The back is helpful here, but it should not be doing all the work.
Form cue: imagine balancing a glass of water on your lower back. If the glass tips, you moved too fast.
5. Glute Bridges That Lift the Hips Without Straining the Belly
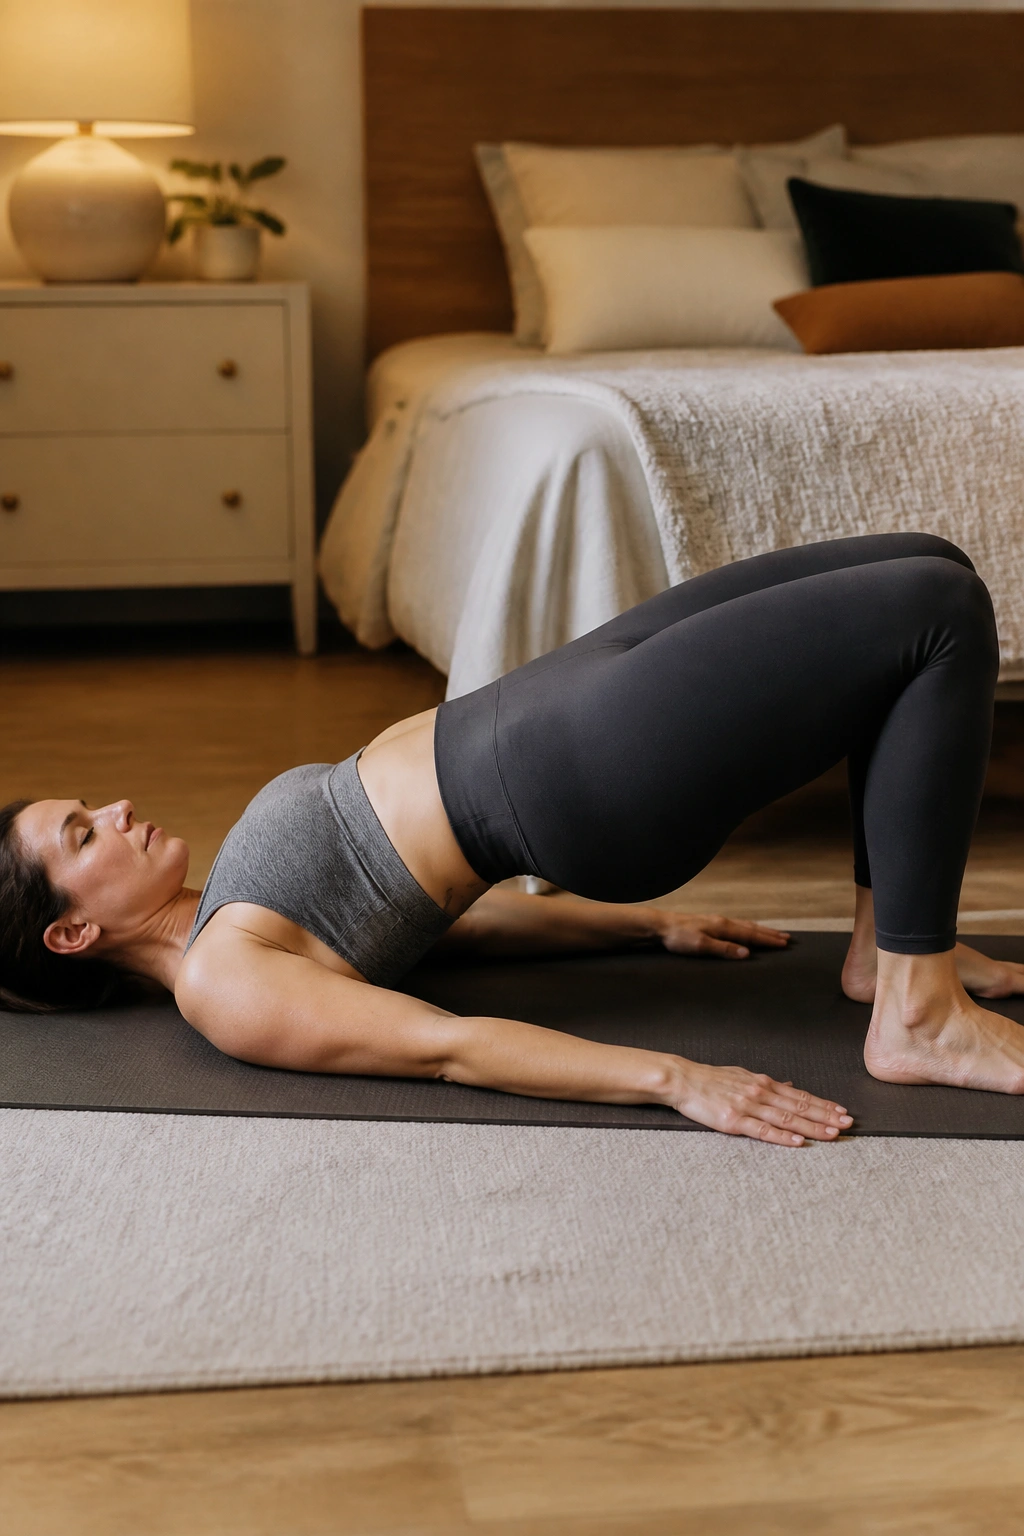
A lot of postpartum bellies feel worse because the hips go quiet. The glutes stop helping, the pelvis tips forward, and the lower belly starts carrying more tension than it should. Glute bridges fix some of that in a way that feels almost old-fashioned, which I like.
Lie on your back with your feet hip-width apart and close enough that your fingertips can almost graze your heels. Exhale, press through your heels, and lift your hips until your body makes a long line from shoulders to knees. Pause for 1 second. Lower slowly.
Do 8 to 12 reps for 2 to 3 sets. Keep your ribs from flaring up at the top. The movement should come from the hips, not from shoving the low back into an arch.
If you feel it mostly in your hamstrings, walk your feet a little closer. If your lower back pinches, make the bridge smaller. That’s not failure; that’s good information.
This one is a favorite because it plays nicely with other goals. Stronger glutes help with walking, stairs, carrying a car seat, and standing posture — all the stuff that quietly affects how your stomach looks and feels.
6. Wall Push-Ups with an Exhale
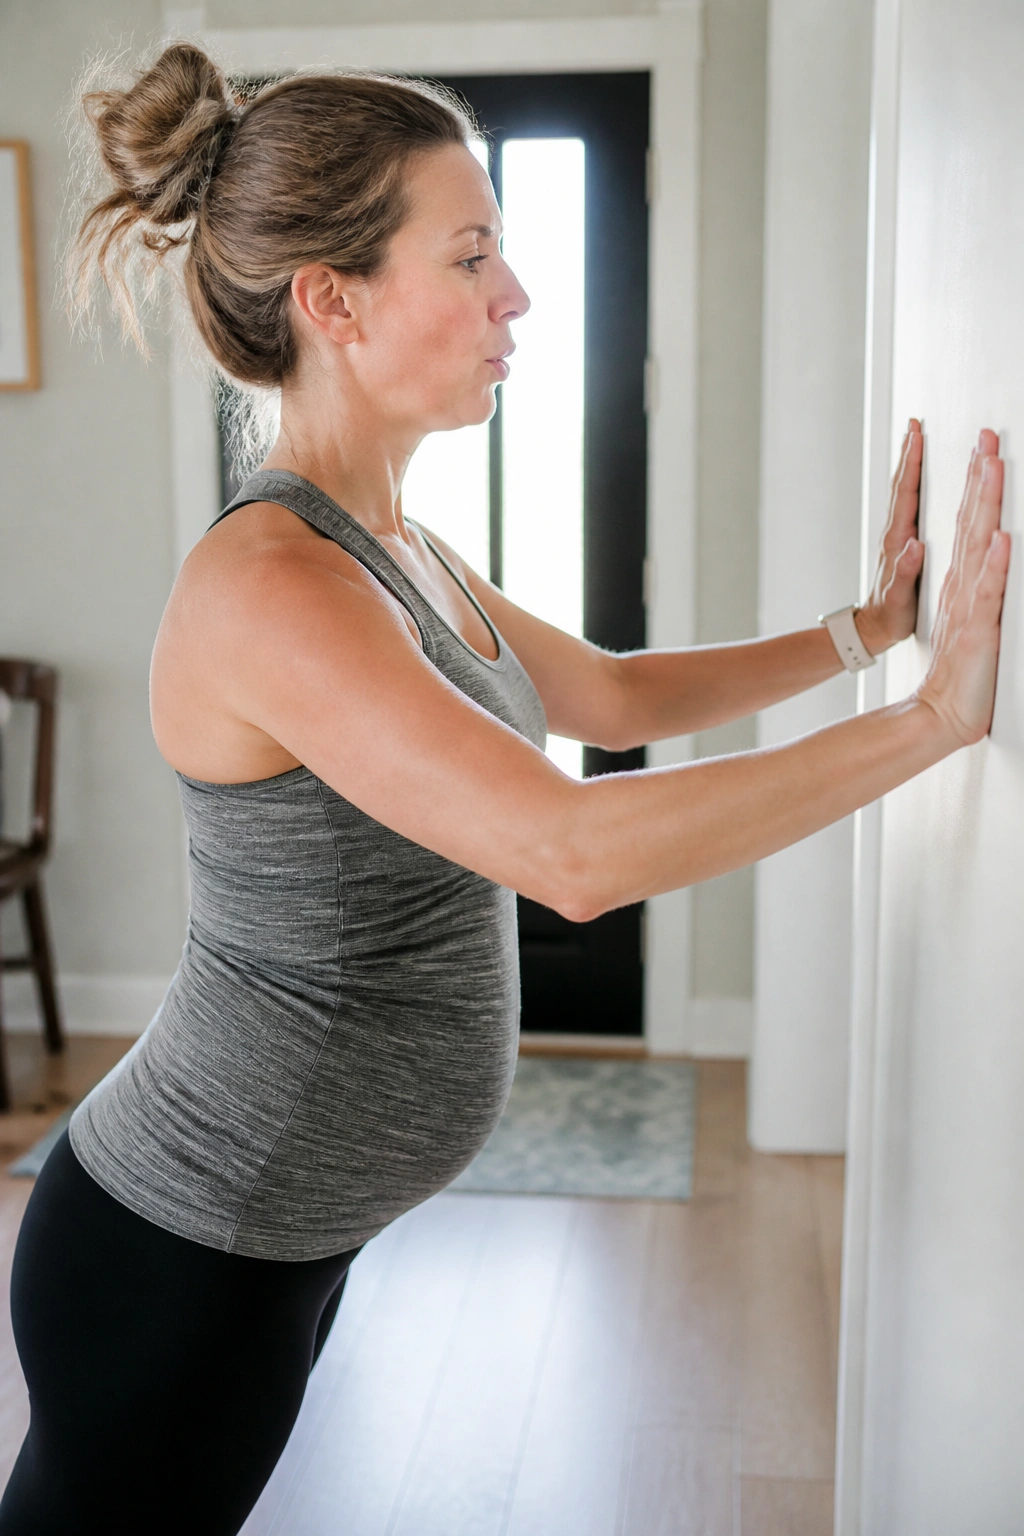
Unlike floor push-ups, wall push-ups let you train the trunk without asking the front of the abdomen to carry a huge load. That makes them a smart early postpartum strength move, especially if your shoulders are rounded from feeding, holding, or endlessly repositioning a baby.
Stand facing a wall, hands at chest height and a little wider than your shoulders. Walk your feet back so your body makes a straight line. Inhale as you bend your elbows and bring your chest toward the wall. Exhale as you press away. Keep your ribs from popping forward.
Do 8 to 15 reps for 2 or 3 sets.
Best Use Case
- Early postpartum when floor work feels like too much.
- When your upper back gets stiff from baby carrying.
- When you want a bit more load than breathing drills but not full plank pressure.
You can make them harder by standing farther from the wall. You can make them easier by stepping closer. That little adjustment is useful, and honestly, a lot cleaner than jumping to exercises your body is not ready for yet.
7. Chair Squats for Real-Life Core Strength
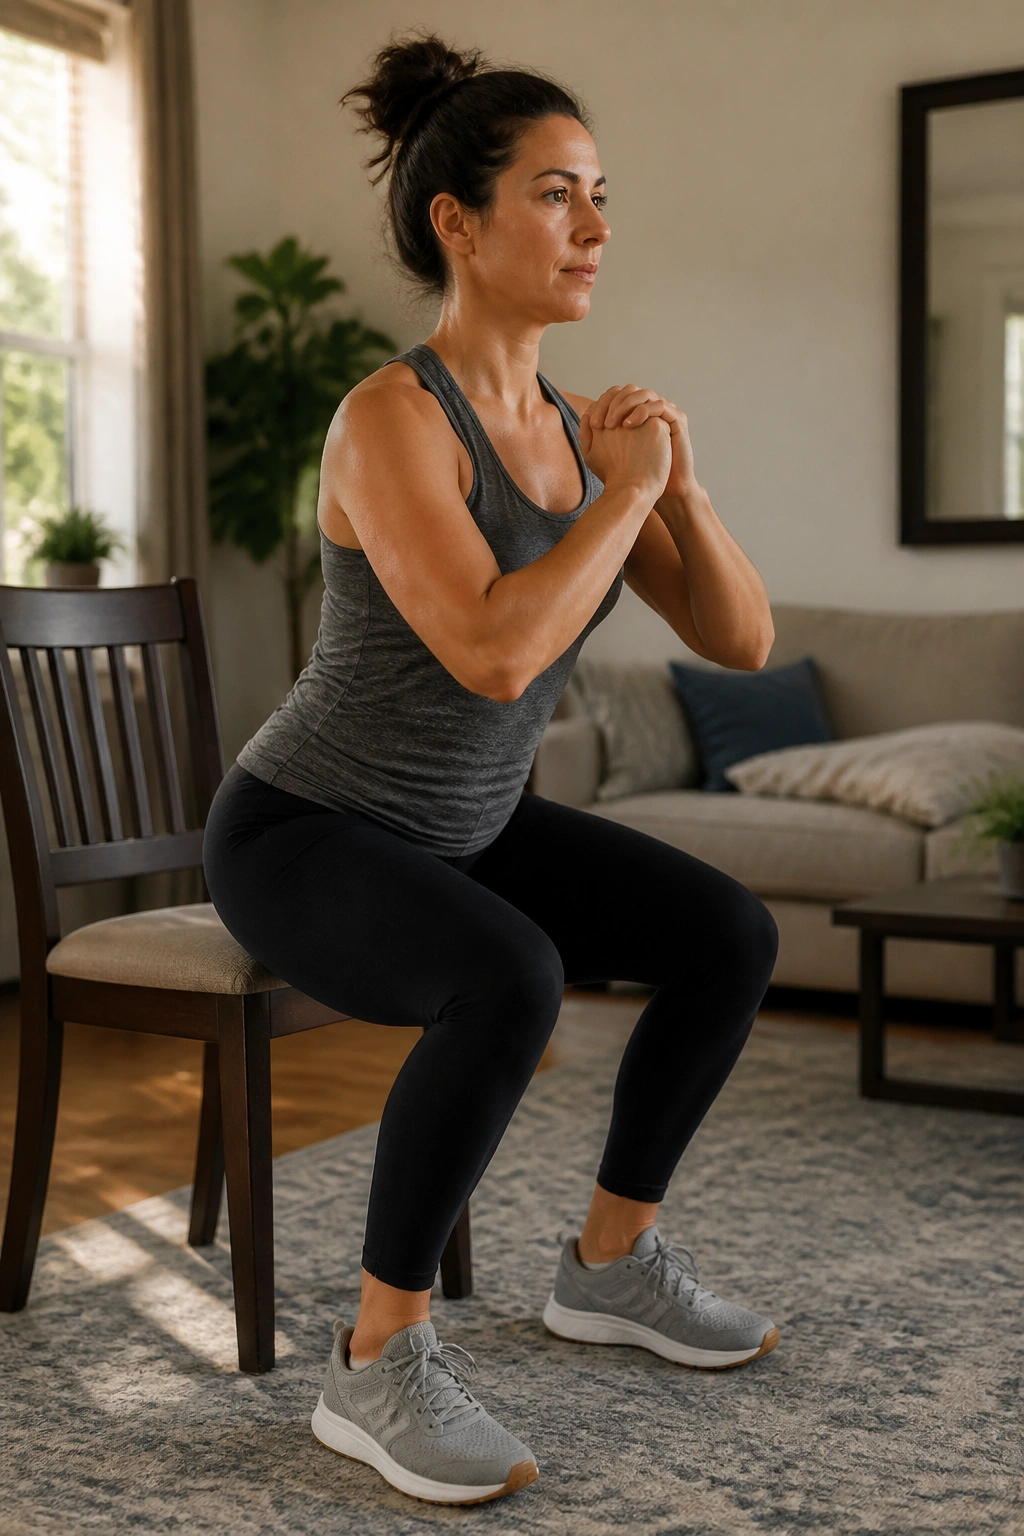
What does sitting and standing have to do with belly work? More than most people think. Chair squats train the whole pressure system under a load you actually meet in daily life. They also wake up the glutes, which takes some strain off the abdomen.
Stand in front of a sturdy chair with feet about hip-width apart. Sit back until you lightly touch the seat, then stand back up by pressing through your heels and exhaling as you rise. Keep your chest lifted without leaning way back.
Form Cues That Matter
- Knees track roughly over the middle toes.
- Weight stays in the whole foot, not just the toes.
- The torso stays steady.
- The belly does not bulge outward on the way up.
Try 8 to 12 reps for 2 sets. If you want more challenge, hold a light dumbbell close to your chest. If your back rounds or your stomach pushes out hard, drop the weight and clean up the pattern first.
A chair squat sounds basic. It is basic. That’s the point. Basic moves done well usually beat fancy ones done badly.
8. Side-Lying Clamshells for Pelvic Support
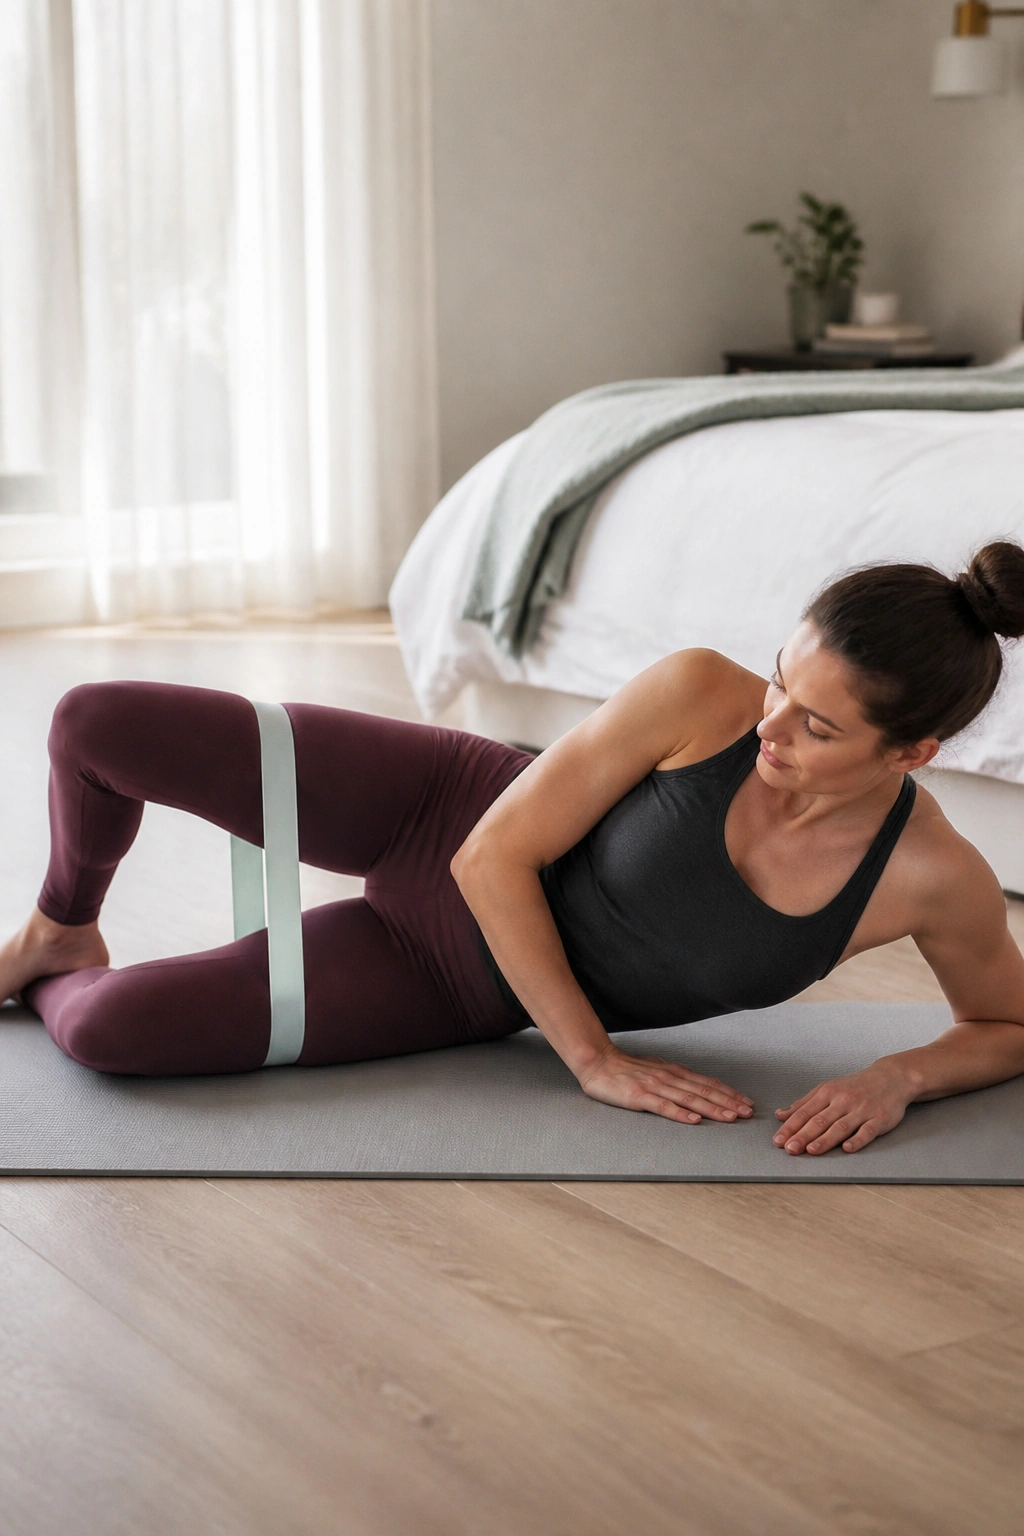
If your hips wobble when you walk upstairs, your core is probably doing extra work to make up for it. Side-lying clamshells help with that by strengthening the glute med, the little side-hip muscle that keeps your pelvis from dropping and twisting every time you step.
Lie on your side with knees bent, heels together, and hips stacked. Keep your pelvis still as you lift the top knee open like a clamshell, then lower it back down slowly. No rolling backward. That cheat makes the move easier, but it also makes it less useful.
Do 10 to 15 reps per side for 2 sets. A light resistance band above the knees can help once bodyweight feels easy.
This is not a flashy belly exercise. I know that. But pelvic stability changes how much the midsection has to brace all day long. Better hips mean less random tension in the stomach, especially when you are walking, turning, or carrying a baby on one side.
Use it as a bridge: clamshells are a smart step between floor rehab and standing strength work.
9. Kneeling Side Planks for the Obliques
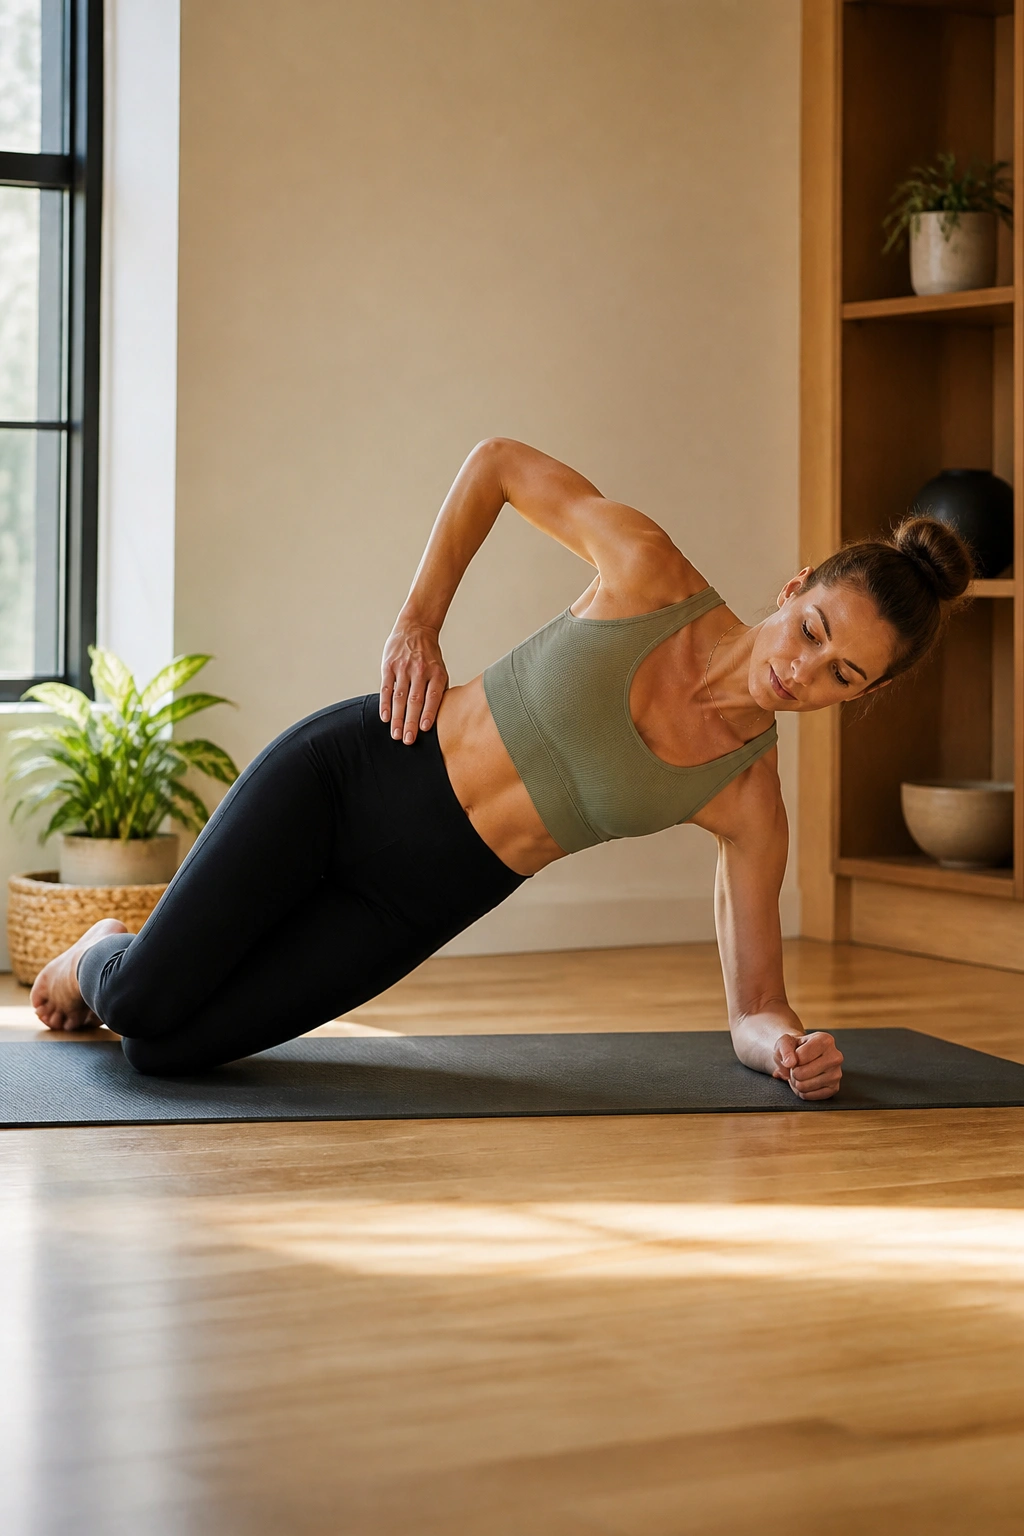
Side planks are where the obliques finally get to do useful work instead of crunching the front of the abdomen. The kneeling version keeps the load low while still teaching the waist to hold shape under side-to-side pressure.
Set one forearm on the floor with your elbow under your shoulder. Bend your knees and stack your legs. Lift your hips so your body forms a straight line from head to knees. Hold for 10 to 20 seconds, then lower with control and switch sides.
Do 2 to 3 rounds each side.
When to Progress
- No doming in the center line.
- No pelvic heaviness.
- No low back pinching.
- No shaking that turns into collapsing.
If the full kneeling side plank still feels too sharp, use a wall side plank instead. Stand next to a wall, press your forearm into it, and lean gently into the side body. It’s less dramatic, but it still trains the same line of support.
This move rewards patience. Too many people jump straight to the long lever version and wonder why their belly pushes out. Short lever first. Earn the long version later.
10. Stroller Walks with Posture Check-Ins
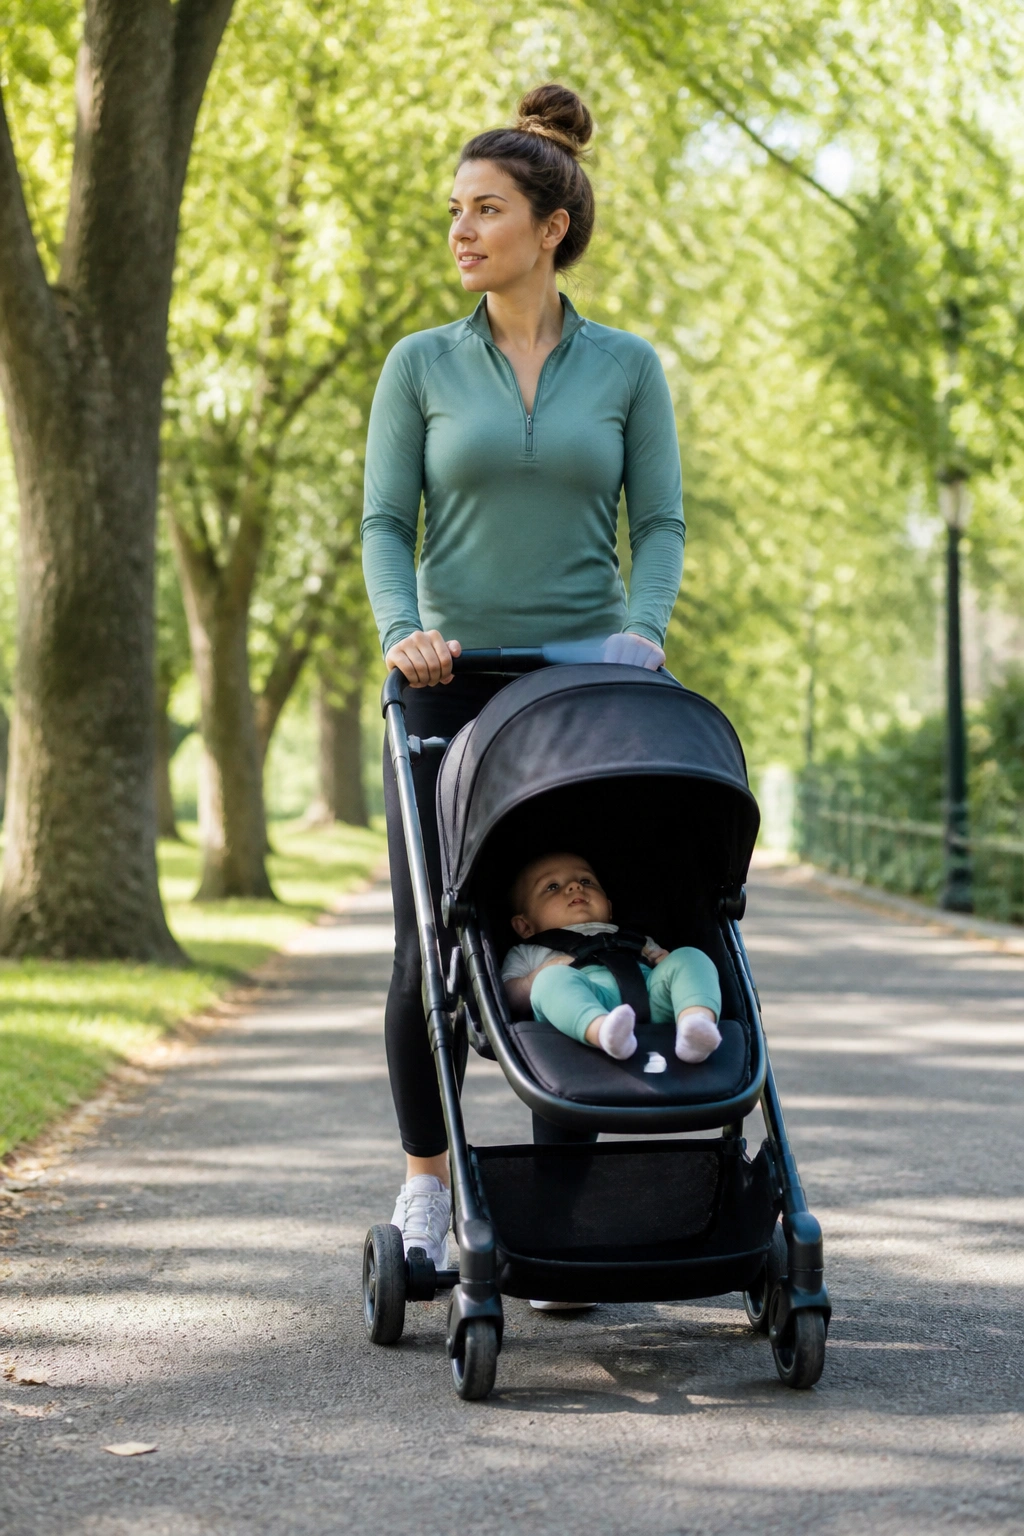
You can push a stroller for 20 minutes and still do core work if you stop hunching over the handle. Walking is underrated postpartum because it supports recovery without the pressure spikes that come with jumping, crunching, or rushing through circuits too soon.
Walk at a pace where you can talk in full sentences but feel your breathing pick up a little. Start with 10 to 15 minutes if that’s what your body can handle, then build toward 20 to 30. Every 5 minutes, do a quick posture reset: ribs over pelvis, neck long, shoulders down, hands relaxed.
What to Check While You Walk
- Are you leaning into the stroller?
- Are your ribs flaring forward?
- Is one hip hiking up more than the other?
- Can you exhale without tightening your jaw?
That last one sounds small. It isn’t.
Walking helps because it builds endurance, nudges fat loss when combined with sane eating, and teaches the trunk to stabilize with every step. The belly often starts looking firmer when the body stops treating standing and walking like a strain.
A brisk walk is not glamorous. Fine. It works.
11. Suitcase Carries for an Upright Waistline
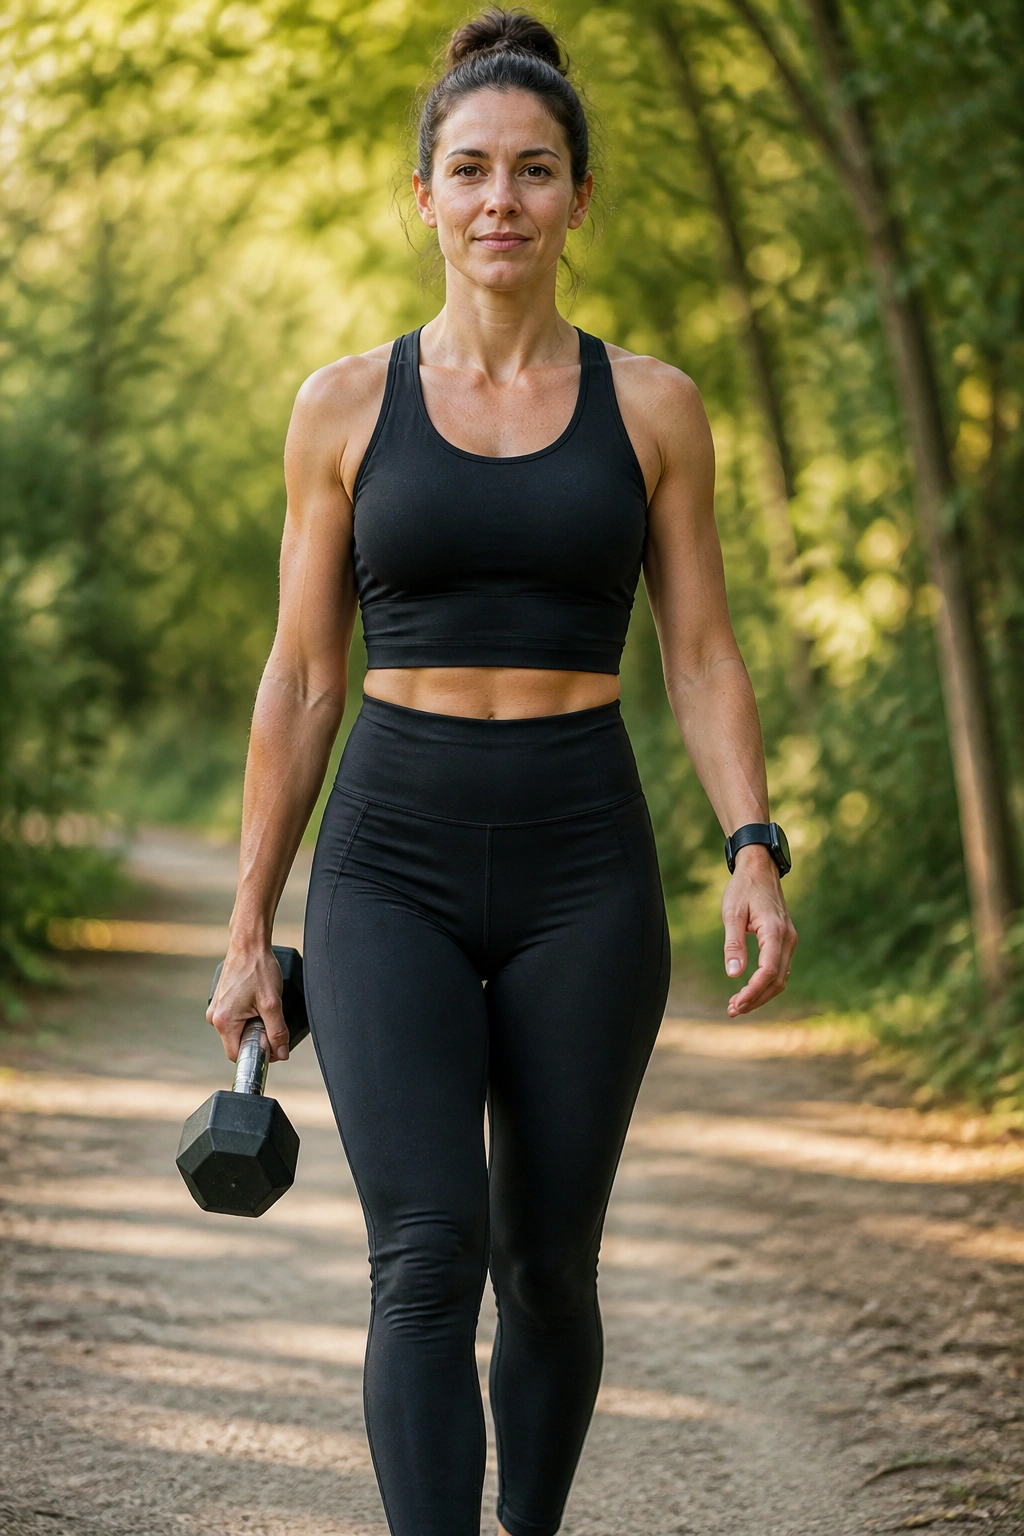
If crunches isolate the front of the body, suitcase carries teach the whole trunk to resist leaning. That makes them one of my favorite postpartum strength moves, especially once basic floor work feels smooth.
Pick up one dumbbell or kettlebell in one hand and stand tall. Do not lean away from the weight. Walk 20 to 40 steps, turn, switch sides, and repeat. The weight should feel challenging enough that the last 10 steps demand focus, but not so heavy that you start tilting or gripping your ribs.
What You Should Feel
- The side of the waist working.
- The ribs staying stacked.
- The shoulder not creeping up toward the ear.
- The glutes helping keep you upright.
Do 2 to 4 carries per side. Rest a little between sets. Keep the steps smooth.
This move is especially useful if you keep carrying a car seat on one side, because it trains the same anti-lean skill your body uses all day. It’s also one of the cleanest ways to work the deep core without ever lying down.
Simple rule: if your torso bends to one side, the weight is too heavy.
12. Dead Bug Toe Taps for More Advanced Core Work
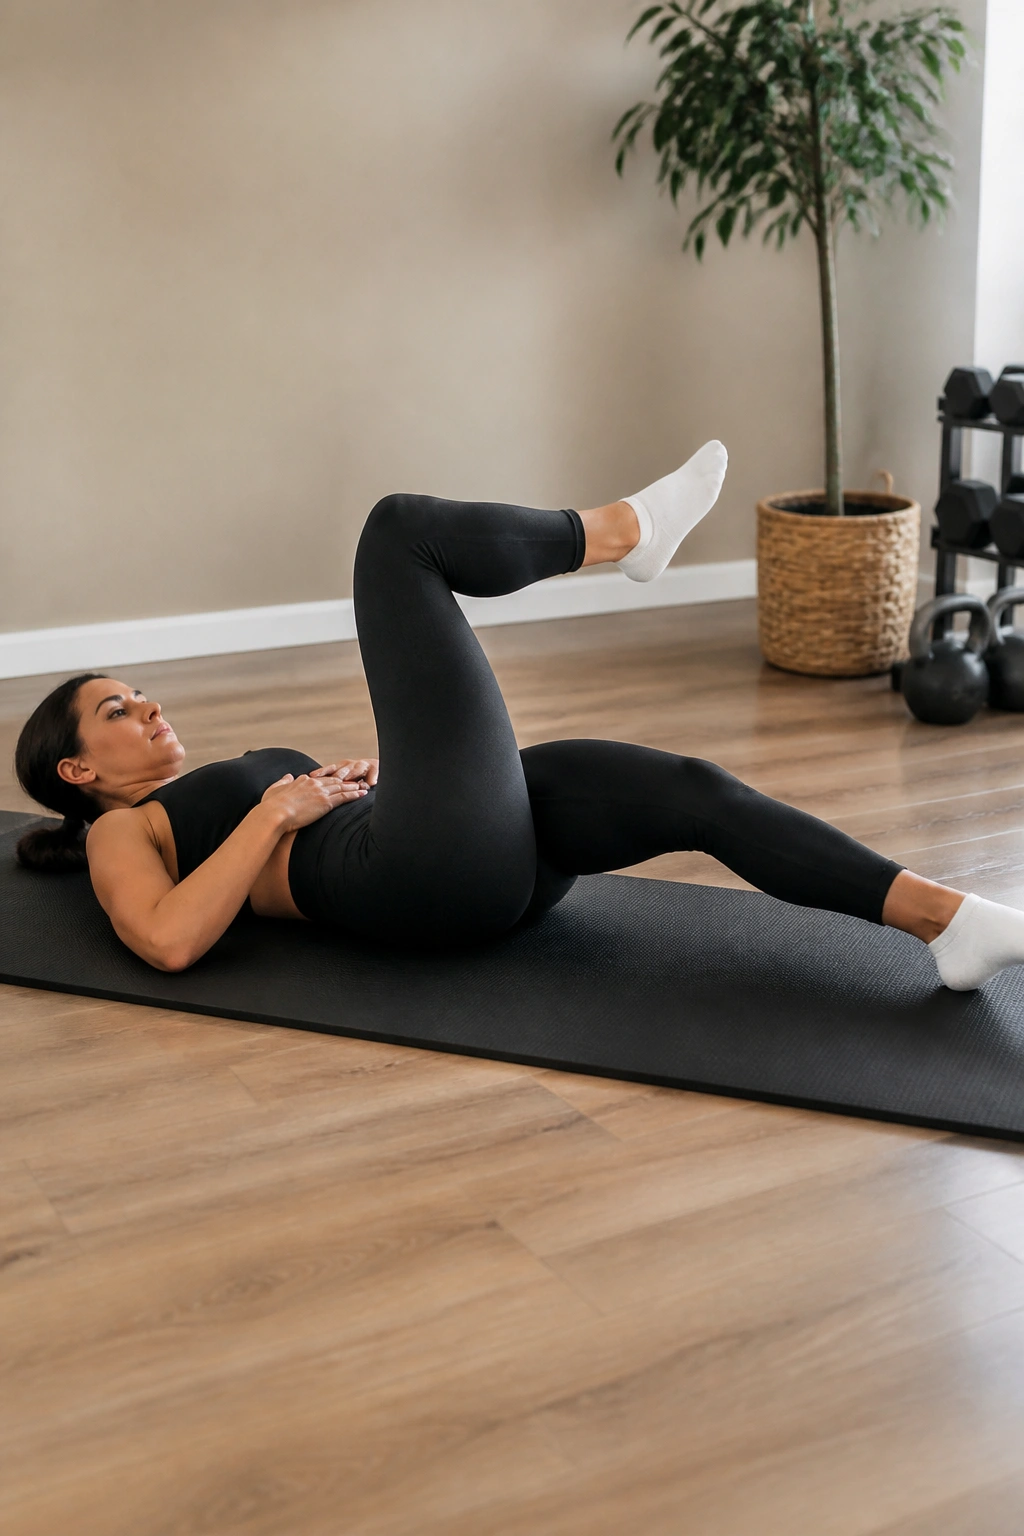
Is this too soon? Possibly. If your belly domes, your back arches, or you feel pressure bearing down, dead bug toe taps are probably more than your midsection wants right now. If, on the other hand, you can hold a quiet trunk during heel slides and bridges, this is a strong next step.
Lie on your back with your hips and knees bent at 90 degrees, or keep one foot on the floor if that feels better. Brace gently as you exhale, then lower one toe toward the floor until it lightly taps. Bring it back up and switch sides. The lower back should stay heavy on the mat.
How to Scale It Down
- Tap one toe at a time.
- Keep the other knee bent.
- Shorten the range.
- Put one hand on your belly to feel for doming.
- Stop the set the moment control starts slipping.
Try 6 to 10 taps per side for 2 sets.
The dead bug earns its reputation because it asks for coordination, not brute force. That’s hard. It also exposes compensations fast, which is useful even when it’s annoying. Your body tells on itself here. Listen.
13. Band Rows That Pull the Ribs Back In
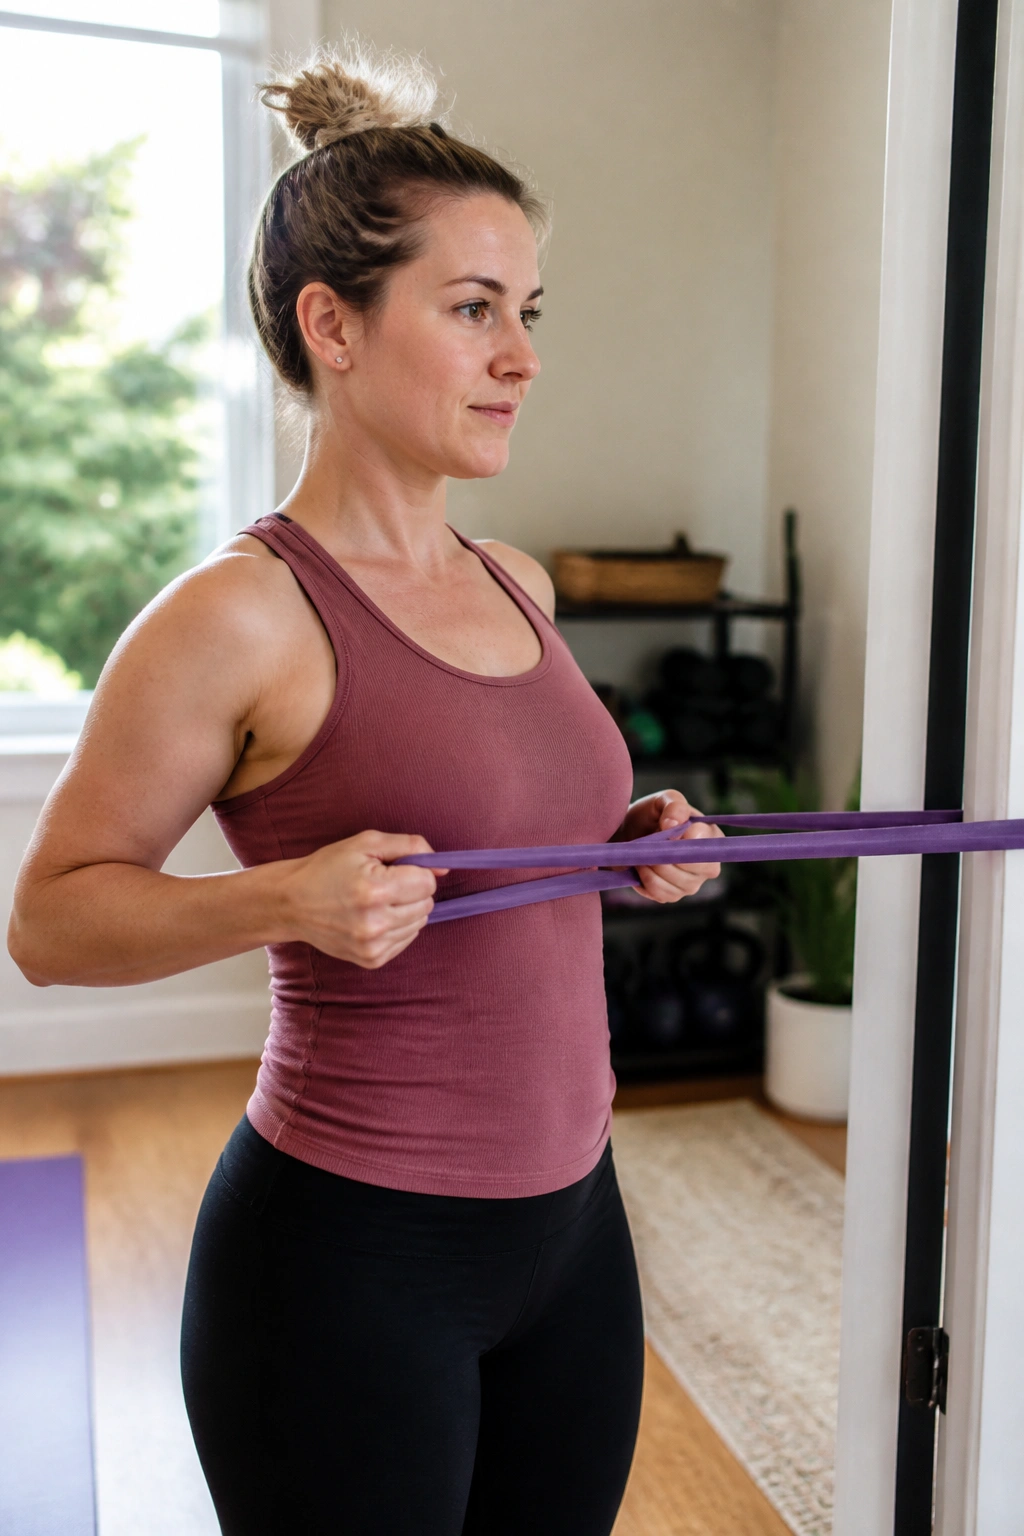
Unlike biceps curls, rows make your back work while your trunk stays organized. That matters postpartum because so many daily tasks round the shoulders forward and pull the ribs open. Feeding, holding, carrying, scrolling — the posture adds up.
Anchor a resistance band at chest height. Hold one end in each hand, step back until there’s gentle tension, and keep your knees soft. Pull the band toward your ribs while exhaling, then slowly return with control. Keep your shoulders down and your chest from puffing forward.
Do 10 to 12 reps for 2 or 3 sets.
A small pause at the end of each row helps. Just 1 second. Enough to feel the shoulder blades move back without turning it into a shrug.
Why It Helps the Belly
- Better posture changes how the waist looks.
- A stacked rib cage makes core bracing easier.
- Stronger upper back muscles reduce the urge to collapse forward.
- The deep core gets cleaner feedback when the ribs stay calm.
If you spend half the day carrying a baby on one hip, rows are not optional. They help undo the slouch before it gets baked into the way you stand.
14. Step-Ups That Train Balance and Belly Control
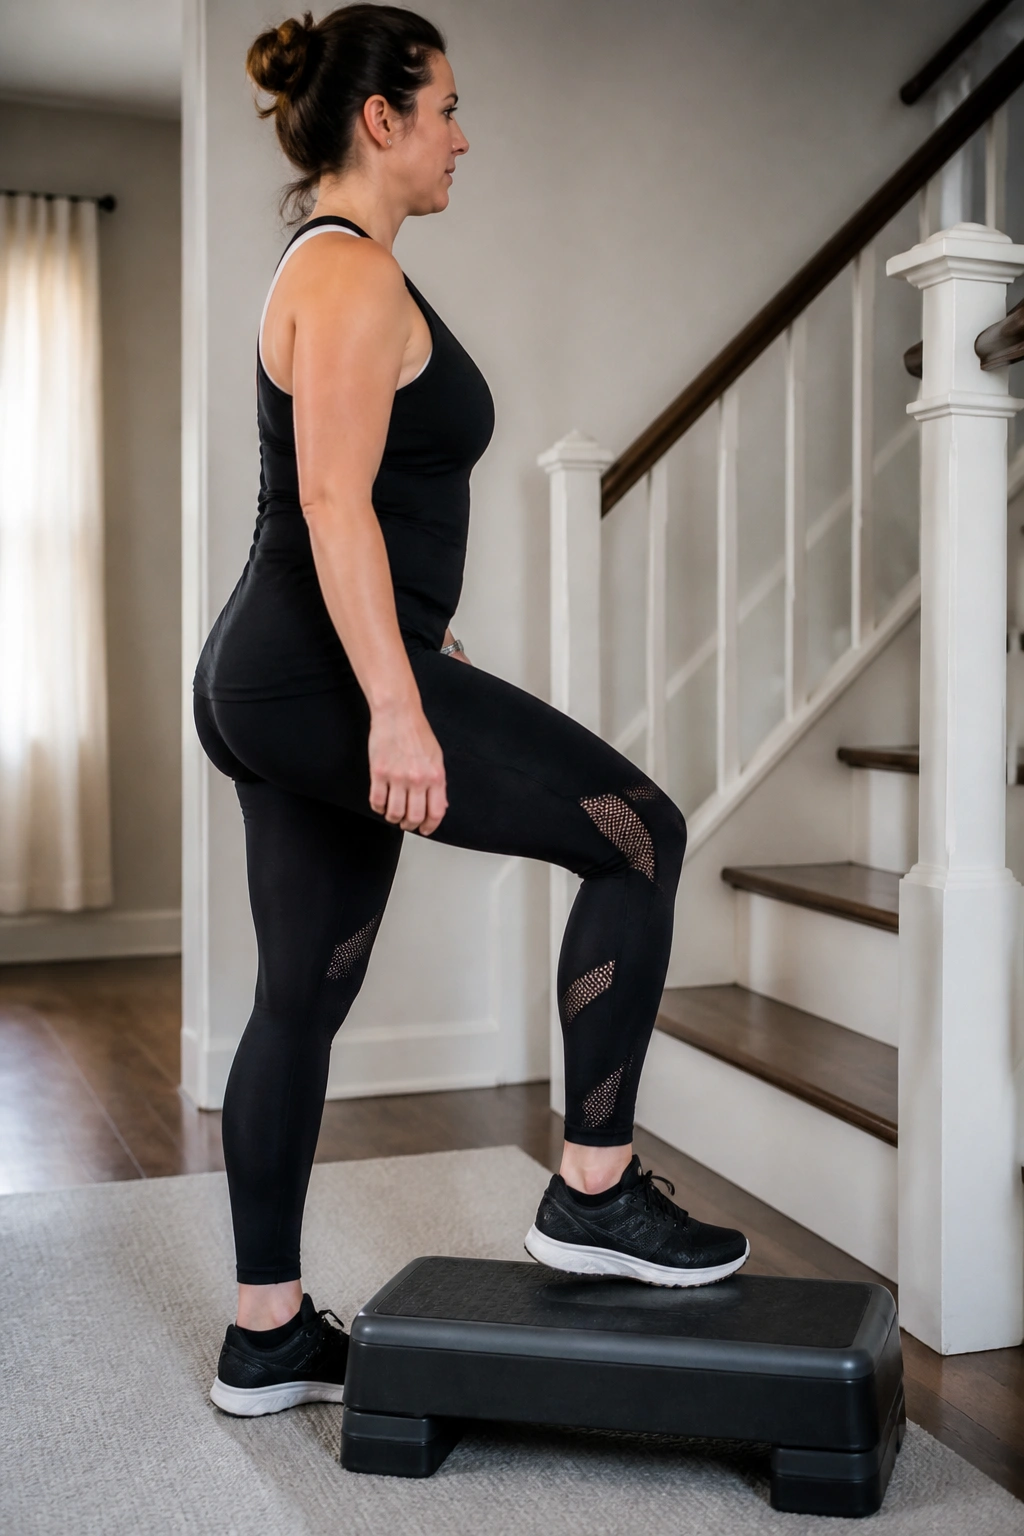
Every staircase in the house becomes a mini workout once you stop rushing through it. Step-ups build leg strength, balance, and trunk control in one clean move, which is why they belong on a postpartum belly list even though they don’t look like an ab exercise at all.
Use a low, stable step or platform. Place one foot fully on top, press through the heel, and stand up tall without bouncing off the back leg. Lower with control and repeat. Then switch sides.
How to Keep It Belly-Friendly
- Use a step no higher than your knee at first.
- Keep your torso upright.
- Exhale as you stand.
- Avoid pushing off hard with the trailing leg.
- Hold a rail if balance feels shaky.
Do 6 to 10 reps per side for 2 sets.
This one feels good when it’s done right. The working leg does most of the job, the hips feel awake, and the midsection learns to stay stacked while the body shifts weight from one foot to the other. That shift is real life. Walking, stairs, curbs, baby carriers — all of it.
If your belly tenses hard on the way up, drop the step height and slow down. Speed is not the prize.
15. A 15-Minute Postpartum Core Circuit You Can Repeat
A short circuit keeps the whole thing practical. You do not need a giant window of time to make progress; you need a sequence that respects healing and can be repeated often enough to matter.
Try this simple 15-minute routine 2 to 4 times a week, with gentle walking on the other days:
- 5 slow 360 breaths
- 8 heel slides per side
- 10 glute bridges
- 6 bird dogs per side
- 8 wall push-ups
- 20-step suitcase carry on each side
Rest 20 to 40 seconds between moves. Keep the pace calm. If the belly domes during any part of the circuit, swap that exercise for breathing or walking and come back to it later.
How to Know It’s the Right Amount
- You finish feeling worked, not wrecked.
- Your stomach doesn’t bulge more during the session.
- Your pelvic floor feels neutral afterward.
- You can still stand up straight when you leave the mat.
That last part matters. A good postpartum core session should make you feel more organized, not folded in half. The belly usually responds better to consistency than to heroic workouts crammed into a bad night’s sleep, and this small circuit gives you a repeatable way to build that consistency without a lot of noise.
Keep the work honest. Keep the range small when needed. And when the movements start to feel almost too easy, that’s usually the moment they’re finally doing the job.
