



A C-section belly does not need punishment. It needs patience, breath, and exercises that teach the deep core to switch back on without tugging the incision.
Crunches and sit-ups are the wrong place to start. So are fast twisting moves that make the center of the stomach dome like a tent. After a cesarean, the abdominal wall, scar tissue, diaphragm, and pelvic floor share pressure in a way most people never think about until something feels off.
The safest early work looks boring: breathing, pelvic tilts, heel slides, tiny marches. Boring is fine. Boring is what lets the transverse abdominis wake up without sending strain to the scar or forcing the lower back to do all the work.
If you notice sharp pain, heavier bleeding, fever, redness, a pulling feeling at the incision, or a coning ridge down the middle of the belly, stop and get checked. Once the body says yes to movement, the best post C-section ab workouts are the ones that leave you steadier at the end, not smoked.
Start with breath. The rest follows.
1. Diaphragmatic Breathing for Post C-Section Core Recovery
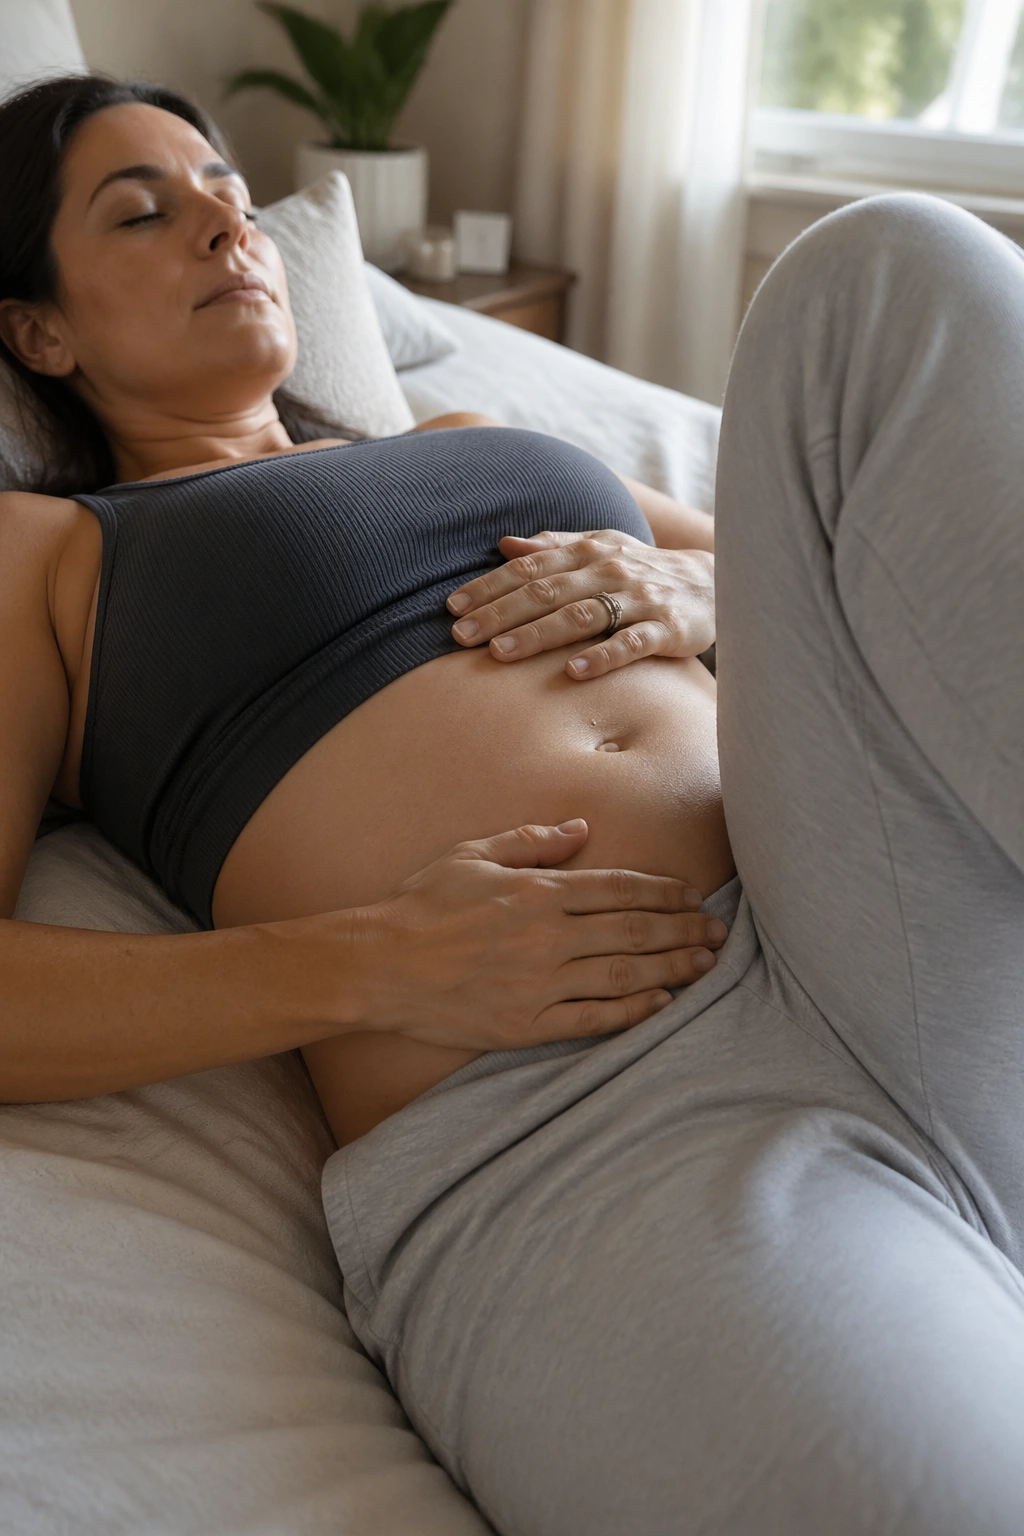
Breathing is the first core exercise, and after a C-section it matters more than people expect. When the diaphragm moves well, pressure inside the trunk spreads out instead of slamming into the scar or making the belly brace hard.
Lie on your back with your knees bent, or sit propped up in bed if that feels better. Put one hand on the lower ribs and the other on the lower belly. Inhale through the nose and try to feel the ribs widen to the sides and into your hands, then let the air out through the mouth like you’re fogging a mirror slowly.
Do not suck your stomach in. That old cue makes a lot of people clamp down through the neck and upper abs, which is the opposite of what you want here.
What to Feel
- The ribs should move more than the shoulders.
- The lower belly can soften on the inhale.
- The exhale should feel long, quiet, and controlled.
- The incision area should stay calm, not sharp or pulled.
Try 5 breaths for 3 rounds. If your belly domes or your back arches, make the inhale smaller and the exhale longer. That tiny adjustment matters more than pushing through.
A good rule: if the breath makes you feel more grounded after a minute, you’re on the right track. If it makes you tense, stop and reset.
2. Pelvic Tilts to Quiet the Lower Belly

Why does such a small movement matter? Because pelvic tilts teach the abdomen and pelvis to move together again without forcing the whole trunk into a crunch.
Lie on your back with your knees bent and feet flat. On the exhale, gently tip the pelvis so the low back presses a little more into the floor. On the inhale, let it return to neutral. That is the whole drill. No heaving. No flattening the back like you’re trying to nail it to the mat.
Keep the range tiny at first. Some people can only make the movement visible through the waistband of their pants, and that is fine. Early recovery is not the time to chase a big range of motion.
A Clean Rep Looks Like This
- The ribs stay heavy.
- The butt stays relaxed.
- The breath keeps moving.
- The scar does not pinch.
Do 8 to 10 reps for 2 sets. If you feel the movement in your hip flexors or lower back more than your abs, shorten the range and slow the exhale. The point is control, not effort.
One sharp thought: if pelvic tilts feel better than almost everything else, keep them. People skip them because they look too easy. Then they wonder why their core still feels disconnected.
3. Heel Slides for Gentle Core Reconnection
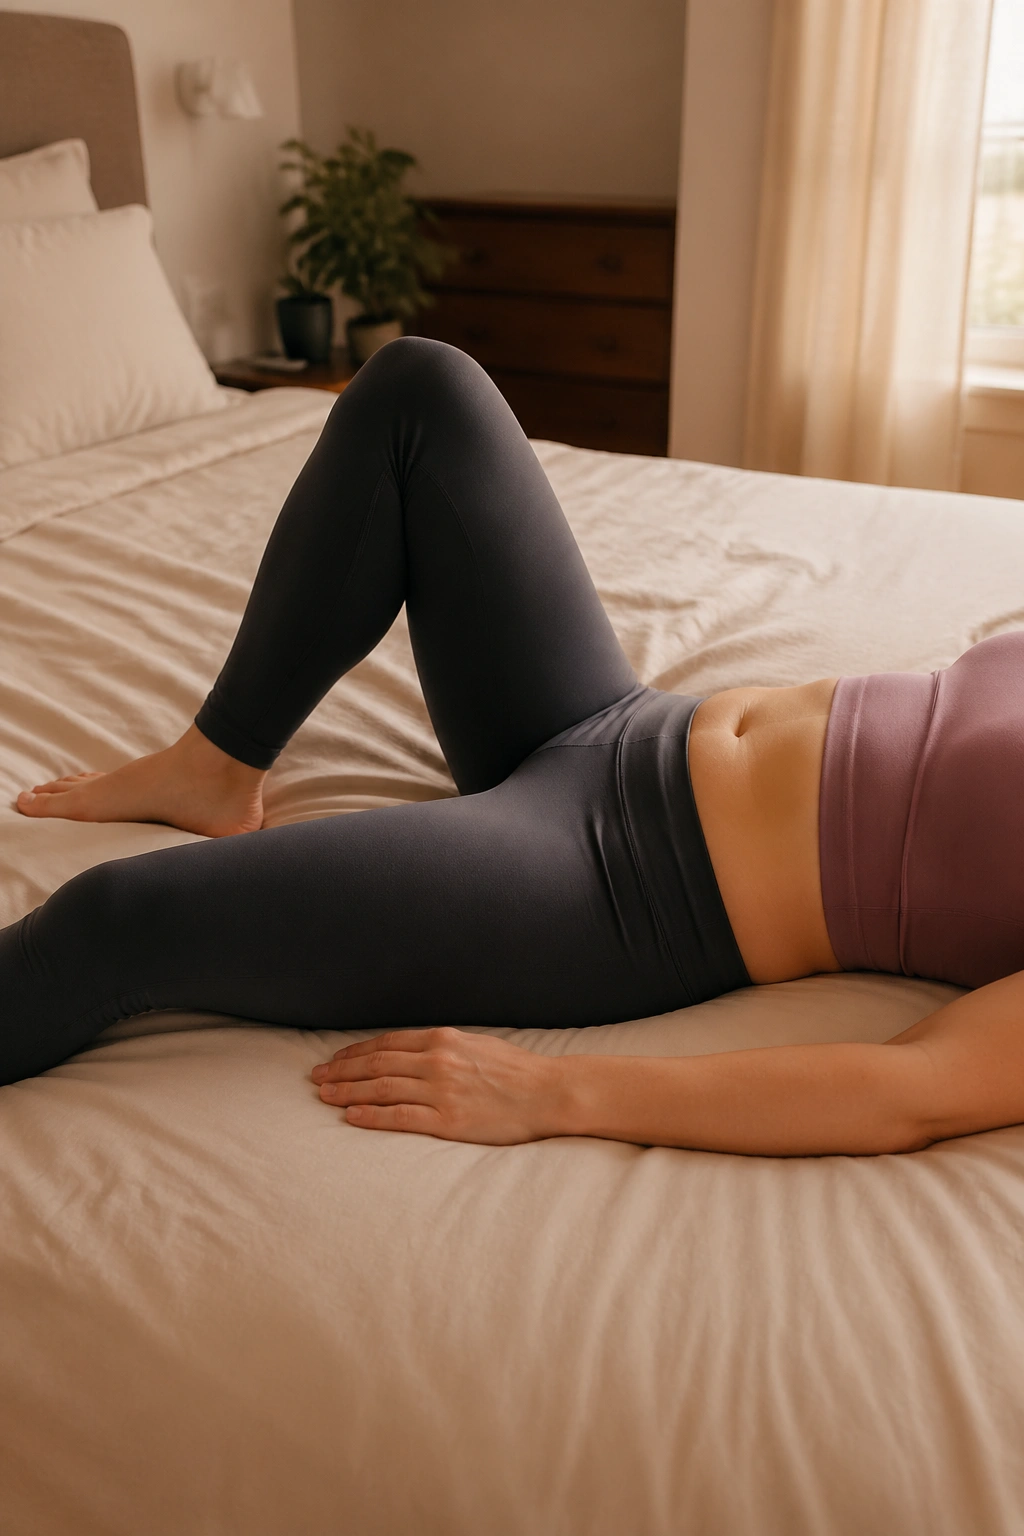
Heel slides are one of those movements that look almost laughably simple until you try to keep the belly quiet. That is the whole game.
Lie on your back with both knees bent. Exhale, gently brace, and slide one heel away from you until the leg is nearly straight. Inhale as you bring it back. Keep the pelvis steady, like a glass of water sitting on your lower stomach.
If the belly pokes up in the center, the slide is too far. Shorten it. Nobody gets bonus points for reaching the end range on day one.
How to Keep the Pelvis Quiet
- Move one leg at a time.
- Keep both hip bones heavy.
- Exhale during the slide out.
- Stop before the low back arches.
Six slides per side is enough for most early sessions. Two sets is plenty. You should finish feeling warm and more connected, not shaky.
A small aside: heel slides are also a nice honesty test. If one side feels smoother, that side probably isn’t “stronger” so much as less guarded. Post C-section bodies do that a lot. They protect the scar, then get clunky on one side without meaning to.
4. Bent-Knee Marches to Train Pelvic Stability
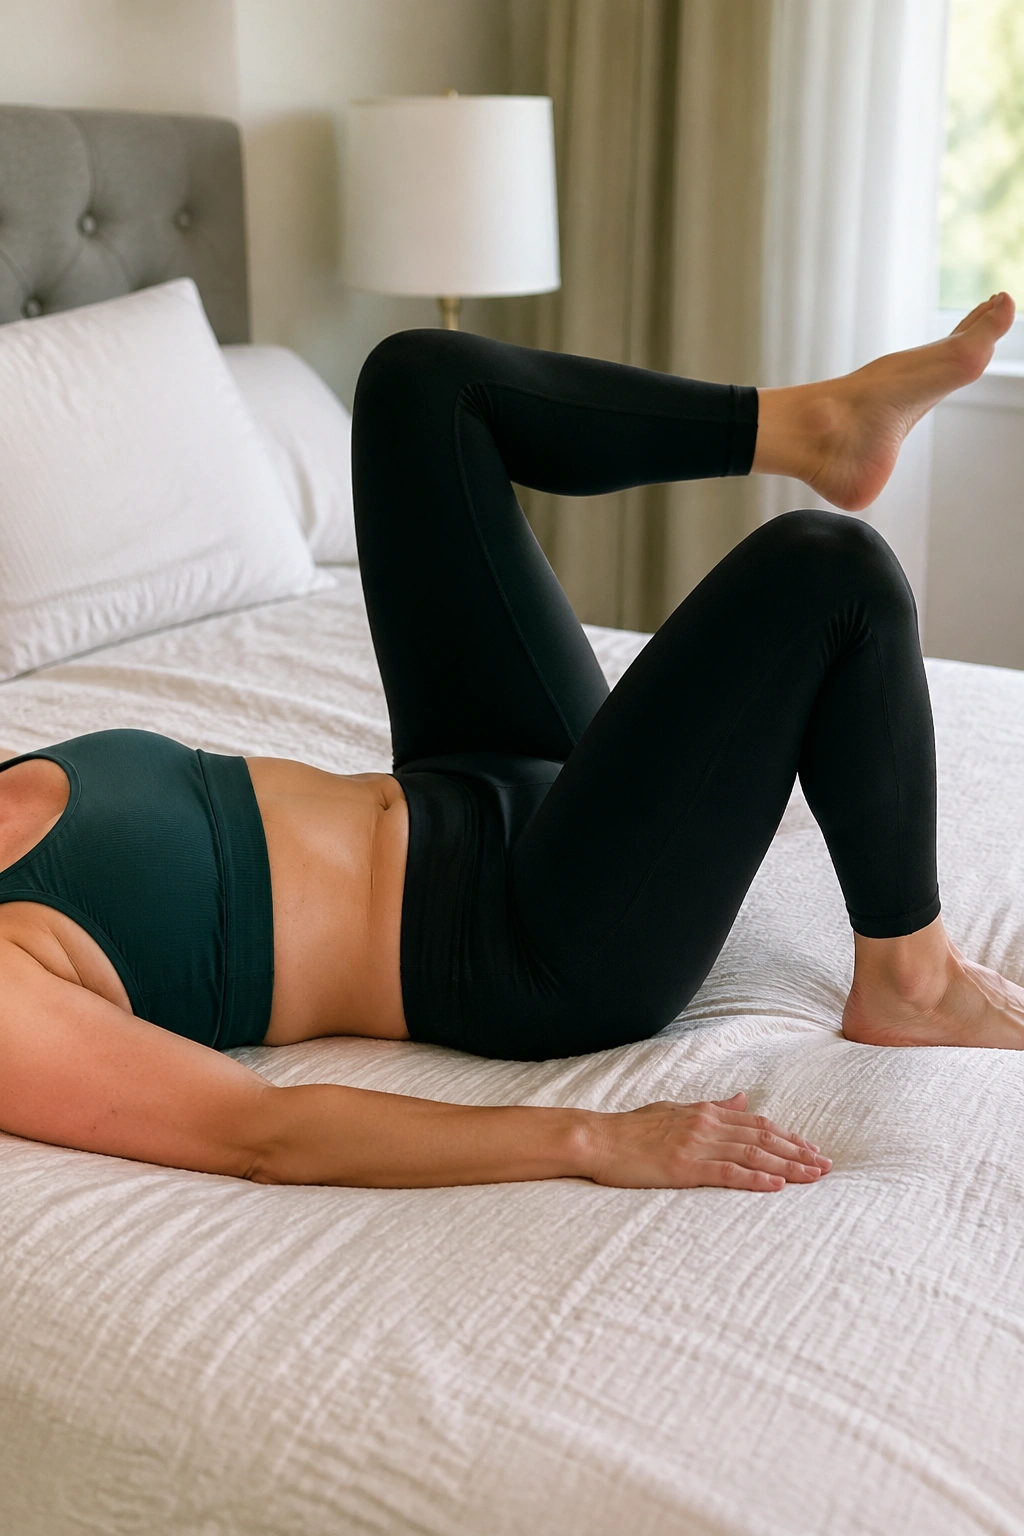
Marching sounds easy until one hip starts hauling the whole trunk around. Then the body reveals exactly where it cheats.
Set up on your back with knees bent and feet flat. Exhale, gently brace the lower belly, and lift one foot just an inch or two off the floor. Set it down, then switch sides. Keep the pelvis from rocking side to side.
This is not a high march. The knee does not need to come up near the chest. A tiny lift is enough when the goal is to teach the deep core to stay organized.
Watch for These Common Mistakes
- Holding the breath.
- Letting the ribs pop up.
- Pulling the knee too high.
- Letting the back arch and the belly bulge.
Try 6 marches per side for 2 sets. If your hip flexors start burning faster than your abs, slow down and make the lift smaller. That burning is not the point.
Marches are a bridge between floor work and standing work. They also show you whether your core can handle one leg moving while the rest of the system stays calm. That matters more than people think, because daily life is full of one-leg moments—stairs, socks, getting in and out of the car, lifting a baby with one hip doing most of the work.
5. Toe Taps With a Tiny Range of Motion
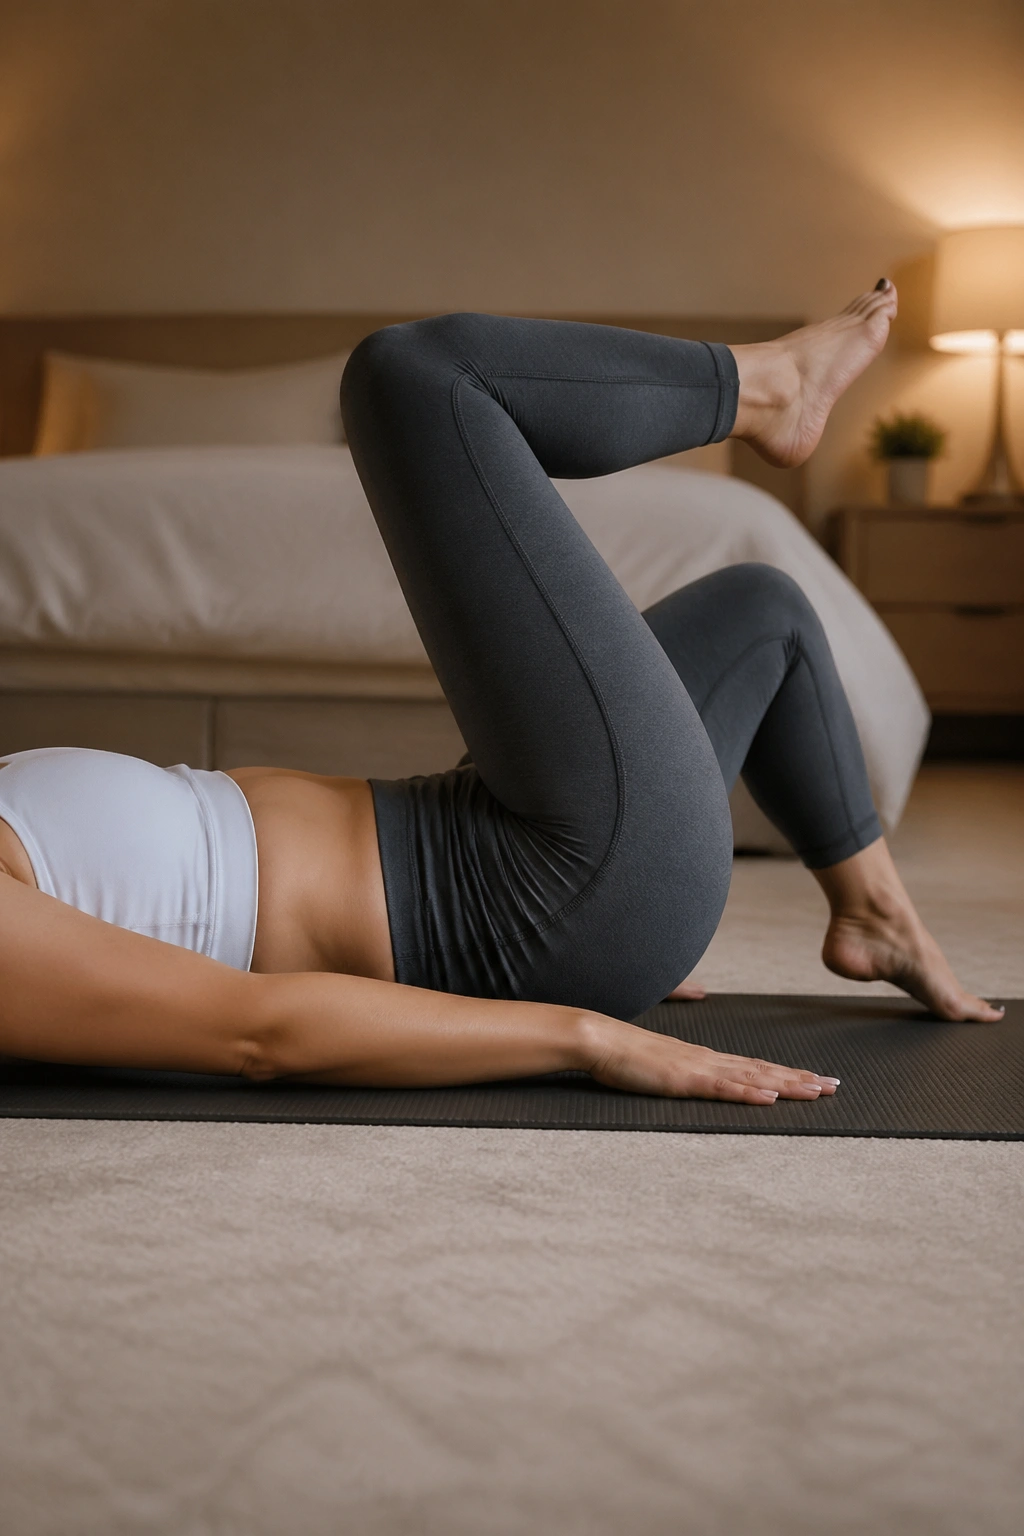
Can you move both legs without your ribs flying up? Toe taps answer that question fast.
Start on your back with knees bent into tabletop only if that feels controlled. If tabletop feels too soon, keep one foot on the floor and tap the other one out. Lower one foot toward the floor on the exhale, tap lightly, then bring it back. Keep the spine steady and the abdomen flat-ish, not domed.
The range should be tiny. A toe tap does not need to touch far away. It just needs to challenge your control a little.
Use This Order
- Start with one foot lifting and tapping.
- Keep the opposite foot planted.
- Exhale through the effort.
- Swap sides only when the belly stays quiet.
Stop the set the moment the midline bulges. That’s the signal to scale back, not push harder.
Four to 6 taps per side is a clean starting point. If you can do that without pulling at the scar or arching your back, build slowly toward 8 per side. Some days the smaller version is the right one. That’s not failure. It’s smart.
6. Side-Lying Clamshells for Hip and Core Support
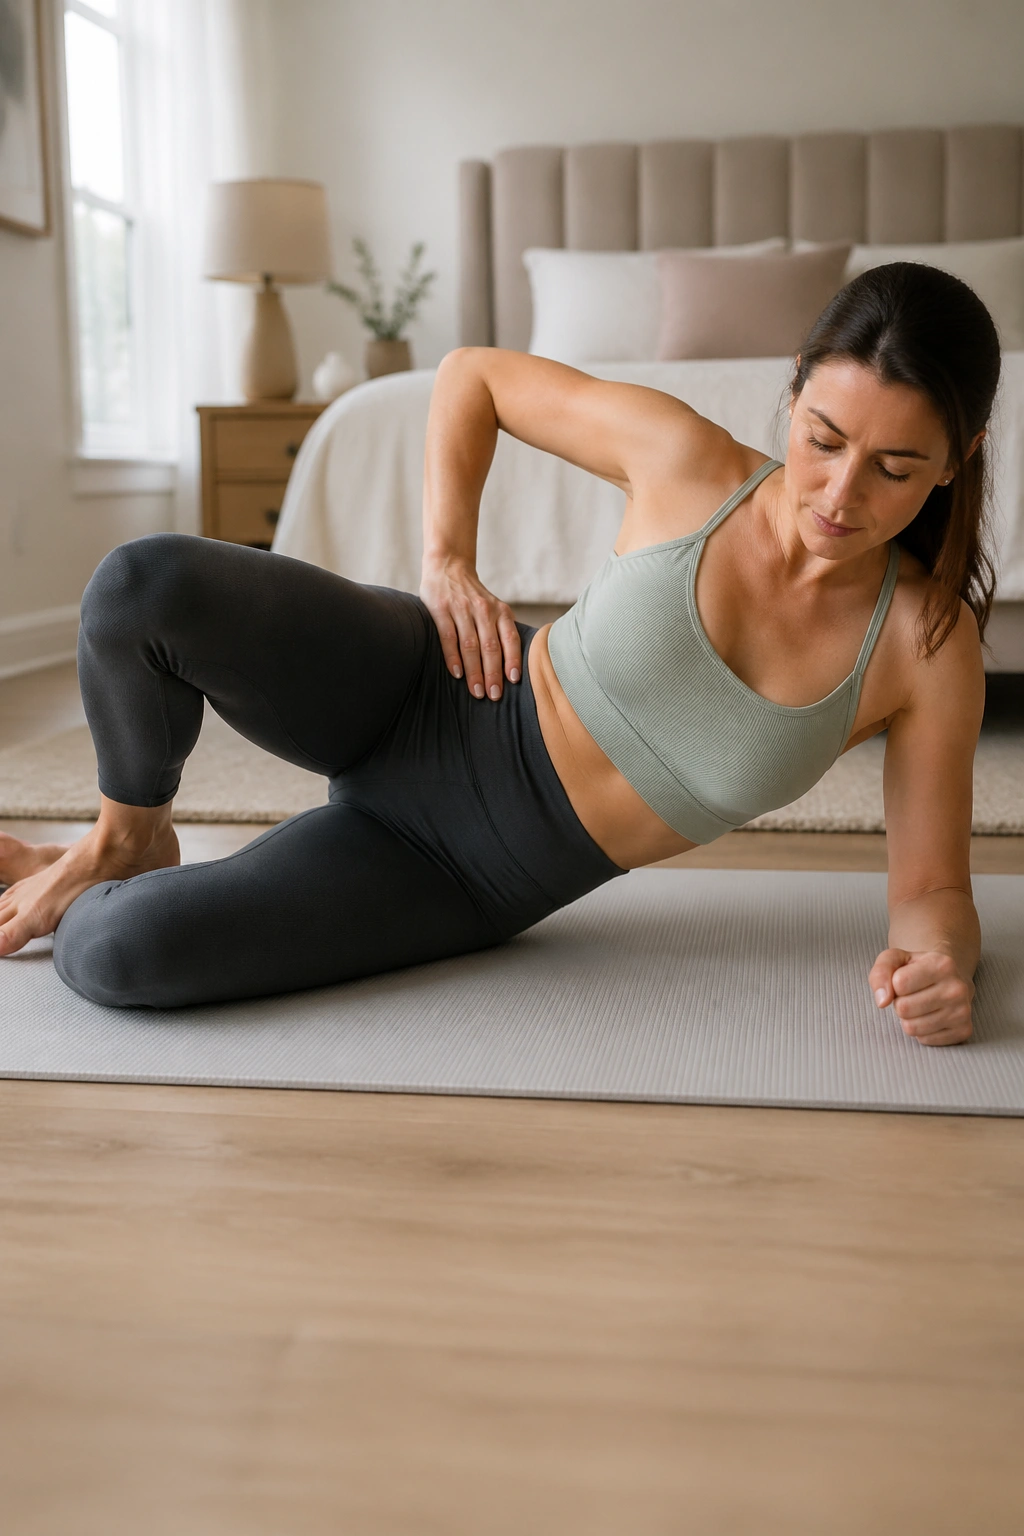
Side-lying clamshells feel almost too tame, which is exactly why they’re useful. They wake up the glute med and help the pelvis stay steadier, and that support makes the abdomen’s job less messy.
Lie on your side with knees bent, hips stacked, and feet together. Keep the feet touching while you lift the top knee a few inches, then lower it with control. The pelvis should stay still. If it rolls back, the range is too big.
This is not an ab workout in the flashy sense. It is an abdominal support drill. Post C-section recovery needs that kind of work because the core rarely works alone.
Clean Form Cues
- Hips stacked, not twisted.
- Feet stay glued together.
- The top waist does not collapse.
- The neck stays soft.
Do 8 to 12 reps per side for 2 sets. A light loop band above the knees can help later, but start without it. If you feel the movement in your lower back, slow down and make the lift smaller.
Clamshells are also one of the better moves when standing work still feels wobbly. They teach the side body to stop freeloading. That sounds harsh, but it’s true.
7. Seated Core Bracing at the Edge of a Chair
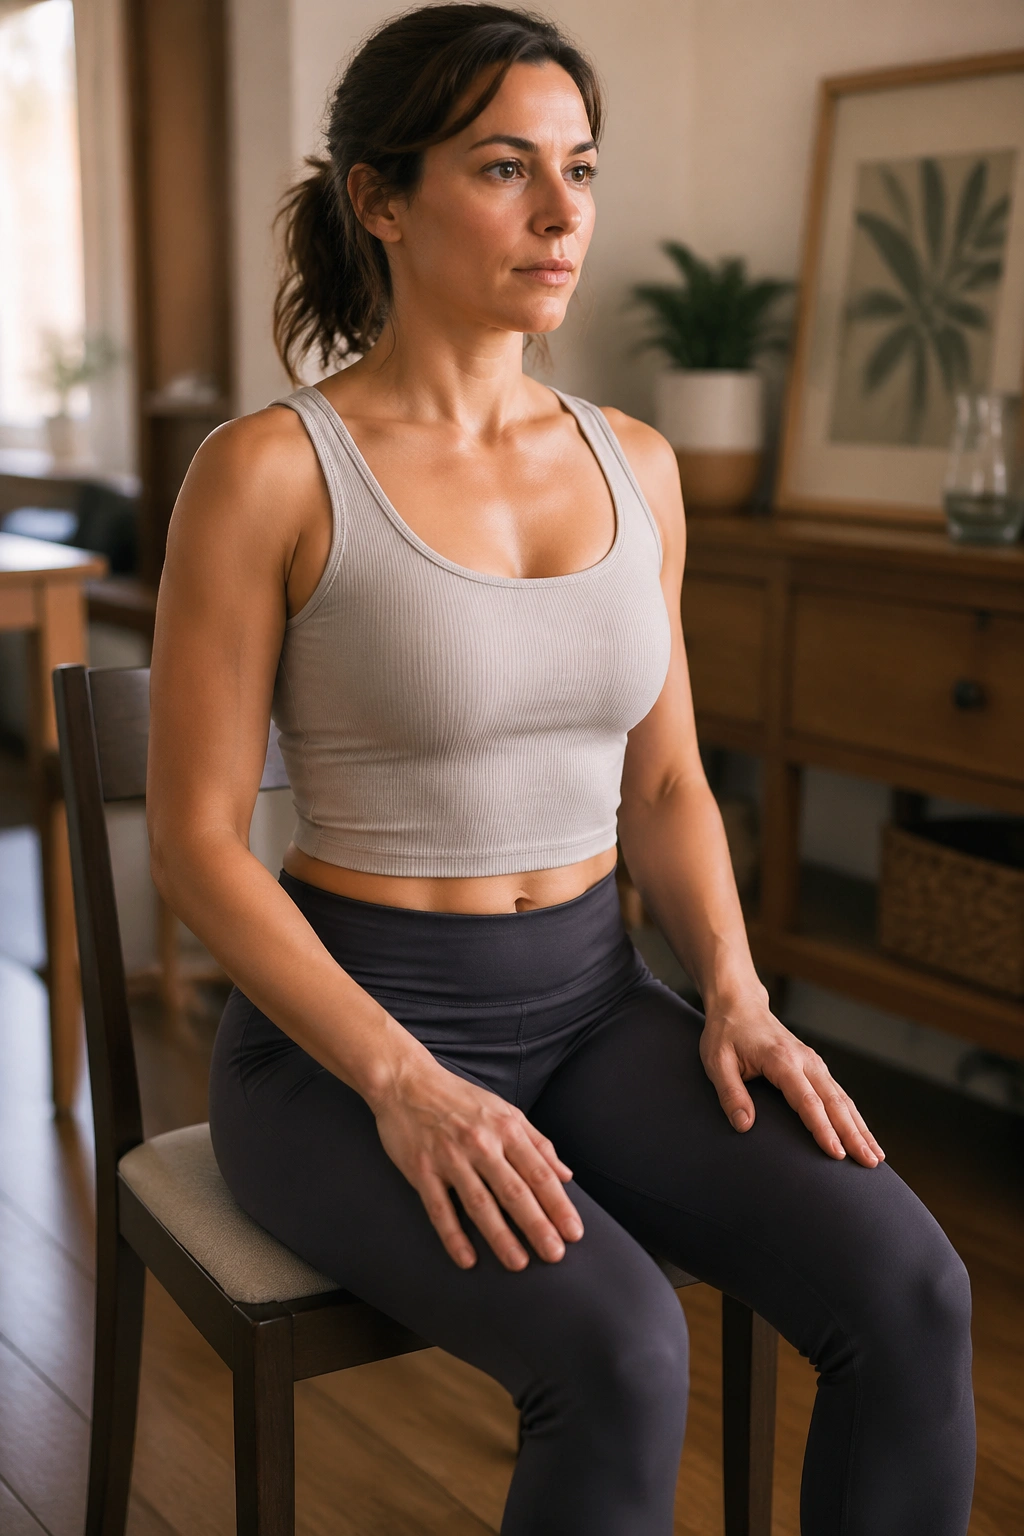
Sitting upright and bracing lightly sounds ordinary. It is. That’s why it fits into real life so well.
Sit near the front edge of a firm chair with both feet flat. Grow tall through the crown of the head, then exhale and gently tighten the lower belly as if you’re zipping up jeans that are one size smaller. Hold that feeling for 3 to 5 seconds, then release and breathe normally.
Do not crush the stomach inward. Do not stiffen the ribs like a board. The brace should feel like a low, even wrap around the waist.
A seated brace is handy because it shows up everywhere. Nursing, feeding, waiting in the car, holding a sleeping baby while your back starts to complain—same drill, same cue.
- Exhale first.
- Gently gather the low belly.
- Keep the shoulders down.
- Release fully between reps.
Five holds is enough at the start. Some people like to pair it with a small march of one foot or a heel lift. That can work, but only if the trunk stays quiet. If the body turns it into a balancing act, strip it back to the basic hold.
This is the sort of move that doesn’t look like much on paper and ends up making daily life feel less ragged.
8. Glute Bridges in C-Section Recovery
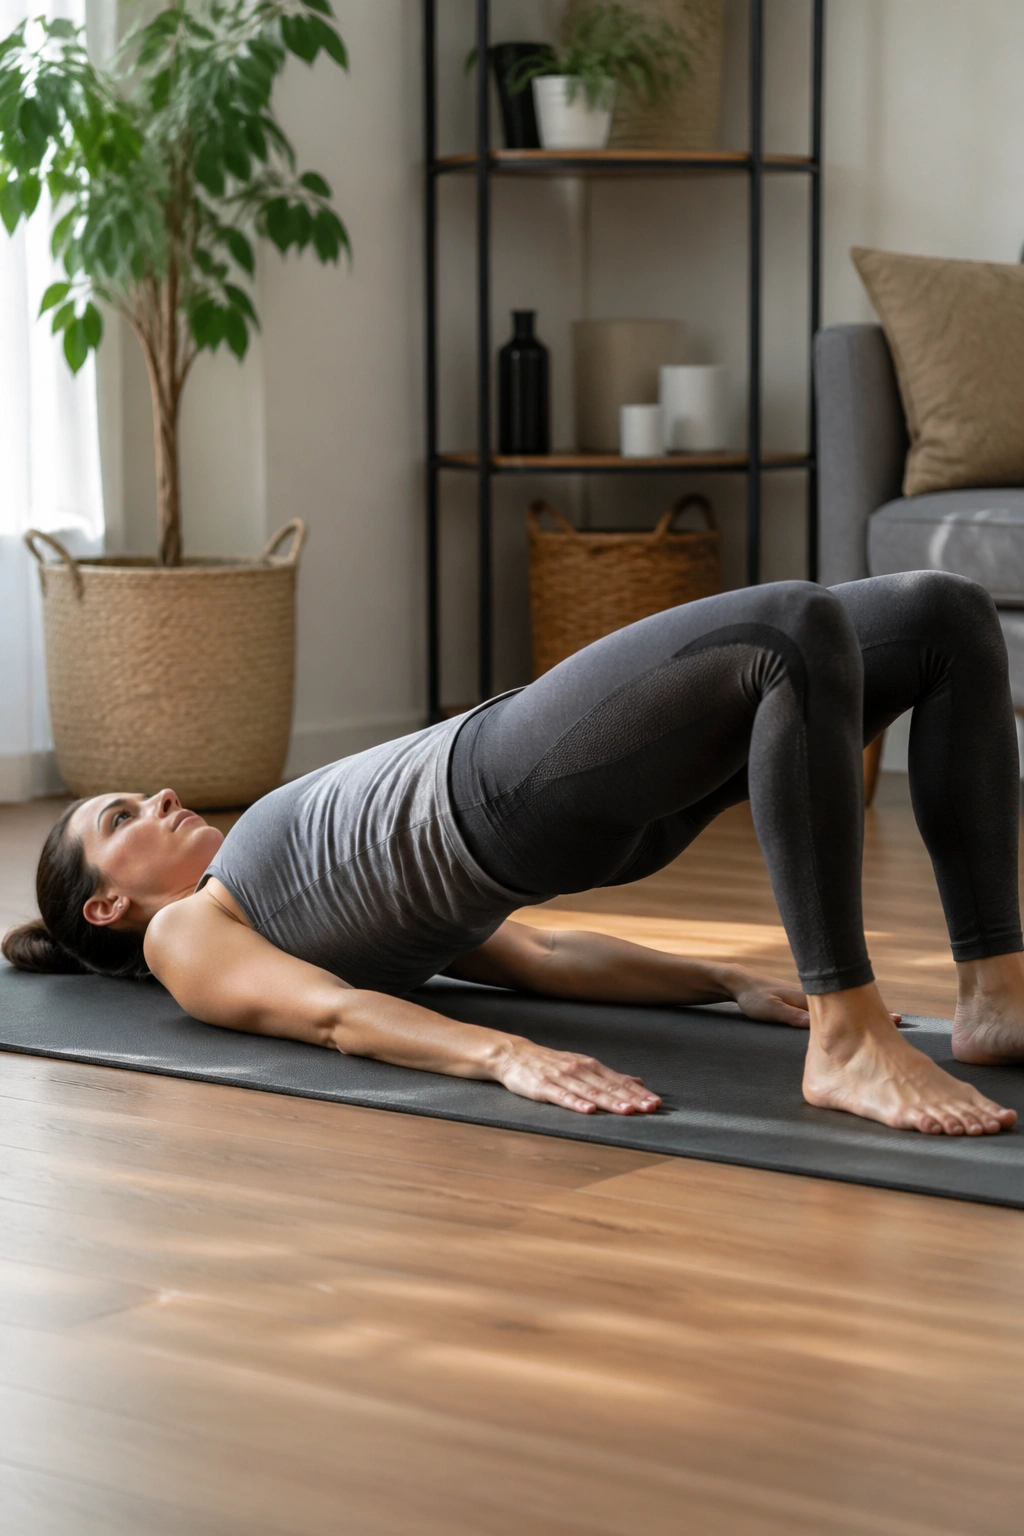
Glute bridges are one of the most useful later-early moves in C-section recovery, but only if the lift is controlled. A sloppy bridge just dumps work into the low back.
Lie on your back with knees bent and feet hip-width apart. Exhale, gently brace, squeeze the glutes, and lift the hips until the body makes a straight line from shoulders to knees. Pause for a second or two, then lower with control. The rise should feel smooth, not yanked.
If the incision feels tugged, cut the height in half. If that still bothers you, stay with glute squeezes on the floor and come back later.
Keep These Details Tight
- Feet stay flat.
- Knees track forward.
- Ribs stay down.
- The neck stays relaxed.
Do 8 to 12 reps for 2 to 3 sets. A tiny ball or pillow between the knees can help some people feel the inner thighs without gripping hard. That can be useful, but only if it doesn’t make the hips tense up.
One thing I like about bridges: they make it obvious when the abs and glutes are not sharing the load. If the hamstrings cramp, shift your feet a little closer to your hips and make the lift smaller. That usually fixes the complaint fast.
9. Bird Dog Holds on Hands and Knees
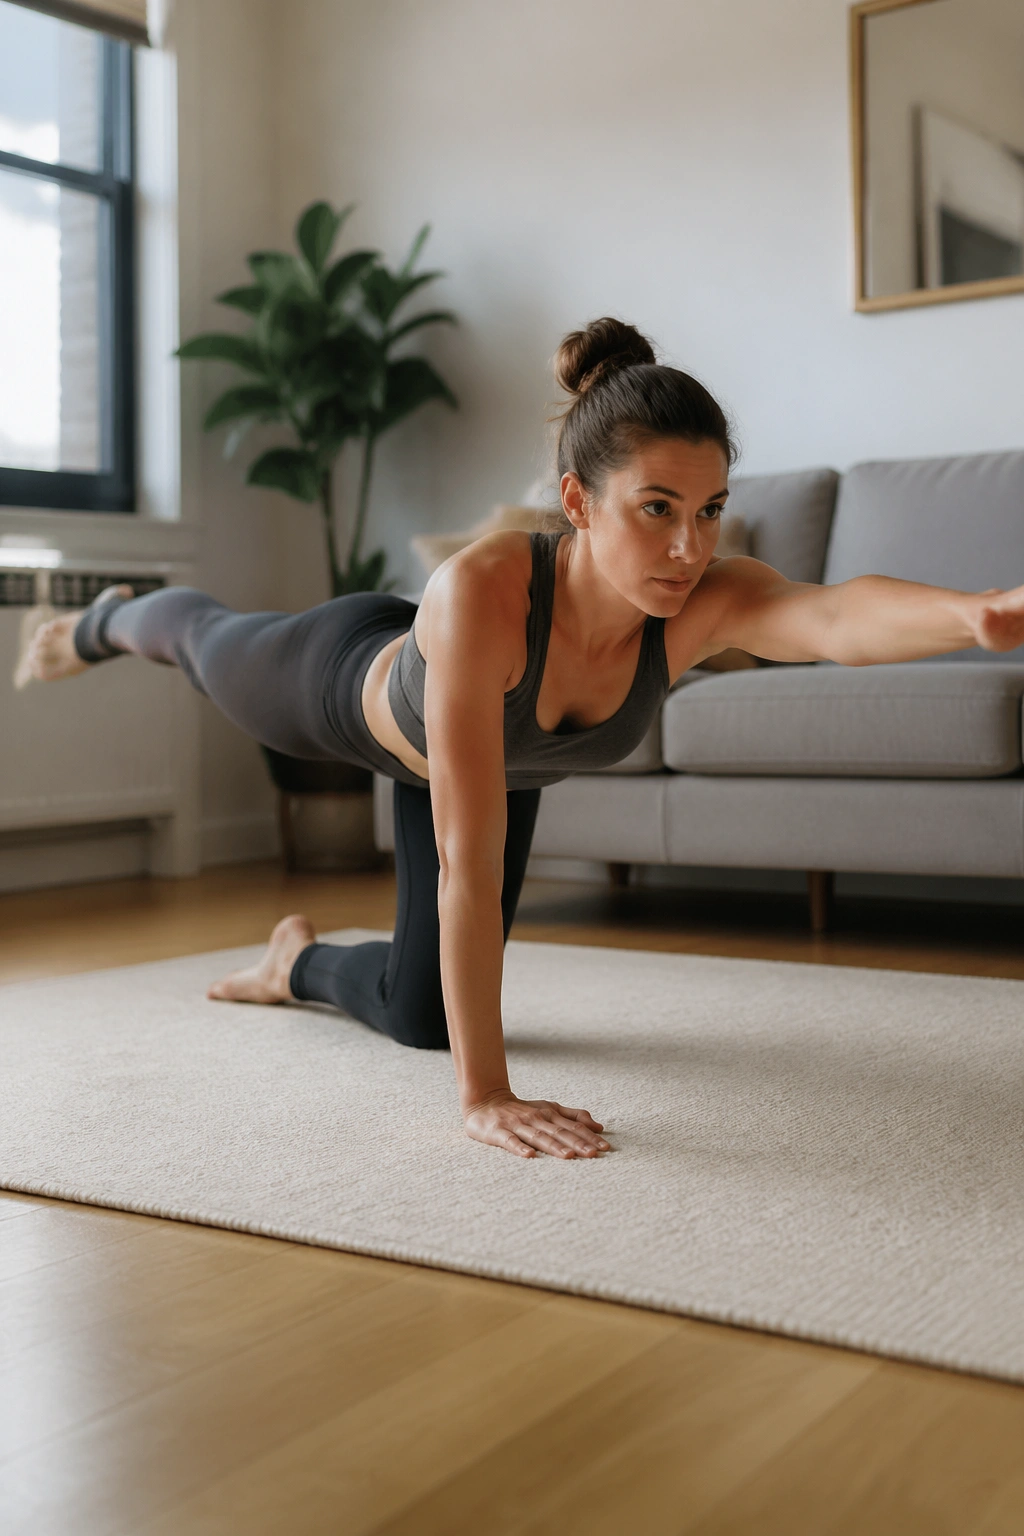
Why does a move on hands and knees help the abs? Because it trains the trunk to resist wobble while the arms and legs move away from center.
Get on all fours with hands under shoulders and knees under hips. Start by sliding one leg back without lifting it high. Once that feels stable, add the opposite arm. Hold for 3 to 5 seconds, then return with control. Switch sides.
The goal is not height. The goal is steadiness. If the pelvis twists or the belly domes, the version is too hard.
Build It in Stages
- Leg only.
- Arm only.
- Opposite arm and leg together.
- Longer hold only after the first three feel solid.
Do 4 to 6 reps per side. Rest a little between reps if needed. There’s no prize for rushing.
Bird dogs are honest. They show you whether the body can keep pressure organized when the limbs move apart. That’s useful long after C-section recovery too, because it carries over to picking things up, reaching into cabinets, and twisting with a bit less drama.
10. Wall-Press Dead Bug Variations
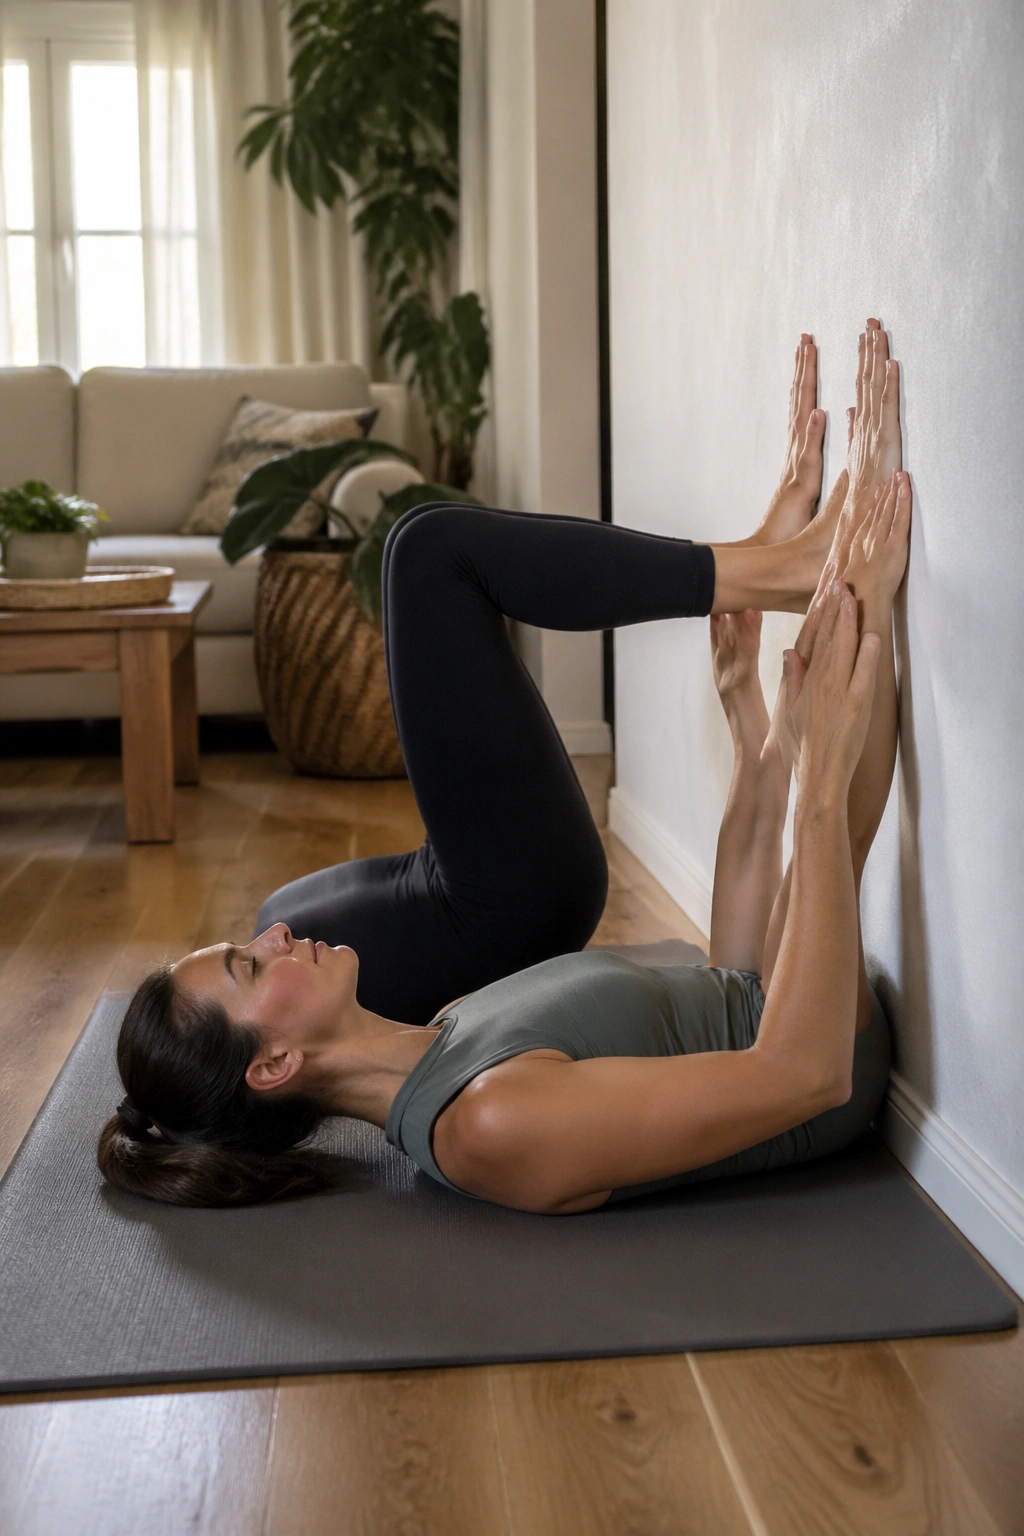
Feet on a wall can make core work feel calmer, and I like that. The wall gives feedback, which means the abs don’t have to guess.
Lie on your back with hips and knees bent about 90 degrees, feet resting lightly on a wall or sturdy surface. Press both hands into the wall above you to create a little whole-body tension. Then lower one heel toward the floor or tap one foot away, keeping the ribs steady and the low back from arching.
The wall helps because it reduces the urge to fling the leg. It also gives the abs and hip flexors a clearer job.
What to Watch For
- The lower back should not arch.
- The ribs should not flare.
- The neck should stay loose.
- The belly should stay flat-ish, not cone up.
Try 6 to 8 reps per side for 2 sets. If one leg moving makes the whole torso wobble, stay with the wall press and just hold the position for 10 seconds at a time.
A small detail matters here: push into the wall as if you’re trying to leave a handprint, but don’t shove so hard that your breath stops. That middle ground is where the work lives.
11. Standing Pallof Presses With a Light Band
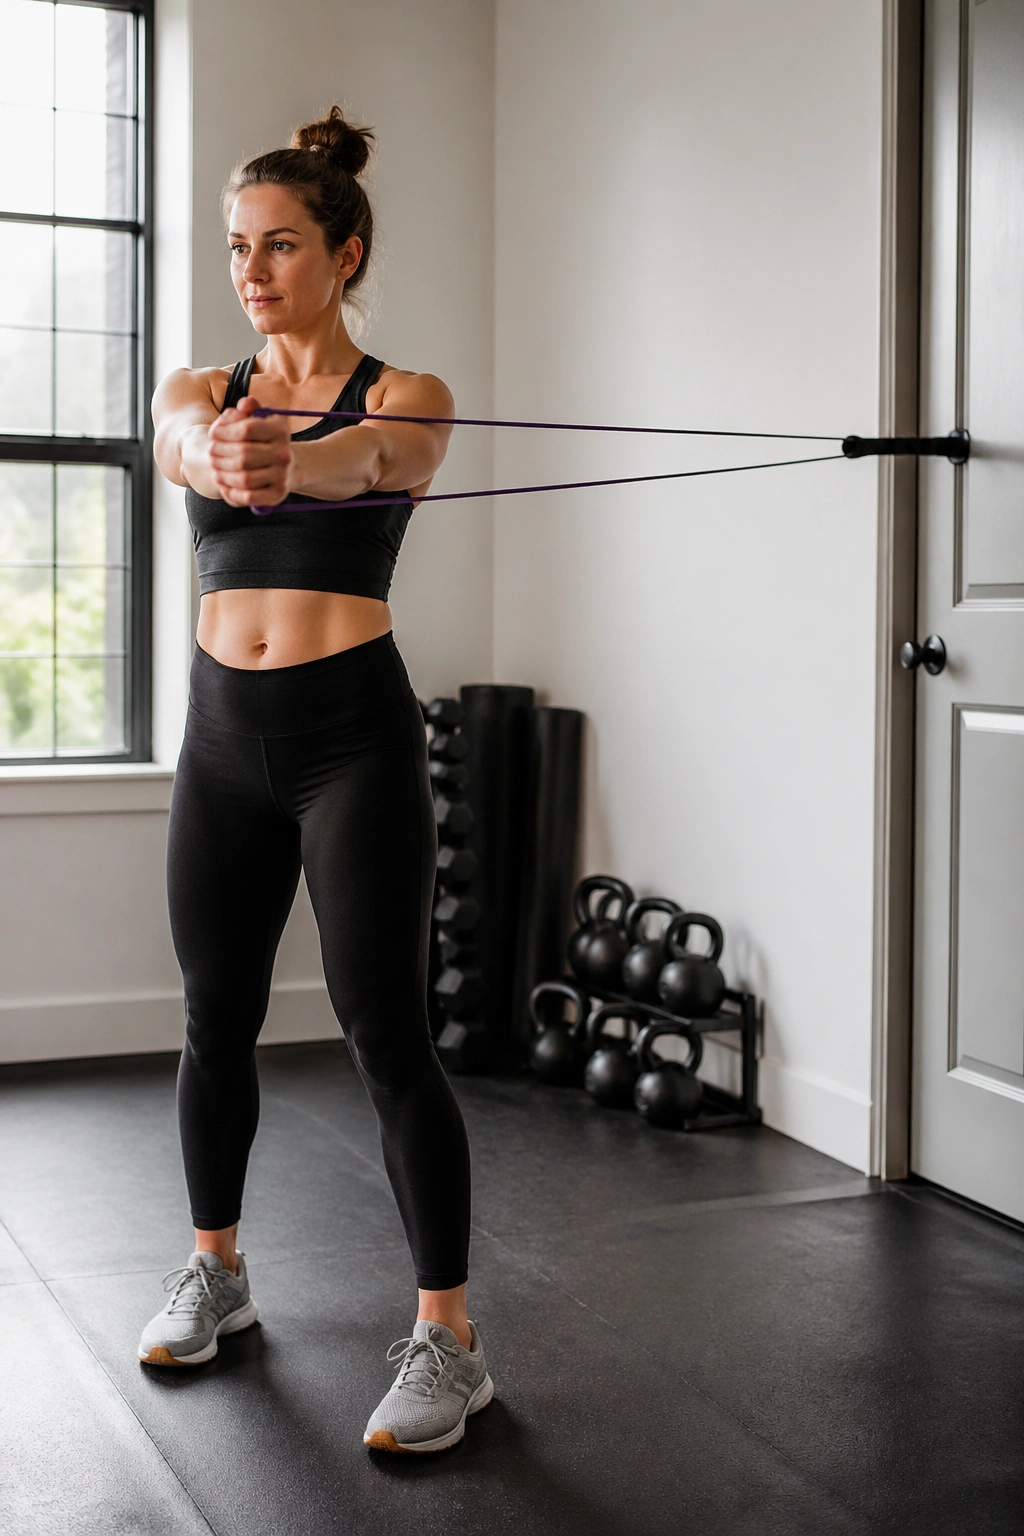
Core training is not always about flexing forward. Sometimes it’s about refusing to twist.
Attach a light resistance band at chest height. Stand sideways to the anchor point with feet hip-width apart. Hold the band at your chest, exhale, and press it straight out in front of you without letting the torso rotate. Bring it back in slowly. Switch sides.
This move works the obliques and deep core in a quiet way. It’s one of the cleaner post C-section ab workouts once floor drills feel easy.
You’ll know it’s too heavy if your shoulders hike up or your body leans into the band. Step closer to the anchor point and cut the tension before you chase strength.
Simple Form Rules
- Knees soft, not locked.
- Ribs stacked over hips.
- Hands press straight out.
- Breathing stays steady.
Do 8 to 10 presses per side for 2 sets. Some people like a half-kneeling version later on, but standing is often the friendlier start because it feels more like daily life.
Pallof presses are a good reminder that a strong core is not just about flexing. It’s about not getting pulled around by outside force. That’s a useful skill when you’re carrying laundry, a diaper bag, or a baby who has decided that one shoulder is the only acceptable place to be.
12. Modified Side Plank From the Knees
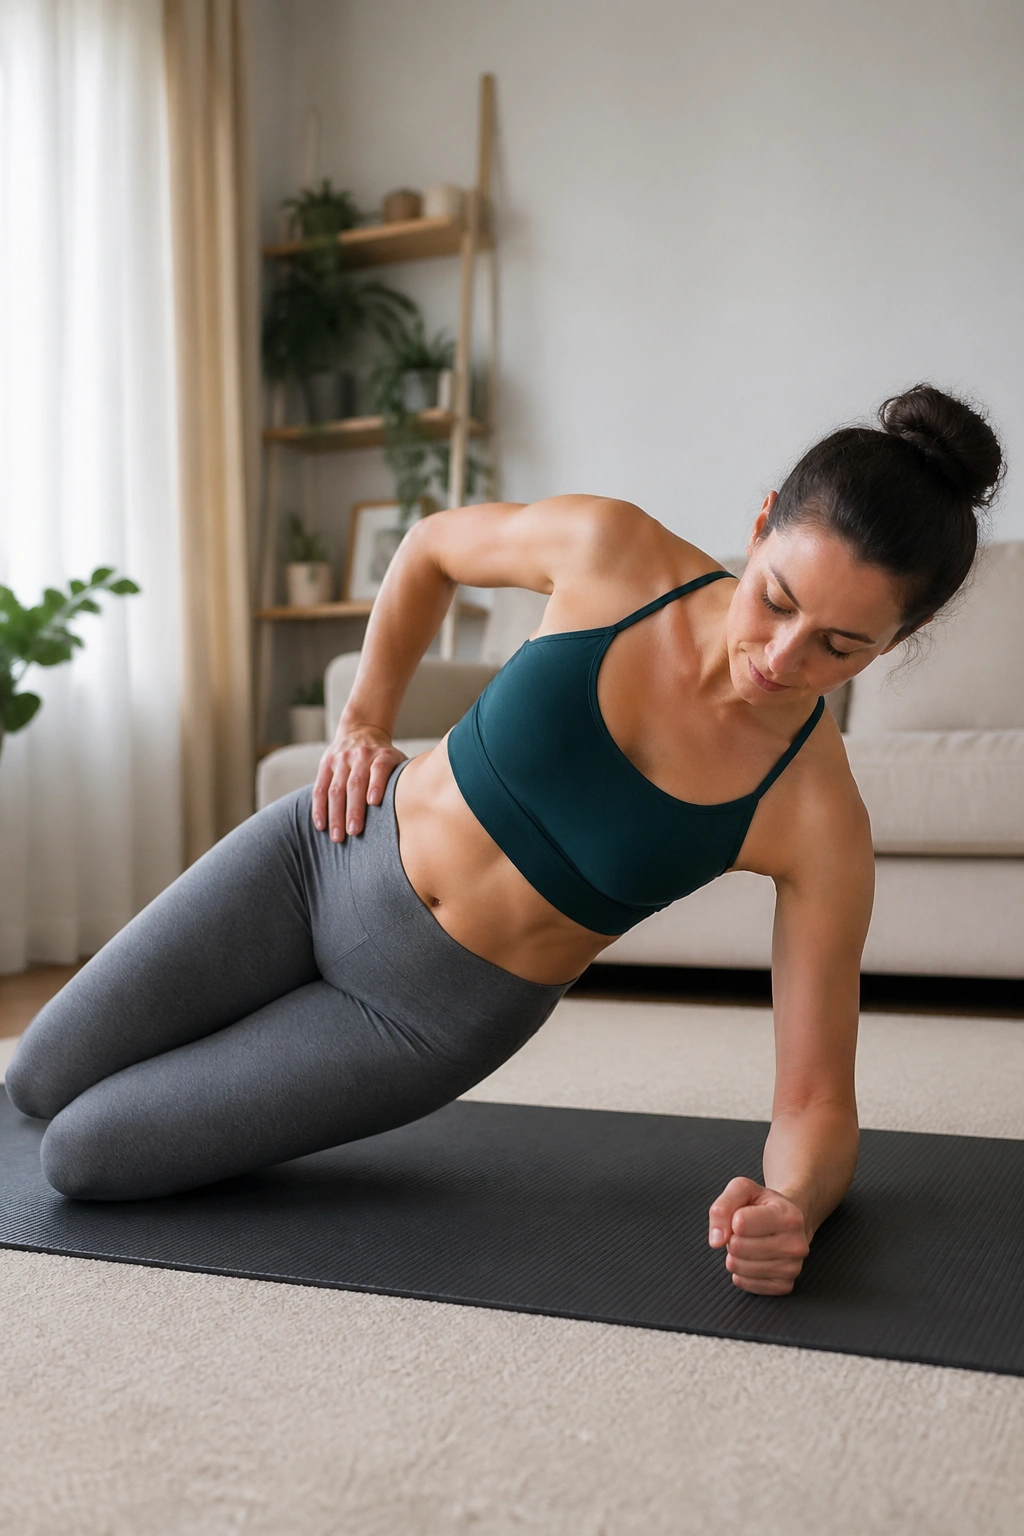
Side planks are not an early move. I’ll say that plainly. But the knee-supported version can be a useful later step when floor work feels easy and the body wants a bigger challenge.
Set up on one forearm with knees bent and stacked. Lift the hips a few inches so the body makes a straight line from shoulder to knee. Hold for 5 to 10 seconds, lower, then rest. Keep the top shoulder from rolling forward and the waist from collapsing.
If the scar area feels tight, don’t force this one. A shorter hold or a higher hand position is better than grinding through a shape the body doesn’t like yet.
Keep the Range Honest
- Hips lift only as high as control allows.
- The neck stays in line with the spine.
- The lower waist does not sag.
- Breath keeps moving.
Start with 3 to 5 holds per side. That may sound tiny. It isn’t. A few clean seconds done well will beat a shaky 30-second hold every time.
There’s a reason I put this later in the list. Side support matters a lot after a C-section, but so does timing. Get greedy too soon and the body will tell you off in the language of pulling, bracing, or doming.
13. Suitcase Carries With a Light Dumbbell
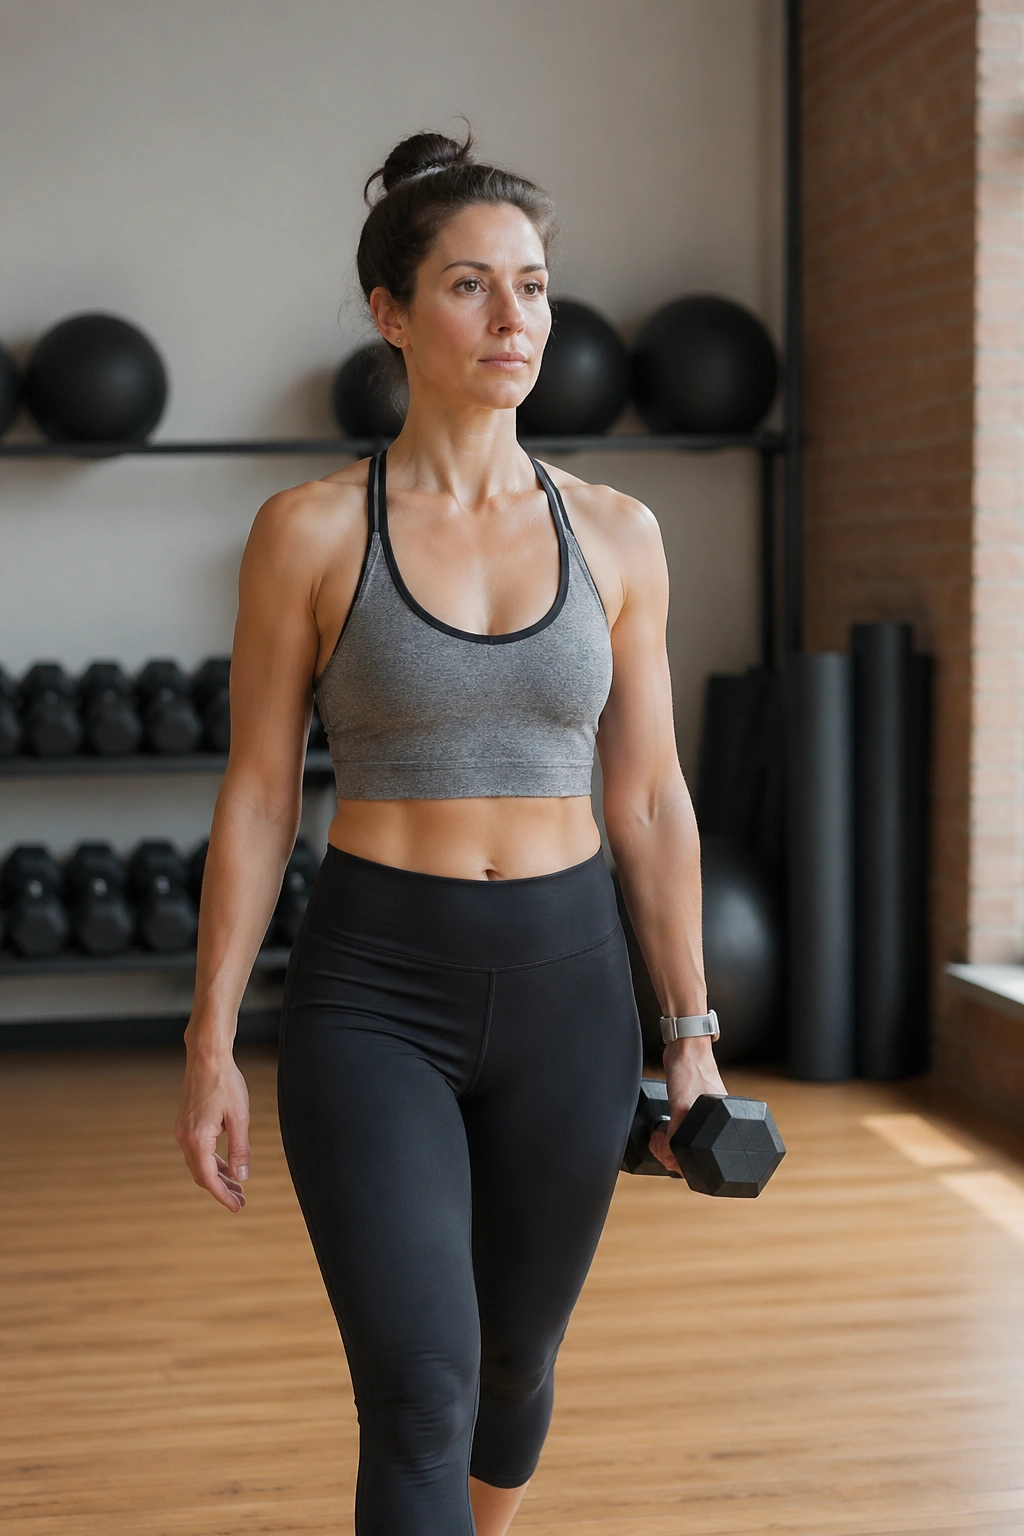
One grocery bag in one hand will tell you more about your core than a hundred sloppy crunches. Suitcase carries are that simple and that useful.
Pick up a light dumbbell, kettlebell, or even a heavy bag of rice. Hold it in one hand, stand tall, and walk slowly for 20 to 40 seconds. Don’t let the weight yank you sideways. Don’t lean away from it. Keep the rib cage stacked over the pelvis and the chin relaxed.
This drill hits the obliques, the deep stabilizers, and the glutes in a way that feels very close to real life. That makes it one of the better later-stage core moves after abdominal surgery.
Good Carry Cues
- Shoulder stays down.
- No side bending.
- Steps stay smooth and even.
- Exhale every few steps if needed.
Do 3 rounds per side with a very light load at first. If you can’t walk without hiking the loaded shoulder or gripping your jaw, the weight is too heavy.
Carries are also sneaky in a good way. You think you’re just walking. Then halfway through, you realize your trunk is doing a ton of work to keep you upright. That’s the kind of work that matters in recovery.
14. Incline Plank Holds at a Countertop
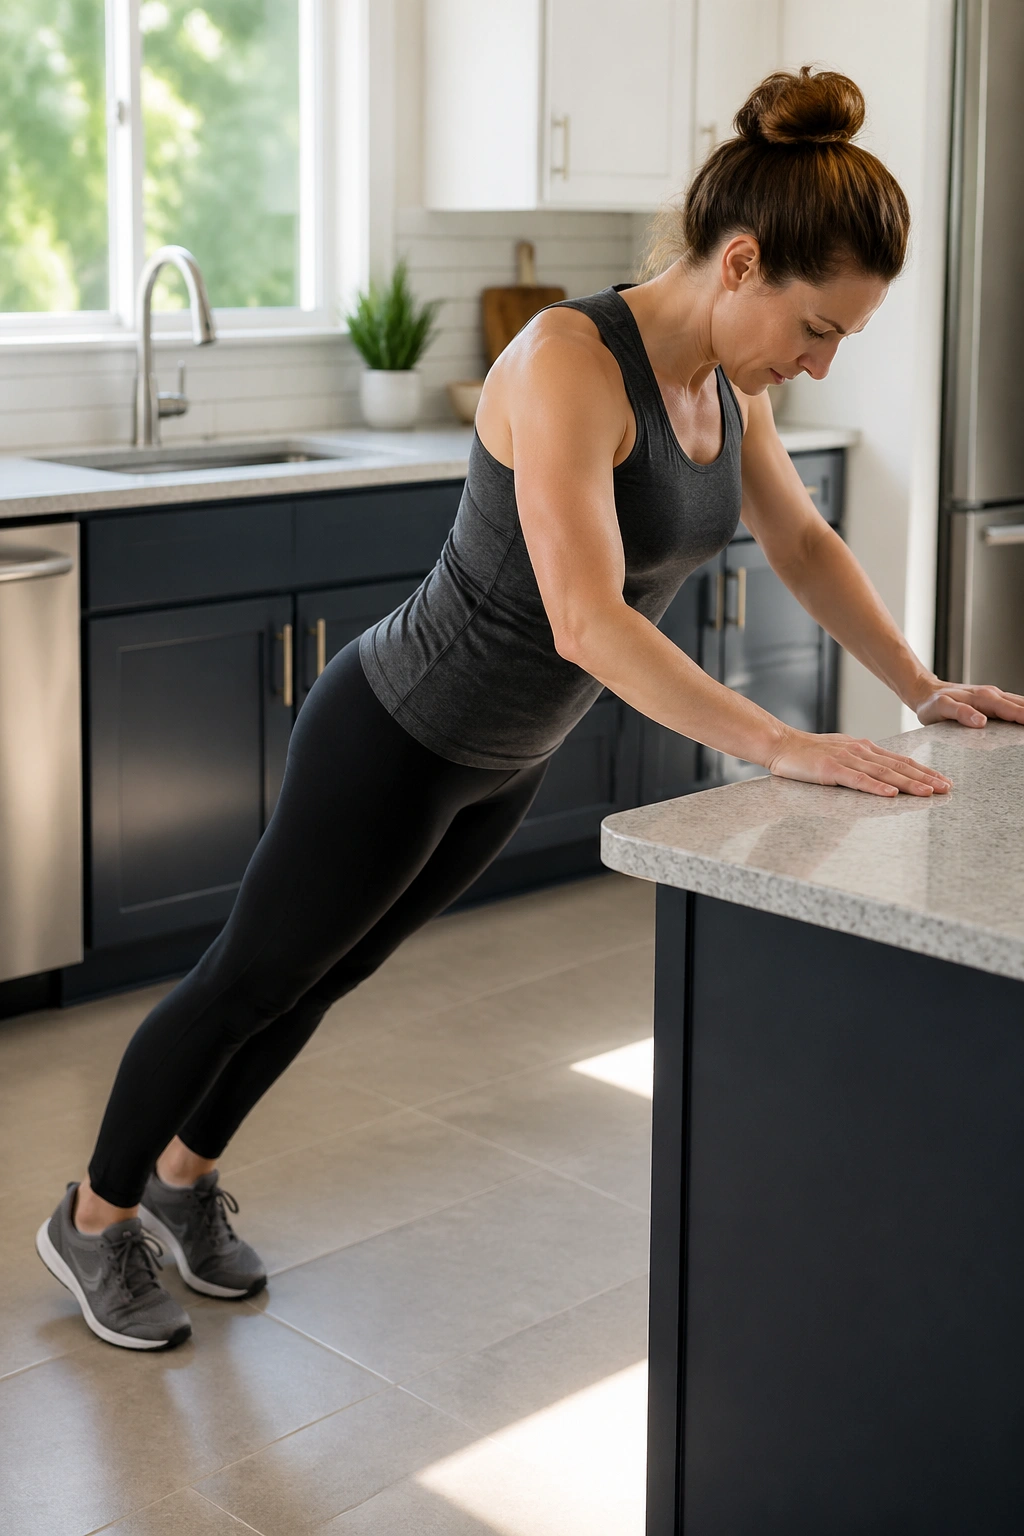
Ready for a true plank? Not flat on the floor yet. A countertop or sturdy bench is the wiser start.
Place your hands on the edge, walk your feet back, and make a long line from head to heels. Hold for 10 to 20 seconds while breathing steadily. The belly should stay flat, the shoulders should stay away from the ears, and the low back should not sag.
If you see doming along the midline, stop. Raise the surface higher or return to wall presses and carries for a while longer.
A Safer Plank Checklist
- Hands are under or slightly in front of shoulders.
- Glutes are lightly on.
- Ribs stay tucked.
- Breath does not freeze.
Do 3 to 5 holds with enough rest to feel calm again between rounds. A plank is only useful if you can keep shape while breathing. Once you can’t do that, you’re practicing strain, not strength.
This move often shows up as the moment people realize recovery has turned a corner. Not because it’s flashy. Because it asks for full-body control, and the body finally answers back without drama.
15. Countertop Plank Shoulder Taps
When the hold feels boring, taps make it honest. Shoulder taps add a little anti-rotation challenge, which is why they belong near the end of a recovery ladder, not the beginning.
Set up in the same incline plank position. Keep feet wider than hip-width at first. Lift one hand to tap the opposite shoulder, then set it down and switch sides. Move slowly enough that the hips barely shift.
If your belly domes or your lower back drops, the move is too ambitious. Go back to a plain incline plank or widen the feet more. The point is staying steady while one arm moves.
How to Make It Work
- Keep the tap small.
- Let the feet stay wide.
- Exhale before each reach.
- Stop before the torso starts twisting.
Try 5 taps per side for 2 sets. That’s enough to feel the challenge without turning the whole thing into a balancing mess.
This is a good place to end because it shows the shape of recovery in one move: the body stays stable, the breath keeps moving, and the scar stops being the center of every decision. Keep one breath drill, one floor drill, and one standing drill in your week, and the whole thing usually feels more manageable than chasing harder moves every session.
