



A belly that domes during a simple move is not a badge of effort. It’s a sign the pressure inside your torso is going the wrong way, and during pregnancy that matters more than most gym advice wants to admit.
Crunches are not the answer.
Diastasis recti exercises while pregnant are really pressure-management drills. The goal is to keep the linea alba — the sheet of tissue running down the middle of the abdomen — from getting hammered every time you breathe, stand up, reach for a shelf, or roll out of bed. When the ribs stay stacked over the pelvis and the exhale does some of the heavy lifting, the belly usually feels steadier and the lower back stops doing all the work.
I like starting with breathing because it tells you what your body is doing before you add load. Then comes floor work, then standing control, then a few stronger moves that still respect the bump. That order matters.
If an exercise causes pain, bleeding, dizziness, fluid leakage, pelvic heaviness, or a sharp cone-shaped bulge down the center of your belly, stop and check in with your obstetric clinician or a pelvic floor physical therapist. Gentle work should feel controlled, not dramatic. Start there.
1. 360 Breathing for Diastasis Recti Support
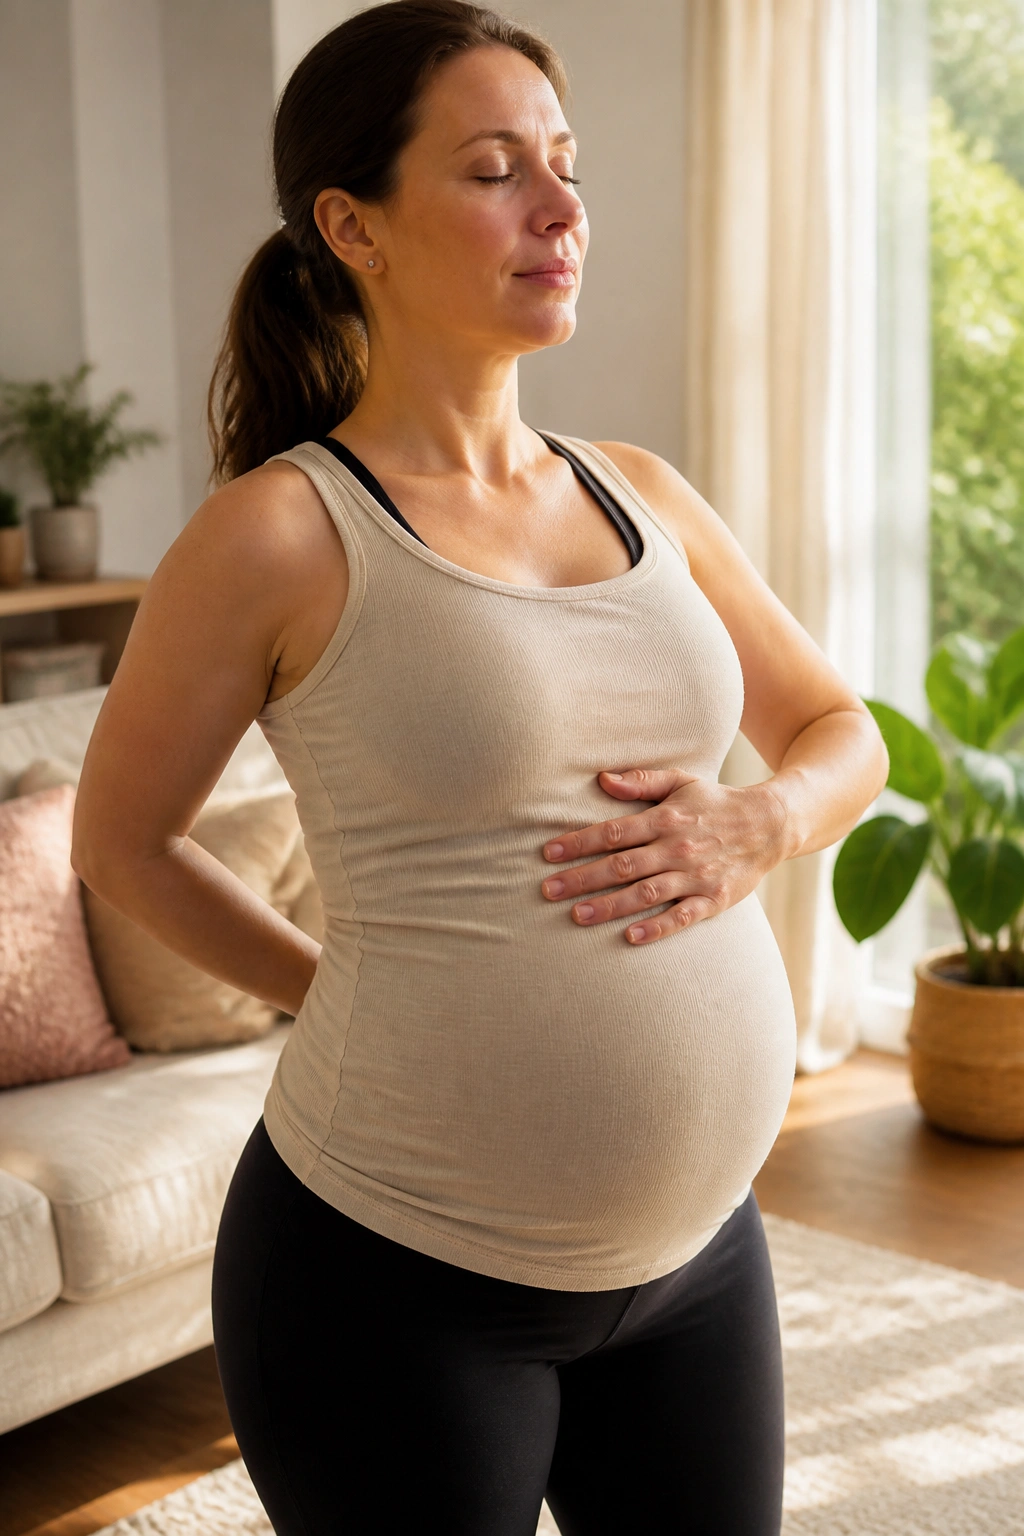
This is the one I’d put at the top of the list every single time. If your breathing is shallow, everything else gets harder. A good 360 breath helps the ribs expand into the sides and back, which gives the abdomen room instead of pressing everything forward.
Lie on your side, sit tall in a chair, or stand with one hand on your lower ribs. Inhale through your nose and try to feel the breath widen around your torso — front, sides, and back. Then exhale through pursed lips as if you were fogging a mirror, letting the ribs soften down and the lower belly narrow a little. No sucking in. No brute force.
What to feel
- The lower ribs should move, not just the chest.
- Your shoulders should stay quiet.
- The belly should soften on the inhale, then gently draw in on the exhale.
- A tiny lift in the pelvic floor is fine. A hard squeeze is not.
Do 5 slow breaths, rest, and repeat once or twice. If you see doming while breathing, you’re trying too hard. Back off and make the exhale lighter.
2. Pelvic Floor Drop, Lift, and Release

Can you train the core without clenching it all day? Yes, and this is where you start. A lot of pregnant people brace like they’re about to get hit, then wonder why their stomach feels tight, tired, and oddly disconnected. The pelvic floor and diaphragm work like a pair. If one is jammed, the other never gets to do its job.
Breathe in and let the pelvic floor soften. That “drop” is subtle, almost like releasing tension you didn’t notice you were holding. On the exhale, imagine a gentle lift inside the pelvis, the kind you could hold for a few seconds without strain. This is not a max-effort Kegel contest. Please don’t make it one.
Do 6 breath cycles. Then pause and check your face, jaw, and shoulders. If those areas are clenched, the exercise has turned into a nervous-system event instead of a useful core drill.
A good version feels tidy. A bad version feels like gripping.
3. Wall Press and Diastasis Recti Belly Brace
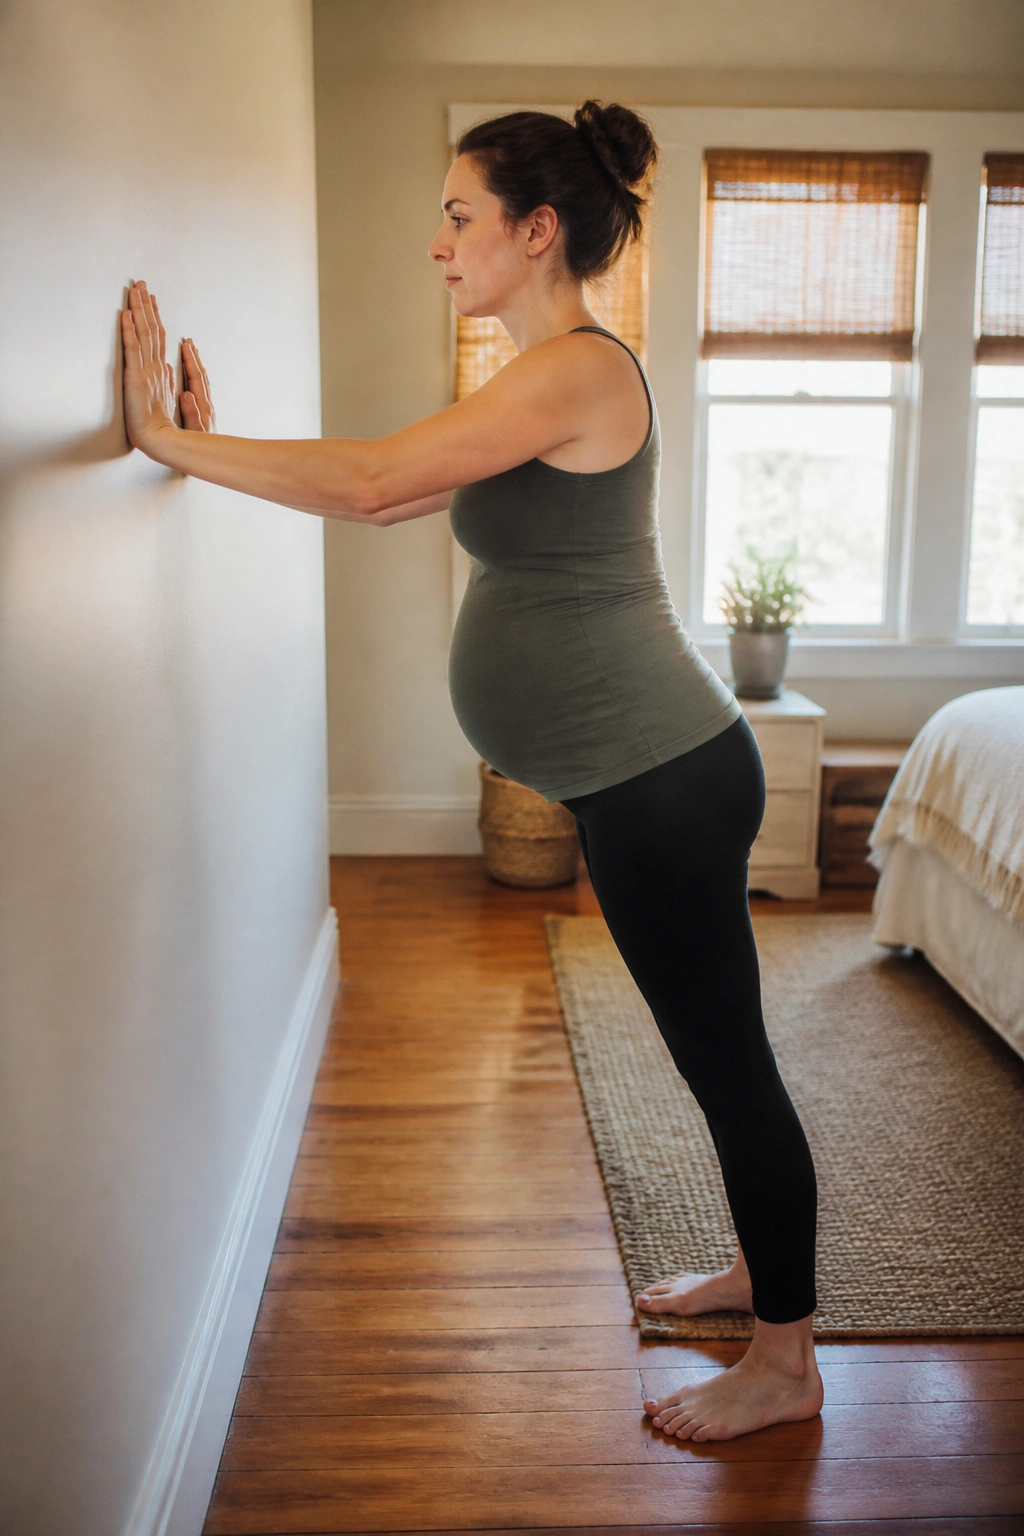
The wall is underrated. It gives your body something stable to press into, which makes it easier to find abdominal support without overdoing it. For a lot of pregnant bodies, this is the cleanest way to practice a core brace because gravity is doing half the teaching for you.
Stand a foot or so from a wall, place your forearms on it at chest height, and exhale as you gently press the wall away. Think of the lower ribs settling down and the belly narrowing just enough to keep the midline quiet. You should feel effort in the upper back, the sides of the trunk, and maybe the deep lower belly.
What to watch for
- The belly ridge should not pop forward.
- Your low back should not arch to “help.”
- The neck should stay long.
- The pressure should feel even, not jammed.
Try 5 presses, holding each for 2 to 3 seconds. If the move feels sloppy, bring your feet a little closer to the wall and reduce the pressure. Less force often gives you a better core response.
4. Quadruped Rock-Backs
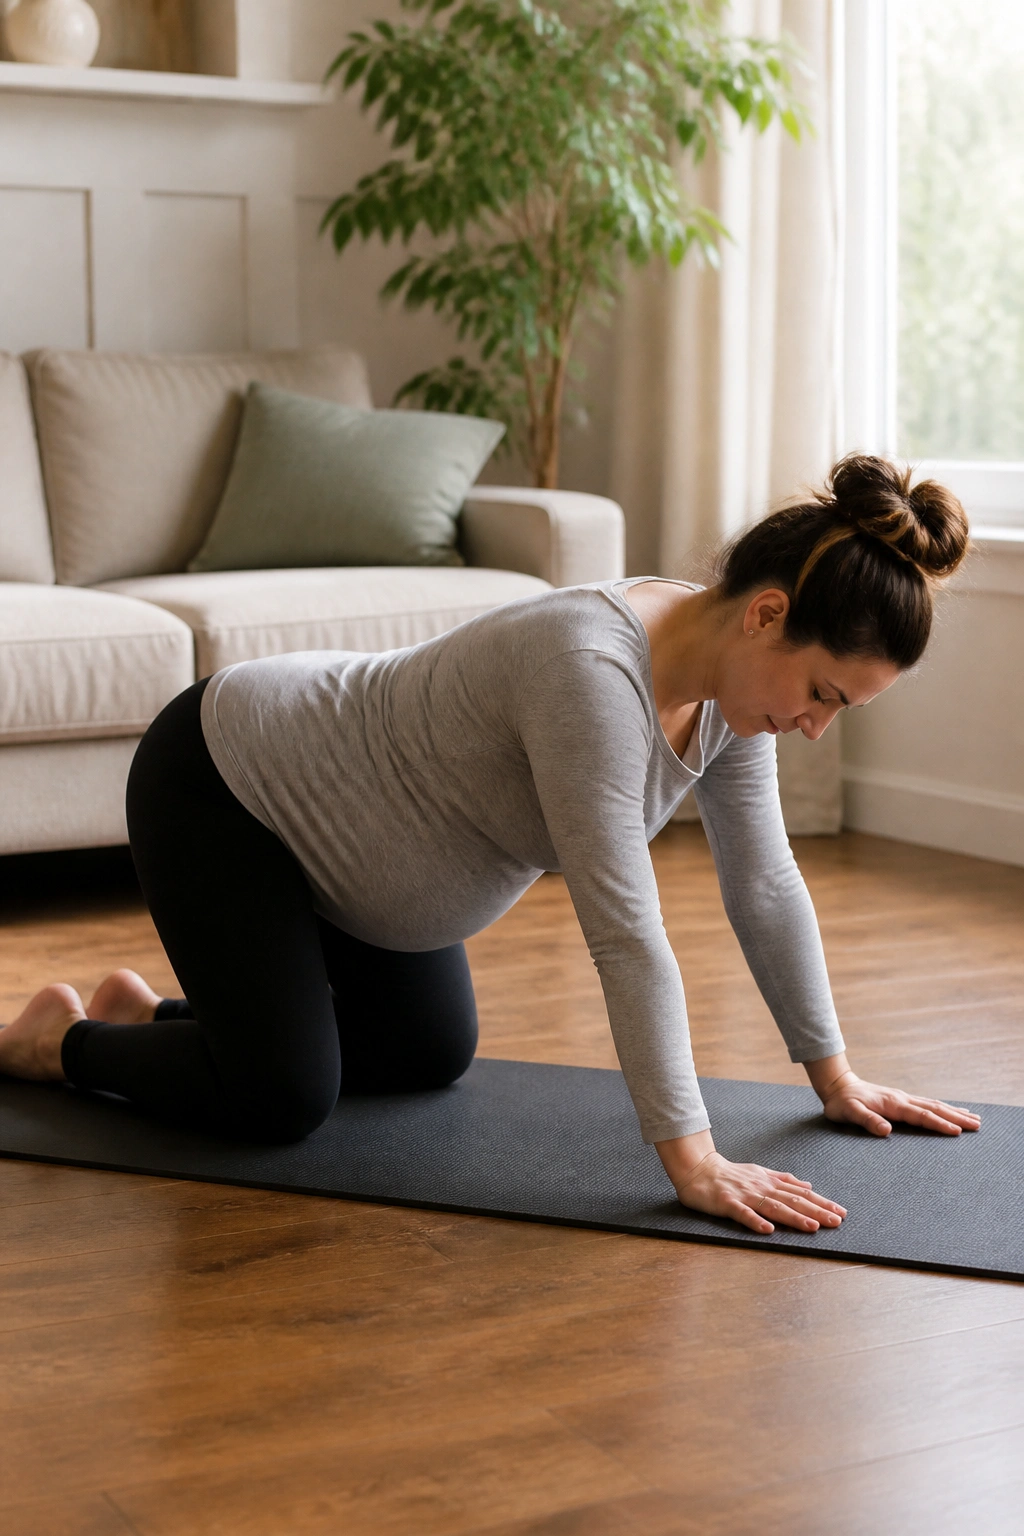
On hands and knees, the belly has space to hang without being squeezed by the floor or by your own bracing. That alone makes quadruped work a favorite of mine for pregnancy. It feels simple. It is simple. And simple is often what works.
Start on all fours with wrists under shoulders and knees under hips. Inhale to lengthen your spine, then exhale as you rock your hips back toward your heels only as far as feels easy. You’re not folding into a child’s pose. You’re just teaching the torso to move without pressure spikes. Come forward on the next inhale.
Small details that matter
- Keep the elbows soft.
- Spread the fingers wide.
- Let the back stay long instead of rounding hard.
- Stop before the belly feels stretched or heavy.
Do 8 slow rock-backs. If your wrists complain, put your hands on yoga blocks or fists. If your knees hate the floor, double up the mat. Tiny fixes. Big difference.
5. Cat-Cow With a Long Exhale
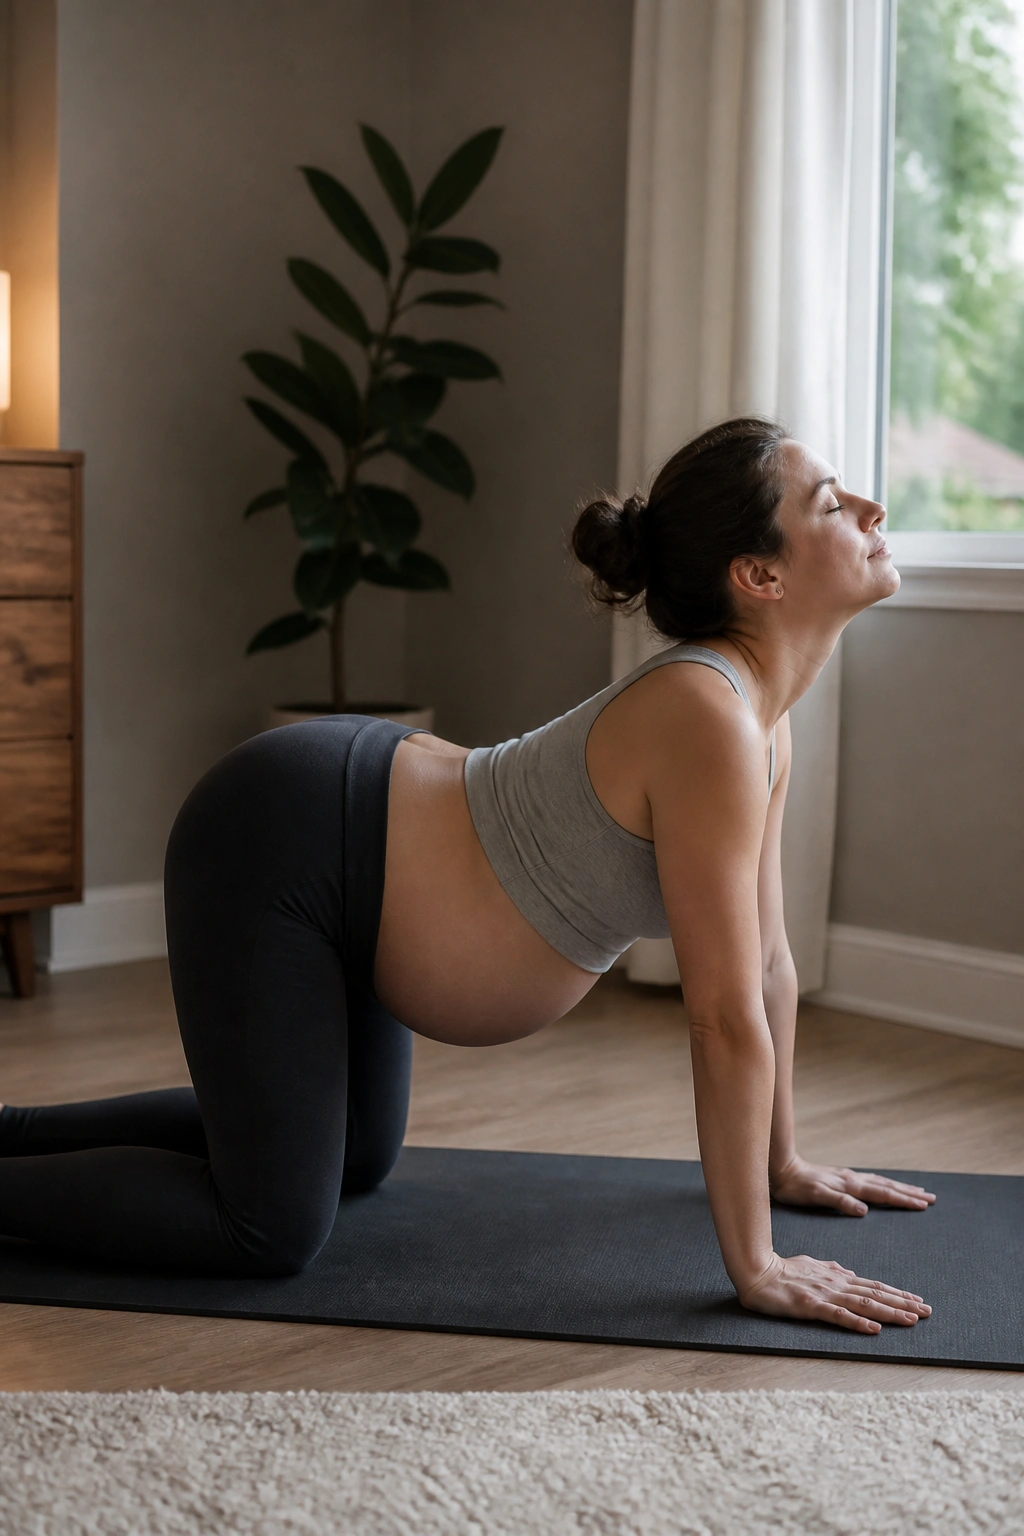
The sound this exercise makes in a quiet room is half the point. You breathe, you move, and the whole torso starts to act like one connected shape again. But keep the range modest. Pregnant cat-cow is not a performance.
Come to hands and knees. Inhale as you gently tip the chest forward and let the pelvis tilt in a comfortable direction. Exhale as you round the spine a little, knitting the lower ribs down and drawing the belly in just enough to stay smooth through the middle. The motion should come from the spine, not a hard abdominal squeeze.
How to keep it useful
- Move slowly enough that you can count to three on each phase.
- Keep your head in line with your neck.
- Avoid collapsing into the shoulders.
- Use the exhale to control the return, not to force a crunch.
Six rounds is usually plenty. If you feel pressure in the front of the belly, shorten the movement. Small cat-cows beat big, flashy ones every time.
6. Heel Slides on the Floor
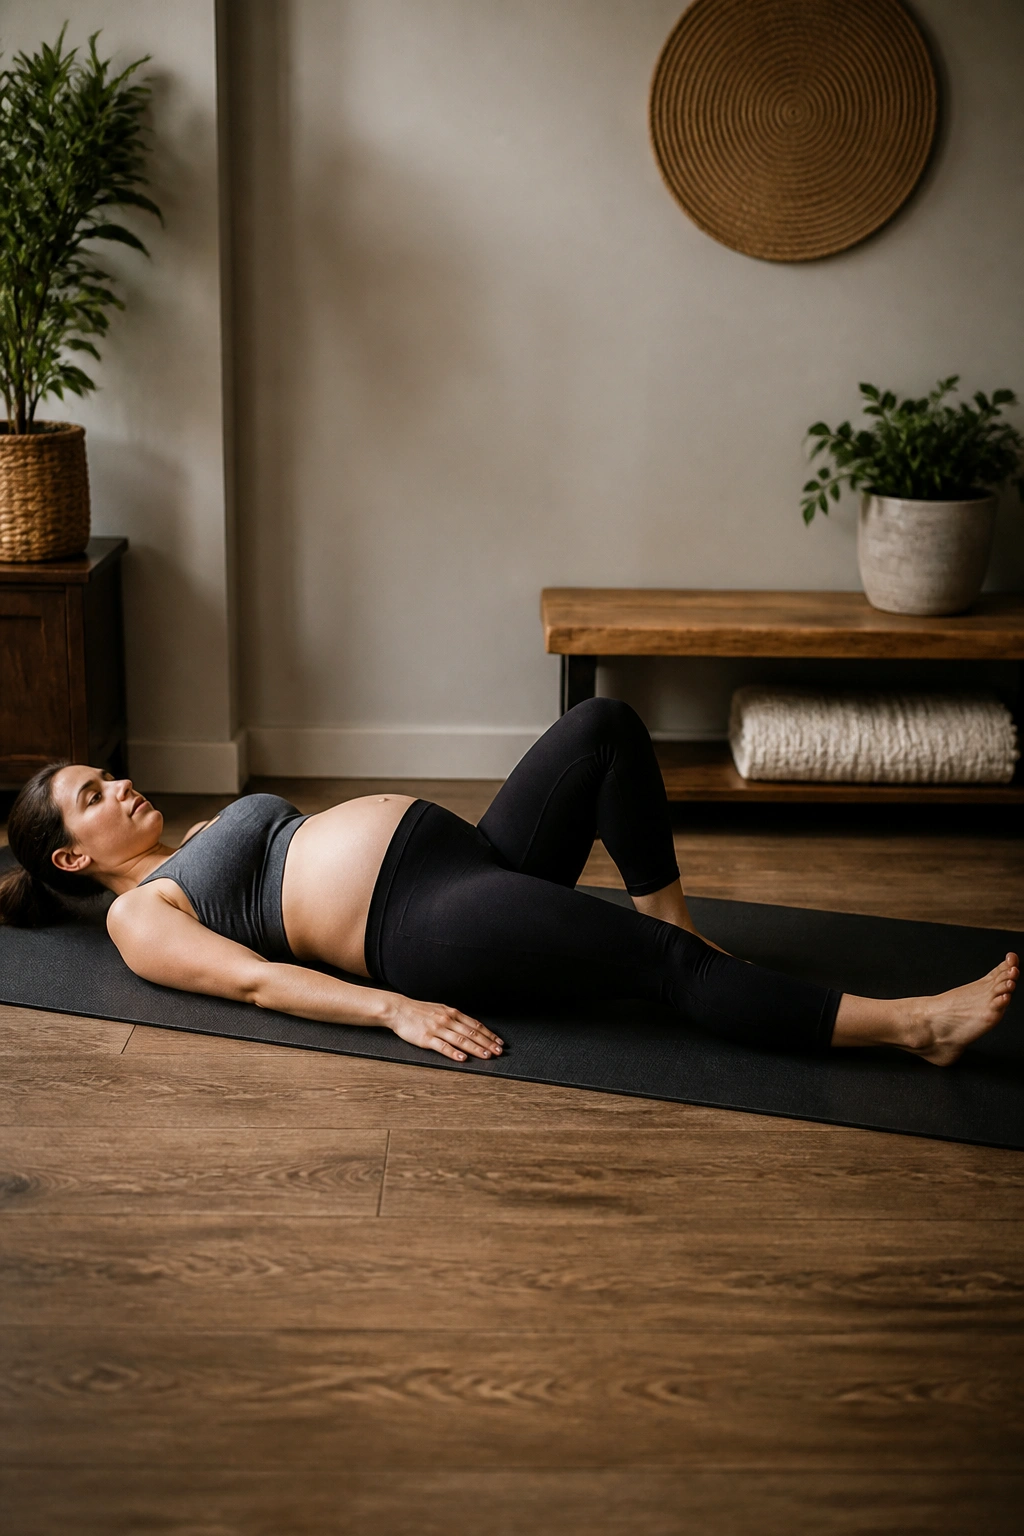
Heel slides look almost too easy, which is exactly why people rush them and turn them into a mess. Done well, they teach the lower abdomen to stay quiet while one leg moves. That skill matters when you’re walking, stepping into the tub, or turning in bed.
Lie on your back only if it feels fine and your clinician has not told you to avoid that position. One knee stays bent, the other heel slowly slides away along the floor or mat. Exhale as the leg extends, then inhale as you slide it back. Keep the pelvis level and the ribs soft.
If lying flat bugs your back or makes you short of breath, do this on a slight incline with pillows or skip to a standing drill.
Use 6 to 8 reps per side. The belly should stay broad and quiet. If it domes, reduce the range or slide the heel only halfway out.
7. Bent-Knee Fallouts
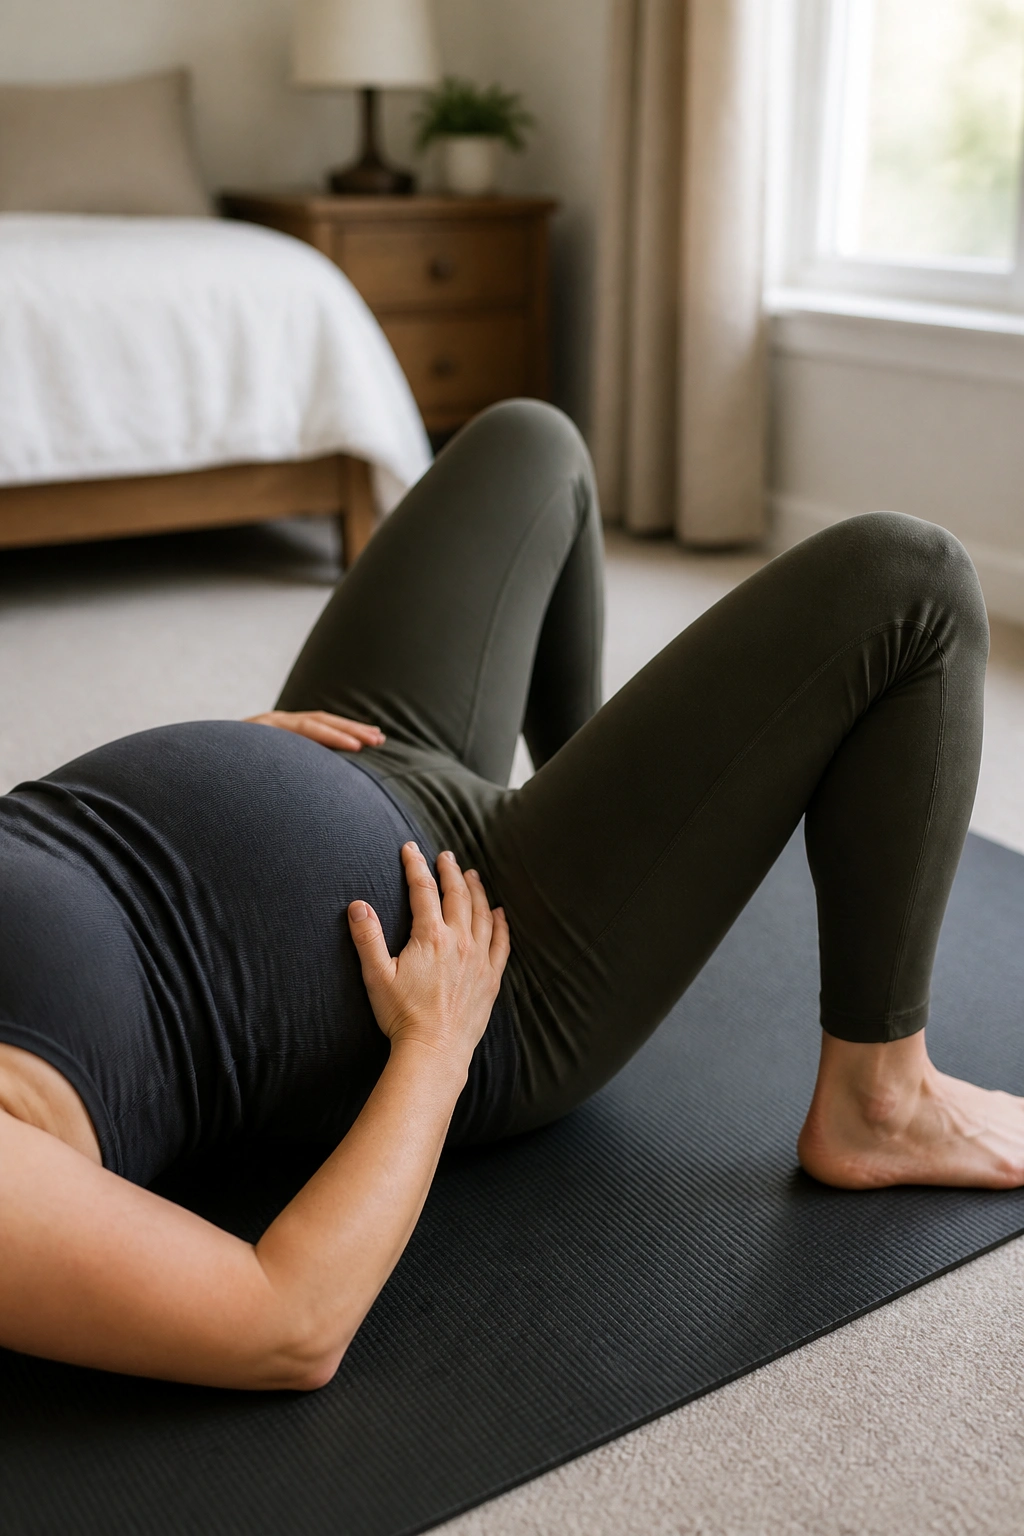
This is a tiny movement with a very specific job: keep the pelvis still while one knee opens out to the side. It sounds easy until the trunk starts twisting like it wants to help. That’s the part you want to catch.
Lie with knees bent, feet flat, and ribs relaxed. On the exhale, let one knee open outward a few inches, then bring it back in on the inhale. The opposite hip should stay steady. No rolling. No rib flare. No sudden shove from the low back.
A pillow under the head can make the setup nicer. So can a folded towel under the knees if your hips feel tight. The goal is control, not depth.
Do 8 reps per side. If the inner thigh or pubic area feels cranky, shorten the range immediately. This move should feel like coordination practice, not stretching your pelvis apart.
8. Bird Dog Arm Reaches
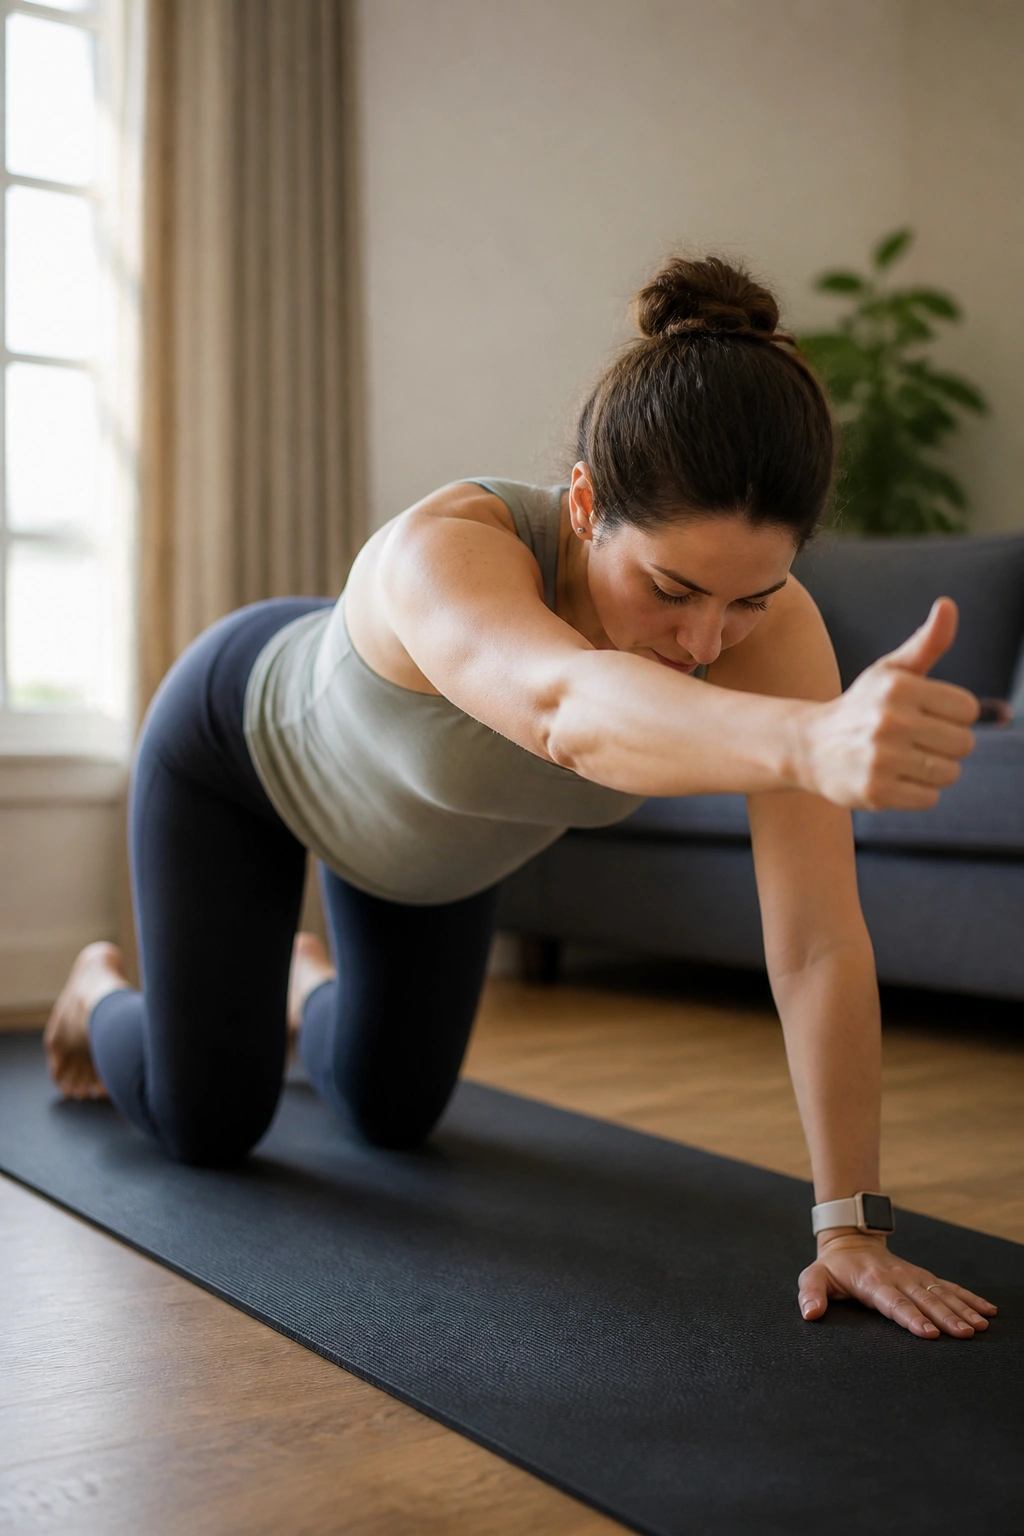
What if you want core work but don’t want a move that feels like core work? Bird dog arm reaches are a good answer. They train the trunk to resist wobble while one arm moves, which is a very pregnant-belly-friendly skill.
Get on hands and knees. Exhale and reach one arm straight forward, thumb up, without shifting your ribs or dumping weight into the opposite side. Reach only as far as you can keep your spine quiet. Bring the hand back on the next breath. If that feels easy, add a tiny pause at the end range.
A few useful checks
- Keep the chin tucked slightly.
- Don’t let the shoulder creep up.
- Keep your weight centered between both knees and both hands.
- Use a wall version if the floor feels awkward.
Six reps per side is enough for most people. Speed ruins this one. If you rush, the belly and low back start taking over.
9. Bird Dog Leg Reaches
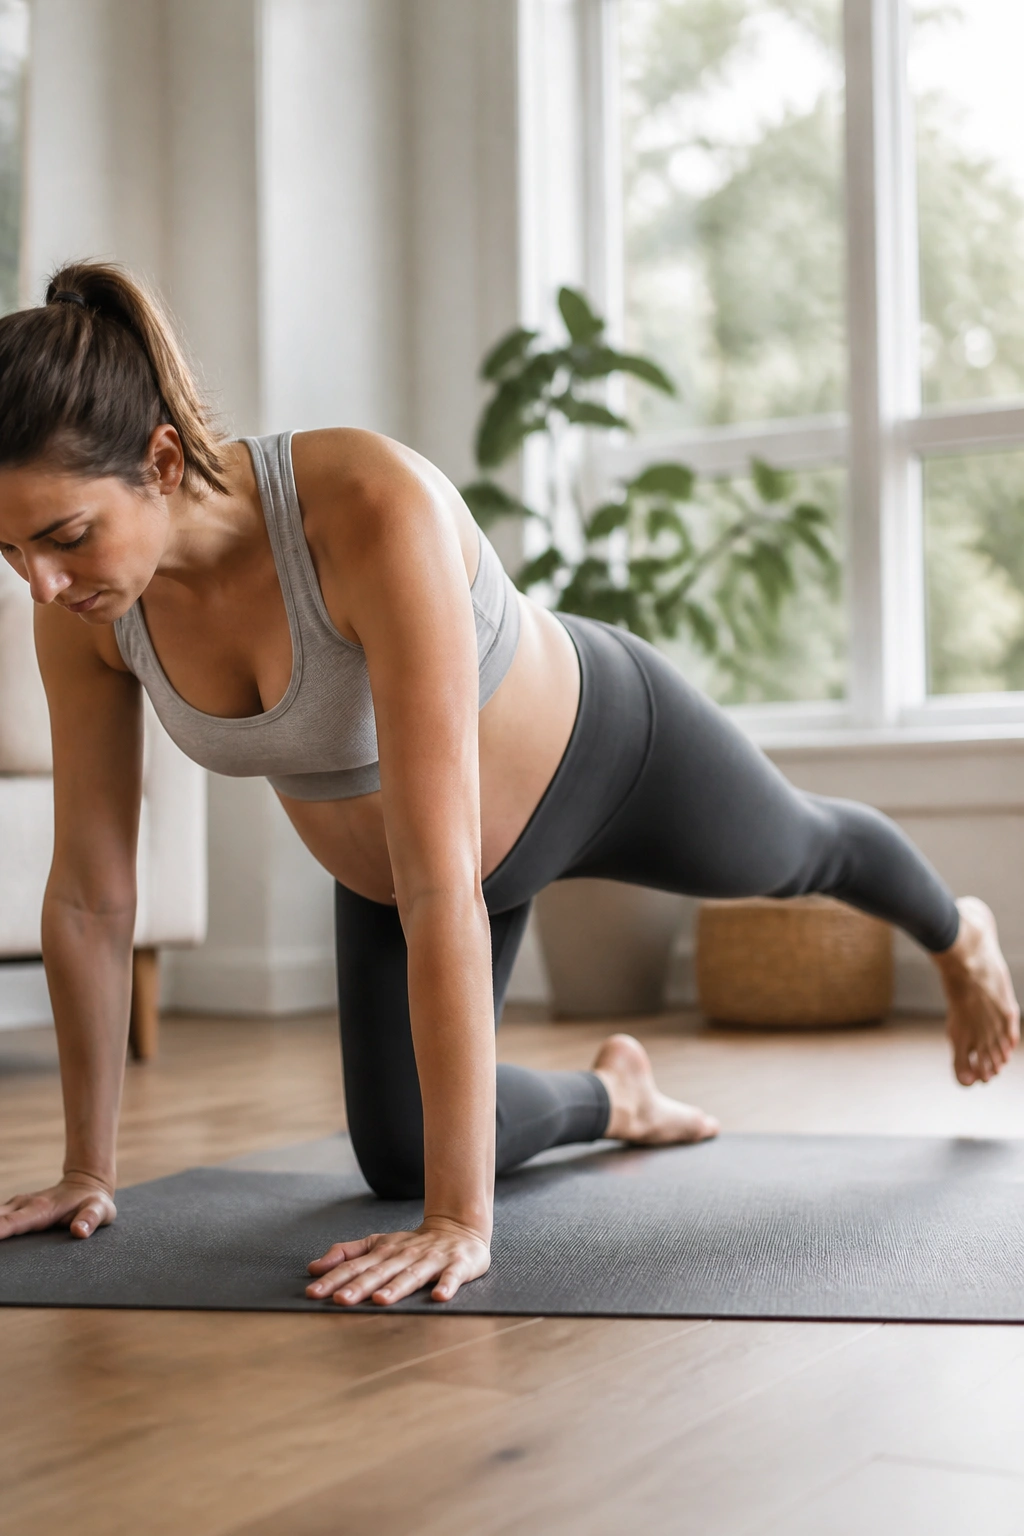
This is the sister move to the last one, and I prefer it as a slide before a lift. A lot of people jump straight to lifting the leg and lose their pelvis in the process. A toe slide keeps things cleaner.
From hands and knees, extend one leg back with the toes touching the floor or mat first. Exhale as the leg reaches long, then either keep the toe down or lift the leg only an inch or two if the trunk stays steady. Bring it back in slowly. The best version looks almost boring. Good.
If the belly tents, the low back arches, or the standing knee feels weird, stay with the toe slide. That is not a downgrade. It’s the right version for that day.
Try 6 reps per side. You should feel the glute on the moving side, some work in the side of the trunk, and not much else. No twisting. No rushing.
10. Wall Push-Aways
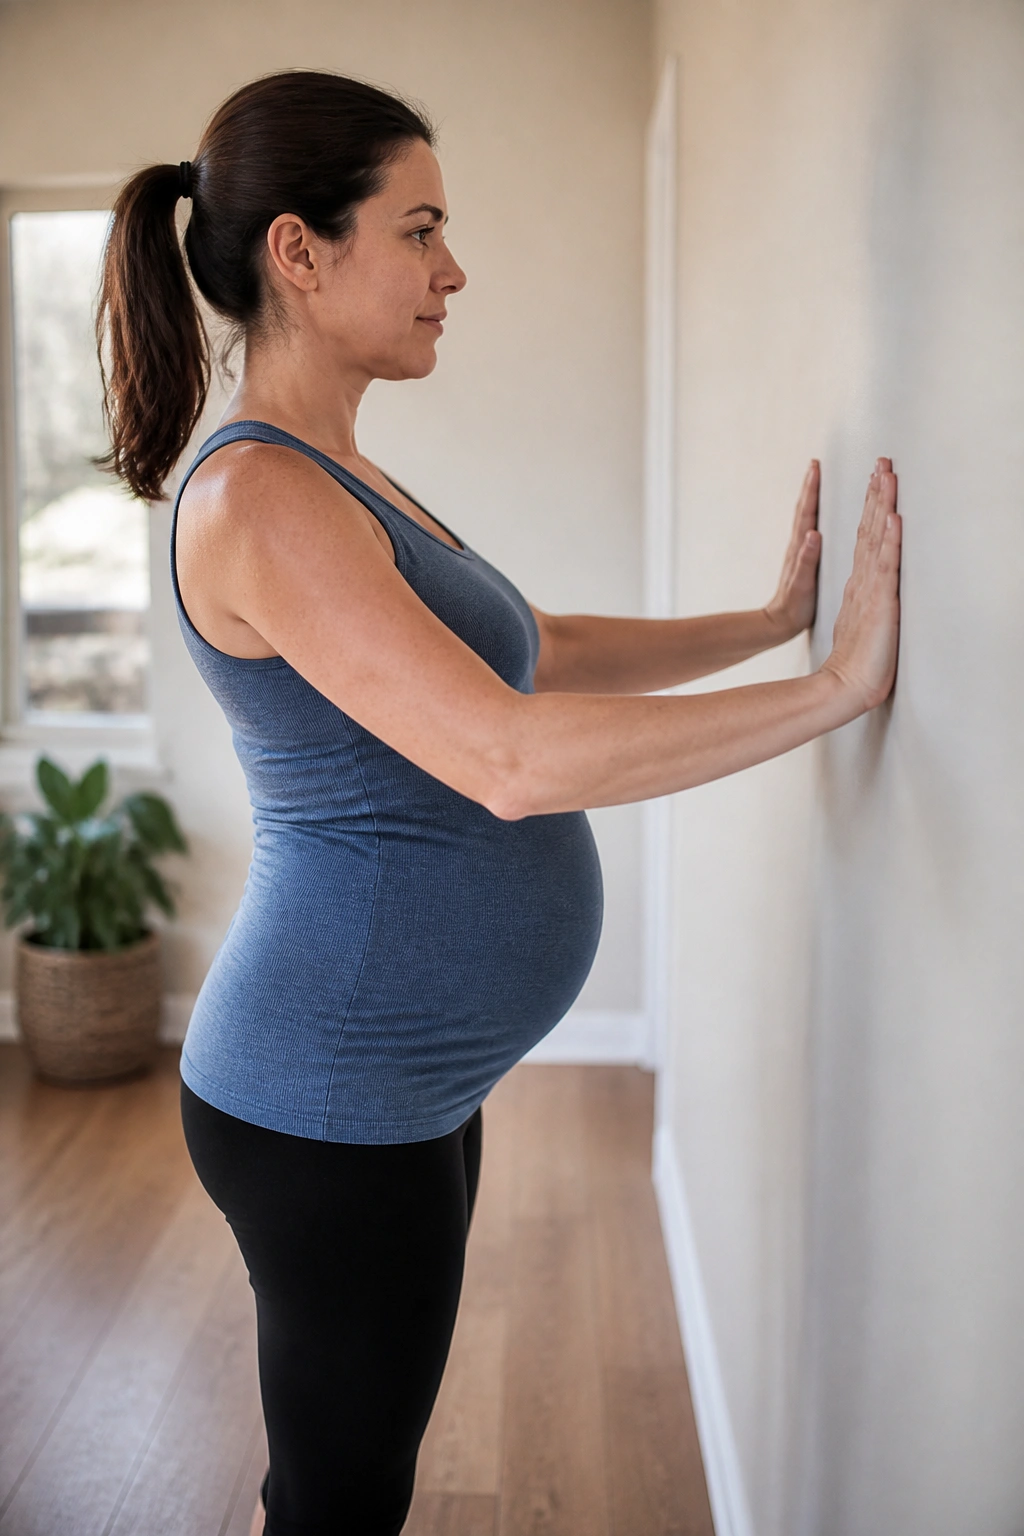
Here’s a move that feels small and still pays rent. Standing push-away drills teach the upper body to support the ribs, which helps keep the belly from popping forward every time you reach, carry, or lean.
Stand facing a wall with hands at chest height. Exhale and press into the wall as if you’re pushing the room away from you, but keep your elbows soft and your shoulders down. The ribs should stay stacked over the pelvis. Think “tall and steady,” not “hard and locked.”
A few people love to over-brace here and flatten everything. Don’t. You want pressure control, not an abdominal plank disguised as standing.
Do 8 gentle presses. Hold each one for 2 seconds. If the wall is too close, step back a few inches. If your belly domes, reduce the push by half. That’s usually enough to clean it up.
11. Standing Marches With Tall Posture
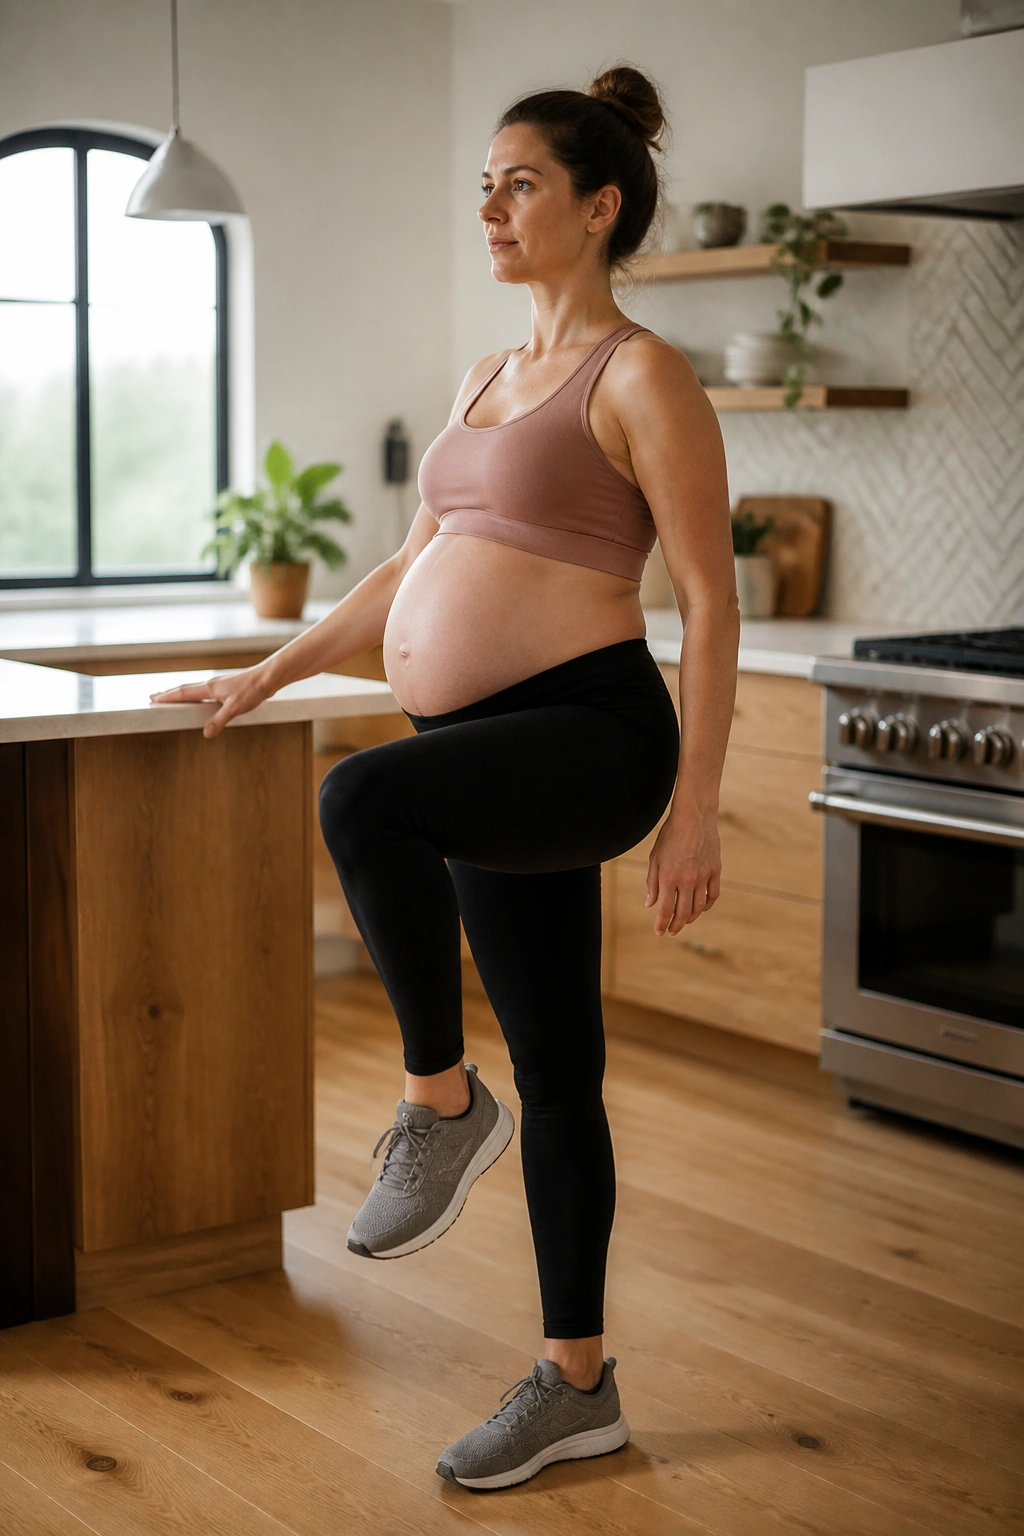
You can learn a lot about core control from a single marching knee. If the body tips, leans, or breath-holds every time one foot leaves the floor, the trunk still needs some practice.
Stand near a counter for balance. On the exhale, lift one knee a few inches, keep the ribs stacked, and lower with control. Switch sides. The pelvis should stay level. The torso should look almost unchanged from the front. That quietness is the whole point.
This one has real-life carryover. Walking up stairs, stepping over a curb, getting in and out of the car — all of that gets easier when marching is clean.
Ten reps per side works well. If you feel yourself leaning back or grabbing your hip flexors, lift the knee lower and slow the tempo down. Tiny knee lifts are not cheating. They’re smarter.
12. Sit-to-Stand With Breath Timing
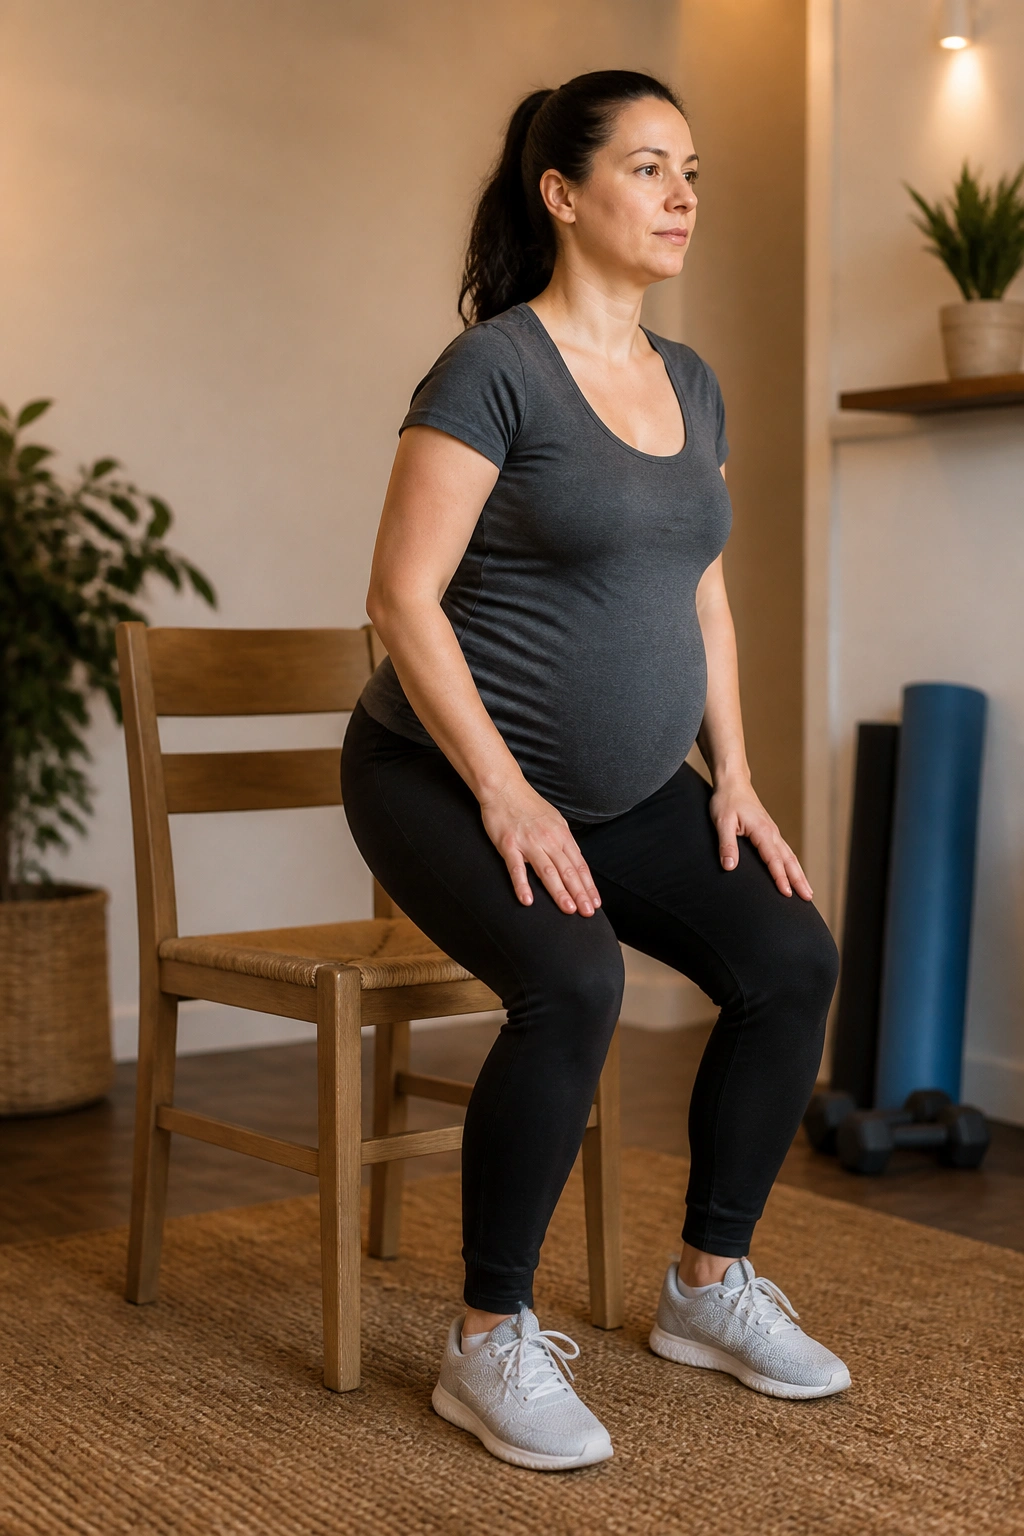
A chair turns core training into something you can actually use. Standing up from a seat without flinging the torso around is a daily skill, not a gym trick, and pregnancy makes that skill worth practicing.
Sit tall on a firm chair with feet flat and roughly hip-width apart. Inhale to prepare, then exhale as you lean forward slightly from the hips and stand up. Keep the chest from pitching far forward and avoid pushing the belly out to get momentum. Sit back down with the same control.
Make it cleaner
- Use a higher chair if you need it.
- Keep the knees tracking over the toes.
- Use your hands on the chair arms if balance is shaky.
- Pause for one breath at the top before you sit again.
Eight reps is enough. I’d rather see three good reps than eight sloppy ones. No plopping. That’s the trap with sit-to-stand.
13. Side-Lying Clamshells
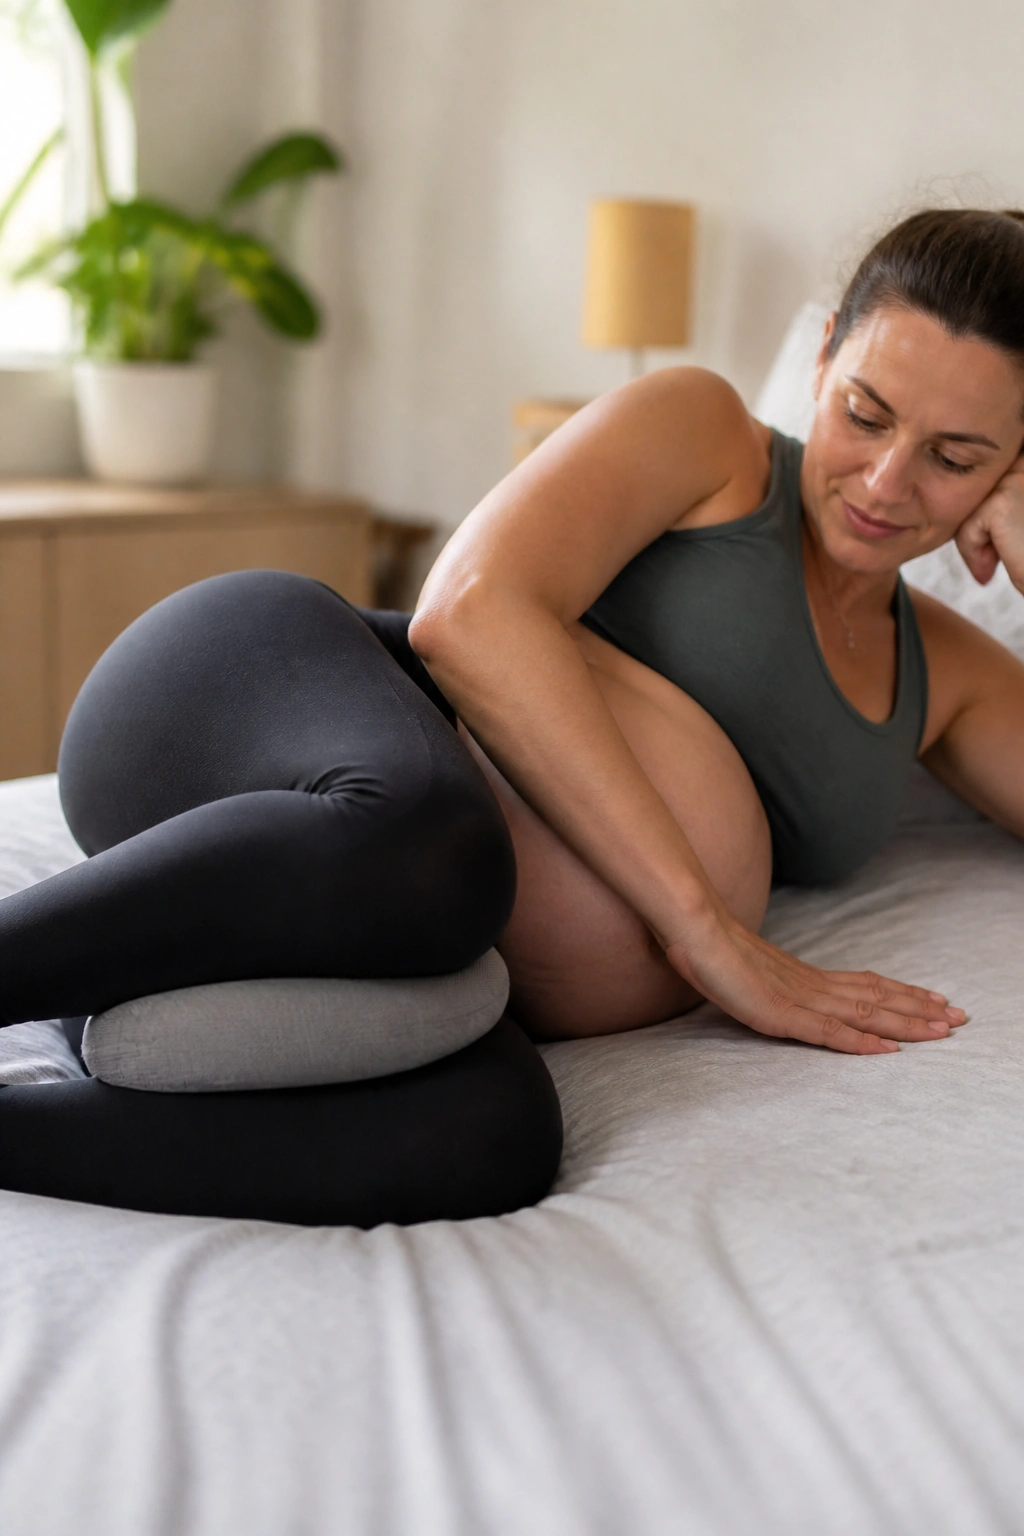
Side-lying work is useful because it takes some pressure off the front of the abdomen while still training the hips that support the pelvis. Clamshells are the classic version, and they earn their place here.
Lie on your side with knees bent and heels together. Keep the pelvis stacked and open the top knee like a clamshell, stopping before the low back rolls open. Close it slowly. A pillow between the knees or under the belly can make the position a lot more comfortable.
The motion should be small. If you’re flinging the knee open, you’ve lost the point. The glute on the top side should do the work, not the front of the hip.
Do 10 to 12 reps per side. If you feel it in the low back, you’re probably rolling backward. Reset the hips and shrink the range.
14. Side-Lying Leg Lifts
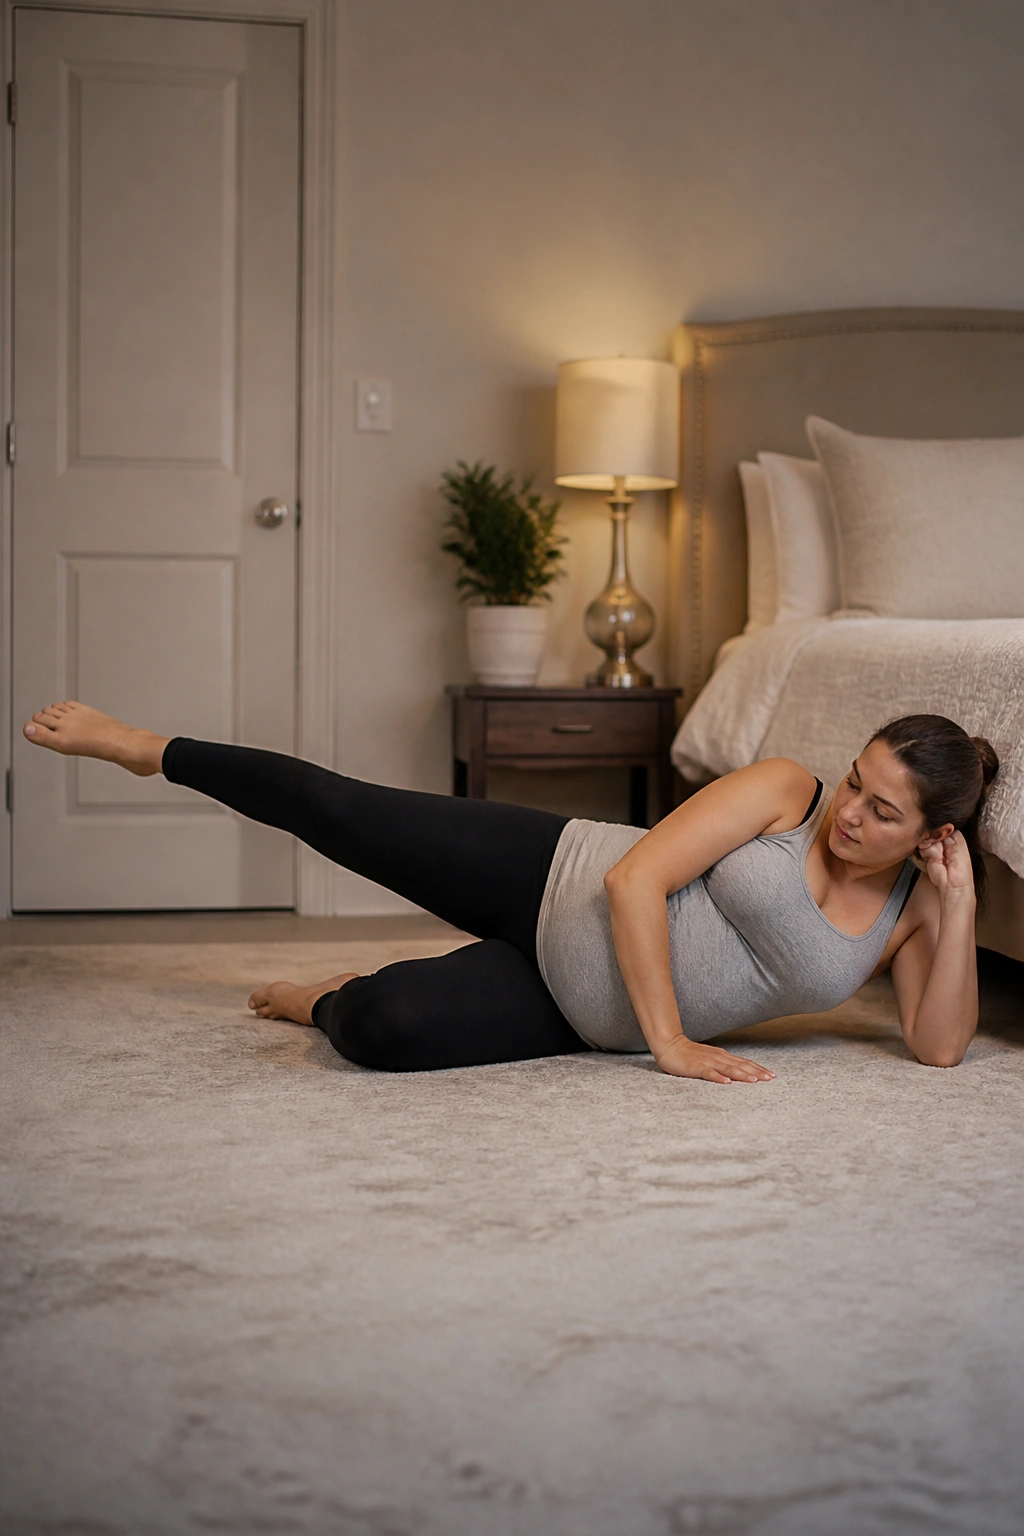
This is the quieter cousin of the clamshell, and I like it because it teaches the outer hip to work without much trunk strain. That matters when you’re tired, swollen, or just done standing on one leg to put on shoes.
Stay on your side. Bend the bottom leg for support and keep the top leg straight or softly bent. Lift the top leg only a few inches, pause, then lower with control. To keep the pelvis honest, imagine the hip bones staying stacked one on top of the other.
If the outer hip cramps, your range is too big or your foot position is off. Turn the toes slightly toward the floor and try again. That usually takes the tension out of the wrong spot.
Eight slow reps per side is plenty. You should feel side-body work, not a tuggy pull in the front of the hip.
15. Modified Side Plank From the Knees
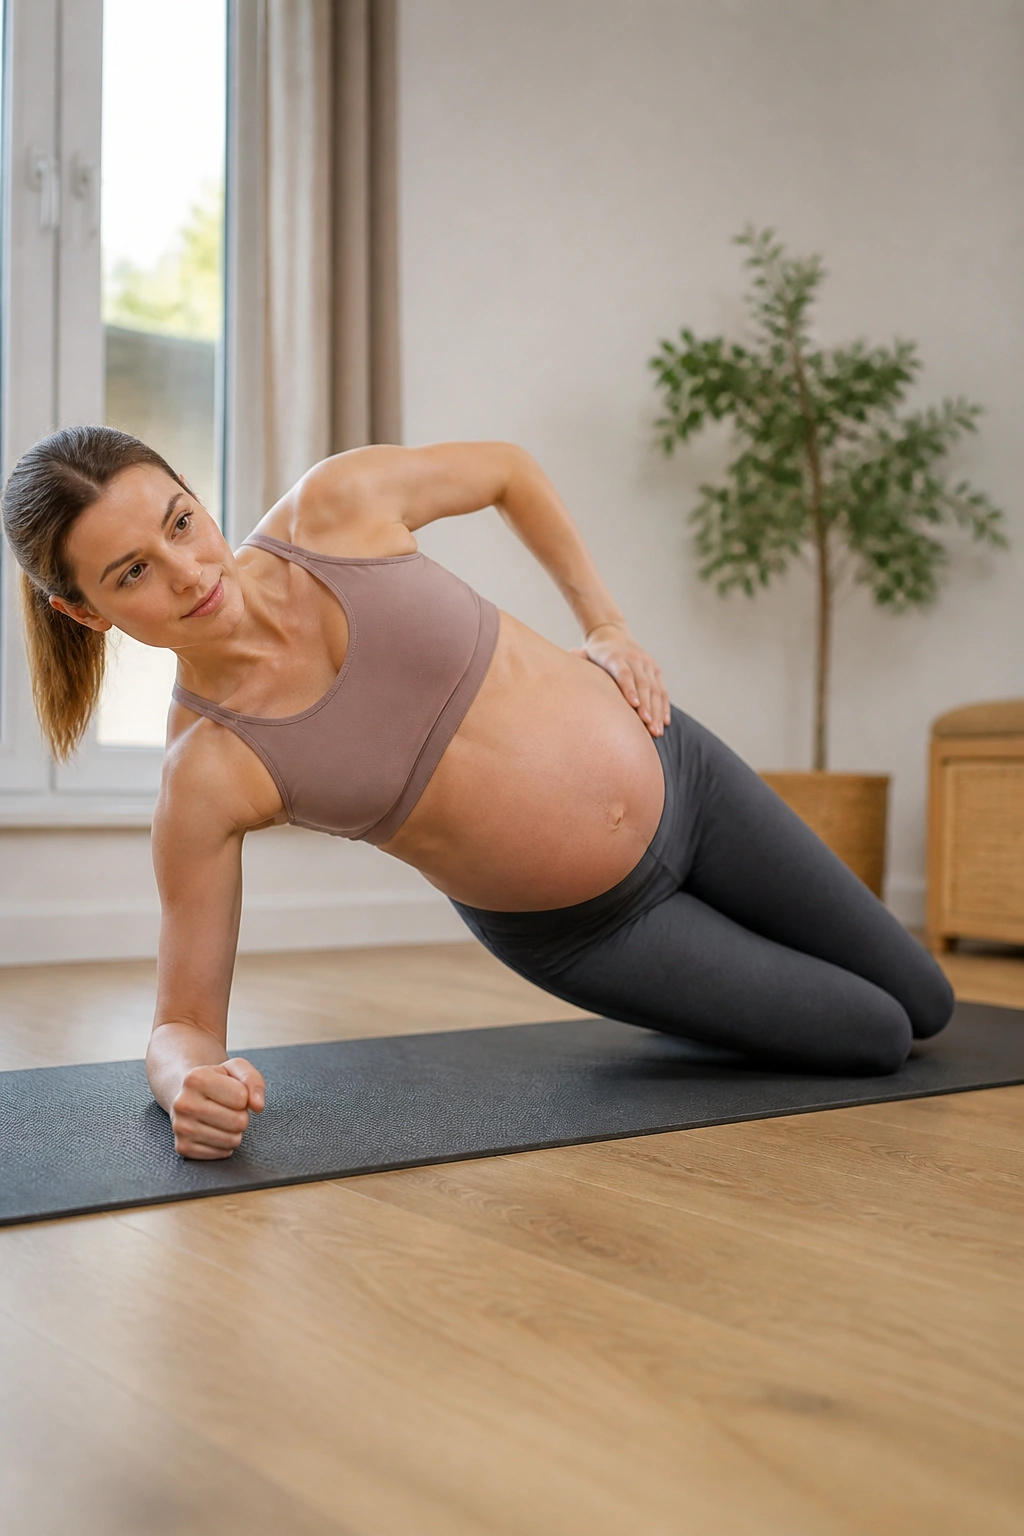
Can you do a side plank while pregnant? Yes, in a modified form, if it feels good and you keep it short. This version teaches the side body to support the trunk without asking the belly to hold a long, shaky plank.
Set up on one forearm with knees bent and stacked, then lift the hips so your body makes a straight line from knees to head. Hold for 10 to 20 seconds while breathing normally. Drop down, rest, and repeat once or twice.
What makes this version work
The knees take away a lot of load, which means less pressure in the front of the abdomen. The side waist and glute do more of the stabilizing. That’s the whole point.
- Keep the top shoulder away from your ear.
- Don’t let the ribs flare open.
- Stop if you feel coning.
- Use a folded blanket under the elbow if the floor is hard.
Short holds beat heroic ones. Always.
16. Pallof Press With a Resistance Band
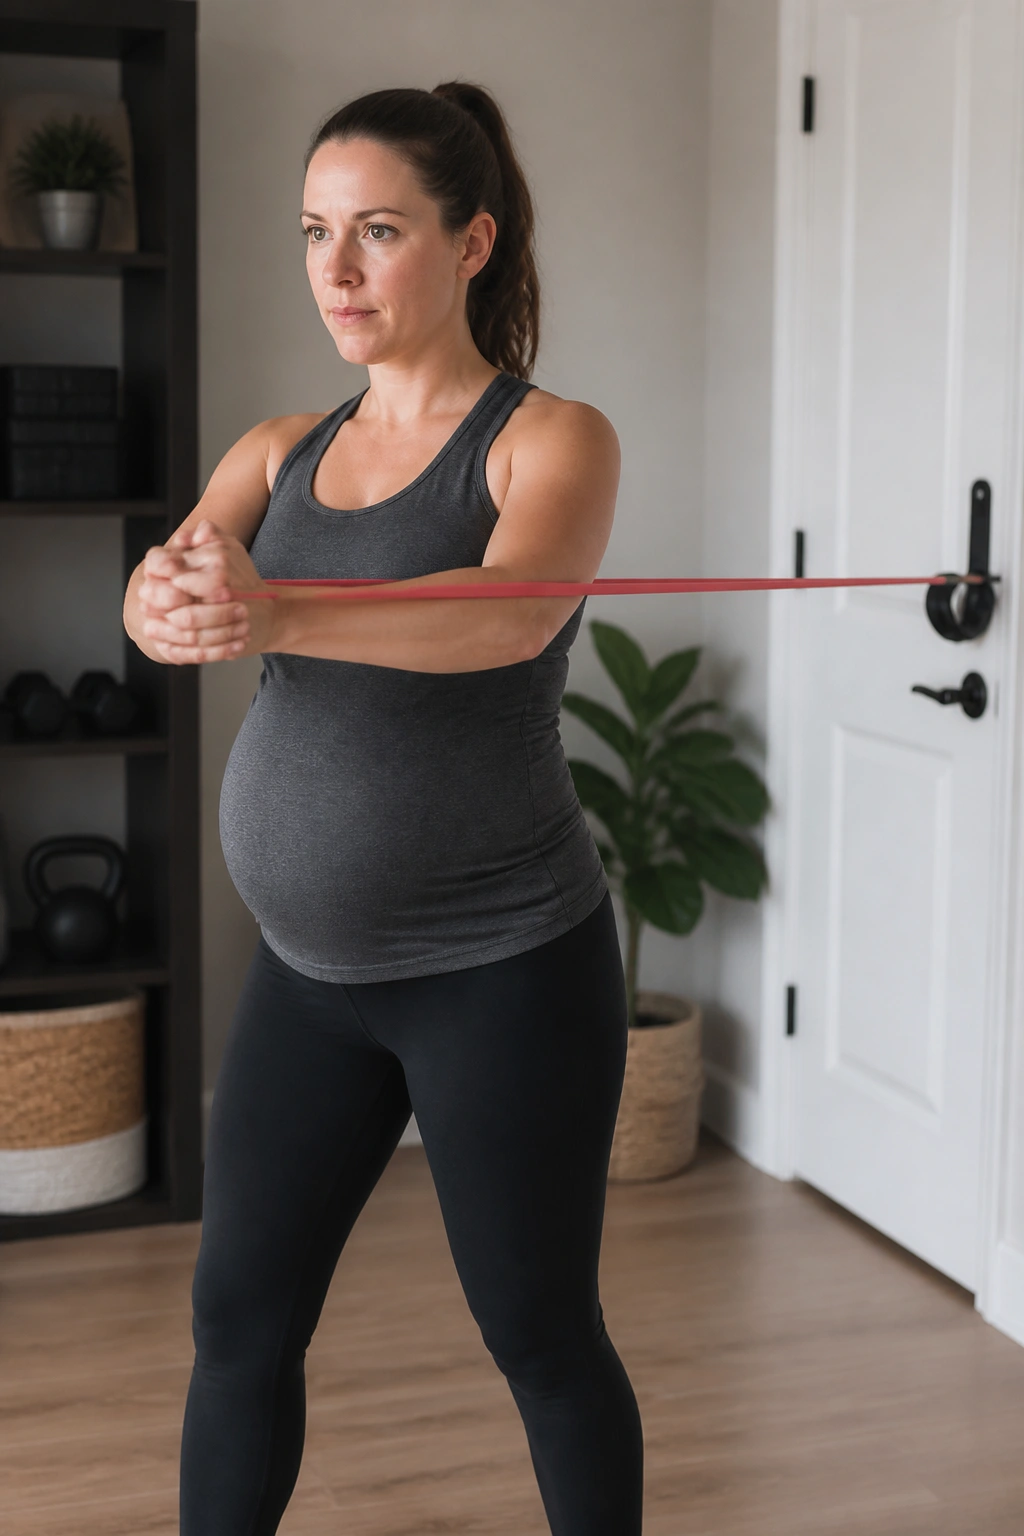
This one looks plain and feels sneaky-hard. The band wants to twist you, and your job is to stay square while your arms move away from your chest. That anti-rotation work is gold for midline control.
Anchor a light resistance band at chest height. Stand sideways to the anchor point, hold the band with both hands at your sternum, then exhale and press it straight out until your elbows are nearly straight. Pause for a second, bring it back, and repeat. Your torso should resist the pull without leaning or rotating.
Use it well
- Start with a light band.
- Keep your feet about hip-width apart.
- Soft knees.
- Quiet ribs.
Do 8 reps per side. If you wobble, that’s fine — but if the belly domes or the breath freezes, lighten the band. The right tension should make you steadier, not rigid.
17. Suitcase Carry With a Light Dumbbell
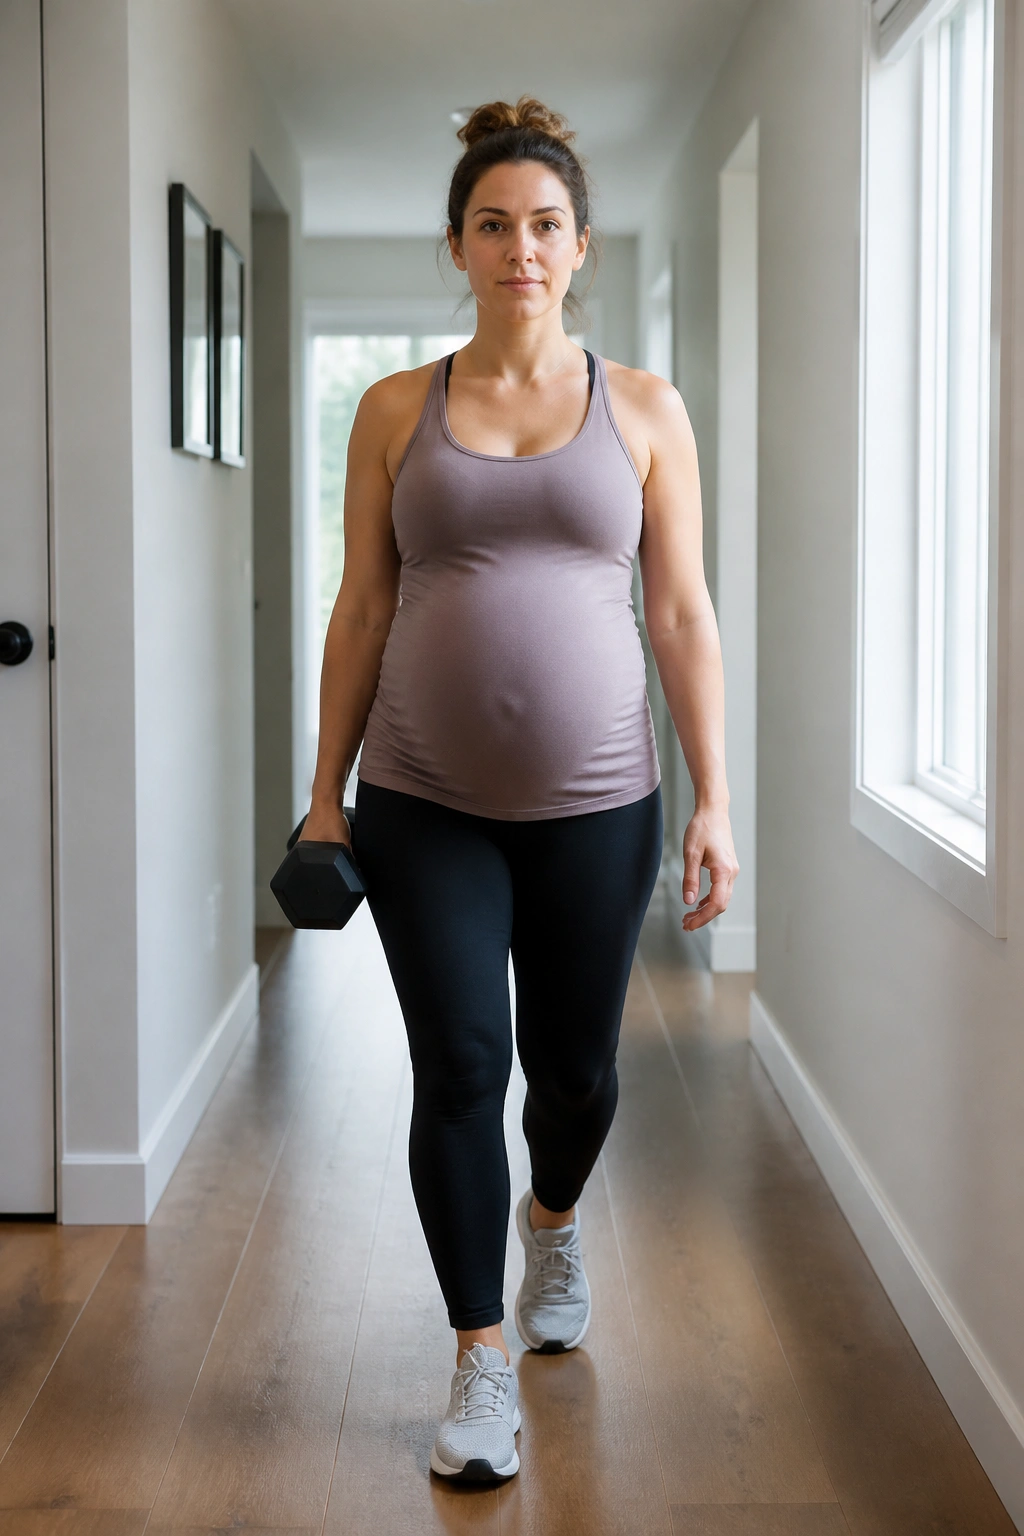
Walking with one weight at your side teaches the trunk to stay tall under uneven load, which is a very real-life skill. Grocery bags, toddler hauling, laundry baskets — they all ask for this kind of side-body control.
Hold a light dumbbell, kettlebell, or even a loaded bag in one hand and walk 20 to 30 steps. Stay upright. Don’t lean toward or away from the weight. Exhale every few steps if that helps keep the ribs settled. Then switch sides.
Start light. Light means light. If you go too heavy, the body starts cheating by hiking the shoulder or swaying the pelvis.
One or two carries per side is enough. If your grip fails before your posture does, that’s fine. That’s your cue to stop, not to force more.
18. Supported Split Squats
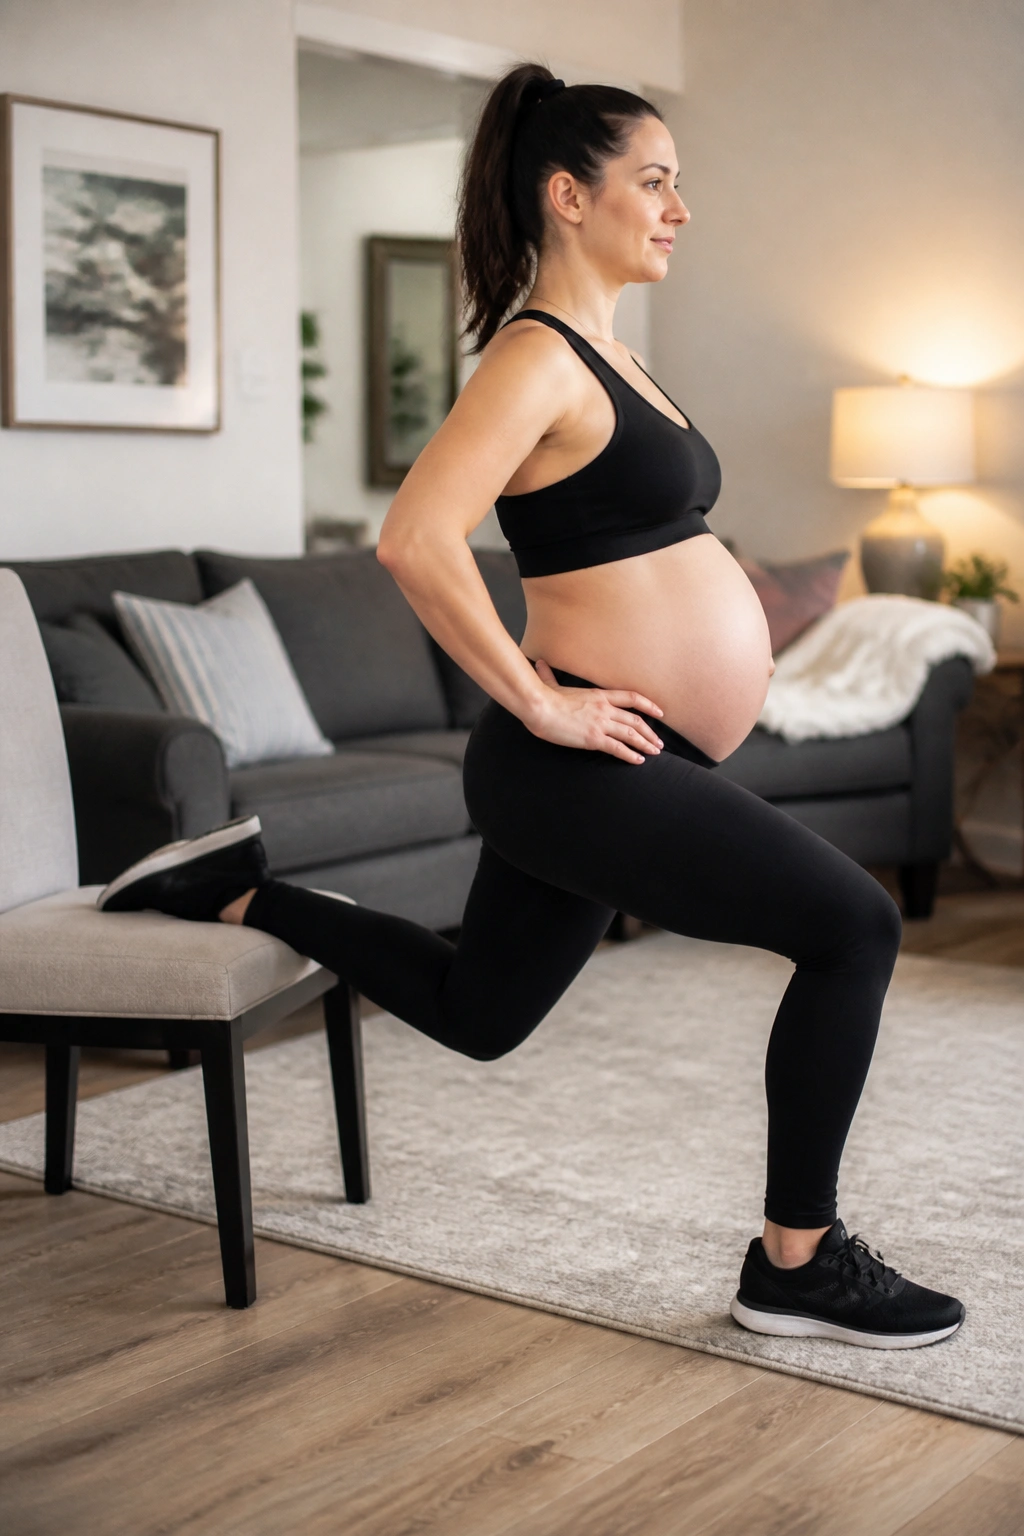
A split squat looks a little like a lunge, but the support makes it friendlier and easier to control. It builds leg strength while asking the trunk to stay centered, which is exactly the kind of work that helps pregnancy movement feel less wobbly.
Stand in a staggered stance with one foot forward and one back, holding a wall or chair lightly. Exhale as you lower a few inches, keeping most of the work in the front leg. Come back up with control. The back heel can stay lifted or lightly grounded, depending on comfort.
Keep the depth modest. There is no prize for going low. If balance feels off, shorten the stance and hold something solid.
Do 6 to 8 reps per side. A smooth rise matters more than a deep bend. The belly should stay relaxed enough to breathe through.
19. Hip Hinge to a Wall
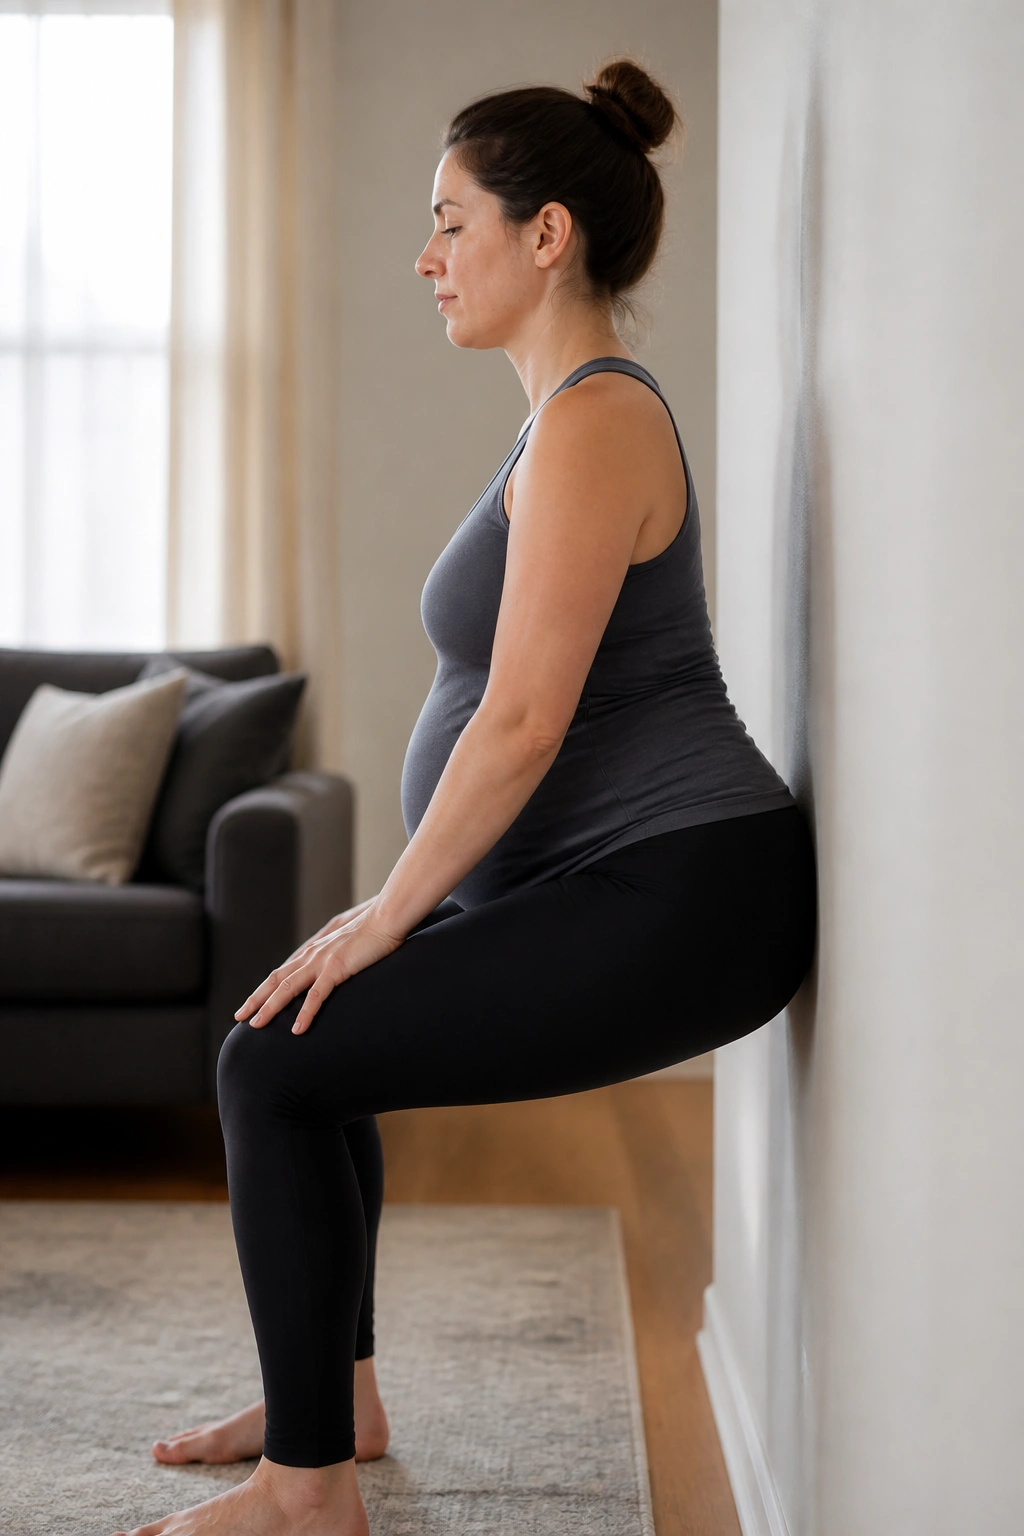
If you ever bend to pick something up and feel your belly dump forward, this drill will make sense fast. It teaches the body to send the hips back instead of collapsing through the waist.
Stand a few inches in front of a wall with feet hip-width apart. Push the hips back until they tap the wall, keeping the shins mostly vertical and the spine long. Exhale as the hips move back, then stand tall again. The knees bend a little, but this is not a squat.
This pattern shows up everywhere: lifting a laundry basket, reaching into a low drawer, even sitting down without flopping. That’s why I like it so much.
Do 10 slow reps. If you hit the wall with a loud thump, move your feet farther away and try again. The touch should be quiet. Quiet usually means controlled.
20. Seated Band Rows With Exhale Control
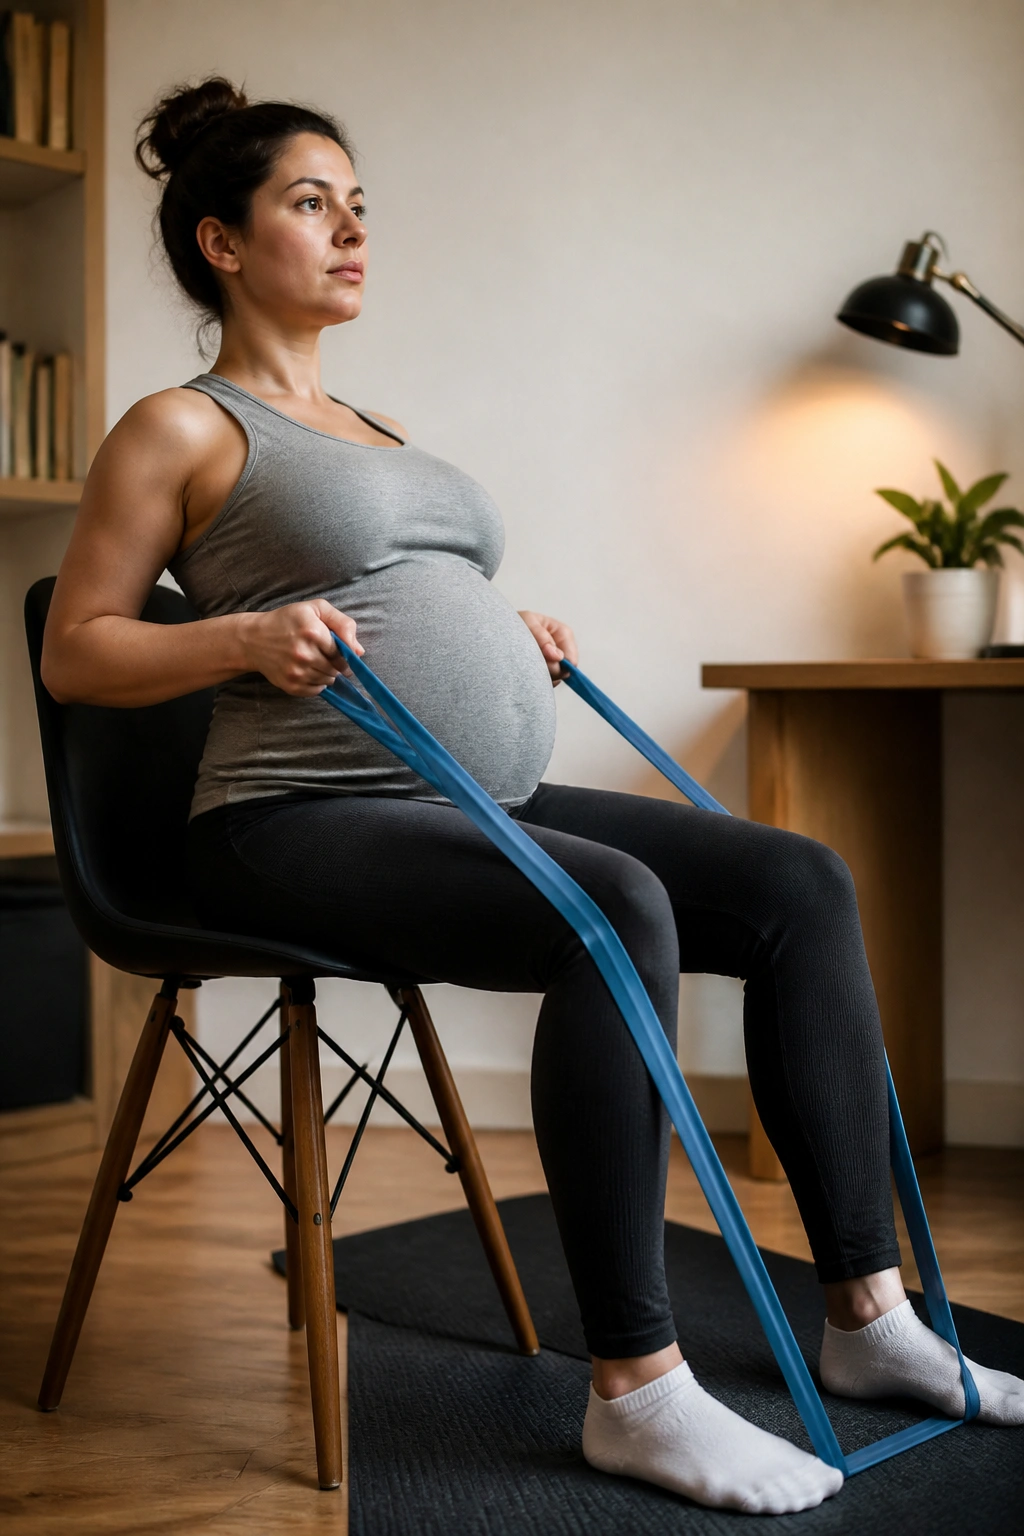
A row might not sound like a pregnancy core exercise, but posture changes the way the abdomen behaves. If the upper back is weak and the ribs keep flaring, the front of the body works harder than it needs to.
Sit on a firm chair with a resistance band looped around your feet or anchored in front of you. Hold the ends and pull the elbows back while exhaling, then return slowly. Keep the chest open without leaning backward. The shoulders should glide, not shrug.
Why I like this one
It gives the upper back something to do, which often makes breathing easier. And easier breathing usually means better abdominal control. That’s the chain.
- Use a light band first.
- Pull the elbows close to the sides.
- Pause for one second at the end of the row.
- Keep the jaw loose.
Ten reps is enough. If you start arching to finish the pull, the band is too heavy.
21. Wall Angels With Ribs Stacked
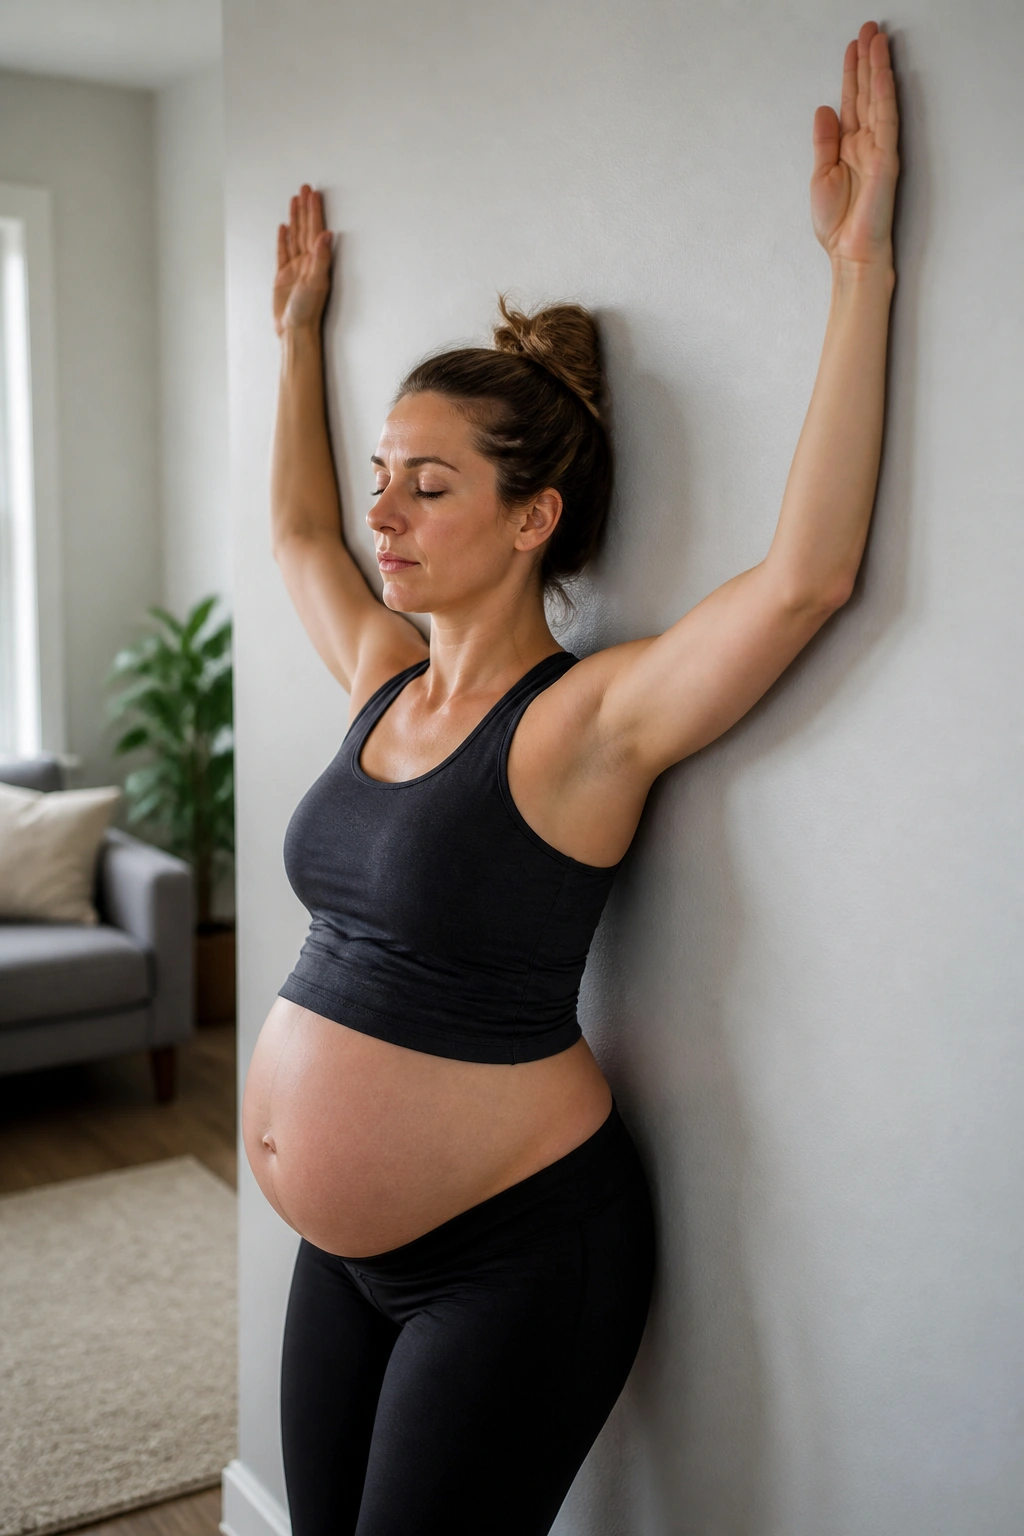
Wall angels are one of those exercises that looks neat and feels annoyingly revealing. If your ribs flare, your shoulders shrug, or your low back arches to help the arms go up, the wall makes it obvious.
Stand with your back a few inches from a wall, knees soft, and ribs gently down. Raise your arms into a goalpost shape, then slide them up and down the wall in a small, controlled range. Exhale as the arms move. If full wall contact feels impossible, don’t force it. A partial range is fine.
This movement is less about “perfect posture” and more about teaching the ribs and shoulders to stay organized together. That organization matters more than people think.
Try 6 slow reps. The lower back should not be fighting for space. If it is, reduce the range and keep breathing.
22. Final Standing Reset for Diastasis Recti Care
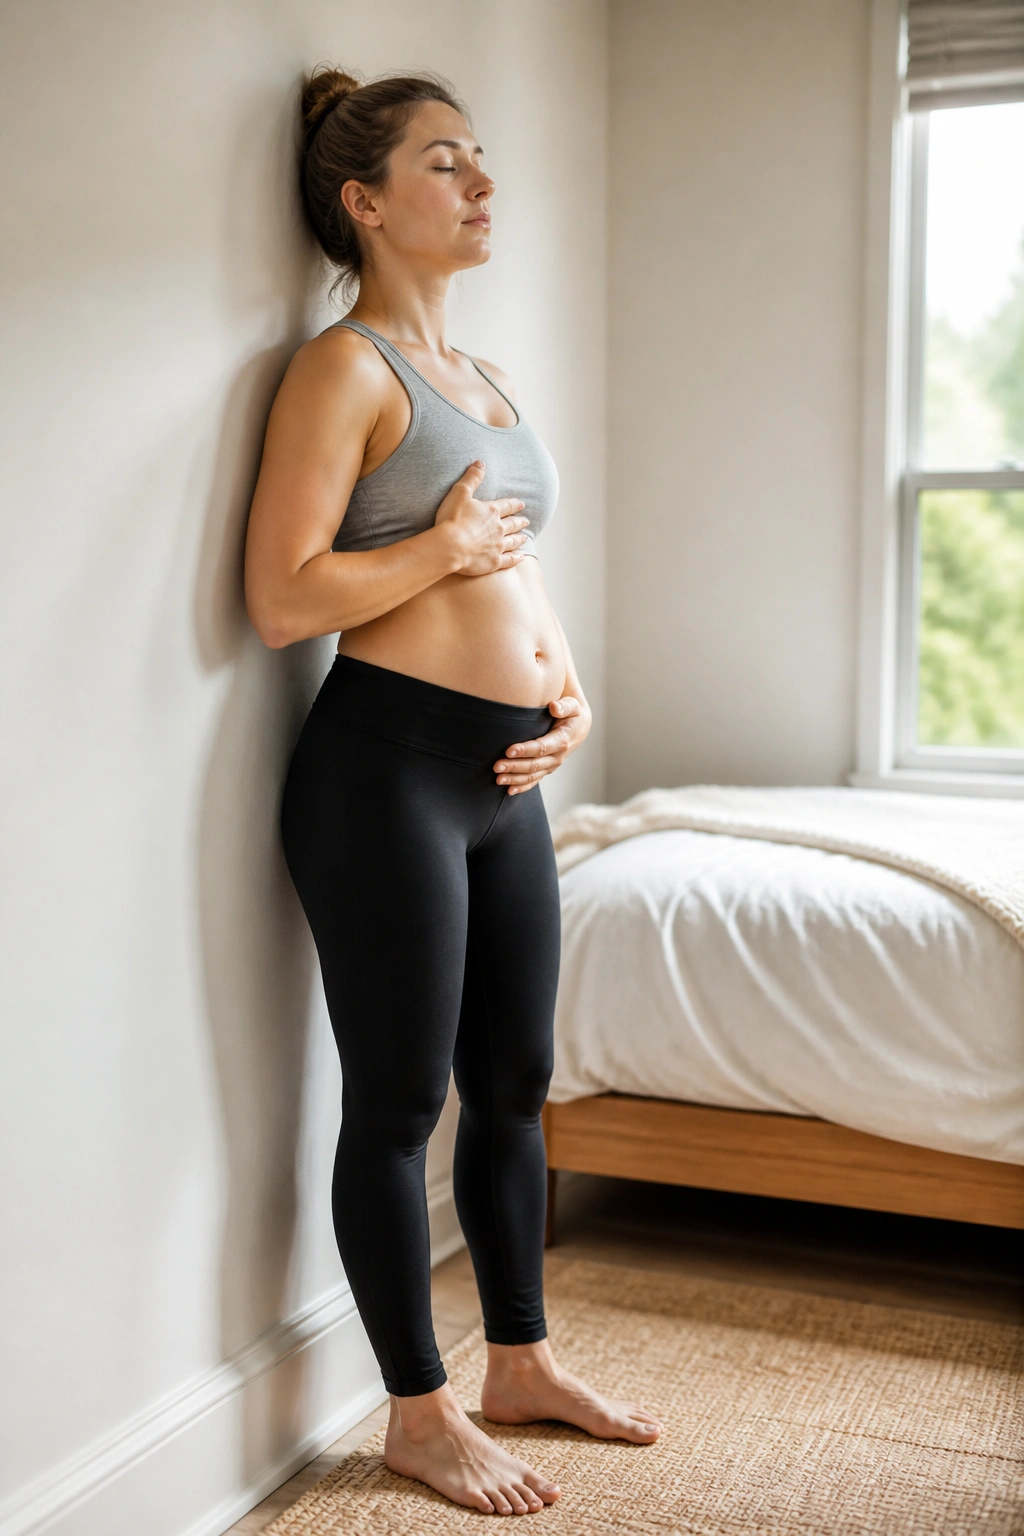
If you only have five minutes, make them count here. This last drill is less about looking like exercise and more about teaching your body what calm, stacked posture feels like before you go back to real life.
Stand facing a wall or with your back a few inches from it, feet hip-width apart. One hand can rest on the ribs, the other on the lower belly. Take 5 slow breaths, then add 10 gentle heel raises or small weight shifts side to side while keeping the abdomen smooth. Think steady, not stiff. Think long exhale, not squeeze.
This is a good place to finish because it connects everything. Breathing. Balance. Pressure control. That’s the whole game.
Pick 3 or 4 exercises from this list and repeat them often instead of trying to do all 22 in one shot. A quiet midline beats a flashy workout every time. If your body wants less, give it less. If it wants more, add one careful step at a time.
