



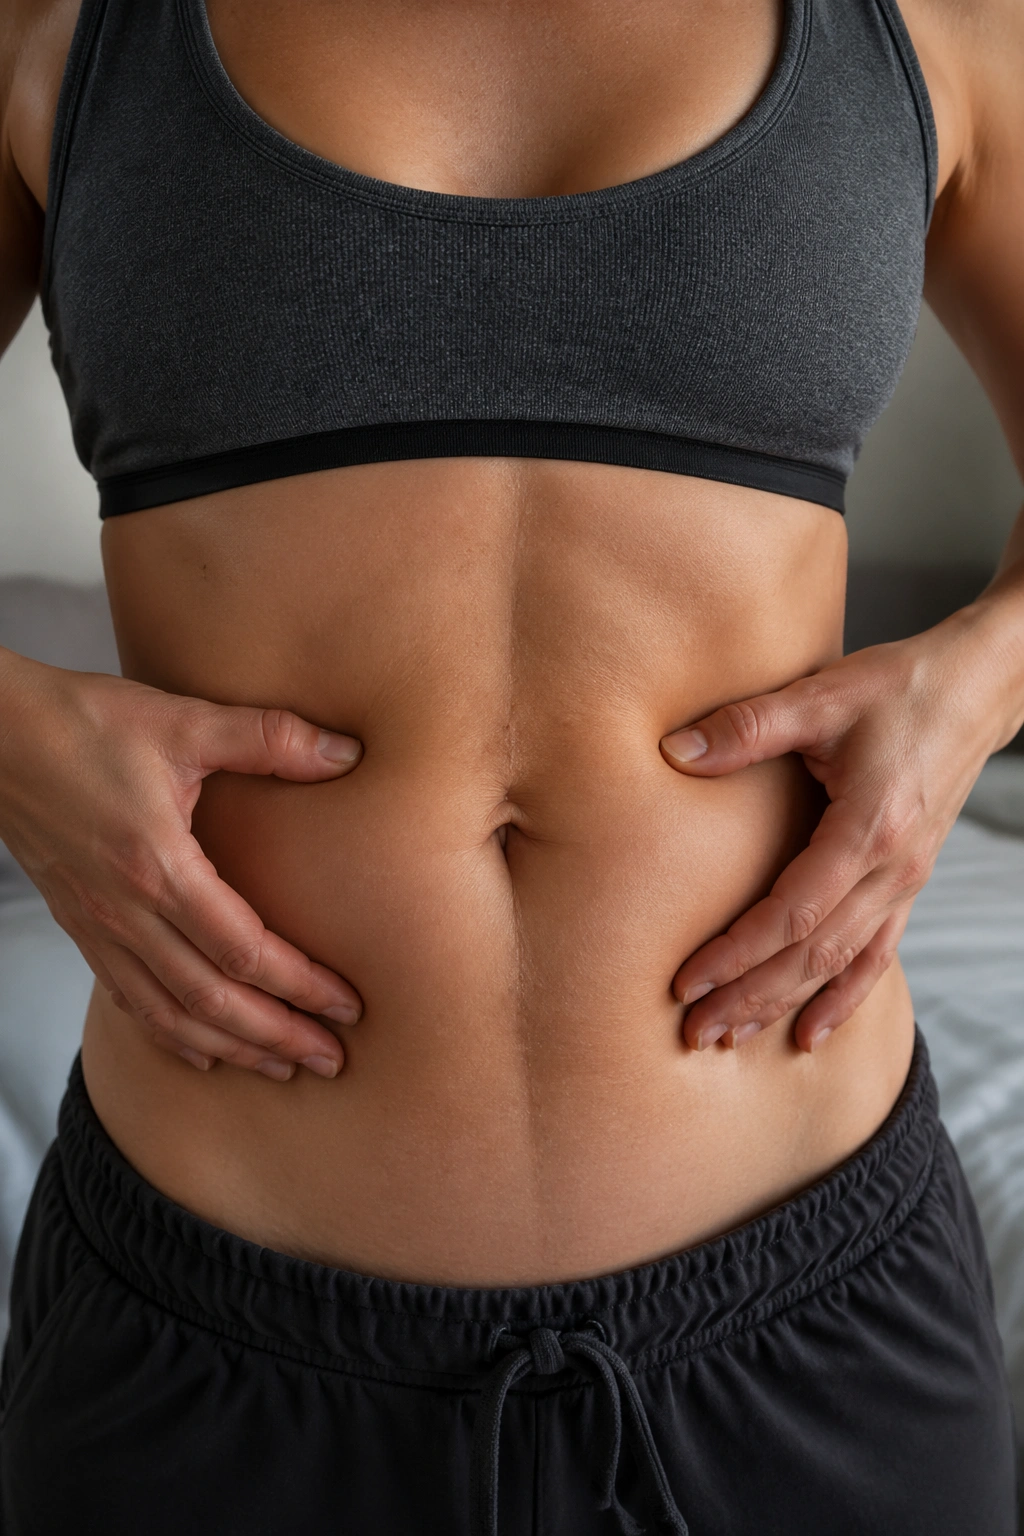
The first time you notice a small ridge running down the middle of your belly when you sit up, cough, or lift the baby, it can be unsettling. A lot of women describe the same reaction: Was that there before? Did I do something wrong? Usually, no. That midline bulge is one of the classic signs of diastasis recti, a widening and thinning of the tissue that runs between the left and right sides of the abdominal wall.
Good postpartum core workouts for diastasis recti do not begin with harder crunches, longer planks, or the old “feel the burn” approach. They begin with breath, pressure control, rib position, and the humble drills that teach your deep core to switch on without pushing force outward into the healing midline. It sounds less exciting than ab circuits. It works better.
That matters because the postpartum core is not only about appearance. Diastasis recti can show up alongside low-back strain, a heavy feeling through the pelvis, leaking when you sneeze, or that odd sense that your middle has gone on strike. The fix is rarely “more abs.” It is better force management.
A strong postpartum core looks calm before it looks hard. Once you feel that, the exercises below make far more sense.
The Midline Gap Is Only Part of the Story
A two-finger gap gets all the attention, yet gap width is only one piece of the picture. Pelvic health therapists also care about the firmness of the tissue underneath your fingers, how well your ribs stack over your pelvis, whether your abdomen domes during effort, and how your body handles daily tasks like rolling out of bed or carrying a car seat.
Diastasis recti happens because the linea alba—the connective tissue down the center of the abdomen—stretches during pregnancy. That stretch is normal. The issue comes later, when the tissue stays thin, the abdominal wall struggles to manage pressure, and every cough, sit-up, or rushed workout shoves force forward into a weak spot.
That is why one woman with a wider gap can feel strong and capable, while another with a smaller gap still feels unstable. Tension matters. Coordination matters. Breathing matters more than people expect.
And yes, this is where a lot of generic ab advice falls apart. If an exercise makes the midline pop up like a little tent, if you have to hold your breath to get through it, or if your low back grabs before your abs do, the move is too hard for that stage. Not forever. Right now.
The Red Flags That Mean an Exercise Is Too Much
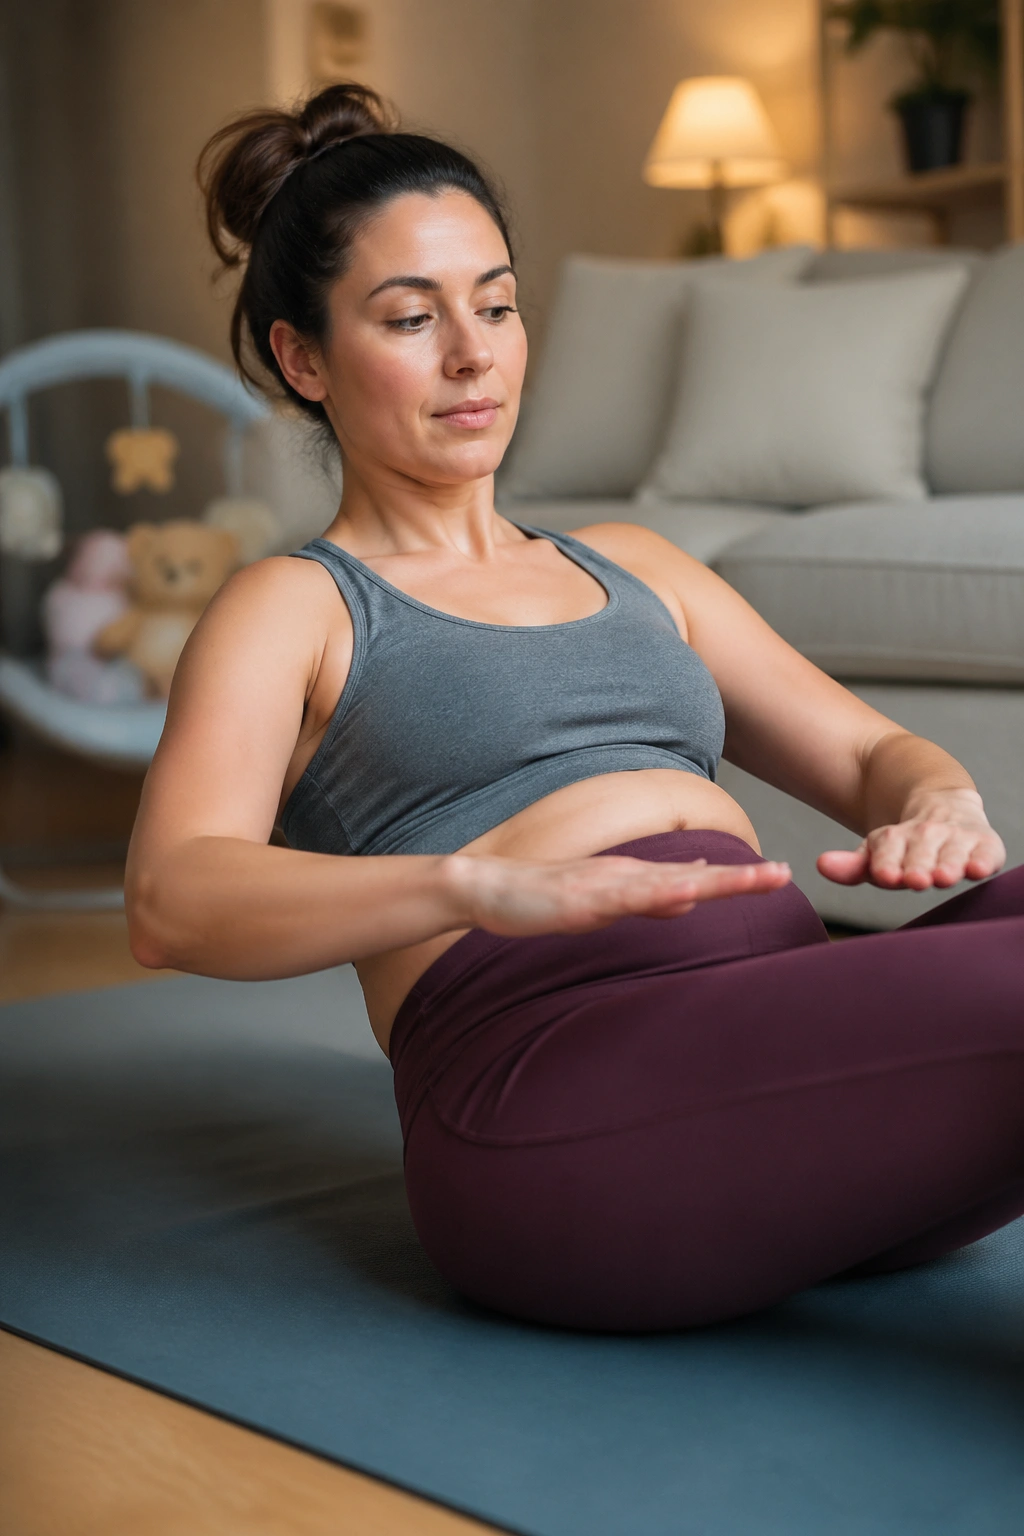
Pain is not your coach.
A postpartum core drill should feel controlled, steady, and almost a little boring at first. When it is the right fit, you can exhale during effort, keep your ribs from flaring, and finish the set without your belly pushing outward or your pelvic floor feeling pressured.
Back off and regress if you notice any of these:
- Doming or coning through the center of the abdomen during the hardest part of the move
- Breath holding, grunting, or a rushed exhale that feels forced
- Low-back pinching or hip flexors doing all the work
- Pelvic heaviness, dragging, or leaking that shows up during or after the set
- Incision discomfort after a cesarean birth
- Lingering soreness along the midline rather than simple muscle fatigue
One odd rep is not a disaster. A pattern is a message.
Another clue: pay attention after the workout, not only during it. If your core feels more disconnected for the rest of the day, if getting out of bed feels harder, or if the ridge at your midline looks more obvious later, you pushed past your useful dose.
The Rules That Make Postpartum Core Training Work

Here is the part people skip, then wonder why the exercises do nothing.
Stack Your Ribs Over Your Pelvis
When your ribs flare up and your pelvis tips forward, the abdominal wall loses a lot of mechanical help. Think breastbone soft, ribs knit down, pelvis neutral. Not tucked hard. Not arched. Stacked.
Exhale on Effort
The hardest part of the rep is where your exhale belongs. Blow out through pursed lips, as if you are fogging a mirror slowly. That exhale gives the deep core and pelvic floor a chance to organize before the load hits.
Build Load Slowly
Start with 5 controlled reps, not 20 messy ones. One clean set beats three sloppy rounds where the abdomen bulges and the neck takes over. Progression comes from more control first, then more range, then more challenge.
A mirror helps. So do your hands. Put your fingertips over the midline during early drills and feel what happens.
1. Supine 360 Breathing
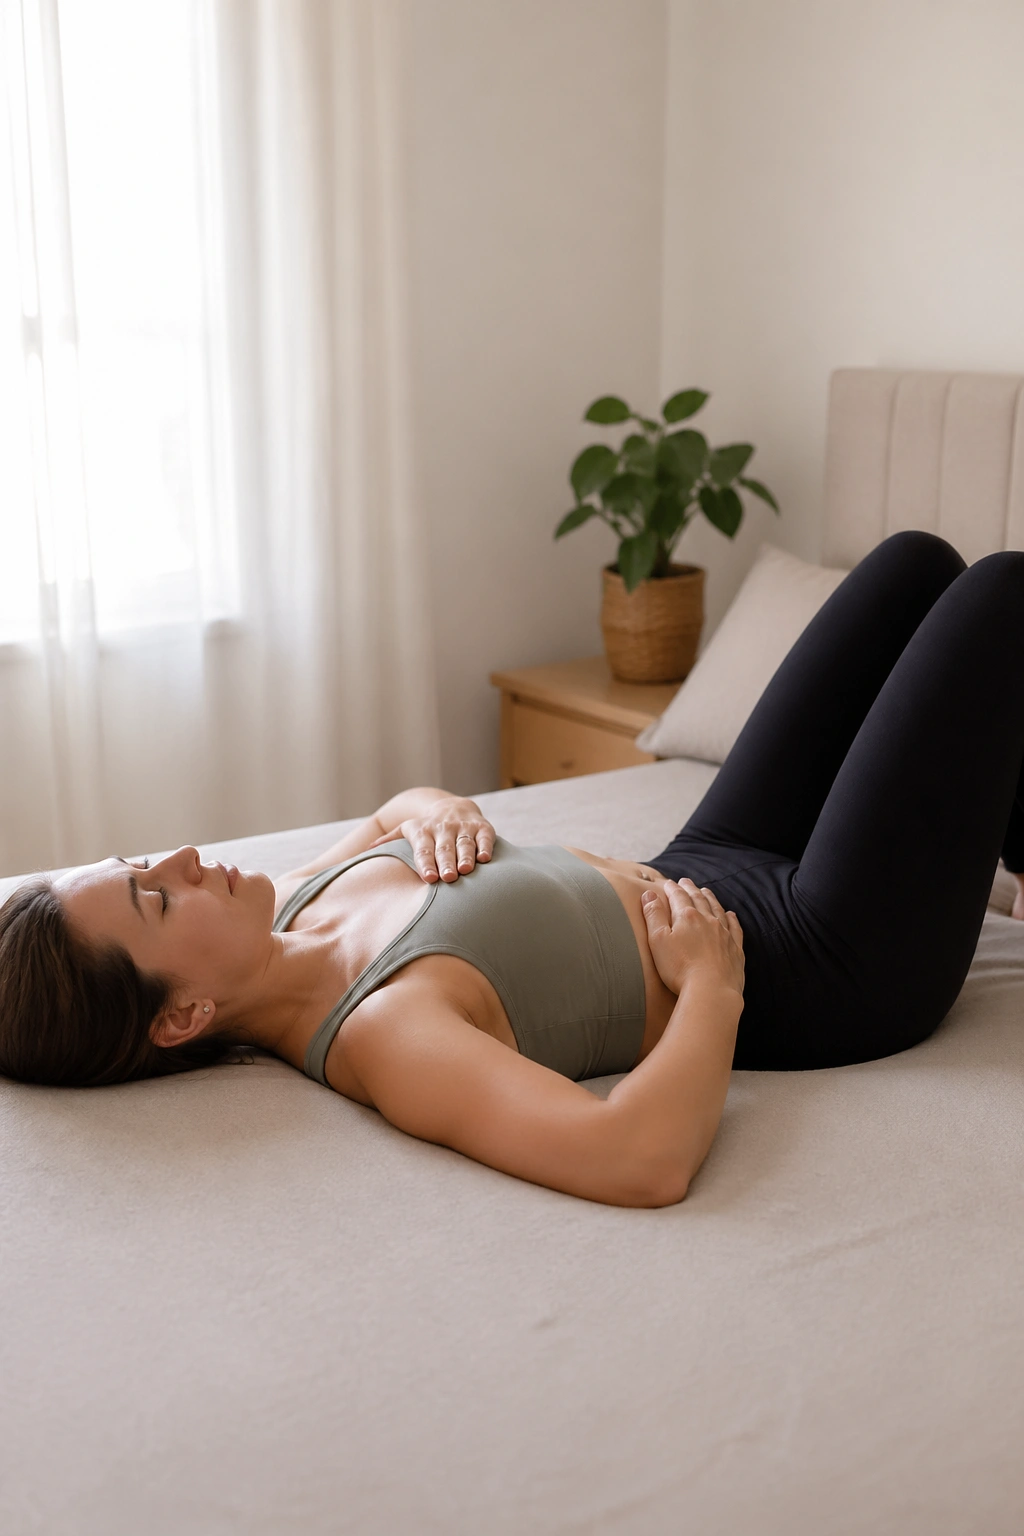
Breathing is the first core drill. Not the warm-up. The drill.
Lie on your back with your knees bent and feet flat, about hip-width apart. Place one hand on your lower ribs and the other low on your belly, a few inches below the navel. Inhale through your nose and try to feel your rib cage widen into your hands—sideways and back, not only up into your chest. Then exhale through pursed lips for 4 to 6 seconds and feel the lower abdomen gently draw inward.
The cue I like is “zip from pubic bone to navel” without smashing your spine into the floor. That small zip is enough. If you clench your glutes, squeeze your thighs, or bear down, you went too hard.
How to Practice It
- Take 5 slow breaths
- Rest for 20 to 30 seconds
- Repeat for 2 to 3 rounds
- Use this at the start of every postpartum core session
A good rep feels quiet. Your shoulders stay soft. Your neck stays out of it. And the midline does not jump forward.
2. Pelvic Tilts on the Floor
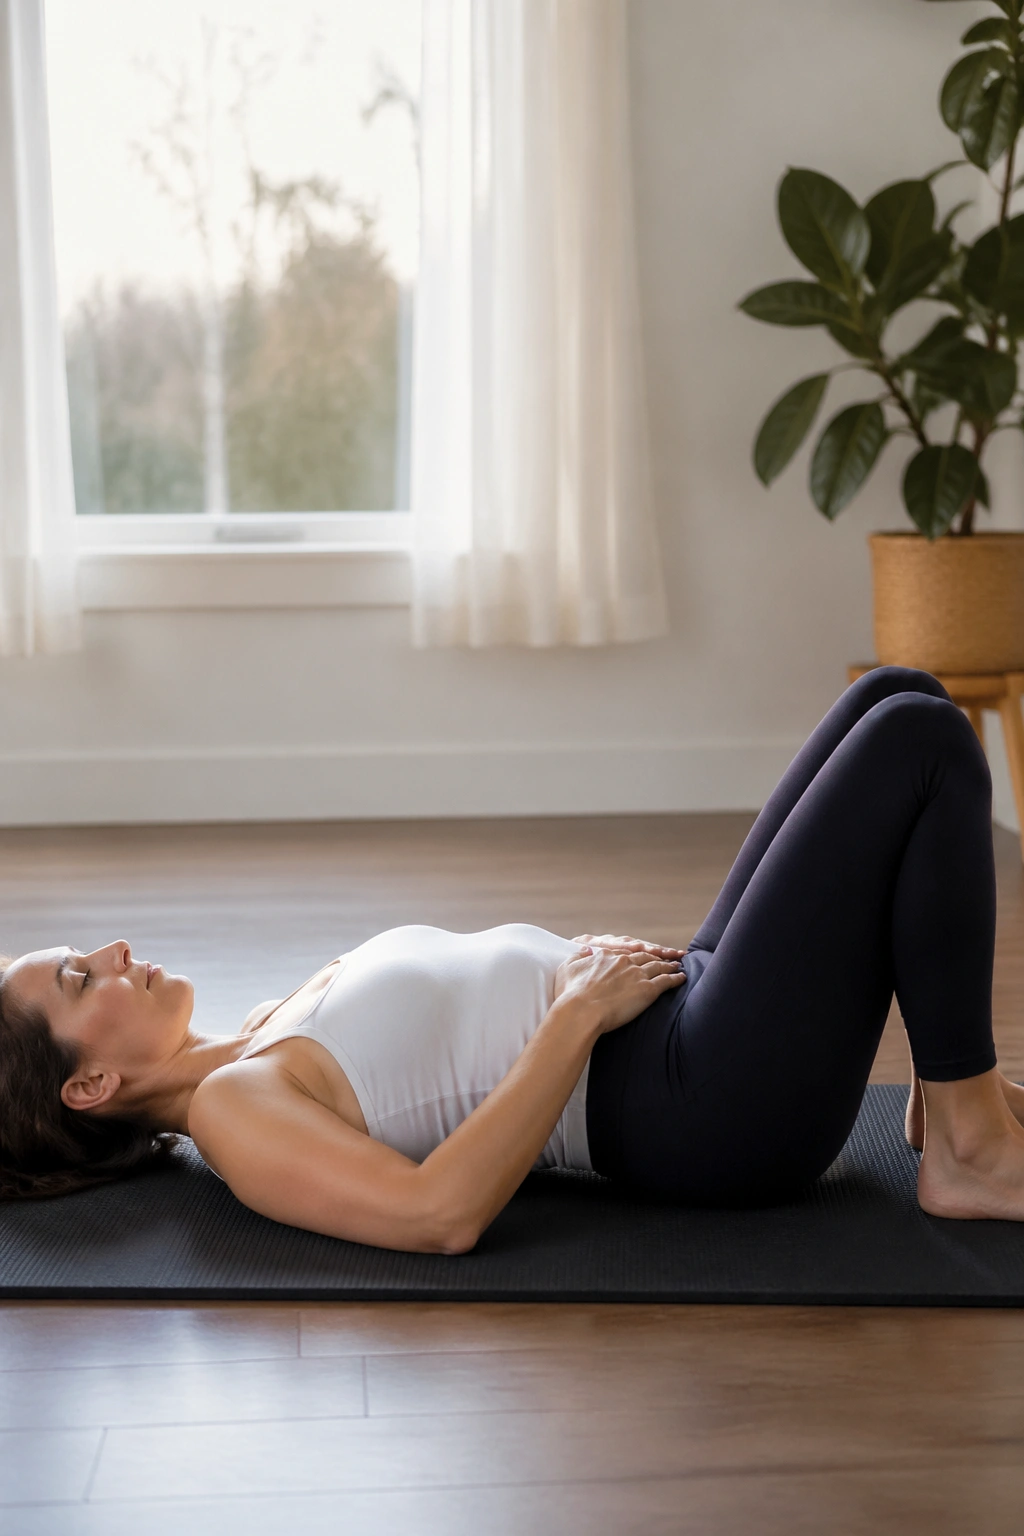
Small movement. Big payoff.
Pelvic tilts help you find the relationship between your pelvis, lower ribs, and deep abs again. After pregnancy, many women live in a bit more extension—ribs up, low back arched, belly pushed forward. A gentle tilt teaches you where neutral sits and how to move around it.
Start on your back with bent knees. Inhale to prepare. As you exhale, tip your pelvis so your tailbone gets a little heavier and your low back lightly contacts the floor. On the inhale, return to your starting position without swinging into a big arch. The motion is small, more like rocking a bowl than doing a bridge.
Do 8 to 10 slow reps. Pause for one full breath in the tucked position on reps 3, 6, and 9. That pause helps you feel the abs working without momentum.
If your hamstrings cramp, move your feet a bit closer to your hips. If your glutes grip first, soften the effort and think about the front of the pelvis moving rather than pushing with the legs.
3. Heel Slides with Exhale
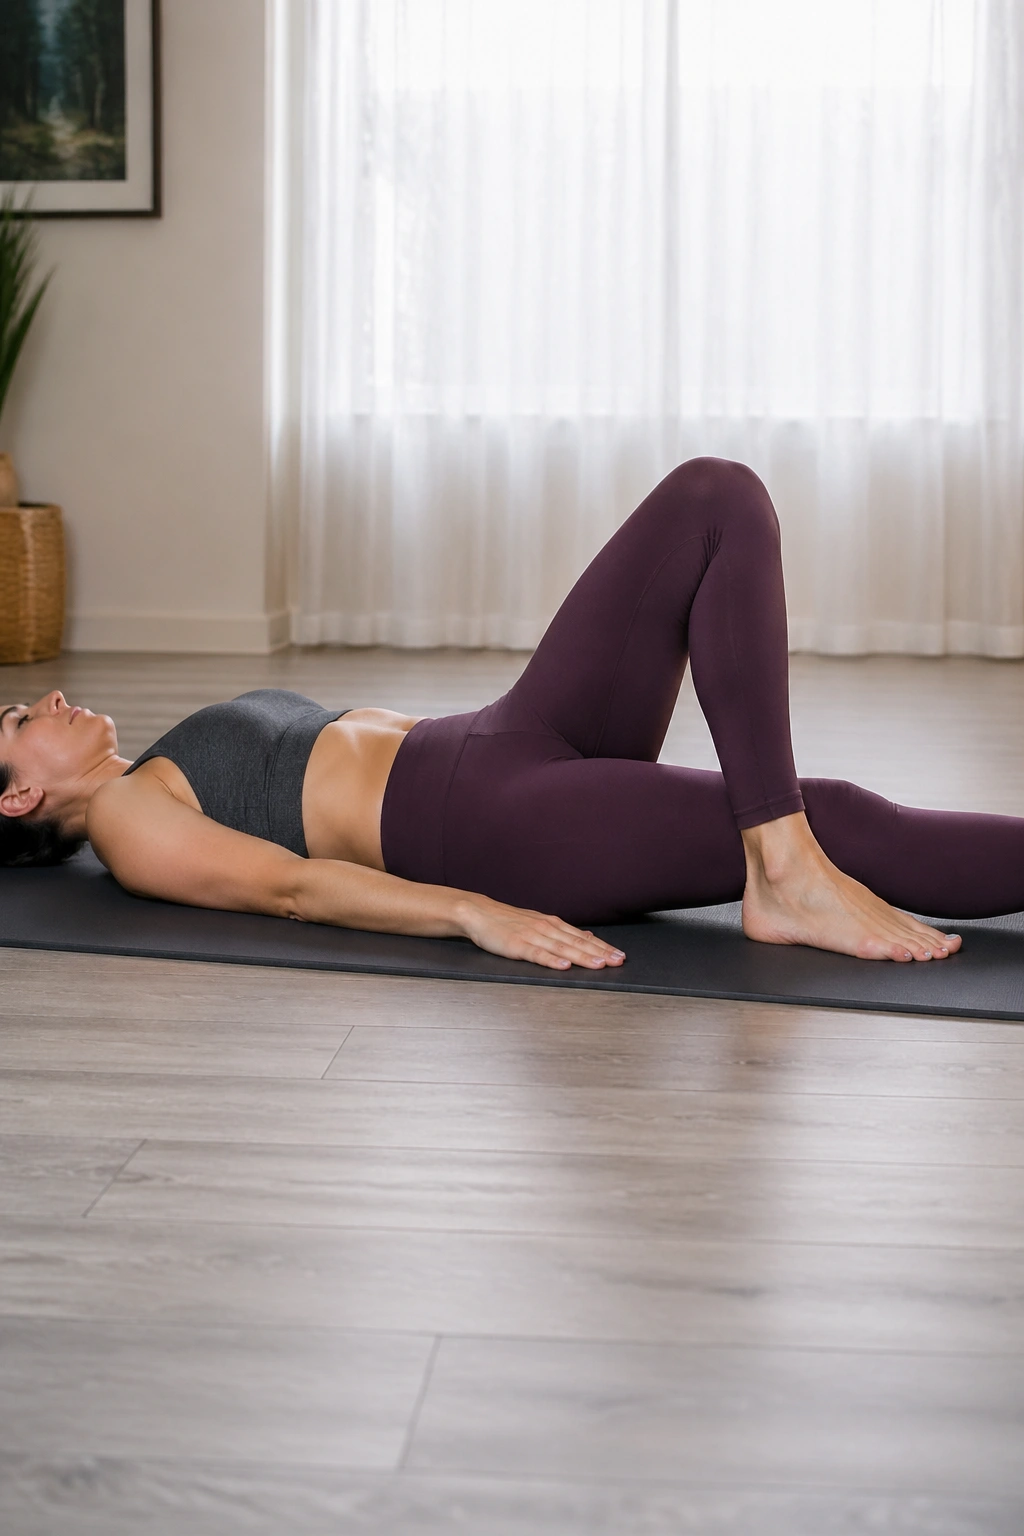
Why start with something as plain as a heel slide? Because it asks your trunk to stay organized while one leg changes leverage, and that is exactly where the postpartum midline often loses control.
Set up on your back with knees bent. Inhale. On your exhale, slide one heel forward along the floor until the leg is nearly straight, while the other foot stays planted. Inhale to slide it back in. Alternate sides.
The goal is not leg work. The goal is zero drama through the torso. No rib flare. No pelvis rocking side to side. No abdomen pushing upward in the center.
What to Watch
- Move the heel slowly for 2 to 3 seconds out
- Exhale during the slide, inhale as you return
- Start with 6 reps per side
- Put your fingers over the midline if you need feedback
Most women know within two reps whether this is their current level or a little too ambitious. If the belly domes, shorten the slide and keep the heel closer to the body.
4. Bent-Knee Marches
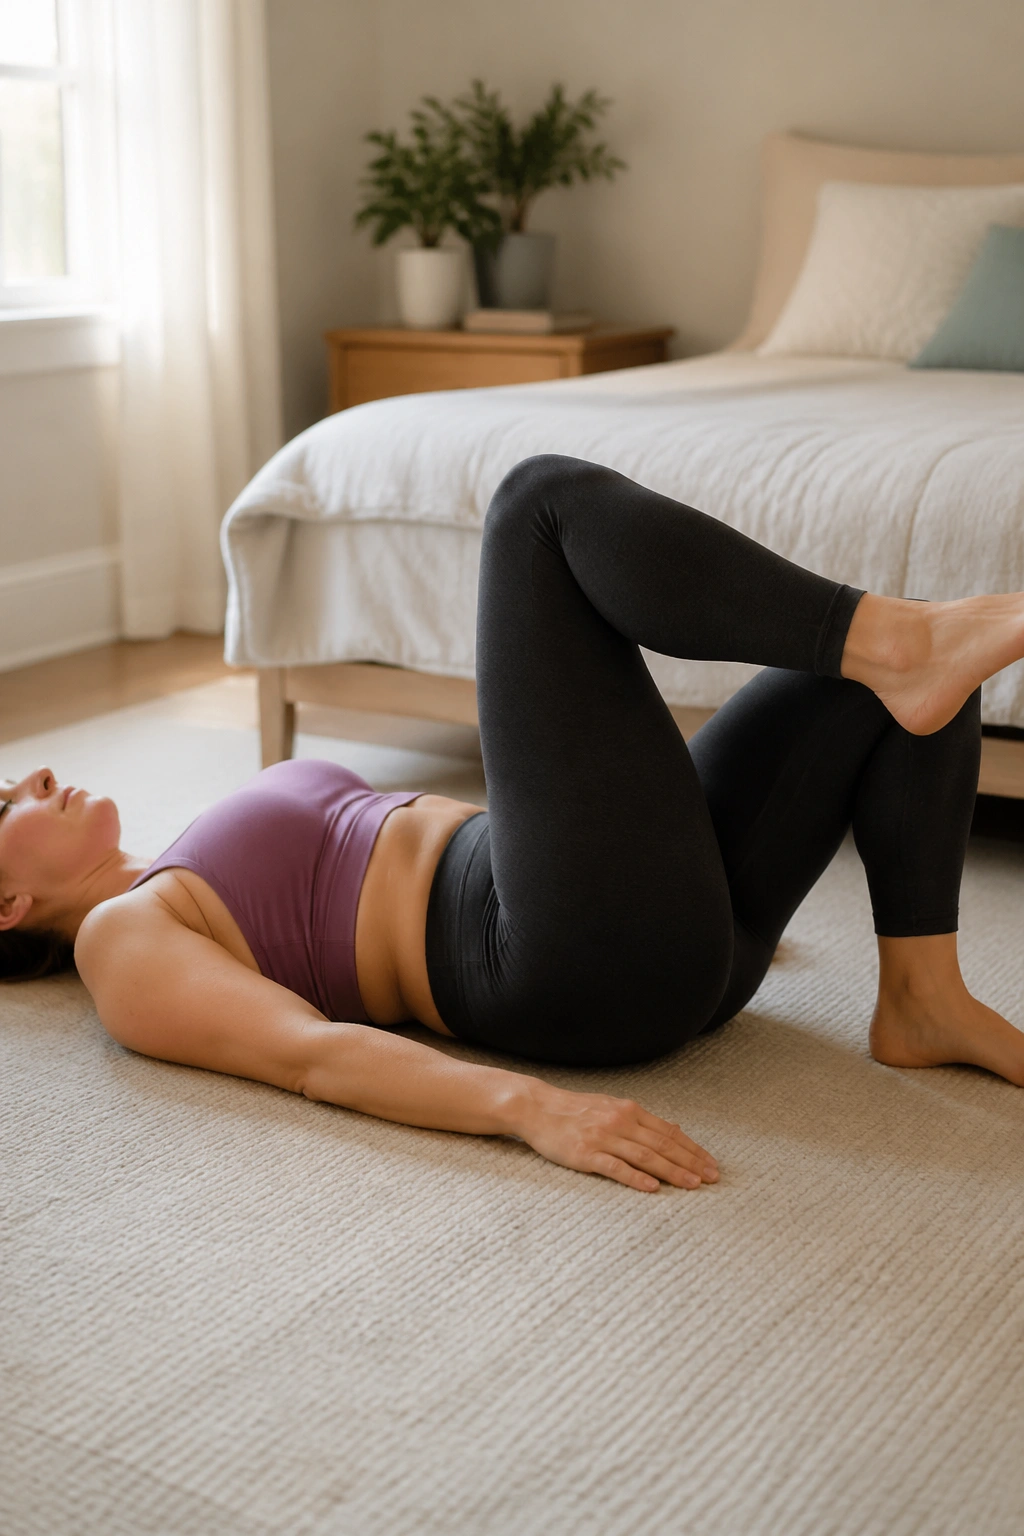
Picture the moment when you lift one foot to step into your underwear, climb a stair, or shift the baby from one hip to the other. A bent-knee march trains that exact single-leg demand without making the move bigger than it needs to be.
Lie on your back with both feet down. Exhale and lift one foot only 1 to 3 inches off the floor, keeping the knee bent. Lower with control. Alternate sides. That is it. You do not need to march high.
A low march is often harder than a high one because you cannot cheat with momentum. Your pelvis has to stay level, and your abs have to keep the trunk from wobbling.
Try 5 to 8 reps per side. If the front of your hips lights up and your lower belly disappears, go back to heel slides for another week or two. No shame there. Marches look easy; they expose weak control fast.
5. Pillow Squeeze with Deep Core Brace
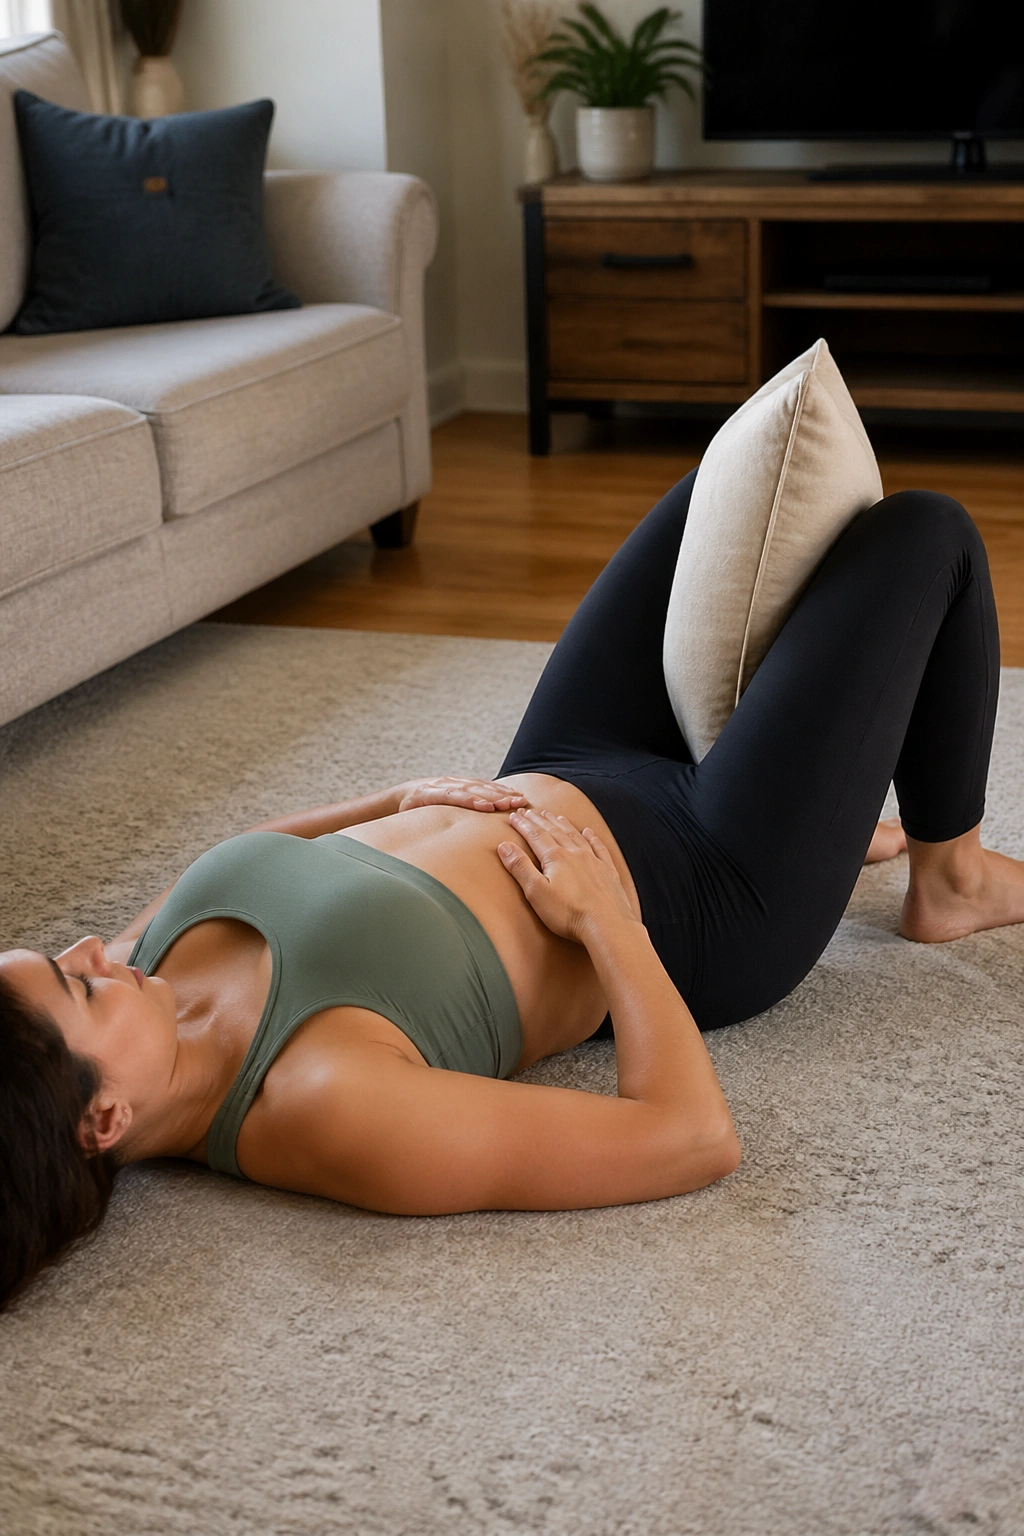
Put a pillow, yoga block, or folded towel between your knees and you will feel this one in a different way. The light inner-thigh squeeze gives some women a cleaner connection to the deep lower abs and pelvic floor, which is helpful early on when the mind-muscle link feels fuzzy.
Lie on your back with knees bent and feet flat. Hold the pillow between your knees with a gentle 30 to 40 percent squeeze—not a max effort crush. Inhale. On the exhale, keep the squeeze and lightly draw the lower abdomen inward. Hold that steady feeling for 3 seconds, then inhale and ease off.
A Good Set Looks Like This
- 6 to 8 slow reps
- 3-second exhale and brace
- Neck relaxed
- Jaw relaxed
- Butt not clenched
If your adductors, the inner-thigh muscles, take over and the core disappears, use less pressure. The squeeze is a signal, not the main event.
Best use: slot this between harder drills as a reset when you feel your form slipping.
6. Wall-Supported Standing Brace
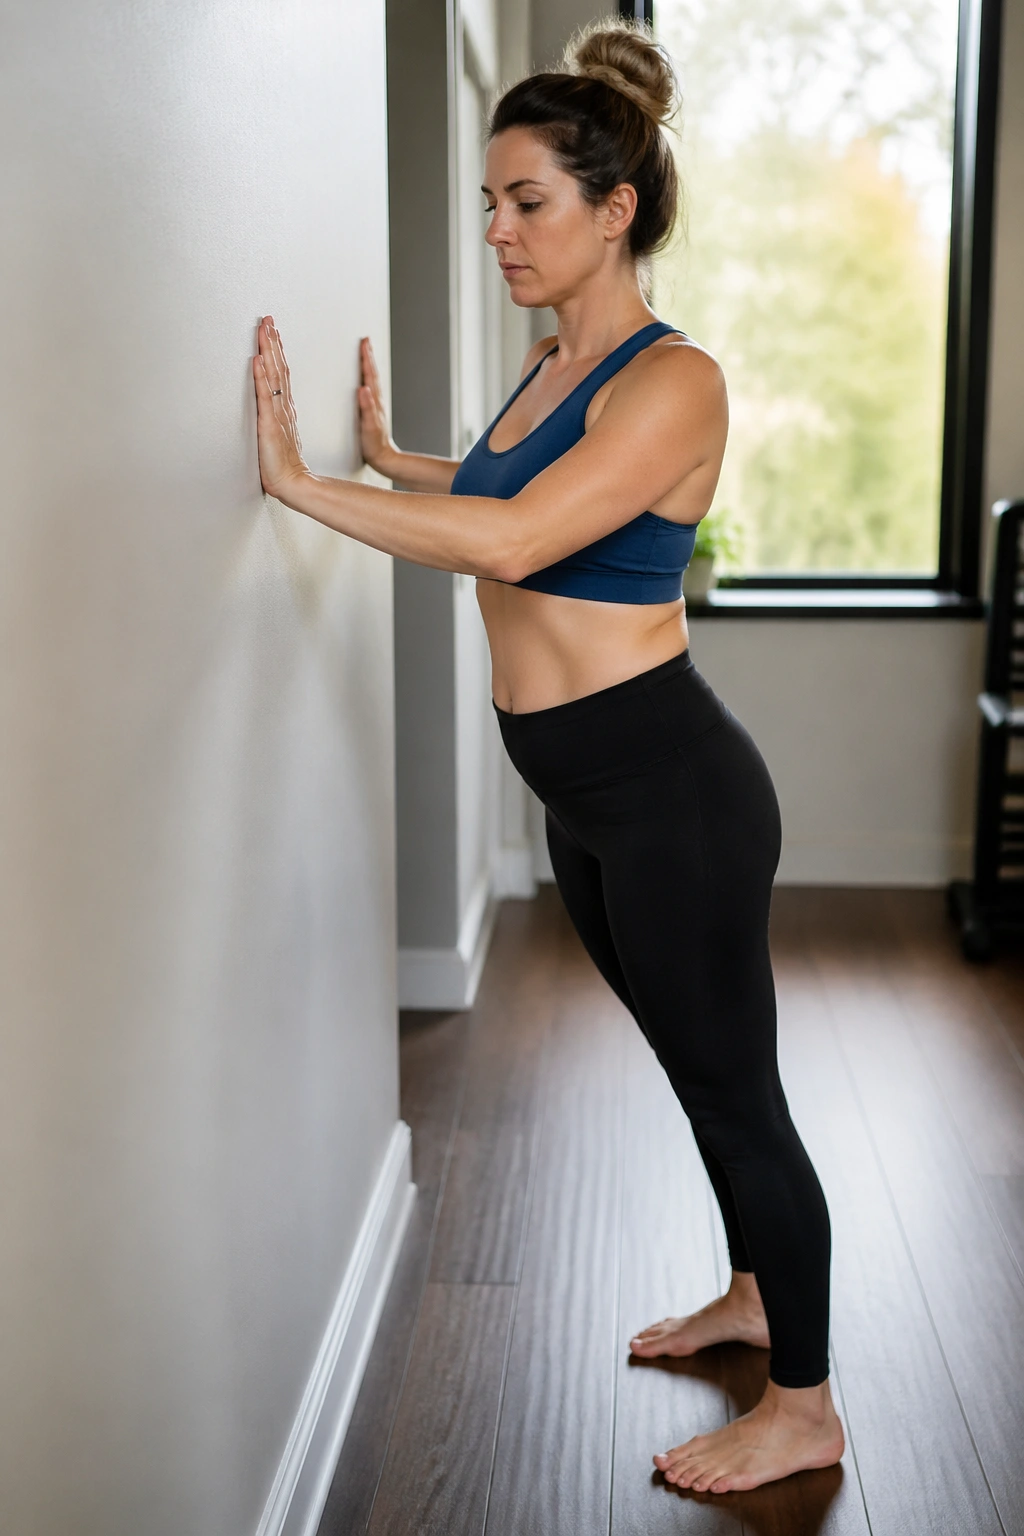
Standing changes everything. Floor exercises remove gravity and give you support on two or three sides. Real life does not.
Face a wall and place your hands on it at chest height. Walk your feet back a step so your body is on a mild angle. Soften your knees. Let your breastbone drop a touch so your ribs are not thrust forward. Then exhale and feel the lower abs gather inward as you gently press the wall away.
That wall press matters. It turns on the front of the body without the pressure spike of a plank. You are teaching the trunk to manage force in the same upright position where you feed the baby, stand at the counter, and hold laundry baskets against your ribs.
Do 5 breaths in this position, or 8 short exhale-and-hold reps. If you feel more pressure downward into the pelvic floor than inward through the lower abdomen, lessen the wall push and reset your posture.
A lot of postpartum women need this drill sooner than they need another floor move.
7. Sit-to-Stand with Exhale
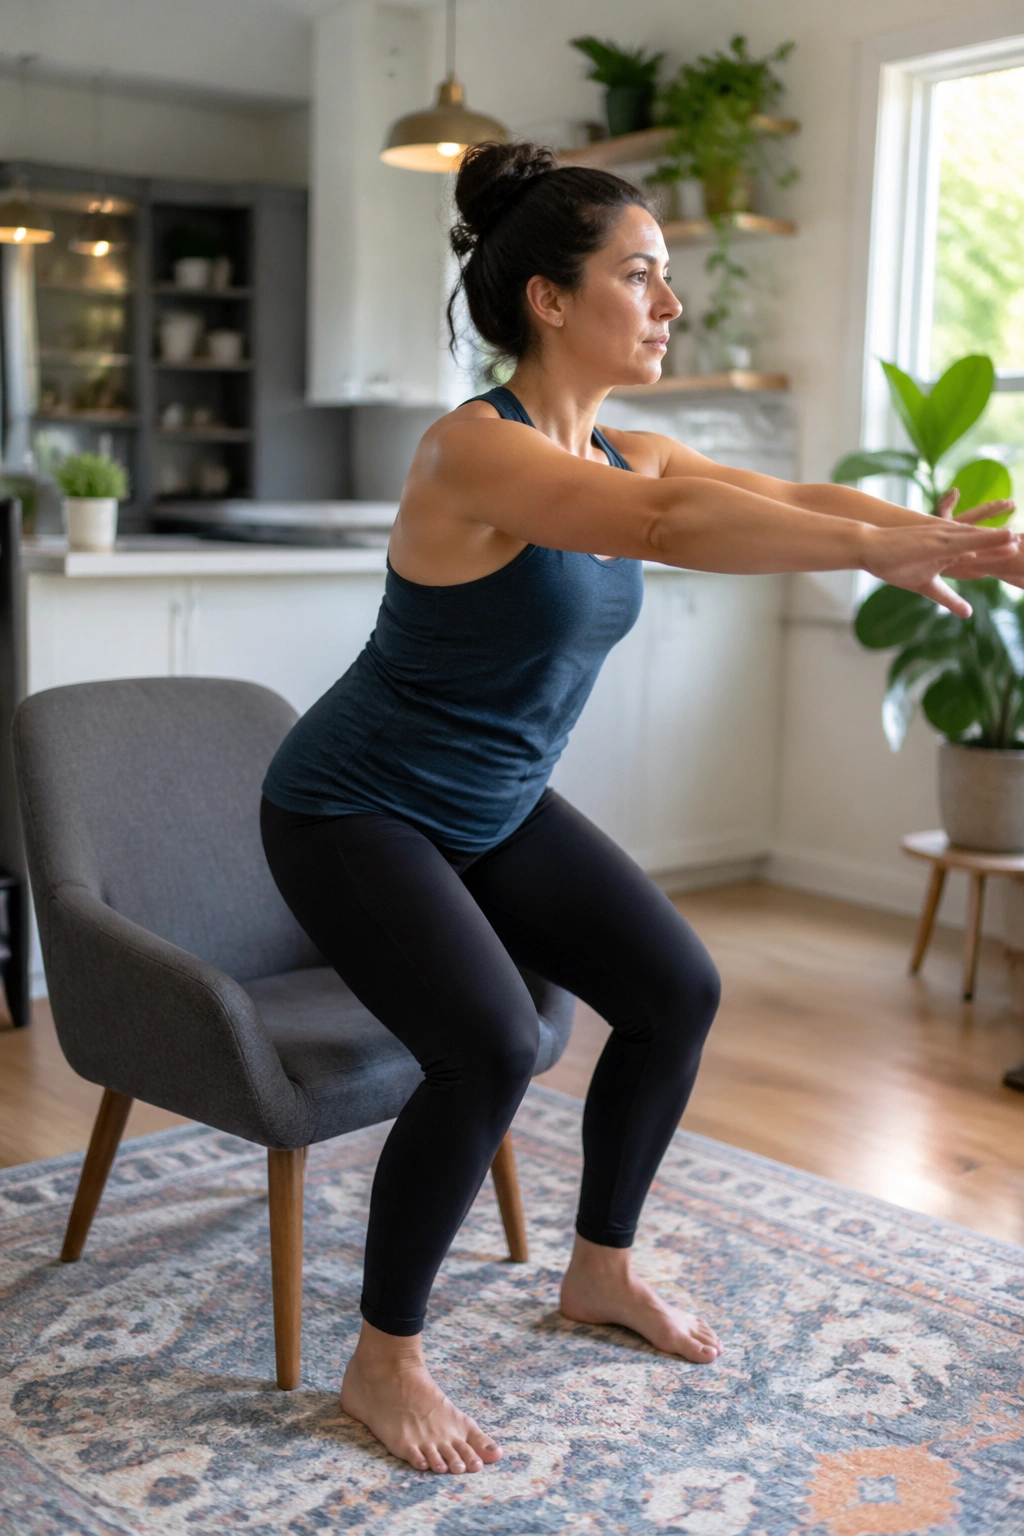
Getting up from a chair is not glamorous training. It is one of the most useful postpartum core exercises you can do.
Use a chair that lets your hips sit a bit higher than your knees. Scoot to the front edge. Plant your feet under you. Lean your torso forward slightly from the hips, then exhale as you stand, keeping your ribs stacked over your pelvis rather than flinging the chest upward.
On the way down, inhale and lower under control. Avoid dropping into the seat. That lowering phase teaches your core to control pressure on the return, which is where plenty of women collapse through the midline.
Two details matter here. First, reach your arms forward if you need a counterbalance. Second, keep the chin soft. A jammed-up neck is usually a sign that the trunk has lost the plot.
Start with 6 reps. Build to 10 to 12 before adding a light weight held close to the chest. If you are caring for a baby all day, that weight progression will come soon enough.
8. Seated Knee Lifts with Stacked Posture
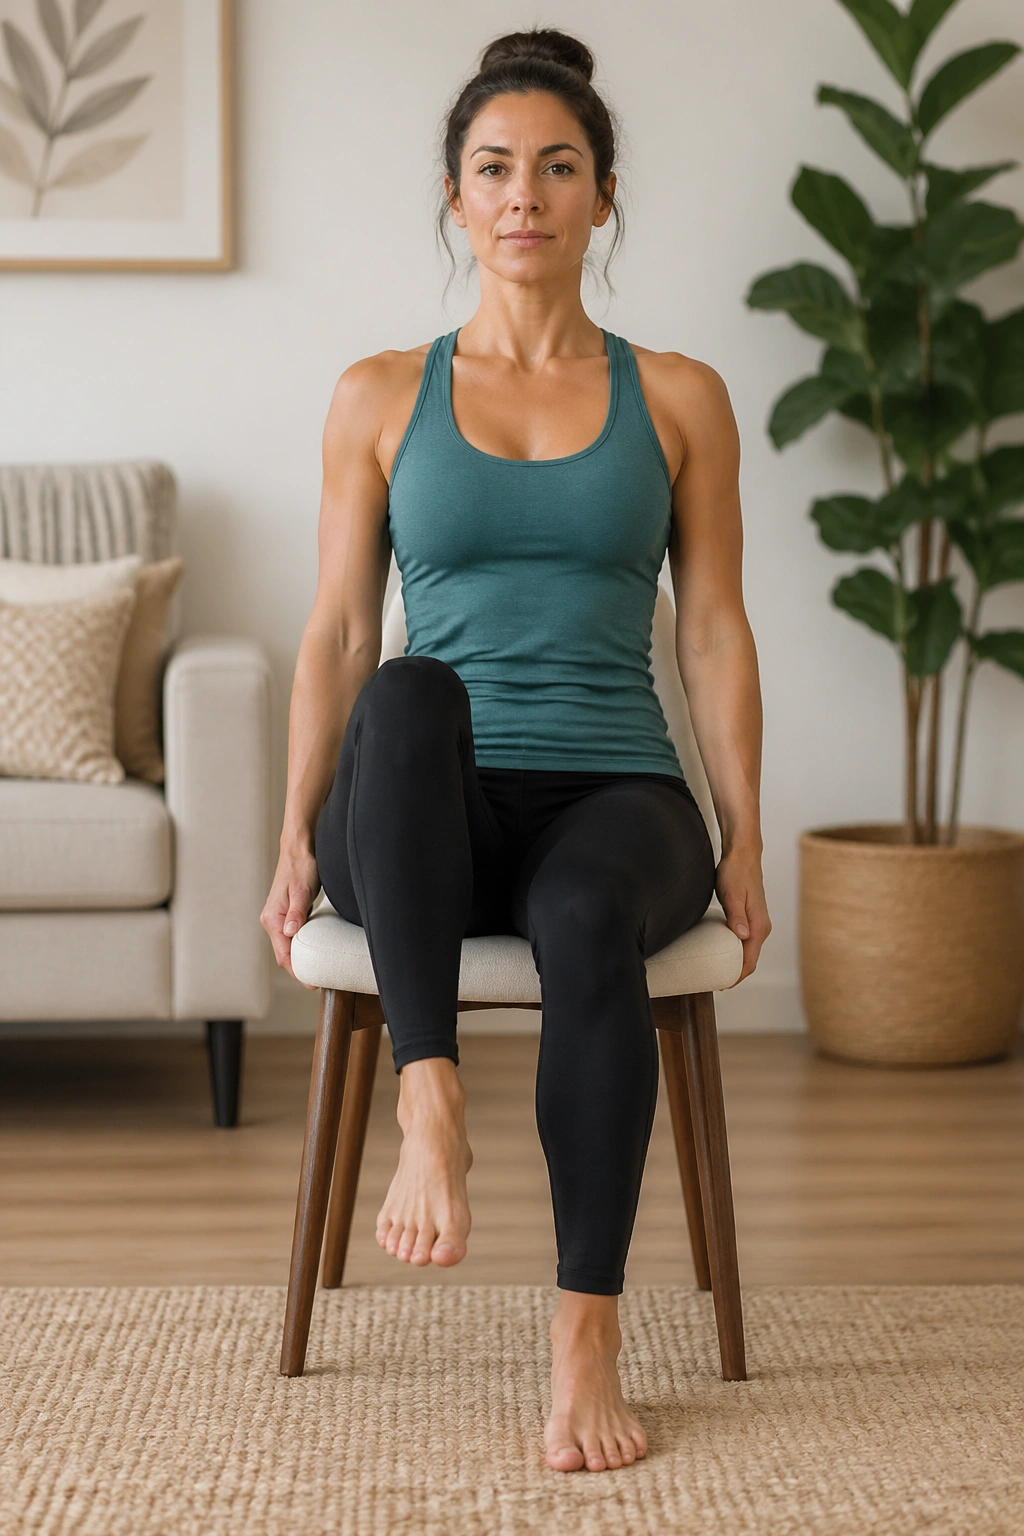
A chair can expose weak pressure control fast.
Sit on the front half of a firm chair with both feet flat. Place your hands on the sides of the seat if you need support at first. Grow tall through the spine without arching. Exhale, brace gently, and lift one foot an inch off the floor. Lower. Alternate sides.
No leaning back. No collapsing into one hip. The whole value of the move is keeping your trunk still while the leg tries to drag your pelvis with it.
Some women feel this more when they sit on a folded towel near the edge of the chair, because the higher seat makes it easier to stack the pelvis and ribs. Others do better with fingertips on the lower ribs so they can catch themselves when the chest pops up.
Try 5 to 8 lifts per side. If the hip flexors dominate, reduce the height of the lift until the abs can stay in the conversation.
9. Glute Bridge with Breath-Led Lift
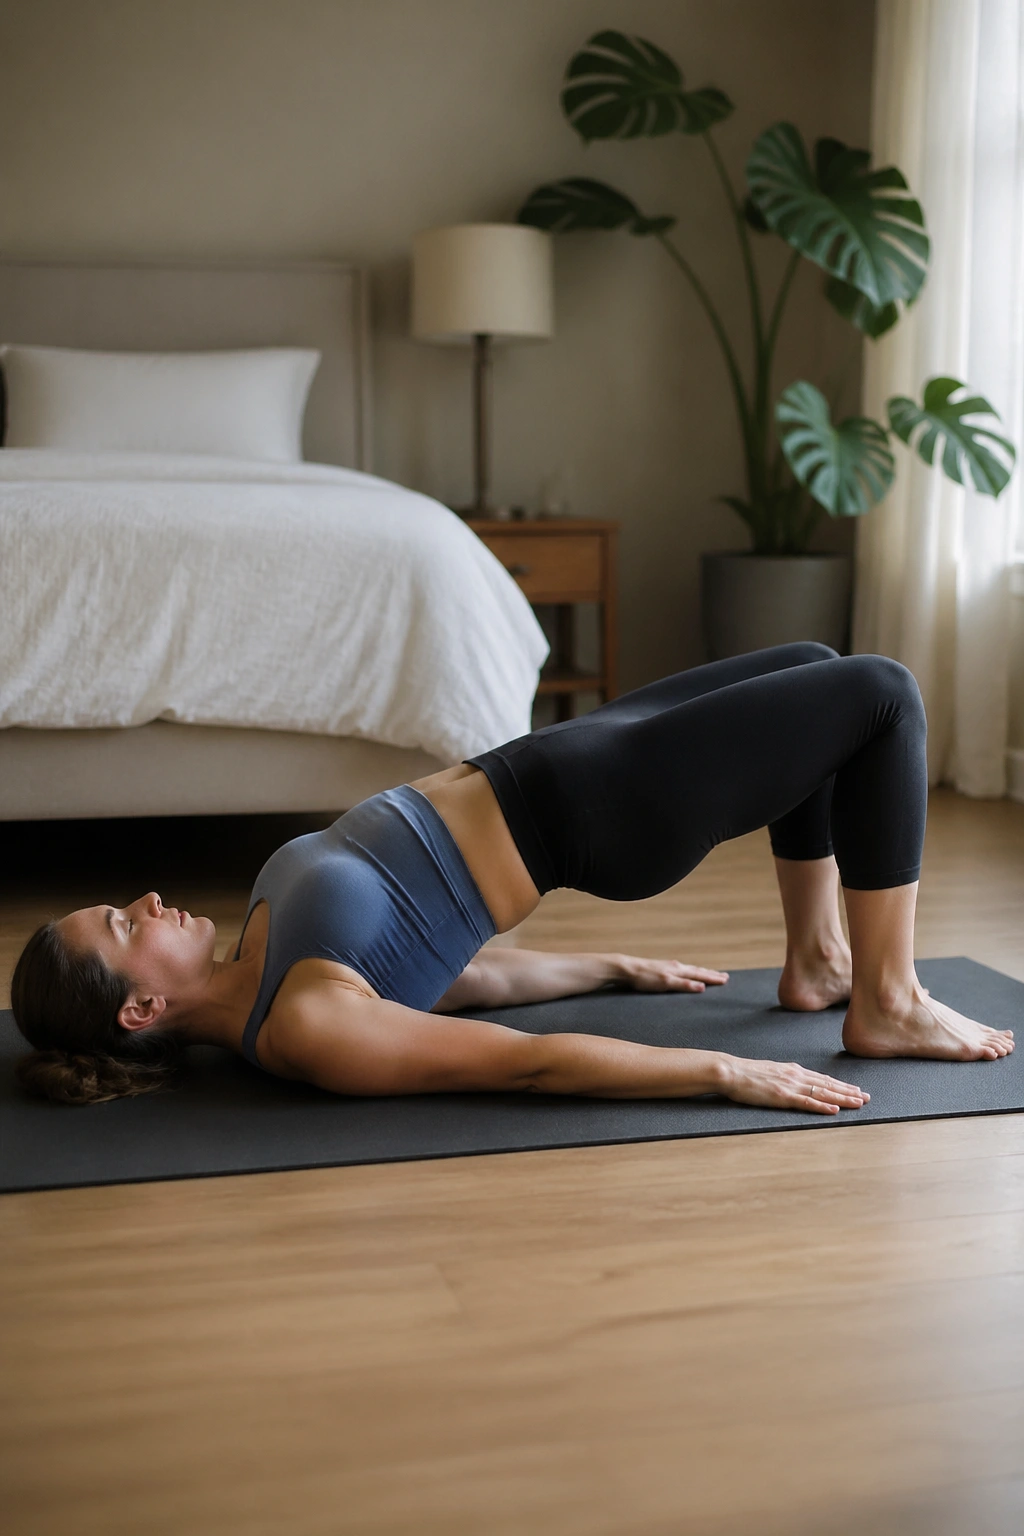
Bridges look like a glute move. They are, yet they are also one of the cleaner ways to train the front-to-back teamwork your postpartum trunk needs.
Lie on your back, knees bent, feet about hip-width apart. Inhale. As you exhale, gather the lower abs inward first, then press through your heels and lift your hips until your body forms a line from shoulders to knees. Stop before your ribs flare. Inhale at the top. Lower on the next exhale or inhale, whichever helps you stay in control.
The Setup That Usually Works Best
- Feet 8 to 12 inches from your hips
- Knees pointing straight ahead
- Lift only until glutes engage
- Pause 1 second at the top
A bridge done well feels solid through the hips and lower abs. A bridge done poorly turns into hamstring cramps, rib flare, and belly pressure. If you see a dome at the midline on the way up, lower the height and slow the tempo.
Aim for 2 sets of 8 reps.
10. Bridge Marches
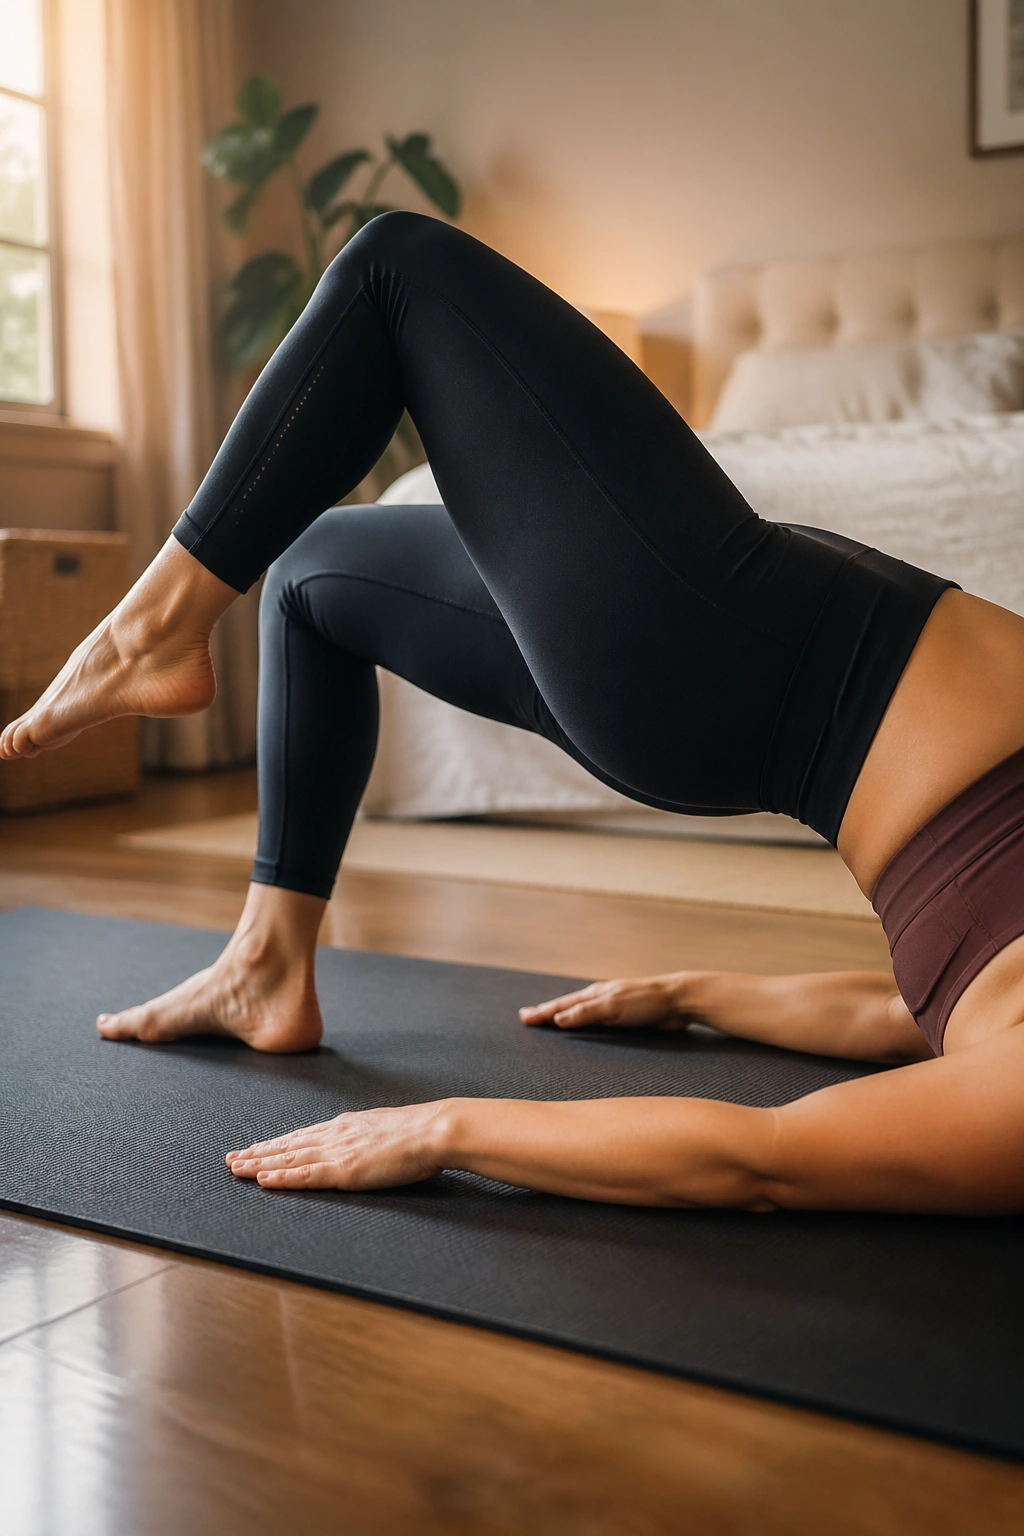
Unlike a regular bridge, the marching version punishes wobble. That is why it is useful.
Press up into your bridge position and hold. Exhale and lift one foot only a fraction off the floor—think postage-stamp height, not a big march. Set it down. Switch sides. If your pelvis tips, your ribs pop, or your abdomen bulges, the move is ahead of you for now.
This is not a race. Three clean lifts per side beat ten ugly ones.
A Tight Progression
- Hold the bridge for 10 seconds without moving
- Tap one heel lighter into the floor, then the other
- Lift one foot 1 inch
- Build to 4 to 6 marches per side
You should feel glutes, deep abs, and some hamstring. You should not feel your low back doing overtime. The minute the bridge turns into a sway-backed hold, drop back to standard bridges.
11. Dead Bug Heel Taps
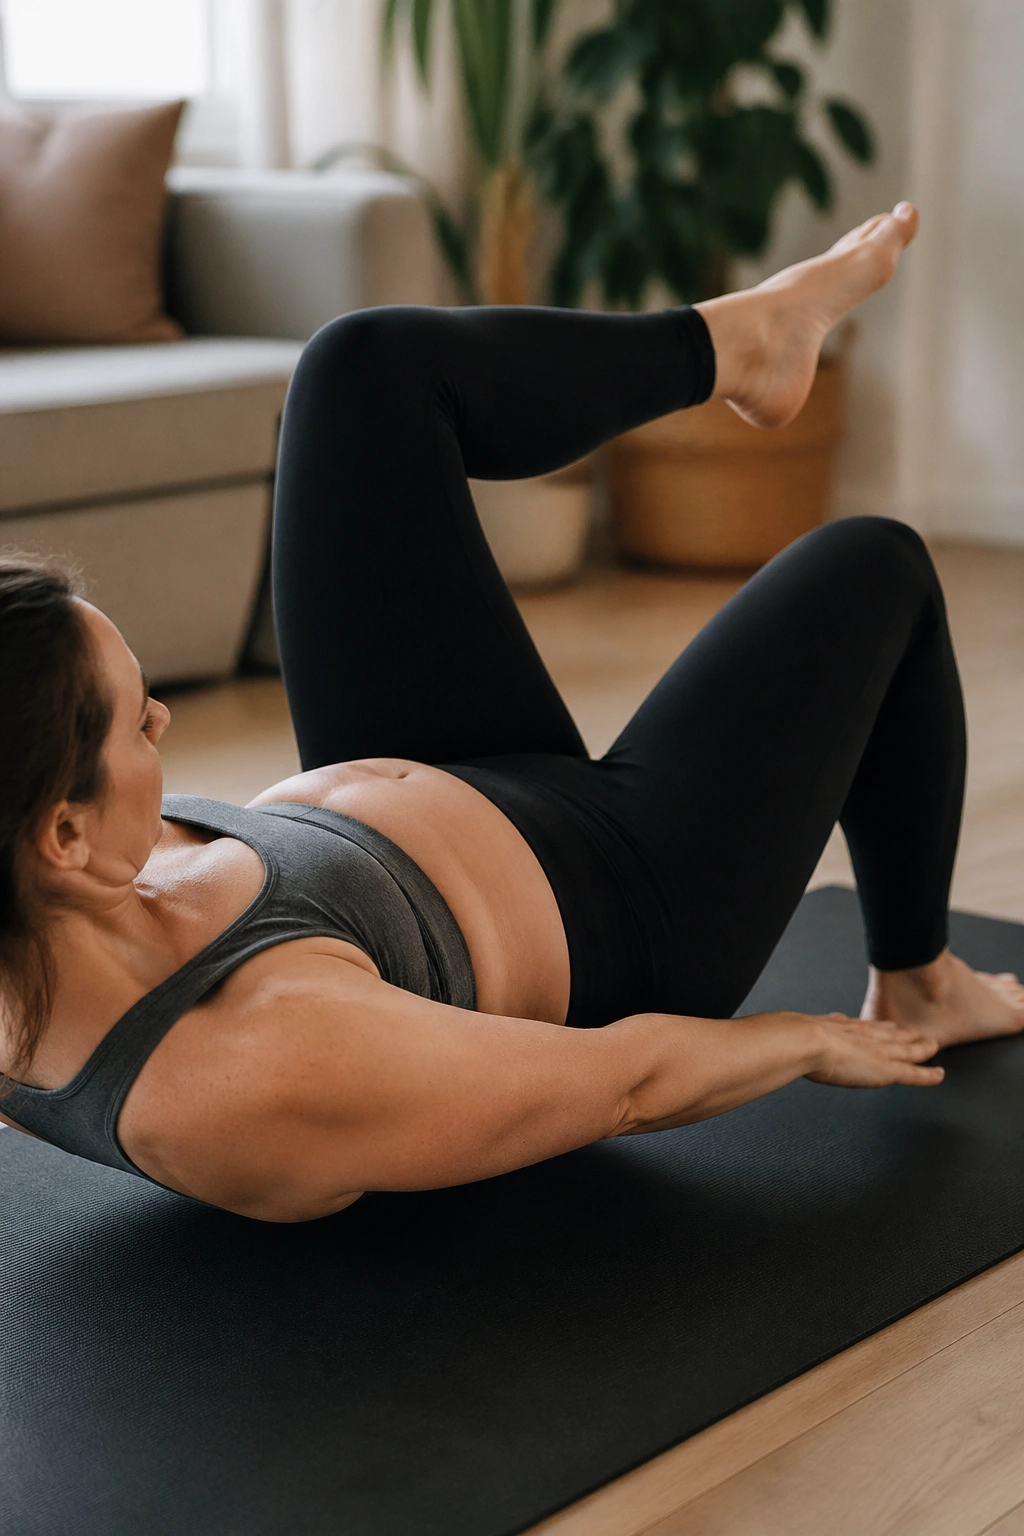
Dead bug variations have a rough reputation postpartum because people rush them and end up doing a floor-based crunch with flailing legs. The modified version is better behaved.
Start on your back. Bring one leg to tabletop and keep the other foot on the floor, or bring both legs to tabletop only if you can hold that position without doming. Exhale and tap one heel toward the floor, then return. Alternate sides.
Why This One Helps
You are training the trunk to resist extension while the legs move away from the center. That skill shows up when you walk faster, climb stairs, push a stroller uphill, or carry a heavier child.
Rep Range
- 4 to 6 taps per side at first
- Slow 2-second lower
- Full exhale on each tap
A small range is not cheating here. If the heel only travels halfway down before the midline starts to rise, stop halfway. The right range is the one you can own.
12. Quadruped Belly Lift and Breath
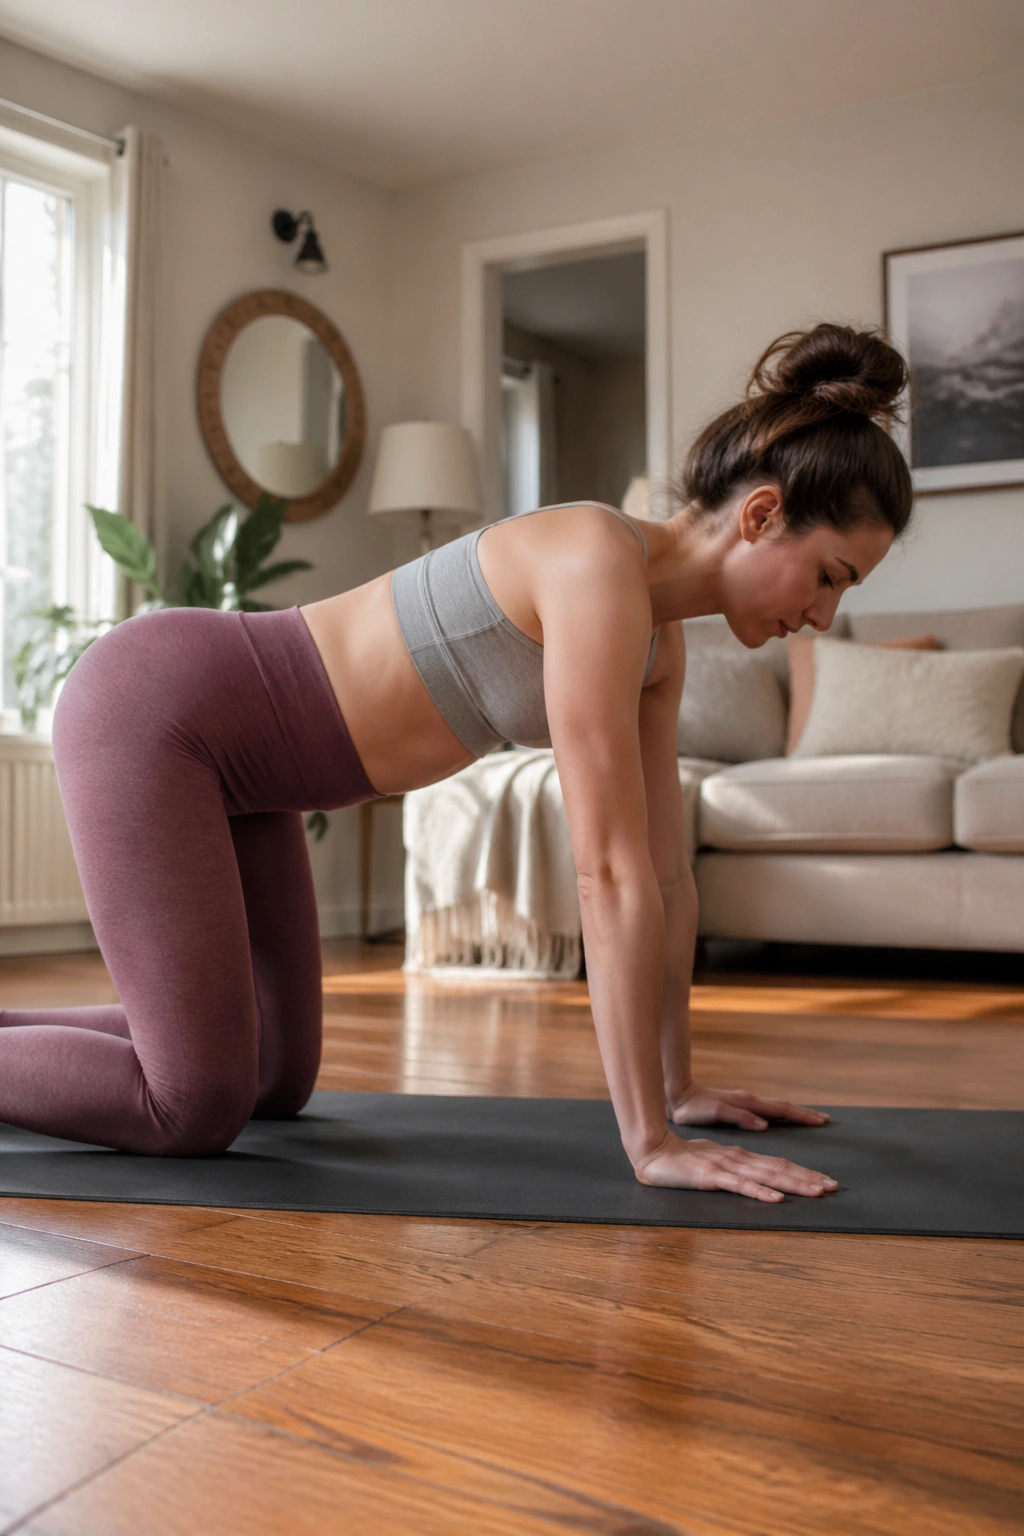
Hands and knees is where many mothers first feel the abdominal wall settle down. Something about the position gives clearer feedback.
Set up with hands under shoulders and knees under hips. Let your spine stay long, not rounded into cat pose and not sagging into your low back. Inhale and feel the belly soften toward the floor. Exhale and gently lift the belly away from the floor while keeping the ribs broad and the neck easy.
The move is tiny. If someone across the room can see it, you are probably doing too much.
Hold the exhale connection for 3 to 4 seconds, then breathe in without dropping all control. Take 5 to 6 breaths. I like this drill because you can feel whether you are gripping the front body or distributing the effort across the whole trunk—front, sides, back, and pelvic floor.
There is one catch. If wrists hate the position, place your hands on yoga blocks or lean onto a bench instead.
13. Bird Dog Toe Slides
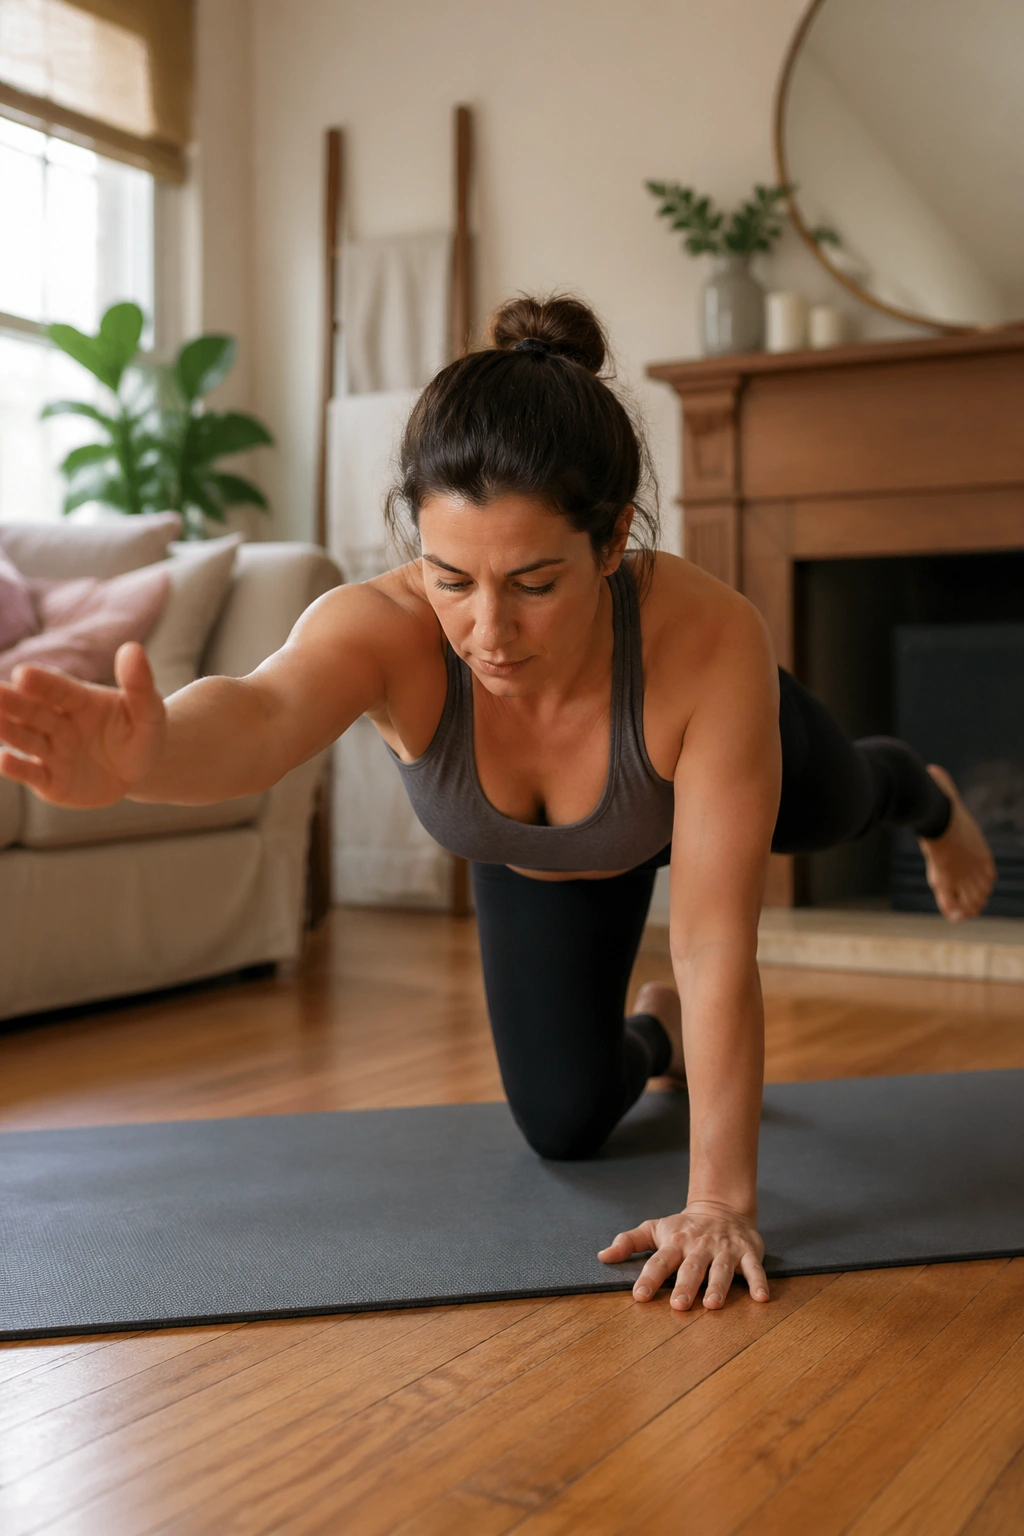
Toe slides beat full bird dogs at the start because the floor helps you control the leg, and the trunk gets less yanked around.
Begin in quadruped. Exhale and slide one foot straight back along the floor until the leg is long behind you. Pause. Inhale to return. Once that feels steady, add the opposite arm reaching forward a few inches. Not shoulder height yet. Earn that later.
This move trains anti-rotation. Your trunk has to stop your pelvis from twisting and your ribs from shifting. That is gold for postpartum function because life after birth is full of uneven loading—one-hip baby carries, one-arm grocery bags, awkward diaper-bag grabs.
Do 6 reps per side. Watch the mirror from the front if you can. Pelvis level, midline quiet, breath steady. If the low back dips when the leg reaches back, shorten the reach and think “heel long” instead of “leg high.”
14. Tall-Kneeling Pallof Press
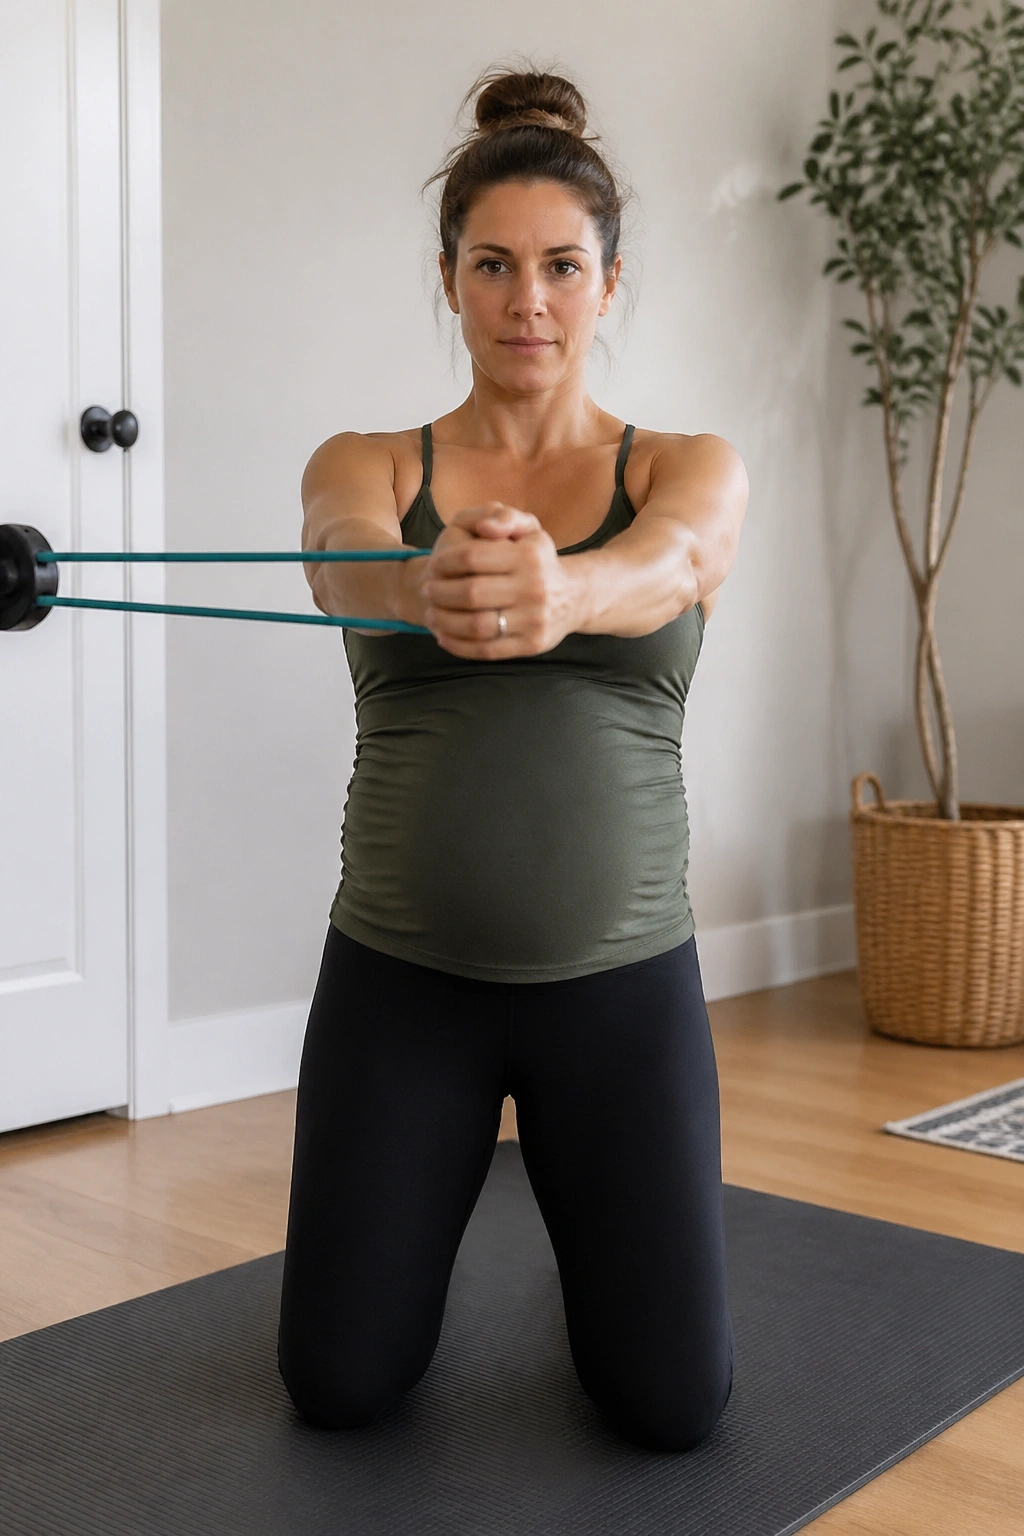
Bands do something floor drills cannot. They ask your core to resist rotation from the side, which is closer to real life than most ab moves.
Anchor a light resistance band at chest height. Kneel tall with both knees down, glutes lightly on, ribs over pelvis. Hold the band at your chest. Exhale and press it straight out in front of you, then bring it back in without twisting.
Why Tall Kneeling Works
The kneeling position removes the ankle and foot from the equation, so you can focus on the trunk. It also makes it harder to lean away from the band, which is the usual cheat.
Start Here
- Light band only
- 6 to 8 presses per side
- 2-second pause with arms straight
- Hips stay square
If you feel this only in your shoulders, step slightly farther from the anchor point or slow the press. A clean Pallof press should make the sides of your waist wake up.
15. Wall Plank Hold
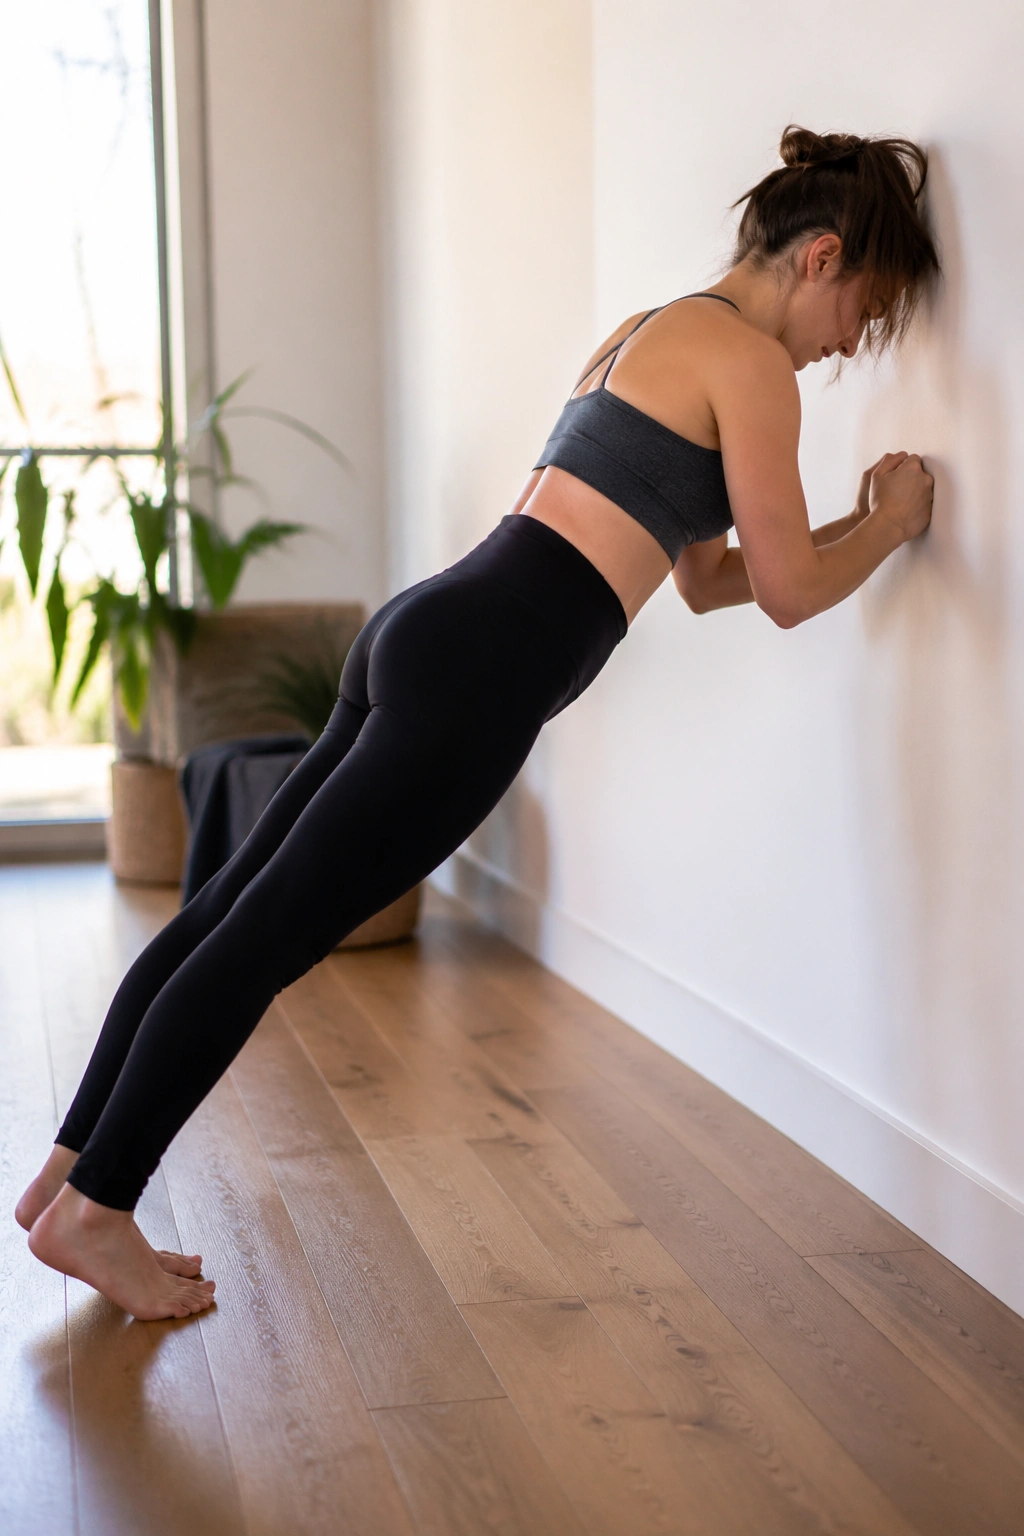
Forget floor planks for a minute. A wall plank is often the smarter first stop.
Stand facing a wall and place your forearms or hands on it, then walk your feet back until your body forms a straight line from head to heels. Exhale and brace lightly. Press the wall away without shrugging. Hold.
The beauty of the wall is that you can scale the move with one step. More upright is easier. More horizontal is harder. That makes it one of the better postpartum progressions because you can find the exact angle where your abdomen stays flat-ish and your breath stays calm.
Hold for 10 to 20 seconds. Repeat 3 times. If you start shaking after 6 seconds, that is useful information, not failure. Stay at that angle until the hold feels steady.
A good wall plank feels long through the back body, firm through the lower abs, and quiet at the midline. No mountain of effort required.
16. Wall Plank Shoulder Taps
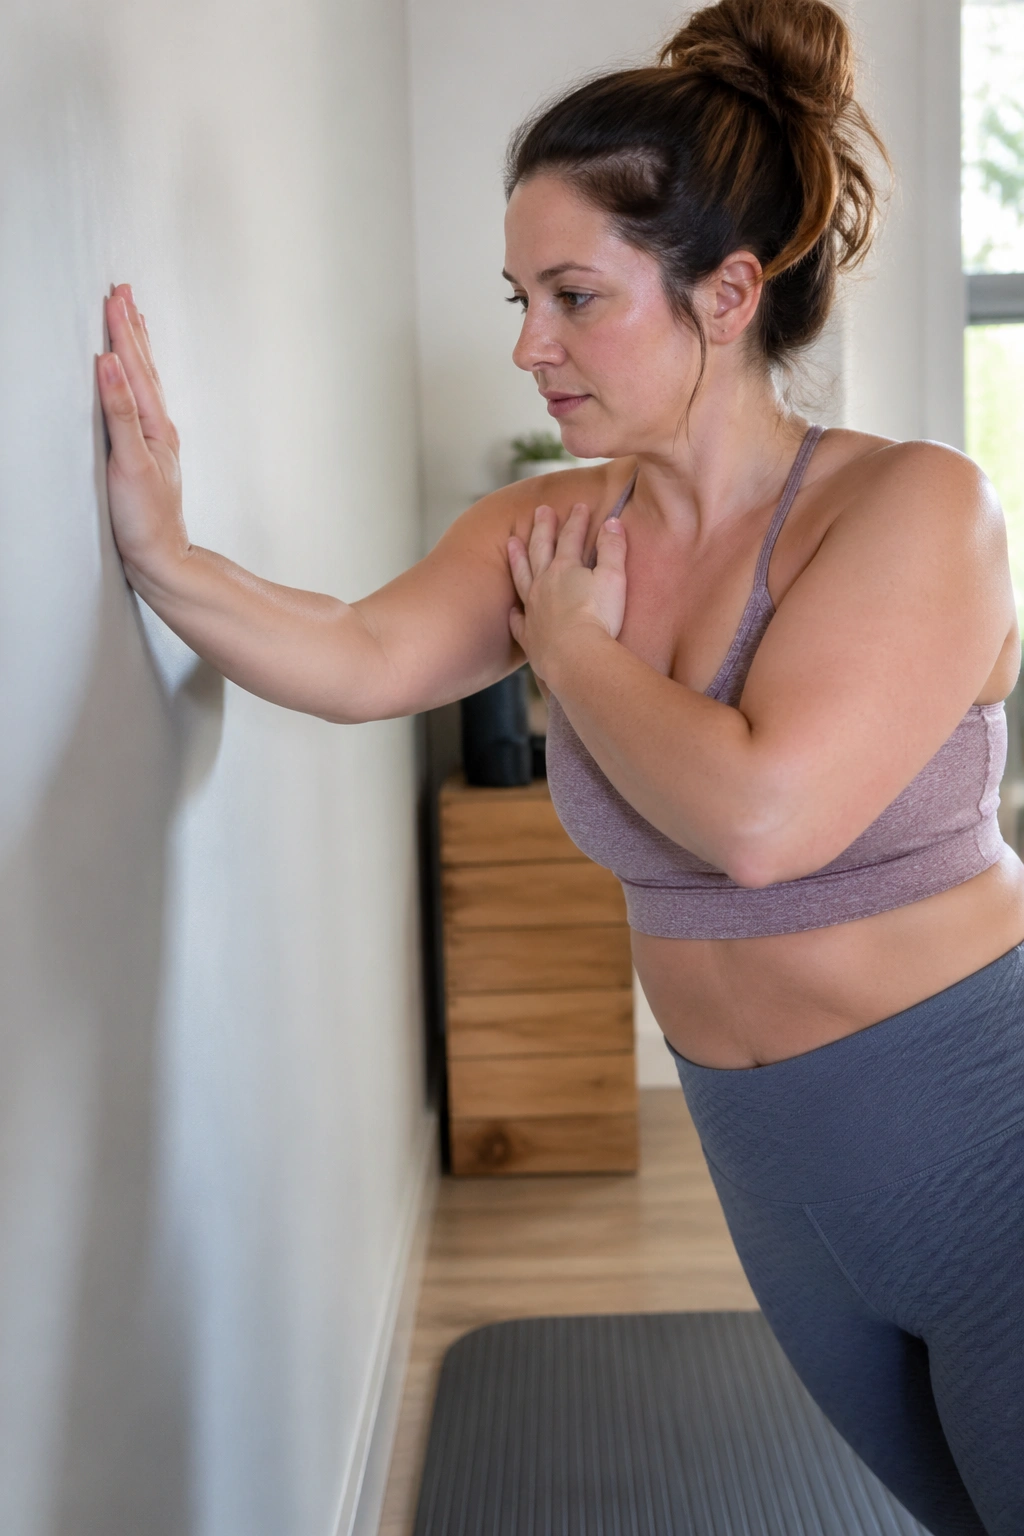
A shoulder tap on the wall sounds easy until you try to keep your ribs from popping and your hips from swaying.
Set up in your wall plank. Shift your weight slightly into one hand and tap the opposite shoulder with the free hand. Return it to the wall. Alternate sides. The trunk should resist rotation the whole time.
Common Form Leaks
- Hips swinging side to side
- Ribs lifting as the hand leaves the wall
- Belly pushing forward
- Tap done too fast
Slow it down until each tap takes about 2 seconds up, 2 seconds down. Start with 4 to 6 taps per side. If the wall version already feels shaky, stay there. If it feels clean for two weeks, move to a countertop plank tap before you think about the floor.
This is one of those exercises that looks almost silly and then humbles strong people fast.
17. Modified Side Plank from the Knees
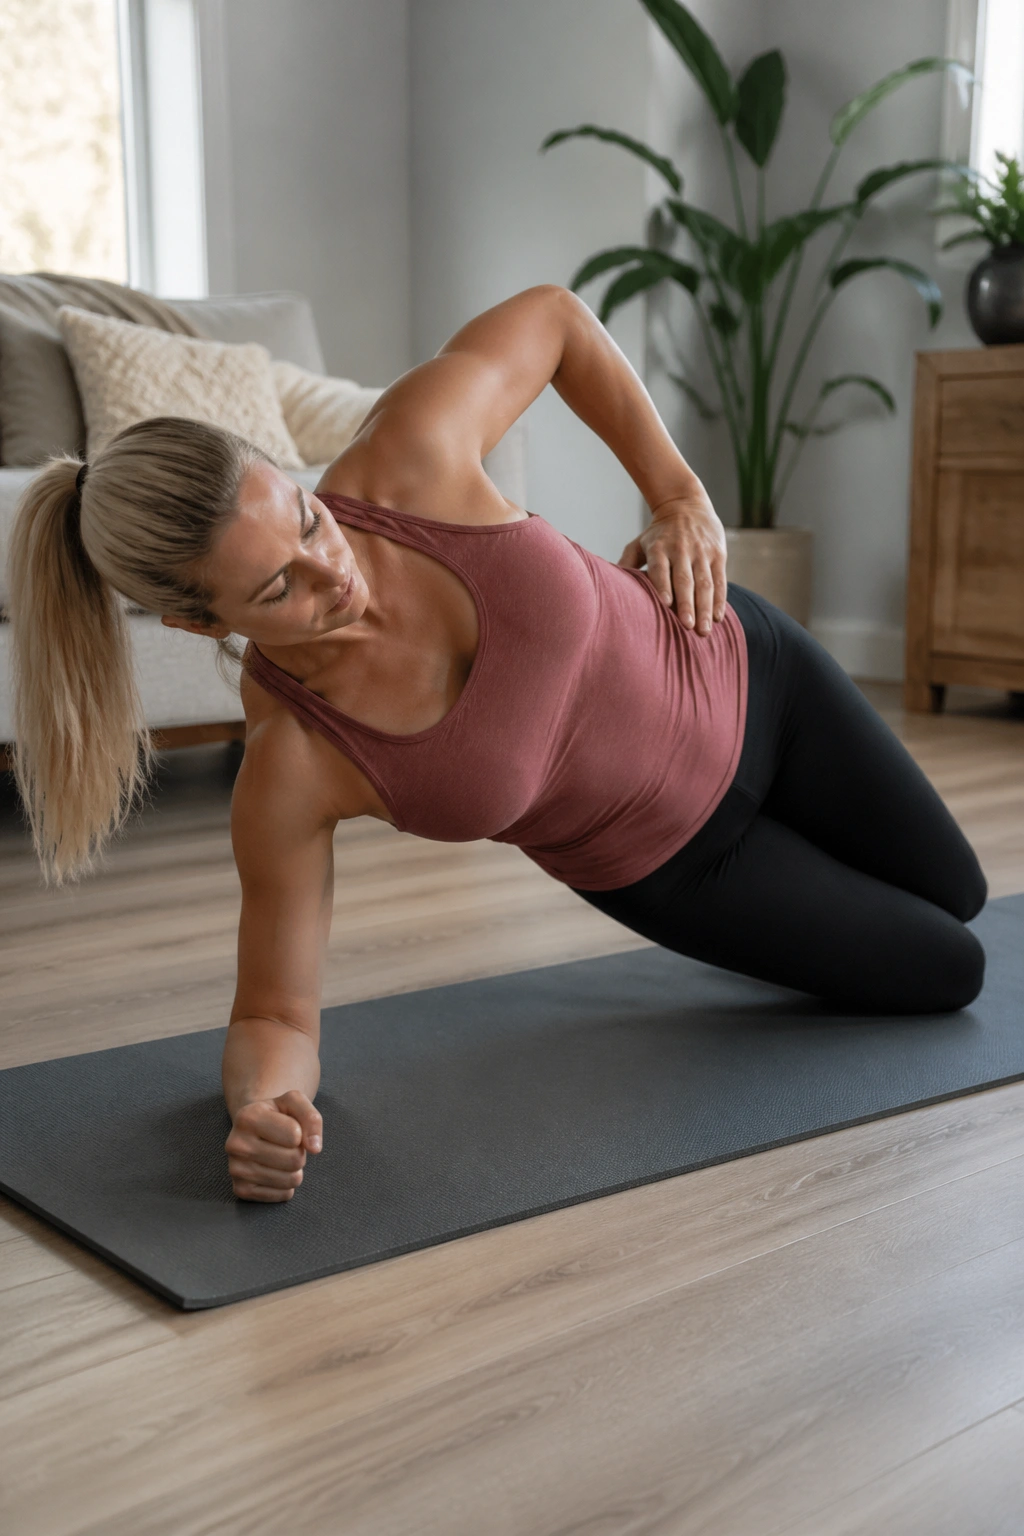
Side planks are often treated like a final exam. They do not need to be. The knee-down version is a solid middle step because it loads the obliques without the same pressure demand as a full front plank.
Lie on your side with knees bent to about 90 degrees and your elbow under your shoulder. Exhale, press the forearm into the floor, and lift your hips until your shoulders, hips, and knees form a long diagonal line. Hold for a breath or two, then lower.
What Makes It Worth Doing
The obliques matter in diastasis recti rehab because they help tension the linea alba and control trunk rotation. A well-done side plank often feels more “connected” through the waist than a front plank does.
Try 3 to 5 holds per side, each lasting 5 to 10 seconds. If your neck takes over, set your bottom shoulder blade first by gently pressing the floor away. If the underside waist cramps, lower sooner and build hold time slowly.
No medal for grinding through a 30-second hold with bad shape.
18. Suitcase Carry

Carry one heavy thing in one hand and your trunk has to answer. That is why the suitcase carry earns a spot near the end of the list.
Hold a dumbbell, kettlebell, or loaded tote bag in one hand at your side. Stand tall without leaning toward or away from the weight. Walk slowly for 20 to 40 steps, breathing normally and keeping your ribs stacked.
This drill is brutally honest. If one side of your waist collapses, if your shoulder hikes up to your ear, or if your belly pushes out as the load gets heavier, the weight is too much.
Start Light
- A load that feels like one grocery bag, not a maximal carry
- 20 slow steps per side
- 2 to 3 rounds
- Switch hands each round
The carry ties your training back to real life. You are not lying on the floor trying to “activate” a muscle. You are walking, breathing, balancing, and managing pressure the way a postpartum body often needs to.
A Simple 15-Minute Postpartum Core Session
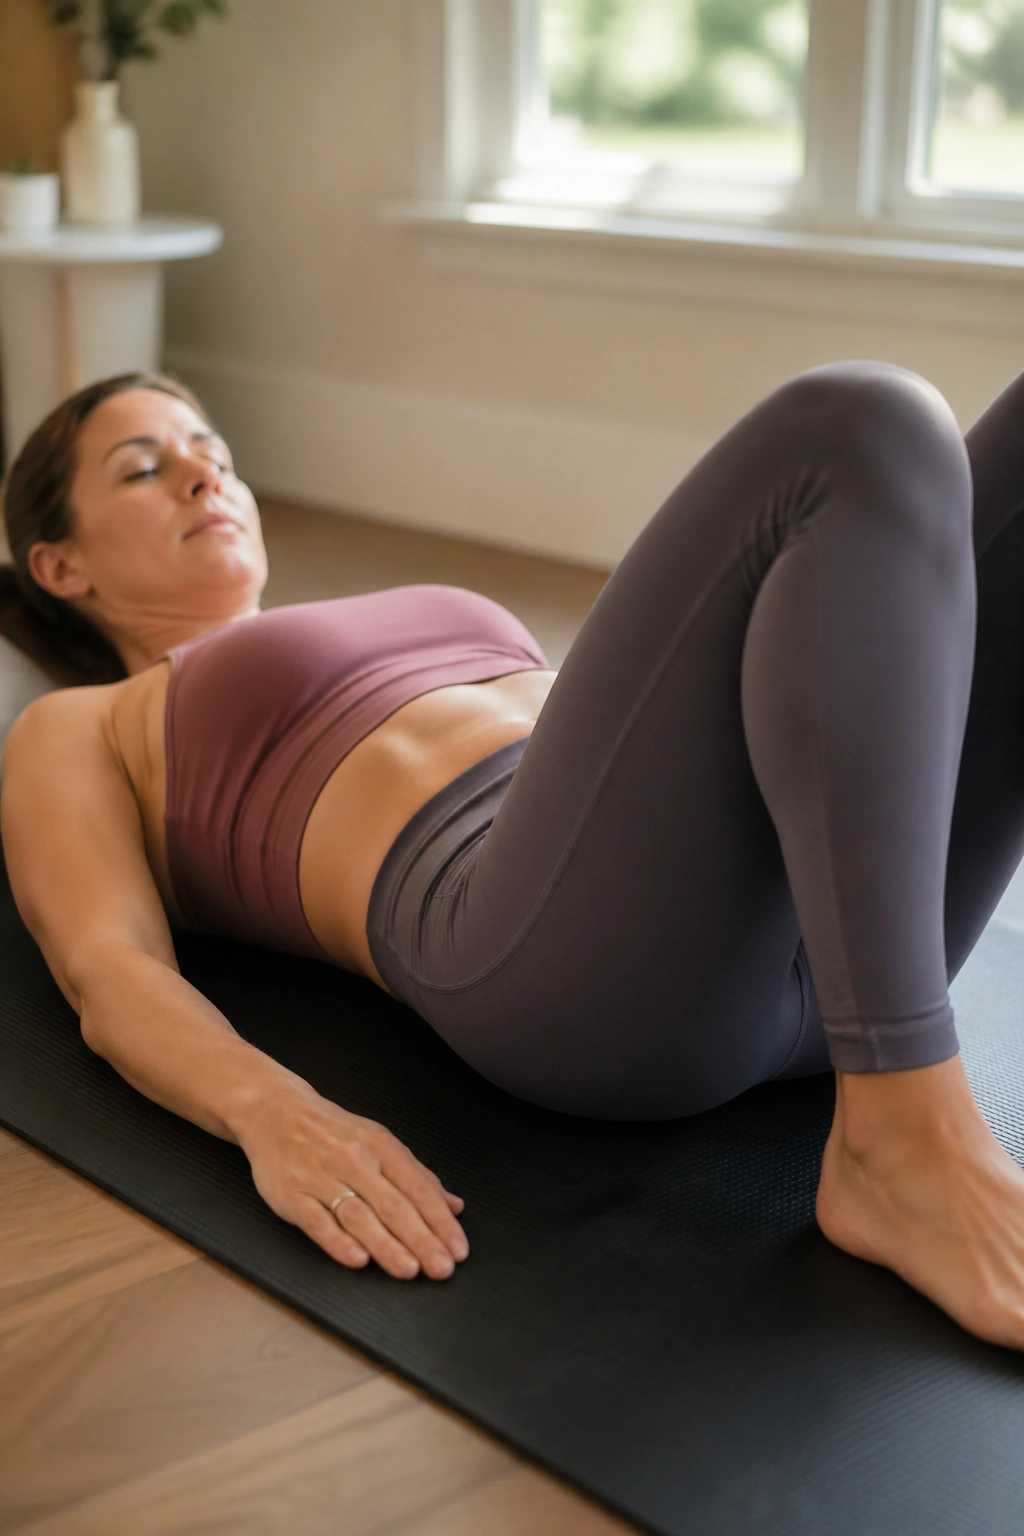
You do not need all 18 moves in one workout.
Pick 5 to 7 exercises that match your current stage and run them as a short circuit, resting when your breath gets choppy or your form slips. A clean 15-minute session done three or four times a week usually beats one giant session that leaves your midline annoyed for two days.
A sample beginner-friendly session could look like this:
- Supine 360 breathing – 5 breaths
- Pelvic tilts – 8 reps
- Heel slides – 6 reps per side
- Wall-supported standing brace – 5 breaths
- Sit-to-stand with exhale – 8 reps
- Glute bridge – 8 reps
A stronger progression might look more like this:
- Quadruped belly lift and breath – 5 breaths
- Bird dog toe slides – 6 reps per side
- Tall-kneeling Pallof press – 8 reps per side
- Wall plank hold – 15 seconds
- Wall plank shoulder taps – 5 taps per side
- Suitcase carry – 30 steps per side
Stay with a level until three things are true: no doming, no breath holding, no pelvic pressure. Then add range, reps, or a harder variation. One lever at a time. That slower build is what gets the postpartum core strong enough to handle jogging, heavier lifting, and the rough-and-tumble pace of family life.
When Extra Help Makes Sense
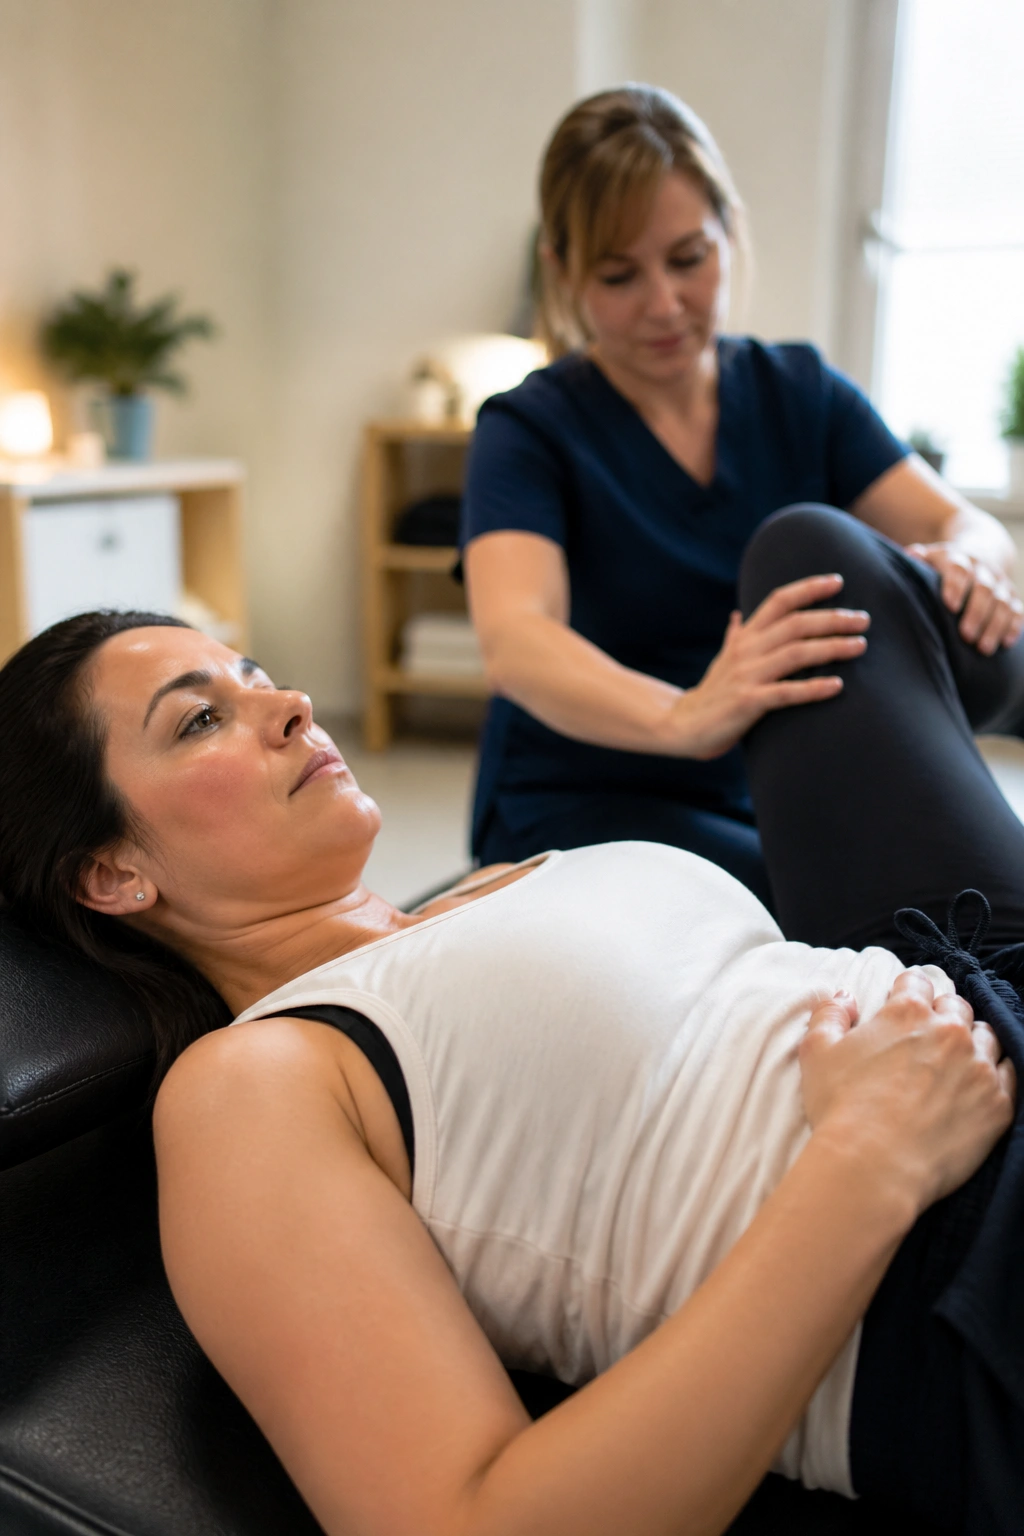
Some cases need more than home exercises, and saying that out loud matters.
If you have a deep trench along the midline, sharp pain, a bulge that feels more like a hernia than a soft ridge, heavy pelvic symptoms, stubborn leakage, or a core that still feels absent after steady practice, a pelvic floor physical therapist is the right next step. They can check tissue tension, breathing mechanics, scar mobility after cesarean birth, rib position, and the movement habits that no online list can fully see.
Scar work, bowel habits, lifting mechanics, and sleep posture sound less exciting than workouts. They matter anyway. Postpartum recovery is rarely one missing exercise. It is often a stack of small factors, and the good clinicians catch that fast.
Final Thoughts
Healing a postpartum midsection is less about crushing your abs and more about teaching pressure where to go. When your ribs, breath, pelvic floor, and abdominal wall start cooperating again, the body feels steadier in ways you notice outside the workout—rolling out of bed, carrying the baby, standing longer, walking faster.
Start lower than your ego wants. Stay there until the reps look calm. That quiet control is the thing you build on.
The flashy stuff can wait. The strong stuff starts here.
