



A Pilates ring can look almost too small to matter. Then you press it between your knees, hold it over your head, or keep it steady while your legs tremble in a plank, and the tiny circle starts making a very loud argument for itself.
That is the charm of Pilates ring workouts. The resistance is light, but the demand for control is not. Your inner thighs wake up first, then your glutes, deep abs, chest, shoulders, and all the little stabilizers that help a body look firm instead of sloppy.
Toning, in Pilates terms, is not about beating yourself up for an hour. It comes from repeated, exact work: press, hold, breathe, release, repeat. A good ring session leaves you feeling longer through the spine and more awake through the legs, with that pleasant, hard-to-fake fatigue that shows up after muscles have actually been asked to do something useful.
Control is the whole game.
Use a ring with foam handles that feels springy but not flimsy. If the spring is weak, you will outmuscle it in a minute and the exercise turns into busywork. If it is too stiff, your grip and neck start cheating for your legs. The sweet spot is a ring that gives you feedback without forcing you to strain.
1. Seated Inner-Thigh Press
A seated squeeze looks harmless. It is not, at least not if you do it with upright ribs and a slow exhale.
Sit on the edge of a chair or on the mat with your knees bent, place the ring between your inner knees, and press for a slow count of three. Ease off halfway, then press again. Ten to twelve reps is enough to make the inner thighs sit up and pay attention, especially if you keep your feet flat and your spine long.
What to feel
- Your thighs should work before your hip flexors kick in.
- The lower belly stays gently firm.
- The shoulders stay heavy and quiet.
A small press done well is worth more than a hard squeeze done badly. If your knees cave inward or your neck starts helping, make the press smaller and cleaner. That is the whole trick.
2. Supine Inner-Thigh Press
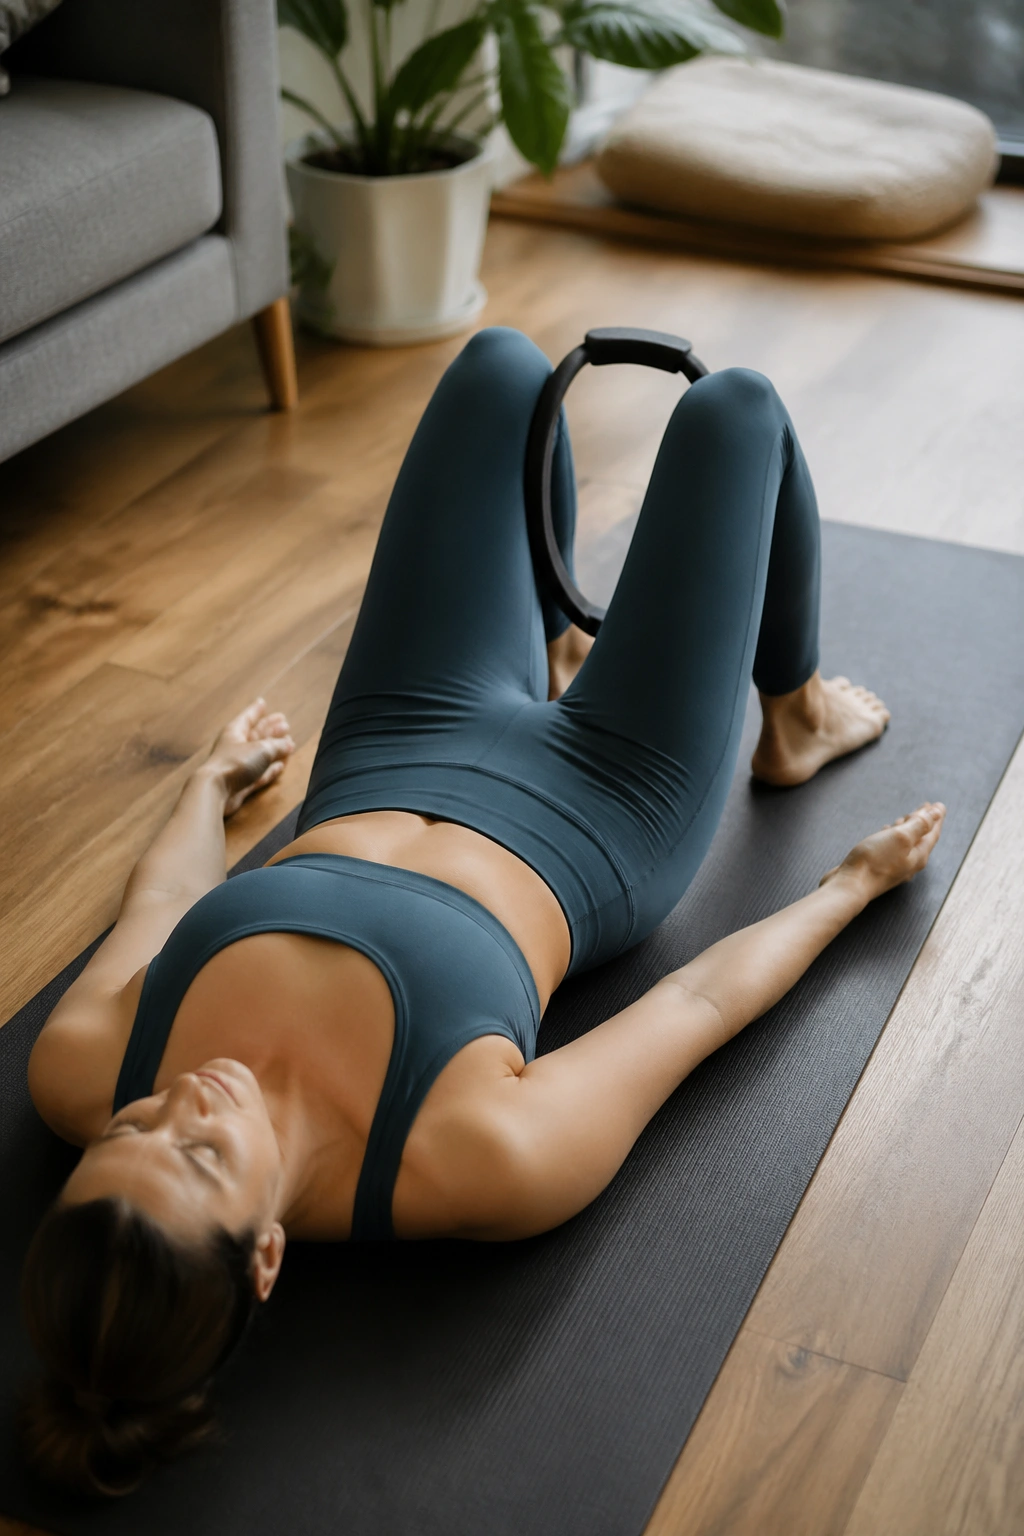
Why does a tiny press matter so much when you are lying flat on your back? Because the floor takes away the drama and leaves only the work.
Place the ring between your knees, lie down with your feet flat, and let your pelvis feel heavy. On the exhale, press the ring to about 70 percent of your strongest squeeze, then hold for two seconds before releasing with control. Do 12 slow reps. If your lower back arches, move your feet a little farther away and make the squeeze lighter.
This is one of the easiest Pilates ring workouts to teach you the difference between effort and strain. There is a nice burn in the adductors, but there should not be a clench in the jaw. If there is, you’re pushing too hard.
3. Glute Bridge Ring Lift
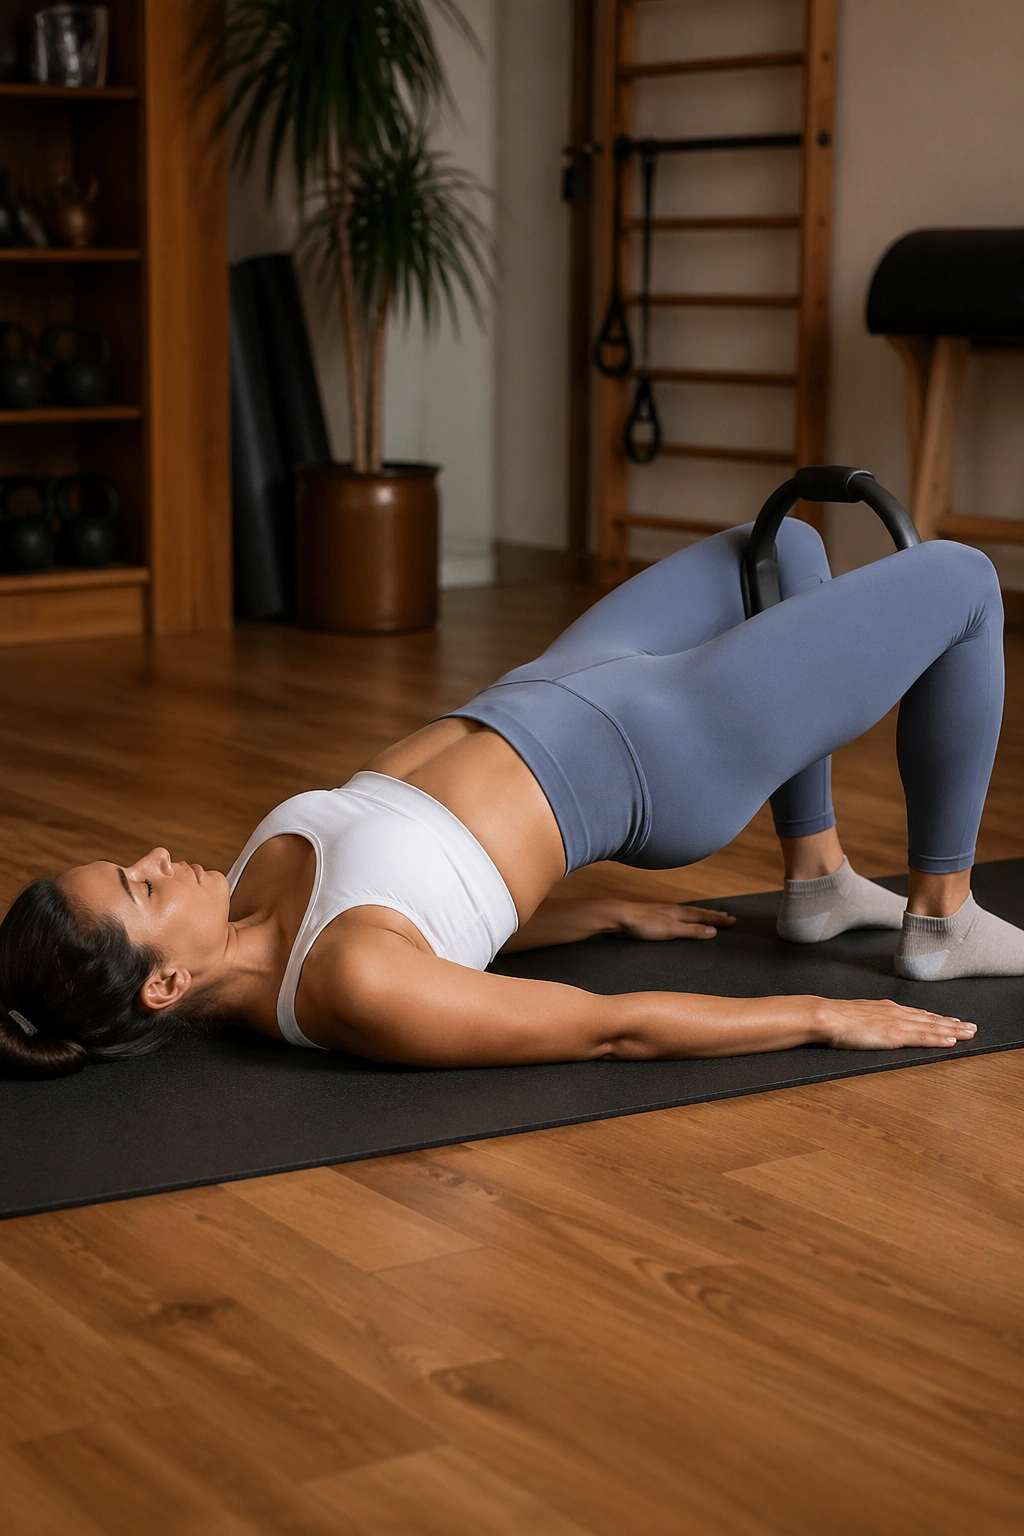
Bridge work is where the ring starts earning its keep.
Place the ring between your knees, lie back, and roll the pelvis up one vertebra at a time until your ribs, hips, and knees form a clean line. Keep a gentle press into the ring as you lift. At the top, pause for two counts, then lower slowly through the spine. Eight to ten reps is plenty if your glutes are doing the lifting instead of your lower back.
The best version feels like the back of the thighs and the sides of the hips are sharing the job. The common mistake is to thrust the hips up and forget the ring the second you rise. Don’t do that. The ring should stay alive from the first inch of the lift to the last inch of the descent.
4. Hundred with Ring Press
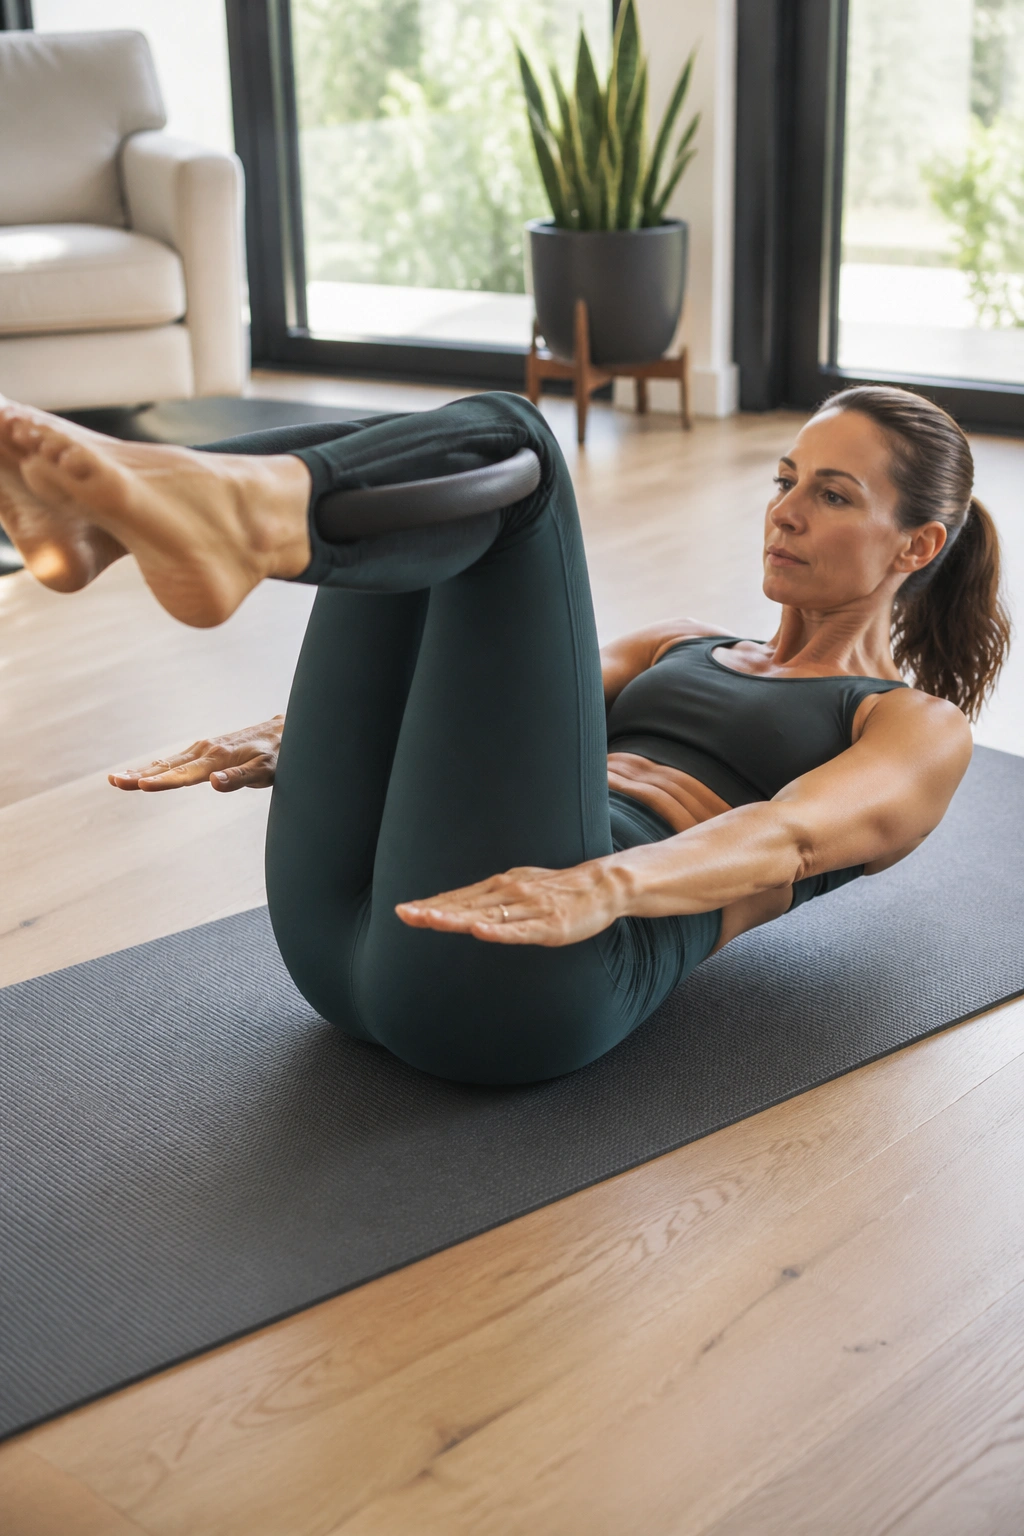
The Hundred gets more interesting when the ring makes your arms and inner thighs cooperate.
Lie on your back, bring the ring between your knees, and lift your legs to tabletop if your lower back stays calm there. Curl head and shoulders up, reach the arms long, and pump them small and fast for five counts in, five counts out. Keep pressing the ring lightly the whole time. Aim for 30 to 50 breath counts, depending on your level.
How the ring changes the Hundred
The ring gives the lower body a job while the torso works. That matters because the exercise stops being only about endurance and starts becoming about organization. The abs stay front and center, but the thighs help anchor the pelvis, which often makes the movement feel cleaner.
If your neck gets tired before your belly does, lower your head for a breath or two. No shame there.
5. Standing Chest Press
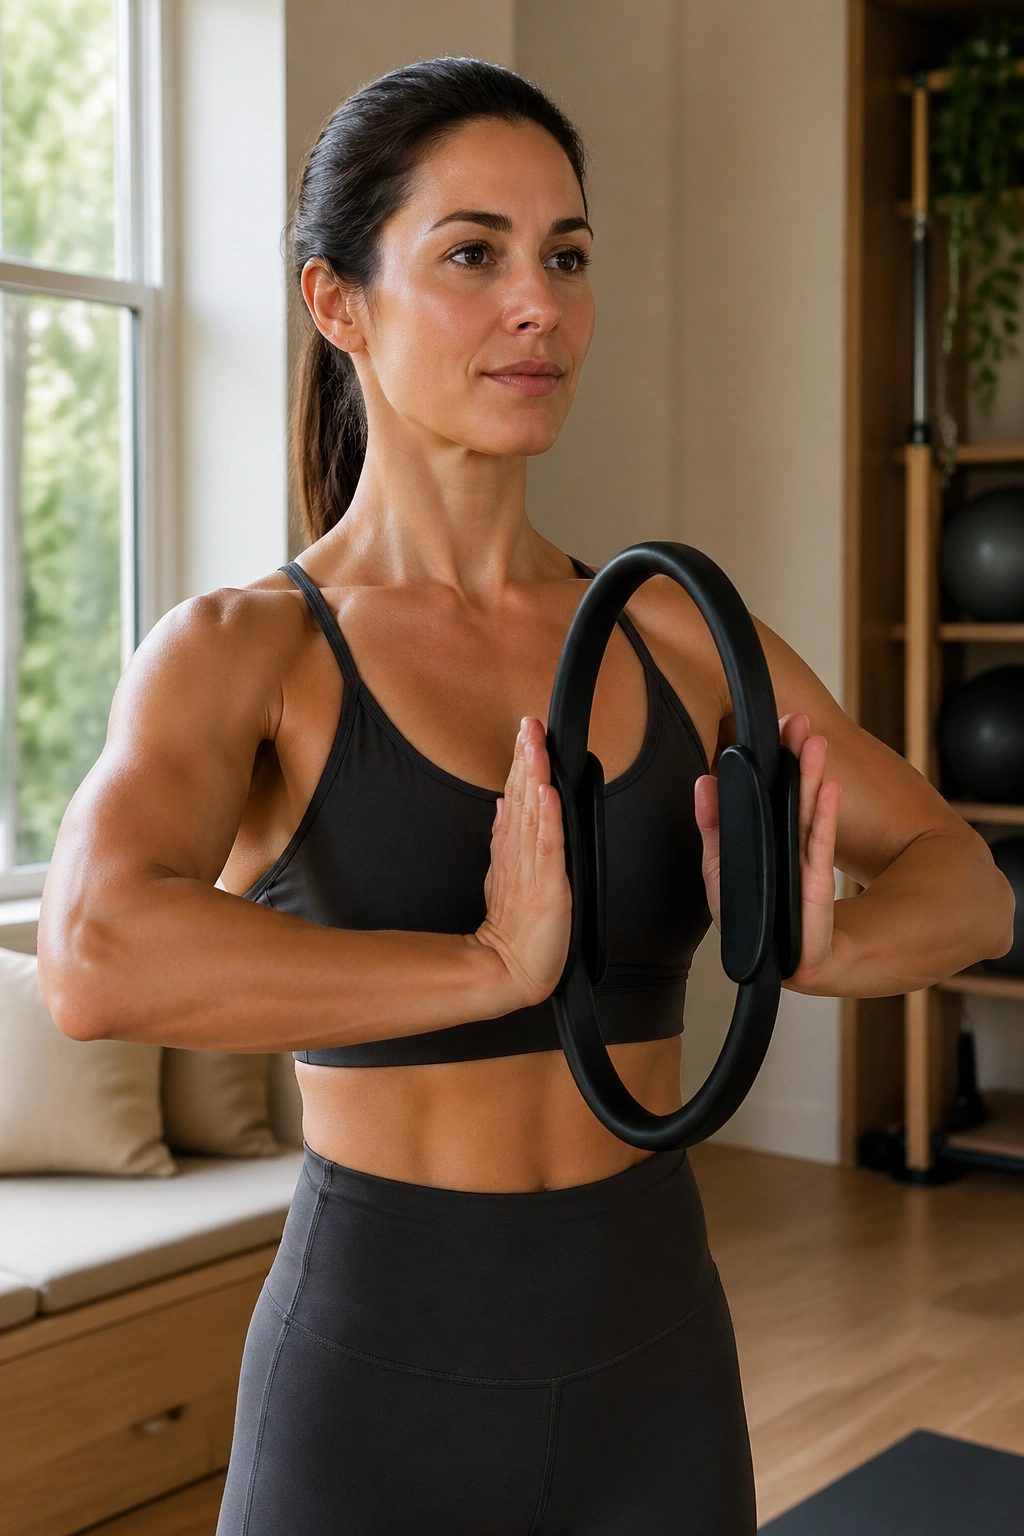
A Pilates ring can train the upper body without turning your shoulders into a wrestling match.
Stand tall with the ring between your palms at chest height. Keep your elbows slightly lifted and press the handles inward for three seconds, then release on a quiet inhale. Ten to twelve presses is enough. The chest, triceps, and front of the shoulders should work, but your ribs should stay closed and your chin level.
This version is especially good if your day has you folded over a desk or steering wheel. The movement reminds the upper back to stay organized while the chest and arms do the job. If the shoulders creep up, lower the ring a few inches and press a little less hard. That tiny change often cleans up the whole shape.
6. Single-Leg Stretch with Ring
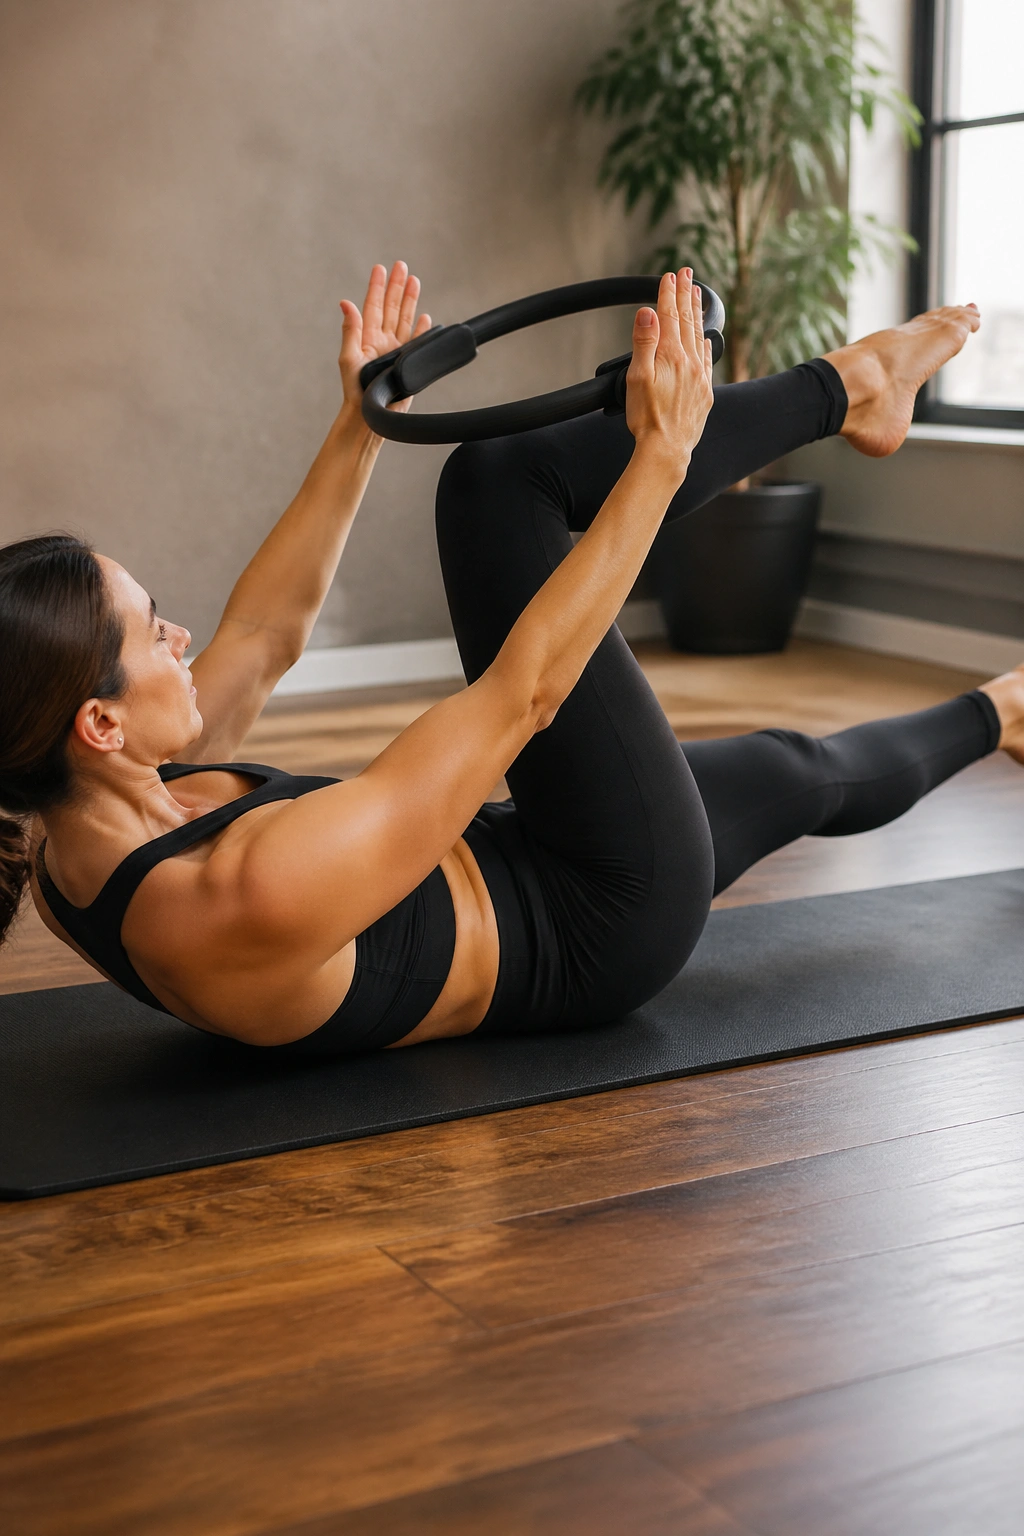
What makes this one feel sneaky is that your legs are moving, but your center is supposed to stay calm.
Curl up into single-leg stretch position, keep the ring between your palms, and hold it just above the thigh of the bent leg. As you switch legs, press gently into the ring so the arms stay active and the chest does not collapse. Do eight to ten switches per side, with the movement staying small and smooth.
The ring keeps your upper body from drifting while the legs cycle. That is the point. If the lower back arches or the pelvis rocks side to side, shorten the leg extension and slow down. Tiny range, clean control. That is the version that pays off.
7. Dead Bug Ring Press
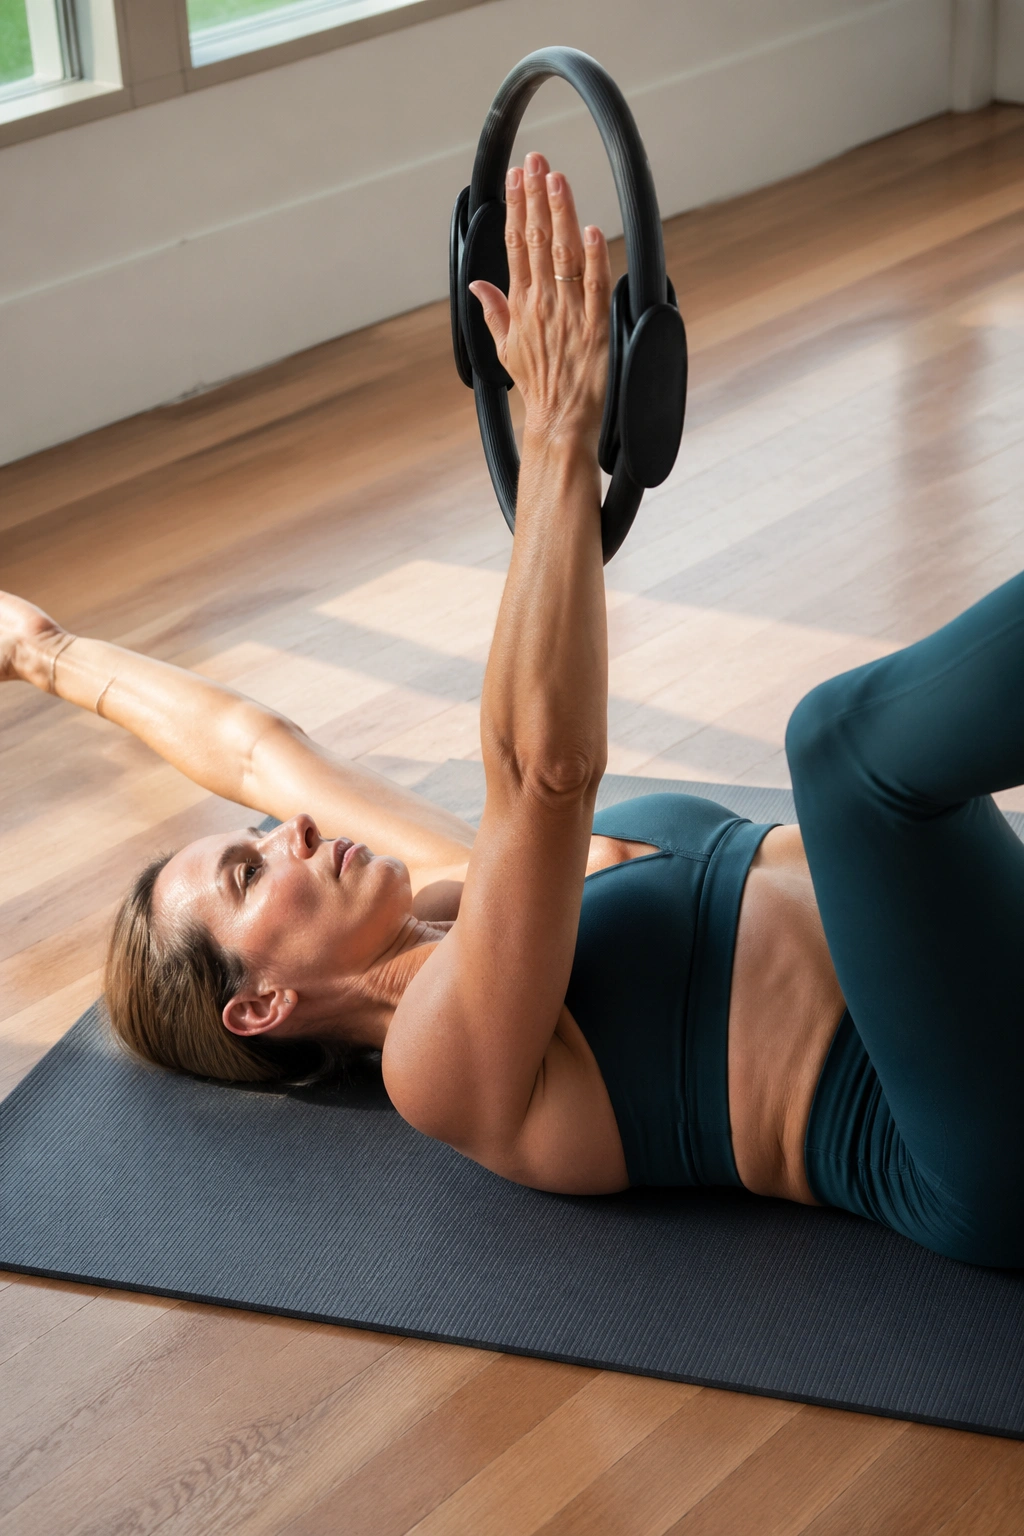
Dead bug with a ring sounds easy until one opposite arm and leg go long at the same time.
Lie on your back with the ring between your palms above the chest. Press into the ring lightly while you extend one arm back and the opposite leg forward, then return to center and switch sides. Six to eight reps per side is enough if you keep the lower ribs from flaring. The ring helps the shoulders stay engaged, which makes the trunk work harder to stay quiet.
Common mistake
People usually rush this one and lose the pelvis on the first long reach. Slow it down. If your low back starts to lift off the mat, shorten the leg reach by a few inches and keep the ring press steady. That is not cheating. That is smart training.
8. Toe-Tap Stabilizer
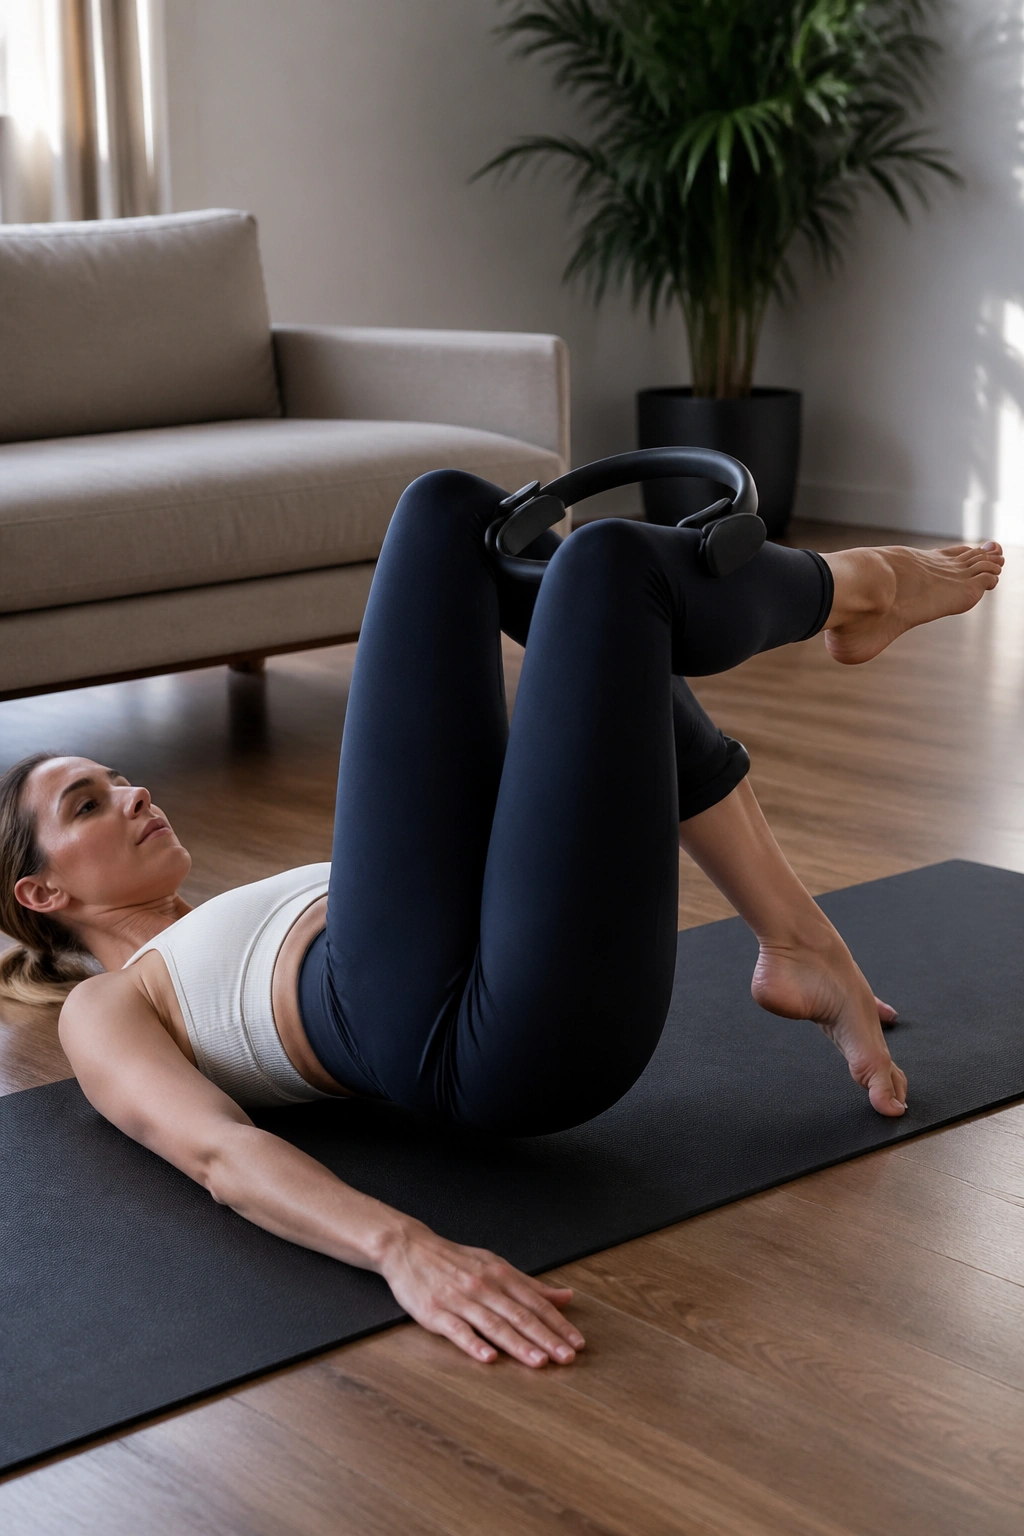
Toe taps are easy to underestimate. The ring makes them a little less forgiving.
Place the ring between your knees, lift your legs to tabletop, and keep a light squeeze while you lower one toe toward the floor and bring it back. Alternate sides for eight to twelve taps per leg. The lower abs should stay engaged, but the pressure into the ring should feel smooth, not frantic.
The beauty of this move is that it shows you exactly where your control breaks down. If the pelvis rocks or the neck starts to strain, keep one foot on the floor and work only one leg at a time until the shape settles. That is still good work. Probably better work, actually.
9. Side-Lying Inner-Thigh Lift
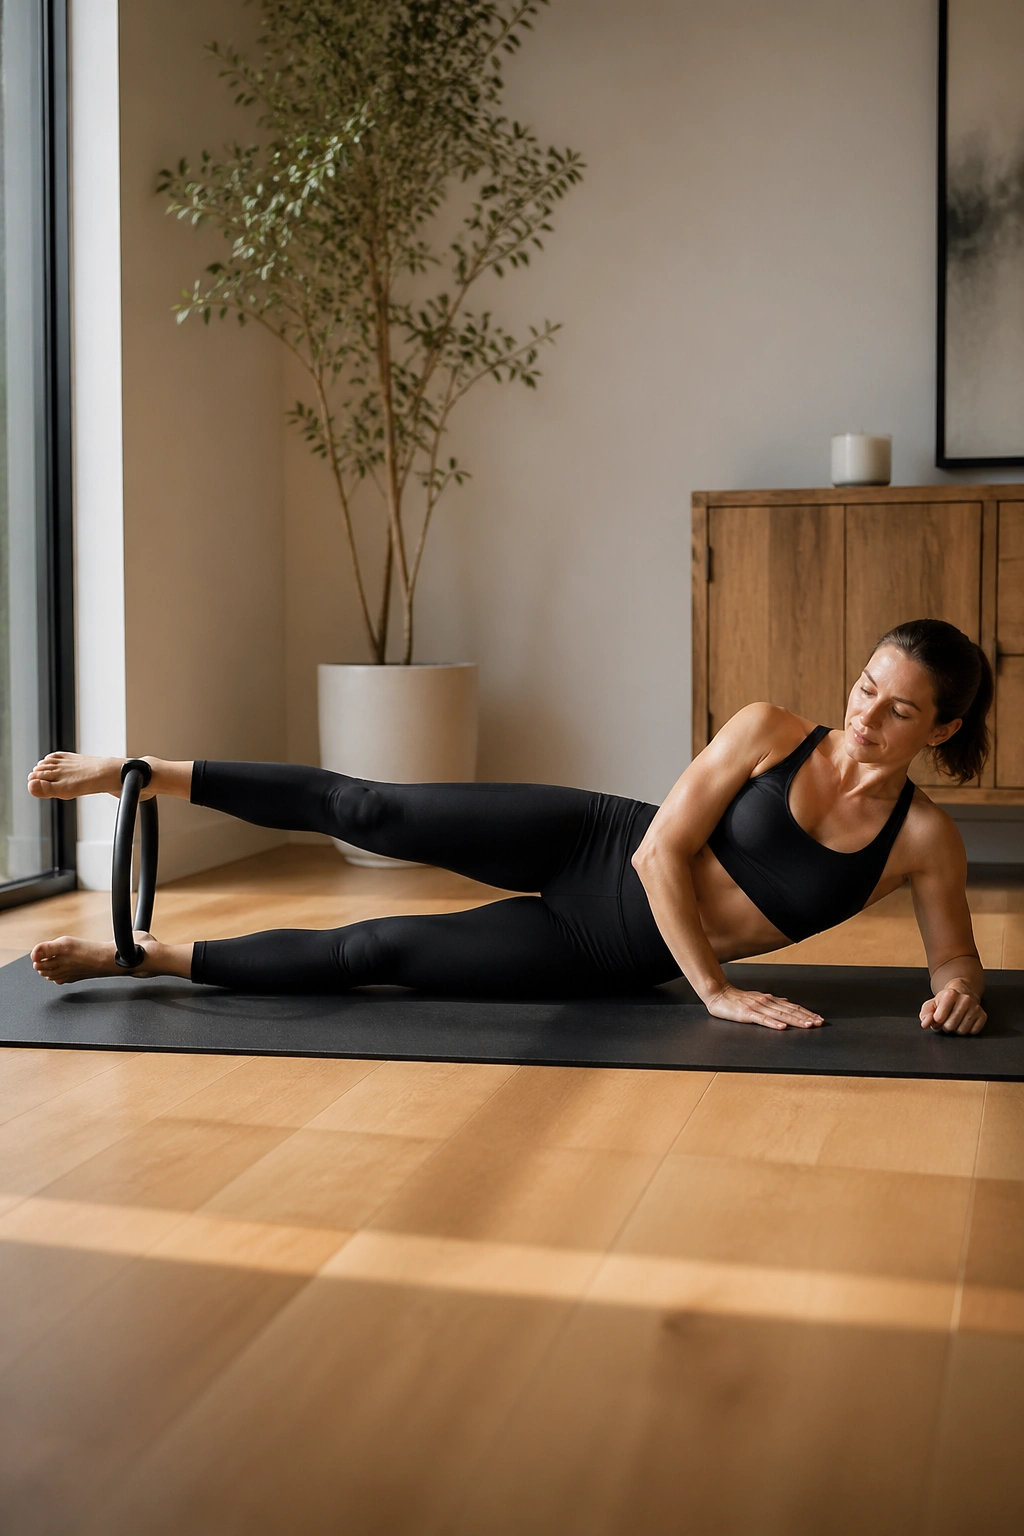
Side-lying work has a way of exposing weak links fast.
Lie on your side with the ring placed lightly between your ankles or just above them, depending on what feels more stable. Lift the bottom leg a few inches, press the ring softly, and lower with control. Six to ten reps per side can light up the inner thigh in a way that surprises people, especially when the top hip stays stacked instead of rolling backward.
This move asks the adductors to work without help from momentum. If your foot points and your torso twists, reset. Flex the feet, keep the waist long, and make the lift smaller. A clean two-inch lift beats a sloppy six-inch swing every time.
10. Side Plank Ring Hold
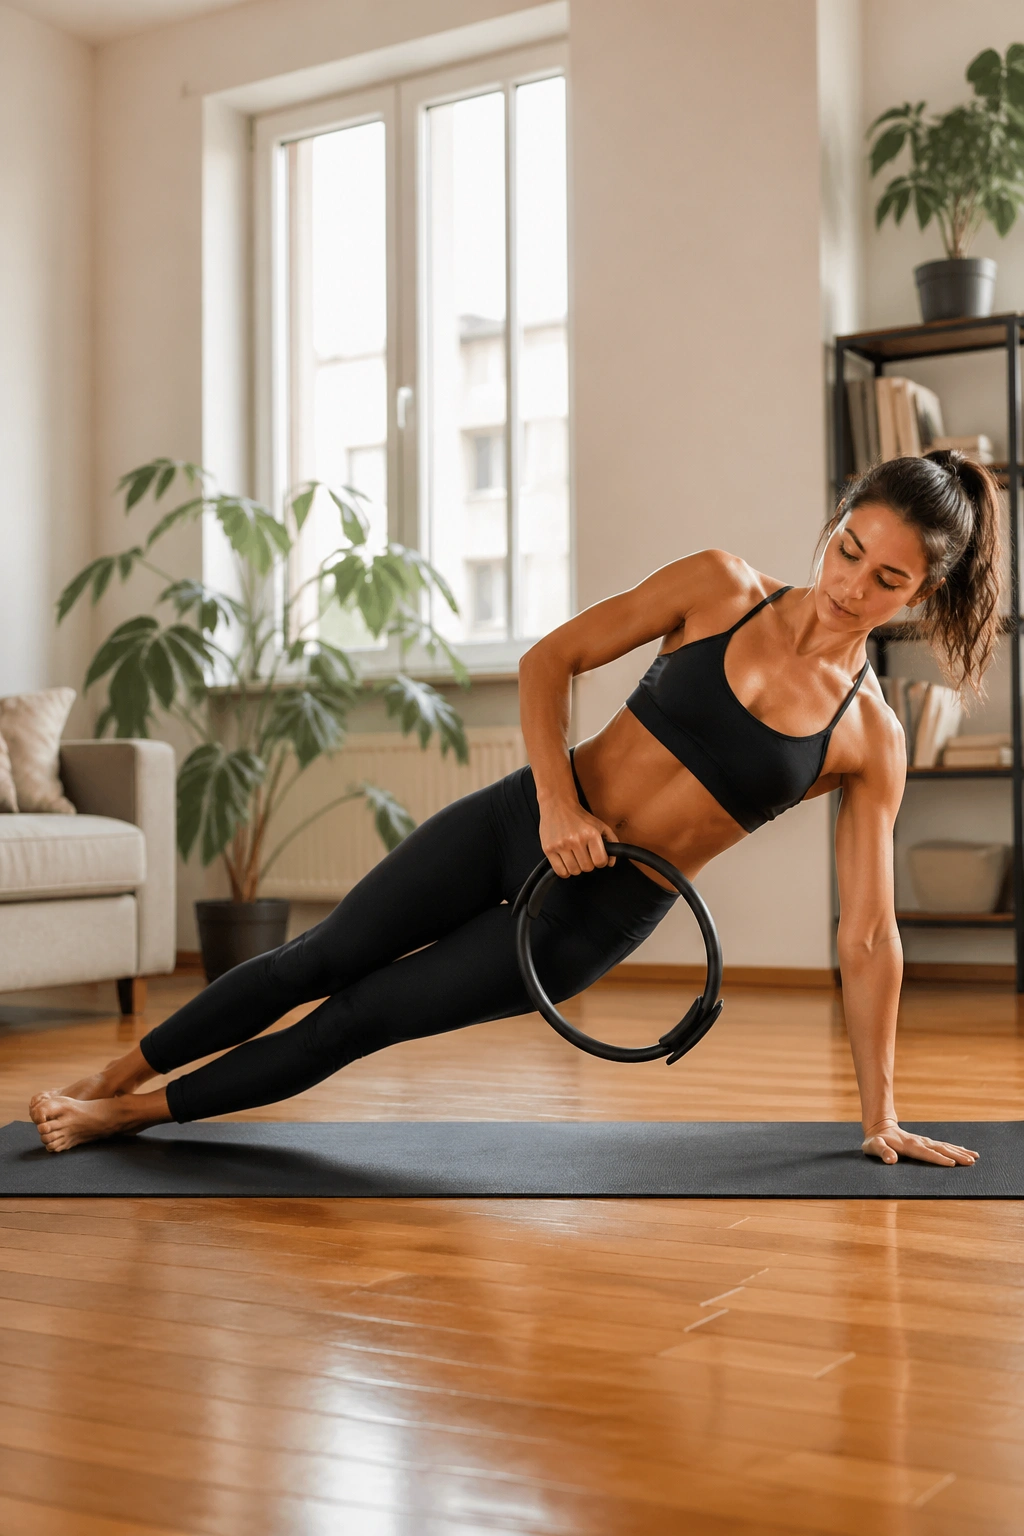
Side planks are where posture gets honest.
Set one hand on the mat and place the other lightly on the ring, or rest the lower hand on the ring if you want a more unstable feel. Lift into a side plank with feet stacked or staggered, and hold for 15 to 25 seconds. The obliques, shoulder stabilizers, and side glutes should all wake up at once. That is the good kind of awkward.
If your bottom shoulder sinks, lower the hips and shorten the hold. If the neck cranes forward, bring your gaze down slightly. The ring is there to make the body pay attention, not to turn the exercise into a circus trick.
11. Clamshell Ring Pulse
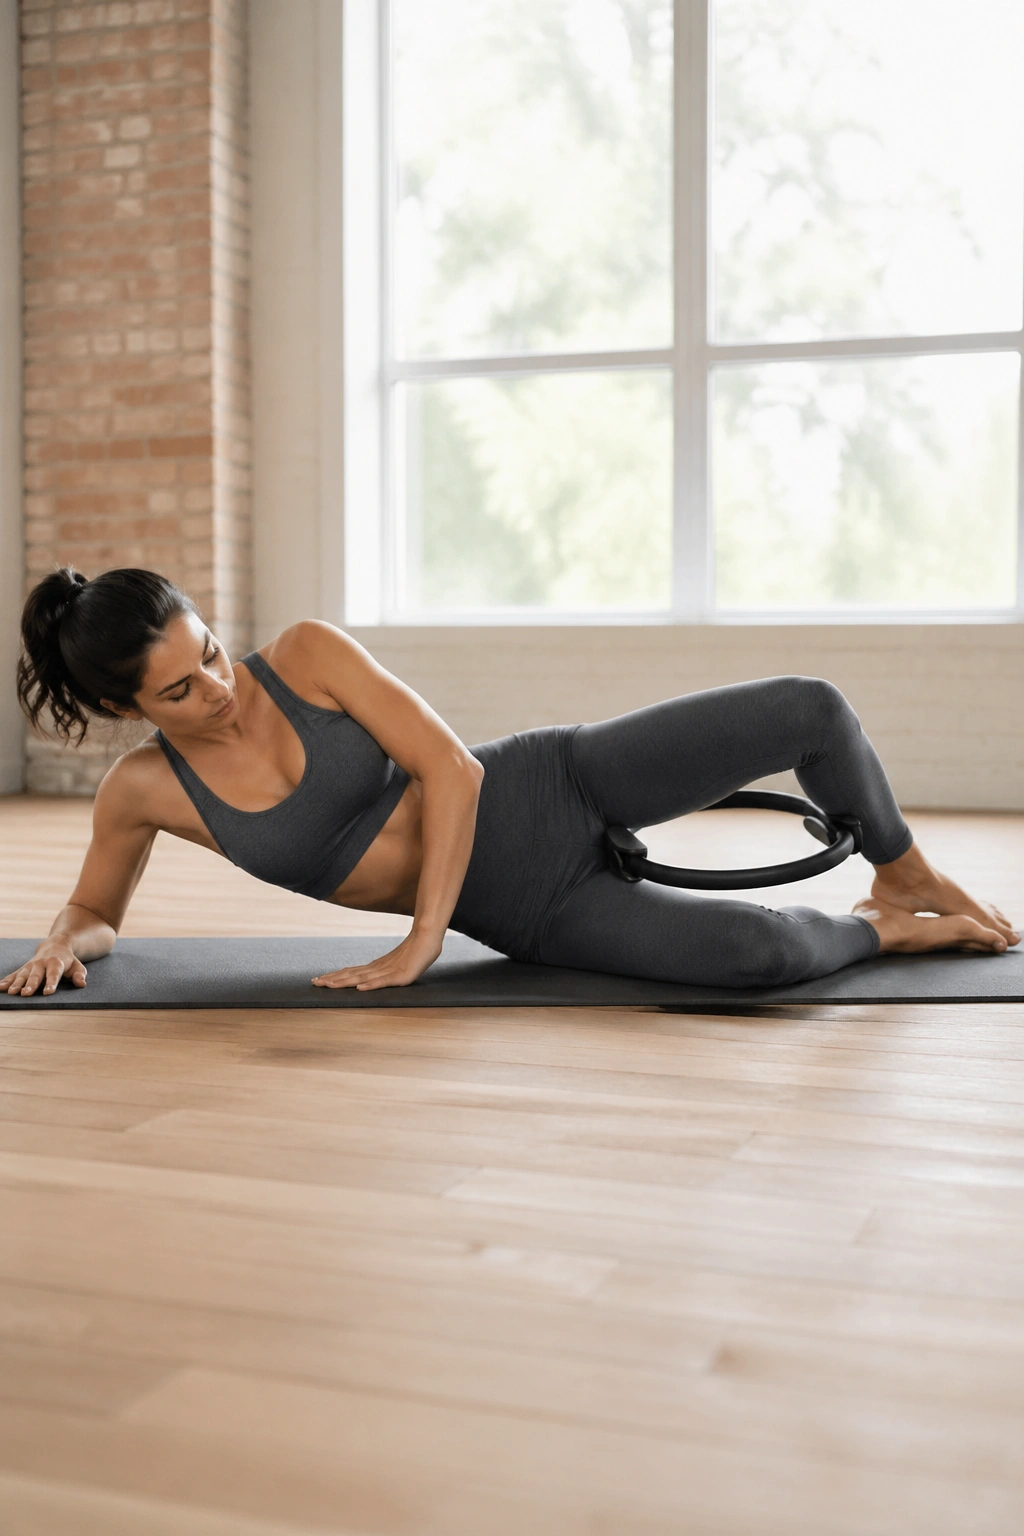
Clamshells are small, which is exactly why they matter.
Lie on your side with knees bent and the ring between the knees. Keep the feet together, open the top knee a few inches, and press the inner thigh back into the ring as you close. Do 12 to 15 reps per side. The movement should feel like the outer hip and glute are steering the knee, not the lower back.
A lot of people yank the knee open too far and then wonder why the pelvis tips. Don’t chase height. Chase steadiness. The best clamshell is almost boring to watch and deeply useful to do.
12. Kneeling Overhead Press
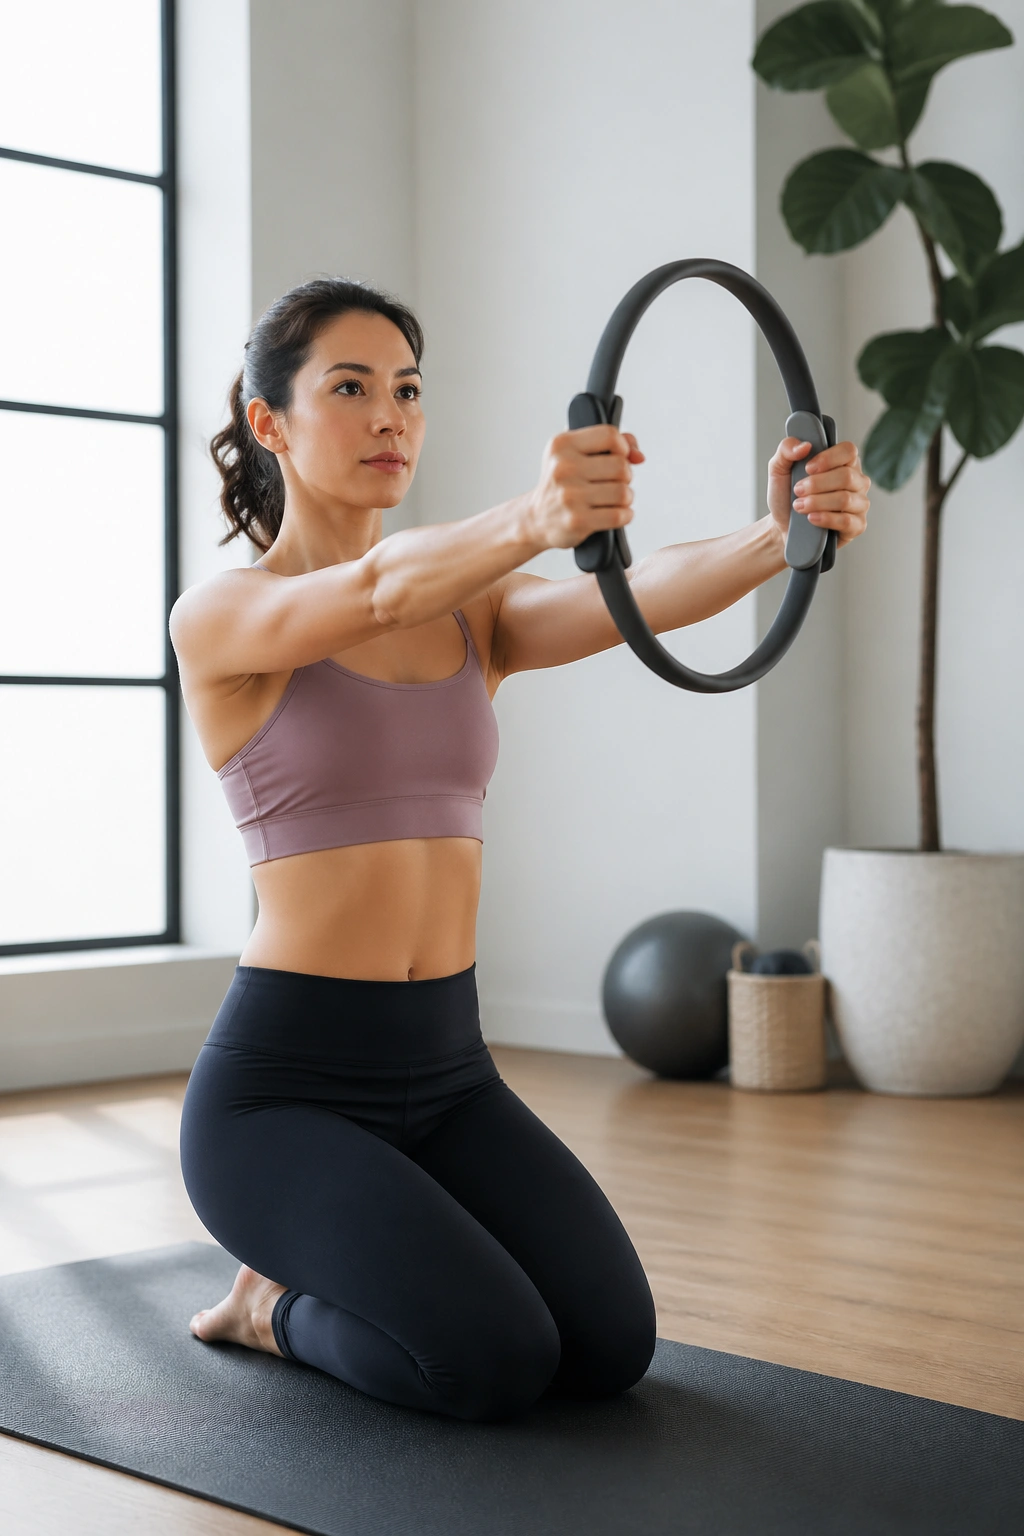
Can a ring teach better shoulder control? Yes, if you kneel tall and stop trying to muscle your way through it.
Kneel with the ring between your palms at shoulder height, then press it overhead on a slow exhale. Keep the ribs stacked over the hips, and avoid leaning back to fake range. Lower with control. Eight to ten reps is enough. The shoulders, upper back, and deep core all have to cooperate, which is why this move tends to clean up posture fast.
How to get more from it
Use a mirror or a wall if you keep arching through the lower back. The line from knee to crown should stay long. If the neck tightens, reduce the overhead reach by a few inches and press more lightly.
13. Mermaid Side Reach
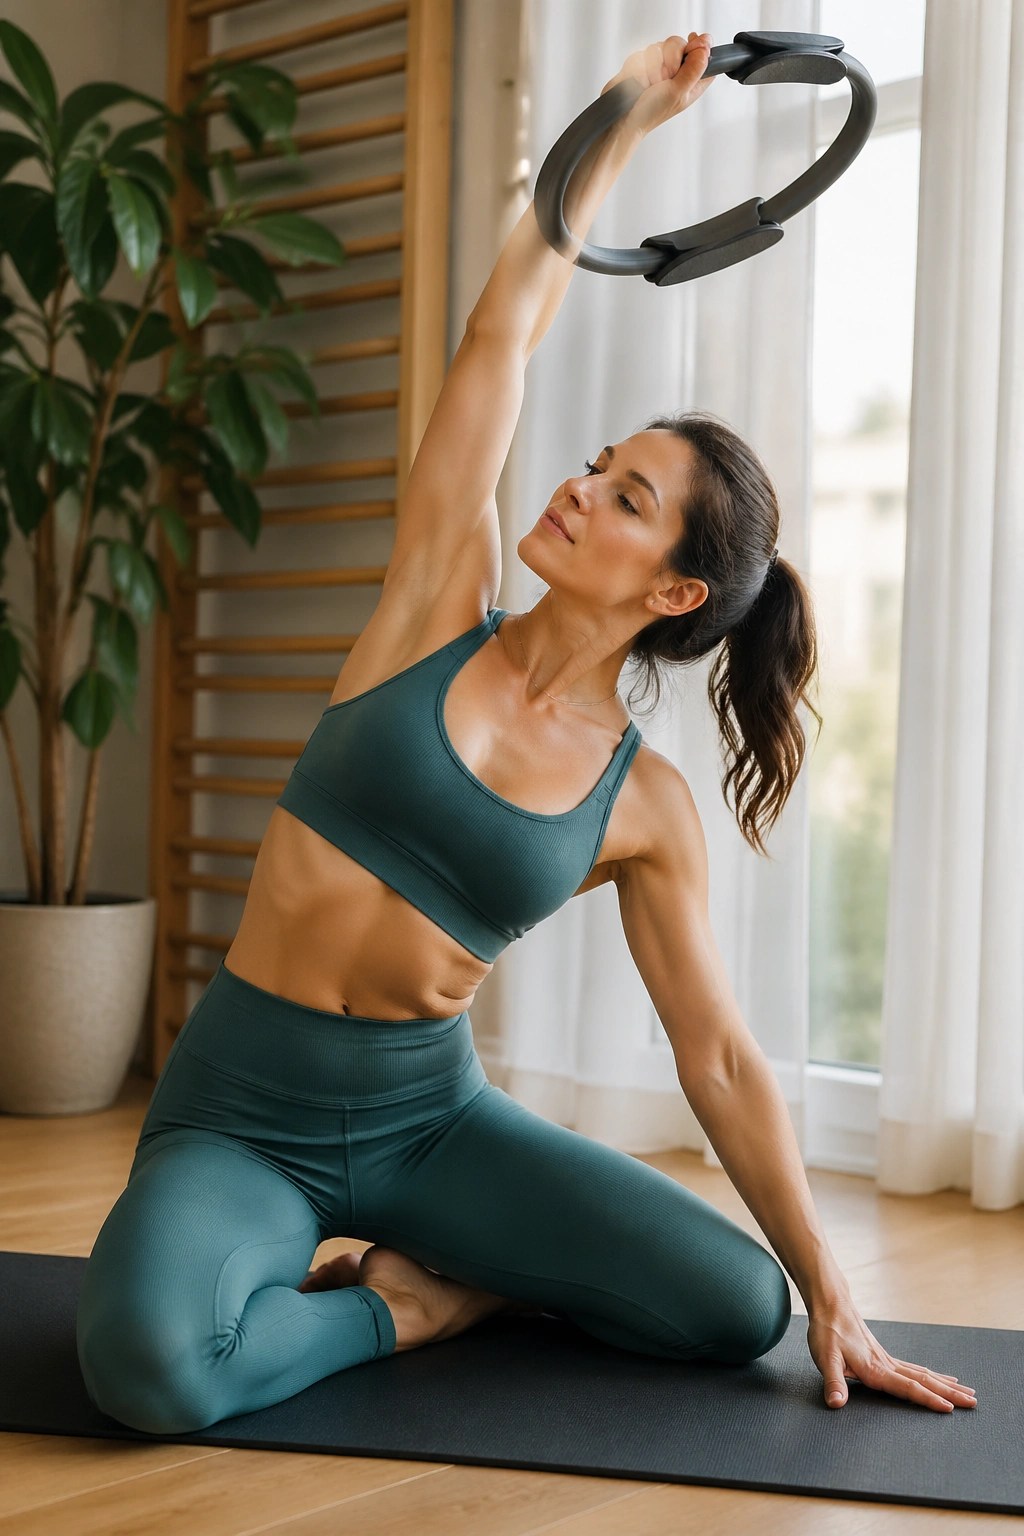
Mermaid with a ring is one of those exercises that feels like a stretch and a strength move at the same time.
Sit in a mermaid position, hold the ring in one hand or both, and reach the ring overhead as you side bend away from the grounded hip. Breathe into the ribs on the side that opens. Hold for two to three breaths, then return through center and repeat on the other side.
The reach should feel spacious, not collapsed. If you’re tipping forward or twisting open, bring the ring a little closer to the head and keep the chest facing front. That tiny restraint keeps the side body honest.
14. Roll-Up with Ring Reach
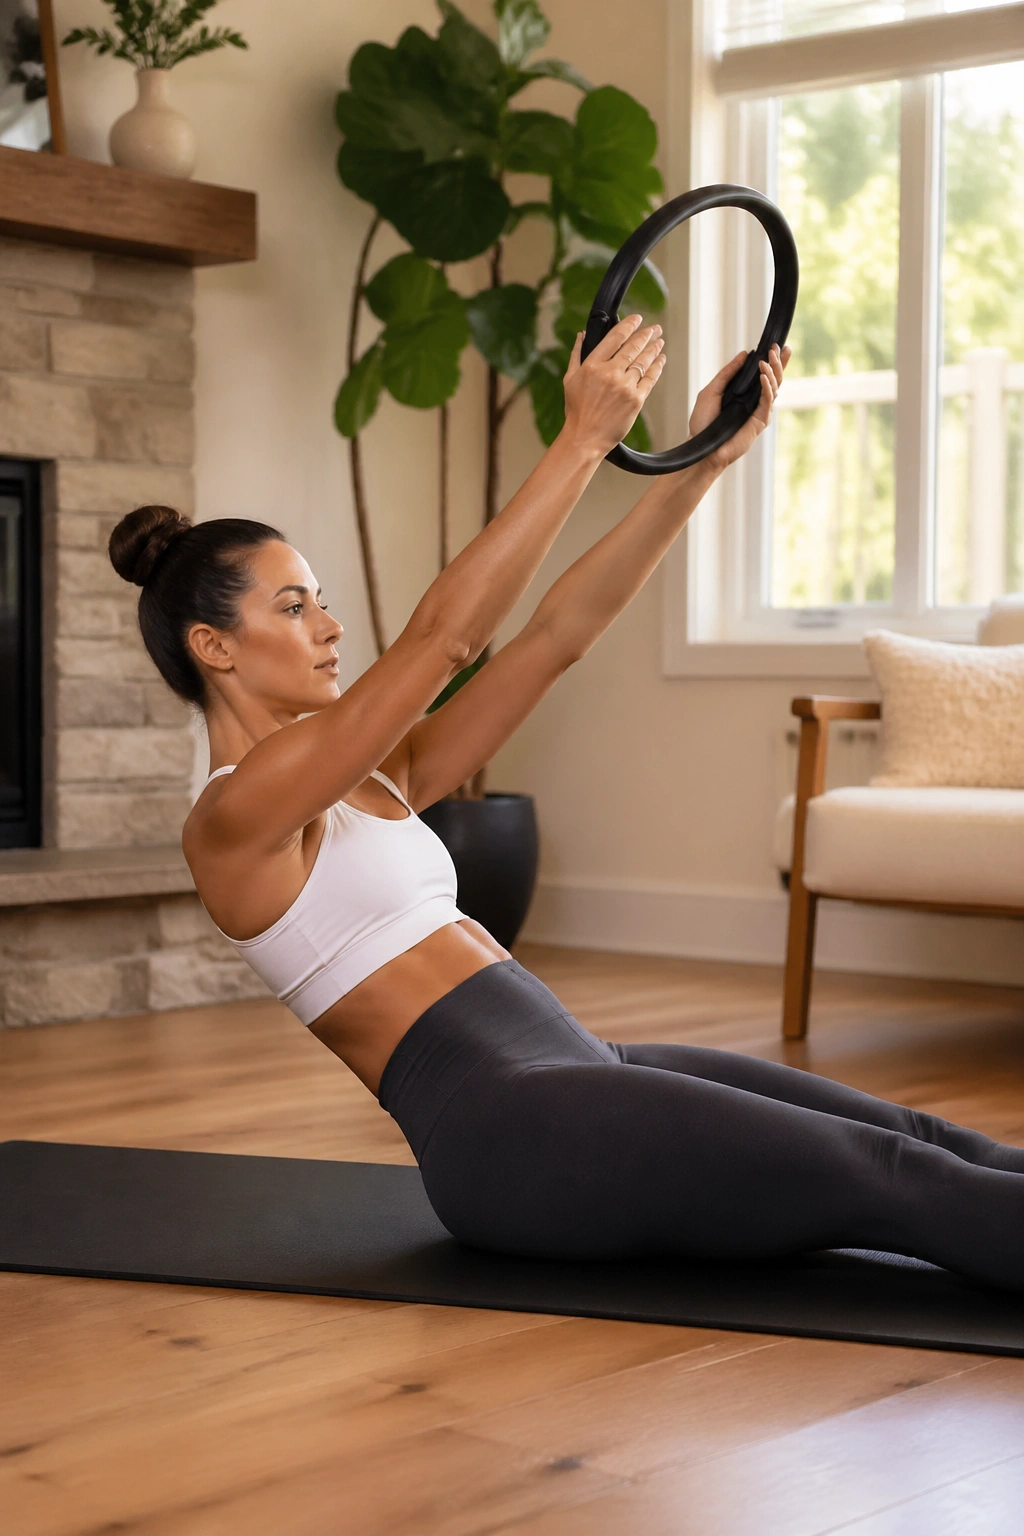
Roll-ups are already demanding. The ring adds a little more work for the shoulders and a little more honesty for the trunk.
Lie flat, hold the ring between your palms, and reach the arms overhead to start. On the exhale, peel up through the spine, bring the ring forward, and keep the shoulders away from the ears. Lower back down one segment at a time. Five to eight smooth reps are enough.
The temptation is to yank the body off the mat with the arms. Skip that. Let the abs lead and the ring simply give the upper body a clear line to follow. If your feet pop up, bend the knees a little or anchor them under a sofa. No one wins prizes for fighting the floor.
15. Forearm Plank Ring Press
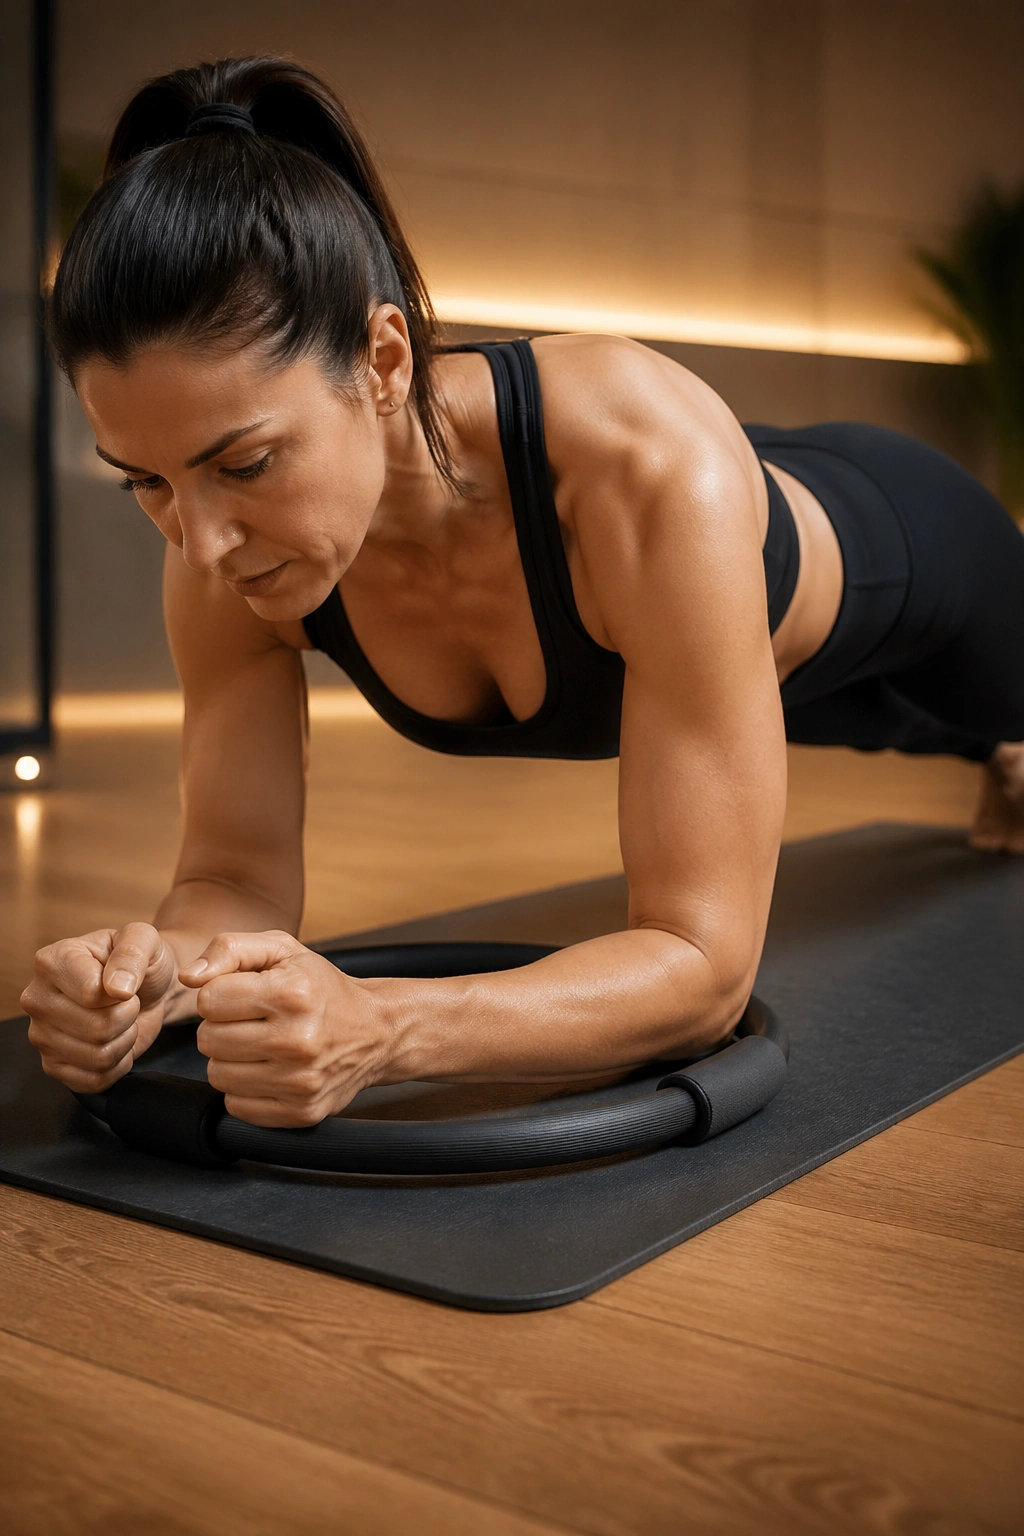
A plank feels different the moment you add a ring under the forearms.
Set the ring on the mat and place one forearm on each handle or side of the frame, then move into a forearm plank. Keep the press into the ring steady while you hold for 15 to 30 seconds. The anti-wobble demand makes the shoulder girdle, deep abs, and glutes work in a neat, coordinated way.
What makes this one useful
The ring gives you feedback the second your shoulders drift or your hips sag. That is exactly why it’s worth doing. If the hold feels shaky, widen the feet a little and shorten the time. Clean planks beat heroic ones.
16. Swan Prep with Ring Squeeze
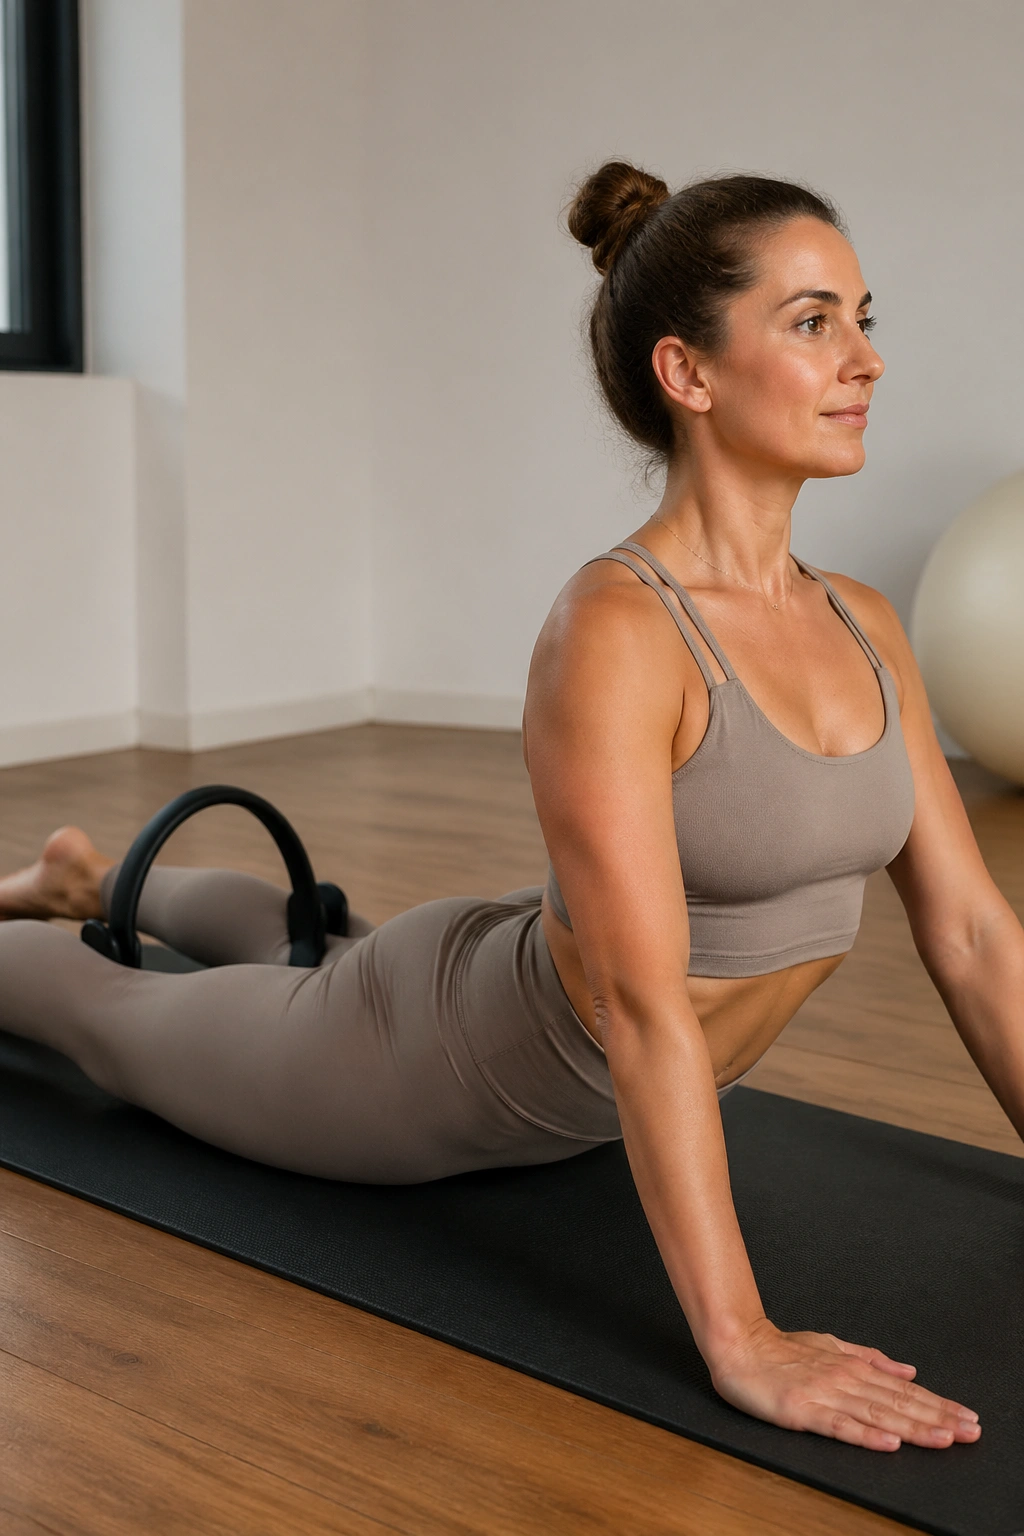
This is where the back body gets to do some of the talking.
Place the ring between the knees, lie face down, and bring the hands under the shoulders. Lift the chest into a small swan prep, pressing lightly into the ring so the inner thighs and glutes stay awake. The lift should come from the upper back opening, not from jamming the low spine into a bigger arch. Four to six controlled reps are enough to feel the line of the exercise.
If the neck pinches, keep the eyes down and make the lift smaller. The goal is a long spine and a broad chest, not a dramatic curve. A lot of people think back extension is about how high you go. It isn’t. It’s about how well you distribute the work.
17. Standing Arm Circle Press
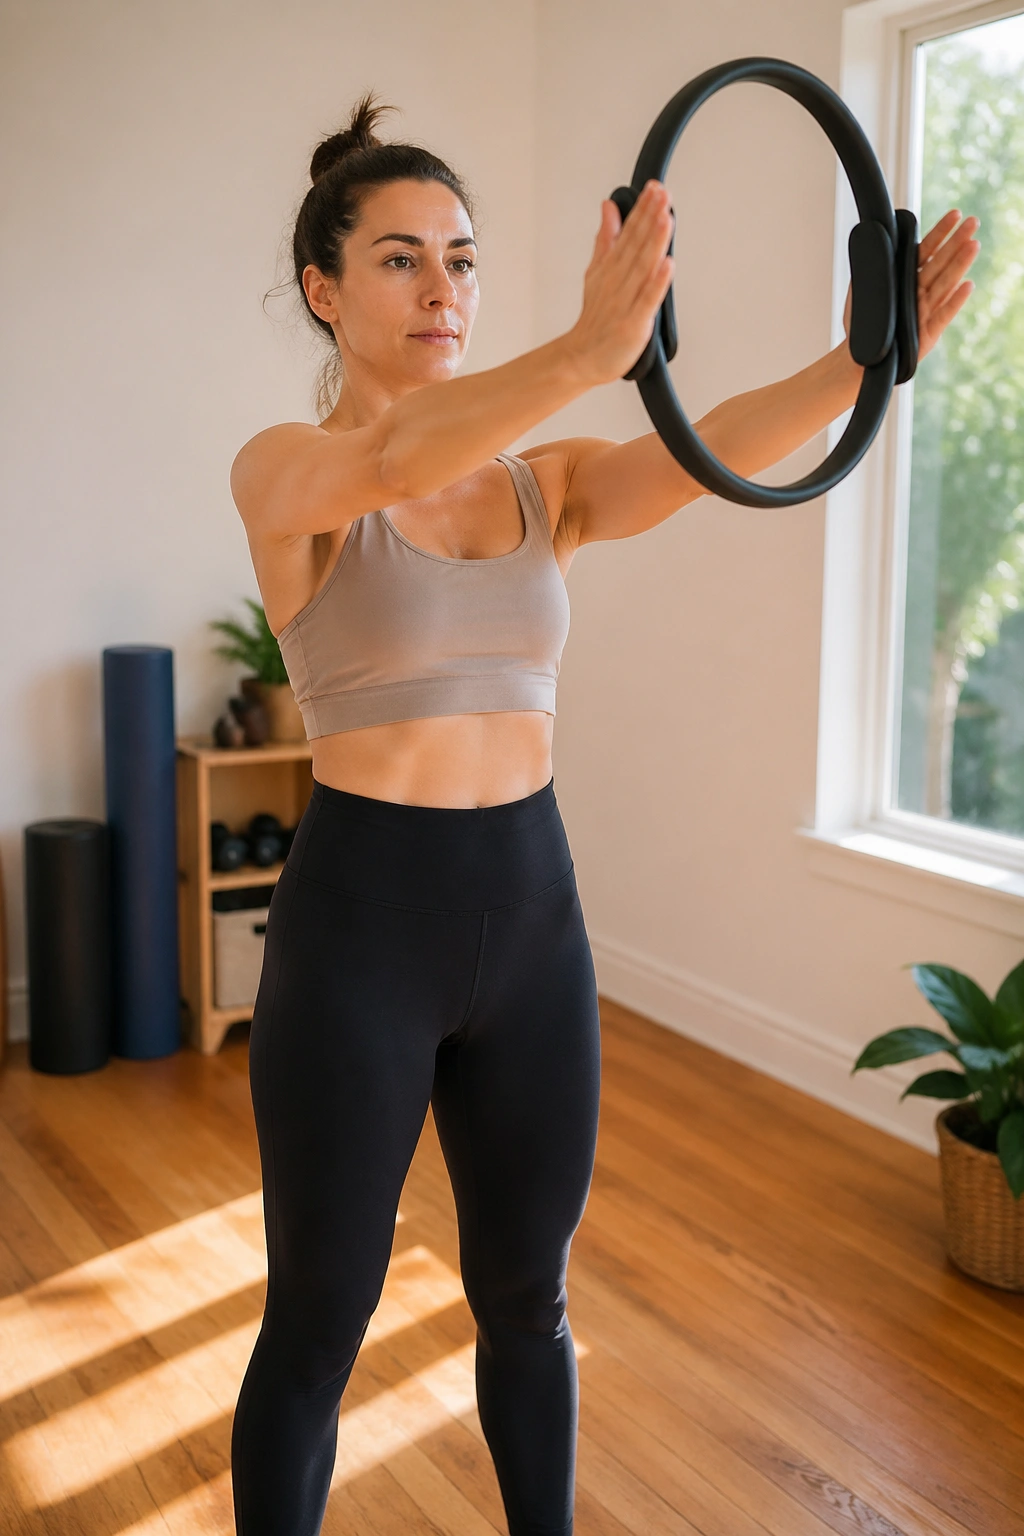
Standing work is underrated because it looks easy right up until you hold it for more than 20 seconds.
Stand with the ring between your palms and the arms reaching forward or overhead. Draw small circles or tiny presses, keeping the shoulders low and the ribs quiet. Go for 20 to 30 seconds, rest, then repeat once or twice. The burn usually shows up in the shoulders and upper arms before the posture muscles catch up.
This move is a favorite when someone wants toned arms without dumbbells. The ring adds enough resistance to make the shoulders work, but not so much that the movement gets jerky. If your lower back arches, bend the knees a touch and lower the arms.
18. Horseback Seat Hold
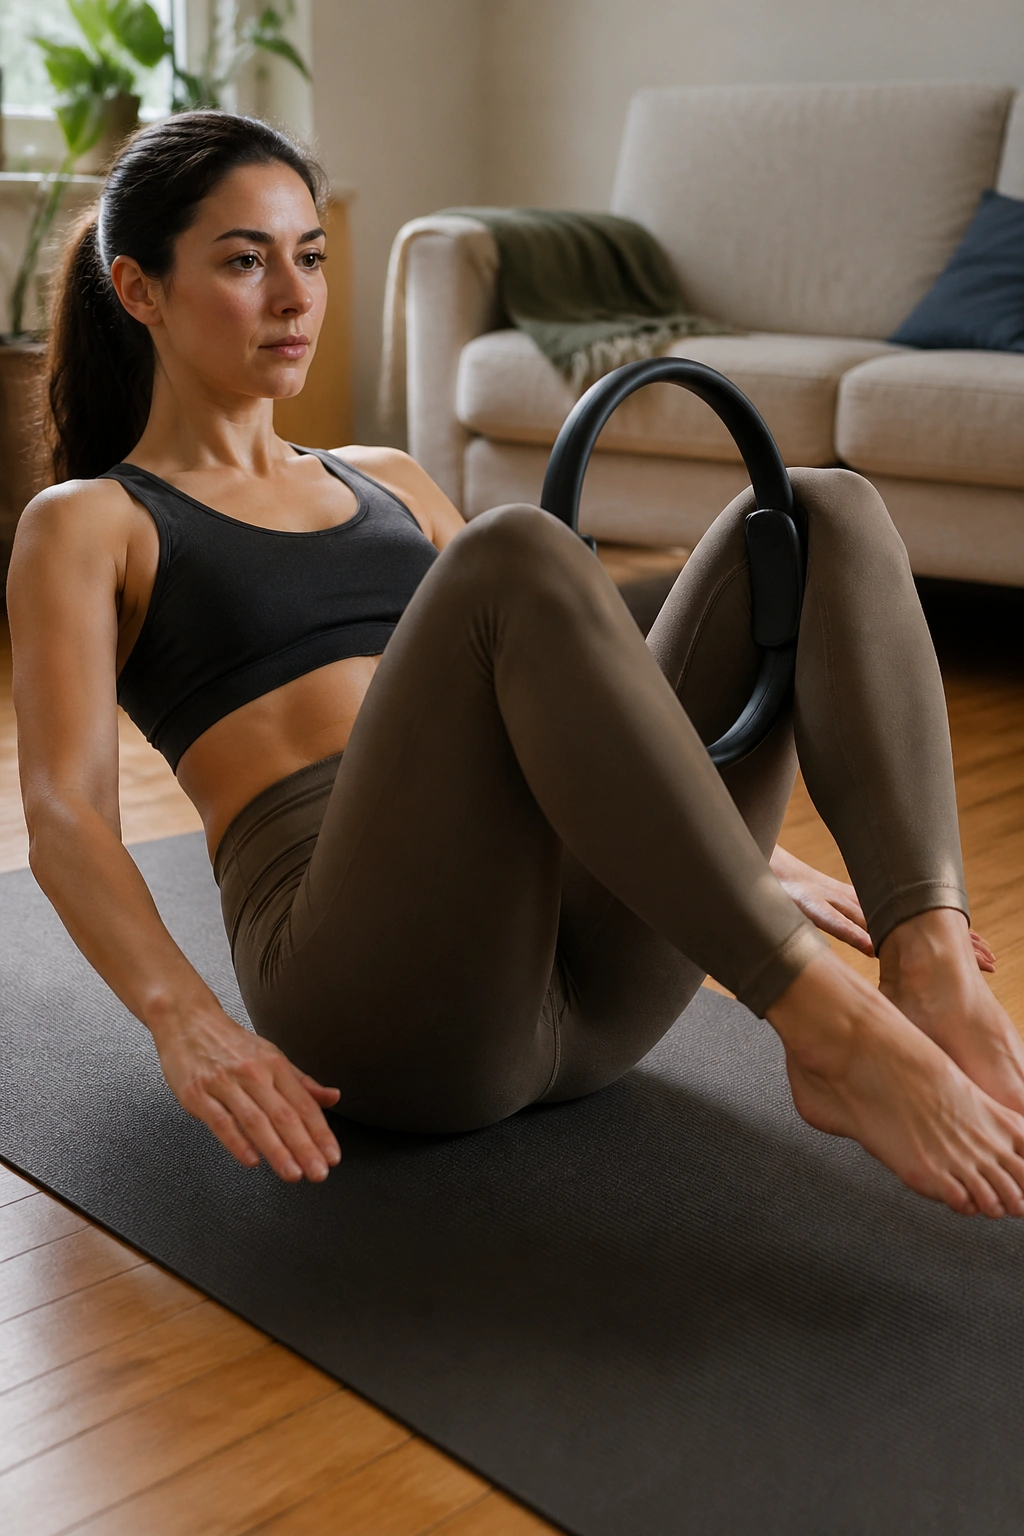
Horseback is pure Pilates attitude: sit down, hover, and stay honest.
Sit with knees bent, feet lightly lifted or resting depending on your level, and place the ring between your inner thighs. Lean the torso back just enough to feel the abs take over, then hold for 15 to 20 seconds while pressing the ring lightly. The quads, inner thighs, and deep core should all be on the clock.
A short hold done well beats a long hold with shaking and collapsing. If the hip flexors scream, bring the feet down and keep the torso a little taller. The point is to keep the pelvis organized while the legs learn to work together.
19. Teaser Ring Press
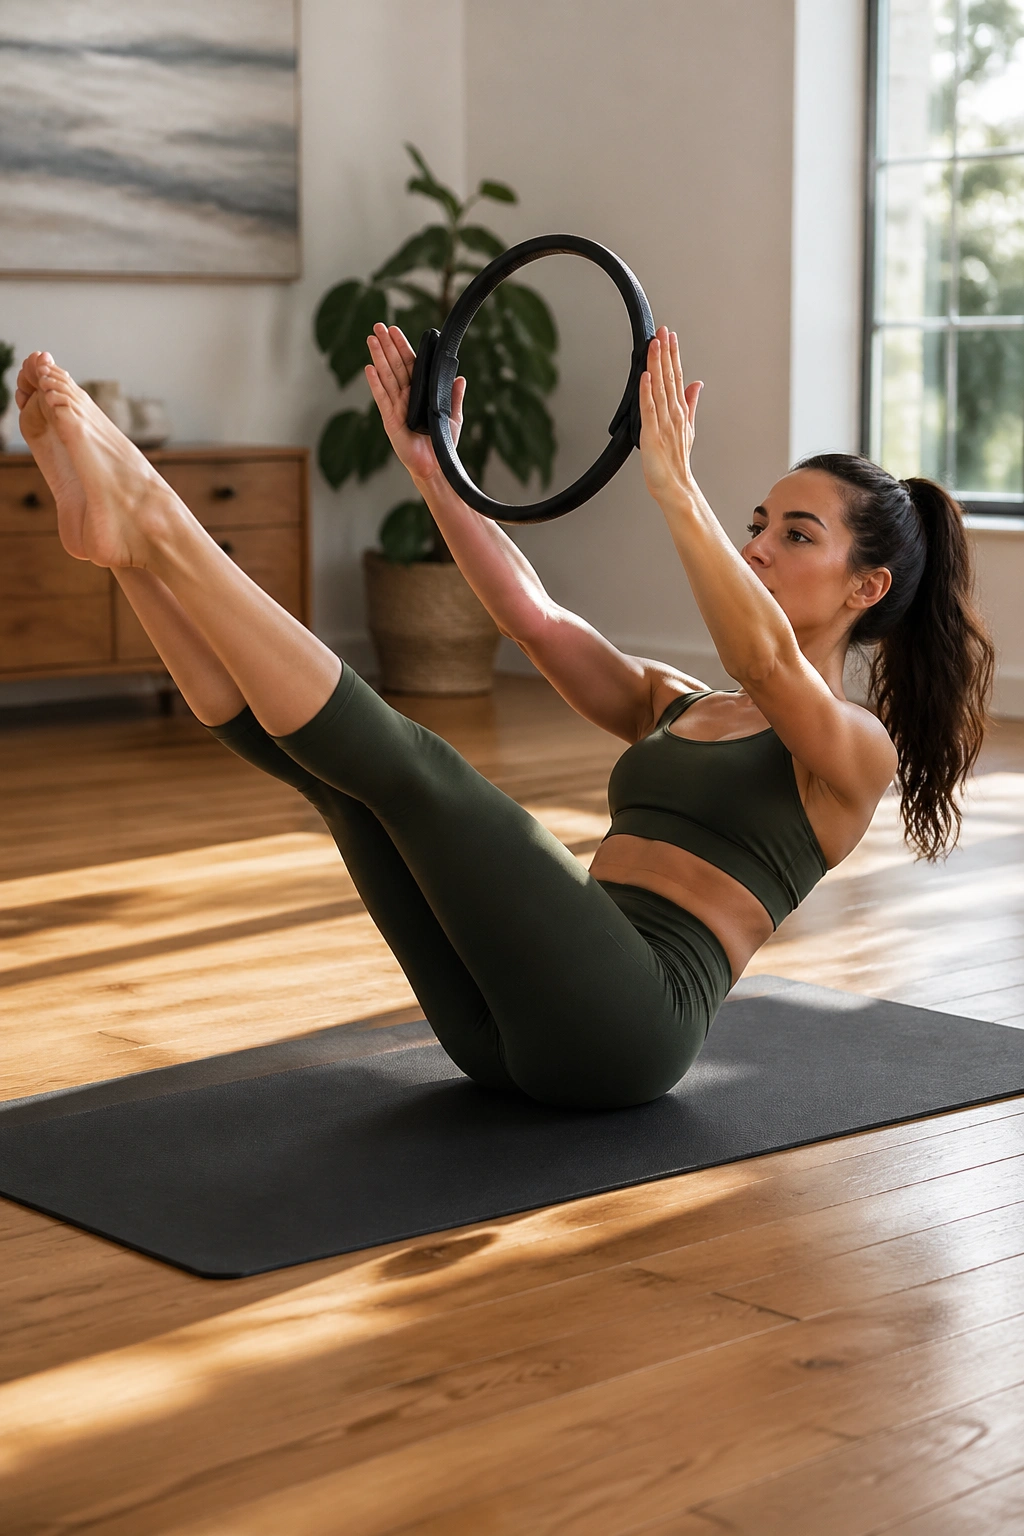
Teaser is one of those moves that makes people grin and groan in the same breath.
Hold the ring between your palms, start on your back, and roll up so the torso and legs create a clean V shape. Keep the ring pressed lightly as you balance, or hold the teaser position for one or two breaths before lowering with control. Three to five quality reps is plenty. The abs, hip flexors, and shoulder line all have to cooperate.
Why it stands out
The ring gives your arms a job so the teaser is less about flailing and more about shape. If the knees bend or the shoulders tense, scale down to one leg extended and one bent. Clean balance beats a bigger shape that falls apart halfway through.
20. Split-Stance Lunge Pulse
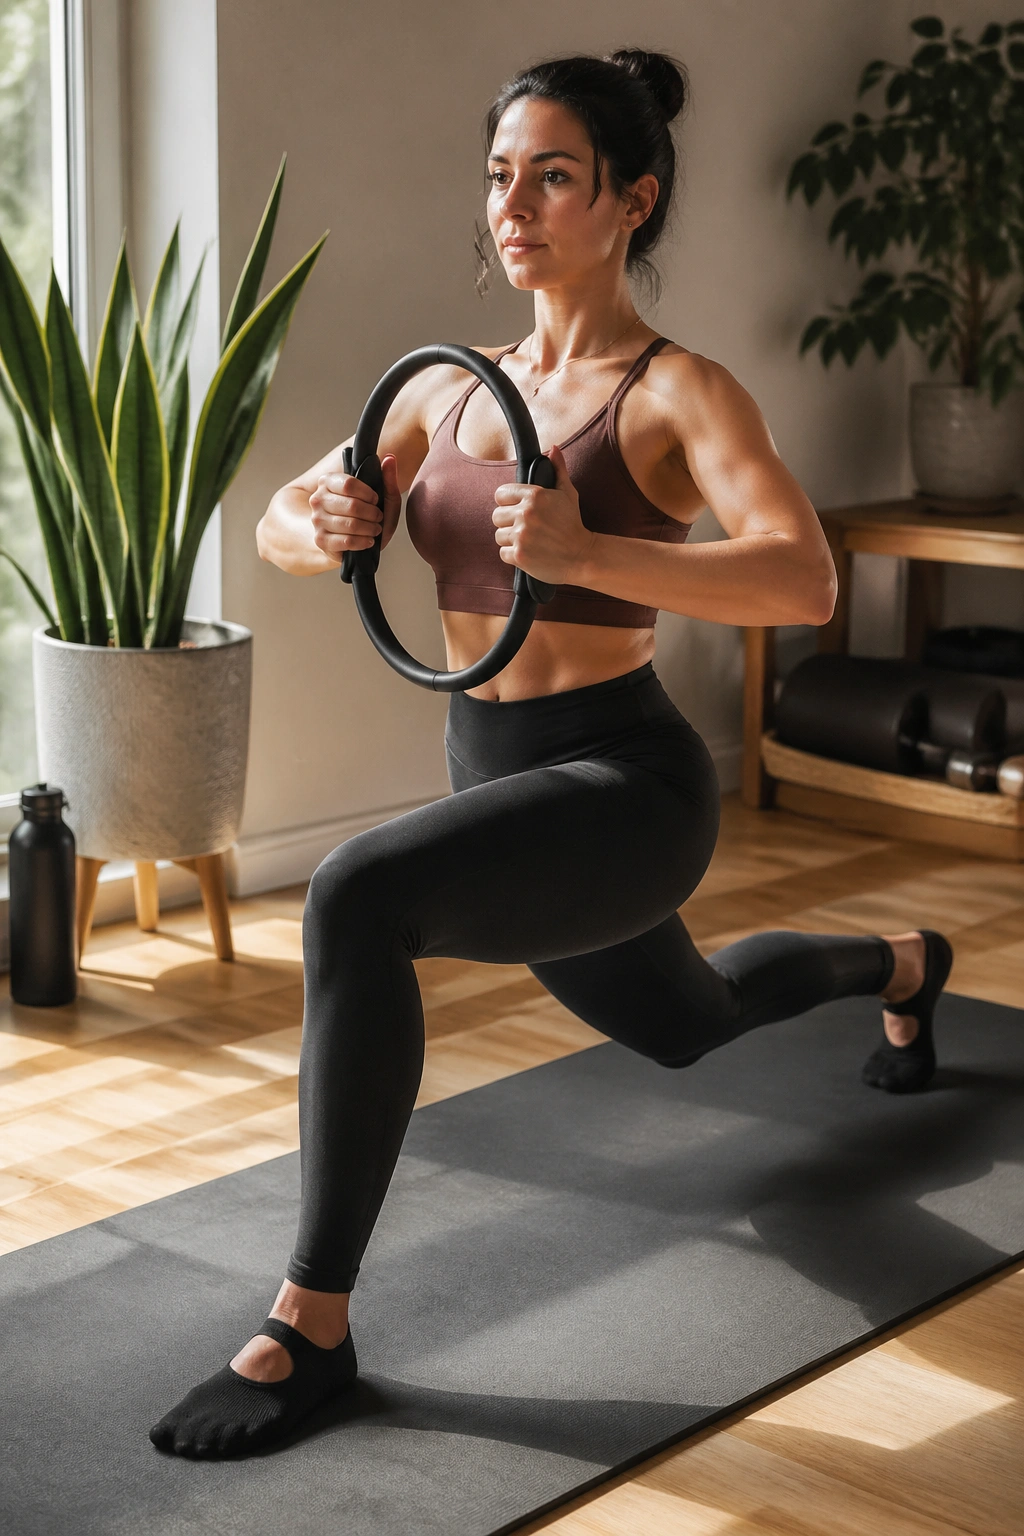
A split stance changes the whole feel of a ring workout.
Stand with one foot forward and one foot back, hold the ring at chest height, and press lightly into it as you pulse down and up in a small range. Eight to twelve pulses per side is enough if your front knee stays lined up over the toes and your back heel is active. The ring keeps the upper body from drifting while the legs do their work.
This is a strong choice for anyone who wants leg tone without a lot of equipment. Keep the pelvis square. If the front knee collapses inward, shorten the stance a little and slow the pulses down. Tiny corrections make a big difference here.
21. Wall Sit Ring Squeeze
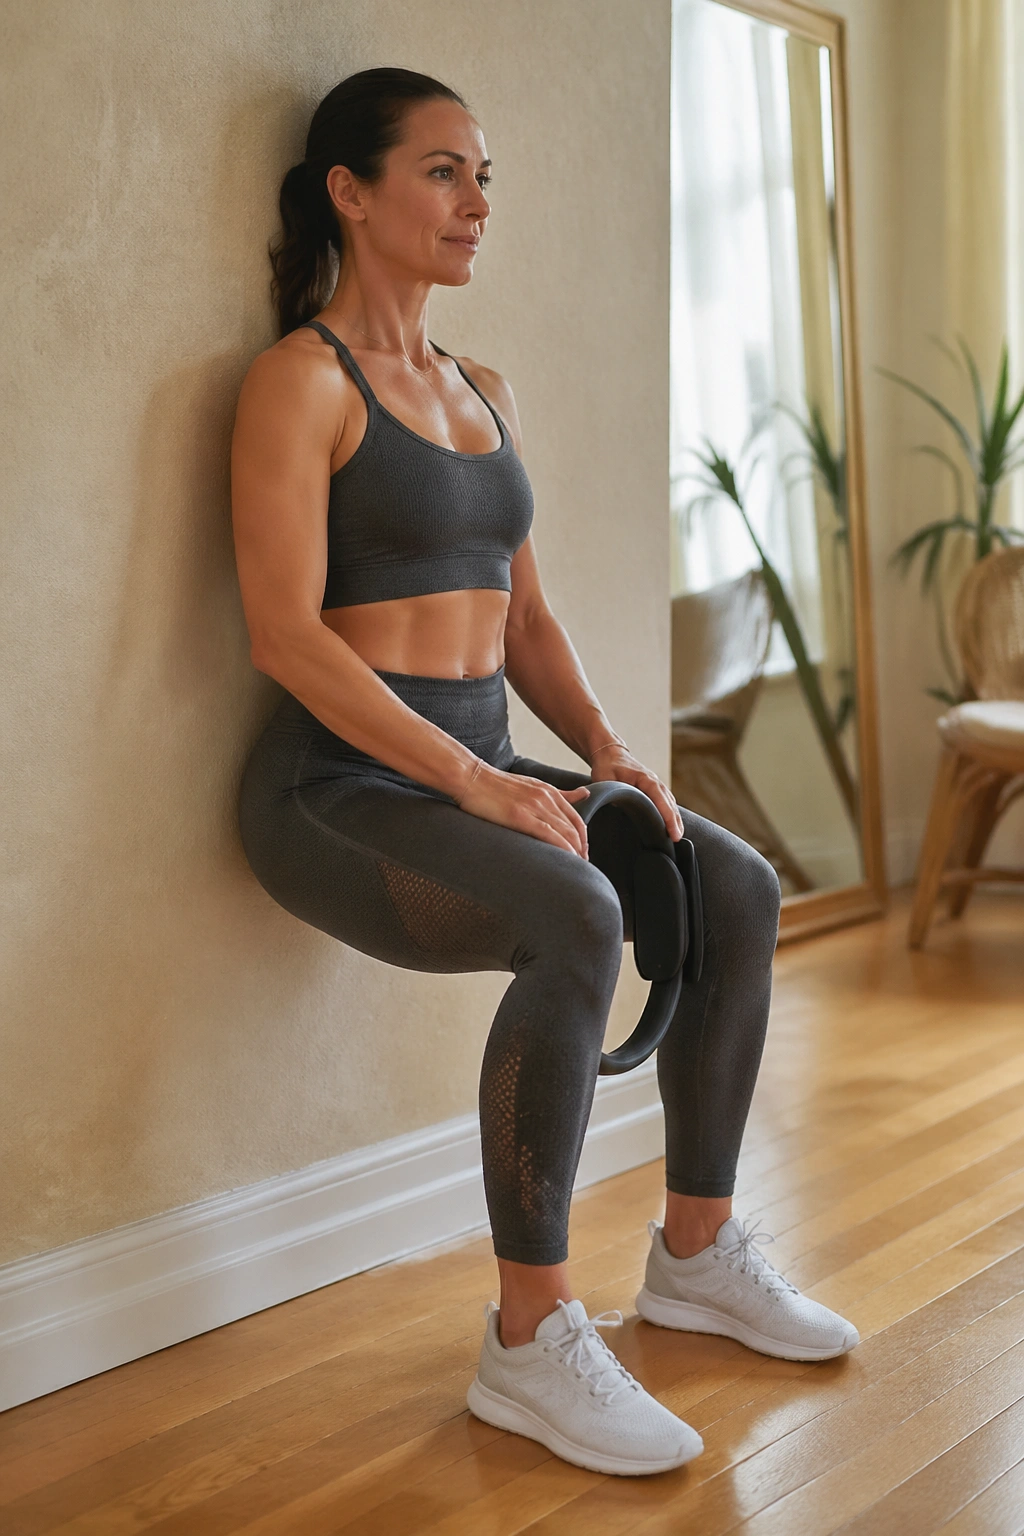
Wall sits are boring in the best possible way.
Place the ring between your knees, slide down the wall until the thighs are about parallel to the floor, and press gently for 20 to 30 seconds. The quads should fire hard, the inner thighs should help, and the lower back should stay flat against the wall. If you want more challenge, add a few slow squeeze-and-release pulses while holding the sit.
The mistake is always the same: people sink too low and turn it into a knee grind. Keep the shape manageable. A wall sit you can repeat is better than a heroic one you dread.
22. Standing Oblique Crunch
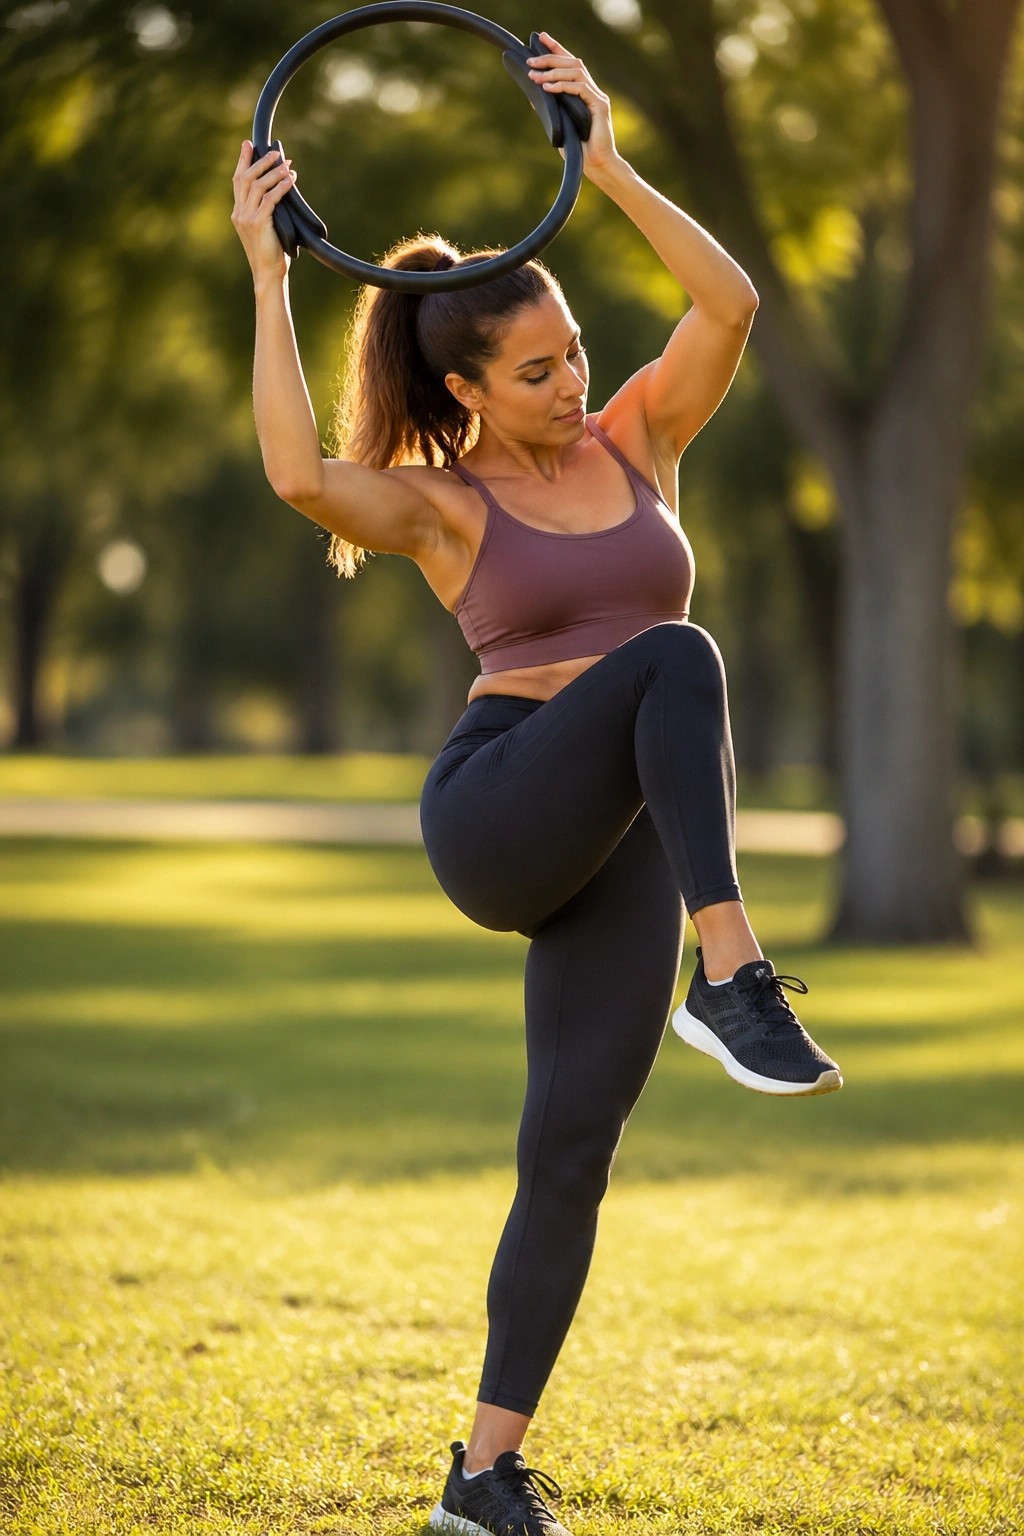
Want the waist to work without a crunch on the floor? Stand up.
Hold the ring overhead or at chest level, shift your weight onto one foot, and bring the opposite knee and elbow toward each other in a controlled side crunch. Return to tall standing and switch sides. Six to ten reps per side is enough. The obliques should close the ribs, not the lower back.
If balance is shaky, keep one hand on a wall for the first few reps. That is not a downgrade; it is a smart start. The ring gives your arms a clear line, which makes the side body work feel more organized and less floppy.
23. Bird-Dog Ring Reach
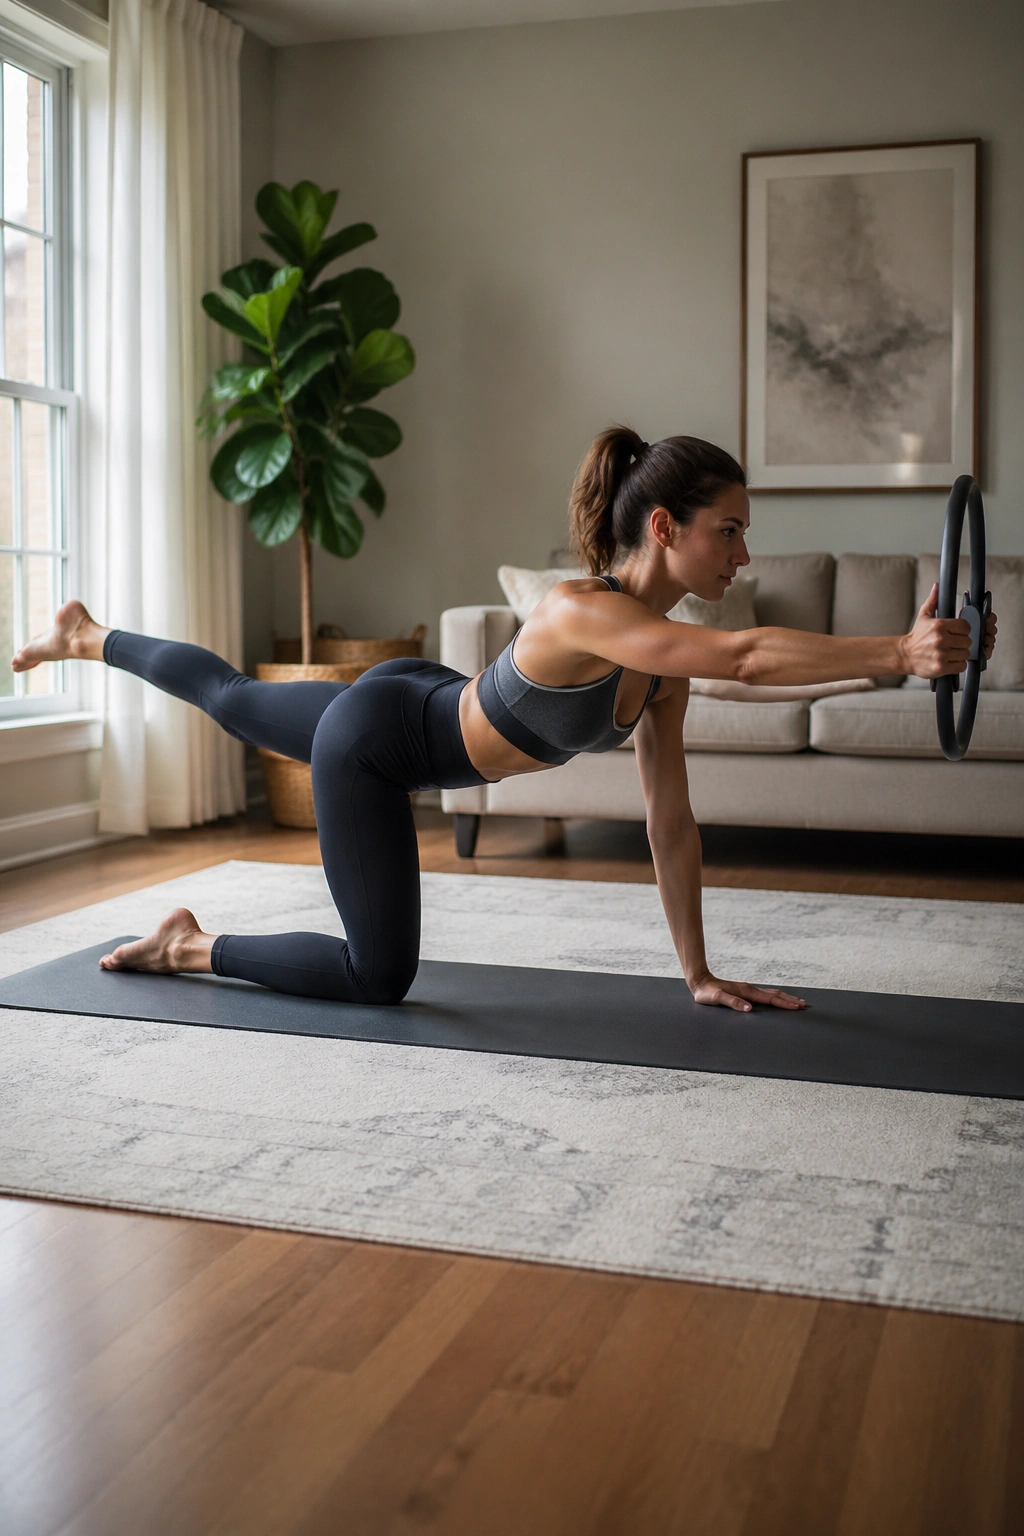
Bird-dog with a ring has a nice quiet cruelty to it.
Come to hands and knees, hold the ring between your palms, and press lightly as you reach the opposite arm and leg long. Pause for one breath, return to center, and switch sides. Six to eight reps per side is enough to make the midsection, glutes, and low-back stabilizers start talking to each other.
What to watch for
- Hips stay level.
- The neck stays long.
- The ring press stays even, not crushed.
If the body sways, make the reach smaller. A smaller bird-dog with real control is better than a bigger one that turns the pelvis into a seesaw.
24. Bridge March with Ring
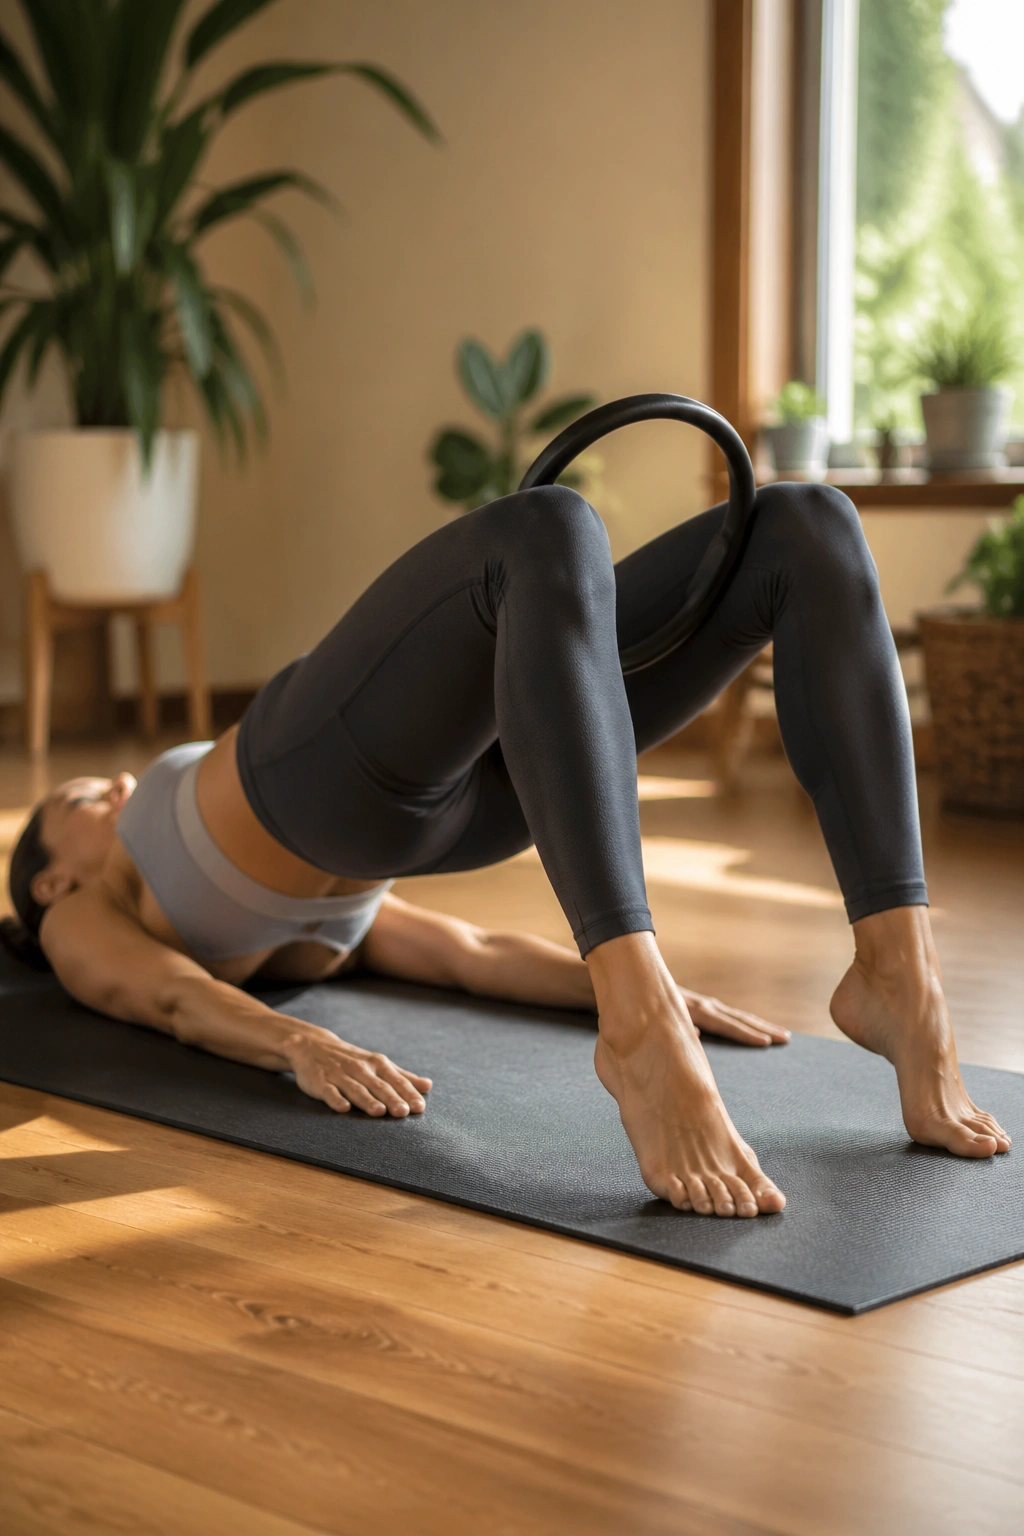
A bridge march can humble people who think they have already “done glutes.”
Set the ring between your knees, lift into a bridge, and keep the pelvis level as you lift one foot a few inches off the floor, then set it down and switch sides. Do six to ten marches total. The ring keeps the adductors active while the glutes and hamstrings work to stop the pelvis from wobbling.
The trick is to keep the hips square. If one side drops, lower the bridge a little and make the march smaller. This move is especially good for anyone who sits a lot, because it asks the back line to wake up without a giant range of motion.
25. Squat-to-Press Finisher
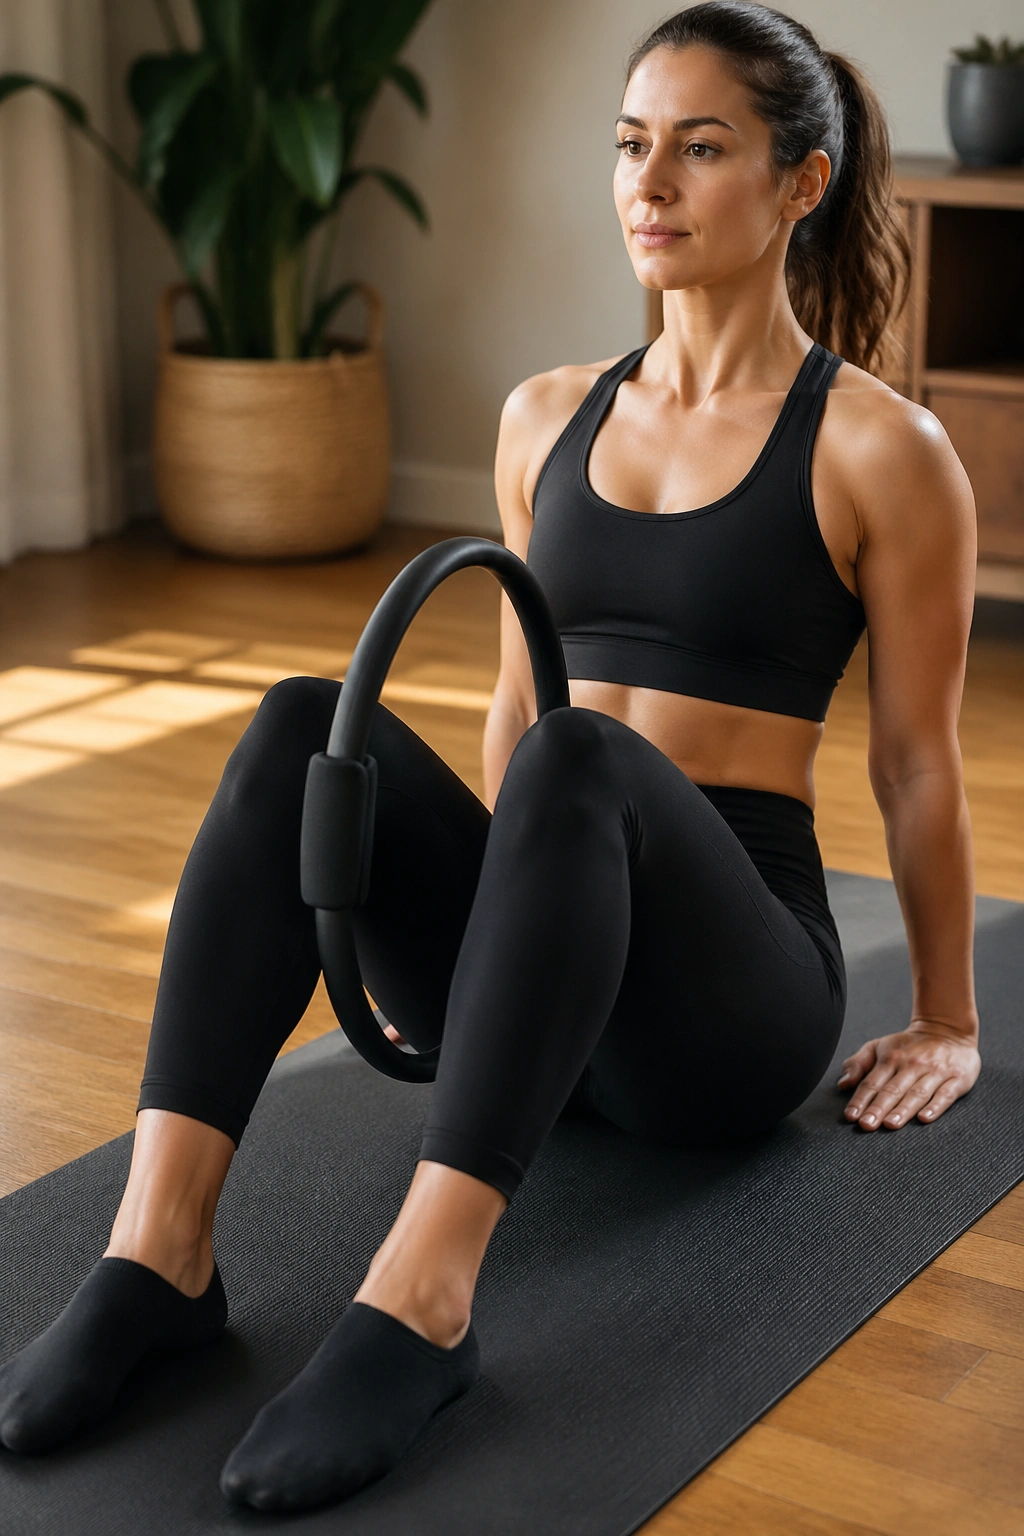
A finishing move should leave you feeling worked, not wrecked.
Stand with feet about hip-width apart, hold the ring at chest level, and drop into a shallow squat. As you stand, press the ring firmly between your palms and reach it upward to about eye level or overhead, then lower it as you sink again. Eight to ten controlled reps is enough to create that whole-body heat people want from Pilates ring workouts.
Keep the knees tracking over the toes, and stop the squat before the pelvis tucks under. If your shoulders rise toward your ears on the press, lower the ring and keep the reach smaller. The best finishers do not need drama. They need clean mechanics and enough tension to make the last reps matter.
A good ring routine leaves the body feeling more awake in places most people ignore: inner thighs, side hips, deep abs, upper back, and the long muscles that hold posture together when you are tired. That is the real payoff. Not fireworks. Better control, better shape, and the kind of steady muscle tone that shows up when the basics are done well, again and again.
