



The first useful postpartum Pilates workouts are almost never the flashy ones. They’re the quiet, slightly boring moves that help your body remember how to breathe, brace, and stand up without leaking energy everywhere.
After birth, a lot of things can feel off in a way that’s hard to describe to anyone who hasn’t lived it. The belly can feel loose or domed, the ribs flare when you inhale, the pelvis feels heavy, and even a simple bridge can expose weak links you never noticed before. None of that means your body is broken. It means it has been doing an enormous job and needs smarter training than a random ab circuit.
Pilates makes sense here because it starts with control, not punishment. The best postpartum Pilates workouts pay attention to pressure management, pelvic floor timing, rib position, and the way your hips and spine share the load. If you’ve had a C-section, a tear, a long labor, or just weeks of awkward sleep and baby carrying, that matters. A lot.
One thing I always tell people: if you see doming along the midline of the belly, feel pulling at an incision, notice heaviness in the pelvic floor, or have to hold your breath to finish a rep, scale the movement down right away. Smaller is not weaker. Smaller is often smarter. The first place to start is with breathing, and the rest of the work grows out of that.
1. 360 Breathing and Rib Stack Reset
Lie down with your knees bent or rest on your side if flat on your back feels like too much. Place one hand on the side of your ribs and the other on your lower belly, then breathe so the ribs widen out to the sides and into the back, not just up into the chest.
Why this belongs first
This is the cleanest way to reconnect your core without crunching anything. The exhale should feel long and easy, like you’re fogging a mirror without pushing hard. On the inhale, let the rib cage expand softly; on the exhale, feel the ribs draw back toward center and the lower belly gently narrow.
Do 5 to 8 breaths, rest for a few seconds, then repeat for 2 rounds. If you’ve been bracing your stomach all day while holding a baby, this can feel weirdly good. It’s small work, but it sets up every other move in the list.
Best cue: think ribs over pelvis, not chest up and belly sucked in.
2. Pelvic Tilts on the Floor
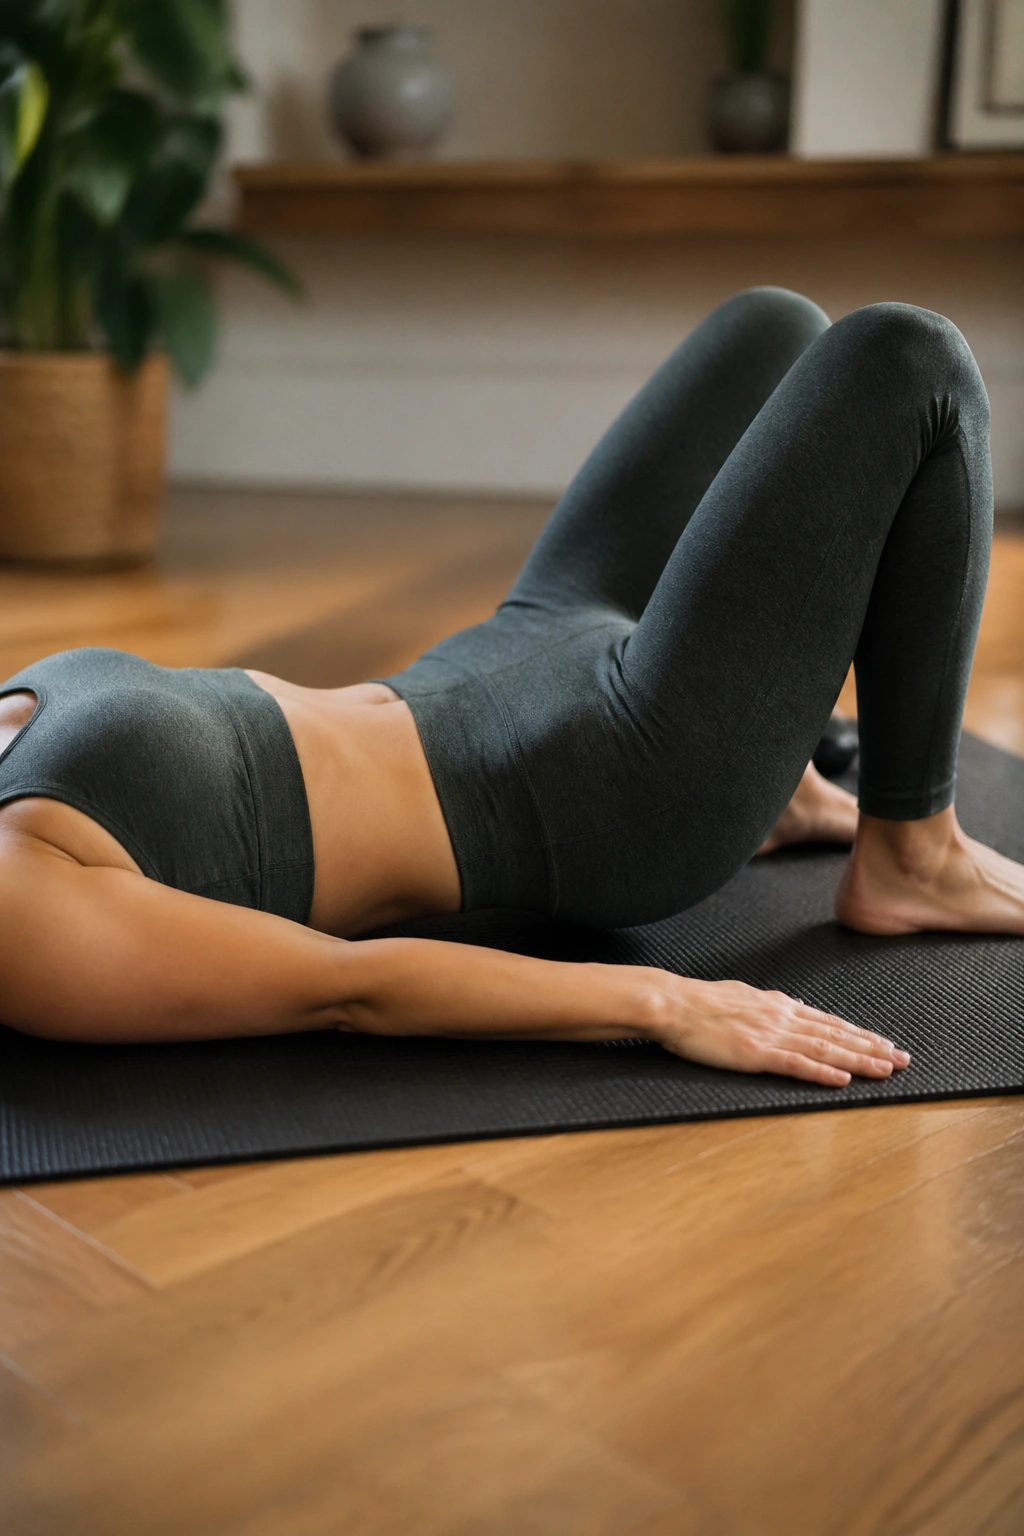
A pelvic tilt looks almost too simple, which is why people skip it. Don’t. It teaches the pelvis to move without dragging the lower back into a fight, and that’s a skill new moms use constantly, from getting out of bed to picking up a diaper bag.
Start lying on your back with knees bent and feet flat. Exhale, gently tip the pelvis so the low back eases toward the floor, then inhale and return to a neutral curve. The motion should be small, almost like you’re rocking a bowl of water without spilling it.
Do 8 to 10 slow reps. If your back feels jammed or you start clenching your glutes hard, make the tilt smaller. You are not trying to flatten every curve out of your spine; you’re learning control, and control is the whole point.
Watch for: a smooth shift, not a hard smash into the mat.
3. Heel Slides for the Deep Core
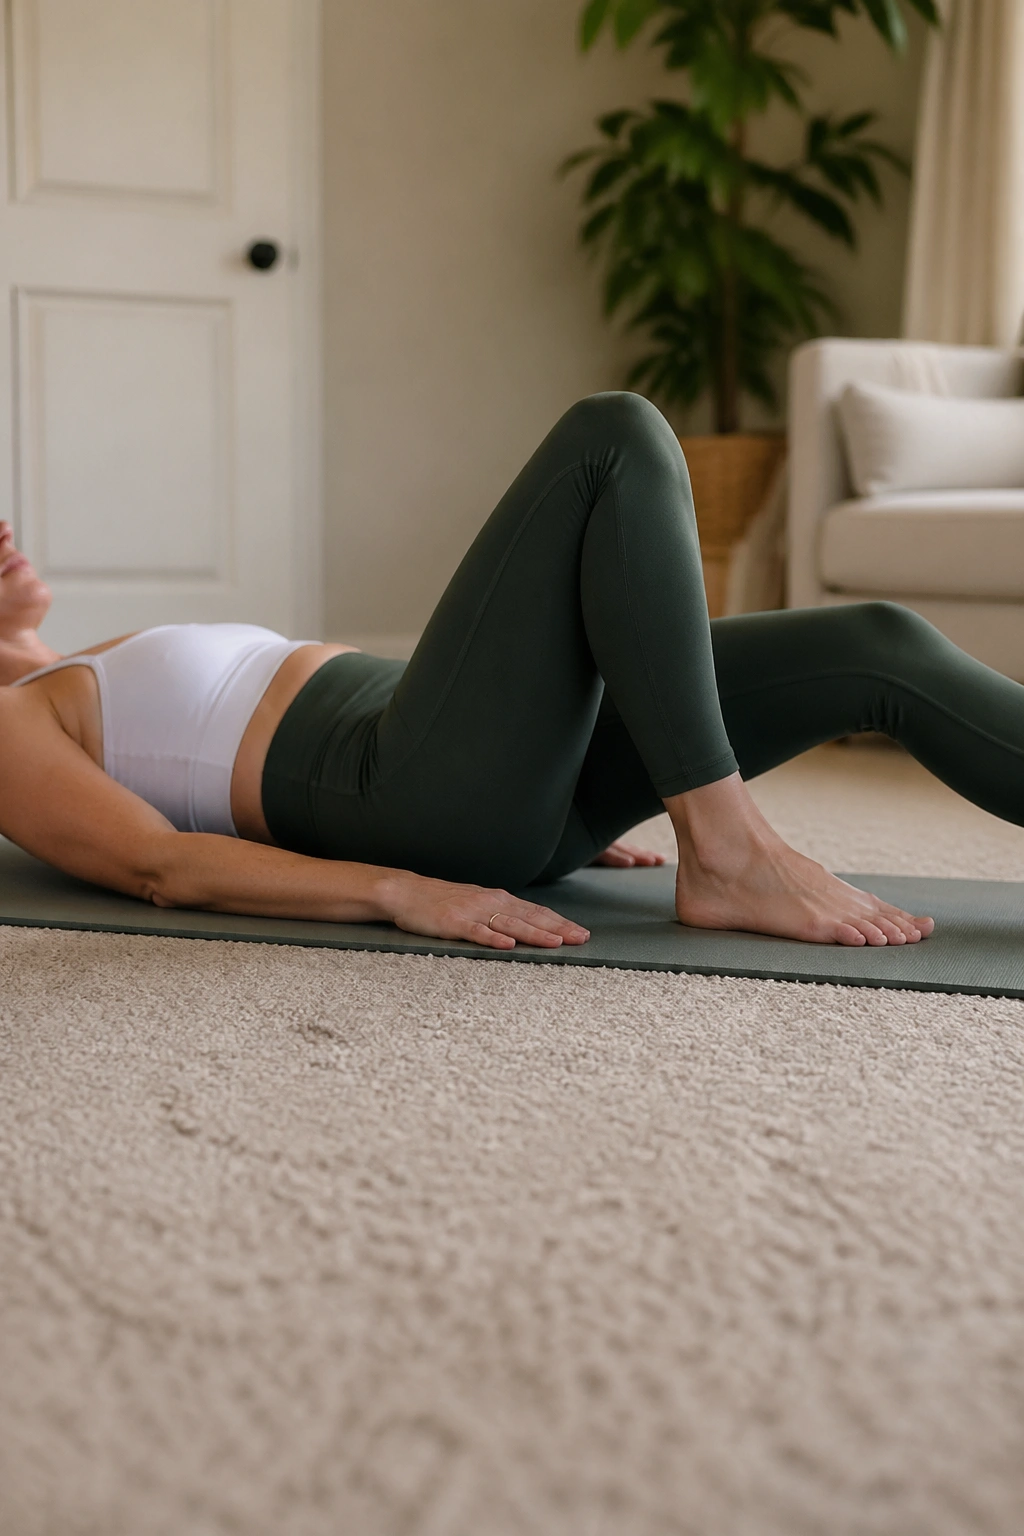
Can your core stay quiet while one leg moves? That’s the question heel slides ask, and it’s a useful one because real life keeps asking it too. Babies do not wait for you to finish your workout before they need lifting, twisting, or carrying.
Lie on your back with knees bent. Exhale, keep the ribs soft, and slide one heel away from you until the leg is almost straight, then inhale and draw it back in. The belly should stay relatively flat, not cone up in the center. If it domes, shorten the slide.
How to use it
- Start with 5 slides per side.
- Rest for one breath between sides if you need it.
- Keep the pelvis steady; no rocking.
- If lying flat is uncomfortable, place a folded towel under the head or do the move with one foot on the floor.
This one is a quiet test of coordination. It does not need to be dramatic. A tiny, controlled slide done well beats a big one done with your breath held.
4. Glute Bridges with a Long Exhale
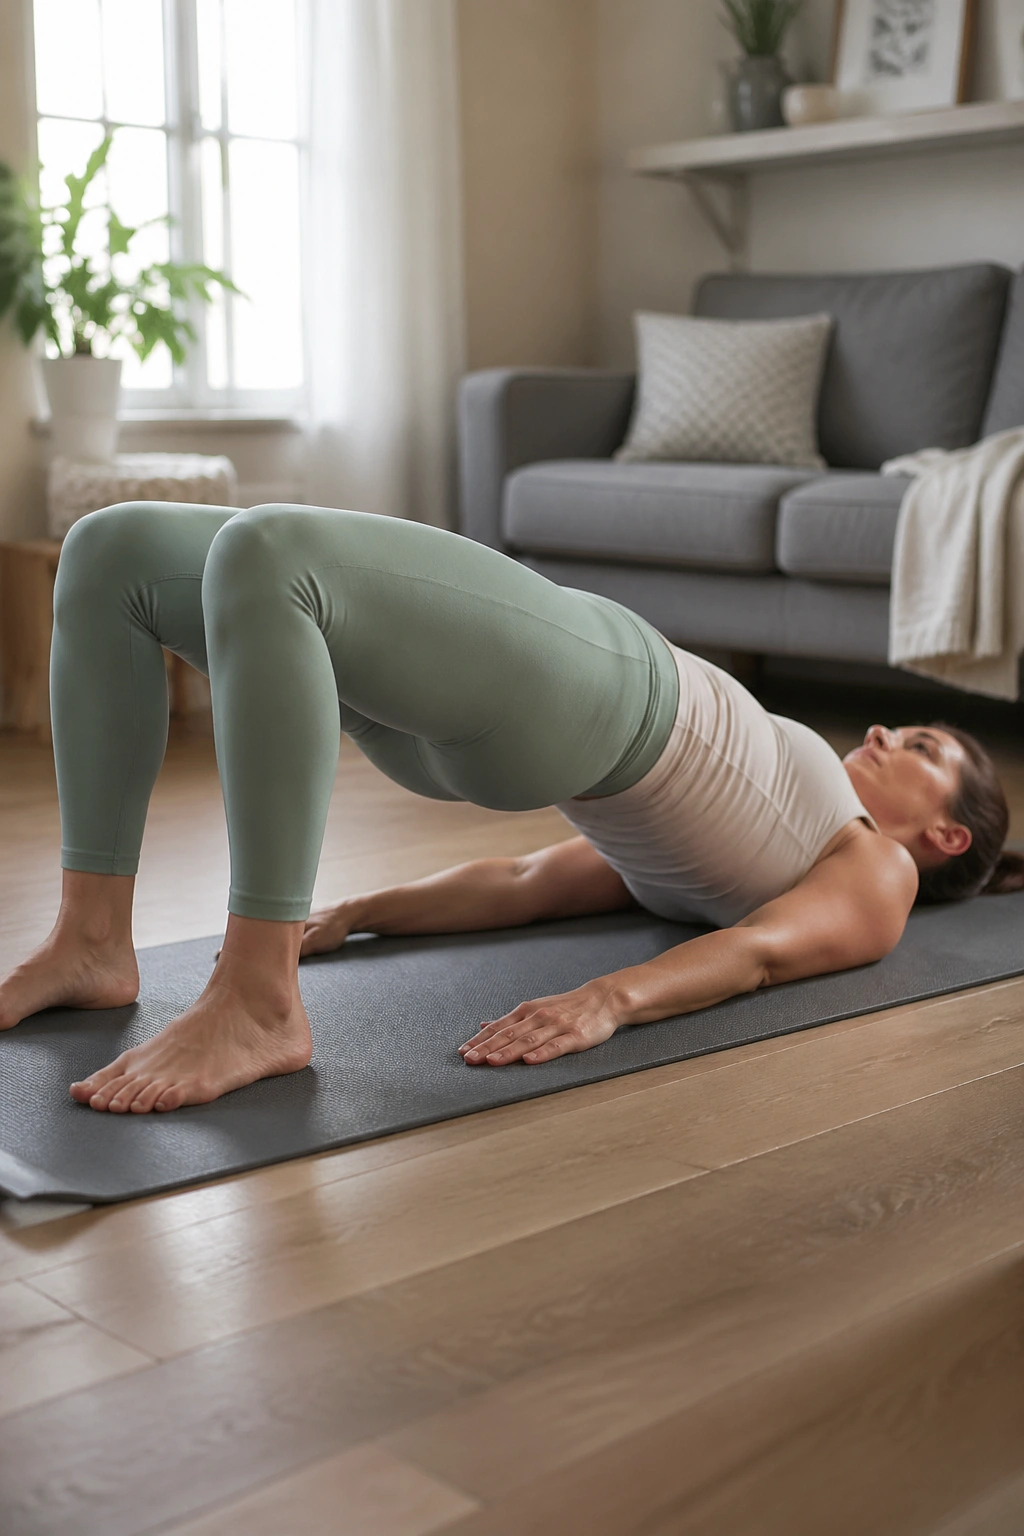
Glute bridges are a gift after pregnancy because they wake up the backside without pounding the joints. They also remind the pelvis and ribs how to line up, which is a detail that gets messy fast when you’re feeding a baby in a chair for the third time before noon.
Set your feet hip-width apart, knees bent, and arms by your sides. Exhale, gently tuck the tailbone, and lift the hips until your body makes a long line from shoulders to knees. Inhale at the top, then lower with control. The lift should come from the glutes, not from cranking the lower back.
Do 6 to 8 reps for 2 sets. If your hamstrings take over and start cramping, bring your feet a little closer to your seat bones and make the bridge smaller. A good bridge feels strong in the back of the hips, not like a backbend in disguise.
Helpful warning: if you feel pressure downward in the pelvis, back off and make the lift lower.
5. Side-Lying Clamshells for Hip Support
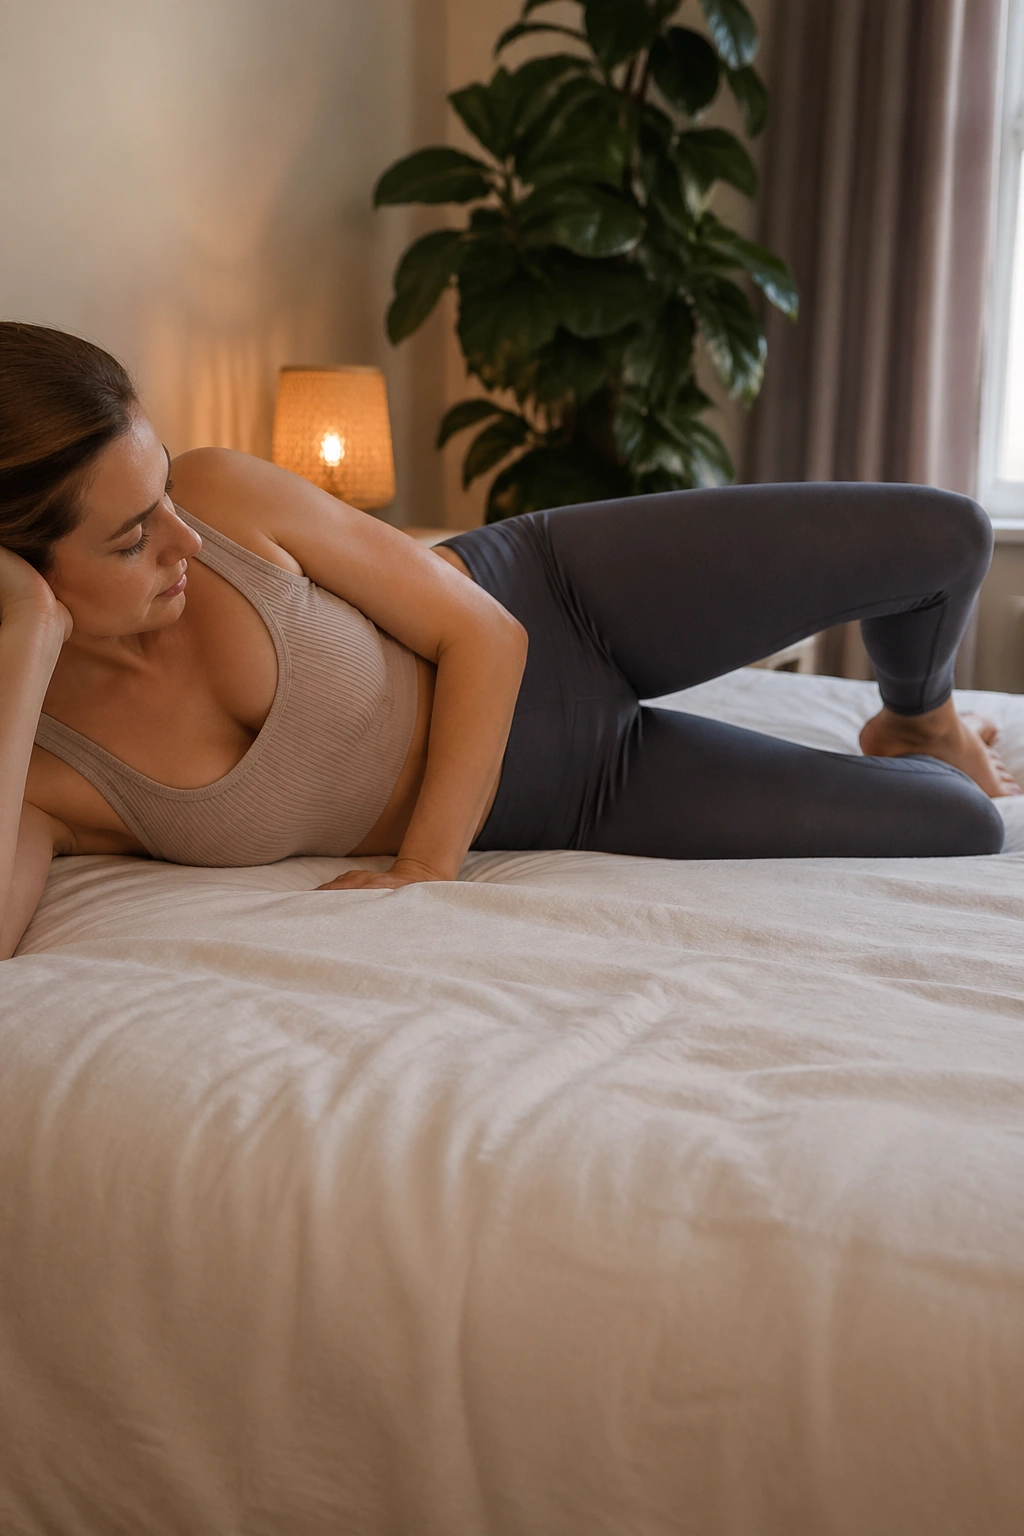
After months of carrying a baby on one side, most new moms have a favorite hip that does too much. Clamshells are useful because they train the side glutes, which help keep your pelvis steady when you walk, climb stairs, or shift from side to side while holding a baby.
Lie on your side with knees bent and heels in line with your hips. Keep your feet touching, exhale, and lift the top knee a few inches without rolling the pelvis backward. Lower slowly. The movement is tiny. Good.
What makes this one worth keeping
- It builds hip stability without loading the abdomen hard.
- It can be done on a bed if the floor feels like too much.
- It is easy to pair with breathing, which keeps the movement clean.
- It helps offset the one-sided carry habits that creep into every day.
Do 10 reps per side, then finish with 5 small pulses if the hips still feel sleepy. No need to rush. If you’ve been feeling lopsided, this is one of the fastest ways to start evening things out.
6. Bird Dog Holds for Control
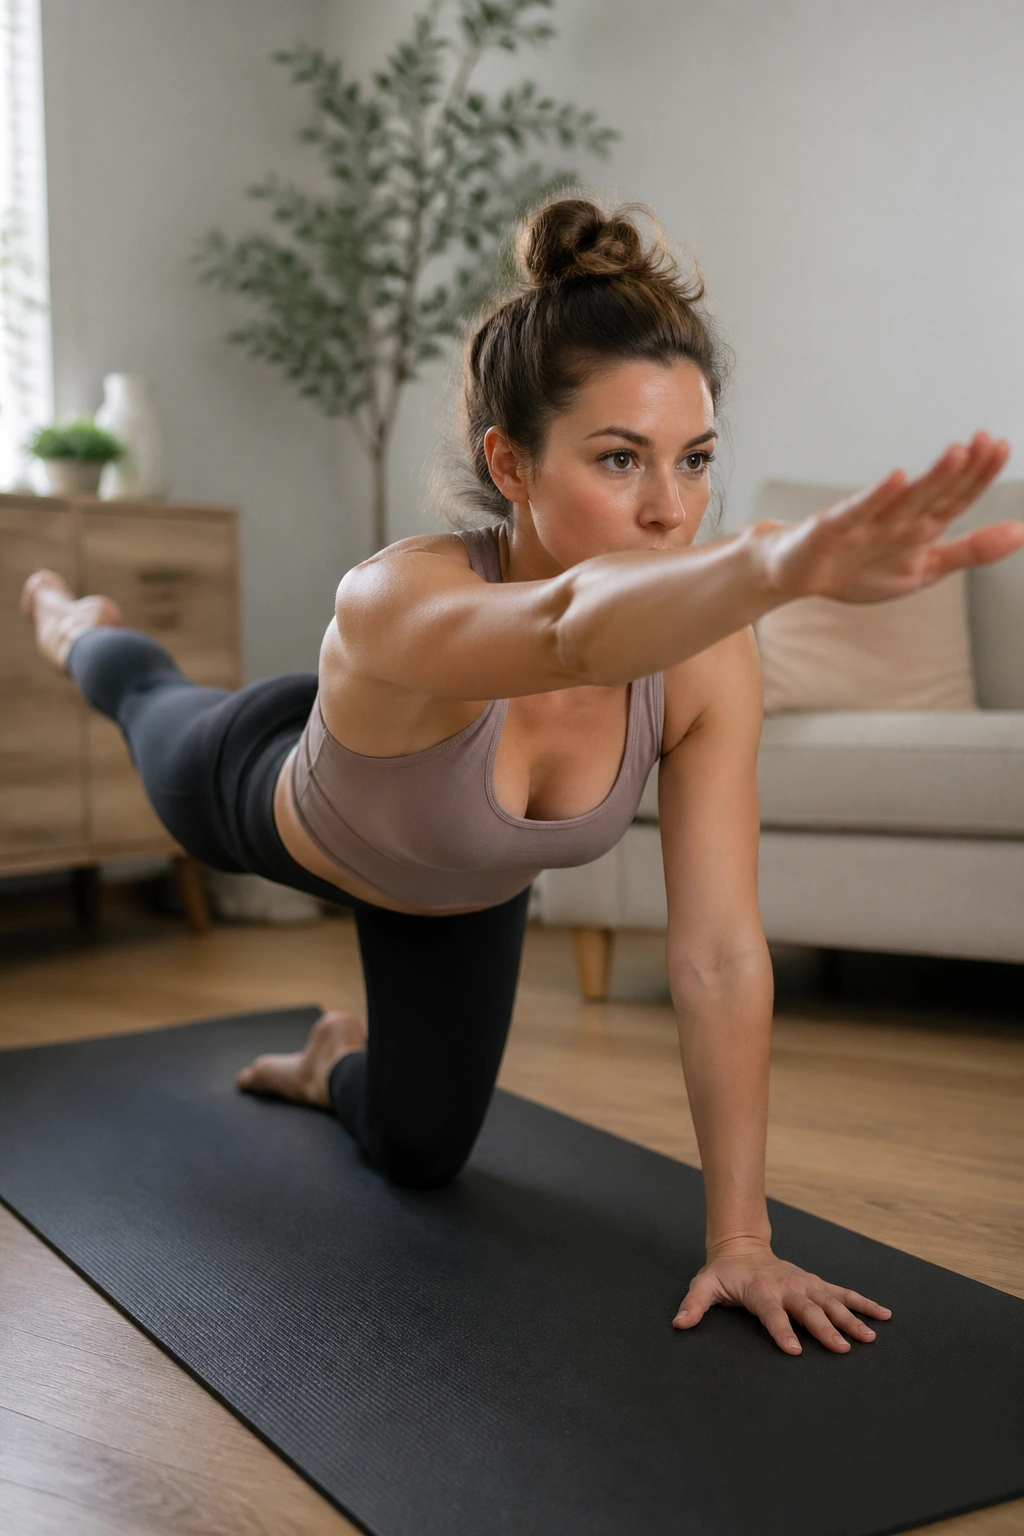
Unlike fast core work, bird dog is about patience. You reach one arm and the opposite leg, then hold still long enough to notice whether your trunk can stay level. That stillness is the hard part. The shape looks simple; the control is not.
Start on hands and knees with your wrists under shoulders and knees under hips. Exhale, extend one leg back and the opposite arm forward, then pause for 2 to 3 seconds. Return with care. If the back arches, if the belly domes, or if your weight shifts wildly to one side, make the reach smaller.
How to make it cleaner
- Keep the toes pointed toward the floor or lightly flexed.
- Reach long, not high.
- Press the floor away with the supporting hand.
- Do 5 slow reps per side.
If your wrists complain, drop to forearms for a modified version. Bird dog is one of those exercises that rewards calm. The prettier it looks, the more likely you are to be cheating.
7. Modified Hundred Prep
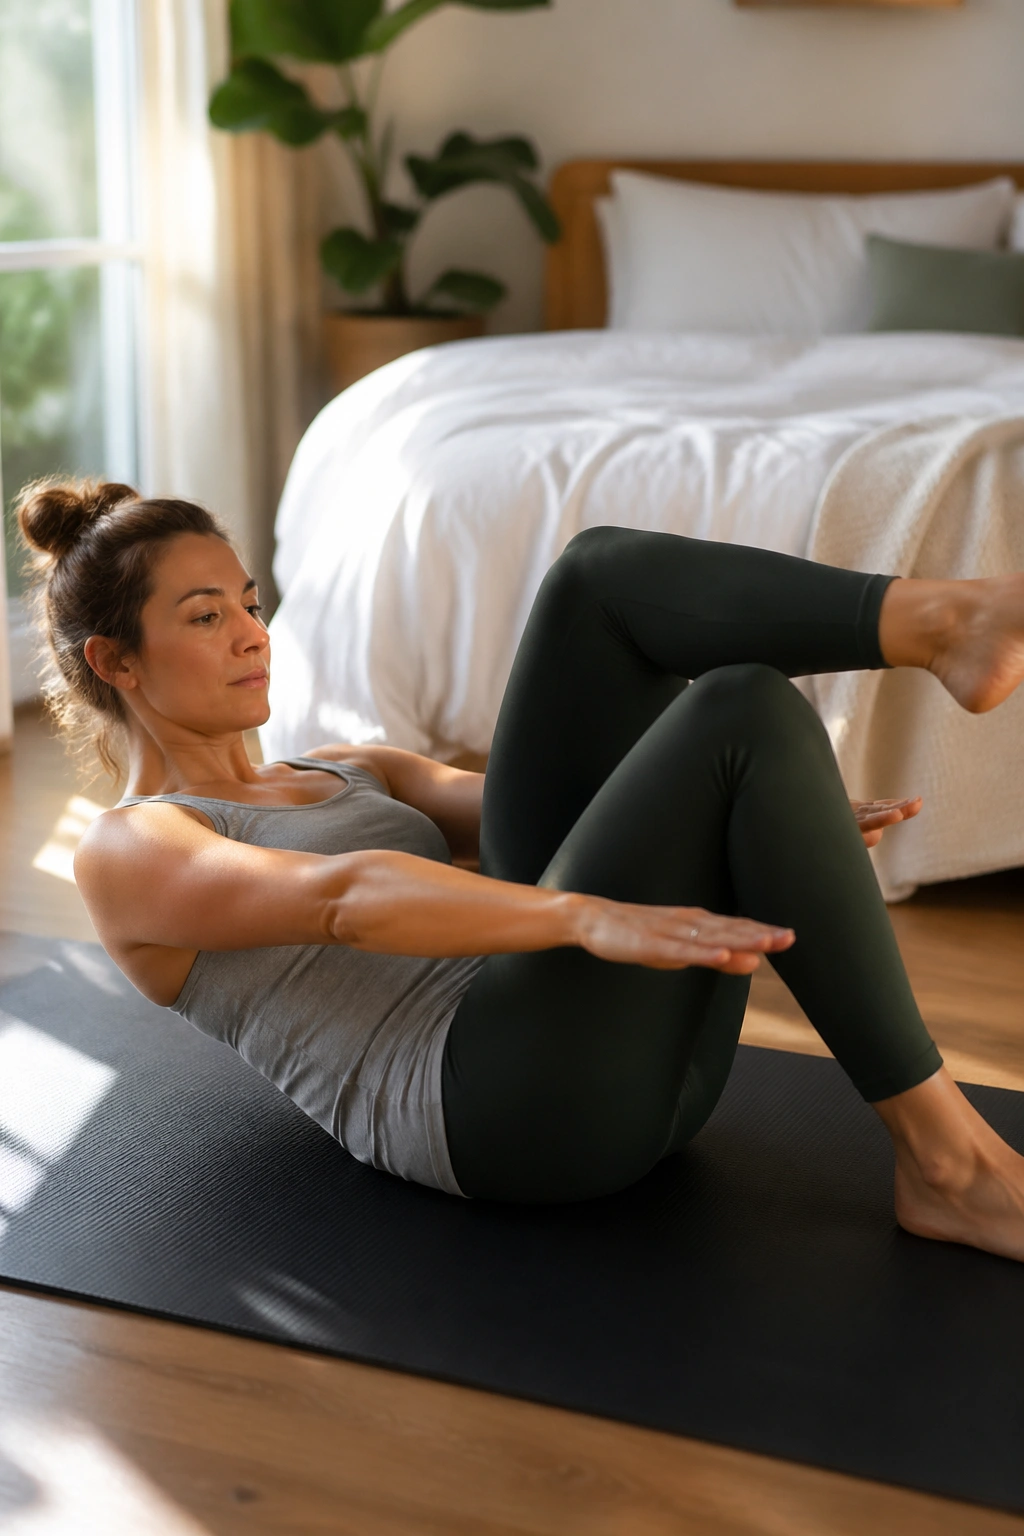
The Hundred has a reputation. It’s earned. Full version, feet lifted, head curled, arms pumping away—too much too soon and the belly often tells on you. The modified version is far kinder and still useful.
Start with knees bent and feet on the floor. Lift the head and shoulders only if you can do it without strain; if not, keep the head down and just practice the breathing pattern with your arms. Pump the arms for 5 short breaths, then rest. If you’re stable and comfortable, try bringing one leg at a time to tabletop, never both if the belly starts to dome.
Use this as a stamina drill, not a punishment set. Your job is to keep the ribs from popping up and the neck from doing all the work. If your neck feels tight after two rounds, the setup is too hard for now.
A good rule: the exhale should feel steady, not frantic.
8. Cat-Cow with Pelvic Floor Release
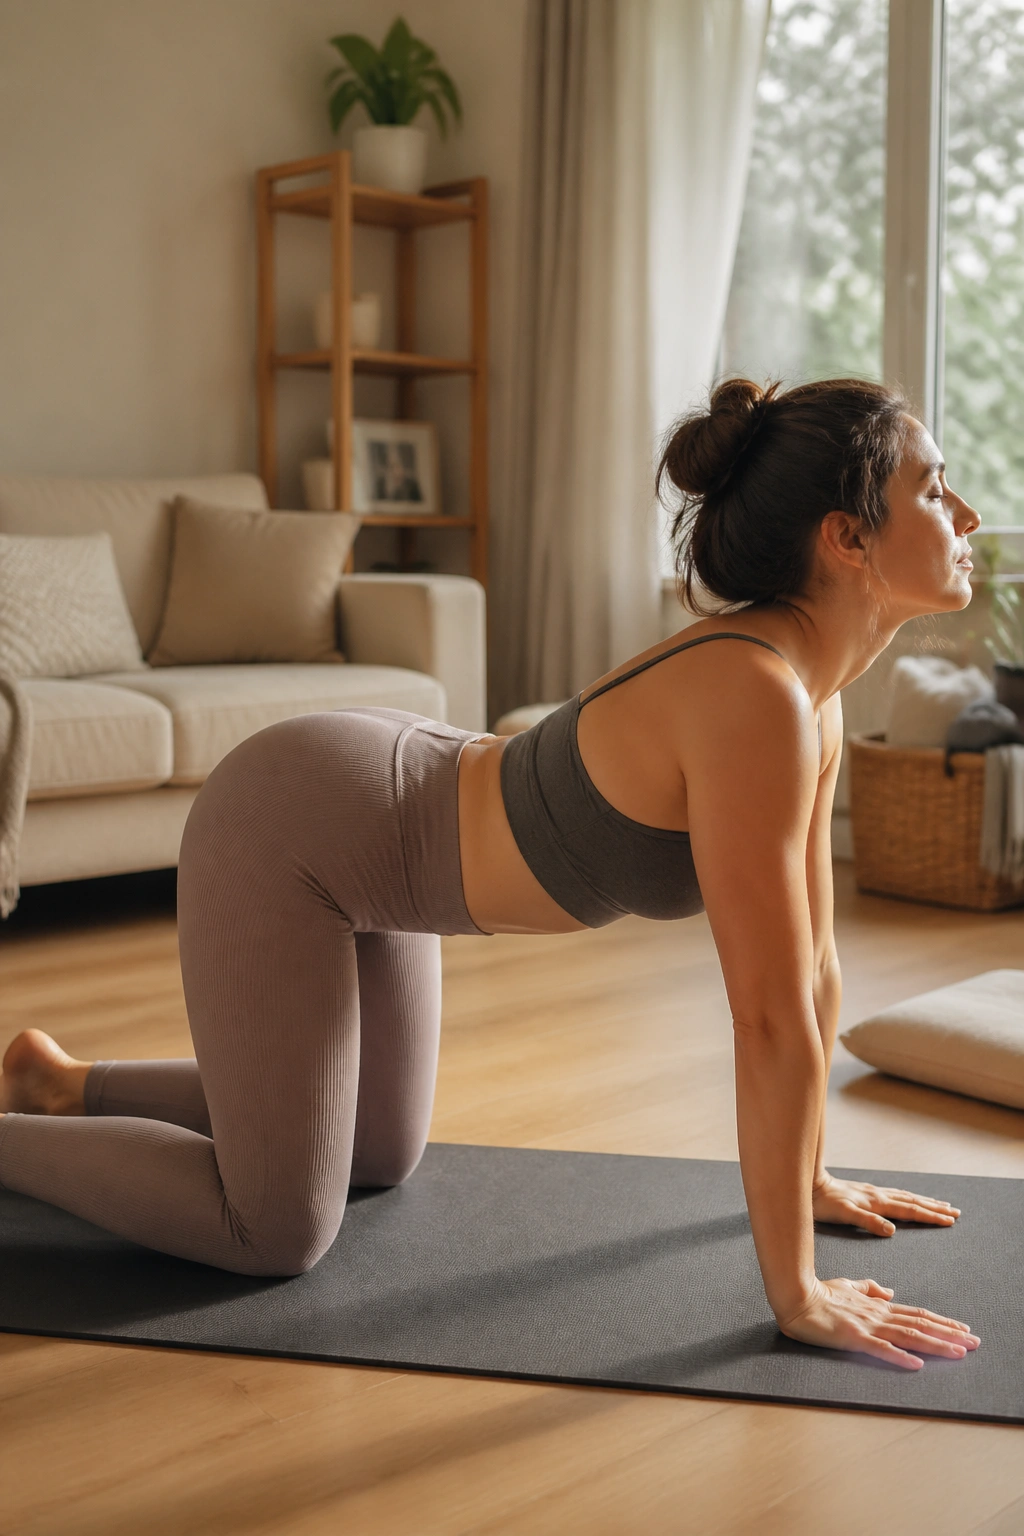
The spine often gets stiff in postpartum life because so much of the day happens in rounded positions: feeding, rocking, holding, washing bottles, falling asleep upright on a couch with a baby on your chest. Cat-cow helps undo that without asking for intensity.
On hands and knees, inhale as you gently arch the back and lift the chest; exhale as you round the spine and let the tailbone tuck under. Keep the movement smooth. The nice part is the rhythm. The whole body gets a little more space.
What to feel
- The shoulders should stay soft.
- The belly should not push down hard into the floor.
- The movement should feel warm, not pinchy.
- The exhale on the round side can help the pelvic floor relax.
Do 6 to 8 slow rounds. If it feels better, pause in the rounded shape for one extra breath and let the lower ribs widen. That little pause can be more useful than racing through twenty reps.
9. Standing Roll-Downs for Postpartum Pilates
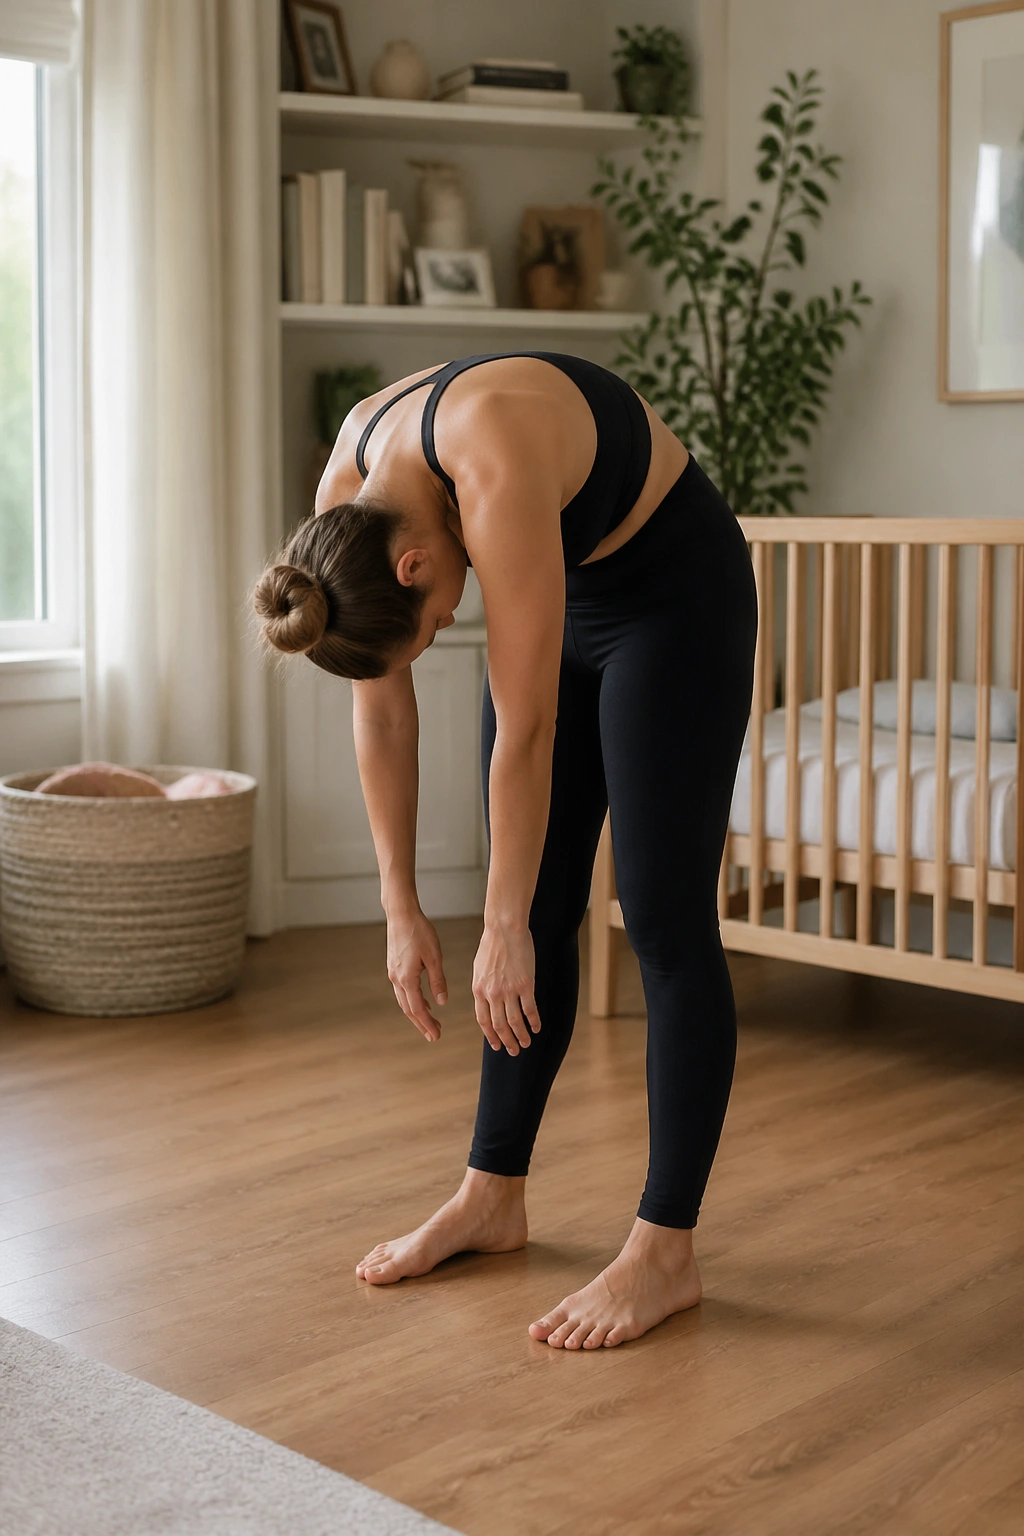
Some days the floor feels impossible. Maybe the baby is asleep on you, maybe your knees are tired, or maybe you just need something you can do in socks beside the crib. Standing roll-downs are the answer I keep coming back to.
Stand with feet hip-width apart and knees soft. Inhale tall, then exhale and nod the chin, letting the upper spine roll down one vertebra at a time until your hands reach toward your shins or thighs. Inhale at the bottom, exhale, and roll back up slowly through the spine. No yanking. No hanging out in your lower back.
This move wakes up the back line of the body and teaches the belly to support without gripping. It’s also sneaky core work because you have to control gravity while standing, which is a much more honest test than lying on a mat and pretending life is calm.
Do 5 slow roll-downs. If you feel dizzy, shorten the range and move even more slowly.
10. Tabletop Toe Taps and Marches
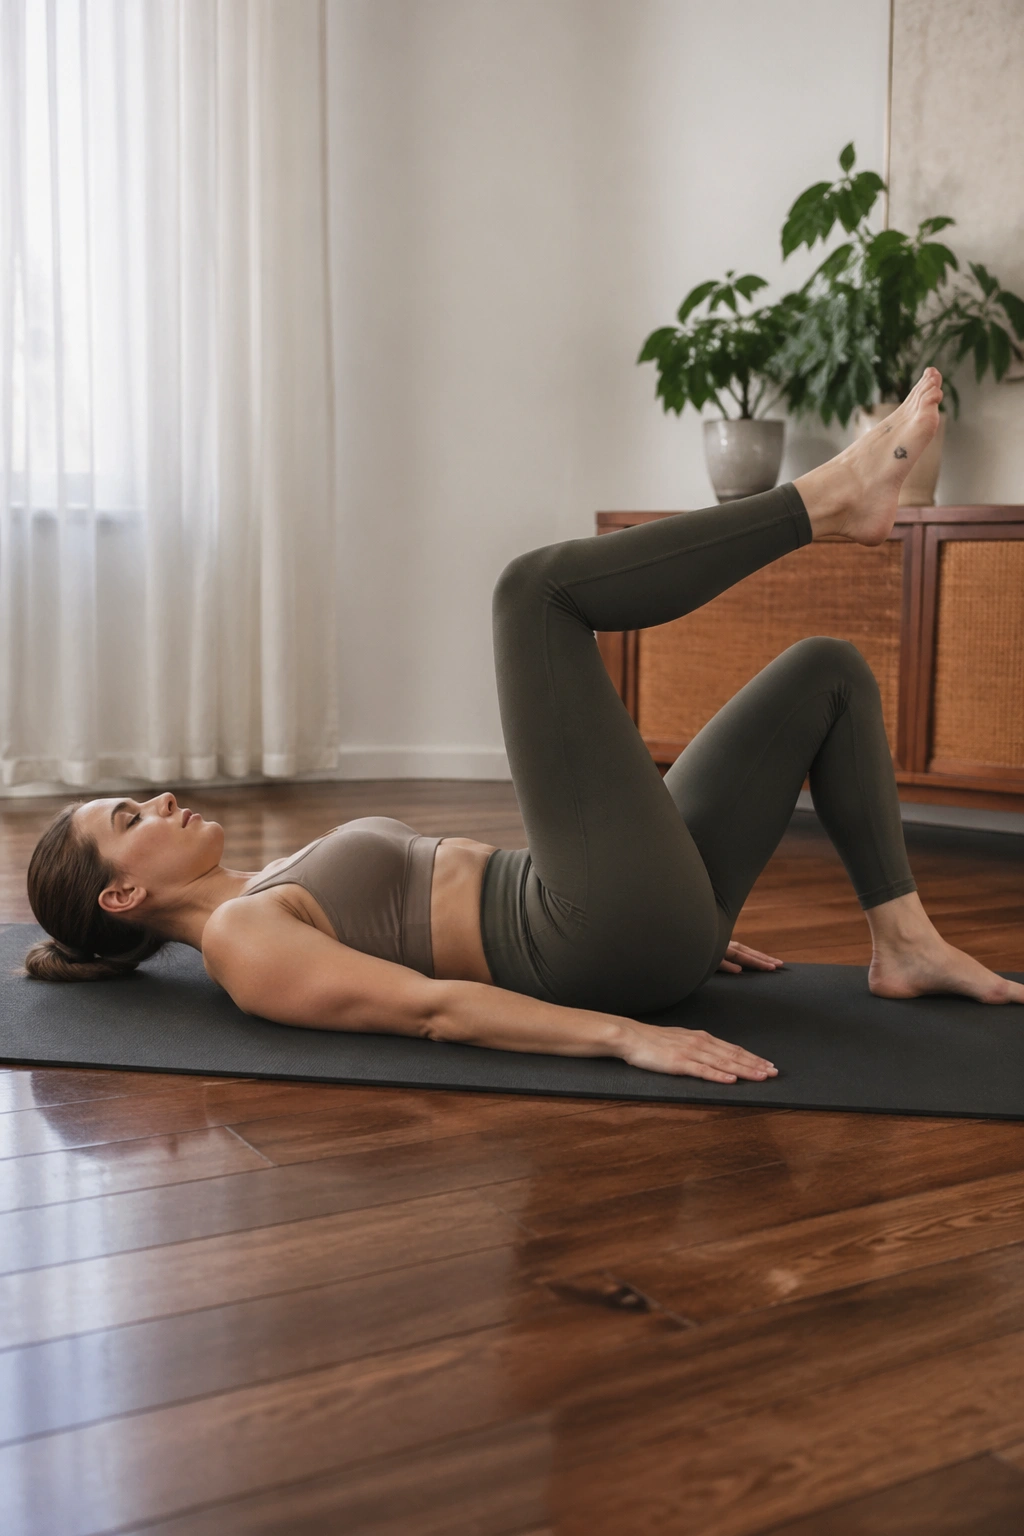
Toe taps are one of the clearest tests of abdominal control after birth. They show you whether the deep core can stay organized when the legs move, which is exactly the challenge of walking with a baby carrier, stepping over toys, and getting in and out of a car with one hand full.
Begin on your back with knees in tabletop only if you can keep the belly flat and the pelvis steady. Tap one toe to the floor, return, then switch sides. If tabletop feels too spicy, keep one foot down and march the other leg instead. That version is often the smarter choice.
The rule I use
If the middle of the belly domes, the back arches, or the breath disappears, reduce the range. Always. A smaller march with a calm trunk is more useful than a big leg lift with a strained face.
Do 6 to 8 taps per side. Add a slow exhale on each lower phase and keep your jaw loose. Weirdly enough, jaw tension and belly tension love to travel together.
11. Knees-Down Side Plank
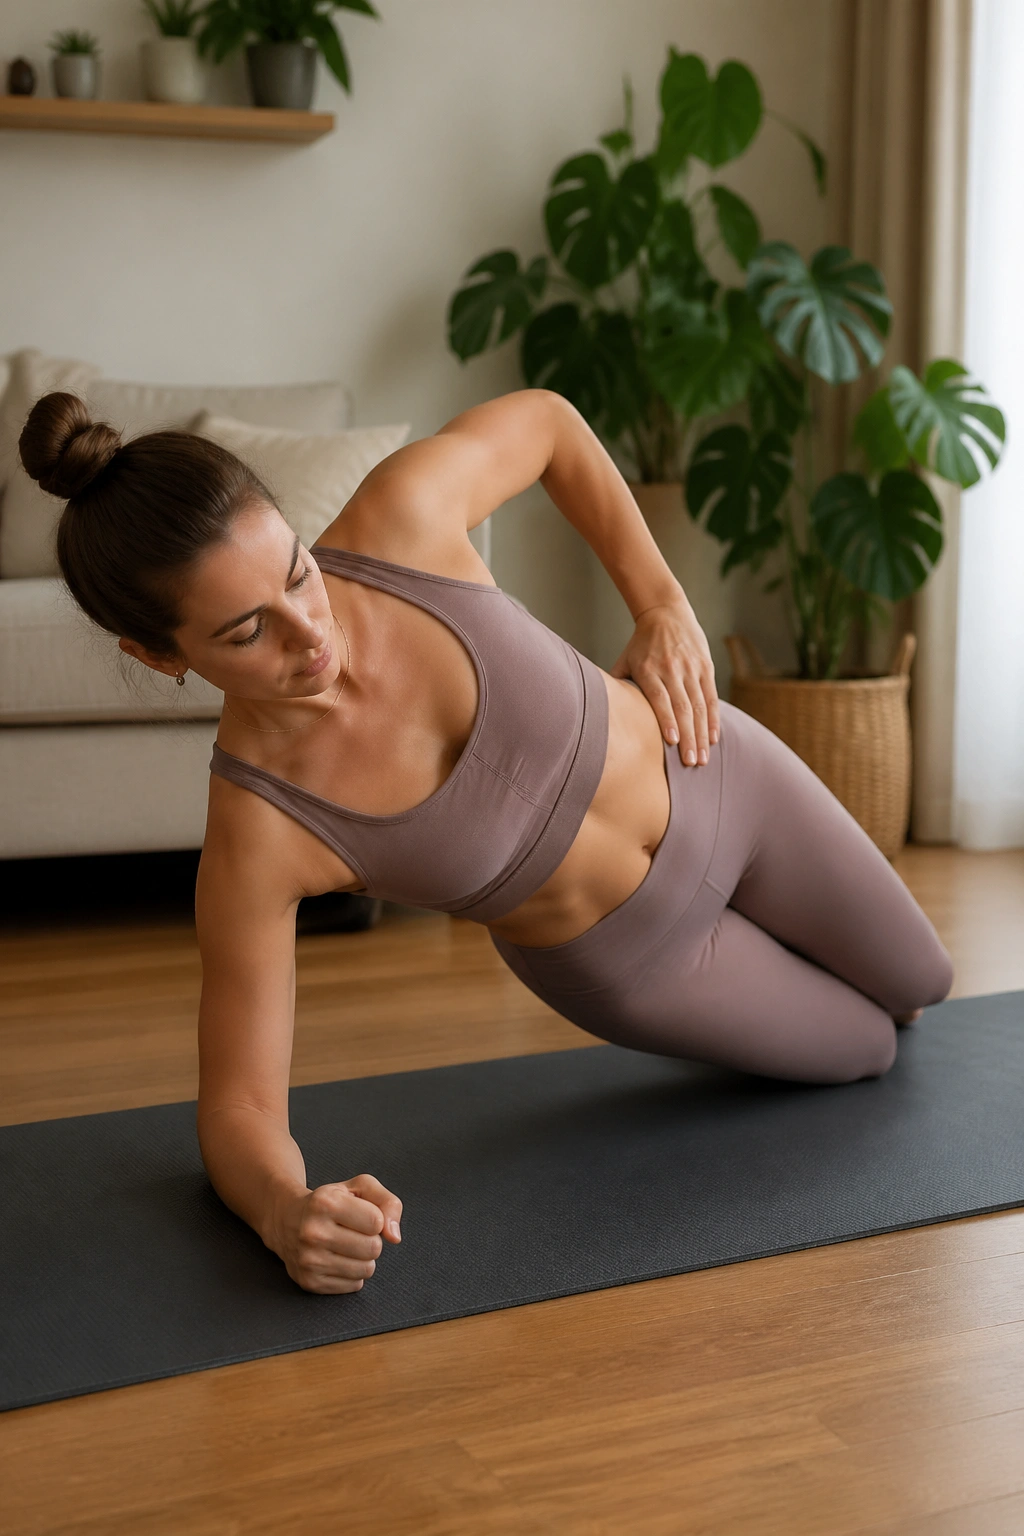
Full side plank is not the place to prove anything in postpartum recovery. The knees-down version gives you the side-body work without making your obliques feel like they’re being dragged through gravel.
Set up on one forearm with the knees bent and stacked, or keep the bottom knee slightly behind the top if that feels steadier. Lift the hips just enough that the waist clears the floor. Hold for 10 to 20 seconds, then lower with control. Switch sides.
This is one of the best moves for rebuilding the line from shoulder to hip. It also helps with posture, since new moms often fold forward for long stretches and forget what an open side body feels like.
If the shoulder hurts, do it against a wall instead. The floor version is not morally superior. It’s just lower to the ground.
12. Kneeling Side Reach
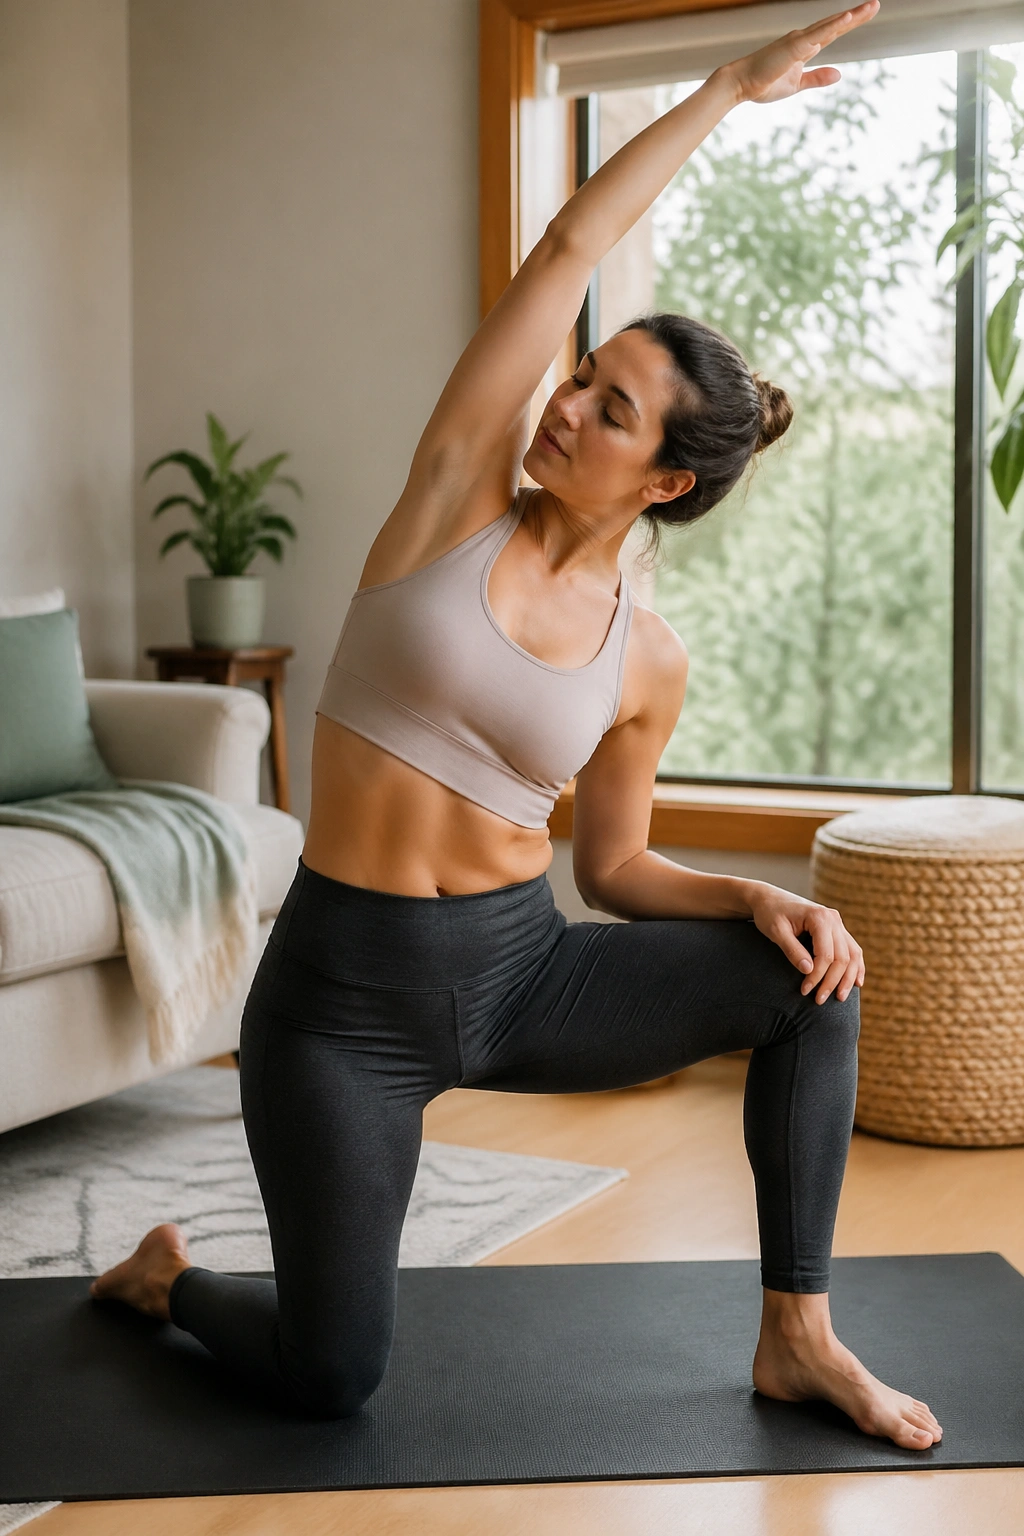
Half-kneeling side reach gives you two things at once: a stretch through the side ribs and hip flexor, plus a little oblique work as you keep the ribs from dumping forward. It’s calm, but it is not lazy.
Start in a half-kneeling position with one knee down and the other foot planted. Reach the arm on the kneeling side overhead and lean gently away. Breathe into the side of the ribs for 4 or 5 breaths, then come back to center and switch sides. Keep the pelvis stacked; don’t let it twist open.
The sensation should feel long and open through the side of the body, almost like the space between your ribs and hip is getting a fresh line of air. If it turns into a low-back pinch, the lean is too big.
I like this one after carrying a baby on one hip. It seems small. It isn’t.
13. Swimming Prep on Hands and Knees
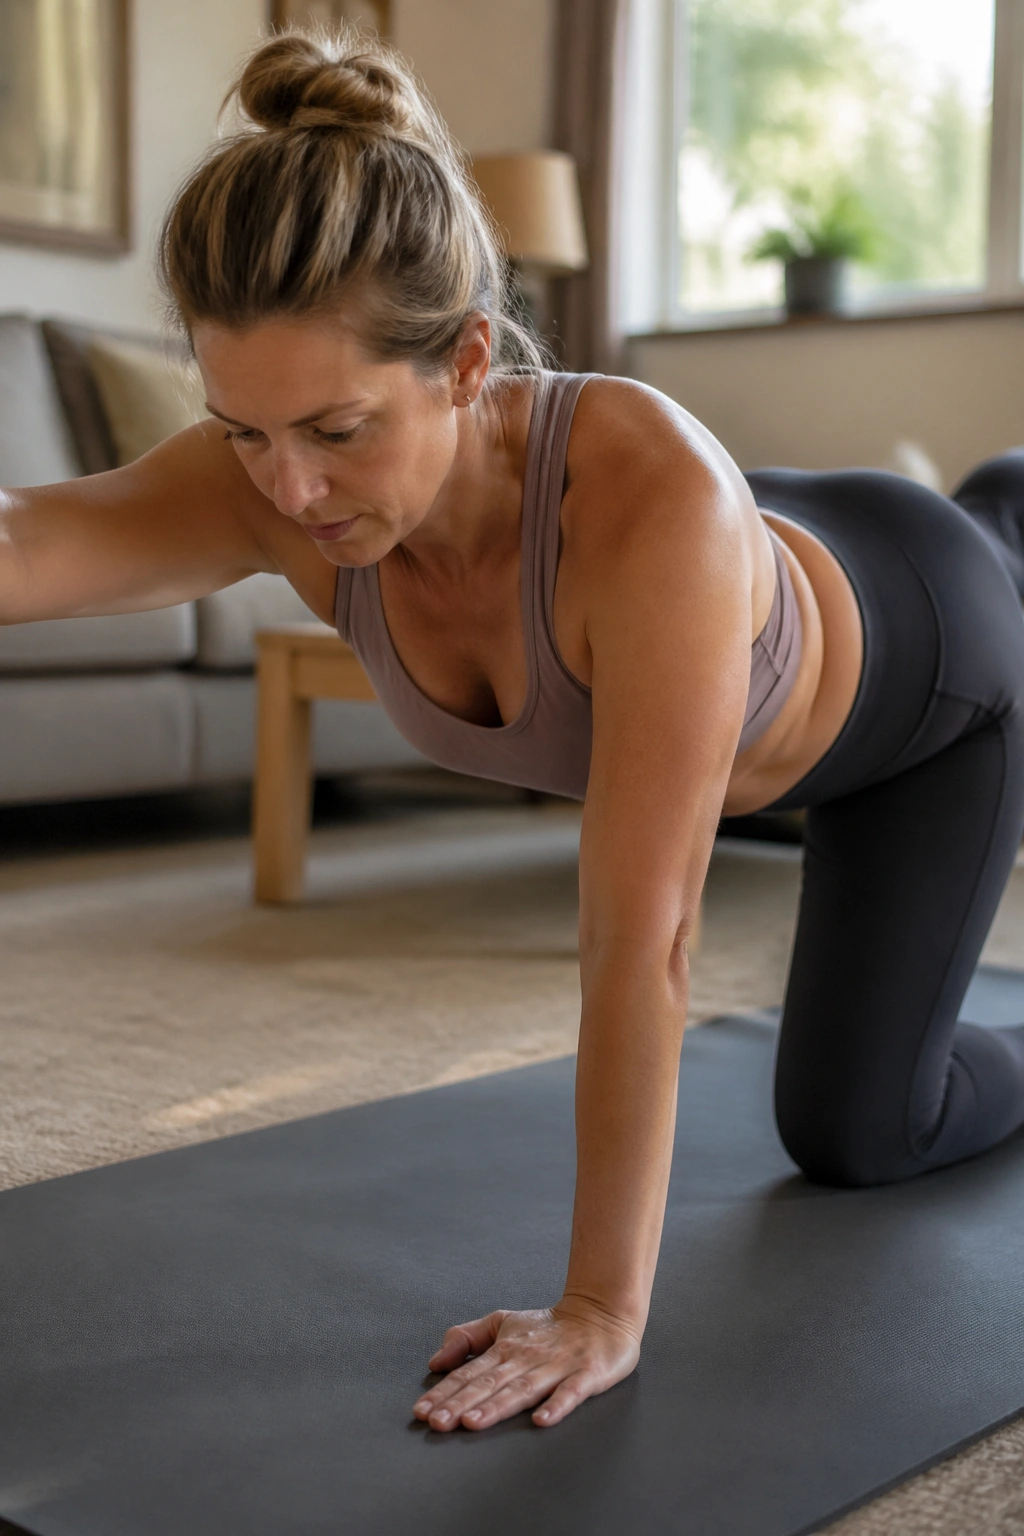
Swimming prep sounds fancy, but the real version is modest: lift one arm or one leg, then try not to wobble like a shopping cart with a bad wheel. That’s the whole game.
Start on hands and knees. Reach one arm forward and the opposite leg back, but keep the motion tiny and the pelvis level. If that feels fine, hold for 2 seconds, lower, and switch. If it feels messy, lift only one limb at a time. That still counts.
How to keep the back quiet
- Keep the ribs wide, not flared.
- Imagine balancing a glass of water on the low back.
- Press through the supporting hand and shin.
- Stop before the lower back starts doing extra work.
Do 4 to 6 reps per side. This is a control exercise, not a speed drill. If you want the kind of challenge that leaves your whole body humming without making you sore in a bad way, this is one to keep close.
14. Seated Spine Mobility Circuit
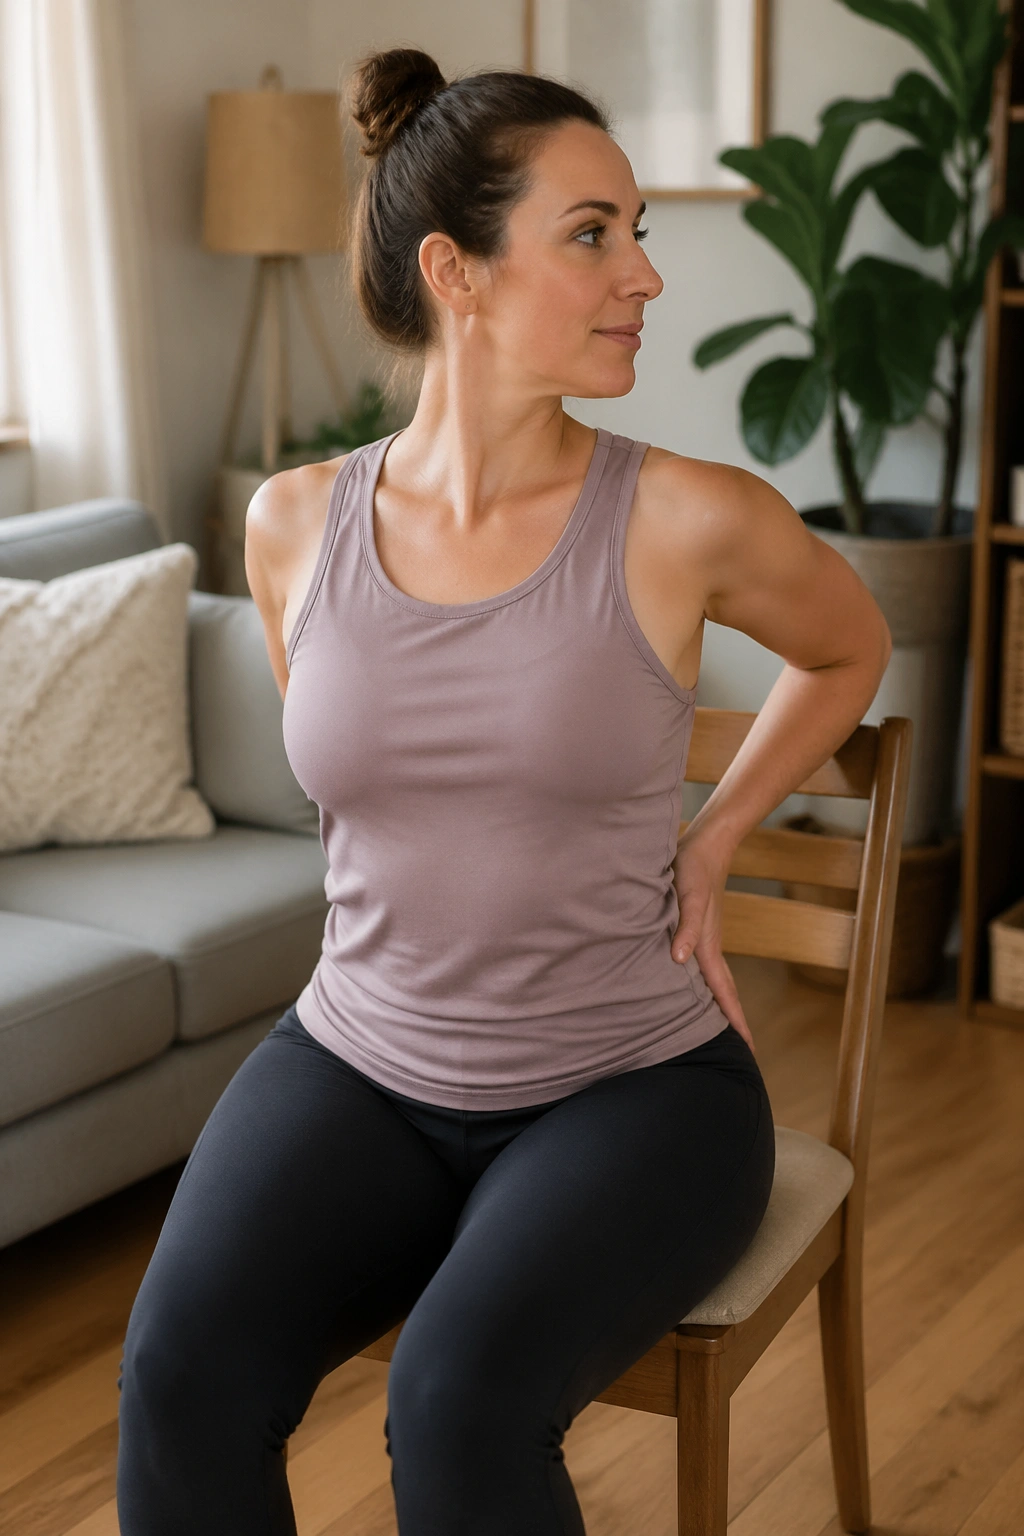
A chair, a couch, even the edge of the bed—pick one and stay there for five minutes. Seated work can sound less impressive than floor work, but postpartum life rarely rewards impressiveness. It rewards what gets done.
Sit tall with both feet on the floor. Roll the shoulders back 5 times, then do small torso rotations to the right and left, keeping the pelvis facing forward. Finish with gentle side bends, one hand sliding down the leg while the other reaches up. The whole circuit should feel like a reset button for your upper back.
Do 5 to 6 reps in each direction. The goal is not to crank farther every time. The goal is to get the ribs moving again so the breath can travel better. When your thoracic spine stiffens, the neck and lower back usually end up doing extra work, and neither of them asked for the job.
If you only have eight minutes, start here. It counts.
15. Mini Squat and Arm Sweep
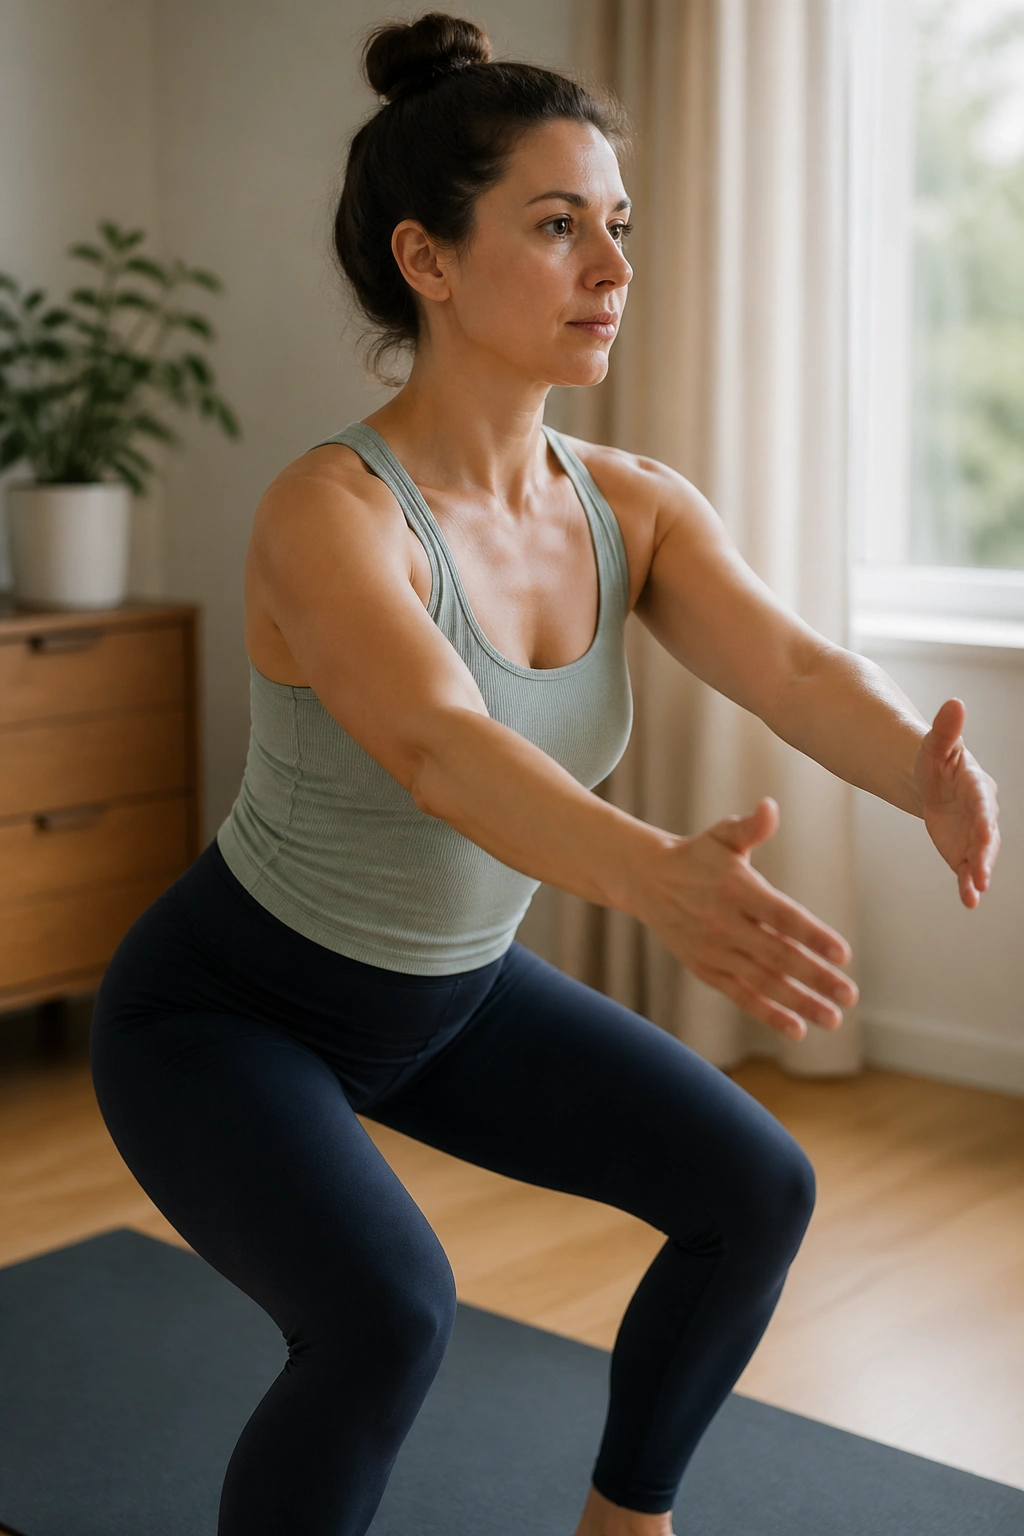
Lower-body strength matters as much as core work, maybe more in the messy middle of new motherhood. A strong squat helps with picking up the baby, standing from the floor, and getting through the thousand tiny up-and-down movements that fill a day.
Stand with feet hip-width apart. Bend the knees and sit back a little as if reaching for a chair, then sweep the arms forward or overhead as you stand. Exhale on the way up and keep the ribs from flaring. The squat does not need to be deep. A small, clean squat beats a deep one with the spine collapsing.
Use this shape when you want
- A little more leg work without jumping.
- Better coordination between arms, ribs, and hips.
- A standing move that feels useful, not random.
- A way to practice lifting mechanics before carrying a car seat.
Do 8 reps. If your knees feel cranky, shorten the bend and focus on the stand-up phase. That part matters just as much.
16. Side Bends and Rib Lift
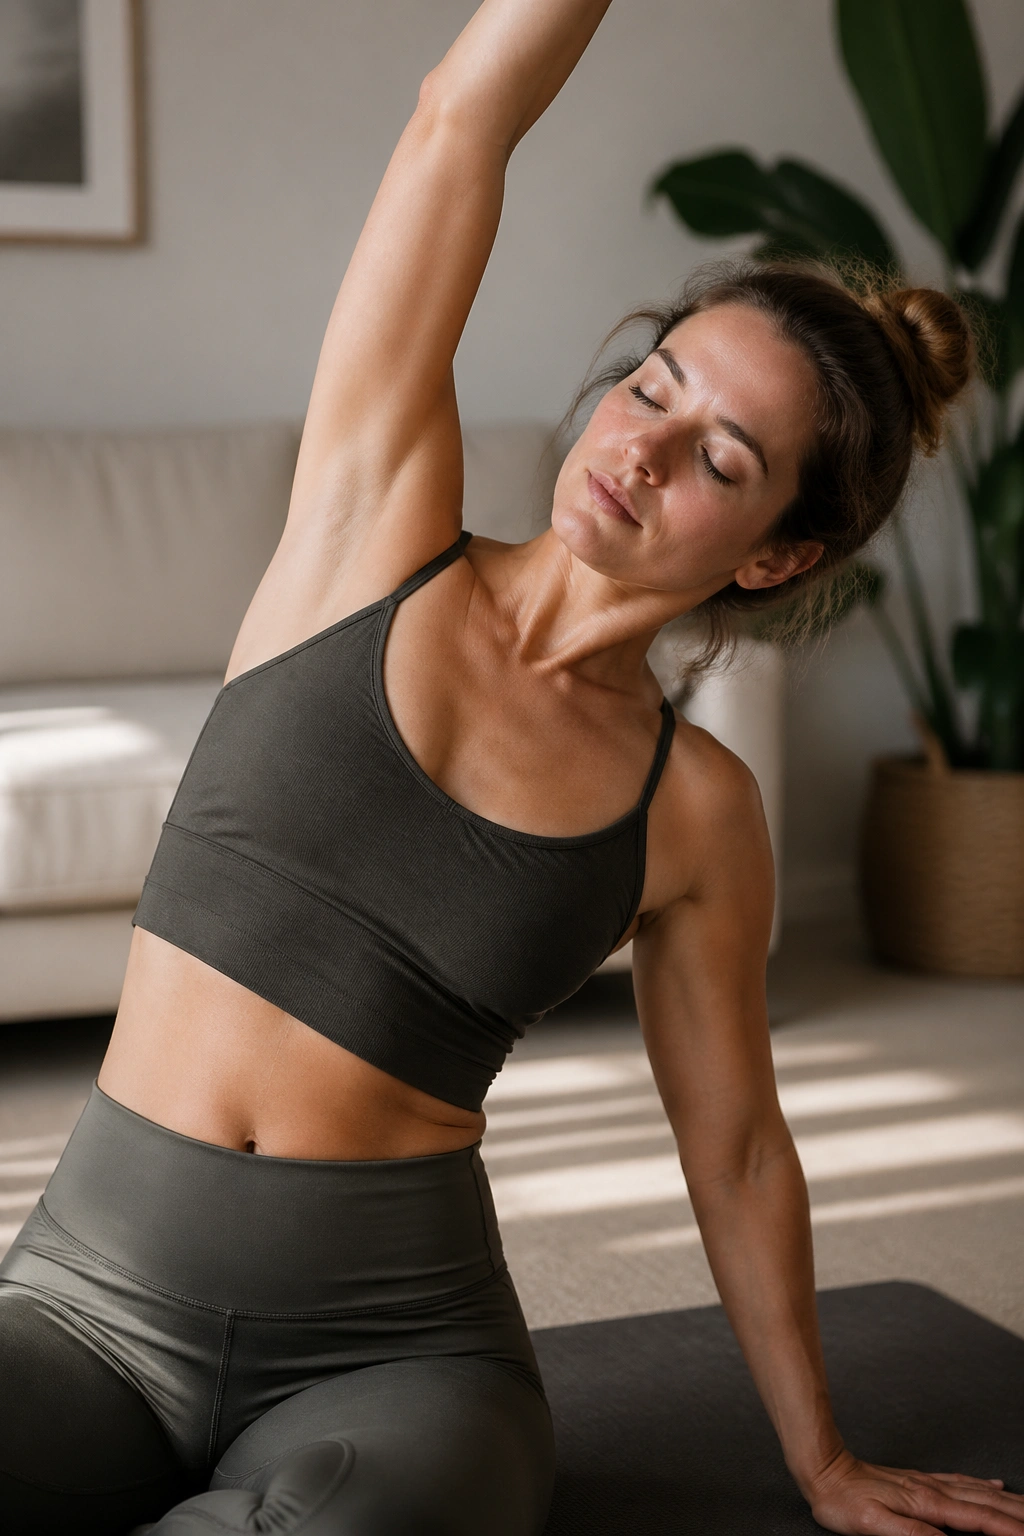
Side bends are one of the most underrated postpartum moves because they help the ribs move without turning the low back into a hinge. They also give the side body a stretch that feels plain good when you’ve spent the day curled around a baby.
Sit or stand tall, lift one arm overhead, and lean a few inches to the opposite side. Breathe into the opening between the ribs and hip. Then come back to center and switch. The movement should be easy enough that you can keep your face relaxed. If you’re bracing your teeth, the bend is too big.
This is a subtle oblique and serratus drill, but I mostly love it for the breathing. The side ribs get stubborn after birth, and the whole trunk feels freer once they start to move again.
Do 4 to 5 breaths per side for 2 rounds. Keep it soft. There’s no prize for a dramatic arc.
17. Floor-to-Stand Practice
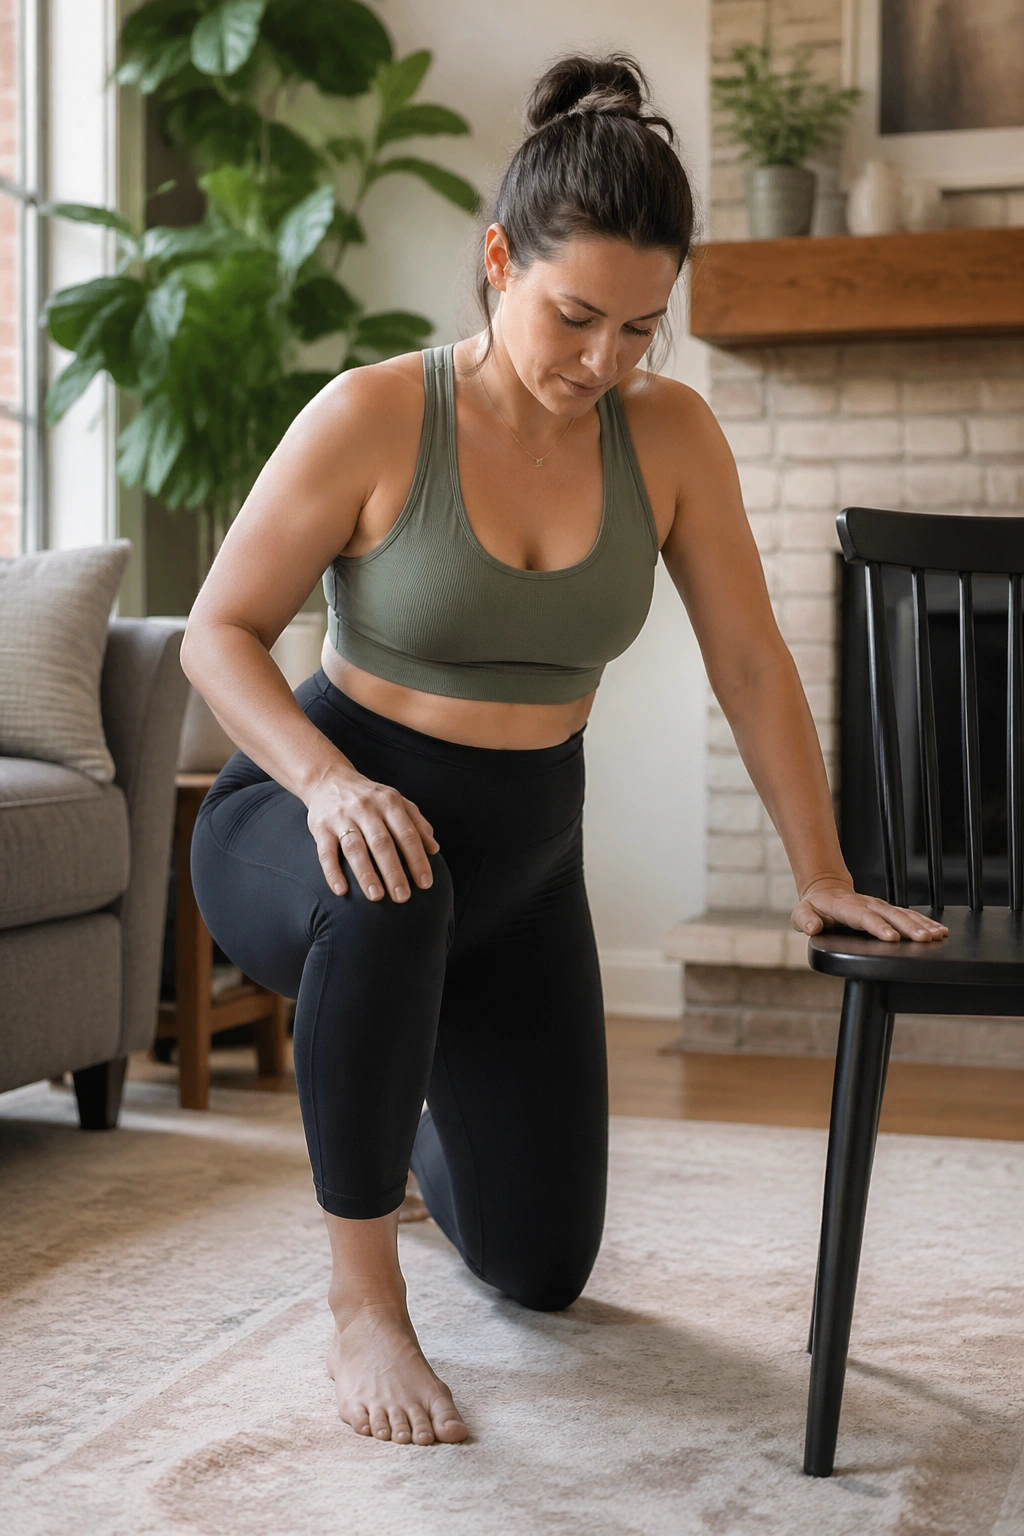
This is not glamorous, and that’s exactly why it belongs here. Getting down and up from the floor with control is one of the most useful postpartum skills there is, because babies seem to live in the exact places you aren’t standing.
Start kneeling on one knee with the other foot planted. Place one hand on the floor or a chair, then shift weight forward and stand using the leg that’s already in front. Reverse the pattern to go back down. Keep the movement slow and organized, with the pelvis steady and the belly quiet.
Why I like this one
It trains real-life movement. It helps you spot weak links. It gives you a clean way to practice without rushing. And it builds confidence, which matters more than people admit.
Do 3 to 4 reps per side. If your knees hate kneeling, place a folded towel under them or use a couch for support. The point is not elegance. The point is getting up without feeling like you wrestled a bear.
18. Stroller or Counter Standing Flow
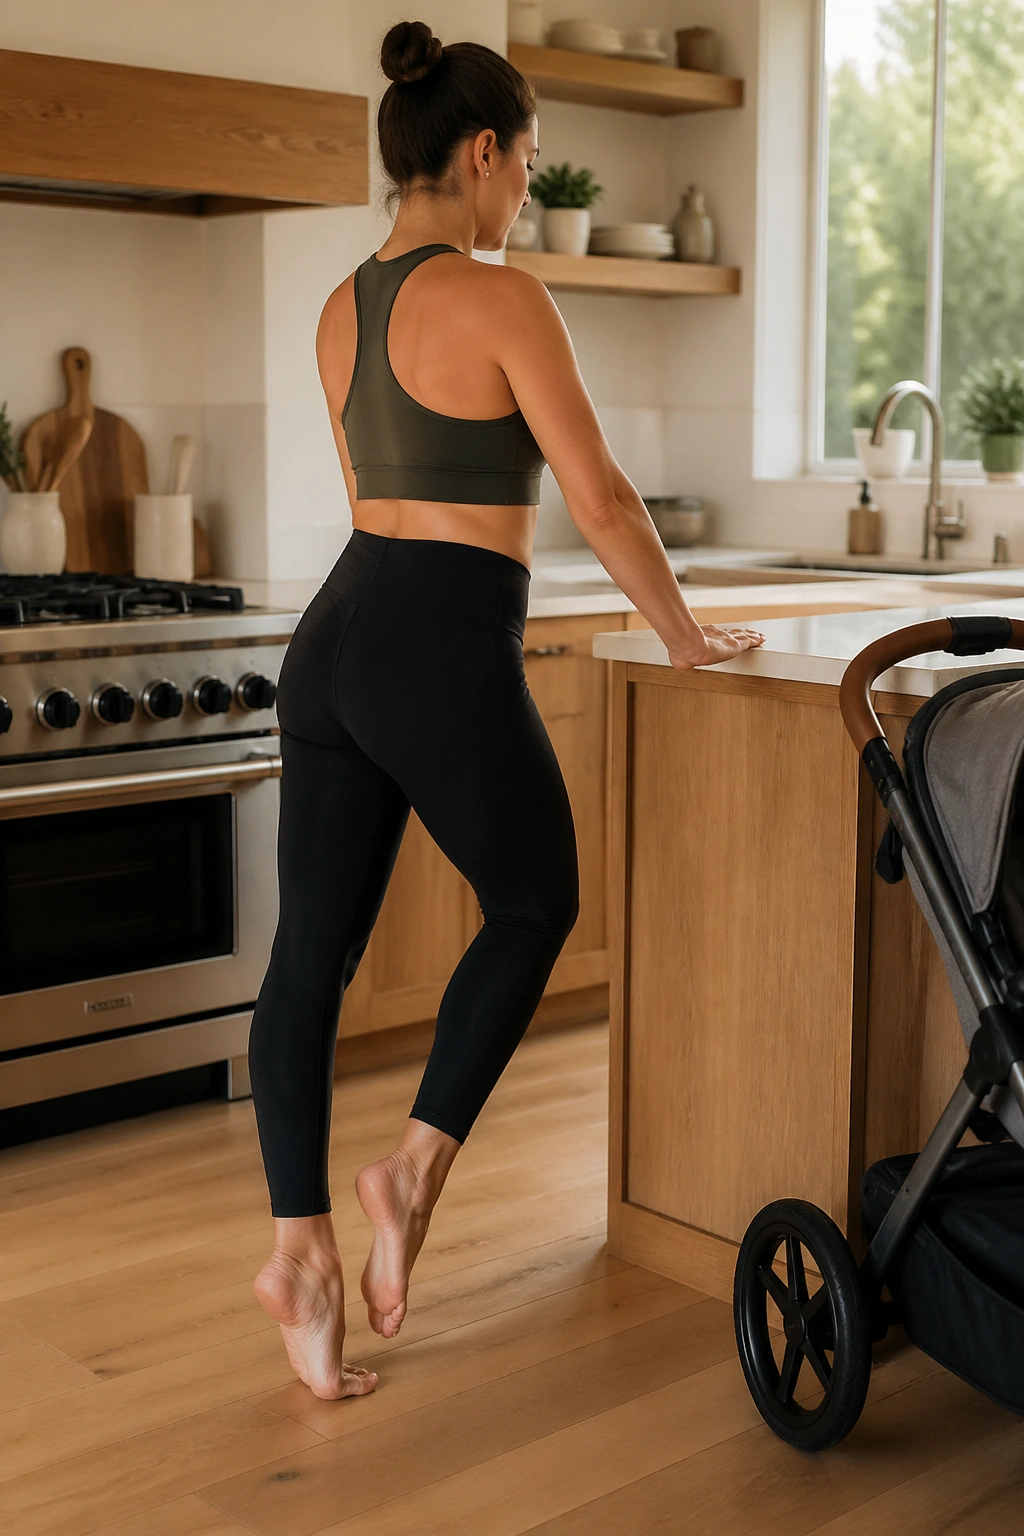
No mat? Fine. Less time? Fine. A standing flow beside a counter or stroller can keep you moving on the strangest, most interrupted days, which are often the days you need it most.
Start with 10 heel raises, then 8 side steps each way, then 6 mini squats, and finish with 5 standing marches per side. Keep the chest relaxed and the breath smooth. If you’re near a counter, rest a hand on it for balance. If you’re outdoors with a stroller, keep the movement small and controlled.
This kind of routine is useful because it mirrors the shape of life. You stand, shift, carry, pause, and stand again. The workout should know that. Fancy is not the goal; repeatable is.
If you’ve got 6 minutes between naps, do one round. If you’ve got 12, do two. Simple wins here.
19. C-Section Friendly Lower-Body Flow
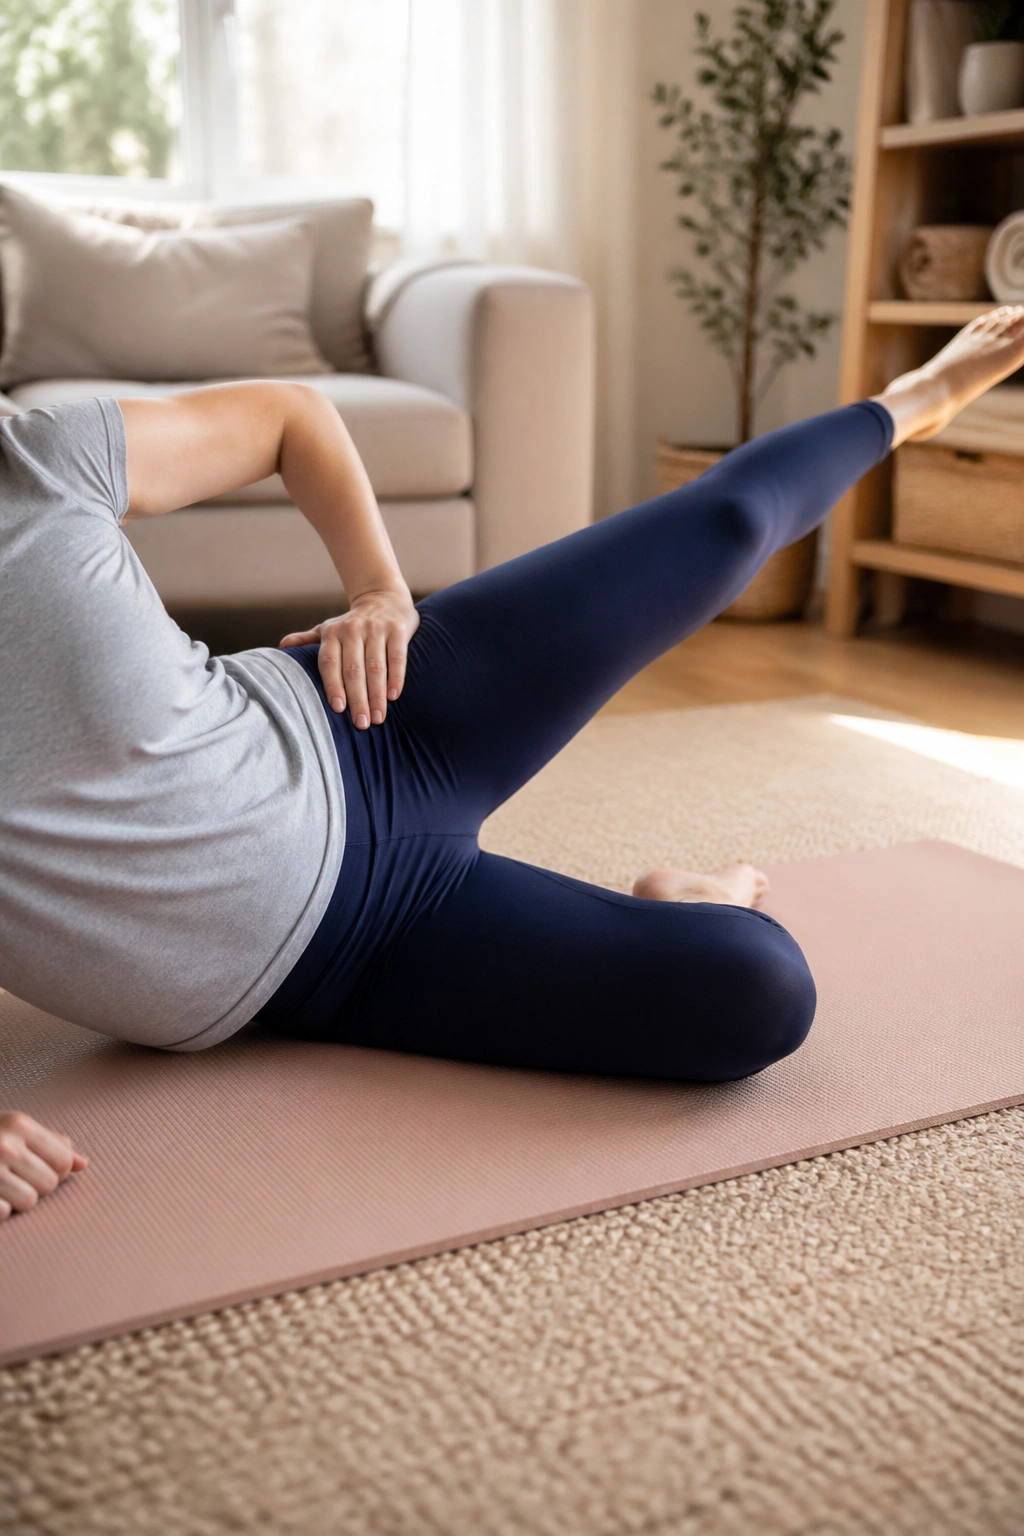
If your abdomen is still tender after a C-section, the smartest workout is the one that respects the incision instead of poking at it. That usually means lower-body and side-body work first, with no rushing into deep flexion or aggressive core curls.
Try side-lying leg lifts, mini squats supported by a wall, gentle bridges only if they feel clean, and standing marches with a soft belly. Watch for pulling, burning, or a strong tugging sensation near the scar. That is your cue to back off. Healing tissue likes patience more than ambition.
A good flow here might look like this:
- 8 side-lying leg lifts per side
- 6 supported squats
- 6 slow standing marches per side
- 5 long breaths with hands around the ribs
Keep the effort moderate. This is not the section where you prove your toughness. This is the section where you build trust with your body again, one careful rep at a time.
20. A 10-Minute Postpartum Pilates Reset
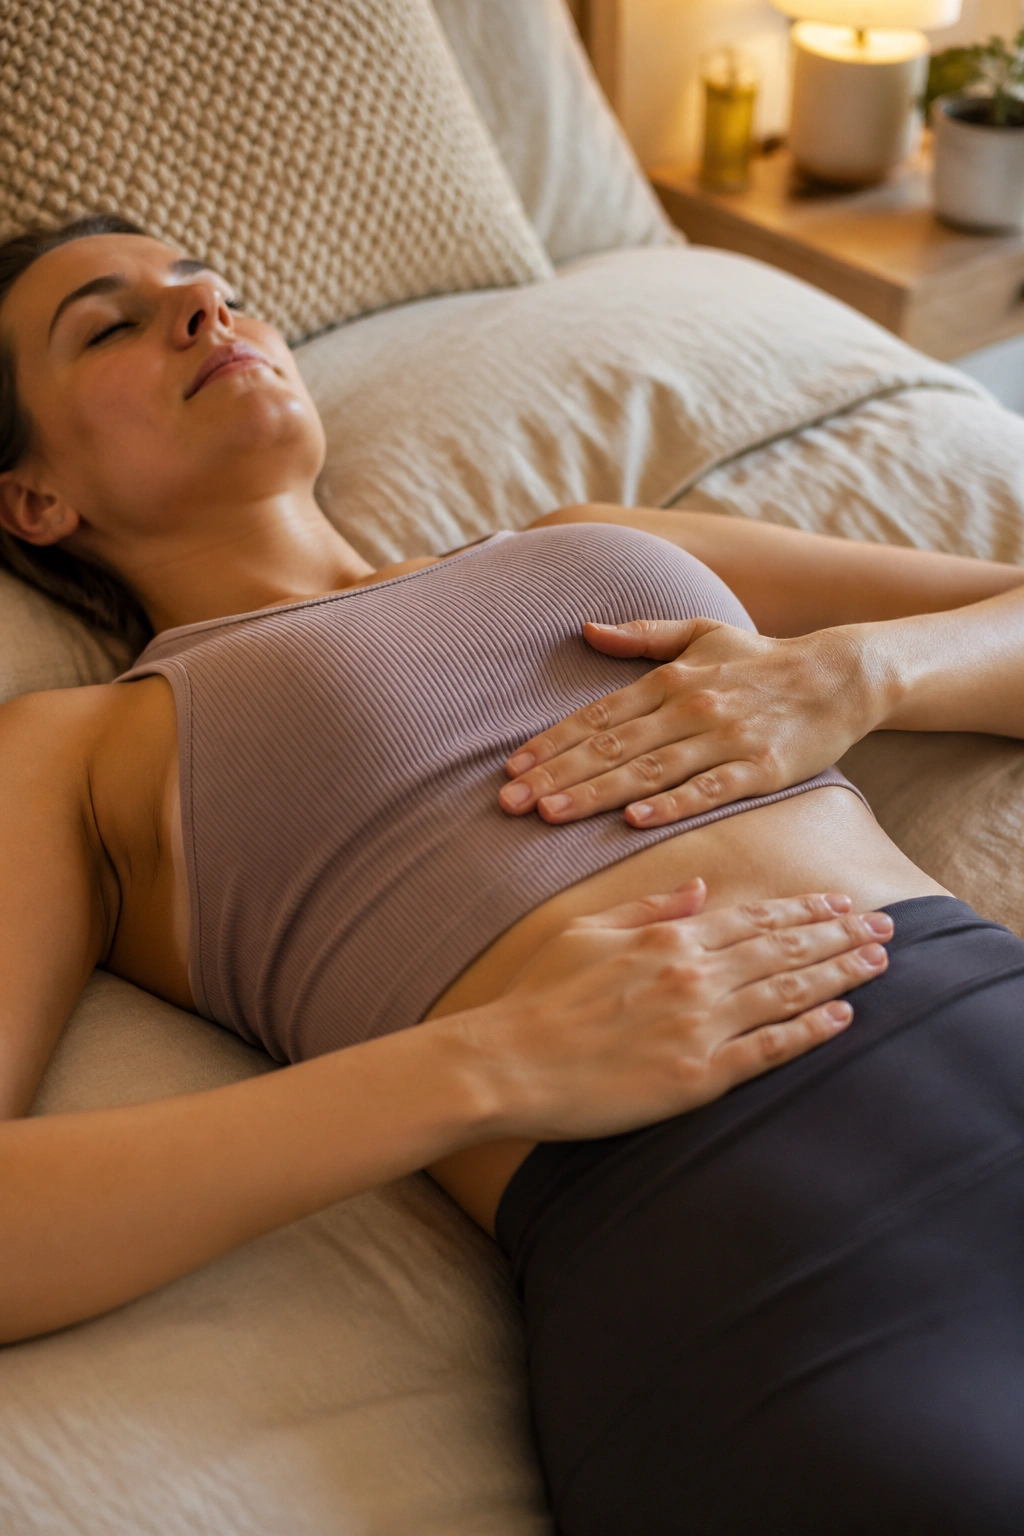
On the days when sleep is choppy and time is ridiculous, a short reset can be more useful than a polished hour-long session. Start with 5 360 breaths, then move into 5 cat-cows, 6 heel slides per side, 8 bridges, and 5 standing roll-downs. Finish with 4 side bends per side and call it done.
That combination gives you breathing, spinal movement, hip work, and a little standing strength without piling on too much. It’s the kind of sequence I like best for new moms because it feels doable before coffee, after a feed, or in the narrow window before the next cry from the bassinet. Small workouts stick. Big, exhausting ones get skipped.
A good postpartum Pilates routine should leave you feeling more organized, not wiped out. If you’re shaky, breathless, or sore in a sharp way after a workout, the set was too hard. Make the shapes smaller, slow the pace down, and keep building from there.
The strongest sign of progress is boring. You stand up easier. You carry the baby without bracing your jaw. The ribs stop flaring when you breathe. That’s real change, and it tends to show up when the work is gentle enough to repeat tomorrow.
