



Room matters.
The best Pilates workouts for plus size women do not ask you to fold yourself into a shape that feels cramped, shaky, or awkward. They make room for the belly, the chest, the thighs, and the joints that need a little more kindness on the mat. A good session should feel controlled and useful, not like a test you have to pass.
Pilates works so well here because the method is built on small, precise movements. You do not need huge crunches or a tiny waist to get the benefit. A wall, a chair, a folded towel, or a loop band can change the whole feel of the workout, and sometimes that is the difference between quitting early and finishing with your muscles awake.
Sharp pain is a stop sign. So is breath-holding, neck strain, or a low back that takes over every rep. The routines below lean on support, room to move, and enough challenge to build strength without beating up your knees or wrists.
Start with the wall.
1. Wall Roll-Downs and Standing Core Bracing
Standing work is a smart place to begin when getting to the floor feels like a hassle. Wall roll-downs give you the clean, tidy spinal movement Pilates is known for, but they spare your wrists, knees, and any grumbling hips that don’t love quick transitions.
Why Standing Work Helps
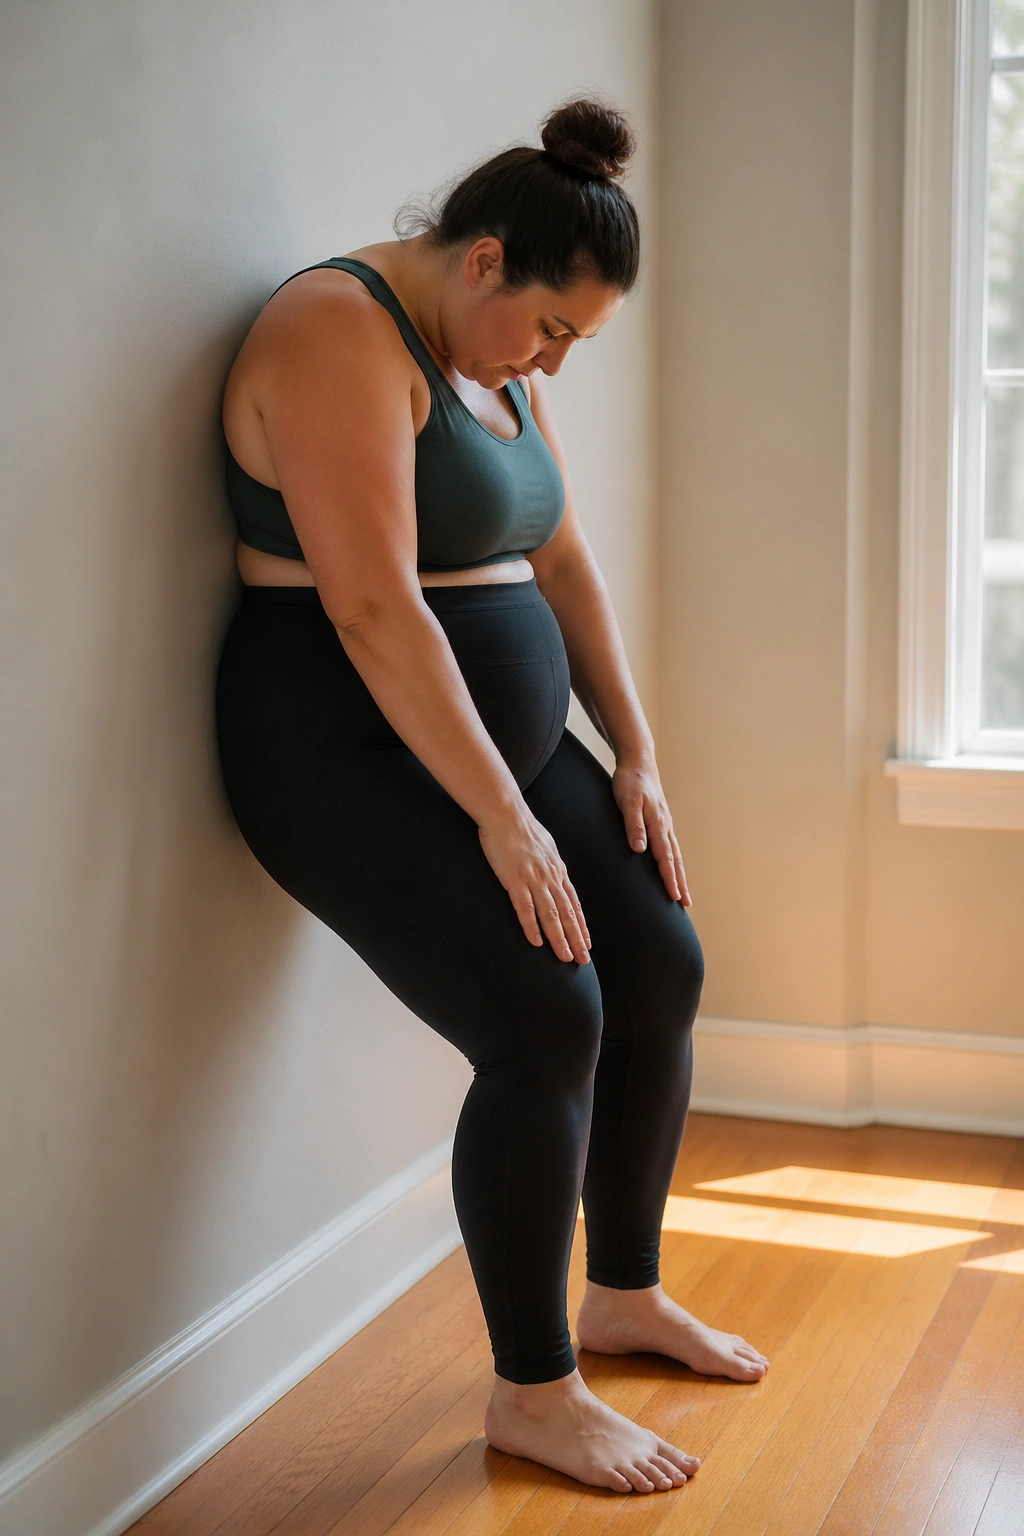
Set your feet about hip-width apart, or a little wider if your thighs need more room. Stand with your back near a wall, soften your knees, and roll down one vertebra at a time until your hands hover near your shins. Then exhale and stack back up, feeling your ribs knit toward your pelvis instead of flaring forward.
That tiny pause at the bottom matters. It gives you time to feel your core switch on without rushing straight through the move. If your neck tends to tense, keep your chin gently tucked and your gaze down. No need to chase a deep fold.
- 5 to 8 slow roll-downs
- 3-second exhale on the way up
- Knees soft, never locked
- Feet flat, toes relaxed
- Stop where your back stays long, not jammed
Tip: If you feel the work mostly in your low back, shorten the range. That is not cheating. That is good editing.
2. Bent-Knee Hundred Prep With Your Head Down
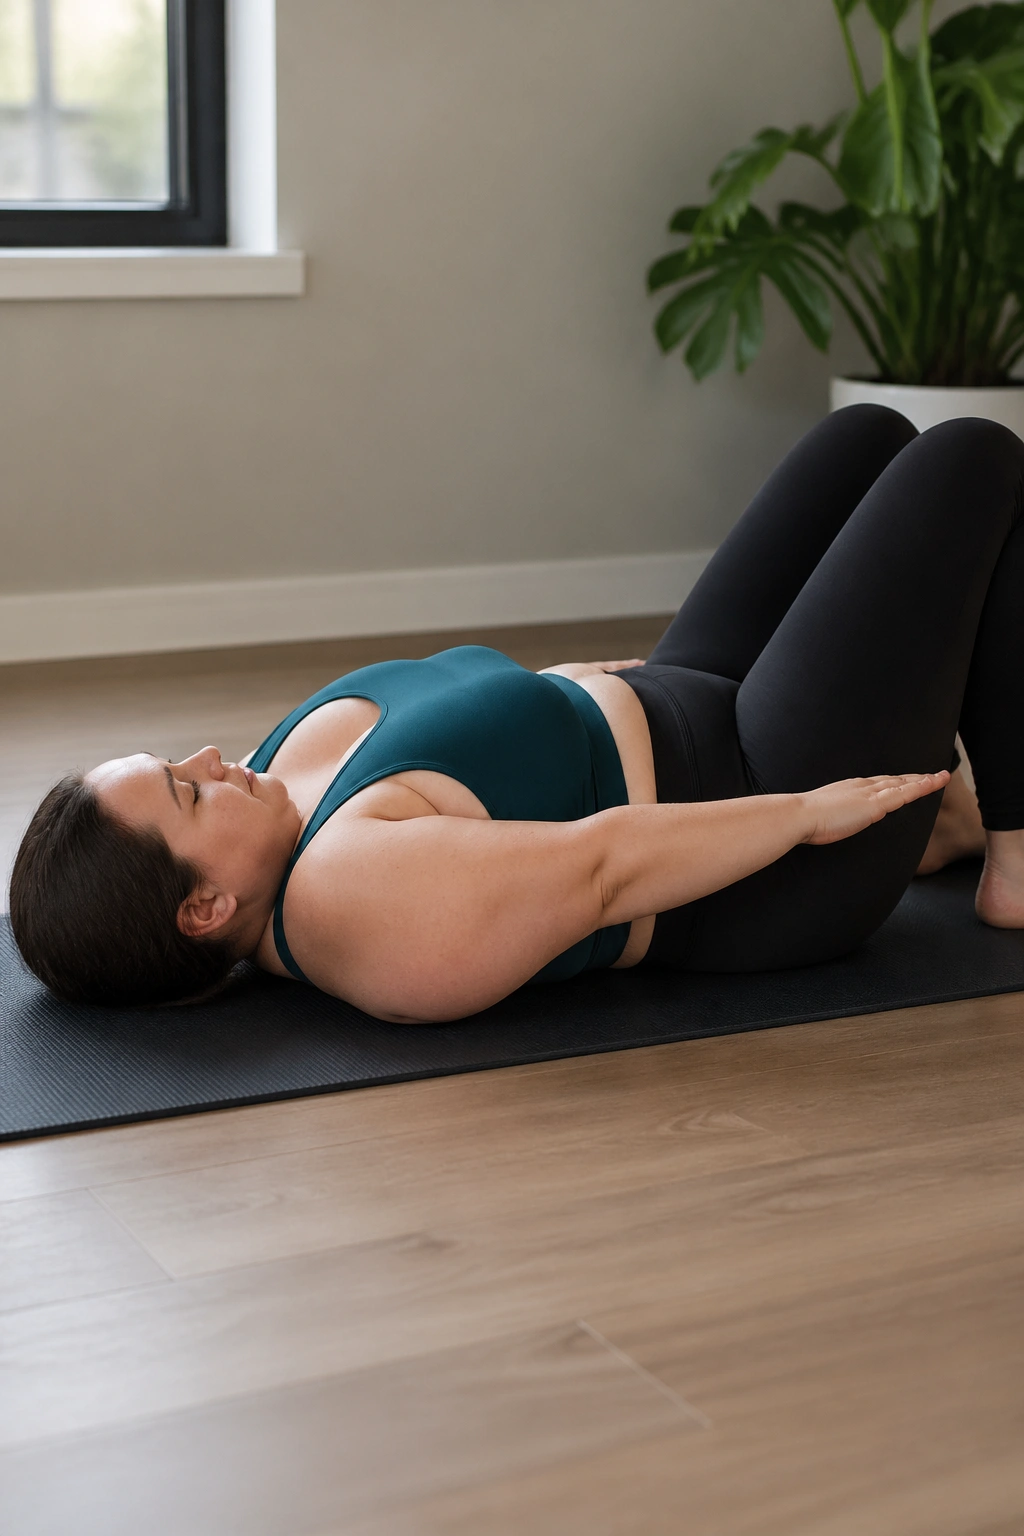
The Hundred does not need to be a neck strain. The classic version gets all the attention, but the prep version is often the better workout for a larger body, especially when your chest, neck, or hip flexors get cranky with full curl-ups.
Lie on your back with knees bent and feet flat, or lift your legs to tabletop only if your low back stays quiet there. Keep your head on the mat. Pump your arms low and brisk, about 6 to 8 inches off the floor, while you take five short inhales and five short exhales. If that sounds too ambitious, do a 20-pulse version and build from there.
The win here is control. Not drama. Your ribs should feel heavy, your belly should draw inward on the exhale, and your shoulders should stay far away from your ears. If you feel doming along the center line of your abdomen, lower one foot to the mat and keep going.
A lot of people try to “prove” core strength with a bigger curl. I’d rather see clean breathing, a quiet neck, and a pelvis that doesn’t tip all over the place.
3. Glute Bridges With Heel Slides
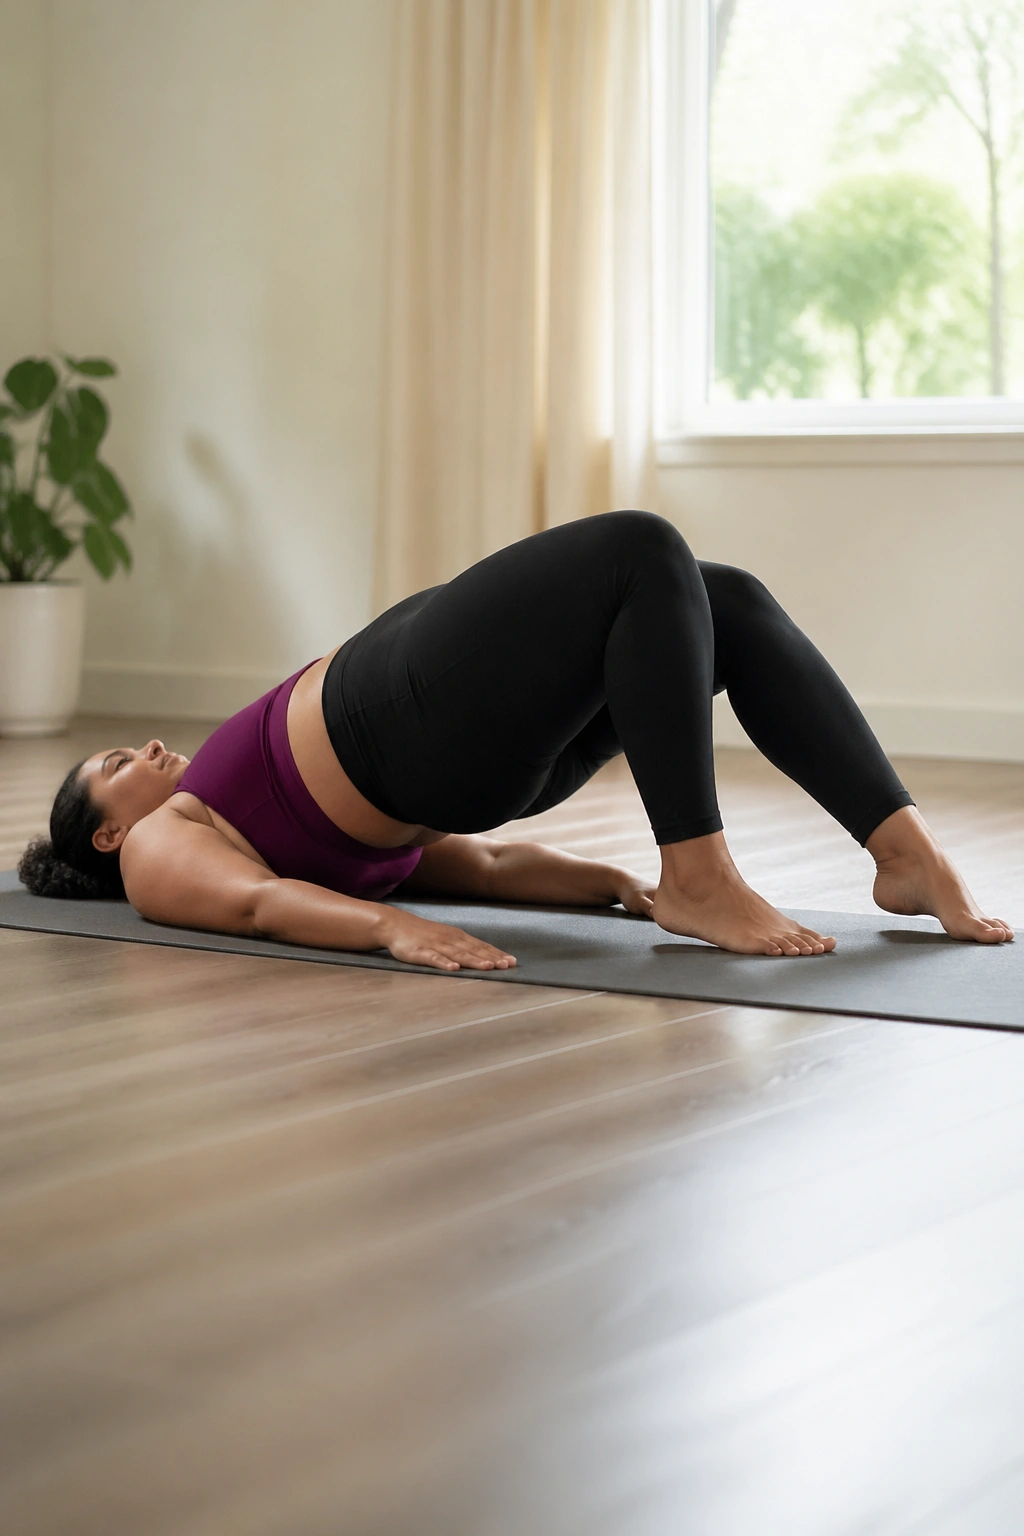
Want a Pilates sequence that wakes up the back of your body without asking for a deep squat? This one earns its spot fast. Glute bridges build hip extension, and the heel slides add just enough instability to make your core pay attention.
Start lying on your back with your feet about 8 to 12 inches from your seat. Lift into a bridge, making sure your ribs do not pop up. Then, keeping the hips level, slide one heel away from you by a few inches and draw it back in. Alternate sides. The slide does not need to be dramatic; a small, smooth glide is enough.
How to Make Heel Slides Easier on the Knees
If your knees dislike deep bending, move your feet a little farther away from your body before you lift. That reduces the angle at the knee and often feels much kinder. A folded towel under the head can help too, especially if your chin tends to jut upward.
- Lift for 5 bridge holds of 3 breaths each
- Add 6 heel slides per side
- Keep the pelvis level
- Press through the whole foot, not just the toes
- Lower slowly, one bone at a time
The glutes should do the heavy work here. If you feel hamstrings cramping, bring the heels a touch closer and squeeze the seat less aggressively.
4. Side-Lying Leg Series With a Pillow Under Your Waist
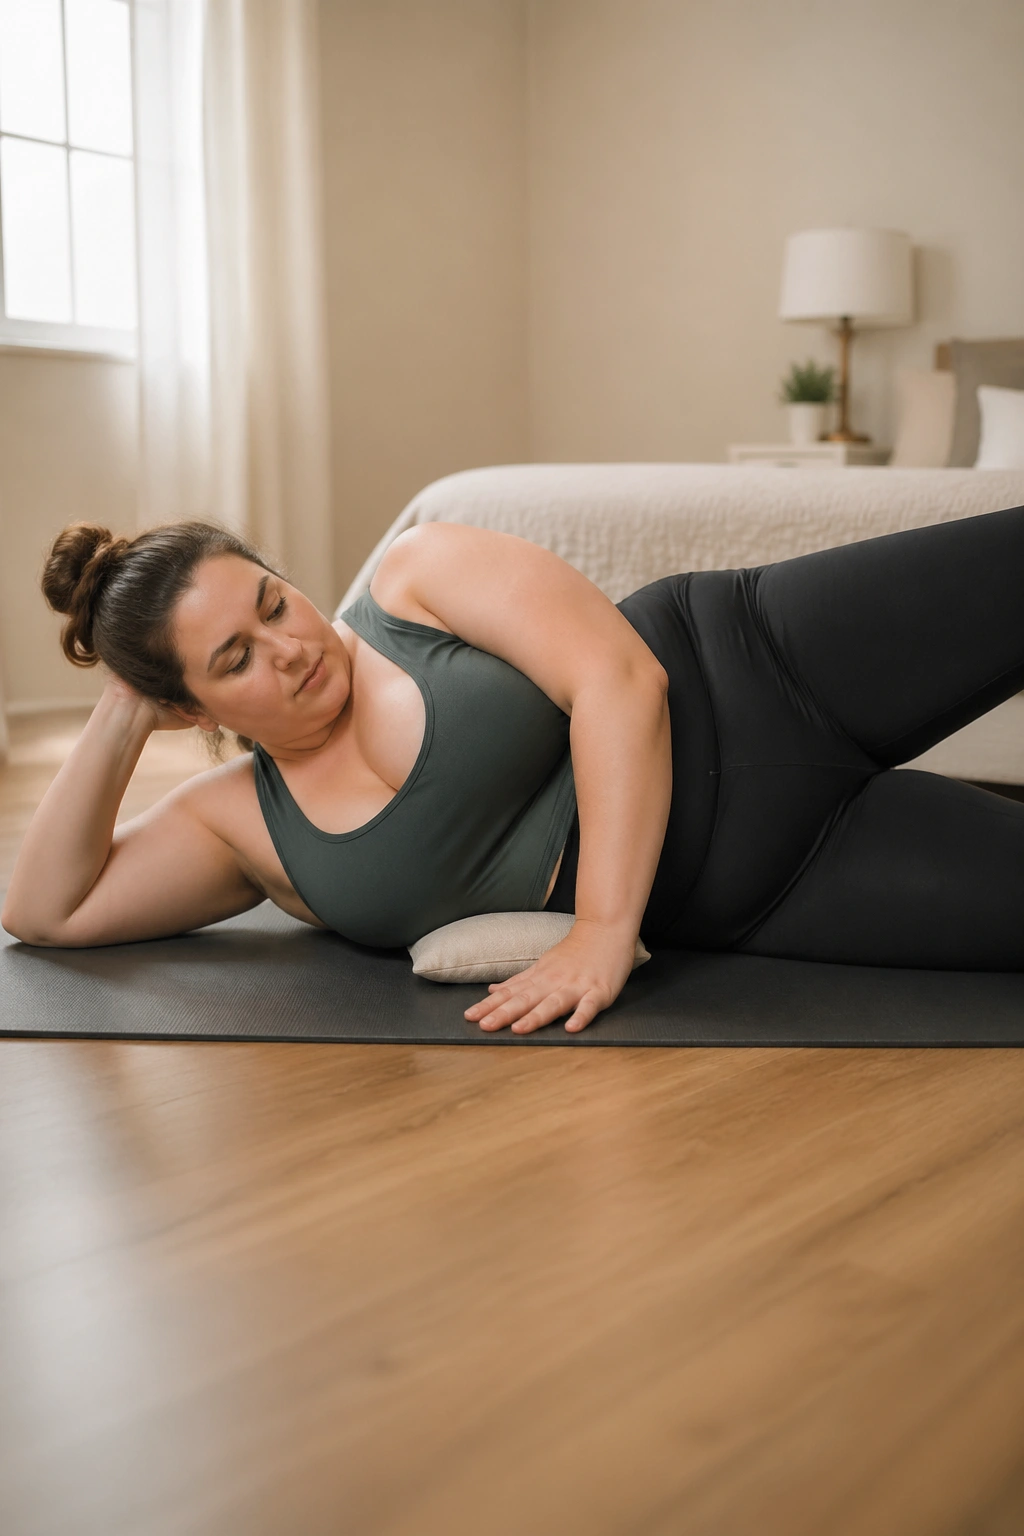
If side-lying work has ever pinched your hip, you already know why props matter. A pillow under your waist, a folded blanket under the head, and a small bend in the bottom knee can turn a cranky position into one that feels stable enough to build real strength.
Lie on one side with your waist supported so the ribcage doesn’t collapse into the mat. The top leg can stay long, or bend slightly if that feels better on the hip joint. From there, try slow clamshells, a small front-and-back leg sweep, and tiny circles. Small is the keyword. The work should come from the side glutes, not from throwing the leg around.
Small Adjustments That Save Your Hip
- Keep the bottom waist lifted by the pillow
- Stack the shoulders, but do not force them flat
- Flex the foot if it helps you feel the outer thigh
- Move only as far as the pelvis stays still
- Pause for one breath at the top of each lift
This series is one of those quiet Pilates workouts that looks easy from across the room and feels sneaky after five minutes. That’s a good sign. The goal is steady alignment, not a big showy burn.
5. Seated Spine Twist and Tall-Posture Flow
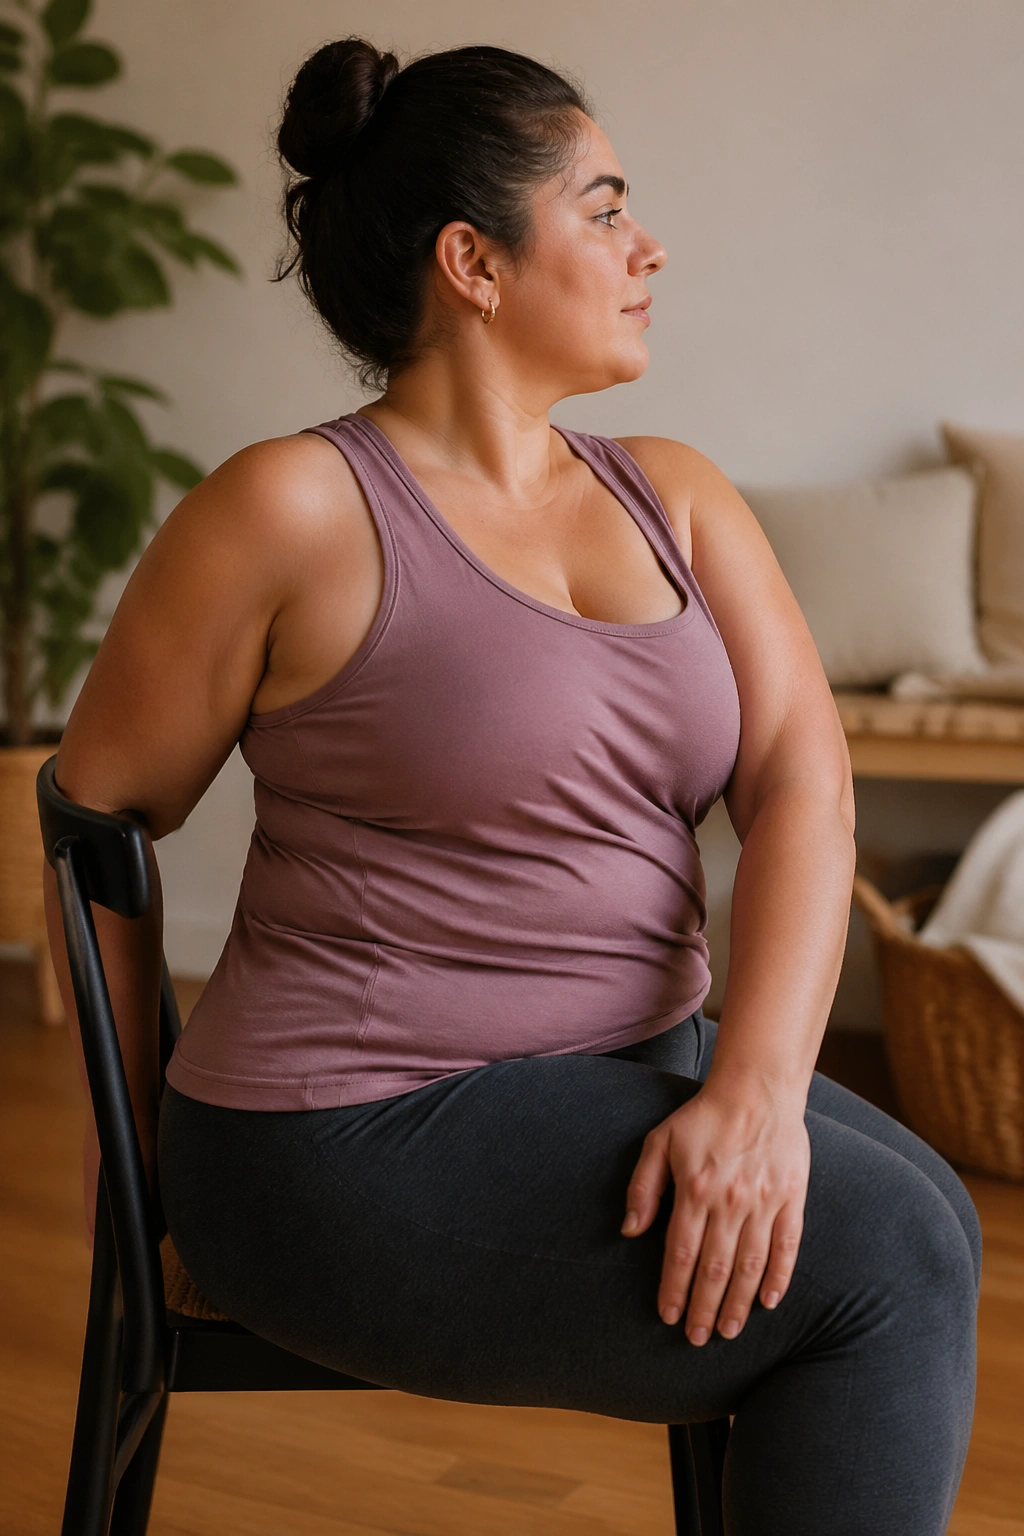
A chair can be a Pilates tool, not a shortcut. That matters on days when kneeling hurts or getting down to the floor feels like too much friction before you’ve even started.
Sit near the front edge of a sturdy chair or on a folded blanket on the floor. Plant both feet and grow tall through the crown of your head. Then exhale and rotate from your ribs, not from yanking your arms across your body. You should feel the twist travel through the mid-back first. If the shoulders lead, the move gets sloppy fast.
A light medicine ball, a small cushion, or even your own hands can add just enough feedback to help you stay centered. The best part is the posture reset. Your ribcage lifts, your pelvis settles, and your lower back gets a break from hanging around in one position all day.
This is a good place to be a little stubborn. Sit taller than feels natural, then soften the shoulders. That tiny contradiction is exactly what makes the exercise work.
6. Chair-Assisted Squats and Arm Reaches
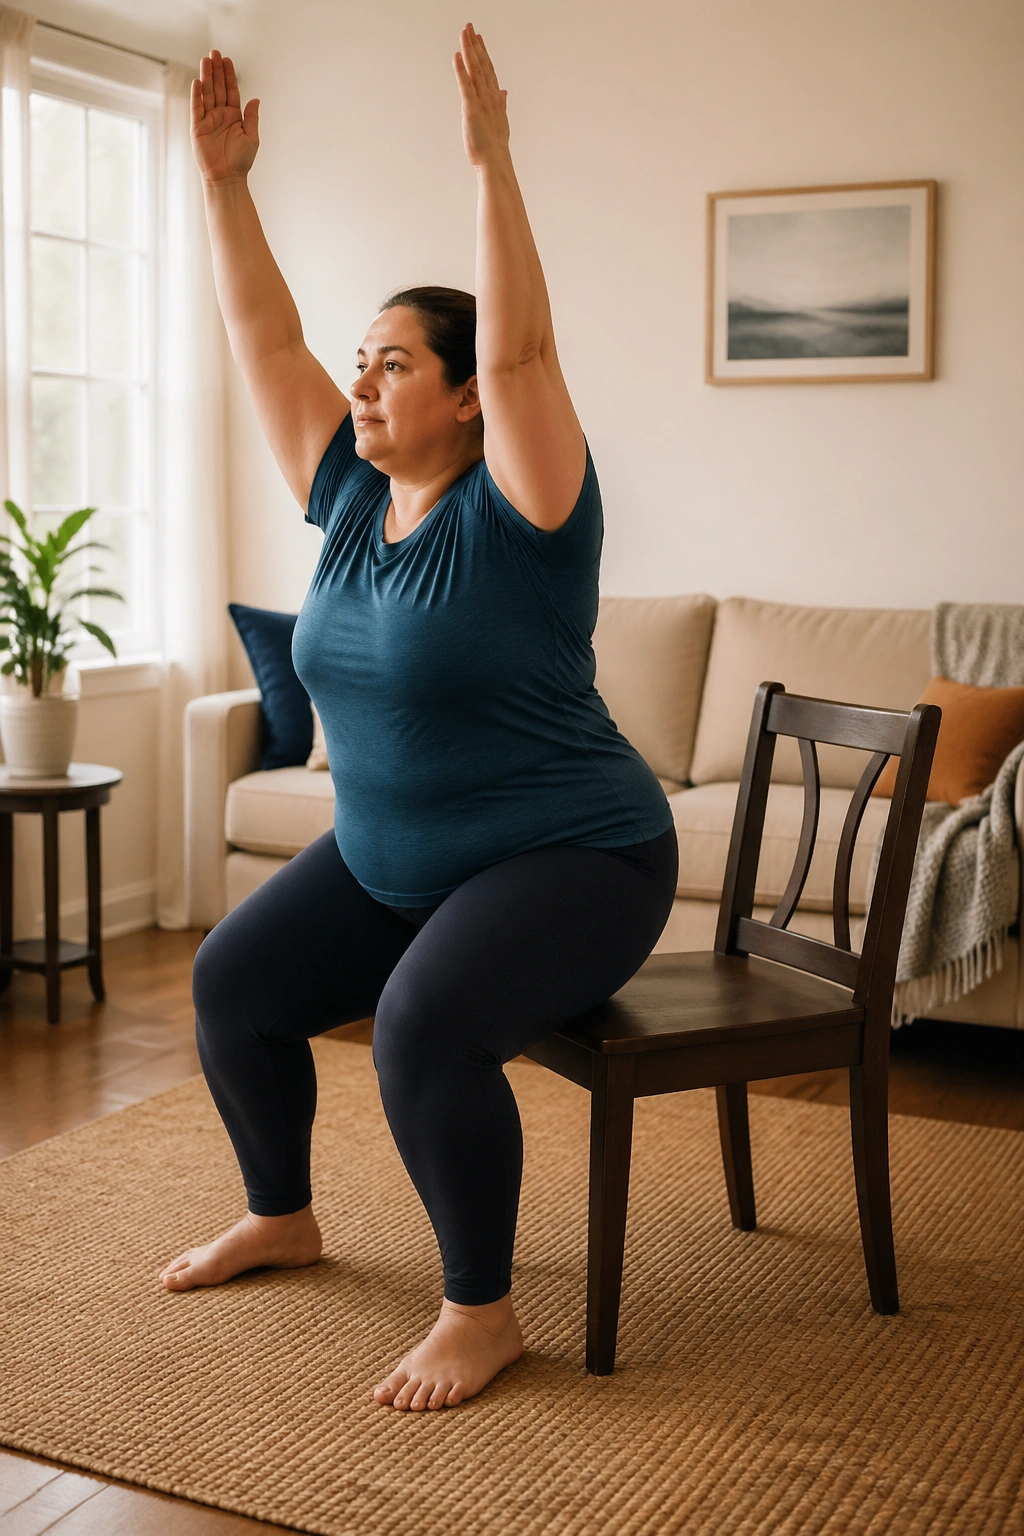
Unlike jumpy cardio, chair-assisted squats let you load the legs slowly and stay in charge of the descent. That makes this one a solid pick for beginners, heavier bodies, or anyone whose knees prefer clear feedback before they bend.
Place a sturdy chair behind you. Stand in front of it with feet just wider than hip-width, then lower until you lightly tap the seat and stand back up. Add an overhead reach at the top, or a forward arm sweep if your shoulders don’t love going high. The chair gives you a target, which often makes the movement feel safer and cleaner.
You can turn this into a short circuit:
- 6 chair taps
- 8 arm reaches
- 10 calf raises
- 2 rounds, resting 30 to 45 seconds between rounds
If your knees drift inward, press the floor apart with your feet. If your chest collapses, slow the movement down. A lot of squat trouble is really posture trouble dressed up as leg trouble.
The chair is not there because you “need” help. It is there because smart feedback makes a better squat.
7. Forearm Bird-Dog on a Cushioned Mat
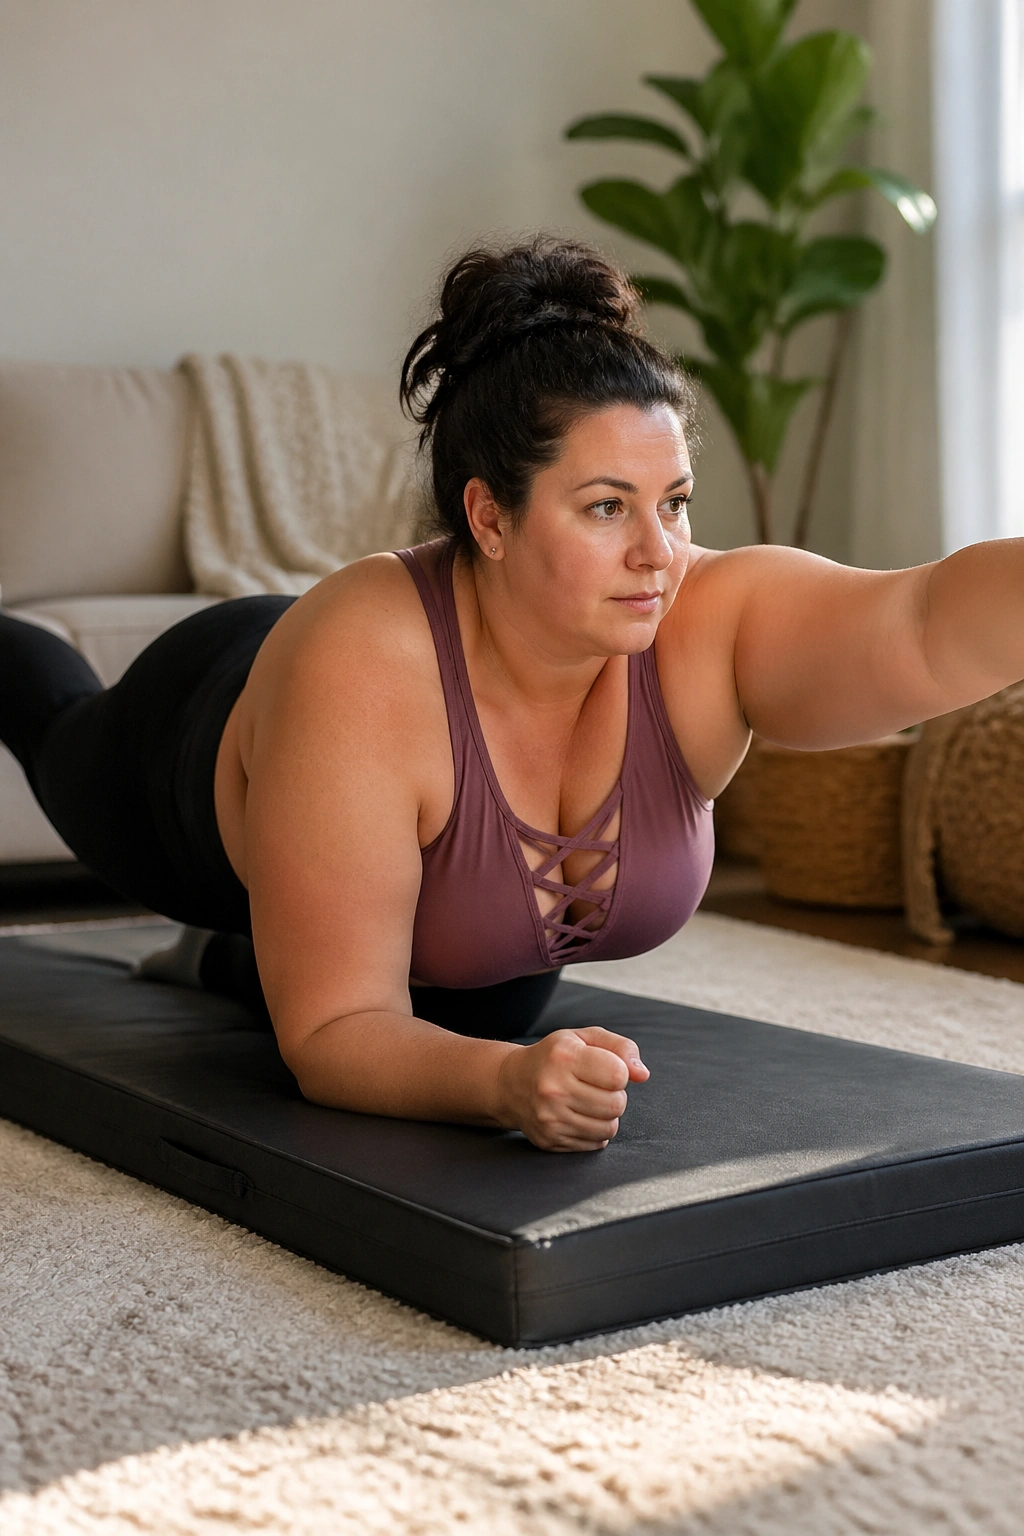
A wobbling tabletop position tells you a lot about your core. If the back arches, the hips shift, or the shoulders start shrugging toward your ears, the body is saying the load is a little too much right now. That is useful information.
Come to hands and knees on a thick mat or folded blanket. If your wrists complain, lower onto forearms. Extend one leg back and the opposite arm forward, but stop before the low back changes shape. Hold for a breath or two, then switch. The best version is the one where the torso stays level and the neck stays long.
What to Watch For
- Hips tipping to one side
- Belly dropping toward the mat
- Toes pointing hard and twisting the leg
- Shoulder blades pinching together
- Breath getting stuck in the chest
If all of that sounds like a lot, shorten the reach. A toe tap behind you and a small arm slide can still train stability without turning the move into a circus act. Sometimes the smaller version teaches more.
This is one of my favorite Pilates patterns for plus size women because it rewards patience. You do not need to reach far. You need to stay honest.
8. Mermaid Side-Bends That Open the Ribs
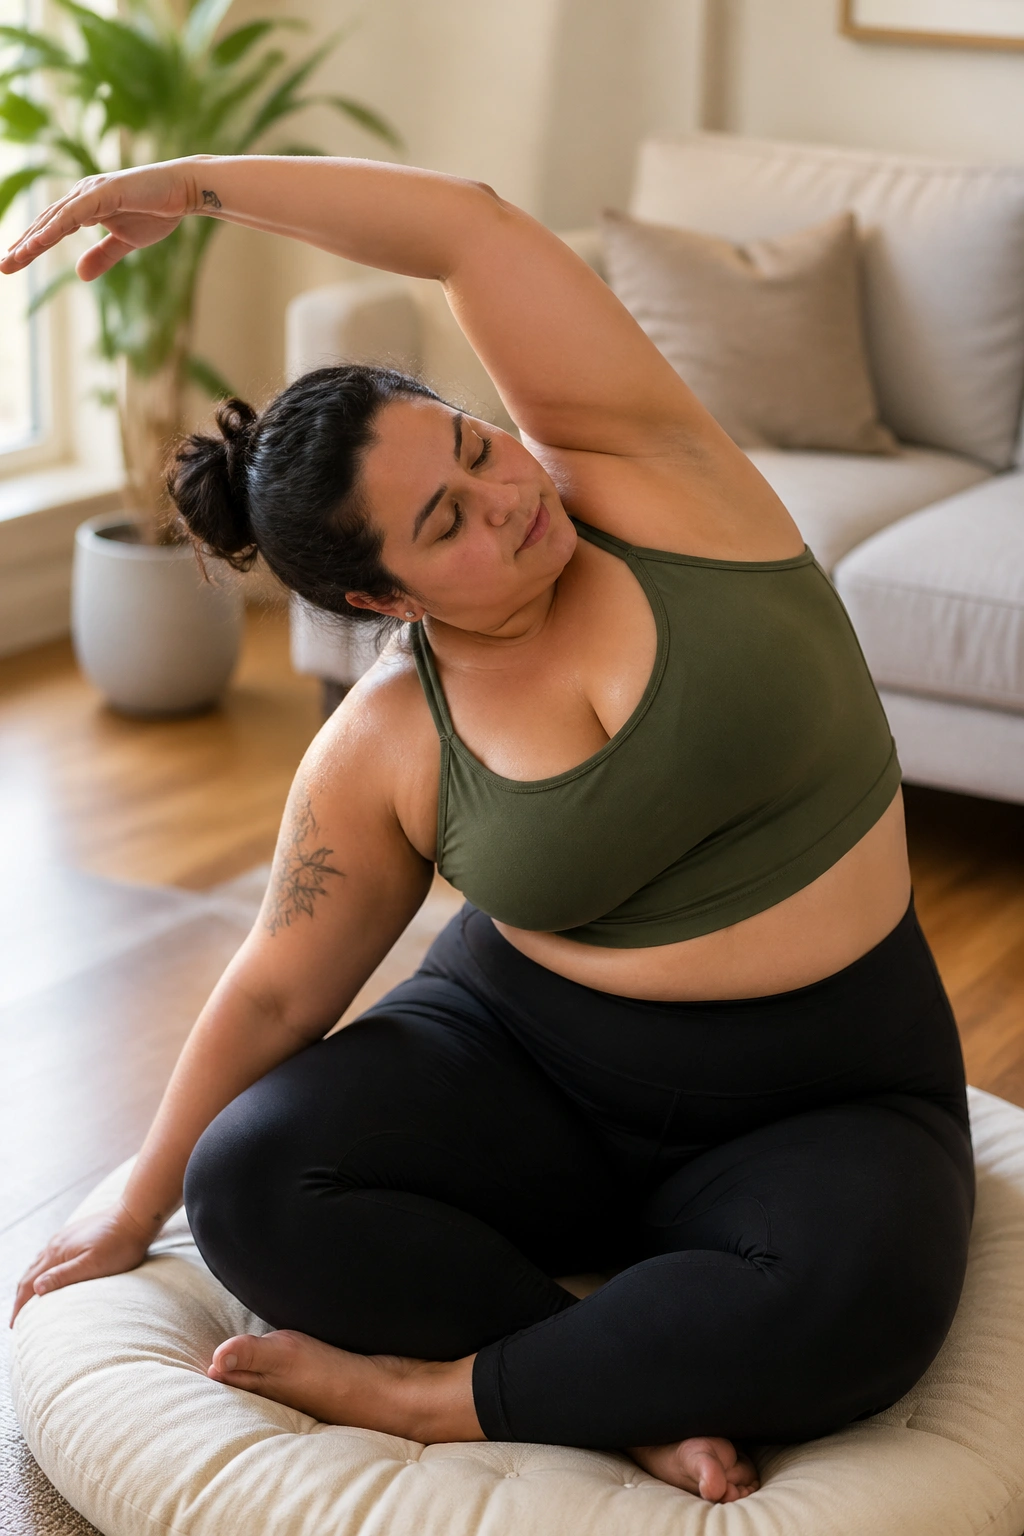
Side-bends deserve more love than crunches. They give the torso space to breathe, which is something a lot of larger bodies appreciate once the ribcage starts feeling tight or compressed.
Sit in a side-sit shape if that’s comfortable, or simply sit cross-legged or on a chair. Lift one arm overhead and lean away from the bent elbow side. The move should feel long through the side body, not collapsed in the waist. If your hip pinches, sit higher on a cushion. That tiny lift often changes the angle enough to make the stretch useful instead of irritating.
Then breathe into the side ribs. That’s the part people skip. If you only yank the arm and dump into the waist, you miss the point. The inhale should widen the side of the chest. The exhale can bring you back to center with control.
A mermaid stretch is quiet, but it’s not soft in the lazy sense. It can wake up the obliques, open the shoulder line, and make breathing feel less boxed in. That’s a nice return for a movement that takes maybe three minutes.
9. Tabletop Toe-Taps and Marching Core Circuit
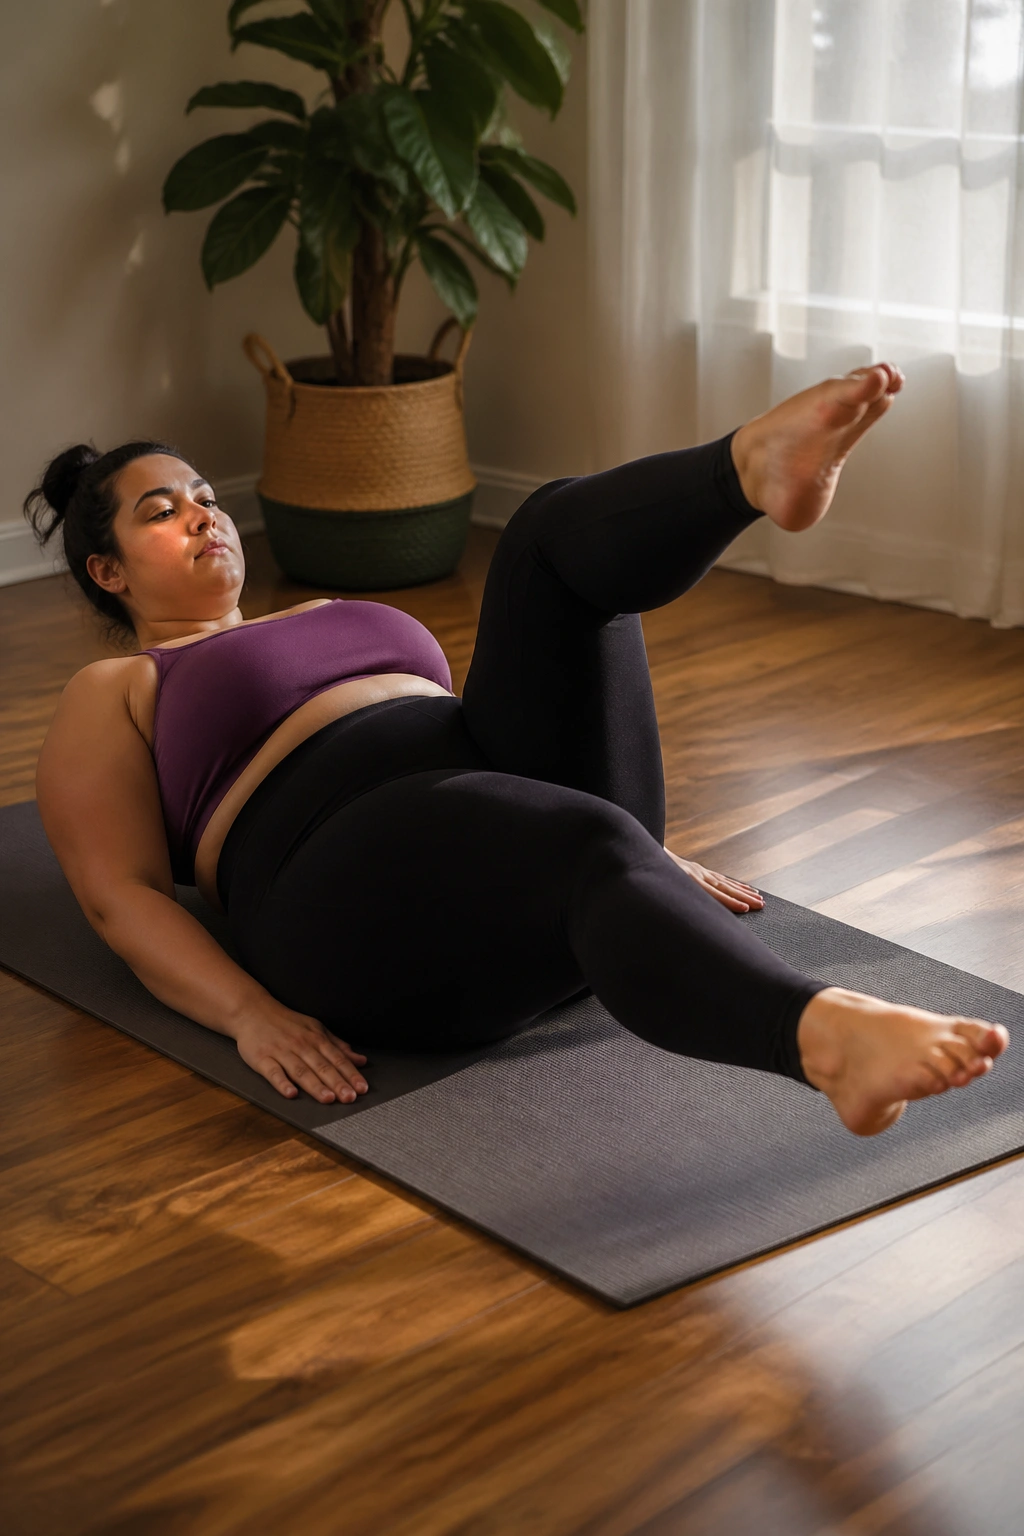
What if crunches feel awful? Then stop forcing crunches. Toe-taps and marching drills usually give you the same deep core challenge with less neck strain and a lot more room to breathe.
Lie on your back with one leg at a time lifted to tabletop only if your pelvis stays steady there. If tabletop feels too intense, keep one foot on the floor and march the other knee in and out. Lower one toe to tap the mat, exhale, and return it. The lower back should stay heavy, not arching like a little bridge.
How to Keep Your Lower Back Quiet
Use a longer exhale than inhale. Keep the ribs soft. Place one hand on your belly if that helps you notice bracing before the move starts. And if the neck wants to help, slide your head back down and make the motion smaller.
A solid mini-circuit looks like this:
- 8 toe taps per side
- 8 marches per side
- 4 slow breaths lying flat
- Repeat twice
This is the kind of work that looks almost too plain to matter. Then you do it properly and feel your whole midsection light up. There’s the catch.
10. Mini-Band Side Steps and Standing Glute Presses
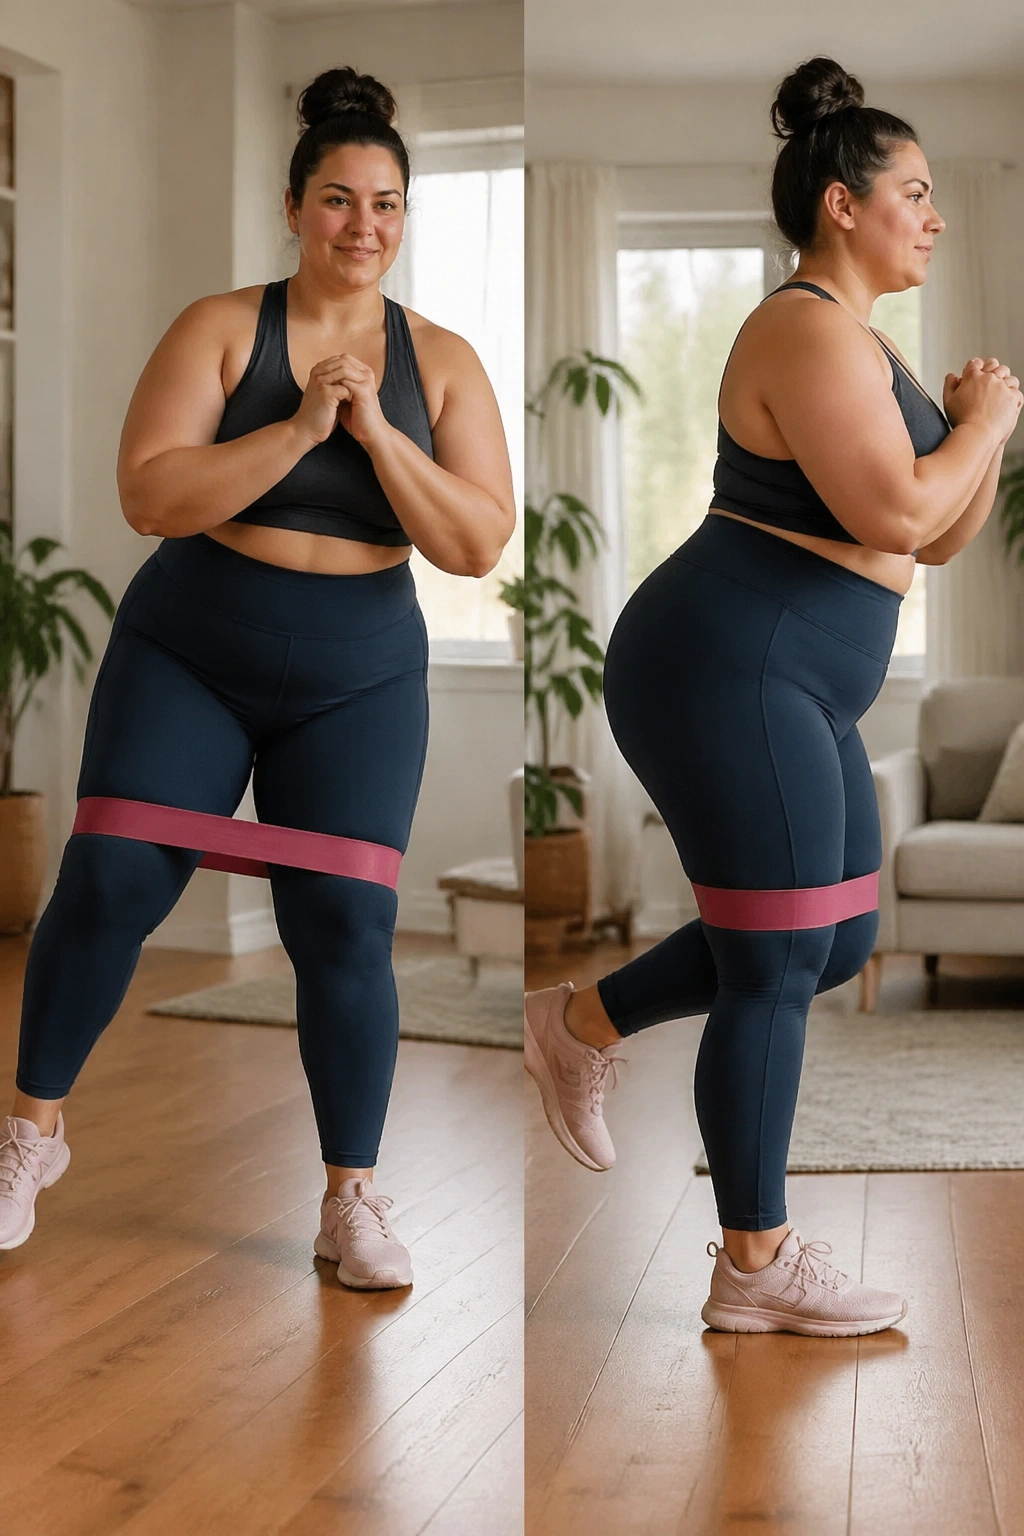
Take this one into the living room and you can get a real lower-body workout in a small space. A mini-band above the knees or at the ankles forces the hips to work against side-to-side collapse, which helps the knees track better when you walk, squat, or climb stairs.
Stand tall with a slight bend in the knees and a soft hinge at the hips. Step sideways in a controlled way, then bring the trailing foot in without letting the band snap your feet together. After a few steps, stop and press one leg slightly behind you for a glute squeeze. The movement stays small, but the muscles notice.
- 10 steps to the right
- 10 steps to the left
- 8 standing glute presses per side
- 2 to 3 rounds total
Keep your ribs stacked over your pelvis. If you flare the chest and lean back, the low back steals the work. If the band feels too intense around the ankles, move it above the knees and slow down.
This routine is plain old useful. Nothing fancy. Just hips that learn to hold their own.
11. Incline Plank at the Wall or Bench
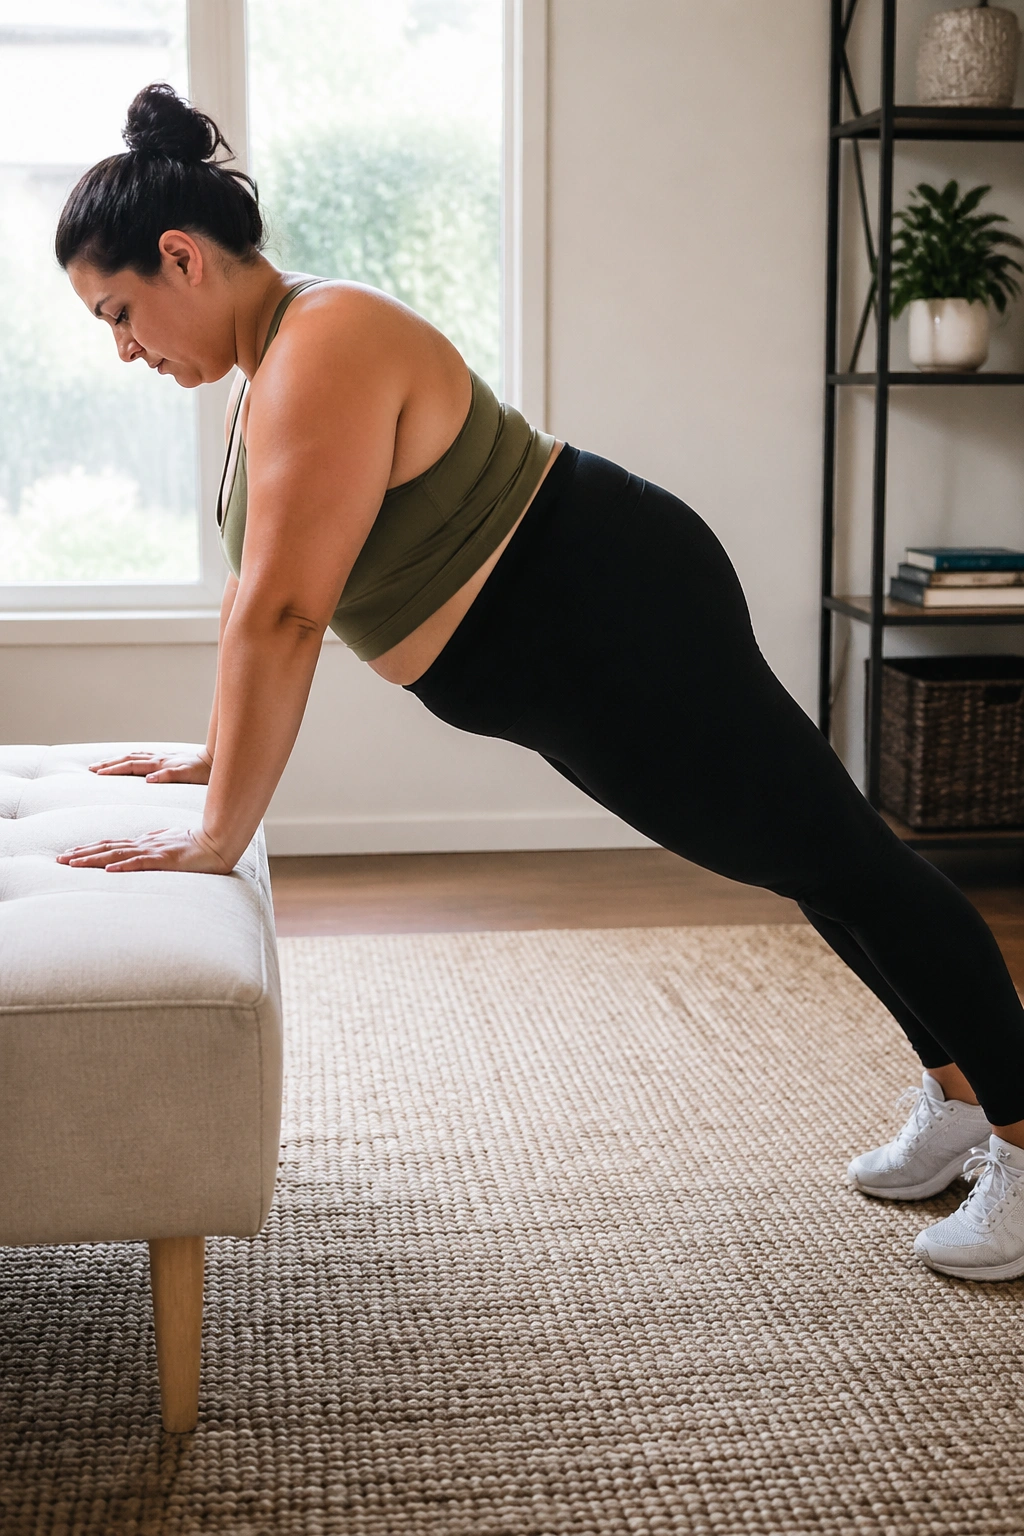
A floor plank is not the gold standard if your shoulders, wrists, or belly don’t love it. An incline plank at the wall or a sturdy bench gives you the same long-line strength work with less compression and less panic.
Place your hands on the wall, a countertop, or a bench at a height that lets your spine stay straight. Step your feet back until your body forms one long line. Then breathe. That last part matters more than people think. If you cannot breathe, the load is too high or the angle is too steep.
A wall plank is a nice option for a true beginner. A bench plank adds more demand without forcing you onto the floor. And if your wrists hurt, try fists or forearms on a bench instead of flat palms.
Stay for 15 to 30 seconds and repeat three times. Better a clean 20-second hold than a messy minute of collapsing shoulders and a sagging low back. That’s not ego talking. It’s mechanics.
12. Towel Hamstring Slides on a Smooth Floor
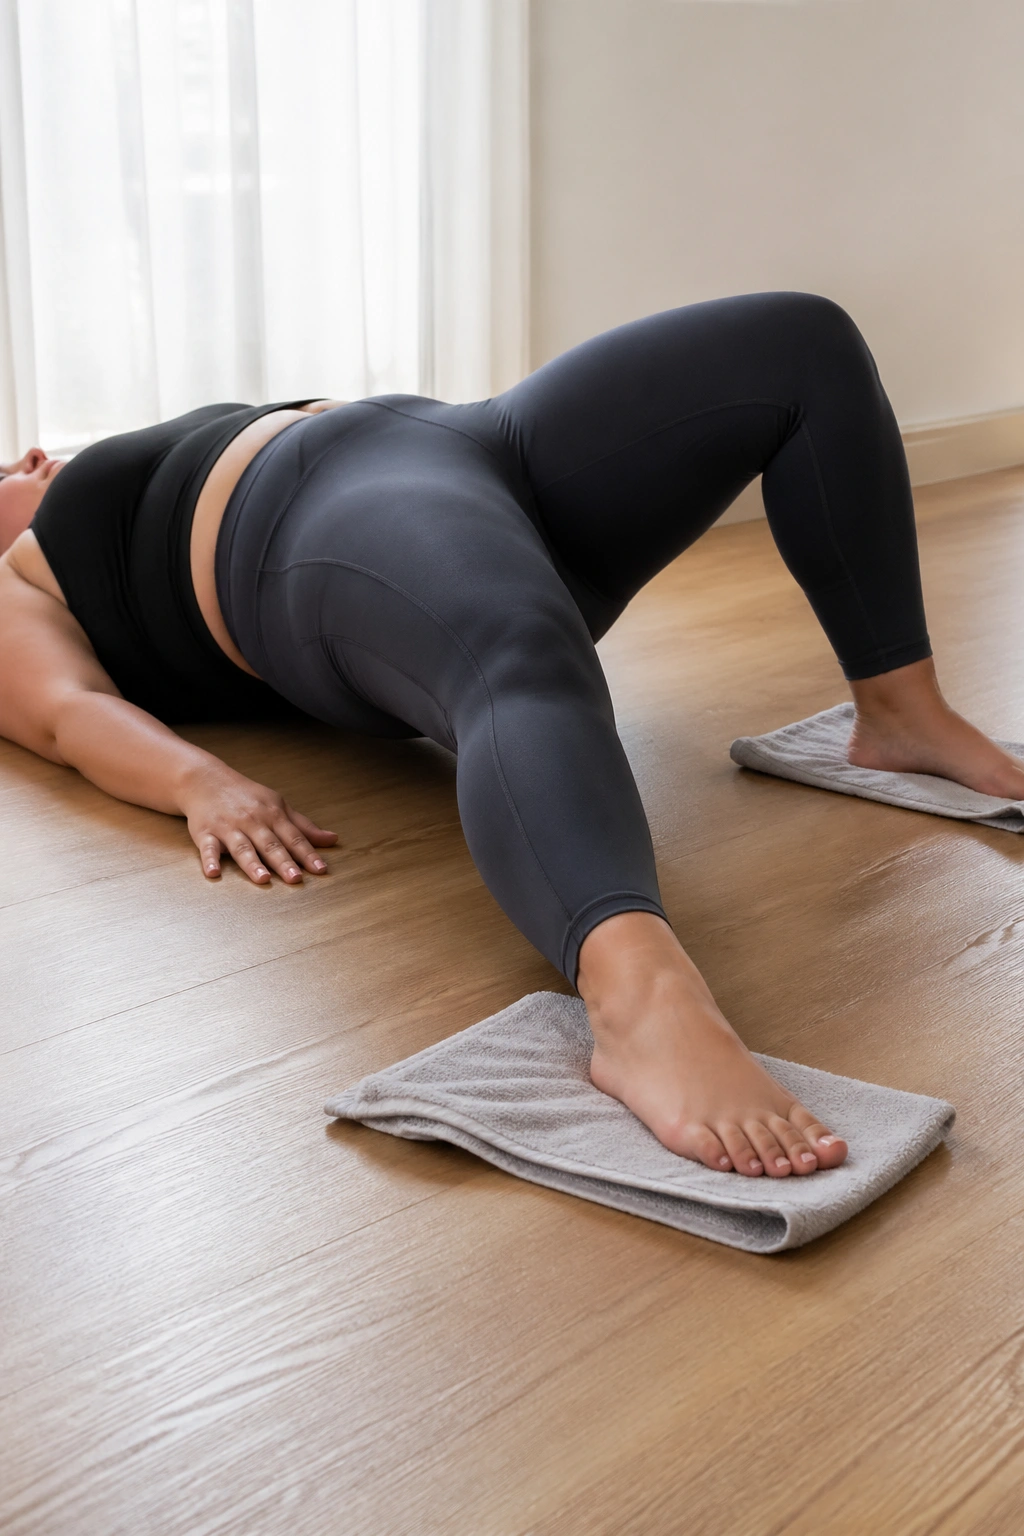
A glossy floor and a bath towel can mimic one of Pilates’ sneakiest hamstring drills. If you’ve ever seen a reformer routine and wished you could borrow the smooth glide at home, this is the closest low-cost version worth doing.
Lie on your back with both heels on small towels or sliders. Lift your hips into a bridge, then slowly slide the heels away and back in. The floor should feel slippery, not sticky. Wood, tile, or laminate works best. Thick carpet fights the movement and turns the drill into a tug-of-war.
Who This Helps Most
This one suits people who want hamstring strength without deep knee bending. It also helps when bridges feel too easy on their own. The sliding leg has to control the pelvis while the glutes and hamstrings stay active, and that coordination is more demanding than it looks.
Start with 4 to 6 controlled reps. Keep the hips lifted only as high as you can hold without rocking side to side. If your hamstrings cramp, lower the hips a little and shorten the slide. A smaller range often fixes the problem fast.
This is one of my favorites because it feels like a clever home workaround, not a watered-down substitute.
13. Pilates Ring Inner-Thigh Presses and Chest Openers
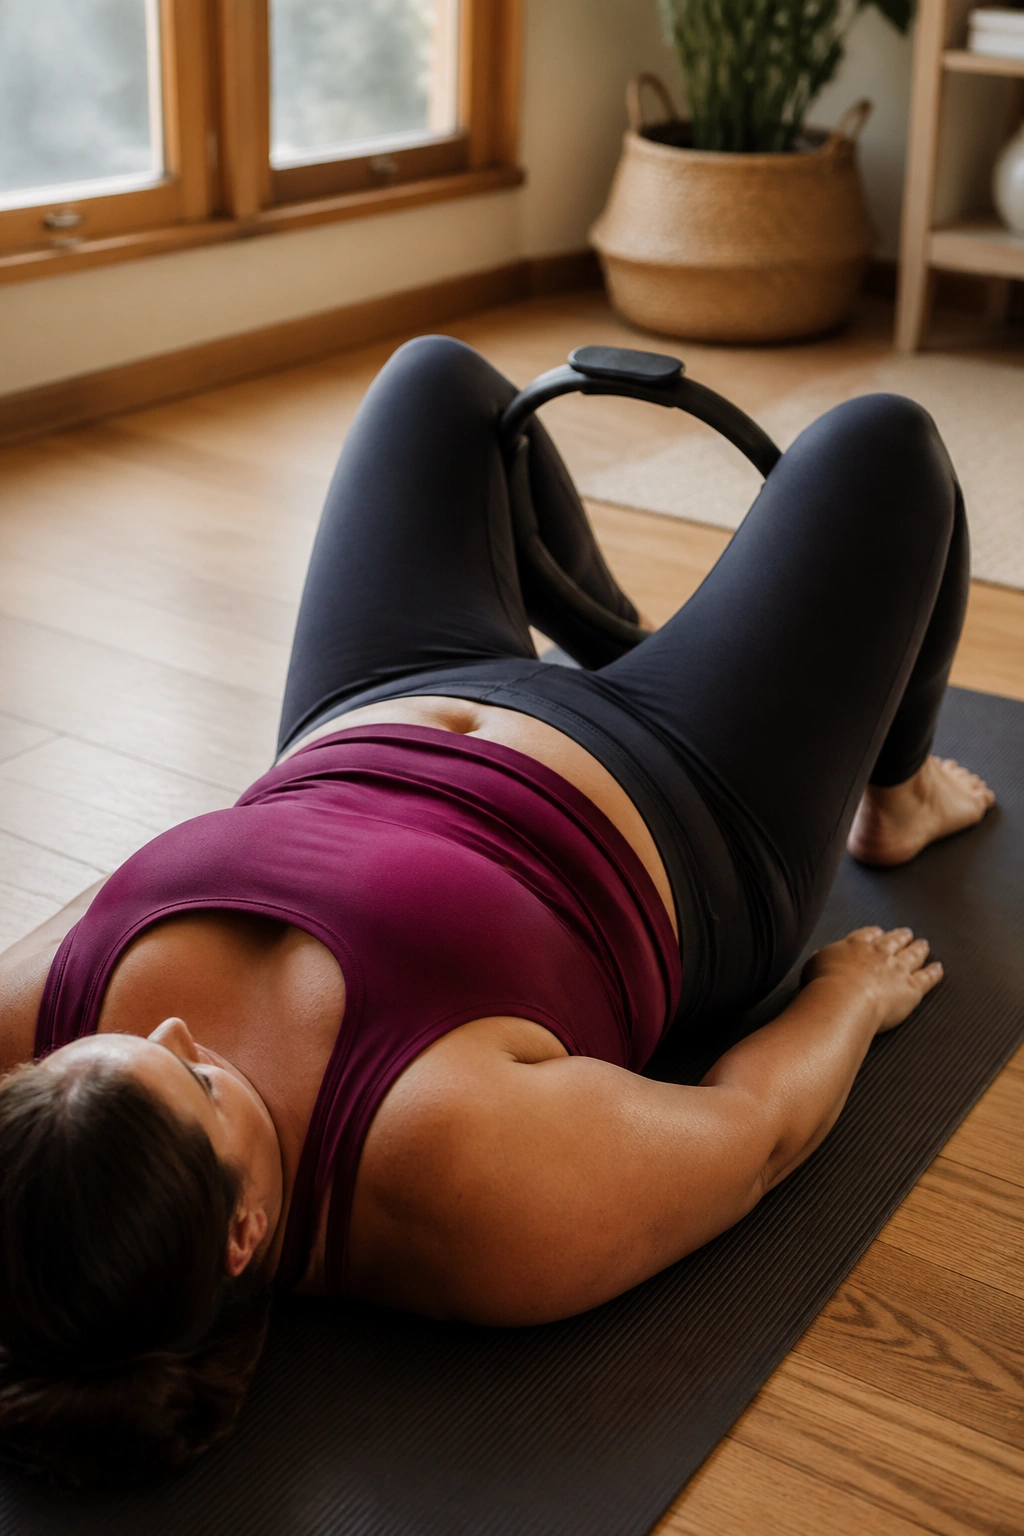
The Pilates ring earns its keep when you use it with restraint. Gentle pressure beats aggressive squeezing every time. You want feedback, not a white-knuckle grip that makes your shoulders climb and your breath disappear.
Two Ways to Use the Ring
Place the ring between your thighs while lying on your back and press in softly for 5 to 8 slow breaths. Or hold it between your palms at chest level and press inward while you exhale. The first version wakes up the inner thighs and lower belly. The second opens the chest and gives the upper body a reason to stay organized.
Use these cues:
- Shoulders down, not pinched
- Jaw loose
- Breath slow and steady
- Press about 30 to 40 percent effort
- Stop before the neck takes over
The ring is handy for plus size women because it gives a clear target. You don’t have to guess whether you’re engaged. You feel it right away. If your wrists are sensitive, the thigh press is the easier option. If your chest feels tight from long hours at a desk, the hand press can be a nice reset.
A little pressure goes a long way here. More is not better.
14. Assisted Roll-Ups and Half-Curl Lift Work
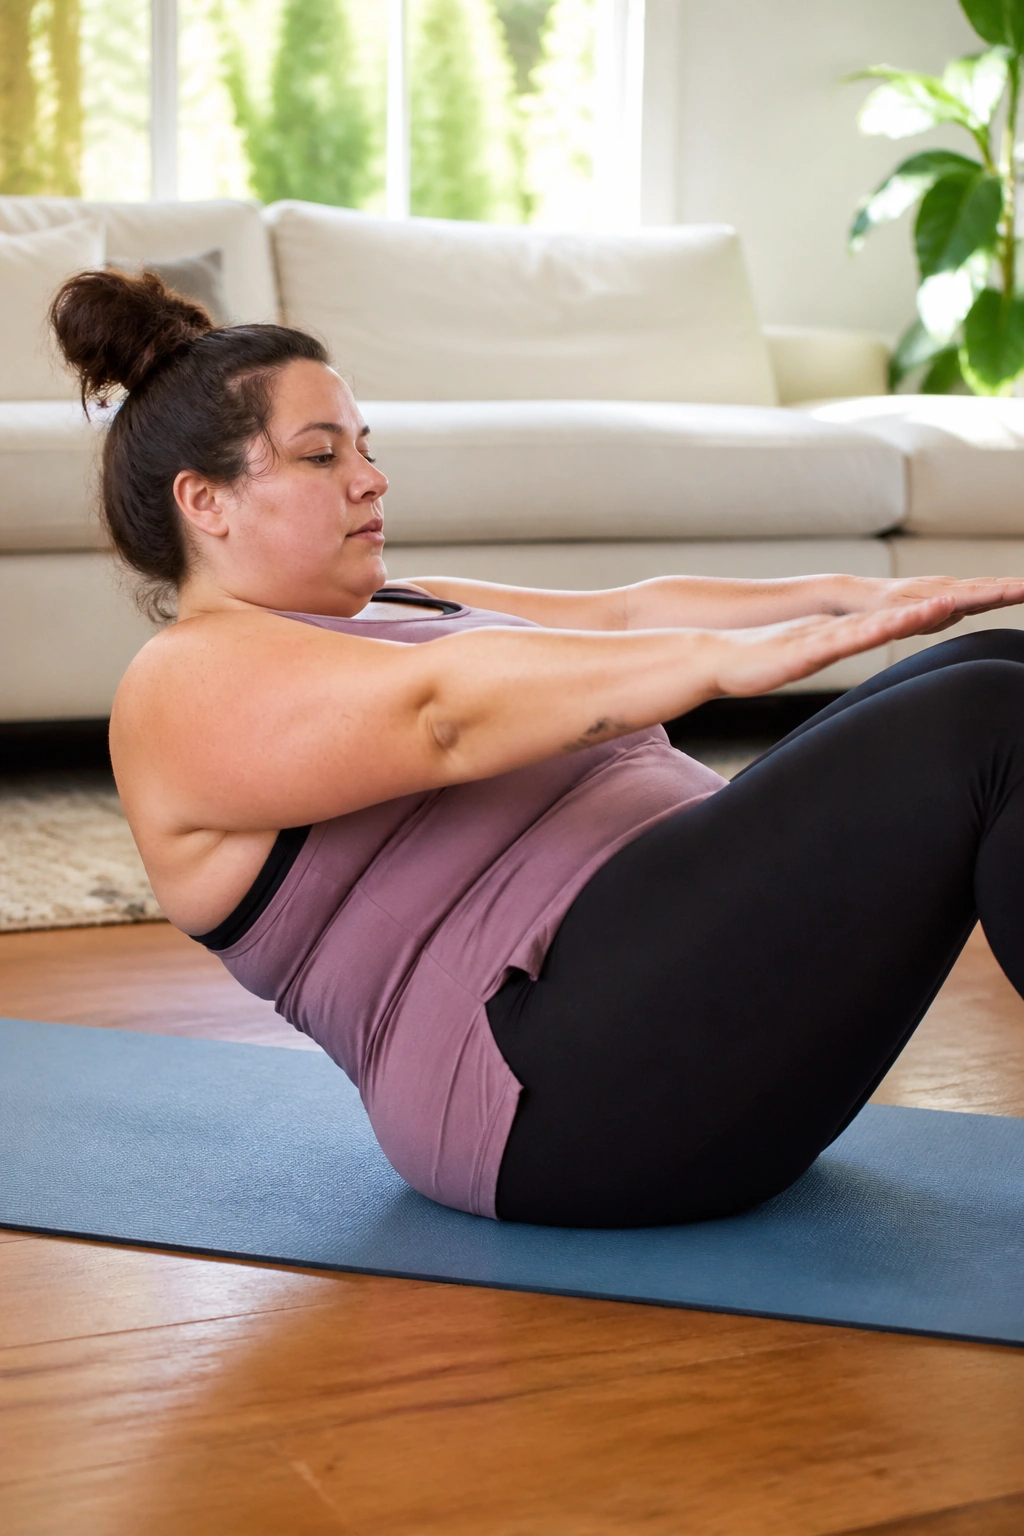
Full roll-ups are optional, not a badge. That single sentence could save a lot of frustration. If your hips feel tight, your belly gets in the way of a deep flexion, or your neck hates the full motion, the assisted version is the smarter place to live.
Lie on your back with knees bent. Reach your arms forward, slide your hands along your thighs, and curl just the head and shoulders off the mat. If that feels fine, come a little higher. If not, stay low and repeat. You can also loop a strap around the feet and use it as a little assist on the way up. That makes the movement more about the spine than about yanking yourself into position.
A few good rules help here. Exhale on the curl. Keep the chin gently tucked. Stop if the low back clamps. And if you feel a lot of effort in the hip flexors instead of the belly, shorten the lift right away.
This version is honest work. It builds the same control pattern without pretending every body has the same shape or range.
15. Breath-Led Restorative Reset for Hips, Back, and Shoulders
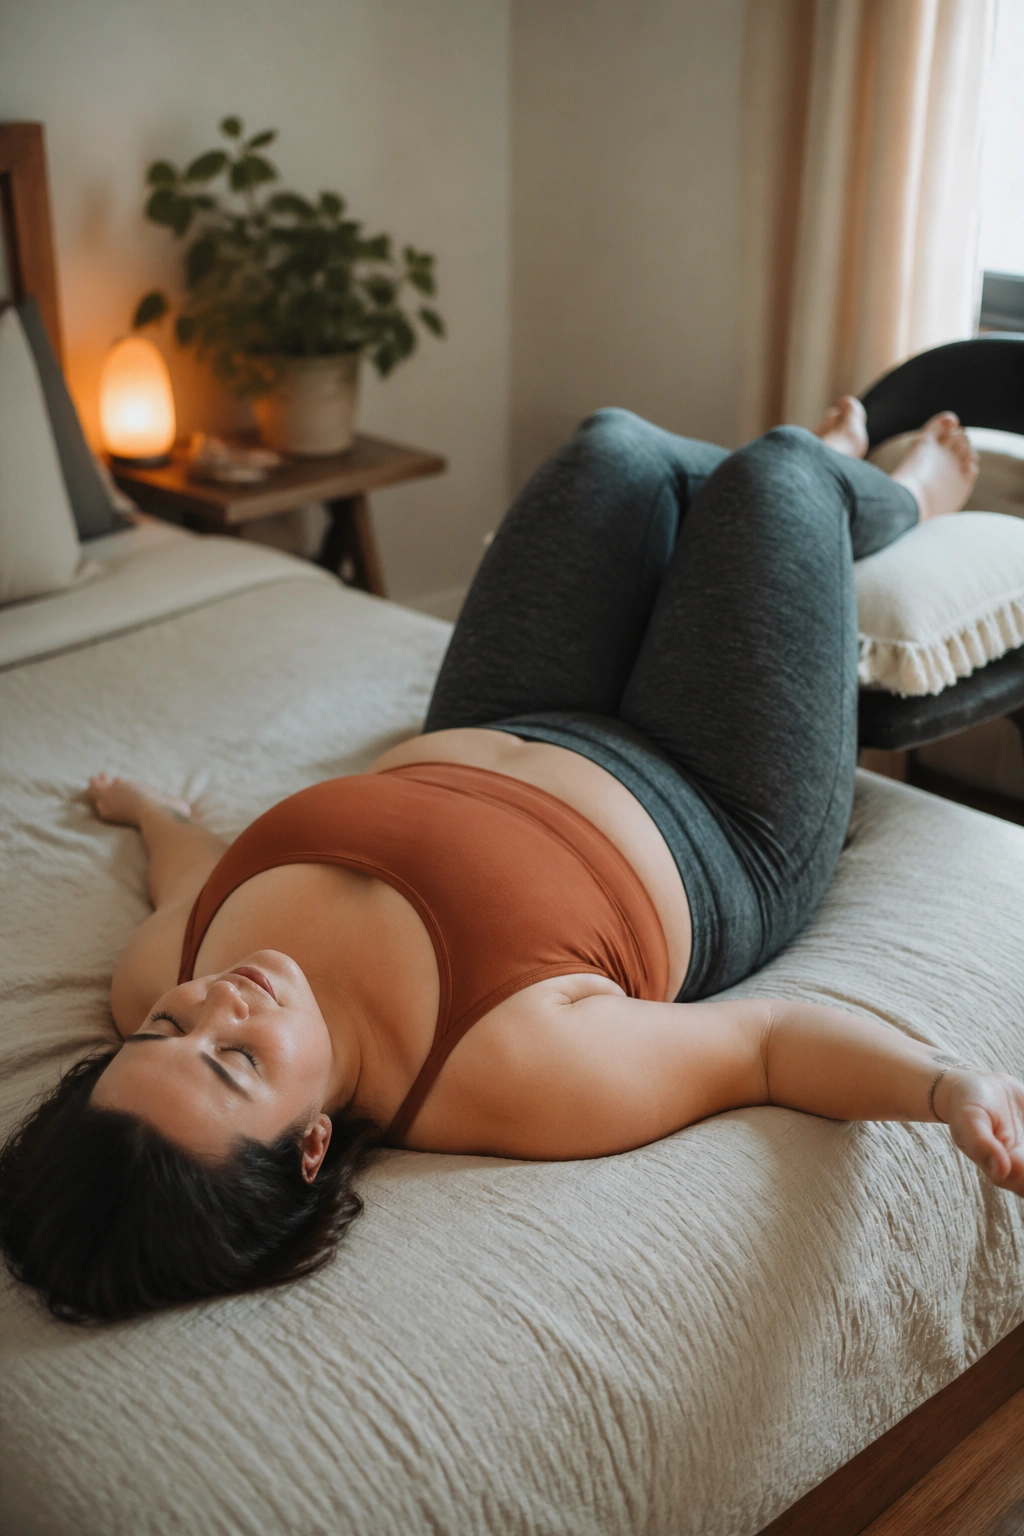
What does a good finish feel like? Less braced, not more tired. A restorative Pilates reset gives the body a chance to drop the guard a little, which is useful after strength work and even more useful on days when tension is already running high.
Lie on your back with a pillow under your knees or place your calves on a chair seat. Breathe into the sides of the ribs for a few rounds. Then add a gentle figure-four stretch, a soft spinal twist, or a supported open-book shape with one arm reaching wide. None of this should feel forced. If it does, the stretch is too deep.
A Five-Minute Version
- 1 minute of slow nasal breathing
- 1 minute of supported knee-to-chest
- 1 minute per side for a figure-four stretch
- 1 minute of gentle spinal twist
That is enough. Seriously. You do not need a marathon cool-down to count it. A short reset helps the nervous system settle and makes it easier to come back tomorrow without dread.
This workout is quiet, but I would not call it easy. Restoring motion after effort takes discipline too.
Final Thoughts
The smartest Pilates routines for plus size women are the ones that respect the body you actually have in front of you. Not the one a video assumes you borrowed for ten minutes. Support, clear alignment, and honest range of motion make the method feel better and work better.
A chair, a wall, a pillow, or a loop band is not a downgrade. It is a tool. Use the props that let you breathe, keep your shoulders soft, and finish a session without that “I fought the whole way through” feeling.
If you want one simple rule to carry into every workout, make it this: choose the version you can repeat with clean form. That is the one that builds strength you can use later, when you’re standing in line, climbing stairs, or just getting up off the couch without a groan.
