



Pilates can be one of the smartest ways for women over 60 to build strength without feeling beaten up the next day. The best sessions do not ask for speed, heavy weights, or floor work you dread; they ask for control, breathing, and enough honesty to stay in a small, useful range.
That matters more than people think. After 60, the body often prefers movements that train balance, posture, hip strength, and trunk control at the same time, instead of chasing big dramatic reps that leave the neck tight and the lower back annoyed. A chair, a wall, or a folded towel can turn a hard move into something you can actually repeat with good form.
I’ve always liked Pilates for that reason. It treats the body like a system, not a collection of disconnected parts, so your ribs, pelvis, shoulders, and hips learn to work together again. That kind of coordination shows up in real life fast: getting off a sofa, carrying groceries, climbing stairs, turning in bed, standing on one leg while you pull on socks.
If your joints are a little fussy, that does not rule anything out. It means precision matters. Start with the floor work that wakes up your breath and deep core, then move into standing patterns once your body feels organized and awake.
1. Pilates Breath and Settle on the Mat
Lie on your back with your knees bent, feet flat, and arms resting by your sides. This is the quiet start that a lot of people skip, and I think that’s a mistake.
Why It Works
Place one hand on your chest and the other on your belly. Inhale through your nose and try to widen the sides of your ribs; exhale through your mouth and let your ribs soften down without pressing your low back into the mat. Do 5 slow breaths, then add 6 gentle shoulder rolls and 4 tiny pelvic nods.
- Keep your jaw loose.
- Let your shoulders feel heavy.
- Use a folded towel under your head if your neck feels strained.
- Make the exhale longer than the inhale.
Tip: If the breath feels forced, make it smaller. Quiet breathing does more than dramatic breathing.
2. Pelvic Clock and Spine Mapping
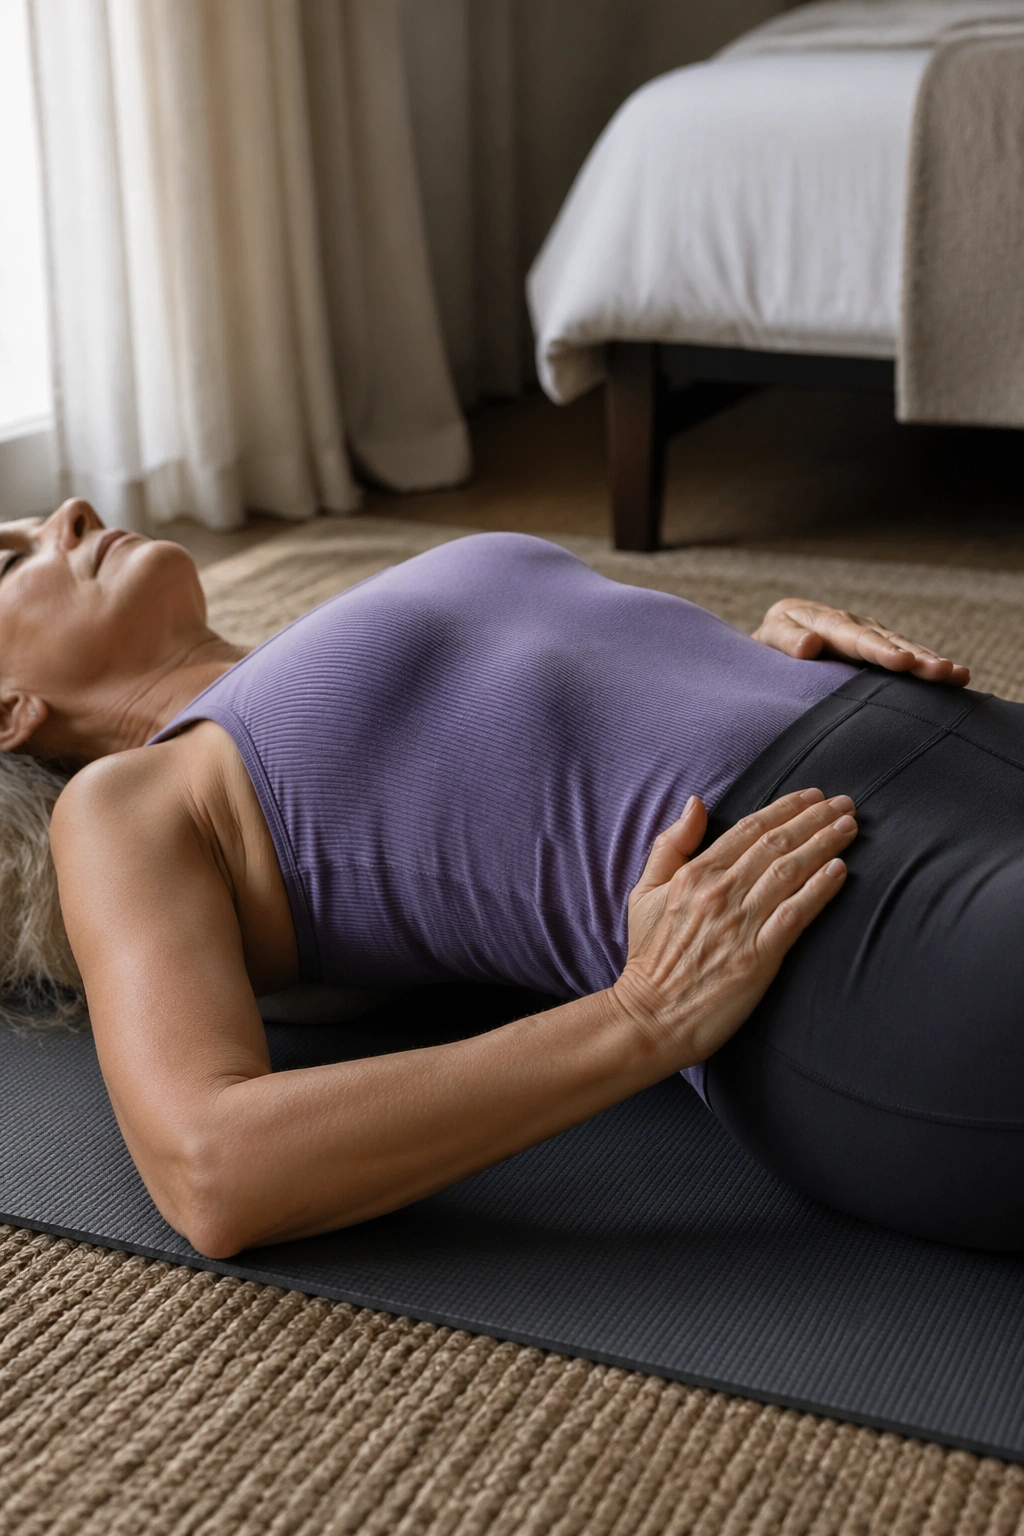
The fastest way to make Pilates feel safer after 60 is to teach your pelvis where neutral lives. That sounds simple, because it is.
Lie on your back and imagine your pelvis as a clock. Tip the front of the pelvis toward 12 o’clock, then gently toward 6 o’clock, then roll the hip points toward 3 and 9. The movement is tiny. No heroics. After a few rounds, pause in the middle and notice where your low back feels broad and easy instead of jammed or flattened.
This drill is useful for stiff mornings, but it also helps if your low back likes to grab during bridges, leg lifts, or standing work. You start recognizing what “too tucked” and “too arched” feel like before a move gets messy. That kind of awareness pays off everywhere else.
3. Bent-Knee Pilates Hundred
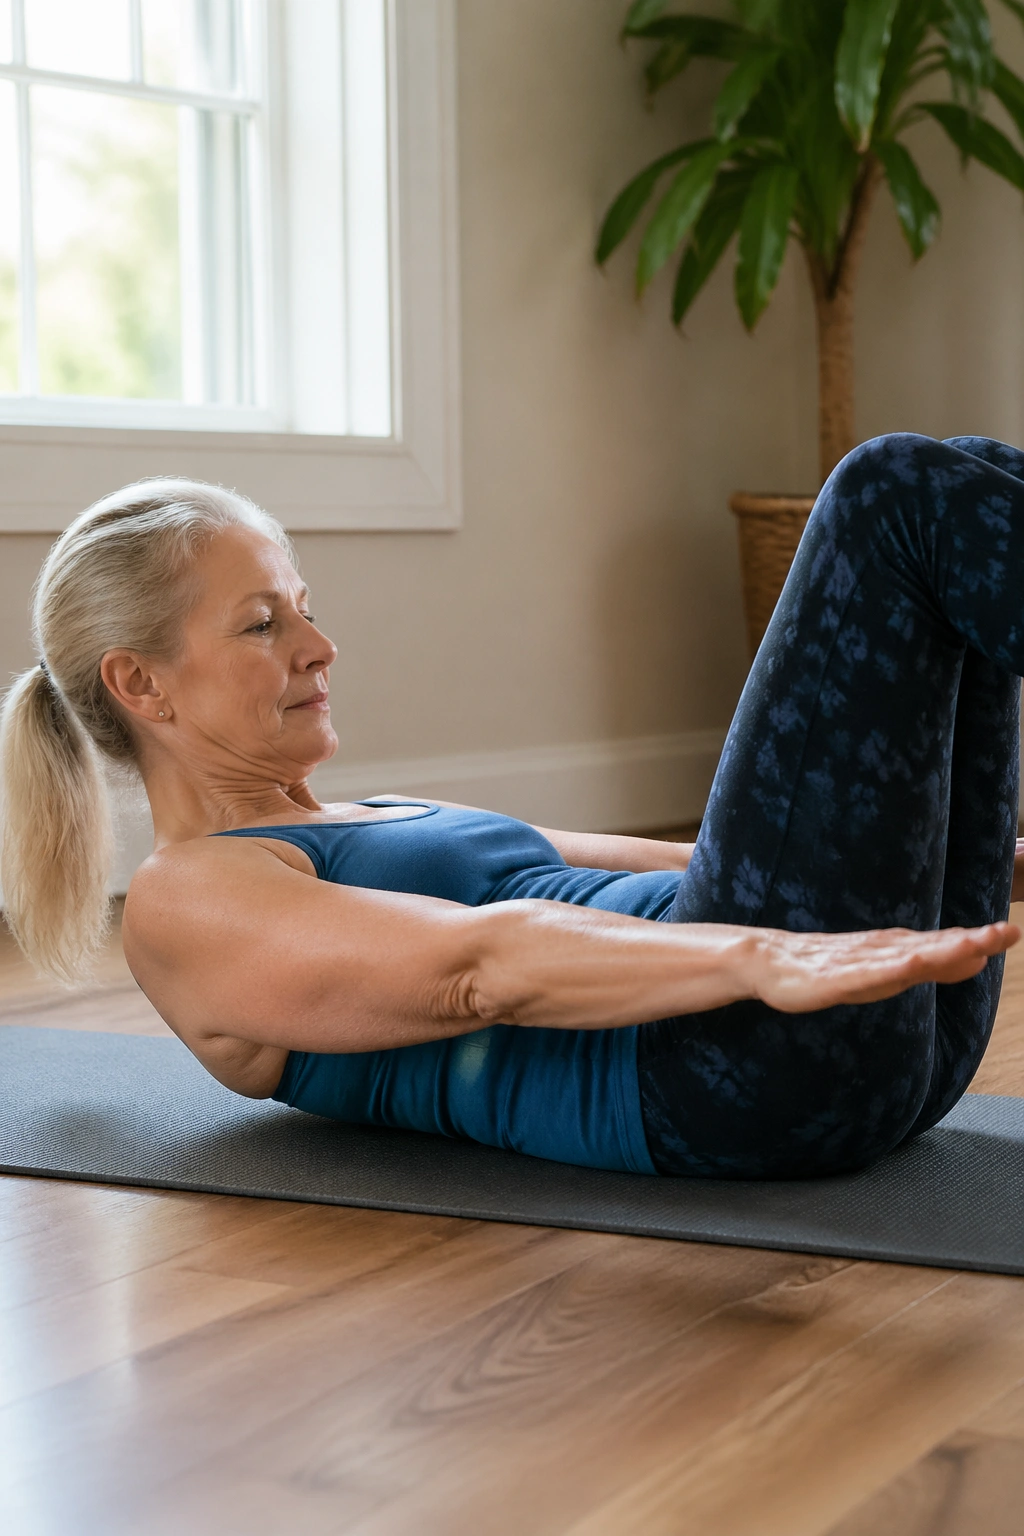
Need a core drill that doesn’t punish your neck? The bent-knee version of the Hundred is the one I reach for first.
How to Use It
Start on your back with your knees bent and feet on the mat. Lift your head and shoulders only if your neck feels fine; if not, keep your head down and pump your arms by your sides while you breathe. Reach your arms long, inhale for 5 arm pumps, exhale for 5 arm pumps, and repeat for 5 rounds.
- Keep the lower ribs quiet.
- Use feet on the floor if tabletop feels shaky.
- Stop the moment your neck starts to grip.
- Keep the pumping small and brisk, not wild.
How to use it: If your core tends to brace hard, keep the range tiny and the breath smooth. The point is control, not strain. If you live with osteoporosis or have been told to avoid spinal flexion, keep your head down and turn this into a breath-and-arm sequence instead.
4. Bridge Lifts for Glute Support
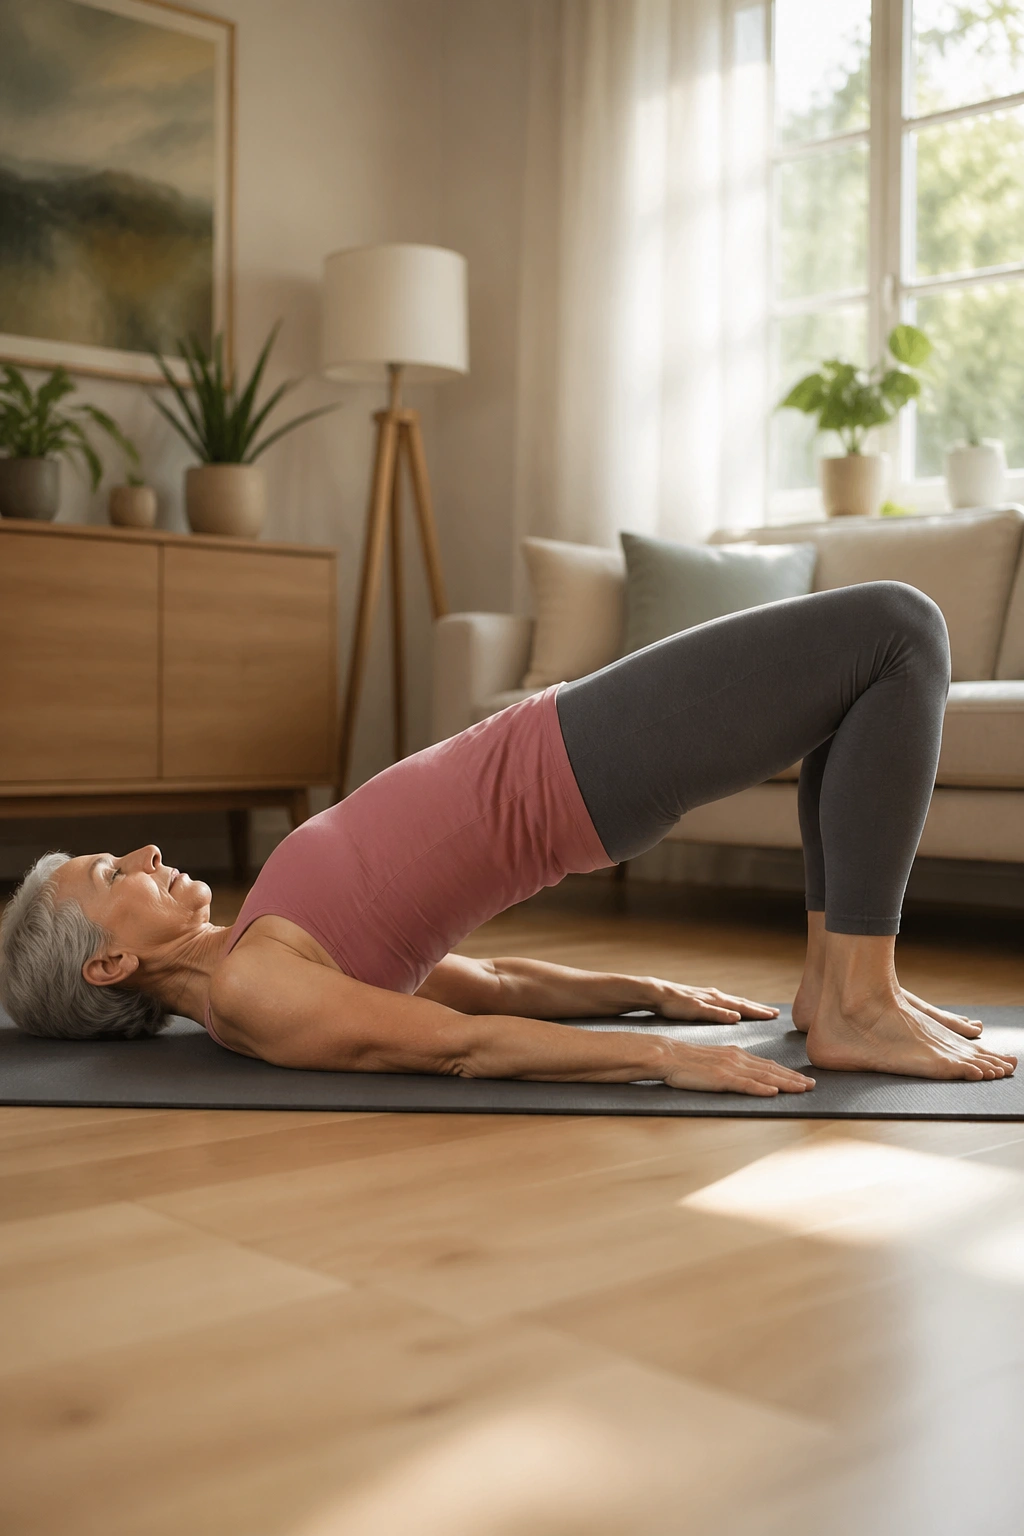
If standing up from a low sofa feels harder than it used to, bridge lifts deserve a permanent slot in your routine. They wake up the glutes, help the hamstrings work more cleanly, and give the lower back a break from doing everybody else’s job.
Lie on your back with your feet hip-width apart and set about 6 to 8 inches from your hips. Exhale, press through your heels, and lift your hips until your body makes a straight line from knees to shoulders. Hold for 2 to 3 seconds, then lower with control.
- Keep your knees pointing forward.
- Stop before the ribs flare.
- If hamstrings cramp, move your feet a little farther away.
- Try 8 to 10 reps, then rest.
The real trick is not height. A high bridge that arches the back is less useful than a smaller bridge that feels steady and clean. That’s the version that transfers to walking, stairs, and getting out of a chair without that old familiar grunt.
5. Side-Lying Clamshells for Hip Stability
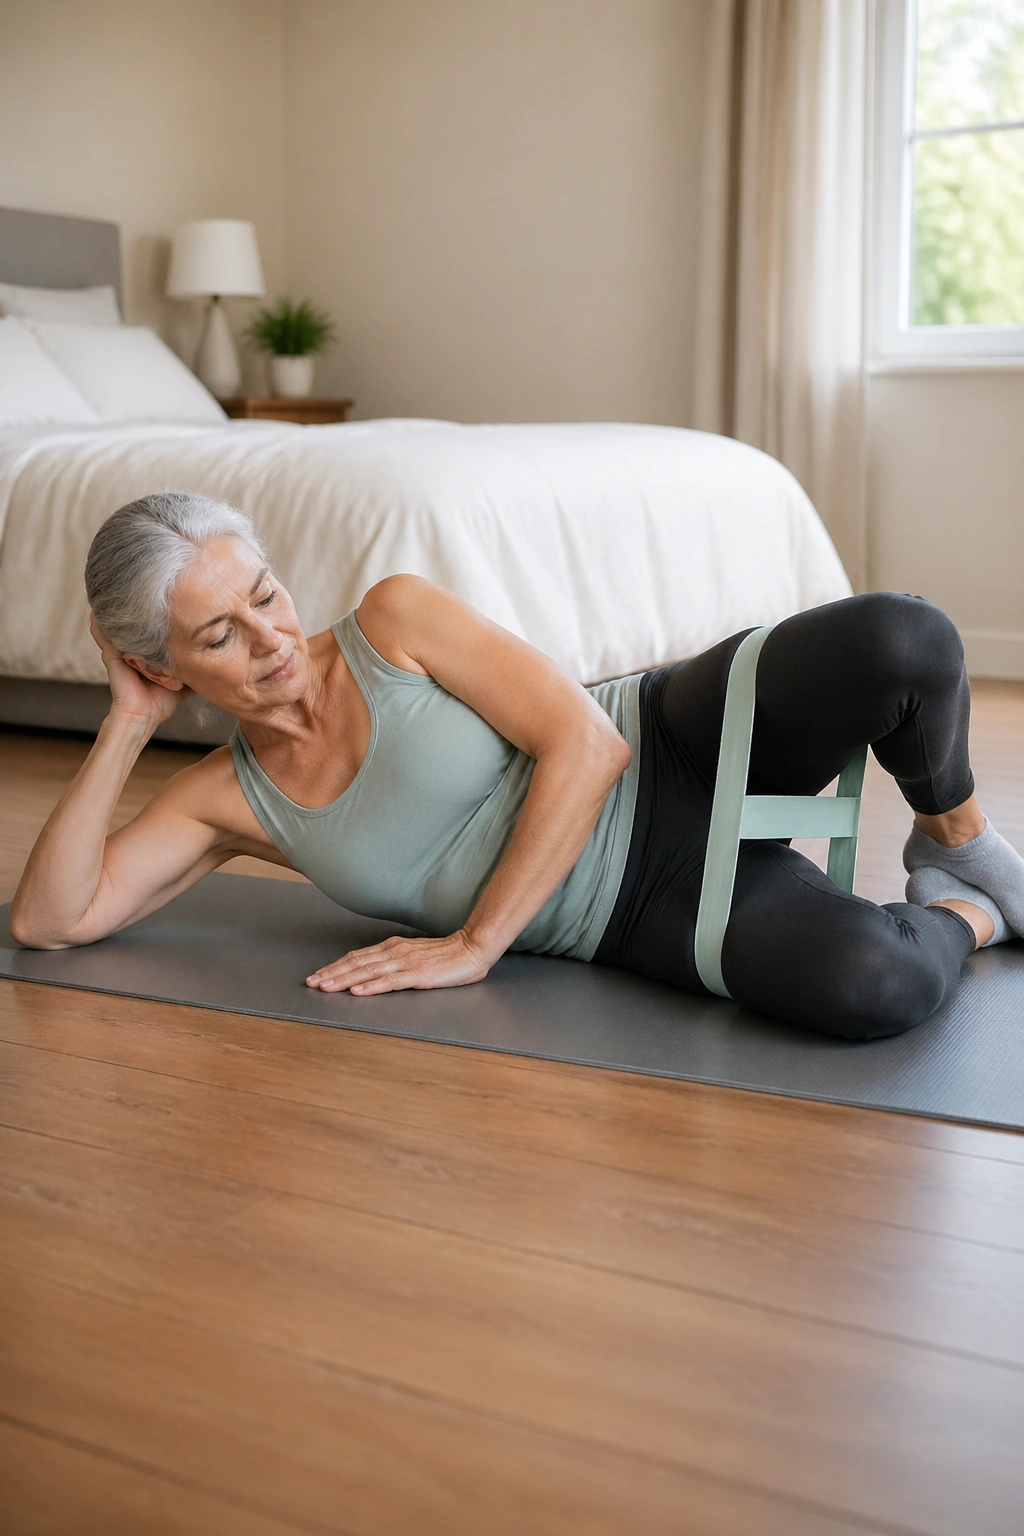
Clamshells look almost too small to matter. They matter.
Lie on your side with your knees bent and your heels lined up with your hips. Keep your feet together and open the top knee a few inches, then lower it slowly. You should feel the outer hip of the top leg working, not the front of the thigh taking over.
I like this move for women over 60 because the glute medius tends to be one of those quiet muscles people don’t notice until it gets weak. Then balance gets sloppy. Then stairs feel off. Then one hip starts doing more than the other, and the whole chain gets cranky.
Do 10 to 12 reps per side with a pillow under your head and, if needed, another pillow between your knees. Small range. Slow tempo. That’s the whole deal. If the low back starts twisting, shrink the lift until the pelvis stays stacked.
6. Seated Roll-Backs on a Chair
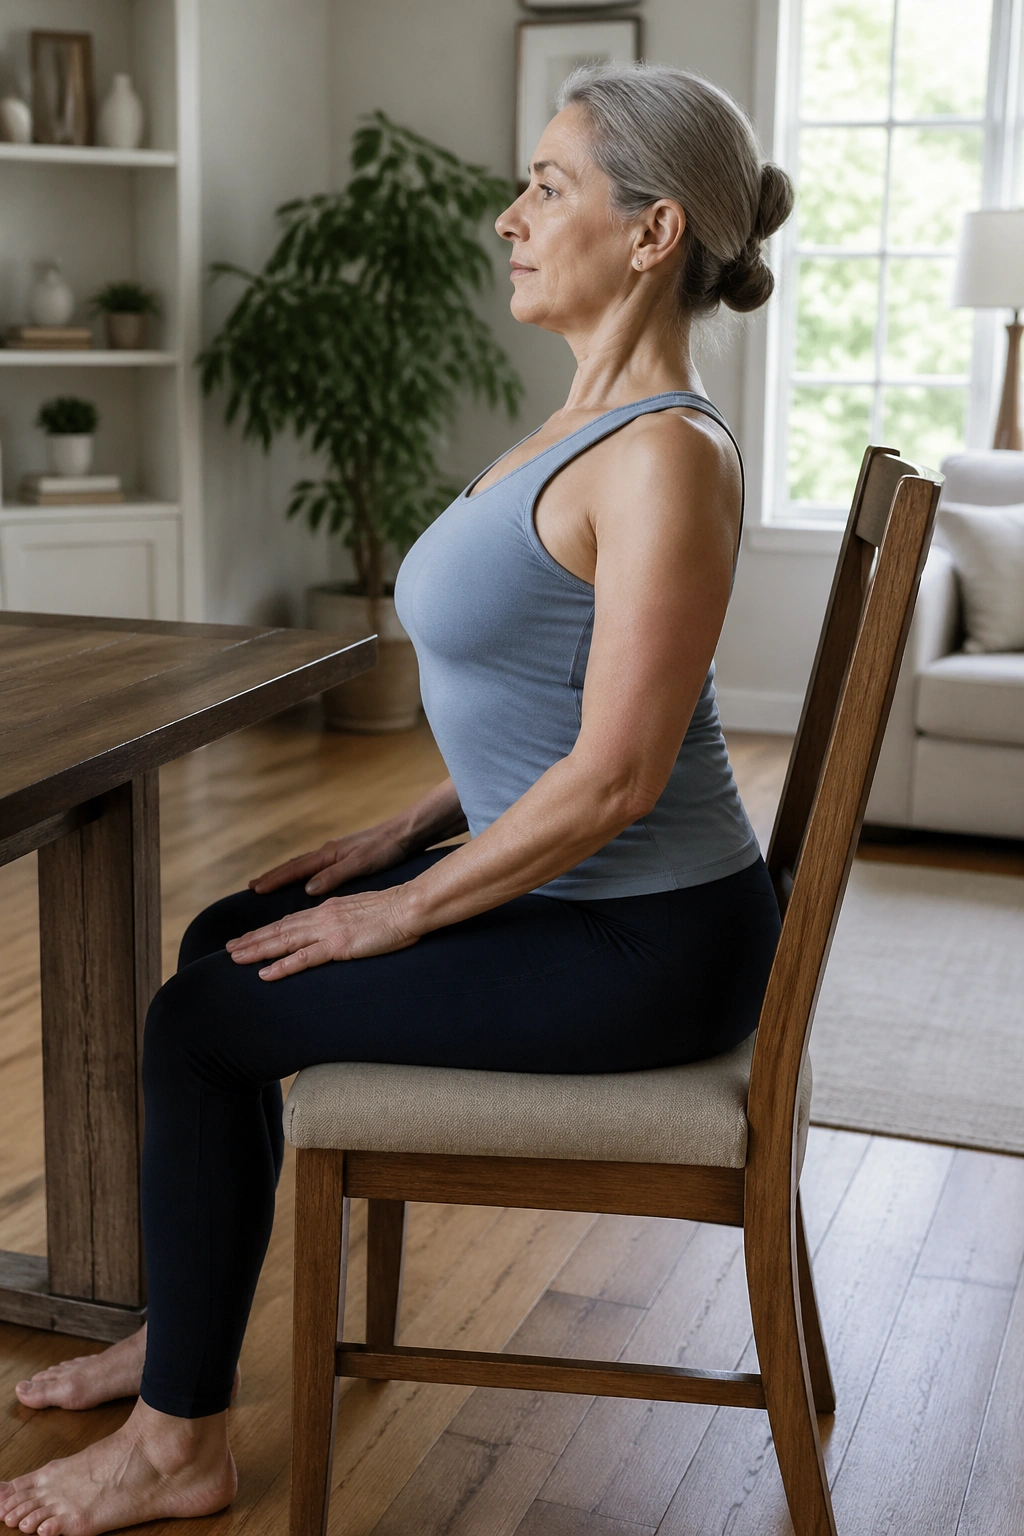
Unlike a crunch, a chair roll-back asks your trunk to move without asking your neck to carry the job. That’s why I like it for anyone who prefers not to spend time on the floor.
Sit near the front edge of a sturdy chair with your feet flat and hands lightly holding the sides or the front edge. Sit tall first. Then exhale and roll your tailbone back a few inches, letting the low ribs move back too, as if you’re taking one smooth piece of your spine off the chair. Inhale to return to upright.
It’s not about collapsing. It’s about controlled articulation. If you stop at the point where your lower back still feels supported, the exercise stays useful and kind. Do 6 to 8 slow reps.
This one is especially good for days when your hips are stiff, your knees don’t love kneeling, or you just want a seated move that still trains the deep abdominal wall. Clean, simple, not flashy. Exactly my kind of drill.
7. Standing Wall Roll Downs
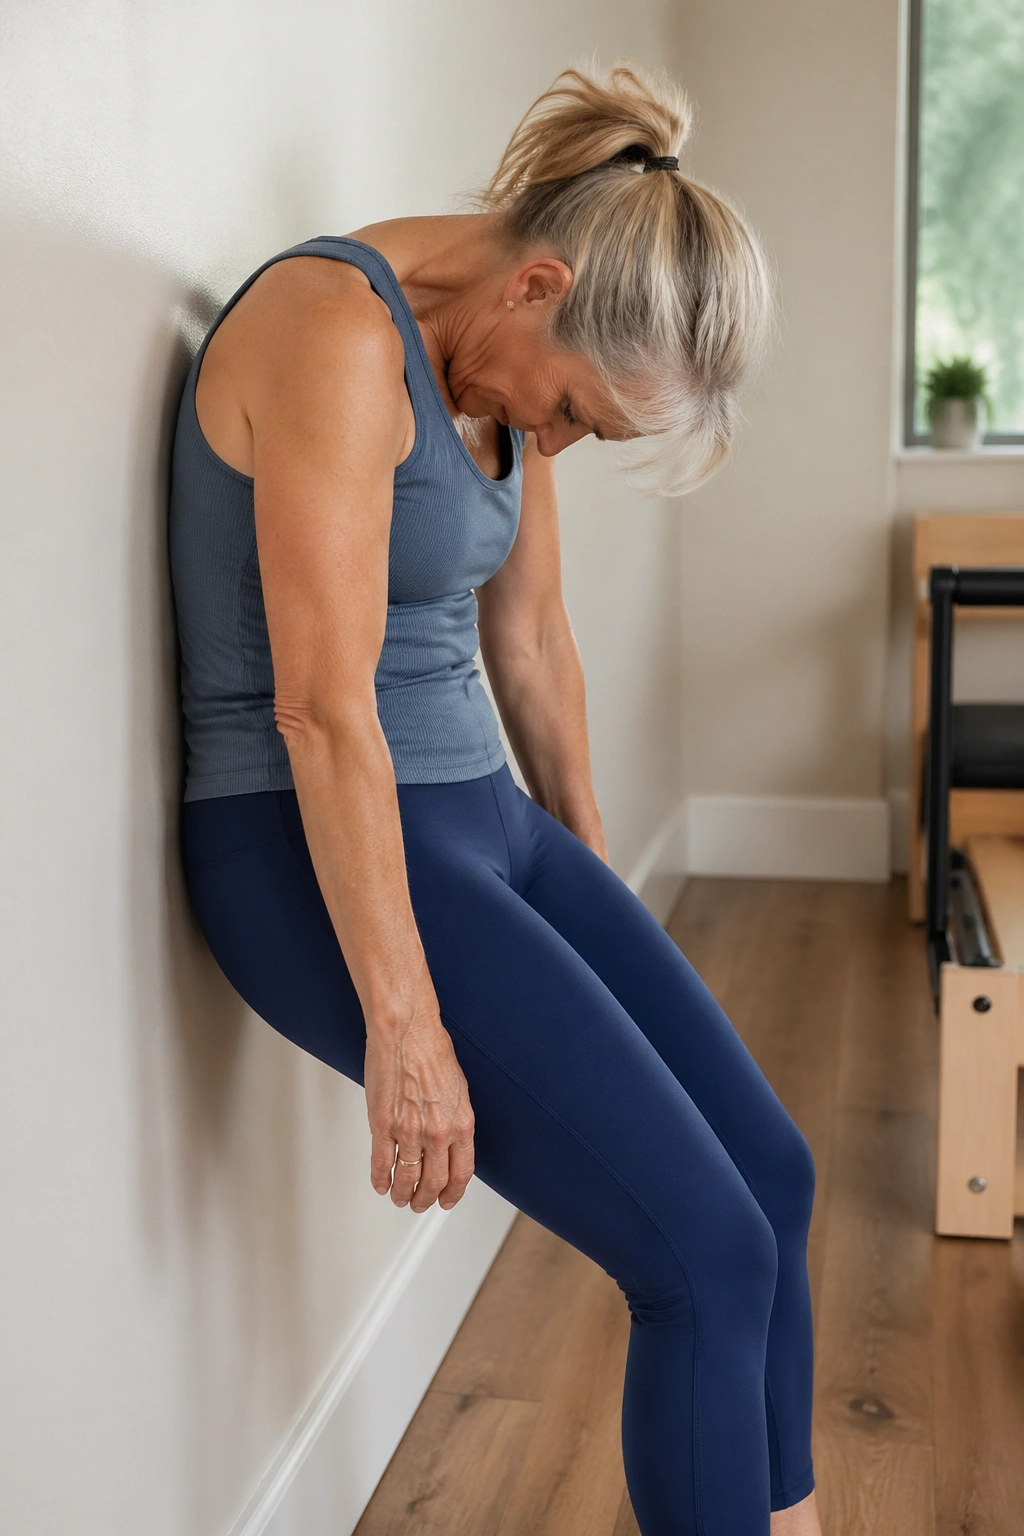
Standing work earns its keep because it teaches your body to hold itself up while the feet stay planted. That matters more than a lot of people think.
What It Looks Like
Stand with your heels a few inches from a wall, knees soft, arms relaxed. Exhale, nod your chin, and begin rolling your spine down one section at a time until your arms hang heavy and your head is lower than your heart. Inhale there for a breath or two, then stack the spine back up slowly.
What to Watch For
- Bend your knees as much as you need.
- Let the wall be a guide, not a target for your forehead.
- Stop the roll before your low back feels like it’s pinching.
- Try 3 slow rounds.
Tip: If hamstrings are tight, let the knees stay bent on the way down and the way up. A clean bend beats a forced straight leg every time.
8. Cat-Cow With Shoulder Slides
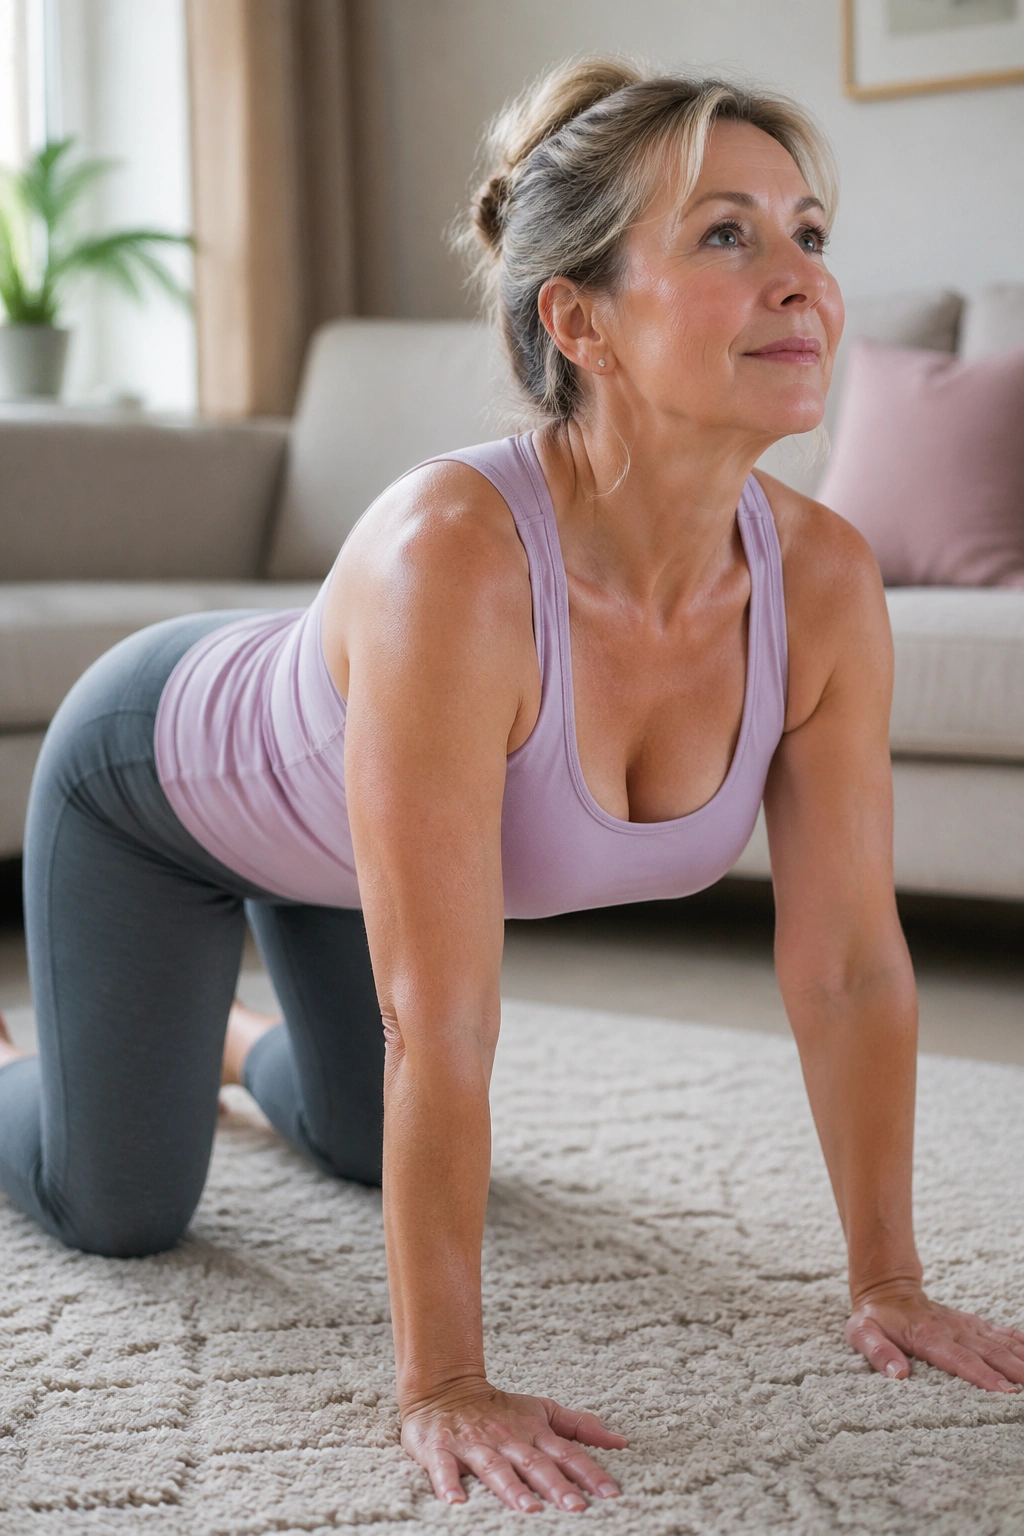
A stiff upper back can make everything feel older than it is. Cat-cow opens that area up while shoulder slides keep the shoulder blades moving, which is a nice two-for-one.
Come onto hands and knees, or do it on a bed or a firm bench if the floor bothers your wrists. Inhale as you lengthen the chest forward and gently tip the tailbone up; exhale as you round the back and slide one arm forward, then switch. Keep the movement slow enough that you can feel each rib moving.
The shoulder slides matter because a lot of older bodies get stuck with the arms working but the upper back staying asleep. A few rounds of this pattern can make reaching overhead feel less clunky. Do 6 to 8 cycles.
If your wrists complain, come up higher. A kitchen counter works. So does a wall. The point is to move the spine with breath, not to win a floor pose.
9. Mermaid Side Bends
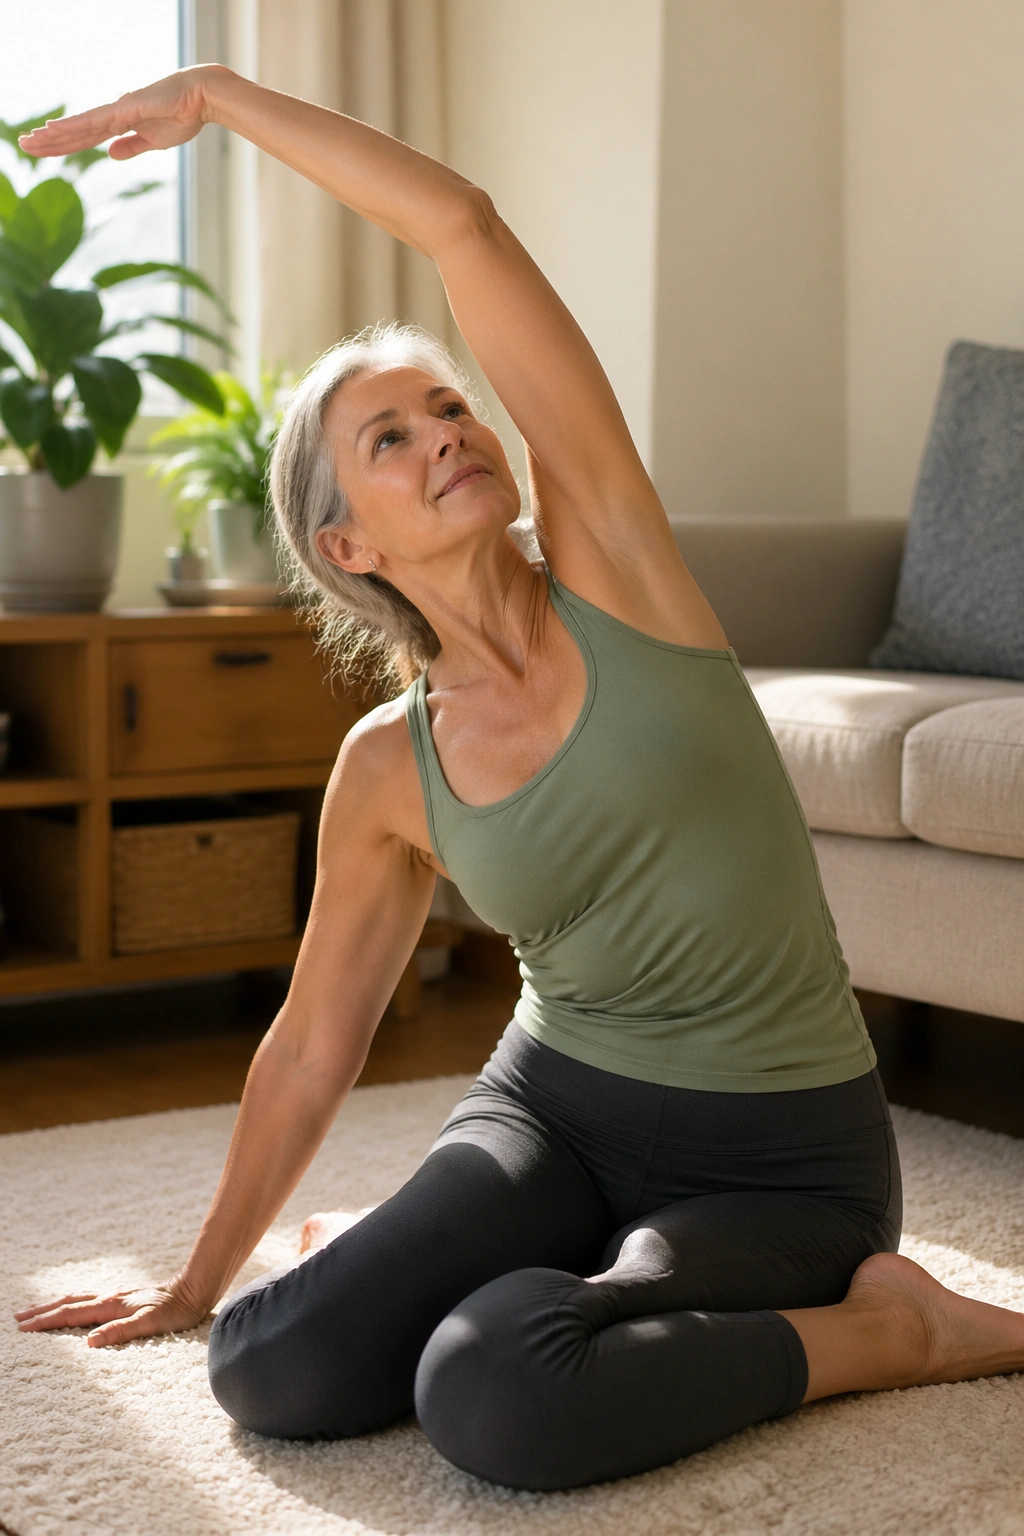
Want a stretch that feels classy without being fussy? Mermaid side bends do a lot with very little.
How to Make It Feel Good
Sit on the floor with your legs folded to one side if that position is comfortable, or sit sideways on a chair with one hand on the seat and the other reaching overhead. Inhale to grow tall through both sides of the waist, then exhale and arc the top arm over until you feel the ribs open. Hold for 2 to 3 breaths, then switch sides.
The movement should feel like a long line from hip to fingertips, not a collapse into one shoulder. Keep the opposite hip heavy. If your knees don’t like floor sitting, the chair version is perfectly fine and often better.
This is one of those Pilates pieces that helps breathing, posture, and rib mobility at once. That’s not glamorous, but it’s useful. Very useful. Especially if you spend time hunched over books, screens, or needlework.
10. Dead Bug Pilates Reach
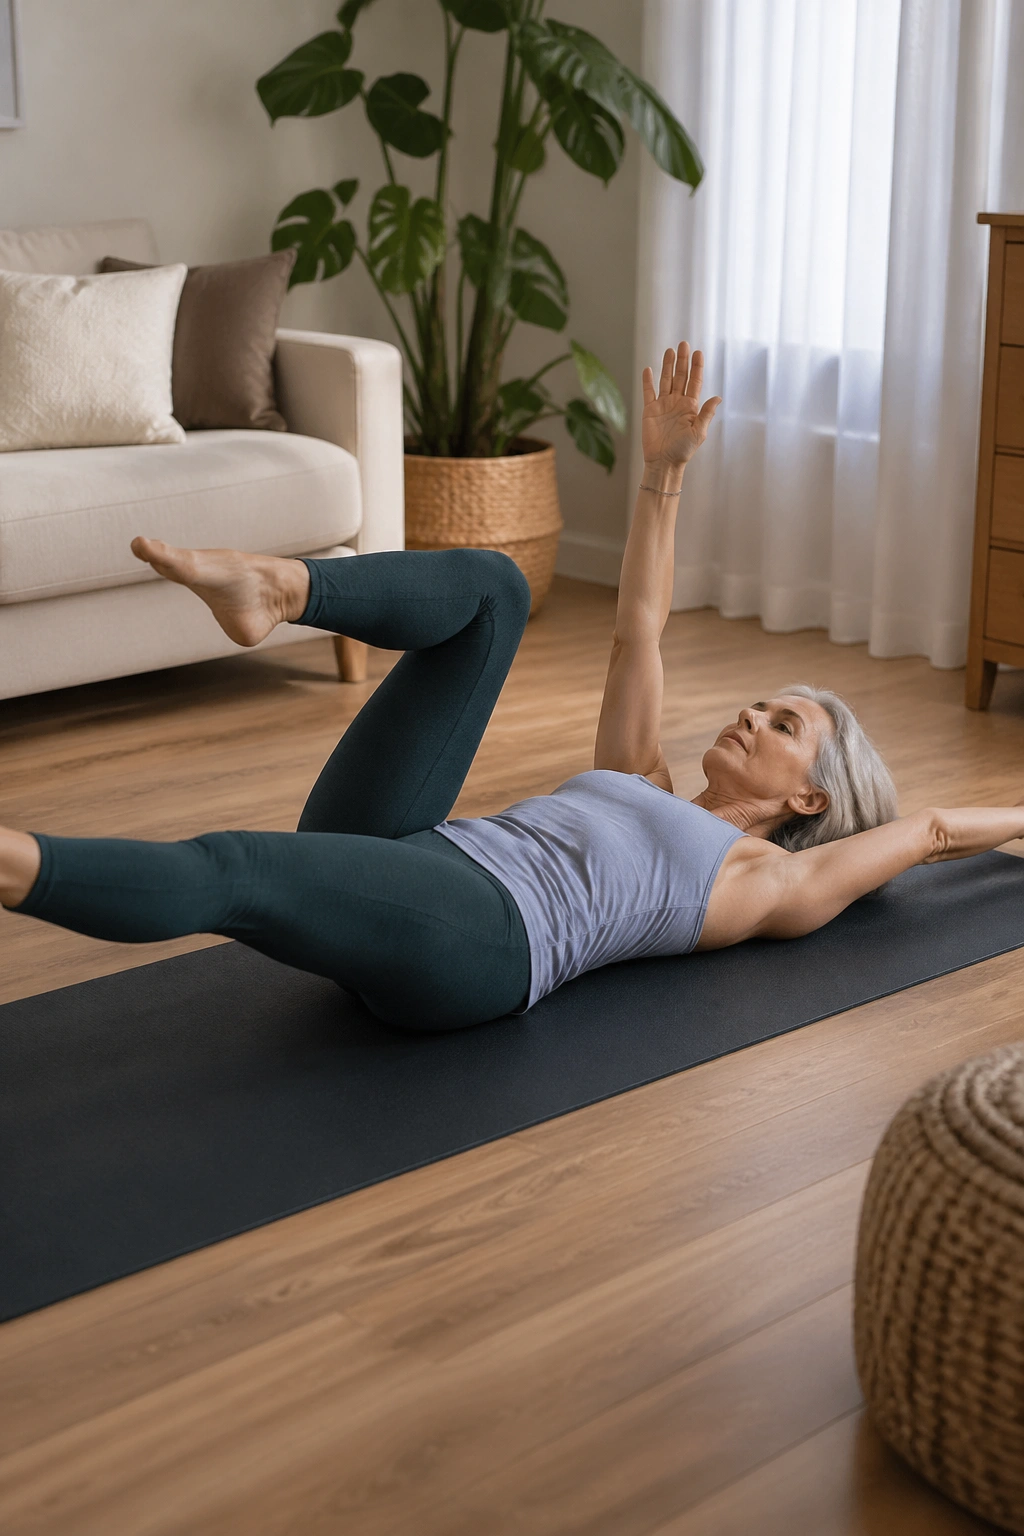
The minute one foot floats off the mat, the pelvis wants to show off. That’s why dead bug work is so valuable.
Start on your back with your knees bent in tabletop or with one foot at a time lifted only a little. Reach one arm overhead as the opposite leg lowers, then return and switch sides. Keep the movement slow enough that you can stop the low back from arching off the mat.
The Clean Version
- Exhale on the reach.
- Keep the ribs heavy.
- Use a smaller leg range if the back starts to lift.
- Do 6 reps per side.
What I like here is the quiet. No crunching, no rushing, no noise. Just control. If you can keep the pelvis steady while the limbs move, walking and carrying things starts to feel less slippery.
11. Bird Dog With Slow Holds
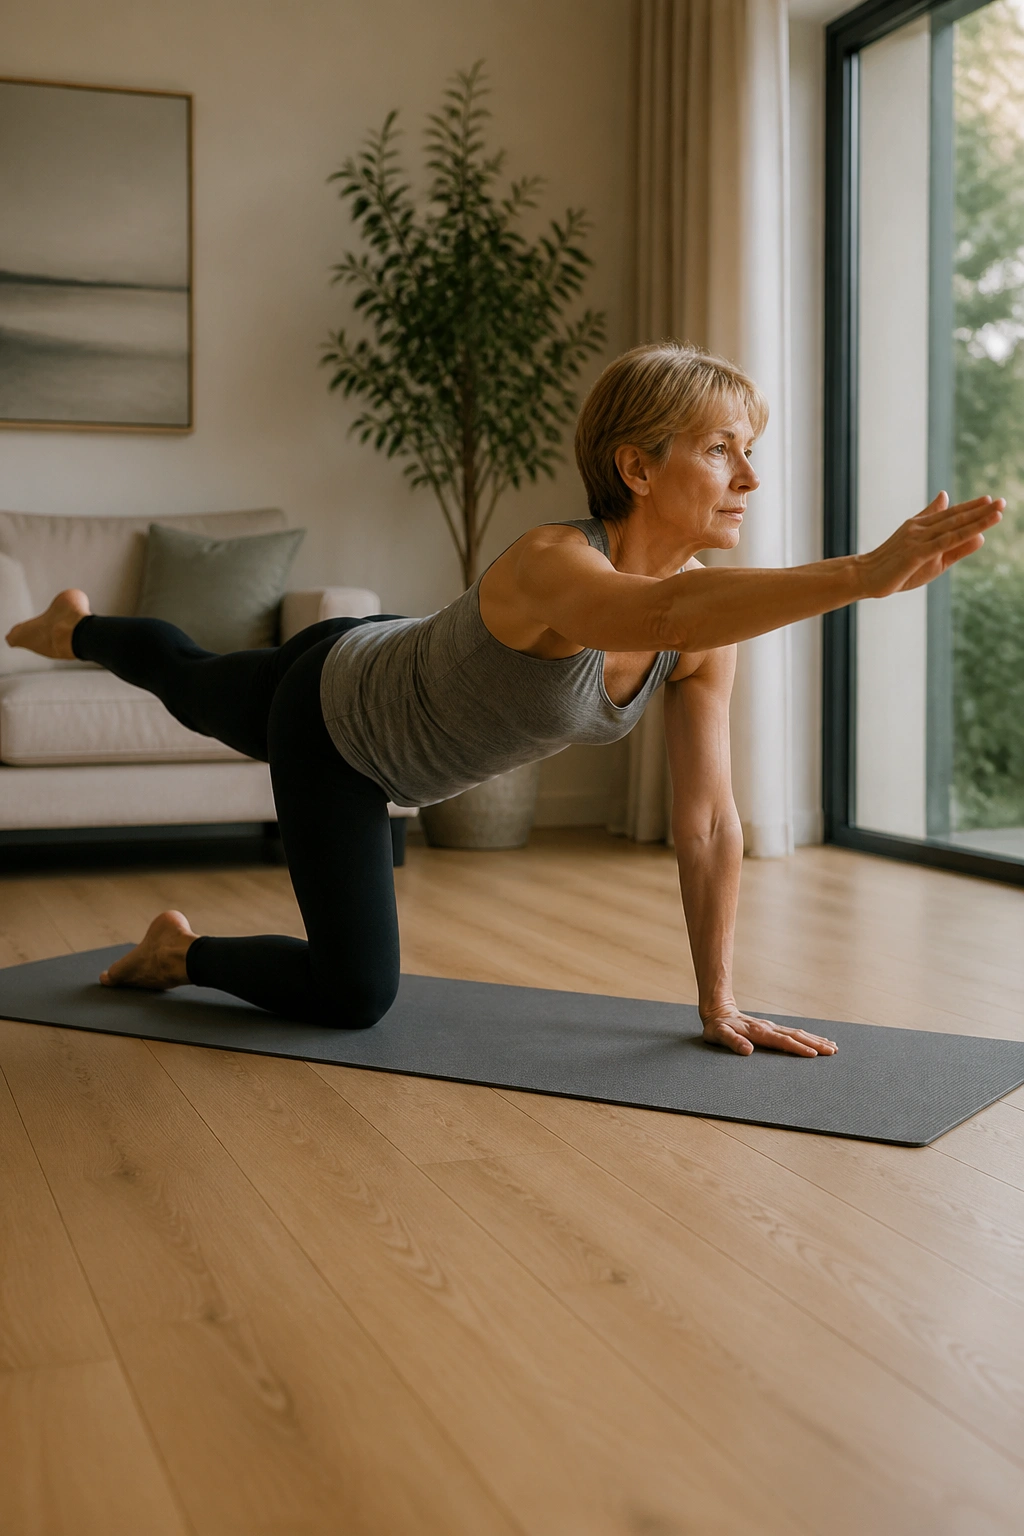
Bird dog is one of those exercises that looks easy until you try to keep your hips from wandering.
Come onto hands and knees, or place your hands on a bench if a lower position feels too demanding. Reach one leg straight back and the opposite arm forward, then hold for 3 to 5 counts before returning with control. The goal is a long line from fingertips to heel, not a lifted leg that twists the pelvis.
Your back should feel long, not squeezed. If you feel the low back sag, shorten the reach. If your shoulders fatigue fast, keep the hand closer to the floor or stay with leg-only reaches for a while.
I like bird dog for women over 60 because it trains cross-body coordination without impact. That coordination matters when you’re stepping around furniture, climbing stairs, or simply trying not to feel wobbly when you turn.
12. Mini Squat and Heel Raise Flow
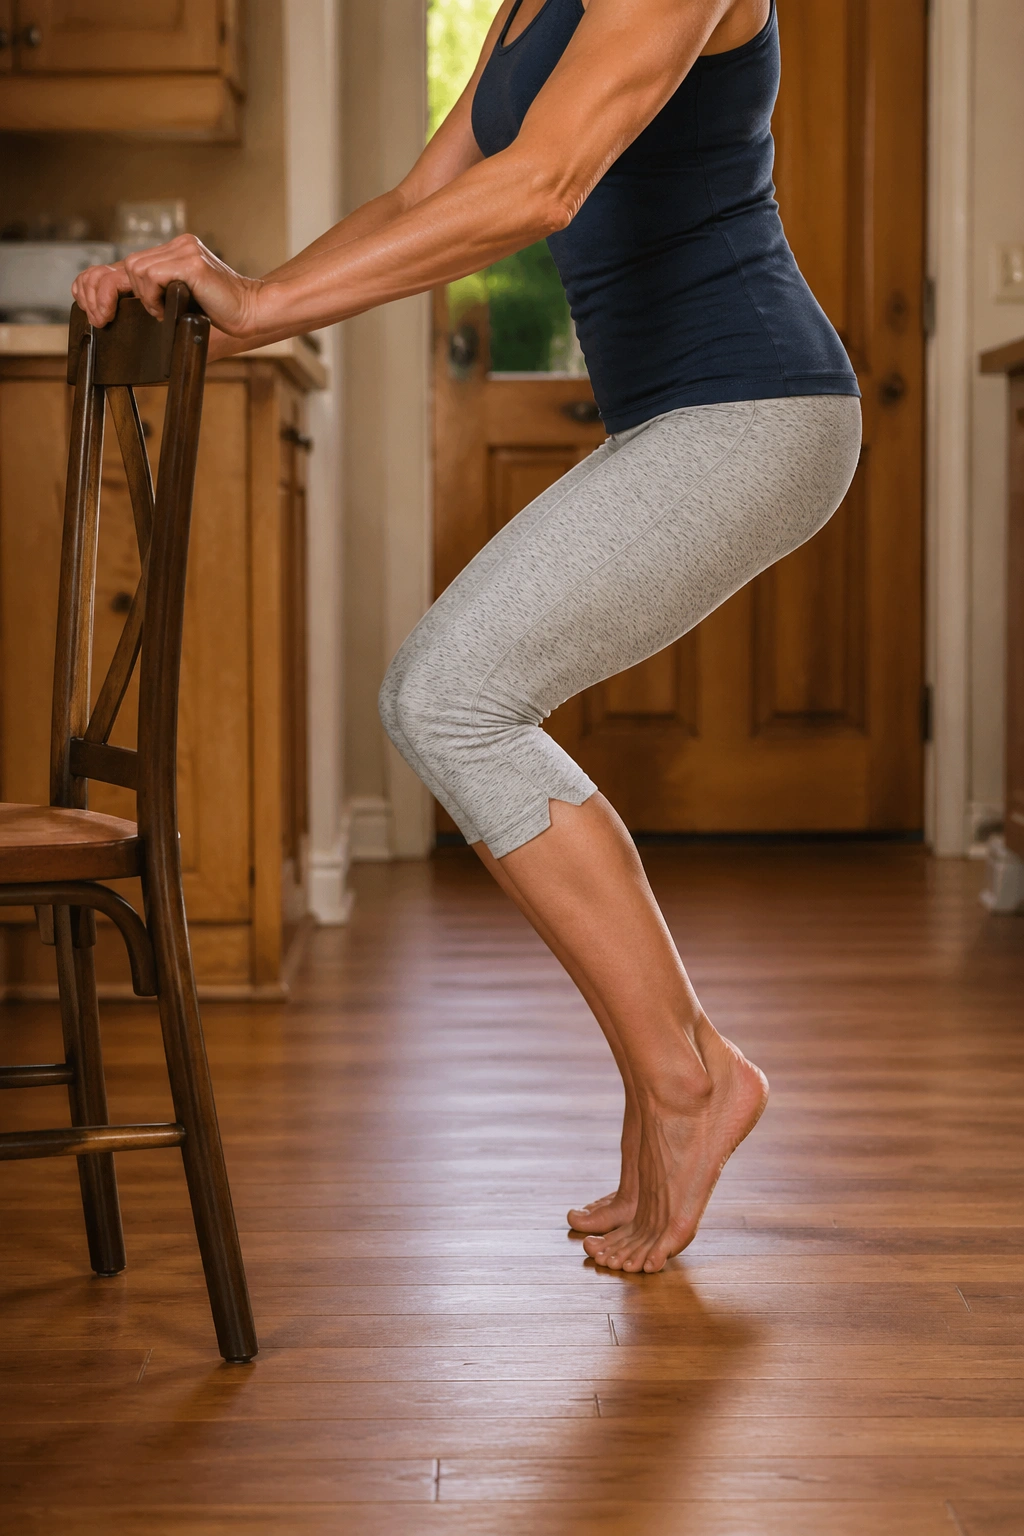
A tiny squat plus a heel raise does more for everyday strength than a lot of bigger, fancier moves. I’ll take that to the bank.
Stand behind a chair and sit your hips back a few inches, as if you’re aiming for a high stool. Keep your chest lifted and your knees tracking over your second toes. Press back to standing, then rise onto the balls of your feet for a heel raise, lower, and repeat.
This works the legs in a way that’s useful for stairs, rising from the toilet, and steady walking. It also gives the calves some attention, which people neglect all the time. Do 2 sets of 8 reps and rest between rounds if your legs start to shake.
Unlike a deep gym squat, this version stays friendly to knees and balance. You’re not chasing depth. You’re building confidence in a movement you use all day.
13. Seated Pilates Spine Twist
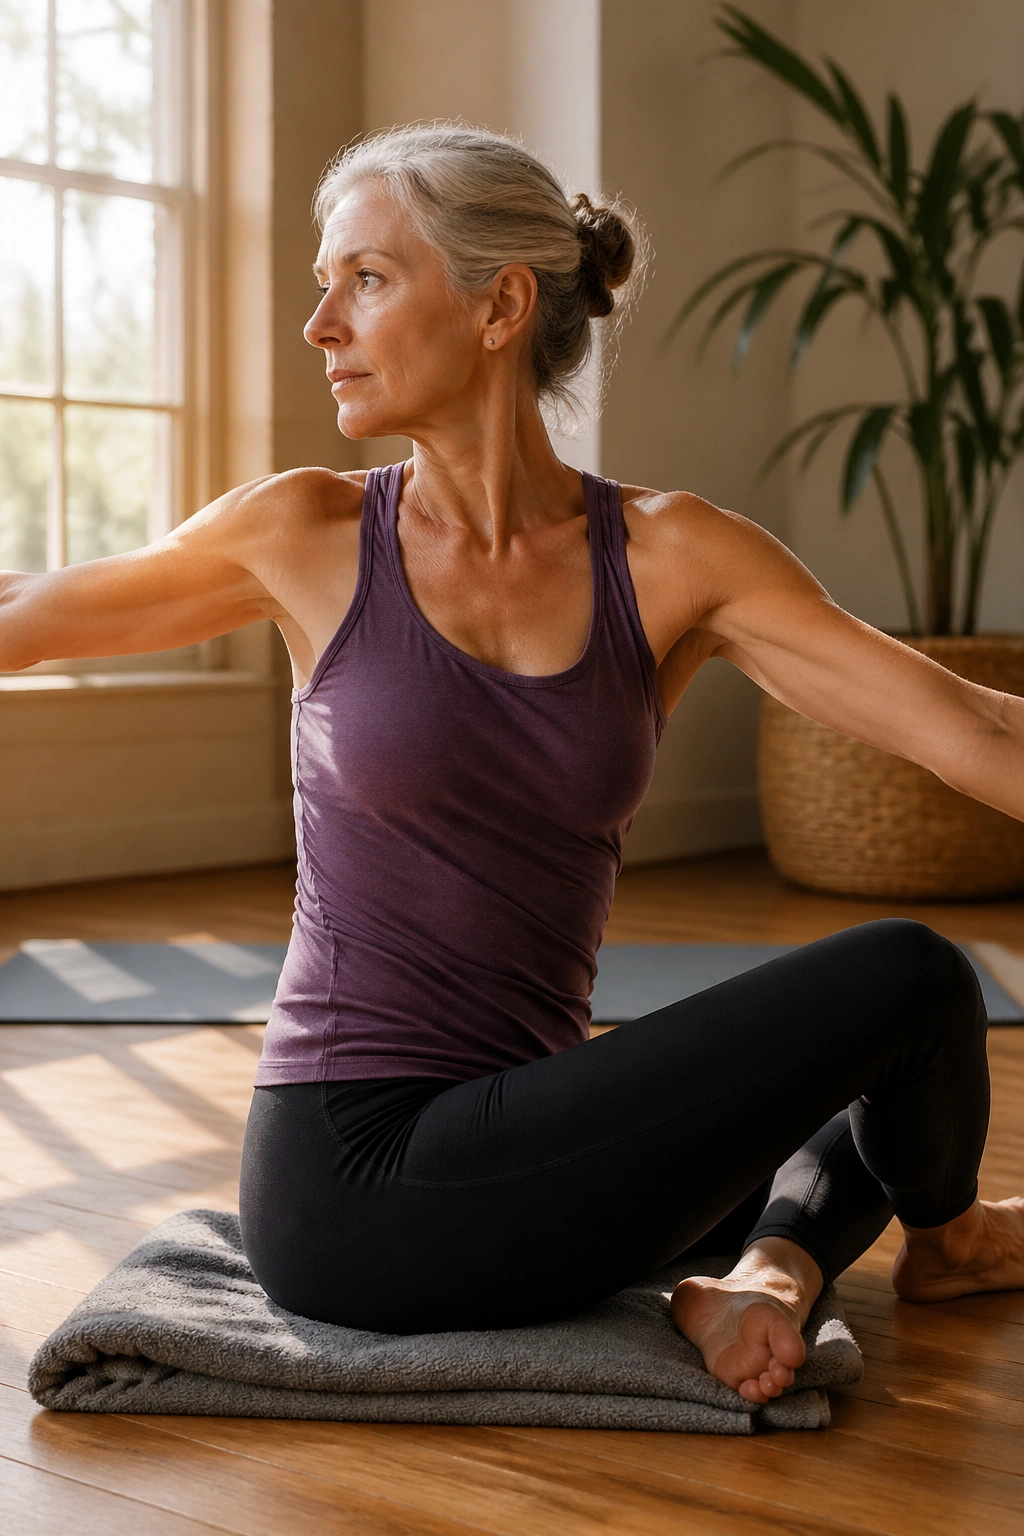
Twisting can be a gift or a nuisance, depending on how you do it. Seated spine twist keeps the gift and leaves the nonsense behind.
What to Watch For
Sit tall on the floor or on a folded towel if your hips are tight. Reach your arms out to the sides, grow long through the crown of the head, and rotate from the ribs while the pelvis stays quiet. The twist should feel like a smooth turn, not a yanked motion from the lower back.
- Keep both sit bones heavy.
- Turn only as far as you can breathe easily.
- Do 4 slow twists per side.
- If your knees move, you’ve gone too far.
Tip: If you’ve been told to be careful with spinal compression or osteoporosis, keep the rotation tiny. A small, controlled twist is enough to work the muscles without hunting for range you do not need.
14. Pilates Band Presses for Upper Back Strength
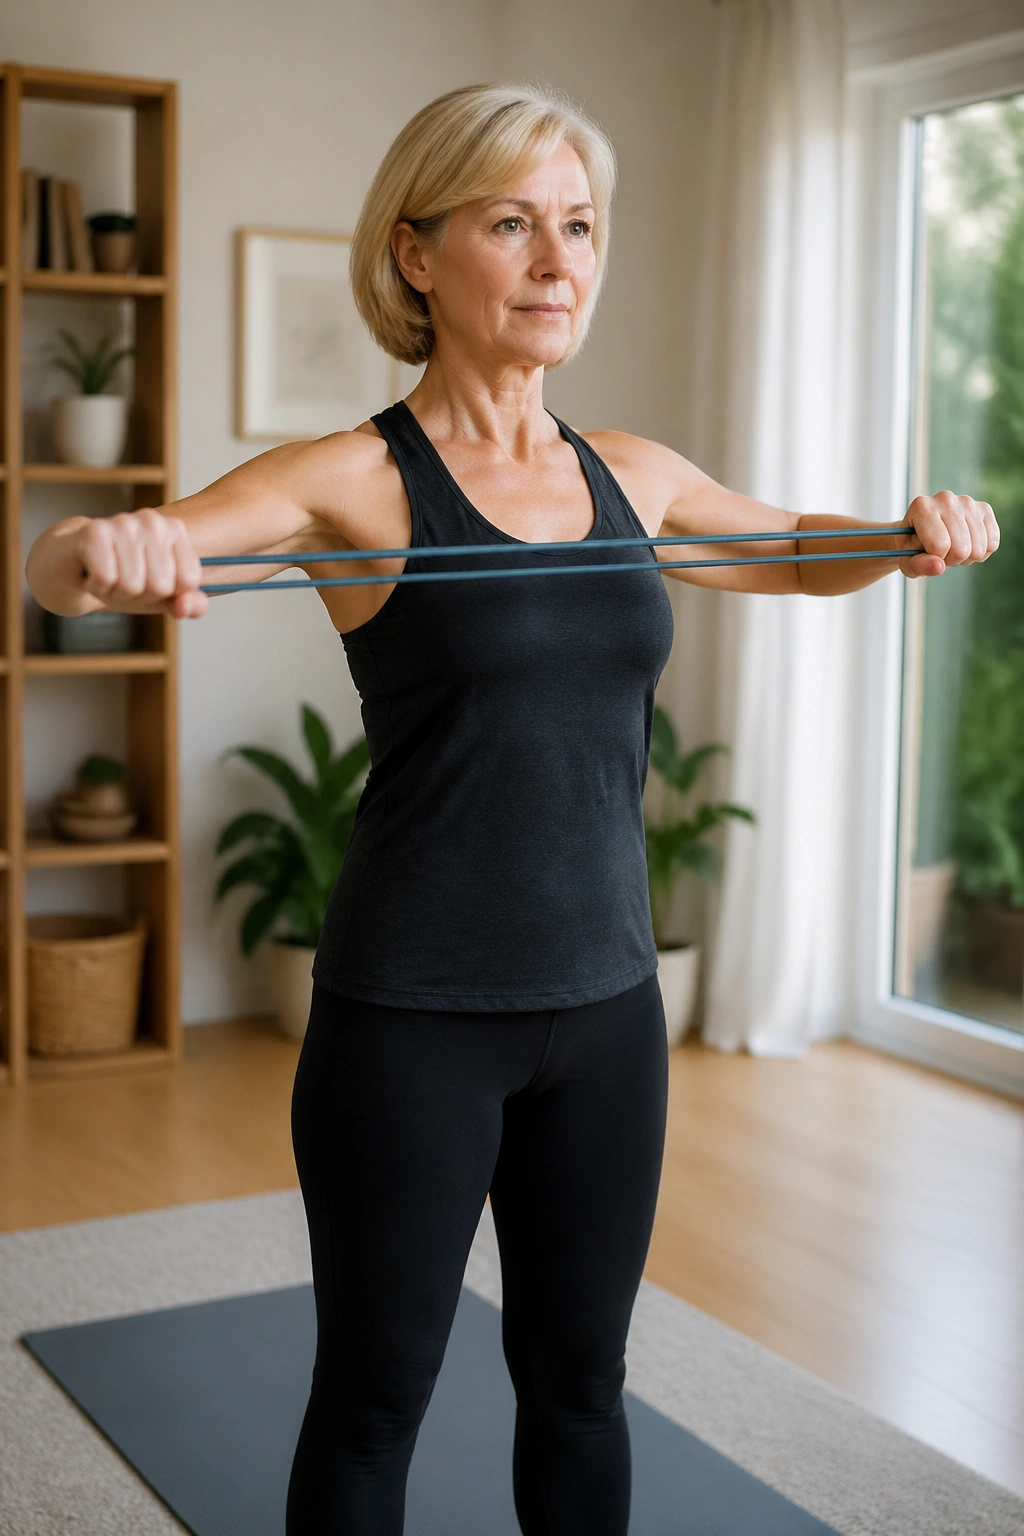
Weak upper backs show up as rounded shoulders and tired necks, and band work is one of the cleanest ways to wake that area up.
Stand or sit tall with a light resistance band held at chest height. Press the band forward, then gently open it by drawing the arms apart until you feel the shoulder blades slide toward the back ribs. Keep the neck soft and the ribs from flaring forward.
This is not a brute-force exercise. The band should feel light to moderate, never like you’re wrestling it. Use 8 to 12 reps, pause for a breath, then do another set if your shoulders still feel organized.
I like this move because it teaches the upper back to support the arms instead of letting the neck do all the work. That’s useful for carrying laundry, pushing a door, and keeping posture from slumping after a long stretch of sitting.
15. Wall Side Plank Hold
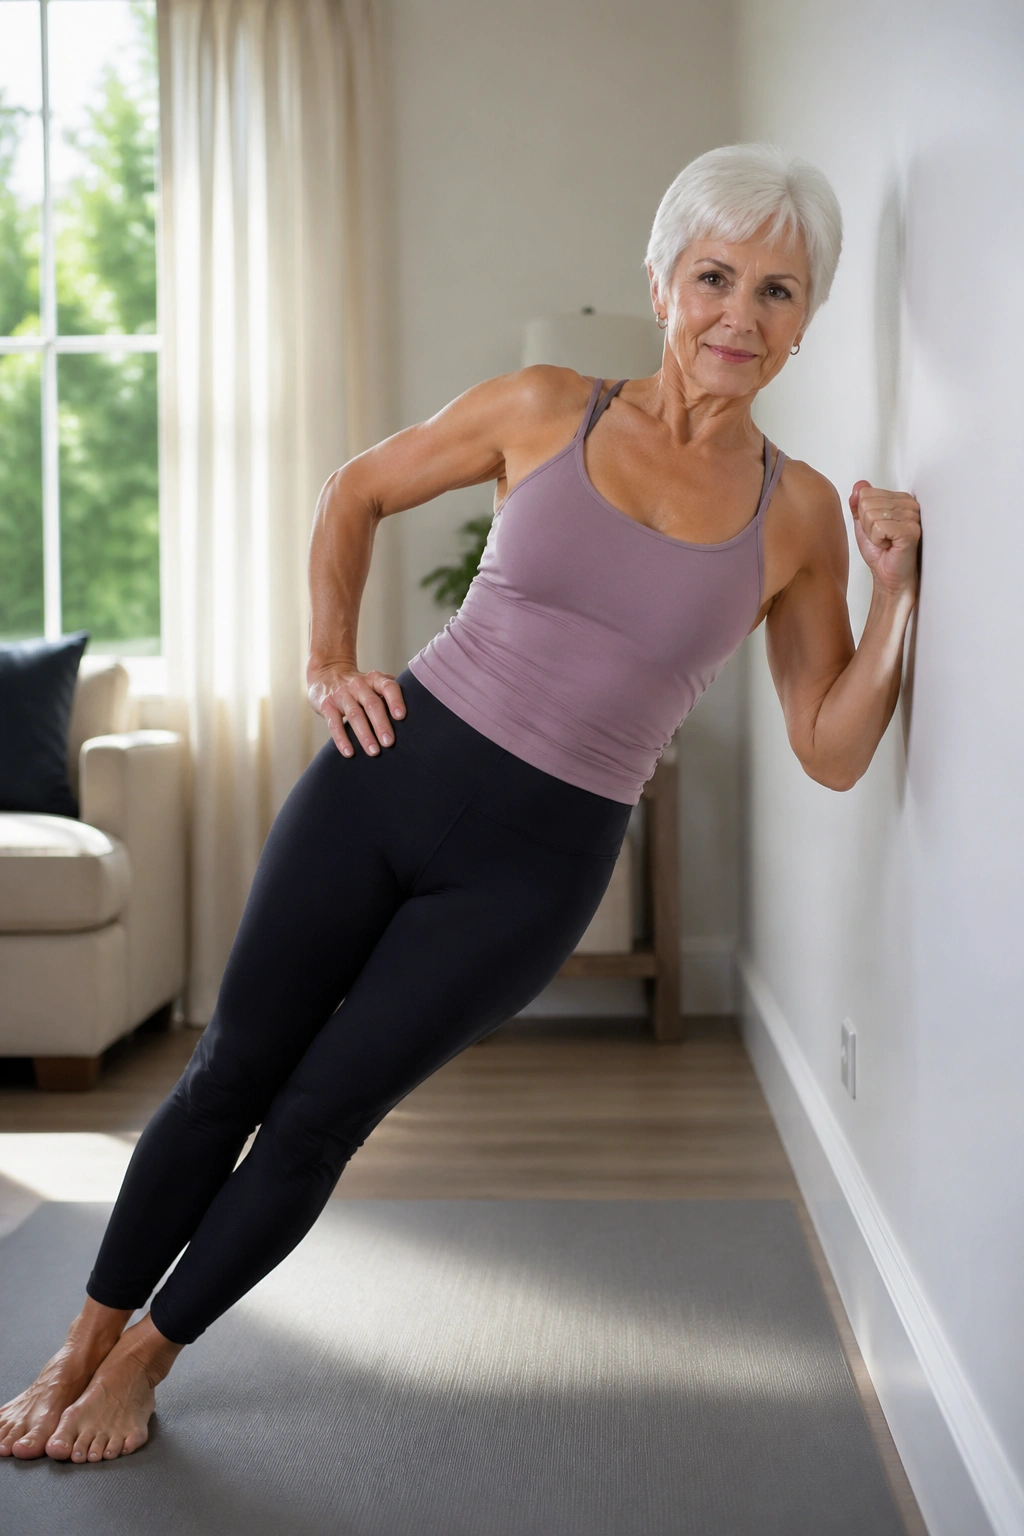
Don’t love floor side planks? Good. The wall version is far more useful for a lot of older bodies anyway.
How to Set It Up
Stand sideways to a wall and place your forearm against it at shoulder height. Step your feet away until your body forms one long diagonal line, then press gently into the wall and hold. Your outer hip and side waist should light up without the shoulder scrunching toward your ear.
Hold for 10 to 20 seconds, then switch sides. Two or three holds per side is enough.
The beauty here is that you get lateral core work without dropping to the mat. That makes it kinder for wrists, knees, and people who simply do not want another floor transfer. A little sideways strength helps with balance, carrying bags, and stopping the body from leaning every time you reach.
16. Swan Prep on a Mat or Bed
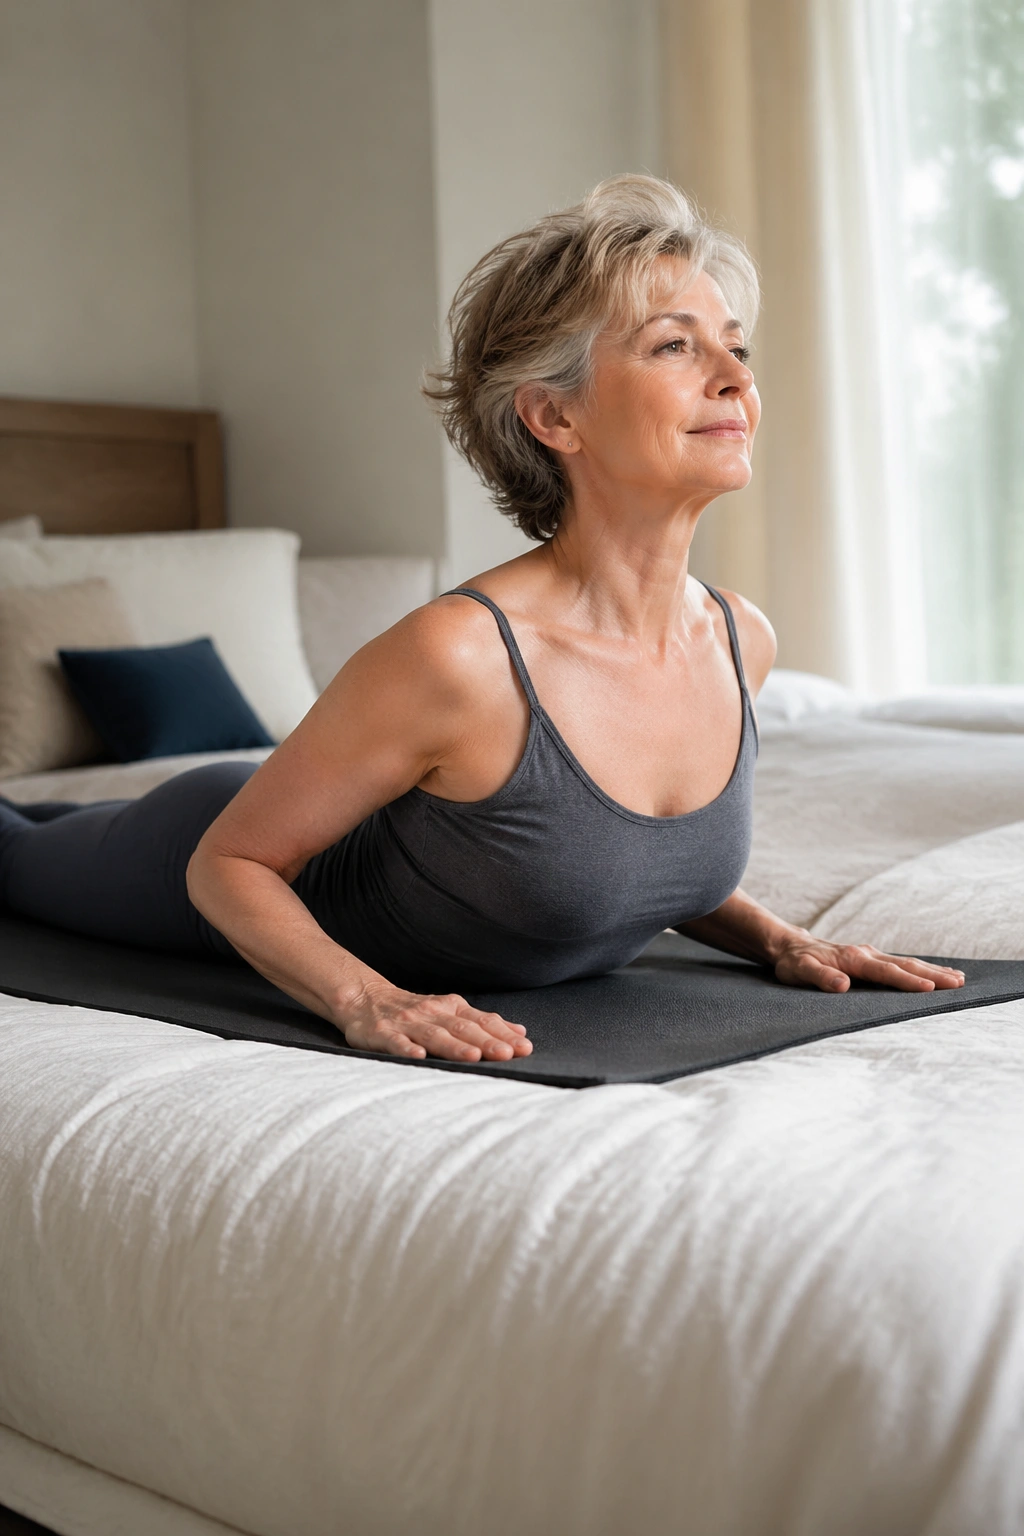
If you spend a lot of time curled over a phone or a book, swan prep is a nice antidote. It opens the front of the body and reminds the upper back how to extend without jamming the lower spine.
Lie face down with your forehead on your hands, or try it on a firm bed if the floor feels too hard. Inhale and lift the chest just 1 to 2 inches, keeping the neck long. Exhale and lower with control.
- Keep the pubic bone heavy.
- Think length, not height.
- Stop before the low back feels pinched.
- Do 5 to 6 smooth lifts.
This is one of those exercises that looks tiny but changes how you stand afterward. Your chest opens, your shoulders settle, and the spine stops feeling welded into one long curve. Small lift. Big payoff.
17. Toe Taps and Tabletop Marches
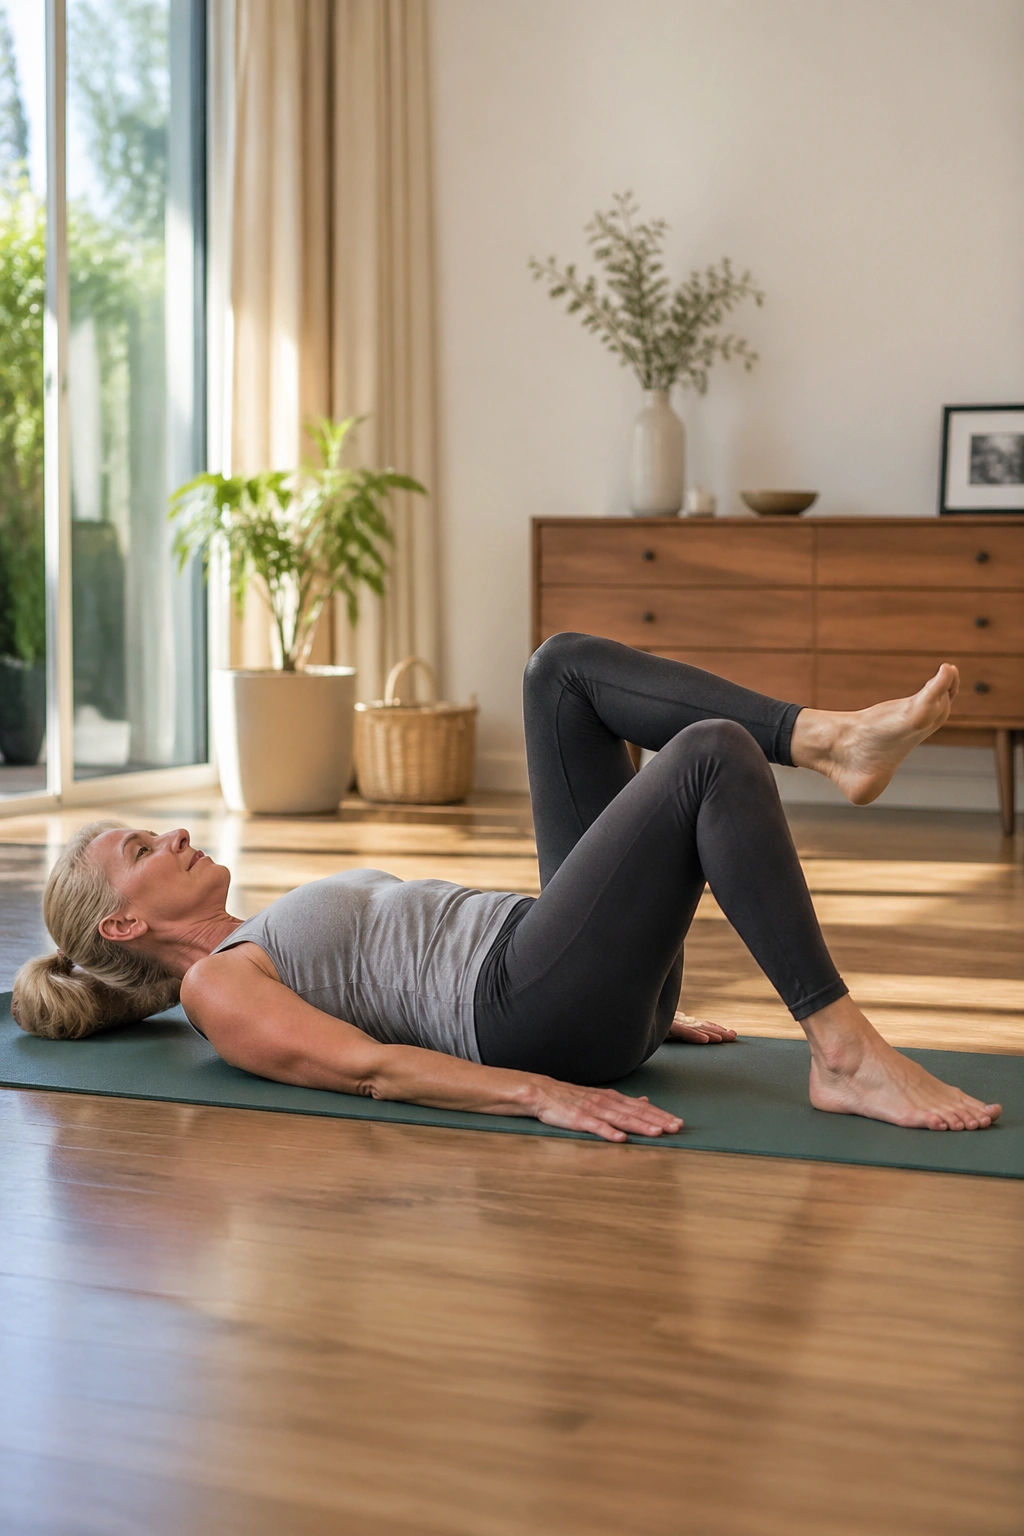
Toe taps are a sweet spot between too easy and too much. They train the lower abs to hold the pelvis steady while the legs move, and that’s a skill worth keeping sharp.
Start on your back with one leg lifted to tabletop or both knees bent. Lower one foot to lightly tap the mat, then bring it back up and switch sides. If that feels smooth, progress to tabletop marches where one knee lifts and lowers at a time while the pelvis stays quiet.
The low back is the teacher here. If it arches, the movement is too big. Shrink the range until the abdomen can keep the spine calm. A slow exhale on each tap helps more than people expect.
I like this one because it teaches steadiness without drama. It’s the opposite of a flashy core routine, and that’s exactly why it works for everyday life.
18. Standing Side Leg Lifts With a Chair
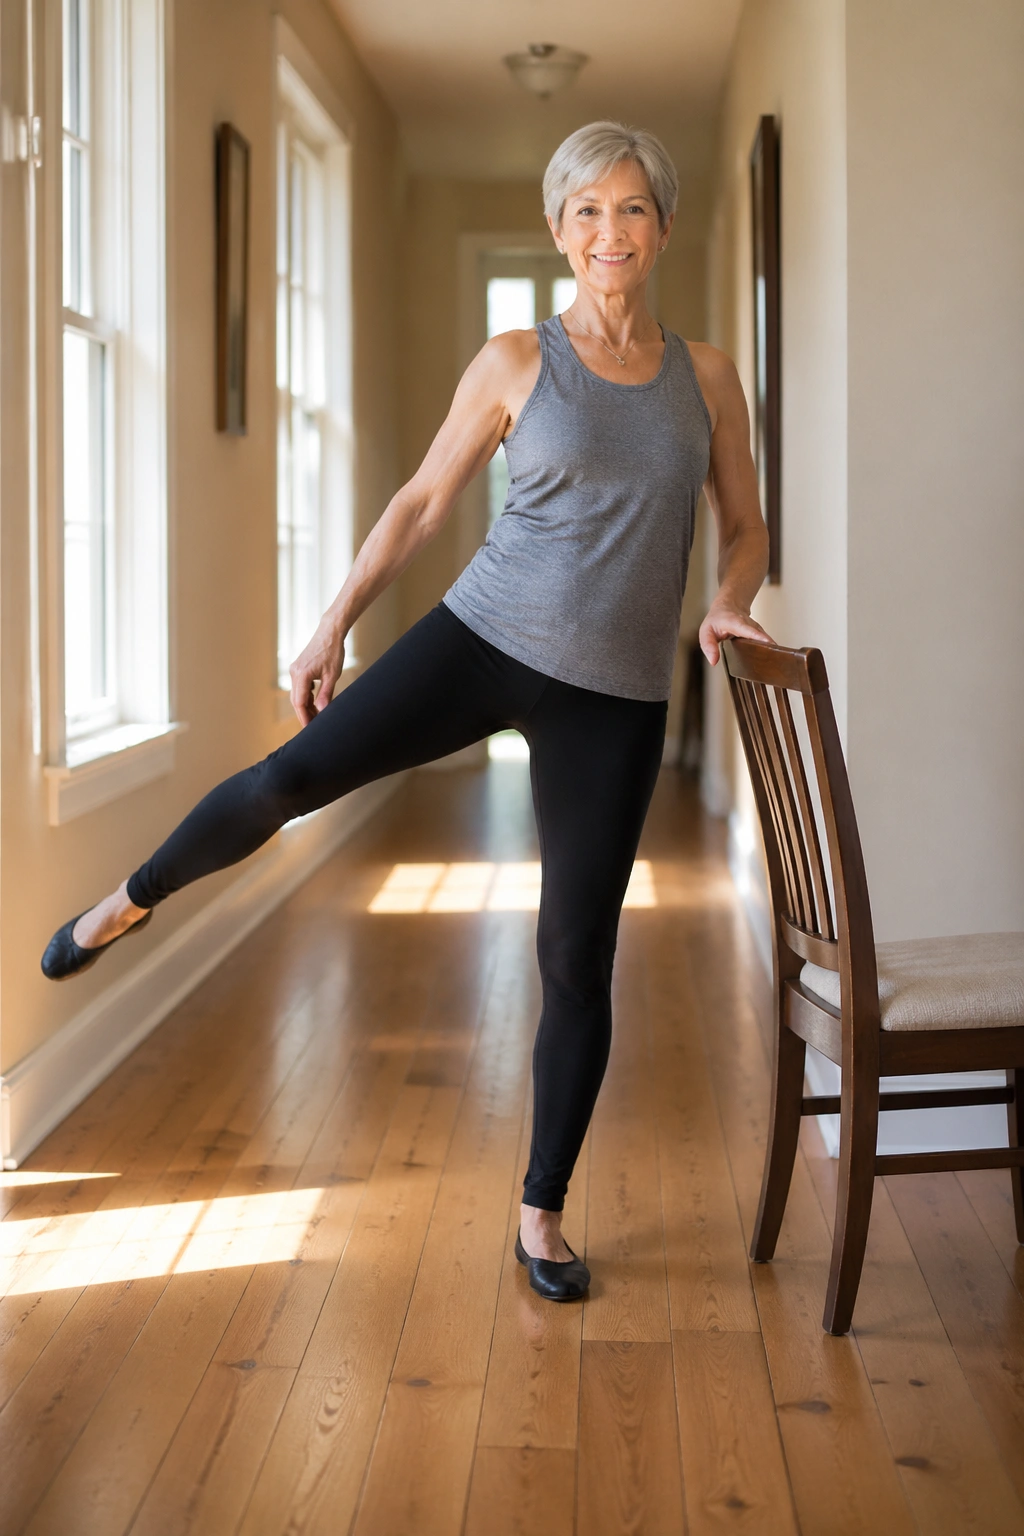
Unlike leg machines, standing side leg lifts train the hip and the balance system at the same time. That makes them a better fit for real life than a seated machine ever will be.
Hold the back of a chair lightly and shift your weight onto one leg. Lift the other leg out to the side 8 to 12 inches, keeping the torso upright and the toes pointing forward. Lower with control and repeat 10 times per side.
The standing leg should feel steady, not locked. The lifting leg should move without the hip hiking up toward the ribs. If balance feels shaky, slow the lift and keep the hand on the chair. No problem there.
These are excellent before a walk or after a long sit. They wake up the outer hips, which do a lot of quiet work when you step, turn, and keep yourself from wobbling on uneven ground.
19. Seated Arm Circles and Breath Counts
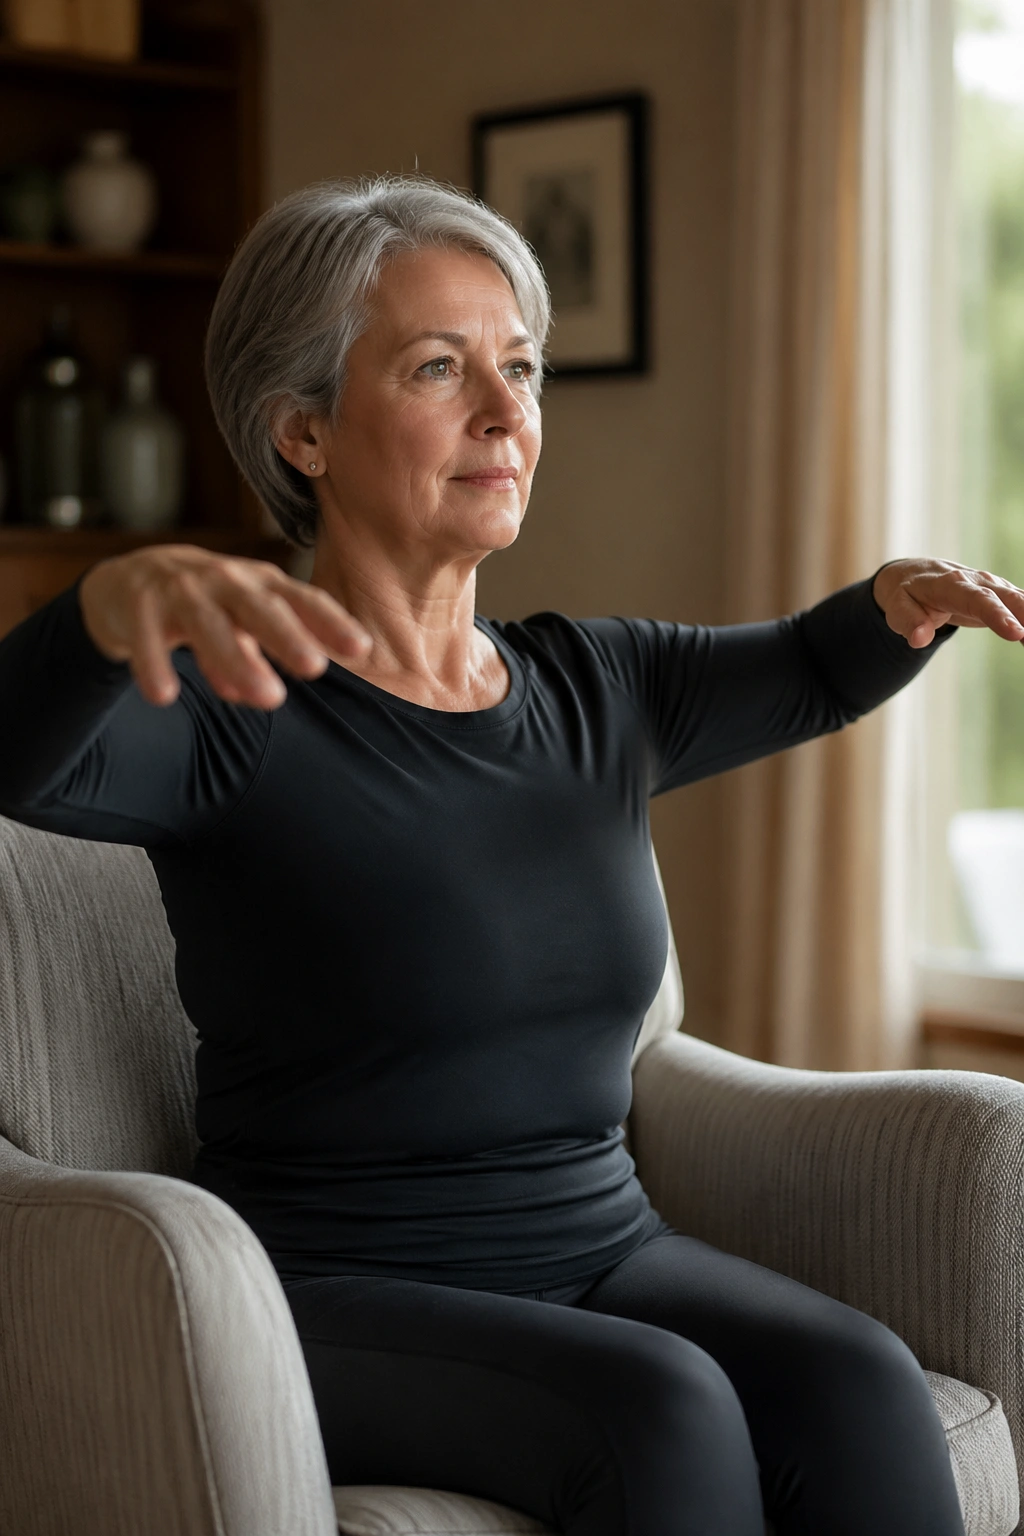
Seated arm circles sound almost too gentle to matter. They do matter, especially if shoulders get cranky after long periods of sitting.
Why It Works
Sit tall on a chair with your feet flat. Lift the arms to shoulder height and draw small circles, no bigger than a dinner plate. Count 4 slow breaths while you move forward, then 4 breaths moving backward. Keep the circles smooth and light.
- Let the shoulders stay down.
- Keep the ribs from popping forward.
- Use a very small circle if the joint clicks or feels pinchy.
- Add a long exhale at the top of each round.
A quiet upper-body drill like this helps people who carry tension in the neck, upper chest, or between the shoulder blades. It also pairs nicely with breath work because the torso stays upright while the arms move.
20. Gentle Pilates Full-Body Cool-Down Flow
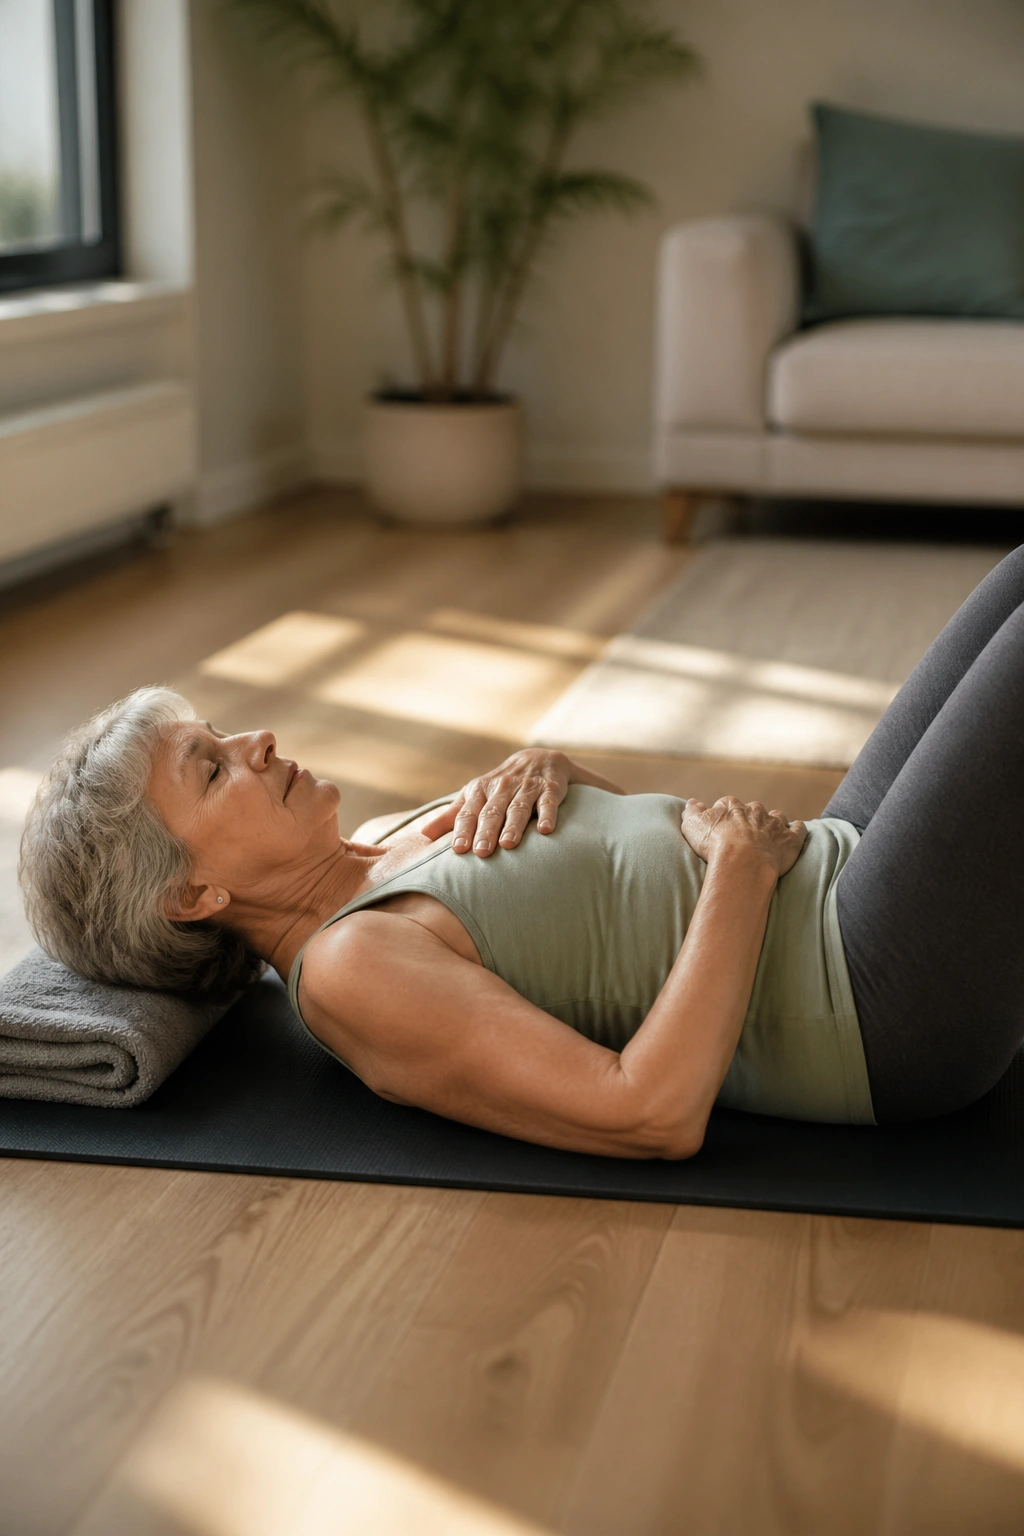
A good finish keeps people coming back. That is probably the most underrated part of Pilates for women over 60.
Start with a seated or standing chest opener, then move to a hamstring stretch with one heel on a low step or folded towel. Add ankle circles, a couple of slow shoulder rolls, and three long breaths with the hands resting on the ribs. If you’re on the mat, you can finish with a gentle knee-to-chest hold, one leg at a time, for 20 to 30 seconds each side.
The point is not to stretch every muscle into the floor. The point is to leave the body feeling longer, looser, and more settled than when you started. That matters on days when the session is short and the energy is low. It matters even more when the weather, sleep, or stress has made everything feel tighter than usual.
If you want one clean rule to keep in mind, use this: small, controlled Pilates work done often beats a hard session done once in a while. The body after 60 tends to reward consistency, not punishment.
And honestly, that’s the nice part. You don’t need to chase fatigue to get stronger. You need a few well-chosen moves, enough patience to keep them tidy, and the nerve to stop before form falls apart.
