



Most people think Pilates is just about gentle stretching. That’s a massive misconception that keeps many from finding the true power of the practice. True Pilates, when done with actual intent, is one of the most demanding strength training disciplines you can do. It requires nothing more than a mat, a few square feet of floor space, and a high level of mental focus. You aren’t just moving; you are isolating muscles you didn’t even know you had.
The goal isn’t to blast through reps. That’s how you accidentally recruit your hip flexors or strain your neck. Instead, you are looking for that deep, trembling burn in your abdominal wall—the kind that signals you’ve finally engaged your deep transverse abdominis. If your neck feels like it’s doing the heavy lifting, stop. Breathe. Reset. Proper form in Pilates is the difference between a wasted session and a transformative one.
These twenty-five movements are designed to be pieced together or performed individually depending on how much time you have. Some focus on endurance, others on stabilization, and a few on mobility. Treat every repetition as a distinct opportunity to connect with your body. You will likely find that some days are easier than others; that is entirely normal. Listen to the feedback your body gives you and prioritize precision over speed every single time.
1. The Hundred
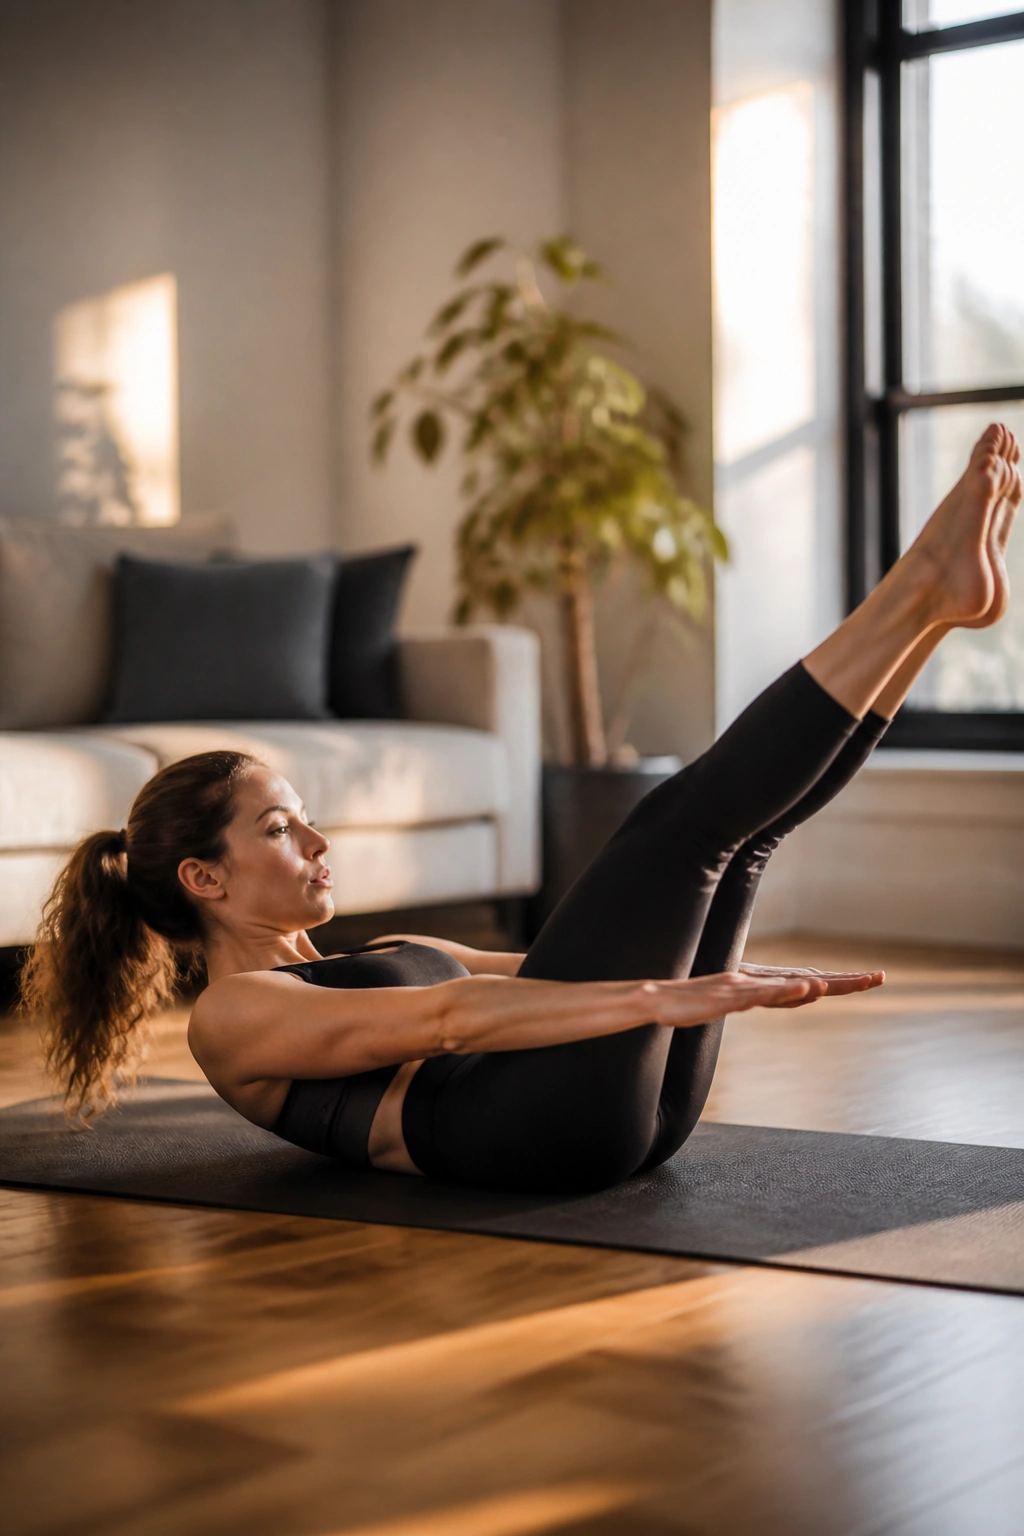
This is the quintessential Pilates exercise. It sets the tone for your entire workout by warming up the core and increasing blood flow. Lie on your back, knees pulled into your chest. Lift your head, neck, and shoulders off the mat—imagine you are trying to look at your belly button. Extend your legs to a 45-degree angle. If that’s too intense, keep them in a tabletop position with knees bent at 90 degrees.
Technique and Breath Pattern
Pump your arms up and down by your sides with significant energy, as if you are slapping the water. Inhale for five counts and exhale for five counts. Repeat this ten times. The rhythm is vital here. Do not let your shoulders creep toward your ears. Keep your neck relaxed by tucking your chin slightly and driving the effort from your midsection.
2. Single Leg Stretch
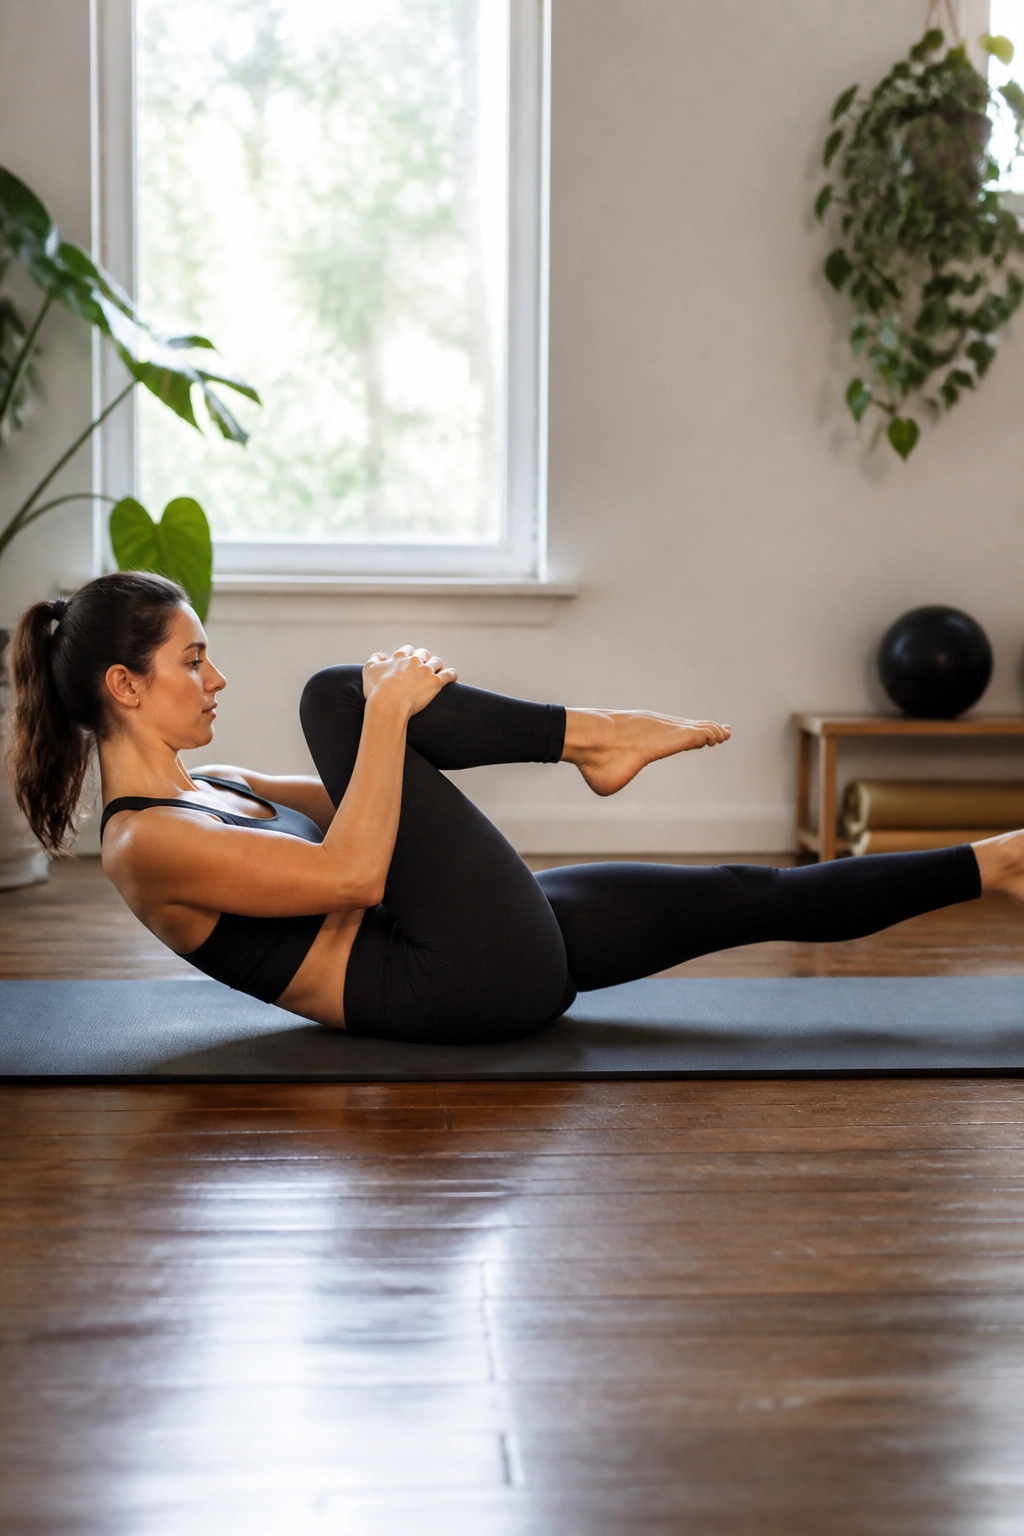
This movement is all about stability while your limbs are moving. Start by hugging your right knee into your chest, with your left leg extended straight out and hovering a few inches above the floor. Keep your upper body curled up, eyes glued to your navel. Switch legs quickly, bringing the left knee in and extending the right.
Managing Your Lower Back
The biggest mistake here is letting the lower back arch off the mat as the legs switch. To prevent this, press your belly button toward the floor. If you feel your back lifting, move your extended leg higher toward the ceiling instead of hovering it low near the floor. It’s better to have good form at a higher angle than to struggle with bad form at a low one.
3. Double Leg Stretch
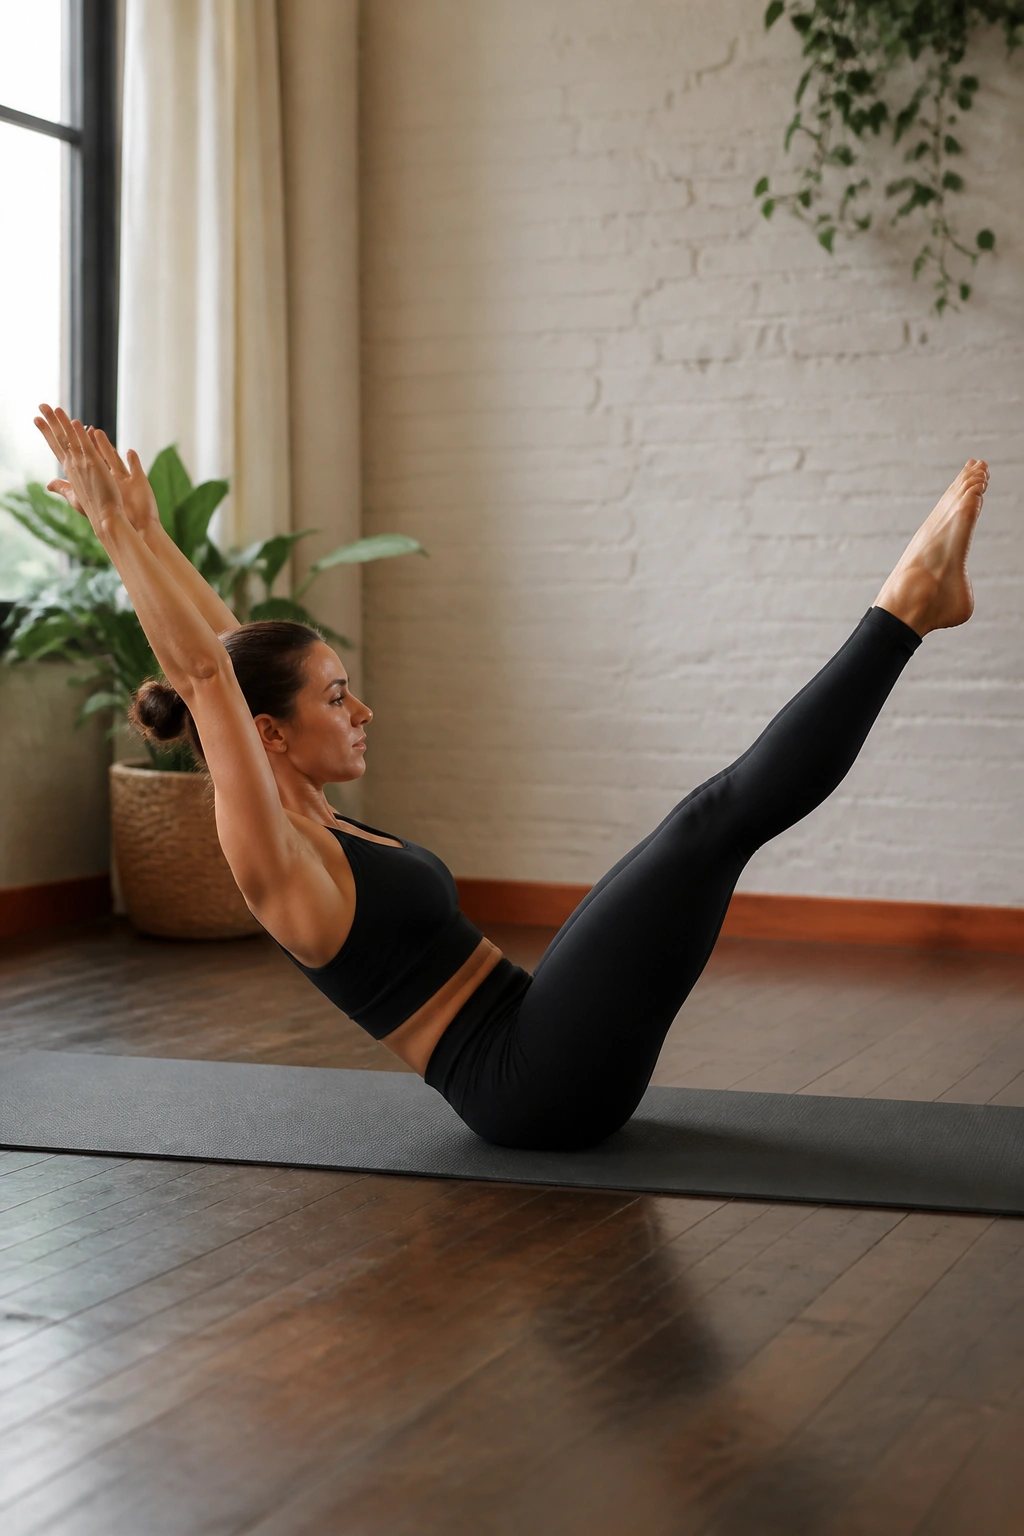
Think of this as a total body engagement exercise. Lie on your back, hugging both knees into your chest. Curl your head and shoulders up into that familiar Pilates position. As you inhale, reach your arms overhead and extend your legs long, creating a long line from fingers to toes. As you exhale, circle your arms back around and hug your knees tightly into your chest again.
Precision Cues
- Keep your upper body curled up the entire time. Do not drop your head as you reach out.
- Your limbs are moving, but your torso should feel like it is anchored to the floor.
- Avoid “flailing.” The movement should be controlled and symmetrical on both sides.
4. Criss-Cross
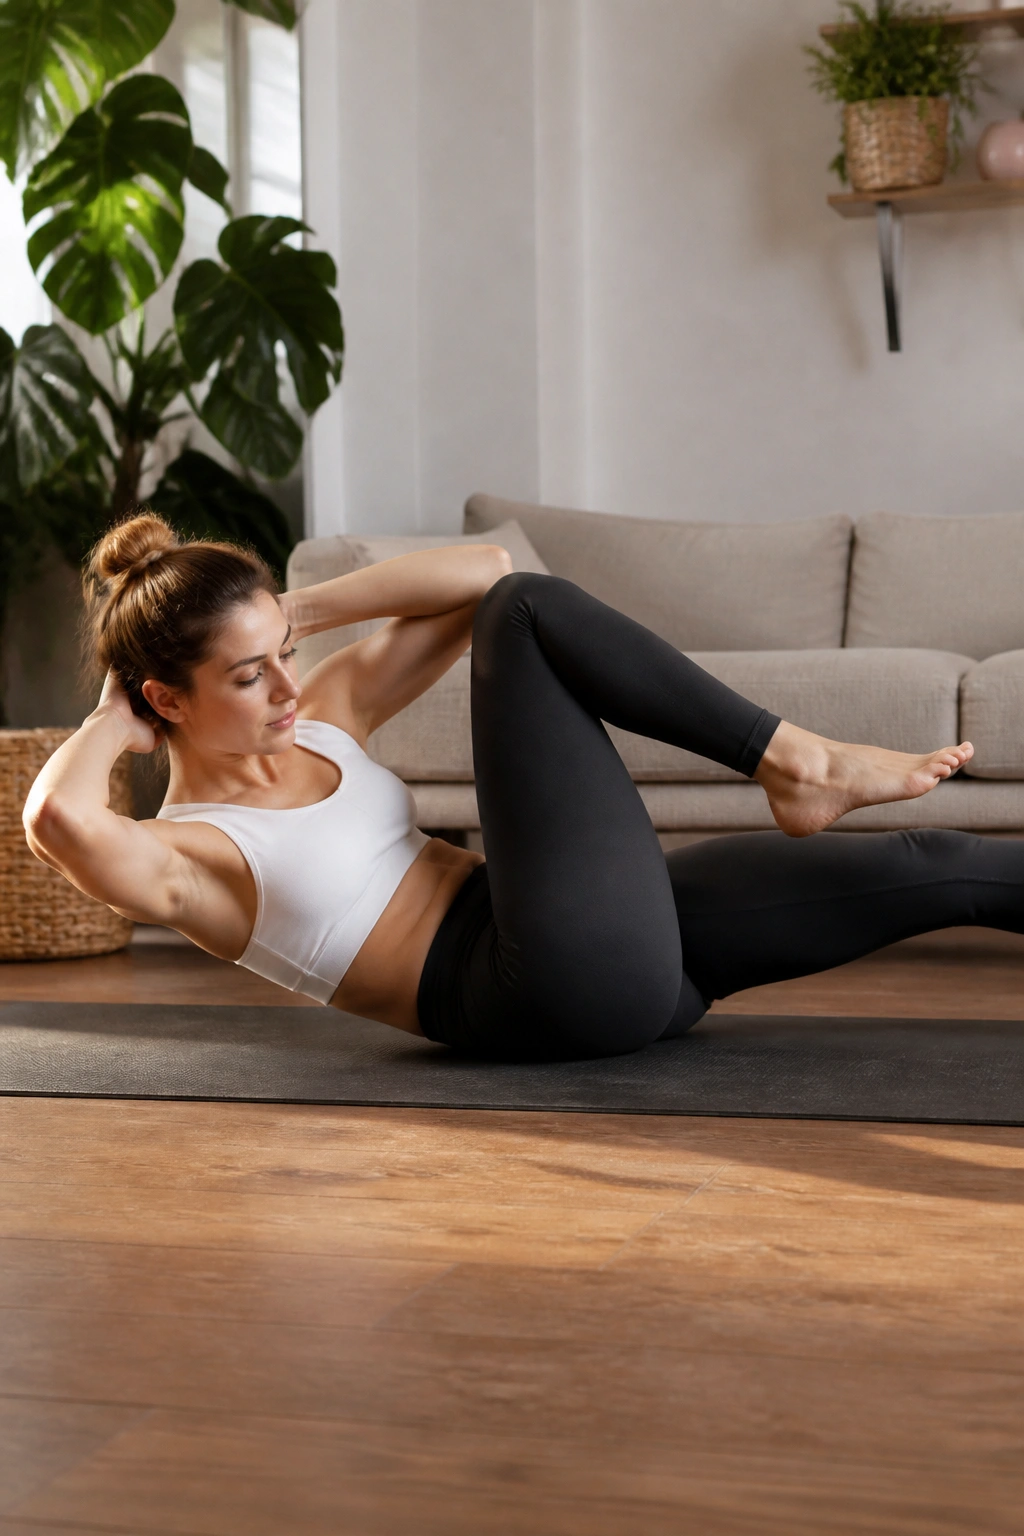
This exercise specifically targets the obliques, those muscles that run along the sides of your torso. Lie on your back with your hands interlaced behind your head to support the weight of your skull. Lift your head and shoulders. Extend your left leg while bringing your right knee in, then rotate your left elbow toward that right knee.
Avoiding Common Errors
Many people yank their head forward to make the movement happen. Don’t do that. Use your abdominal muscles to generate the rotation, not your neck. Imagine you are wringing out a sponge; the twist should come from the ribcage, not the shoulders. If you need to, keep the movement smaller and slower to maintain the proper muscle connection.
5. Leg Circles
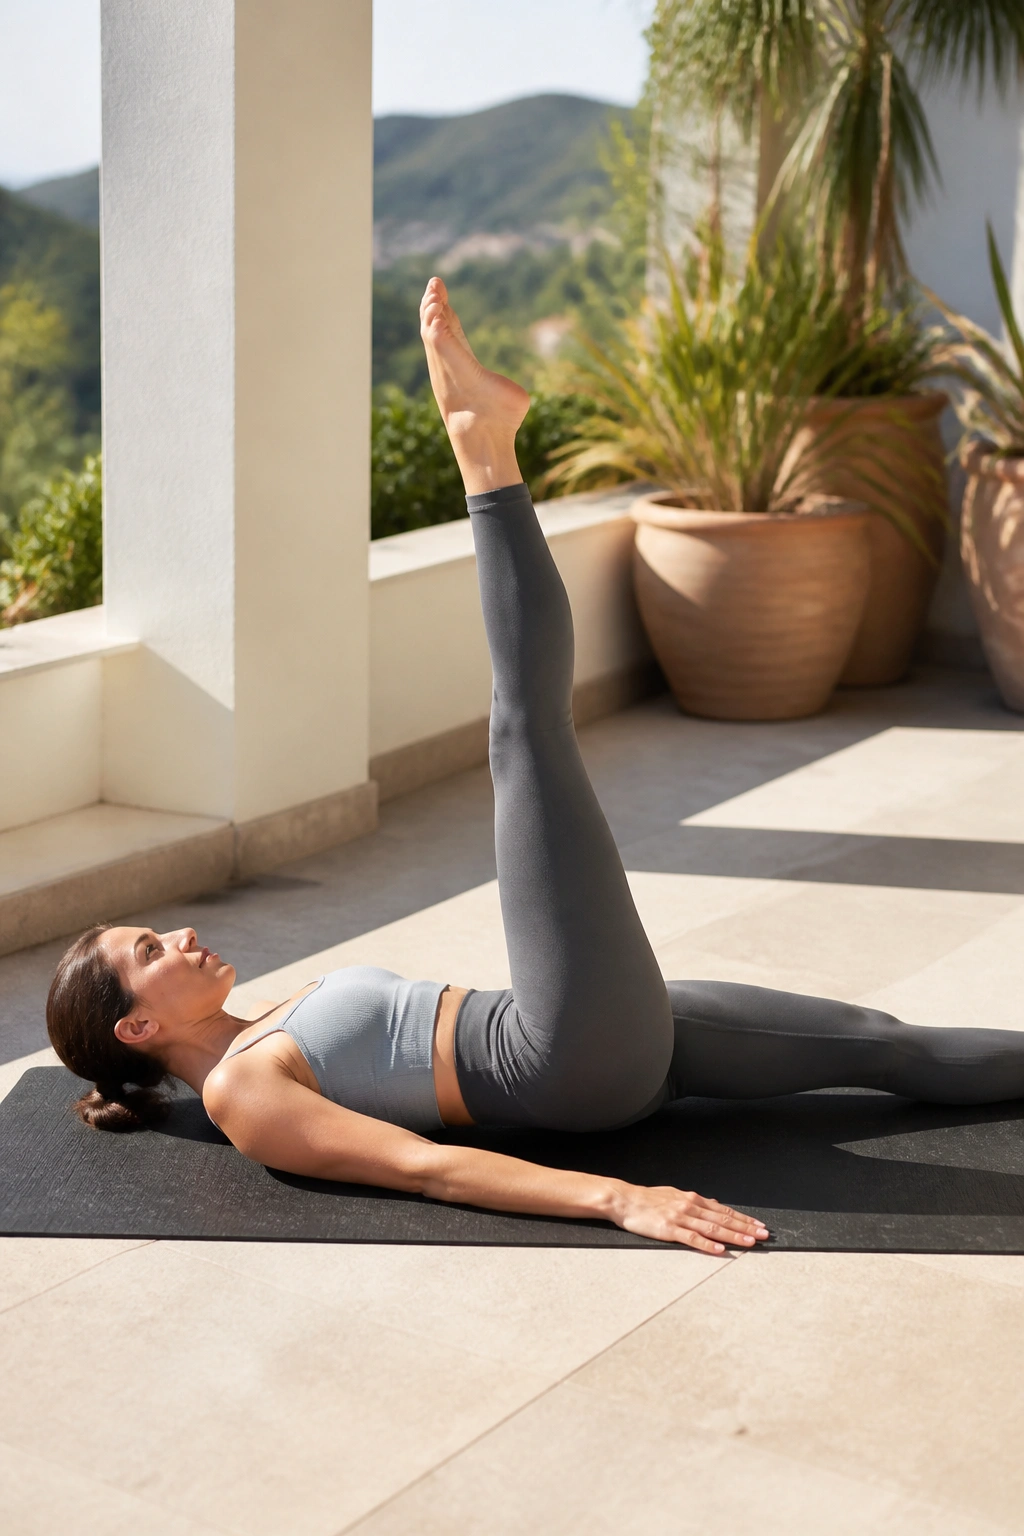
This movement challenges core stability while the legs move independently. Lie flat on your back with your arms by your sides. Reach your right leg straight up toward the ceiling. Circle the leg across your body, down, and around, ending back at the top. The rest of your body—specifically your hips and pelvis—should be completely motionless.
Why This Matters
It is remarkably easy to let your hips rock back and forth. To counter this, imagine your pelvis is glued to the mat. If your hips are shifting, make the circles smaller. A tiny, perfect circle is much more effective for your core than a large, sloppy one that compromises your form. Perform five circles in one direction, then five in the other.
6. Scissors
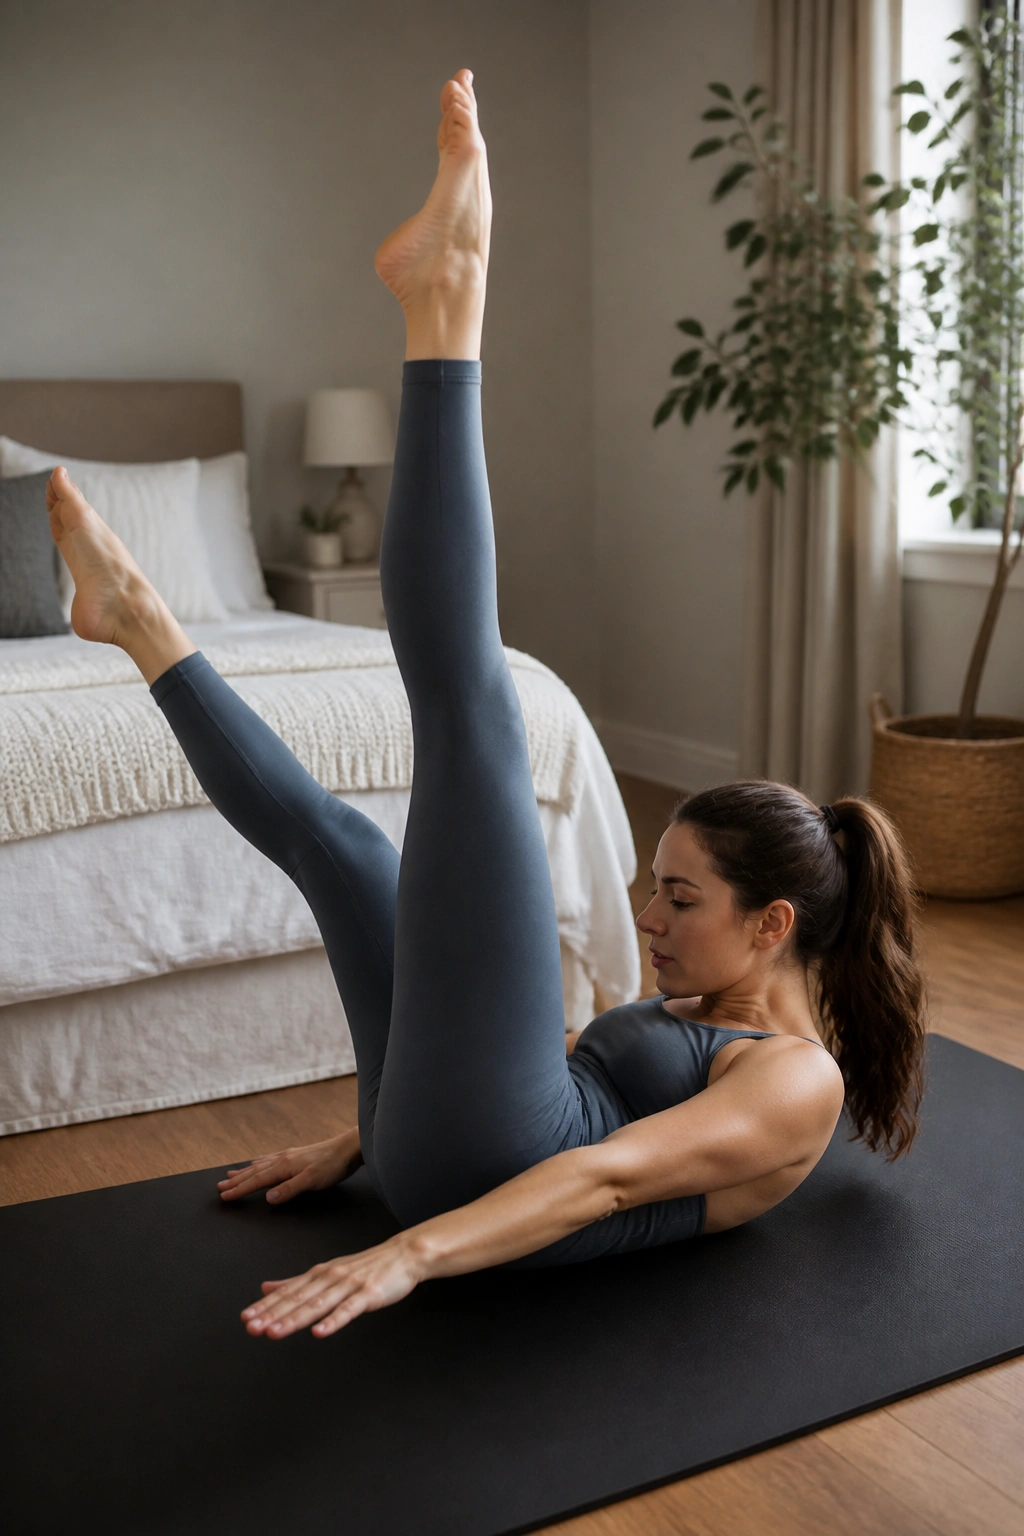
Scissor kicks are essentially a hamstring stretch with an added core challenge. Lying on your back, reach both legs straight up to the ceiling. Keep your head and shoulders curled up. Lower your left leg toward the floor while pulling your right leg toward your face. Hold the right leg with both hands—give it a gentle pulse—then switch.
Developing Coordination
- Focus on the “pulse” aspect. Two quick tugs on the leg helps deepen the stretch.
- Keep your torso perfectly still as the legs pass each other.
- If your neck starts to burn, it’s a signal to take a break. Your neck shouldn’t be doing the work; your abs should.
7. Spine Stretch Forward
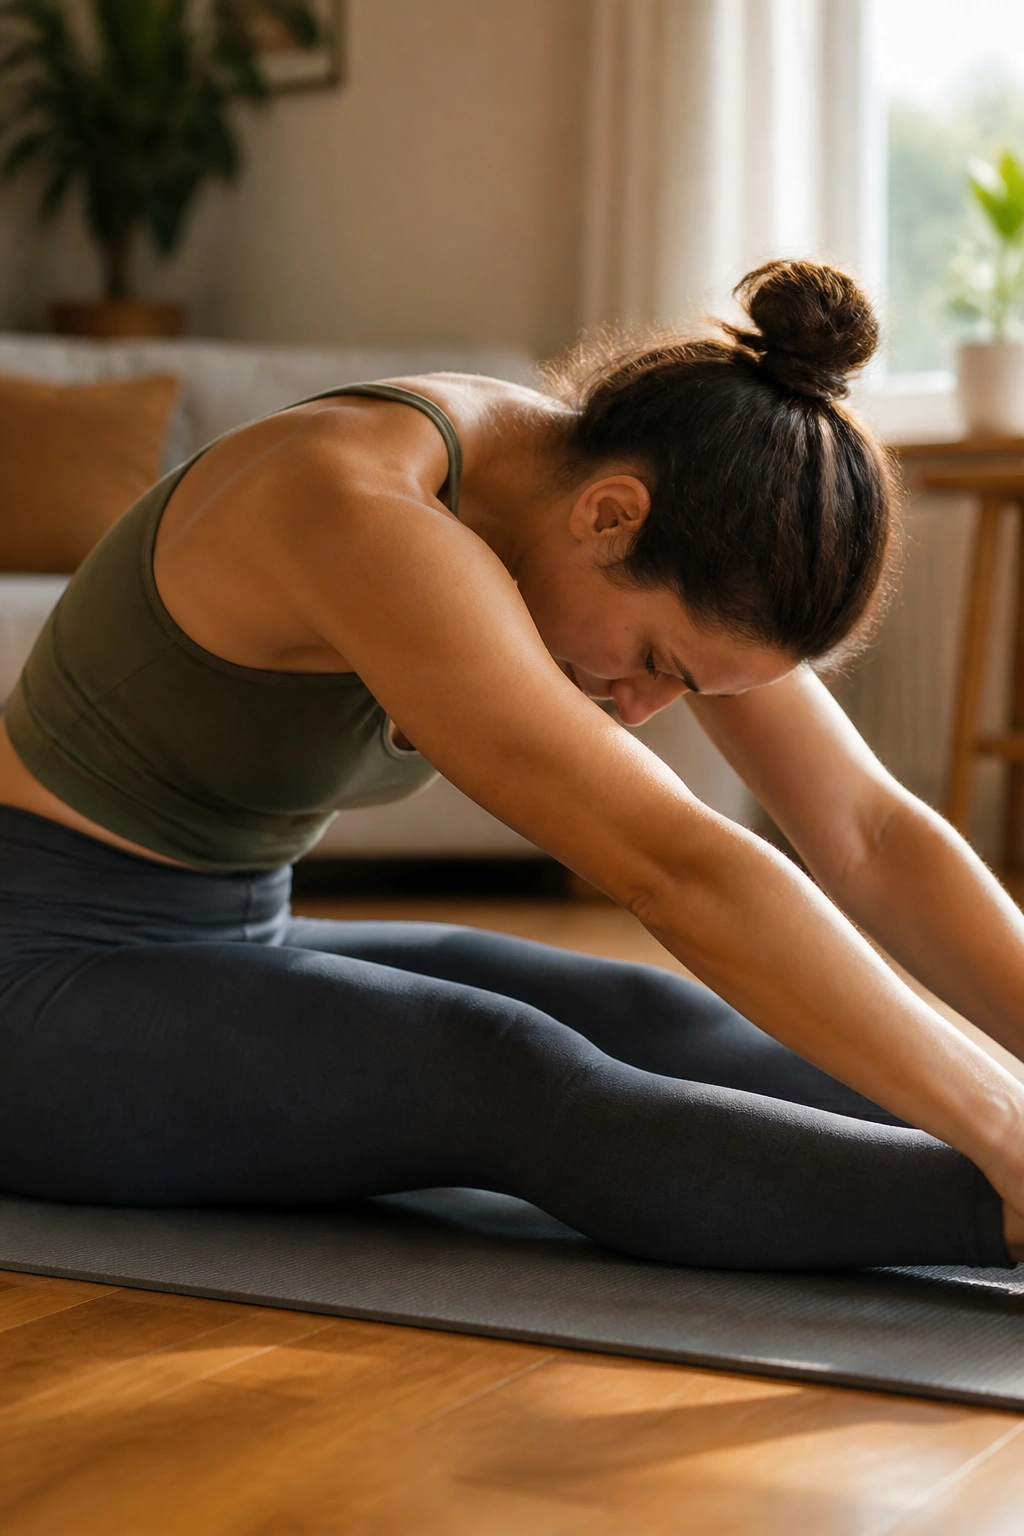
This isn’t just a stretch; it’s a movement that teaches you how to articulate your spine segment by segment. Sit tall on your mat with legs extended slightly wider than your hips. Reach your arms forward at shoulder height. Inhale, and as you exhale, reach forward as if you are peeling your spine off a wall.
The Visualization
Imagine you are curving over a large beach ball. Keep your heels anchored to the floor and your stomach pulled back toward your spine. This push-pull sensation is key. You are reaching forward with your hands while simultaneously pulling your navel back to create a C-curve in your spine.
8. The Saw
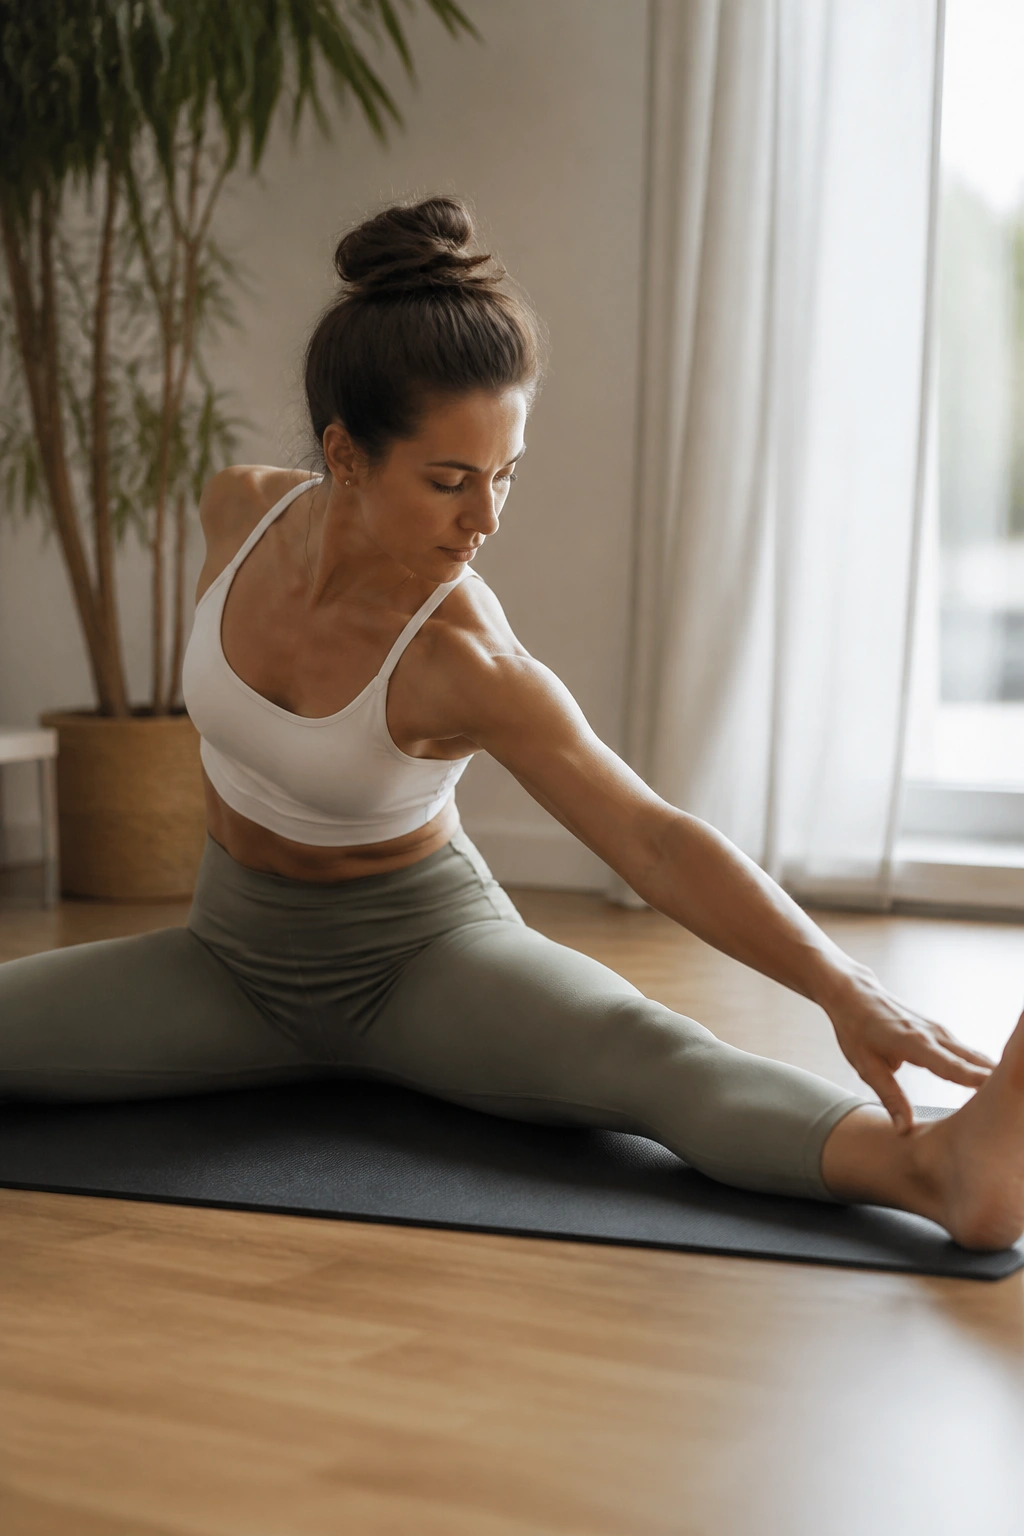
The Saw is excellent for rotational strength. Sit tall with legs wider than mat-width. Extend your arms out to the sides. Rotate your torso to the right, and then reach your left pinky finger toward your right pinky toe. Saw off the toe with a little pulsing motion, then return to center and switch sides.
Controlling the Movement
Keep your hips heavy. When you rotate, don’t let the opposite hip lift off the floor. Both sit bones need to stay glued to the mat. This requires you to engage your obliques to anchor yourself while your torso twists. It’s a wonderful exercise for balancing out tightness in the back.
9. Roll-Up
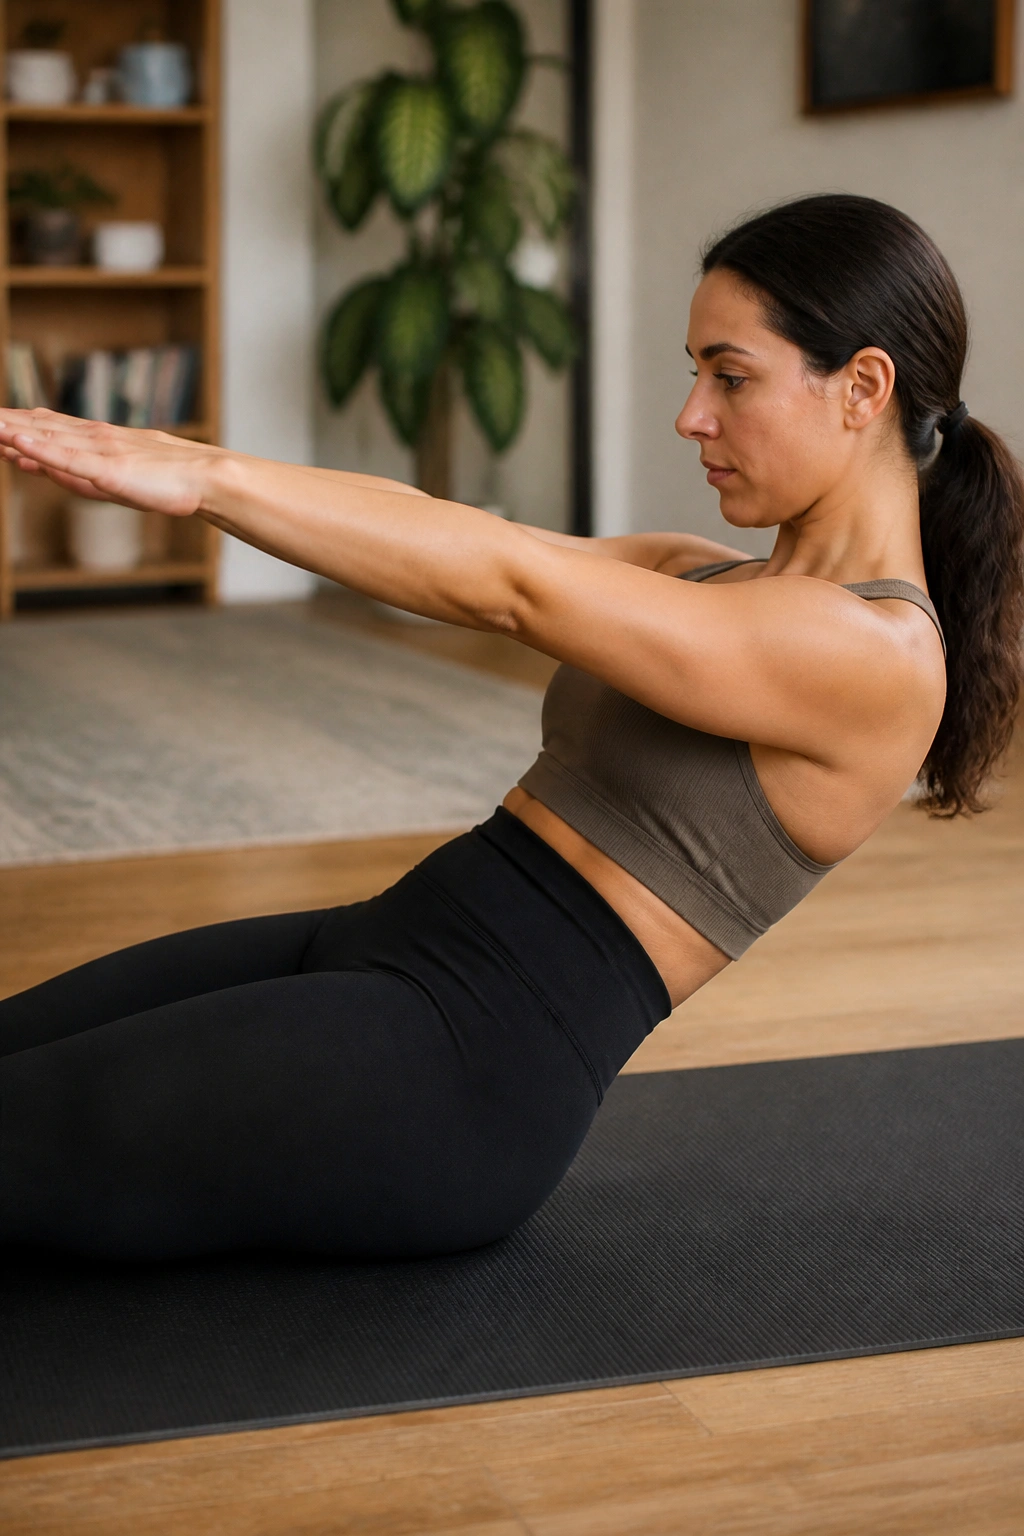
The Roll-Up is the ultimate test of control. Lie flat on your back with arms extended over your head. Inhale and start to peel your spine off the mat, one vertebra at a time. Exhale as you reach toward your toes, curving your body into a deep C-shape. Then, inhale and roll back down slowly, controlling the descent.
Troubleshooting the Momentum
Avoid using momentum. If you find yourself throwing your arms to get up, you are likely missing the core engagement. If you are stuck, bend your knees slightly or hold onto the back of your thighs until you build the strength to do it with straight legs. The slow movement down is often the most important part.
10. Roll-Over
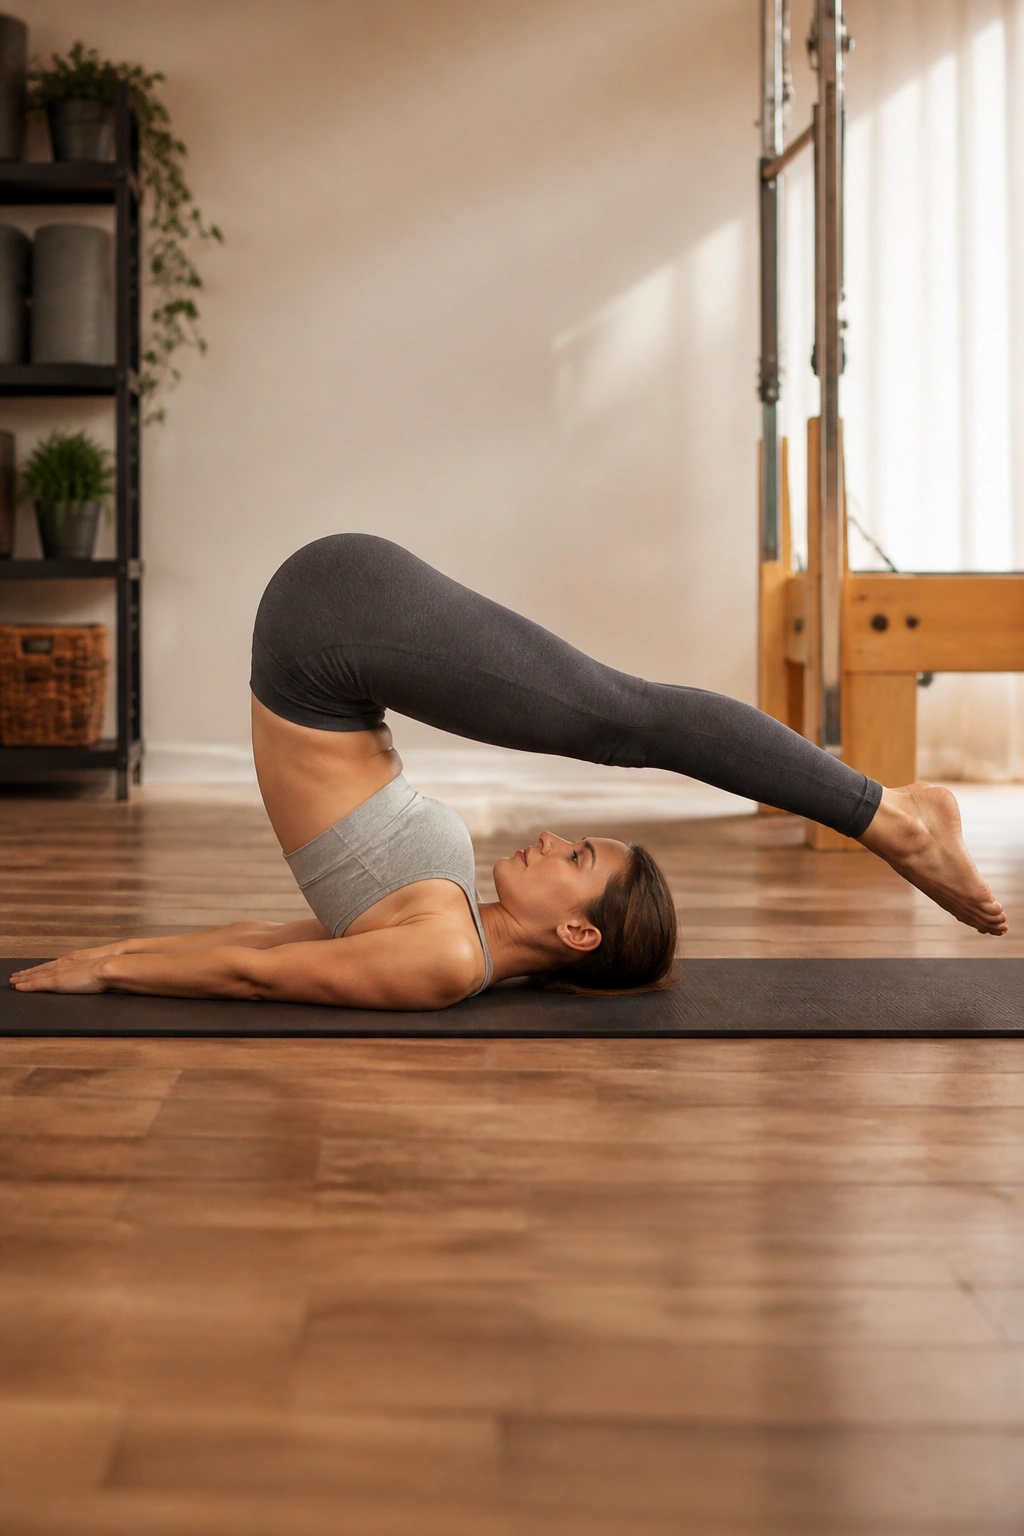
This is an intermediate-to-advanced move that demands significant control. Start on your back with legs reaching toward the ceiling. Use your abs to lift your hips and legs up and over your head, parallel to the floor. Open the legs to shoulder-width, then roll back down one vertebra at a time.
Safety First
Never use your neck to support your weight. All the pressure should remain on your upper back and shoulders. If you feel neck pain, modify this by just lifting your hips slightly without going all the way over. This is a powerful move, but it requires patience to master.
11. Plank to Pike
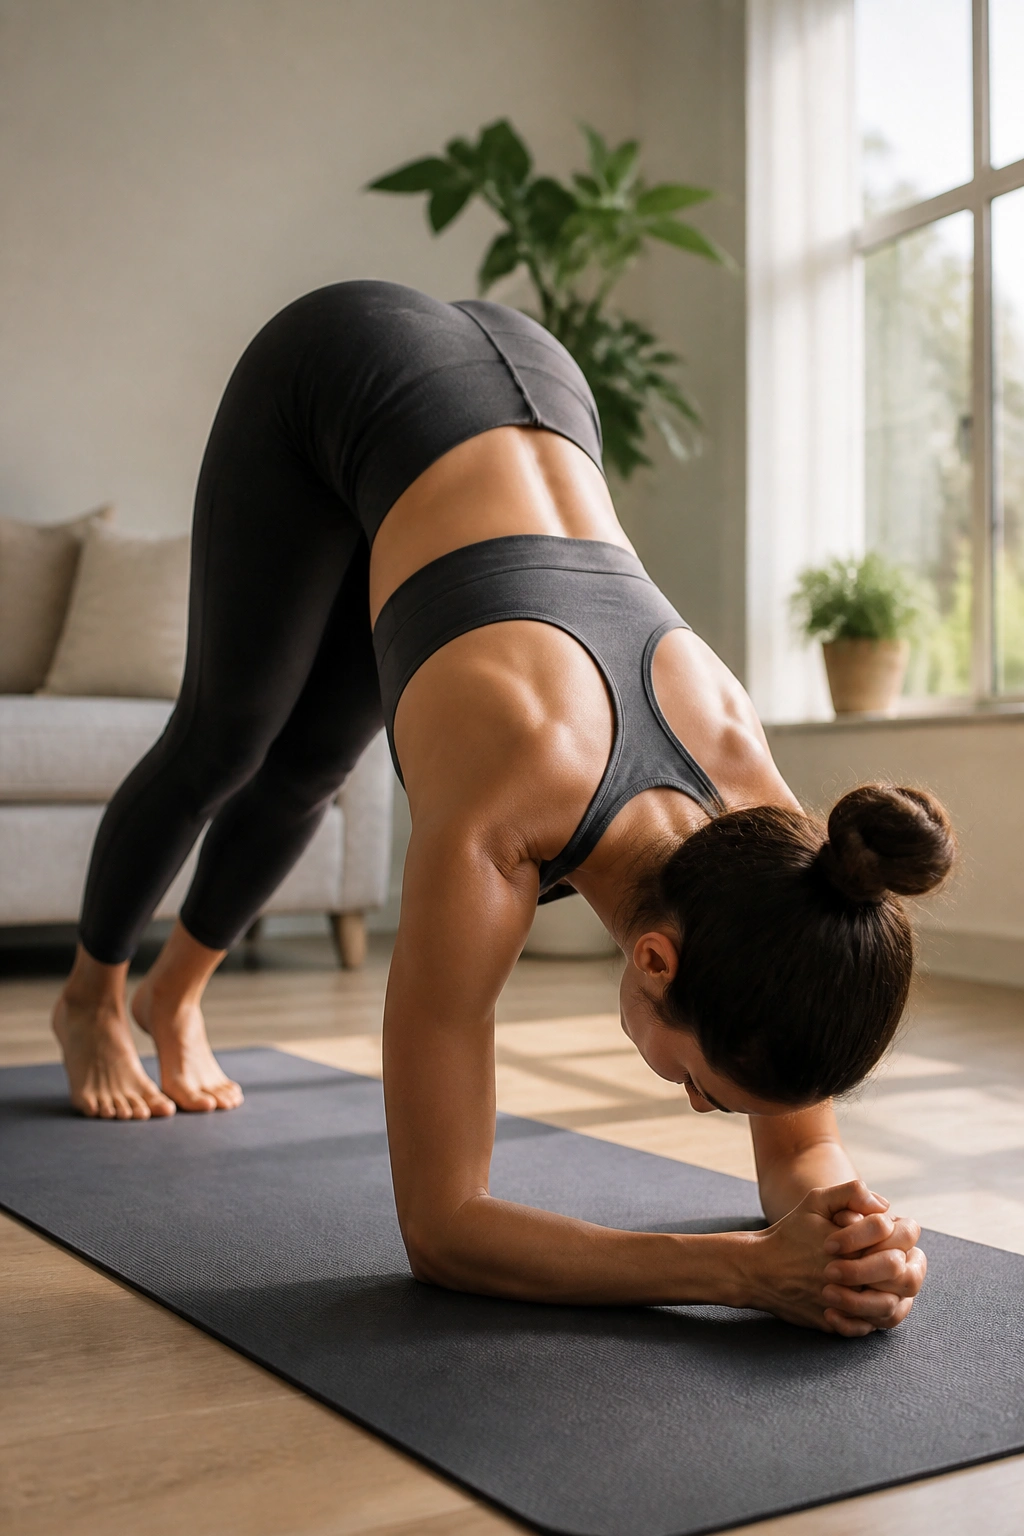
Planking is a fundamental core movement, but adding the pike variation makes it dynamic. Start in a standard forearm plank. Ensure your elbows are directly under your shoulders. From here, lift your hips high, creating an inverted V-shape, then carefully lower back into the plank.
Finding the Rhythm
The movement should be slow and deliberate. As you pike, pull your abs deeper into your spine to lift your hips. When you return to the plank, make sure you don’t let your lower back sag. If your back dips, your core has disengaged. Tighten your glutes to keep the pelvis neutral.
12. Bird Dog
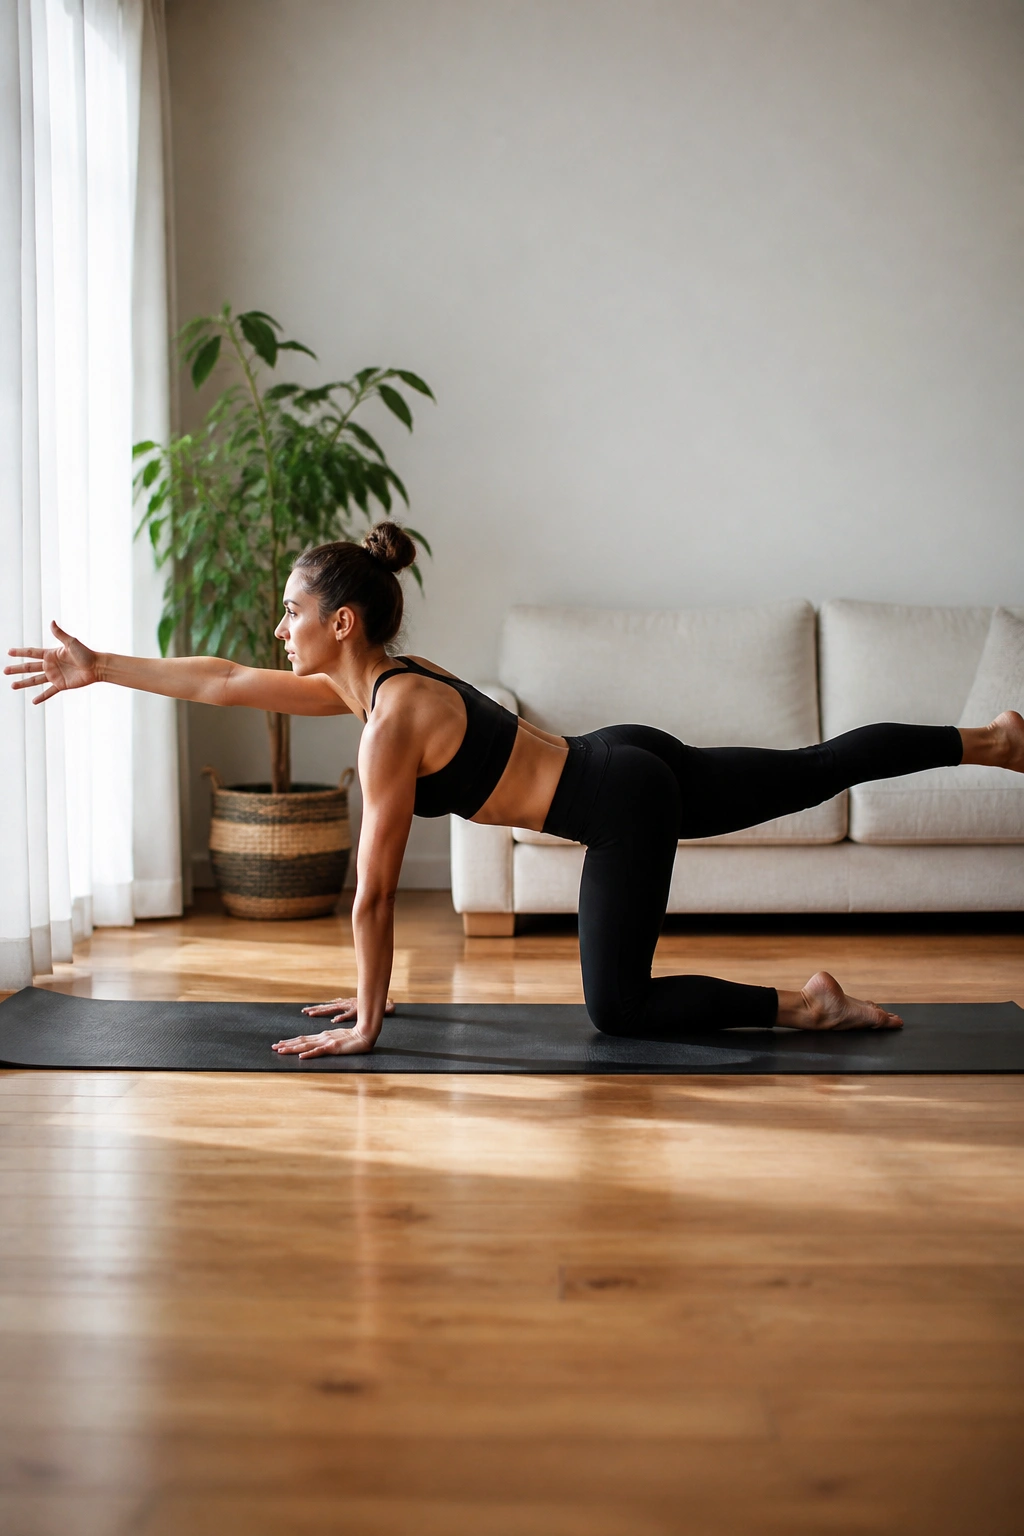
This is a fantastic exercise for balance and posterior core strength. Start on all fours, with knees under hips and hands under shoulders. Simultaneously extend your right arm forward and your left leg backward. Keep them at shoulder and hip height. Hold for a moment, focusing on not tipping to one side.
Why This Works
The instability of having only two points of contact forces your core to work overtime to keep you level. Try to keep your back flat, like a table. Imagine balancing a glass of water on your lower back. If you spill the water, you are moving too quickly. Move with intention.
13. Dead Bug
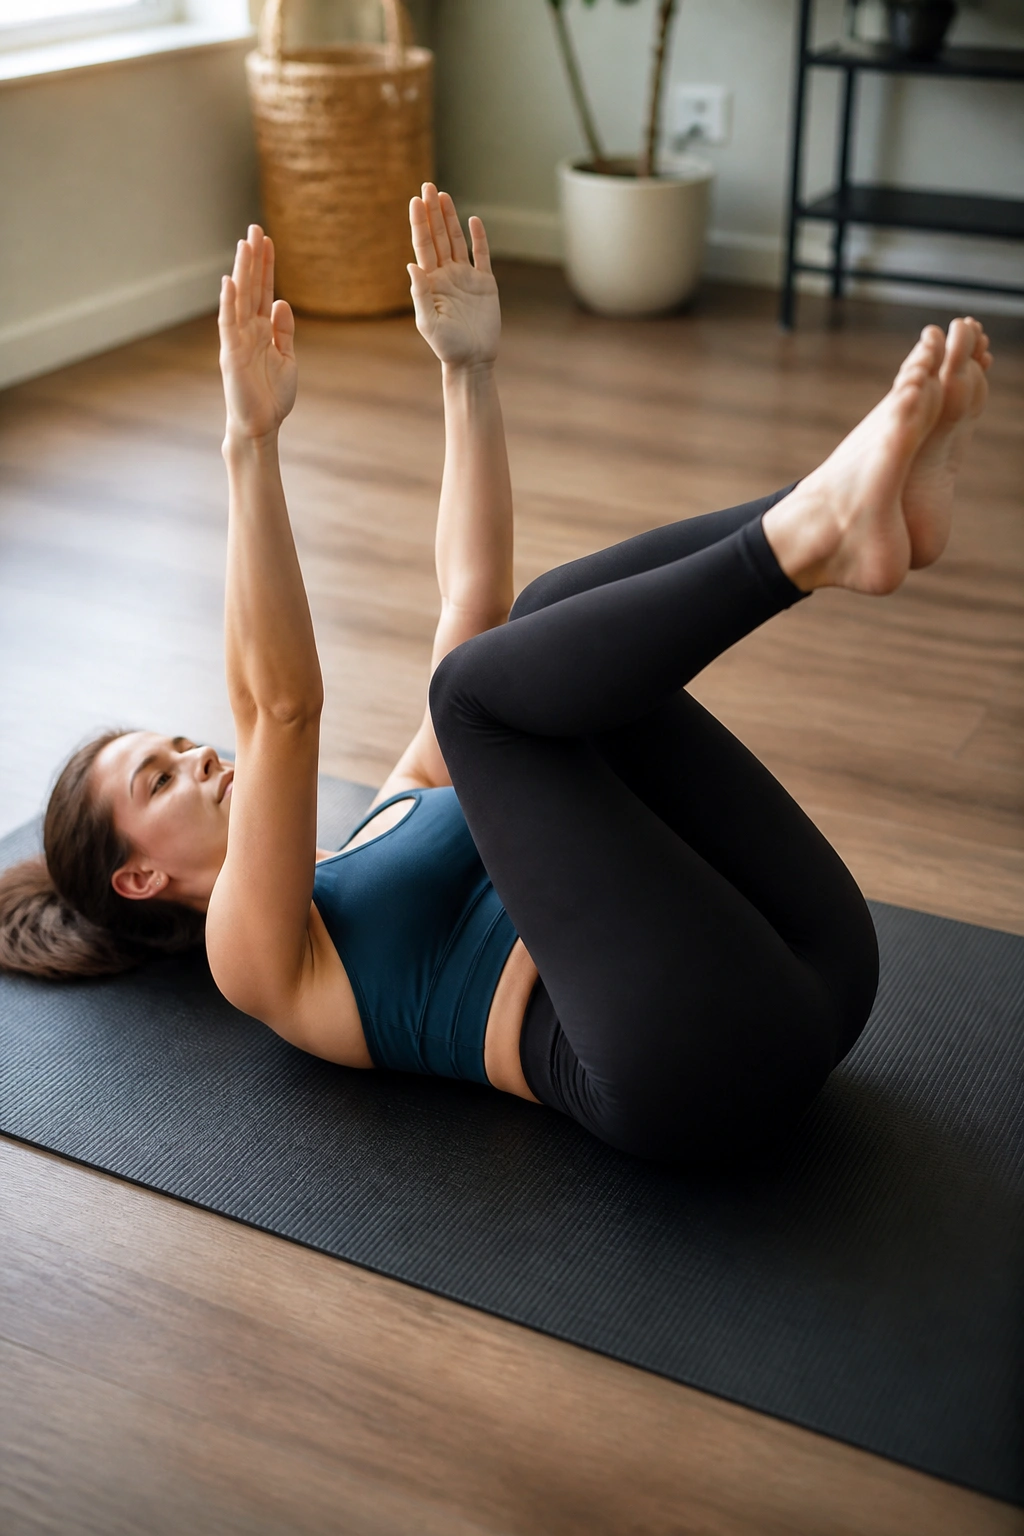
The Dead Bug is deceptively simple. Lie on your back, arms extended to the ceiling, legs in a tabletop position. Lower your right arm behind you and extend your left leg forward simultaneously. Ensure your lower back remains pressed into the mat the entire time. Return to start, then switch.
The Anchor Principle
The lower back must not arch. That is the non-negotiable rule of the Dead Bug. If you find your back popping off the mat, do not lower your leg as far. Stop at the point where you can maintain total contact with the floor. This is an incredible exercise for the deep core muscles that protect your spine.
14. Bridge with Leg Lift
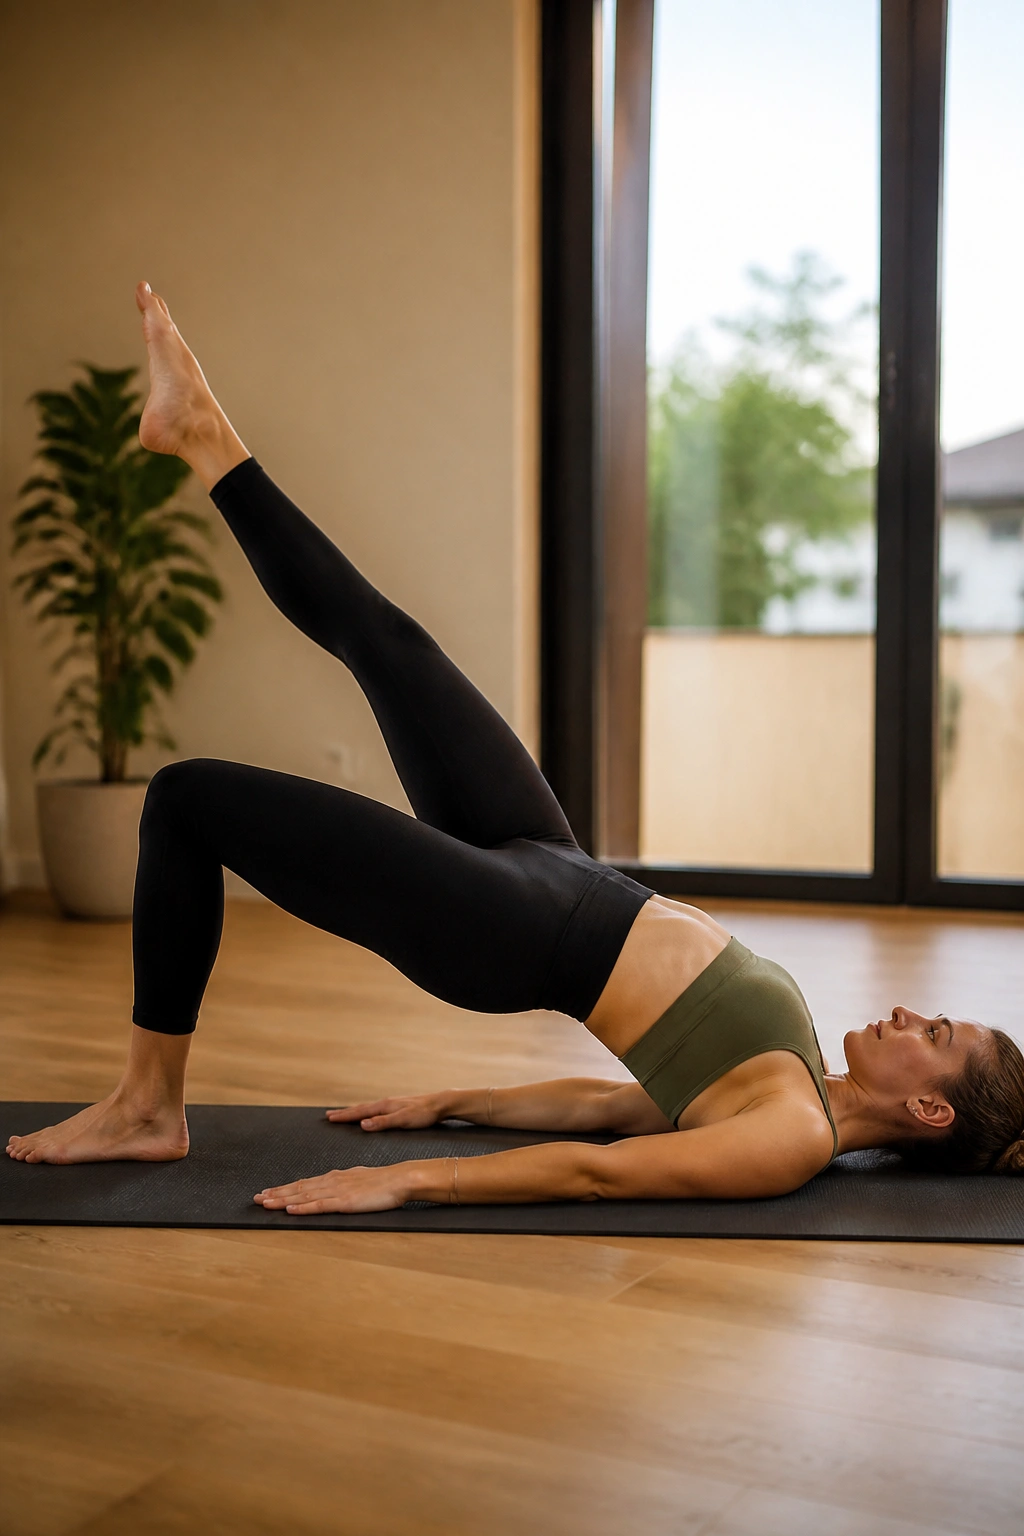
Lie on your back, knees bent, feet flat on the floor. Lift your hips toward the ceiling, engaging your glutes and hamstrings. Once your bridge is stable, extend one leg straight out at a 45-degree angle. Hold, ensuring your hips don’t drop on one side, then lower the leg and switch.
Precision Cues
- Imagine you are holding a block between your knees; don’t let the legs splay out.
- Keep the ribs knitted together; don’t let them flare out toward the ceiling as you lift.
- The work happens in the glutes and the lower abdominal wall, not the lower back.
15. Side Plank with Hip Dip
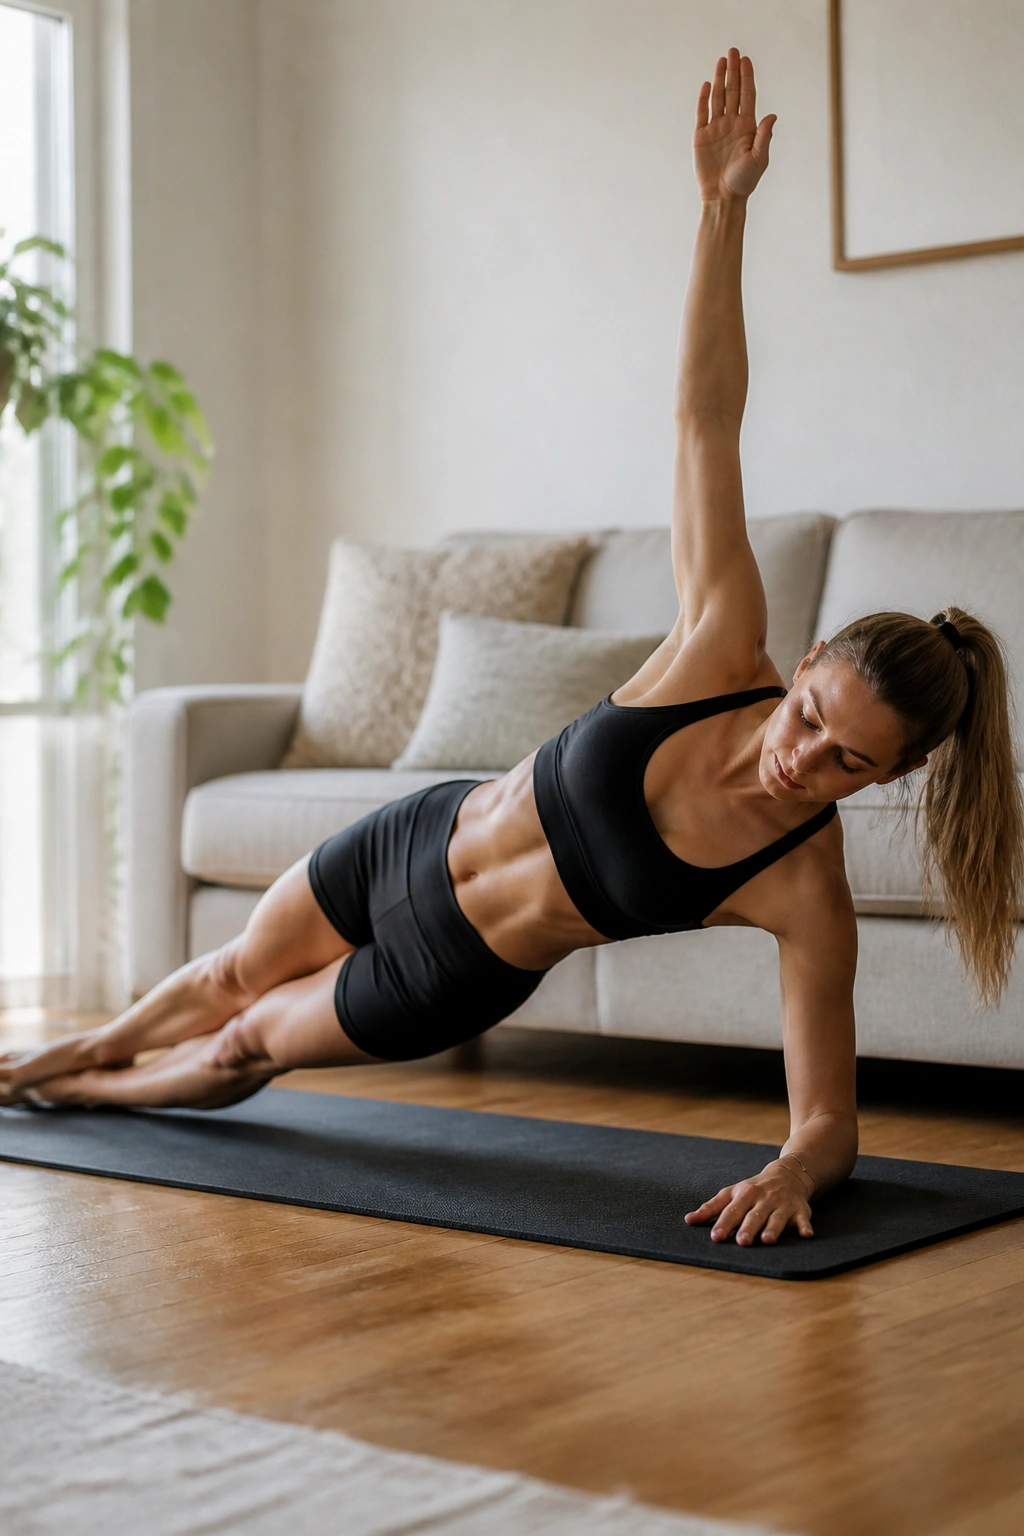
Side planks are essential for targeting the obliques. Get into a forearm side plank, stacking your feet. Reach your top arm toward the ceiling. Slowly lower your hip toward the mat, just barely touching it, then drive it back up to the starting position.
Managing Intensity
If the full side plank is too challenging, drop your bottom knee to the floor. You still get the core-stabilizing benefits without the strain. Regardless of the version, focus on pushing the floor away with your bottom elbow. This protects the shoulder joint and forces the lat muscles to engage, supporting the entire torso.
16. Swimming
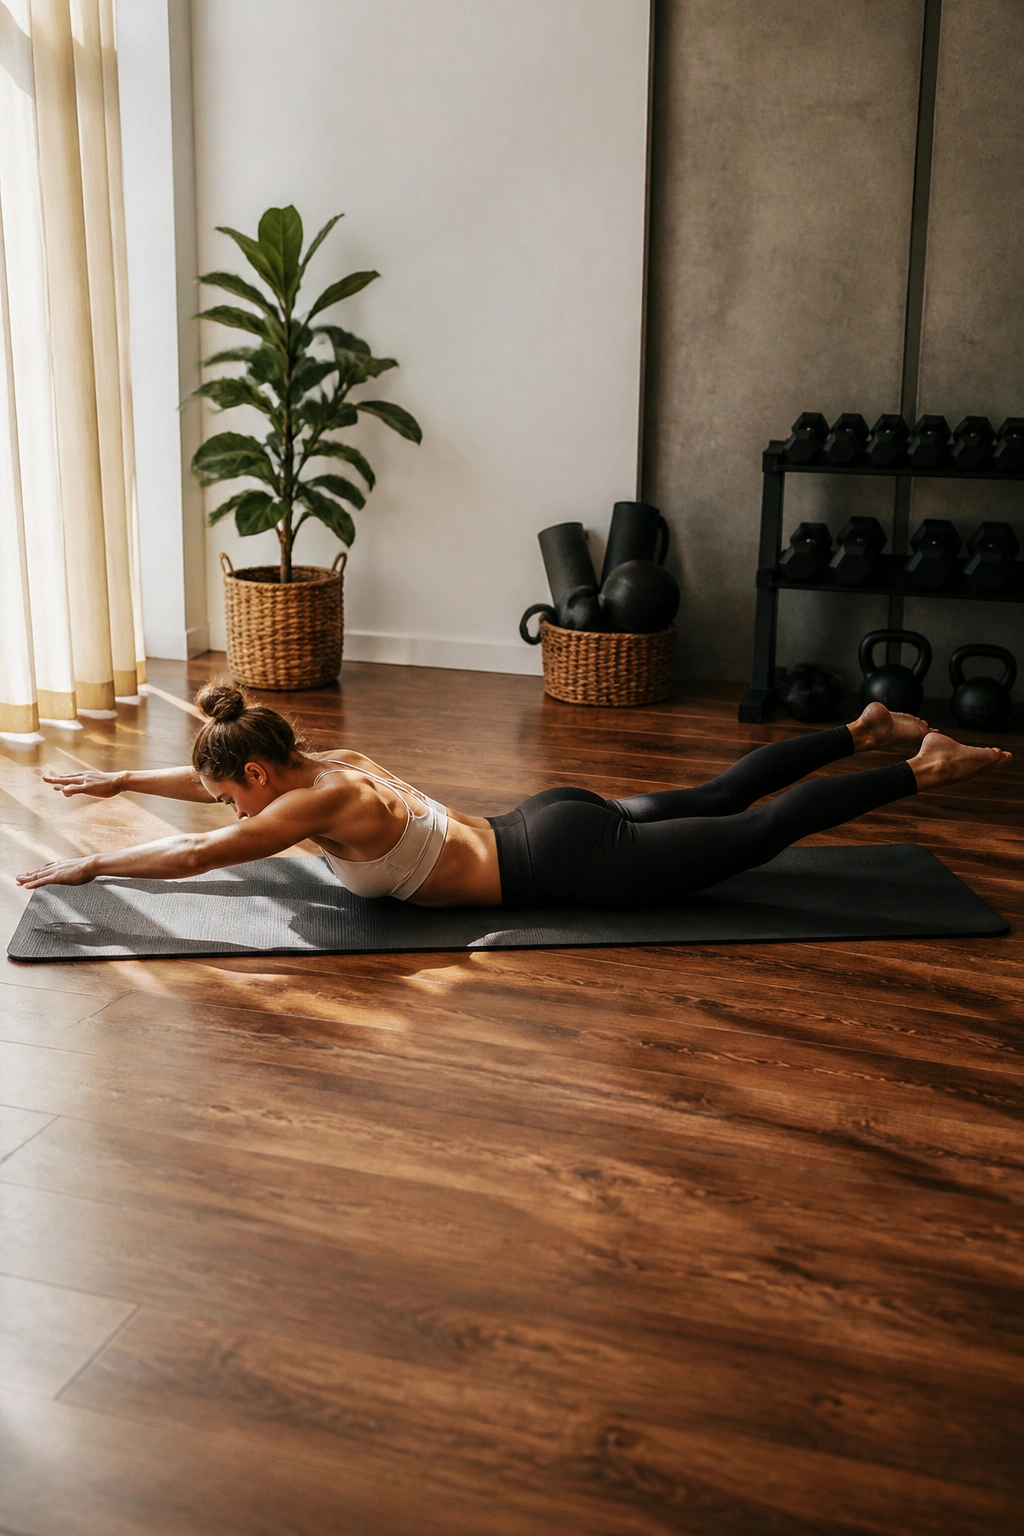
This is the ultimate exercise for the back of the body—the posterior chain. Lie on your stomach, arms and legs extended. Lift your head, chest, arms, and legs off the mat. “Swim” by rapidly fluttering your opposite arm and opposite leg. Inhale for five counts, exhale for five counts.
Creating Length
Don’t focus on how high you can lift. Focus on how long you can reach. You want to feel like someone is pulling your fingers and your toes in opposite directions. The lift should come naturally from that extension. Keep your gaze toward the floor so you don’t crank your neck upward.
17. Teaser
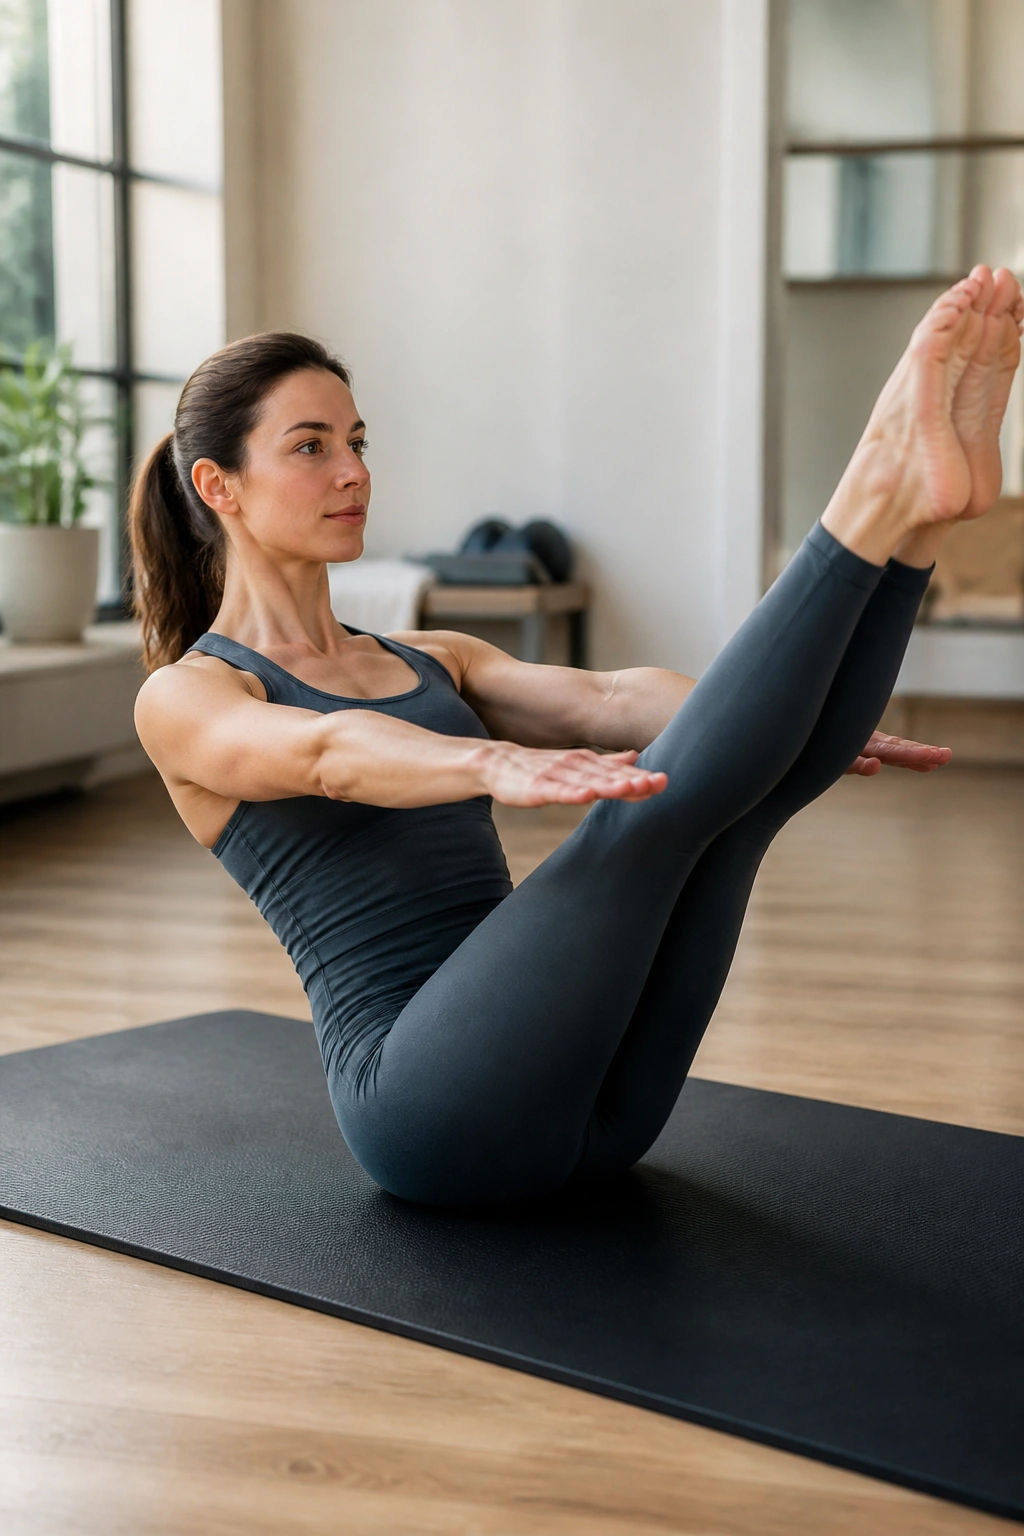
The Teaser is often considered the peak of the Pilates mat series. Start on your back with legs extended and arms overhead. Simultaneously reach up and forward as you lift your legs to a 45-degree angle. You should balance on your sit bones, forming a V-shape with your body.
Breaking Down the Challenge
This is difficult. If you can’t come all the way up, start by just lifting the head and chest. Build the strength to lift the legs, then combine the two. The beauty of the Teaser is that it forces you to use your entire abdominal wall to stabilize the balance. Don’t get discouraged if you wobble; the wobbling is where the work happens.
18. Swan Dive
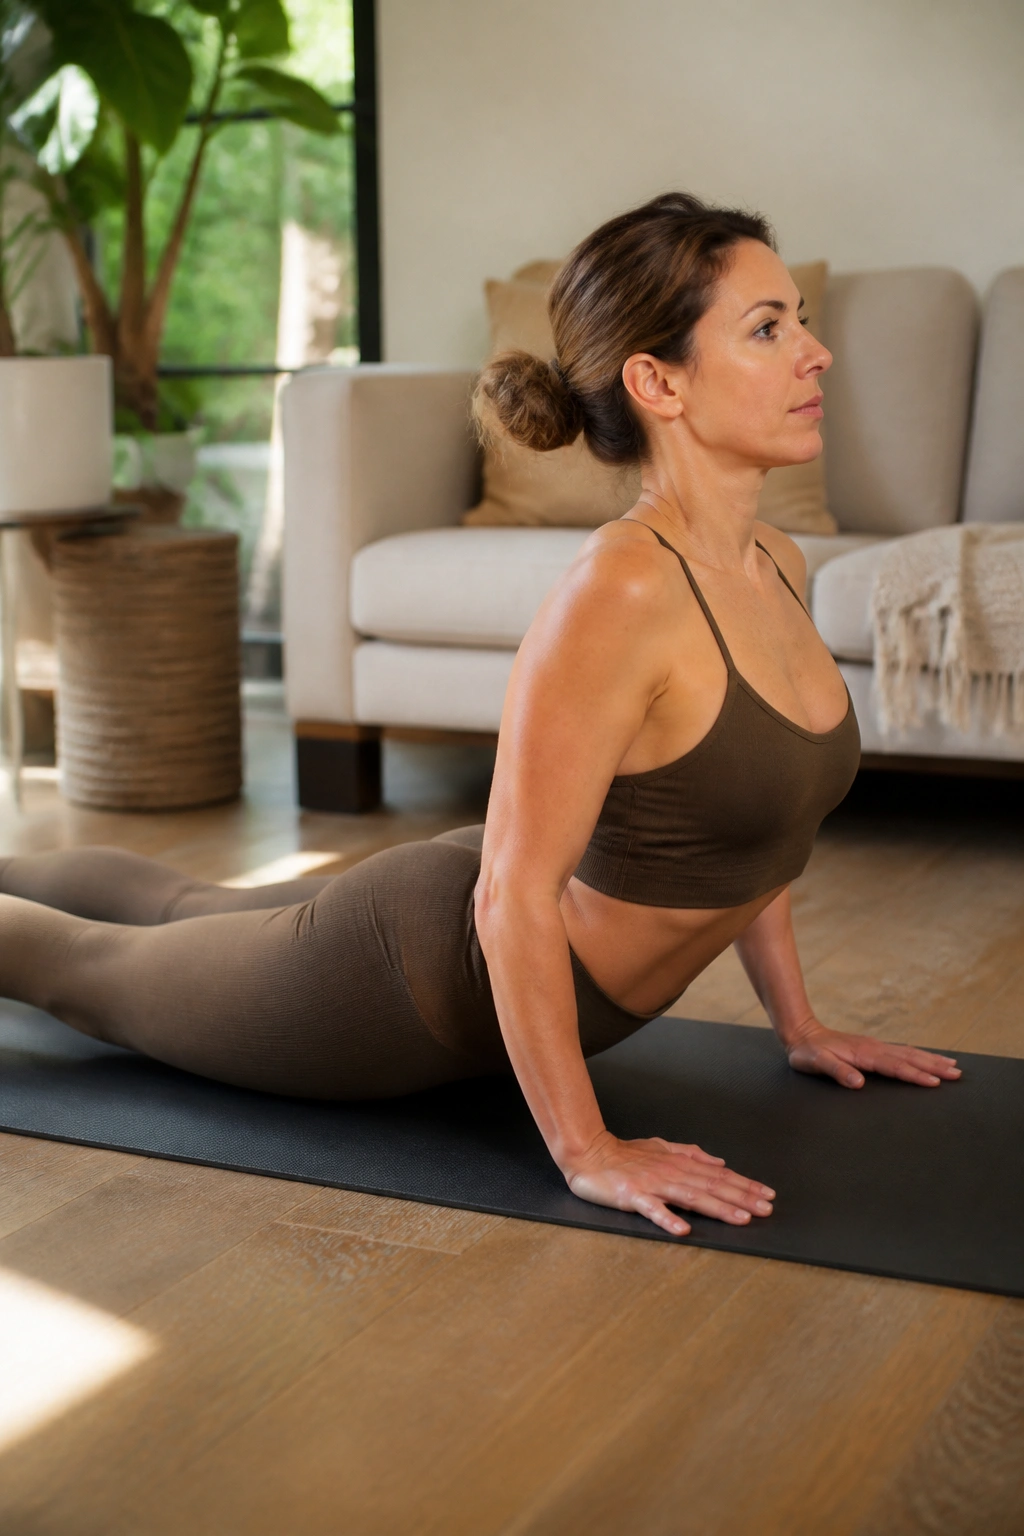
This is a beautiful way to stretch the abdominals while strengthening the back. Lie on your stomach, hands under your shoulders. Press into your hands to lift your chest off the mat, keeping your gaze forward. The “dive” variation involves rocking forward and back, lifting your legs as your chest goes down.
Mindful Extension
Be careful not to collapse into your lower back. Think of lifting up and out through the top of your head, rather than just crunching backward. The core should stay engaged to support the spine, even while you are in extension. It feels like a long, arching stretch, not a sharp bend.
19. Corkscrew
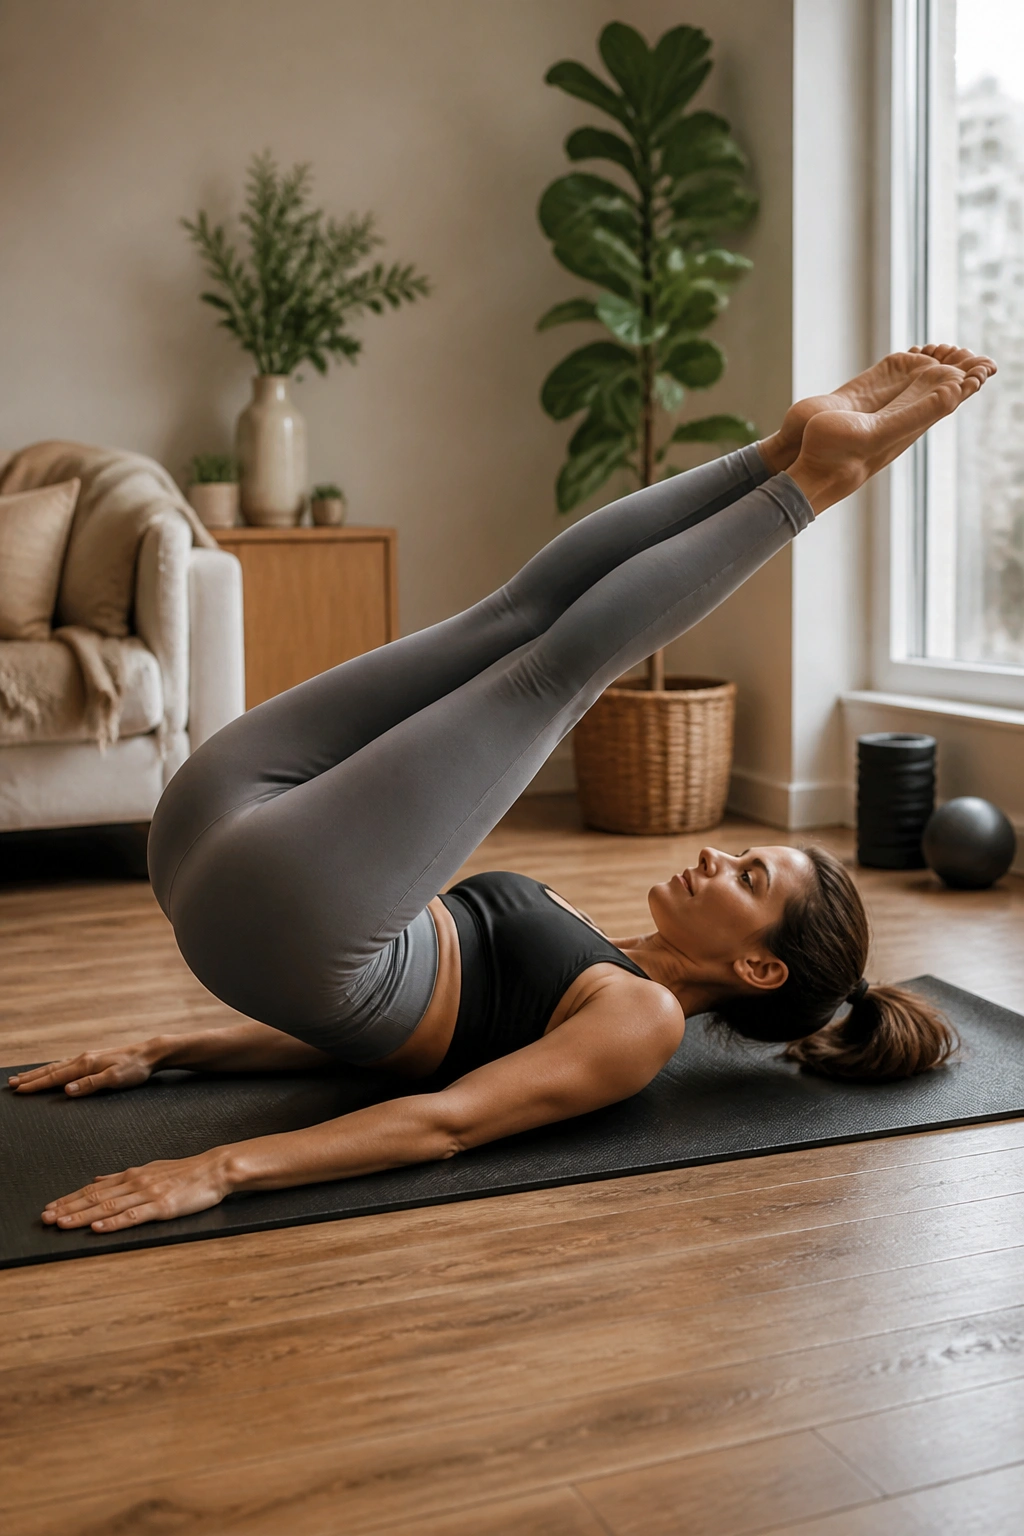
The Corkscrew is a rotational challenge. Lie on your back, legs extended and glued together. Lift your legs toward the ceiling. Circle both legs together to the right, down, across, and back up to the top. The hips stay level, and the torso remains unmoved.
The Rotation
Imagine your legs are a giant pencil drawing a circle on the ceiling. Because your legs are heavy, this exercise exerts a strong pull on your core. Use your abs to resist that pull. The bigger the circle, the harder the exercise—but start with smaller circles until you can maintain the stability of your pelvis.
20. Leg Pull Front
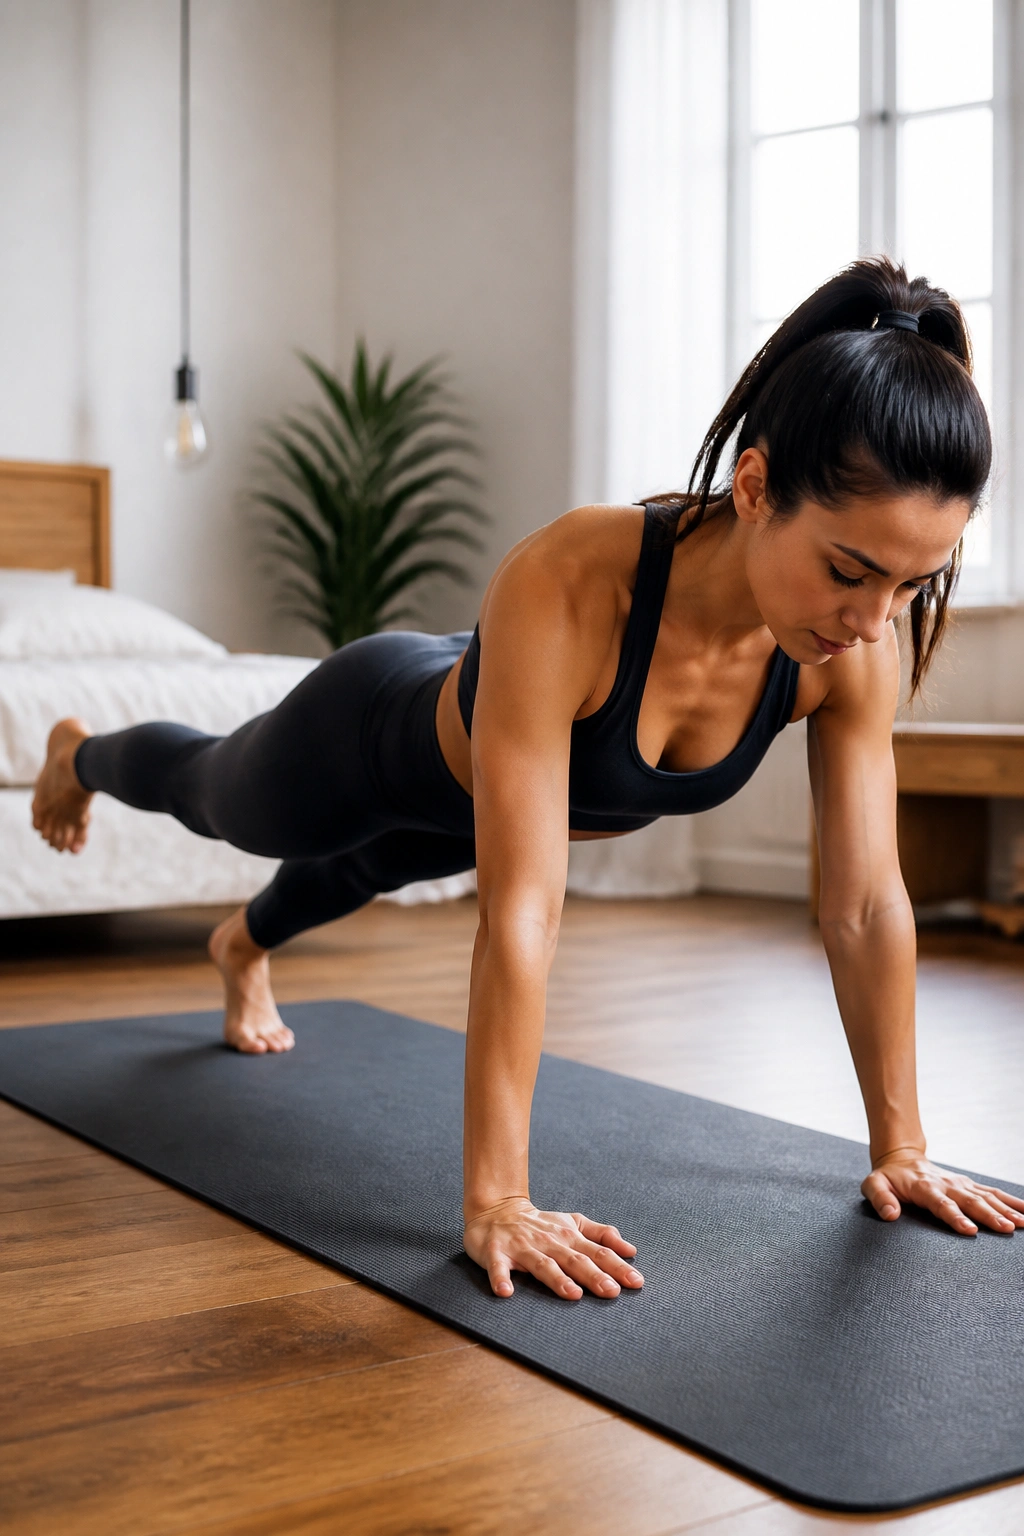
This is a plank-based exercise that adds a dynamic leg movement. Start in a push-up position, arms straight and body in a long, flat line. Lift one leg a few inches off the floor, then lower it. Keep your body perfectly still—no shifting or twisting.
Full-Body Integration
The secret here is avoiding the “sag.” As you lift the leg, you are naturally going to want to let your hip drop or your back arch. Fight that urge. Squeeze your glutes and tighten your belly. This move is less about the leg lift and more about maintaining the rigid plank position while something else is moving.
21. Mermaid Stretch
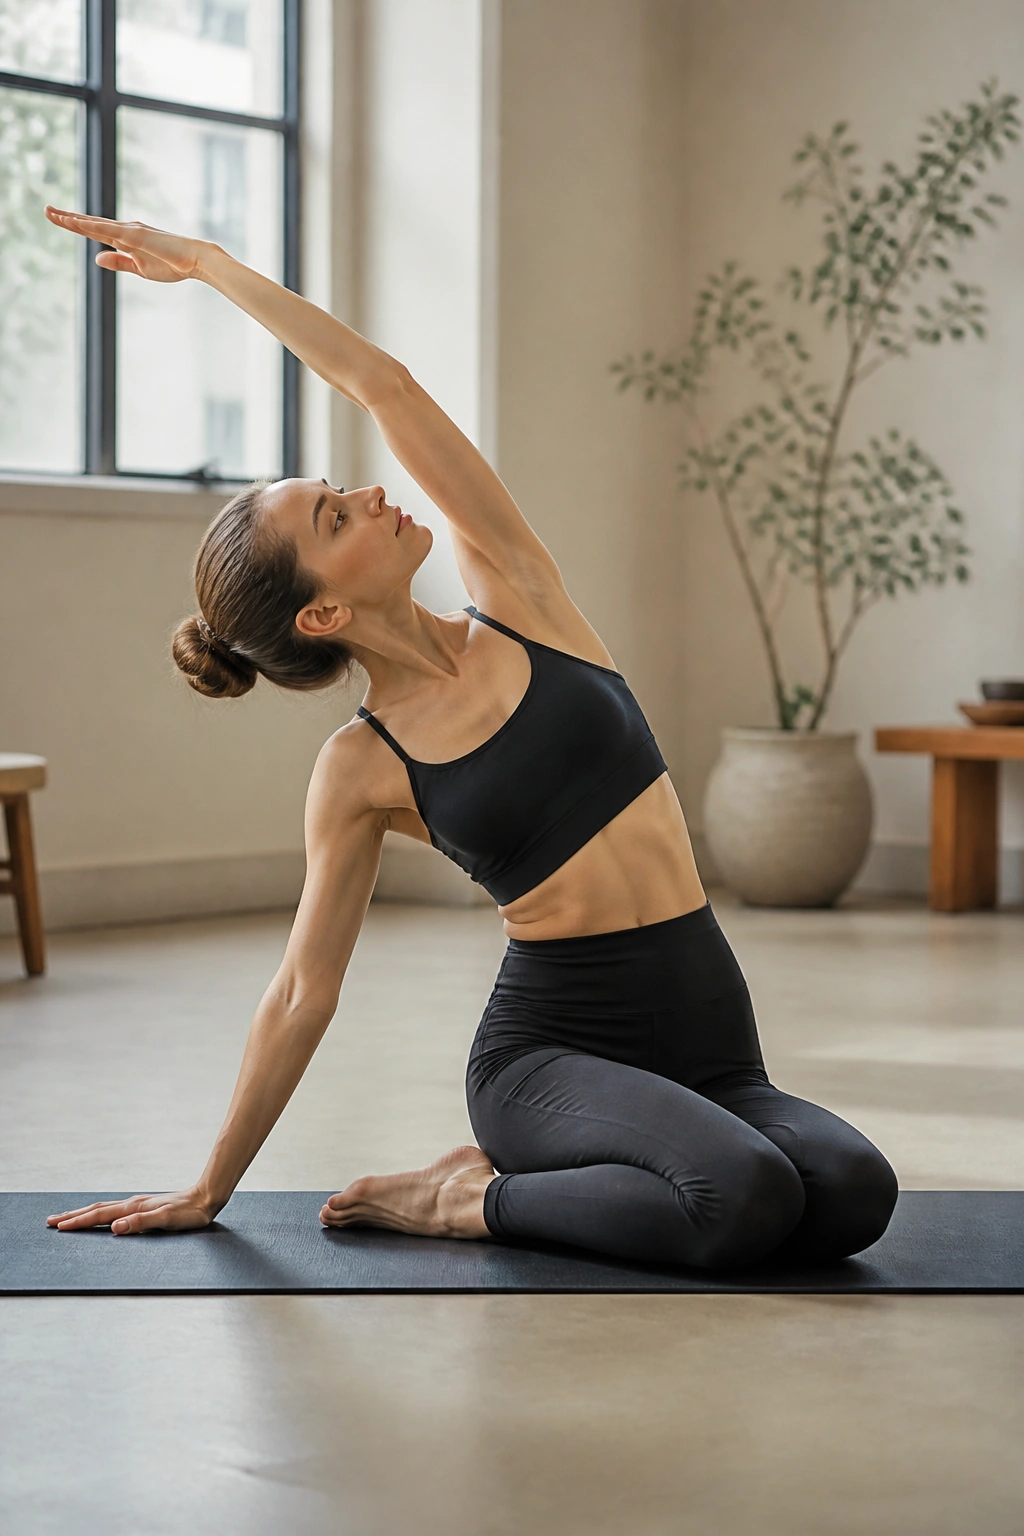
The Mermaid is crucial for lateral flexibility. Sit on your mat with your legs folded to the side. Place one hand on the floor and reach the other arm over your head, creating a long curve in your spine. Switch sides.
Why You Need This
Core strength isn’t just about flexion; it’s about lateral stability. This movement stretches the intercostal muscles between your ribs and the obliques, which often get tight and restrict breathing. It helps reset your posture after a workout, allowing your core to expand fully and recover between sets.
22. Shoulder Bridge
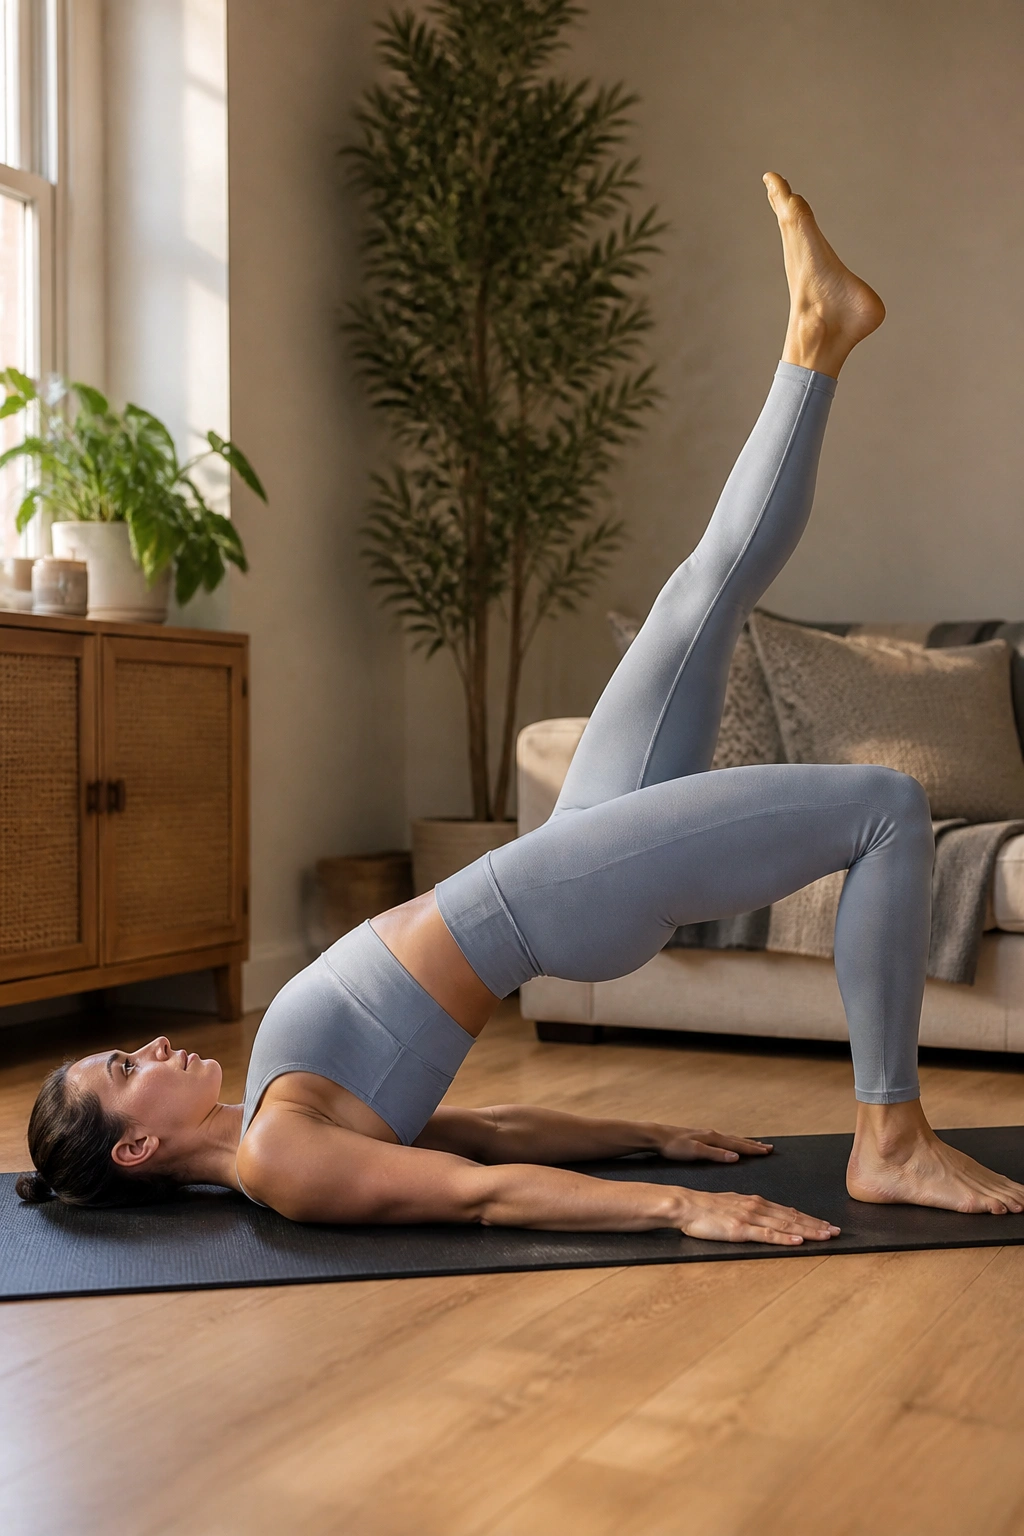
This is a more complex version of the basic bridge. Lift your hips into a bridge, then lift one leg straight up toward the ceiling. Lower the leg until it aligns with the other thigh, then kick it back up. Do this a few times, then switch legs.
The Stabilizing Challenge
When you lift one leg, your hips will naturally try to tilt. Use your hands to feel your hip bones; they should remain level like a tabletop. This exercise requires intense focus on glute activation and abdominal bracing to keep the pelvis from rotating while the leg is in motion.
23. Seal
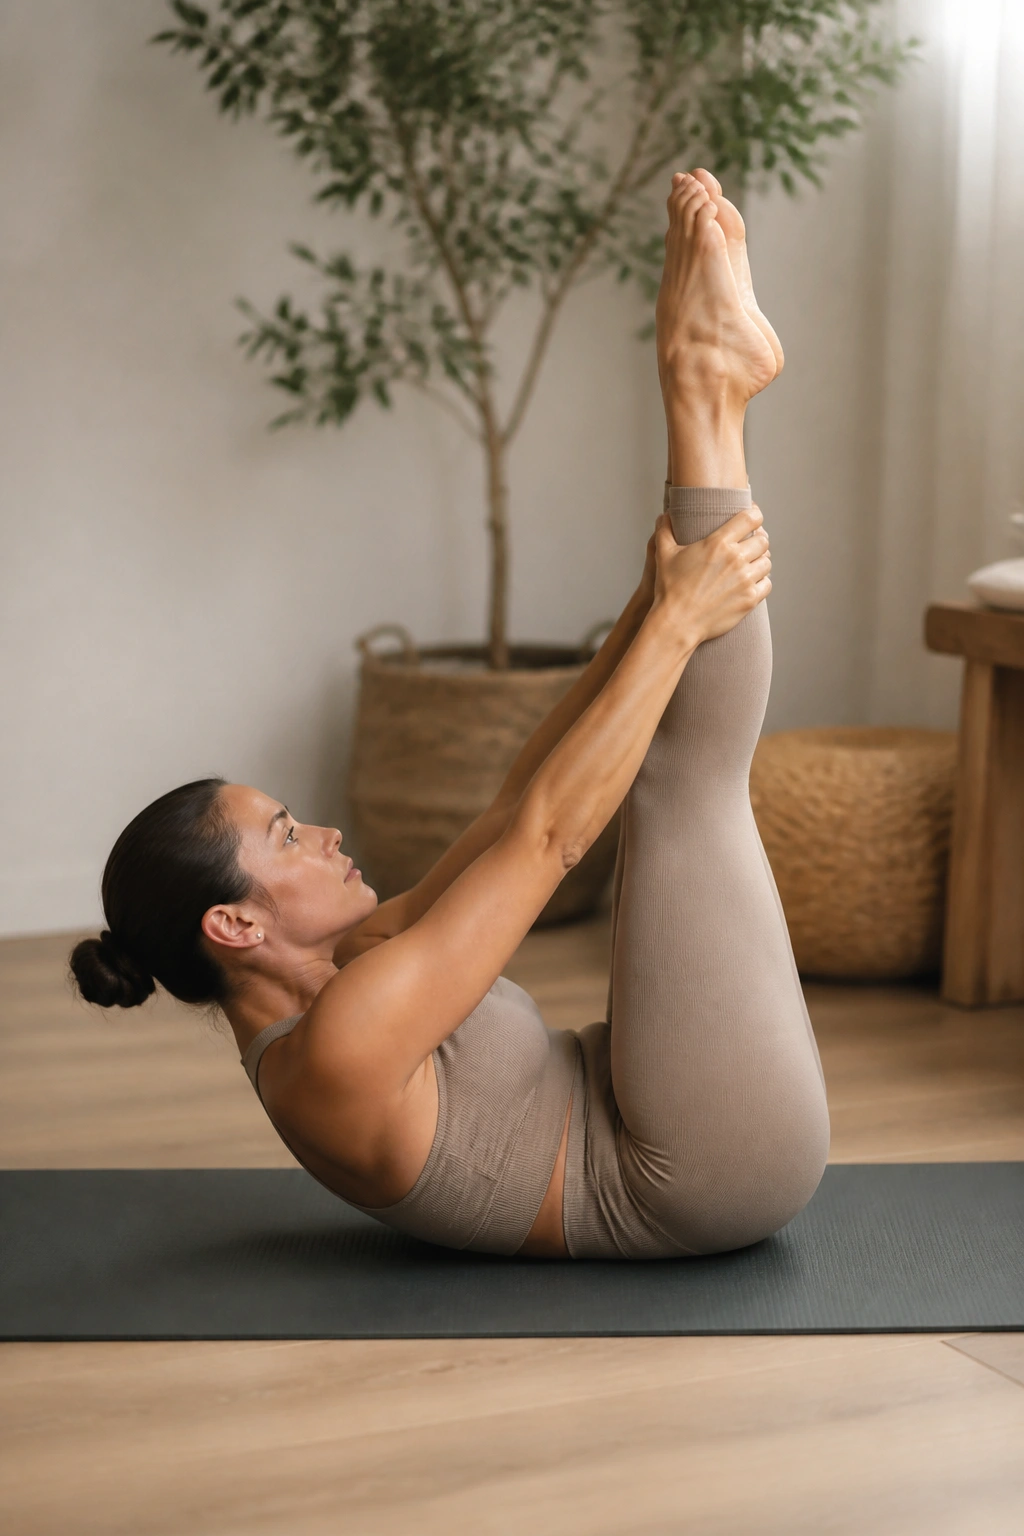
The Seal is a fun, balancing exercise that massages the spine. Sit and balance on your sit bones, holding your ankles with your hands. Roll backward onto your shoulder blades, then rock forward and balance again, clapping your feet together at the top and bottom.
Maintaining Balance
The key is the “pause.” When you rock forward, you must use your deep core to stop yourself from tipping over. It’s an exercise in control. You are using momentum to roll, but you are using pure abdominal strength to halt that momentum and find your center point.
24. Cat-Cow Flow
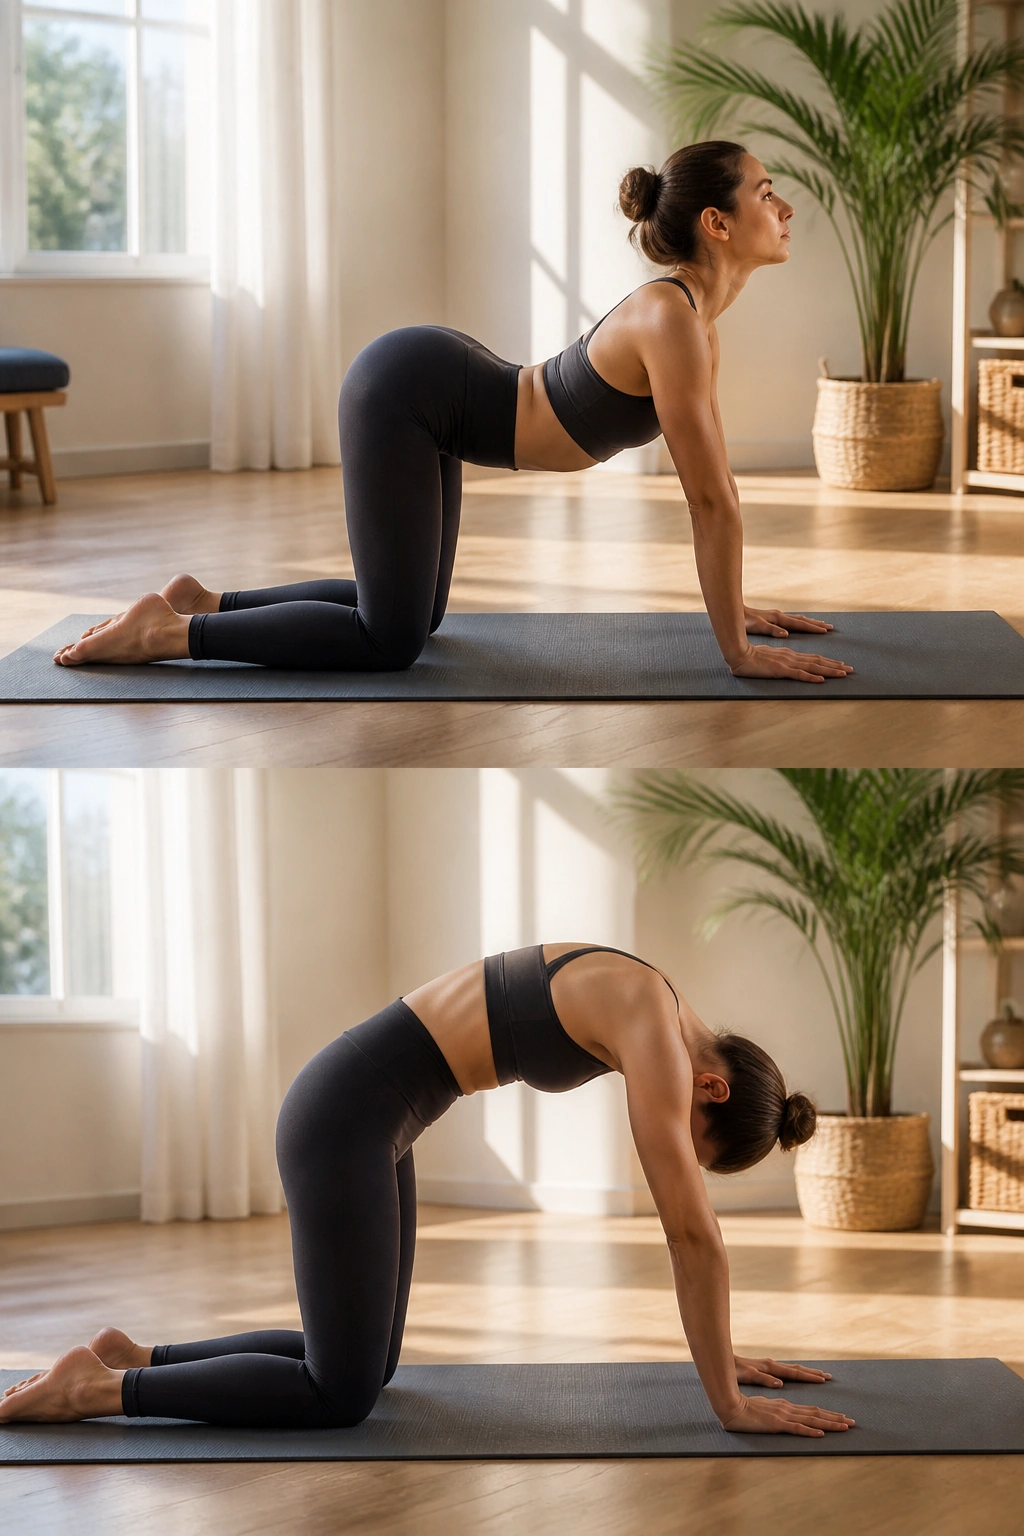
This is your mobility reset. Get on all fours. Inhale, drop your belly, and look up (Cow). Exhale, tuck your chin, and round your spine toward the ceiling (Cat). Move through this slowly, syncing the movement with your breath.
Spinal Articulation
Focus on moving the spine vertebra by vertebra. Don’t just jerk into the positions. In the “Cat” position, really pull your navel to your spine—this is the moment to engage the deep core. It serves as a gentle reminder to keep the core active even when you aren’t doing high-intensity work.
25. Child’s Pose
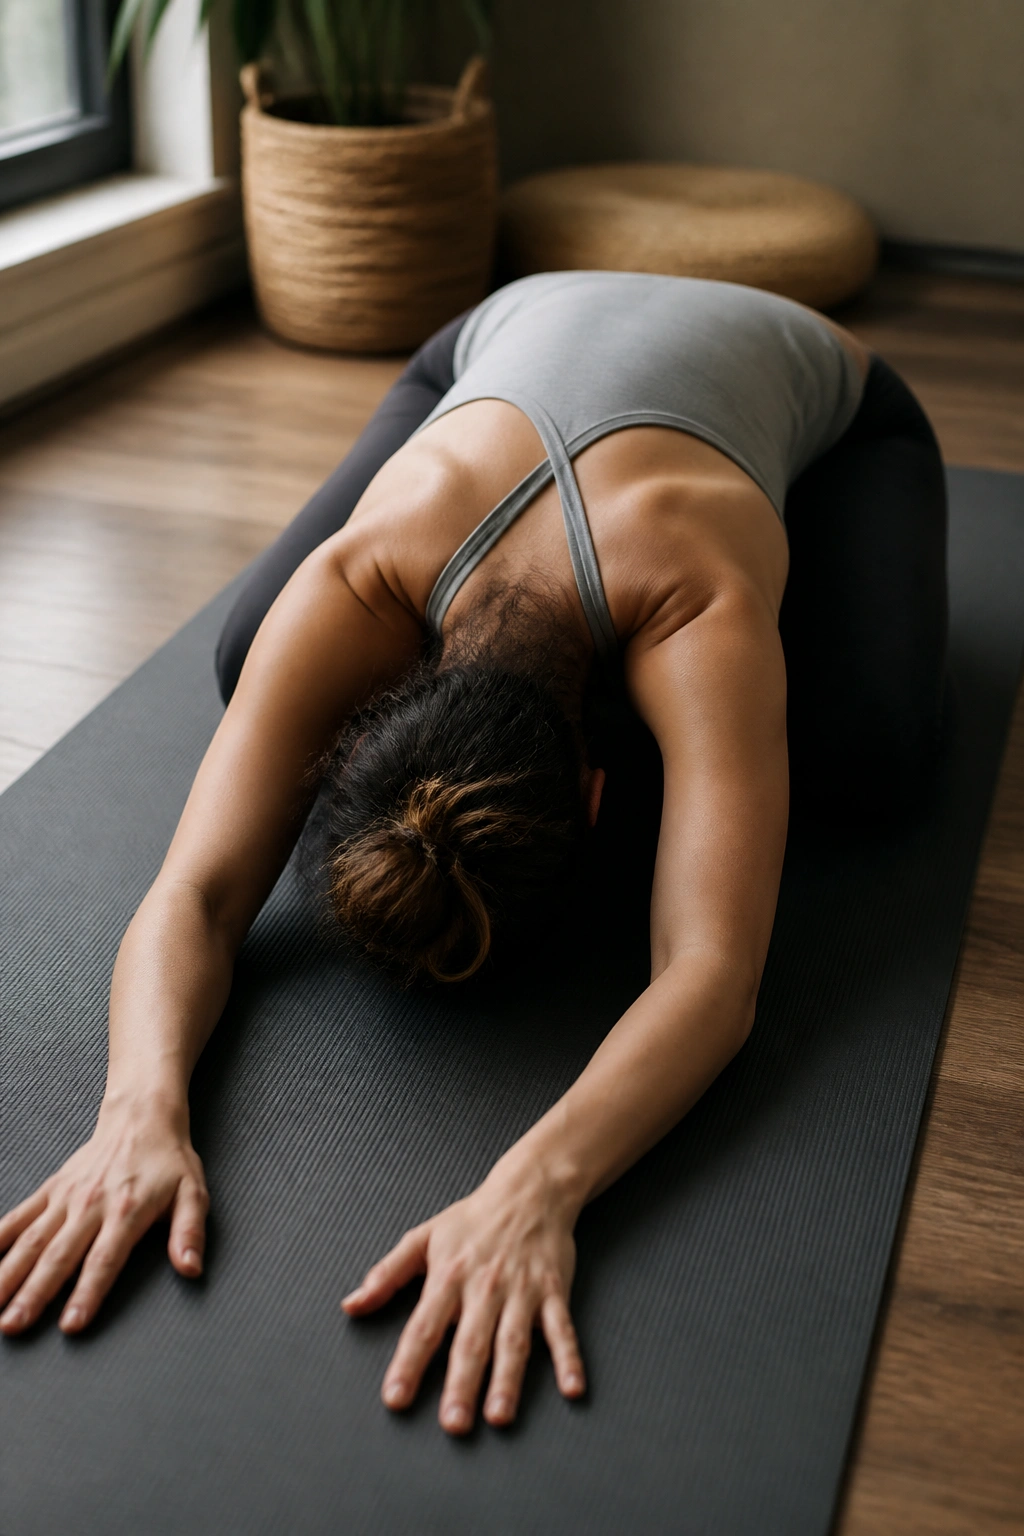
Always end with a release. Knees wide, big toes touching, sit your hips back toward your heels and reach your arms forward. Rest your forehead on the mat. Take long, deep breaths.
The Importance of Release
Your core muscles have been working hard to stabilize your body throughout this session. This pose allows the lower back to decompress and the muscles to relax. Do not rush this part. Let your heart rate settle. Acknowledge the work you just put in. Consistency is the secret, so take a moment to appreciate the movement and prepare for the next time you step onto the mat.
Final Thoughts
Building a strong core doesn’t require complex machinery or expensive equipment. It requires the willingness to slow down and focus on the tiny adjustments that make a movement effective. You might find that on some days, the simplest exercises are the ones that challenge you the most. That is perfectly fine. The point of Pilates is not to get to the end of the list; it is to perform each repetition with total awareness.
When you finish, you shouldn’t feel drained, but rather lengthened and centered. If you feel sharp pain, stop immediately and check your alignment. Your body is the best teacher you have. As you keep practicing these movements, the connections will become stronger, and the exercises will start to feel more fluid. Stick with it, and notice how that strength translates into your daily life—how you sit, stand, and move. That is where the real value lies.
