



Most people chase core strength with crunches and end up training their necks and hip flexors instead. Pilates board workouts for core strength feel different right away because the moving platform gives you instant feedback: if your ribs flare, the board shifts; if you rush, your hips wobble; if you hold your breath, the whole move gets harder than it needs to be.
That feedback is why a Pilates board can be so useful at home. A mat hides a lot. A board or sliding carriage does not. The second you lose your neutral spine, dump into one hip, or push from your shoulders instead of your center, the machine tells on you.
There’s another reason these workouts work so well. Good Pilates core work is not only about spinal flexion. It’s about anti-extension, anti-rotation, pelvic control, breath timing, and clean hip movement. The deep abdominal wall — especially the transverse abdominis — works with your diaphragm, pelvic floor, and spinal stabilizers to keep your trunk steady while your arms and legs move around it.
If your board has adjustable cords, start with light resistance unless a move says otherwise. Slow reps beat sloppy reps. And if you only borrow one cue from Pilates, make it this one: exhale on the hard part, and keep the front ribs heavy.
1. Seated Roll-Back With Press-Out
If you want one move that teaches what Pilates is supposed to feel like, start here.
Sit near the front of the board with your knees bent and feet planted wide enough that you feel stable. Hold the handles with light tension, sit tall on your sit bones, and soften your ribs so your chest is not popping forward. Then roll your pelvis back until your low back starts to round and your torso leans behind your hips at about a 45-degree angle.
Why this one works
The roll-back trains segmental spinal control, which is a fancy way of saying you lower one part of the spine at a time instead of collapsing in a lump. Adding the press-out makes the move harder because your arms create a longer lever. Your abs have to resist the urge to arch.
Setup and rep guide
- Exhale as you roll back, then press the handles straight forward to shoulder height.
- Pause for 2 seconds without shrugging.
- Inhale to hold, then exhale and return upright with control.
- Aim for 8 to 10 reps for 2 or 3 sets.
- Use the lightest cord setting that still gives you feedback in the press.
A lot of beginners pull from the arms here. Don’t. The arms move, but the work should feel like it starts below your navel and wraps around your waist.
Tip: If your hip flexors take over, place a folded towel under your sit bones and make the range smaller.
2. Forearm Plank Knee Tucks
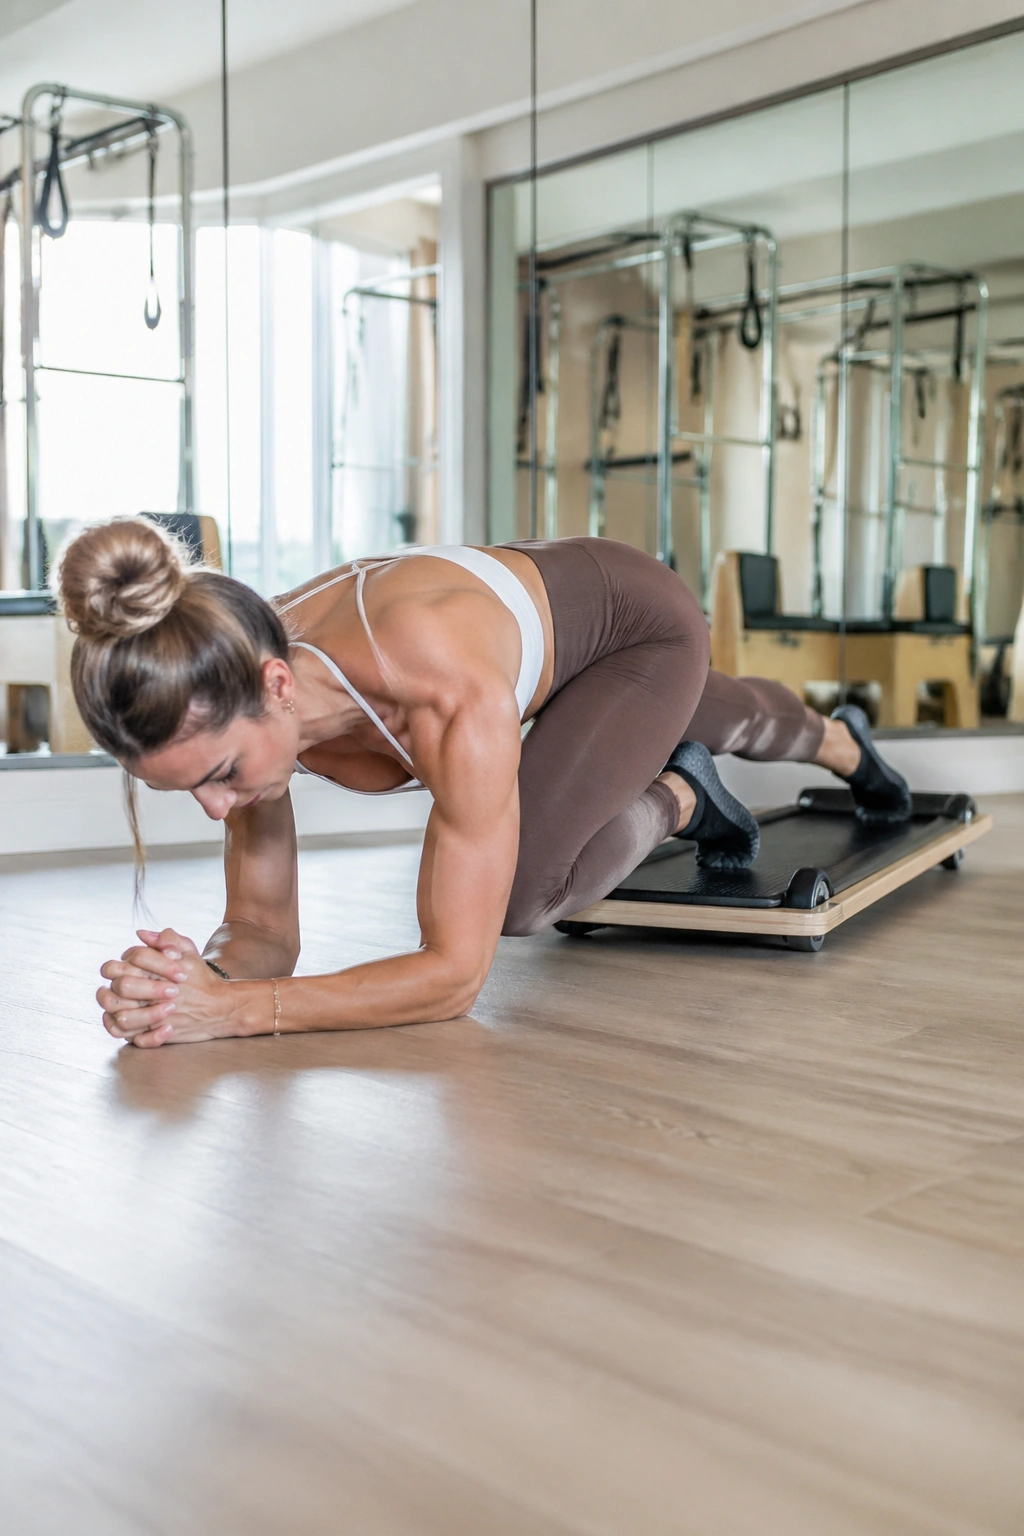
Speed ruins this exercise. A clean knee tuck on a Pilates board is a deep-core drill, not a race.
Set your forearms on the floor, elbows under shoulders, and place both feet on the board. Step back into a long plank. Before the knees move, push the floor away so your upper back feels broad and your neck stays long. Pull your front ribs up, squeeze your inner thighs together, and glide both knees toward your chest without letting your shoulders drift behind your elbows.
The hard part is the return. Your board wants to shoot back. Your job is to lengthen the legs while keeping the low back from dropping toward the floor. That’s where the anti-extension piece kicks in, and it is why this move builds usable trunk strength instead of empty ab burn.
Start with 6 controlled reps. If your plank shape stays crisp, build to 10 reps or 30 seconds of work. Rest long enough that the next set looks the same as the first.
Form tells the truth here. If your hips pike high, you made it easier. If your belly sags, you made it risky. Knees in. Pause. Slide out. Repeat.
3. Pilates Board Gliding Pike
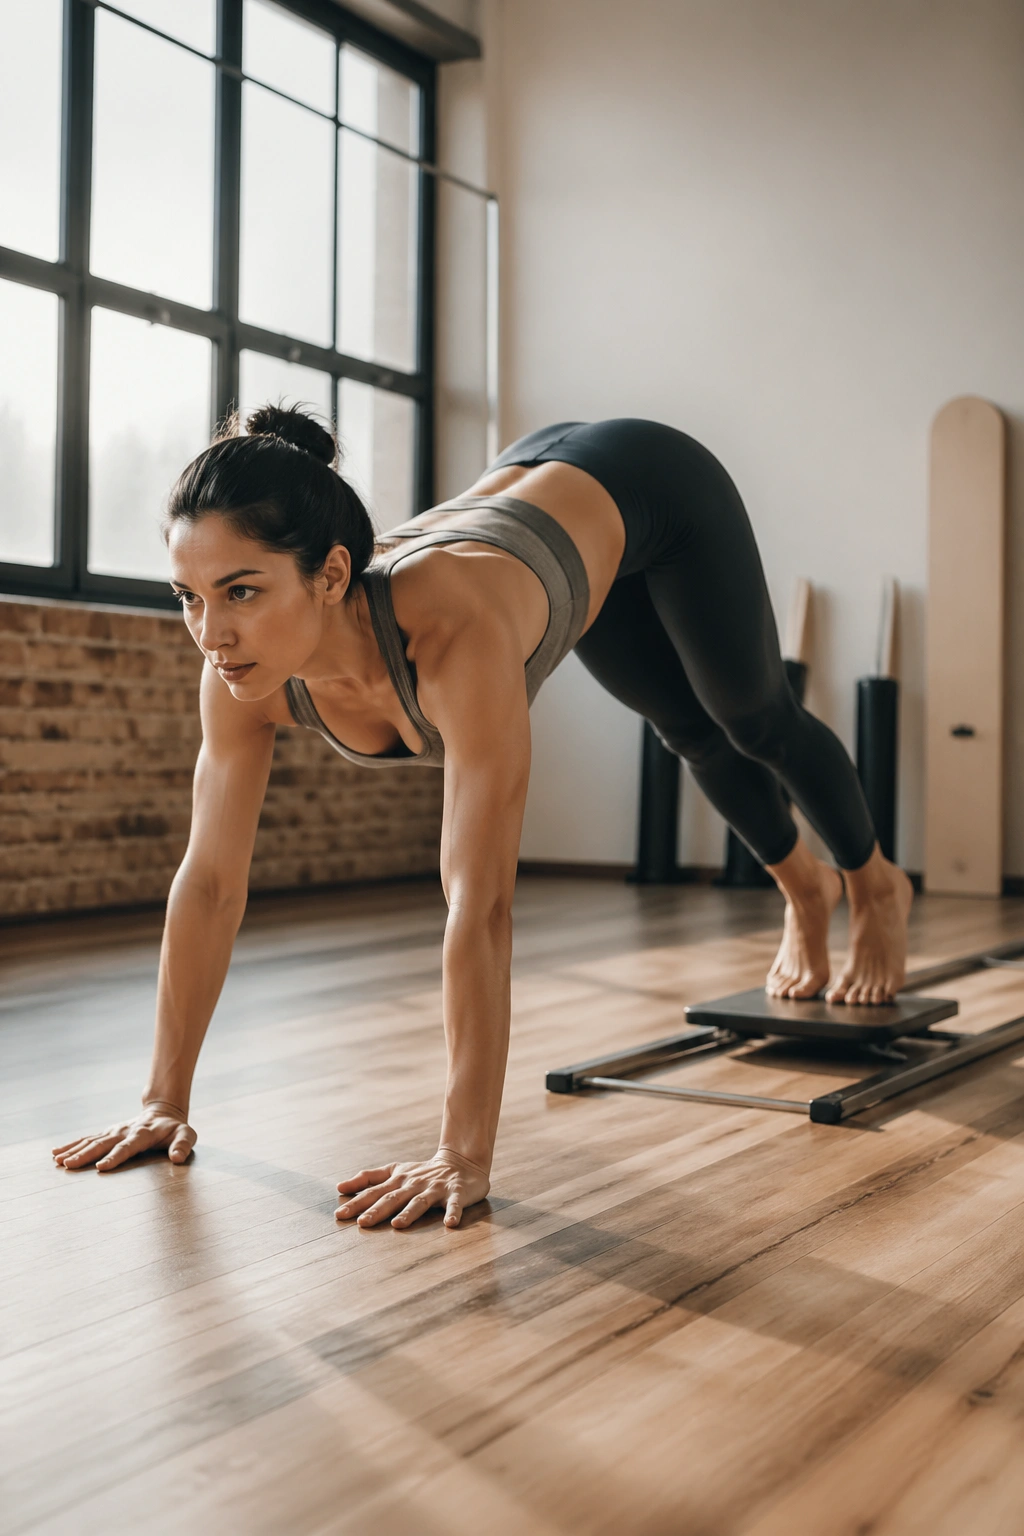
Why does the pike humble people who can hold a plank for a full minute?
Because a plank asks for stiffness. A pike asks for stiffness and fold. Your shoulders have to stay strong while your abs lift the pelvis over the rib cage, and that takes timing more than brute force.
Start in a high plank with your hands on the floor and both feet on the Pilates board. Shift your shoulders a hair forward of your wrists. From there, exhale and lift your hips toward the ceiling, drawing the board in with straight or softly bent legs. Think of pulling your pubic bone toward your ribs rather than kicking your butt up in the air.
How to make the pike clean instead of messy
Use a small range first. If the board comes in 8 to 12 inches and your spine stays smooth, that rep counts. If you yank the carriage all the way under you and round through the shoulders, it doesn’t.
A few details matter:
- Keep your gaze between your thumbs.
- Press through the whole hand, not only the heel of the palm.
- Stop the rep when the shoulders start to collapse.
- Try 5 to 8 reps with a full exhale each time.
Short range. Strong shape. That combination will build more core strength than a dramatic pike done with momentum.
4. Bear Plank Slide-Outs
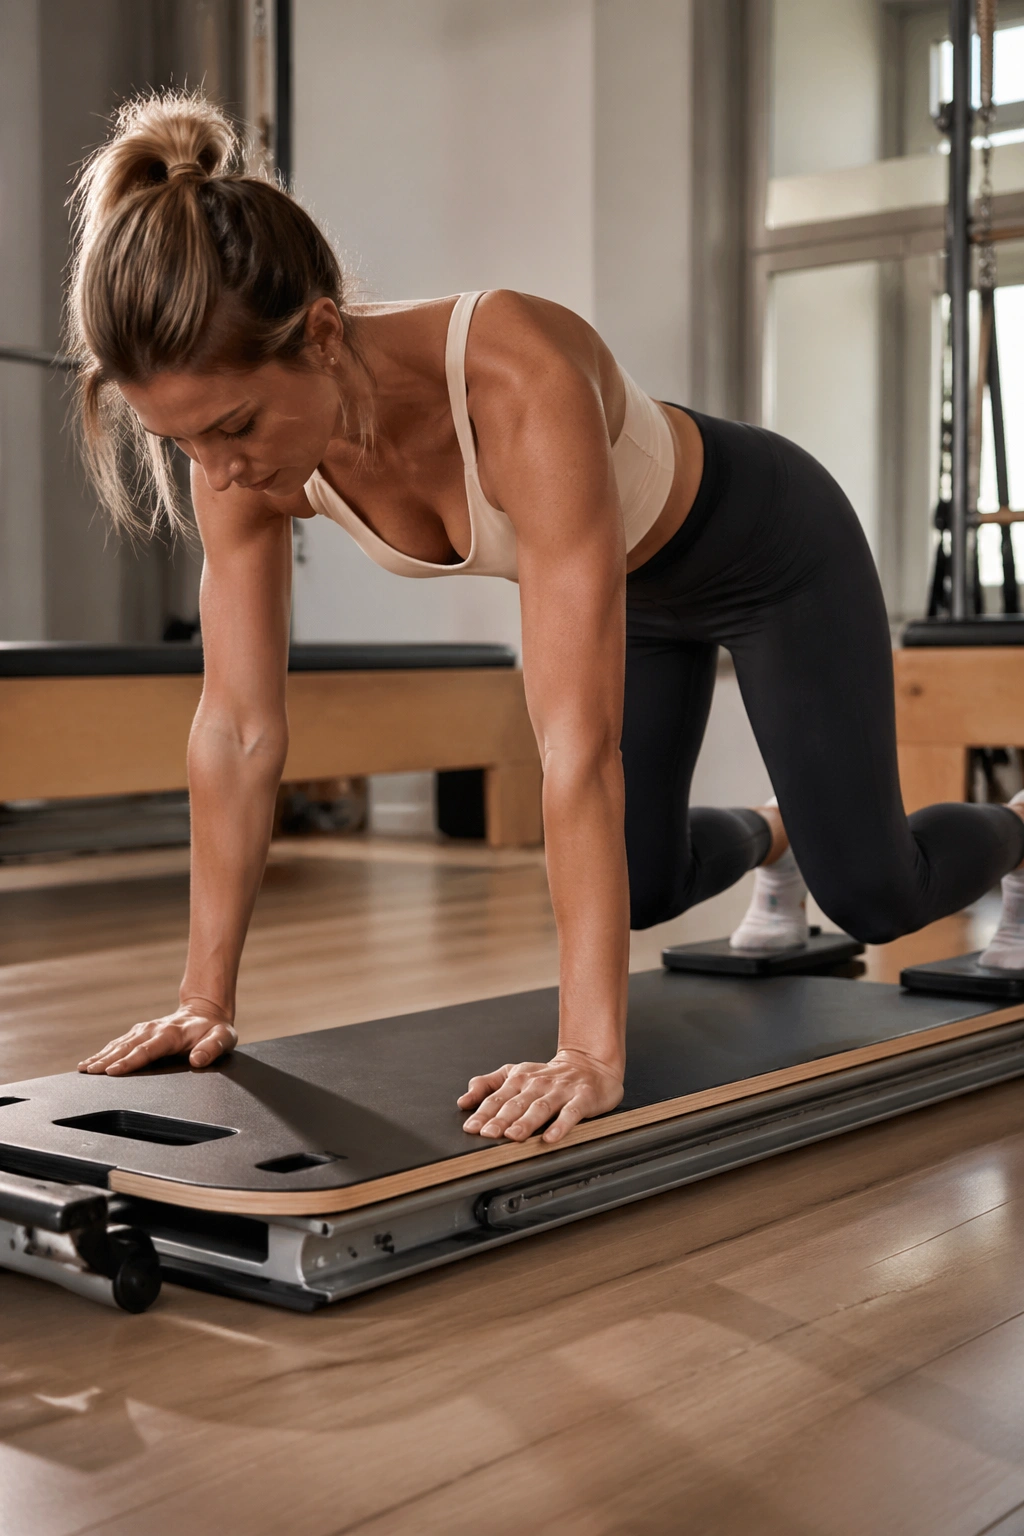
The first time you slide both knees two inches away from center in a bear plank, your trunk lights up fast.
Set your hands under your shoulders and place your knees on the board or on sliders if your board uses separate pads. Hover your knees 1 to 2 inches off the deck, toes tucked, spine neutral. From that compact bear position, glide the knees backward a few inches while keeping the back flat and the head in line with the spine. Then pull back in.
This move looks small because it should stay small. Once the lower back starts to arch, the drill stops being a core move and turns into a low-back compensation pattern.
Use these guardrails
- Slide out only 3 to 6 inches at first.
- Exhale during the slide back in.
- Keep your shins parallel to the floor.
- Do 20 seconds of work, then rest for 20 to 30 seconds.
- Two or three rounds is enough for most people.
Bear slide-outs are a strong middle step between beginner dead bugs and harder rollout patterns. They teach the brace without asking you to manage a huge lever.
5. Side Plank With Top-Leg Sweep
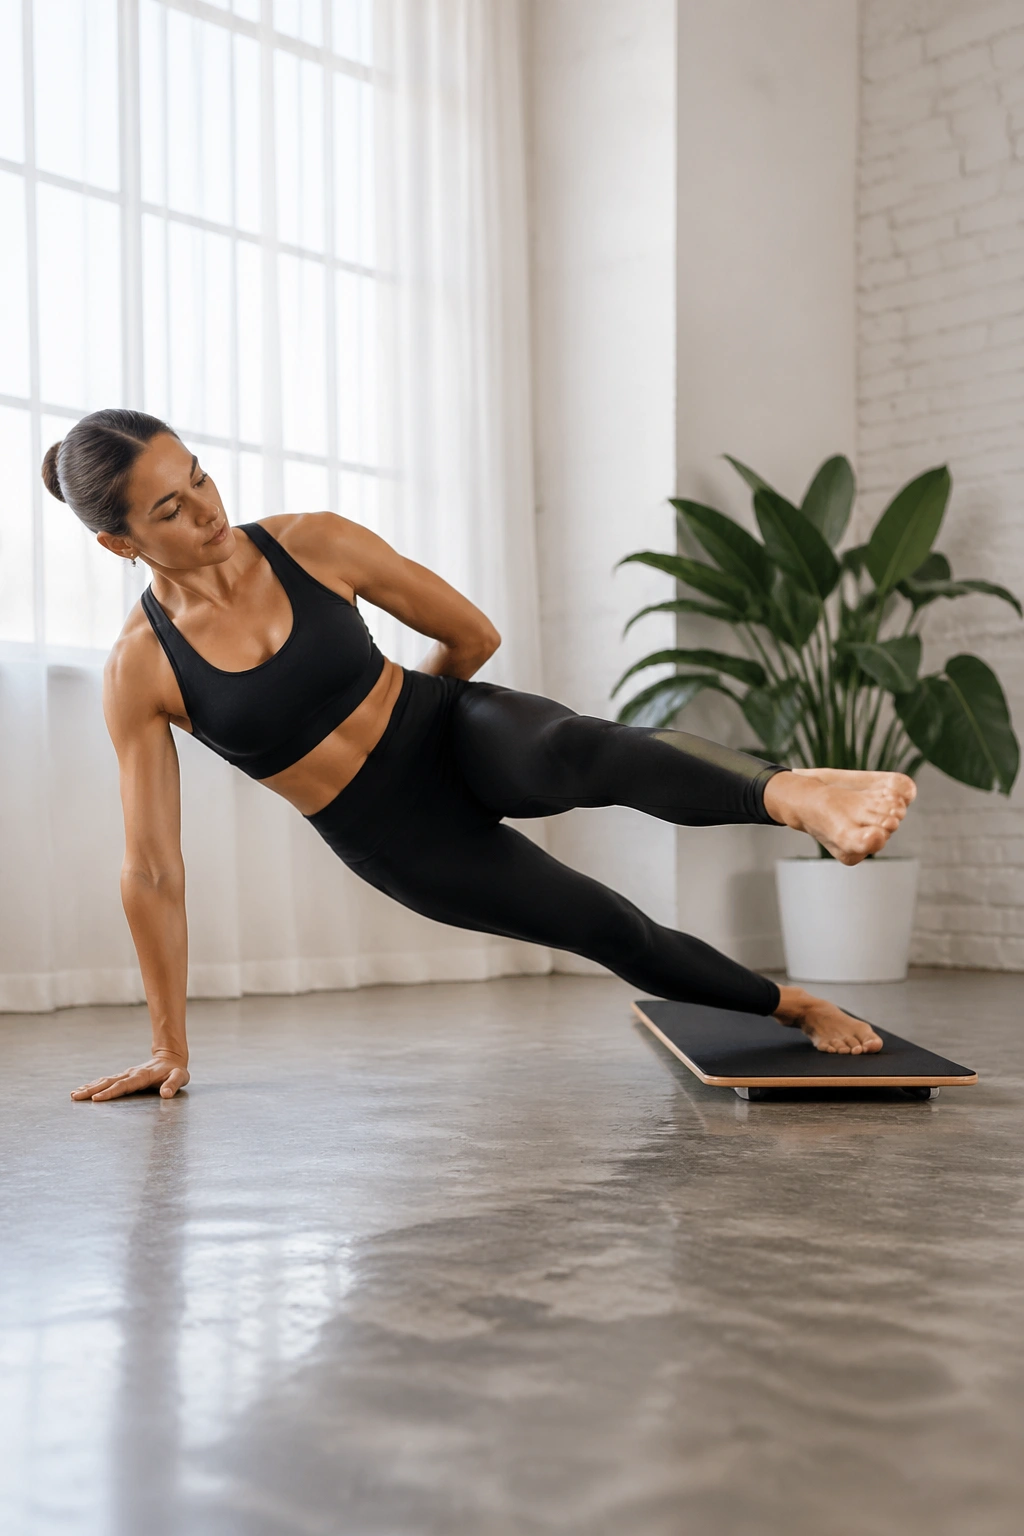
Your bottom-side oblique will usually start shaking before the top leg finishes its second sweep. That is not a flaw in the plan. That’s the point.
Set up in a side plank with your bottom hand on the floor and your feet stacked, or place the bottom knee down if you need a shorter lever. Put the top foot on the board. Lift the hips first. Then glide the top leg forward and back in a slow sweep while the trunk stays long from head to heel.
The board changes the feel of side plank in a useful way. On the floor, people often hang on passive structures and fake stability. The sliding top leg adds motion, so your obliques, glute medius, and shoulder stabilizers have to keep earning the position.
Go light on the range. A forward sweep of 6 to 10 inches is enough. If your bottom waist collapses, cut the distance in half and keep the hips stacked.
Some people feel this more in the shoulder than the waist. When that happens, look at your hand placement. Press the floor away, rotate the chest open, and think of lifting the underside of the rib cage instead of sinking into it.
Hold for 20 to 25 seconds per side or perform 6 slow sweeps. Then switch. No heroics needed.
6. Supine Bridge Hamstring Curls
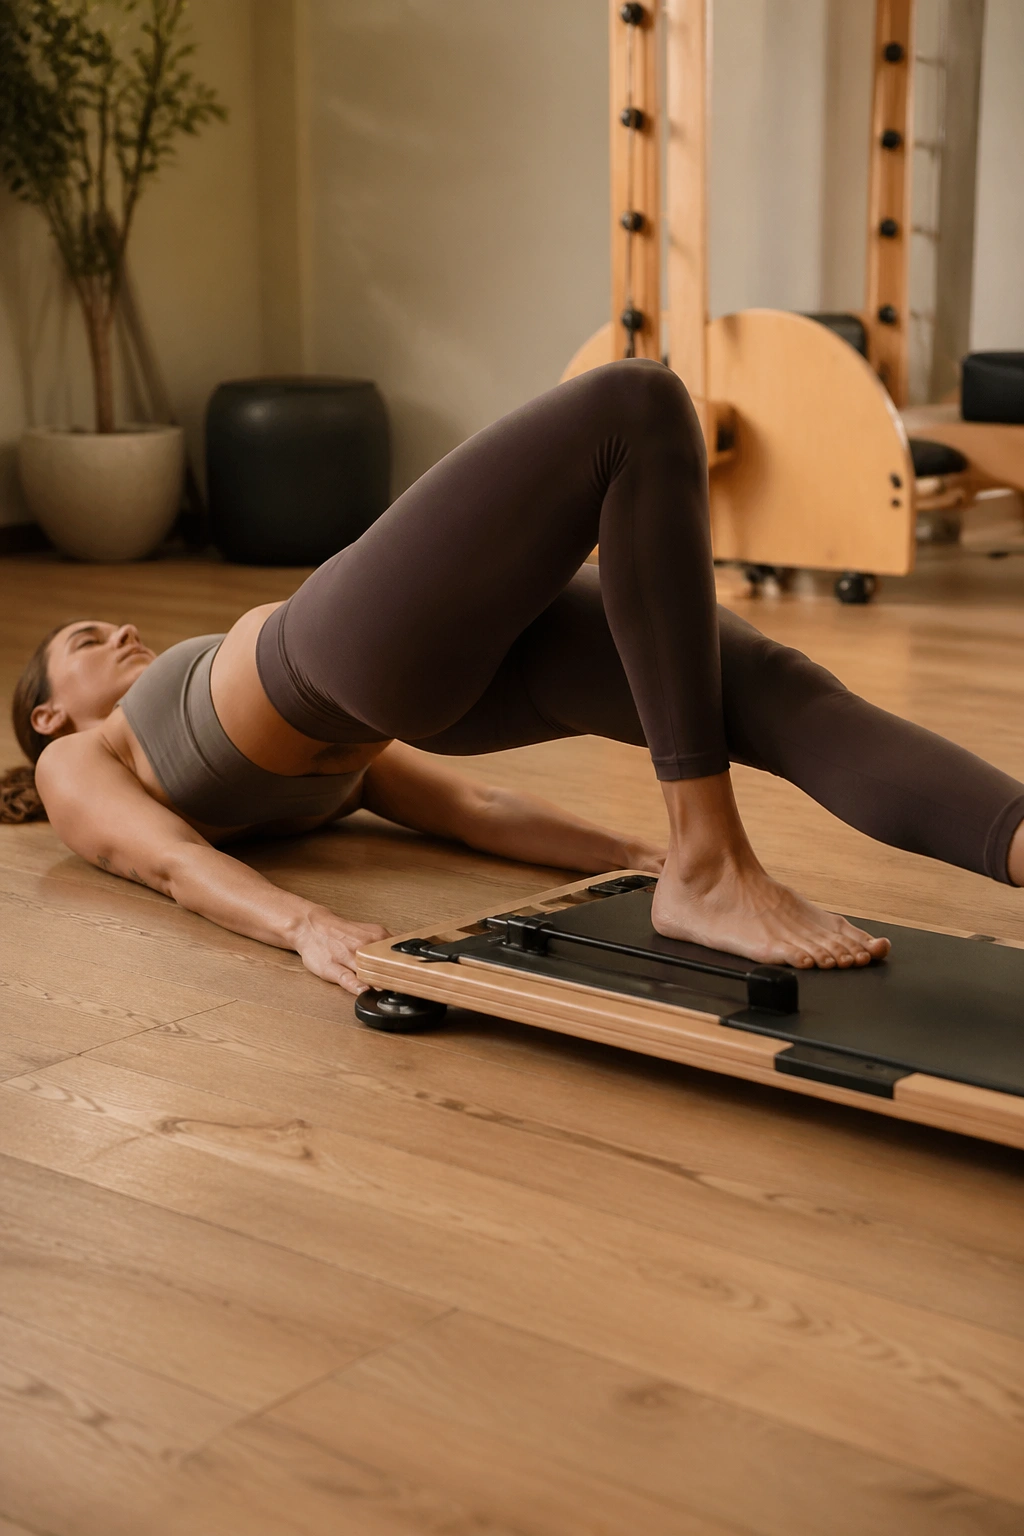
Unlike a floor bridge, the board curl gives your legs a job they cannot fake. Your hamstrings have to work through length and motion while your abs stop the ribs from flaring.
Lie on your back with your heels on the board, knees bent, arms long by your sides. Press into the heels and lift into a bridge until you have a straight line from shoulders to knees. From there, slide the board away until your legs almost straighten, then pull it back in without dropping the pelvis.
Here’s why this belongs in a core-strength list: the trunk has to stay organized while the lever changes. If the ribs spring up and the pelvis tips forward, the hamstrings lose leverage and the low back starts taking stress it did not ask for.
This drill teaches a clean relationship between rib cage and pelvis. That phrase sounds dry, I know, but on a board you can feel it right away. When the shape is right, the hamstrings work hard and the front of the hips stays quiet.
Try 8 reps with a 3-second slide out and a 2-second pull in. If both legs feel easy, switch to an alternating pattern: slide one heel out while the other knee stays bent. That version gets spicy in a hurry.
7. Dead Bug With Overhead Band Press
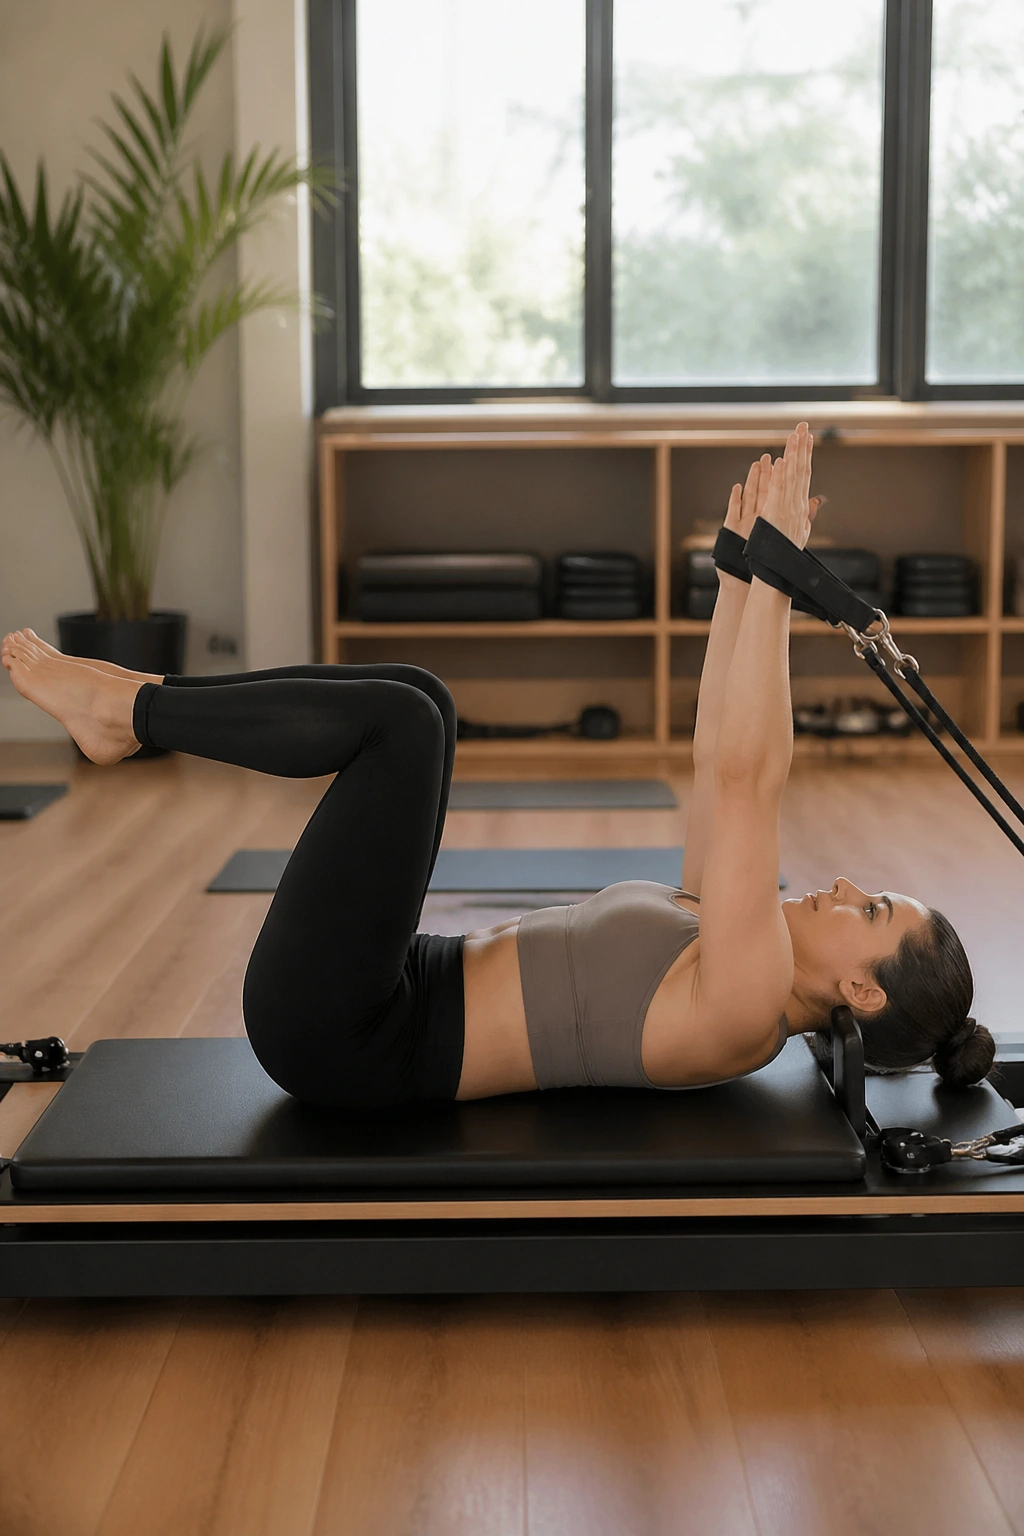
A dead bug gets better when you give the arms a reason to matter.
Lie on your back with your head near the anchored cords if your board has them. Bring your hips and knees to tabletop, and press the handles straight above your chest with light tension. Flattening your spine into the floor is not the goal; a small natural curve is fine. What you want is a steady pelvis and ribs that stay heavy.
What makes this version worth doing
Pressing the handles wakes up the lats and anterior core together. That link matters because the deep abs do their best work when the rib cage and pelvis stack well, not when you jam the low back down and hope for the best.
A clean rep looks like this
- Exhale and lower one heel toward the board while both arms keep pressing upward.
- Stop when the heel is 1 to 2 inches above the surface or lightly taps it.
- Inhale to return to tabletop.
- Alternate sides for 6 to 8 reps per leg.
- Use enough band tension that the shoulders feel connected, not strained.
Small note: if your neck grips, place a thin pad under your head so your chin does not tip up.
8. Pilates Board Mountain Climber Slides
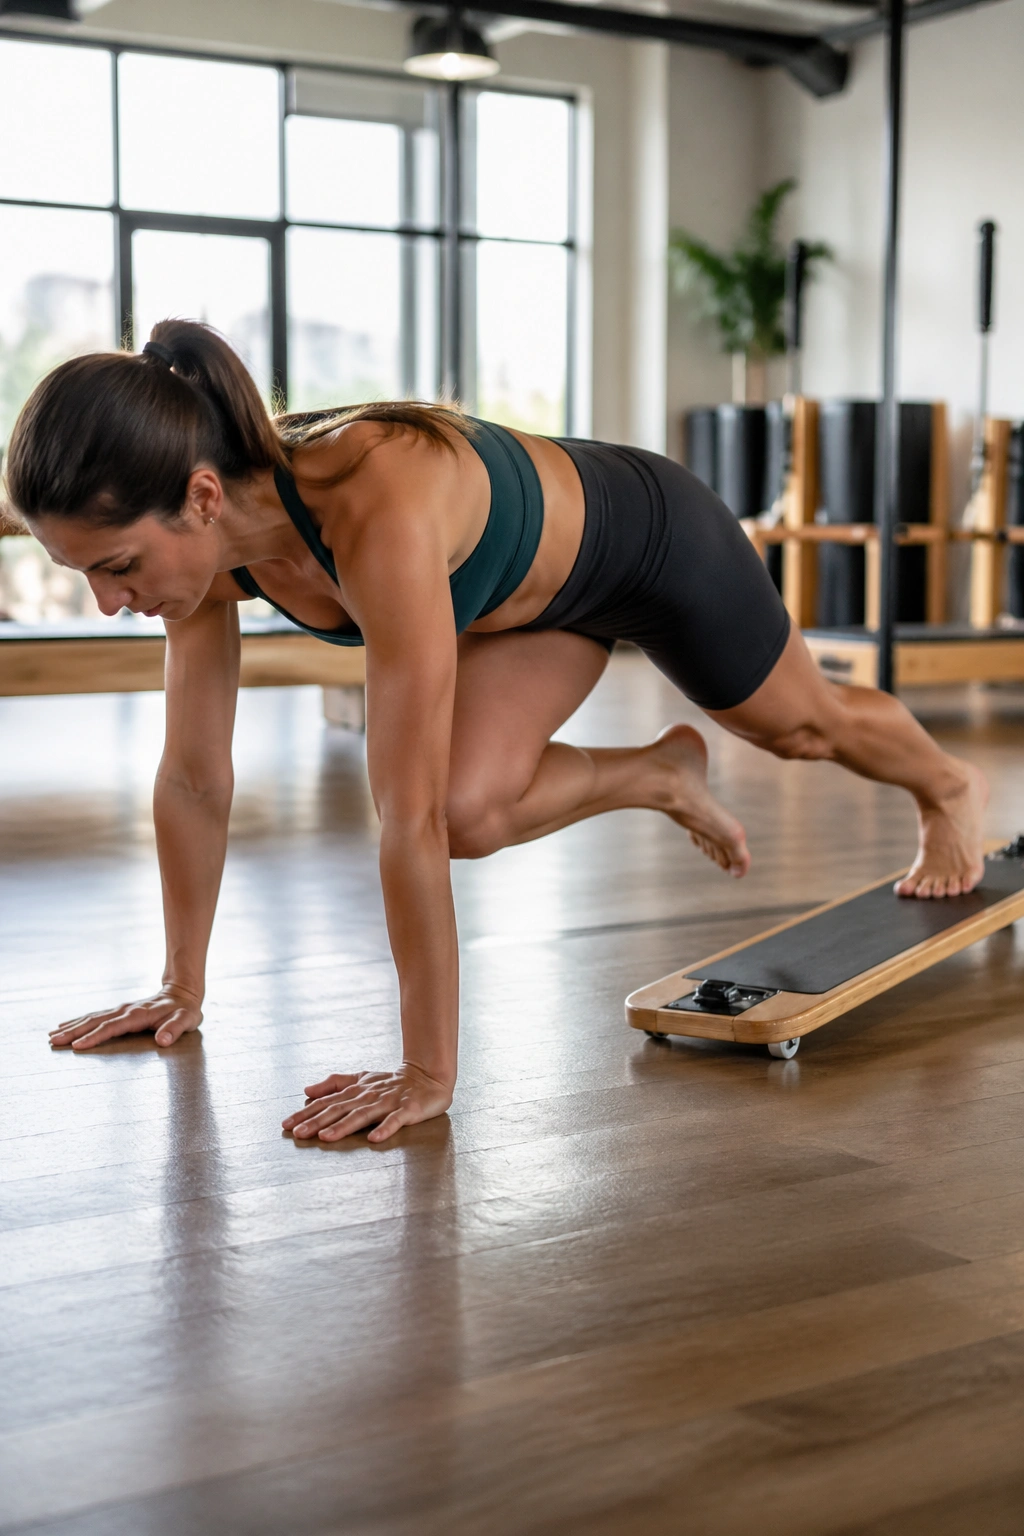
Most people turn mountain climbers into cardio noise. The Pilates board version slows the whole thing down and exposes every shortcut.
Place your hands on the floor, stack shoulders over wrists, and set both feet on the board. Pull one knee toward your chest while the other leg stays long. Pause. Slide back. Switch. That pause matters. Without it, you can bounce off the hip flexors and call it core work when it isn’t.
You should feel a mix of lower abs, serratus, and deep front-body tension. Your upper back stays wide, your pelvis stays level, and your feet glide like they are on rails. If the board starts zigzagging, your weight has shifted too far into one side.
Use short intervals: 20 seconds on, 20 seconds off, 3 rounds. The movement stays cleaner that way. Longer sets tempt people to turn it into a sprint, and then the whole point is gone.
A good cue is “quiet board, quiet ribs.” When those two things hold, the move does what it is supposed to do.
9. Mermaid Oblique Pulls
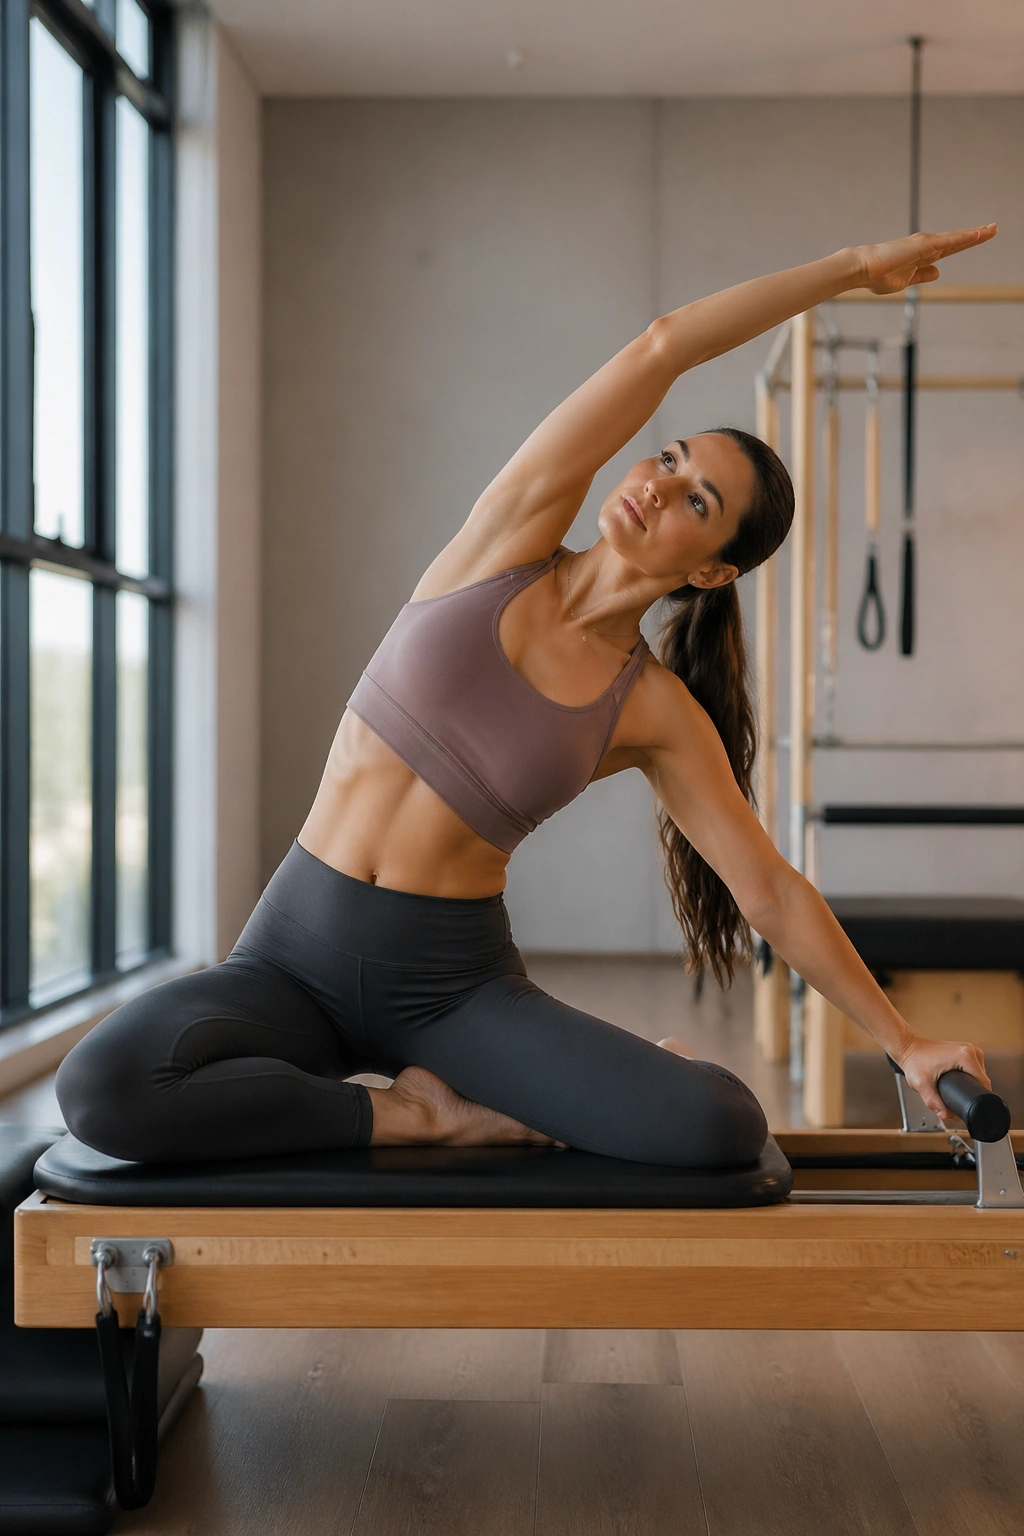
Pilates is not only front-body work, and the mermaid pull proves it.
Sit sideways on the board with your legs folded comfortably or in a modified Z-sit if your hips allow it. Hold one handle in the outside hand, or place the outside hand lightly on the board if your setup does not use cords. Reach the free arm overhead and create a long side bend away from the anchor, then pull yourself tall through the side waist.
Why bother with side bending?
Because your obliques do more than twist you. They help control the rib cage, support breathing, and keep the trunk organized when weight shifts from one side to the other. A well-taught mermaid feels like opening and strengthening at the same time, which is a nice break from plank-after-plank programming.
Use a slow rhythm: bend for 2 counts, return for 2 counts, and do 8 reps per side. You are not yanking on the handle. You are lengthening one side of the waist and shortening the other with control.
If the sitting bones lift off the board, reduce the range. The work should stay in the waist, not slide into the low back.
10. Long Stretch Hold With Alternating Reach
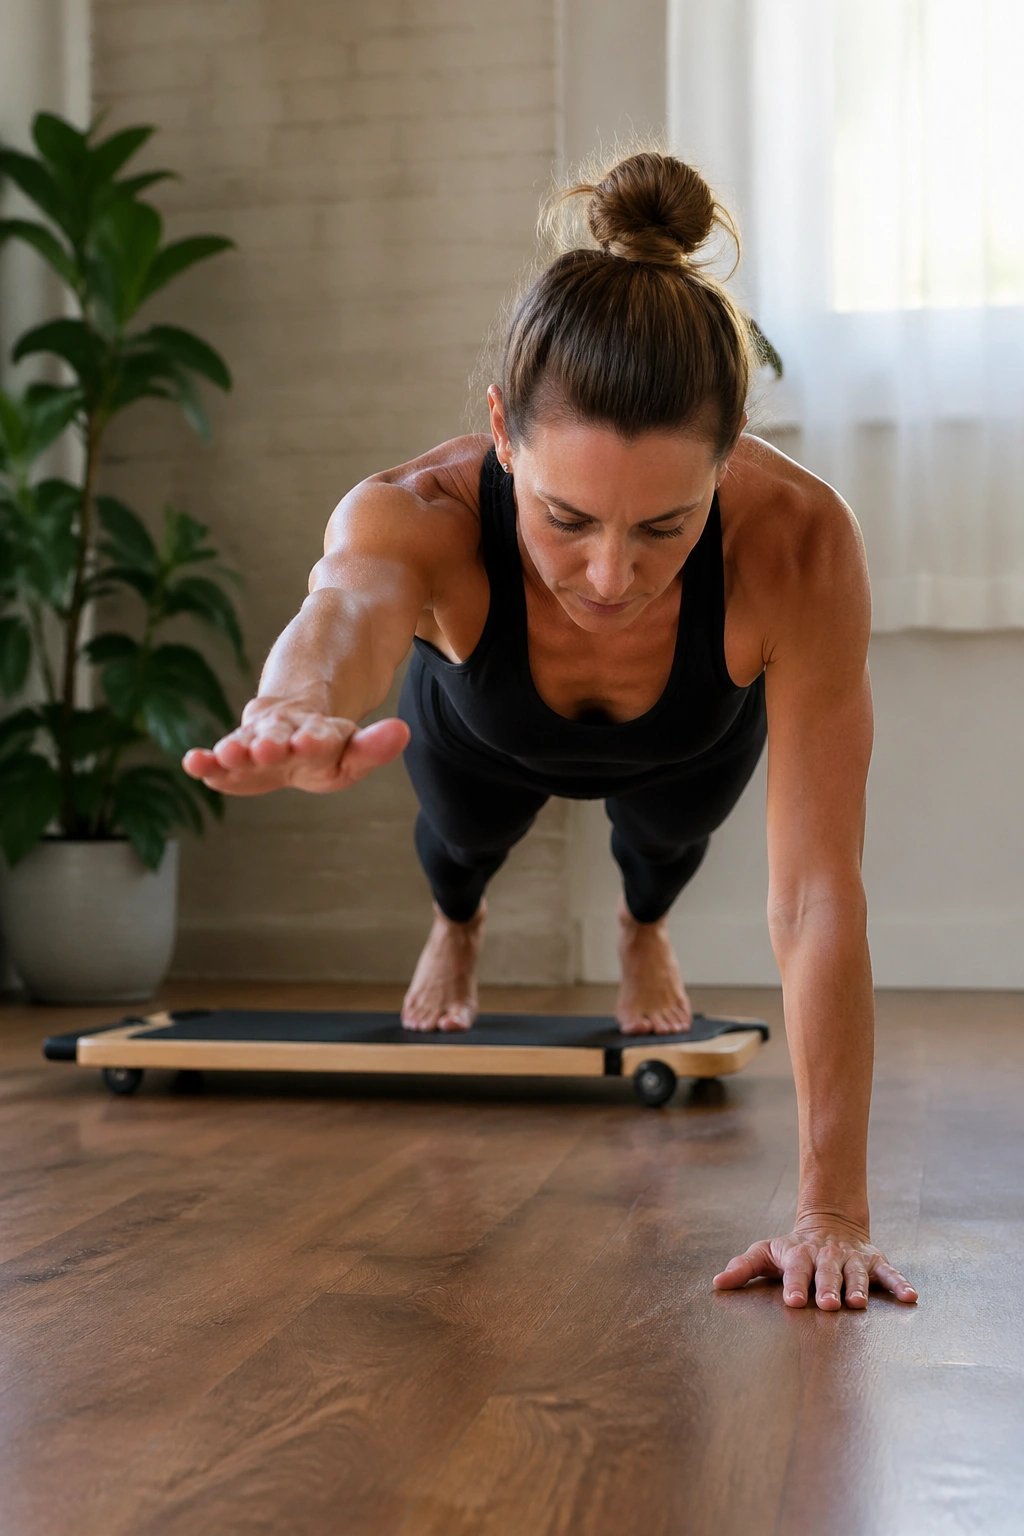
Picture a plank where one hand leaves the floor for two full seconds and nothing else is allowed to move. That’s the long stretch reach, and it is sneaky.
Set up in a high plank with your feet on the board and hands on the floor. Find your long line first. Then lift one hand and reach it forward 3 to 4 inches, place it back down, and repeat on the other side. The body wants to rock, twist, and widen through the ribs the second a hand leaves the floor. Your core’s job is to say no.
This move teaches anti-rotation in a way people can feel right away. The abs are working, sure, though the shoulders and glutes have to join the conversation. That is why it feels like a full-body exercise even though the target is trunk control.
Do not chase a big reach. You are not trying to touch the far wall. You are trying to keep your zipper line aimed at the floor while one hand floats. Six reaches per side is enough for most sessions.
The board will tell you if you cheated. If it slides sideways, you shifted.
11. Reverse Plank Slide-Throughs
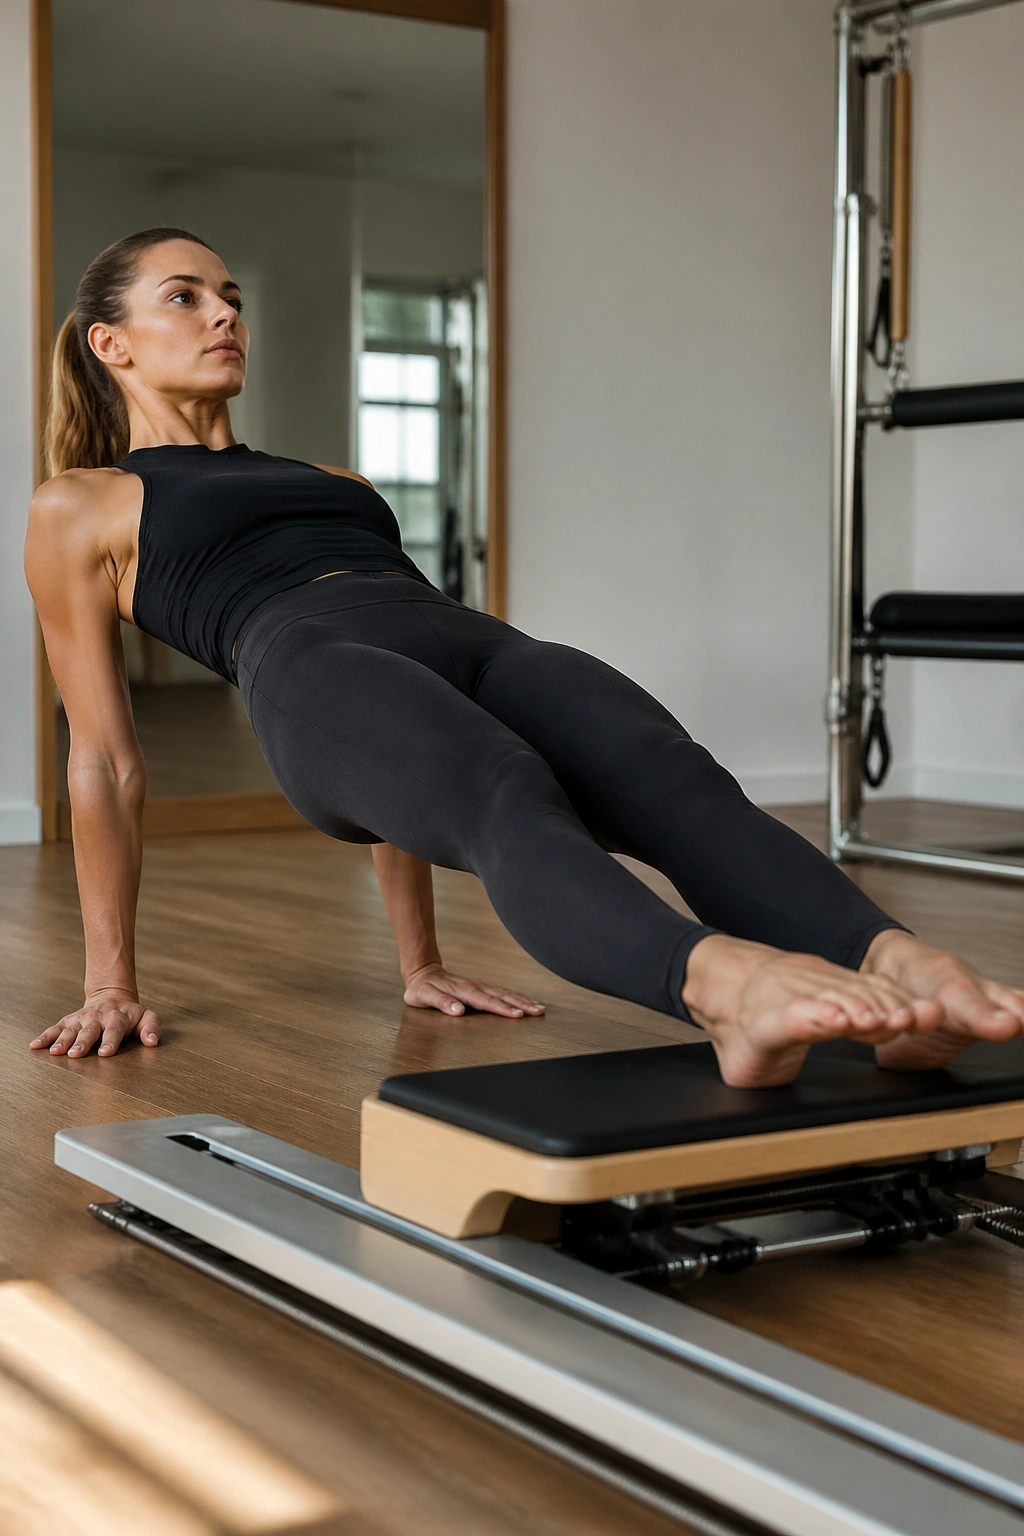
This one looks easy until your triceps and hamstrings start arguing with each other.
Sit on the floor with your hands behind you, fingers pointing toward your feet or slightly outward if your wrists prefer that angle. Place both heels on the board. Press into your hands, lift your hips into a reverse plank or tabletop, then slide your heels forward and back without letting the chest cave in.
The front of the body has to stay open, but the ribs cannot pop. That balance is the trick. People hear “reverse plank” and think only about the back side. On the board, the anterior core still has to manage the shape or the whole line falls apart.
A few useful details:
- Start with bent knees and a tabletop shape before trying a straight-leg reverse plank.
- Keep the shoulders broad instead of pinched together.
- Slide out for 3 counts and in for 2 counts.
- Perform 6 to 8 reps.
You might cramp in the hamstrings the first round. Pause, shake it out, then go back in with a smaller range. The body usually learns fast here.
12. Kneeling Pilates Board Rollouts
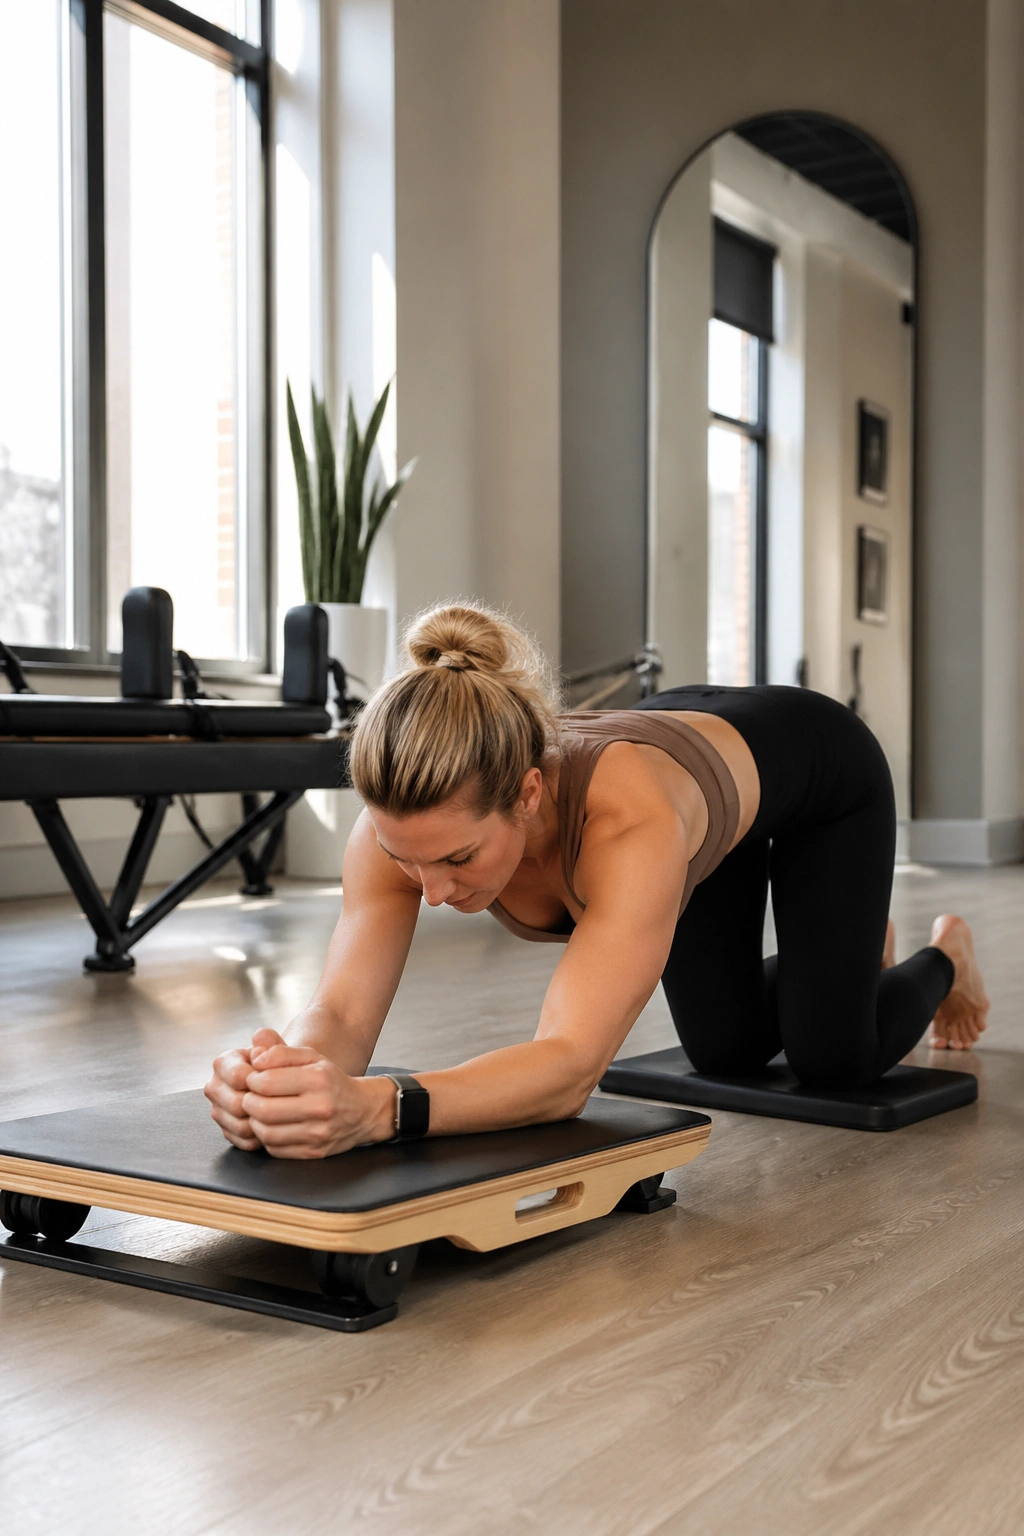
Unlike an ab wheel, a Pilates board rollout gives you a little more control and a little less drama. That makes it better for learning.
Kneel on a pad with your forearms or hands on the board, hips stacked over knees. Brace the abs before the board moves. Then glide forward slowly, keeping the pelvis slightly tucked and the ribs from spilling open. Stop when you feel your low back ask for help. Pull back in from the abdominals, not by yanking with the shoulders.
This is one of the cleanest ways to train anti-extension strength. Your torso wants to turn into a hammock as the lever gets longer. Your job is to keep it more like a plank on a diagonal line.
Depth is earned here. A rollout of 6 inches with a quiet spine is a stronger rep than a huge one done with a back arch. Start with 5 reps, each with a 2-second return. Rest. Then decide if you have another set.
Do not chase the floor. Chase control.
13. Boat Hold With Alternating Toe Taps
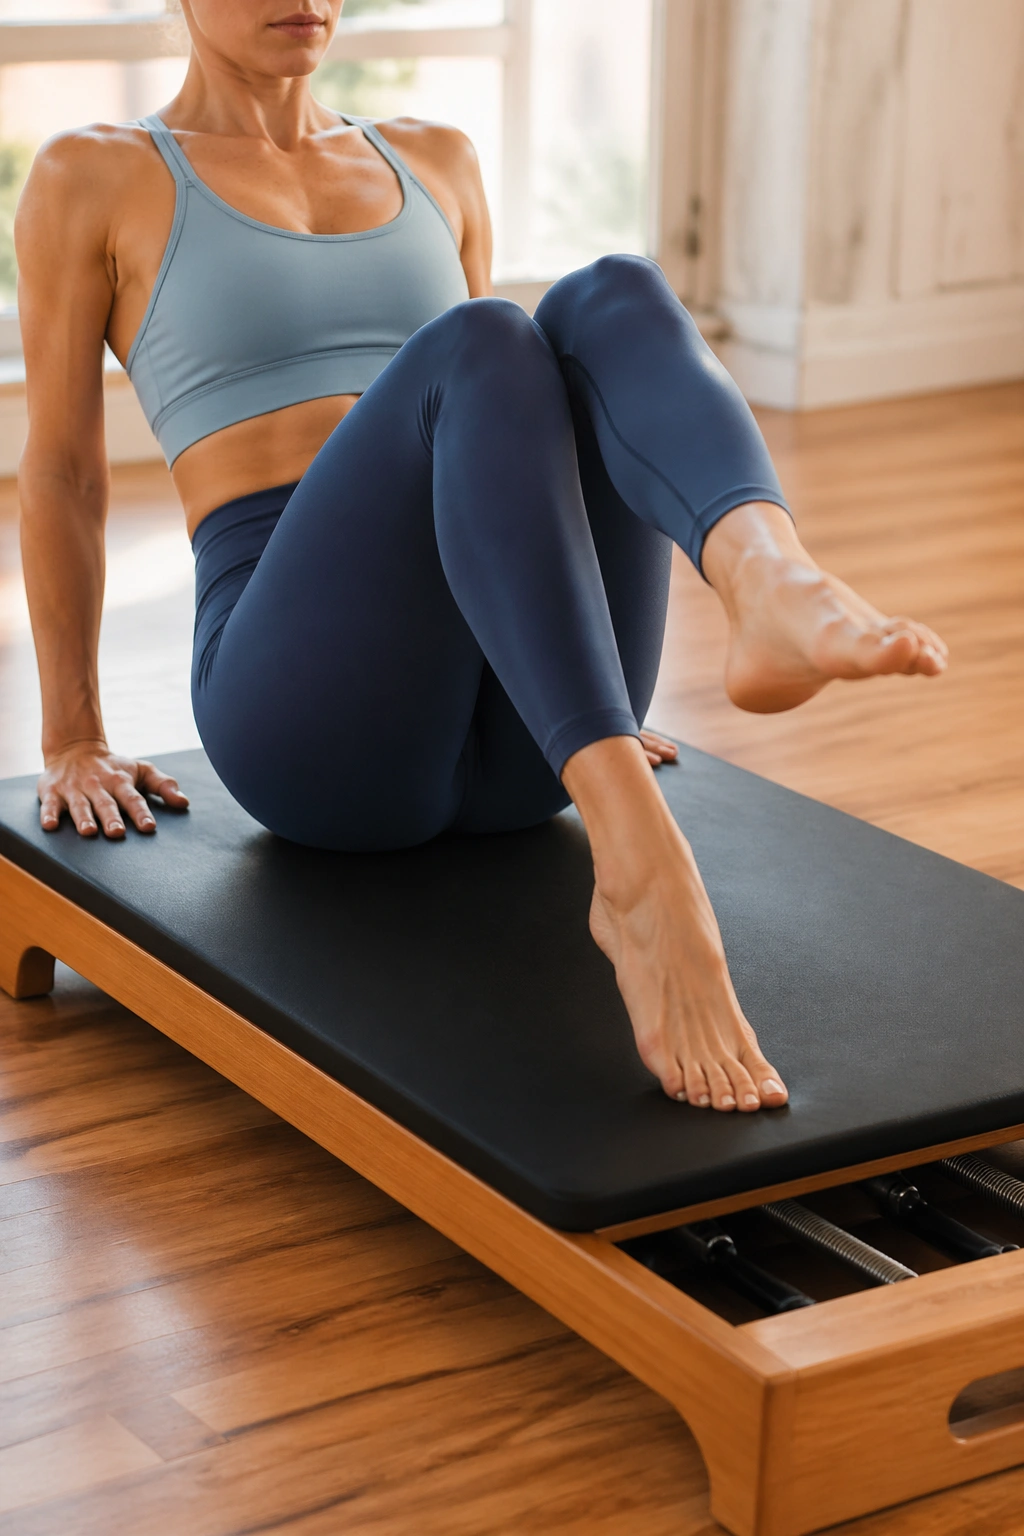
This one sits right on the line between balance drill and abdominal burner.
Sit near the middle of the board with your knees bent and hands lightly holding the sides or handles for balance if needed. Lean back until your torso and thighs make a V shape, then lift one foot at a time to tabletop. From there, alternate tapping one set of toes down to the board while the other leg stays lifted.
Where people miss it
They throw the chest back, grip the hip flexors, and let the spine turn stiff. A better rep keeps the sternum soft, the low belly drawn inward, and the movement small enough that your pelvis does not rock.
Try this sequence
- Hold the V shape for 10 seconds first.
- Add 6 toe taps per side.
- Exhale each time the toes lower.
- Rest, then repeat for 2 rounds.
If your low back complains, place your hands behind your thighs for support and keep the taps shallow. You will still get plenty of work.
14. Standing Scooter Lunges
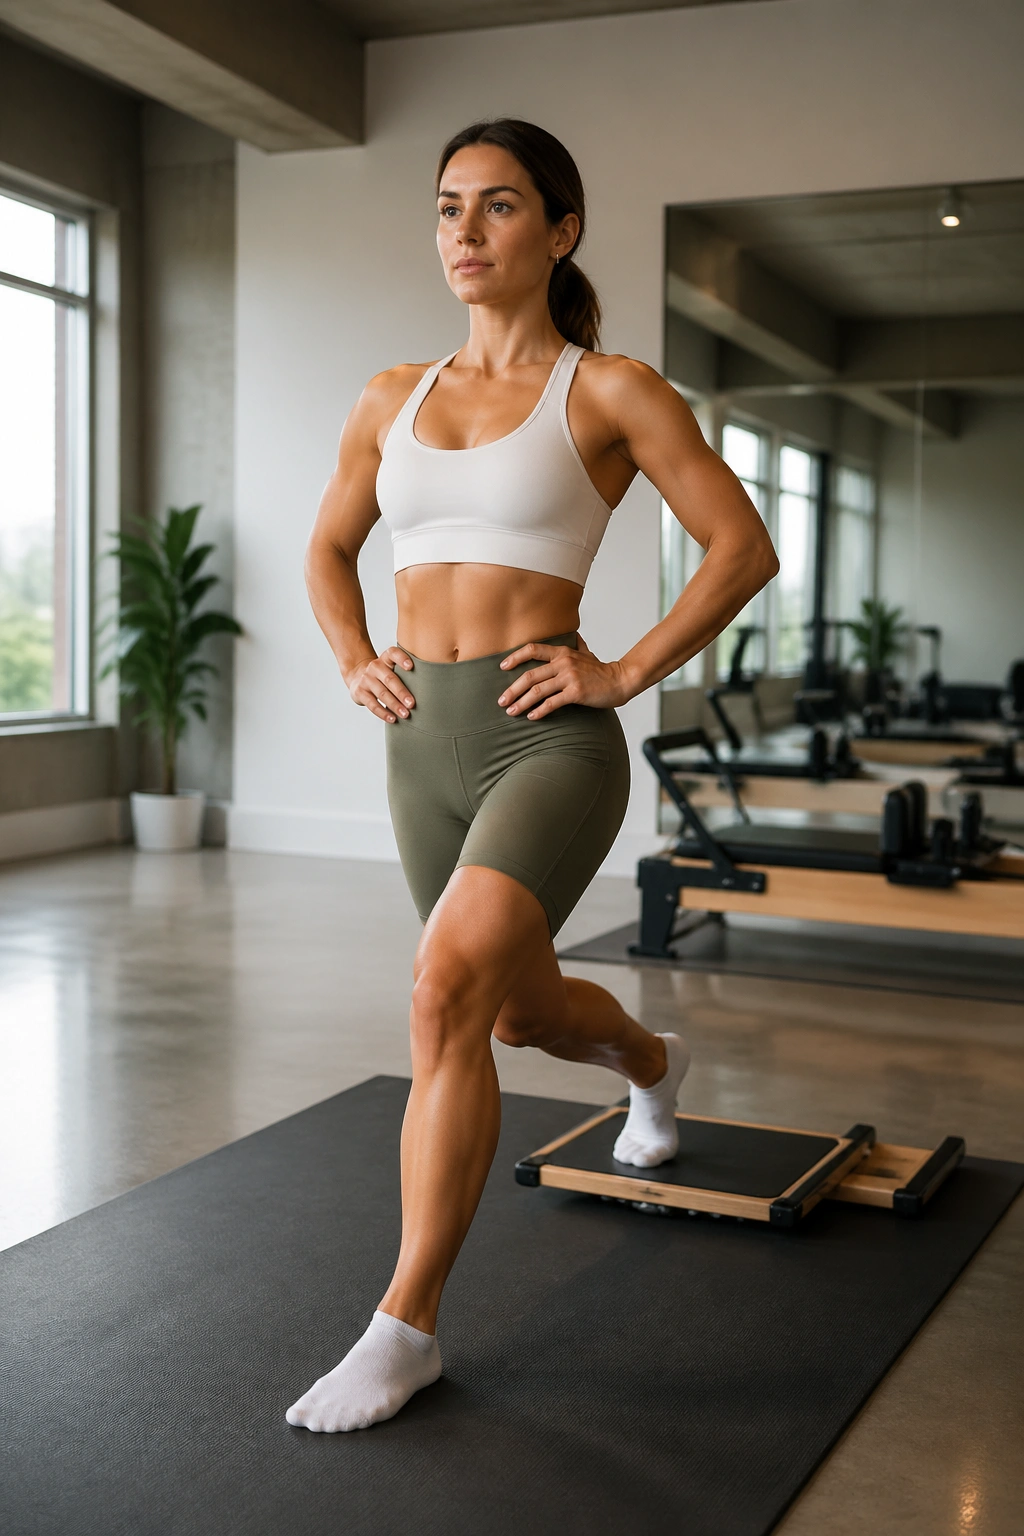
Not every strong core move happens on the floor. The standing scooter lunge is proof.
Stand tall with one foot planted on the floor and the other foot on the board behind you. Hands can rest on your hips, press into the handles, or reach forward at chest height. Bend the standing leg and glide the back leg straight behind you into a lunge, then pull back to standing without letting your pelvis twist.
The standing foot does most of the work, though the core is what keeps the torso from tipping forward and the hips from opening. You will feel the glute on the front leg, the inner thigh on the moving leg, and a firm wrap around the waist if you stay tall.
A lot of people use momentum on the return. Skip that. Press through the whole front foot — heel, big toe mound, outer edge — and think of zipping up from pelvic floor to lower belly as you come in.
Do 8 to 10 reps per side. Hold the end range for 1 second before returning. If balance is shaky, place two fingertips on a wall. There is no prize for wobbling through ugly reps.
15. Side-Kneeling Rotation Press
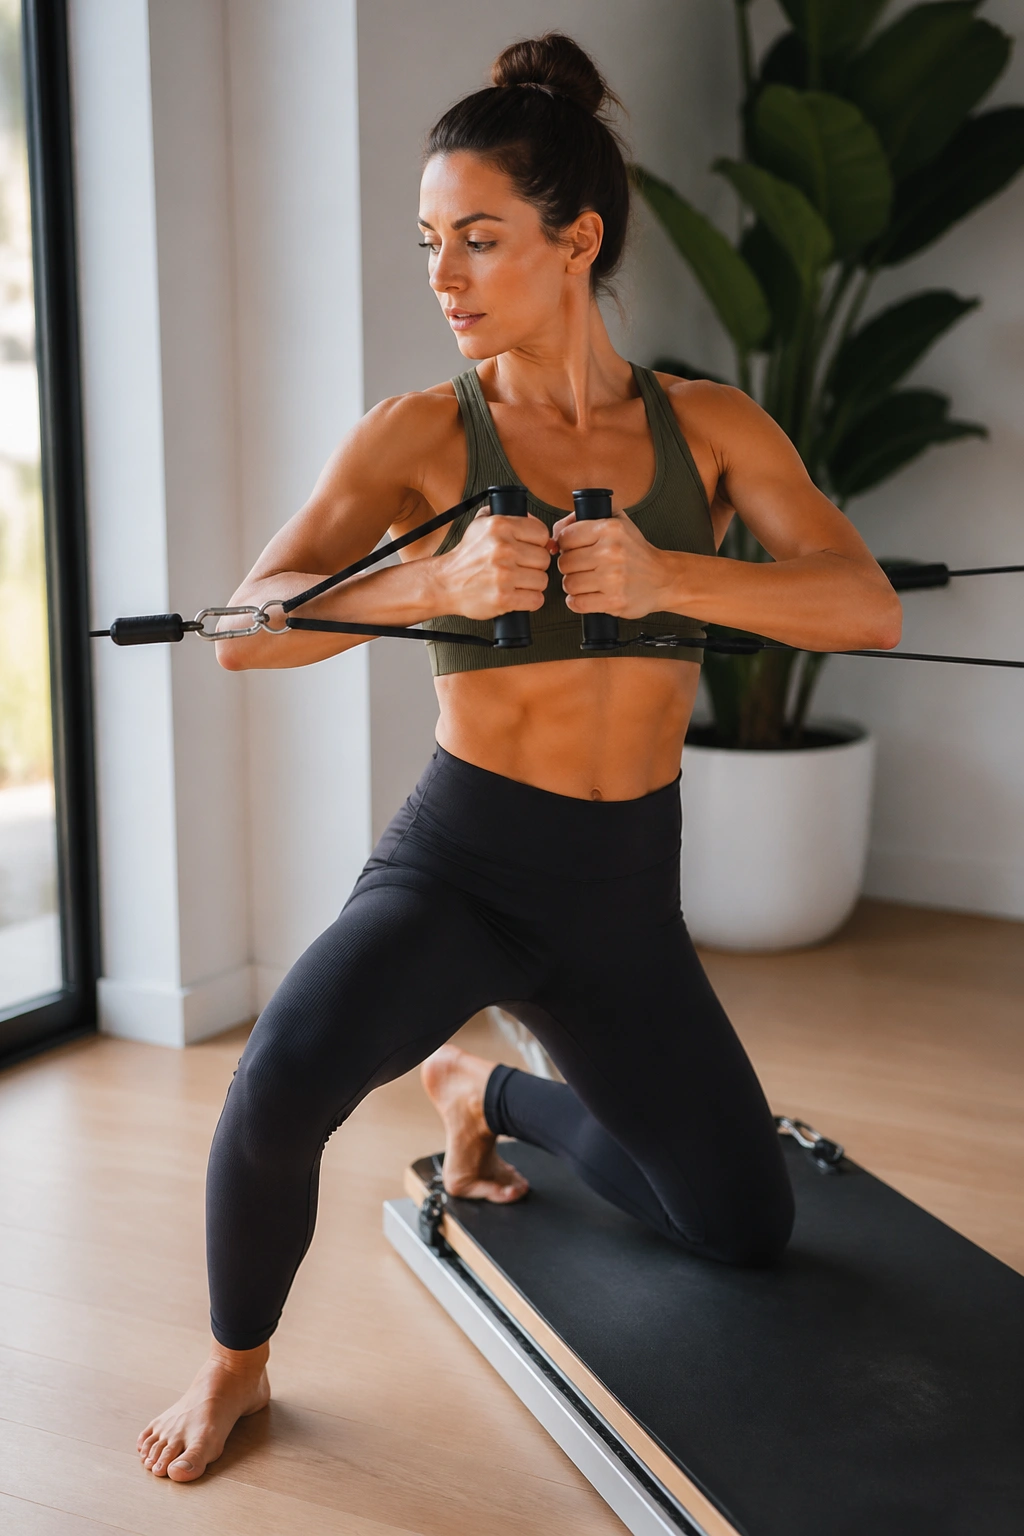
Want an oblique exercise that does not feel like recycled crunches? Try this.
Kneel sideways beside the board with the knee closest to it down and the outside foot planted. Hold both handles at your chest if your board uses cords. Press the arms forward and rotate your rib cage a small amount away from the anchor, then return to center. The hips stay stacked and quiet while the upper trunk moves.
Why it hits differently
Rotation on a stable base is one thing. Rotation while you are side-kneeling, resisting side bend and pelvic drift, is another. The board setup gives you tension that pulls you off line, so the obliques have to create and control the turn.
Keep the movement modest. A twist of 20 to 30 degrees is enough. Bigger turns often dump into the low back.
Use 10 reps per side with a brief pause in the press. If your neck tightens, lower the handles a bit and widen the collarbones. The shoulders should not be the star here.
16. Plank Saw
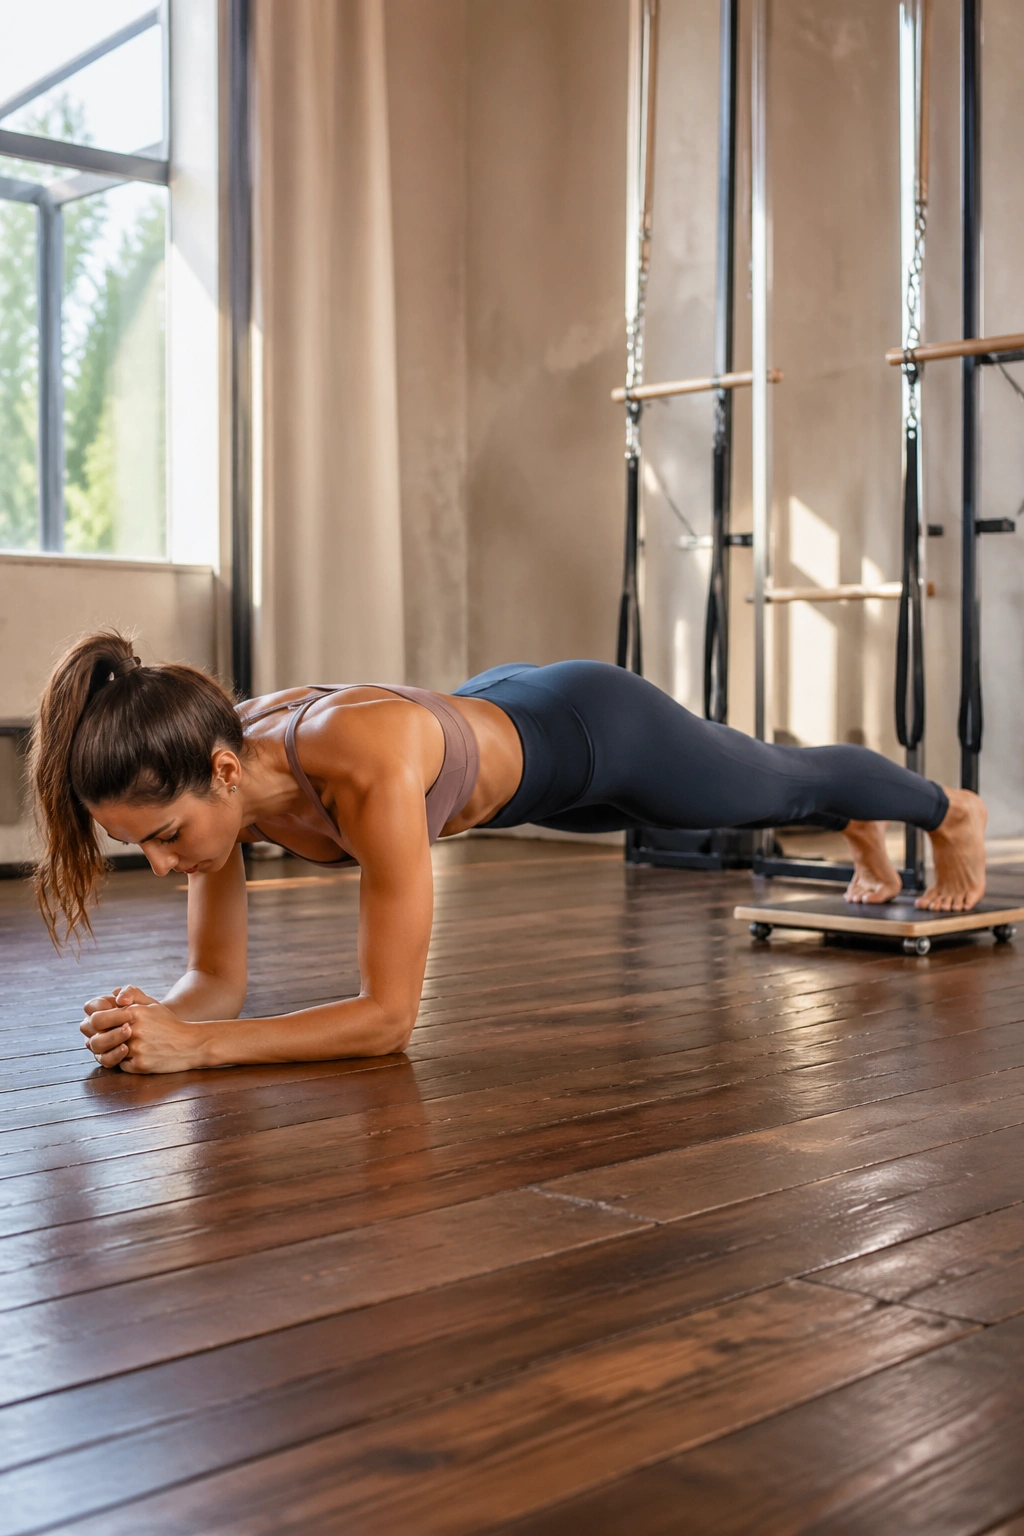
Small range. Big demand.
Set your forearms on the floor and place your feet on the board in a forearm plank. From that long line, rock your body backward a few inches by pushing the board away with your toes, then pull yourself forward again until your shoulders move slightly past your elbows. The body stays straight the whole time.
What makes the plank saw nasty — and useful — is the lever. As you glide back, the force on the trunk changes, and the abs have to keep the pelvis from tipping. Your serratus, lats, and glutes join in, which is why this drill feels like a full-chain challenge rather than isolated ab work.
The range only needs to be 4 to 6 inches. More than that often turns into a sagging low back or a piked butt. Neither gives you the training effect you want.
Work for 15 to 25 seconds. Rest. Repeat for 2 or 3 rounds. If you shake, good. Shaking with shape is part of the deal.
17. Hollow Body Slide Circles
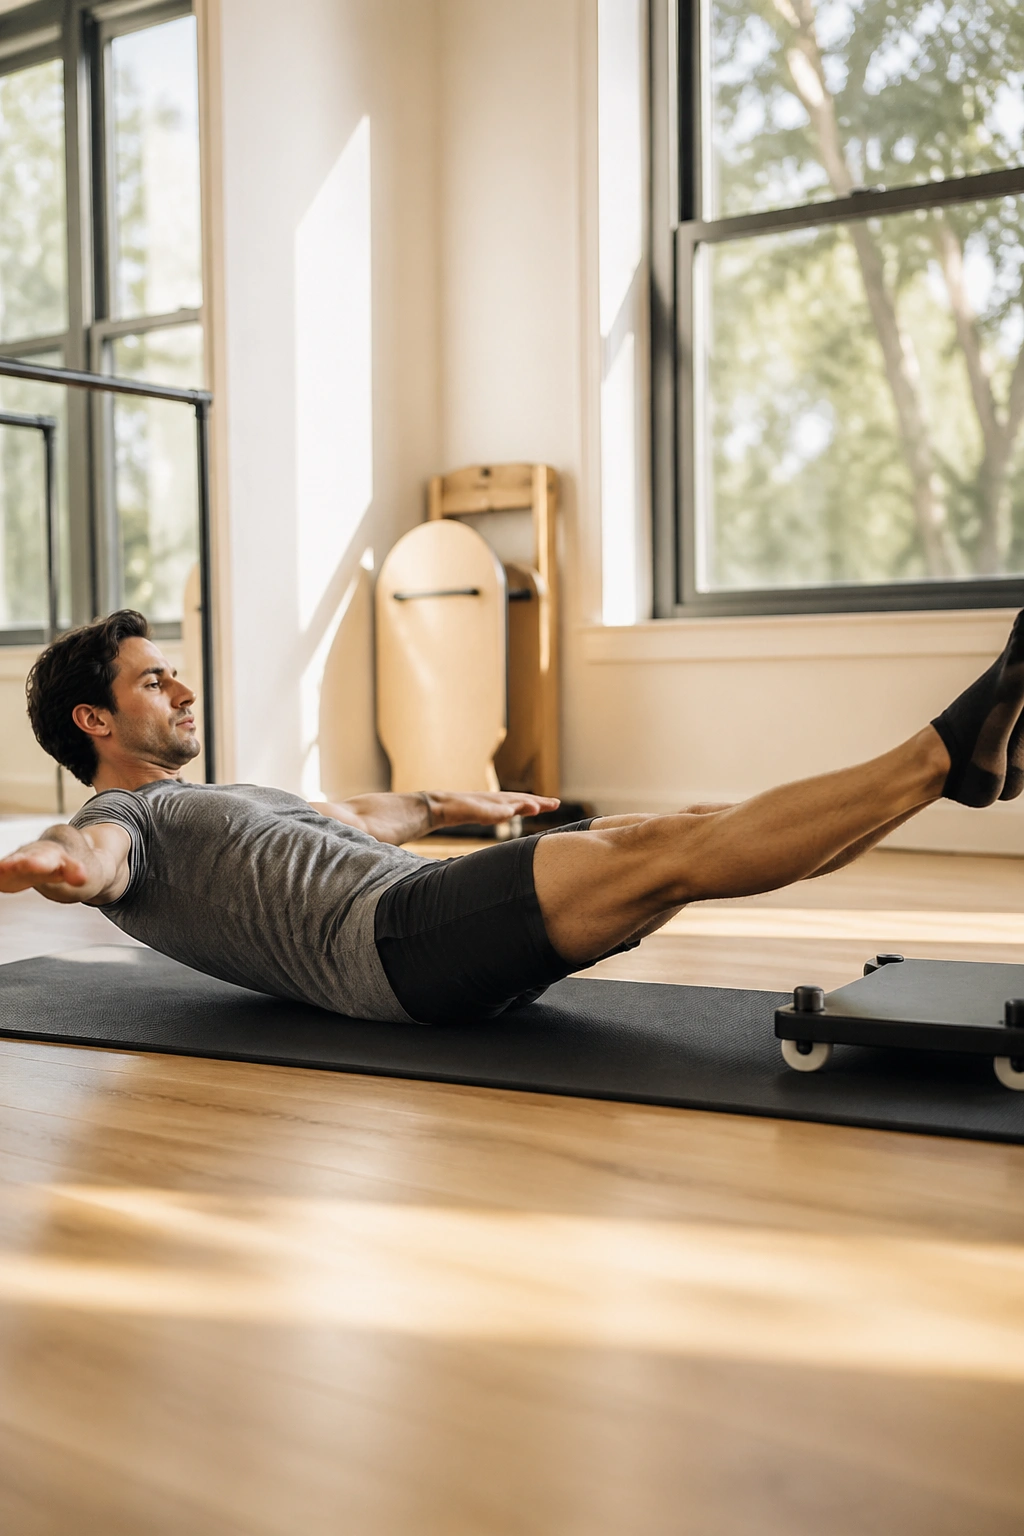
A clean hollow hold is hard enough. Add moving heels, and the board starts asking tougher questions.
Lie on your back with your shoulder blades lifted, arms long by your sides, and both heels resting lightly on the board. Press the low ribs down, keep the pelvis heavy, and extend the legs to a low angle that you can control. From there, draw small circles, about the size of a saucer, with both heels together.
The trick is not the circles themselves. The trick is keeping the trunk still while the legs stir underneath it. Your deep abs, lower fibers of the obliques, and hip flexors all pitch in, though the sensation should stay in the front wall of the abdomen, not pinch into the low back.
Breathe in short sips if you need to. Long dramatic breaths often knock people out of position here. Four slow circles one way, four the other way, rest, then repeat.
Neck tired? Drop the head for the second set and keep the ribs anchored. You lose a little intensity, not the point of the exercise.
18. Single-Leg Bridge Eccentric Curls
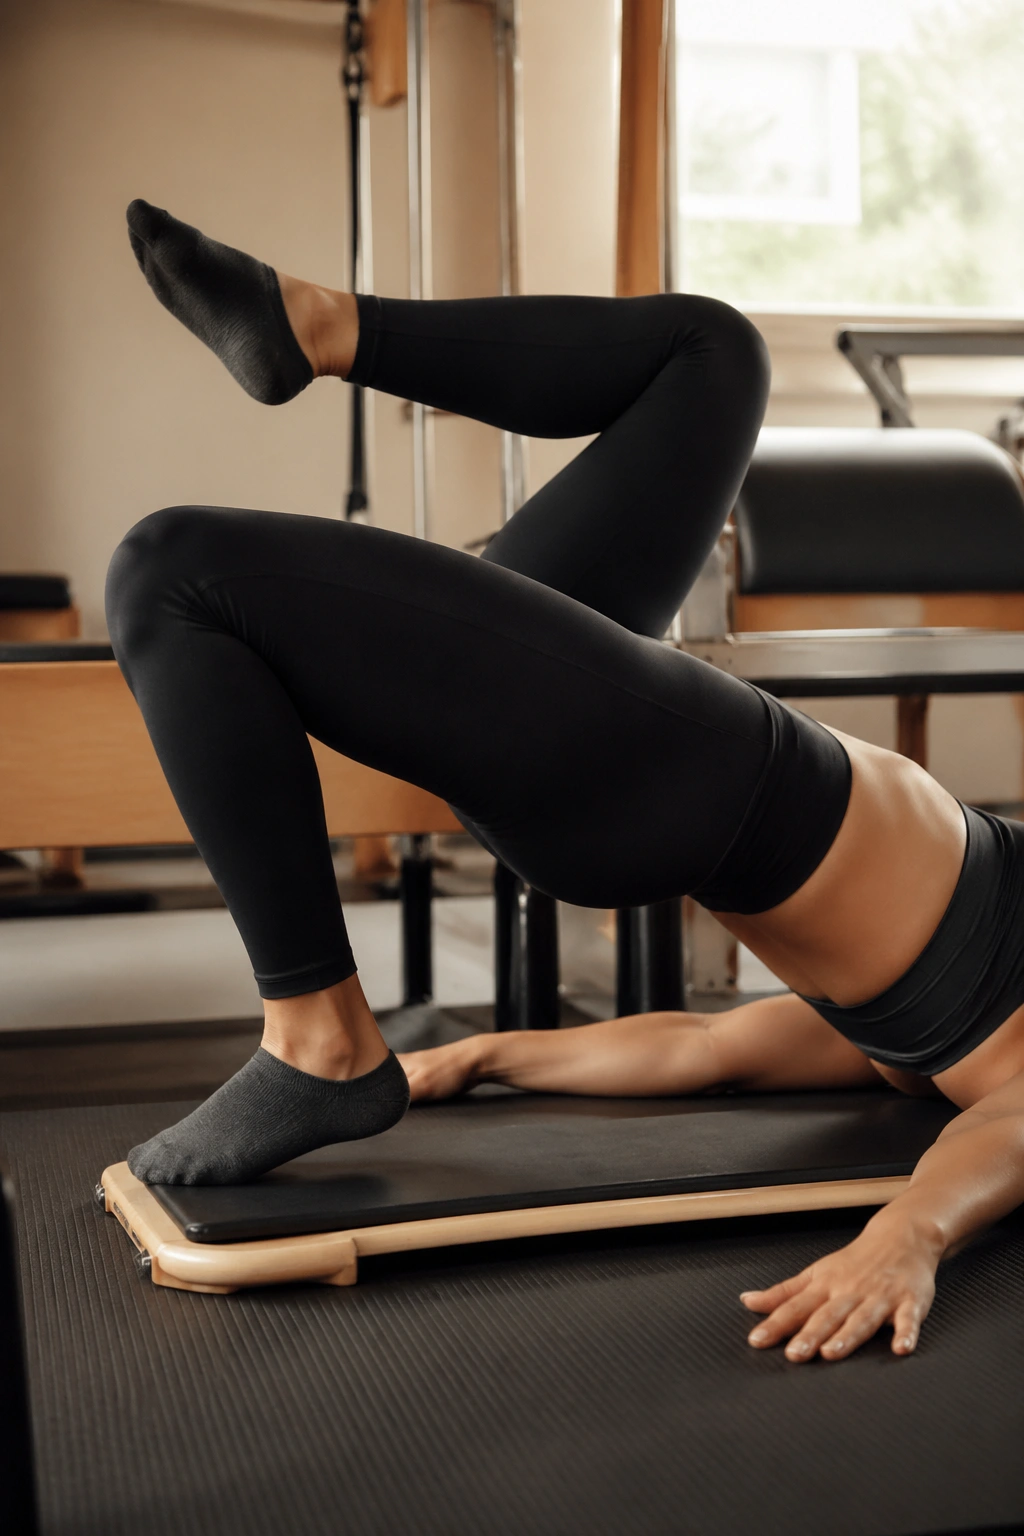
The first rep usually feels manageable. The third one tells the truth.
Lie on your back with one heel on the board and the other leg lifted straight up or bent in tabletop if that feels steadier. Lift into a bridge. From there, slowly slide the working heel away until the knee is close to straight, then place the hips down, reset, and pull the board back in before the next rep. That slow lowering phase is the eccentric part.
This drill is gold for posterior-chain strength, pelvic control, and anti-rotation. With one leg doing the sliding, your pelvis wants to drop or swivel. Your obliques and deep core have to keep the belt line level.
Use a slow count:
- Lift the hips first.
- Slide out for 4 seconds.
- Lower down with control.
- Reset and pull in.
- Complete 5 reps per side.
If hamstring cramps show up, shorten the slide and think about pressing through the heel instead of clawing with the toes.
19. Half-Kneeling Chop With Front-Foot Slide
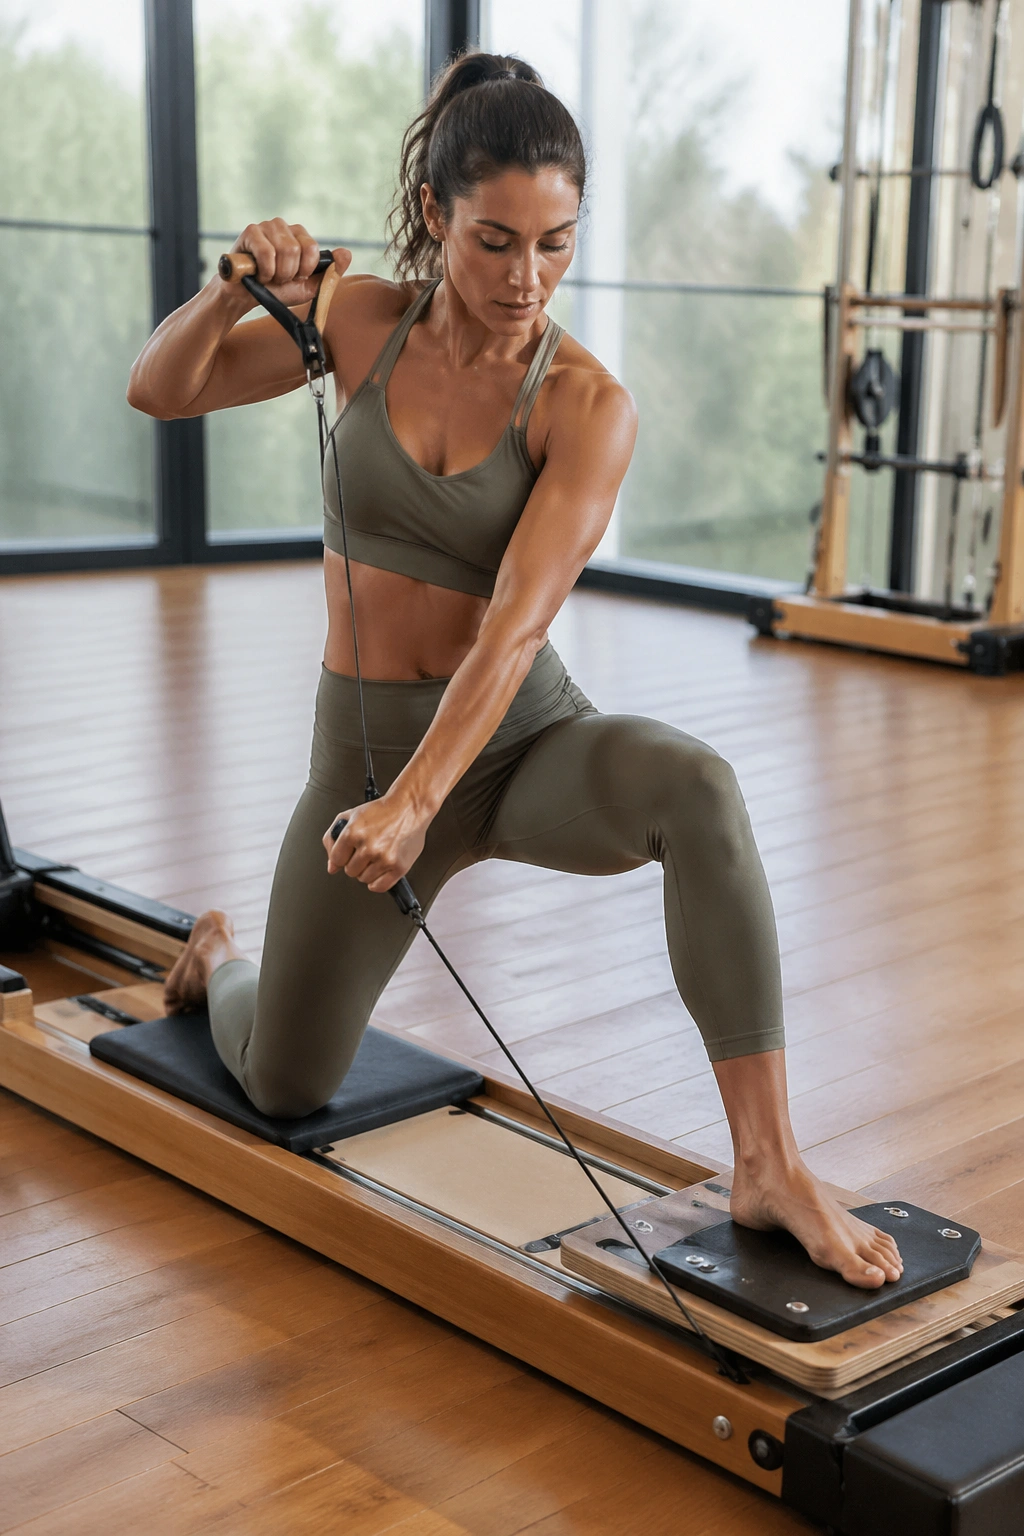
Unlike a seated twist, this variation forces your core to deal with rotation while your lower body resists being dragged around.
Set up in a half-kneeling stance beside the board with your front foot on the sliding surface and your back knee on a pad. Hold one handle high near the shoulder opposite the front leg. From there, chop diagonally down across your body while the front foot glides forward an inch or two, then return with control.
That small front-foot slide changes the whole feel of the exercise. Your adductors, glutes, and obliques have to cooperate so the pelvis does not tip and the knee does not cave inward. It is a coordinated move, not a brute-force one.
Keep the range on the foot tiny at first. 1 to 3 inches is enough. Bigger slides tend to turn the drill into a balance save instead of a chop pattern.
Aim for 8 reps per side. Exhale on the chop. Inhale as you return. If you cannot keep the front knee lined up over the middle toes, reduce the cord tension and tighten the range before adding speed.
20. Assisted Teaser on the Board
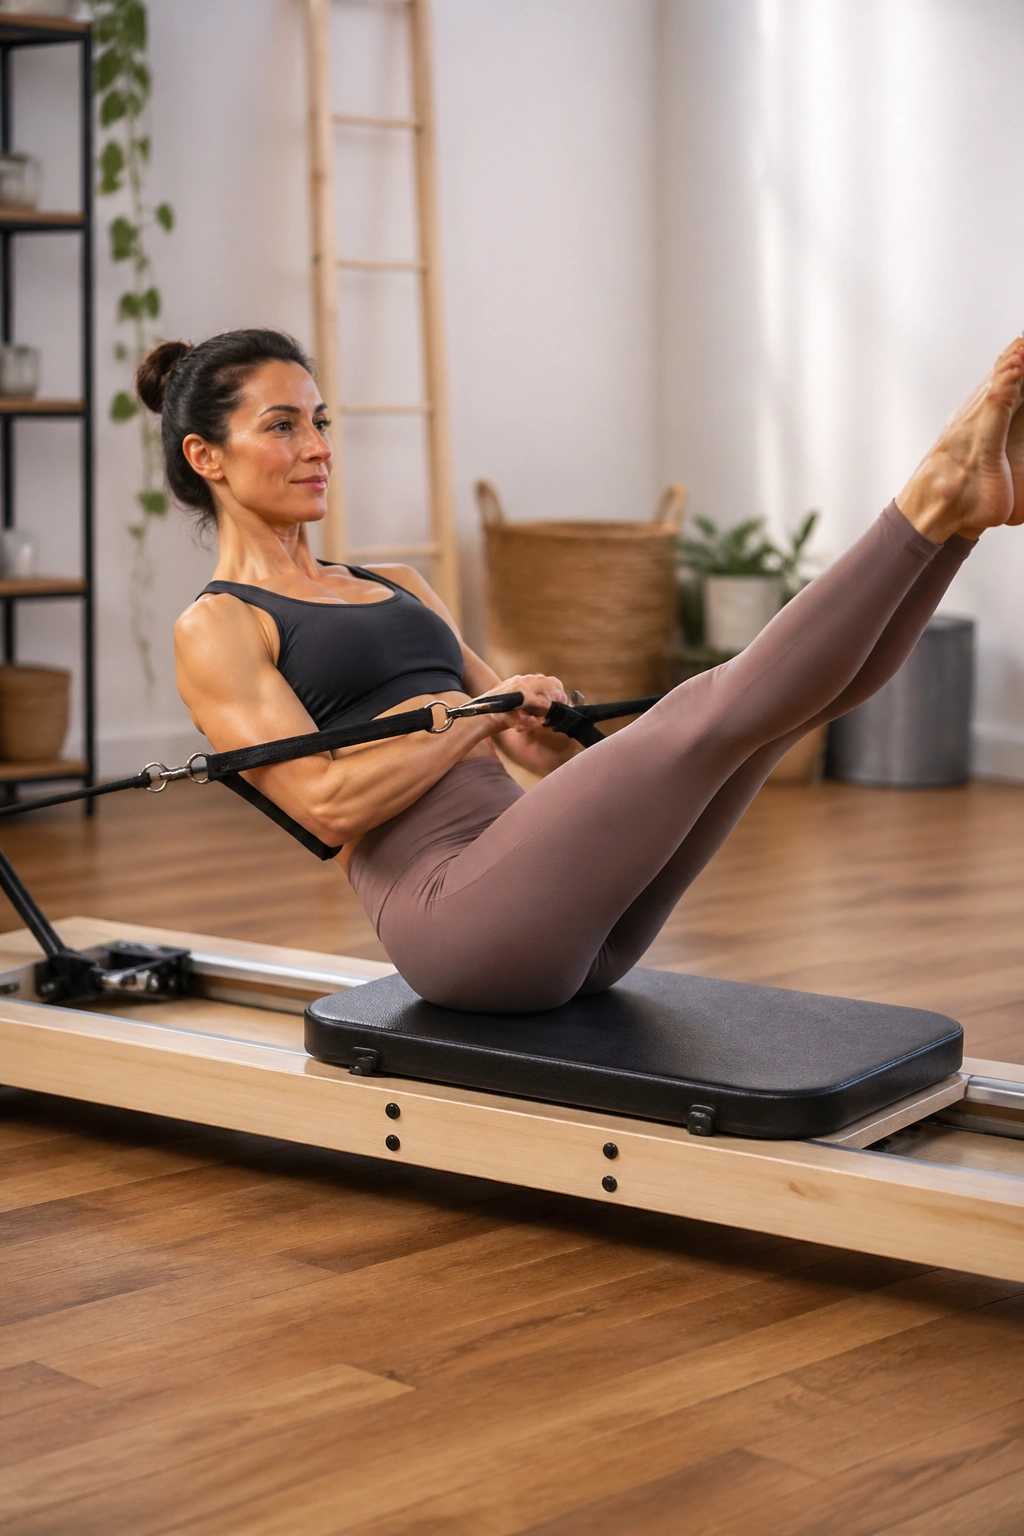
The teaser is one of those classic Pilates moves that people either love or avoid for years. Using the board for light assistance makes it more trainable and less random.
Lie on your back on the board with your knees bent and feet grounded or lightly supported, depending on your setup. Hold the handles with light tension. Start by nodding the chin, peeling the head and shoulders off the board, and rolling the spine up one segment at a time until you balance on your sit bones. Then extend the legs to your teaser shape if you can keep the chest lifted and the low belly pulled inward.
What the board does for the teaser
The handles can give you just enough help to learn the sequencing without yanking on your neck or swinging your legs. Used well, that support teaches the path of the movement instead of replacing it.
A solid approach
- Roll up slowly for 4 counts.
- Hold the top for 2 breaths.
- Lower down for 4 counts.
- Start with bent knees before trying straight legs.
- Perform 5 to 6 reps.
Do not rush the descent. The lowering phase is where the abs earn their keep.
Final Thoughts
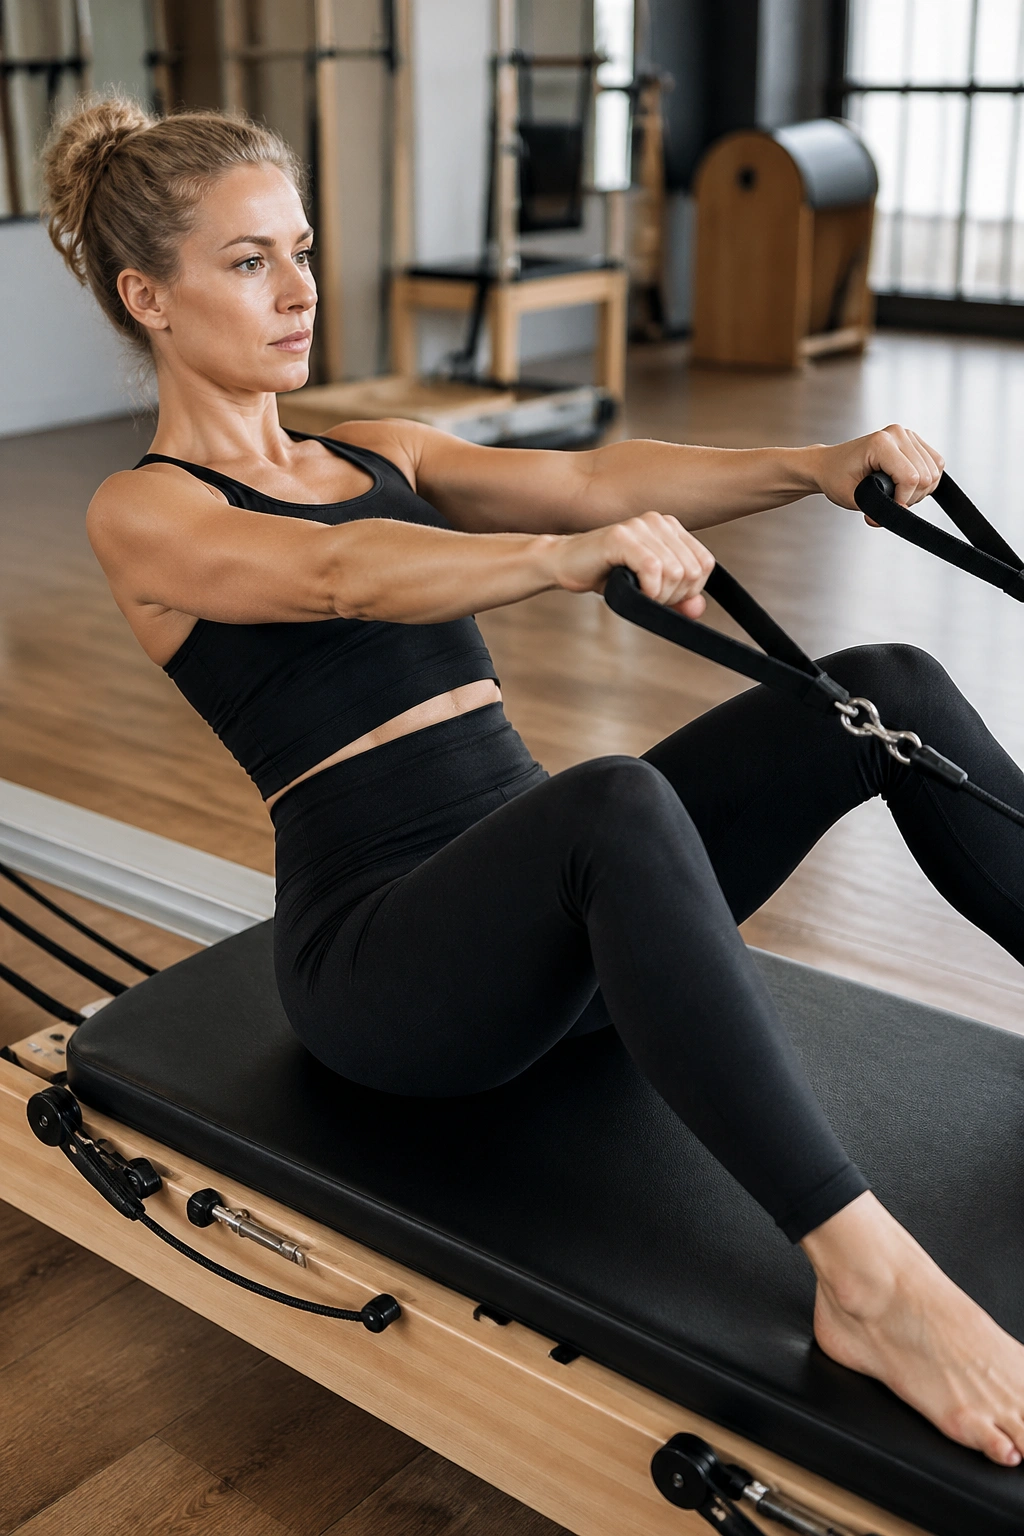
If you want these Pilates board workouts to build lasting core strength, do not cram all 20 into one session. Pick 4 to 6 moves and give each one a clear role: one flexion pattern, one anti-extension move, one bridge or hamstring curl, one side-body exercise, and one standing drill. That mix trains the trunk the way life uses it — resisting, transferring, stabilizing, and moving on purpose.
A short session done with control will beat a longer one done in a blur. Ten clean kneeling rollouts, six honest pikes, and a side plank that stays stacked will carry over more than fifty rushed reps that throw stress into your neck and low back.
Start light, breathe on the effort, and let the board teach you where you leak tension. When the carriage gets quieter under you, that is usually the first sign your center is getting stronger.
