



Most people walk into a gym, head straight for the heavy iron, and assume that unless they are piling plates onto a barbell, their leg training is effectively a waste of time. They see resistance bands tucked away in a corner bin and dismiss them as rehab tools or low-intensity accessories for warm-ups. This is a mistake. The truth is that bands offer something a squat rack never can: consistent, unrelenting tension through every single degree of movement. When you squat with a barbell, the weight is effectively “dead” at the bottom of the movement. When you squat with a band, the resistance increases as you stand up, forcing your muscles to work harder, not just at the bottom, but all the way through to the lockout.
Training your legs with bands changes the resistance profile entirely. It forces you to control the eccentric—or lowering—phase of every lift, because the band wants to snap you back to the start. If you let it, you lose the tension. If you fight it, you build incredible stability and strength. This is not about making things easier; it is about making things smarter. Whether you are at home, traveling, or looking for a way to add a finishing burn to your existing weightlifting routine, these exercises will force muscles to fire that you have probably been neglecting for months.
You do not need a fancy gym membership or thousands of dollars in equipment to build powerful, defined legs. You just need to know how to manipulate the tension. The following exercises are designed to hit the quads, hamstrings, glutes, and calves from every angle imaginable, ensuring no muscle fiber goes unworked.
1. Resistance Band Squats
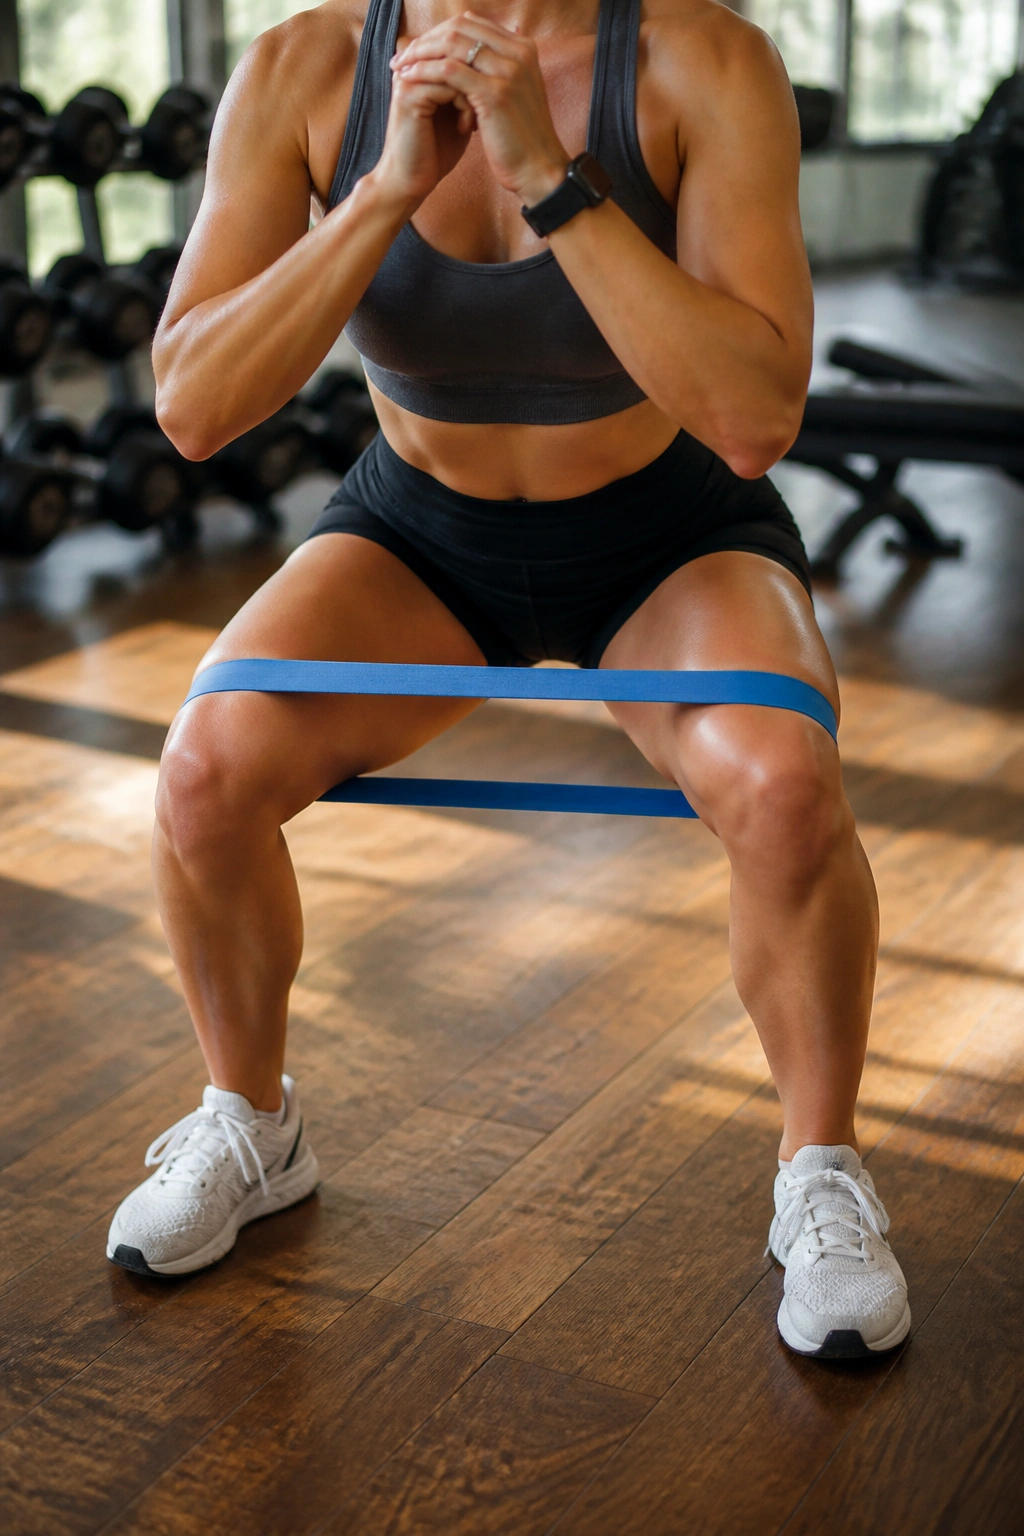
The fundamental movement of leg training is the squat, but adding a band adds a layer of difficulty that hits your glutes significantly harder than a standard air squat. Place a looped band just above your knees, step your feet shoulder-width apart, and push your knees outward against the resistance as you sit down. If your knees cave in, you aren’t doing it right.
The Mechanism
By forcing your knees outward to fight the band, you activate the glute medius and minimus, the smaller muscles on the side of your hips that control stability.
- Keep your chest up, looking straight ahead.
- Pause for a full second at the bottom.
- Drive up through your heels, not your toes.
Pro tip: Do not let the band snap your knees together on the way up; fight to keep them pushed out throughout the entire repetition.
2. Glute Bridges
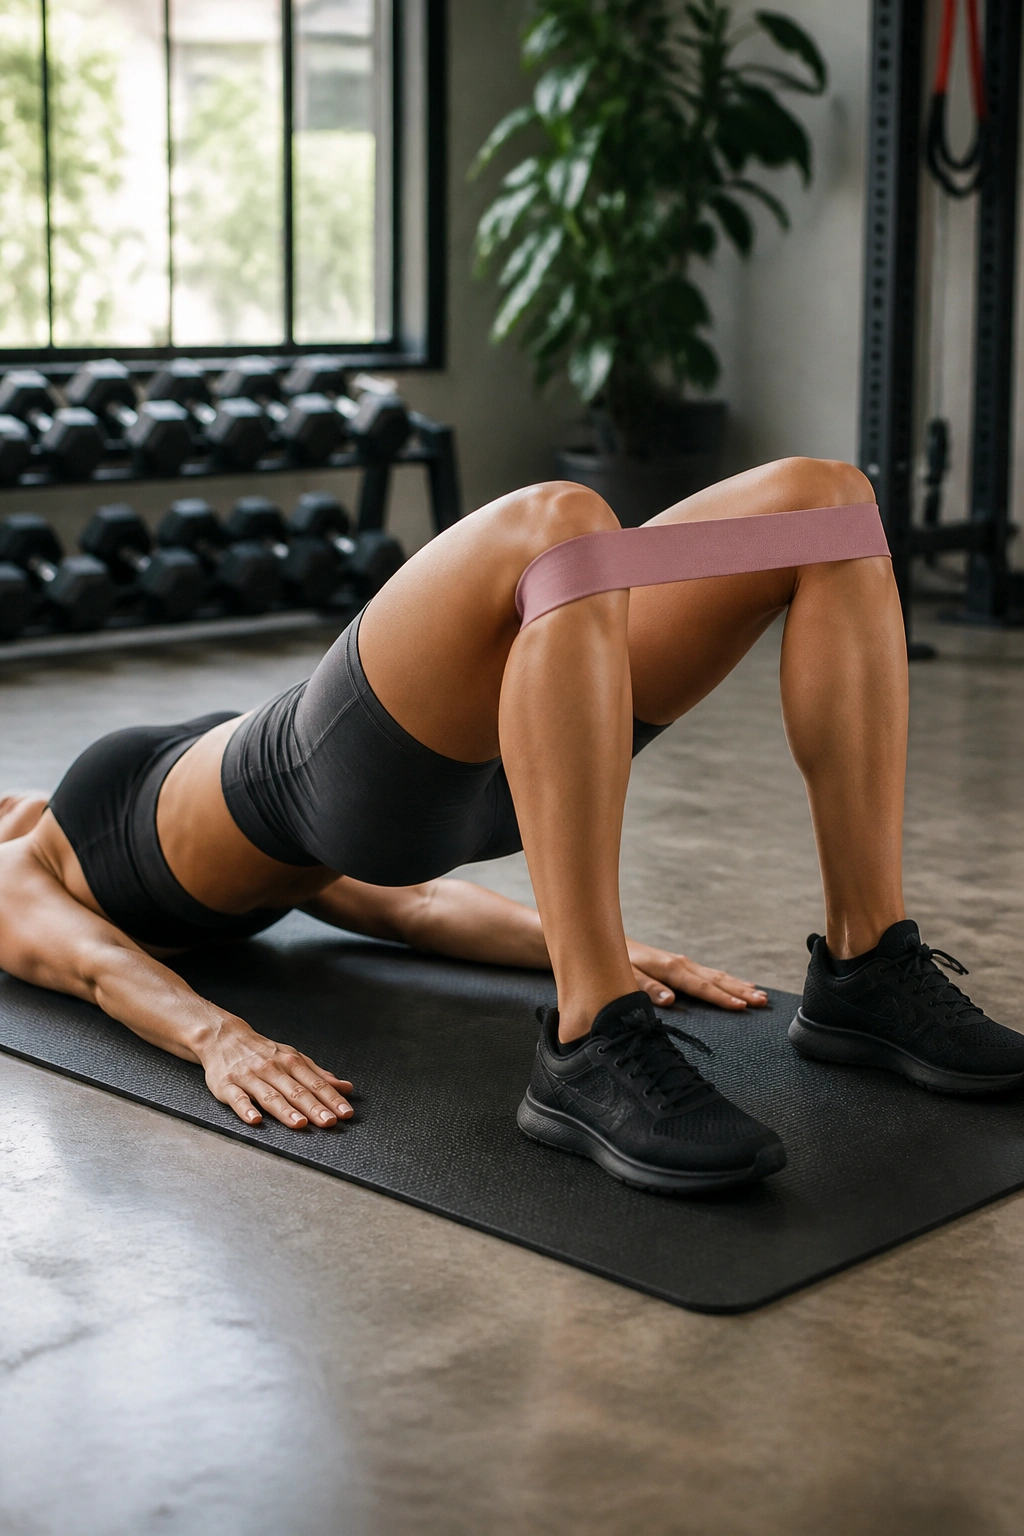
Lie flat on your back with your knees bent and feet planted on the floor, about hip-width apart. Place a looped band around your thighs, just above your knees. Drive your hips toward the ceiling by squeezing your glutes as hard as you can, ensuring your spine stays neutral. Do not arch your lower back.
Why It Works
This move is all about the “mind-muscle connection.” Because the band wants to pull your knees inward, your outer glutes have to fire constantly to keep your alignment perfect. If you feel this in your lower back instead of your butt, you are likely overextending your spine. Tuck your pelvis slightly underneath you at the top of the bridge to shift the focus back to where it belongs.
3. Standing Lateral Walks
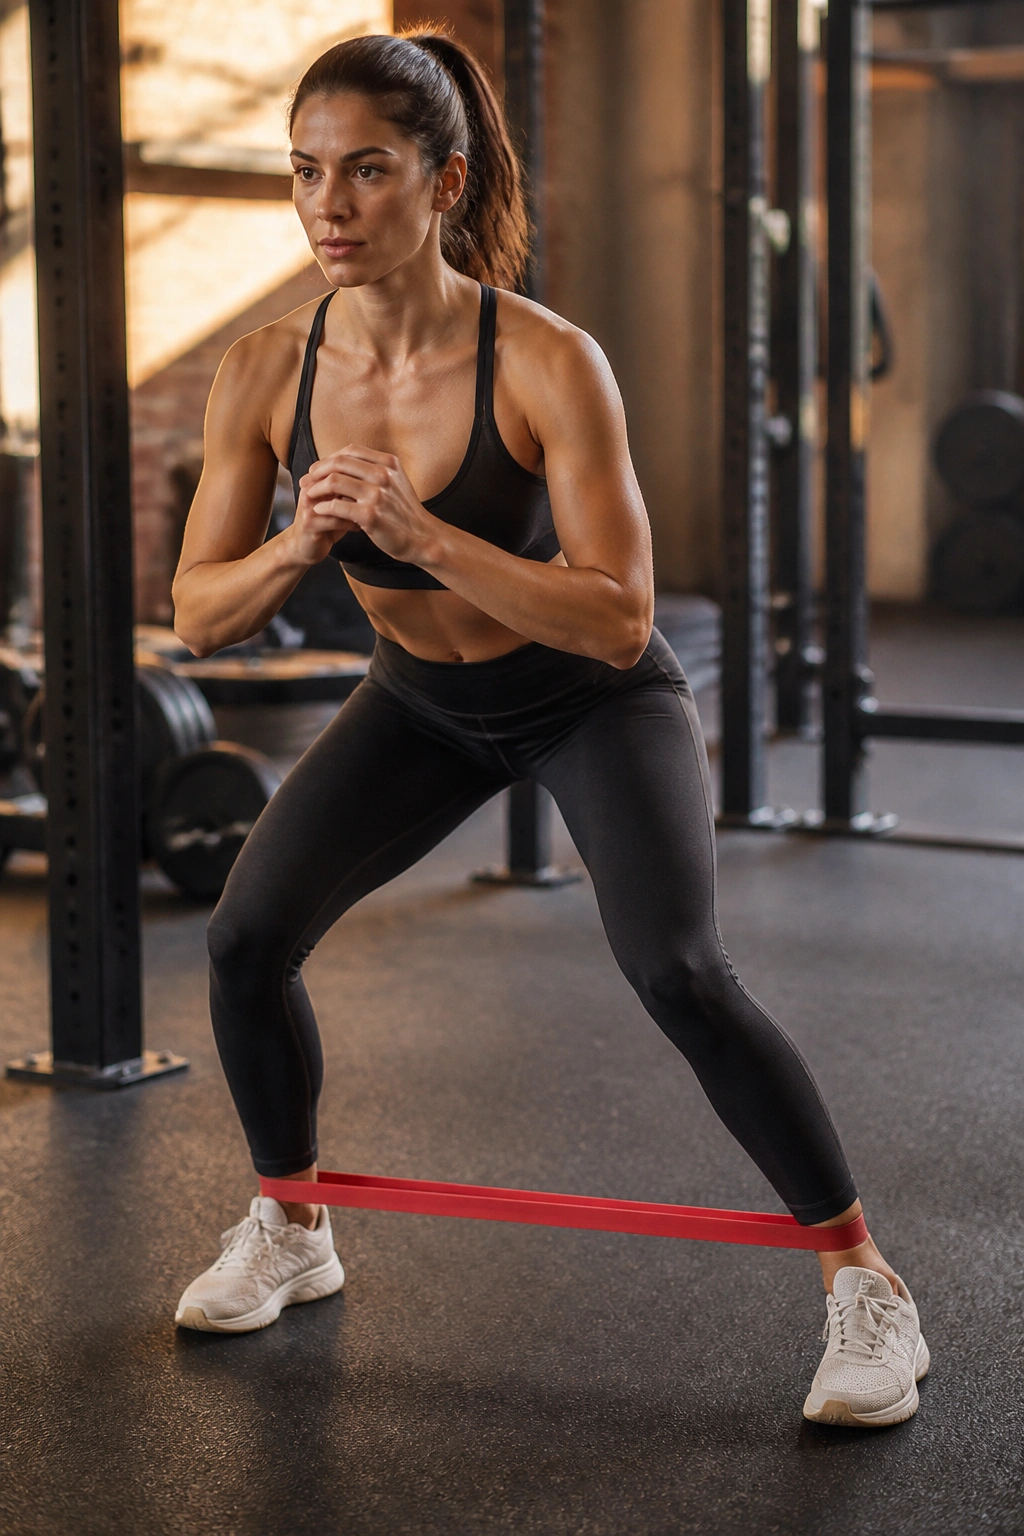
This is the classic “fire-up” exercise for the hips. Start in a quarter-squat position—hips back, knees bent, core braced—with a looped band around your ankles. Step one foot out to the side, then follow with the other, keeping tension on the band the entire time. You should never let the band go slack between steps.
What to Watch For
People often stand too upright during this move, which kills the glute activation and shifts the load to the quads. You must stay low. Think about being in a defensive stance for basketball. If your shins are vertical, you’re too high. Aim for ten steps to the left and then ten steps to the right. Your hips will start to burn, and that’s exactly the signal to keep going for another set.
4. Clamshells
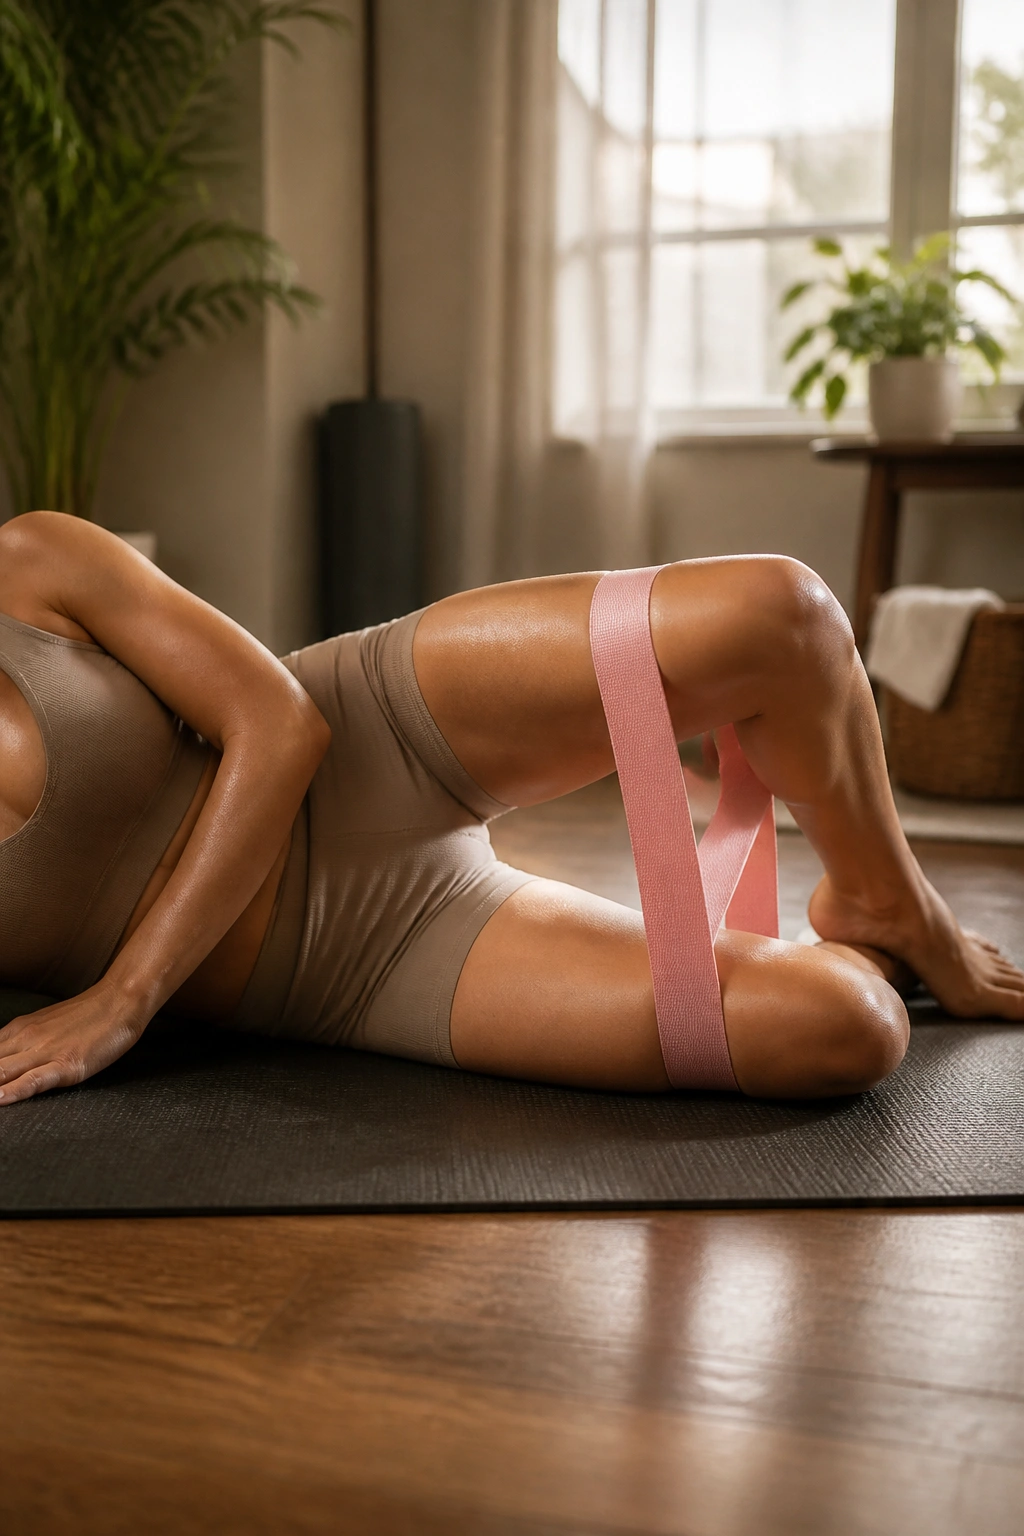
Lie on your side with your legs stacked, knees bent at a 45-degree angle, and a band placed just above your knees. Keep your feet touching throughout the movement. Open your top knee toward the ceiling, like a clamshell opening, then slowly lower it back down.
Why This Matters
Clamshells are an isolation movement for the hip abductors. It’s easy to cheat by rocking your hips backward, but that ruins the effect. Keep your torso completely rigid. You should feel a deep, localized burn in the side of your hip—the kind of burn that feels almost like a cramp if you push the volume high enough. If you’re not feeling it, you might be using a band that’s too light.
5. Standing Straight Leg Kickbacks
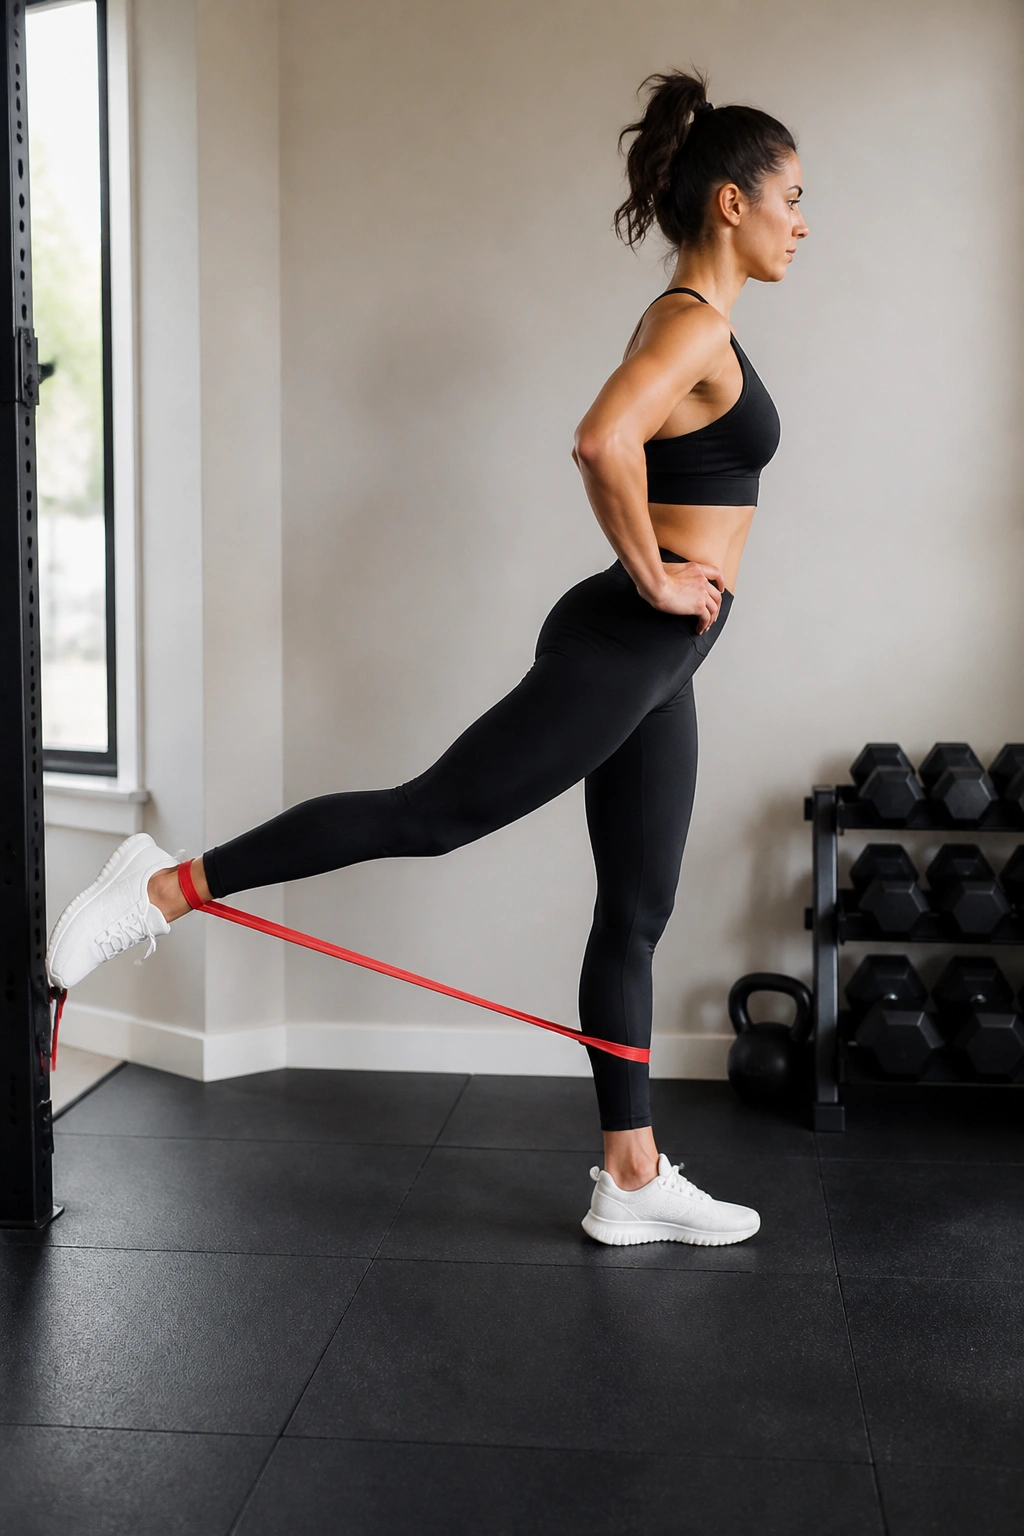
Stand tall and anchor one end of a long resistance band to a sturdy pole or door frame. Loop the other end around your right ankle. Facing the anchor, shift your weight to your left leg, brace your core, and slowly kick your right leg straight back behind you. Squeeze your glute at the very top of the motion.
The Technique
The trick here is to avoid leaning your torso forward to compensate for the weight. Keep your upper body vertical. If you lean forward, you’re just turning this into a lower-back exercise. This move is strictly about glute extension. Because the band provides continuous resistance, you can’t rely on momentum. You have to lift, squeeze, and hold.
6. Standing Hip Abduction
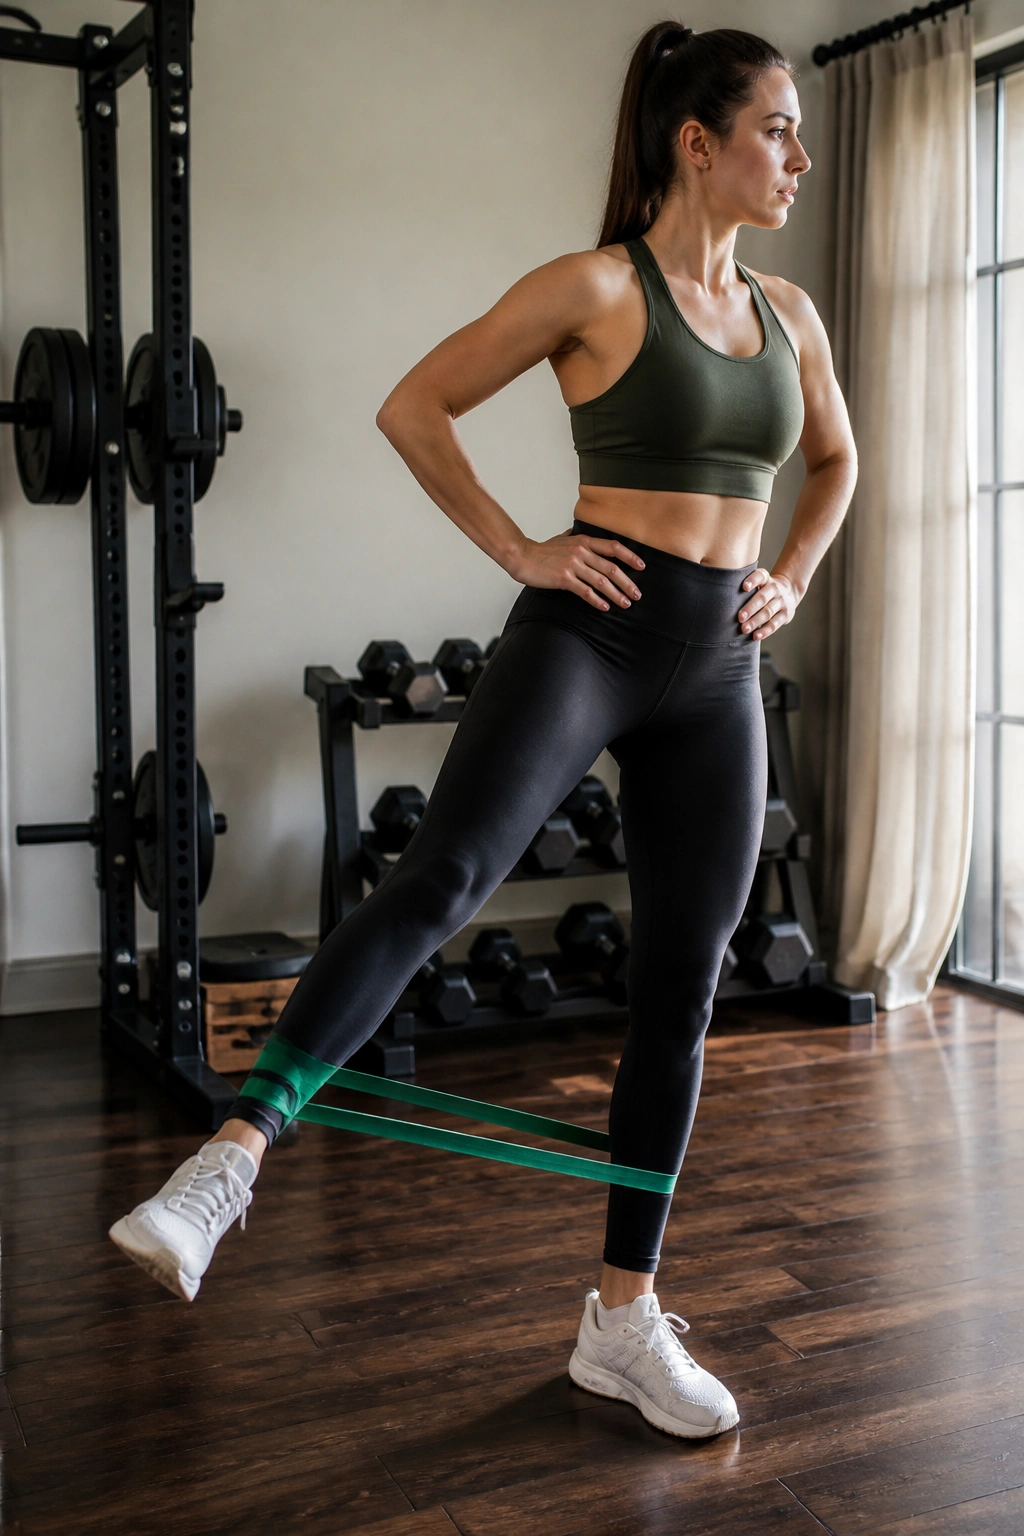
Stand sideways to your anchor point with a band attached to your outer ankle. With your standing leg slightly bent for balance, kick your banded leg straight out to the side, away from the midline of your body. Think about leading the movement with your heel rather than your toe.
Muscle Focus
This is the single best way to isolate the outer glutes without putting stress on your spine. Unlike machines at the gym, the resistance curve here is steep—the band pulls hardest when your leg is furthest out. That is exactly where you need the most work. Perform the movement slowly, especially on the return phase.
7. Resistance Band Hamstring Curls
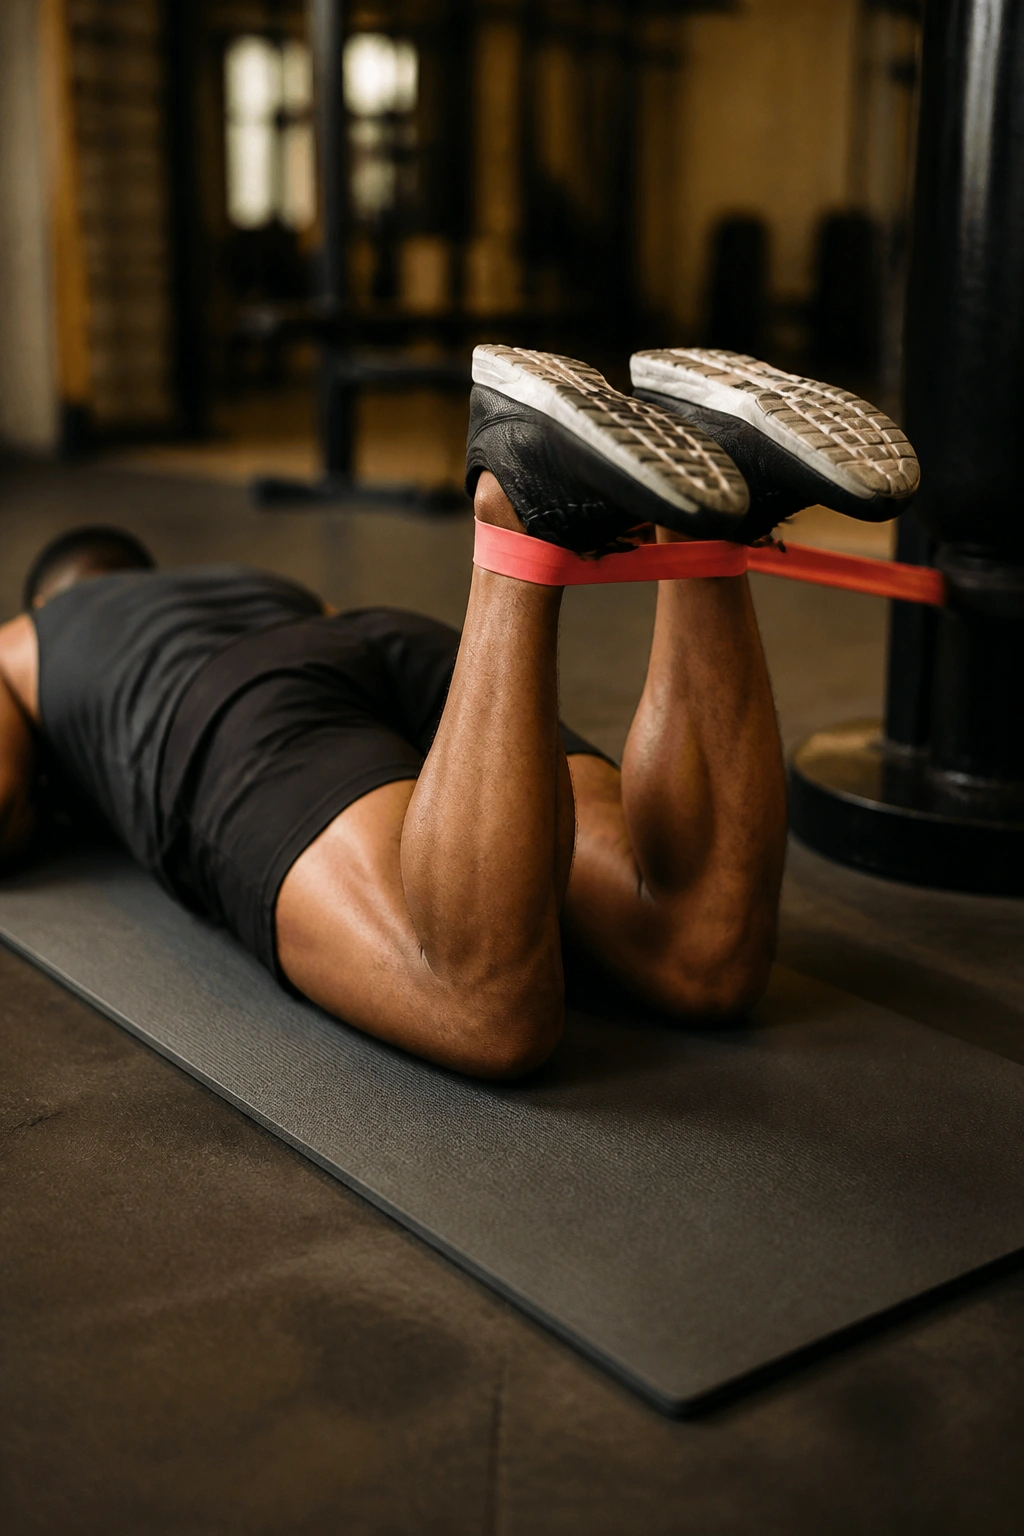
Lie face down on the floor with a resistance band anchored to a heavy object behind you and looped around your ankles. Keep your hips pinned to the floor and curl your heels toward your glutes against the resistance. If you are doing this at home without an anchor, use a partner to hold the band or secure it to a sturdy table leg.
Why It’s Effective
Most people struggle to isolate the hamstrings without a lying leg curl machine. This variation simulates that machine perfectly. The constant tension of the band ensures that your hamstrings are under load from the moment you start to the moment you finish. Squeeze your glutes to ensure your hips don’t lift off the ground, which is the most common form error.
8. Seated Leg Extensions
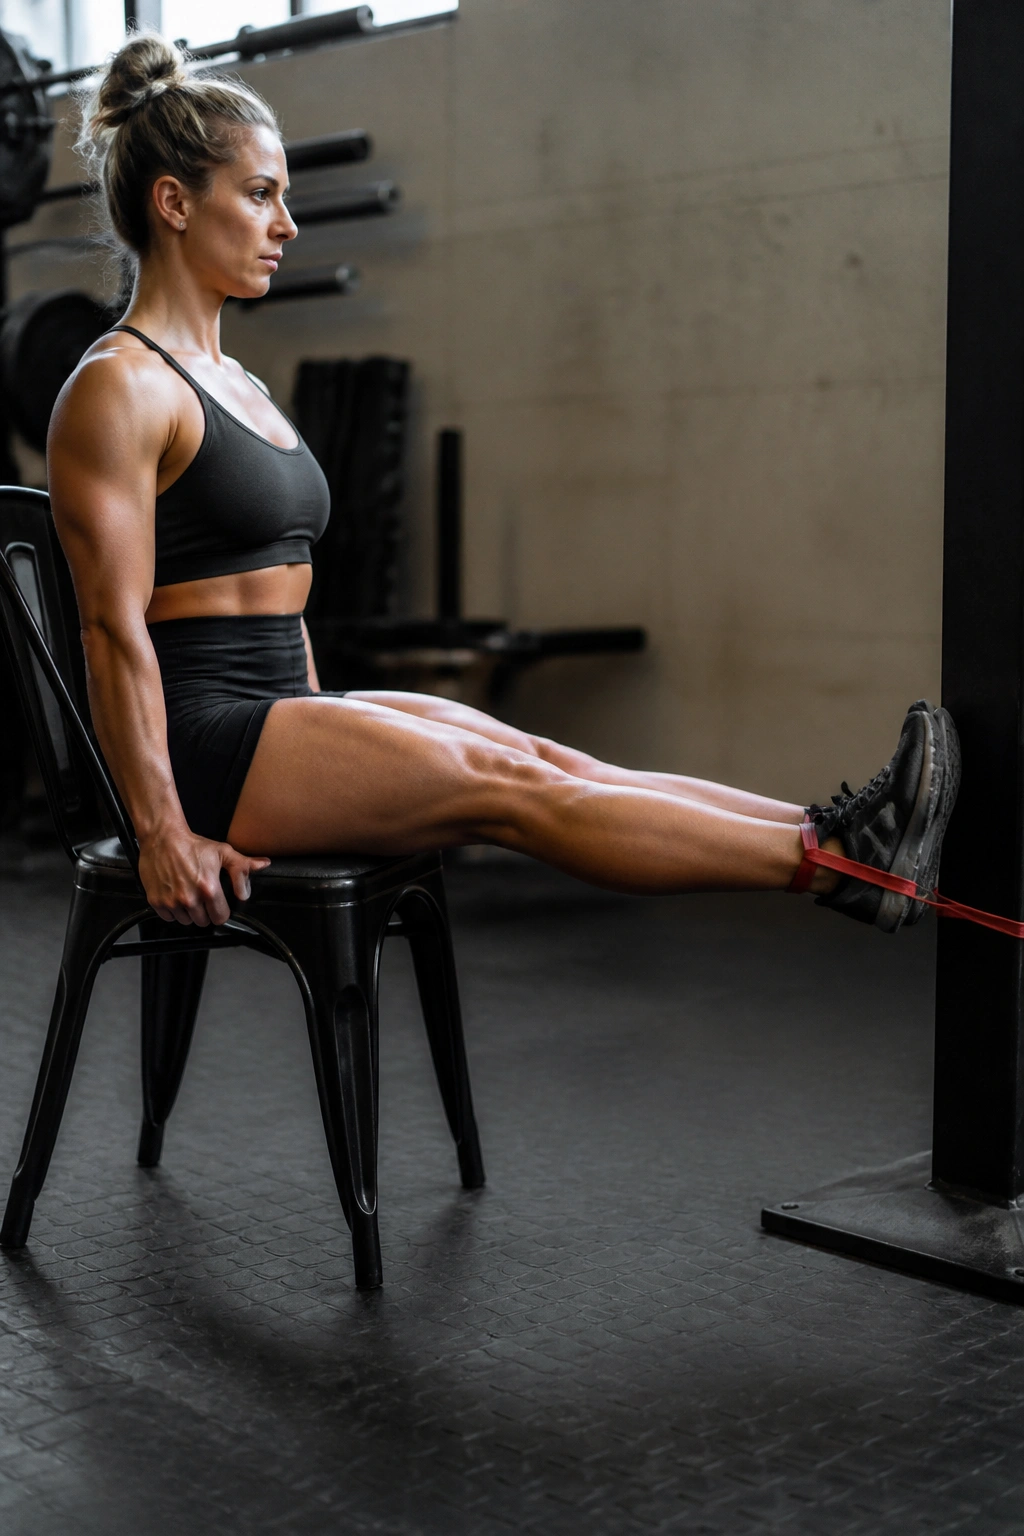
Sit on the edge of a sturdy chair or bench. Loop a resistance band around a secure pole in front of you and the other end around your ankles. Extend your legs straight out, fighting the band’s pull, until your knees are locked.
The Burning Sensation
This is a high-repetition exercise. Do not try to load this with a heavy band. Instead, pick a lighter resistance that allows you to do sets of 20 to 30 repetitions. By the time you reach the end, your quadriceps will feel like they are on fire. That is the accumulation of metabolic stress you want for hypertrophy.
9. Split Squats
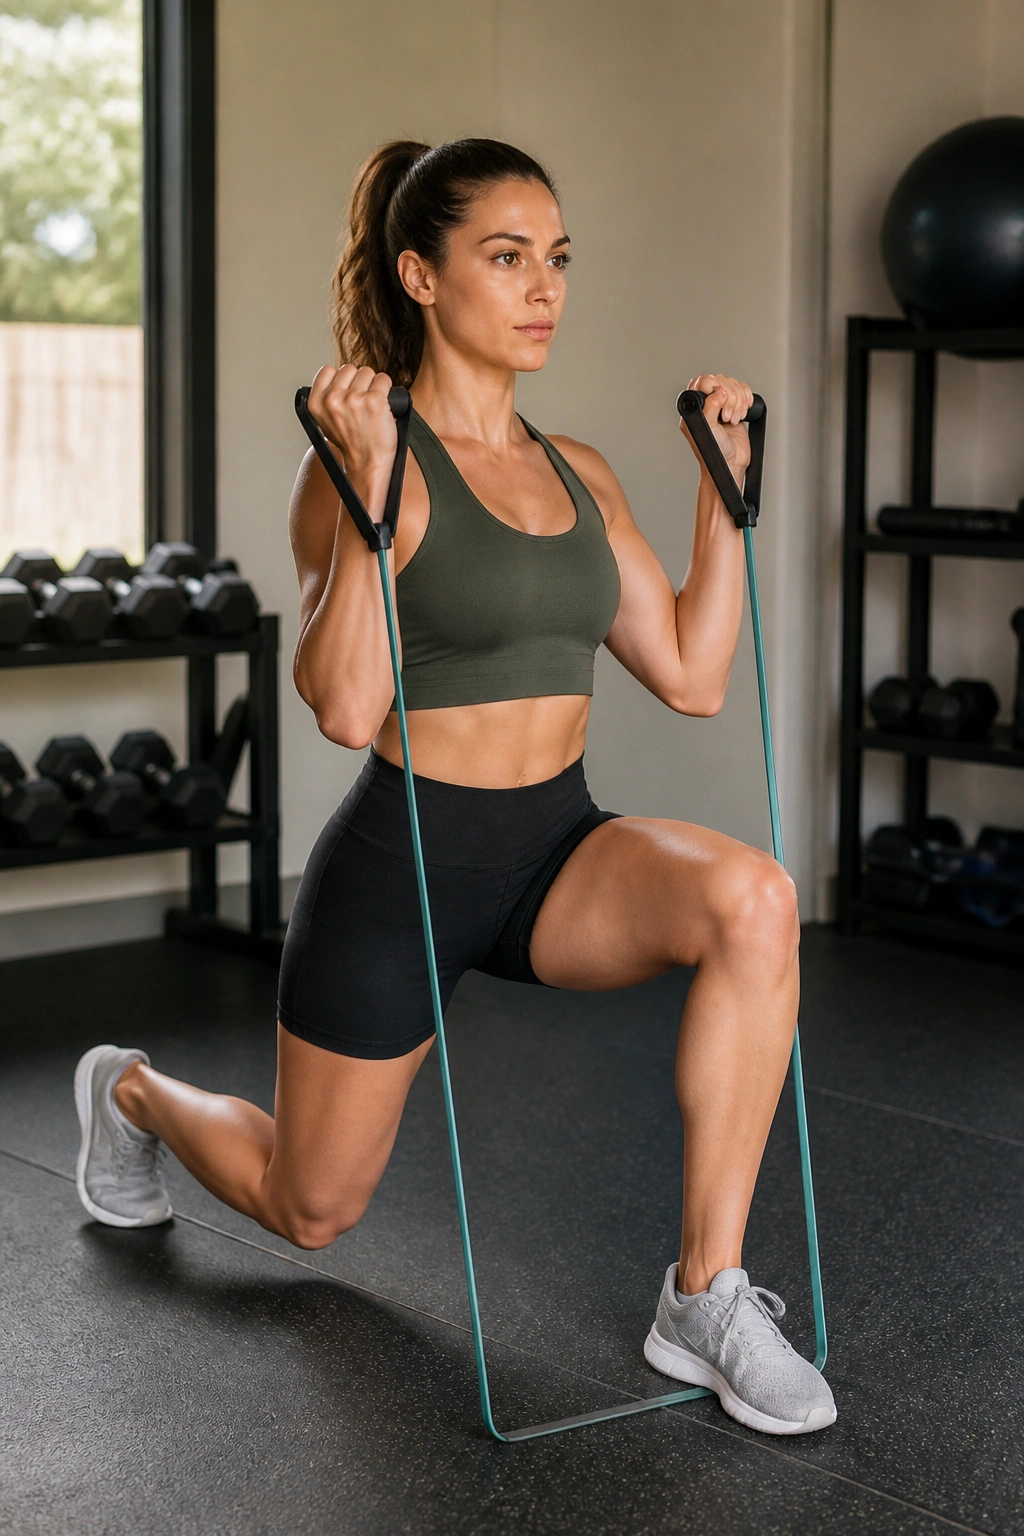
Place a resistance band under the arch of your front foot and hold the handles up at shoulder height. Step your other foot back into a lunge position. Lower your back knee toward the floor, keeping your front torso upright, then drive back up to the starting position.
Balance and Stability
The split squat is a beast of an exercise because it forces you to stabilize your entire body on one leg. Adding the band adds vertical resistance that mimics a barbell squat but places zero compressive load on your spine. Keep your front heel glued to the floor. If it starts to lift, you need to adjust your stance width.
10. Romanian Deadlifts
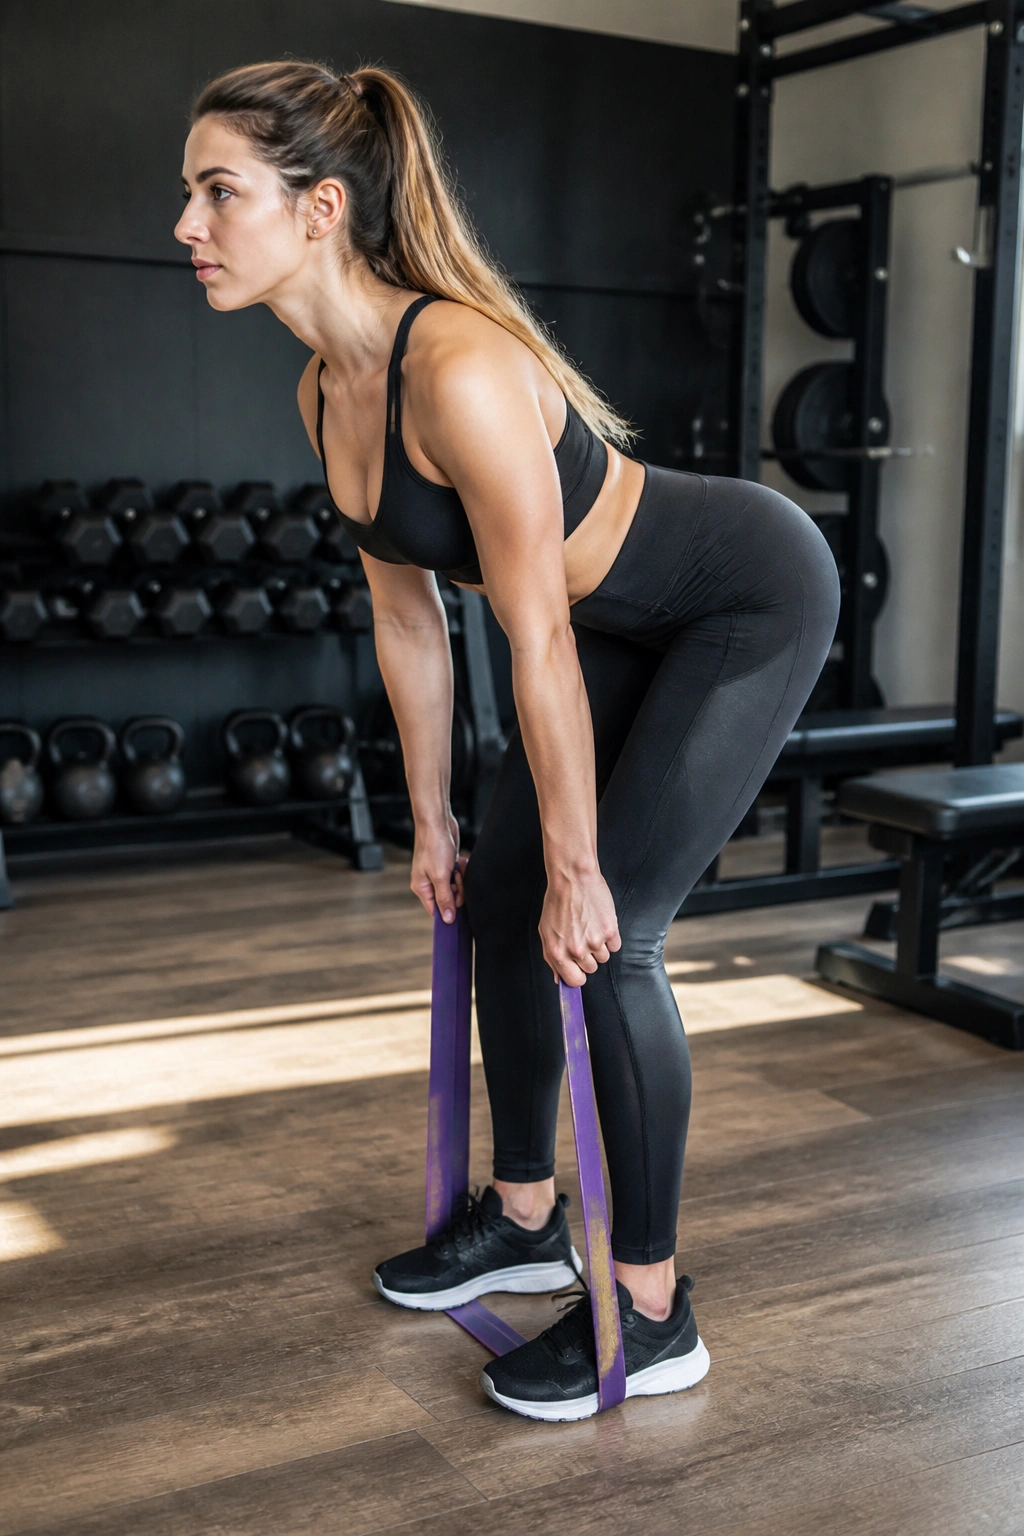
Stand on the middle of a long resistance band and grasp both ends with your hands. Keep your knees slightly bent but static. Hinge forward at the hips, pushing your butt backward until you feel a significant stretch in your hamstrings, then squeeze your glutes to stand back up.
Proper Hinging
This is not a squat; it’s a hinge. If your knees bend more as you go down, you’ve turned it into a squat. The motion should be entirely in your hips. Think about closing a door with your butt. You should feel the band pulling your hands down toward your shins. If you don’t feel the stretch, you aren’t going low enough.
11. Walking Lunges
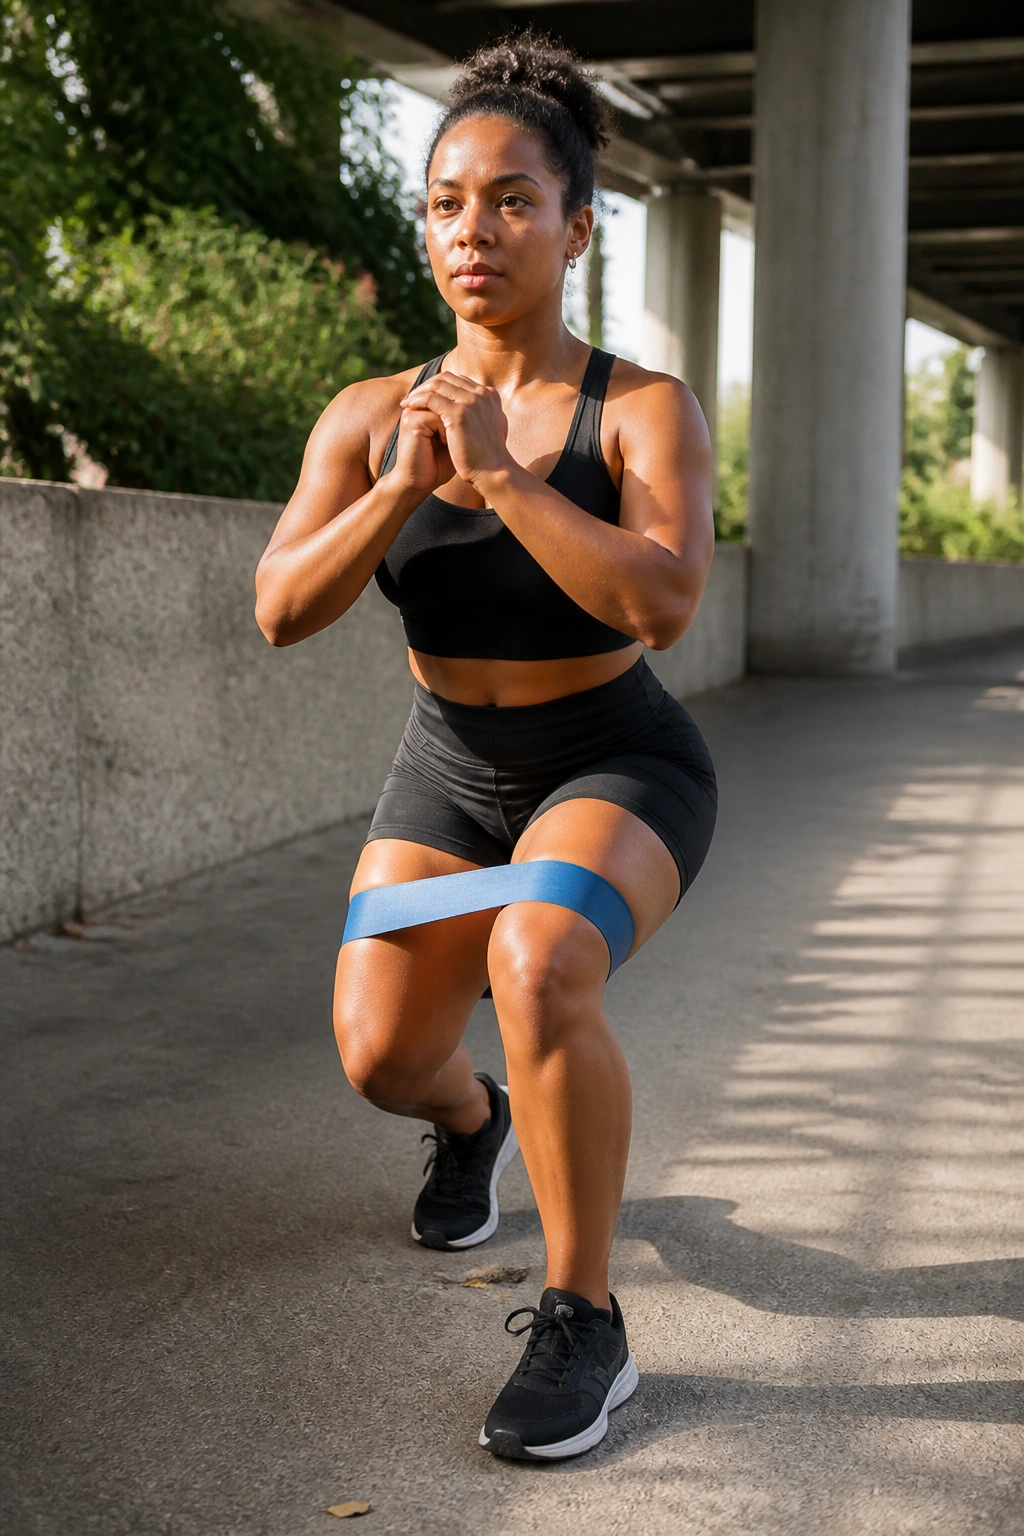
Loop a mini-band around your thighs just above the knees. Step forward into a long lunge, ensuring your front knee stays tracked over your ankle, not caving inward. As you step through into the next lunge, the band will try to pull your legs together. You must fight that inward pull with every step.
Coordination
Walking lunges with a band are surprisingly difficult because they require lateral stability in the middle of a forward-moving exercise. Take shorter, controlled steps. If you take giant, lunging steps, you will lose your balance and the band will likely slip. Focus on a smooth transition between steps.
12. Donkey Kicks
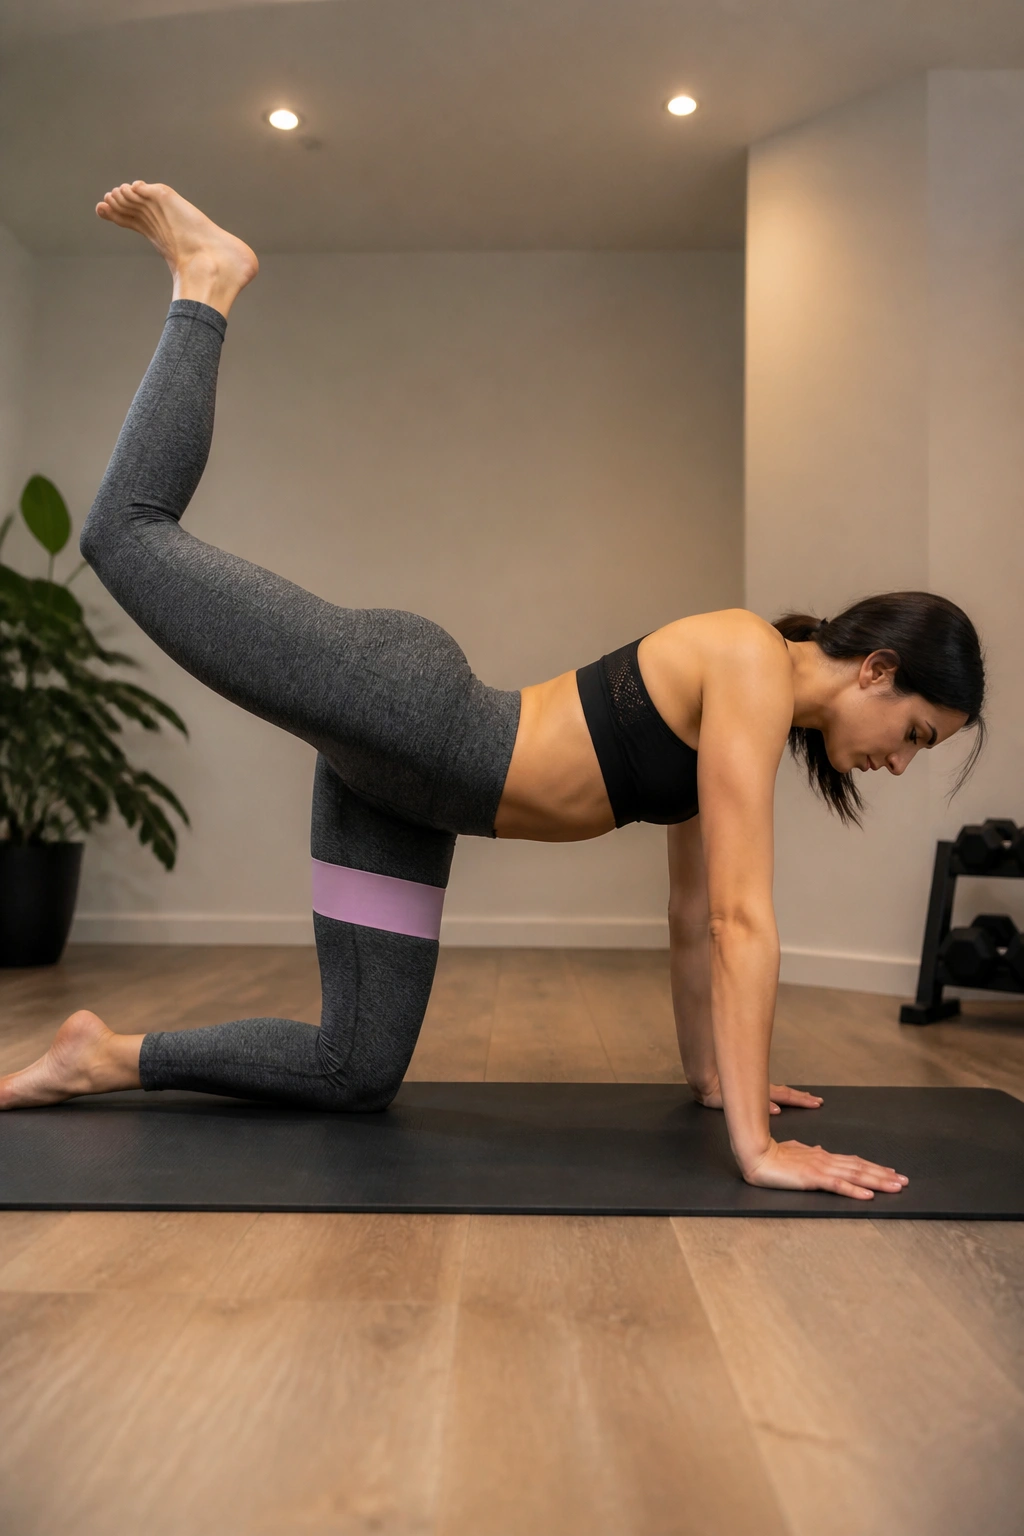
Get on all fours with a mini-band around your thighs. Keeping your knee bent at a 90-degree angle, lift one leg directly up toward the ceiling. Focus on driving your heel toward the sky. Squeeze the glute at the very top.
The Range of Motion
You don’t need to kick your leg up to the ceiling to make this work. In fact, most people kick too high and arch their back, which is a mistake. Stop the movement as soon as your glute is fully contracted. If your lower back starts to move, you’ve gone too far. Keep your core tight like a statue.
13. Monster Walks
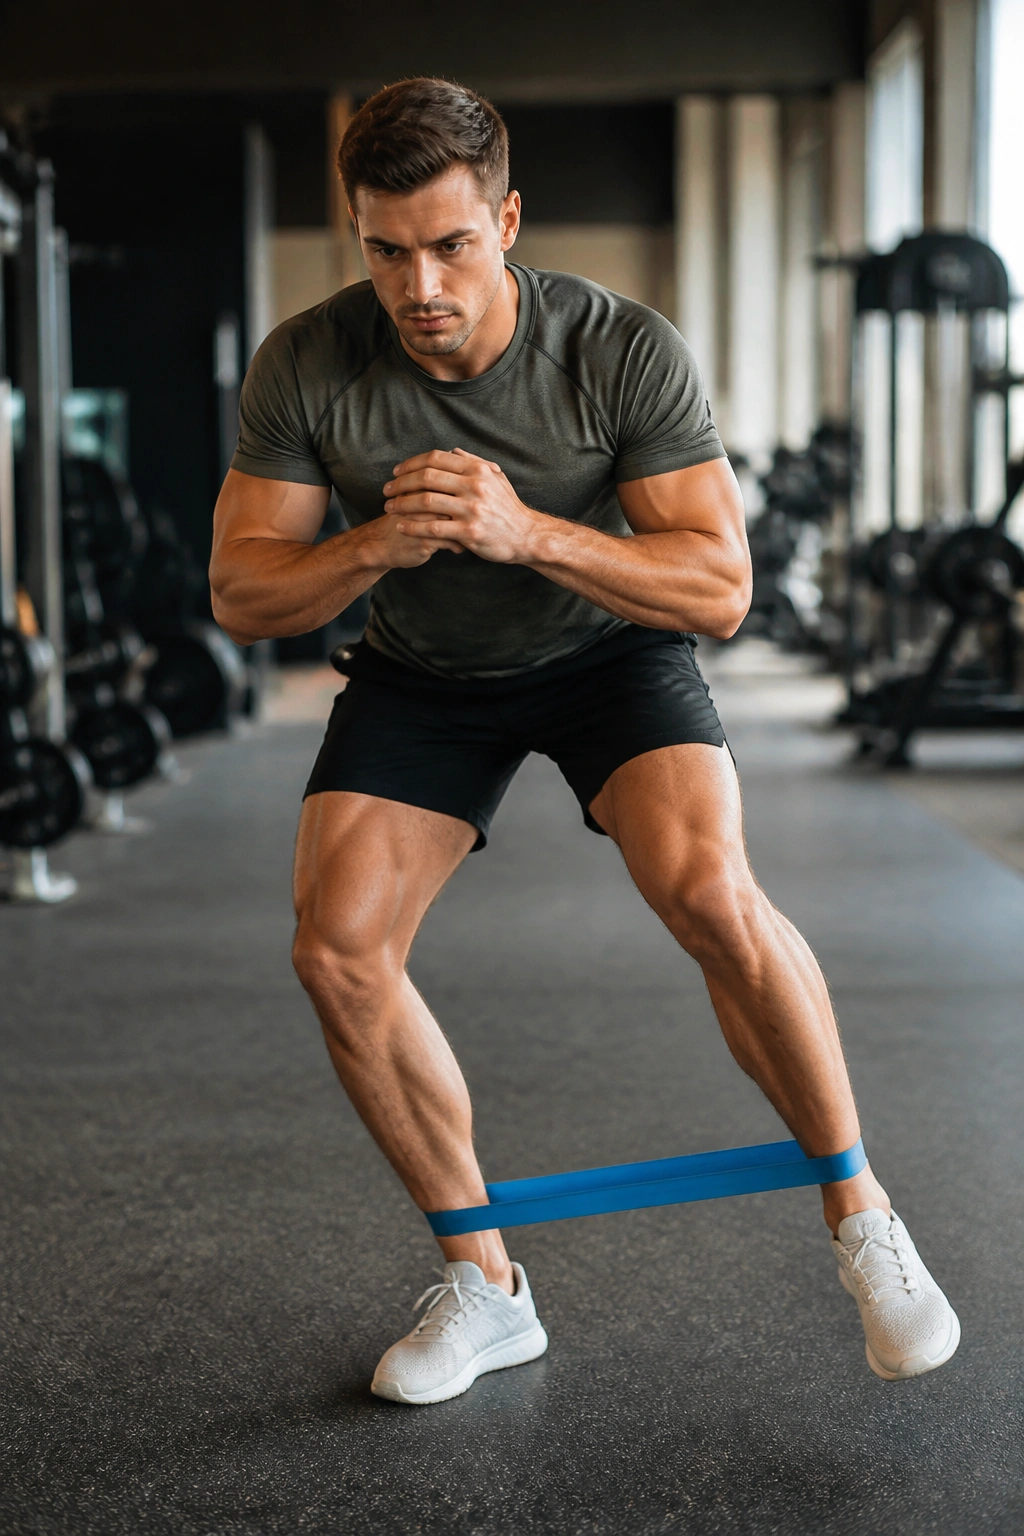
This is the advanced version of the lateral walk. With a mini-band around your ankles (or knees for more leverage), walk forward at a 45-degree angle for several steps, then walk backward at a 45-degree angle. You want to maintain tension the entire time, looking like a monster stomping around.
Why This Is Different
By alternating between forward and backward diagonals, you hit the glutes from multiple angles that a standard linear walk misses. This recruits the deep rotators of the hip. Stay low, keep your chest up, and try to keep your feet wide. The wider your base, the more tension you create.
14. Curtsy Lunges
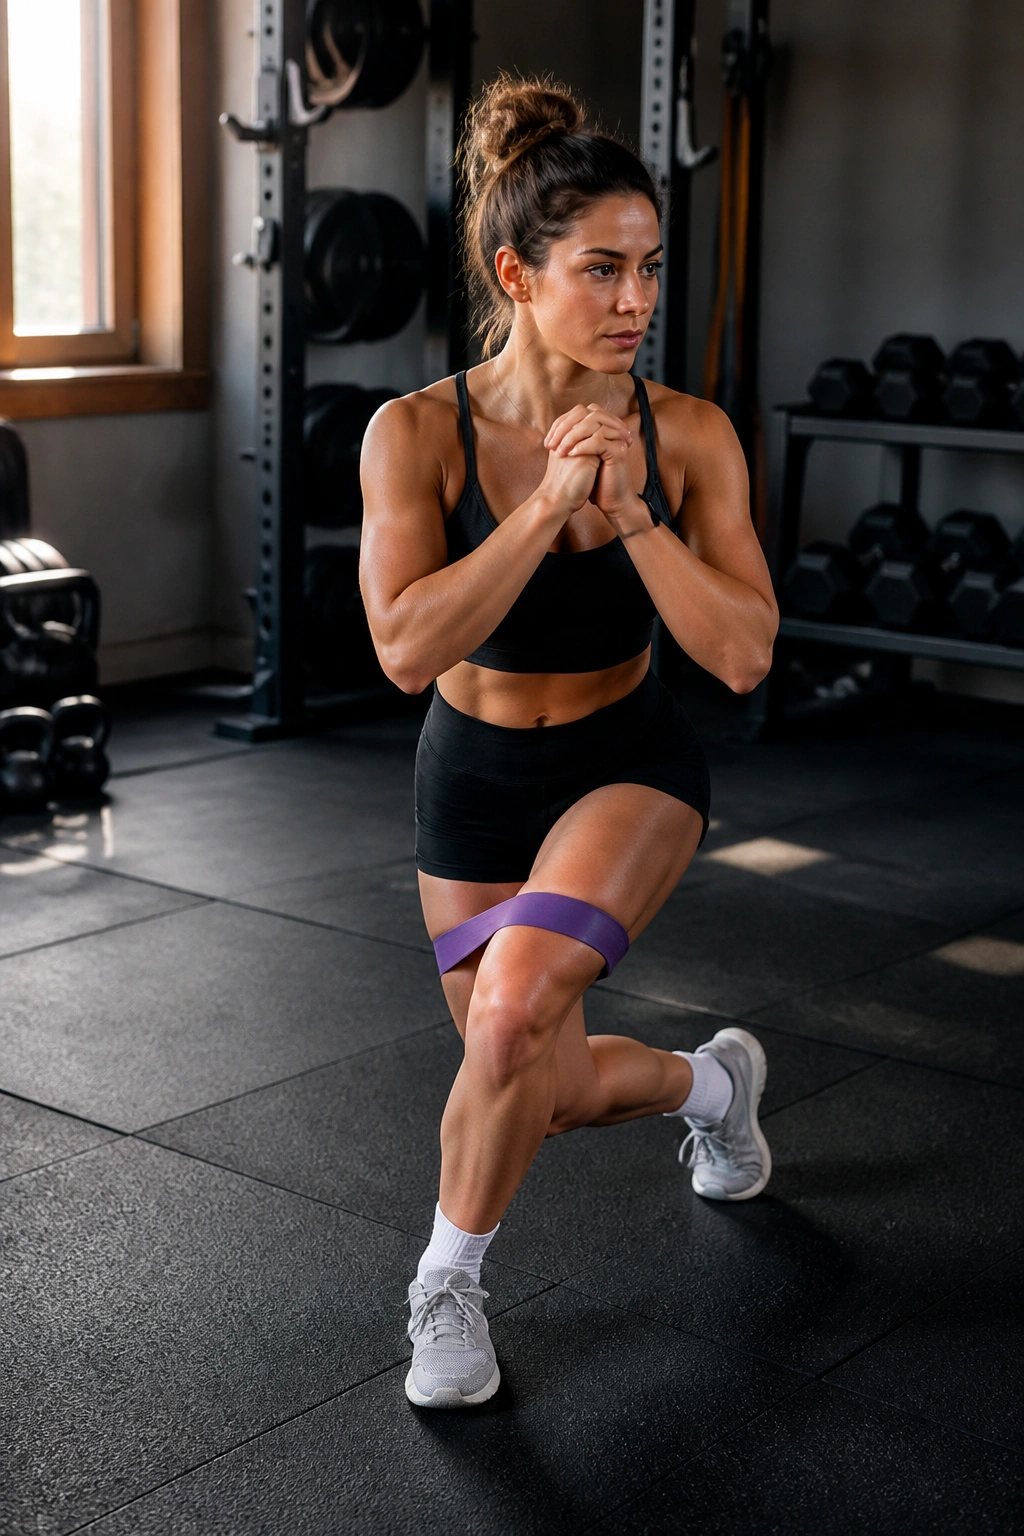
Stand with a band around your knees. Step one leg back and across behind your other leg, lowering your hips into a curtsy. Return to the starting position and repeat on the other side. This movement targets the glute medius and the inner thigh.
Targeted Activation
The key here is the cross-over. By stepping behind and across, you place the hip in a position of adduction and rotation, which is where the glute medius really shines. Because of the band, you also have to work hard to keep the front knee from buckling inward. This is a technical move, so start slow until you master the coordination.
15. Fire Hydrants
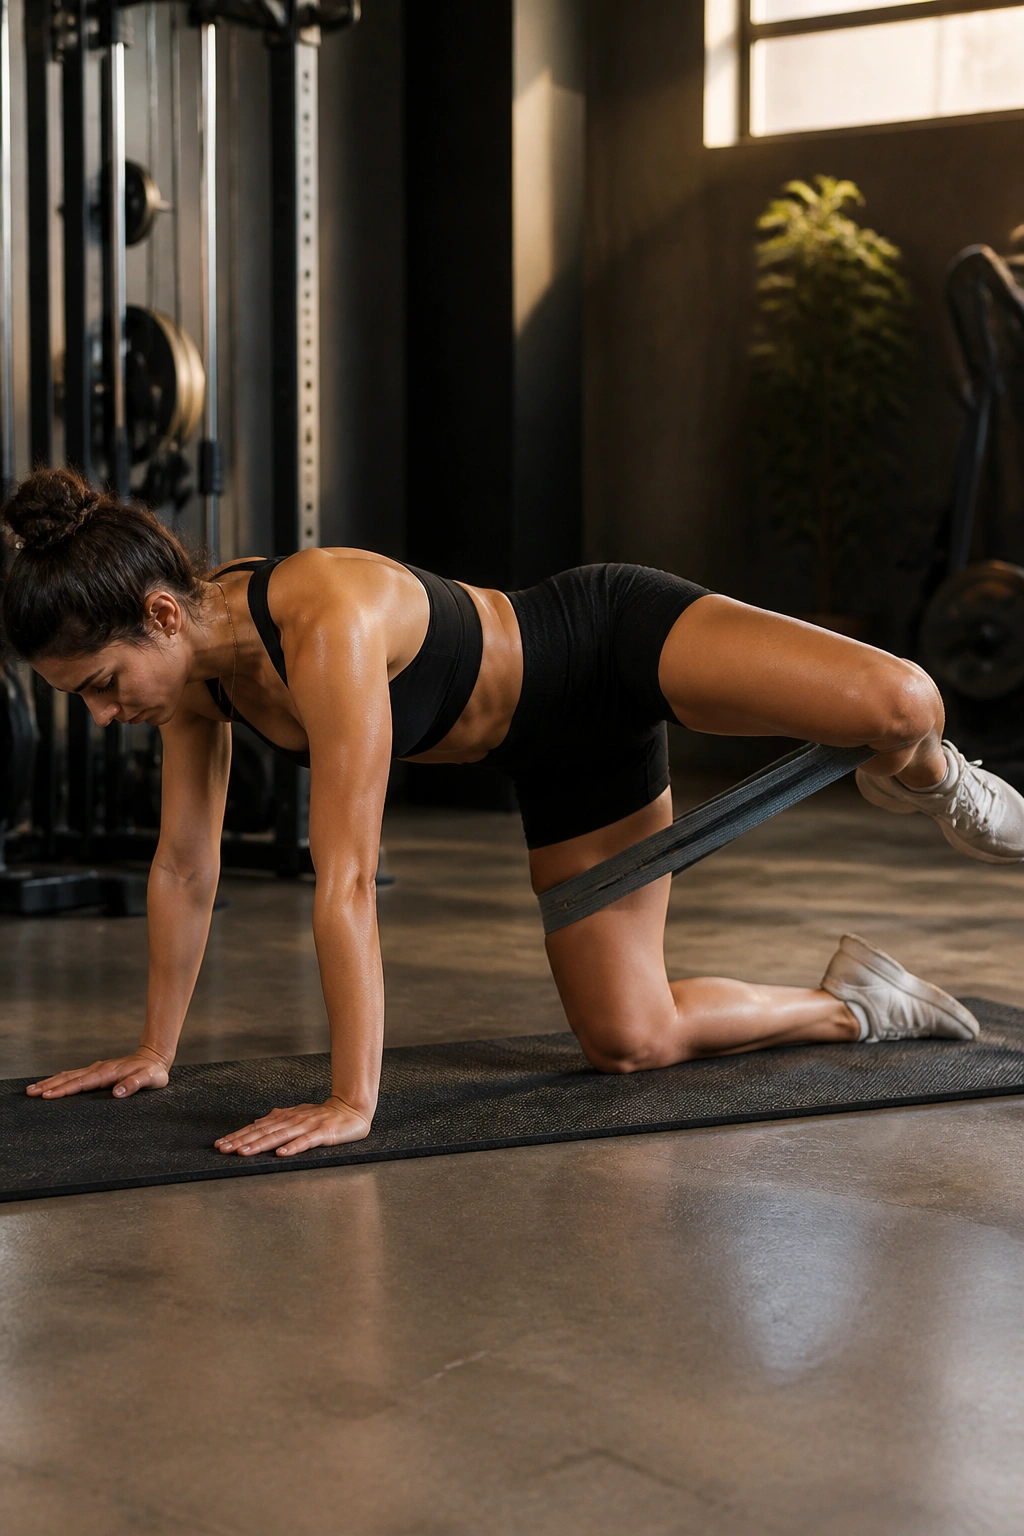
Start on all fours with a band around your knees. Keeping your knee bent, lift your leg out to the side like a dog at a fire hydrant. Try to lift your knee as high as you can without rotating your spine or tilting your torso.
The Hip Mobility Benefit
Beyond just being a glute exercise, this is excellent for hip mobility. If you spend all day sitting at a desk, your hips are likely tight. This movement forces the joint to open up. You will feel a strong contraction in the outer glute of the working leg and a stretch in the inner thigh of the supporting leg.
16. Single-Leg RDL
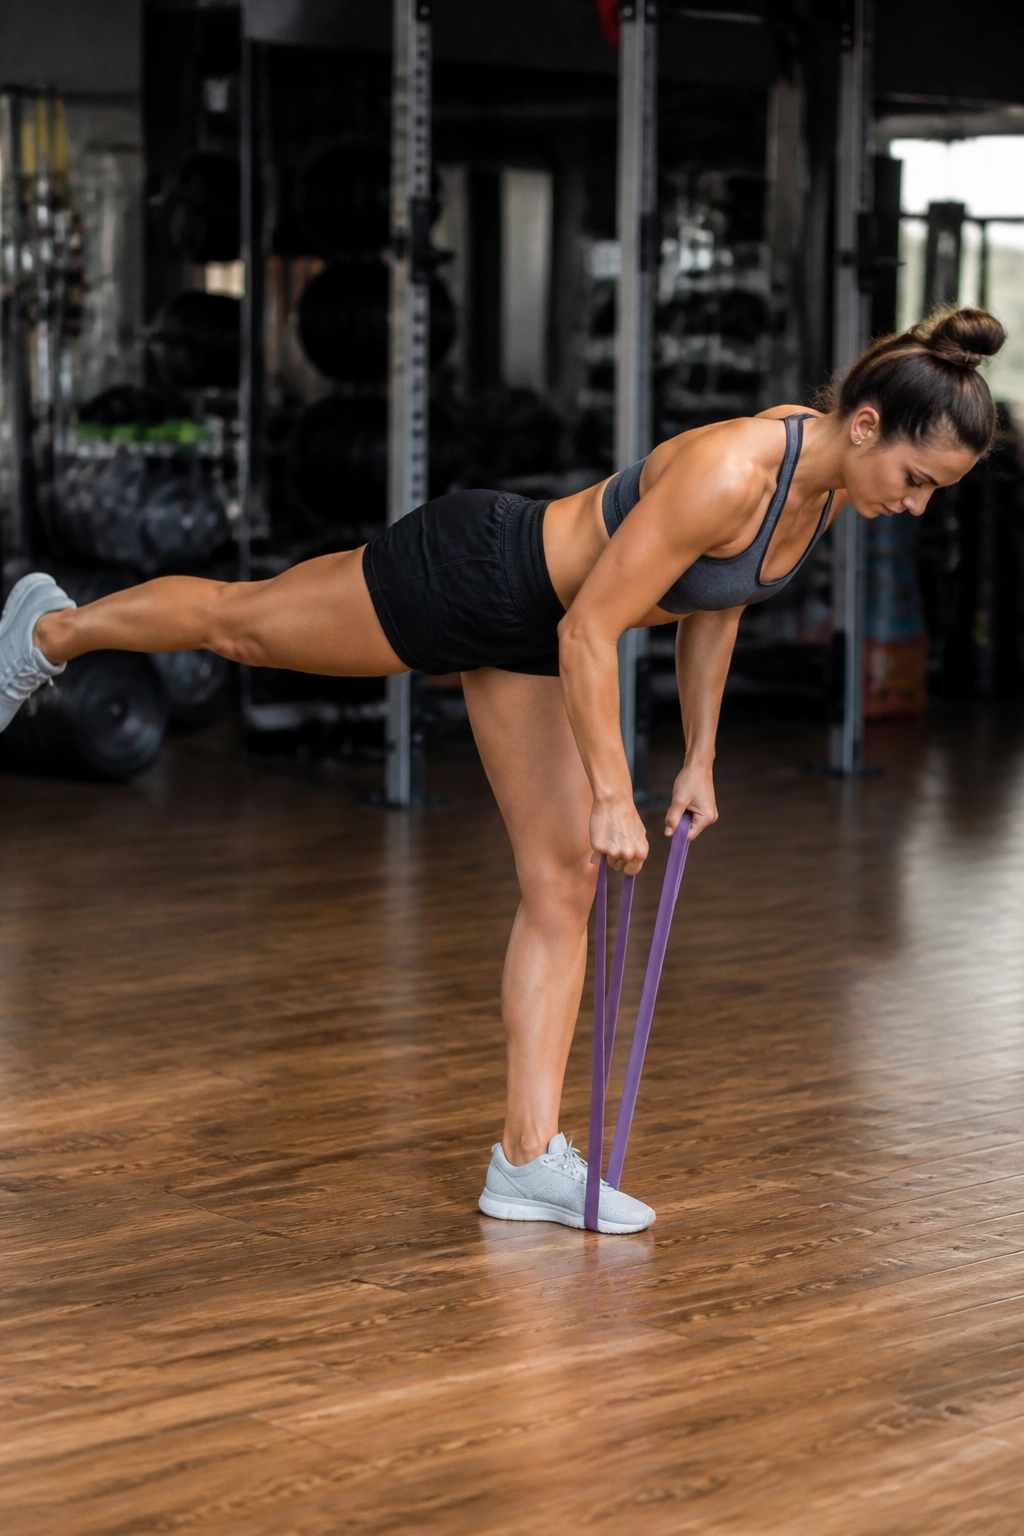
Stand on a resistance band with one foot, holding the other end in your opposite hand. Hinge forward at the hips, lifting the leg that isn’t on the band straight back behind you. Return to standing. This is arguably the best single-leg movement for hamstring and glute development.
Stability Challenges
This requires significant balance. Don’t be surprised if you wobble on your first few attempts. That wobbling is your stabilizer muscles working. If you can’t keep your balance, do this near a wall so you can lightly touch it for stability until you build the necessary strength in your ankle and hip.
17. Sumo Squats
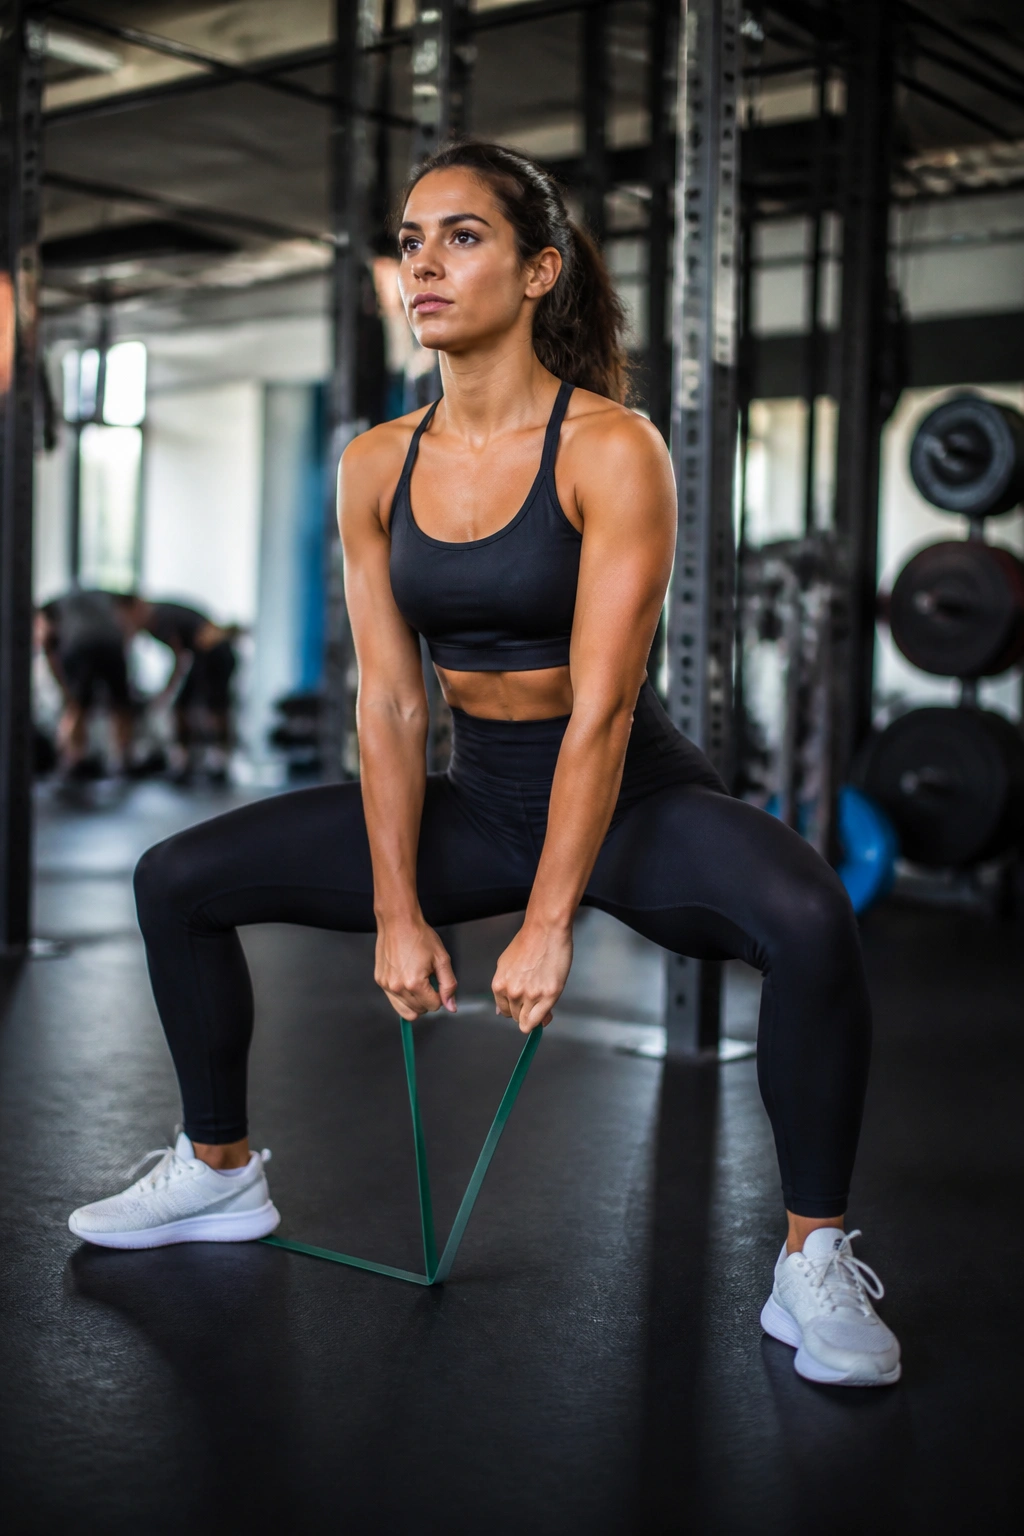
Step inside a large resistance band, spreading your feet much wider than shoulder-width. Point your toes slightly outward. Hold the other end of the band with both hands down between your legs. Squat down, keeping your torso upright, and drive back up.
Inner Thigh Focus
The wide stance puts a massive stretch on your adductors (inner thighs). By holding the band low, you also add a bit of an upright row component, but the primary focus remains the legs. Because your feet are wide, your glutes are in a more stretched position at the bottom of the squat, which increases the range of motion.
18. Calf Raises
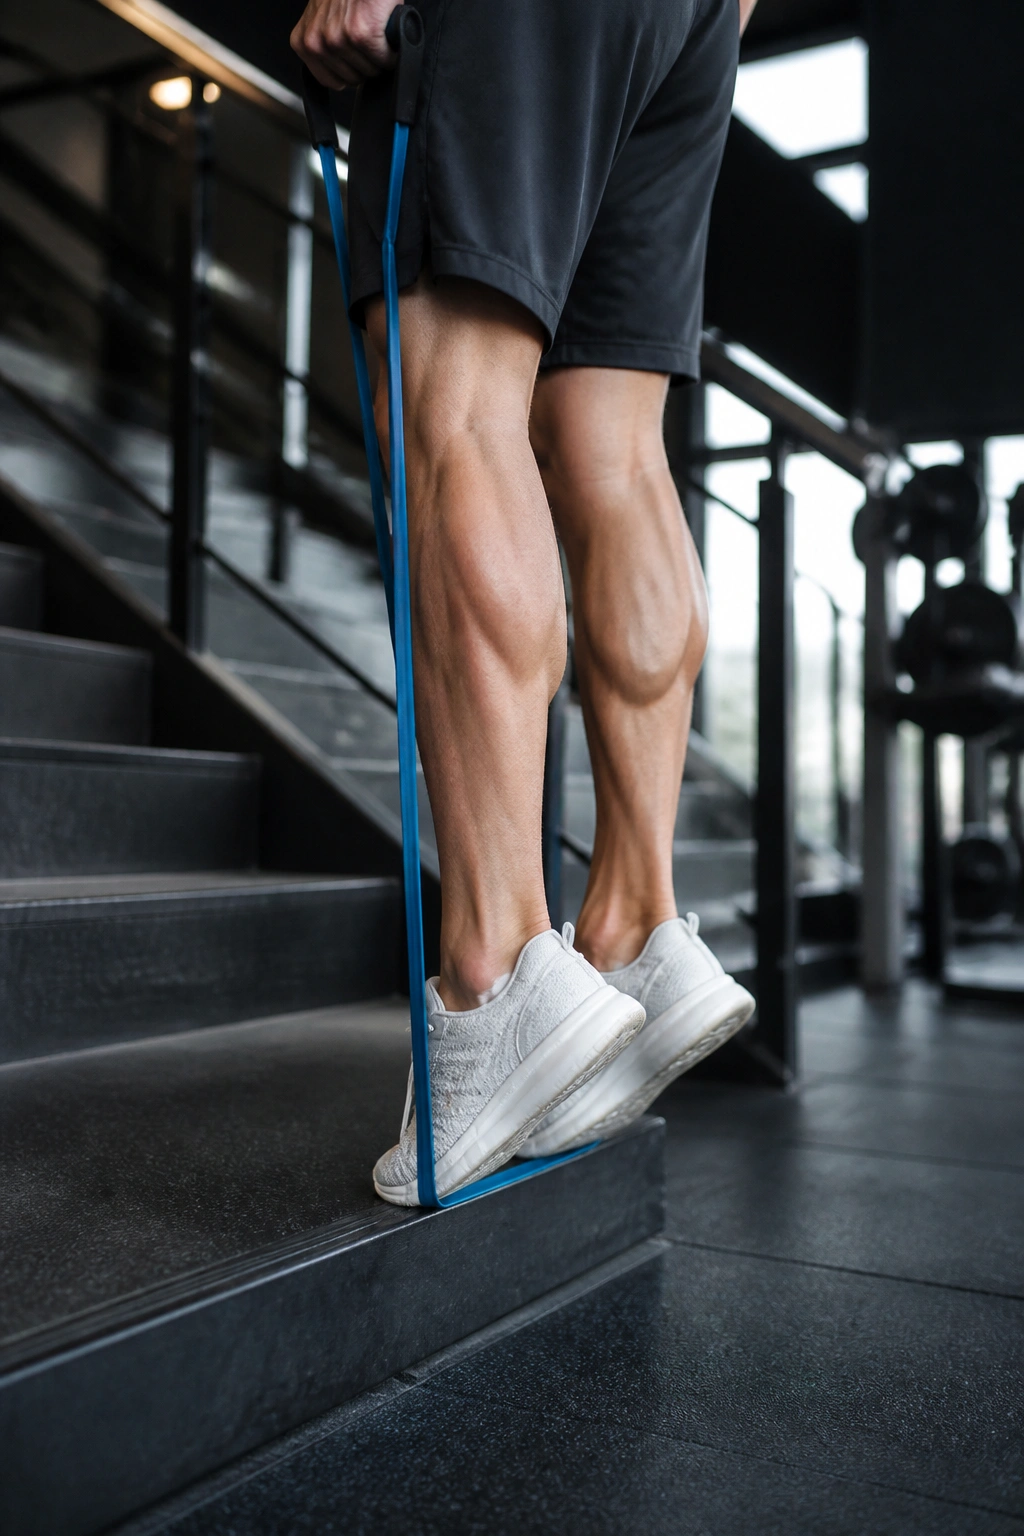
Stand on the edge of a sturdy step with a resistance band looped under the balls of your feet and the handles held at shoulder height. Press up onto your toes, fighting the band’s resistance, and lower your heels back down below the level of the step.
The Stretch
Calf exercises are often done too quickly, with people just bouncing up and down. With the band, you have to control the eccentric phase. Lower your heels slowly until you feel a deep stretch in your calves. Pause for a second at the bottom, then drive up. This pause eliminates the elastic energy of your Achilles tendon and forces the calf muscle to do the actual work.
19. Side-Lying Leg Lifts
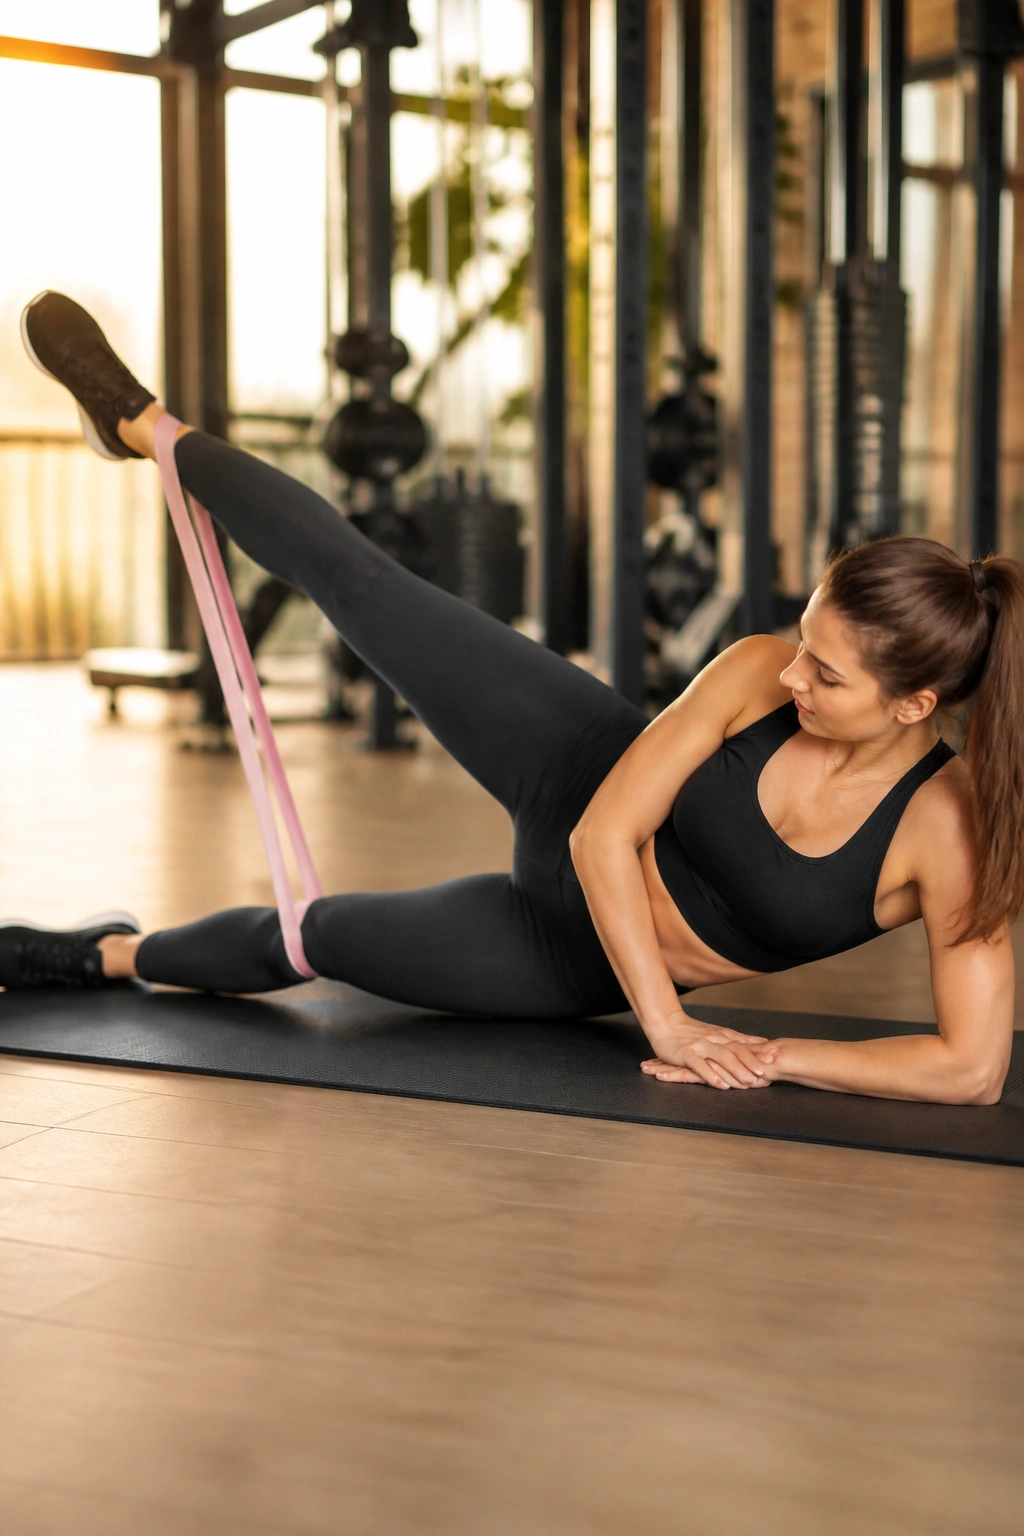
Lie on your side with your legs straight. Place a mini-band around your ankles. Lift your top leg toward the ceiling as high as you can while keeping your foot pointed forward (not toward the sky). Lower it back down with control.
Isolation
This is a surprisingly humble exercise. It doesn’t look like much, but perform 20 reps per side and you will see why it’s a staple in physical therapy and glute conditioning. The band adds just enough resistance to fatigue the glute medius, which is responsible for keeping your pelvis level when you walk and run.
20. Glute Bridge Marches
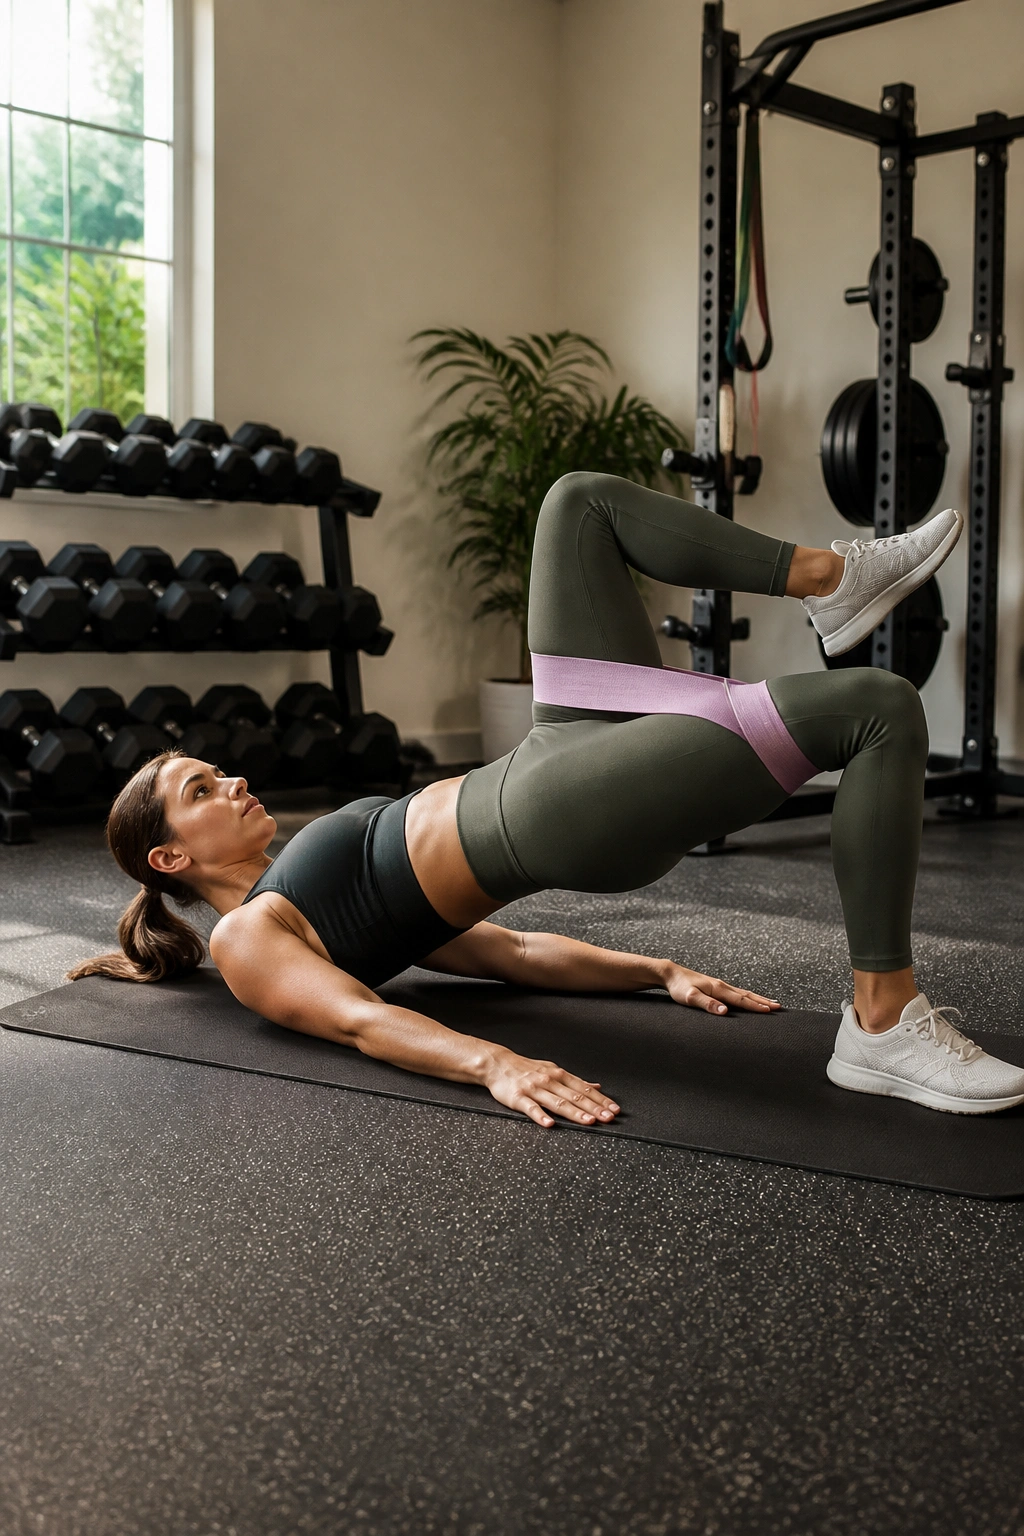
Get into a standard glute bridge position with a band around your knees. Once your hips are lifted, lift one foot off the ground and pull your knee toward your chest. Place it back down and repeat with the other leg, all while keeping your hips fully extended and squeezed.
Core Engagement
This move is diabolical because it adds an anti-rotation component to a glute exercise. Every time you lift one foot, your hips will naturally want to drop. You must brace your core and squeeze your glutes harder to keep your pelvis square to the ceiling. It’s a full-body movement disguised as a glute exercise.
21. Kneeling Hip Thrusts
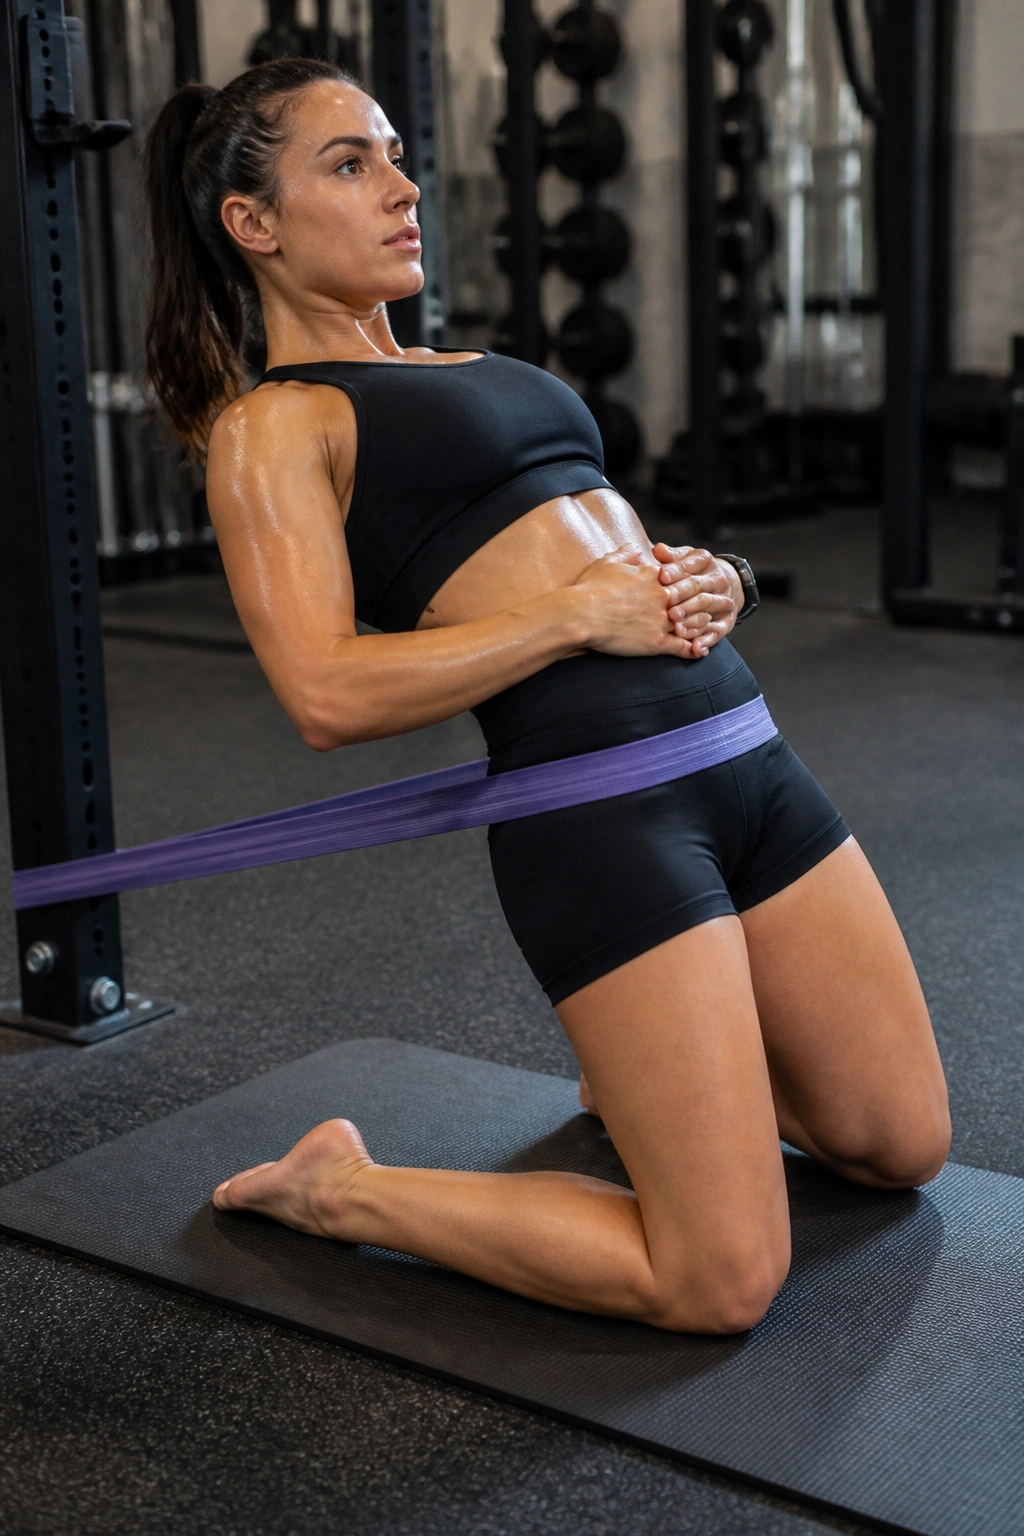
Kneel on a mat with a resistance band anchored behind you, wrapped around your hips. Start with your butt on your heels, then drive your hips forward until your body is in a straight line. Squeeze your glutes at the top.
The Pump
This is a pure glute pump exercise. Because you are kneeling, you remove the hamstrings from the movement, making it strictly about the glutes. The band provides constant tension on the hips. Make sure you don’t hyperextend your lower back at the top; the focus should be on the glute contraction, not how far you can throw your hips forward.
22. Resistance Band Leg Press
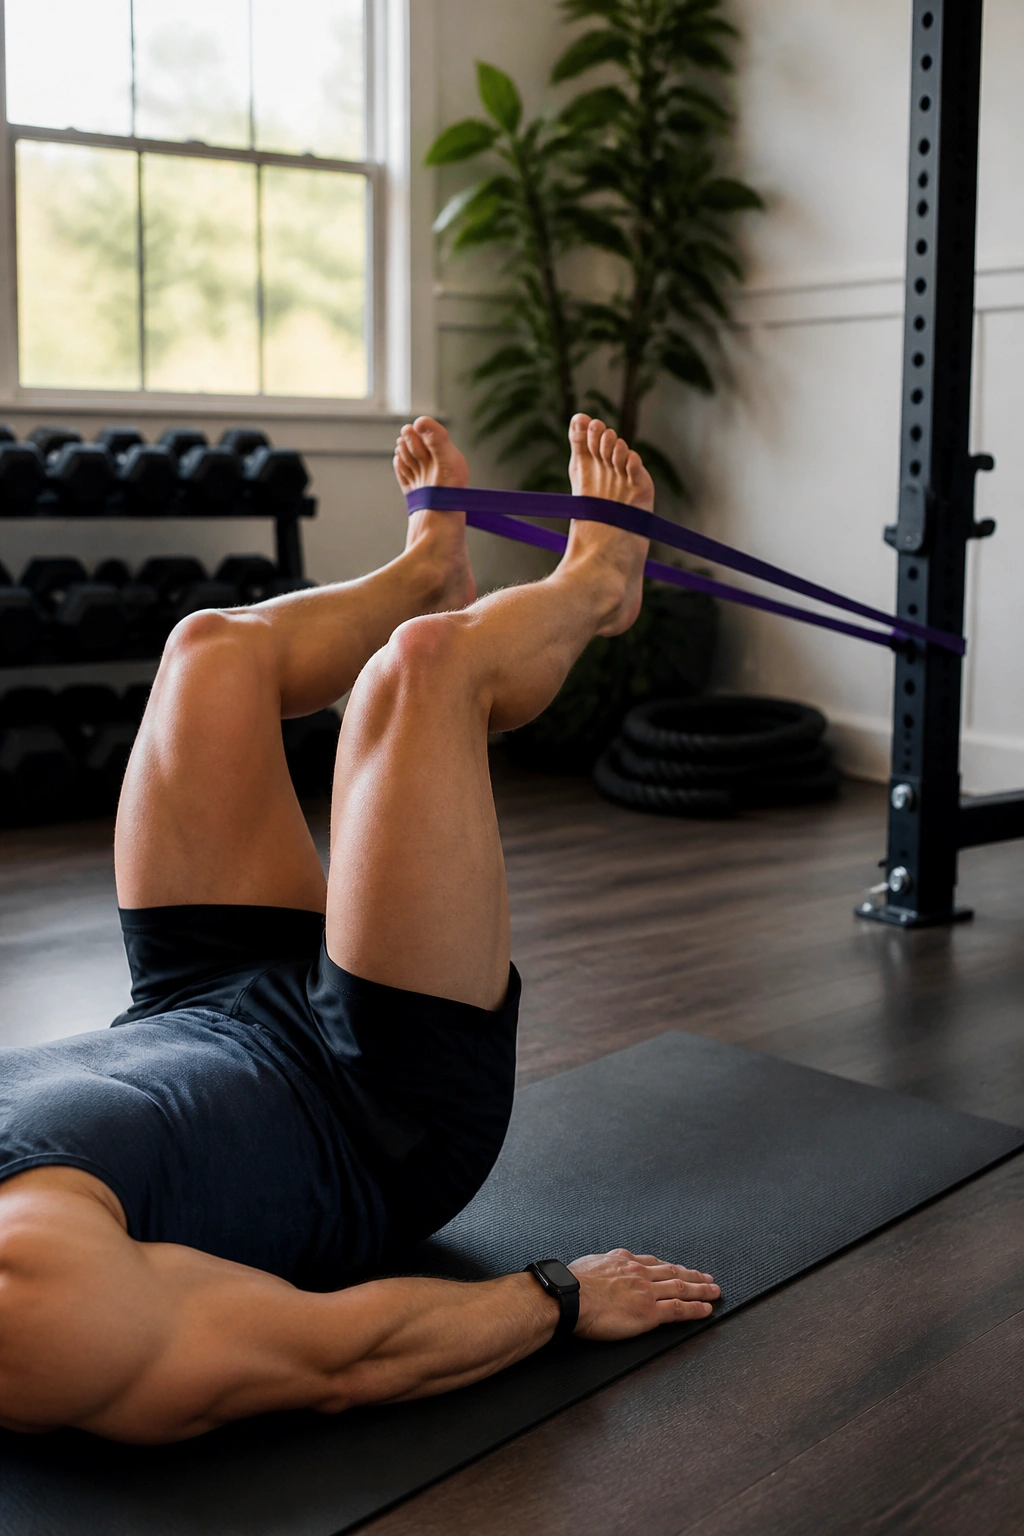
Lie on your back, knees to chest. Loop a heavy band around the balls of your feet and anchor the other end to something very sturdy, like a squat rack or a heavy couch. Push your legs straight out, fighting the resistance of the band, and return slowly.
Safety and Control
Since you don’t have a sled or machine, you have to be careful with the band. Ensure it is anchored securely so it doesn’t snap back at you. This move is incredible for high-volume quad work. If you do this with a slow, four-second negative phase, your quads will be shaking by the end of the set.
23. Goblet Squat with Band
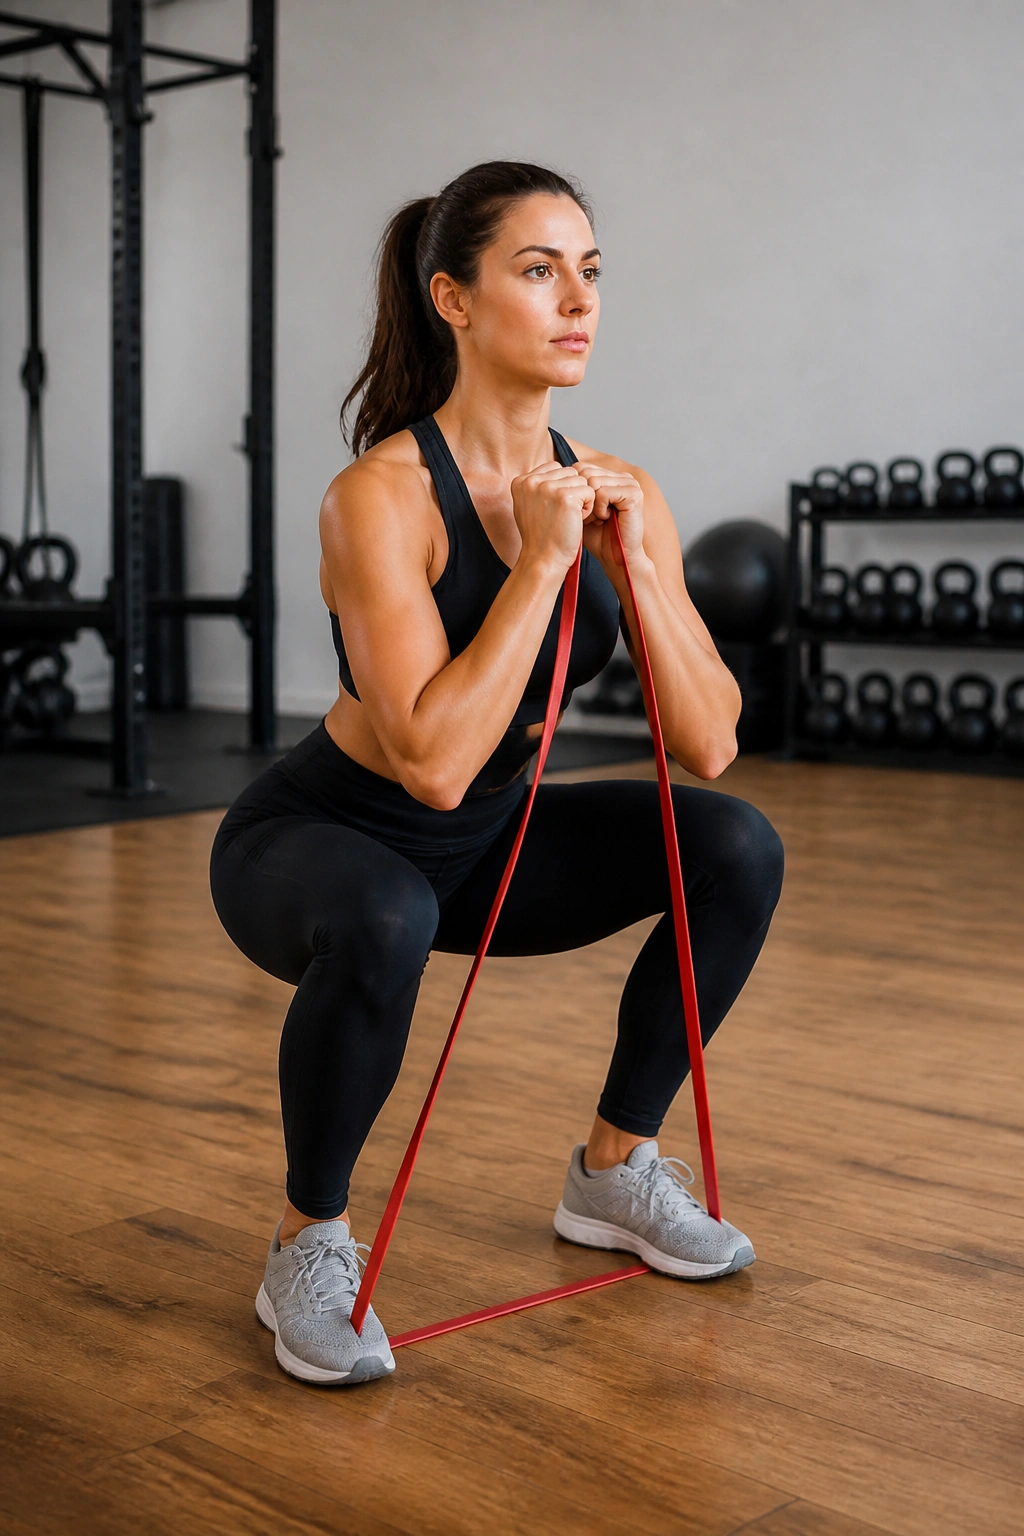
Place a band under your feet and pull the top of the band up to your chest, holding it like a goblet. Perform a squat while holding that tension against your chest. This ensures your upper body stays upright throughout the entire movement.
The Benefit of Posture
Holding the band at your chest does two things: it adds resistance for your legs, and it forces your thoracic spine to stay extended. If you hunch forward, the band will slip or pull you off balance. This teaches you how to keep your chest up during heavy squats, which is a critical skill for avoiding back injury in more advanced lifting.
24. Plank Leg Lifts
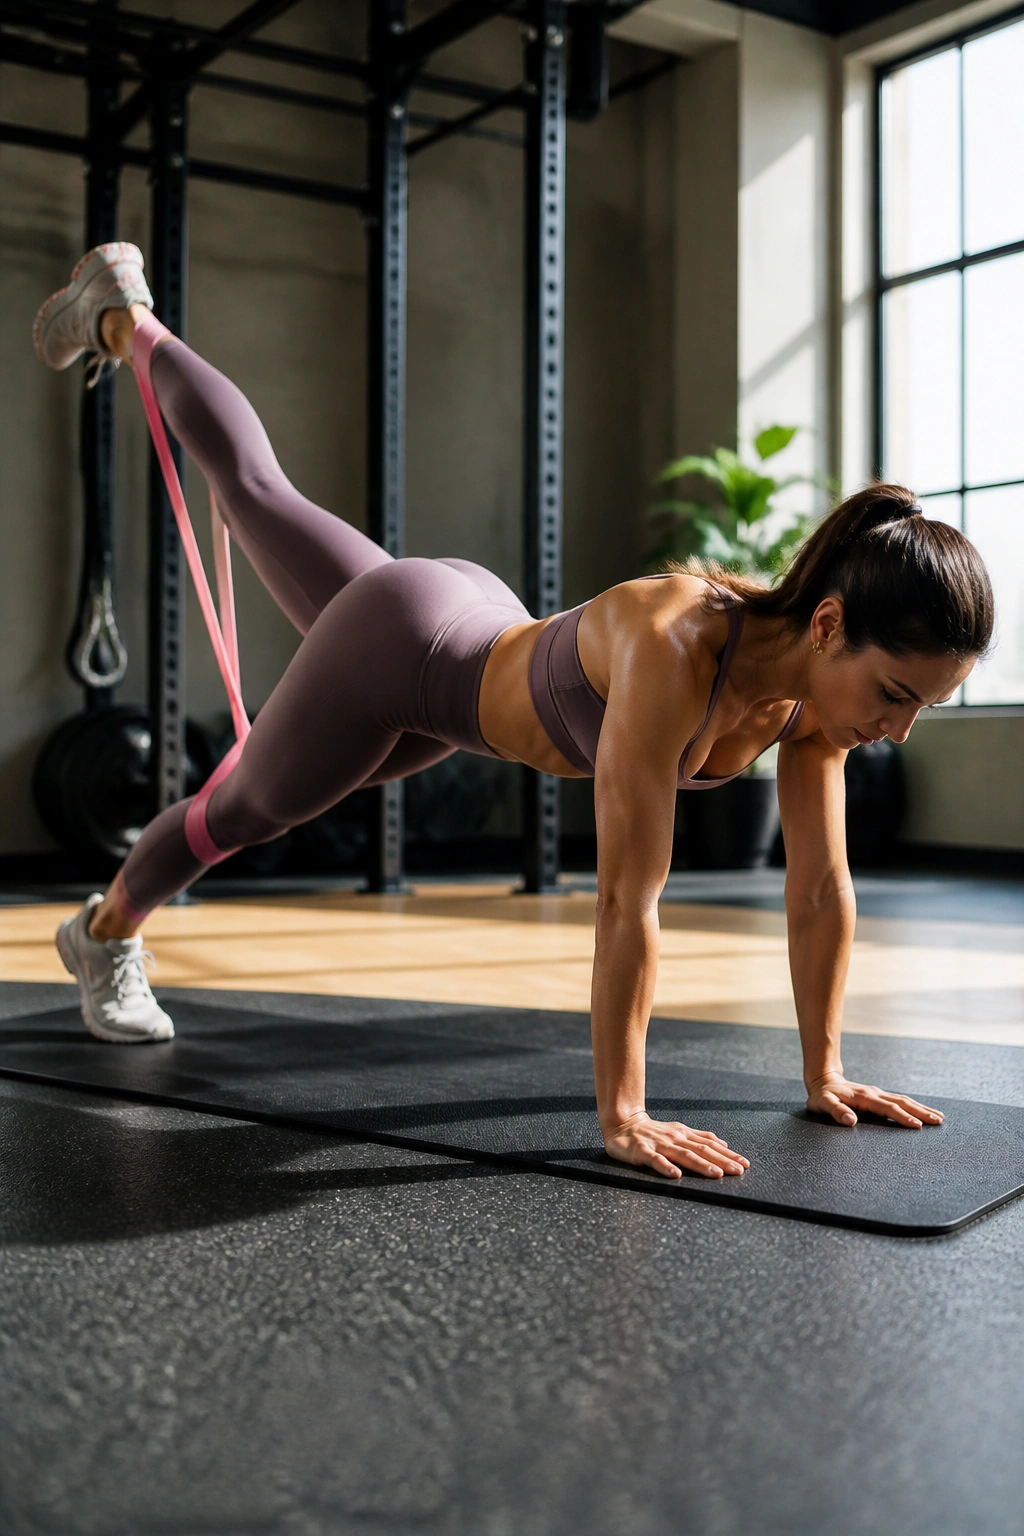
Get into a high plank position (top of a push-up) with a mini-band around your ankles. While keeping your back flat and core tight, lift one leg straight up toward the ceiling. Alternate legs.
The Multi-Tasker
This is a core exercise that doubles as a glute workout. Most people do planks for their abs, but adding the leg lift forces the glutes to stabilize the hip while the abs keep the spine neutral. Do not let your butt pike up into the air; keep your body in a straight line from your head to your heels.
25. Cossack Squats
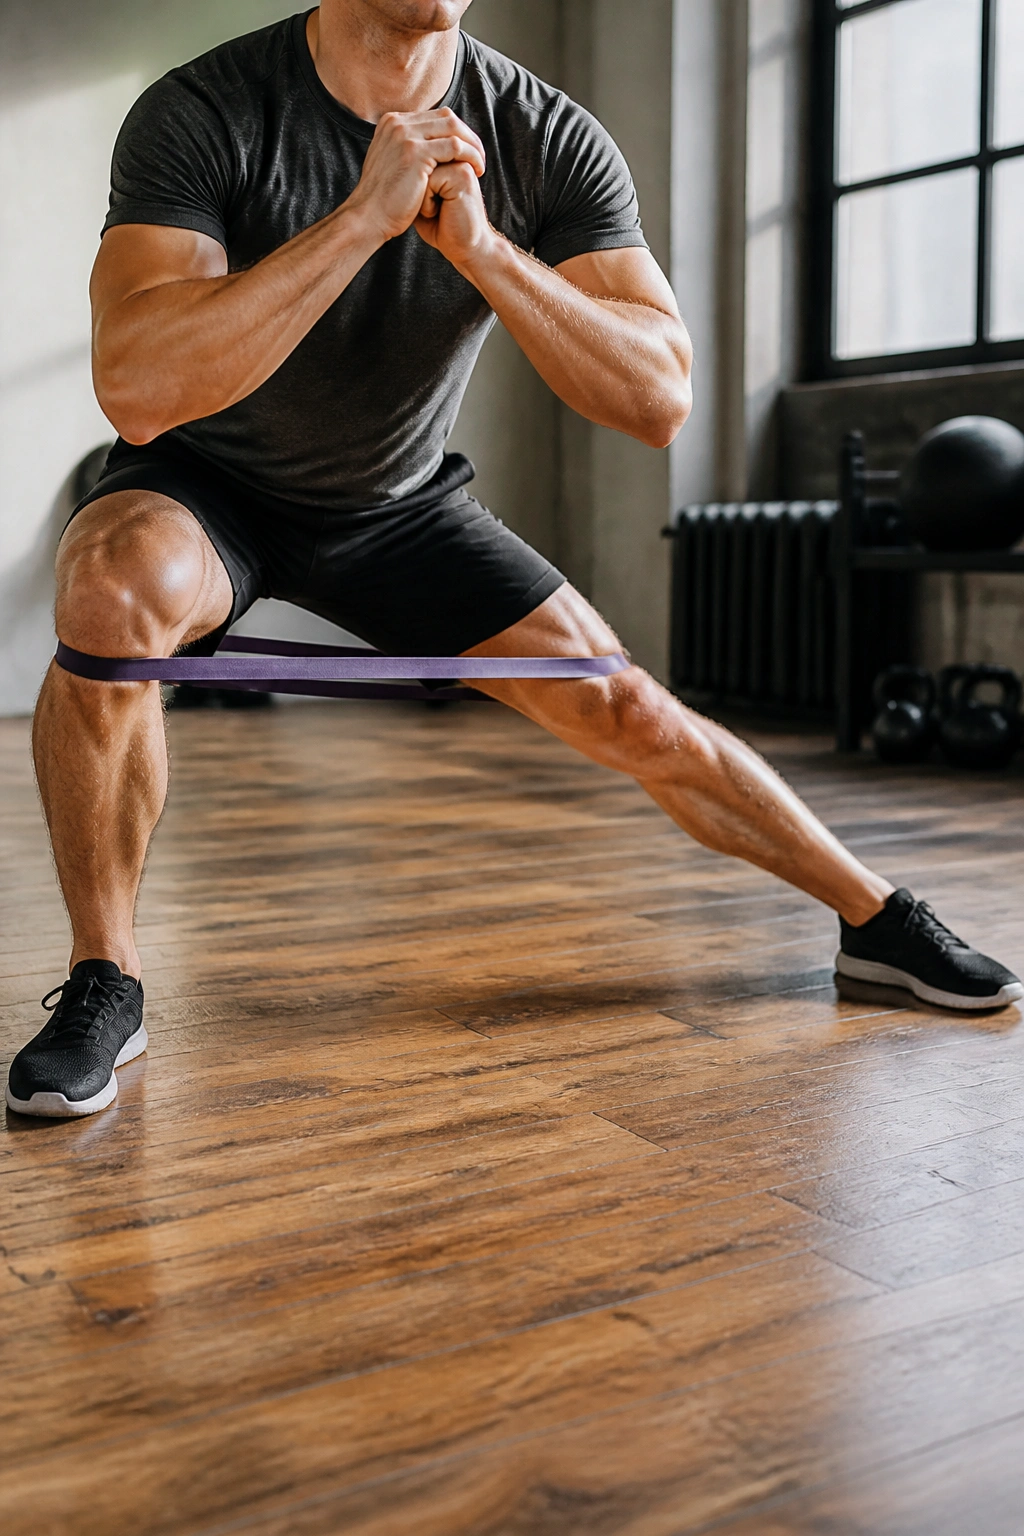
Stand with a wide stance, band around your knees. Shift your weight to one side, bending that knee while keeping the other leg completely straight. Return to center and shift to the other side. This is an incredible movement for the inner thighs and hip mobility.
Athleticism
This move isn’t just about strength; it’s about control. It requires you to maintain tension on the band while shifting your center of gravity laterally. It builds the kind of functional strength that helps with stability in sports and daily life. You’ll feel this deep in your adductors and glutes after just a few reps.
Wrapping Up
Resistance bands are often underestimated because they don’t have the “clank” of iron plates or the sheer intimidation factor of a heavy barbell. But your muscles do not know the difference between a dumbbell and a piece of latex—they only know tension. If you provide enough tension, and you control the movement well, your muscles will grow and strengthen.
The key to getting real results with these exercises is consistency and time under tension. Stop trying to rush through your sets. Focus on the squeeze at the top, the slow lowering phase, and keeping the band taut throughout the entire range of motion. You don’t need a massive home gym; you just need to be willing to feel the burn and embrace the discomfort of a workout well done. Start with two or three of these moves in your next session, and you’ll quickly see why bands deserve a permanent spot in your training rotation.
