



Most people miss the upper glute because they keep chasing bigger squats and hoping the right shape appears on its own.
That upper outer shelf — the part that helps your hips stay level and gives the back side of your glutes more lift — responds better to angles, pauses, and one-legged work than to mindless volume. Upper glute workouts at home do not need a gym full of machines. A floor, a couch, a mini band, a backpack, and a little patience are enough.
The catch is that a lot of common moves get rushed. People arch their lower back on bridges, twist their hips on fire hydrants, or bounce through lunges so fast the glutes never really have to work. Clean reps matter. So does where you feel the move: upper glute, outer hip, side of the butt, not the lower back.
I keep coming back to one point because it matters: if a move feels easy in the wrong place, it usually means the setup needs fixing, not the exercise itself. Start with the floor work below, then layer in the standing and single-leg pieces when your hips are ready.
1. Frog Pumps for a Fast Upper-Glute Burn
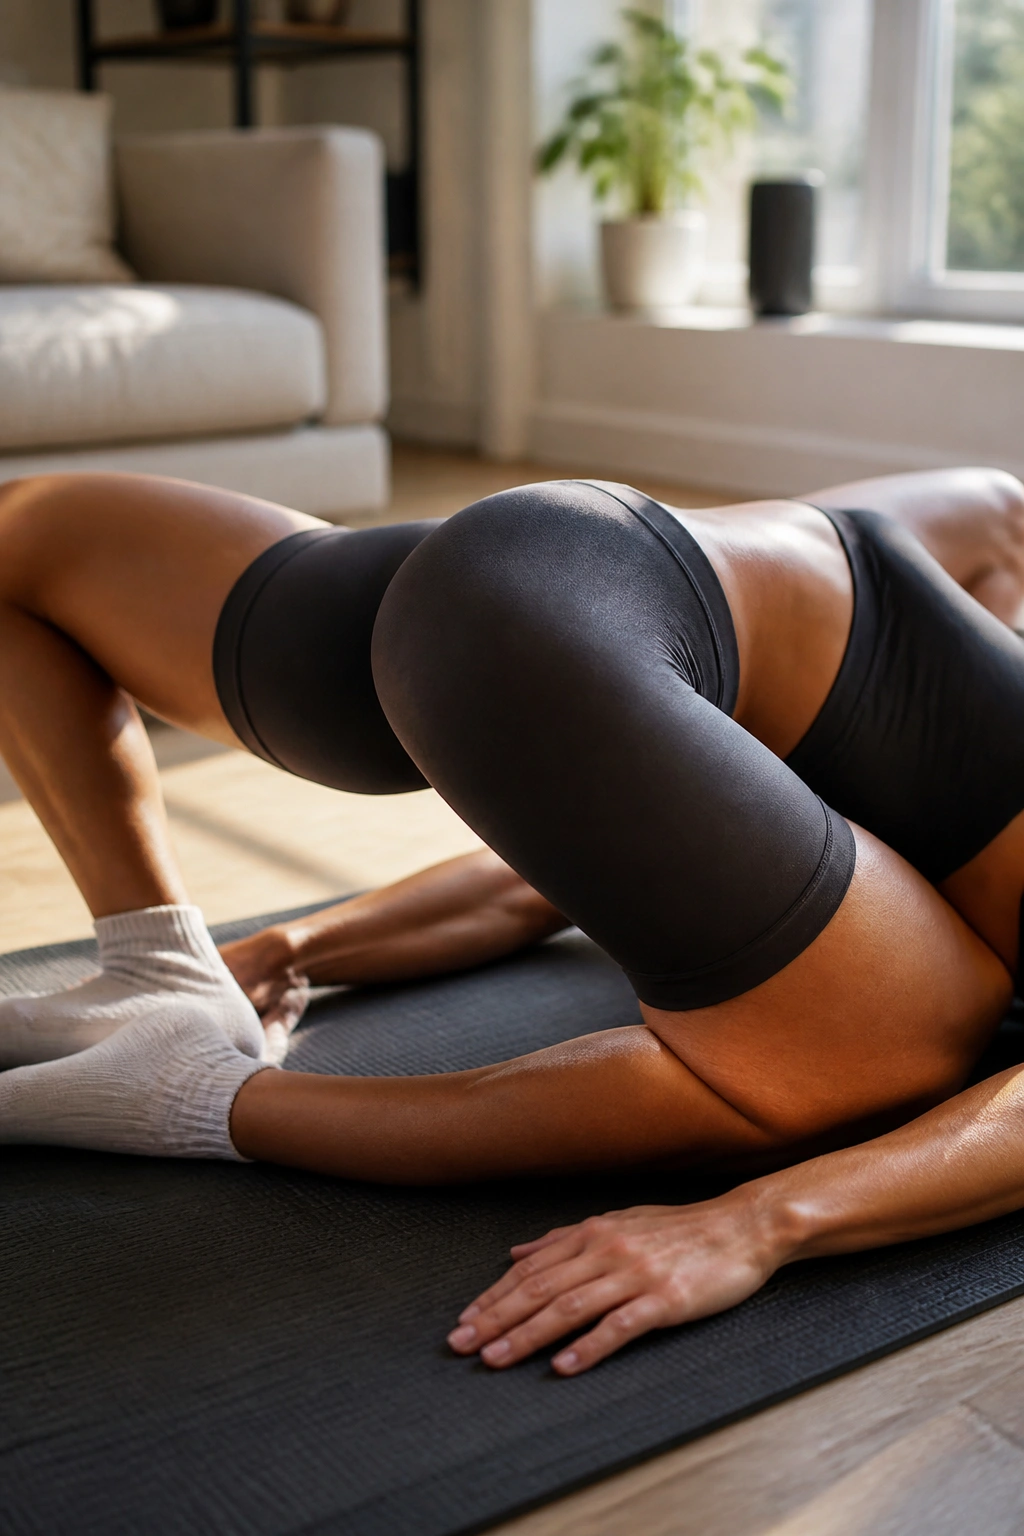
Frog pumps look almost too simple, which is probably why people skip them. That’s a mistake. With your soles pressed together and knees dropped open, the glutes stay under tension in a short range where a lot of people can actually feel the upper fibers working instead of the lower back doing all the talking.
What makes them work
- Lie on your back, press the soles of your feet together, and slide them in close enough that your heels stay near your glutes.
- Lift your hips a few inches, then pulse at the top for 20 to 30 reps.
- Keep your ribs down. If your chest is flaring and your lower back is arching, the move has gone sideways.
A clean frog pump should feel like a tight, hard squeeze across the top of the glute line. Not in the hamstrings. Not in the lumbar spine. That’s the whole game.
Best use: finish a lower-body session with 2 to 4 sets, or pair them with a band move when you want a quick burn without a long setup.
2. Glute Bridges With a Mini Band
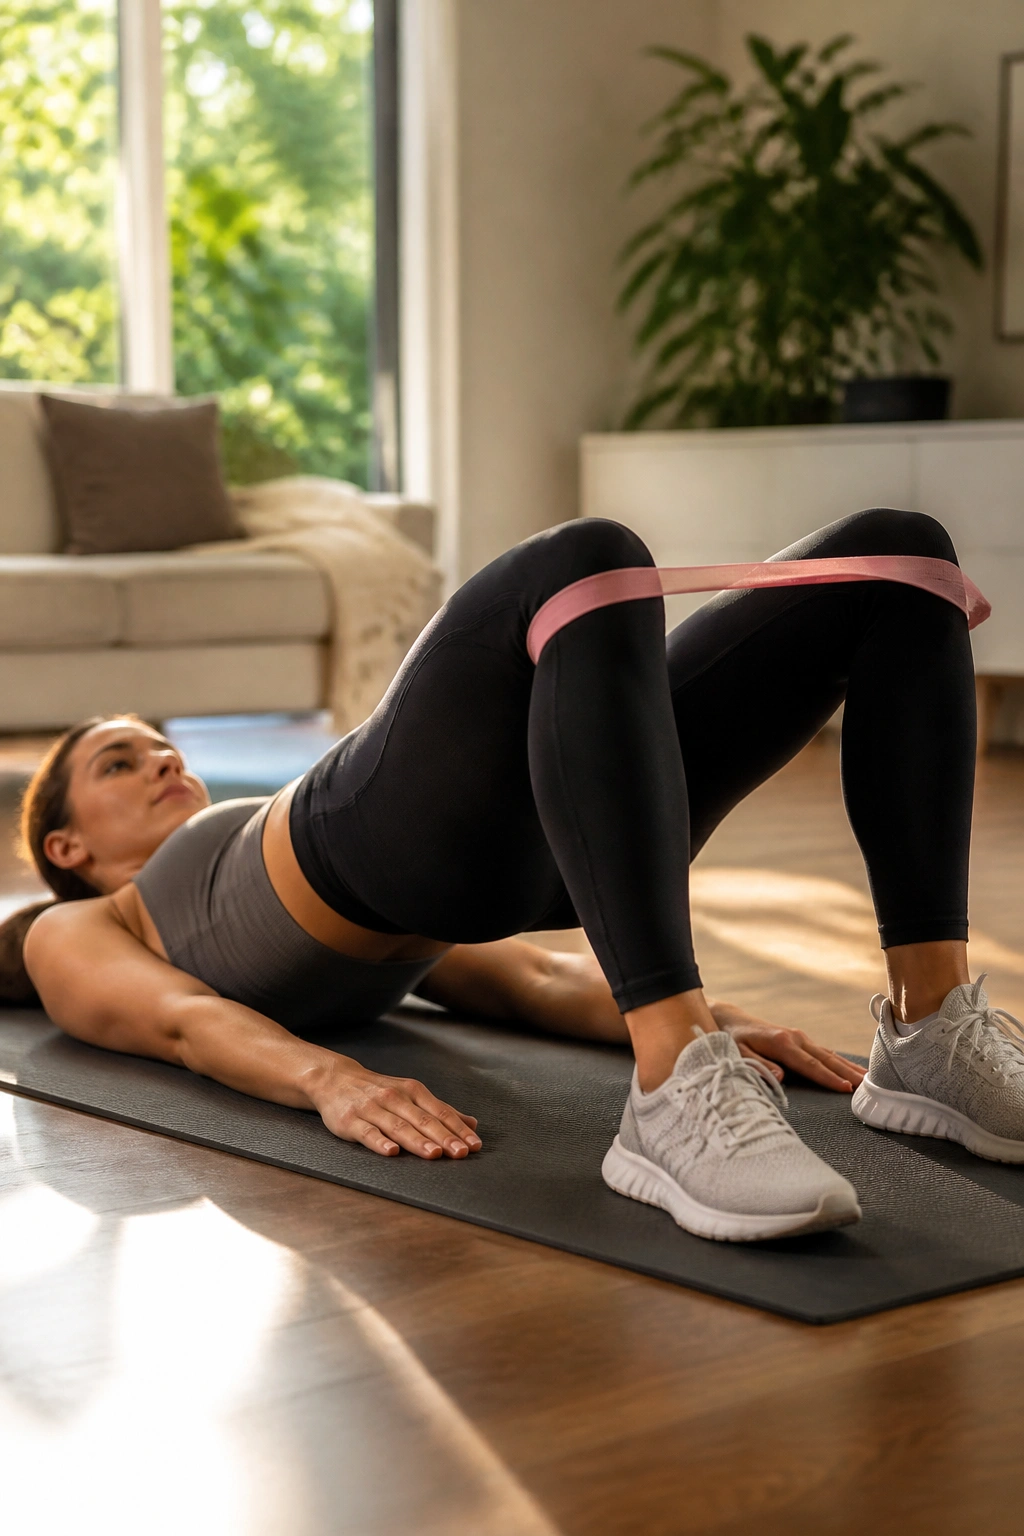
Why does a plain bridge sometimes feel underwhelming while a banded one lights up the outer hip? Because the band gives your glutes a job that pure hip extension does not: it asks the knees to stay open against resistance while the hips rise.
Start with the band just above your knees, feet flat, and heels close enough that you can lift without cramping your hamstrings. Push your knees slightly out as you drive through the heels, then pause for 2 full seconds at the top. That pause matters more than people think. It keeps the glute under load instead of letting momentum do the work.
A good rep feels smooth and controlled. The pelvis should rise as one piece, not tip or twist. If you can’t hold the top without arching your back, shorten the range and slow down. No shame in that. Actually, it’s smarter.
I like these in the first half of a workout because they wake up the whole hip without frying you. 2 to 3 sets of 12 to 15 reps is plenty.
3. Single-Leg Glute Bridges That Expose Weak Sides
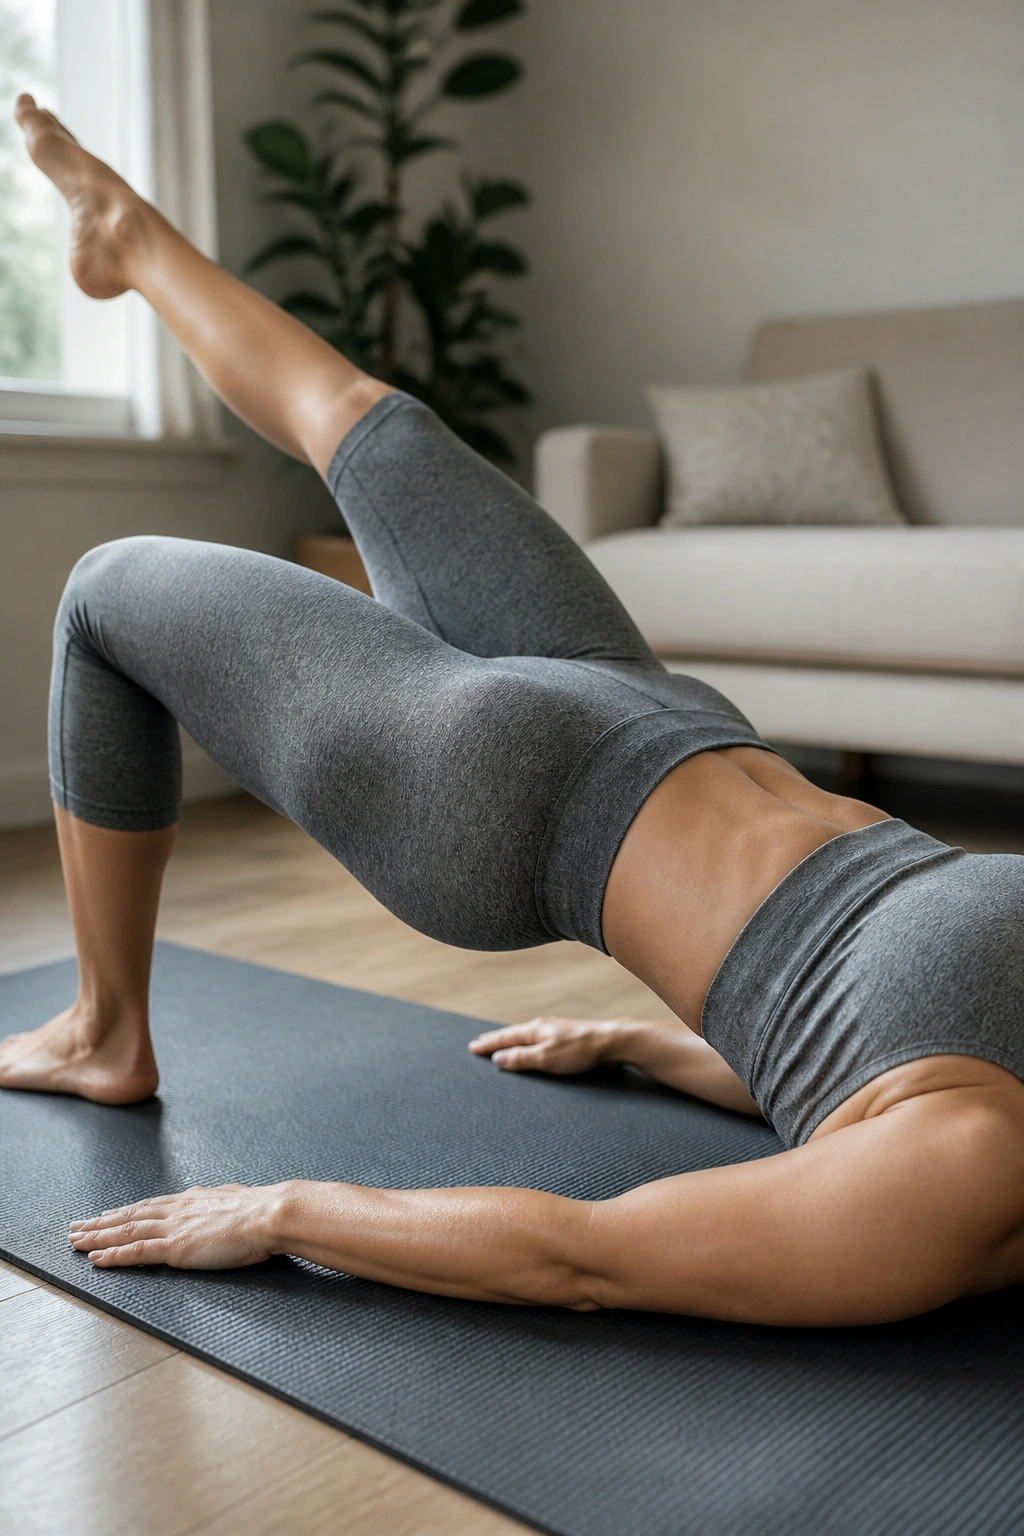
Single-leg bridges are a blunt little truth serum. One side usually feels easy. The other side cramps, shakes, or drops. That difference is useful, not annoying.
Lie on your back with one knee bent and the other leg straight out in front of you. Keep your hips level, then press through the planted heel and lift until your torso forms one line from shoulder to knee. If the lifted side of your pelvis dips, stop chasing height and fix the control. High reps with crooked hips are just sloppy practice.
Easy version
Place the free heel lightly on the floor for balance and take the load off the hard side. It sounds like a cheat. It is a smart step.
Harder version
Hold the top for 3 seconds on every rep. That tiny pause makes the upper glute on the working side stay honest.
I’d use 8 to 12 reps per side and keep the tempo slow enough that you can feel each rep finish.
4. Fire Hydrant Pulses on All Fours
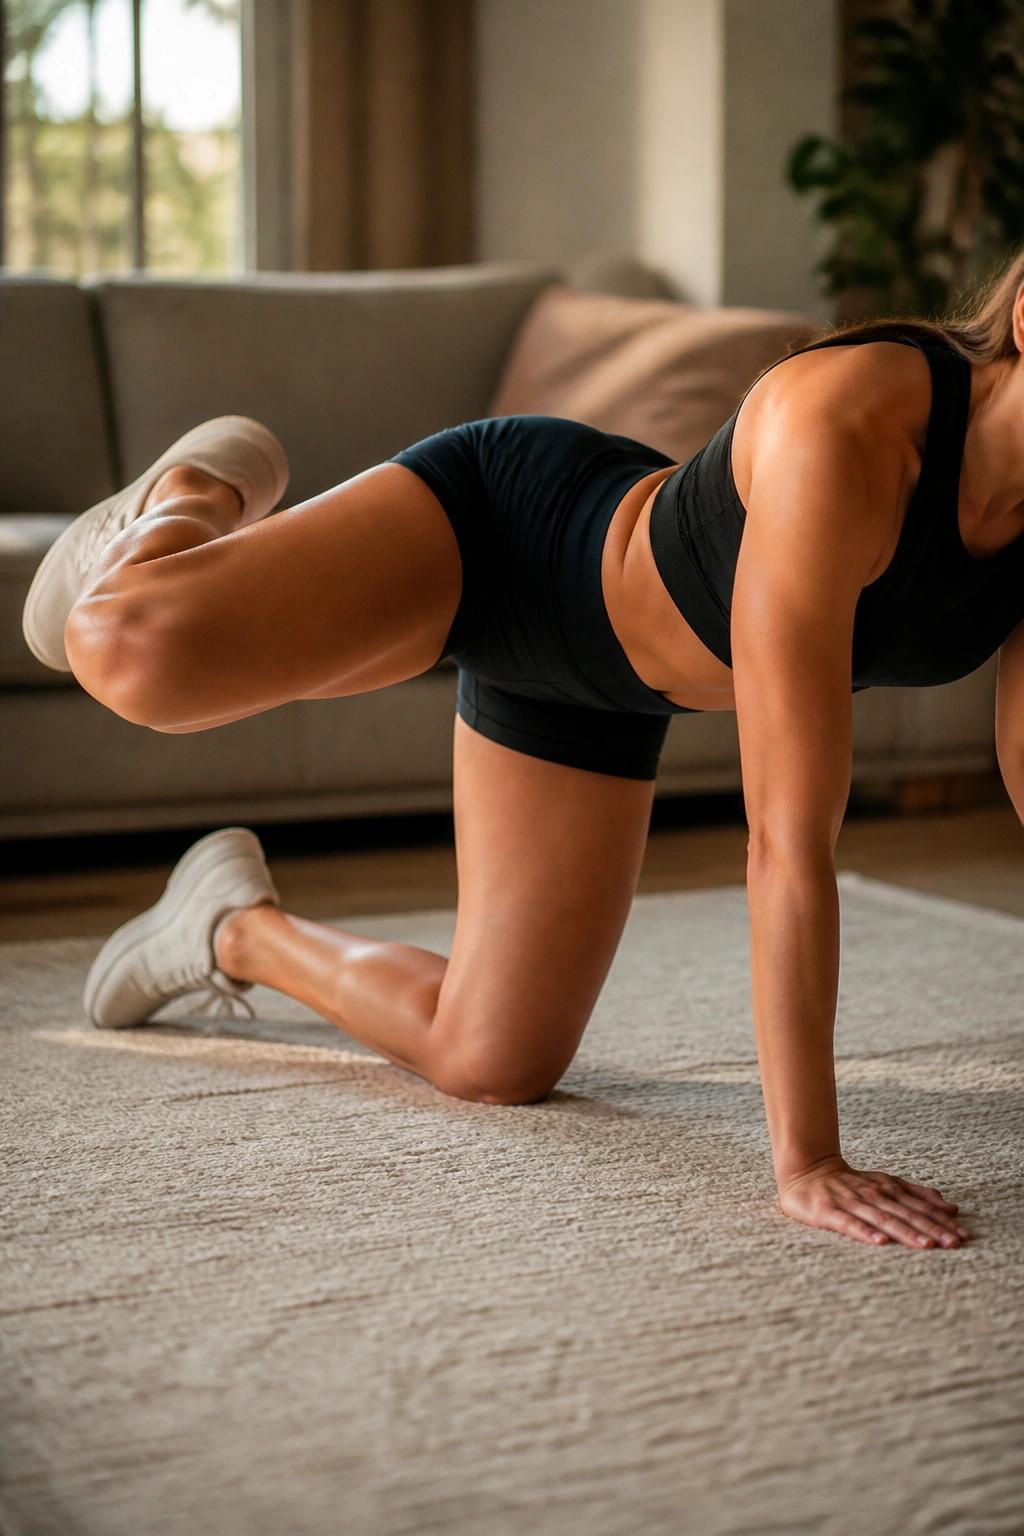
Fire hydrants are only useful when the torso stays quiet. If your ribs twist open and the whole body spins to get the leg higher, the glute medius stops working the way it should.
Get on all fours, wrists under shoulders and knees under hips. Lift one knee out to the side until you feel the outer hip take over, then pulse in a small range near the top for 10 to 15 pulses. The leg does not need to climb very high. A smaller arc with no trunk sway beats a giant swing every time.
Quick cues
- Keep your lower back flat, not arched.
- Don’t lean onto the supporting arm.
- Stop the rep before your pelvis starts to roll.
If you want more from the move, add a 5-second hold after the last pulse. That stillness is where the burn gets honest.
Use this as a warm-up, a burnout, or part of a glute circuit. It’s simple. It works.
5. Side-Lying Leg Raises Done the Right Way
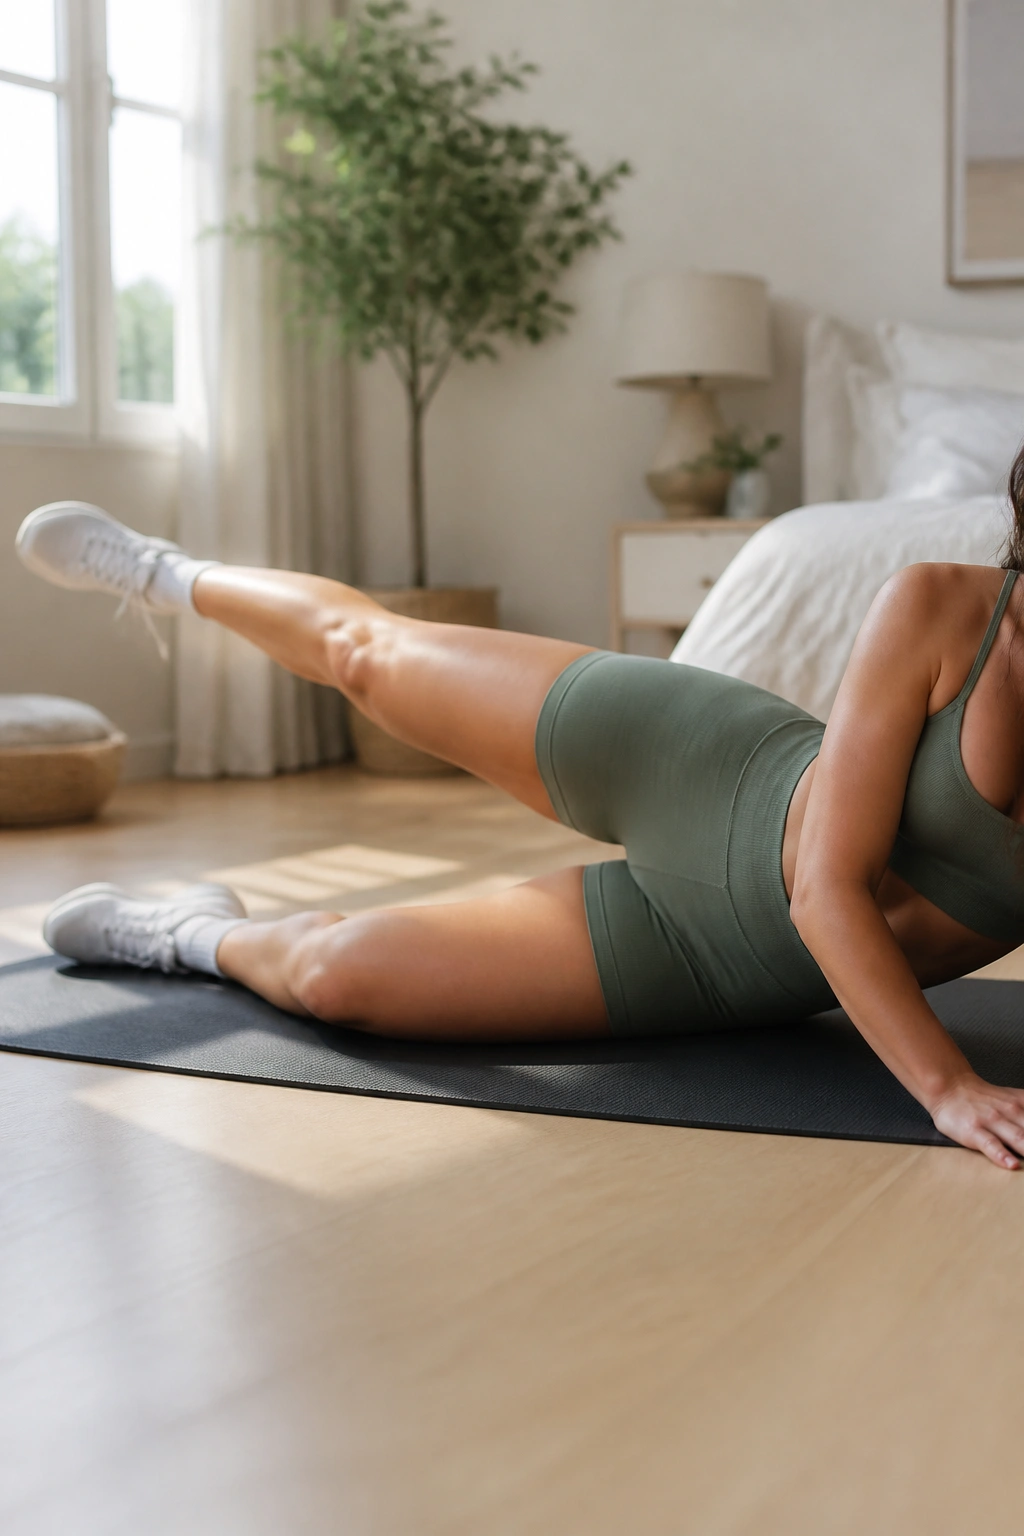
This is one of those exercises people think they know until their hip flexor starts yelling. The fix is tiny: shift the top leg a little behind your body, turn the toes slightly down, and lift from the side of the hip instead of the front of the thigh.
Lie on your side with your lower leg bent for support if needed. The working leg should rise only until you feel the outer glute take over. Bigger is not better here. If the leg rockets upward and the pelvis rolls back, you’re losing the target.
Tiny range. Big payoff.
A short pause at the top makes a difference, especially if you hold 1 to 2 seconds before lowering. You want tension, not speed. I also like these after long sitting because they wake up a sleepy hip without asking for much coordination.
Try 15 to 20 reps per side. If bodyweight feels too easy, add an ankle weight only after the form stays clean. That part matters more than people admit.
6. Clamshells With a Mini Band
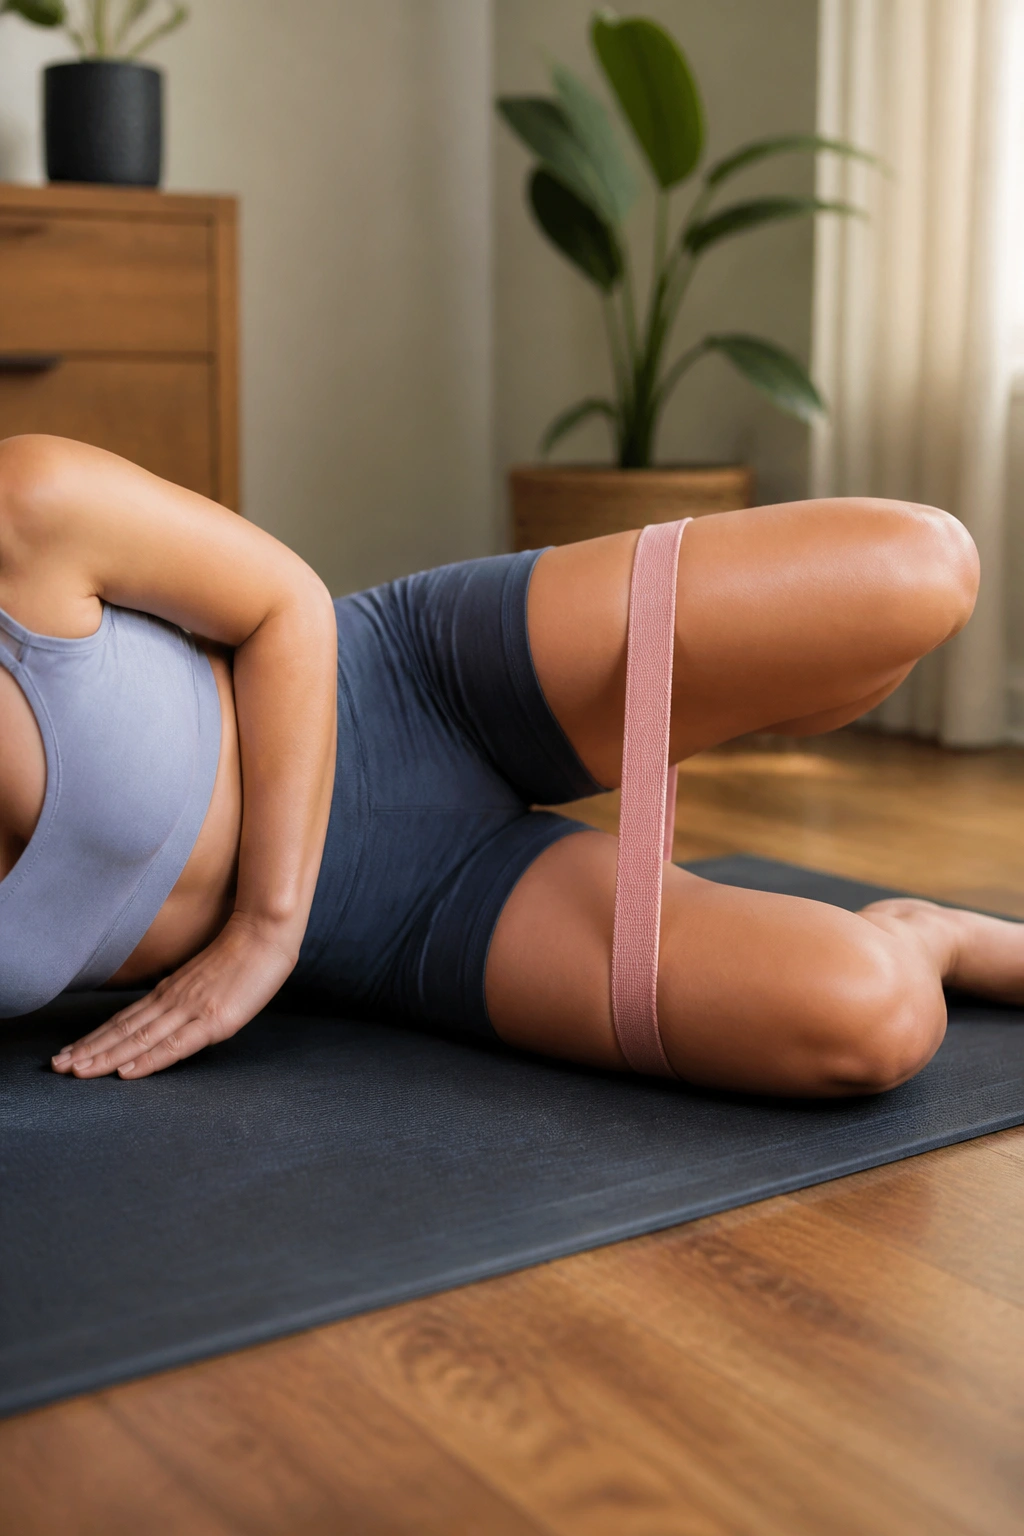
Clamshells get mocked because they’re quiet and small. Then someone does them correctly and discovers the side of the hip burning like it has a personal grudge. The mini band helps, but the real work comes from keeping the pelvis stacked while the knee opens.
The details that matter
- Lie on your side with hips stacked and knees bent about 90 degrees.
- Keep your feet together and open the top knee without rolling your torso back.
- Stop as soon as the pelvis wants to move. That is your real end range.
- Use 15 to 25 reps and make the last five slow.
The common mistake is chasing height. You do not need the knee to fly open. You need the outer glute to take over while the hips stay quiet. That’s a much smaller movement than people expect.
When to use them
Clamshells work well before heavier single-leg work. They also fit nicely at the end of a session if your hips are a little lazy and you want a final dose of side-glute work.
7. Banded Lateral Walks That Wake Up the Outer Hip
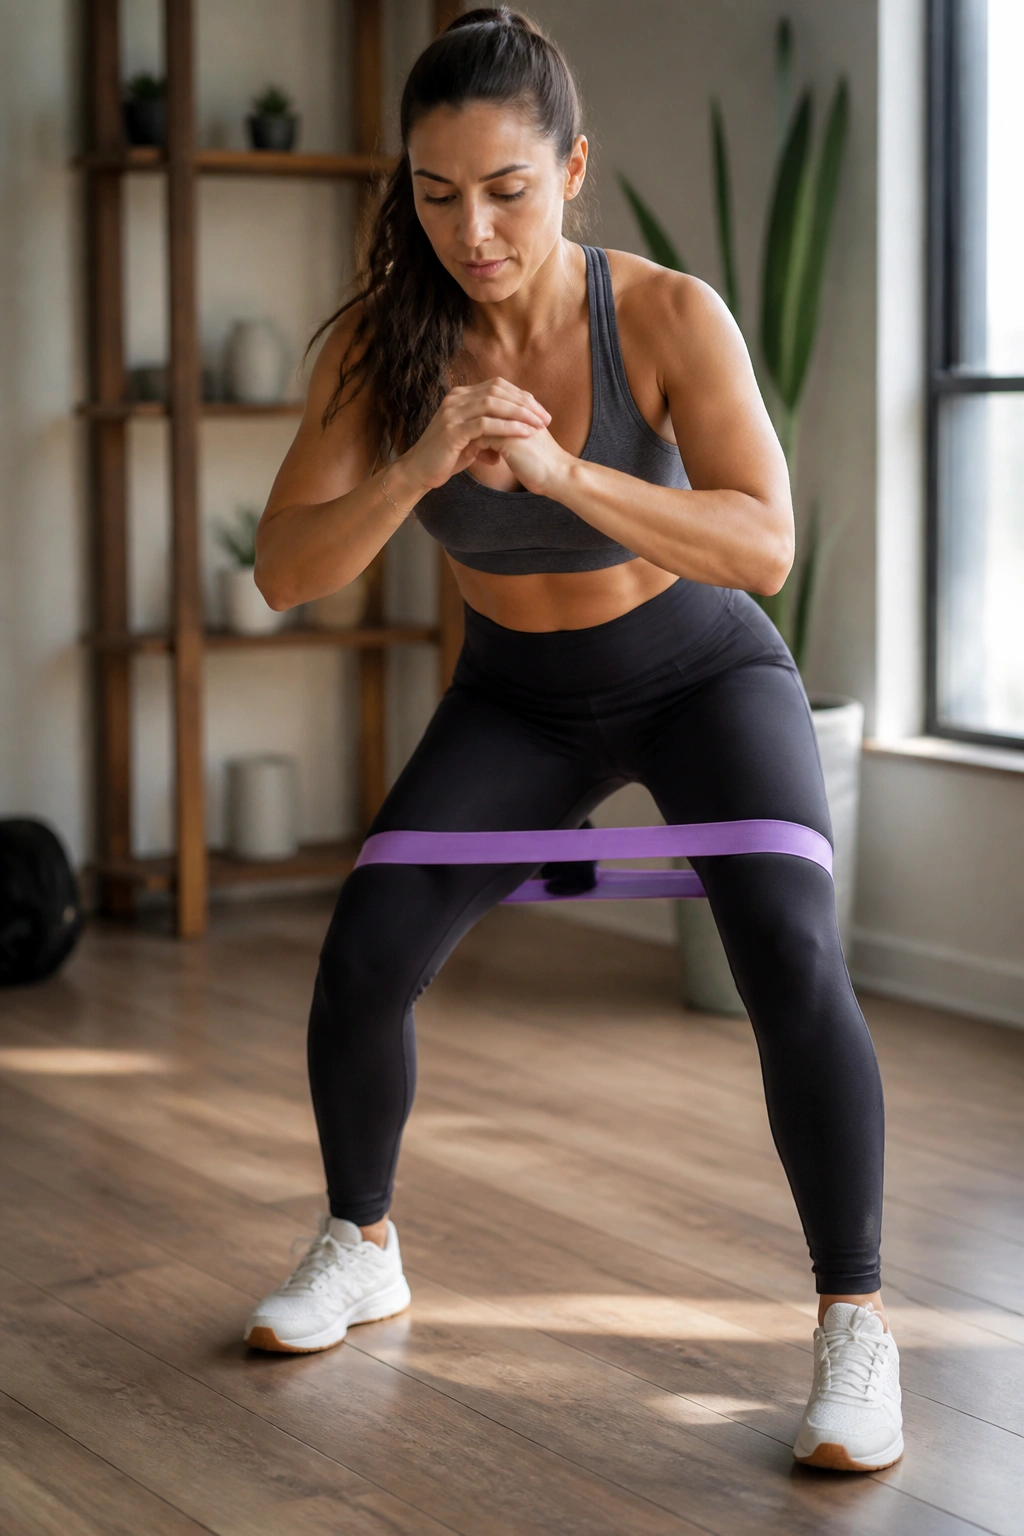
I’m not a huge fan of flashy band work that looks hard and feels sloppy. Lateral walks are the opposite when they’re done right. They’re plain, maybe even boring, and they tell the truth about weak glutes fast.
Place a mini band above the knees or around the ankles if you want more challenge. Sink into a shallow squat, shift your hips back a little, and step sideways with control for 8 to 12 steps in each direction. Keep the feet parallel. If the knees cave in or the torso bobs up and down, the band is winning.
A lot of people take steps that are too large. That turns the move into a hip flexor mess. Shorter steps, steady tension, and a slight knee bend are the useful version. Also, keep your weight through the whole foot, not dumped into the toes.
Use them as a warm-up, between sets, or as part of a glute burnout. They’re one of the few exercises that can make your outer hip feel awake before the work even starts.
8. Curtsy Lunges for the Upper Glute and Hip Stability
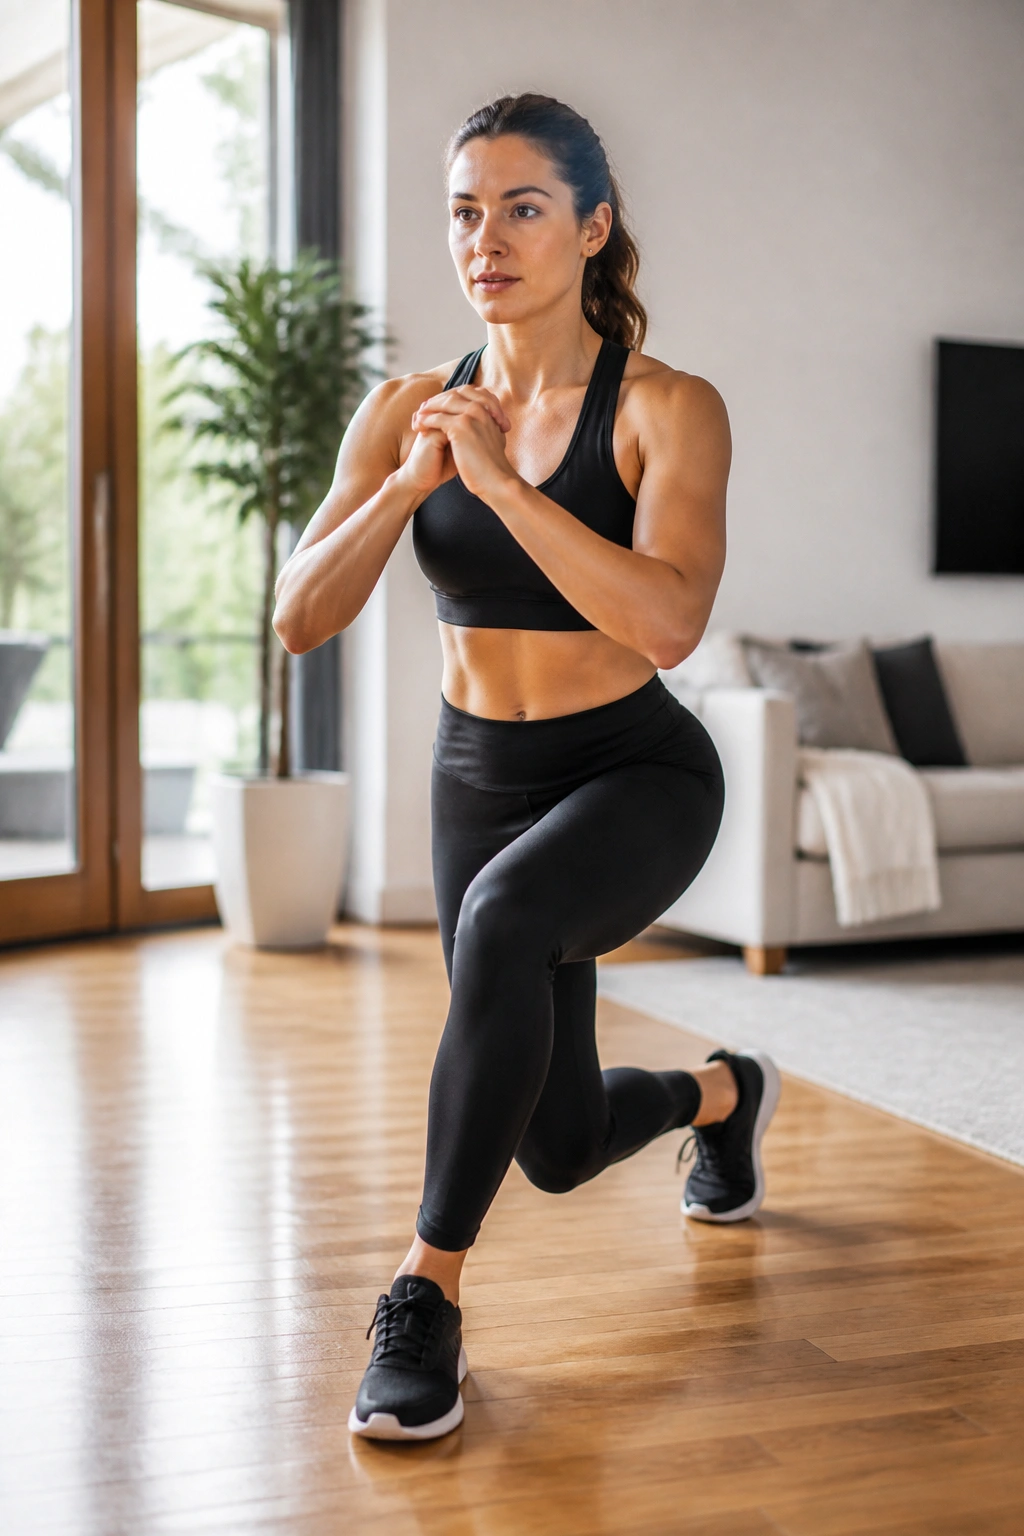
Curtsy lunges are not just a leg move. They ask the standing hip to keep the pelvis level while the working leg crosses behind, and that’s exactly where the upper glute earns its keep.
Step one leg behind and slightly across the body, then bend both knees until you feel the front hip and outer glute load up. The torso can lean forward a touch, but do not collapse into the front knee. That’s the part people rush. A shallow curtsy with a solid hip sit is better than a deep wobbly one.
How to make it kinder on the knees
- Keep the cross step short.
- Sit back a little more than down.
- Stop if the front knee feels pinchy instead of loaded.
I like 8 to 10 reps per side and a slow return to standing. The control on the way up matters as much as the descent. If your balance is shaky, hold the back of a chair for the first few sessions. No need to make it heroic.
9. Bulgarian Split Squats With a Slight Forward Lean
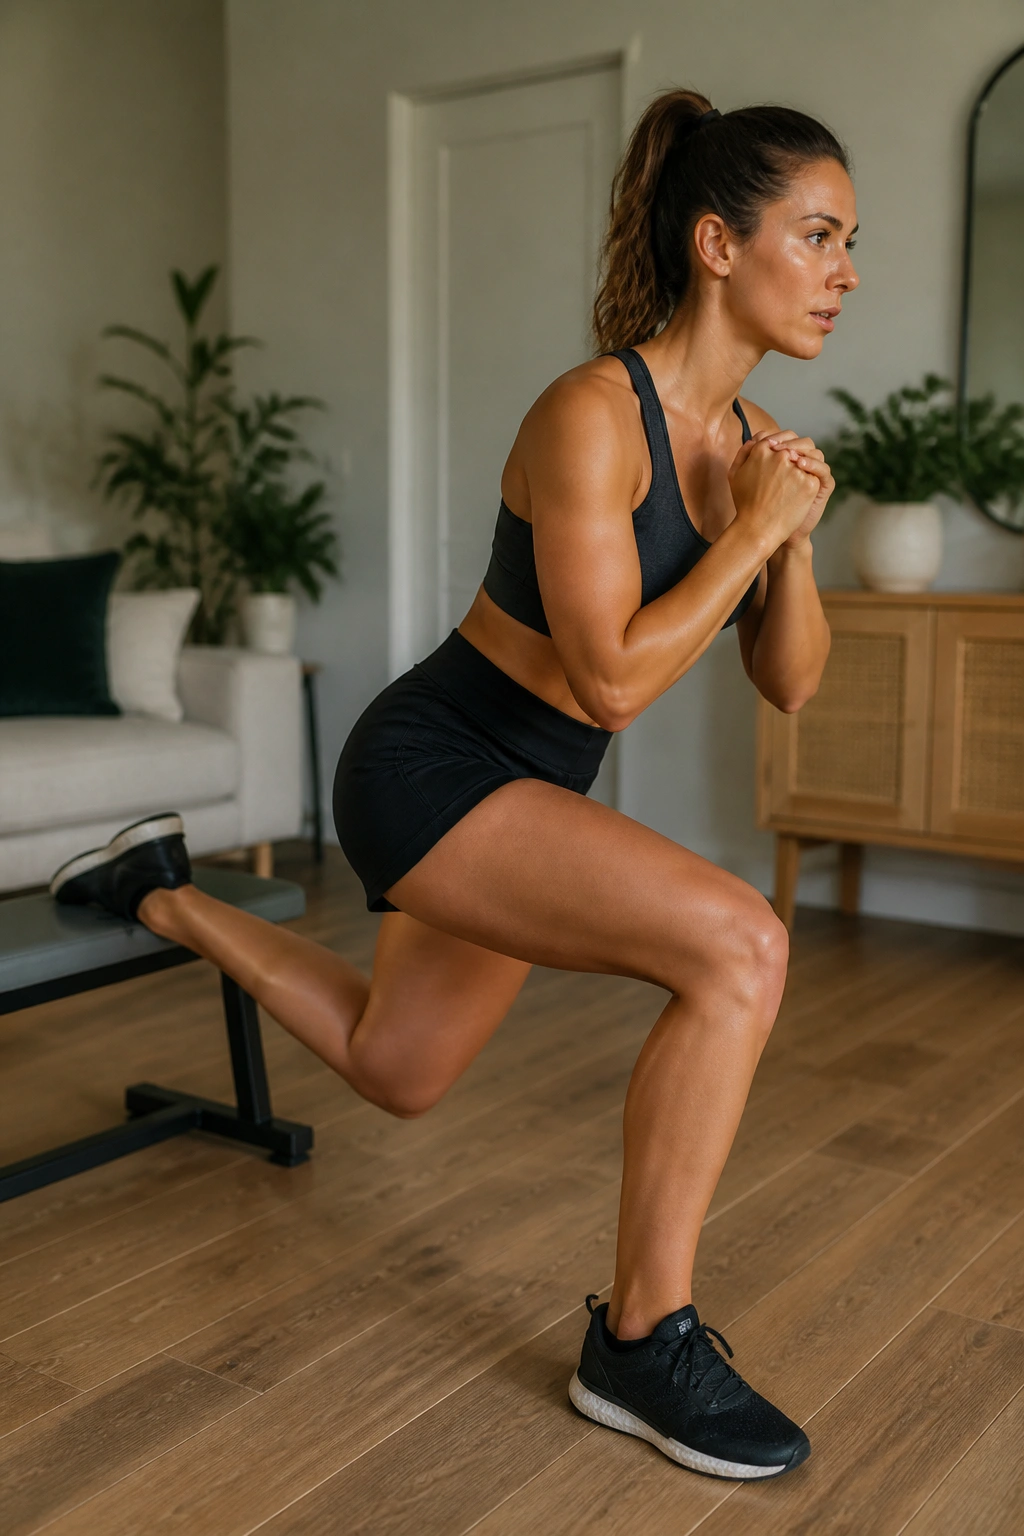
Can a split squat hit the upper glute? Absolutely — if you stop standing bolt upright like a lamppost. A slight forward torso angle shifts the work into the front hip and glute, which is where most people want it.
Set the back foot on a couch or chair and step the front foot far enough forward that the front shin can stay mostly vertical. Lower under control, then drive through the front heel and midfoot. The back leg is there for balance. It should not be doing the main job.
A lot of home versions go wrong because the bench is too high or the front foot is too close. Both make the movement miserable. A lower surface and a longer stance usually feel better and hit the glutes harder. Use a pillow under the back knee if the setup needs it.
Try 8 to 12 reps each side. If you want more upper-glute emphasis, pause for 1 second near the bottom before standing back up.
10. Step-Ups With a Slow Knee Drive
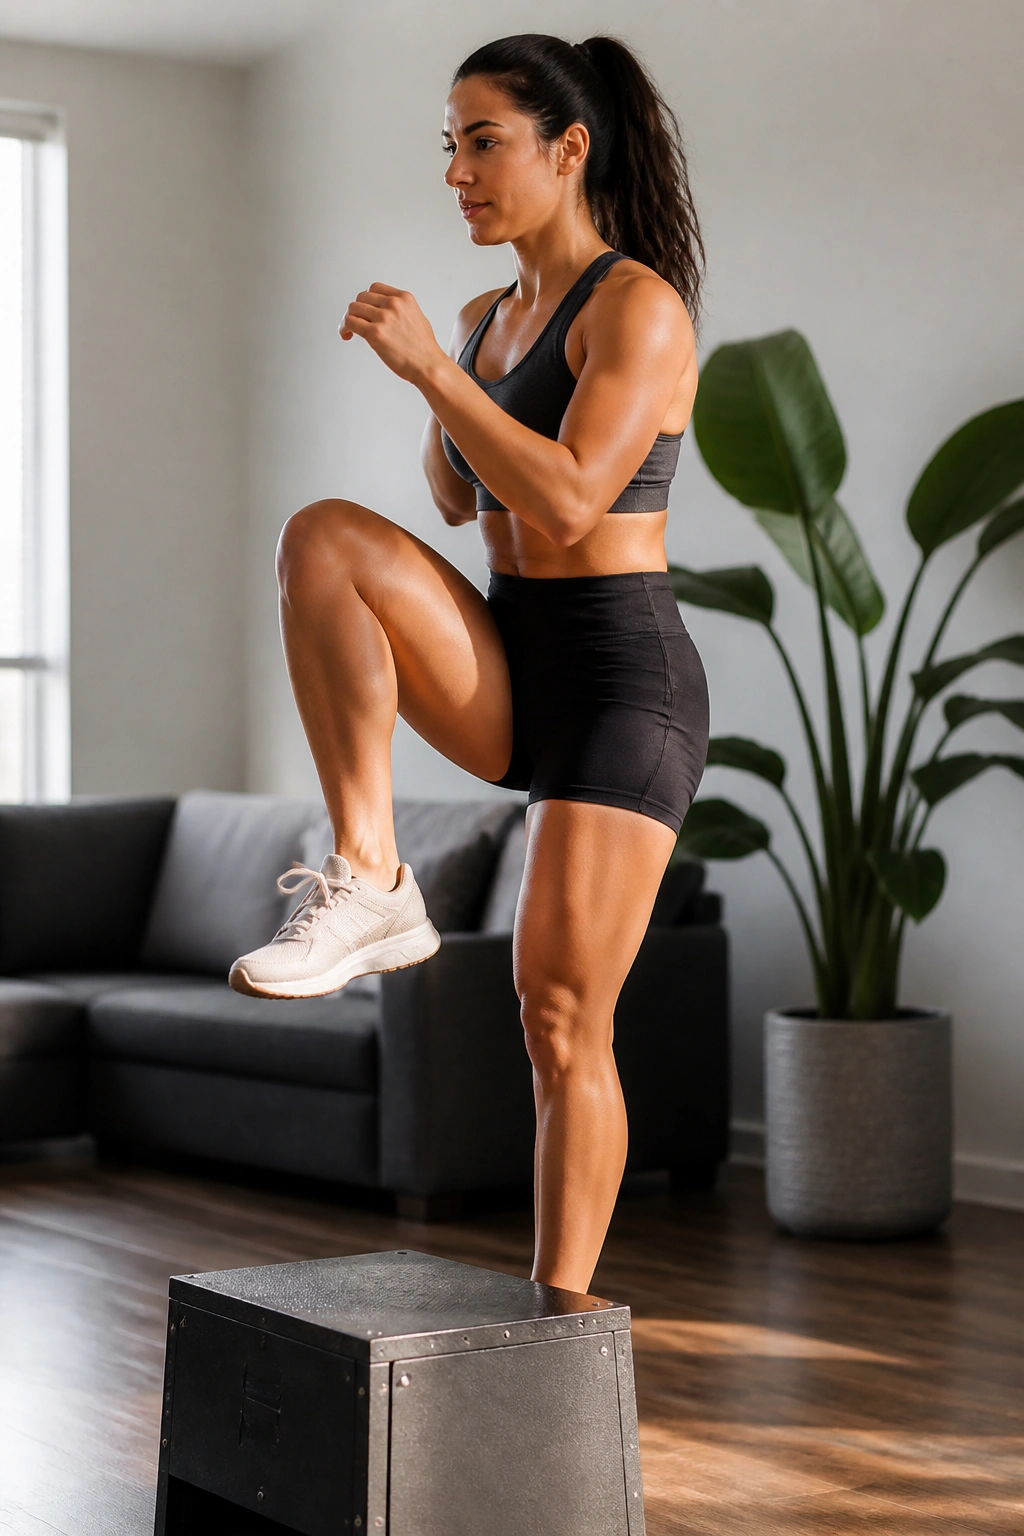
If stairs exist in your home, you already have a useful upper-glute workout.
Pick a sturdy step, box, or bench that lets your working thigh stay roughly parallel or slightly above. Place one whole foot on top, lean forward just enough to load the hip, and stand by driving through the planted heel. Bring the opposite knee up with control instead of swinging it like a marching band move.
The biggest mistake is pushing off the back leg. That steals the work. The second mistake is dropping too fast on the way down. Lowering slowly is where the glute medius helps stabilize the pelvis, and that’s part of why step-ups belong in an upper-glute routine.
A good rep should feel like your standing hip is organizing the whole body. 8 to 10 reps per side is a solid starting point. Add a backpack only when bodyweight stops feeling challenging.
11. Lateral Step-Downs for Control, Not Speed
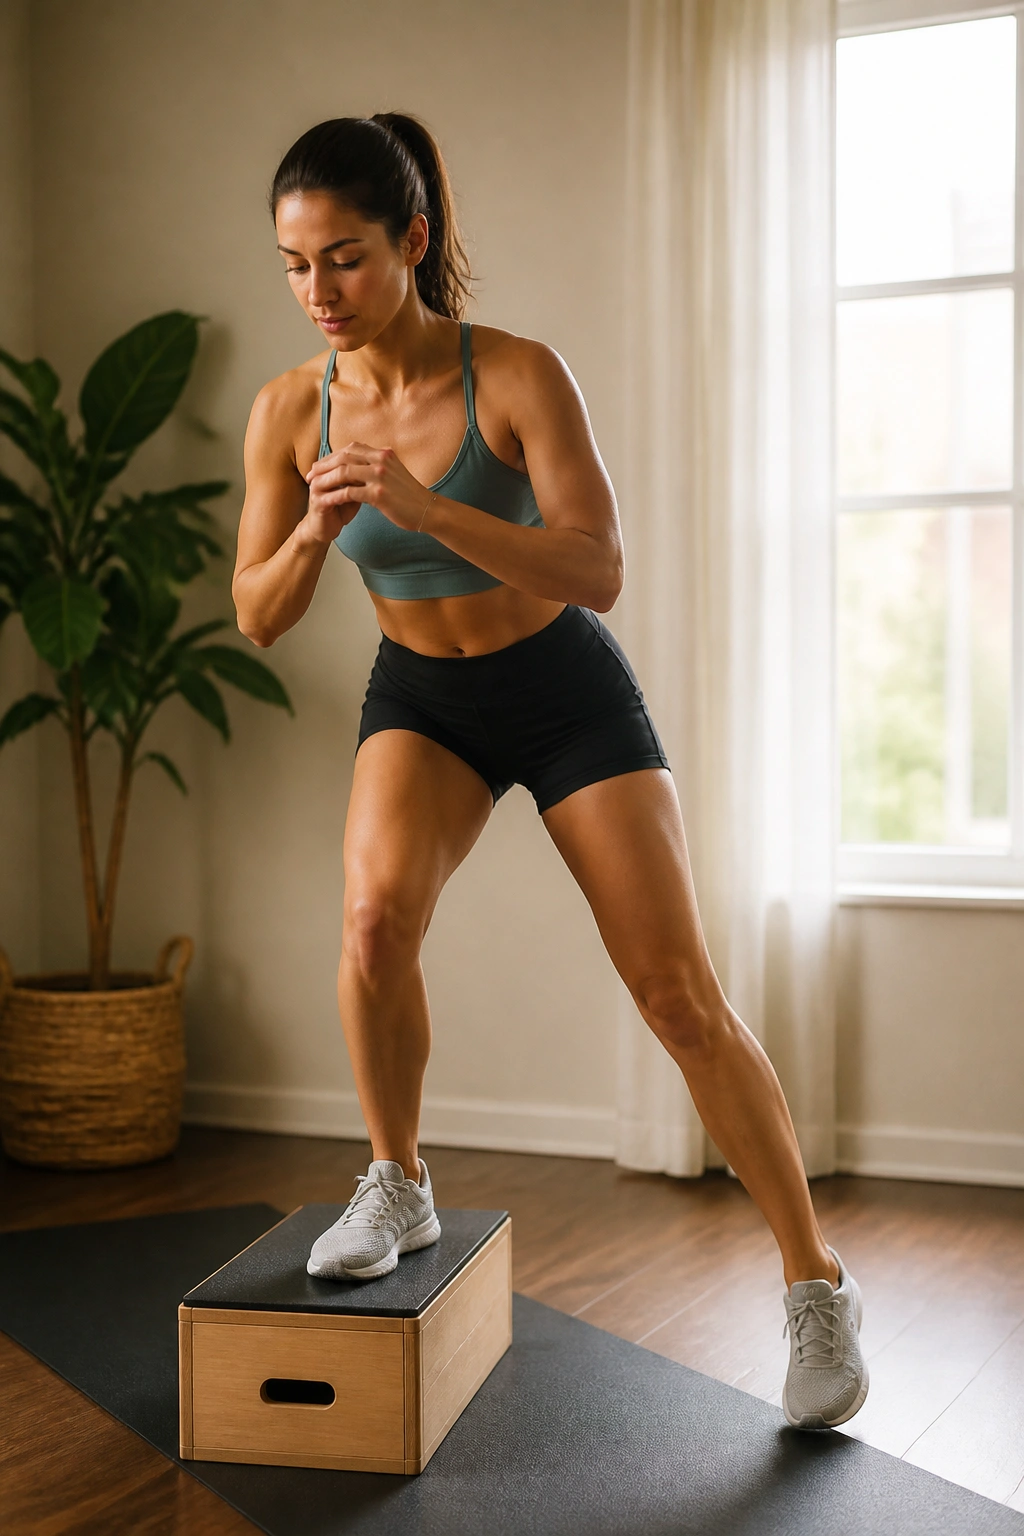
Lateral step-downs look plain, and that is why they work. There’s no momentum to hide behind. Just one leg, a step, and the question of whether your hip can keep the pelvis steady while the other heel taps the floor.
Stand on a step with one foot near the edge. Slowly lower the free heel toward the ground by bending the standing knee and hip, then press back up without bouncing. Keep the standing knee tracking over the middle toes. If it caves inward, the upper glute is not holding the line well enough.
What to watch for
- The standing hip should stay level.
- The descent should be slow, around 3 seconds.
- The free foot should tap lightly, not crash down.
I like these for people who sit a lot, because they make the side hip work in a way that feels very real. Use 6 to 10 reps per side and keep the box low at first. A stacked book, a step stool, or a stair can all work.
12. Couch Hip Thrusts for a Bigger Range
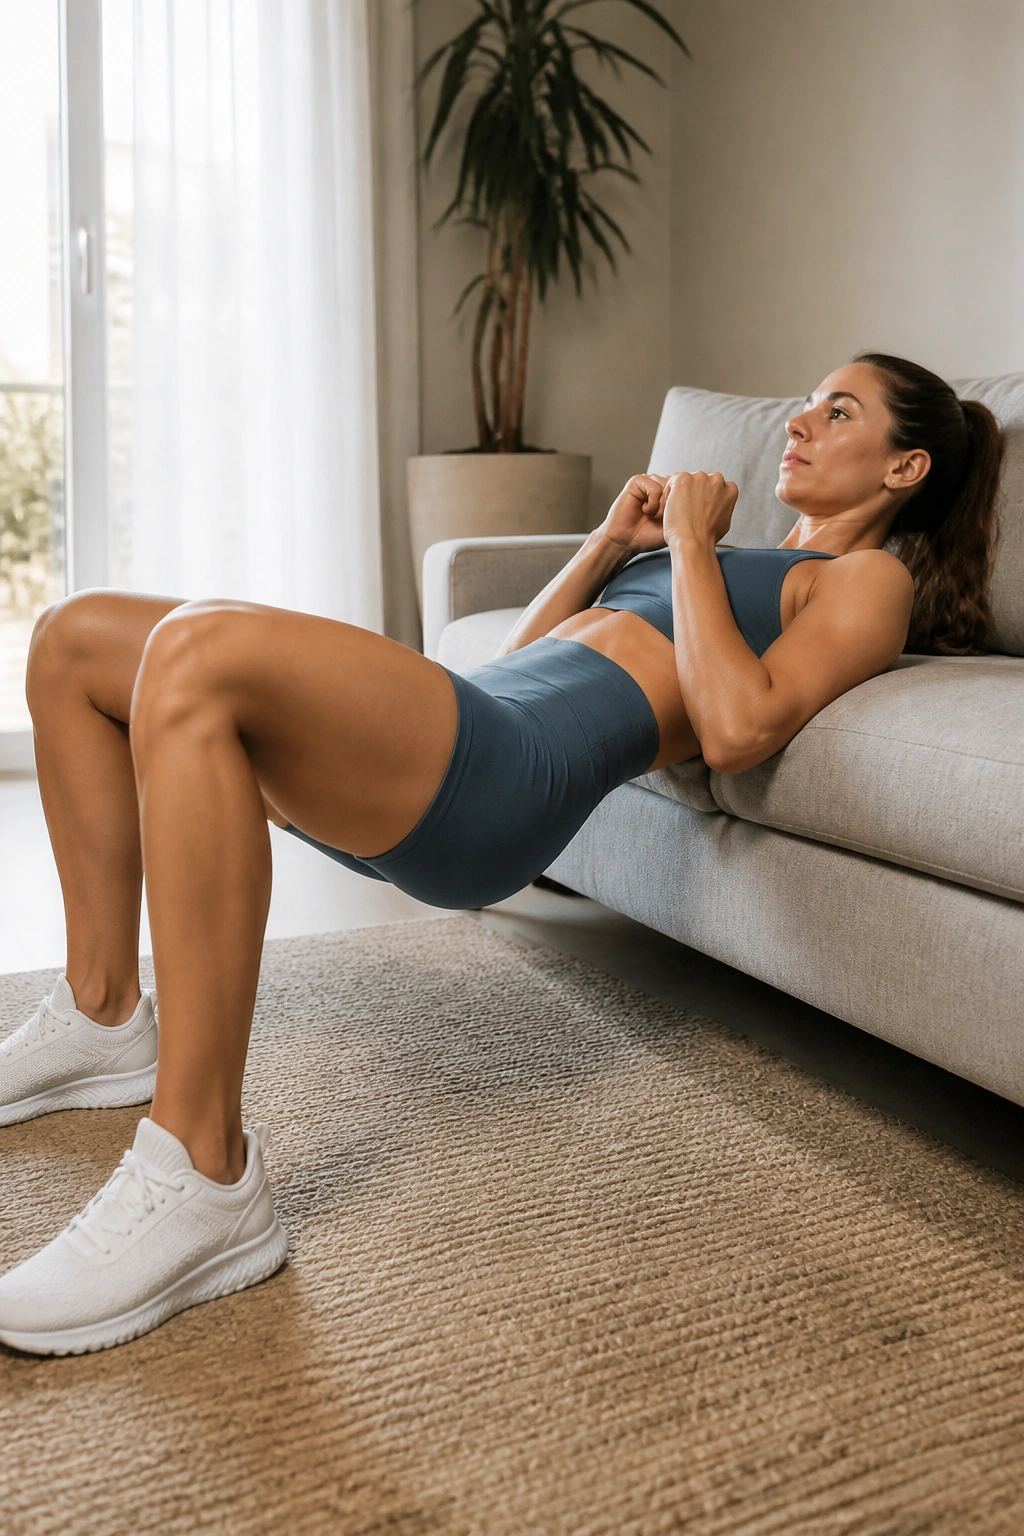
A hip thrust off the couch gives you more range than a floor bridge, and that extra range often means a better glute hit. The upper back rests on the couch, feet planted, and the hips drop lower before driving up. That longer path can light up the upper glute fast.
Set your shoulder blades on the edge of a sturdy couch or bench, tuck the chin, and drive through the heels until the hips are fully extended. Pause at the top for 2 seconds. That squeeze should feel like the glutes finish the rep, not the lower back.
Common mistakes
- Feet too far away, which turns the move into a hamstring cramp.
- Overarching at the top.
- Letting the knees cave in as the hips rise.
If bodyweight feels easy, place a backpack or dumbbell across the lap. A towel under the load helps. Try 10 to 15 reps and don’t rush the bottom position. The stretch matters.
This is one of my favorite home moves because it feels like real strength work without needing any fancy gear.
13. Donkey Kicks With the Foot Turned Out
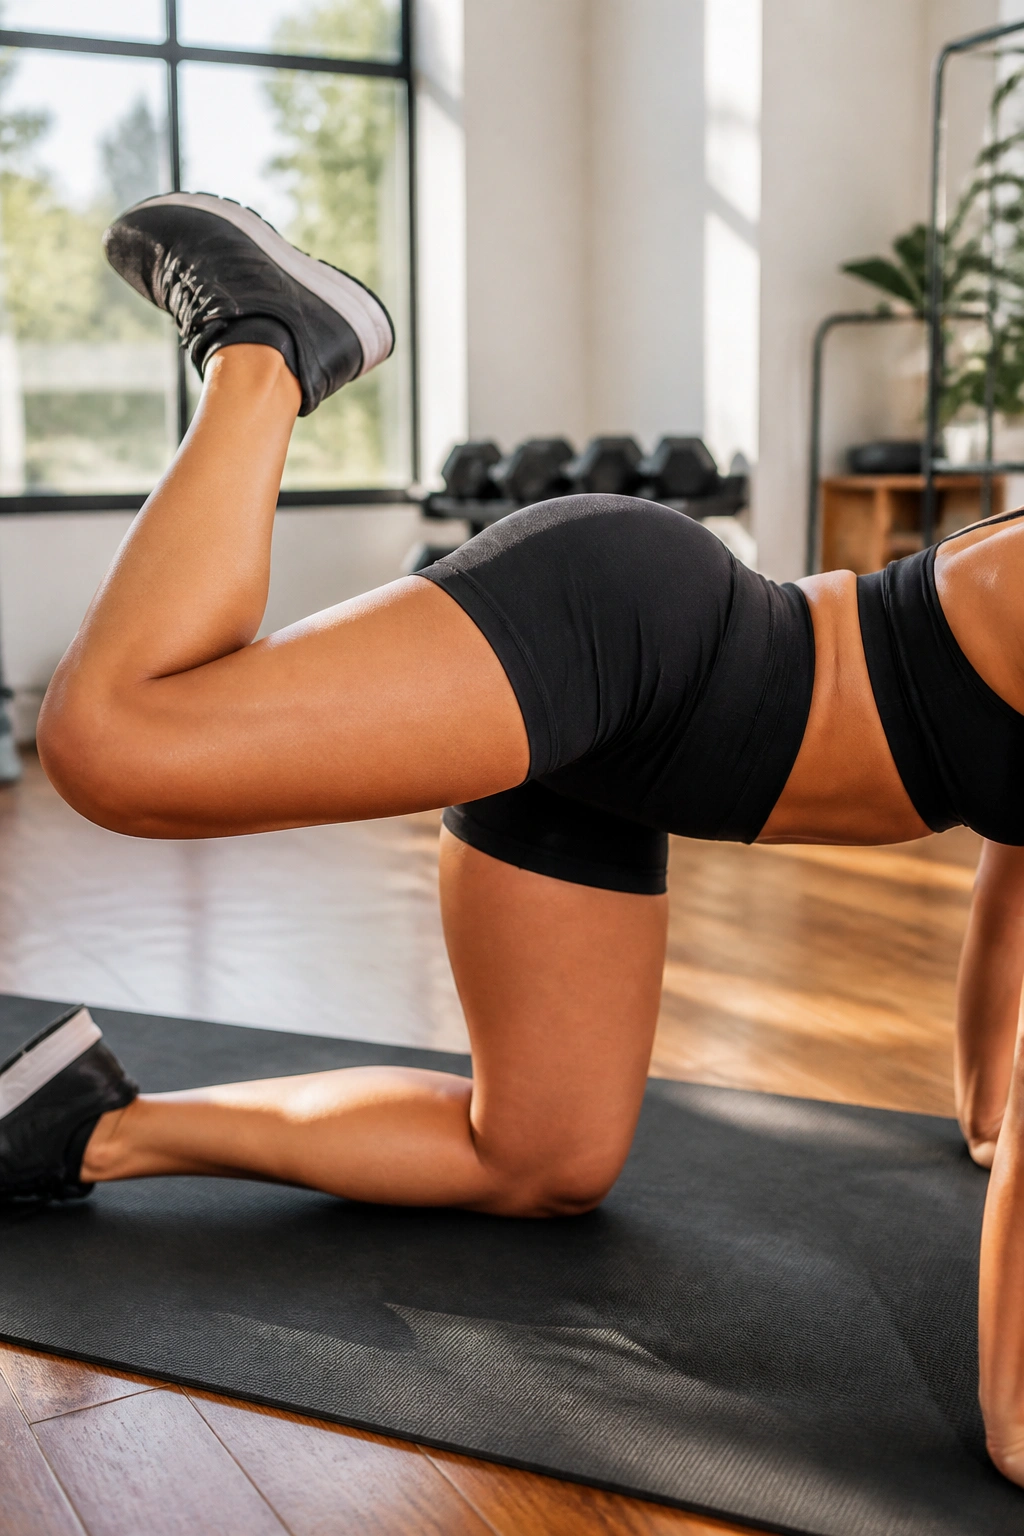
Donkey kicks get butchered all the time by people throwing the leg high and arching the back. Turn the foot out slightly, keep the knee bent, and the target shifts much closer to the upper glute than a sloppy straight-up kickback.
Start on hands and knees. Brace the core, then lift one heel toward the ceiling until the glute takes over. The leg only needs to rise until the hip stops staying still. If the lower back starts pinching, the range is too big. Period.
A small toe-out angle can help some people feel the upper glute more cleanly. Not dramatically. Just enough to change the line of pull. Keep the movement slow and controlled, and add a 1-second squeeze at the top.
Try 12 to 15 reps per side. If you want a harsher challenge, hold a small dumbbell behind the knee or use an ankle weight, but only after the bodyweight version feels honest.
14. Rainbow Kicks for Side-Glute Control
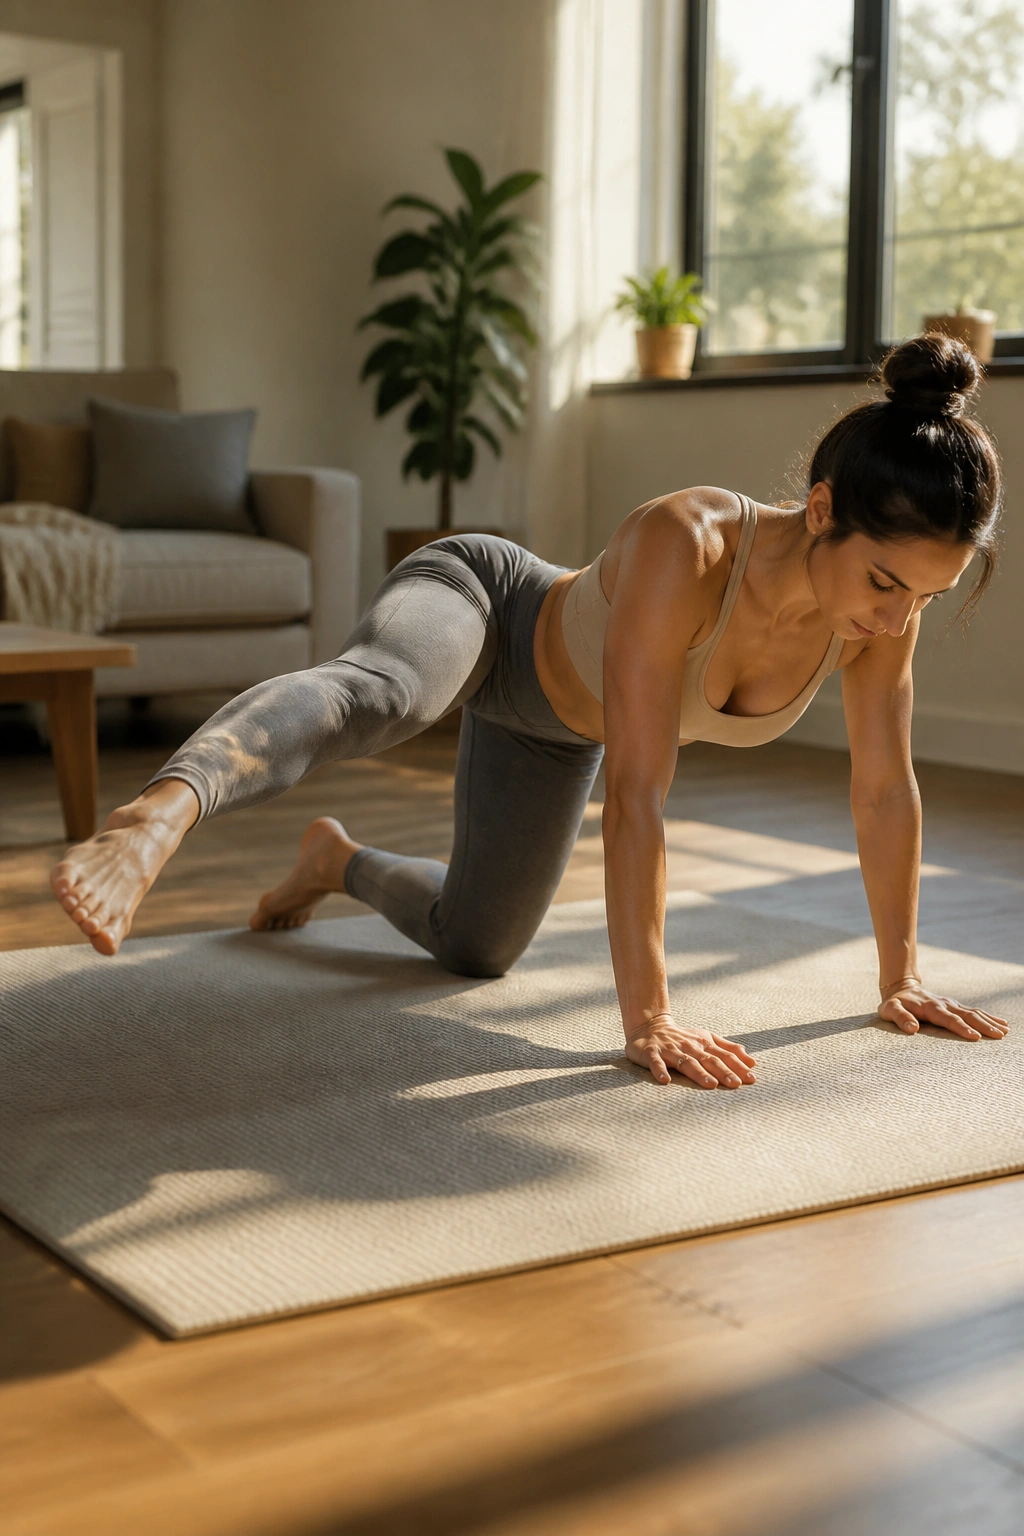
What makes rainbow kicks different from regular kickbacks? The arc. Instead of lifting the leg straight up and down, you sweep it across the body in a half-moon shape, which makes the hip work through a more awkward — and useful — range.
Get on all fours and extend one leg back. Sweep it outward in an arc, then bring it back across the center line without letting the torso twist. The pelvis should stay mostly level. If the shoulders rock or the lower back moves a lot, the arc is too big or too fast.
How to keep the torso quiet
- Keep your hands pressed firmly into the floor.
- Think “small sweep,” not “big kick.”
- Pause near the outer edge of the rainbow for 1 second.
I like these when the hips feel stale from too much straight-ahead work. They wake up the side glute in a way that’s a little different from bridges and hydrants. Use 8 to 12 sweeps each direction per side and keep the movement slow enough that you can feel the line.
15. Backpack Romanian Deadlifts at Home
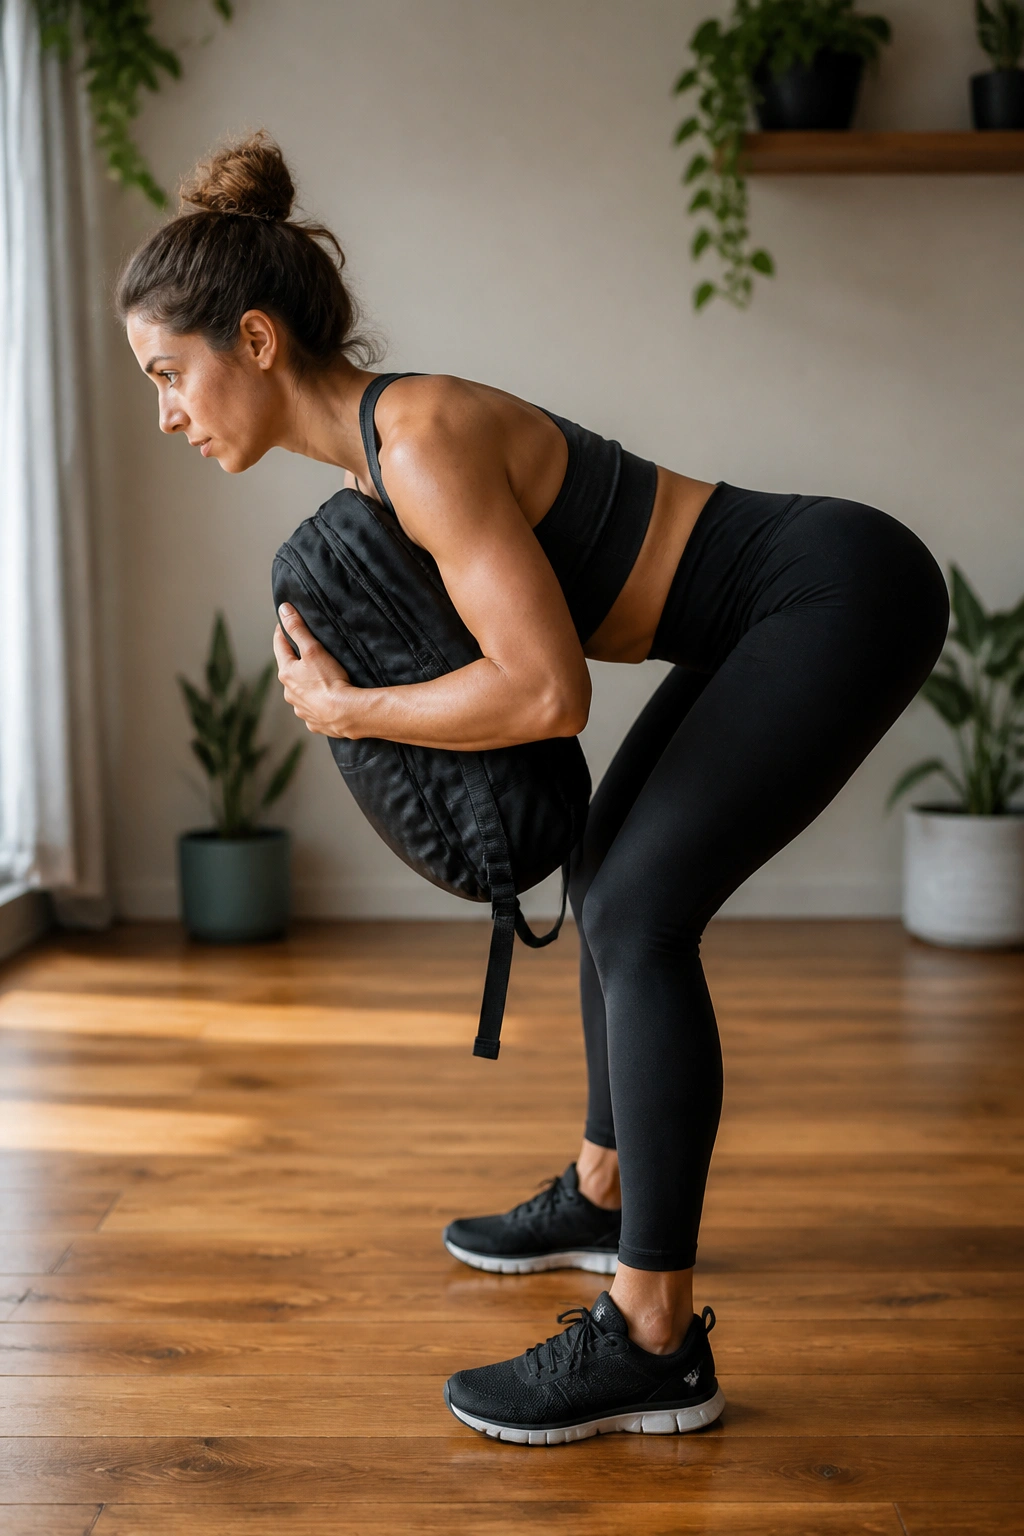
A loaded hinge belongs in an upper-glute plan even if it doesn’t look as fancy as floor work. Romanian deadlifts train the glutes through a stretch, and that stretch is gold when you want fuller development across the back side of the hips.
Hold a backpack with both hands or wear a loaded backpack snug against the chest if that setup feels safer. Push the hips back, keep a soft bend in the knees, and lower until you feel a strong stretch in the hamstrings. Then stand by driving the hips forward, not by leaning back.
The key is to stop the descent before the spine rounds. A neutral back and a long hip hinge make this move useful. A rounded back makes it a gamble. Not worth it.
8 to 12 reps is a solid range if the backpack has enough load. If it’s too light, slow the lowering phase to 3 or 4 seconds. That alone makes the exercise matter more.
16. Skater Squats to a Chair
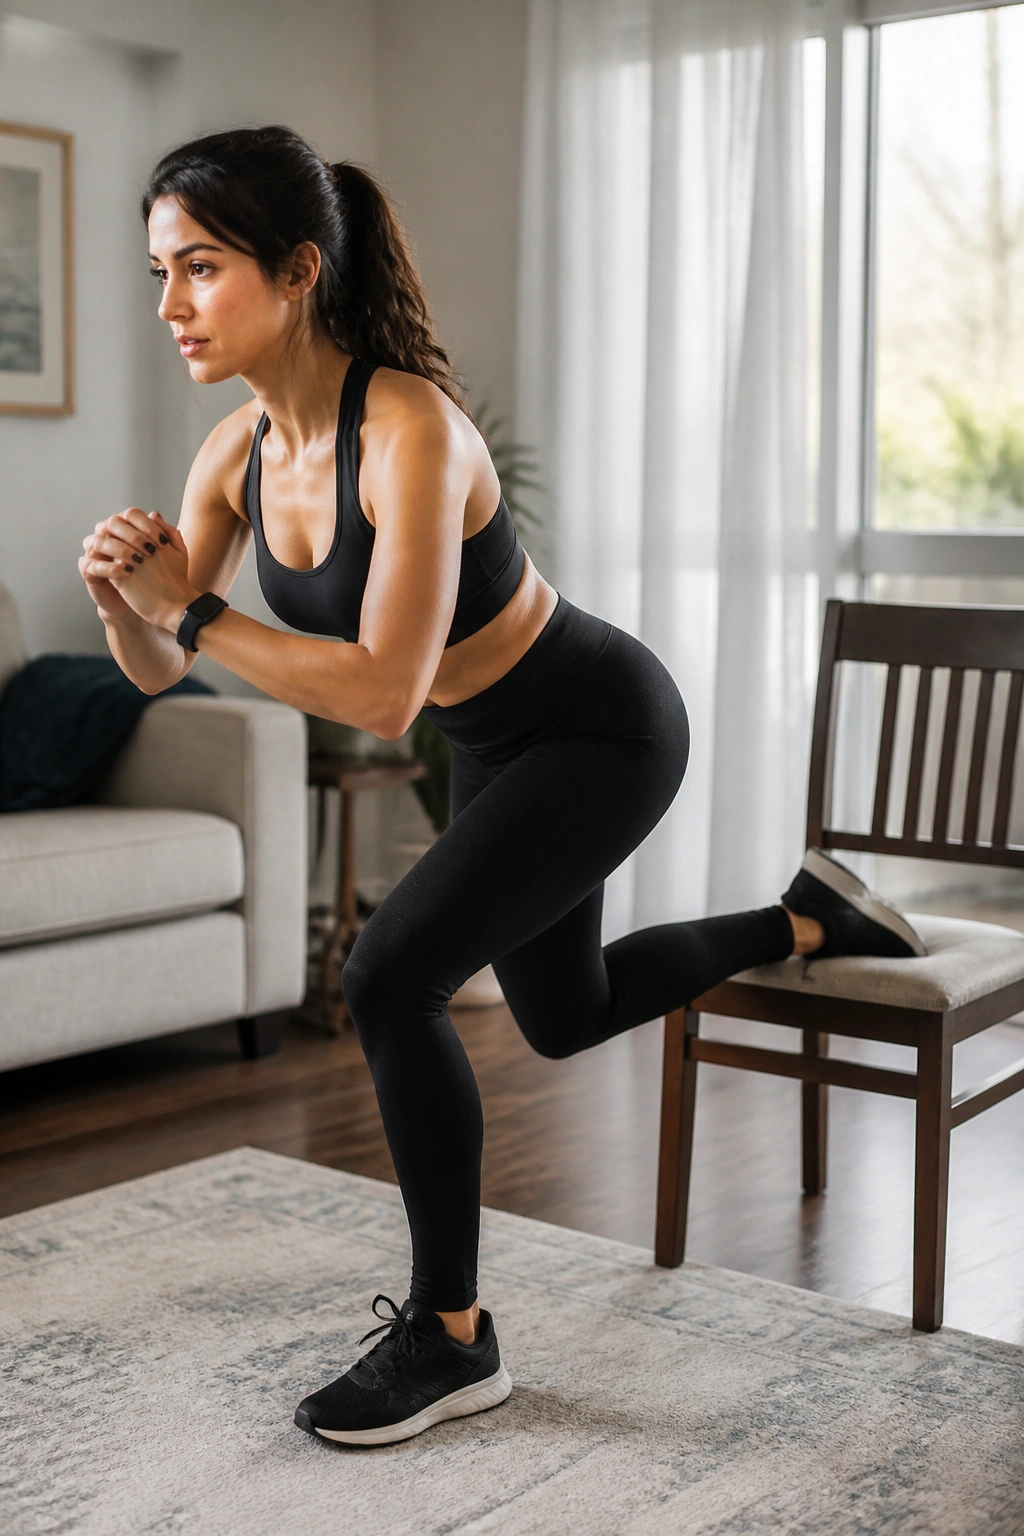
If single-leg squats make you wobble, the wobble is the point. Skater squats to a chair force the standing hip to control the body as the free leg reaches back, and that’s excellent territory for the upper glute.
Stand on one leg a few inches in front of a chair or low box. Reach the free leg behind you, then sit back until the glutes tap the chair lightly. Stand back up without bouncing. Keep the working knee tracking over the middle of the foot and the pelvis square.
A cleaner way to practice them
- Use a high chair first, not a deep box.
- Hold a wall or counter if balance gets ugly.
- Tap softly. Do not crash down.
The move is awkward at first. Good. That means it’s challenging the hip stabilizers instead of letting you coast. I’d use 5 to 8 reps per side and keep the tempo slow. If the knee caves in, shorten the depth before adding more reps.
17. Side Plank Leg Raises for the Glute Medius
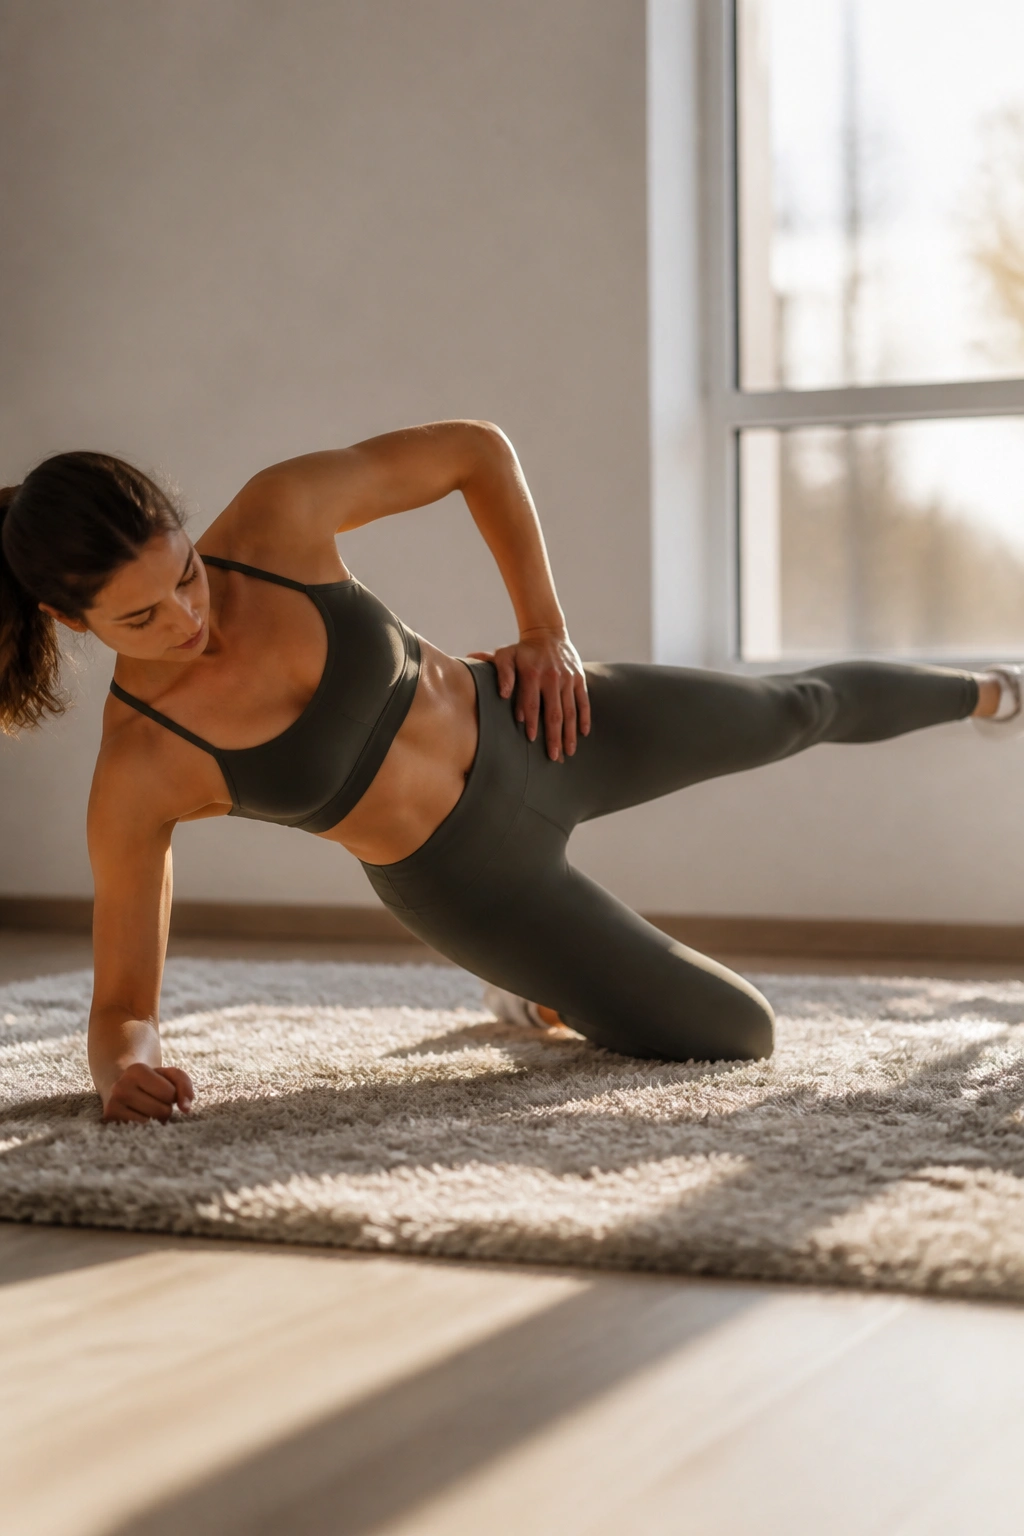
Side plank leg raises hit the glute medius and the obliques in one shot, which is handy when you want a stable pelvis and a stronger outer hip. They look a little strange. They also work.
Set up in a side plank, either on the feet or with the bottom knee down if you need a friendlier version. Once the body is stacked, lift the top leg a few inches and lower it under control. The lift should feel like the side hip is doing real work, not like the top leg is flinging itself around.
Why this one matters
The glute medius helps stop the pelvis from dropping on one side. That matters when you walk, climb stairs, or stand on one leg while putting on shoes. This move trains that exact job.
Aim for 6 to 12 leg raises per side or hold the plank for 20 to 30 seconds before adding the lifts. If the shoulder gets tired before the hip does, shorten the hold and keep the quality high.
18. Lateral Lunges That Load the Outer Hip
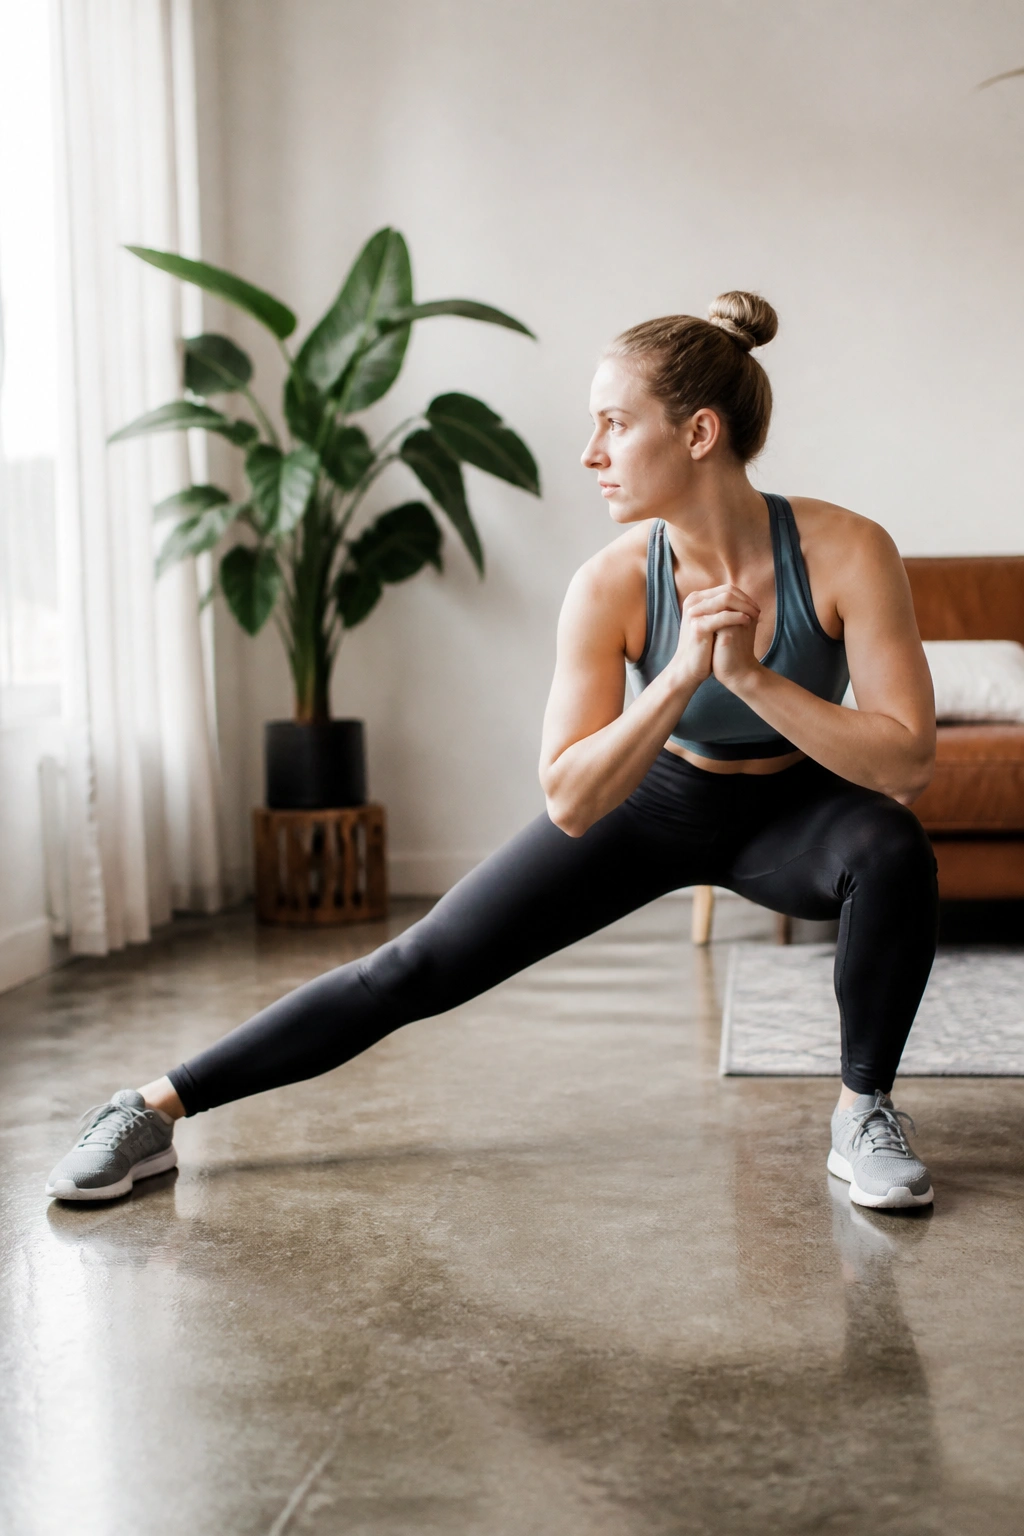
Lateral lunges are a nice break from forward and backward patterns, and they make the outer hip work in a range most people ignore. Step wide, sit into one hip, and keep the other leg long. The loaded side should feel like the glute and inner thigh are sharing the job.
The foot on the working side stays flat. The hips move back, not just down. And the torso can lean forward a little, because a rigid upright torso usually steals the load from the glutes and makes the move clumsy.
A short, controlled lunge is enough. You do not need to slide into a giant side squat unless mobility is excellent. 8 to 10 reps per side is fine when the form is honest.
This move is useful after long hours of sitting because it opens the hips while still asking the glutes to stabilize. That’s a good combination. A rare one, honestly.
19. Monster Walks Plus Glute Bridges
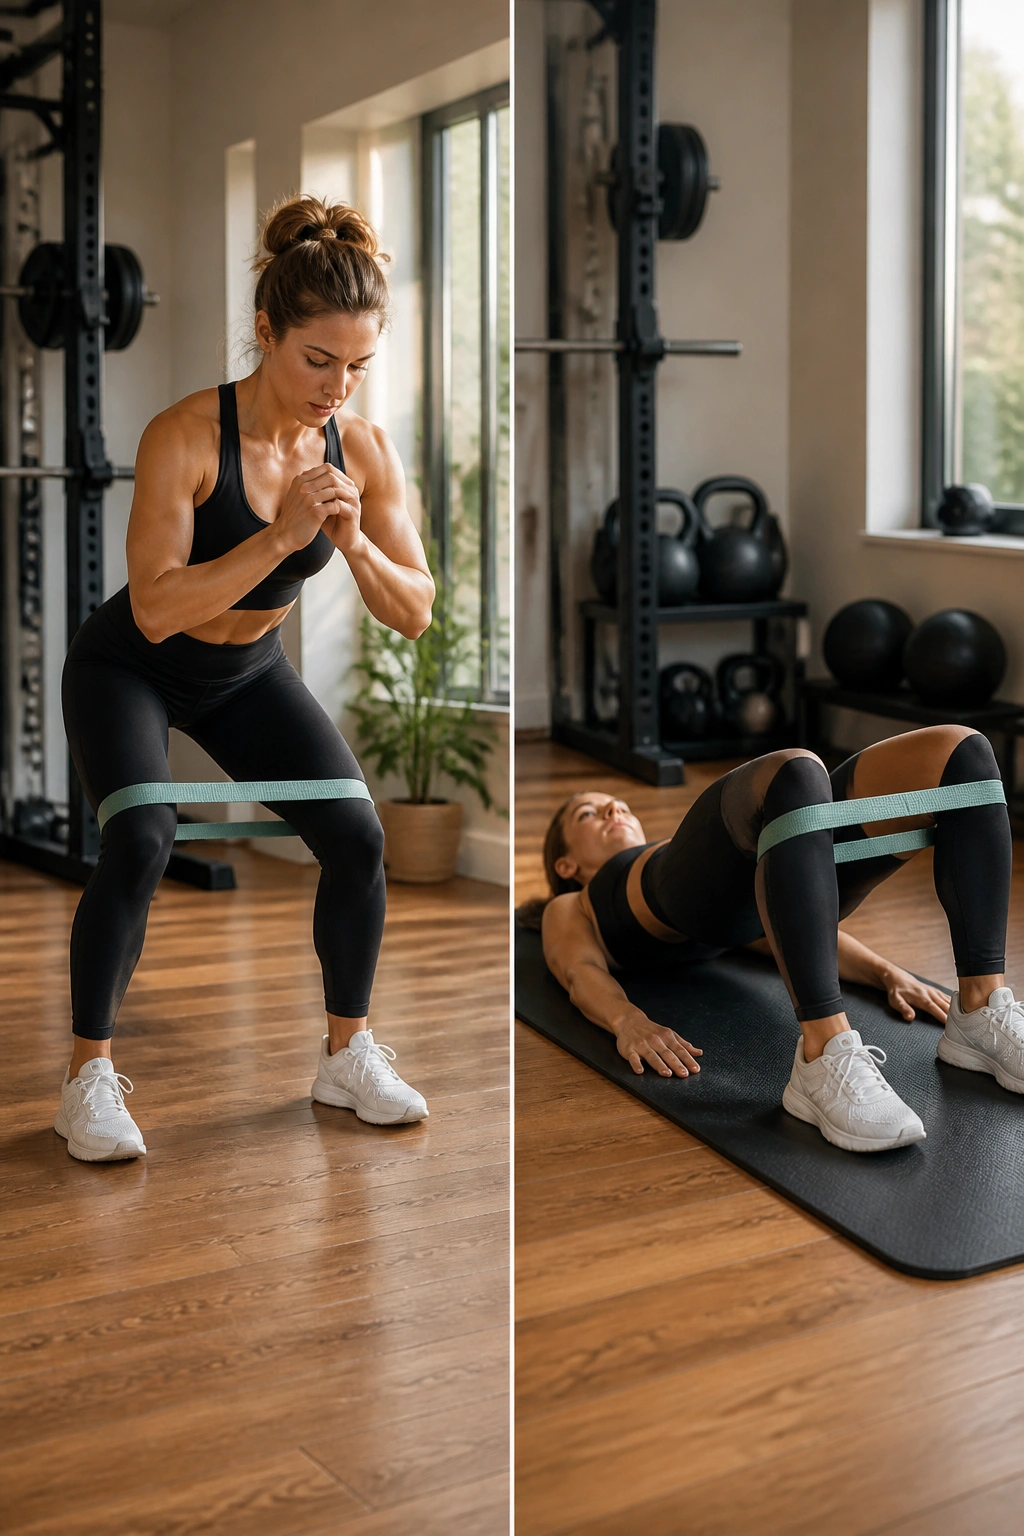
Some workouts need a finisher that feels like a short argument with your hips. This is mine. Monster walks and bridges together give you band tension in two directions: side-to-side and straight up. The burn can get loud fast.
How to run the combo
- Place a mini band just above the knees or around the ankles.
- Walk forward for 10 steps with a slight squat.
- Walk backward for 10 steps without letting the band slack.
- Drop to the floor and do 12 glute bridges.
- Rest 30 to 45 seconds, then repeat for 2 to 3 rounds.
Keep the steps small and steady. If the feet cross or the body sways, the band is too heavy or the stance is too wide. The point is not drama. The point is a long, steady upper-glute burn that leaves the outer hips awake.
I like this on days when the main work is done and I want one last clean hit before I call it.
20. Wall Press Holds and Mini Lifts for a Standing Finisher
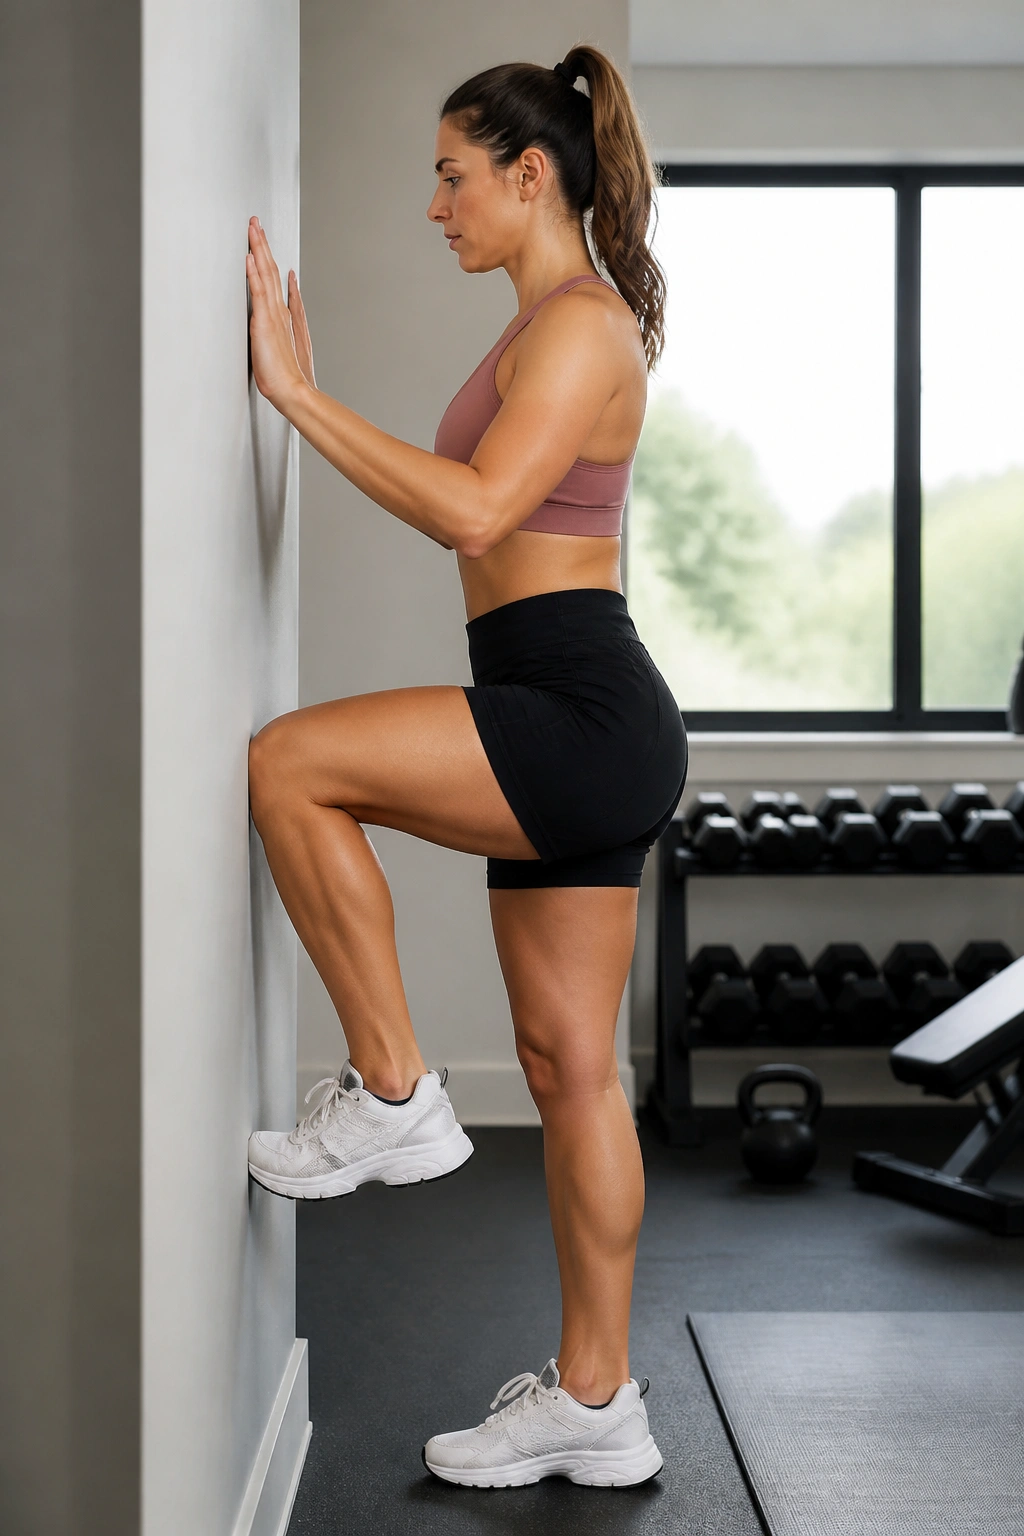
If you want an upper-glute exercise you can do in socks, next to a wall, without getting on the floor, this is the one to keep.
Stand sideways to a wall with the working knee bent about 90 degrees and press the outer knee into the wall. Hold that pressure for 20 to 30 seconds, then add 8 to 10 tiny lifts away from the wall without losing the press. The standing leg should feel like it’s doing a quiet but serious job.
The setup
- Stand tall, ribs down.
- Keep the pelvis level.
- Press the outer knee into the wall hard enough to feel the side hip wake up.
When it shines
This is a smart finisher after bridges, lunges, or split squats. It also works on days when floor work feels annoying and you need something simple that still hits the upper glute.
I like ending with this because it’s sneaky. It looks mild. It is not. If you finish and the outer hip feels warm, tight, and a little shaky, you did it right.
