



Sitting at a desk for eight hours a day effectively puts your glutes to sleep. You might have noticed that even after months of squats or lunges, your posterior chain doesn’t feel like it’s firing the way it should. That dead-weight feeling isn’t just in your head; it’s a physiological reality of modern sedentary life. Your glutes are the largest muscles in your body, yet they frequently atrophy into a state of chronic under-activation.
Resistance bands are the single most effective tool for waking them up. Unlike heavy iron, which relies on gravity, bands provide constant tension. This force creates an “accommodating resistance” that forces your glutes to work at the top of the movement—exactly where the squeeze is most critical. When you move against the elastic tension, your hip stabilizers are forced to engage, which creates a level of muscle fiber recruitment that standard bodyweight moves simply cannot match.
You do not need a gym membership or a rack of expensive plates to build serious glute strength. You just need a set of loops, a bit of floor space, and the discipline to focus on the contraction rather than the clock. Stop counting reps and start feeling the muscle fiber engage. If you aren’t feeling the burn within the first few sets, adjust your band placement. Small changes in position—moving the band from your ankles to your knees, for example—completely change the leverage.
1. Glute Bridge
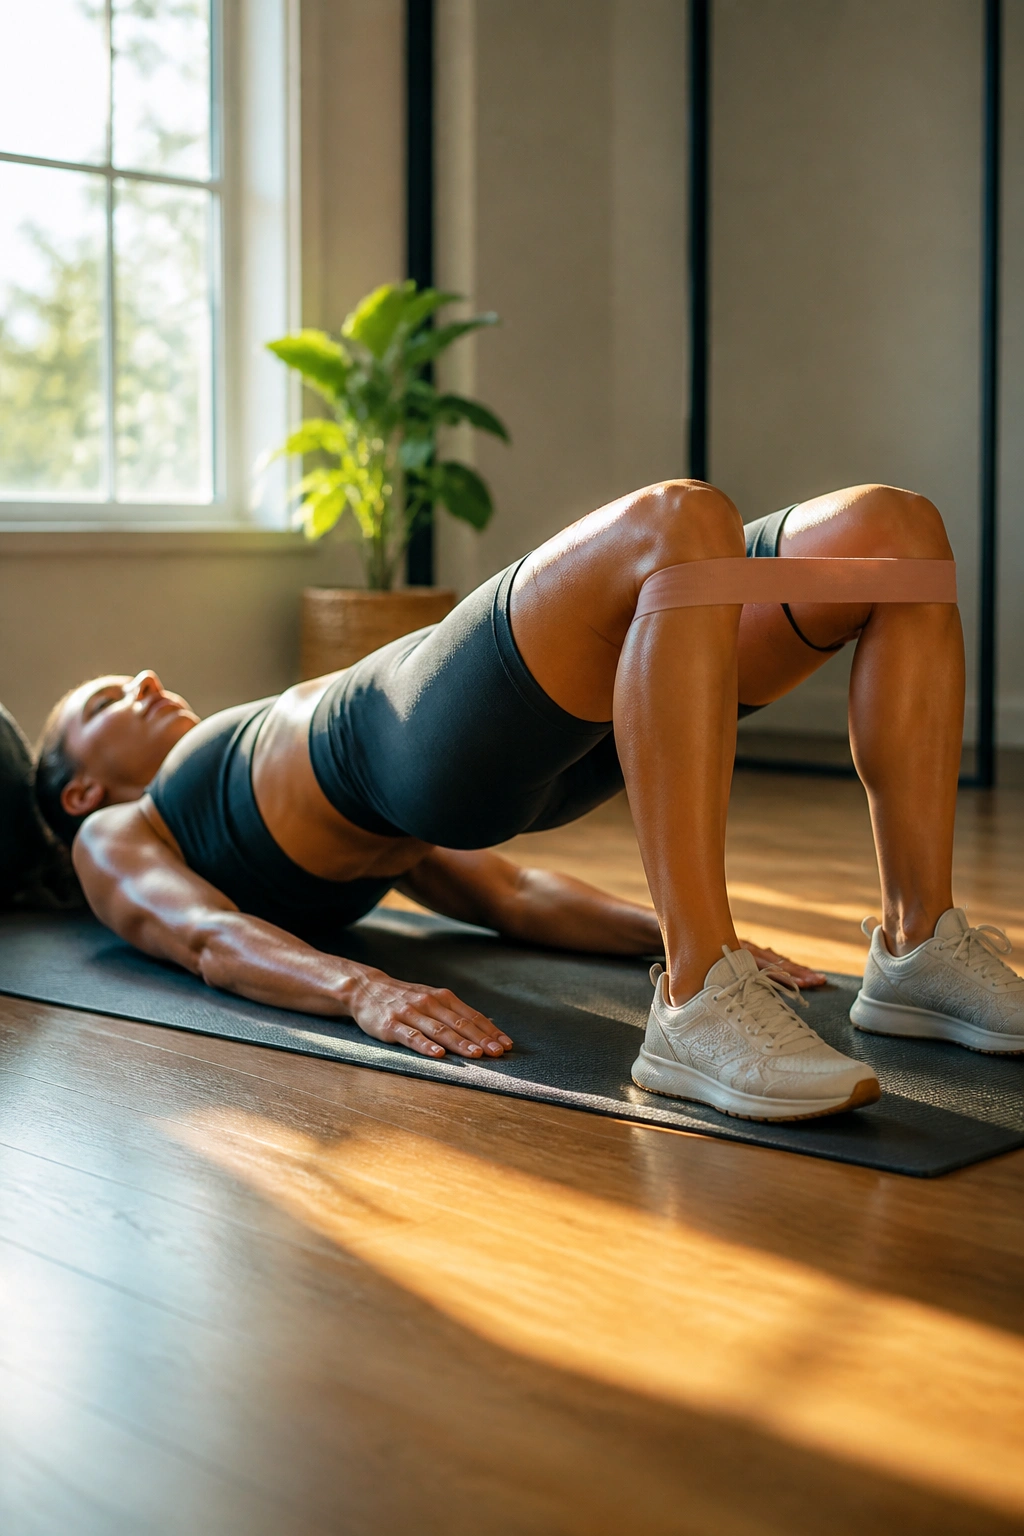
Start with the classic floor-based bridge. This movement is the baseline for learning how to isolate the glutes without relying on your lower back. Lie flat on your back, knees bent, feet hip-width apart. Place the resistance band just above your knees. Drive through your heels to lift your hips toward the ceiling.
The Mind-Muscle Connection
At the top of the movement, pause for two full seconds. Really fight against the band by pushing your knees outward. If you feel this in your hamstrings, shift your feet slightly closer to your glutes. If you feel it in your lower back, you are likely over-extending your spine instead of engaging your core. The goal is to create a straight line from your shoulders to your knees at the top of the bridge.
Common Mistakes
- Arching the lower back excessively.
- Letting the knees cave inward (always fight the band).
- Moving too fast and losing the tension at the bottom of the rep.
2. Clamshells
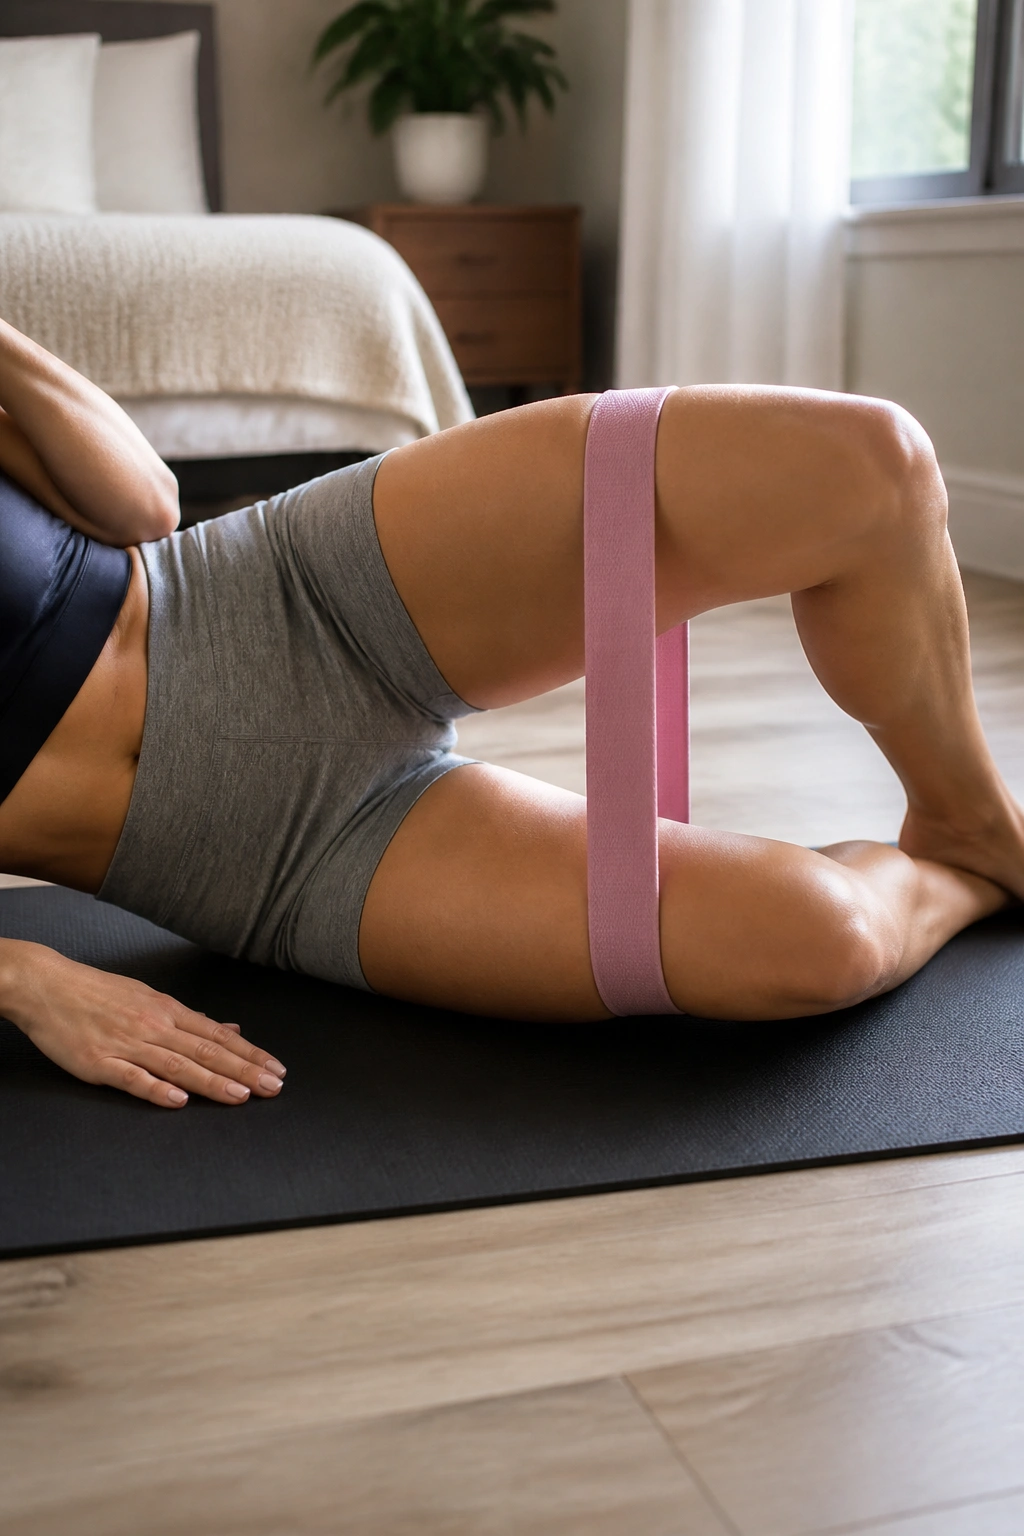
This is a targeted move for the gluteus medius, the muscle responsible for hip stability and that rounded look on the side of your hip. Lie on your side with your legs stacked, knees bent at a 45-degree angle. Place the band just above your knees. Keep your feet touching throughout the entire movement.
How to Execute
Lift your top knee away from the bottom one as high as you can without rotating your hips backward. Think of your legs like a clam opening up. The movement should be slow and controlled, both on the way up and the way down. You will feel a deep, burning sensation in the side of your hip—that is exactly where you want to be.
Pro Tip for Effectiveness
If you find your torso is wobbling, press your bottom hand into the floor for stability. Do not try to open the knee wide if it means your hip rolls open; a smaller range of motion with a strict, stable pelvis is far more effective than a wide range with poor form.
3. Lateral Band Walks
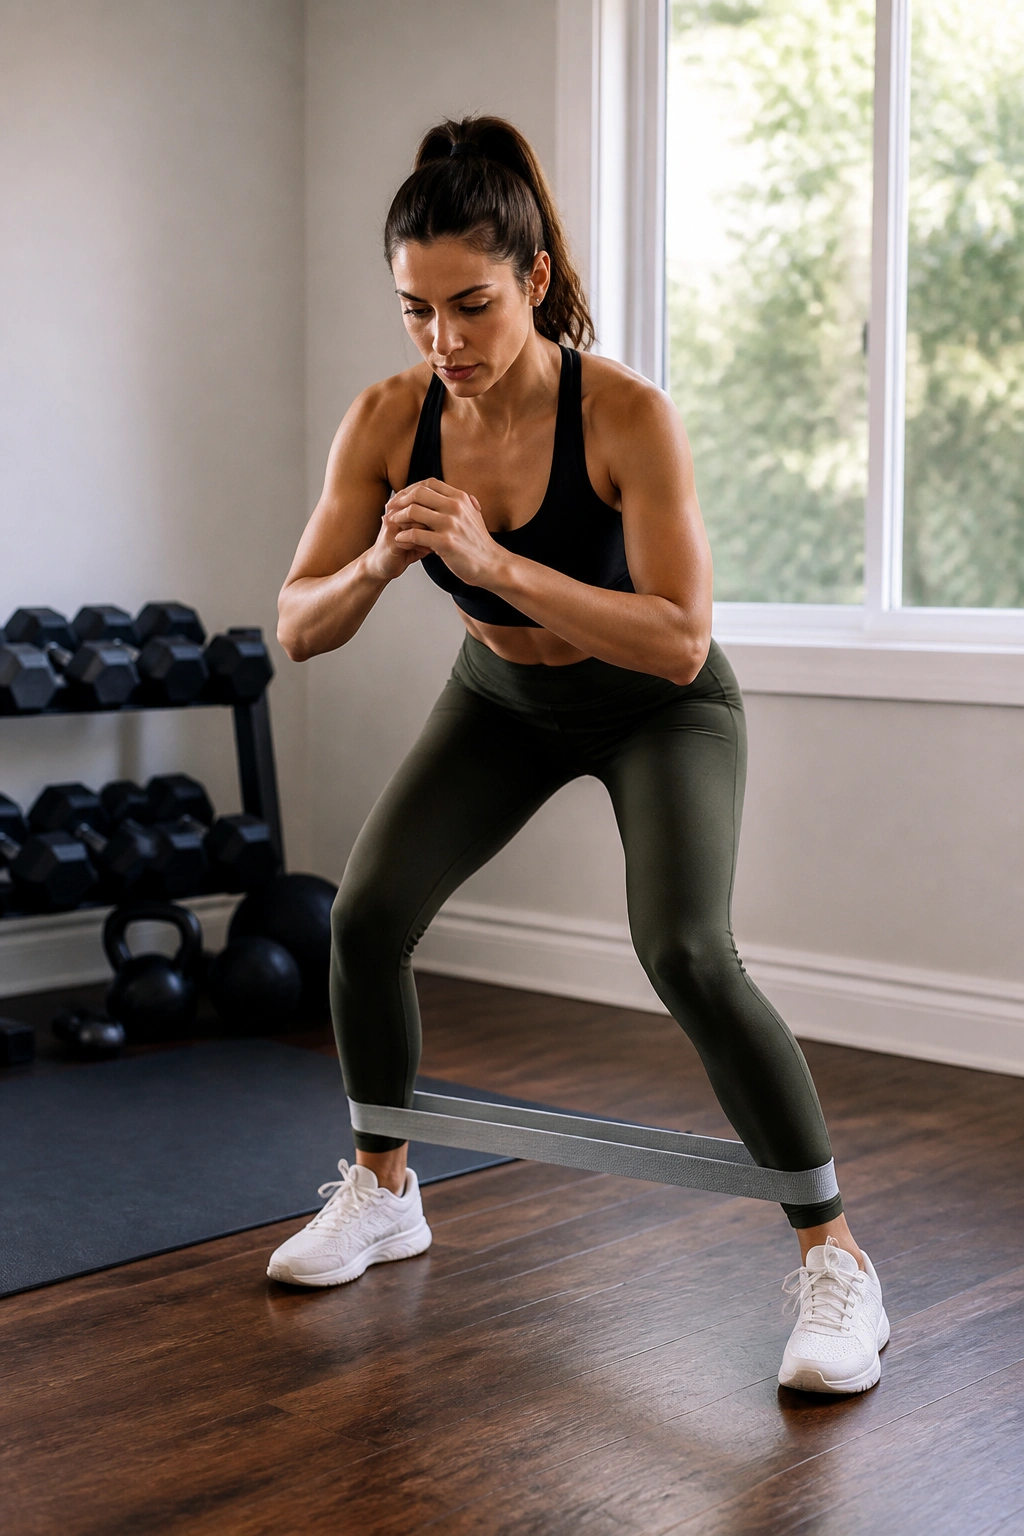
Athletic performance is often about lateral stability, and this exercise is the gold standard for that. Stand with your feet hip-width apart, knees slightly bent, and the band positioned around your ankles or just below your knees. The lower the band, the more intense the lever.
Creating Tension
Lower yourself into a quarter-squat position and hold it there. Step one foot to the side, then follow with the other, keeping tension on the band the entire time. Do not let the trailing leg drag or the band go slack. You are looking for a controlled “step-and-drag” motion.
Why This Works
By keeping your knees bent and your core engaged, you are forcing the outer glutes to stabilize the pelvis against the pulling force of the band. If you stand straight up, you lose most of the benefits. Keep the chest proud and maintain that quarter-squat throughout the entire set.
4. Donkey Kicks
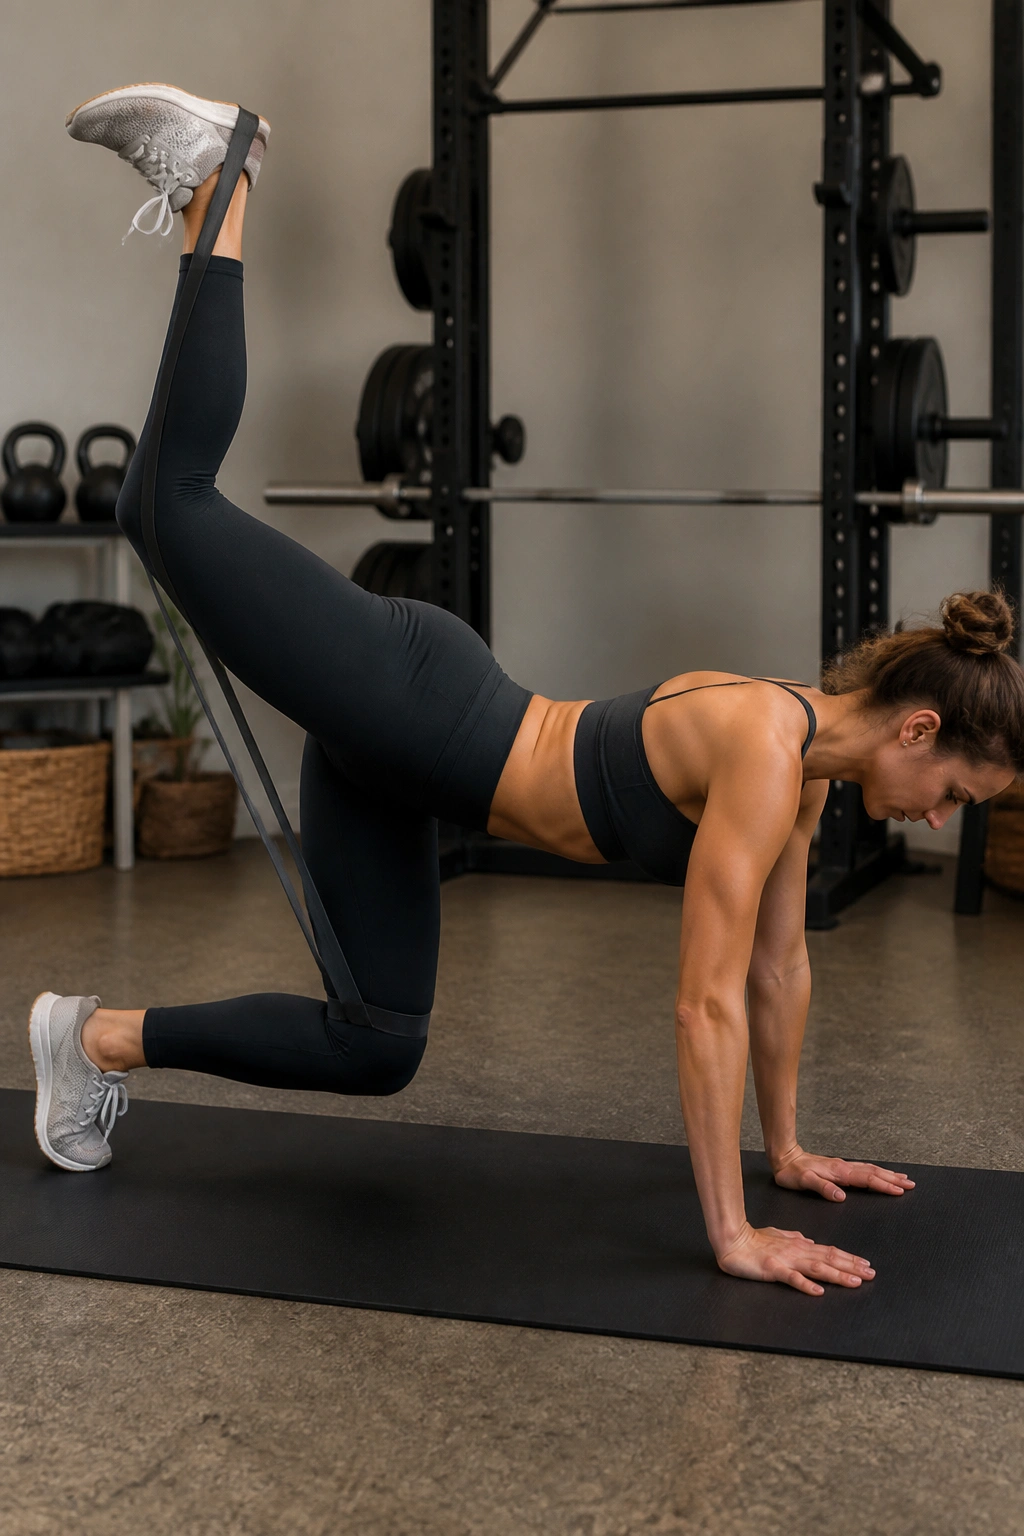
Get on your hands and knees in a tabletop position. Place the band around the arch of one foot and the other end just above your opposite knee. This provides an anchor point that makes the movement feel significantly heavier than bodyweight alone.
The Mechanics of the Kick
Keeping your back completely flat, kick your banded foot straight up toward the ceiling. Do not arch your lower back. The movement should come entirely from the hip joint. You are squeezing your glute hard at the very top of the kick. Lower your leg back down with control—do not just drop it.
Troubleshooting
If the band snaps against your skin, you might be using a material that grabs. Use a fabric-based band instead of latex if skin irritation is a factor. Keep your weight centered; do not shift your hips to the side to “cheat” the height of the kick.
5. Fire Hydrants
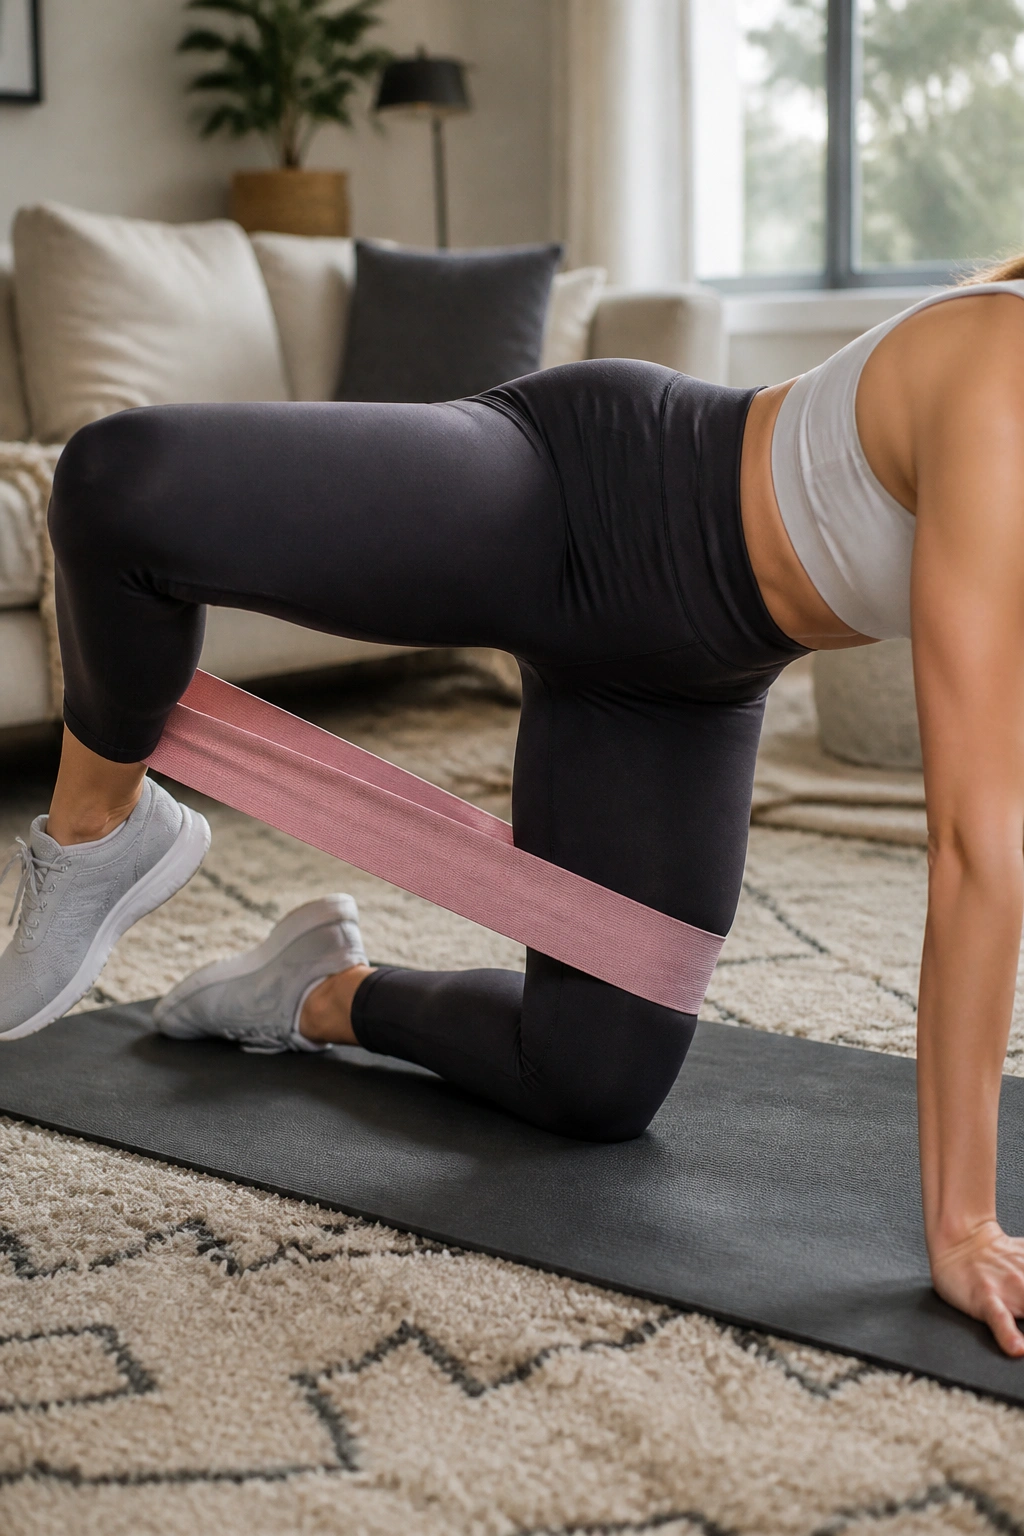
Named for the obvious reason, this exercise targets the hip abductors and the gluteus medius with surgical precision. Start on all fours, hands under shoulders, knees under hips. Keep the band just above your knees.
Finding the Rhythm
Lift your right leg out to the side, keeping the knee bent at a 90-degree angle. Try to get your thigh parallel to the floor. The challenge here is keeping your hips square to the ground. If you tilt your whole body to the side to get the leg higher, you are missing the glute engagement.
The Burning Sensation
You will feel this burn very quickly. That is the point. Do not rush through these. The eccentric phase—lowering the leg back to the starting position—is just as important as the lift. Control the descent for a full two seconds.
6. Standing Abduction
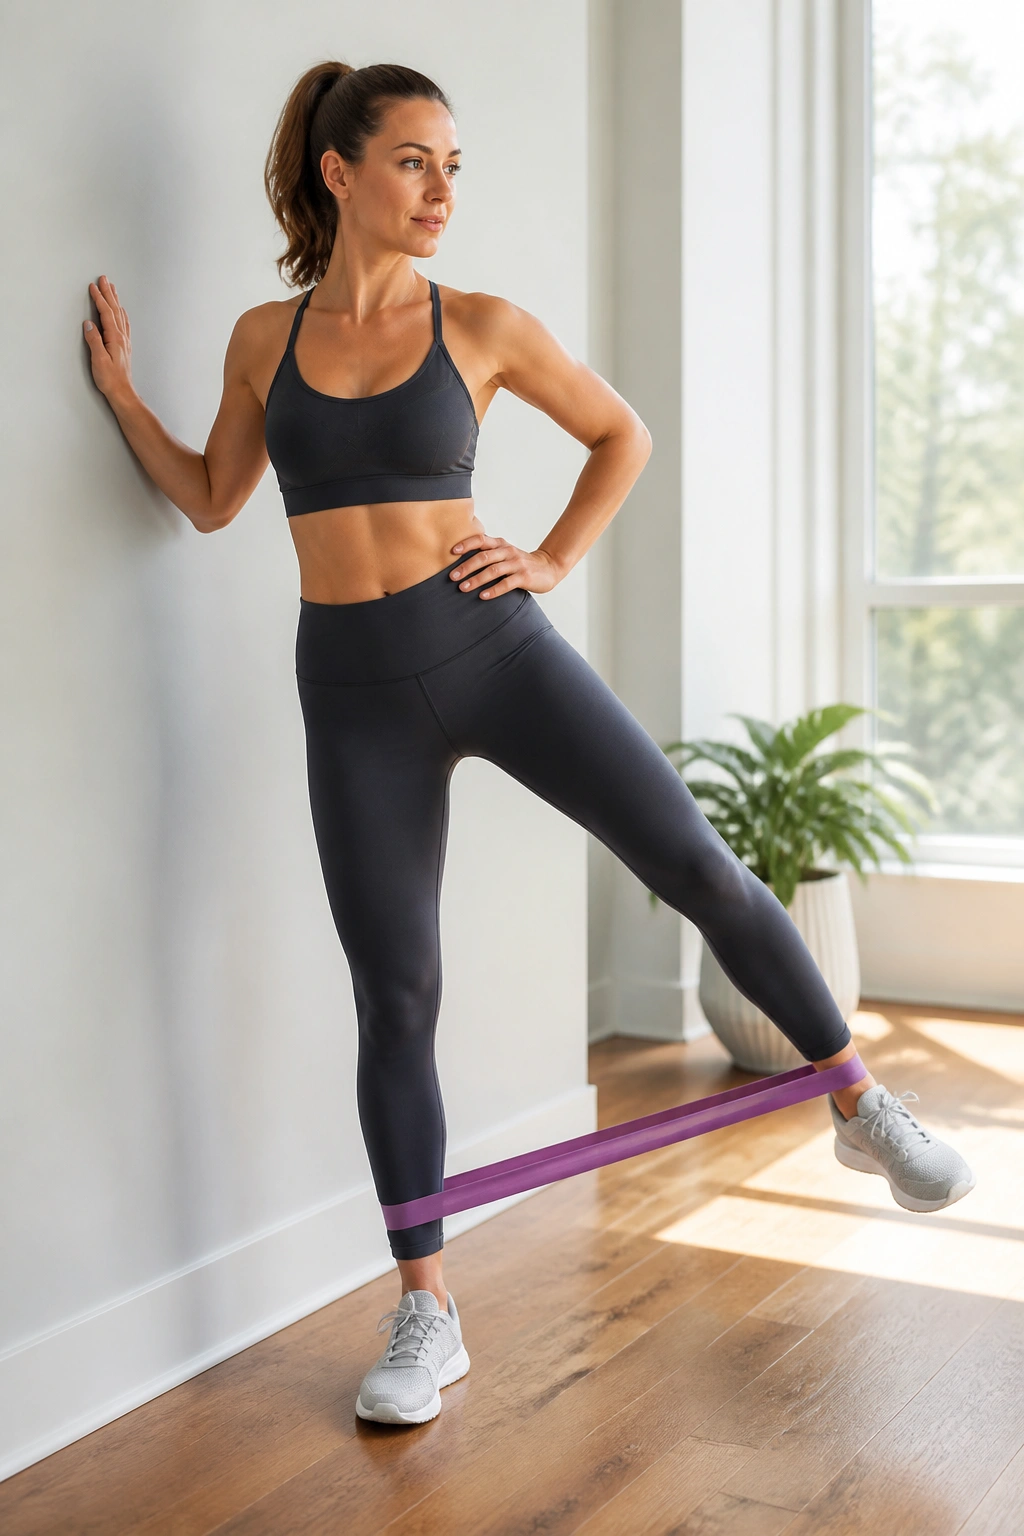
Standing exercises for glutes require balance, which engages your core and stabilizers simultaneously. Stand next to a wall or a sturdy chair for support. Place the band around your ankles.
Controlled Motion
Keep your standing leg slightly bent. Lift the banded leg straight out to the side, fighting the resistance. Do not swing your leg; push it out as if you are moving your foot through thick water. Pause for a second at the apex of the movement, then slowly bring it back.
Why Balance Matters
By performing this standing, you are training your body to stabilize while moving the opposing limb. This is functional strength. If you can perform these without holding onto the wall, you are effectively training your core and your standing-leg glute at the same time.
7. Banded Squats
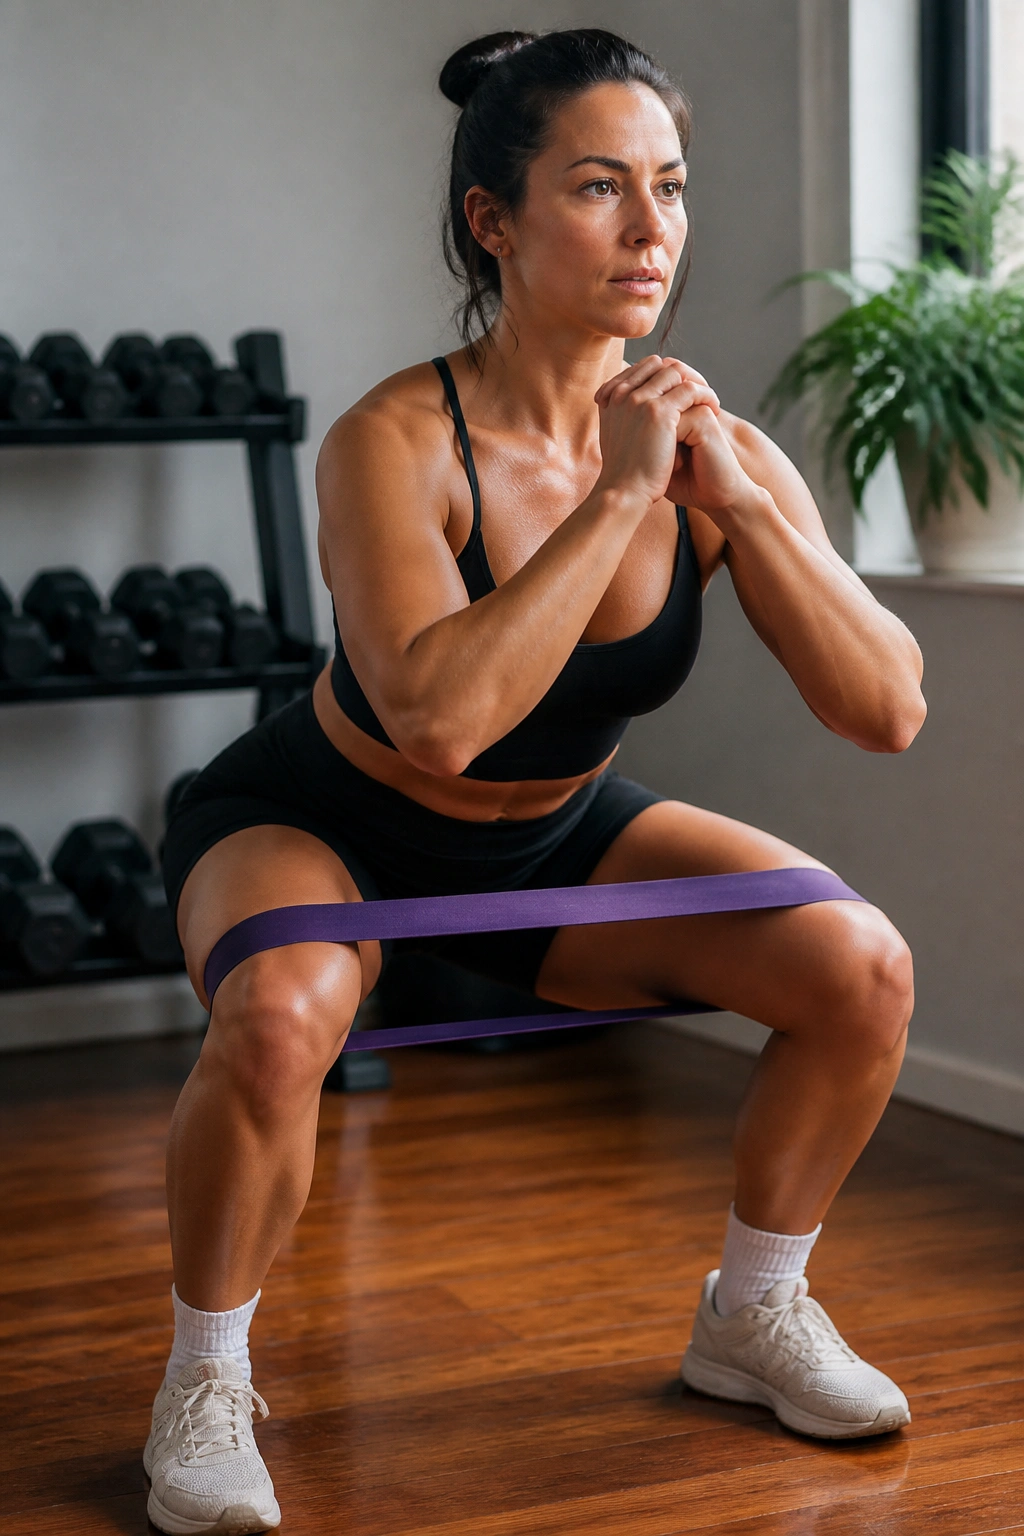
The standard air squat is great, but adding a band turns it into a glute-dominating exercise. Place a loop band around your knees. As you descend into your squat, you must actively push your knees outward against the resistance of the band.
The Focus Area
Most people let their knees cave in during a squat; this exercise makes it physically impossible to do so without losing tension. This outward pressure recruits the glute medius, ensuring that all three parts of the glute group are firing.
Depth and Form
Go as deep as your mobility allows while maintaining a neutral spine. If your heels start to lift, widen your stance. Keep the band tight. The moment your knees cave in, you have lost the engagement, so focus on pushing out until your legs are fully locked at the top.
8. Banded Romanian Deadlifts
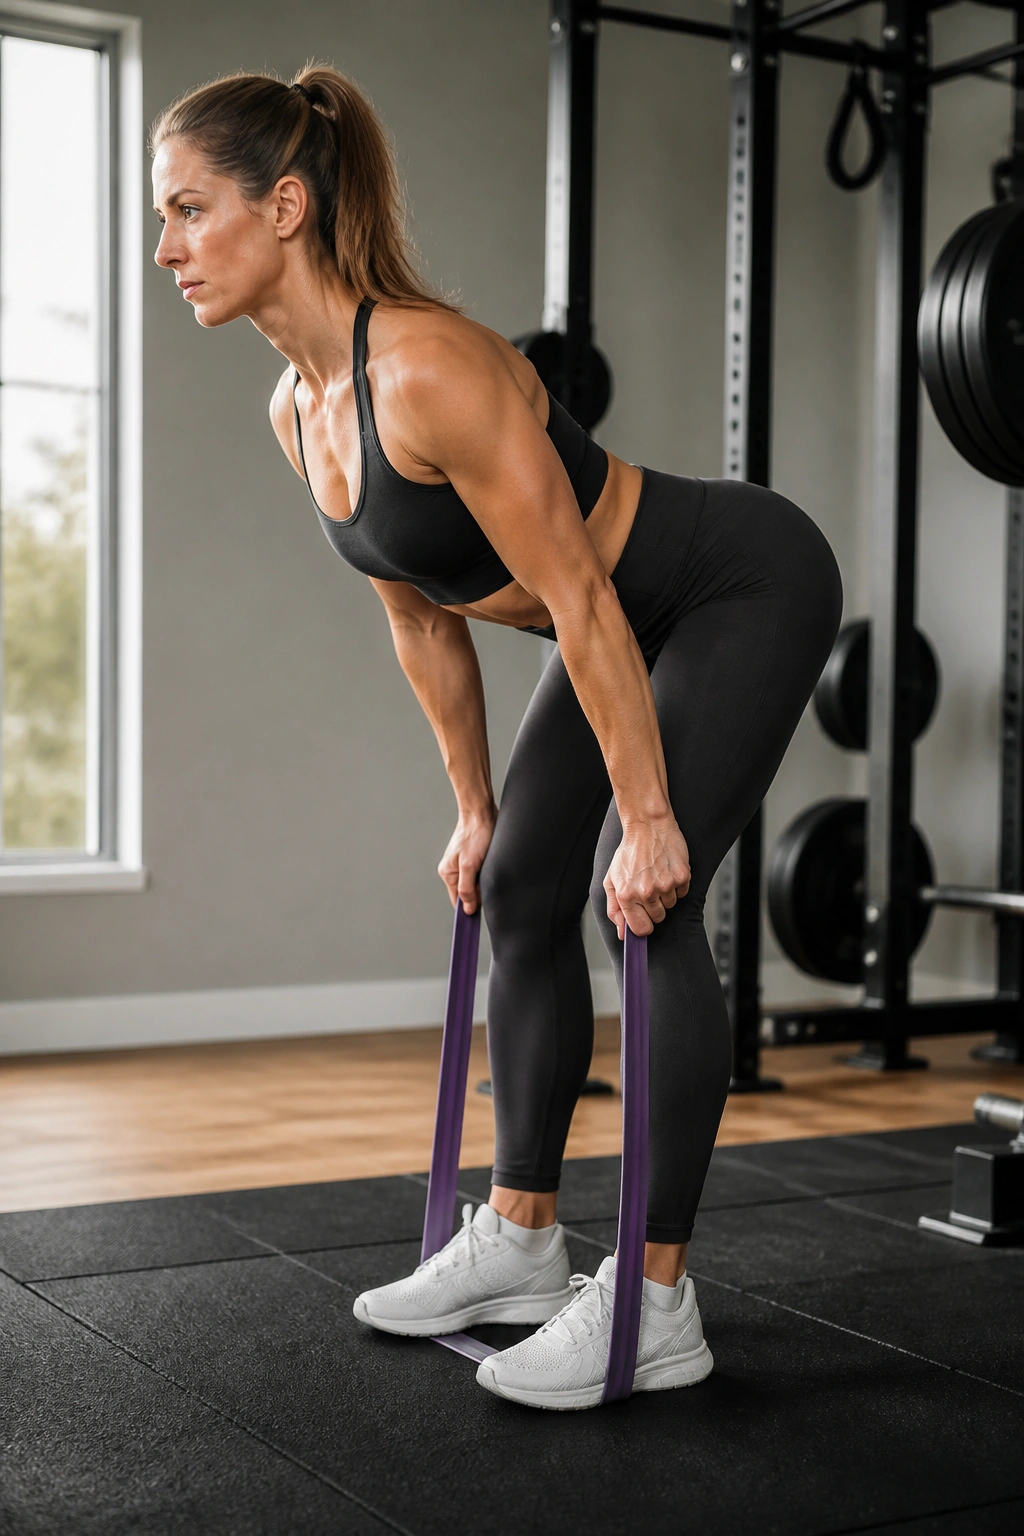
The hinge is the most important movement pattern for glute growth. Stand on the band with both feet, holding the top of the loop in your hands. This creates vertical tension that pulls your hips down, forcing your glutes to resist.
The Hinge Mechanic
Push your hips backward as if you are trying to touch a wall behind you with your glutes. Keep your knees slightly soft, not locked. You should feel a deep stretch in your hamstrings and the lower part of your glutes. When you reach the bottom, drive your hips forward to stand up, squeezing the glutes at the top.
Critical Technique
Do not pull with your arms. Your arms are just hooks. The entire movement is driven by your hips. Imagine your upper body is just a rigid lever and your hips are the hinge. If your back rounds, you have gone too low.
9. Curtsy Lunges
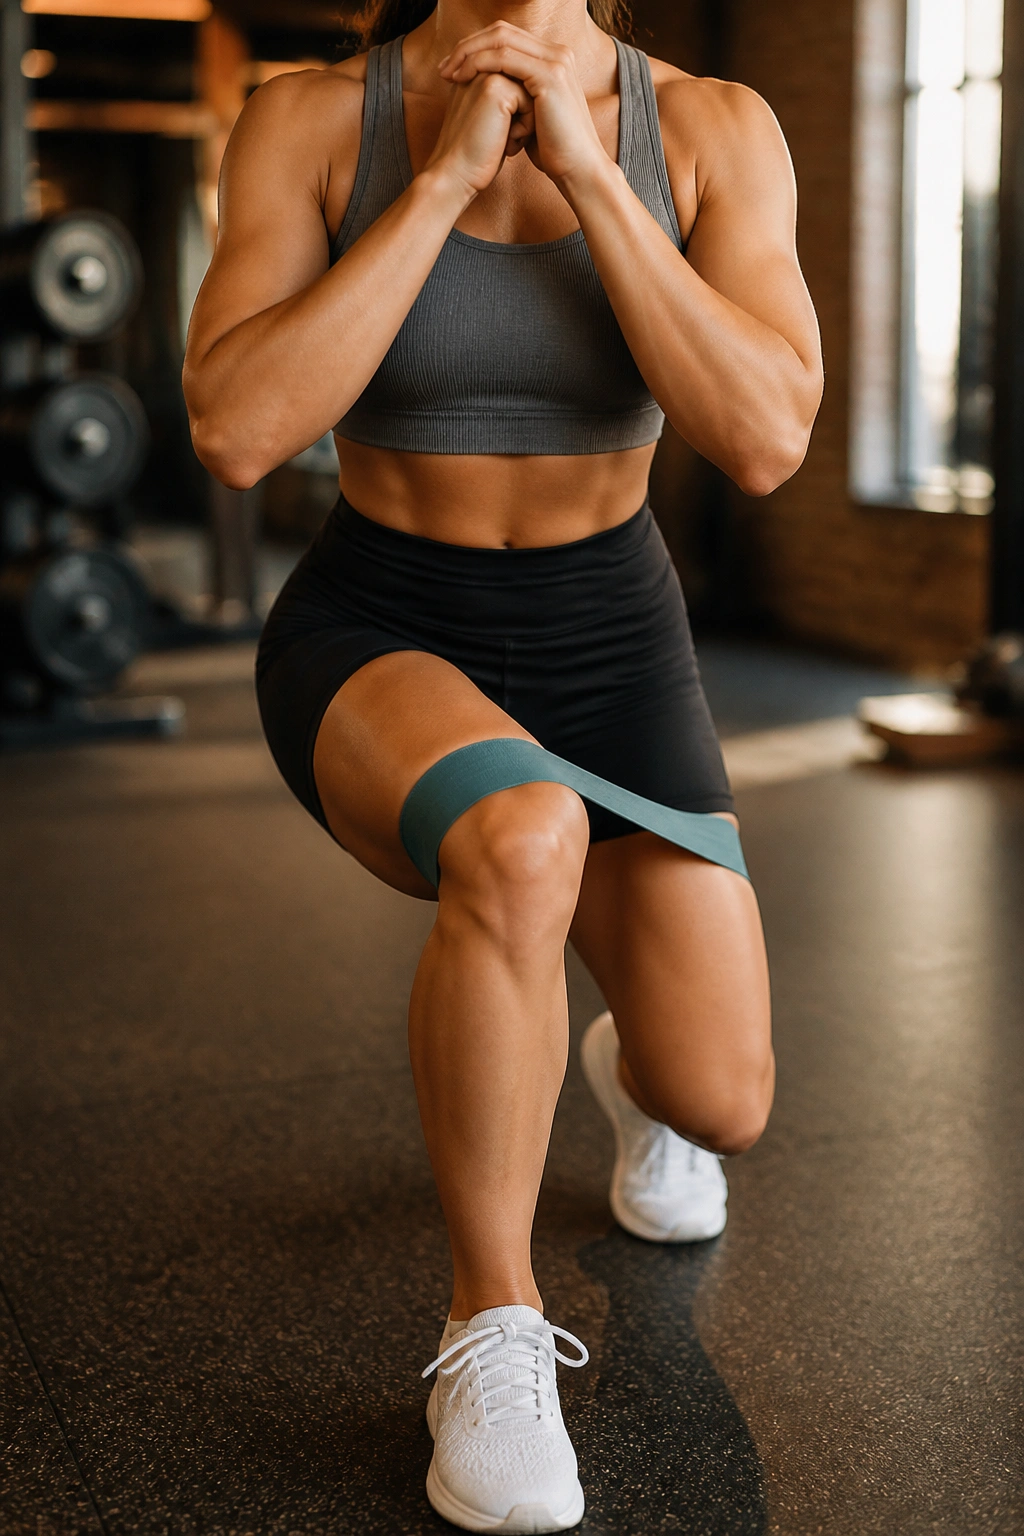
The curtsy lunge changes the angle of pull on the glutes, targeting the upper glute and side hip area. Place the band just above your knees. Start standing, then step one leg behind the other and to the side, as if you are performing a curtsy.
The Lunge Angle
Lower your hips until your front thigh is roughly parallel to the floor. As you drop down, the band will try to pull your front knee inward. You must fight to keep that front knee tracked directly over your toes. That fight is exactly what builds the glute stability.
Variation for Intensity
Try holding a weight in the opposite hand of the front leg. This adds a slight rotation component that further challenges the hip stabilizers. Step back and reset after every rep to ensure you are balanced before starting the next one.
10. Reverse Lunges
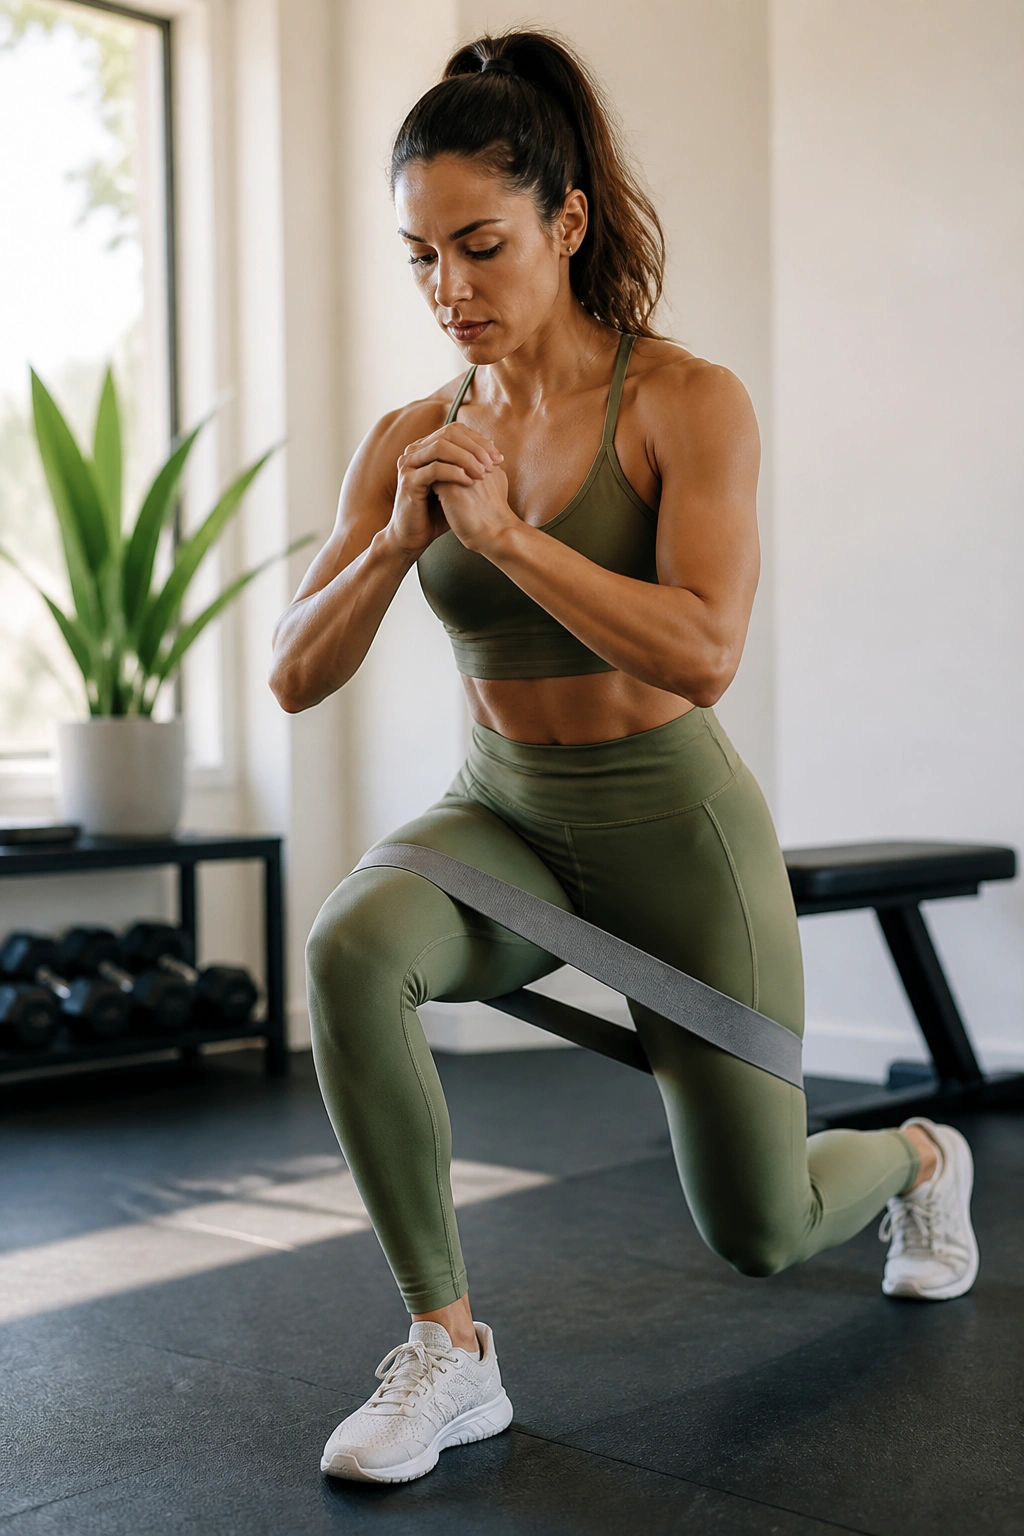
Reverse lunges are generally friendlier to the knees than forward lunges and allow for a deeper glute stretch. Place the band just above your knees. Step backward with one foot and lower your hips.
The Power Step
The key here is to drive through the heel of the front foot to stand back up. You should feel your front glute doing almost all of the work. If you feel it in your quad, lean your torso slightly forward. This subtle shift in your center of gravity transfers the load from the quadriceps to the gluteus maximus.
Stability Check
Because the band is around your knees, it forces you to keep a wide base. This prevents the “tightrope walk” feeling that many people get with lunges, which is where balance is lost. Keep the chest high, but the lean forward is the secret to glute isolation.
11. Glute Kickbacks
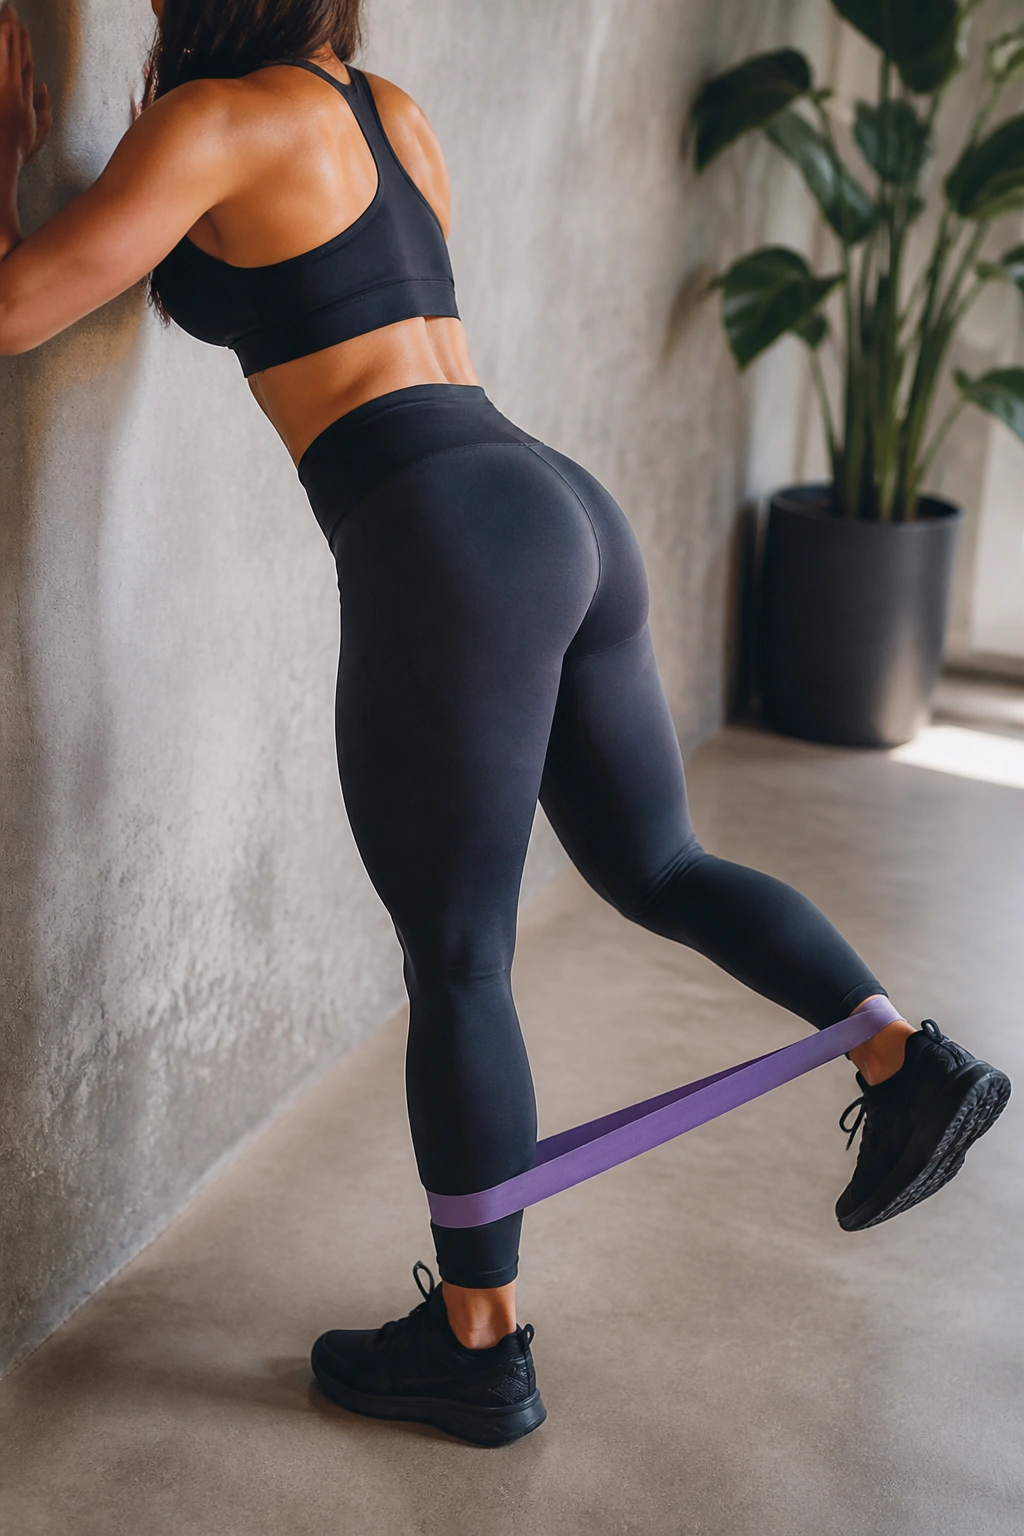
This is an isolation move, plain and simple. Stand facing a wall, band looped around your ankles. Lean forward slightly and keep your core rock-solid.
The Movement
Kick one leg straight back behind you, engaging the glute at the very end of the movement. Your leg does not need to go very high; it only needs to go far enough to achieve a full contraction of the muscle. If you try to kick too high, your lower back will take over.
Mindful Execution
This is a small, controlled movement. Think of it as a pulse rather than a swing. If you find yourself swinging your leg, you are using momentum. Eliminate the momentum, and you will find that even a light band feels incredibly heavy after ten repetitions.
12. Seated Hip Abduction
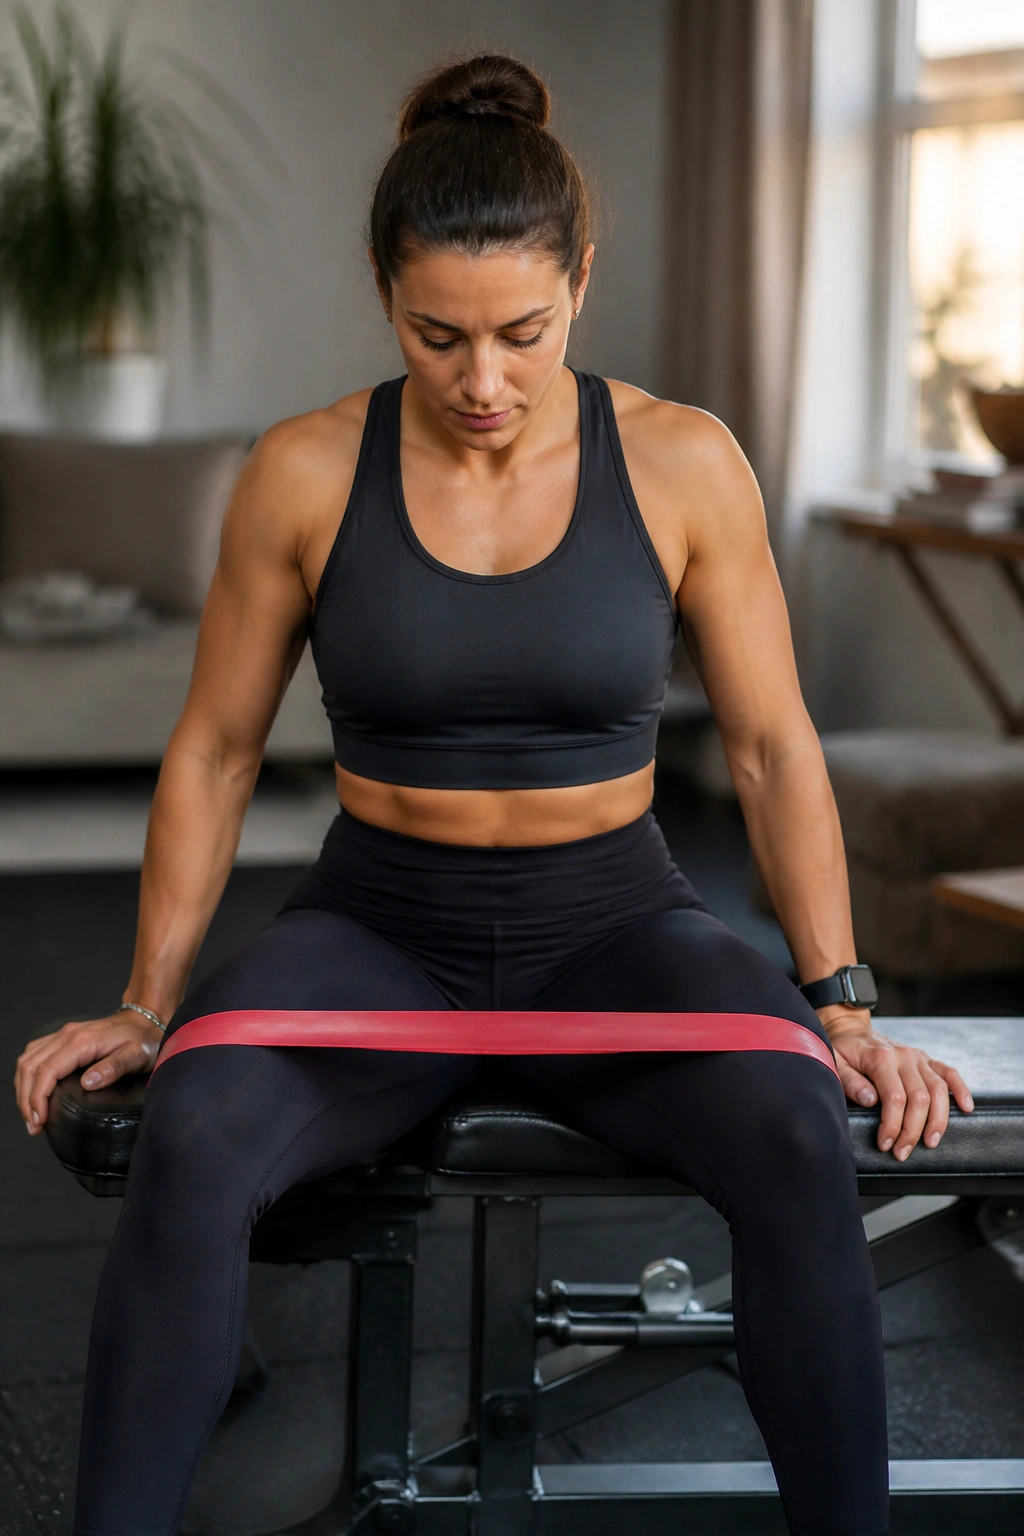
You do not need fancy gym machines to isolate the abductors. Sit on the edge of a bench or chair with the band around your knees. Lean forward slightly, keeping your spine straight.
The Wider Stance
Push your knees out as wide as possible against the band. Pause at the peak of the width, feeling the side of your hips engage. Slowly return your knees to the starting position, but do not let them touch—keep the tension on the band at all times.
Adjusting Intensity
If this feels too easy, move the band down toward your ankles. This increases the length of the lever arm, making the resistance exponentially more difficult. This is a phenomenal exercise for the “shelf” of the glutes.
13. Banded Monster Walks
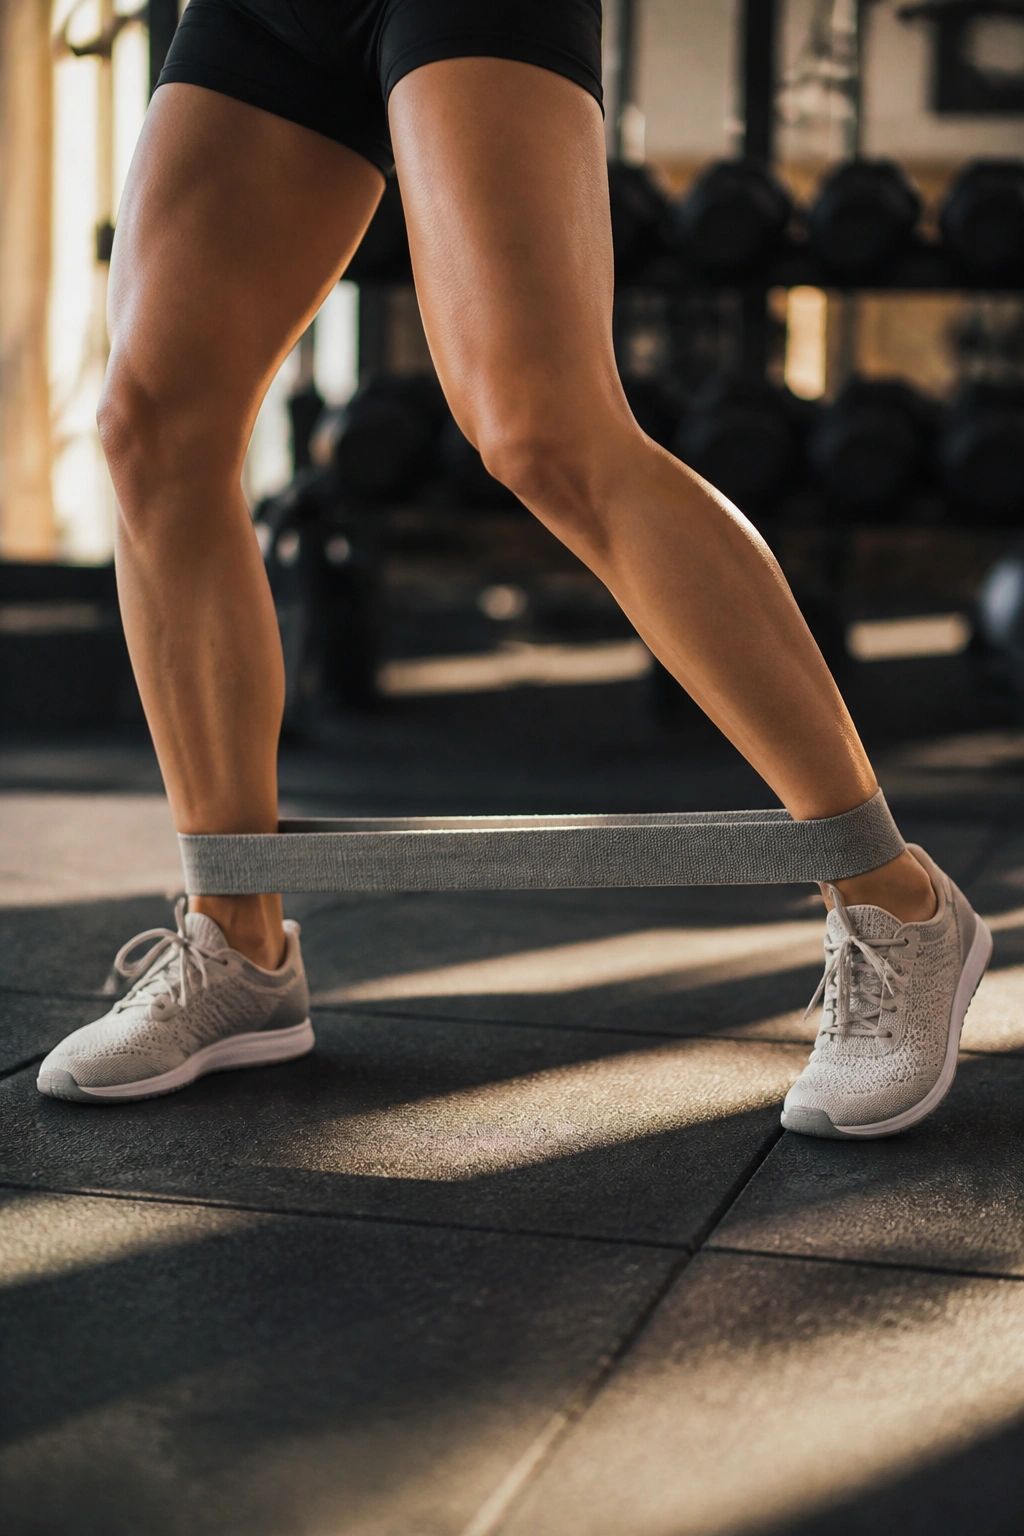
This is the ultimate warm-up or finisher. Place the band around your ankles. Step your feet slightly wider than hip-width to create tension. Step forward and out at a 45-degree angle.
The Rhythmic Walk
Keep your knees bent and your posture athletic. Walk forward for ten steps, then backward for ten steps. The backward walk is particularly effective for firing the lower glutes. Try to maintain the same distance between your feet throughout the entire movement.
Why This Is Effective
This exercise requires constant tension. There is no point of rest. Because you are moving in multiple directions—outward, forward, and backward—you are hitting all the glute fibers in a very short amount of time. If your legs aren’t on fire by the end of one minute, you need a heavier band.
14. Lying Leg Raises
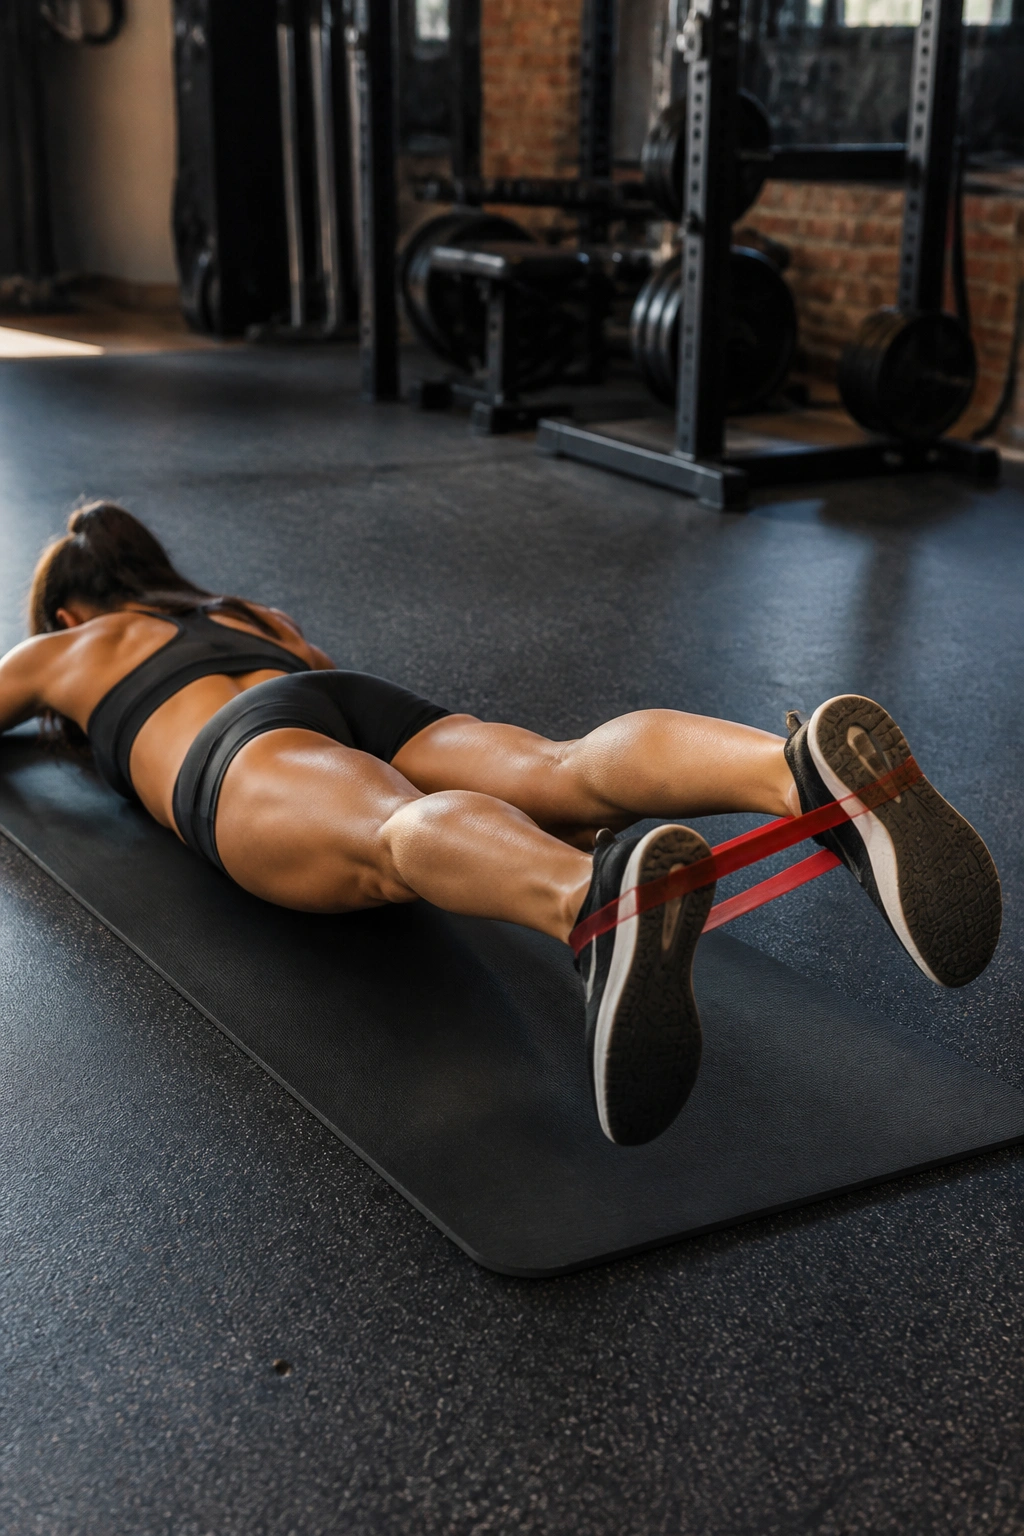
Lie on your stomach with the band around your ankles. Keep your legs straight. This is a very targeted movement for the lower glute and the hamstring tie-in.
The Lift
Squeeze your glutes to lift both legs simultaneously off the floor. Your feet do not need to go high. A lift of a few inches is sufficient. The resistance of the band will make this incredibly difficult if you have a strong band.
Controlling the Lower Back
This move requires a very strong core to protect your lumbar spine. If your back starts to hurt, stop immediately and place a pillow under your hips to change the angle of your pelvis. This small adjustment can alleviate the pressure on your lower back while keeping the focus squarely on your glutes.
15. Glute Bridges with Abduction
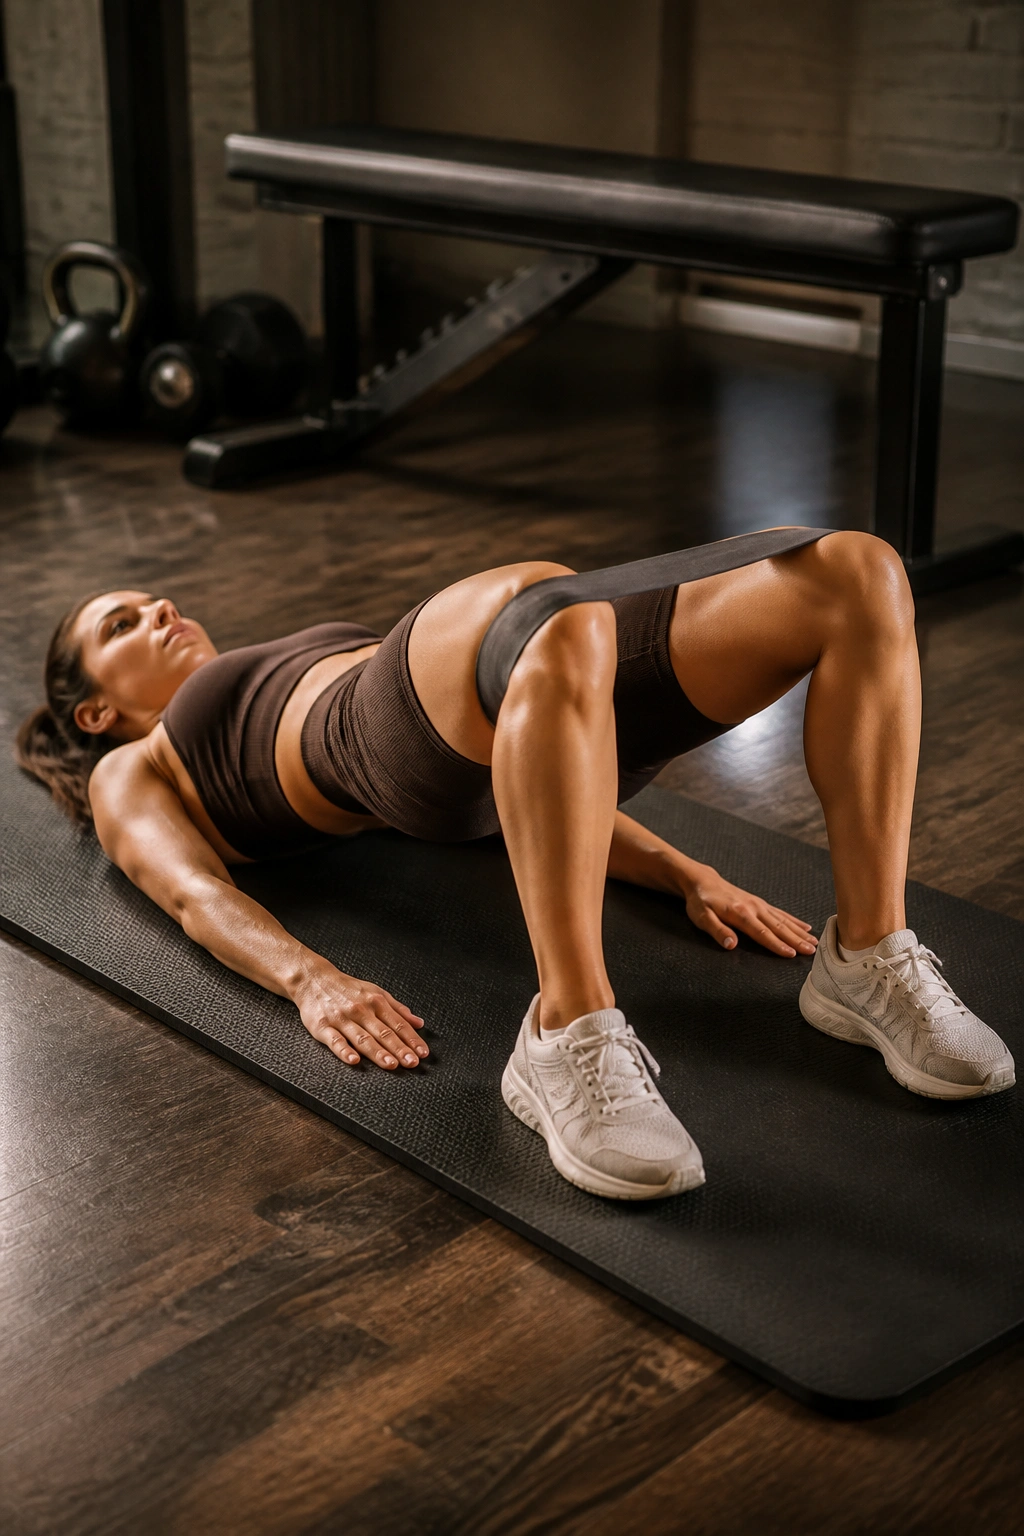
Combine the bridge with an abduction movement for a high-intensity finisher. Perform a standard glute bridge (as described in section 1), but at the very top of the bridge, pulse your knees outward against the band three times.
The Burn
Lower your hips back to the floor, then repeat the lift and the triple-pulse. This combination hits the glute maximus (the lift) and the glute medius (the abduction) in one rep. It is a grueling combination that forces muscle fatigue quickly.
When to Use This
This is not a starter move. Save this for the end of your session when your glutes are already fatigued. It’s perfect for forcing blood into the muscle and achieving that “pumped” feeling. Keep the pulses short and sharp.
16. Banded Sumo Squats
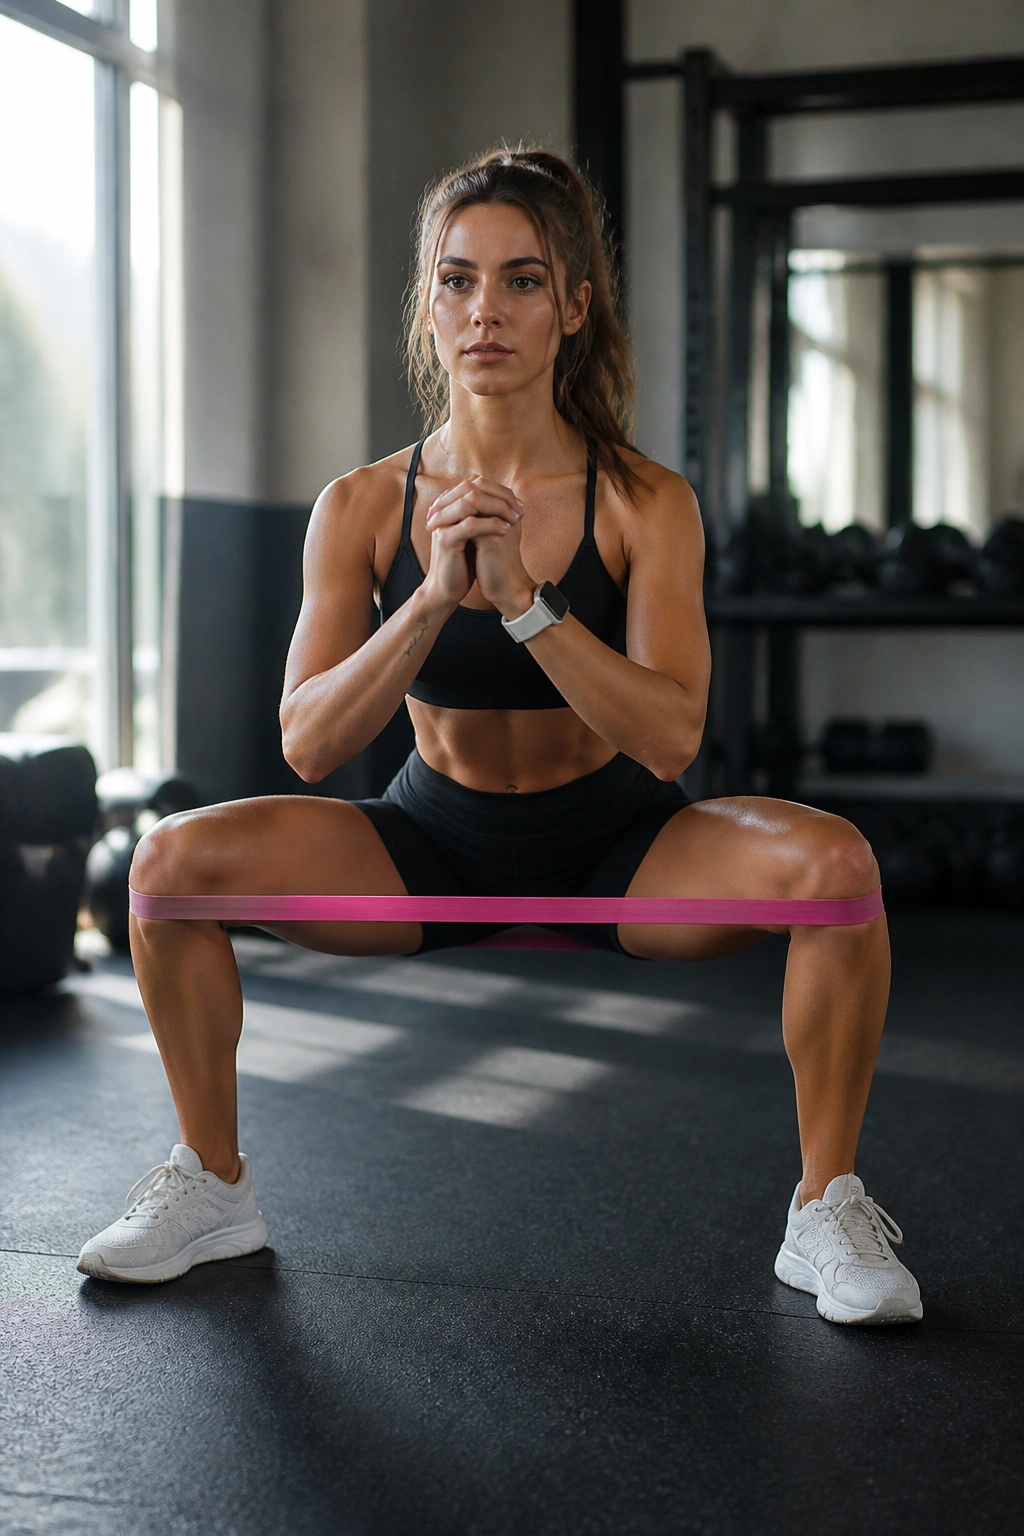
Take a wider-than-shoulder-width stance. Point your toes slightly outward. Place the band around your knees. This wide stance forces your adductors (inner thighs) and your glutes to work in tandem.
The Deep Stretch
Squat down, focusing on pushing your knees out to track over your toes. Because of the wide stance, you will feel a significant stretch in your inner thighs. Drive back up through your heels. The glutes have to do more work in this position because the wide stance naturally shifts the load.
Proper Depth
Do not worry about going as deep as a narrow squat. The wide stance restricts hip mobility for many people. Go down until you feel the tension in the glutes and inner thighs, then drive back up. The squeeze at the top is the most important part.
17. Split Squats
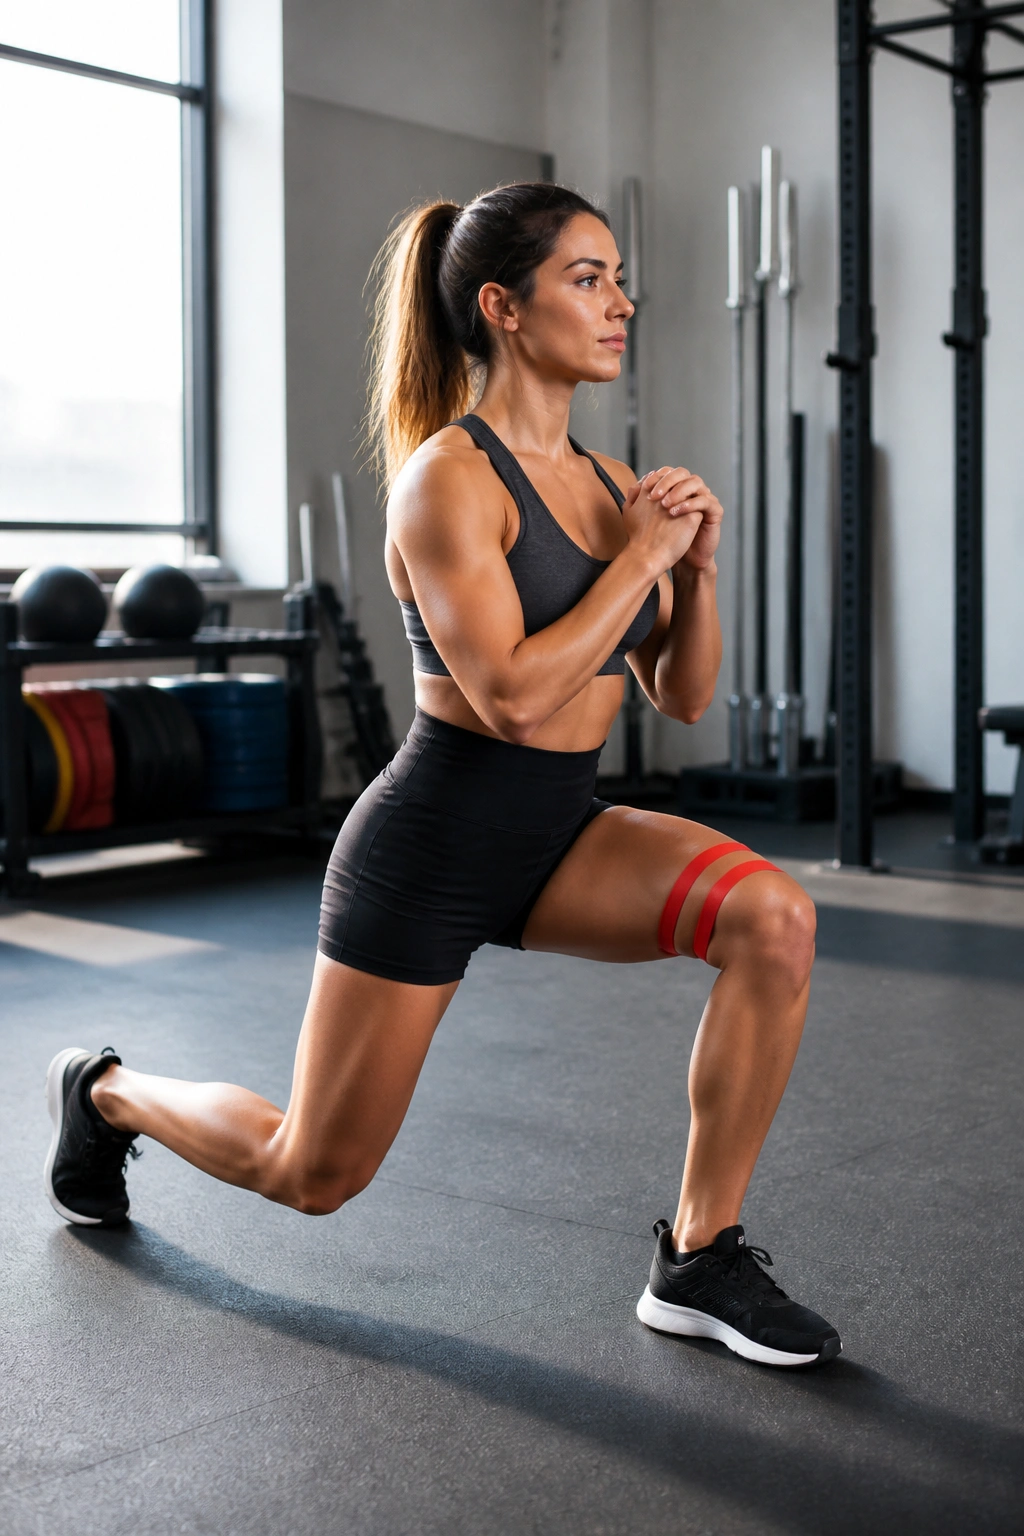
Place the band around your front knee. Step into a split stance—one foot forward, one foot back. Lower your hips until both knees are bent at roughly 90-degree angles.
The Single-Leg Focus
Because this is a single-leg exercise, the glute stabilization requirement is doubled. The band around your front knee forces you to actively keep that knee from collapsing inward. This creates an intense focus on the front-leg glute.
Troubleshooting
If you feel this entirely in your back leg’s hip flexor, shorten your stance. A longer stance stretches the hip flexor more; a shorter, more vertical stance places more load on the glute of the front leg. Experiment with the stance length until you feel the drive coming from the front glute.
18. Banded Hip Thrusts
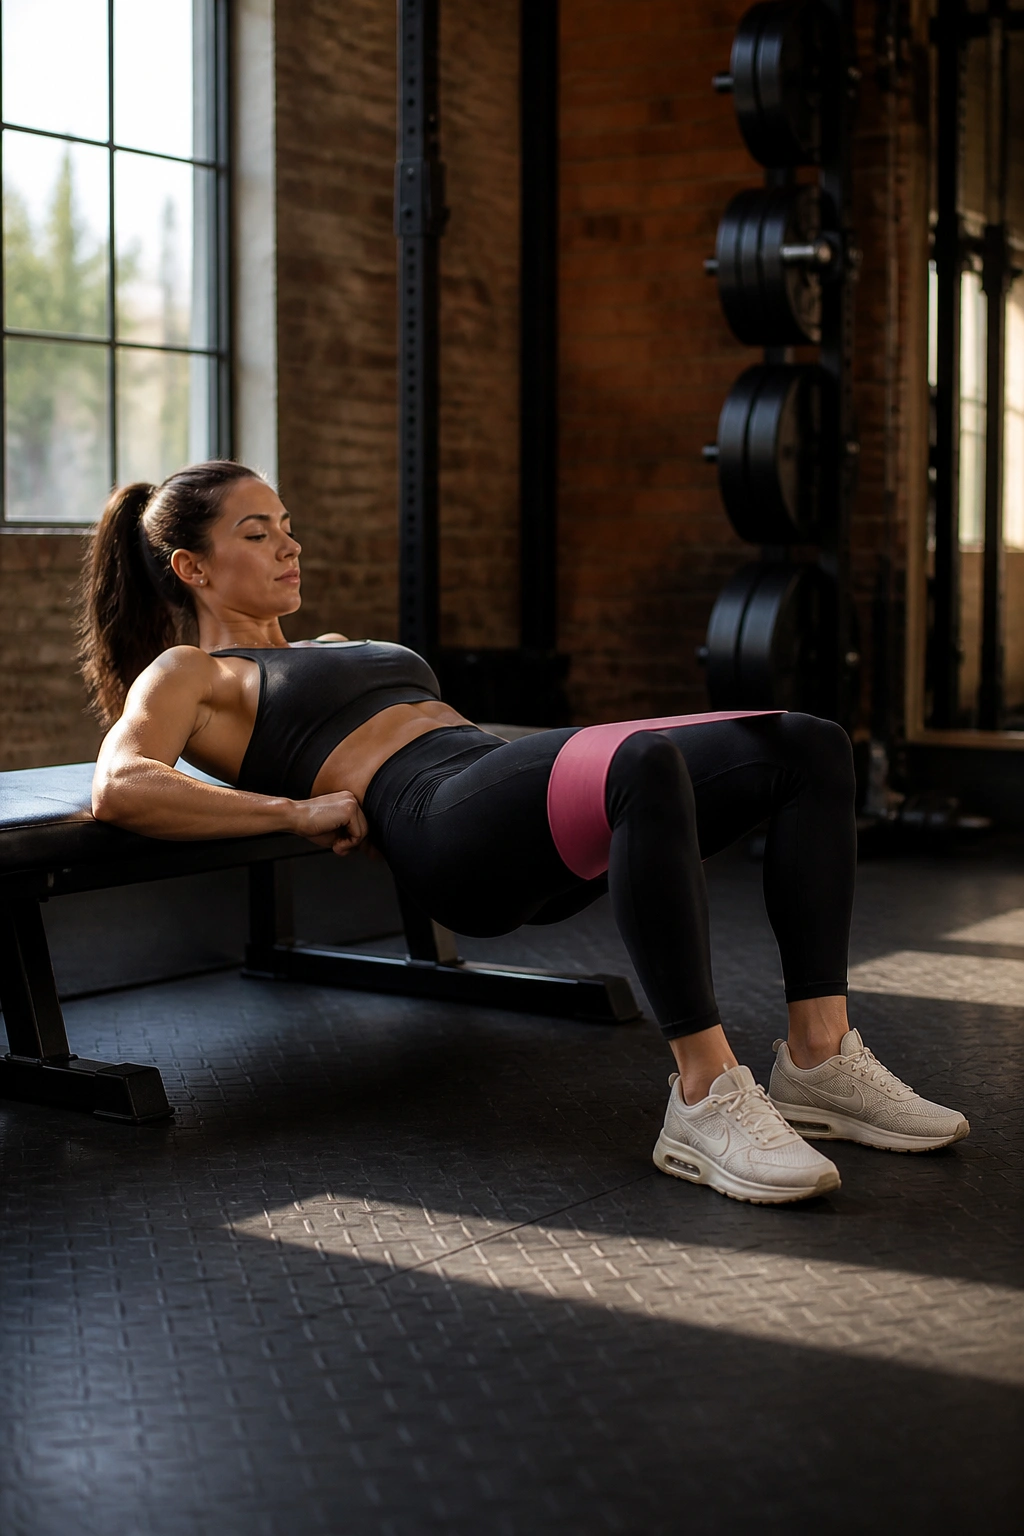
This is the king of glute movements. Sit on the floor with your back against a sturdy bench or couch. Place the band around your knees. Walk your feet in so your knees are bent at 90 degrees when you lift.
The Power Move
Drive your hips up, squeezing your glutes as hard as you can at the top. Keep your chin tucked toward your chest to prevent your spine from arching. At the top of the movement, your torso should be parallel to the floor, and your shins should be vertical.
Maximizing Tension
Because the band is around your knees, you must keep them pushed out. This resistance, combined with the heavy loading of the hip thrust, makes it arguably the most effective move for glute hypertrophy. Do not rush the descent; lower your hips slowly to maximize the time under tension.
Final Thoughts
Building stronger glutes is rarely about finding one “perfect” exercise. It is about understanding how to create tension and how to isolate muscles that have spent years being dormant. You can do all the squats in the world, but if your hips aren’t properly firing, you are mostly just using your quads. Resistance bands are the equalizer here—they provide that constant, frustrating, necessary tension that forces your posterior chain to wake up.
Start with lighter bands to master the technique. The form is non-negotiable. If you find yourself compensating with your lower back, stop, reset, and lower the intensity. You want to feel the fire in your glutes, not an ache in your spine. Over time, you will find that your pelvic stability improves, your lower back pain diminishes, and your overall lower body power increases, regardless of what other lifting you do. Consistency is the only thing that actually changes the muscle; keep at it, and the results will follow.
