



If the phrase at-home workouts for total beginners makes you picture burpees, floor sweat, and a stack of equipment you do not own, good. That image is the problem, not you. The best starting point is usually much smaller: marching in place, sitting down and standing up from a chair, pressing against a wall, and learning how your body feels when it works without drama.
I like beginner home training when it feels almost too easy at first. That is not a flaw. It is how you build a habit without spending the next three days negotiating with sore legs and irritated shoulders. A workout that leaves you a little warmer, a little steadier, and still willing to do it again tomorrow beats a heroic session you dread.
The nice part is that you do not need a gym floor or fancy gear to get started. A chair, a wall, a stair, and a little floor space are enough. Good form matters more than intensity at this stage, and the small details—where your feet land, how fast you breathe, whether your lower back stays flat—make a bigger difference than people expect.
Start with one move, then add another. The list below moves from the easiest patterns to the slightly tougher ones, so you can build confidence without guessing what to try next.
1. Marching in Place
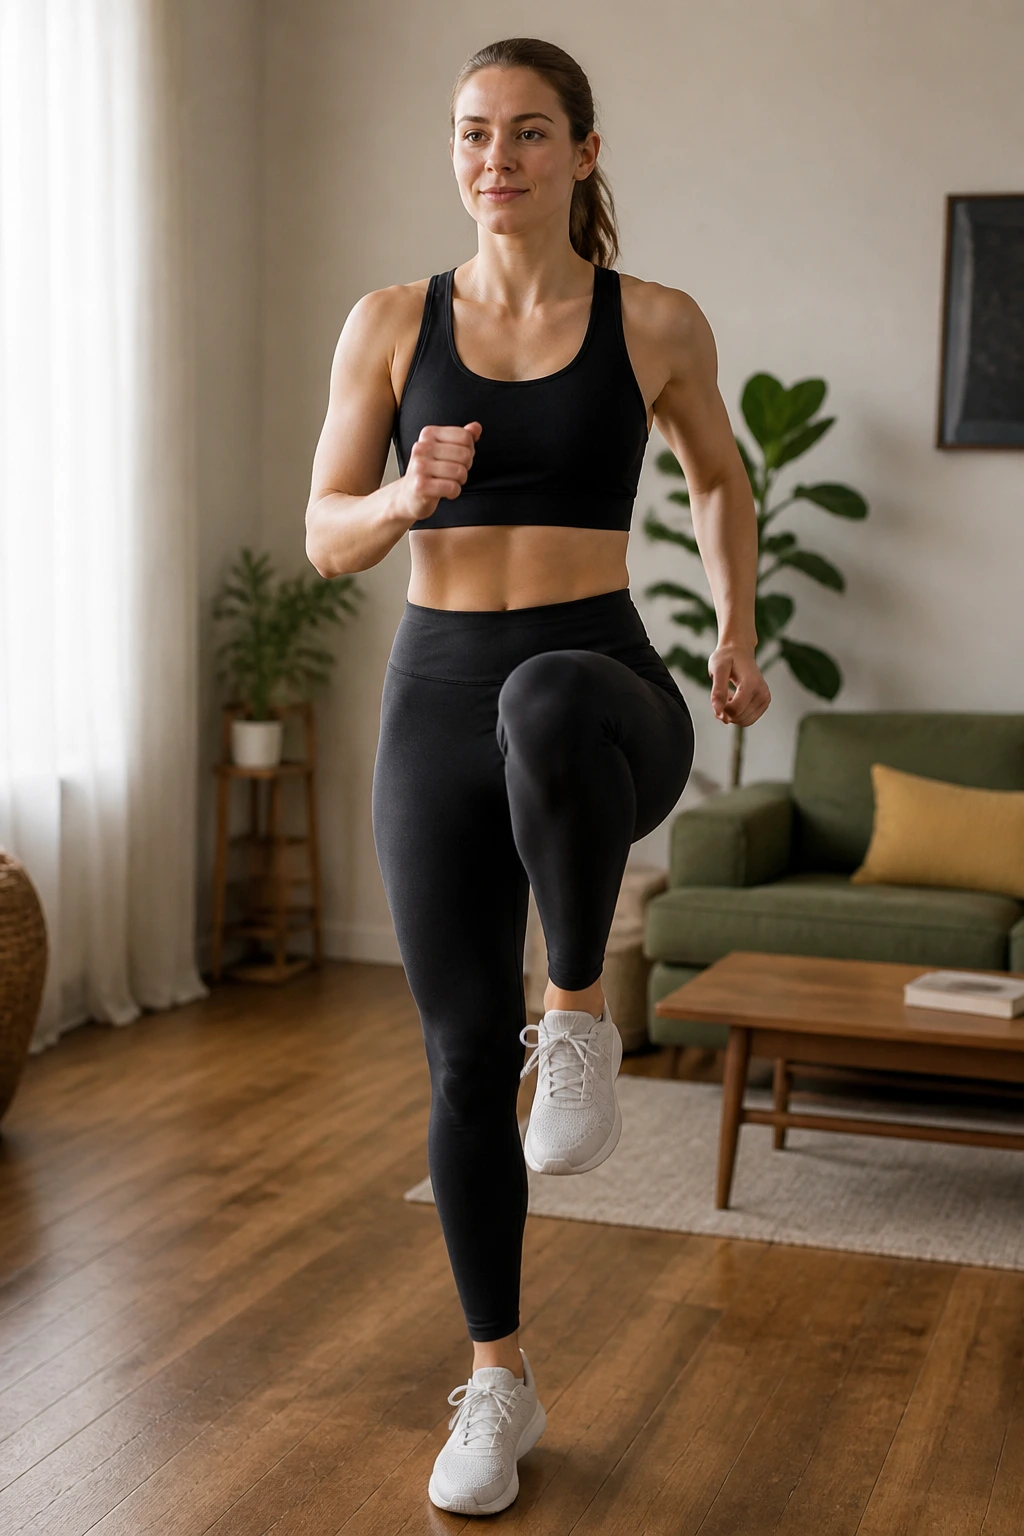
Marching in place looks tiny, and that is exactly why it works so well for a first workout. You can do it in socks, shoes, or bare feet, and you can stop the second your breathing starts to feel choppy.
Why I put this first: it warms up your hips, ankles, and shoulders without asking your joints to do anything dramatic. If you can walk across a room, you can march.
How to make it feel like a workout
- Stand tall with your feet hip-width apart.
- Lift one knee at a time to a comfortable height.
- Swing your arms naturally, not like a robot.
- Try 30 seconds on, 30 seconds off for 5 rounds.
One small trick makes a difference: keep your feet landing under your hips, not way out in front. That keeps the movement smooth and takes pressure off your knees. If you want more effort, lift your knees a little higher and speed up the arm swing. Easy. No drama.
2. Sit-to-Stand Squats from a Chair
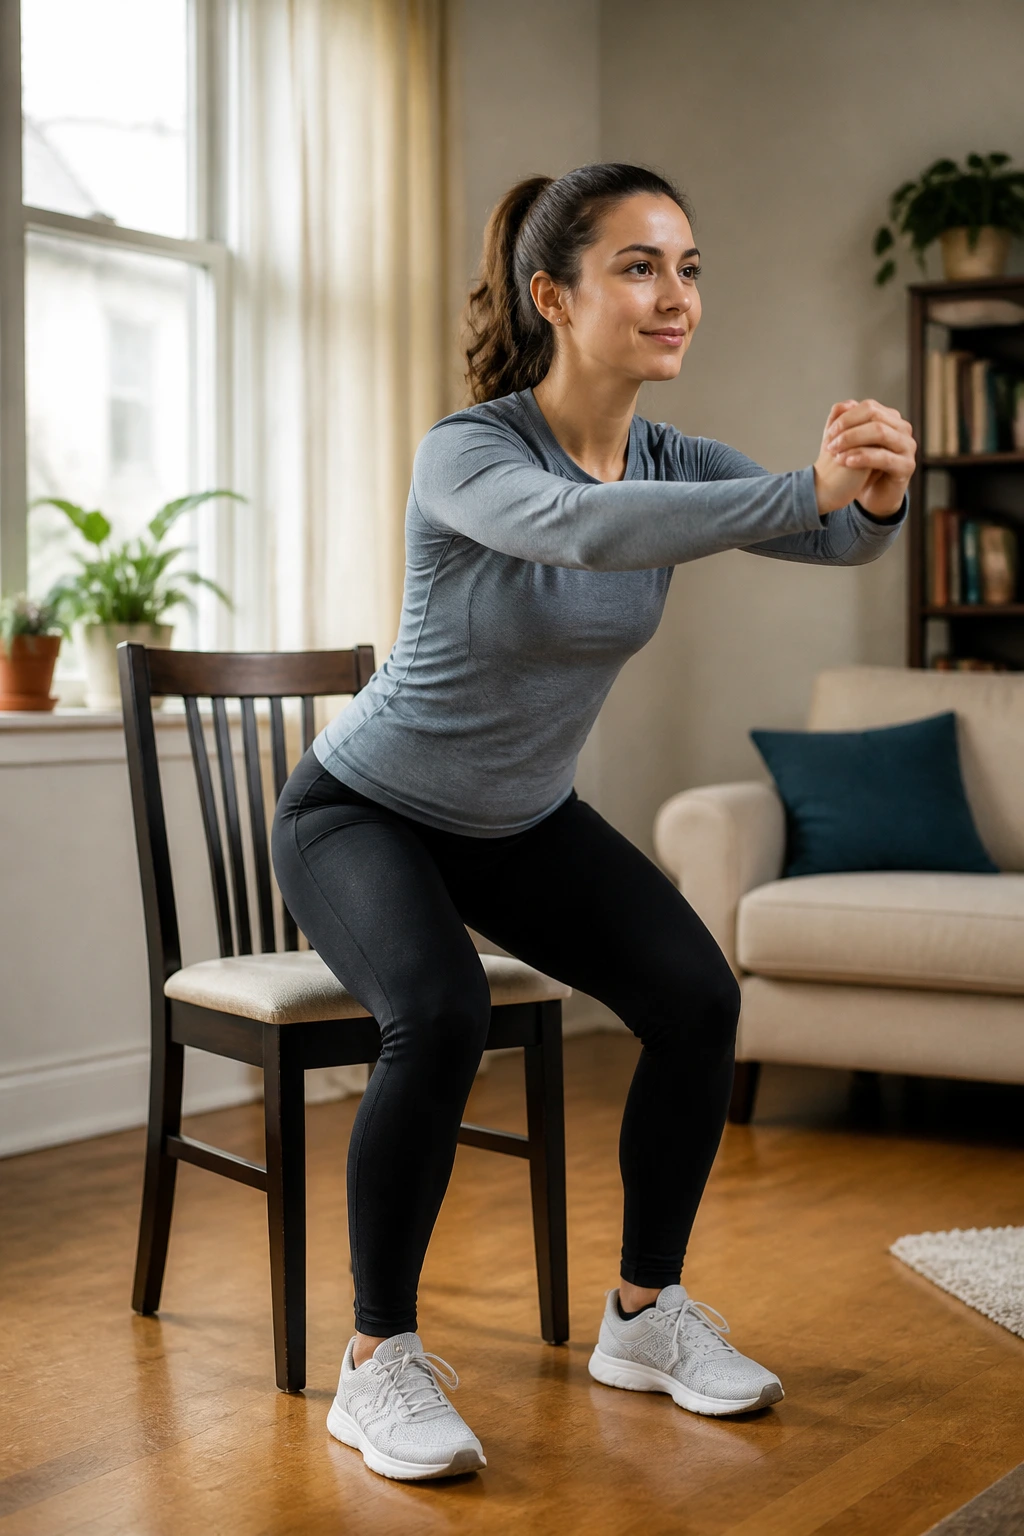
This is the move I hand to people who think squats are off-limits. They’re not. A chair gives you a clear target, and that target keeps the movement honest.
What makes it easier
- Use a sturdy chair that does not slide.
- Sit back until your hips touch the seat, then stand up again.
- Keep your chest open and your feet flat.
- Start with 5 to 8 reps for 2 rounds.
The chair does more than save balance. It also teaches you how a squat should feel in the legs and hips, not in the lower back. If standing up feels too hard, use your hands on your thighs for a little push. If that still feels rough, raise the seat with a cushion. Small adjustments matter here.
3. Wall Push-Ups
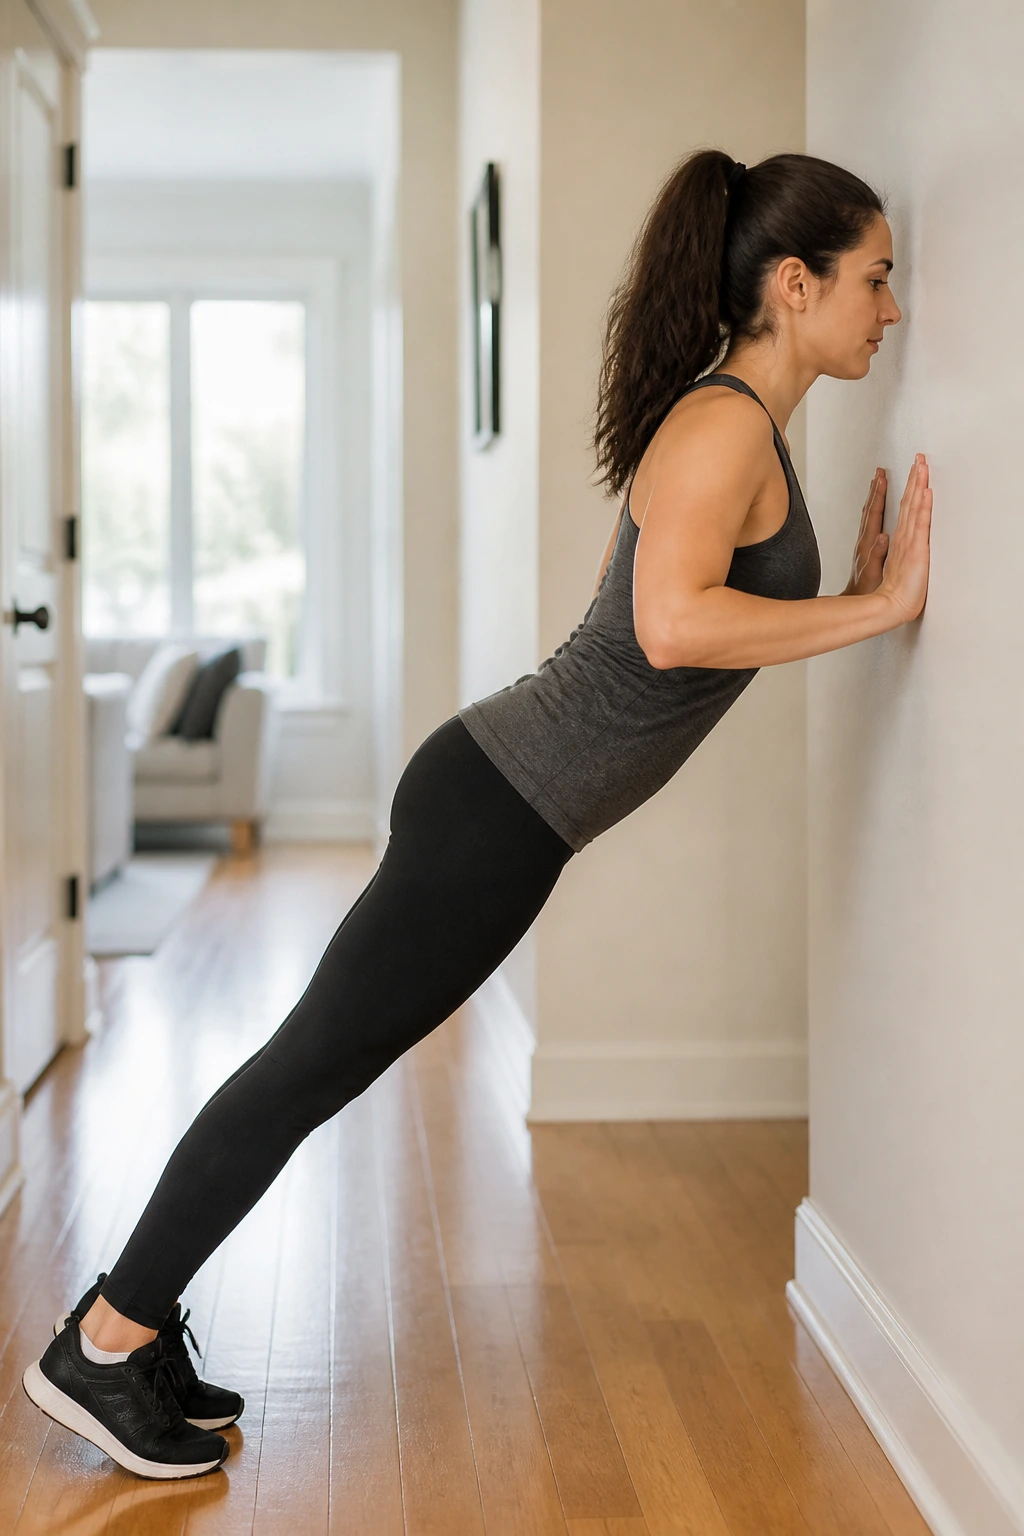
If floor push-ups feel like a bad joke, start here. Wall push-ups train your chest, shoulders, and triceps without forcing you onto the floor before your body is ready.
Stand about arm’s length from the wall, place your hands at chest height, and bend your elbows until your face gets close to the wall. Then press back out. That’s the whole thing, and it’s enough.
Keep your body in one long line from head to heels. Do not let your hips sag forward like you’re melting into the wall. Six to 10 reps is a solid starting point, and a slow tempo makes them harder without making them messy. If you want a little more work, step your feet farther from the wall. If your wrists complain, turn your hands slightly out.
4. Glute Bridges
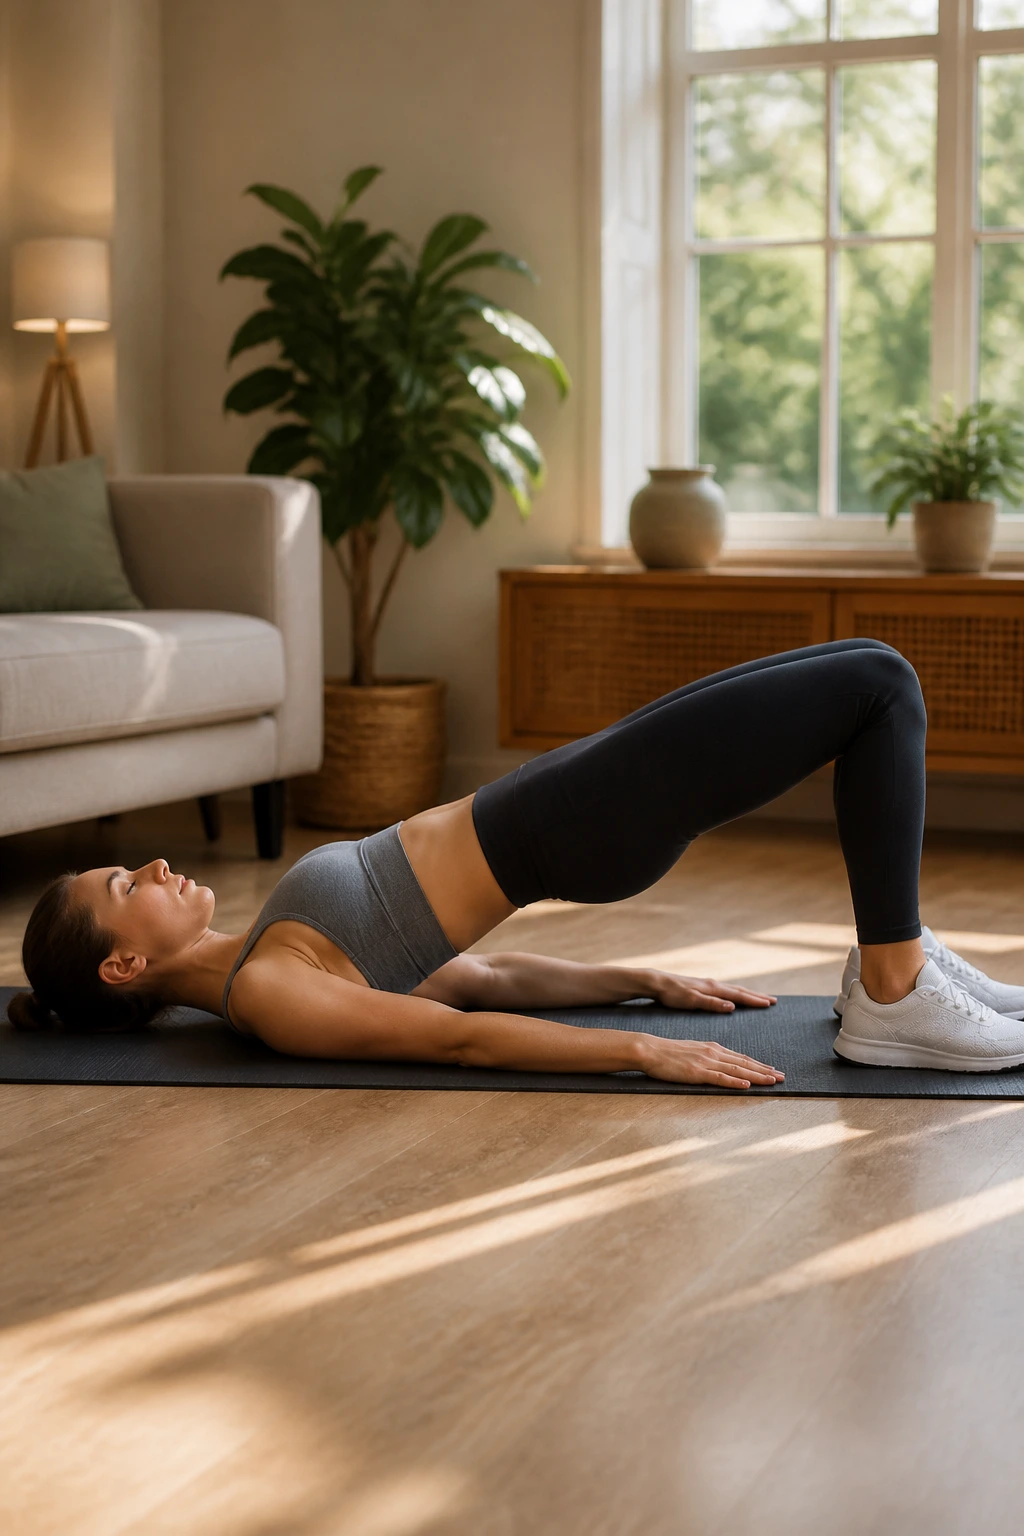
Glute bridges are one of those exercises that look peaceful and then suddenly make your hamstrings pay attention. Good. That usually means your hips are waking up.
Lie on your back with your knees bent and your feet flat, about hip-width apart. Press through your heels, lift your hips, and squeeze your glutes at the top for a second or two. Lower with control.
What to watch for
- Keep your ribs down instead of arching your lower back.
- Put your feet close enough that your fingertips can brush your heels.
- Stop at the top when your body makes a straight line from shoulders to knees.
- Try 8 to 12 reps for 2 sets.
If you feel the move mostly in your back, your feet are probably too far away, or you’re pushing your hips too high. Tiny correction. Big difference.
5. Bird Dog
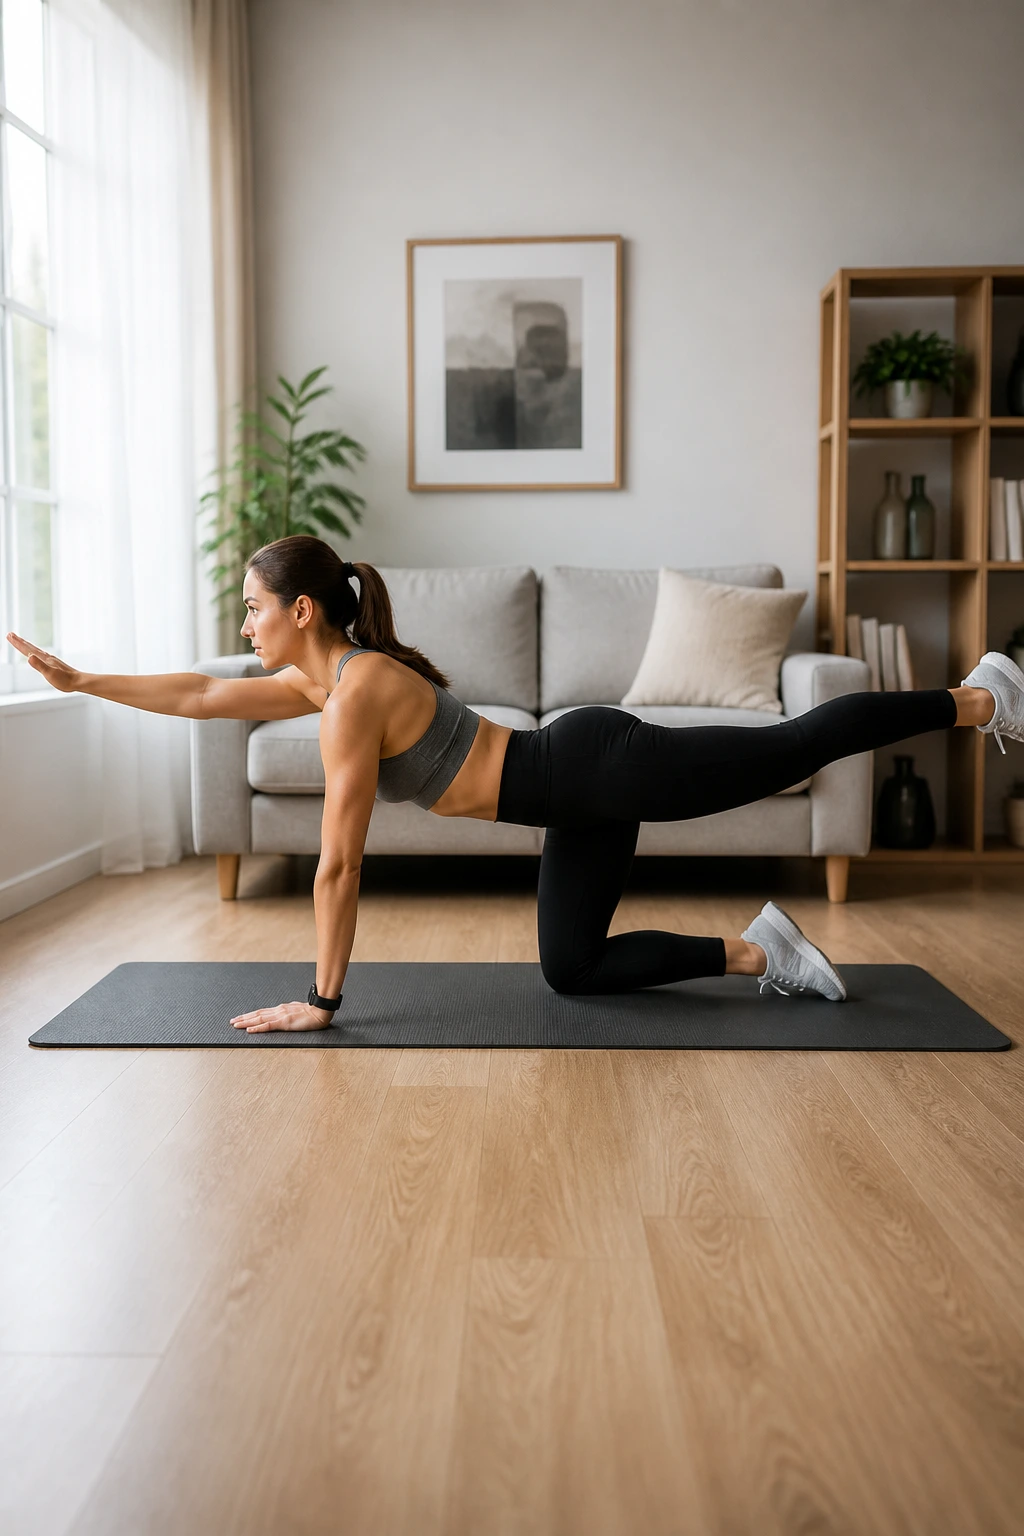
Why do so many beginner plans use bird dog? Because it teaches balance, core control, and back stability without putting much load on the spine. That is a rare combination.
Start on your hands and knees. Reach one arm forward while extending the opposite leg back, then come back to center and switch sides. Keep the motion slow enough that your hips stay level.
How to get the most from it
- Reach long, not high.
- Keep your neck neutral, eyes on the floor.
- Hold each rep for 2 to 3 seconds.
- Do 5 reps per side for 2 rounds.
A lot of people rush this one and miss the point. The goal is not speed. The goal is to stay steady while opposite sides move at once. If that feels wobbly, shorten the reach. No shame in that. Bird dog gets more useful when it gets cleaner.
6. Standing Calf Raises
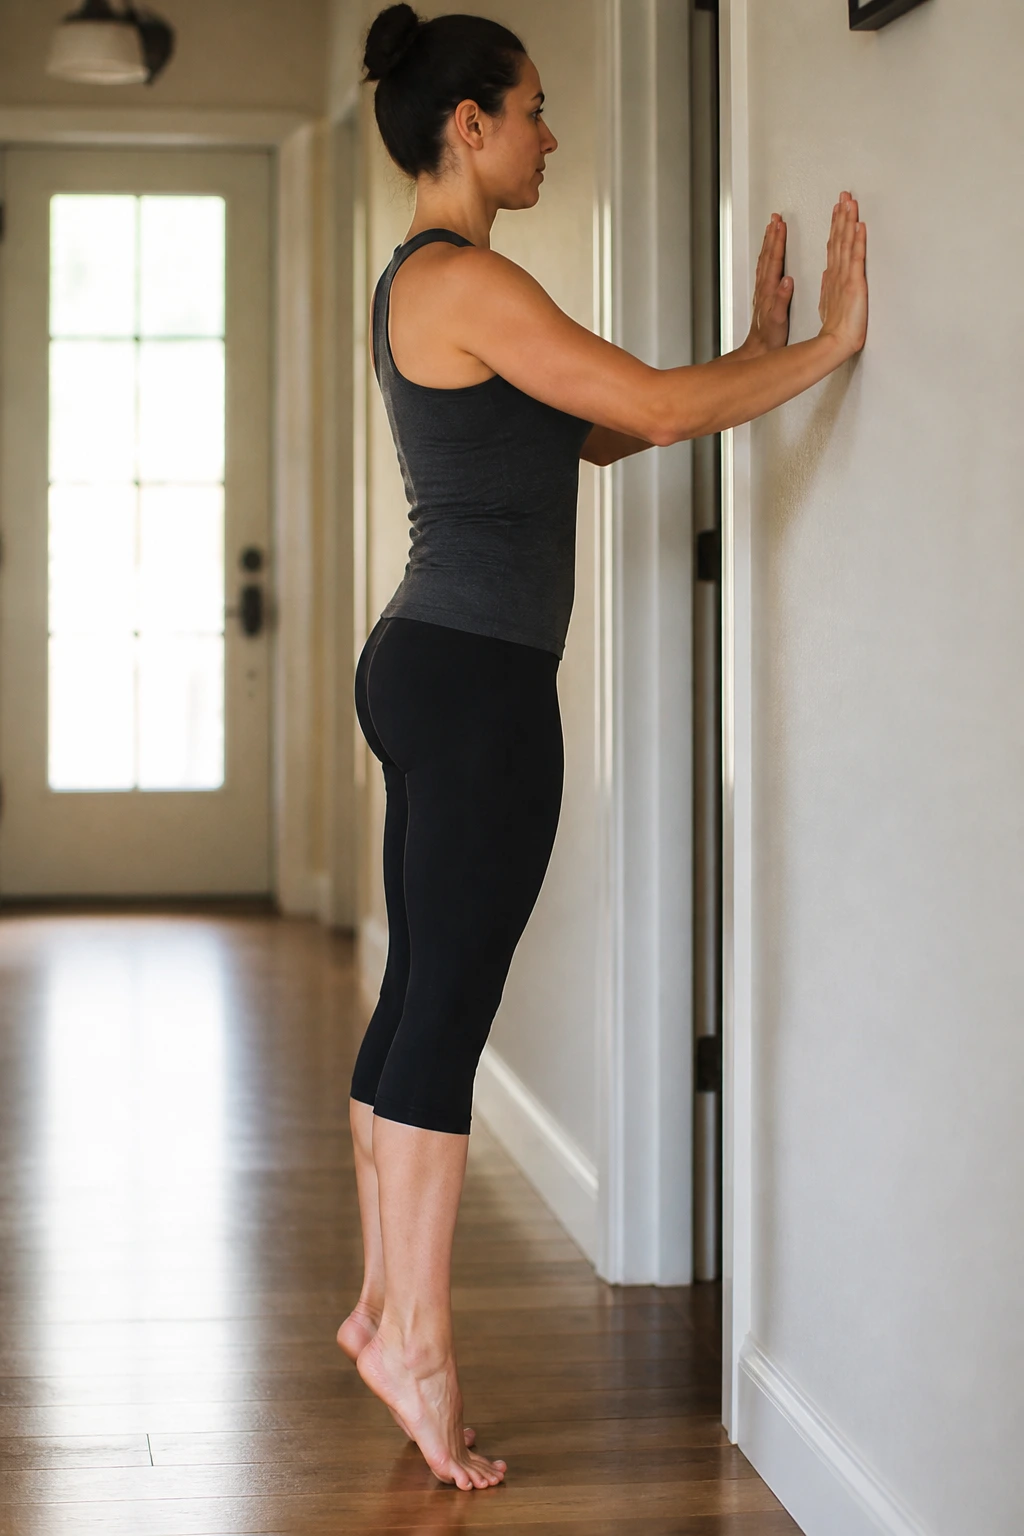
Standing calf raises are almost suspiciously simple, which is why beginners skip them. Then they notice their ankles feel stiff when they walk upstairs or stand on tiptoe for something on a shelf.
Hold a wall or chair for balance, lift your heels, pause for a second, and lower slowly until your heels touch the floor again. That lowering phase matters. It’s where the work hides.
Do 12 to 15 reps for 2 or 3 sets. If both feet feel too easy, try one foot at a time while holding onto something sturdy. The movement should feel controlled, not bouncy. And if your feet cramp, take a break, roll your ankles, then try again with a slower pace.
7. Dead Bug
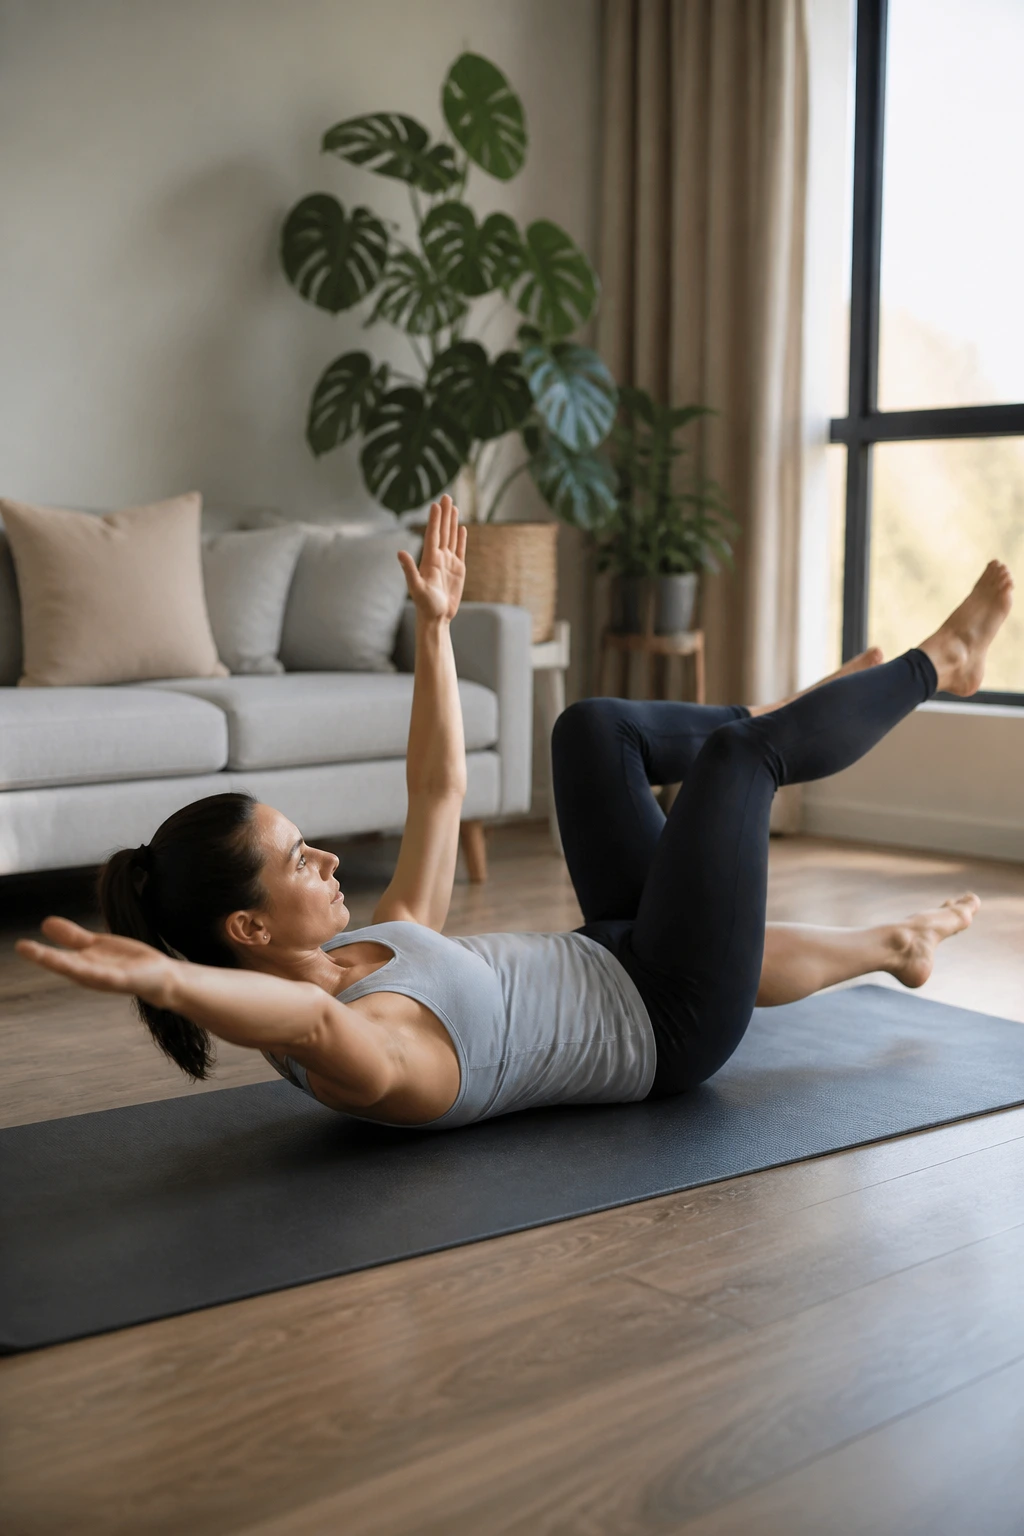
Dead bug sounds silly until you do it correctly. Then it becomes one of the best beginner core moves in the whole pile.
Lie on your back with your knees bent over your hips and your arms pointed toward the ceiling. Lower one opposite arm and leg toward the floor, then bring them back up and switch sides. Your lower back should stay gently pressed into the floor.
Quick cues that help
- Move one side at a time.
- Keep the back from arching.
- Lower only as far as you can control.
- Try 6 to 8 reps per side.
If your back pops up, shorten the reach or bend your knees more. That is not cheating. That is smart scaling. Dead bug works because it teaches control, not because it looks impressive.
8. Step-Back Lunges
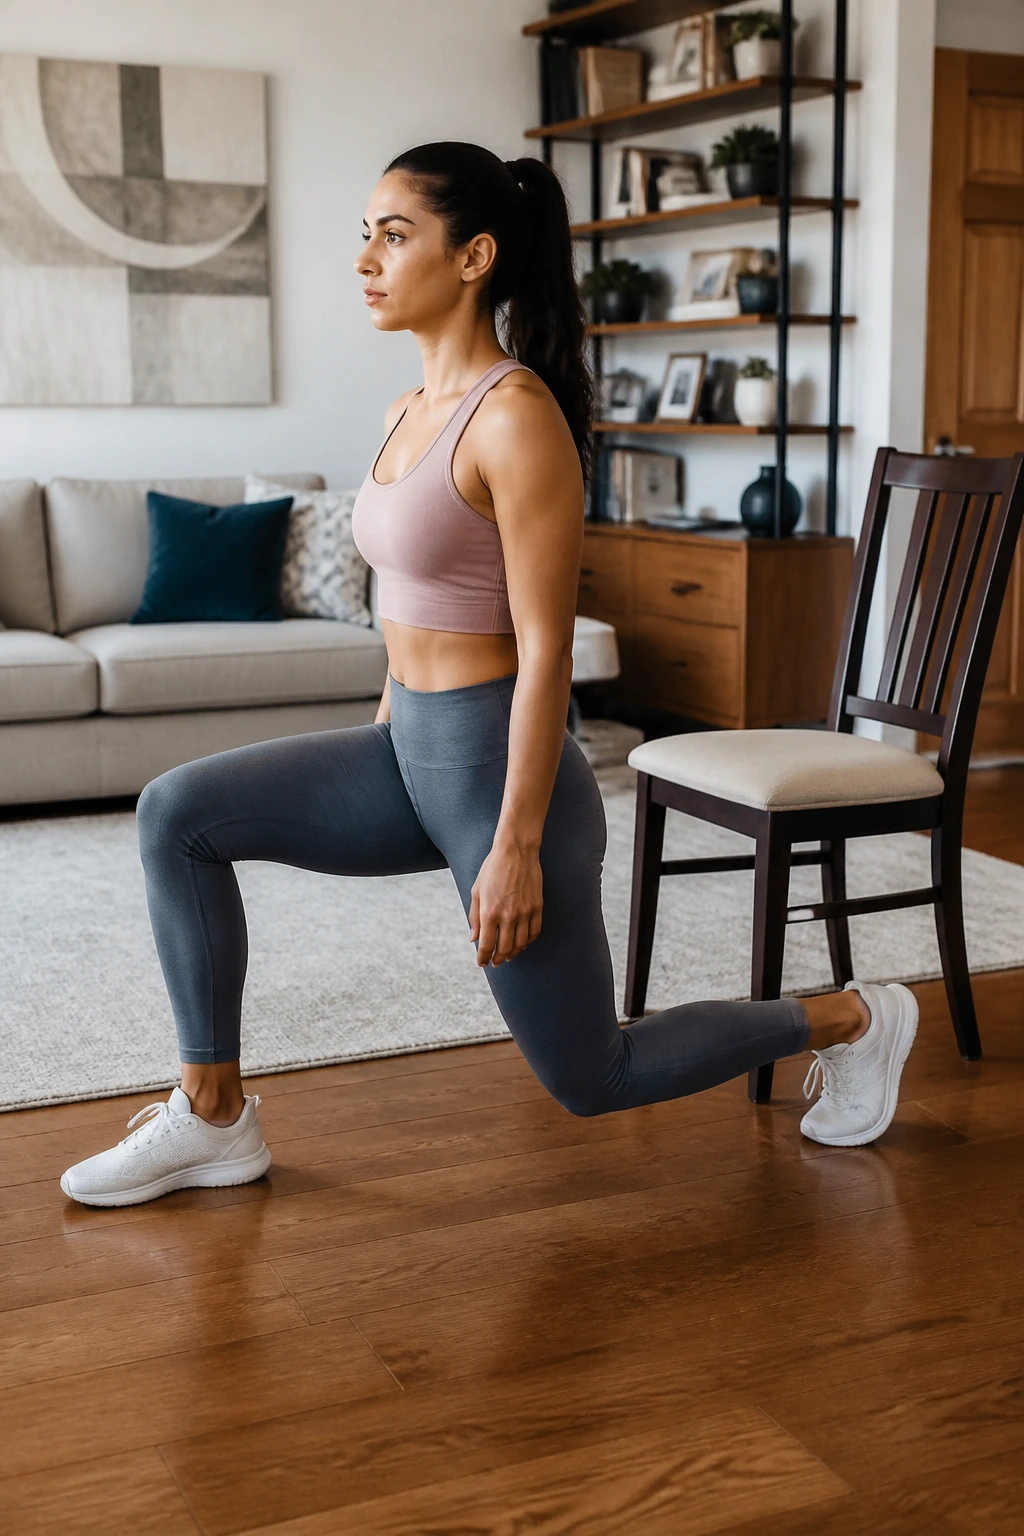
Step-back lunges are kinder than forward lunges. That little step backward gives you more control and usually feels less like your knees are being surprised.
Stand tall, step one foot back, bend both knees, then push through the front heel to stand again. Keep your front foot planted and your torso upright. I prefer these for beginners because the backward step is easier to manage than a forward drop.
A good first target is 5 to 8 reps per side. If balance feels shaky, hold the wall or the back of a chair. If the lunge feels too deep, shorten the step and stop higher. The front knee should track roughly over the middle toes, not collapse inward. That matters more than going low.
9. Wall Sit
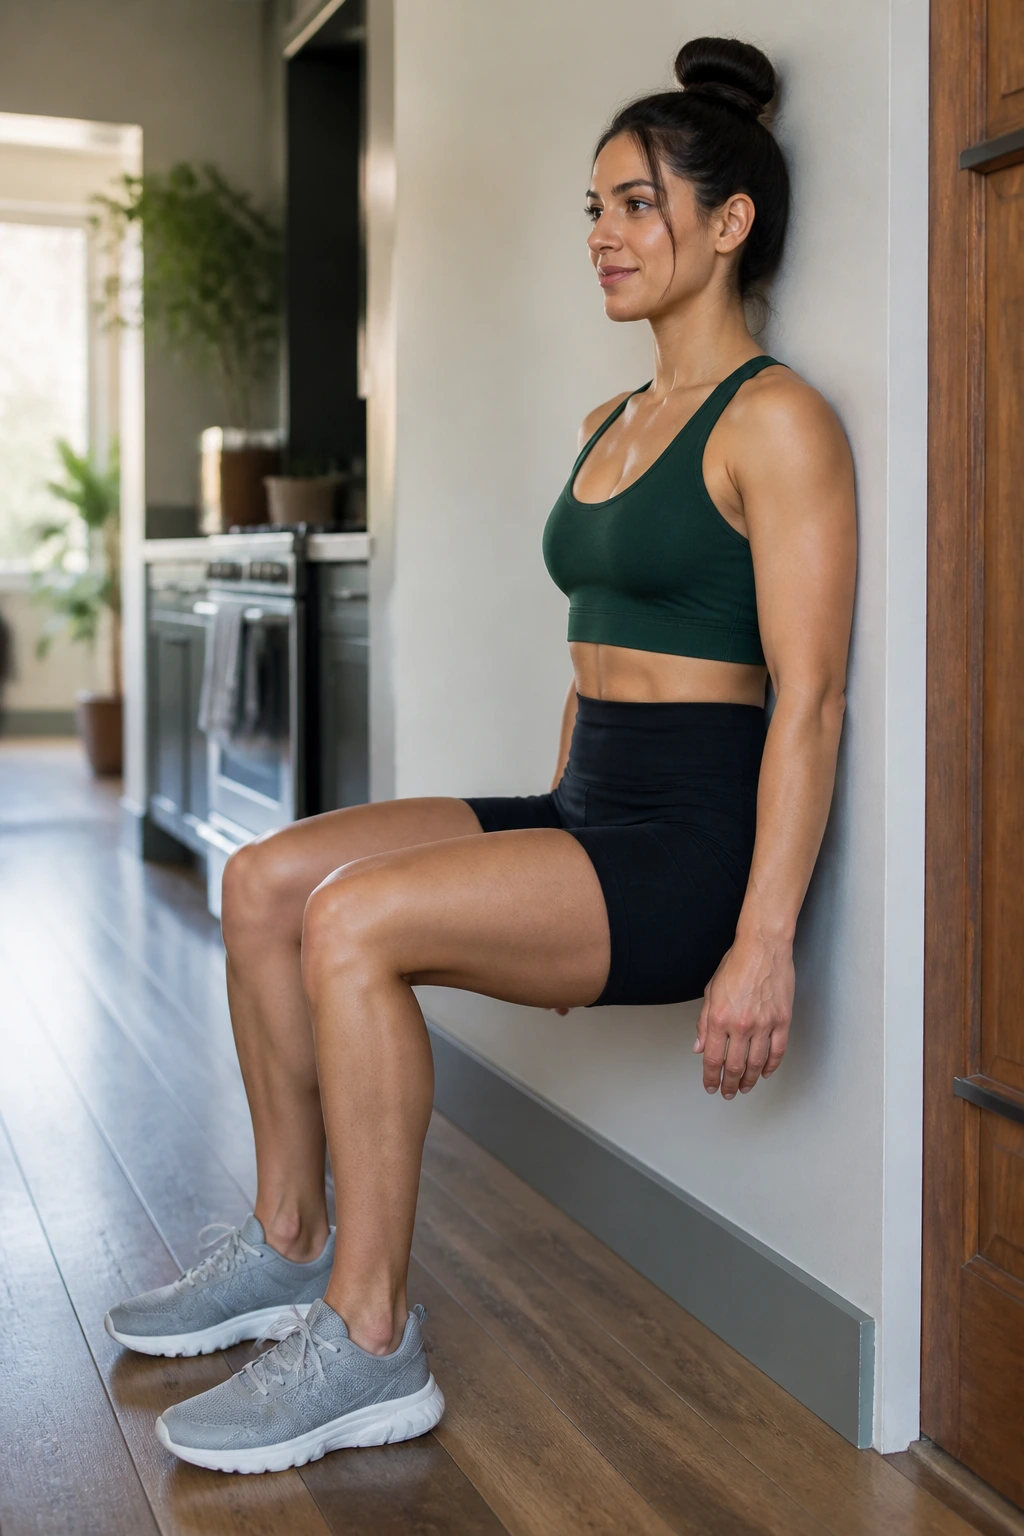
Wall sits have a funny way of looking harmless right before your thighs start talking back. They are static, sure, but they still load the legs in a way that gets attention fast.
Lean your back against a wall, walk your feet out a little, and slide down until your knees bend to a comfortable angle. A full 90 degrees is not required. Honestly, a slightly higher seat is better for most beginners.
Hold for 15 to 30 seconds, rest, then repeat for 2 or 3 rounds. Your legs should burn; your knees should not feel pinched. If they do, slide up a few inches. Boring? Maybe. Useful? Absolutely.
10. Incline Push-Ups
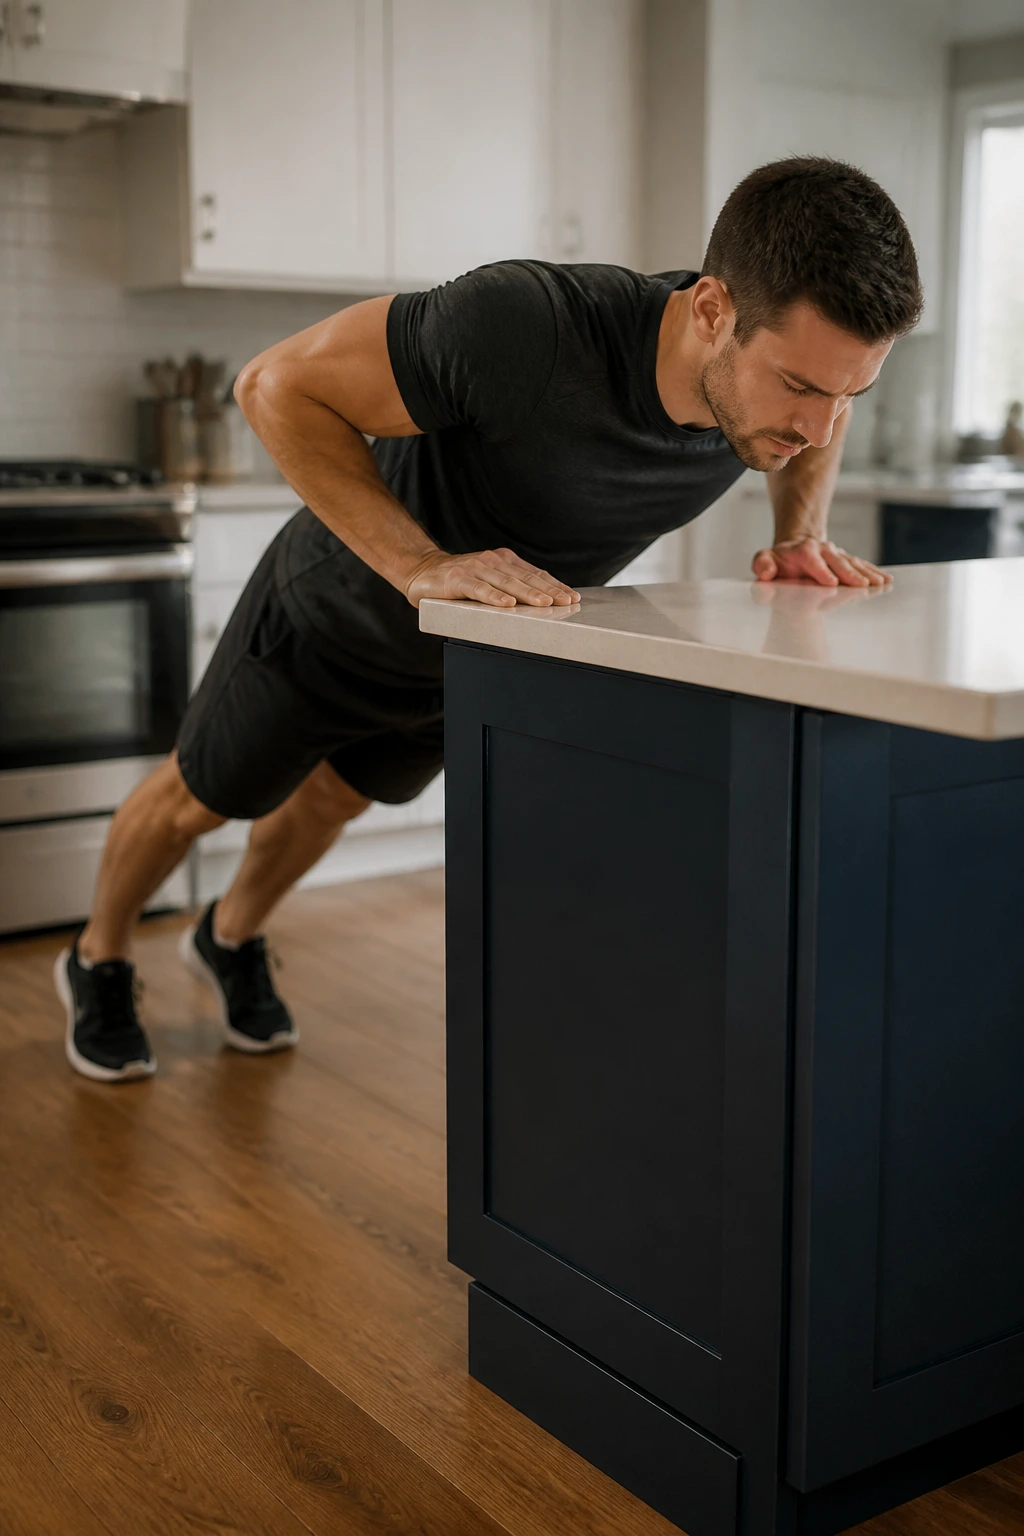
Incline push-ups are the bridge between wall push-ups and floor push-ups, and that bridge matters. A countertop, sturdy desk, or couch arm can make the movement feel reachable instead of impossible.
Best setup
- Choose a surface that does not wobble.
- Start higher than you think you need.
- Hands slightly wider than shoulders.
- Body stays in a straight line.
- Use 6 to 10 reps and stop before form gets sloppy.
The higher the surface, the easier the rep. That is the whole game here. If you can do 8 clean reps on a counter, try a lower surface next time. If your shoulders shrug up toward your ears, reset and try again with slower elbows. The move should feel strong, not frantic.
11. Toe Taps
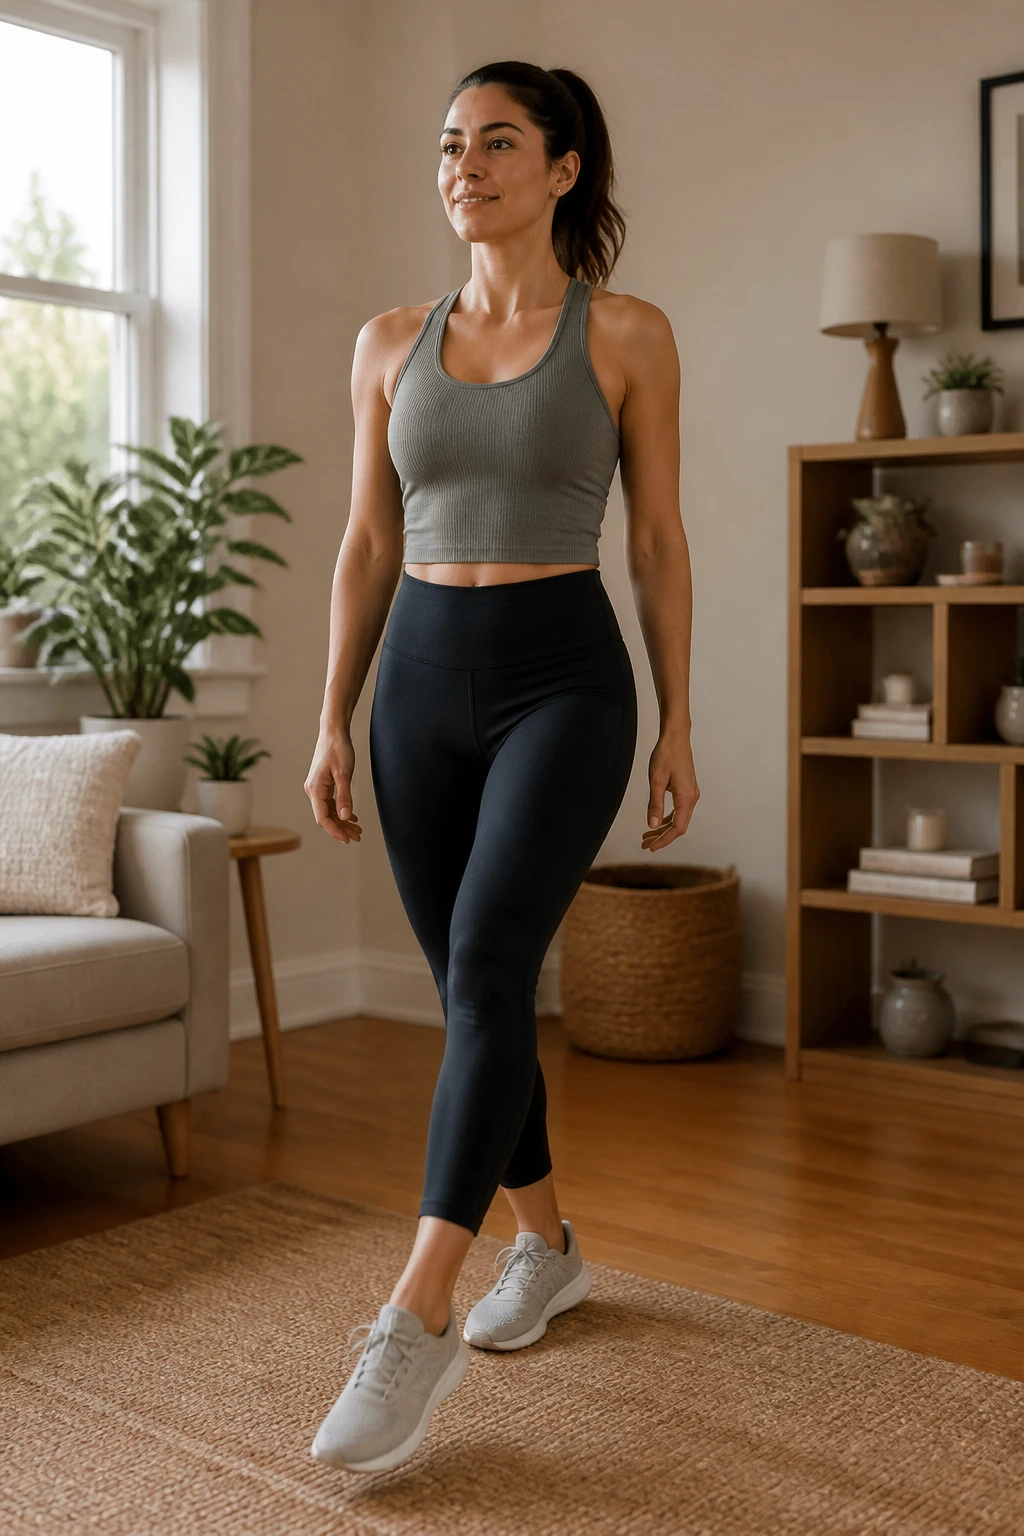
Toe taps are a simple way to get your heart rate up without jumping around like you’re in a bad fitness video. They work well in small spaces, and they’re easy to scale down.
Stand tall and tap one foot out in front of you, then switch feet in a steady rhythm. You can tap to the floor, a low step, or even a book if you need a bit more height. Keep your core lightly engaged and your shoulders relaxed.
Try 20 to 30 seconds at a steady pace, rest, then repeat. If you want more effort, speed up the taps and swing your arms. If you want less, slow the tempo and keep the taps low. No equipment. No jumping. No weird choreography.
12. Side Leg Raises
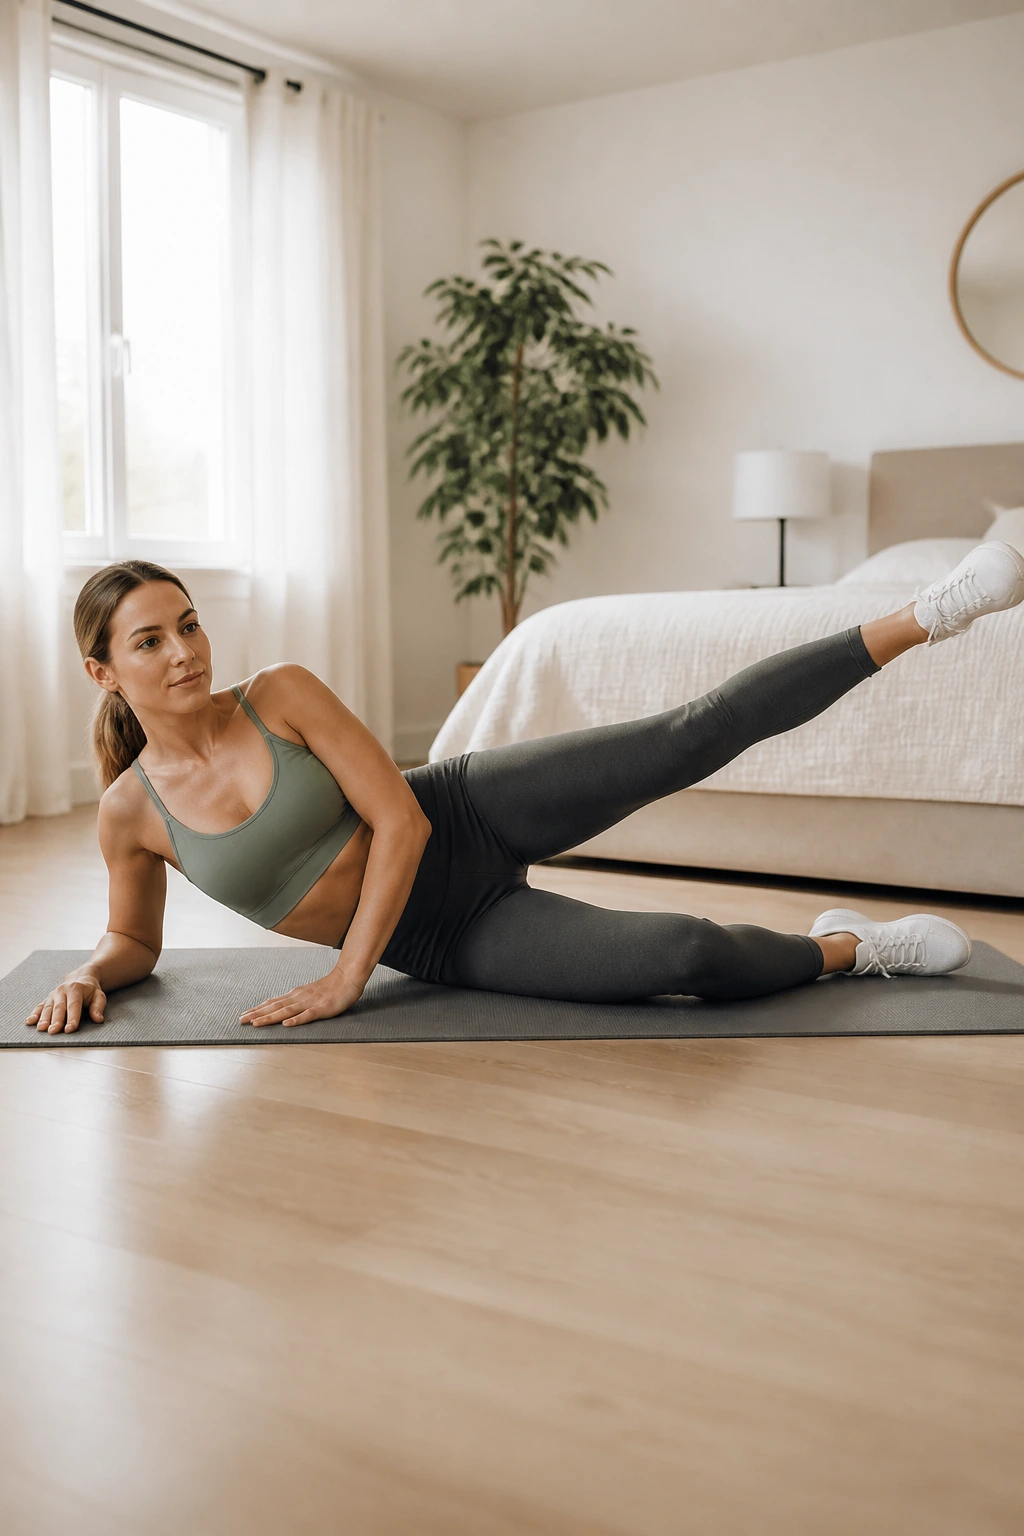
Side leg raises feel almost too gentle at first, which is exactly why they’re useful. They wake up the outer hips, and that helps with walking, balance, and a lot of everyday movement.
You can do them lying on your side or standing while holding a chair. Lift one leg out to the side without tipping your torso, then lower it with control. The move should come from the hip, not from swinging the leg like a pendulum.
Do 10 to 12 reps per side for 2 sets. If you’re standing, keep the standing knee soft and your pelvis level. If you feel it in your lower back, slow down and reduce the range. These look easy. They are not always easy.
13. Hip Hinge Good Mornings
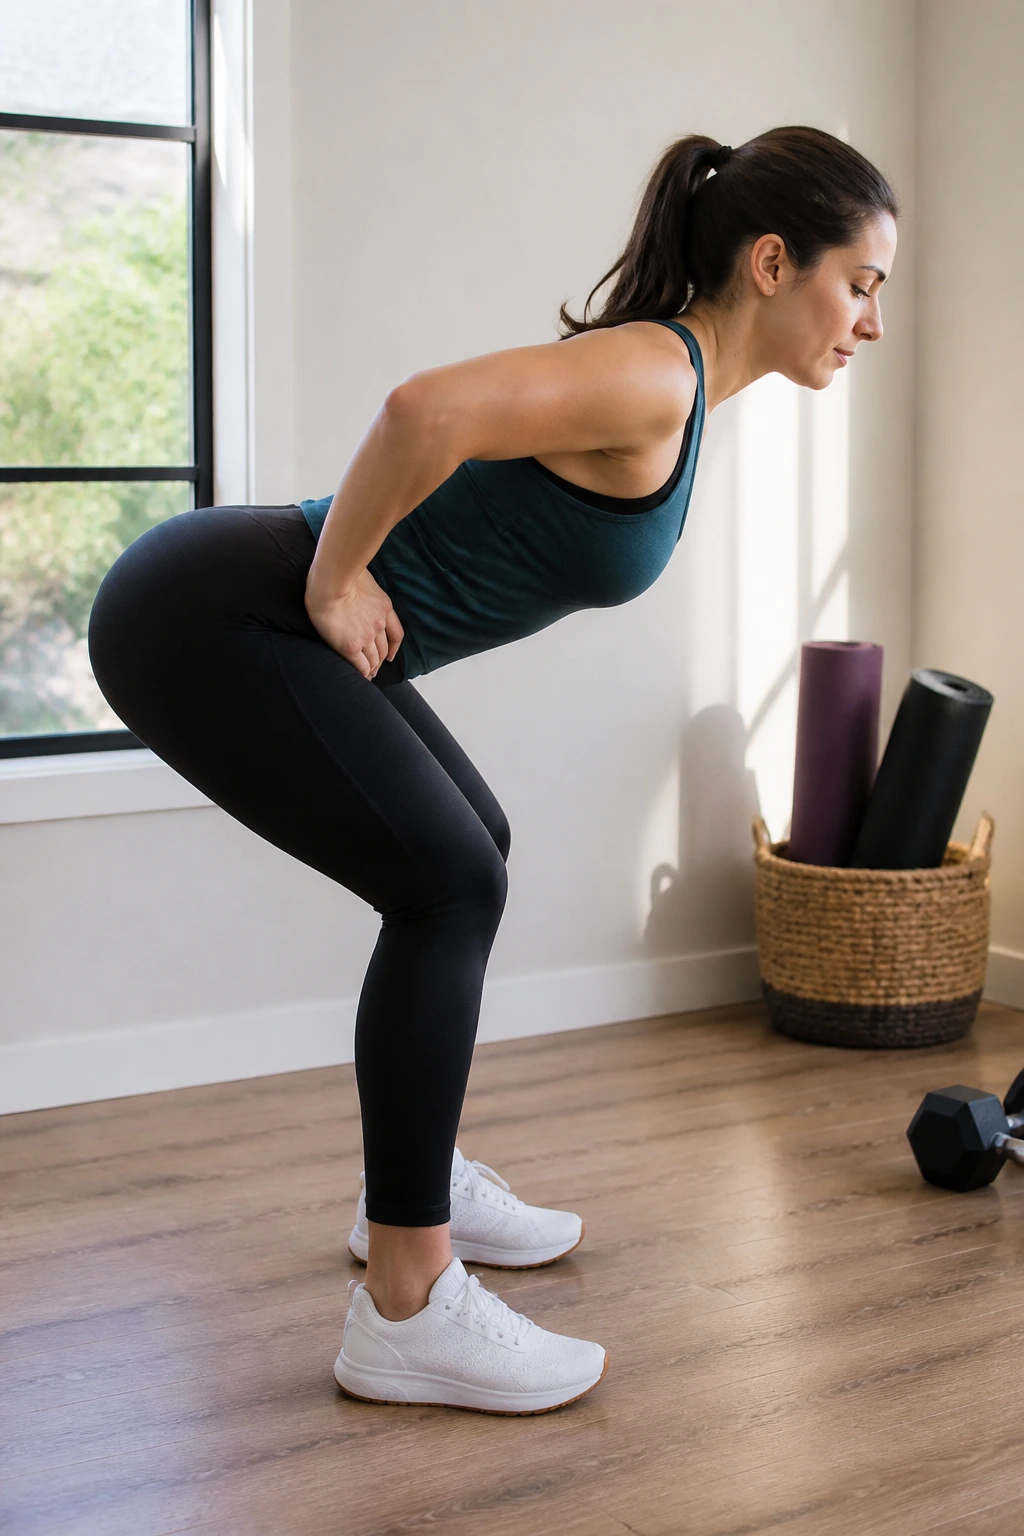
A lot of people bend with their back when they should be bending from the hips. Good mornings teach the opposite, and they do it with almost no equipment.
Keep the hinge clean
- Stand with feet hip-width apart.
- Place hands on your hips or across your chest.
- Soft bend in the knees.
- Push your hips back until your torso leans forward a little.
- Stand by squeezing your glutes.
Do 8 to 10 slow reps for 2 rounds. You should feel the stretch in the backs of your legs, not a sharp tug in your lower back. If the movement turns into a squat, send the hips farther back. If you’ve got a broomstick or towel across your back, that can help you feel the line from head to tailbone.
14. Knee Push-Ups
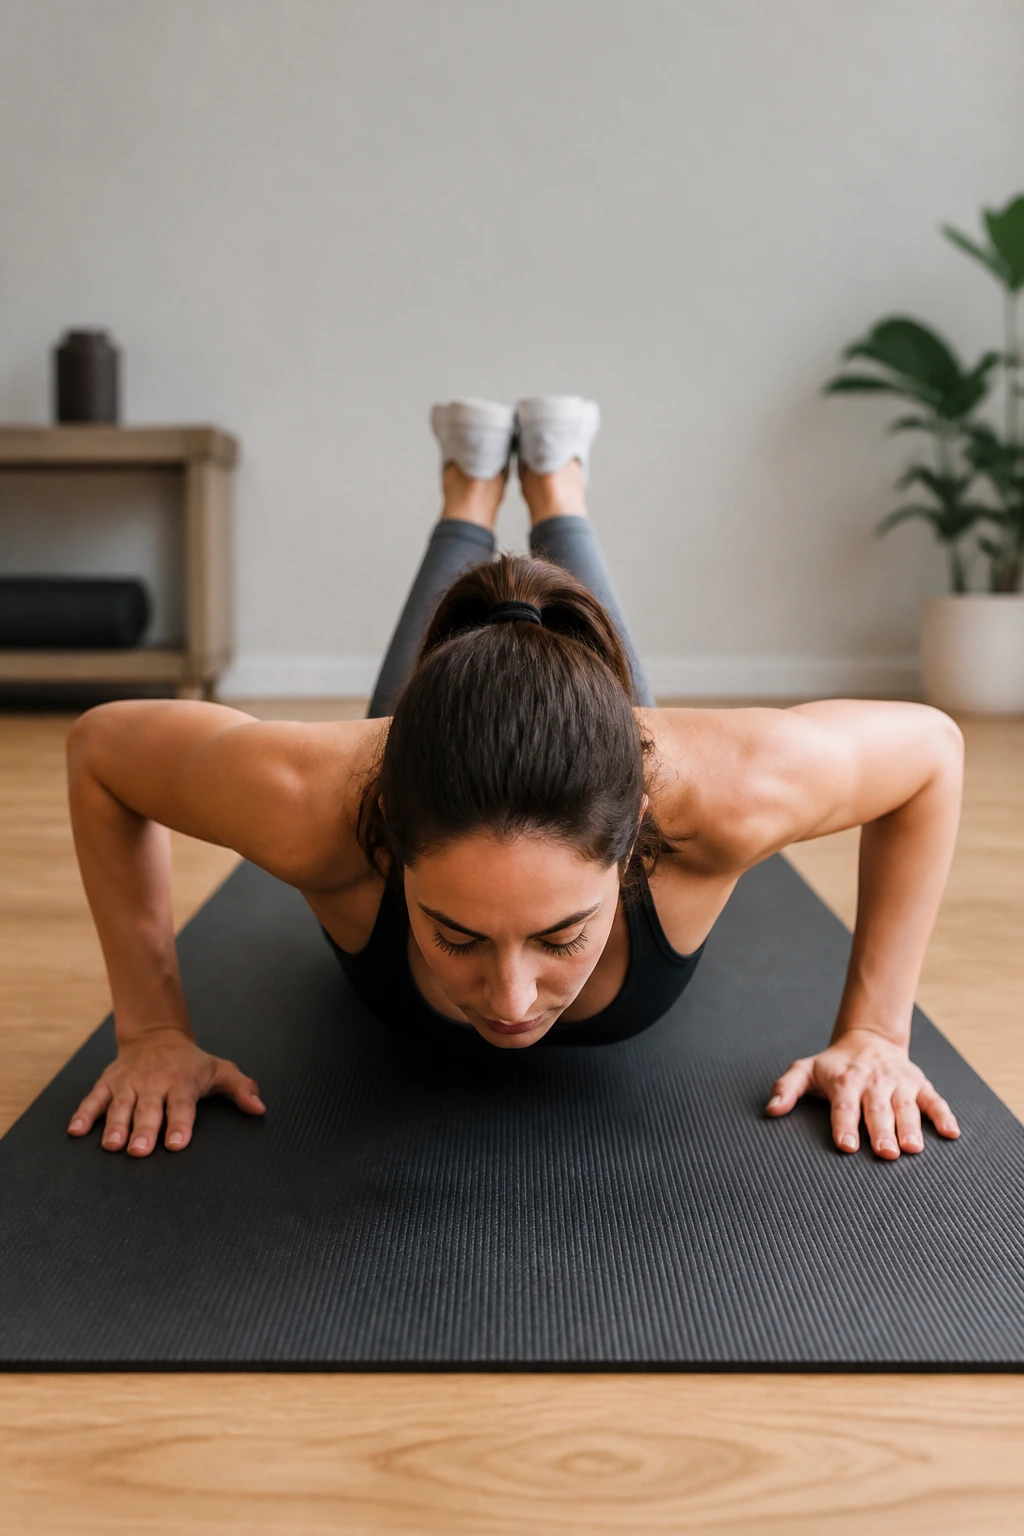
Knee push-ups are not a consolation prize. They’re a legitimate strength move, and they’re one of the cleanest ways to build pressing strength before full push-ups.
Compared with wall or incline push-ups, these ask a little more from your chest and core. That’s the point. Start on hands and knees, walk your hands a touch forward, and lower your chest toward the floor with control. Keep your hips from sagging.
A good starting set is 5 to 8 reps. If your shoulders feel pinchy, bring your hands slightly wider. If your lower back arches, tighten your stomach and shorten the range. I’d rather see a small, controlled rep than a messy deep one any day.
15. Shadow Boxing
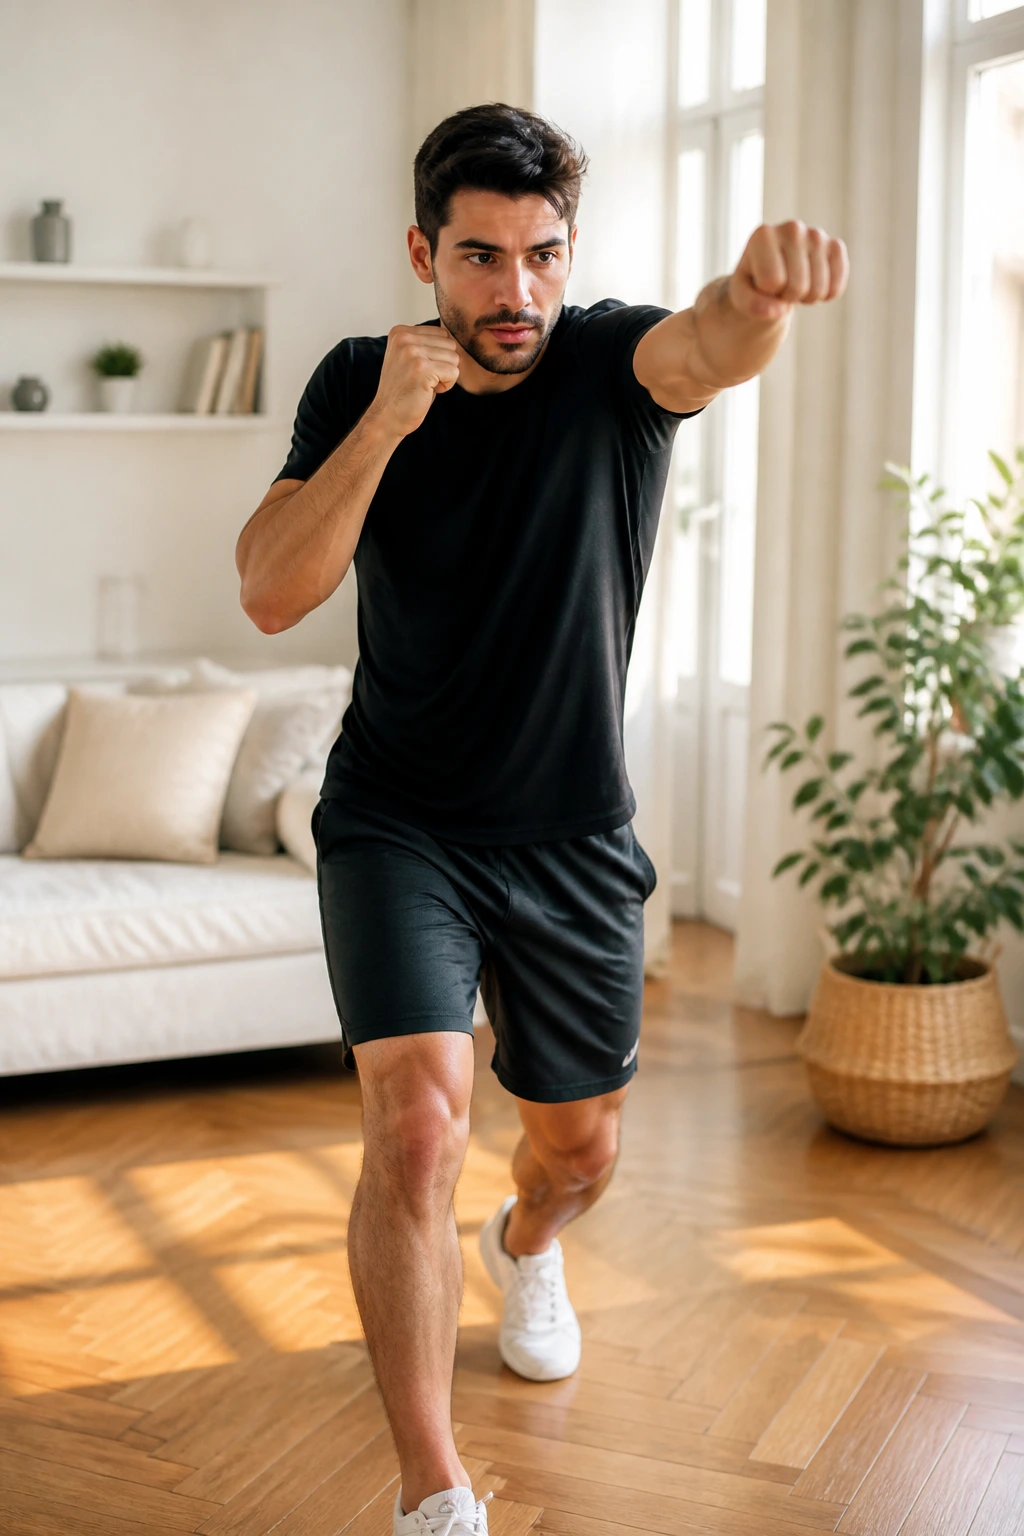
Shadow boxing is one of my favorite beginner cardio moves because it feels alive. Your feet move, your shoulders wake up, your arms work, and you can keep the pace light or turn it up without needing any gear.
Imagine you’re bouncing lightly in place and throwing relaxed punches into open air. Jab, cross, jab, cross. Keep your fists loose until the moment they extend, then bring them right back to guard. Step side to side if that feels good.
A 30-second round can get your heart rate up fast, especially if you move your feet the whole time. You do not need to punch hard. In fact, don’t. Smooth rhythm beats wild effort here. It’s a cardio drill, not a street fight.
16. Low-Impact Jumping Jacks
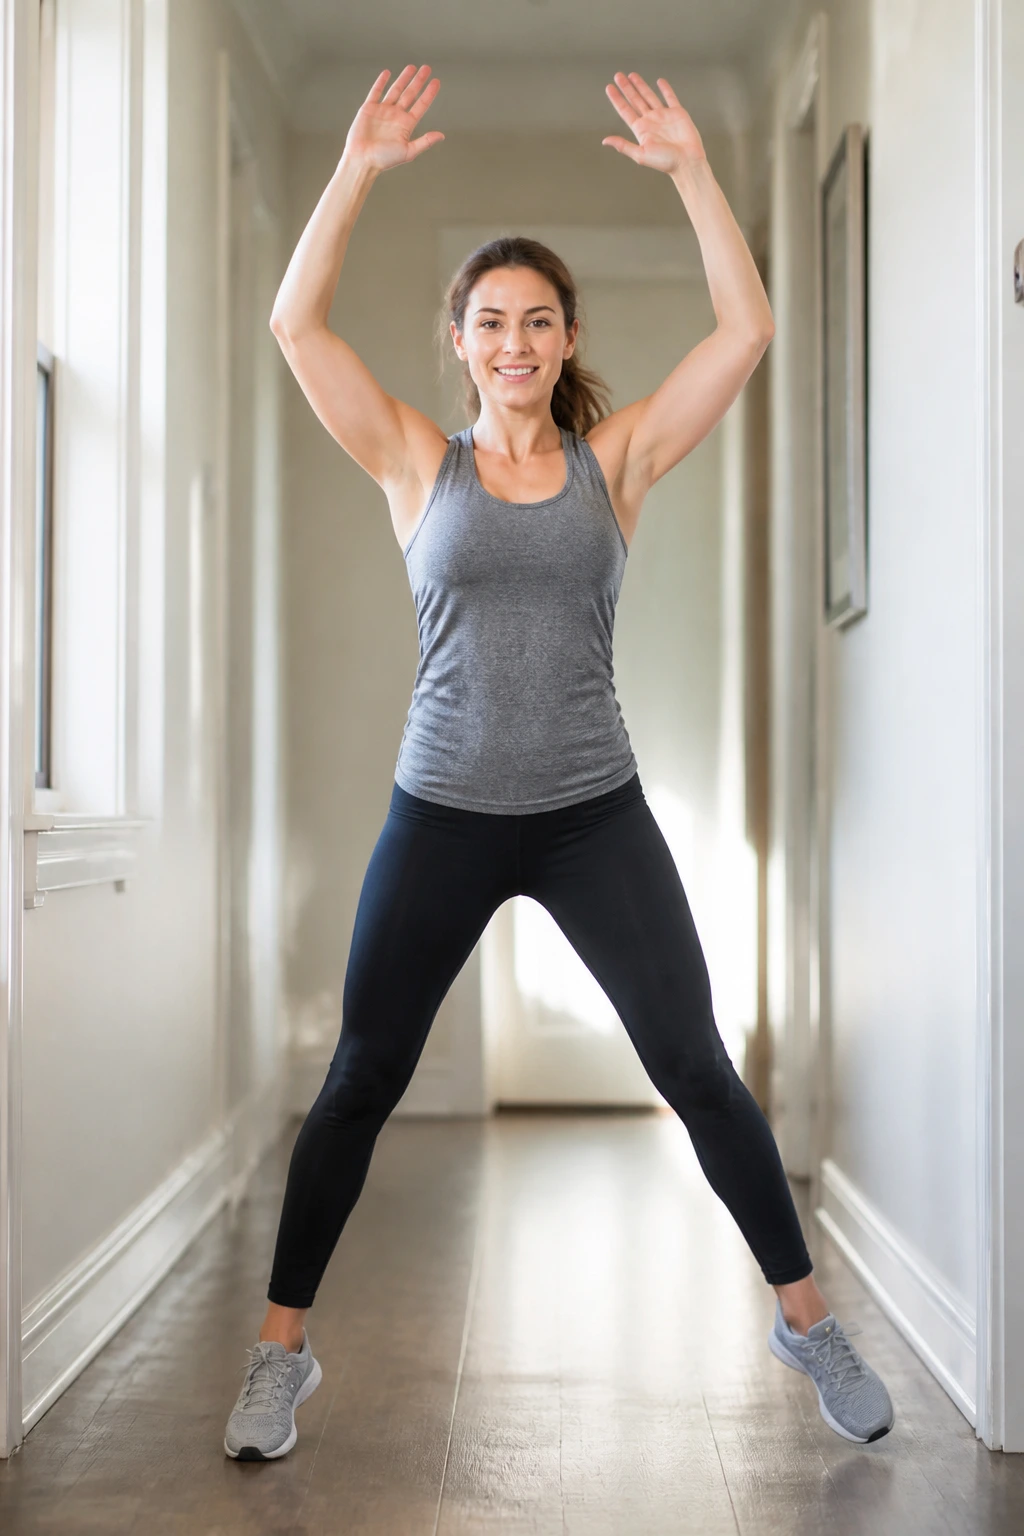
If regular jumping jacks feel like too much impact, step-jacks are the smarter choice. Same arm pattern. Less pounding.
Step one foot out to the side while raising your arms overhead, then step back to center and switch sides. Keep the movement springy, not frantic. Your feet should land softly, almost quietly.
A simple way to use them
- Start with 20 seconds on.
- Rest for 20 to 40 seconds.
- Repeat 3 to 5 rounds.
- Step wider if you want more work.
The arms matter as much as the feet. If your shoulders get tired before your legs do, slow the pace and shorten the arm path. That keeps the drill doable for longer, which is the whole point at the beginner stage.
17. Knee Plank
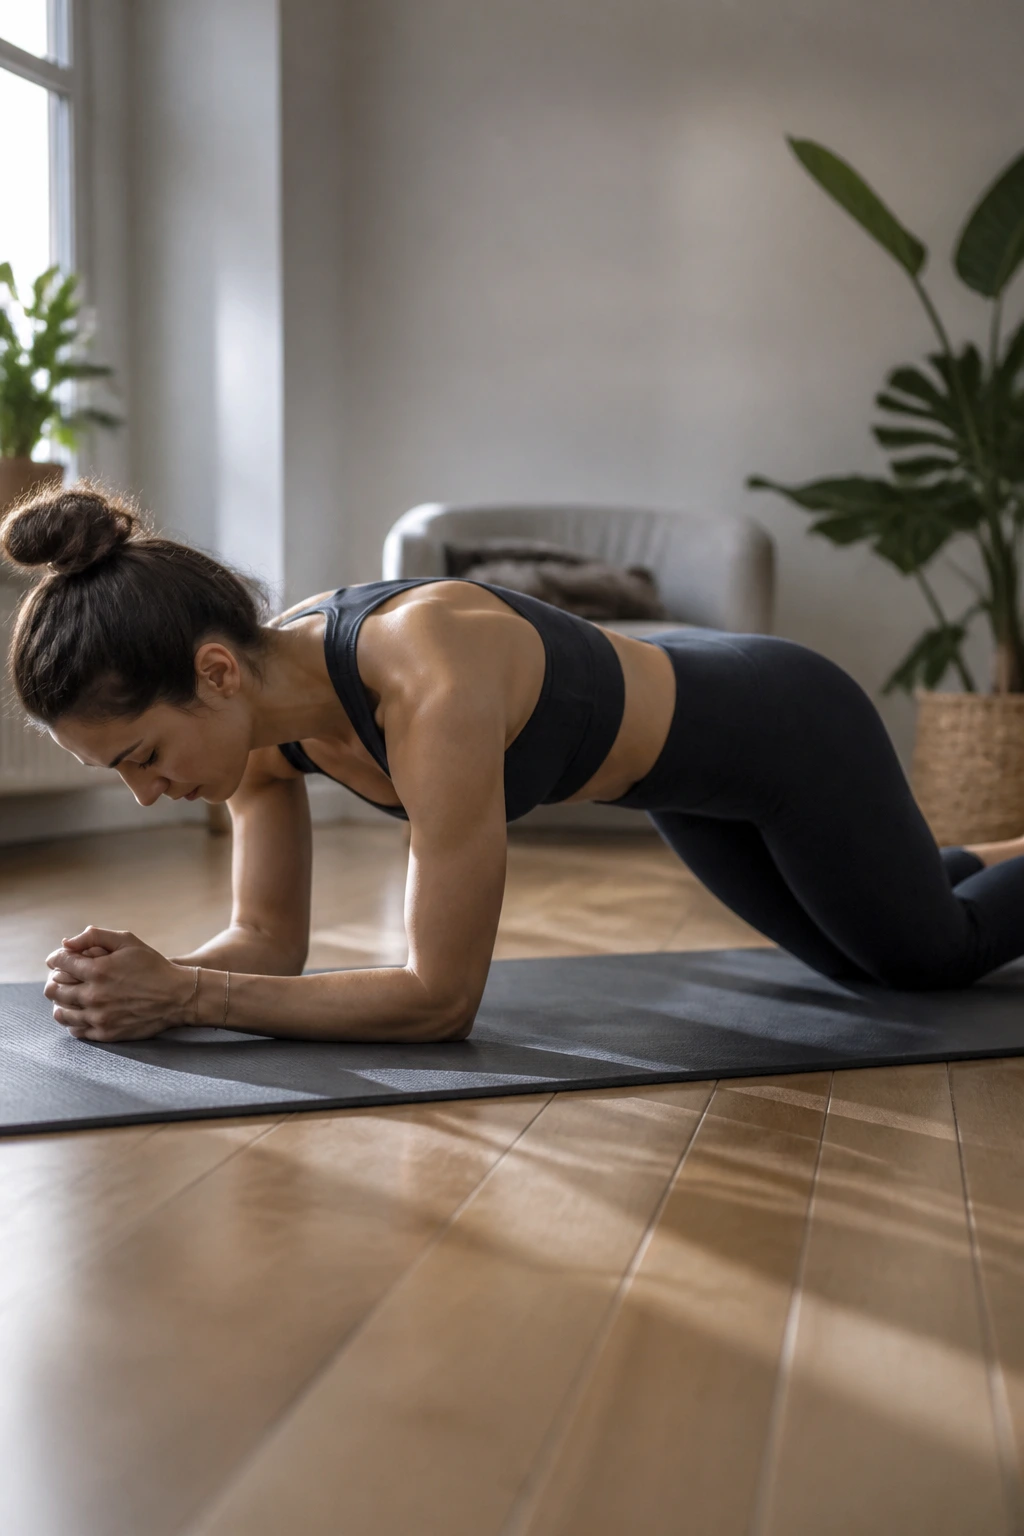
A knee plank is a safer place to learn how planking feels before you tackle the full version. It still asks for core tension, shoulder stability, and some patience.
Set your forearms on the floor, bring your knees down, and keep your body in one line from shoulders to knees. Pull your stomach in just enough to stop your lower back from sagging. That’s the sweet spot.
Hold for 10 to 20 seconds, rest, and repeat 3 times. If your hips are rising too high, bring them down a notch. If your lower back is taking over, stop, reset, and try a shorter hold. You don’t need a long plank to make this useful. You need a clean one.
18. Heel-to-Toe Walk
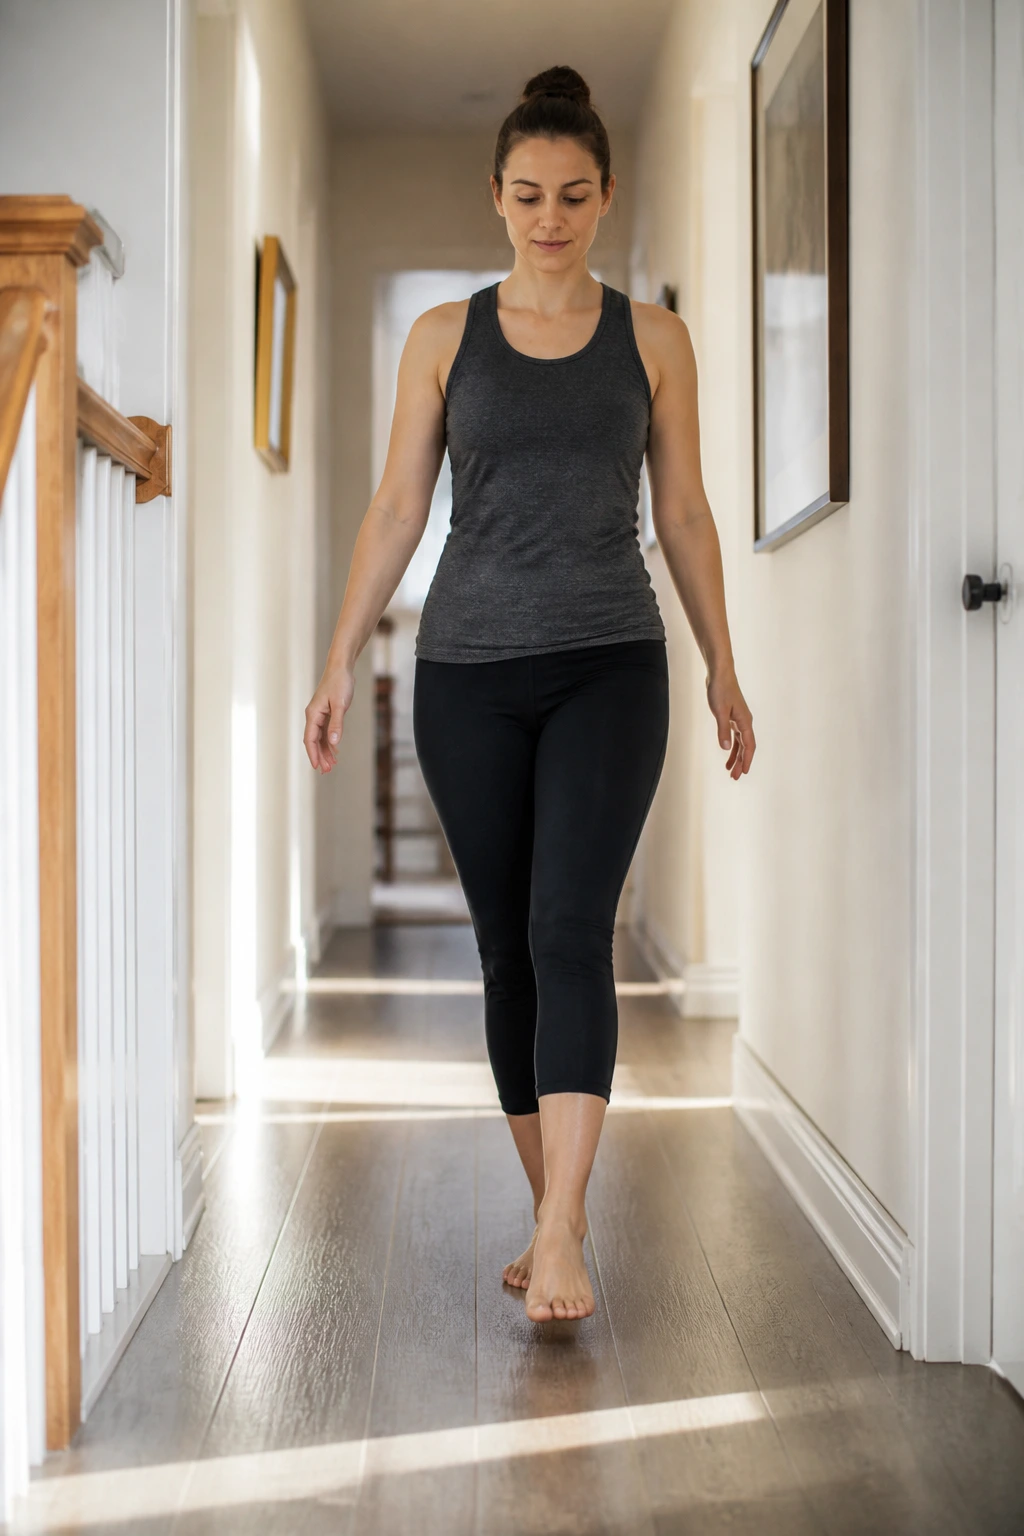
This one looks like balance practice, but it trains your ankles, feet, and lower legs in a way that carries over to almost everything else. It’s also easy to do in a hallway.
Place the heel of one foot directly in front of the toes of the other, then take a slow step forward and repeat. Keep your eyes forward, not glued to the floor the whole time. If balance is shaky, use a wall or counter nearby.
Useful details
- Walk 8 to 10 steps forward.
- Turn around and come back.
- Repeat 2 or 3 rounds.
- Keep your shoulders relaxed.
You’ll feel this more than you expect in the small stabilizing muscles around your ankles. That’s a good thing. It’s subtle work, and subtle work gets ignored too often.
19. Donkey Kicks
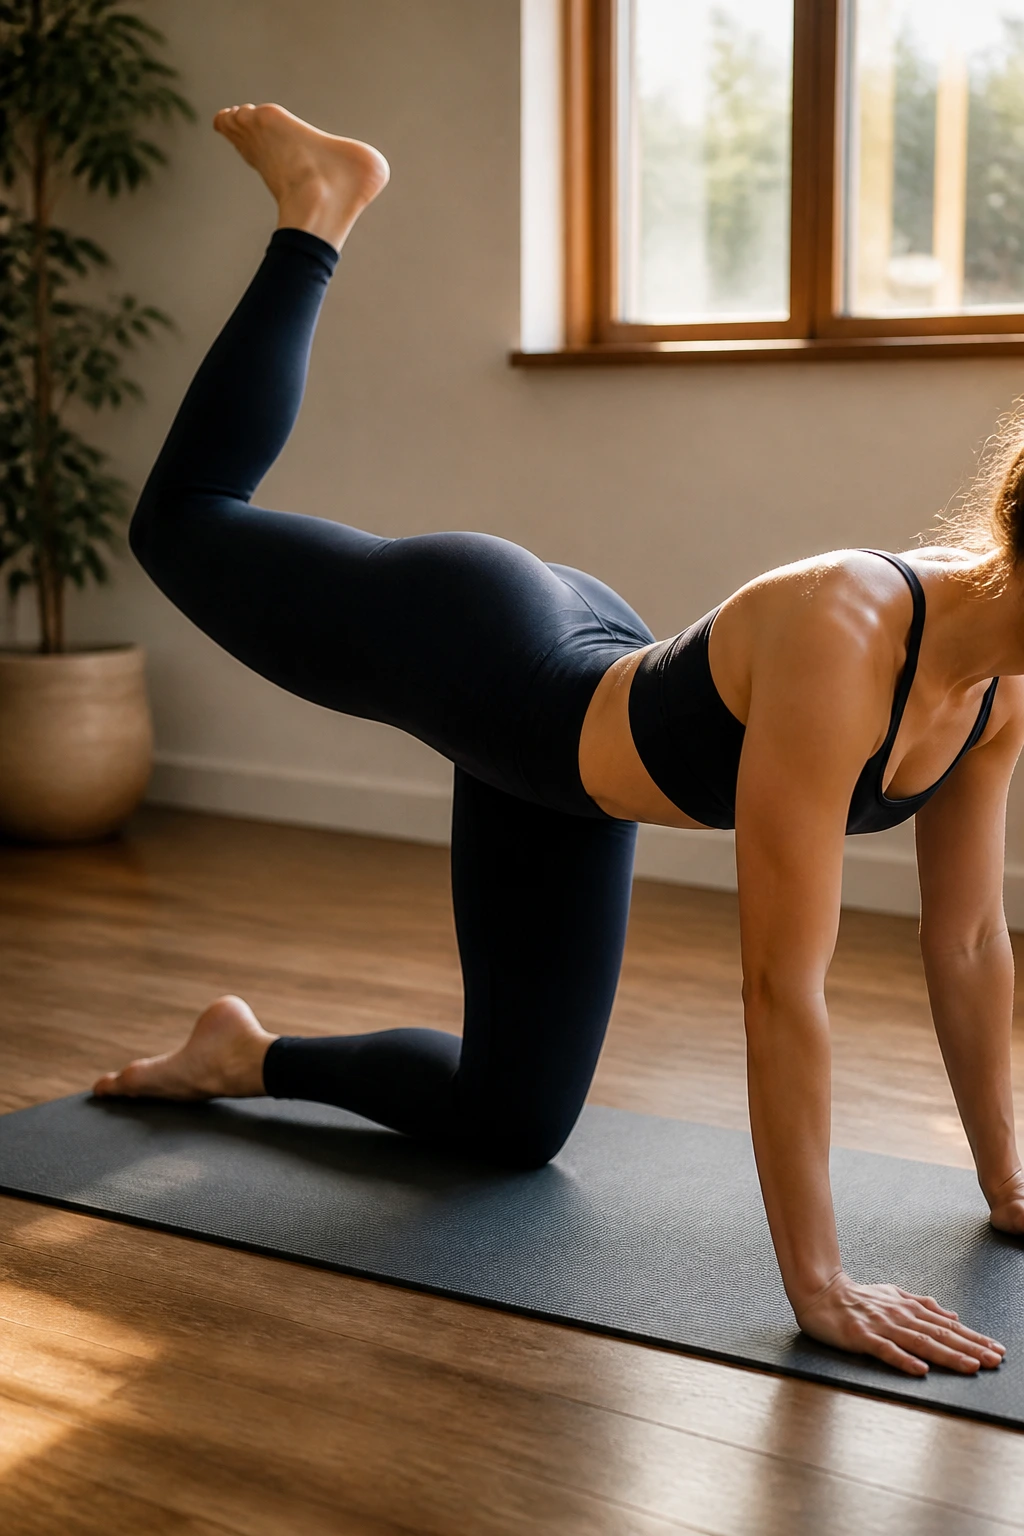
Why does a tiny leg lift make your glutes burn so fast? Because the movement cuts out momentum and puts the work where it belongs.
Start on hands and knees. Keep one knee bent at about 90 degrees, lift that foot toward the ceiling, then lower it without letting your lower back take over. The torso should stay quiet. No swaying. No twisting.
How to keep it honest
- Move slowly.
- Keep the knee bent.
- Stop the lift when the glute tightens.
- Do 8 to 12 reps per side.
If you feel your lower back arching, the leg is going too high. Lower it a little and try again. That small correction changes the exercise from a back squeeze to a glute exercise. And that’s the whole game.
20. Fire Hydrants
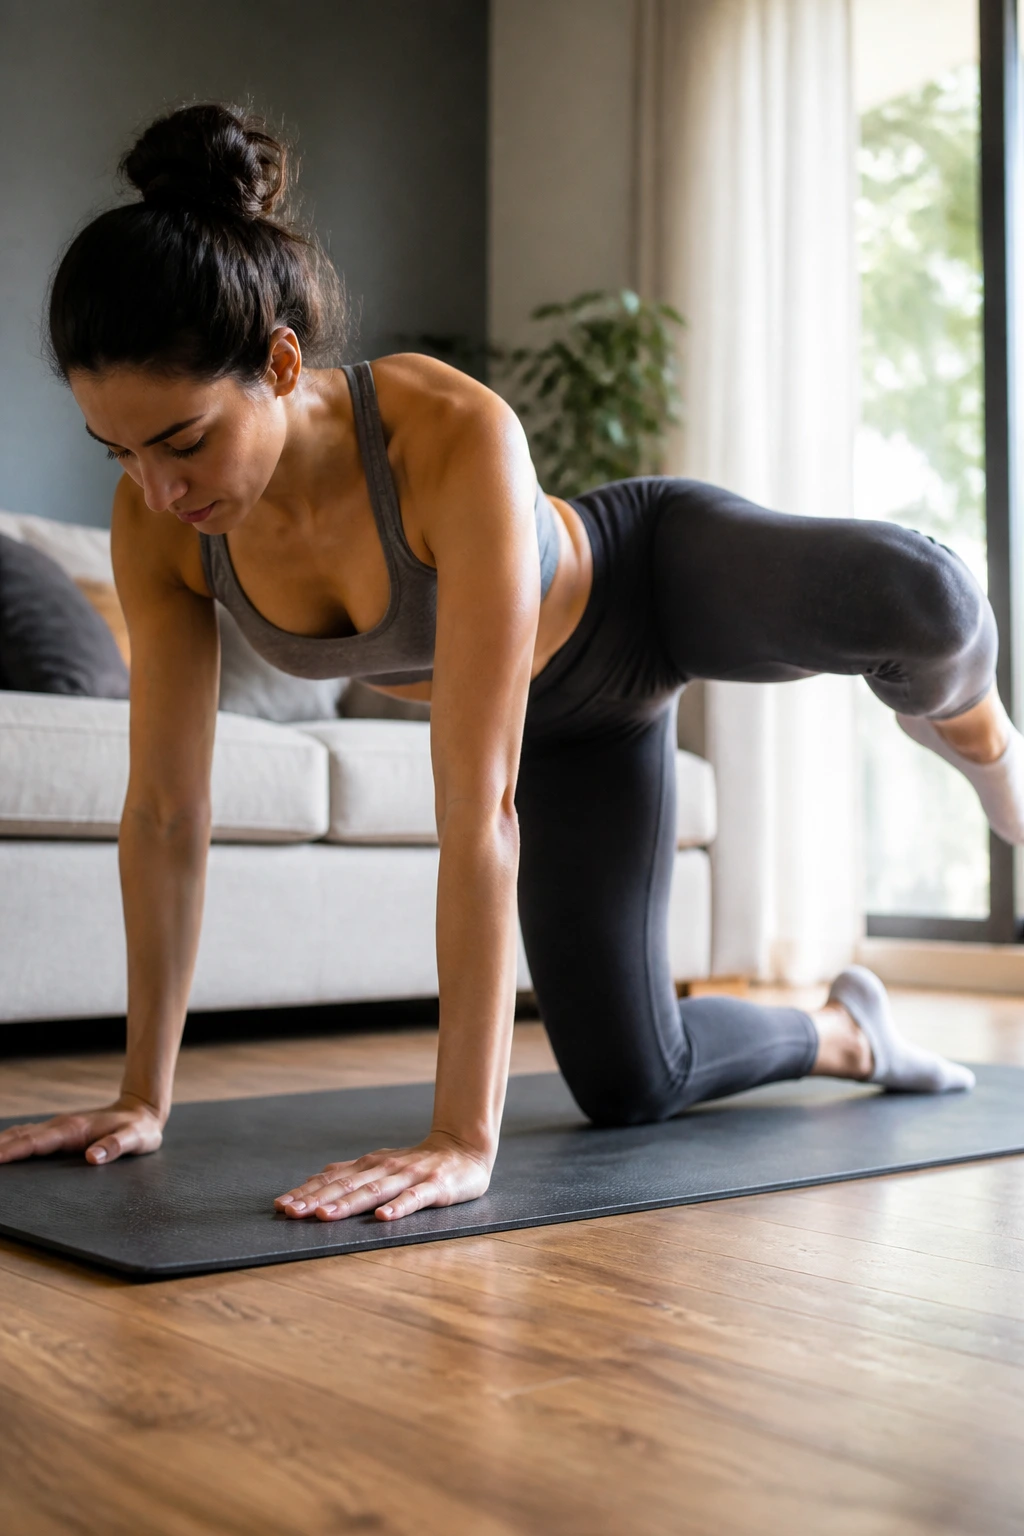
Fire hydrants are a little awkward, which is fine. Awkward doesn’t mean useless. They work the side glutes and help build hip stability, especially if you spend a lot of time sitting.
Get on hands and knees, lift one bent knee out to the side like a dog at a fire hydrant, then lower it with control. Keep your hips square to the floor. If your torso rolls open, reduce the range.
Do 8 reps per side for 2 or 3 sets. I like this move as a follow-up to glute bridges or donkey kicks because it hits the hips from a different angle. If the floor bothers your knees, put a folded towel or mat underneath. Small comfort fix, big difference.
21. Slow Mountain Climbers
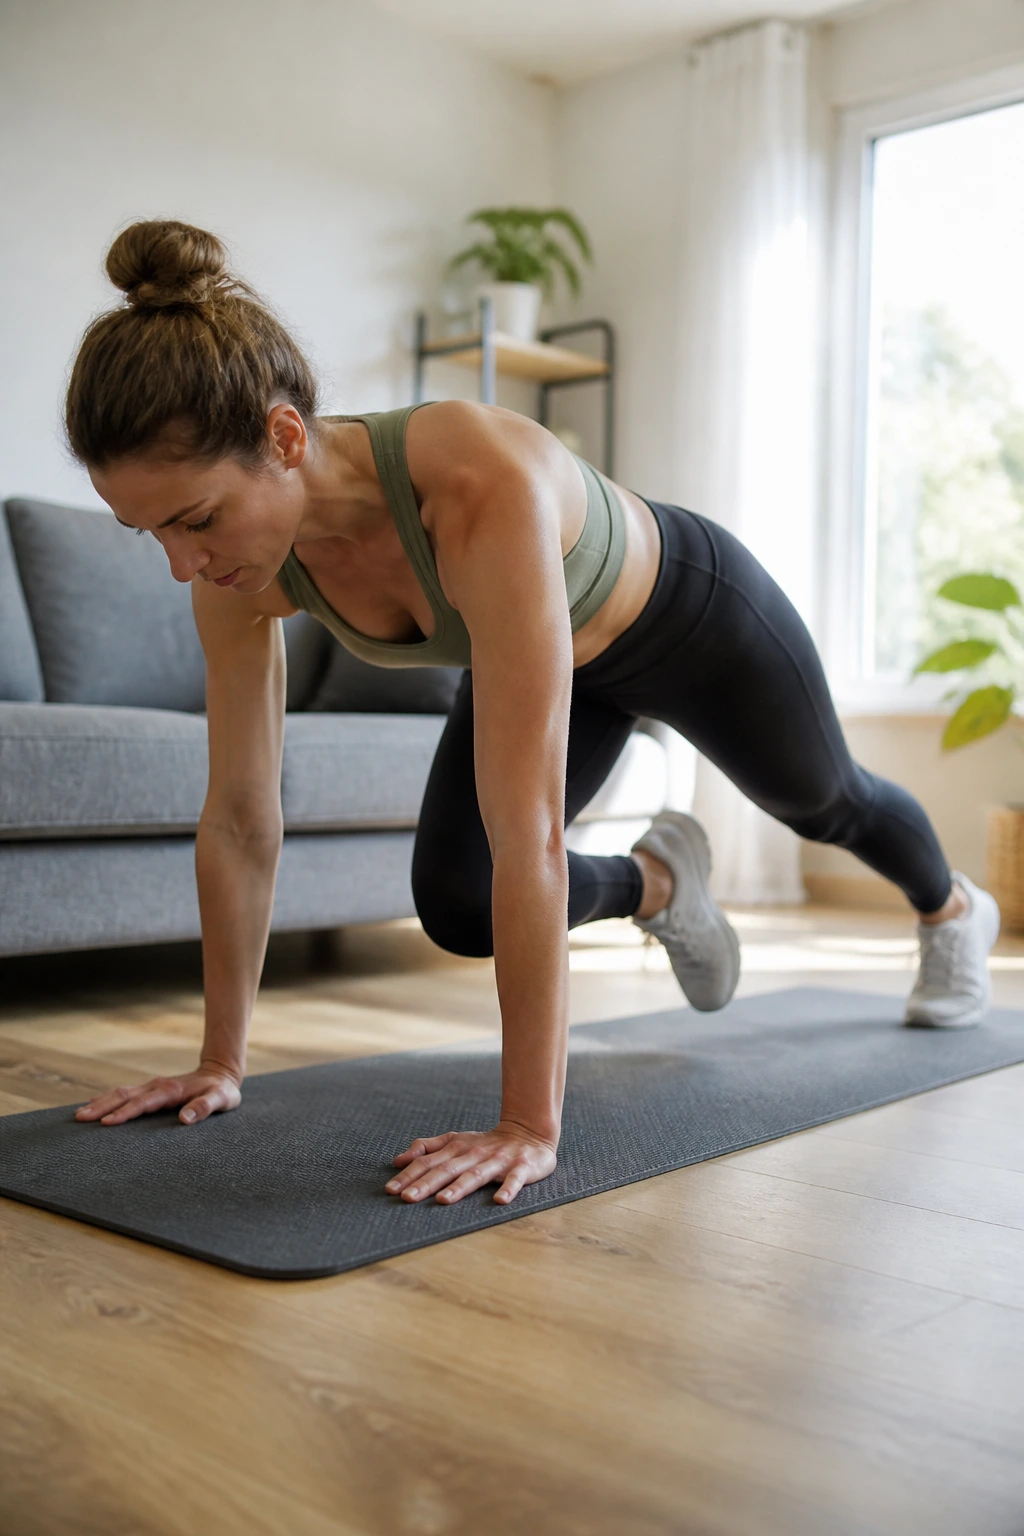
Fast mountain climbers can feel like a cardio punishment. Slow mountain climbers feel more like a beginner core drill with a pulse.
Start in a high plank or place your hands on a sturdy couch, bench, or counter if the floor is too much. Bring one knee toward your chest, set it back, then switch sides. Keep your shoulders stacked over your hands and your hips from bouncing around.
Keep the pace easy
- Aim for 20 seconds of work.
- Move one knee at a time.
- Keep the core tight, not rigid.
- Elevate your hands if needed.
The slower version teaches control first. Once that feels solid, speed comes later. Do not rush it just because the name sounds athletic. A clean slow rep gives you more than a sloppy fast one.
22. Superman Holds
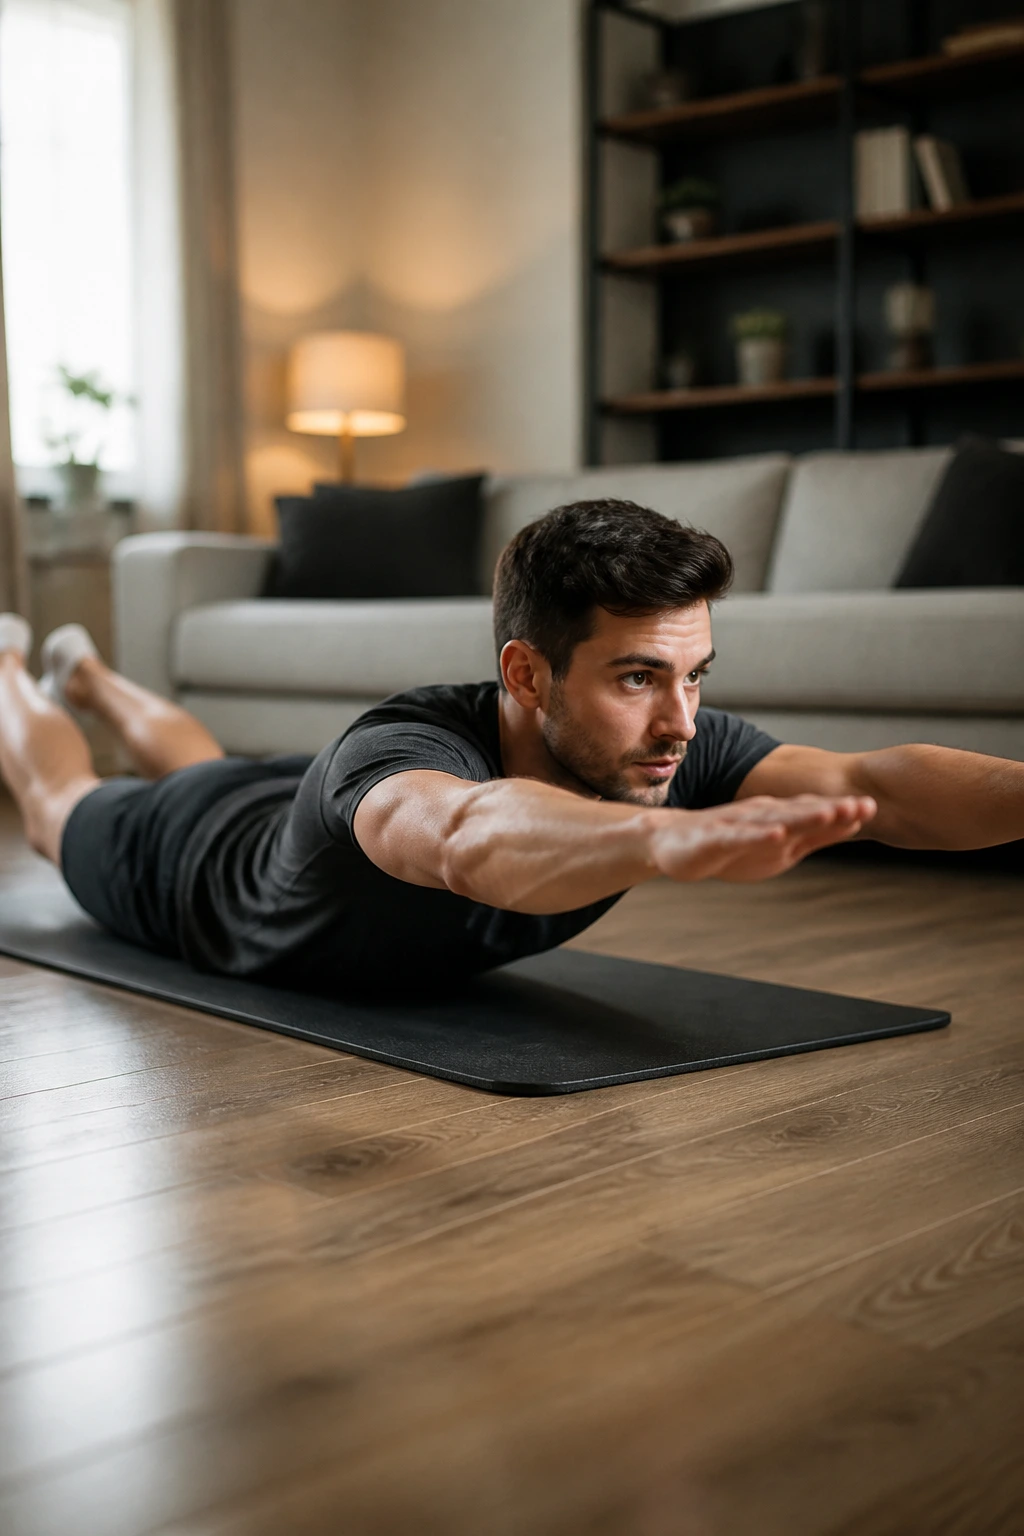
Superman holds are old-school, and they still earn their keep. They wake up the back of your body without equipment, and they remind you that your back muscles need attention too.
Lie face down, extend your arms forward, and lift your chest and legs just a few inches off the floor. Hold for a few seconds, lower, and repeat. Keep the lift small. Bigger is not better here.
A good starting point is 5 to 8 holds of 5 seconds each. If your neck feels strained, look down at the floor instead of craning up. If the lower back feels pinched, reduce the lift and make the hold shorter. This move should feel like a controlled squeeze, not a backbend contest.
23. Side Plank from the Knees
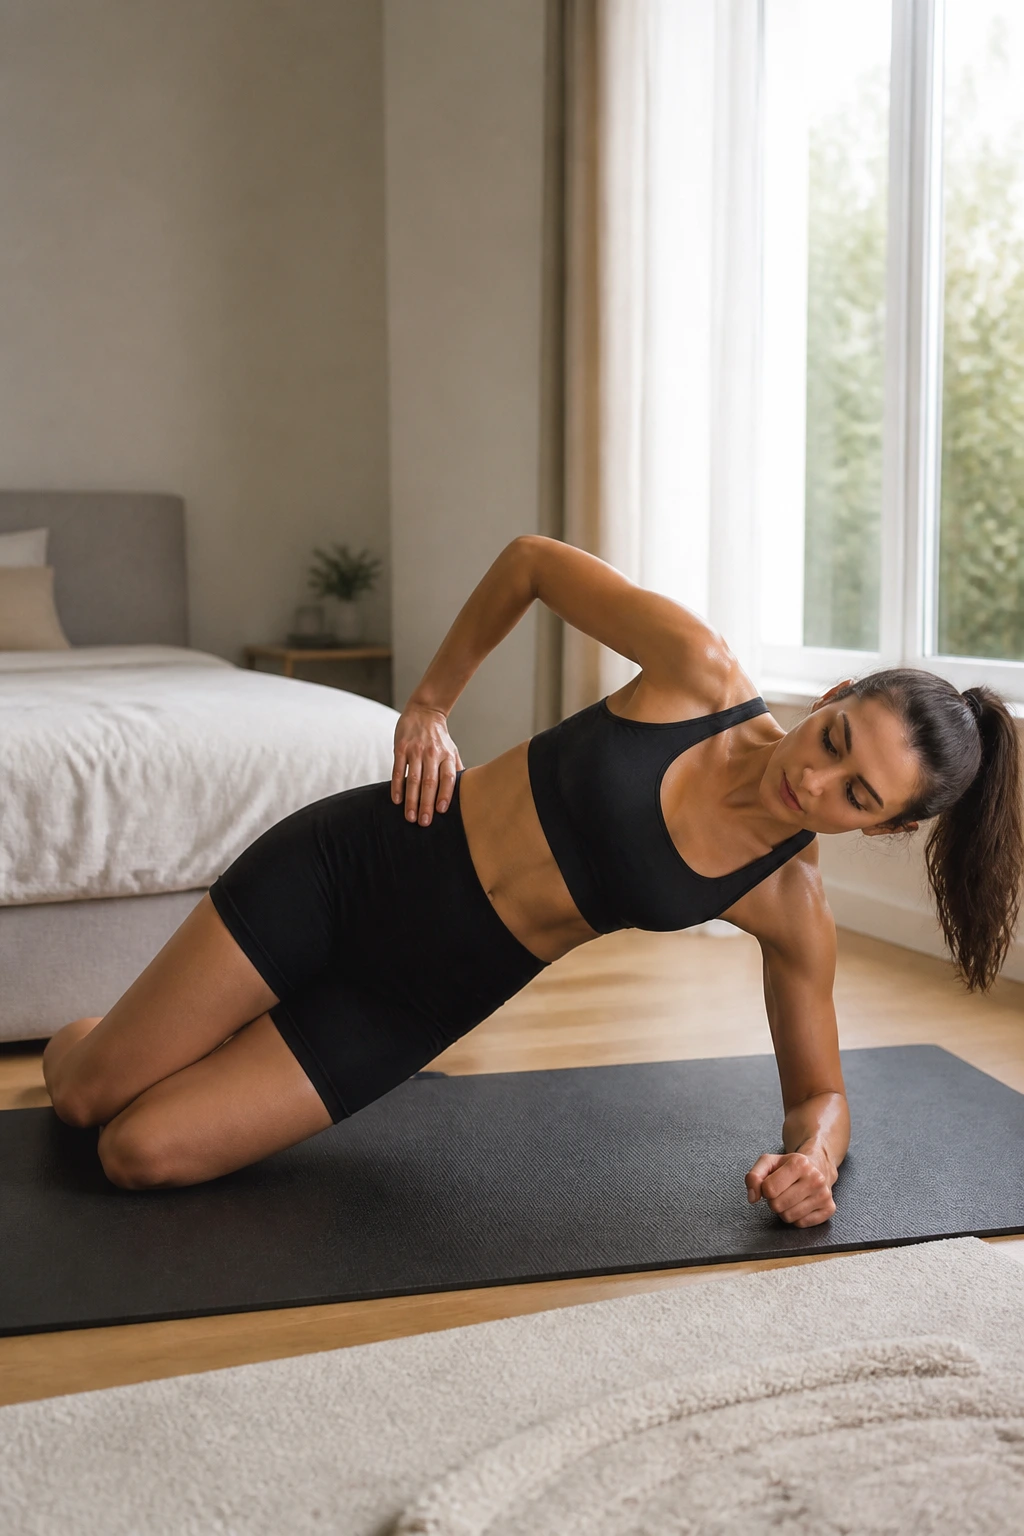
Side planks from the knees are a cleaner first step than the full version. They train the obliques, hips, and shoulder without asking too much from your balance.
Set your elbow under your shoulder, bend your knees, and lift your hips so your body makes a straight line from head to knees. Keep the top shoulder stacked over the bottom one. Then breathe. People forget that part.
Compared with a full side plank, this version is easier on the wrists and the lower back. It’s also more forgiving if your shoulder strength is still building. Hold for 10 to 15 seconds per side and repeat 2 or 3 times. If you feel the bottom hip dropping, stop the set and reset. Clean position beats stubborn holding.
24. Step-Ups on Stairs
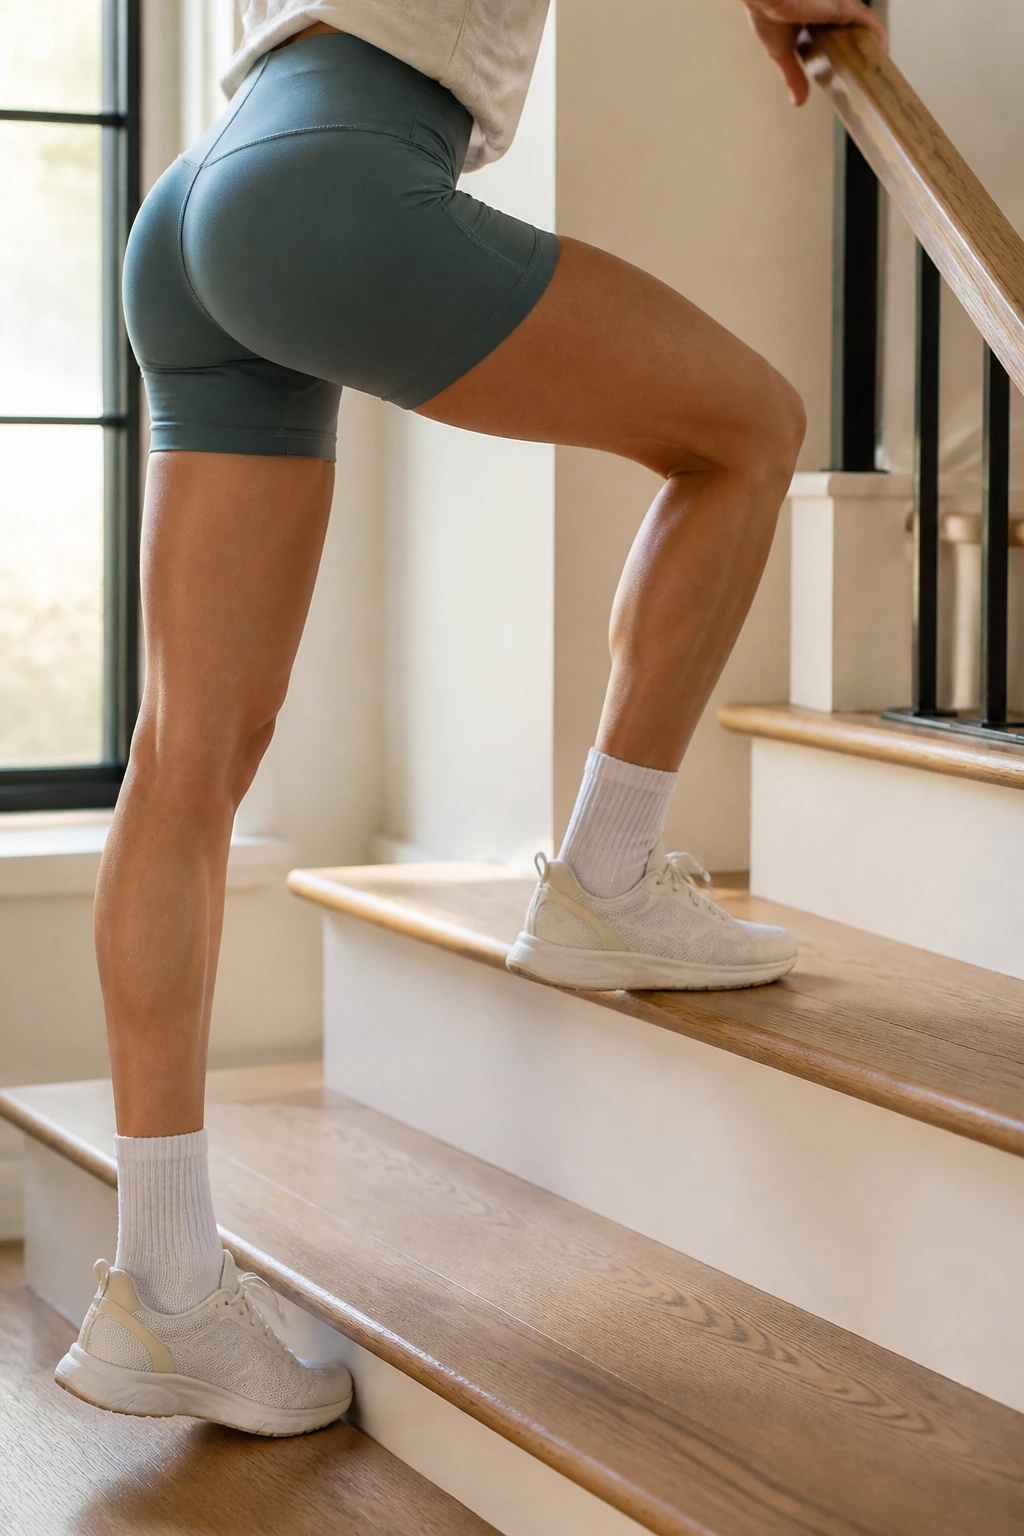
A single stair can turn into a solid workout if you use it with care. Step-ups train the legs, glutes, and balance all at once, and they feel closer to daily life than a lot of gym moves.
Step onto the first stair with one foot, press through the heel to stand, then step back down and switch sides. Hold the rail if you want extra confidence. Keep the movement smooth and avoid pushing off the back leg too much.
A few details that matter
- Use the lowest safe step.
- Keep your whole foot on the stair.
- Start with 6 to 8 reps per leg.
- Move slowly on the way down.
The lowering phase is where beginners rush and wobble. Don’t. That part teaches control. If stairs aren’t available, a sturdy step platform or curb can work, as long as it does not slide.
25. Five-Minute Mobility Flow
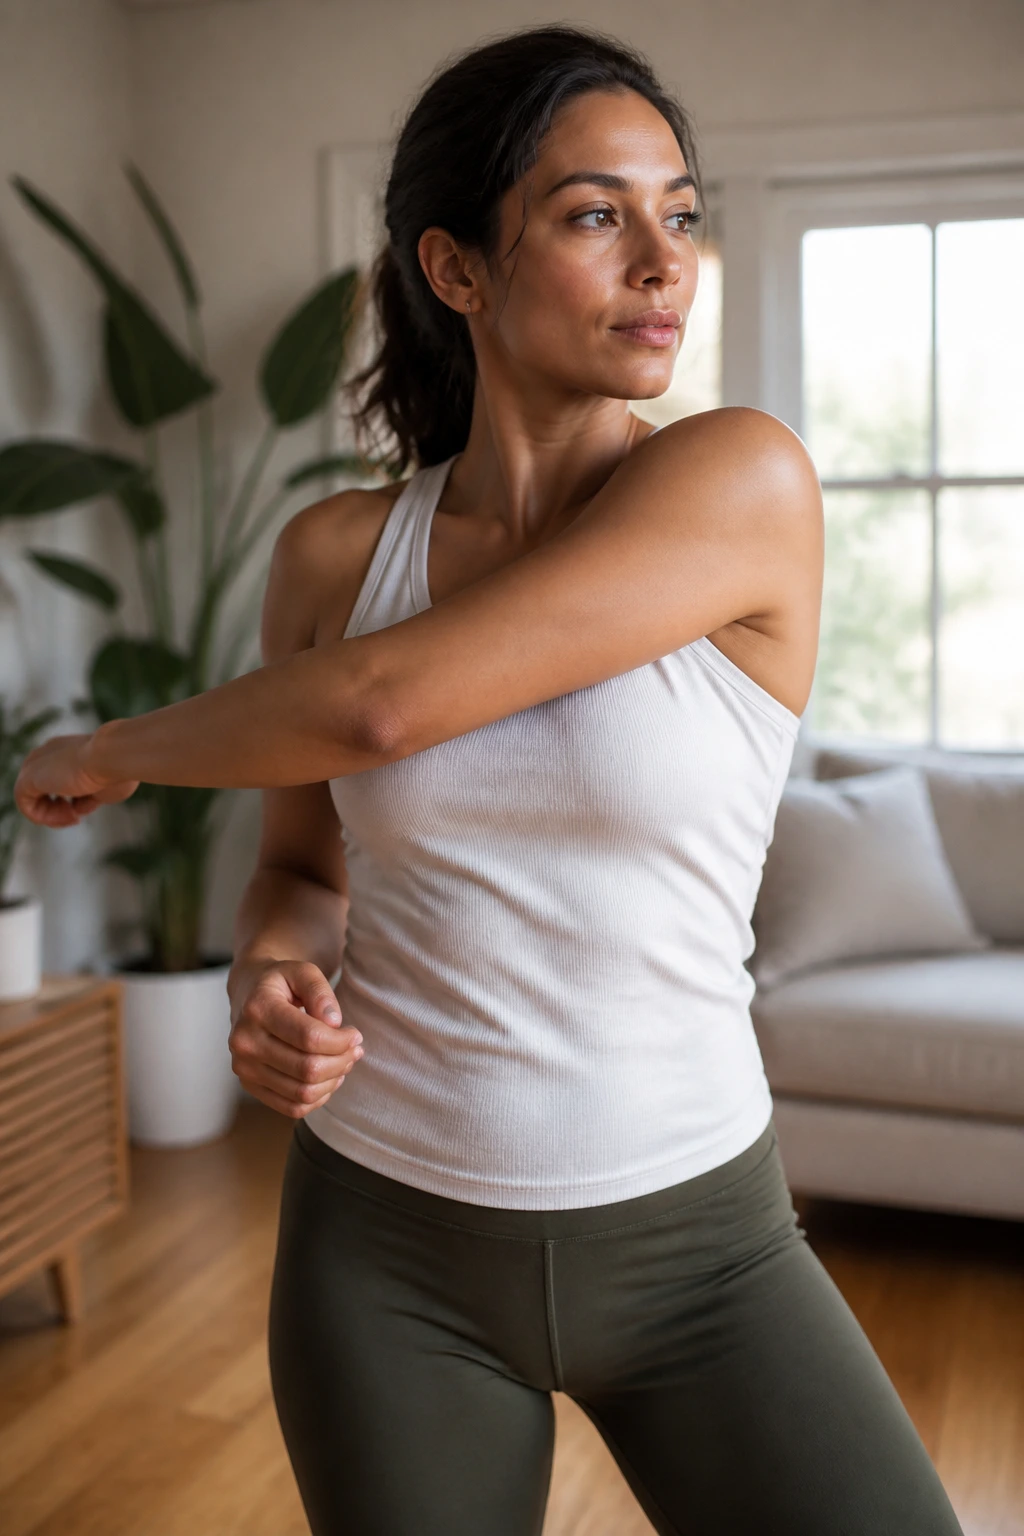
On sore days, I like a short mobility flow more than a “real workout” that feels too big to start. It keeps the body moving, loosens stiff spots, and gives you a clean way to show up without overthinking it.
Try a simple sequence: 30 seconds of marching in place, 30 seconds of arm circles, 30 seconds of hip circles, 30 seconds of ankle rolls, 30 seconds of gentle torso twists, and 30 seconds of forward reach with a soft knee bend. Then repeat the loop once. That is five minutes, give or take.
How to string it together
- Keep every move easy and smooth.
- Breathe through your nose if you can.
- Move only in a pain-free range.
- Use it as a warm-up or a recovery day drill.
This kind of session matters because it keeps the habit alive. Not every workout needs to leave you sweaty. Some of them just need to make your body feel less rusty.
Final Thoughts
The best beginner workout is the one you can finish without bargaining, whining, or needing a nap on the floor afterward. That usually means starting smaller than your ego wants and letting clean movement do the work.
A chair, a wall, a stair, and a little floor space can carry you farther than people think. Keep the reps modest, the pace steady, and the form honest, and you’ll build more than strength. You’ll build trust with your body.
And that’s the part that tends to stick.
