



Most at-home strength workouts fail for one boring reason: they try to copy the gym without the gear. A backpack, a chair, a towel, and a little patience can do more than people think, as long as the work is built around tempo, single-leg loading, and honest ranges of motion.
A loaded bag held tight to the chest can make squats feel heavy. A slick floor turns hamstring curls into a lesson. Even a wall sit in a narrow hallway can leave your quads shaking for an hour afterward.
That is the fun part.
The routines below are built to scale. Some are quiet and slow, some will make your breathing pick up fast, and a few are better with a chair or step than with a dumbbell you do not own. If you keep the form clean and pick the right level, you can train hard in a small room without turning it into a circus.
1. Backpack Goblet Squat Ladder
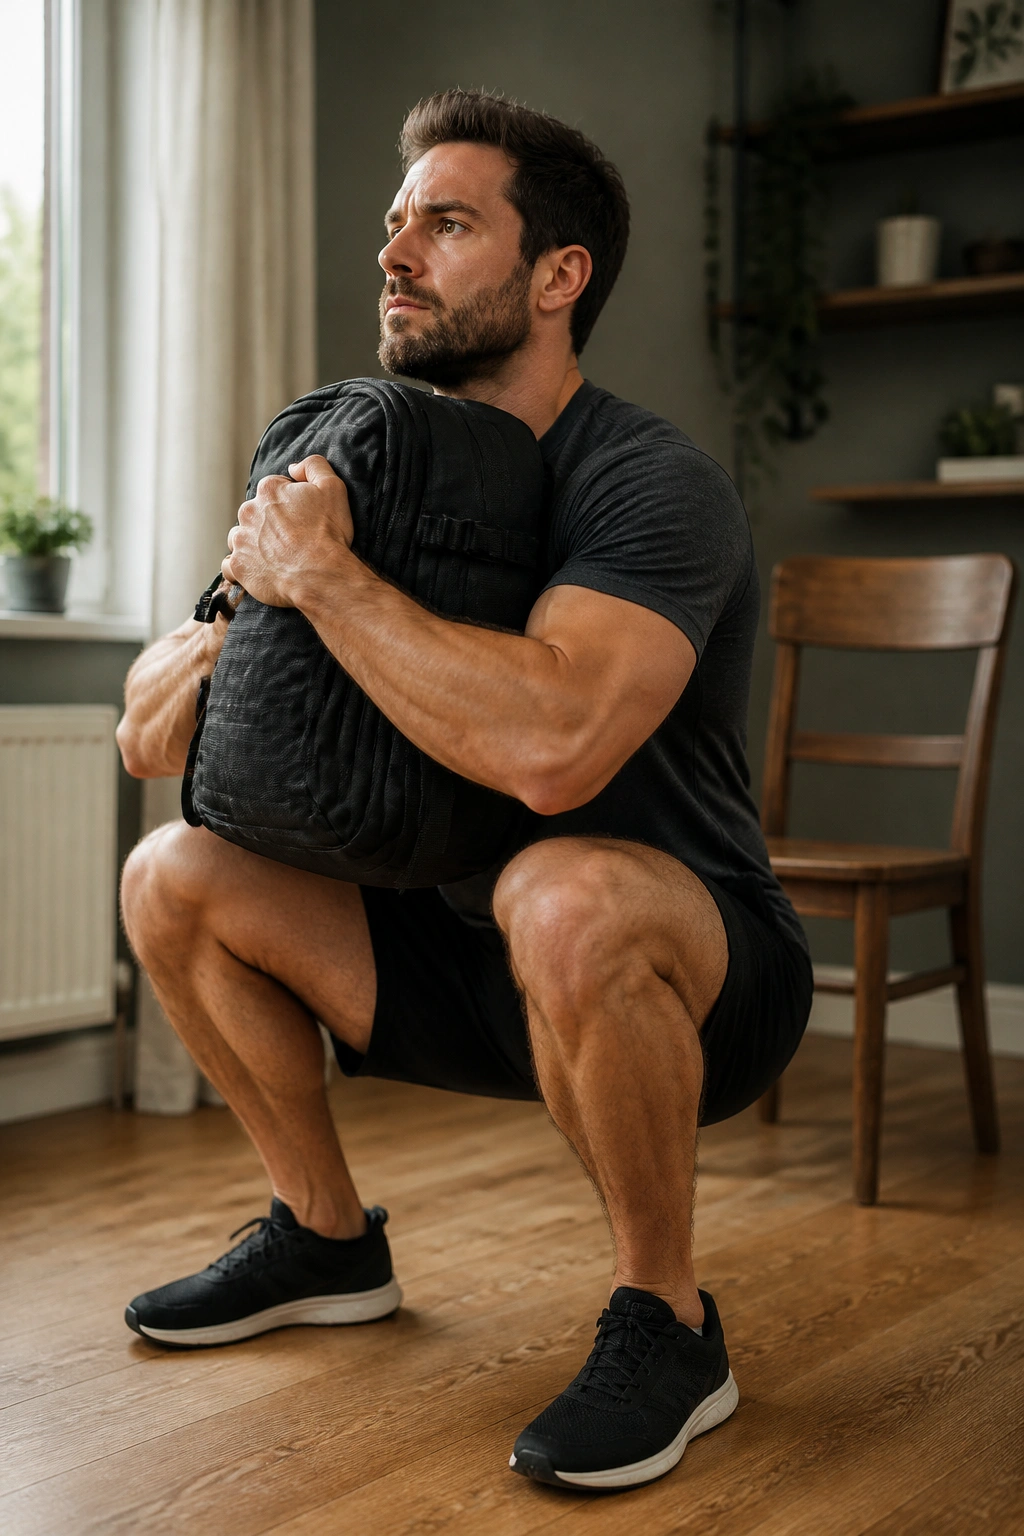
A loaded backpack turns an ordinary squat into real strength work fast. Hold it tight at chest height, brace your ribs down, and treat the descent like you mean it.
Run this as a ladder: 10 reps, 8 reps, 6 reps, 4 reps, with 45 to 60 seconds of rest between rounds. Keep your feet about shoulder-width apart, sit between your hips, and stop the descent when your thighs are at least parallel or your back starts to round.
How to load it
- Start with books, canned goods, or water bottles packed snugly so the weight does not slosh around.
- Zip the bag tight and hug it to your sternum; if it hangs low, the squat gets awkward.
- Use a chair or couch behind you if you want a cleaner depth target.
If the bodyweight version feels easy, slow the lowering phase to 3 or 4 seconds. If your knees cave in, shorten the stance a little and think about spreading the floor with your feet.
One clean rep beats three sloppy ones.
2. Incline Push-Up and Row Superset
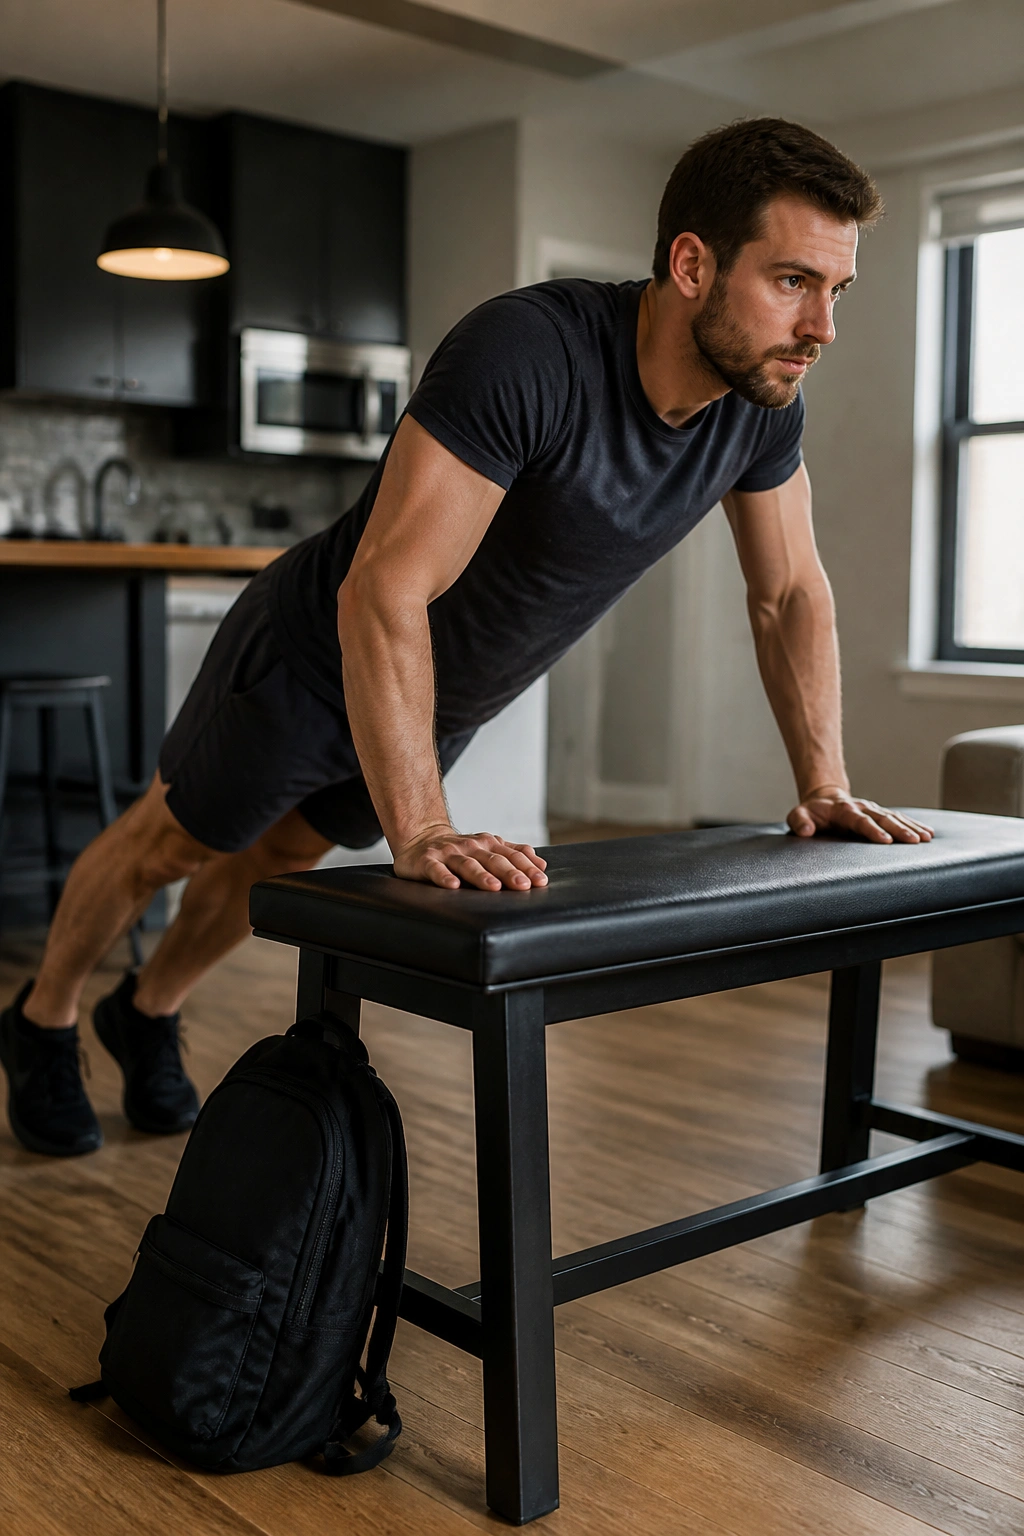
Why pair a push with a pull? Because shoulders like balance, and home training gets messy when every session is just pressing. This simple superset keeps your upper body honest.
Do 8 to 12 incline push-ups on a counter, table edge, or sturdy bench, then 10 to 12 backpack rows with a flat back. Rest 60 seconds and repeat for 4 rounds. The incline lets newer lifters keep their torso tight without face-planting into the floor, while the row gives your upper back work that usually gets ignored.
If the counter version is too easy, lower your hands to a chair or the floor. If it is too hard, raise your hands higher and keep your elbows at about 45 degrees from your sides. On the row, let the backpack hang for a full second at the bottom before you pull it back to your ribs.
Simple setup. Serious payoff.
3. Glute Bridge March and Hip Thrust Combo
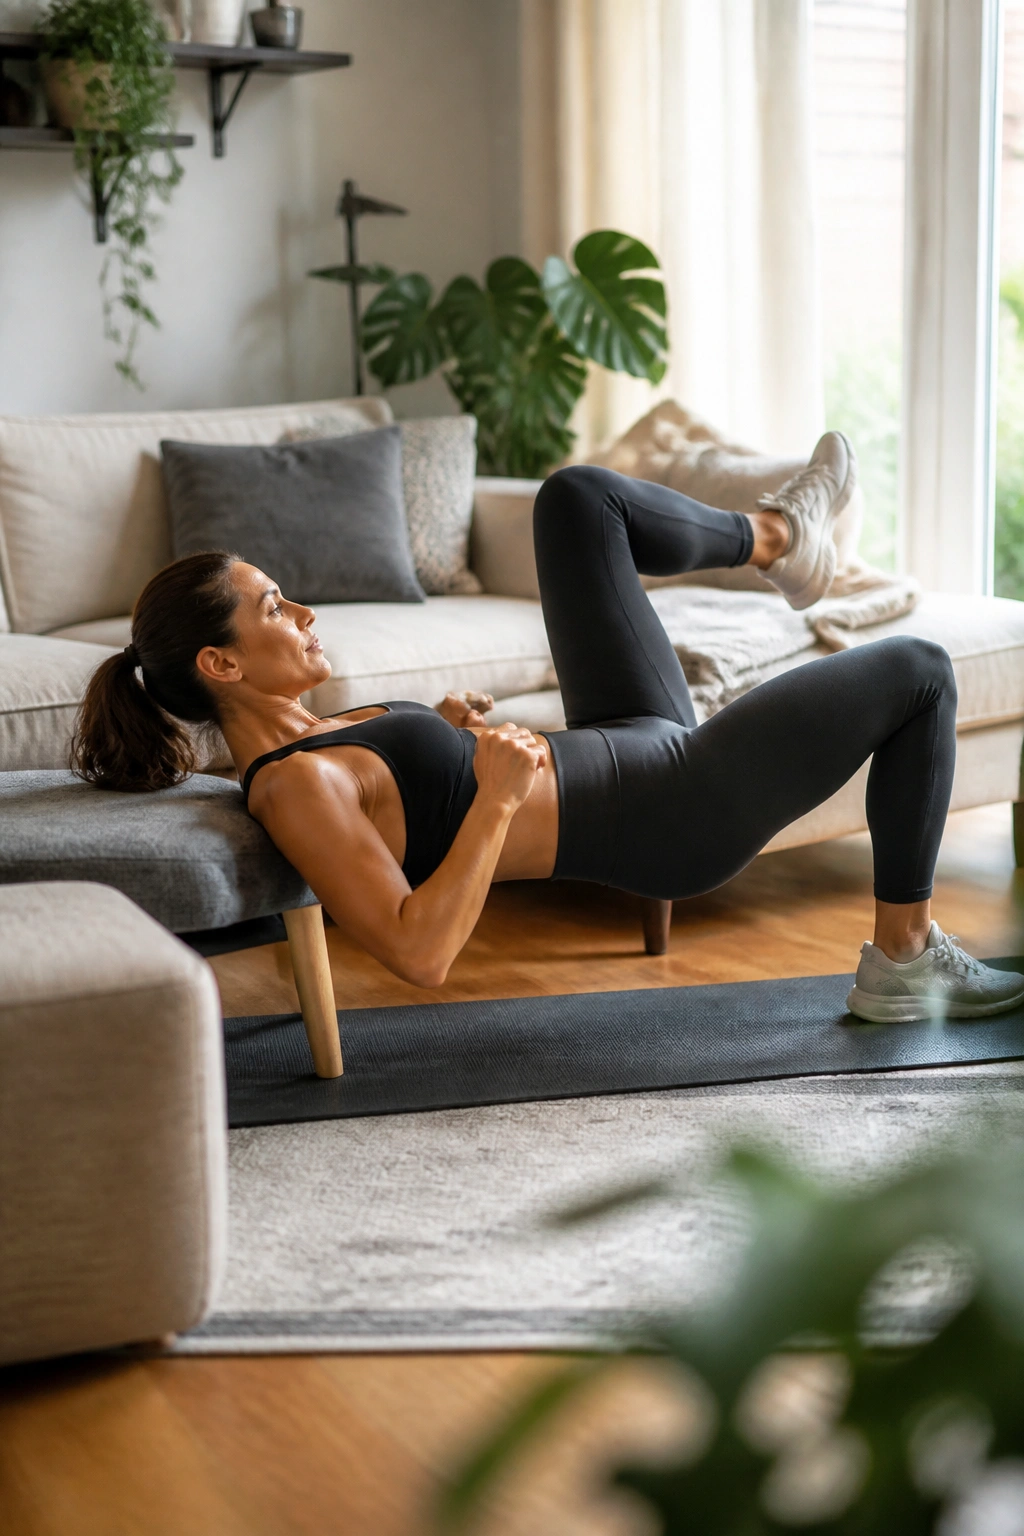
Long sitting tends to switch the glutes off in a hurry. This is the kind of home workout that brings them back online without needing any fancy equipment.
Start with 15 glute bridges, then move to 10 hip thrusts with your shoulders on a couch or low bench, then finish with 20 marching steps while keeping your hips lifted. Rest 30 to 45 seconds and repeat for 3 rounds. If you want more work, place a loaded backpack across your hips during the thrusts.
Make the glutes do the work
- Tuck your pelvis slightly before each rep.
- Keep your chin tucked so you do not arch your low back.
- Drive through the heels, not the toes.
- At the top, squeeze for 1 full second before lowering.
The bridge should feel like your butt and hamstrings are doing the job. If your lower back lights up first, the range is too big or your ribs are flaring. Cut the height in half and rebuild from there.
4. Split Squat and Reach Circuit
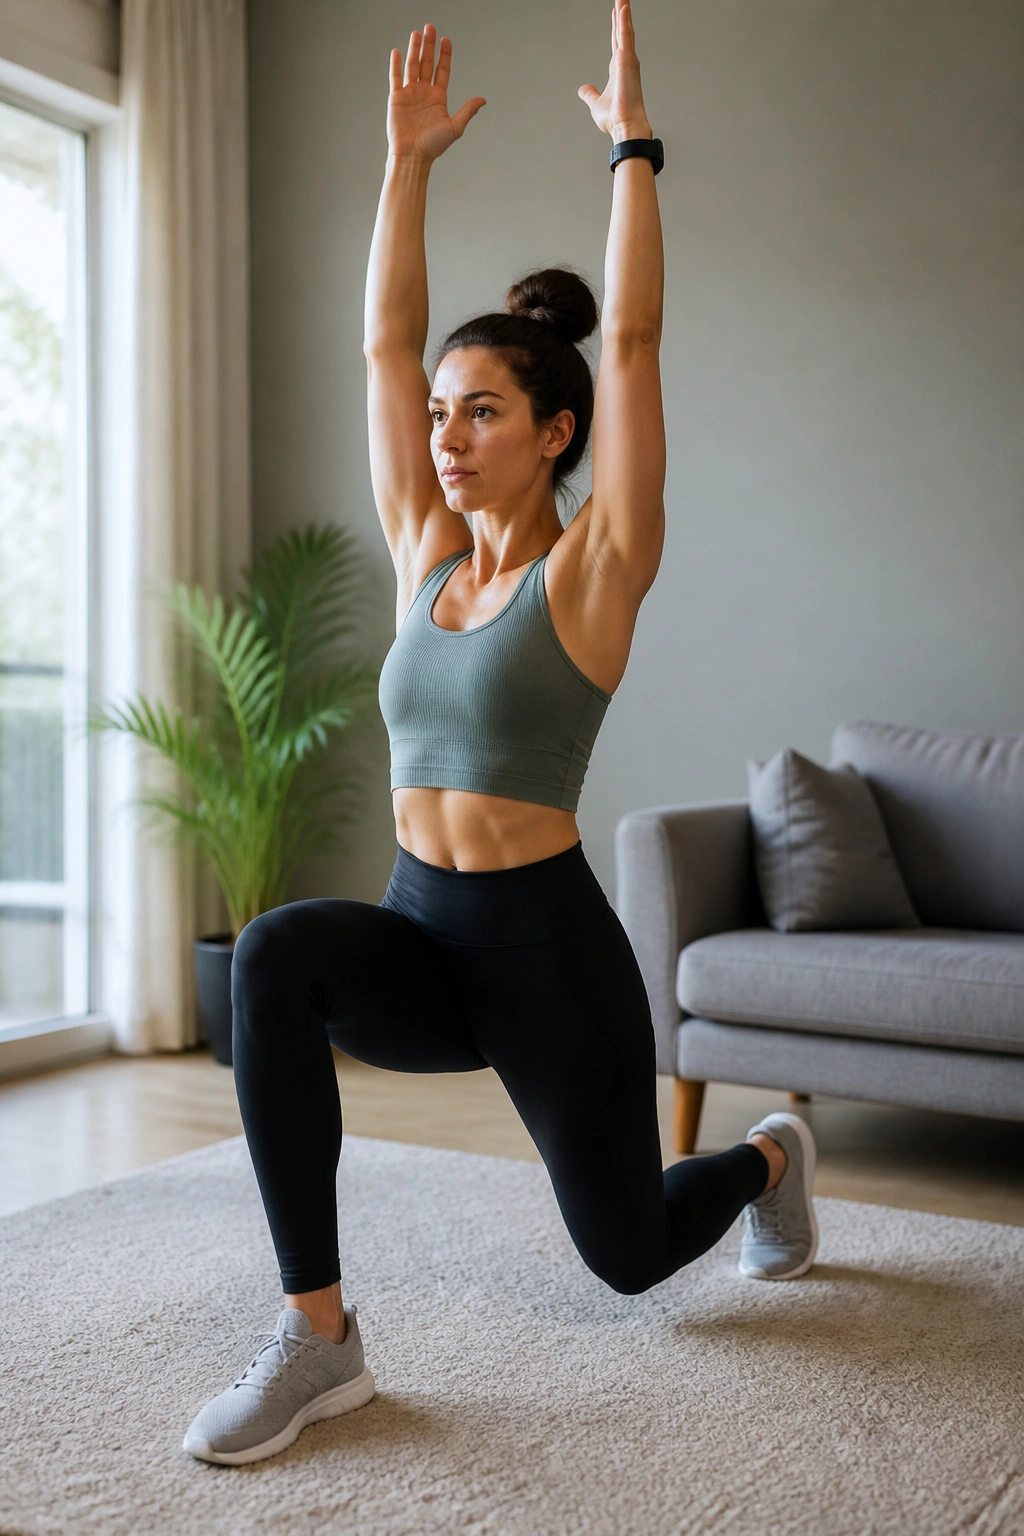
The split squat looks tame from a distance. It is not.
Set one foot forward and one foot back, then lower until both knees bend to about 90 degrees. Do 8 to 10 reps per side, then add 5 controlled overhead reaches on each leg to make your trunk work a little harder. Run 3 rounds with 45 seconds of rest.
The overhead reach changes the whole feel of the movement. You are not only training the legs; you are asking the ribs, hips, and balance system to stay put while the body moves. That is why this one carries over so well to everyday movement, stairs, and carrying bags.
If balance is the weak point, keep one hand on a wall for the first set. If the legs feel fine but the top position wobbles, shorten your stance a bit and slow the lowering phase to 3 seconds.
One leg at a time. Much harder than it sounds.
5. Plank-Shoulder-Tap At-Home Core Builder
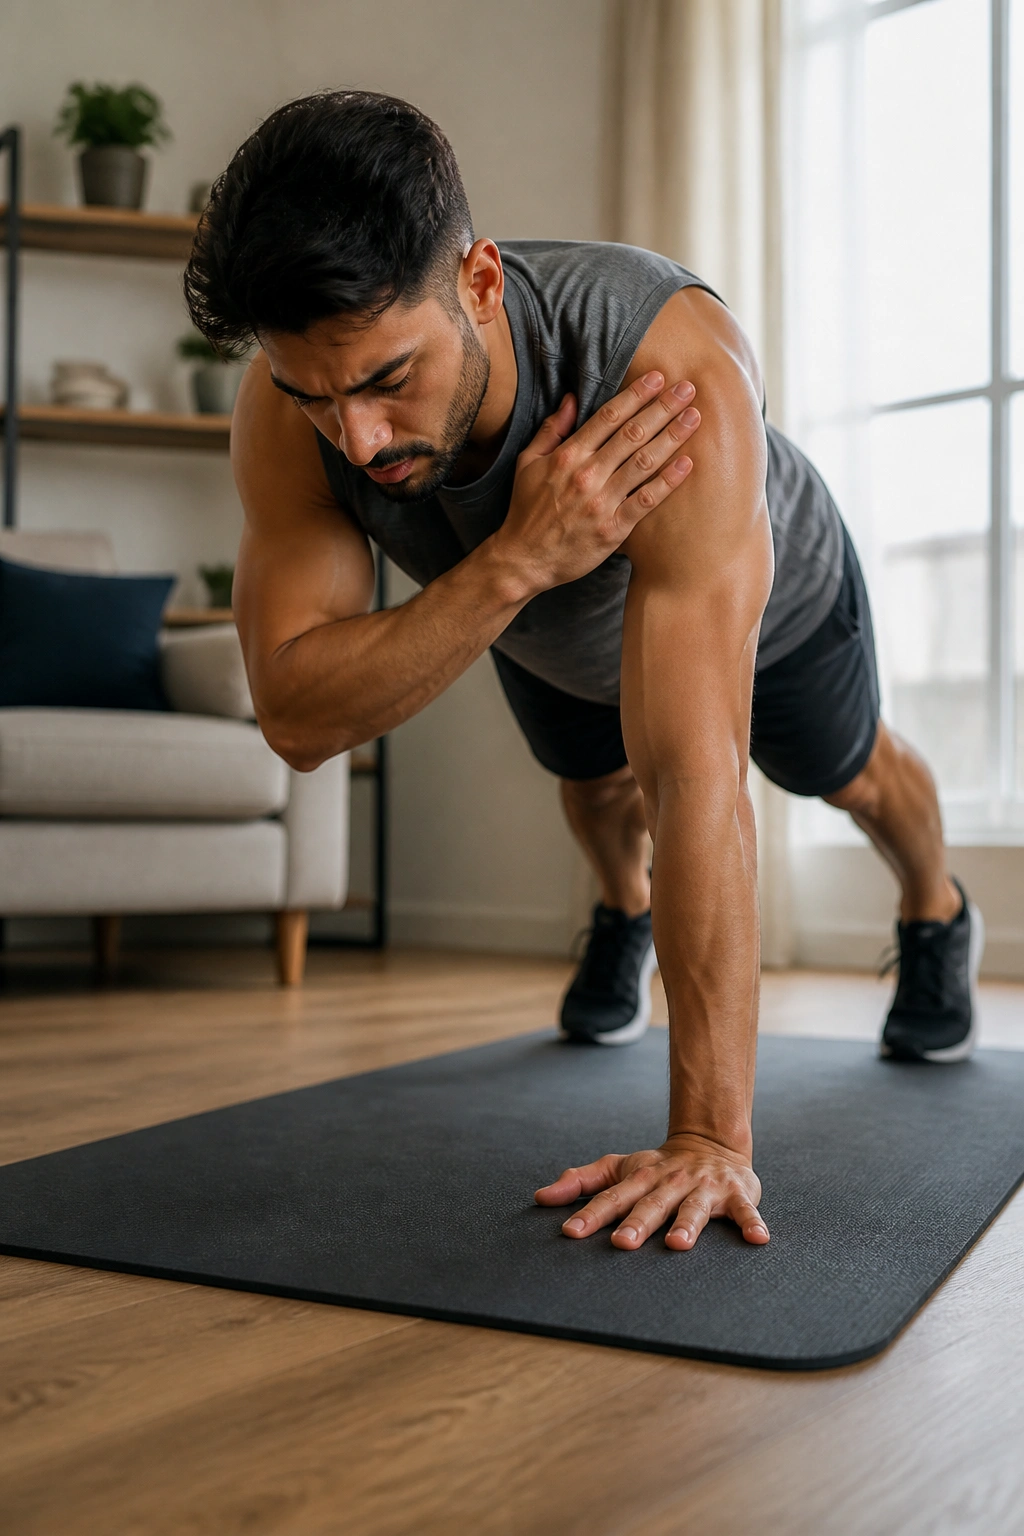
A still torso is the whole point here. The shoulder tap turns a plank into an anti-rotation drill, which is a fancy way of saying your body has to resist twisting while your arms move.
Start in a strong high plank, hands under shoulders, feet a little wider than hip-width. Tap the opposite shoulder 20 times total, then hold the plank for 20 seconds. Repeat this for 3 rounds. If your hips rock side to side like a wobbling cart, widen your feet or drop to an incline on the couch.
What it should feel like
- Your abs should stay braced, not sucked in.
- The tap should be quiet and controlled.
- Your shoulders should feel steady, not pinched.
- Your neck should stay long, not cranked forward.
Forearms are fine if your wrists complain. A mat helps, but it is not required. The main mistake is chasing speed. Fast taps with swinging hips are just a noisy plank.
6. Backpack Deadlift and At-Home Hinge Session
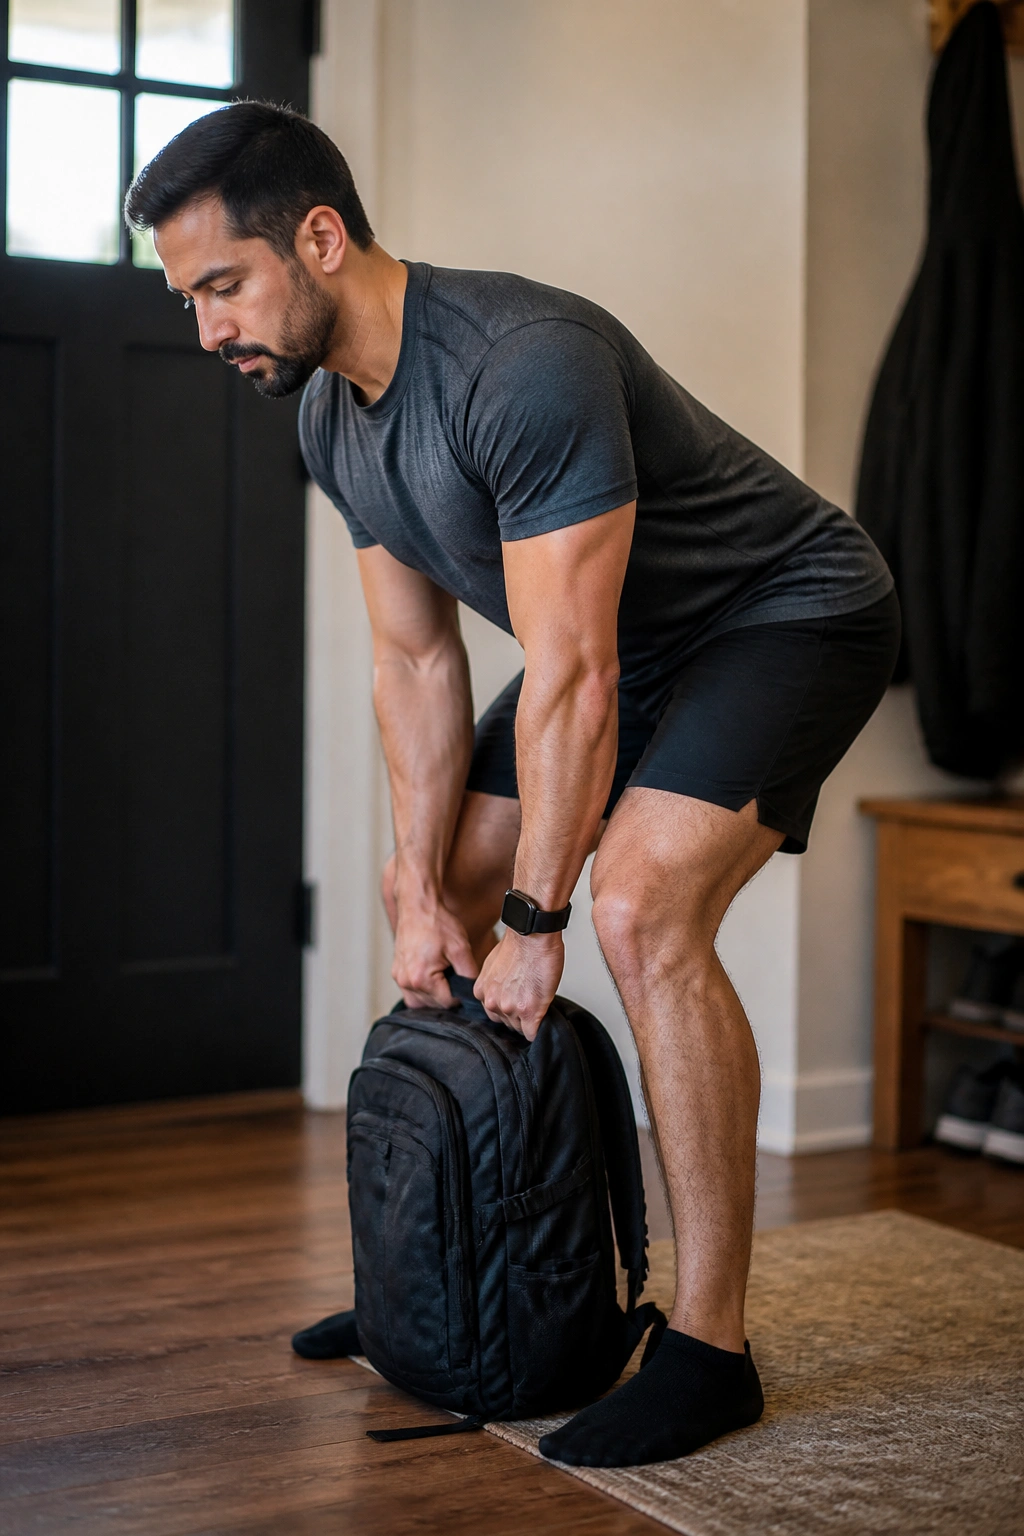
Do you need a barbell to train the hinge? No. You need a load that forces your hips to push back and your hamstrings to wake up.
Hold a backpack with both hands, stand with your feet about hip-width apart, and push your hips back until the bag reaches mid-shin. Stand up by driving through the floor. Do 4 sets of 8 to 10 reps, resting 60 to 75 seconds between sets. At the bottom, pause for 1 second before you come up.
A wall drill helps if you are still learning the pattern. Stand about 6 inches from a wall, reach your hips back until they touch it, then stand tall again. That cue keeps the movement from turning into a squat with a weird name.
If your back rounds, the load is too far away or too heavy. Keep the backpack close to your legs and think about your chest moving as one piece with your hips.
7. Wall-Sit and Calf Raise Burner
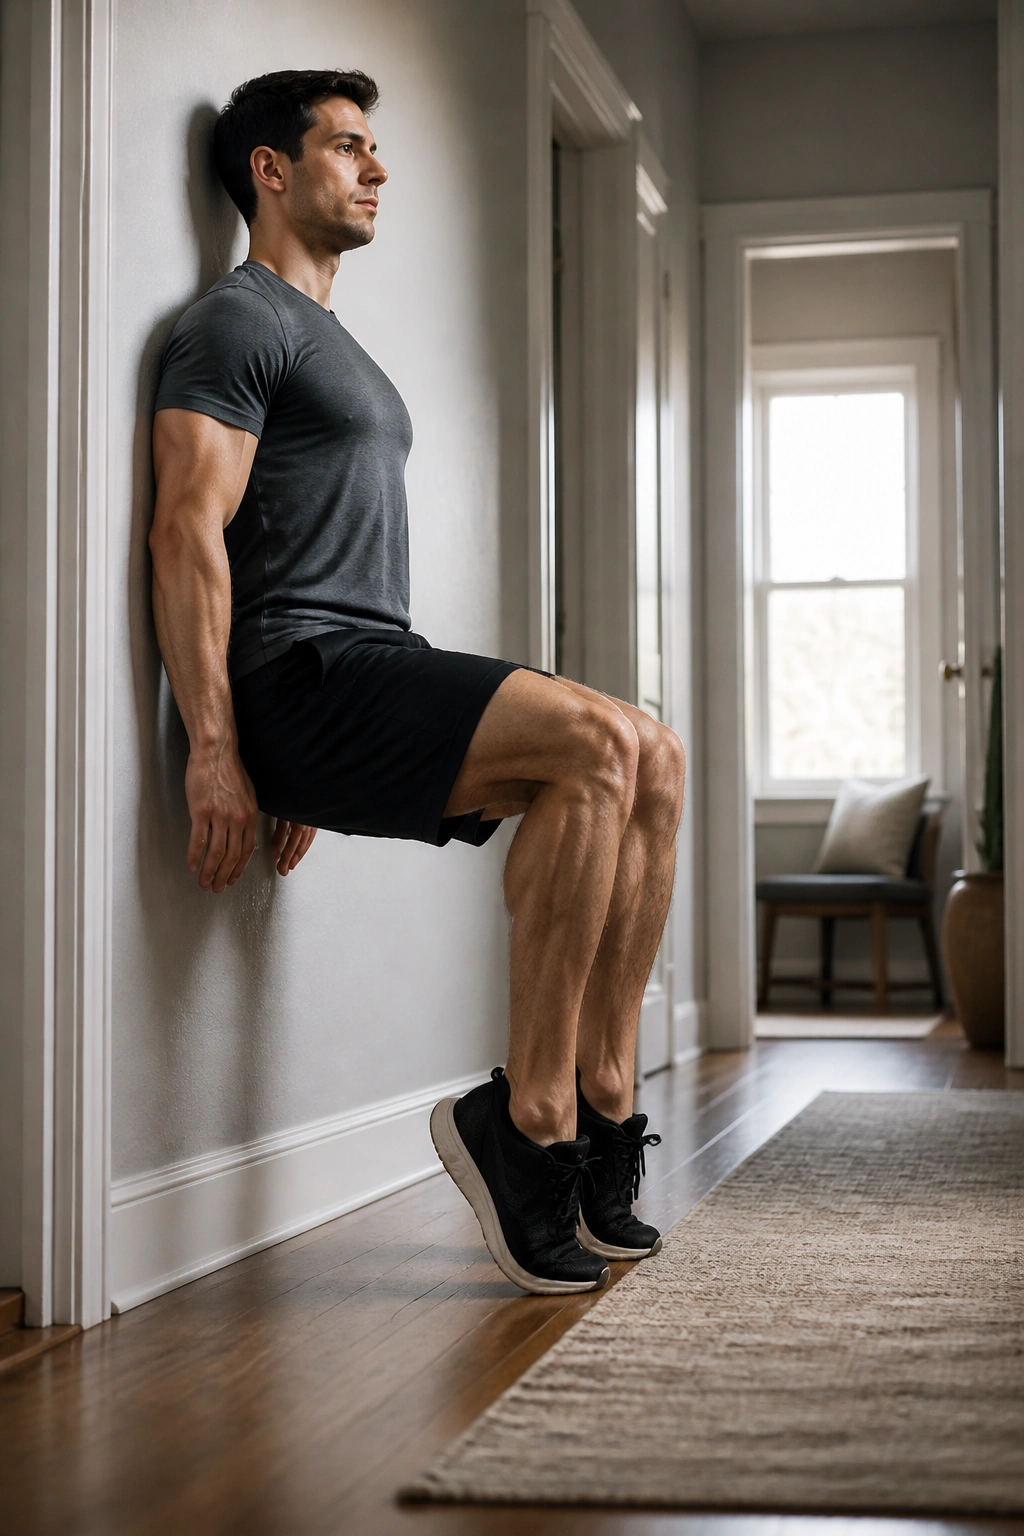
Hallways and apartment corners have their uses. This is one of them.
Drop into a wall sit with your back flat against the wall and your knees around 90 degrees. Hold for 30 to 60 seconds, then stand up and do 20 calf raises with a slow squeeze at the top. Rest 30 seconds and repeat for 4 rounds.
The wall sit is a quiet little torture test for the quads. The calf raises finish the job by teaching your lower legs to hold tension without bouncing around. Together, they build endurance that carries into lunges, stairs, and any workout where your legs start to fade before your lungs do.
If deep knee bends bother you, move your feet a little farther away from the wall and keep the knee angle a touch more open. If you want more challenge, hold a backpack in your lap during the wall sit.
Small space. Big burn.
8. Bear Crawl Strength Circuit
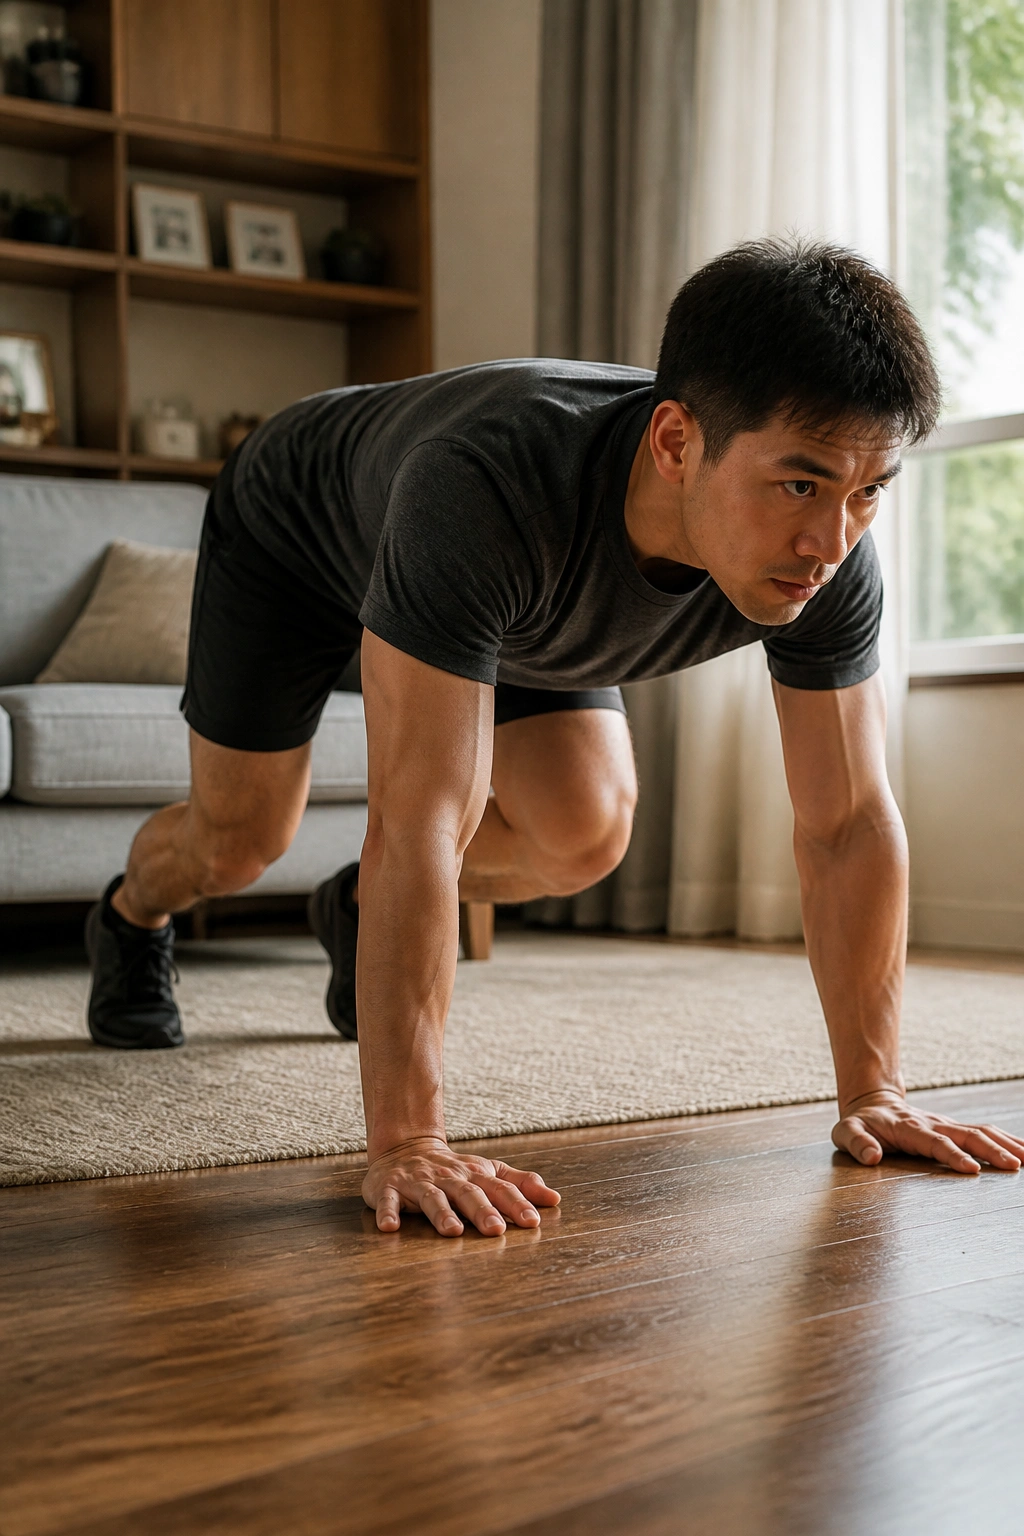
Bear crawls look almost playful until your shoulders and core start arguing with you. Keep your knees hovering about 1 to 2 inches off the floor, and move slow enough that your back stays flat.
Crawl forward for 20 seconds, crawl backward for 20 seconds, then rest for 30 seconds. Do that for 4 rounds. If backward crawling feels awkward, reduce the distance to a few steps and keep the steps short and deliberate.
The point is not speed. It is control. You are loading the shoulders, teaching the trunk to brace while the limbs move, and forcing the hips to stay quiet. That mix makes bear crawls sneaky-good for anyone who wants strength without a pile of equipment.
One more thing: keep your feet soft. Loud footfalls usually mean the hips are bouncing too much, and once that starts, the exercise turns into a scramble.
9. Chair Dips and Pike Push-Up Upper-Body Day
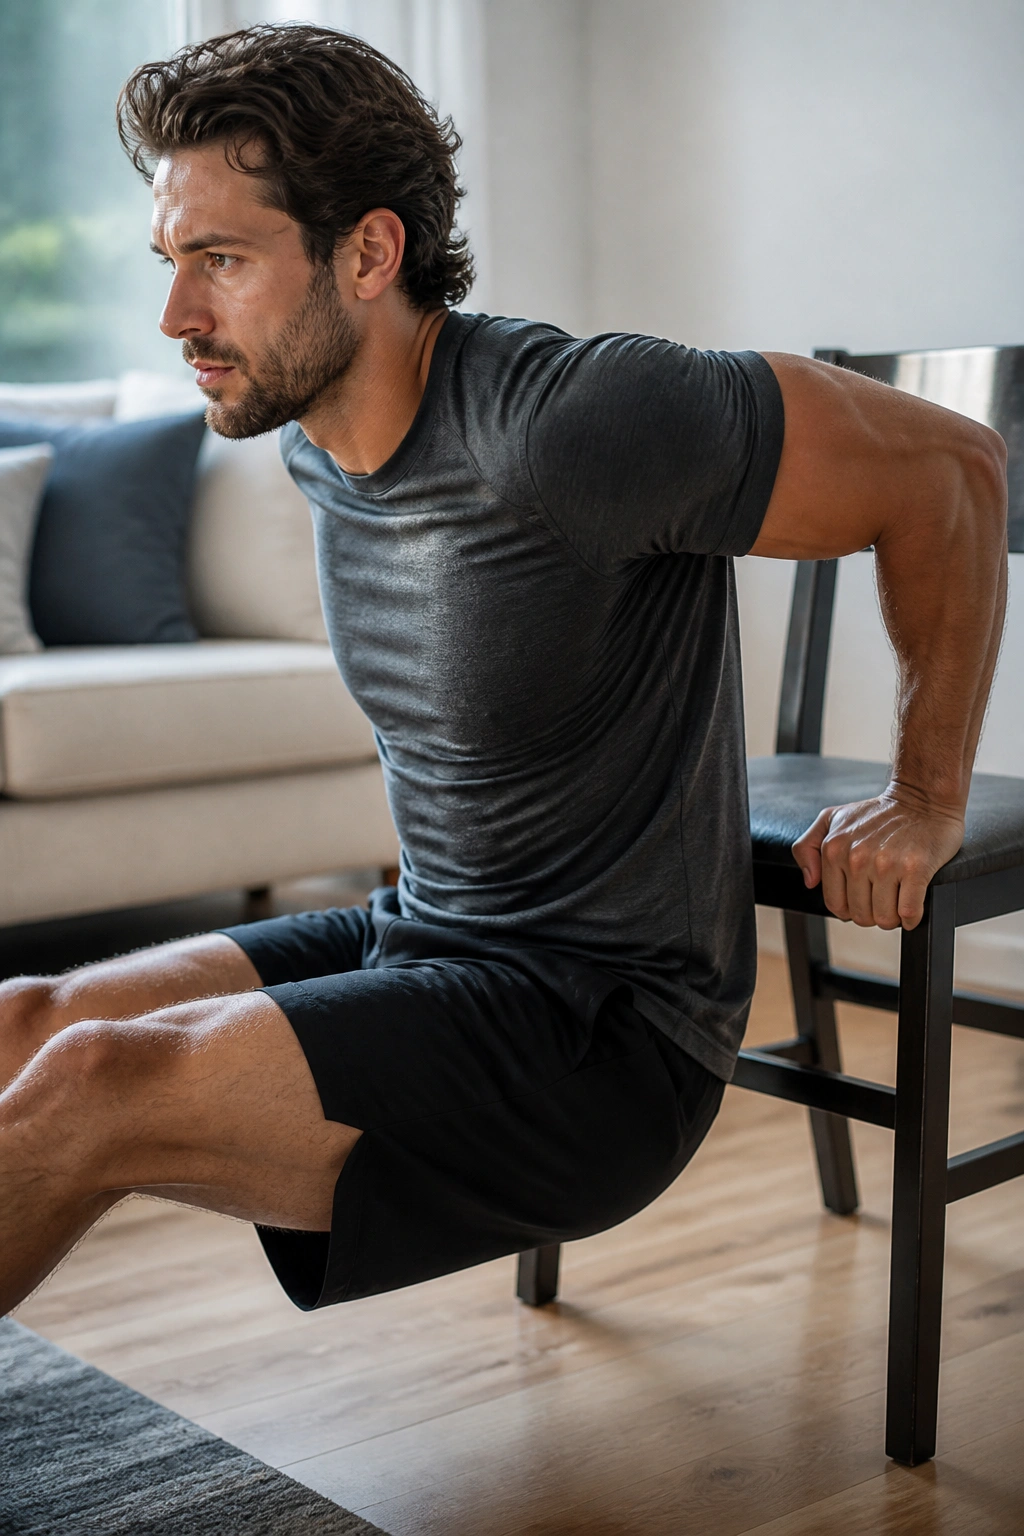
Chair dips and pike push-ups are not the same thing, and that matters. Dips hit the triceps hard; pike push-ups train the shoulders in a more vertical line, which gives your pressing work a better shape than floor-only work.
Use a stable chair for 6 to 10 dips, then shift into 6 to 8 pike push-ups with hips high and head moving toward the floor between the hands. Rest 60 seconds and repeat for 3 rounds. If the chair feels shaky, skip it. Not worth the risk.
A lot of home plans lean too hard on push-ups and forget that the shoulder likes variety. This pairing gives you both elbow extension and overhead-style pressing without needing a rack or a bench press setup. If dips bug the front of your shoulders, swap them for close-grip incline push-ups and keep the pike push-up.
The whole session should feel solid, not sloppy. If your lower back sags in the pike position, you are too fatigued or your hands are too close together.
10. Reverse Lunge to Knee Drive Flow
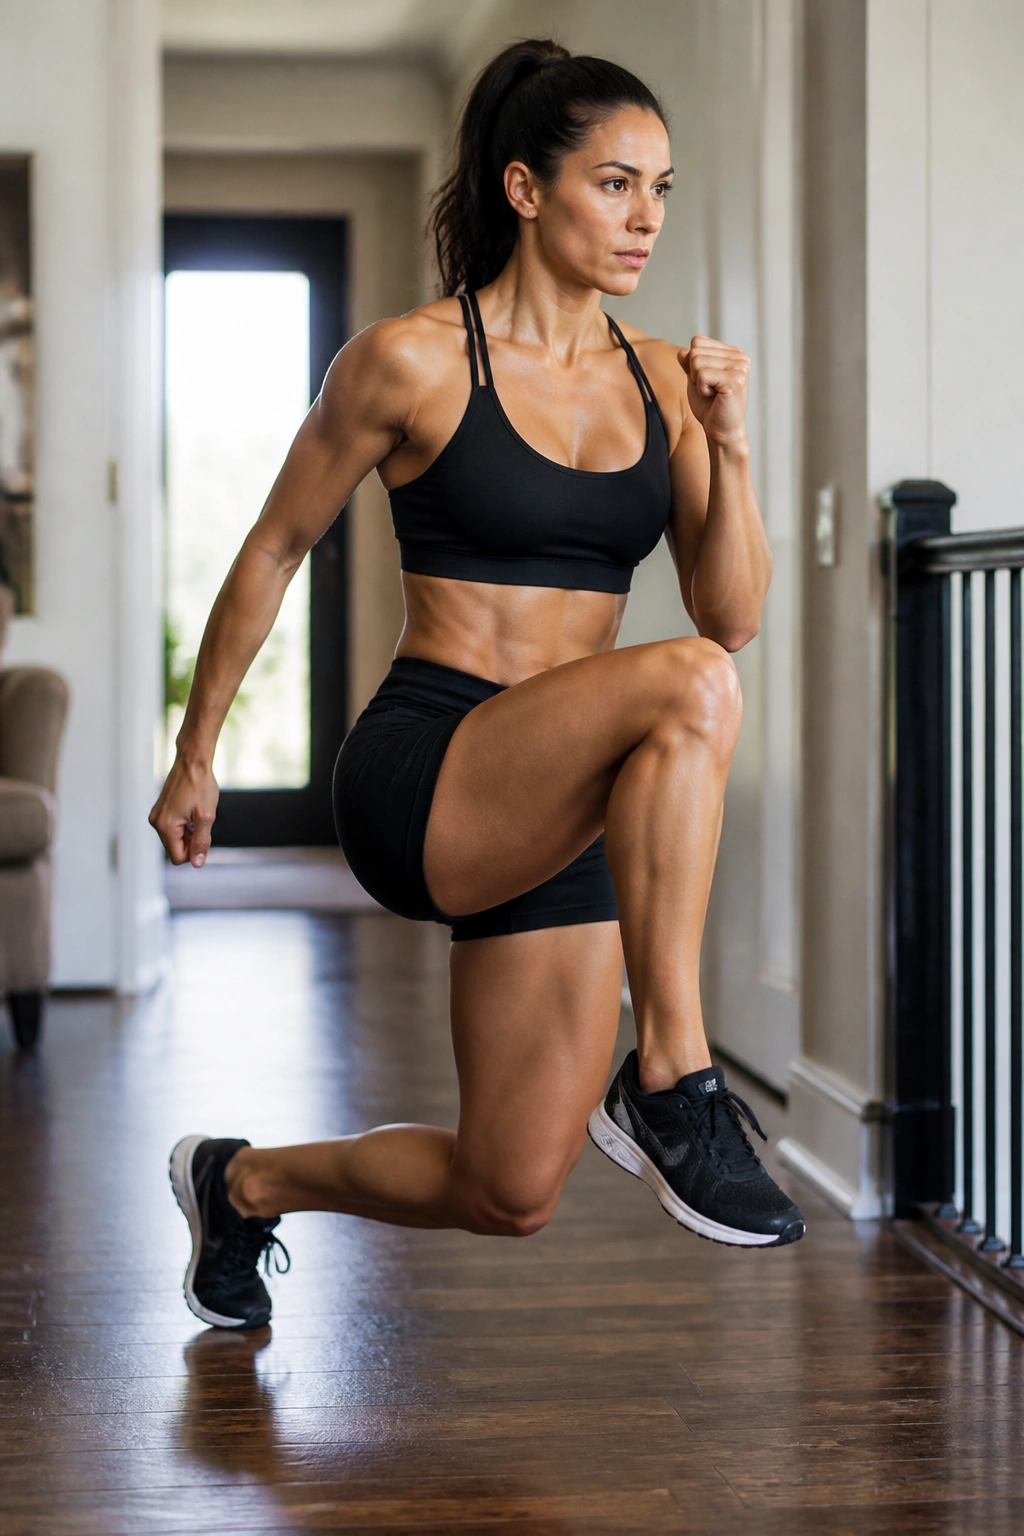
This is the kind of session that fits between errands, a TV episode, or the five minutes before dinner gets cold. A reverse lunge keeps the front knee a little happier than a forward lunge, and the knee drive adds balance work on top.
Step back, lower with control, then drive the back knee up into a brief pause at the top. Do 8 reps per side, rest 30 to 45 seconds, and complete 3 sets. If bodyweight starts to feel light, hold a backpack at chest height or carry a single bag in the hand opposite the working leg.
Cues that matter
- Keep the front heel down.
- Step back far enough that the front shin stays close to vertical.
- Pause for 1 second at the top before the next rep.
- Move straight down and straight up; do not wobble around to save the rep.
This is one of those workouts that gets more useful the cleaner it gets. The smoother the rep, the better the hip and leg work. The sloppier it gets, the more it turns into a balance contest.
11. Towel Hamstring Curl Floor Session
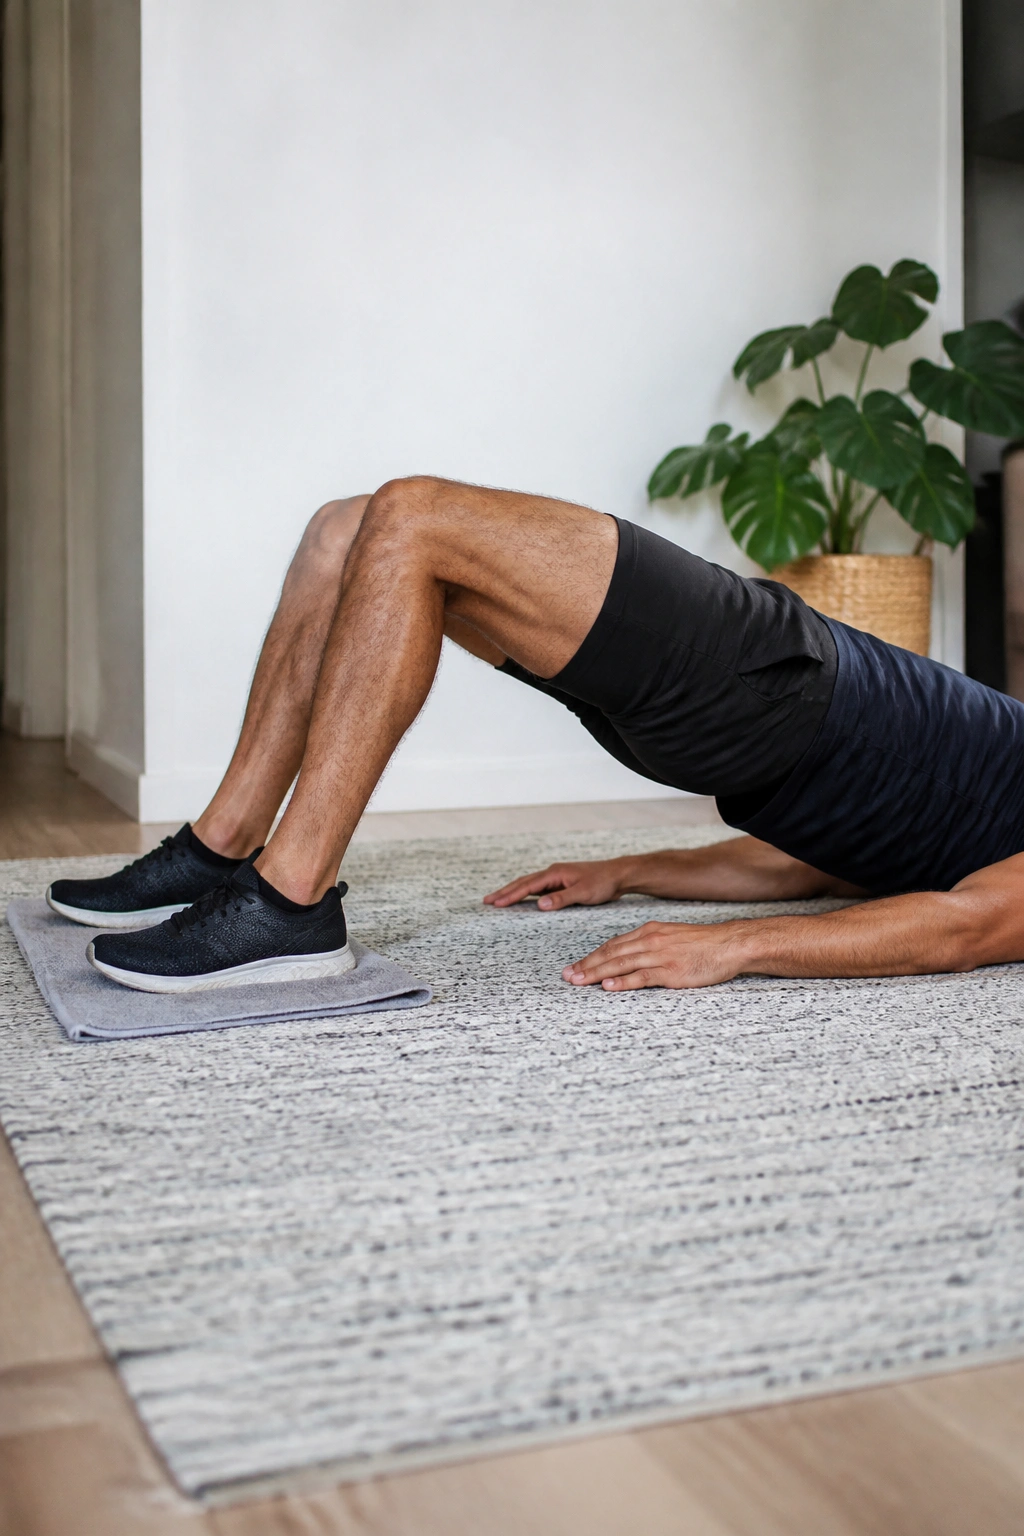
Why does this humble floor drill light up the back of your legs so fast? Because the hamstrings have to control both the bridge and the slide, and that double job gets difficult in a hurry.
Lay on a smooth floor with socks on or place your heels on a towel. Lift your hips into a bridge, then slowly slide your heels away and back in. Try 3 sets of 8 to 12 curls with 45 seconds of rest. If the full motion is too much, slide out only halfway and focus on keeping the hips lifted.
How to keep the hips high
- Press the upper arms into the floor.
- Tuck the pelvis before each rep.
- Keep the ribcage from flaring upward.
- Move slowly on the way out; that part is where the work lives.
This one is nastier than it looks. Good. That means it is doing something useful. If your hamstrings cramp, pause for 20 seconds, shake them out, and shorten the range on the next round.
12. Tempo Push-Up Density Workout
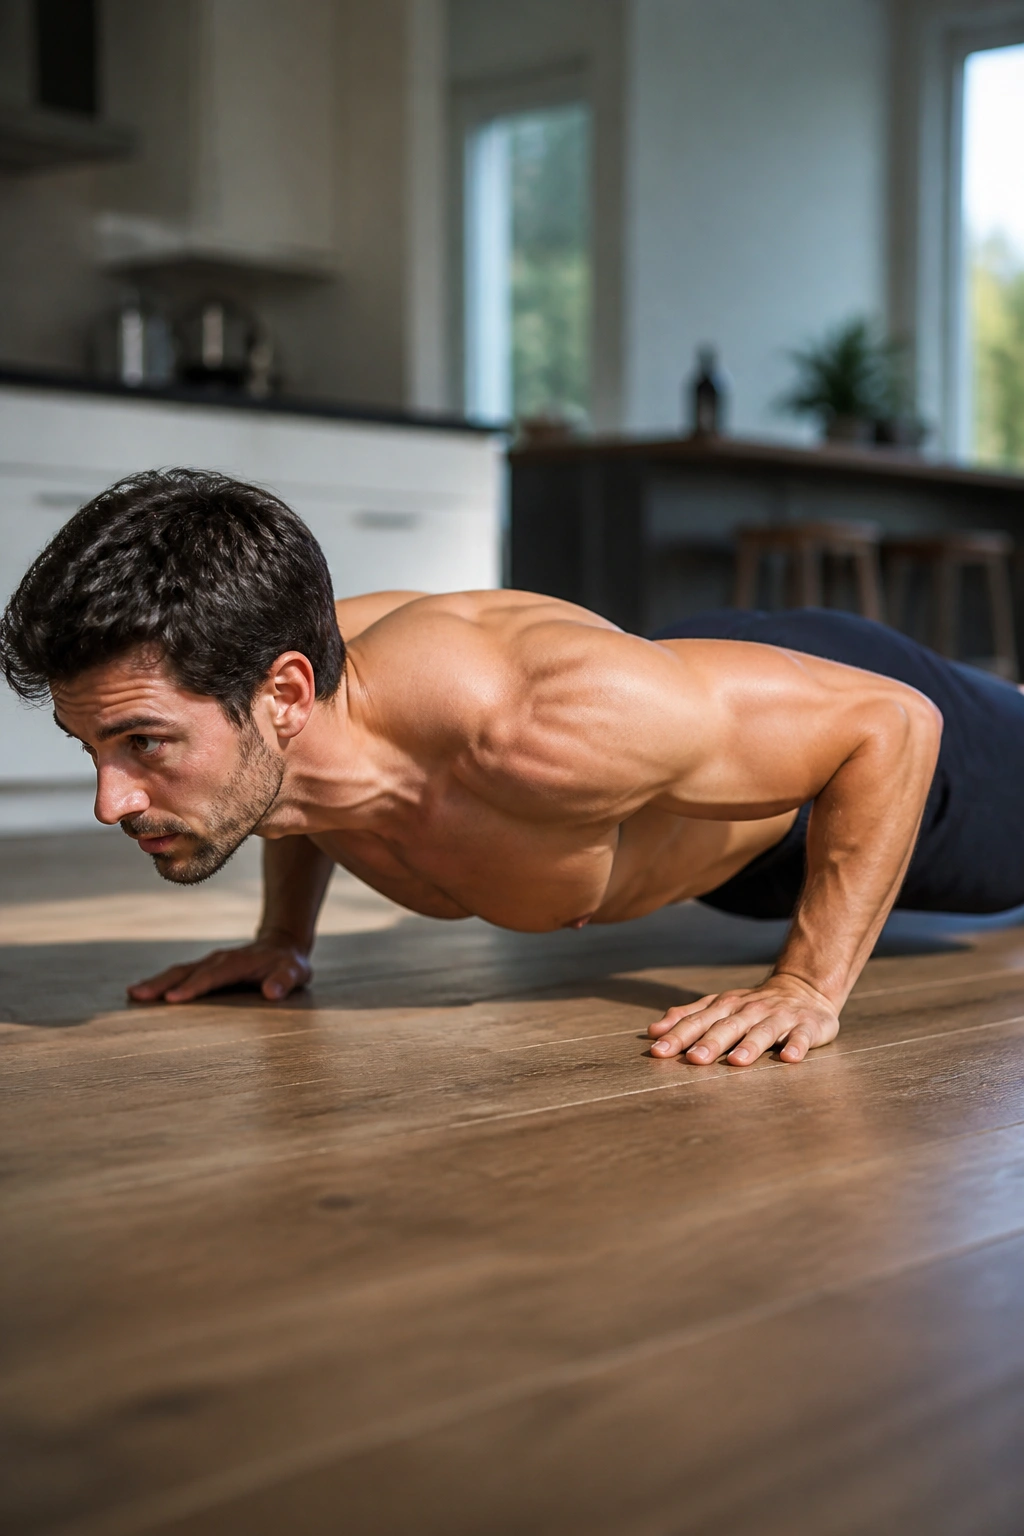
Slow push-ups expose weakness fast. They also give you a lot more muscle-building work from the same floor space, which is why tempo matters so much when you train at home.
Use a 3-second lower, 1-second pause, 1-second press pattern for 4 sets of 6 to 8 reps, resting 60 seconds between sets. If you want a tougher version, make the lowering phase 4 seconds. If floor push-ups are still a fight, put your hands on a counter or couch and keep the same tempo.
What to watch for
- Elbows should angle back about 30 to 45 degrees.
- Chest and hips should rise together.
- The pause at the bottom should stay controlled, not collapsed.
- Keep the neck neutral; no reaching for the floor with your chin.
This workout is sneaky because the tempo removes momentum. A fast push-up can hide a weak core or half-depth rep. A slow one cannot. That honesty is useful, even if it stings a little.
13. Single-Leg Romanian Deadlift Balance Set
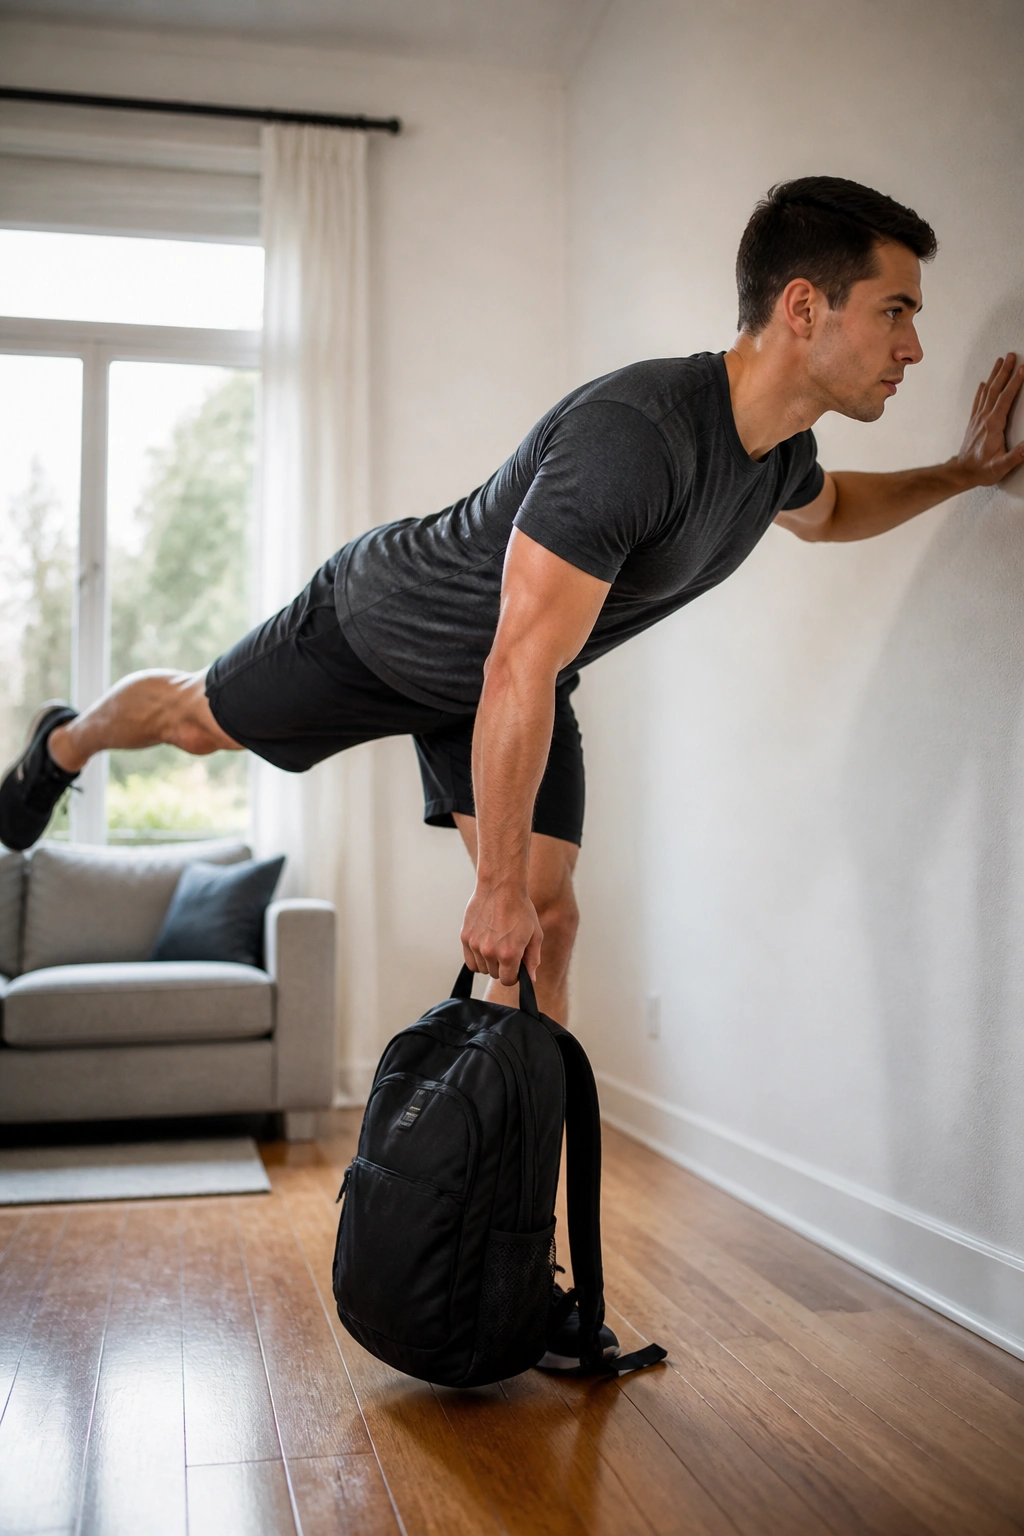
Stand near a wall or couch the first time you try this. You will probably want it.
Hold a backpack or water jug in one hand, soften the standing knee, and hinge forward while the back leg reaches behind you like a counterweight. Do 6 to 8 reps per side, with a 3-second lowering phase, for 3 sets. Pause for a full second near the bottom so you can feel whether the hips are staying square.
The goal is not to touch the floor. The goal is to keep your hips level and your back long while one leg does the heavy lifting. If you twist open at the hip, reduce the load and shorten the range until the movement cleans up.
Common mistakes
- Locking the standing knee.
- Rounding the upper back.
- Turning the lifted leg into a wild kick.
- Rushing the rep because balance feels weird.
This one gets easier only when the setup gets better. Slower, quieter, more controlled. That is the rule.
14. Side Plank and Rotation Core Circuit
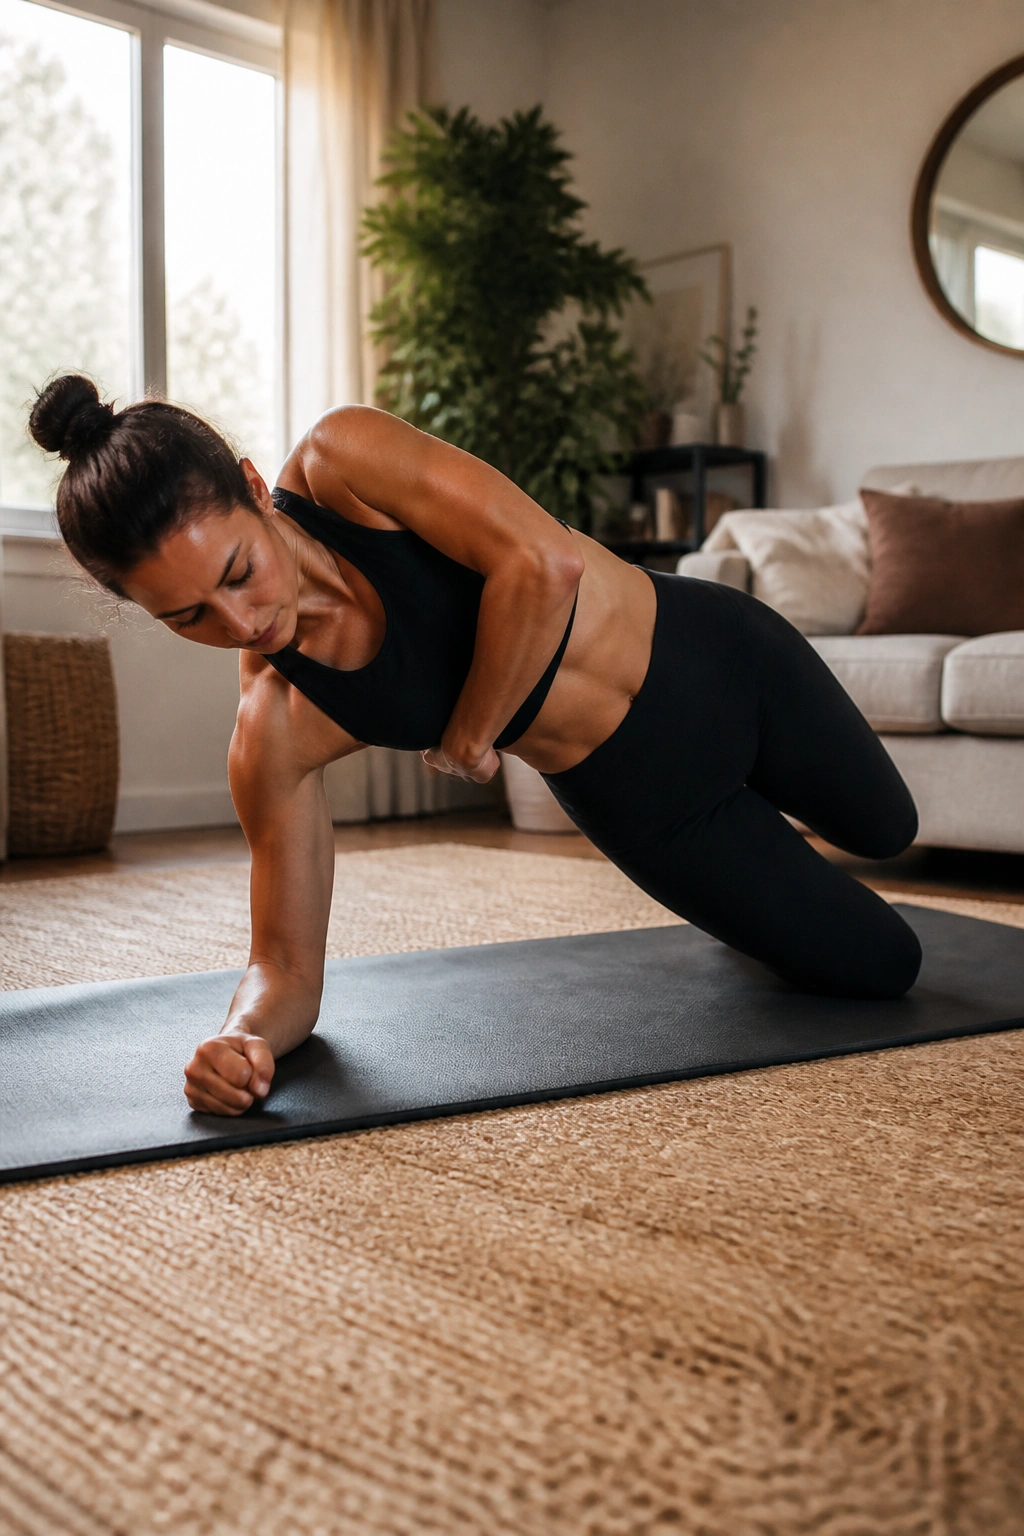
Crunches bend the trunk. Side planks teach it not to wobble. That distinction matters, especially if you spend a lot of time sitting, walking, or carrying things on one side.
Hold a side plank for 20 to 40 seconds, then do 6 controlled reach-throughs under your torso, then finish with 8 hip lifts. Switch sides and repeat. Run 3 rounds total. If a full side plank is too much, drop the bottom knee and keep the same reach-through pattern.
The reach-through changes the load in a nice way. Your obliques have to resist rotation, then control it, then stop it before it becomes sloppy. That is closer to real movement than endless floor crunches, and it is one reason this circuit shows up in a lot of good home programs.
Keep your ribs stacked over your hips. If your top shoulder caves forward, the plank got too loose and the rep stopped being useful.
15. Step-Up and Carry Workout
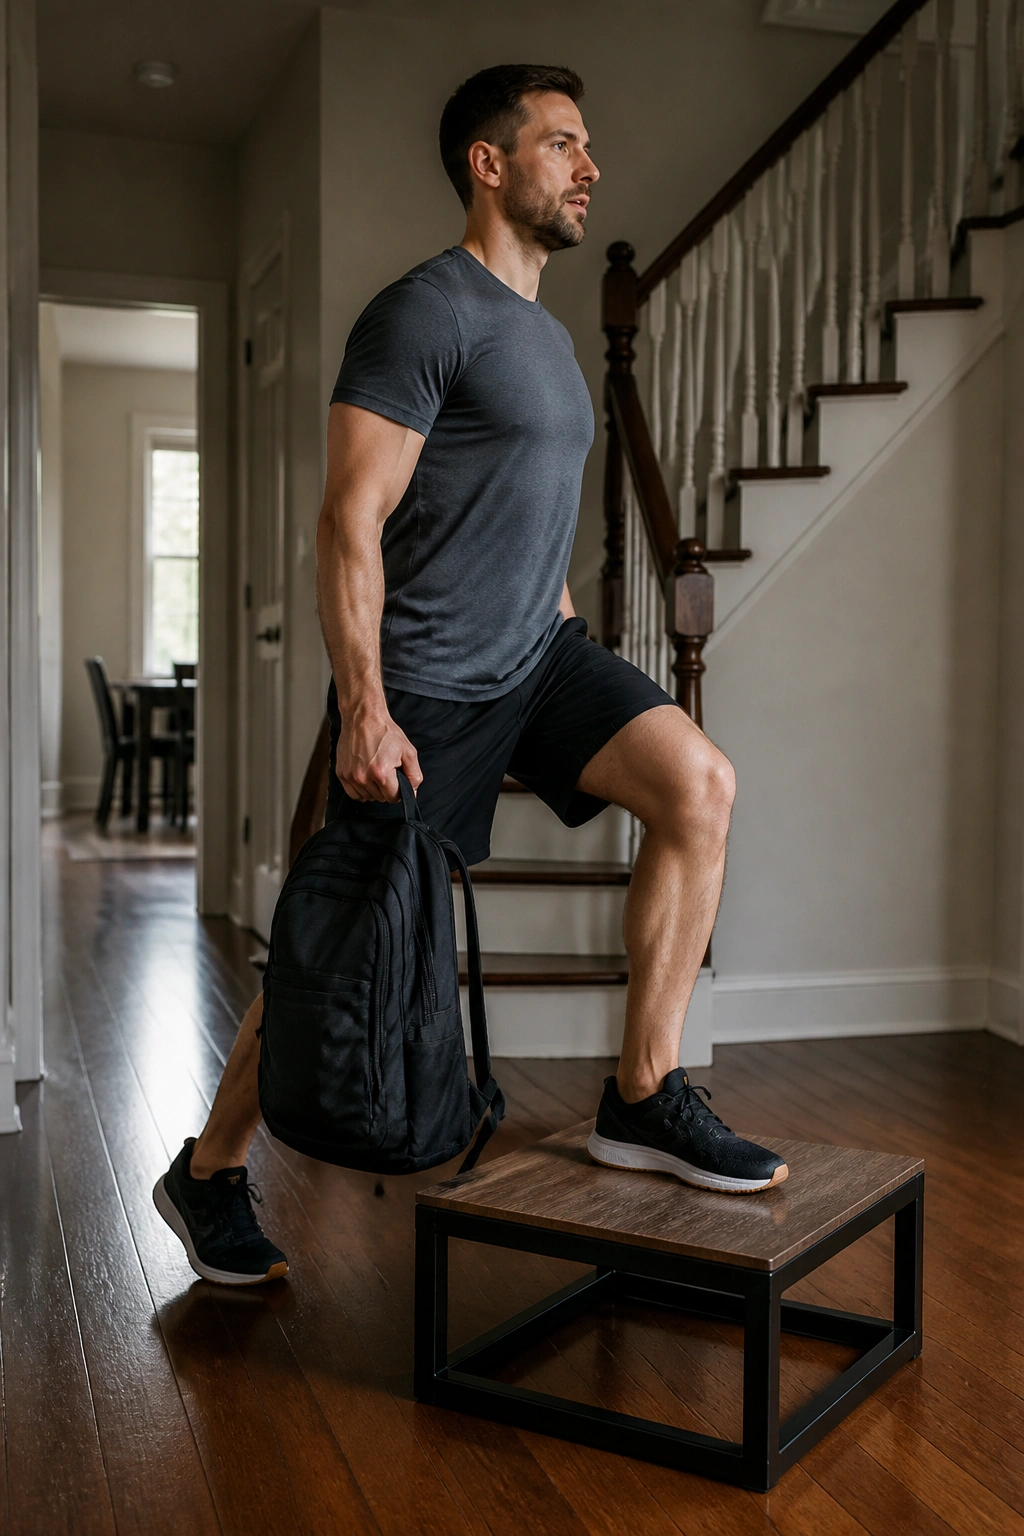
A staircase, a sturdy step, or even the lowest stair in the house can become a strength station if you use it well. Step-ups train the legs without a ton of impact, and carries teach your grip and trunk to stay solid while you move.
Do 8 step-ups per leg, then grab a backpack or two grocery bags and walk for 30 to 45 seconds. Repeat for 4 rounds. If space is tight, walk a slow loop through the room. If you want a harder version, hold the weight on one side only and switch hands each round.
The key is using the whole foot on the step. Don’t launch off the back leg. That turns the movement into a hop and steals the work from the front leg. On the carry, stay tall and keep the bag from swinging into your knee.
This is one of those home workouts that feels plain on paper and useful in real life. That is a good sign.
16. Squat-Thrust and Walkout Conditioning Set
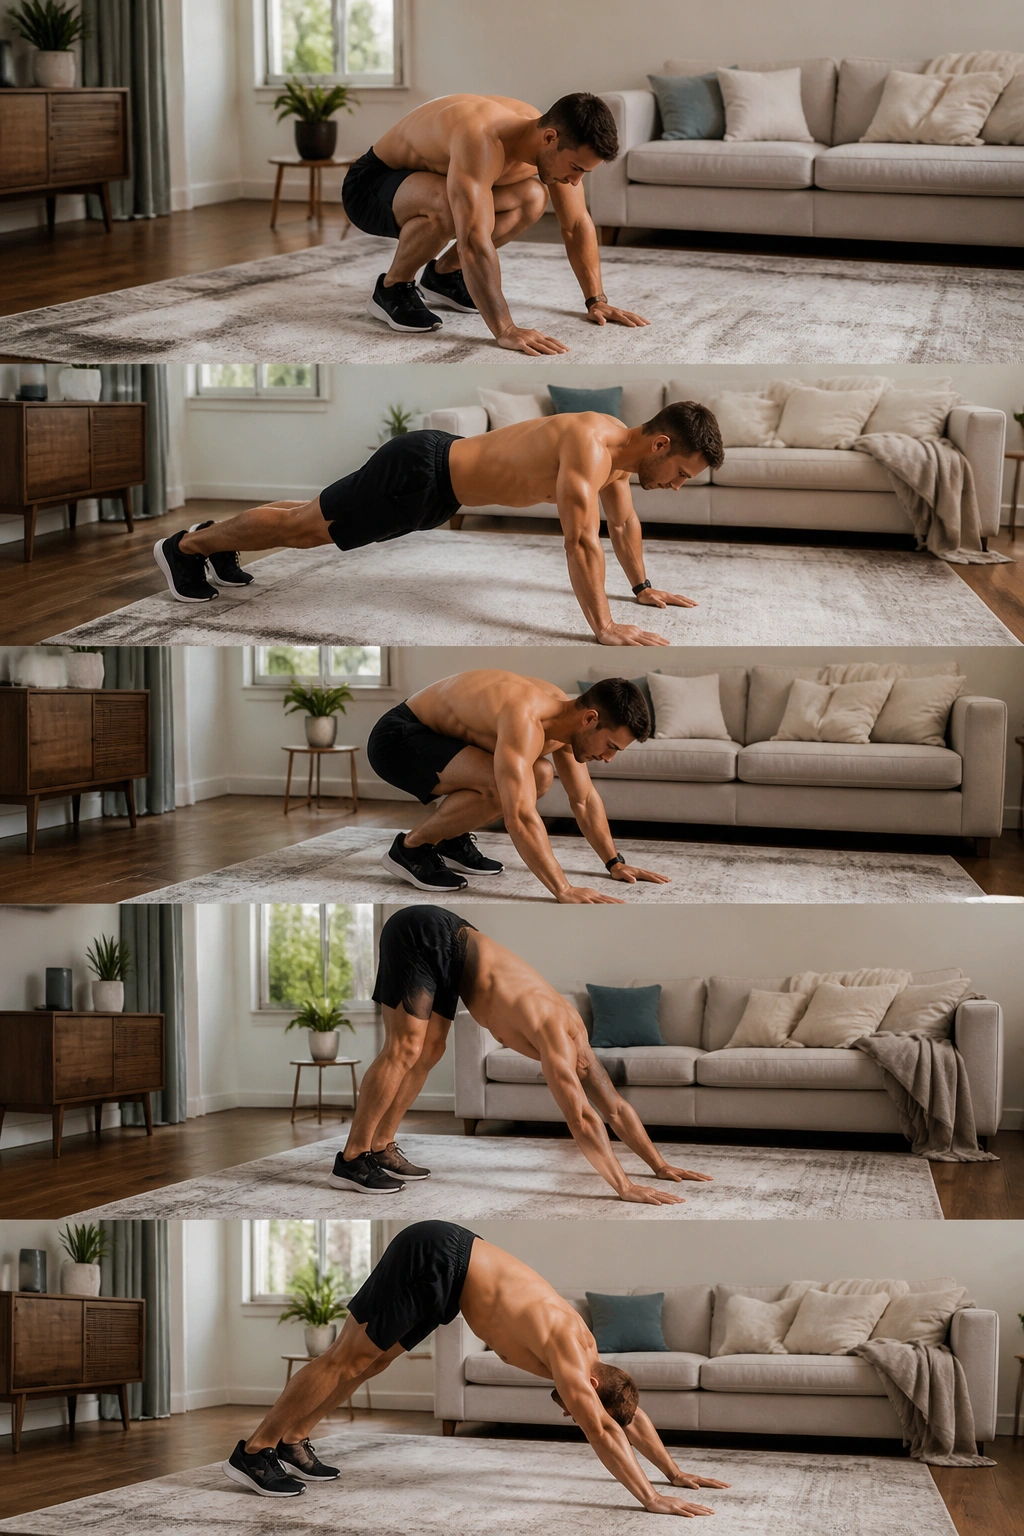
Want strength work that still raises your pulse? Use squat-thrusts and walkouts, but keep them clean enough that they still count as strength training rather than chaos.
A squat-thrust is a burpee without the jump. Squat down, step or jump the feet back, step them forward again, and stand. A walkout starts from standing and takes you down to a plank before you walk the hands back in. Pair them like this: 6 to 10 squat-thrusts, then 6 walkouts, rest 45 seconds, and repeat for 4 rounds.
How to keep it from turning sloppy
- Step back instead of jumping if your form starts to spill.
- Keep the core braced during the plank.
- Skip the push-up if your shoulders are already fried.
- Move with purpose, not speed for its own sake.
This works because it asks the body to brace, press, and stand up again under fatigue. That blend is useful. It is also humbling, which I think is part of the appeal.
17. Backpack Overhead Press and Pull-Apart Series
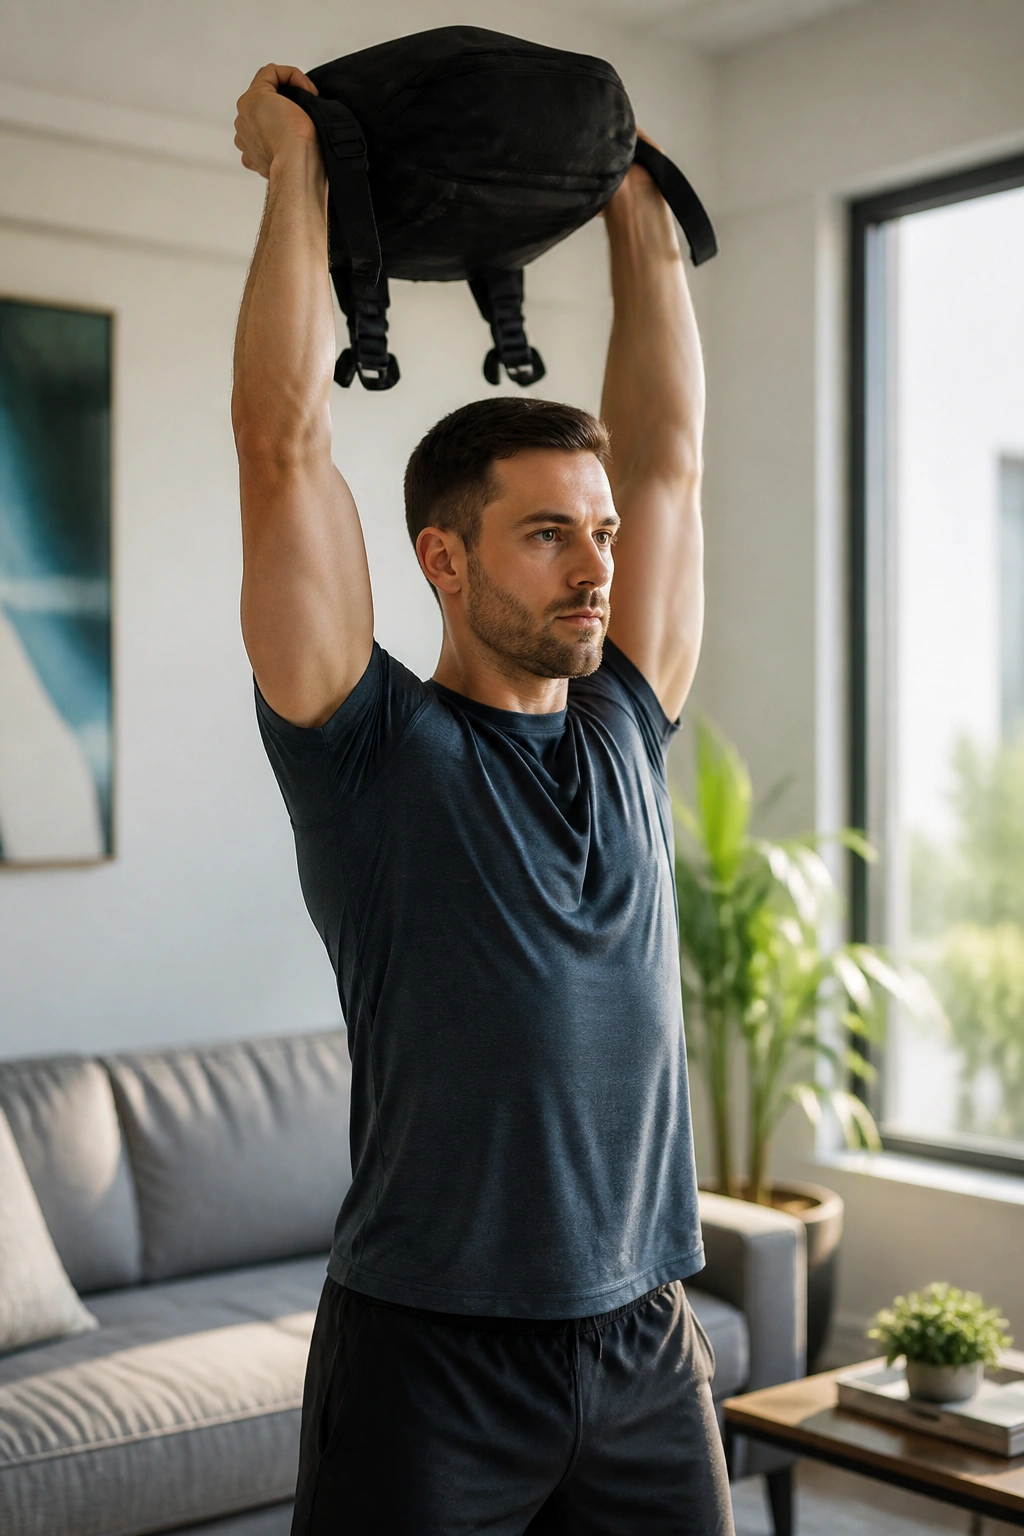
Shoulders like balance more than bravado. Pressing without any upper-back work is how home training starts feeling lopsided, so this pairing pulls the whole thing back into line.
Hold a backpack with both hands or press a water jug overhead for 8 to 10 reps, then do 12 towel pull-aparts by pulling the ends of a towel apart for 15 to 20 seconds. Rest for 45 to 60 seconds and repeat for 4 rounds. If you want more shoulder control, add 6 prone Y-T-W raises on the floor between rounds.
Equipment options
- Backpack press: good for both hands at once.
- One-arm jug press: useful when you want to challenge the trunk.
- Towel isometric pull-apart: great if you do not own a band.
- Prone Y-T-W: slow and awkward in the best way.
Keep the ribs down during the press. If you arch your lower back to finish the rep, the shoulders are not really doing the job. A half-kneeling press can help if you want more control.
18. Frog Pump and Glute Kickback Session
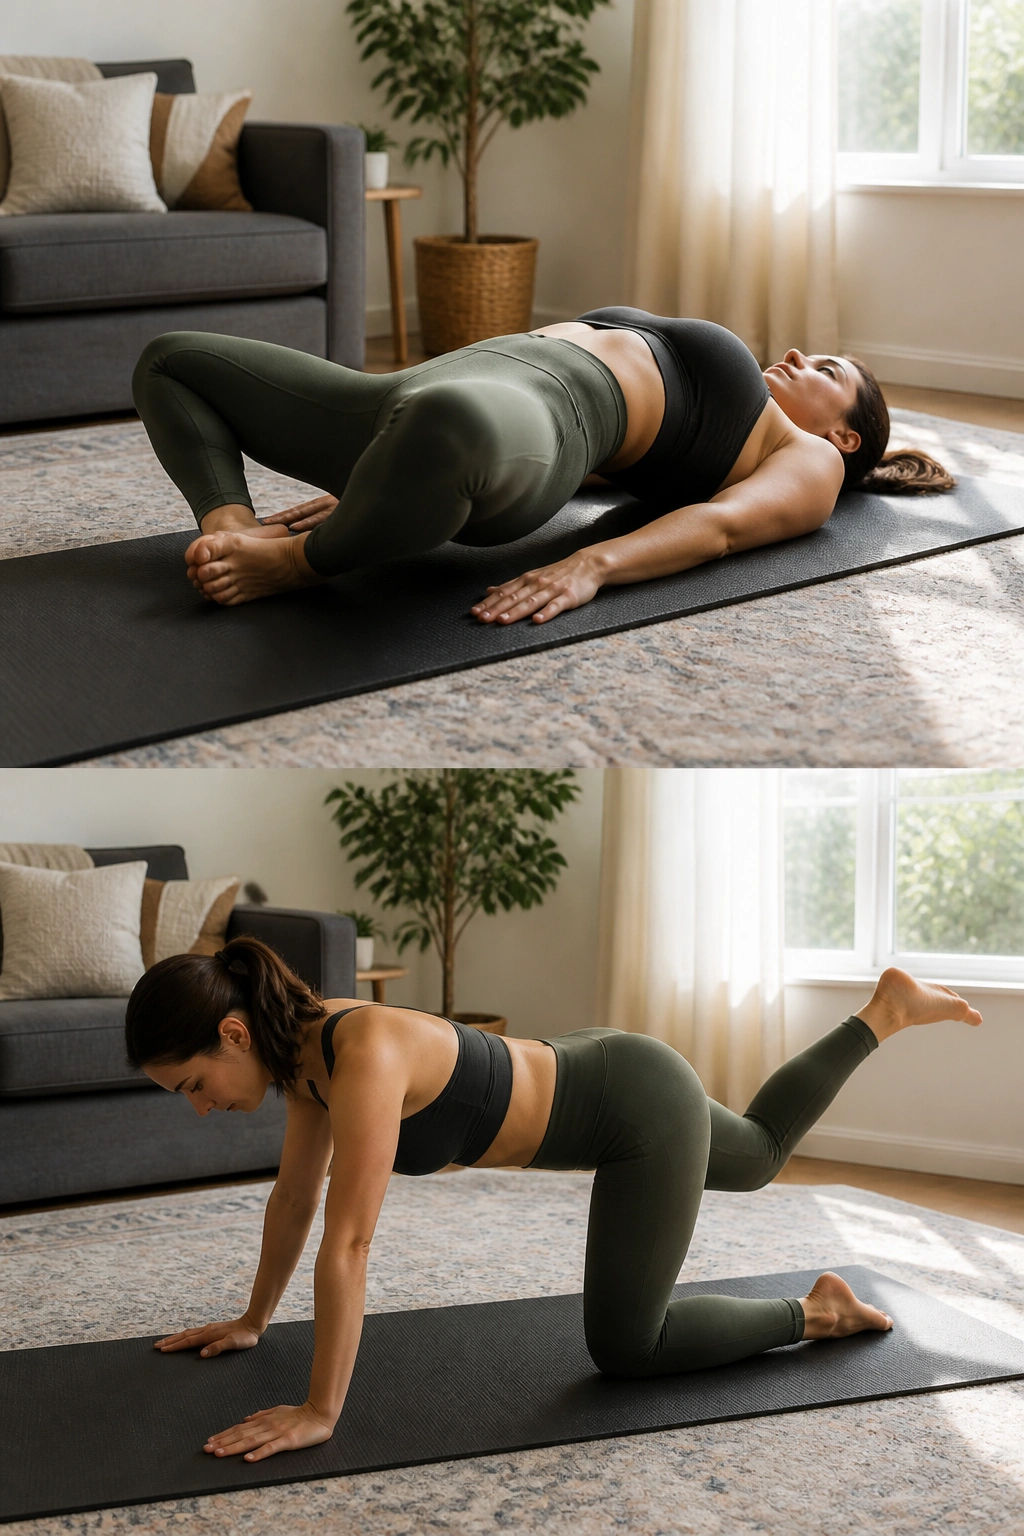
After a long day of sitting, this is the kind of work that wakes the hips up without beating up the knees. Frog pumps feel odd the first time. That is part of why they work.
Lie on your back, bring the soles of your feet together, and let the knees fall open. Pump the hips up for 20 to 25 reps, then switch to 12 kickbacks per side on hands and knees. Finish with a 15-second hold at the top of the last frog pump. Repeat for 3 rounds.
Keep the lower back quiet
- Tuck the pelvis before each lift.
- Keep the movement small and precise.
- Squeeze the glutes at the top, not the low back.
- Do not rush through the kickbacks; the point is control.
This session is especially useful if you want glute work without a lot of spinal loading. It is not glamorous. It is useful. There is a difference.
19. Full-Body At-Home Strength EMOM With Minimal Space
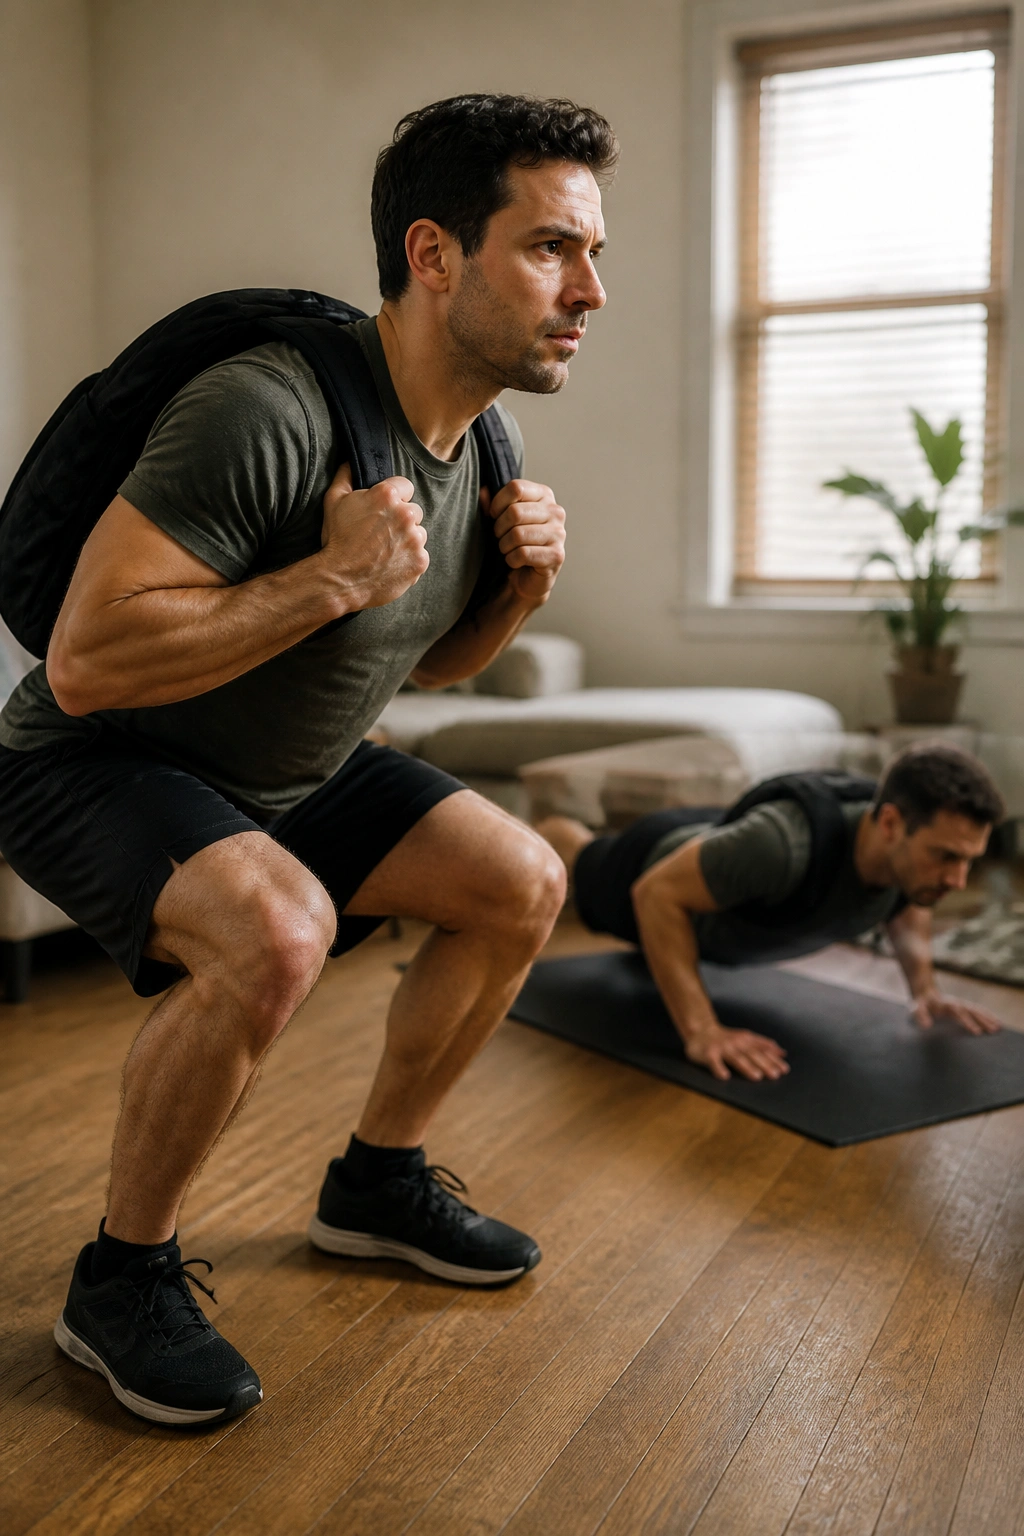
EMOM means every minute on the minute. It is one of the cleanest ways to keep a home strength workout honest because the clock tells you when to start, when to stop, and when you have wasted time.
Set a timer for 12 minutes. Minute 1: 10 squats. Minute 2: 8 push-ups. Minute 3: 10 backpack deadlifts. Minute 4: 20-second plank. Repeat that block 3 times. If you finish a minute early, rest. If you barely finish at all, cut the reps by 2 on the next round.
For a beginner, use counter push-ups and bodyweight squats. For a harder version, add a backpack to the squats and deadlifts or slow the lowering phase to 3 seconds. The beauty of EMOM work is that it scales without changing the whole plan.
Phone timer. Clear floor. Done.
20. Repeatable At-Home Strength Circuit for Busy Days
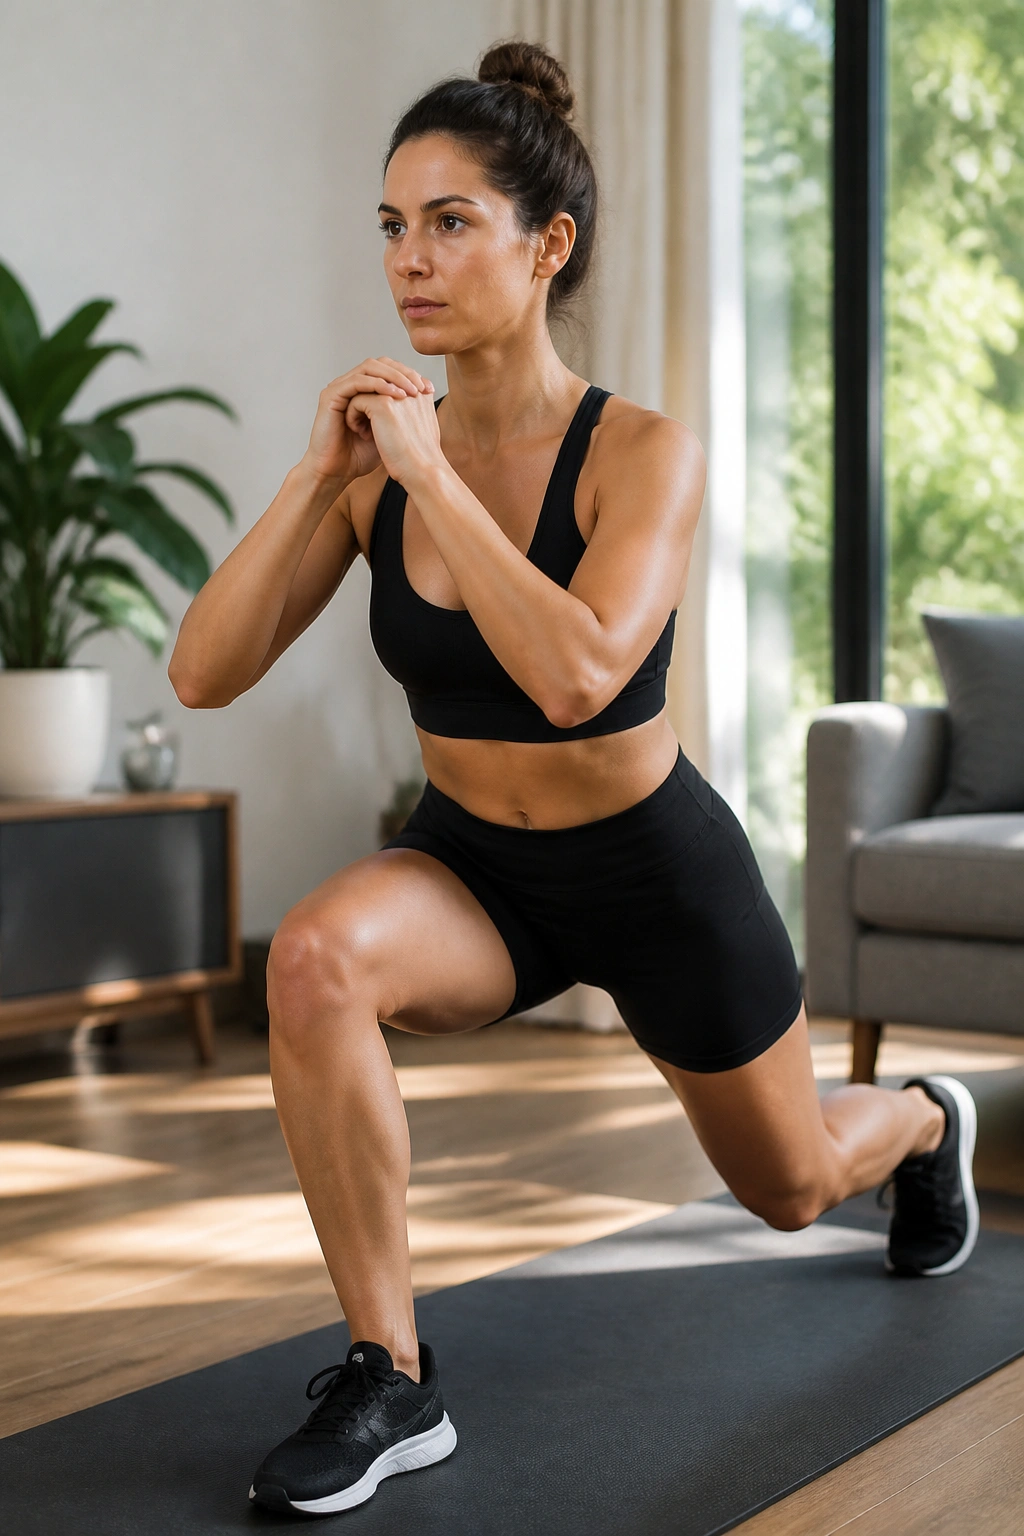
If you want one session you can keep coming back to, make it this one. It is simple enough to remember and hard enough to matter, which is a rare combination.
Set up 5 movements and run them for 40 seconds of work, 20 seconds of rest across 4 rounds:
- Squat
- Push-up
- Hip hinge
- Reverse lunge
- Plank
If that feels too easy, hold a backpack during the squat and hinge, or switch the push-up to a slower tempo. If it feels too hard, use an incline for the push-up and cut the work blocks to 30 seconds. The workout stays the same shape either way, which makes it easy to repeat on the days when decision-making is the last thing you want.
There is a reason people get stronger when they stop redesigning the session every week. A plan you can repeat beats a perfect plan you abandon. Keep this one nearby, and let the room do more than it looks like it should.
