



If your lower back takes over during core work, the problem usually isn’t weak abs alone. It’s that the midsection is being asked to do a job it was never built to do by itself: resist motion, transfer force, and keep your torso from flopping around while your arms and legs move.
Crunches have their place. They’re not the whole story.
A stronger midsection shows up in the boring places people ignore: the moment you pick up a heavy grocery bag with one hand, brace before a deadlift, keep your ribs from flaring on an overhead press, or hold your body still when you’re tired and your form wants to drift. That’s why the smartest core training mixes floor work, crawling, anti-rotation drills, carries, and a little bit of old-fashioned flexion.
The moves below cover the whole map. Some are gentle enough to learn control from scratch. Others are nasty in that quiet way where you realize five clean reps are harder than twenty sloppy ones. Start with the ones that teach your midsection to stay stacked, then earn your way toward the exercises that ask for speed, load, and serious tension.
1. Dead Bug for Ribs-Down Core Control
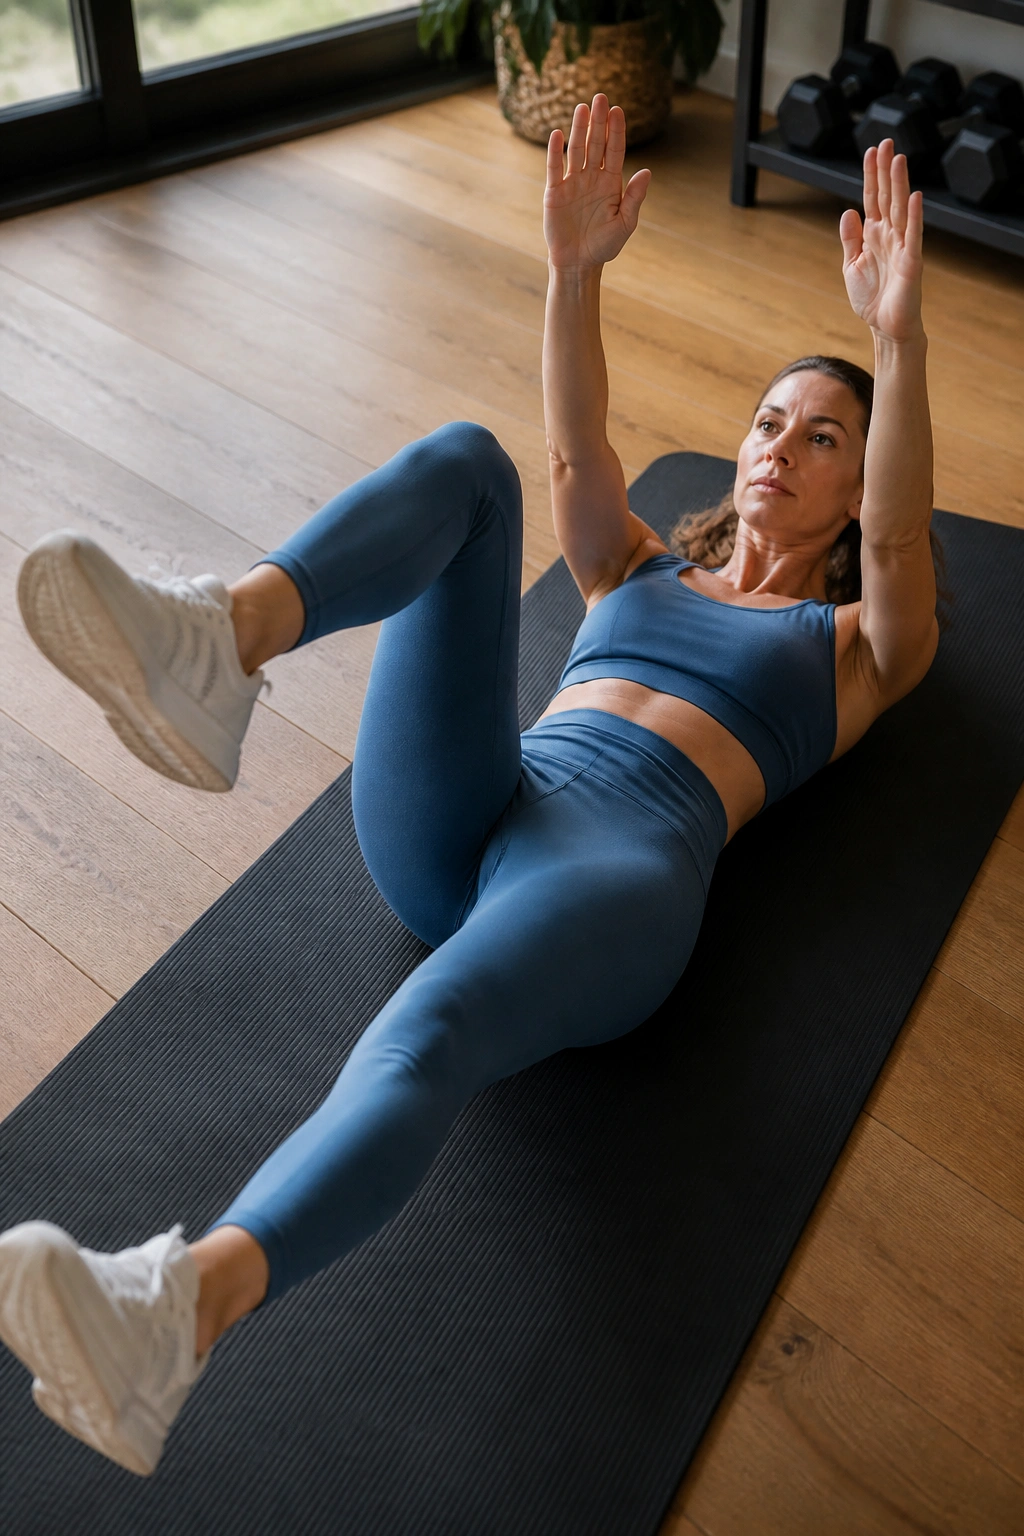
This is the move I’d give almost anyone first. It looks harmless, and then your lower back starts arching off the floor the second you reach your leg out too far. That’s the point: the dead bug teaches you to move your limbs without losing control through the middle.
How to make it count
Lie on your back with your knees over your hips and your arms pointed toward the ceiling. Exhale fully, press your low back gently into the floor, then lower one opposite arm and leg at the same time. Move slowly. If your back pops up, shorten the reach.
- Do 2 to 4 sets of 6 to 8 reps per side
- Keep the movement smooth, not fast
- Stop each rep before your rib cage flares
- Use a 2-second exhale on the way down
Tip: if your neck or hip flexors get cranky, raise the working leg a little higher. Control beats range every time.
2. Forearm Plank for Straight-Line Bracing
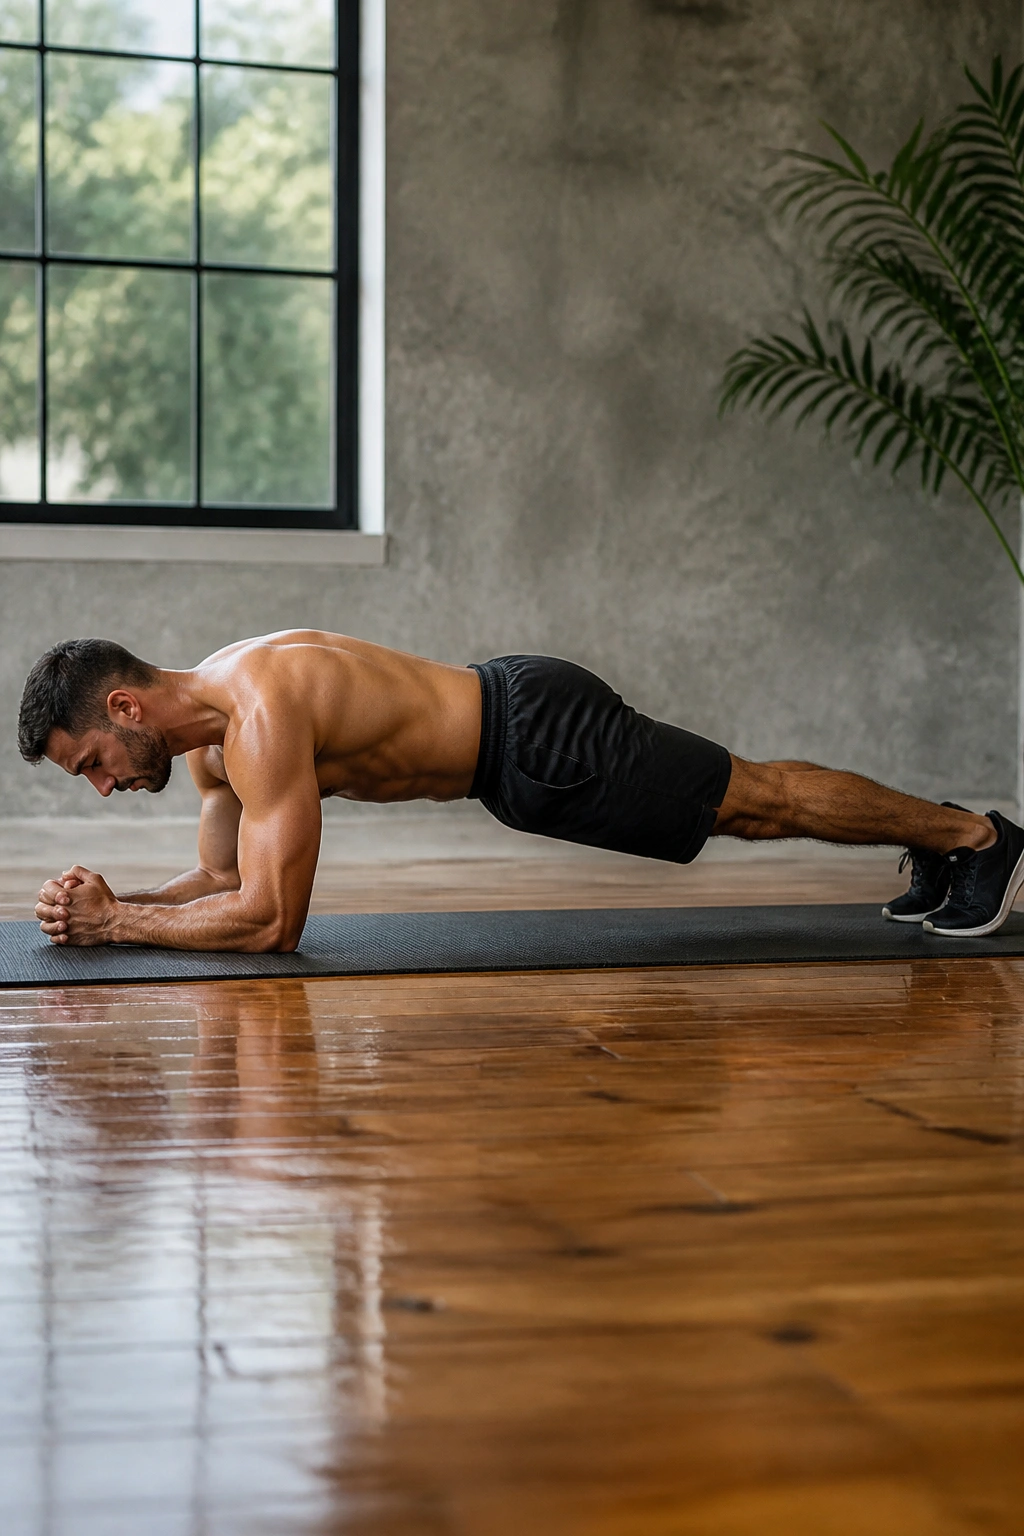
A clean forearm plank is harder than most people admit. Not because it’s flashy. Because holding a straight body line while breathing normally is a sneaky test of whether your core can do its real job.
The common mistake is turning the plank into a low-grade survival contest. People chase time, their hips sag, their shoulders creep toward their ears, and the lower back does all the complaining. That’s junk work. A 25-second plank with perfect tension is worth more than a shaky 90-second hold.
Set your elbows under your shoulders, squeeze your glutes, and think about pulling your ribs toward your pelvis without collapsing. Breathe through your nose if you can. If you can’t breathe, you’re probably holding too much tension in the wrong place. Try 3 sets of 20 to 40 seconds and stop the moment your shape falls apart.
3. Side Plank for Obliques and Hip Stability
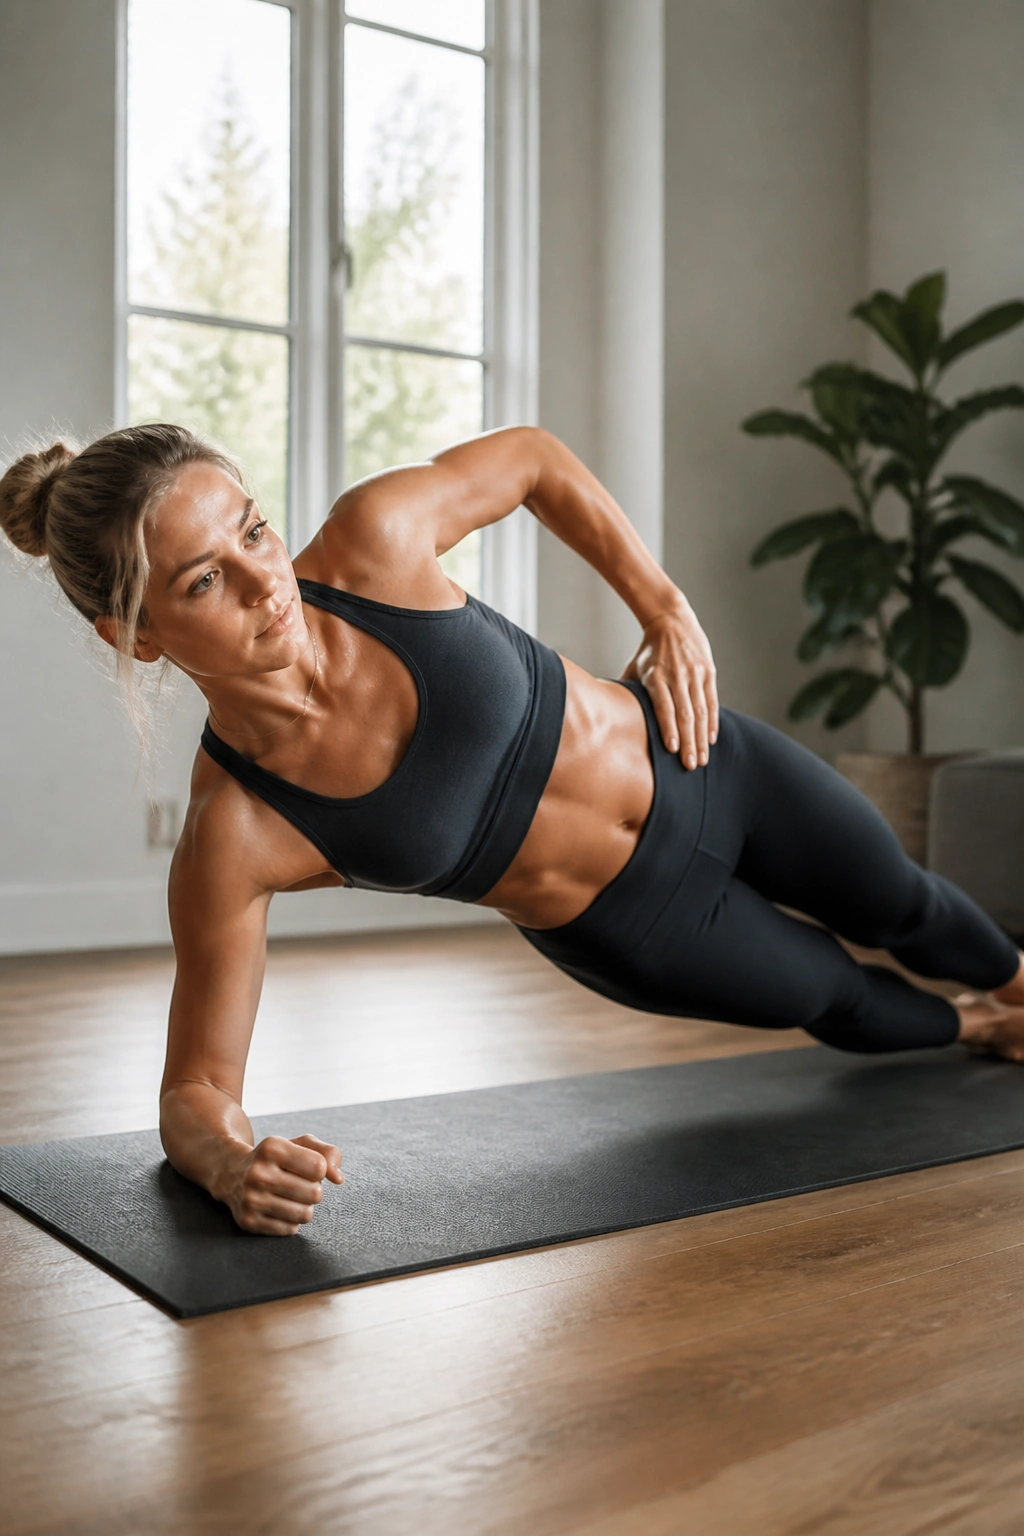
Why do side planks show up in strong-core programs over and over? Because they train the side body to resist bending, which is a big deal if you care about your back, your gait, and the annoying wobble that shows up when one side gives out sooner than the other.
What to watch for
Lie on one side, stack your feet, and lift your hips so your body makes one clean line from head to heel. If that version is too much, drop the bottom knee. No shame in that. The job is to keep the torso steady while the obliques and glute med do their work.
A good side plank should feel like a firm squeeze along the side of your waist, not a shoulder grind. Hold 15 to 30 seconds per side for 2 to 4 rounds. Want more? Raise the top leg a few inches. That changes the game fast.
4. Hollow Body Hold for Anti-Extension Strength
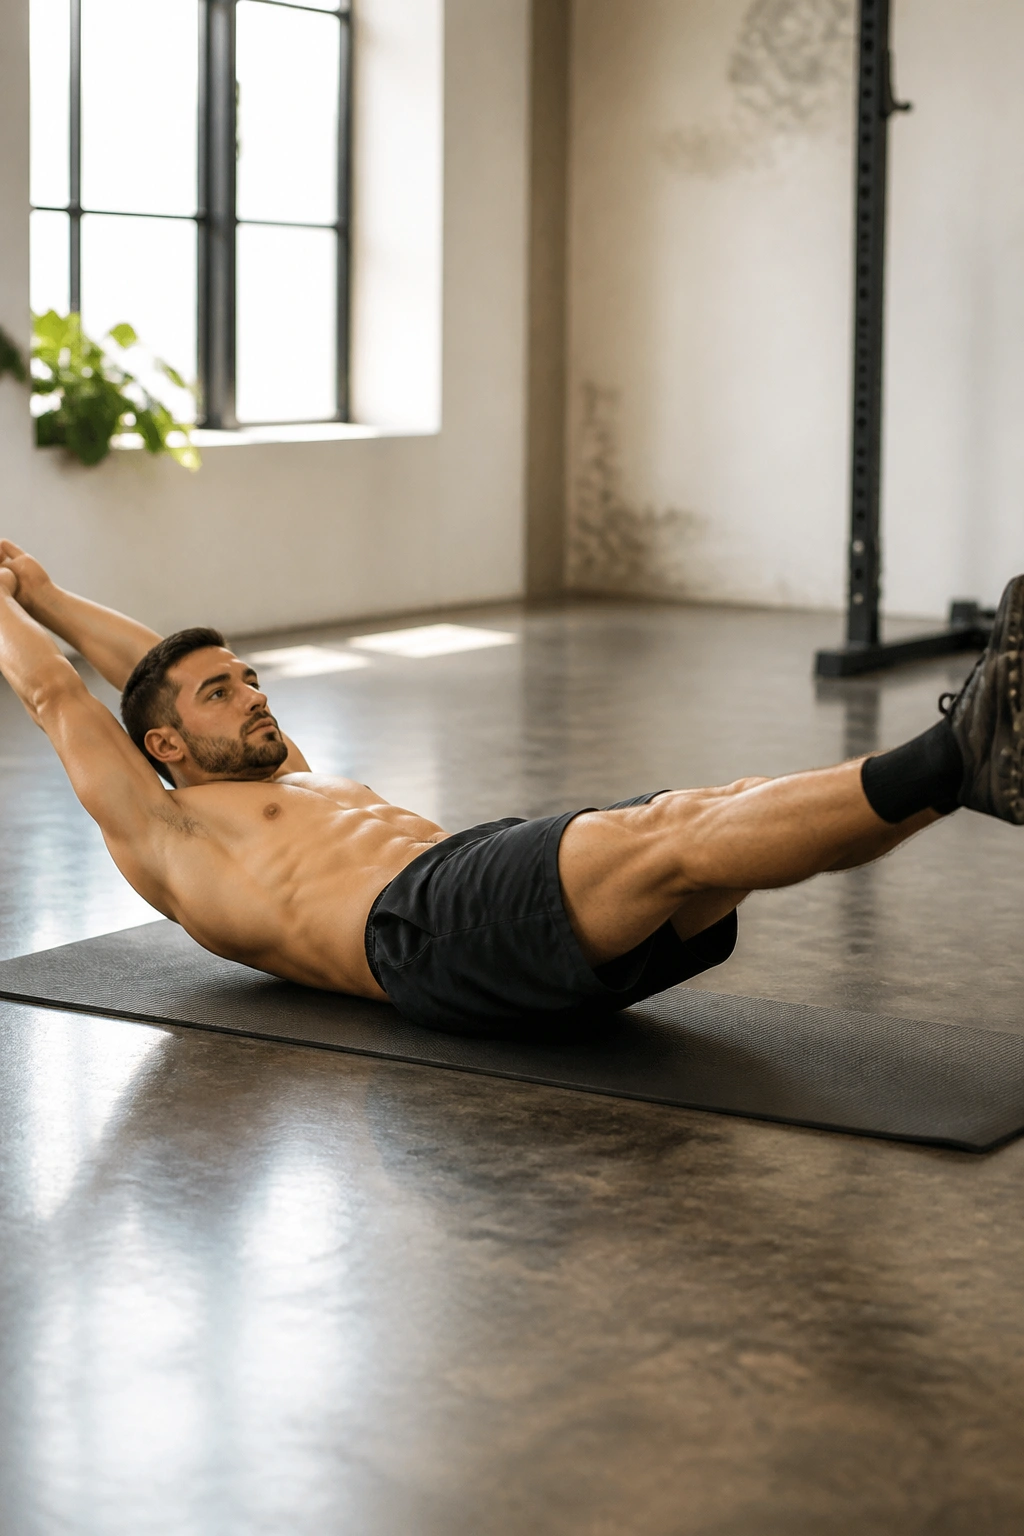
I’ve watched strong people shake in a hollow hold. That usually surprises them, because the position looks simple until they realize how much the midsection has to do to keep the low back pinned down.
The part people miss
The hollow hold is an anti-extension drill, which is a fancy way of saying it teaches your spine not to arch when your limbs extend away from you. That matters for gymnastics-style core strength, sure, but it also carries over to planks, presses, and even running posture.
- Start on your back, then press your low back into the floor
- Lift your shoulder blades slightly off the ground
- Extend your arms overhead and legs out only as far as you can control
- Hold 10 to 25 seconds without losing the floor contact in your lower back
One hard rule: if your back arches, bend the knees and shorten the lever. That is not a regression to feel bad about. It’s how you earn the full version later.
5. Bird Dog for Cross-Body Stability
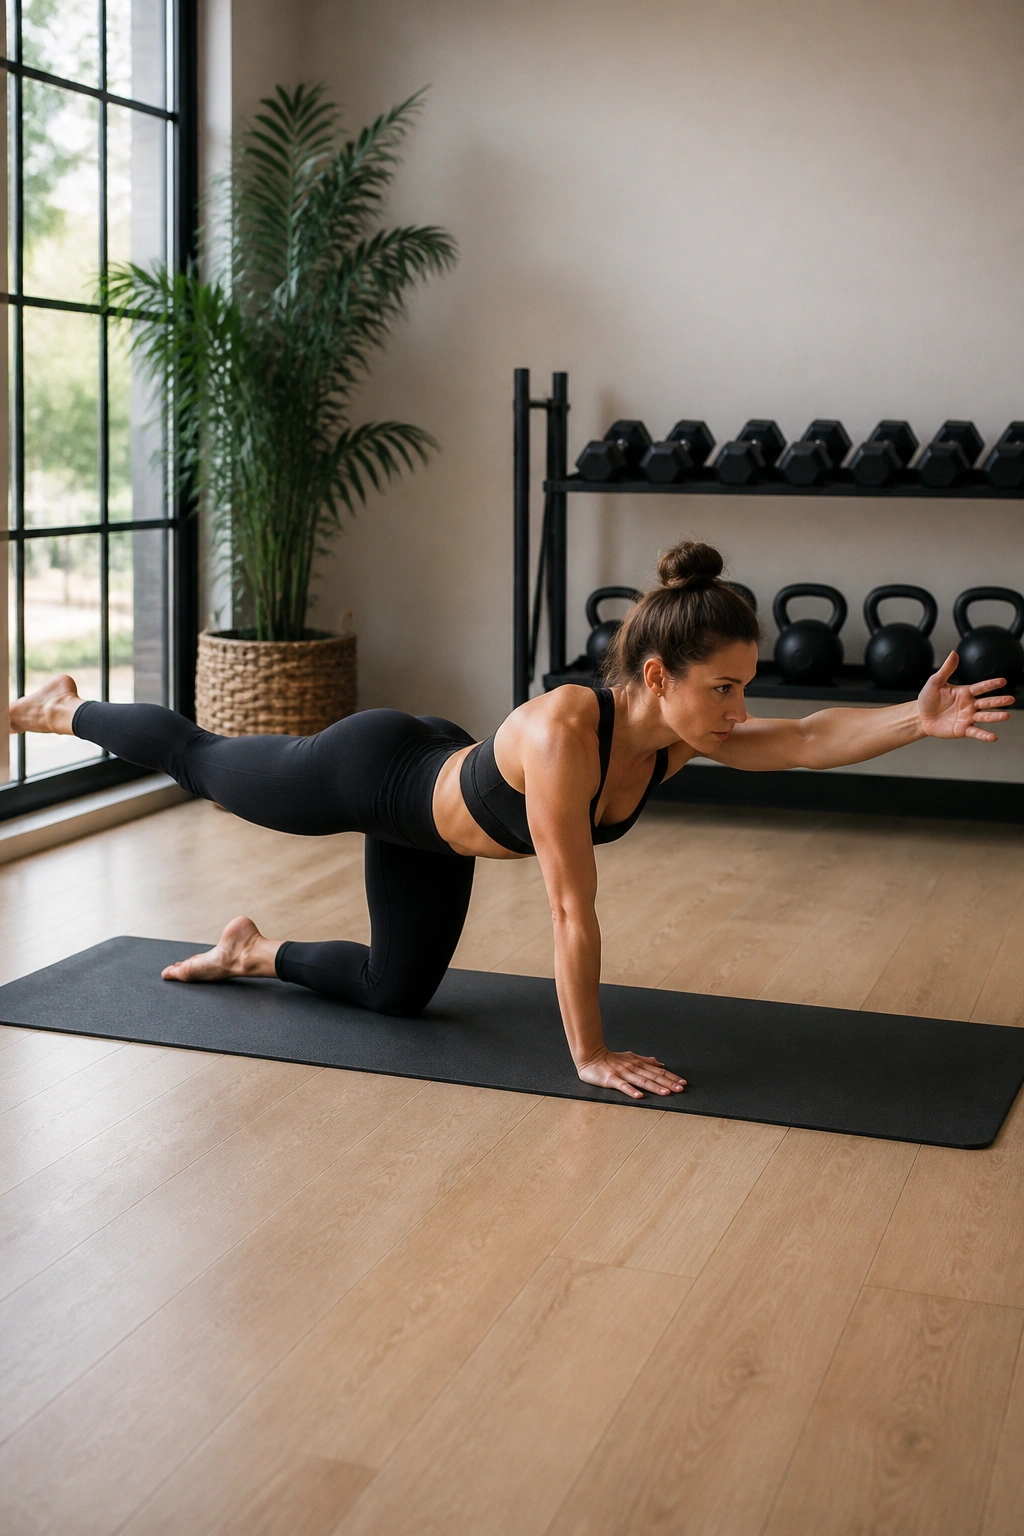
The bird dog is one of those exercises people rush through because it looks easy. Then you slow it down and realize your hips want to twist, your ribs want to flare, and your reaching arm is doing more work than your core ever got credit for.
This move trains the diagonal link between opposite shoulder and hip. That cross-body connection matters in real life. Walking, throwing, rowing, even standing up from the floor — all of it asks one side of the body to support the other without a wobble. Keep your hands under your shoulders and knees under your hips, then reach one arm and the opposite leg long. Pause for a second or two. Don’t kick the leg high. Long is better than high.
I like 3 sets of 6 slow reps per side. If your back starts shifting, cut the range in half and make the pauses cleaner.
6. Reverse Crunch for Posterior Pelvic Tilt
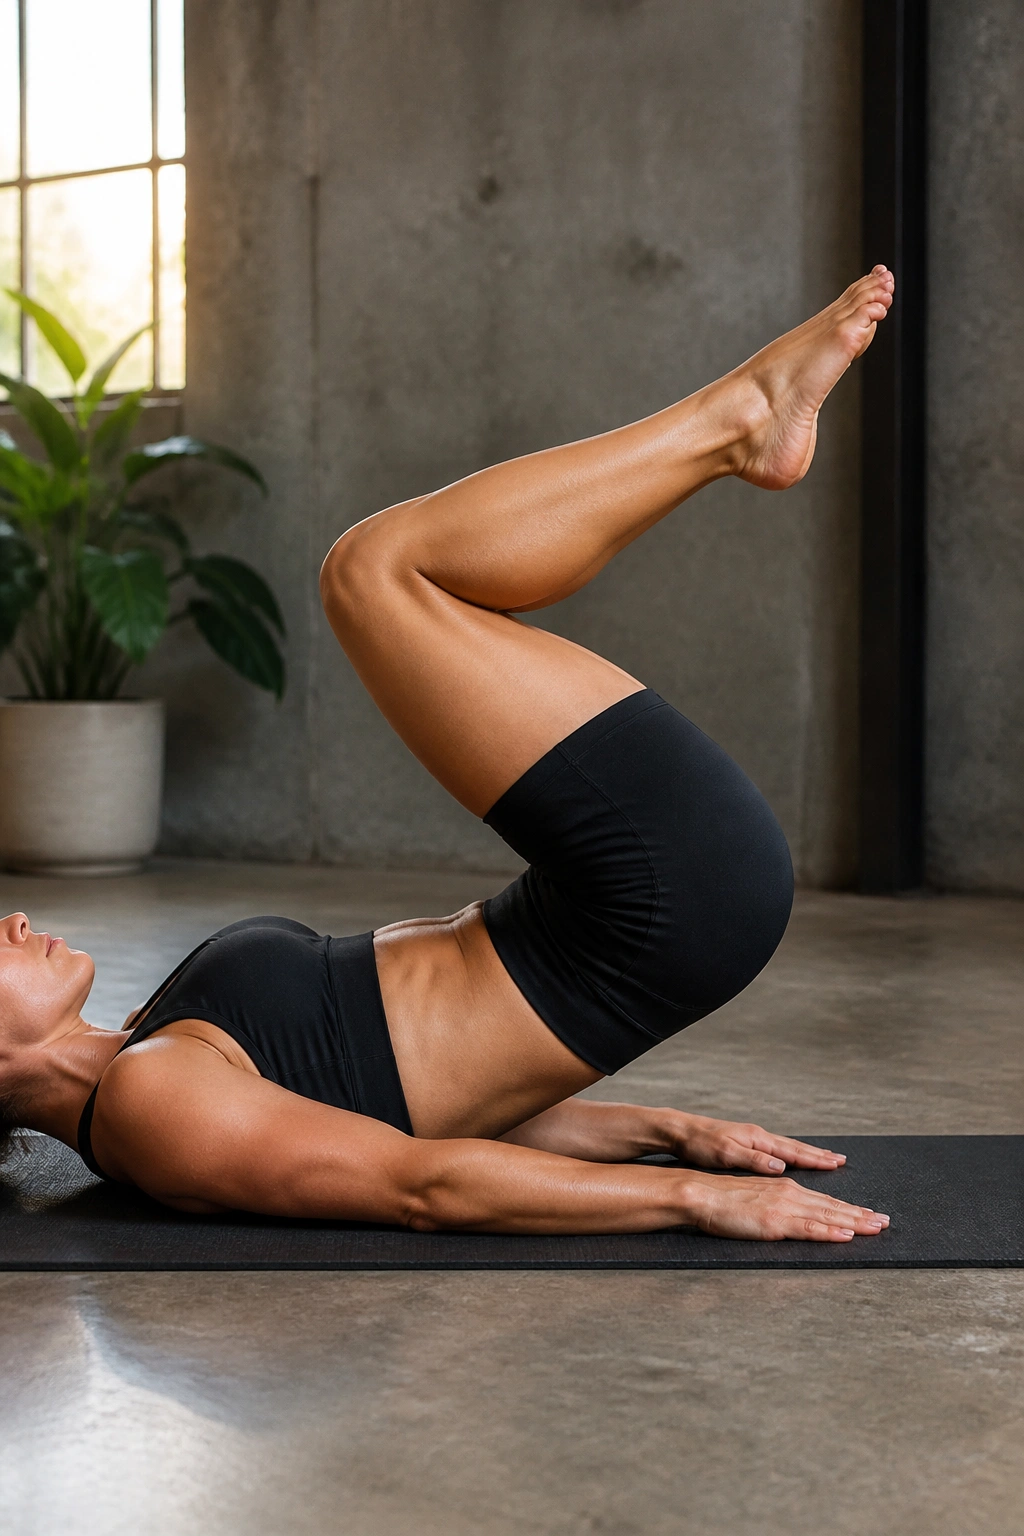
A reverse crunch is not a sloppy sit-up with momentum. Done well, it teaches the pelvis to curl under while the abs do the lifting. That small pelvic motion is a big deal.
Why it beats a fast crunch
Regular crunches often turn into neck tugging and rib flaring. Reverse crunches shift the emphasis lower, into the part of the rectus abdominis that helps you draw the pelvis up and in. You’ll feel it in the lower belly if you keep the movement controlled.
Lie on your back, bend your knees, and bring them toward your chest. Then curl your tailbone off the floor a few inches. That’s the rep. Lower slowly until your feet hover just above the ground, not slammed down. Try 3 sets of 10 to 15 reps.
A tiny pause at the top makes the whole thing better. Tiny. Not dramatic. Just enough to stop the swing.
7. Hanging Knee Raise for Lower Ab Control
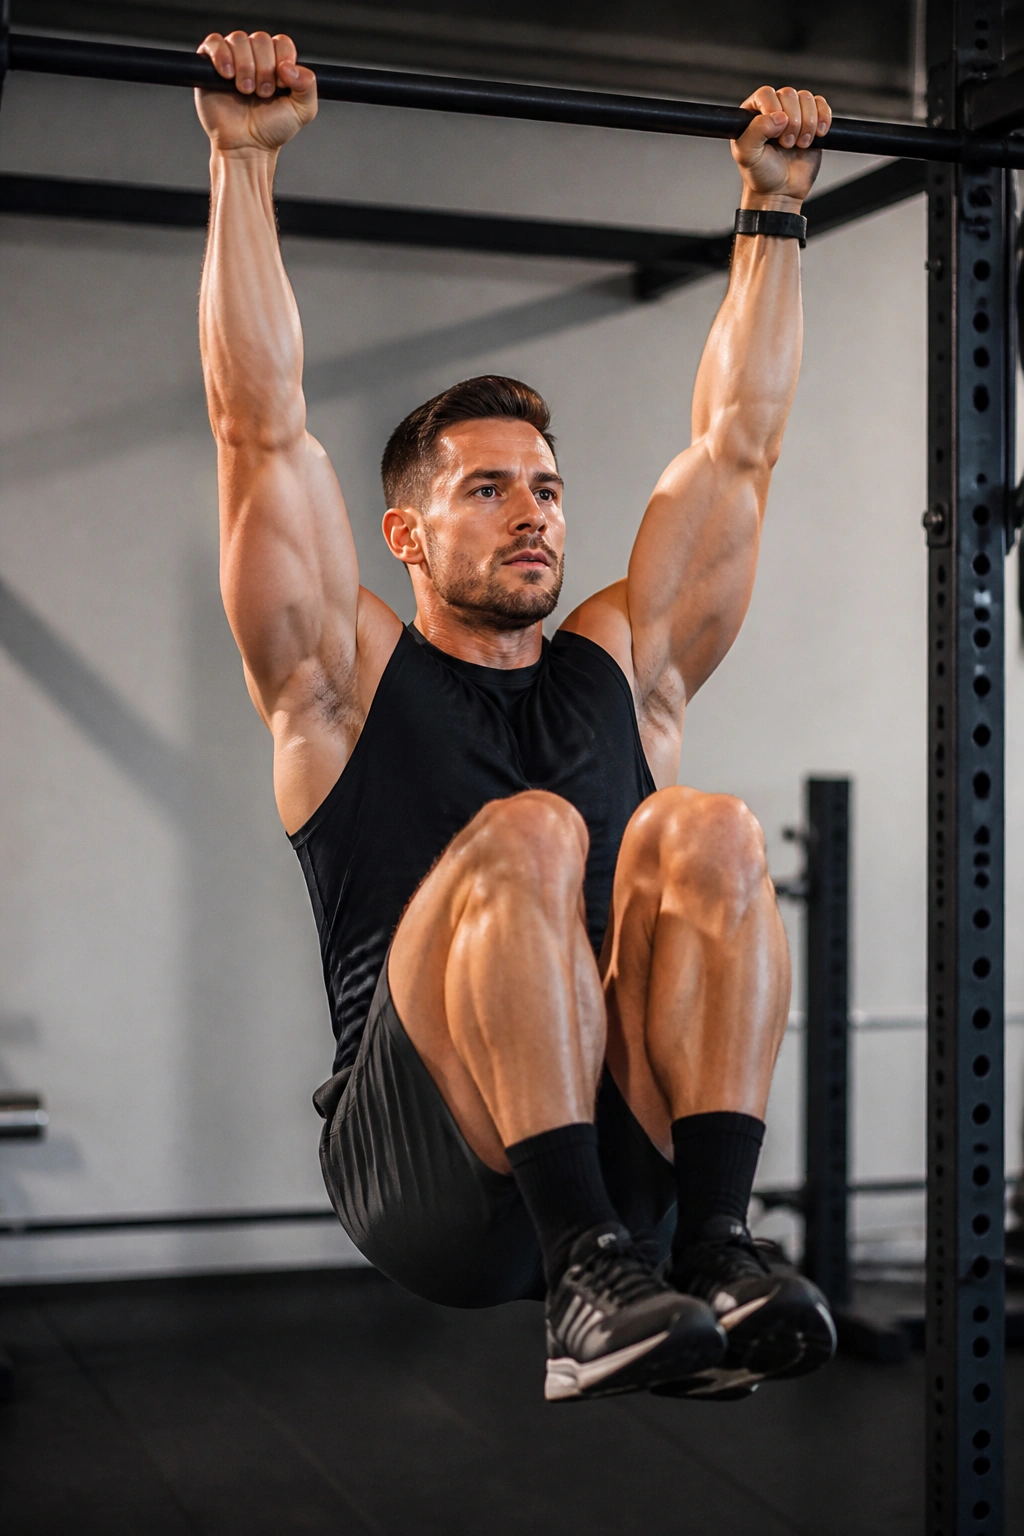
This one looks simple from across the gym. Up close, it’s a lesson in whether your grip, lats, and abdominals can stay organized while gravity tries to peel you open.
Start by hanging from a bar with your shoulders active, not dead-hanging like a sack of laundry. Bring your knees up under control, then lower them slowly. The lower you can go without swinging, the better the set. If the swing starts, stop and reset. Momentum turns this into a hip-flexor drill fast.
How to make it useful
- Use a captain’s chair if a bar is too much
- Keep the pelvis tucked slightly at the top
- Lower for 2 to 3 seconds
- Aim for 6 to 12 clean reps
If you can do hanging leg raises later, great. Knee raises are where most people should start. There’s nothing glamorous about that. They still work.
8. Pallof Press for Anti-Rotation Strength
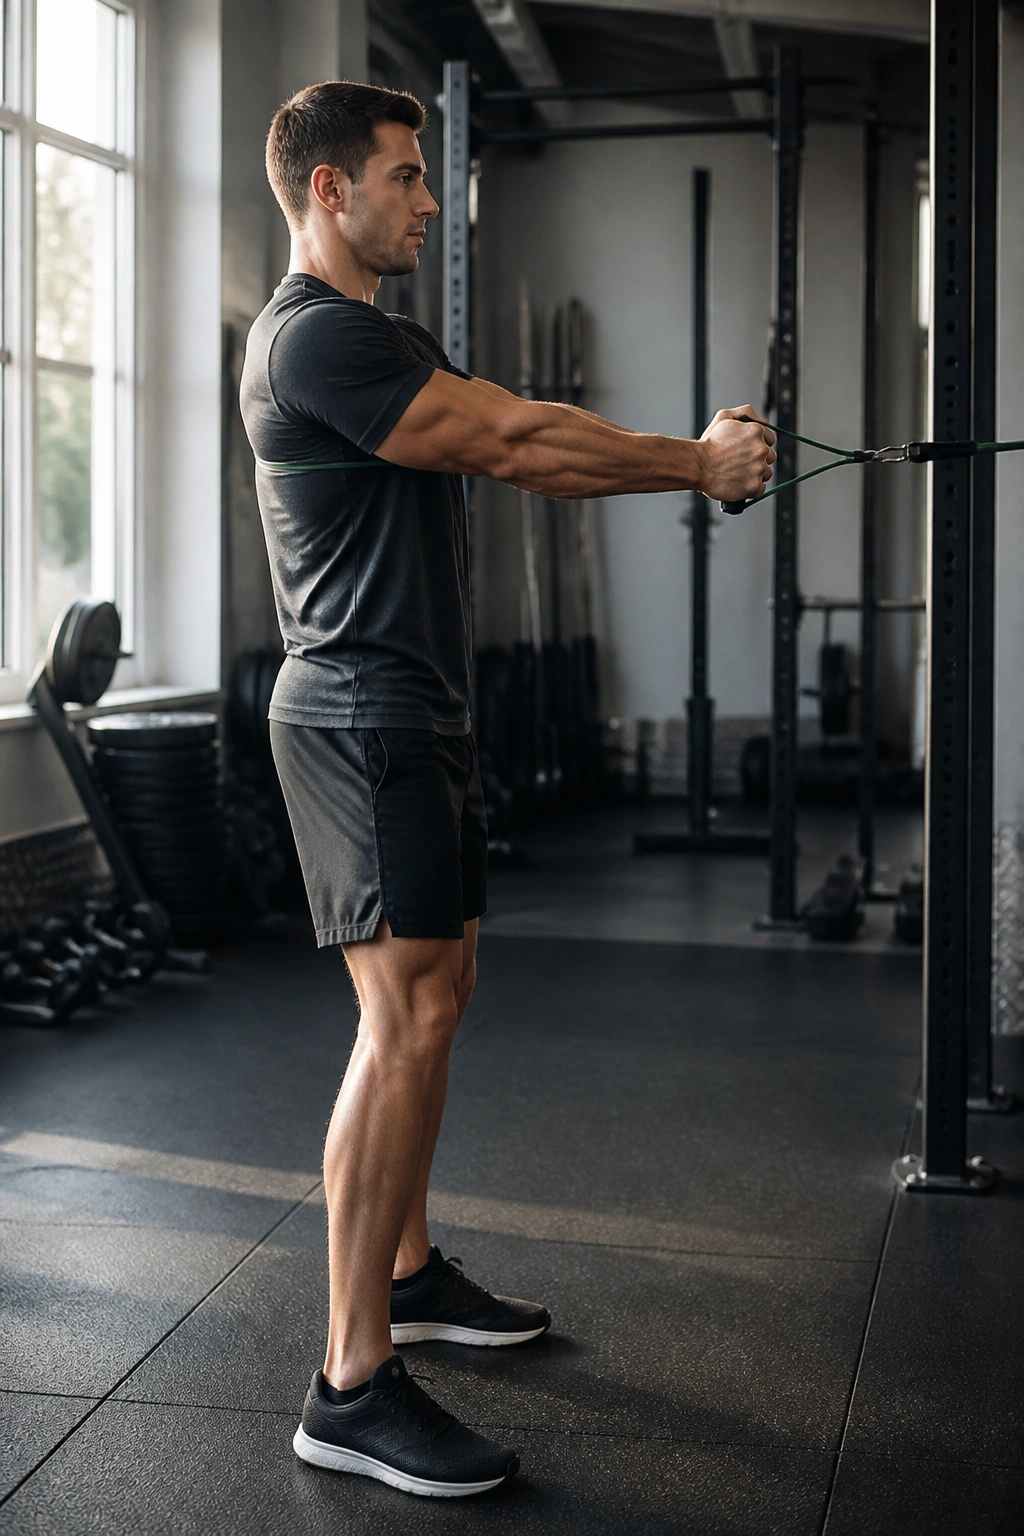
Here’s the honest truth: a lot of core work is just flopping around and hoping for the burn. The Pallof press is the opposite. It asks you to stay boring. Tight. Square. Unmoved.
Attach a band or cable at chest height, stand sideways to the anchor, and press the handle straight out from your sternum. The load will try to twist you toward the machine. Your job is to refuse. That refusal is the exercise.
Do 2 to 4 sets of 8 to 12 presses per side, or hold each press for 5 to 10 seconds if you want more challenge. Keep your feet planted and your ribs stacked over your pelvis. If your shoulders rotate, lighten the load. This is not a strength contest against the cable stack.
9. Cable Wood Chop for Controlled Rotation
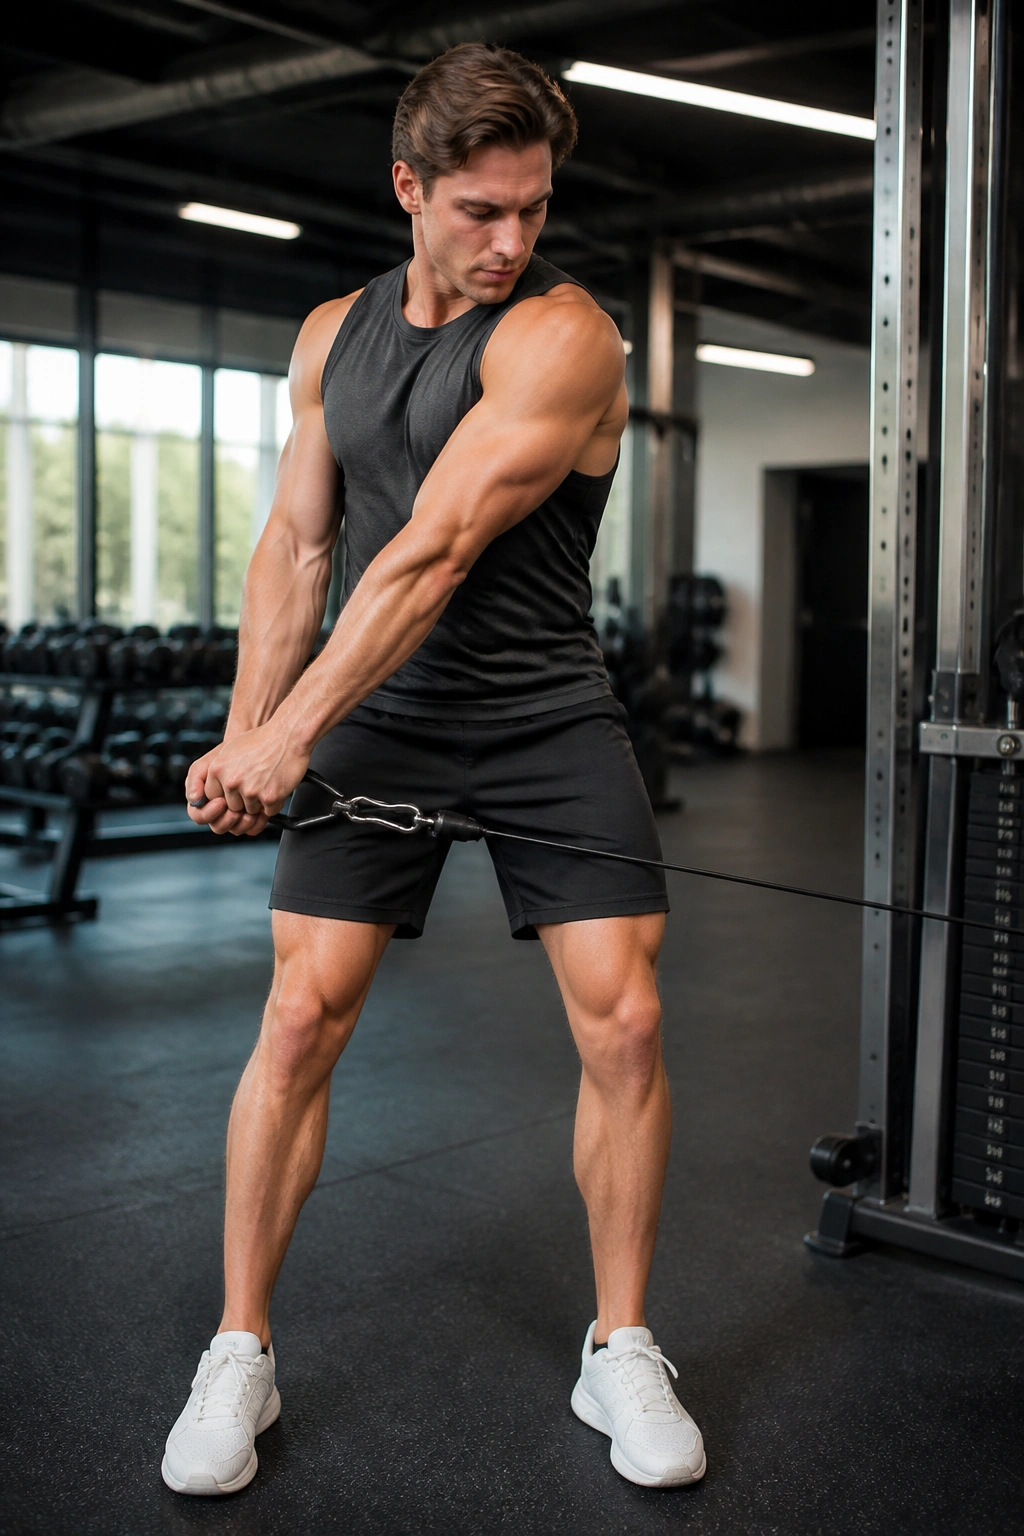
What makes a wood chop different from random twisting? The control. If your hips and rib cage work together, the movement trains rotation. If your shoulders whip around while your lower half stays asleep, it turns into noise.
High-to-low or low-to-high?
Both work. High-to-low tends to feel more natural for many people because it mimics a downward chop pattern, while low-to-high hits the obliques from a slightly different angle. Pick one and keep the torso steady as you rotate through the trunk rather than yanking with the arms.
Stand tall, brace first, then move the handle across your body with a smooth path. Don’t let your lower back cave or your knees spin wildly. Think “turn and stop,” not “spin and pray.”
Try 3 sets of 8 to 10 reps per side. Use a load that lets you finish with clean ribs and no jerky finish. Clean rotation is the whole reason this exercise belongs in a real core program.
10. Ab Wheel Rollout for Full-Torso Tension
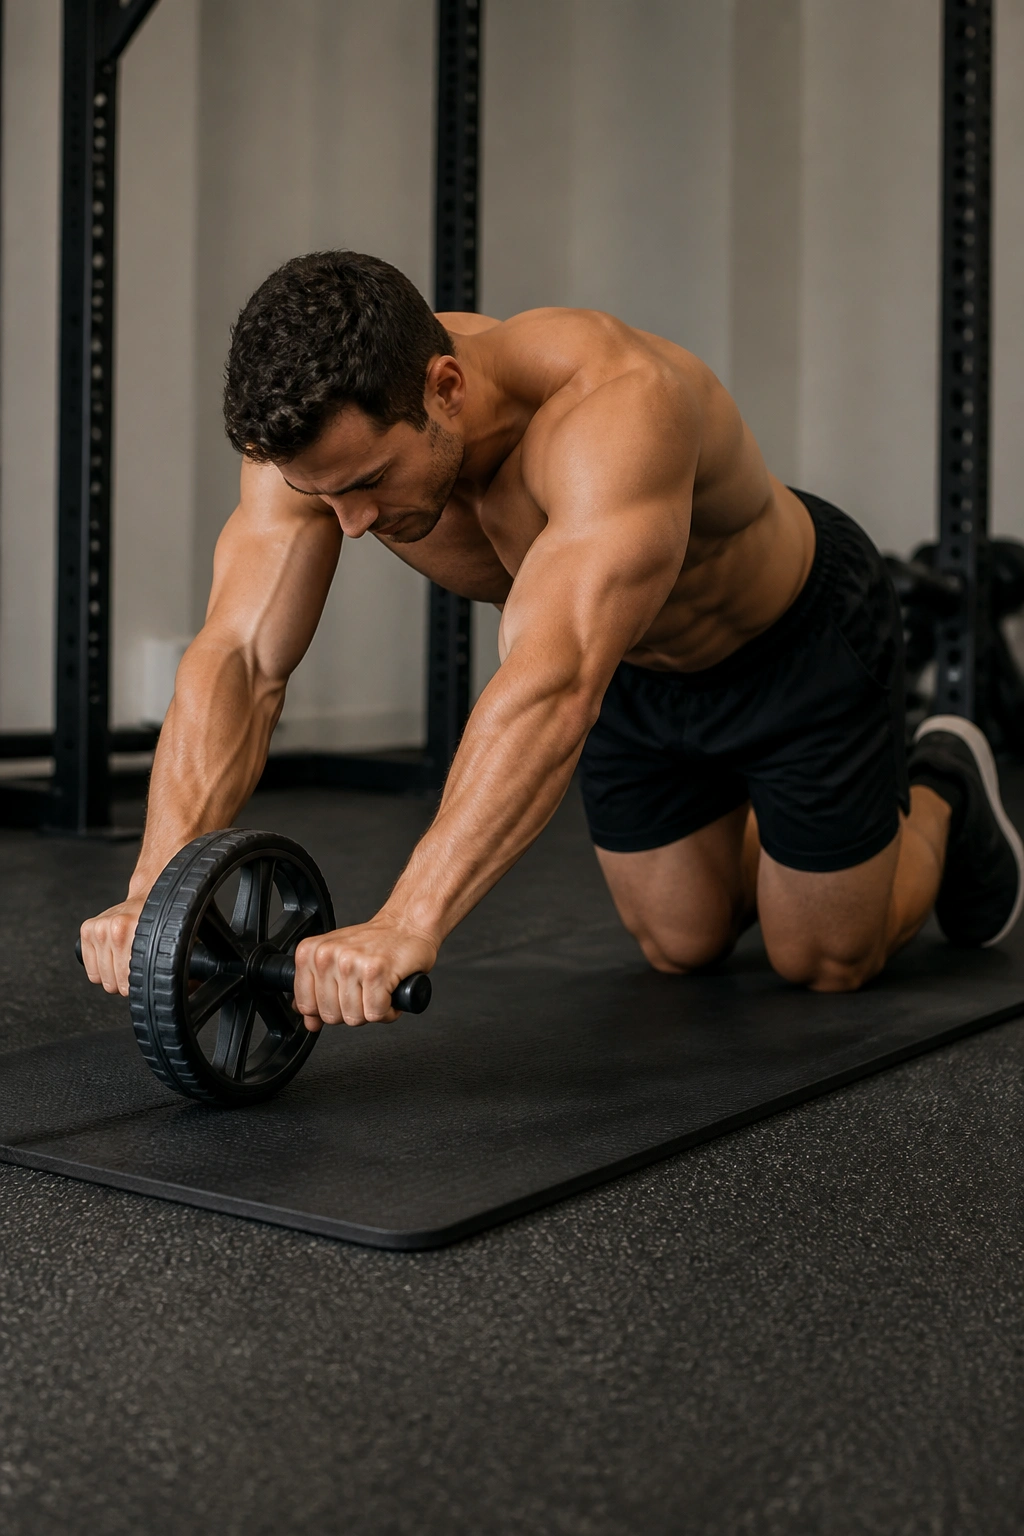
The ab wheel is the exercise people love to fear, and honestly, that reputation is deserved. It punishes sloppy bracing. It also teaches your midsection to resist extension under a long lever, which is a very useful skill.
Imagine a plank that keeps getting longer and longer. That’s the feel here. Kneel on a mat, grip the wheel, and roll forward only as far as you can keep your low back from sagging. Then pull yourself back using your abs and lats together. The return should be controlled, not a collapse.
- Start with a short range
- Keep the hips slightly tucked
- Exhale on the way out
- Try 2 to 3 sets of 5 to 8 reps
If your back arches, you went too far. Period. Shorten the rollout and own the line before you chase distance.
11. Stability Ball Rollout for a Friendlier Progression
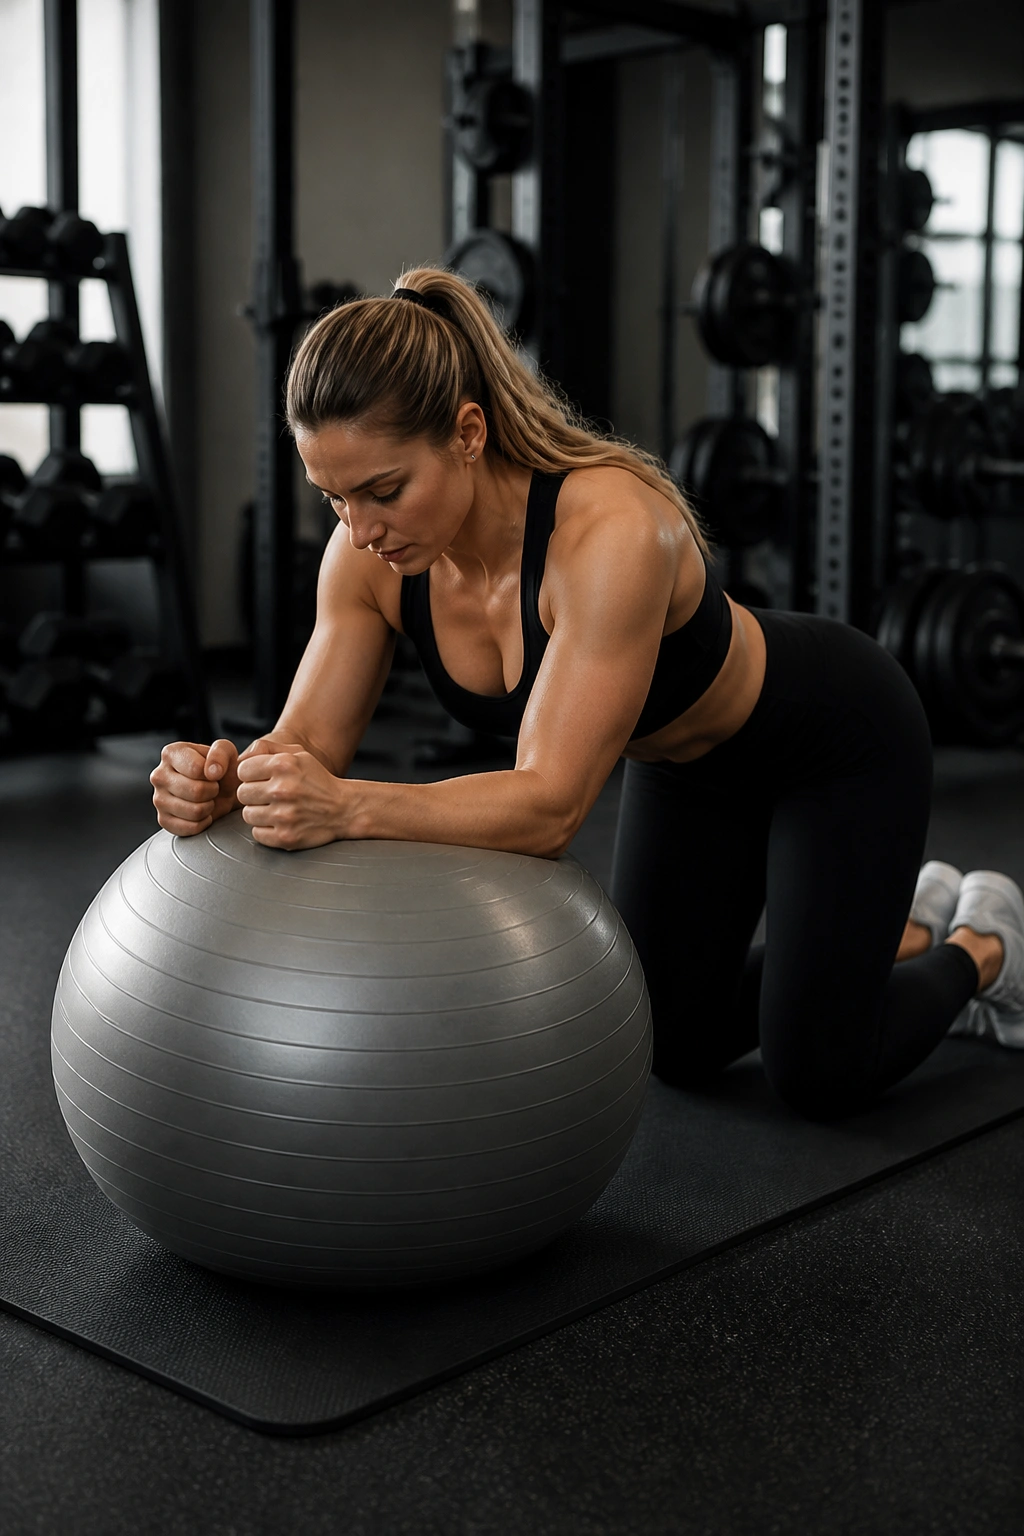
The stability ball rollout is the version I like when someone isn’t ready for the ab wheel yet, or when they want a little less wrist pressure and a touch more forgiveness. It still asks for serious trunk tension. It just gives you a wider base and a slower learning curve.
Lie with your forearms on the ball, kneel on the floor, and roll the ball forward a few inches. Feel your abs catch before your low back does anything weird. Then pull the ball back under you. The move should feel long and smooth, not aggressive.
What I like about this one is the feedback. If you lose tension, the ball starts drifting in a way the ab wheel doesn’t allow. That makes it easier to learn clean bracing without fighting the full load yet. Use 3 sets of 8 to 12 reps.
12. Mountain Climber for Fast Core Engagement
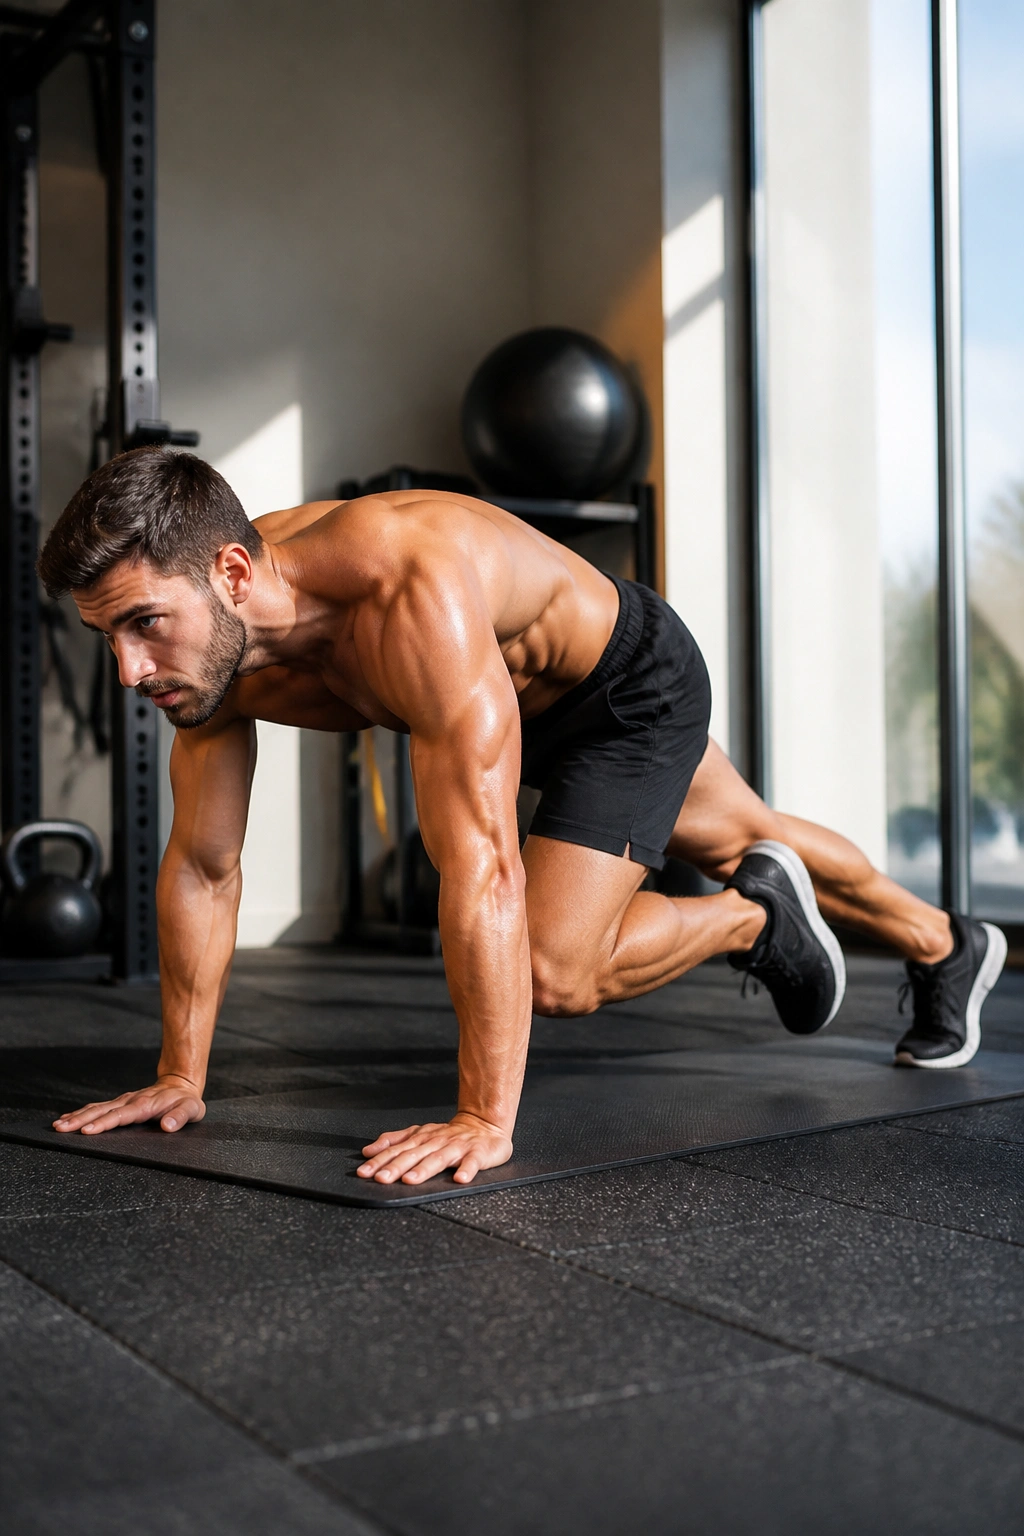
A fast mountain climber is mostly cardio. A slow mountain climber with intent? That’s much closer to a core drill.
Unlike the frantic version people race through in boot camps, this one asks your torso to stay level while your knees drive in under control. Start in a strong high plank, pull one knee toward your chest, and switch without letting your hips bounce. The goal is not speed. The goal is staying organized while your legs move.
That tiny distinction matters. If your hips are popping up and down like a metronome, your abs are losing the job. Keep the shoulders over the wrists and think about dragging the knees through thick air. Ten slow reps each side can be harder than thirty rushed ones.
I’d use this as a finisher: 3 rounds of 20 to 30 seconds, resting 30 to 45 seconds between rounds.
13. Plank Shoulder Tap for Quiet Hips
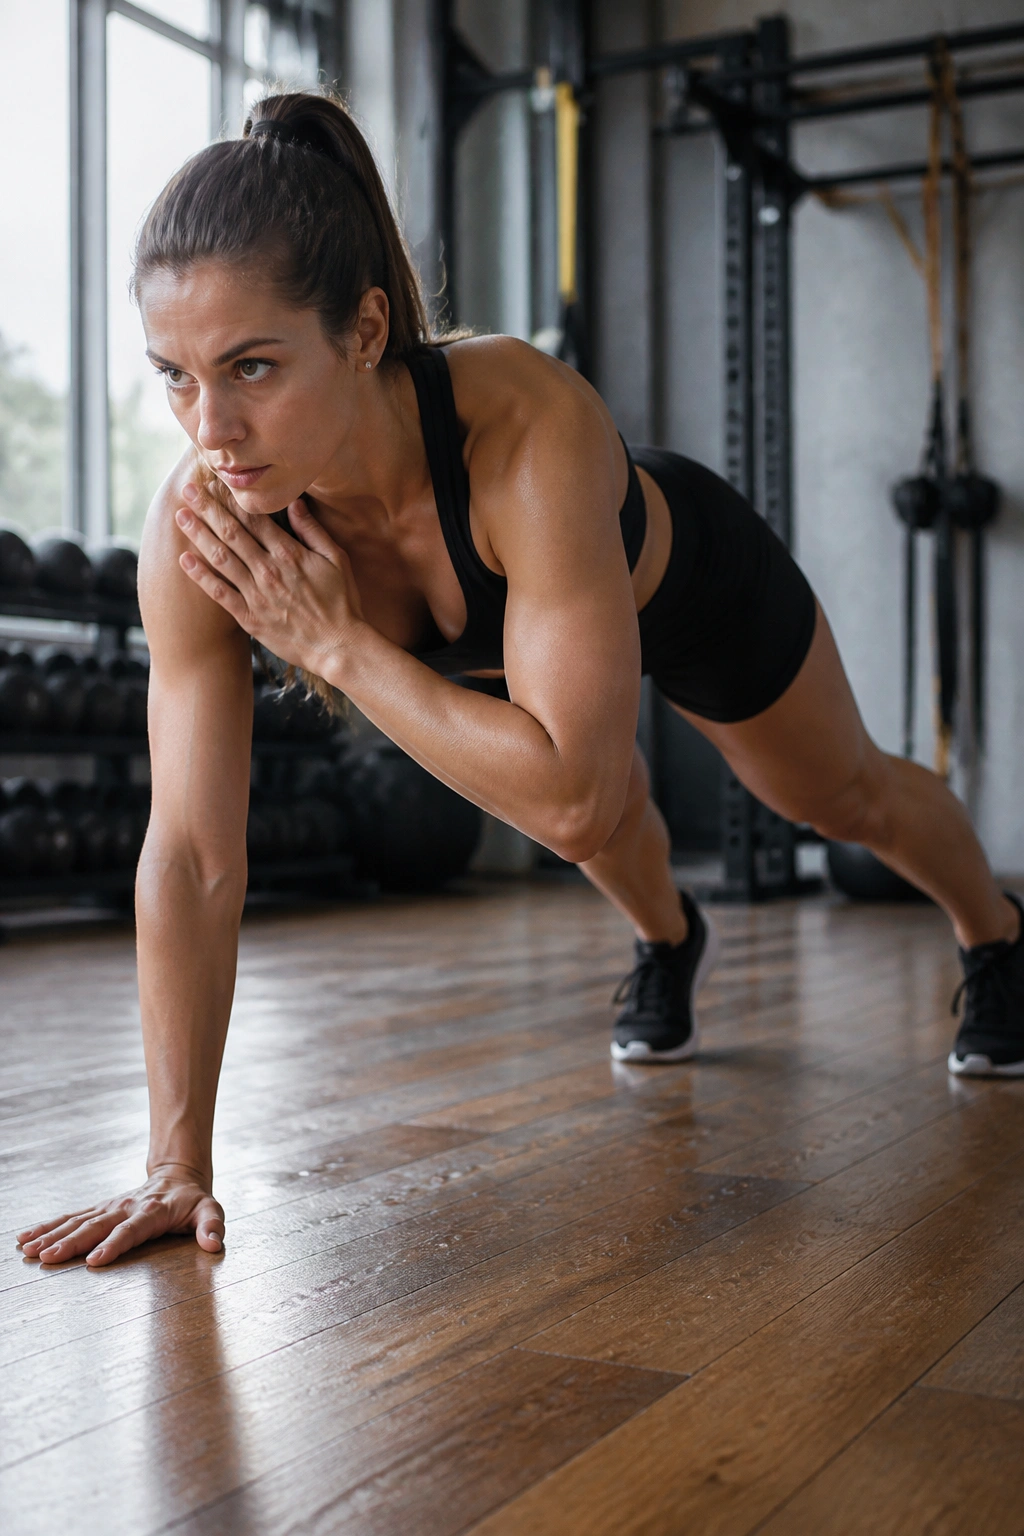
This is one of the cleanest tests of anti-rotation strength you can do with no equipment. And it’s rude. The second one hand leaves the floor, your hips try to do a little dance you never asked for.
What makes it work
Set up in a high plank with your feet a bit wider than hip-width if needed. Tap one shoulder with the opposite hand, then switch. Move slowly enough that your hips stay almost level. If they rock hard side to side, widen the feet or slow the pace.
A lot of people make this harder by speeding up. Bad idea. The challenge is resisting the shift, not creating more chaos.
Try 2 to 3 sets of 10 to 20 taps total. I like this exercise after a heavier lift session because it teaches the torso to stay calm when the upper body moves. That calm is worth training.
14. Bear Crawl for Total Midsection Tension
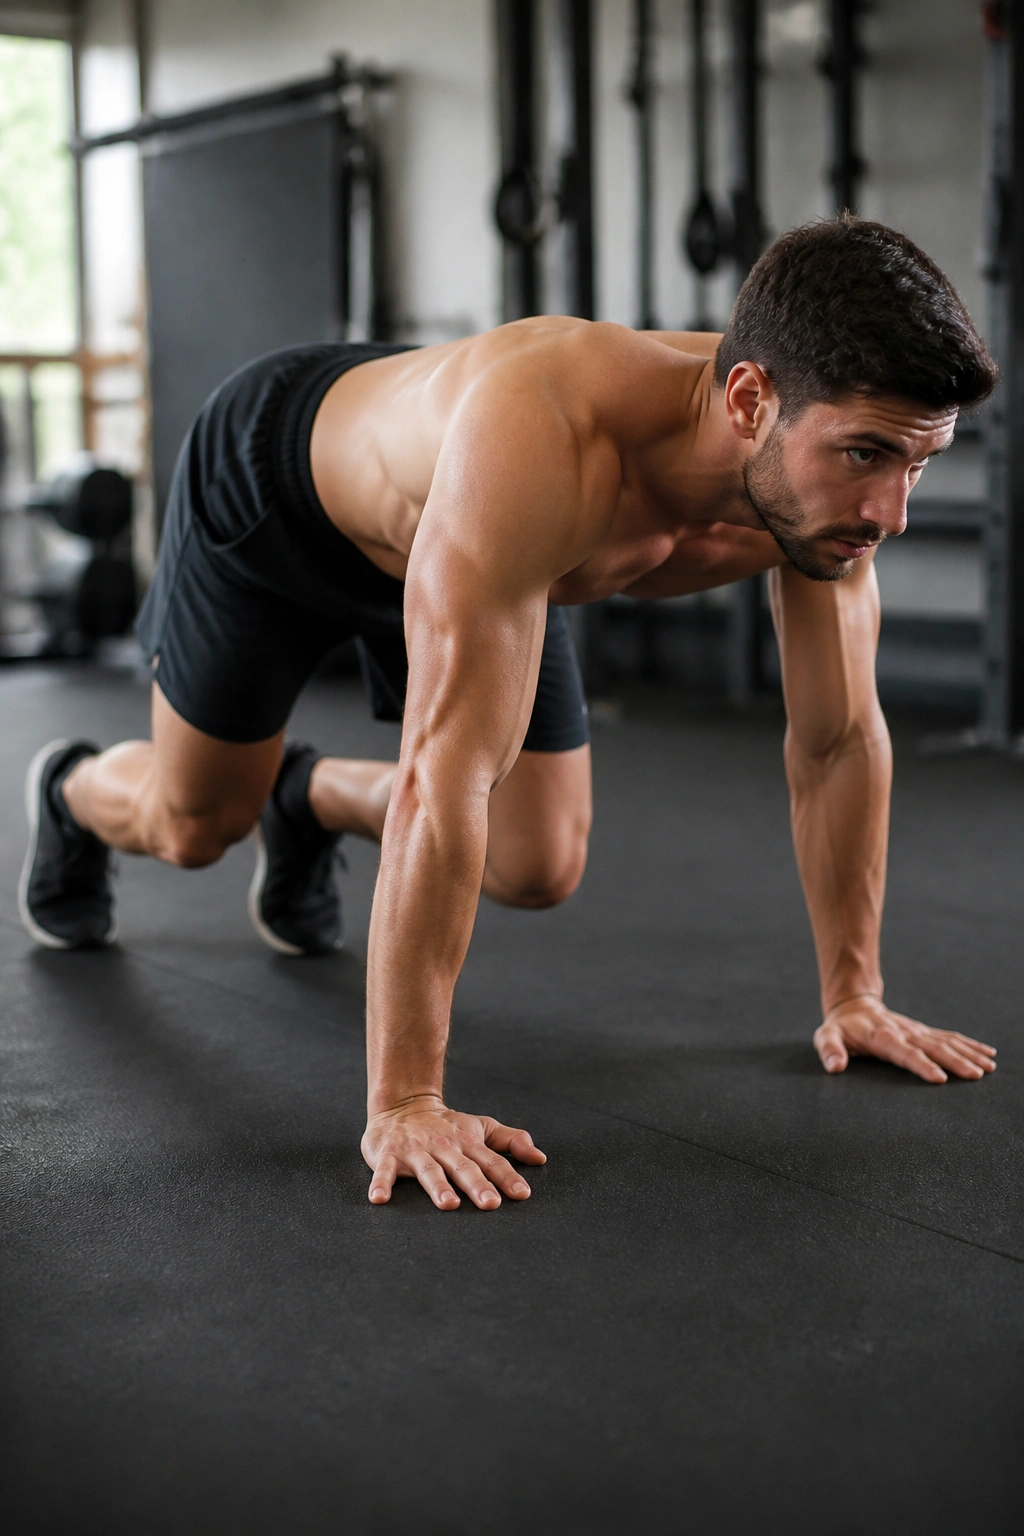
Bear crawls look a little ridiculous. That’s part of their charm. They also light up the shoulders, hips, and core in a way that feels surprisingly honest once you stop crawling like a toddler and start doing it on purpose.
How to crawl without dumping into your low back
Get on hands and knees, lift your knees about 1 to 2 inches off the floor, and move the opposite hand and foot forward in tiny steps. Keep the back flat and the steps short. Long strides usually cause the hips to sway and the lower back to sag.
A good bear crawl should feel tight through the belly and upper back, with the whole body working to stay compact. Try 20 to 30 seconds at a time, or crawl 10 to 15 yards down and back if you have space. That’s enough. You don’t need to race it.
This is one of the rare core drills that feels like a full-body job from the first second. It is.
15. Suitcase Carry for Side-to-Side Control
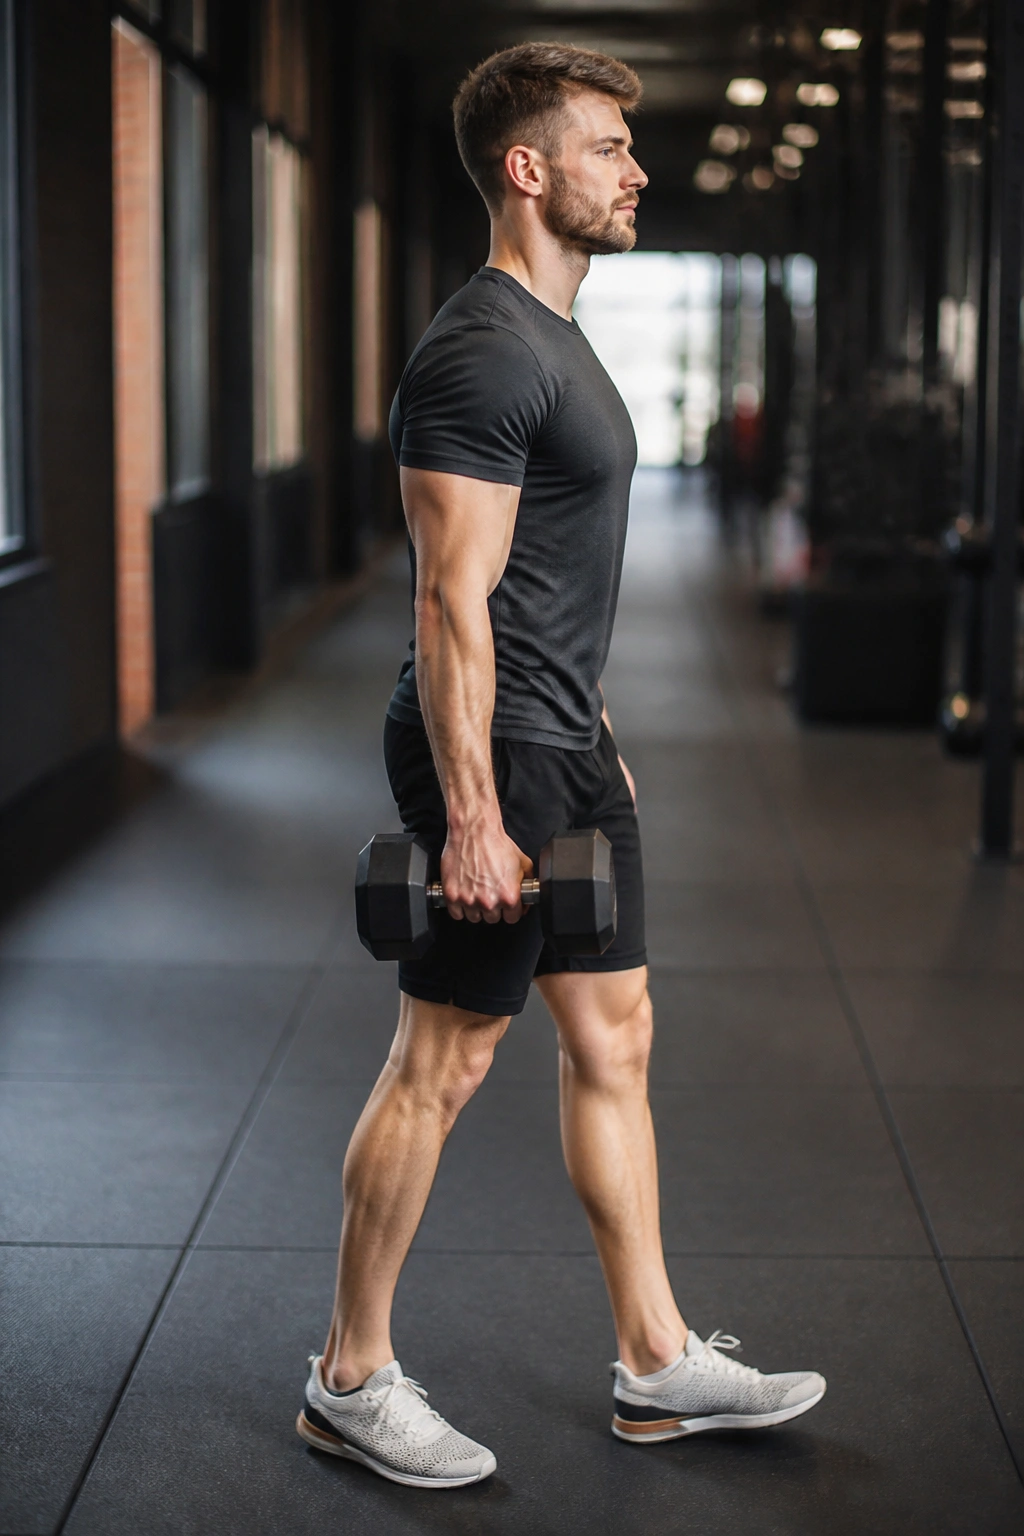
If I had to pick one loaded core drill for real-life use, suitcase carries would be near the top. One heavy dumbbell. One side of your body trying to bend you over. Your job is to stay tall and keep walking.
How to use it
Hold a dumbbell or kettlebell in one hand and walk 20 to 40 yards at a steady pace. Don’t lean away from the weight. Don’t shrug the shoulder. Don’t rush. Walk like you’re carrying a full glass of water on your head and somebody’s testing your patience.
The suitcase carry trains the obliques, quadratus lumborum, grip, and hip stabilizers in one shot. That makes it a very efficient drill, even though “efficient” is a boring word for something that feels this demanding. Use a weight that makes you work hard for the last third of the walk, then switch sides.
16. Farmer Carry with March for Loaded Bracing
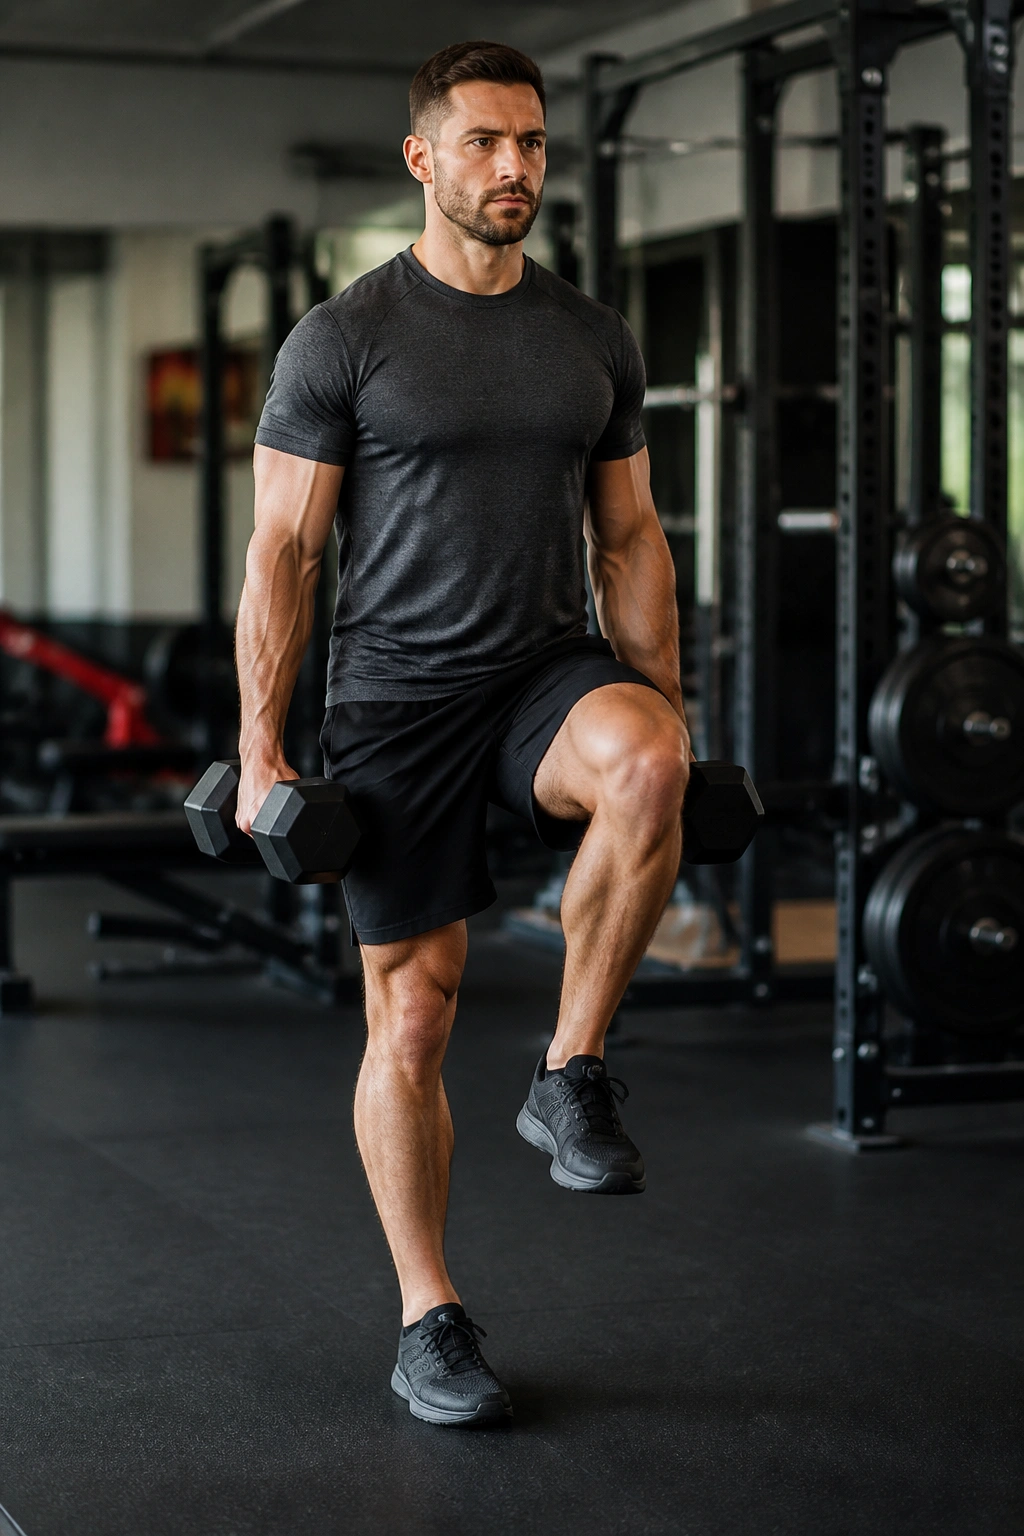
A heavy farmer carry gets even more interesting when you turn it into a march. Now the body has to resist sway while one knee lifts at a time, which makes the midsection behave a little more like it does during gait.
You can do this with dumbbells, kettlebells, or trap bar handles if your gym has them. Stand tall, brace lightly, then march in place or move forward slowly. Each knee lift should happen without your torso bobbing around. If it does, the load is too heavy or the pace is too fast.
- Keep the ribs down
- Take small, quiet steps
- Let the breath stay steady
- Use 20 to 40 seconds per set
This one feels simple until it doesn’t. Then it feels like balance, posture, and abs all signed a contract together.
17. Russian Twist for Rotational Endurance
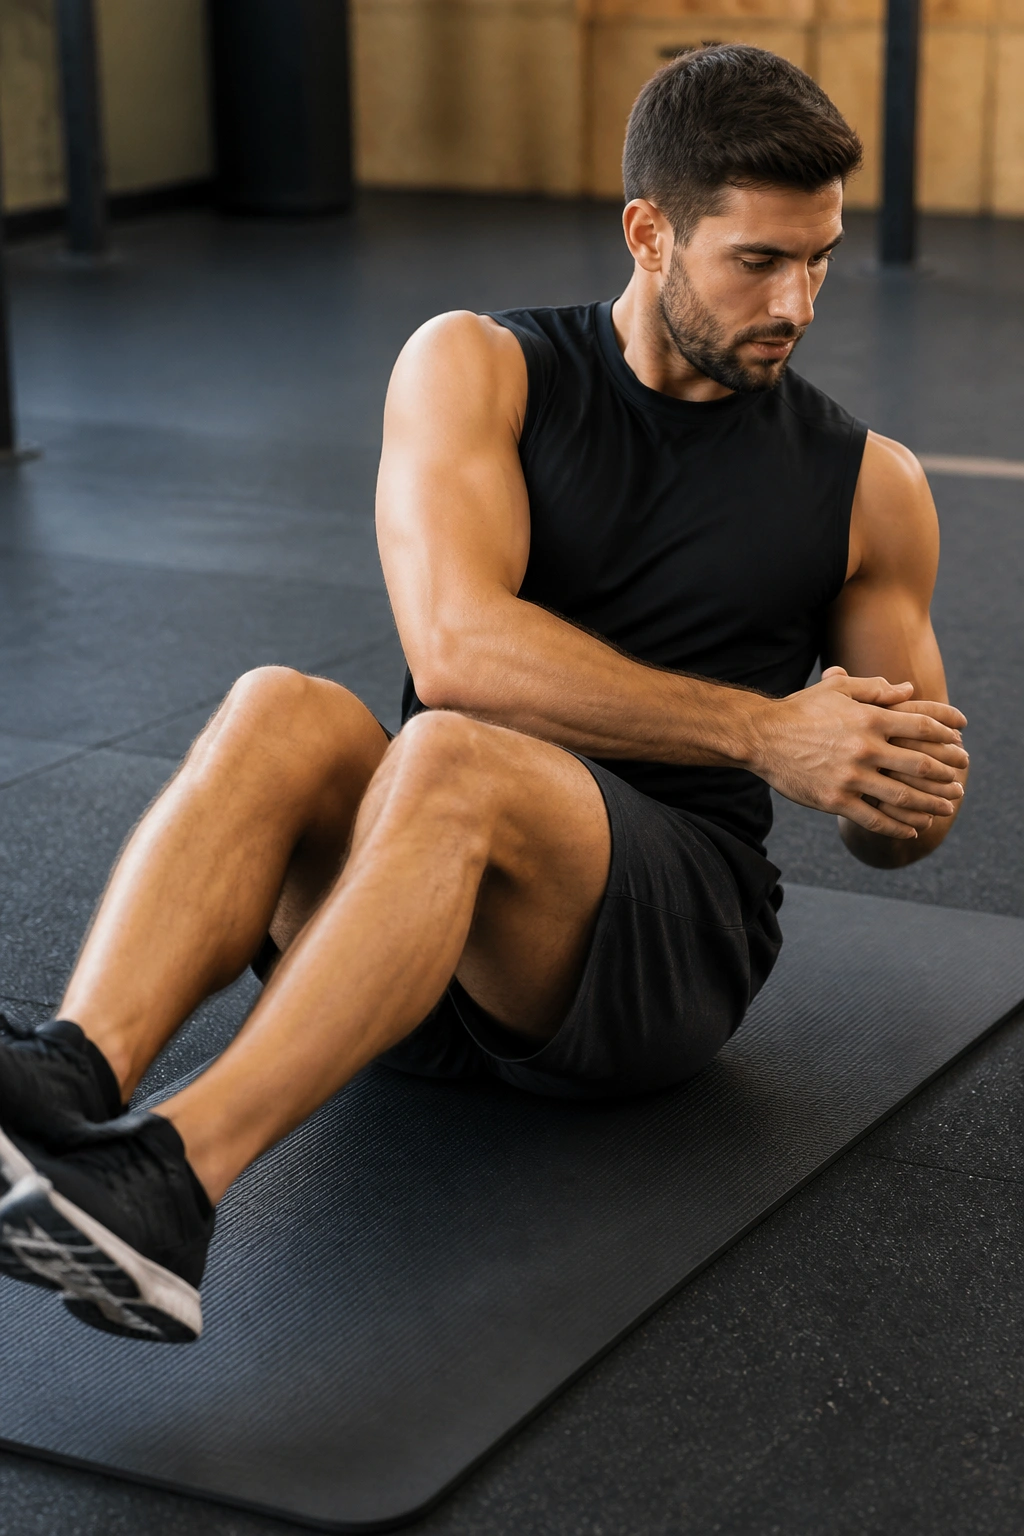
People love to turn the Russian twist into a speed event. That’s usually a mistake. The fast, feet-off-floor version can turn into hip flexor chaos and a jerky spine if you’re not careful.
Done well, the Russian twist trains the obliques to control rotation through a manageable range. Sit with your chest tall, knees bent, and feet either down or lightly lifted. Rotate the rib cage from side to side with a small controlled turn. You do not need a huge sweep. In fact, a smaller range often keeps the tension where it belongs.
I prefer this with a light medicine ball or even just bodyweight at first. Try 2 to 3 sets of 12 to 16 total twists. If your lower back feels cranky, keep the feet on the floor and shorten the rotation. The exercise isn’t the problem. The reckless version is.
18. V-Up for Strong Flexion Control
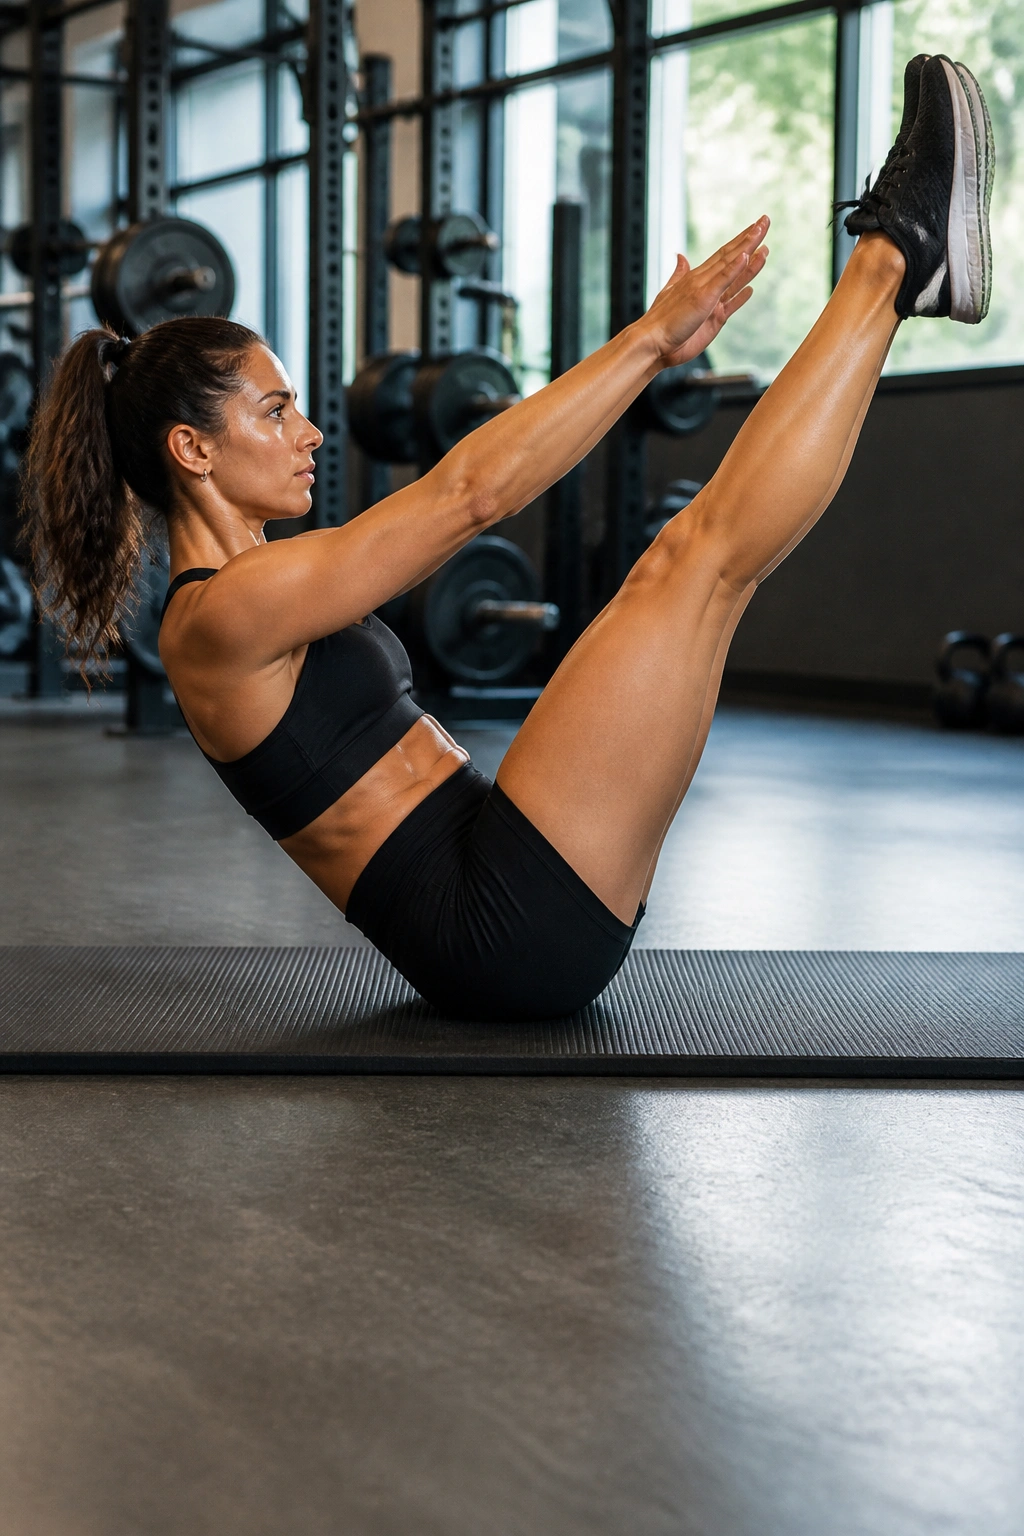
A V-up is a bit like a reverse crunch and a sit-up decided to meet in the middle. When it’s done cleanly, it asks your abs to lift the torso and legs together without turning into a flail.
Unlike a basic tuck-up, the V-up rewards tight timing. The legs and upper body should rise together, then lower together under control. If you swing your arms and jerk your neck, the reps stop being useful fast. A solid V-up feels crisp, almost sharp, at the top.
This move is best for people who can already hold a plank, dead bug, and reverse crunch with control. Start with bent knees if needed. Try 3 sets of 6 to 12 reps. Quality matters more here than chasing a bigger range.
If you want to make it harder, pause for one count at the top. That pause strips out momentum immediately.
19. Toe Touch Crunch for Upper Ab Burn
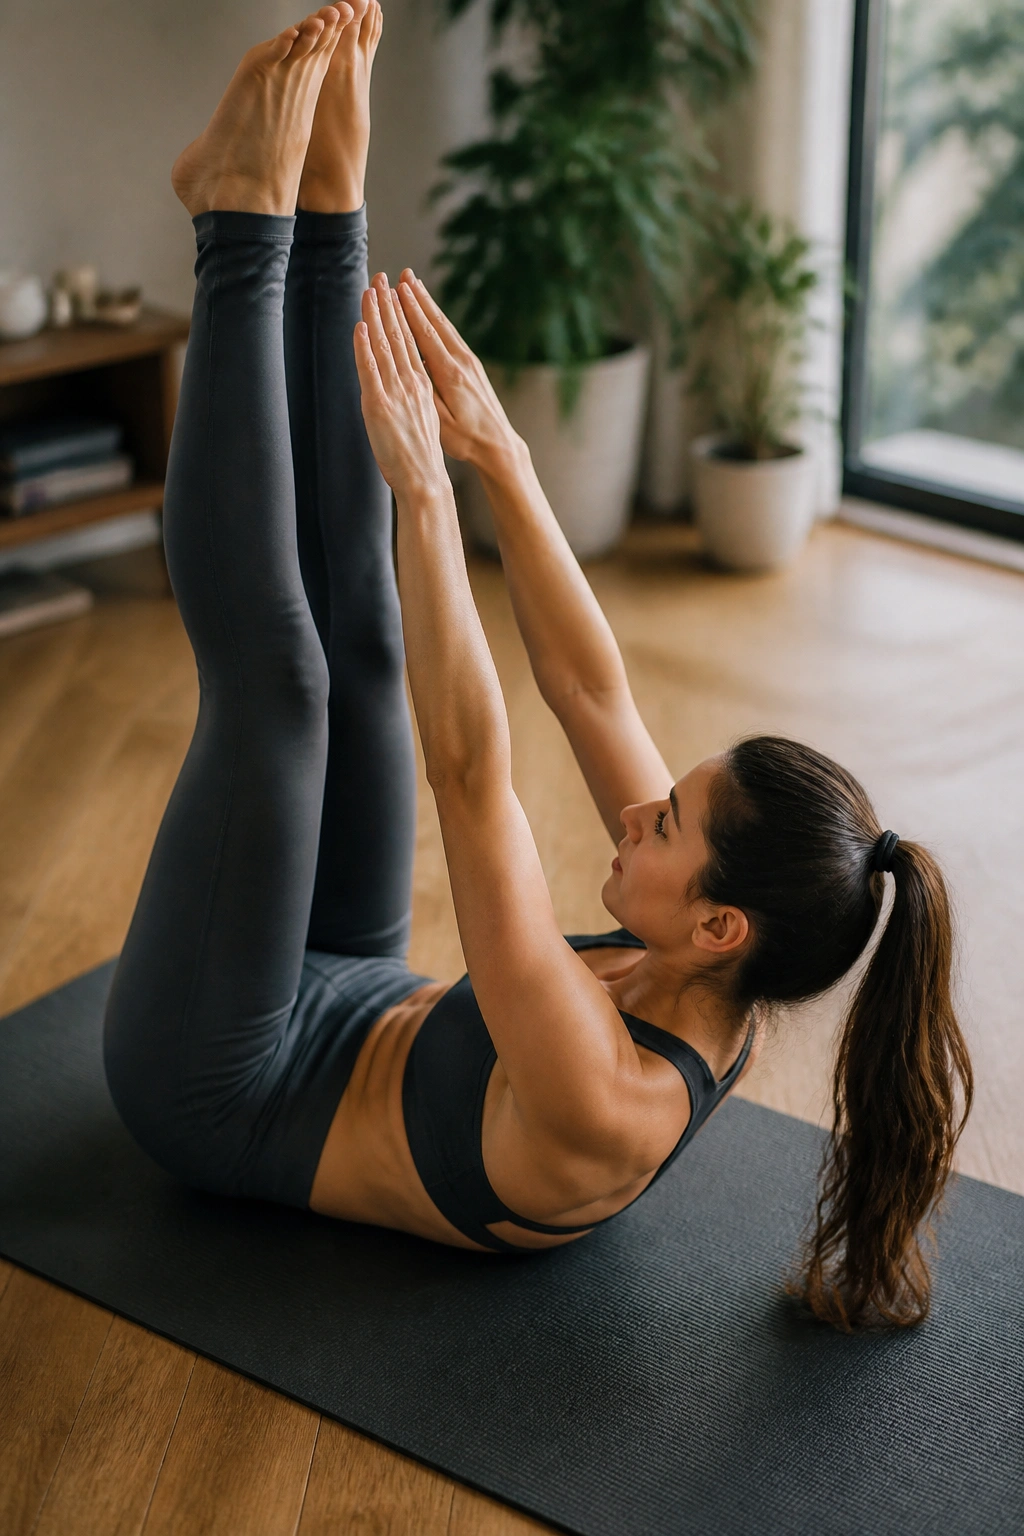
Toe touch crunches get dismissed sometimes because they look old-school. Fine. Old-school still works when the form is honest.
Why this version is useful
Lie on your back with your legs pointed upward and your arms reaching toward your toes. Crunch the shoulder blades off the floor while keeping the pelvis lightly curled. That small pelvic tuck matters. Without it, people often yank their neck and do half a rep.
A toe touch crunch is more about upper-ab contraction than full-body strength, and that’s okay. It can be a useful higher-rep drill after your heavier core work. Try 2 to 4 sets of 10 to 20 reps, resting 30 to 45 seconds between sets.
Keep the chin slightly tucked and reach upward with the chest, not just the hands. The difference is small, but you’ll feel it. Fast.
20. Flutter Kick for Low-Ab Endurance
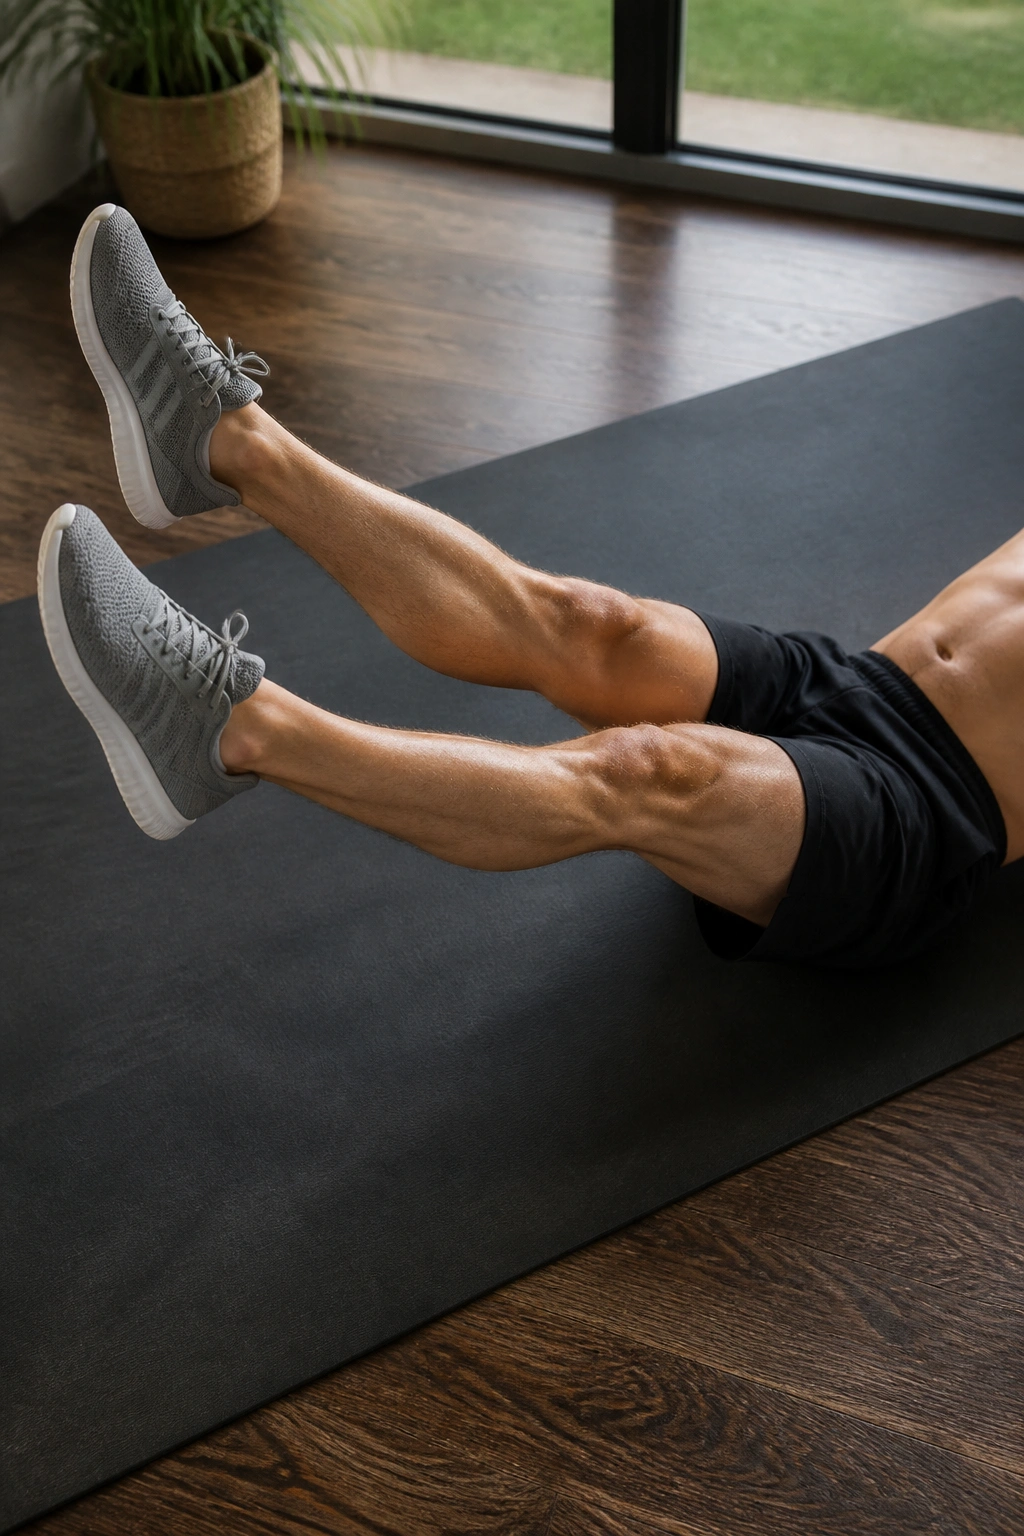
A good flutter kick is less about speed and more about keeping the lower back glued to the floor while the legs hover and alternate. That’s the whole challenge, and it’s a sharper one than it sounds.
If you kick wildly, your hip flexors take over and your low back starts arching. Don’t let that happen. Lie on your back, press your hands under your hips if needed, and float the legs a few inches above the floor. Kick one up as the other goes down, keeping the motion small and steady.
Use 15 to 30 seconds per set, or 20 to 30 total kicks if you like counting reps. The moment your back lifts, stop. The floor is your form check. If it leaves the floor, the set is done.
21. Heel Tap for Oblique Control
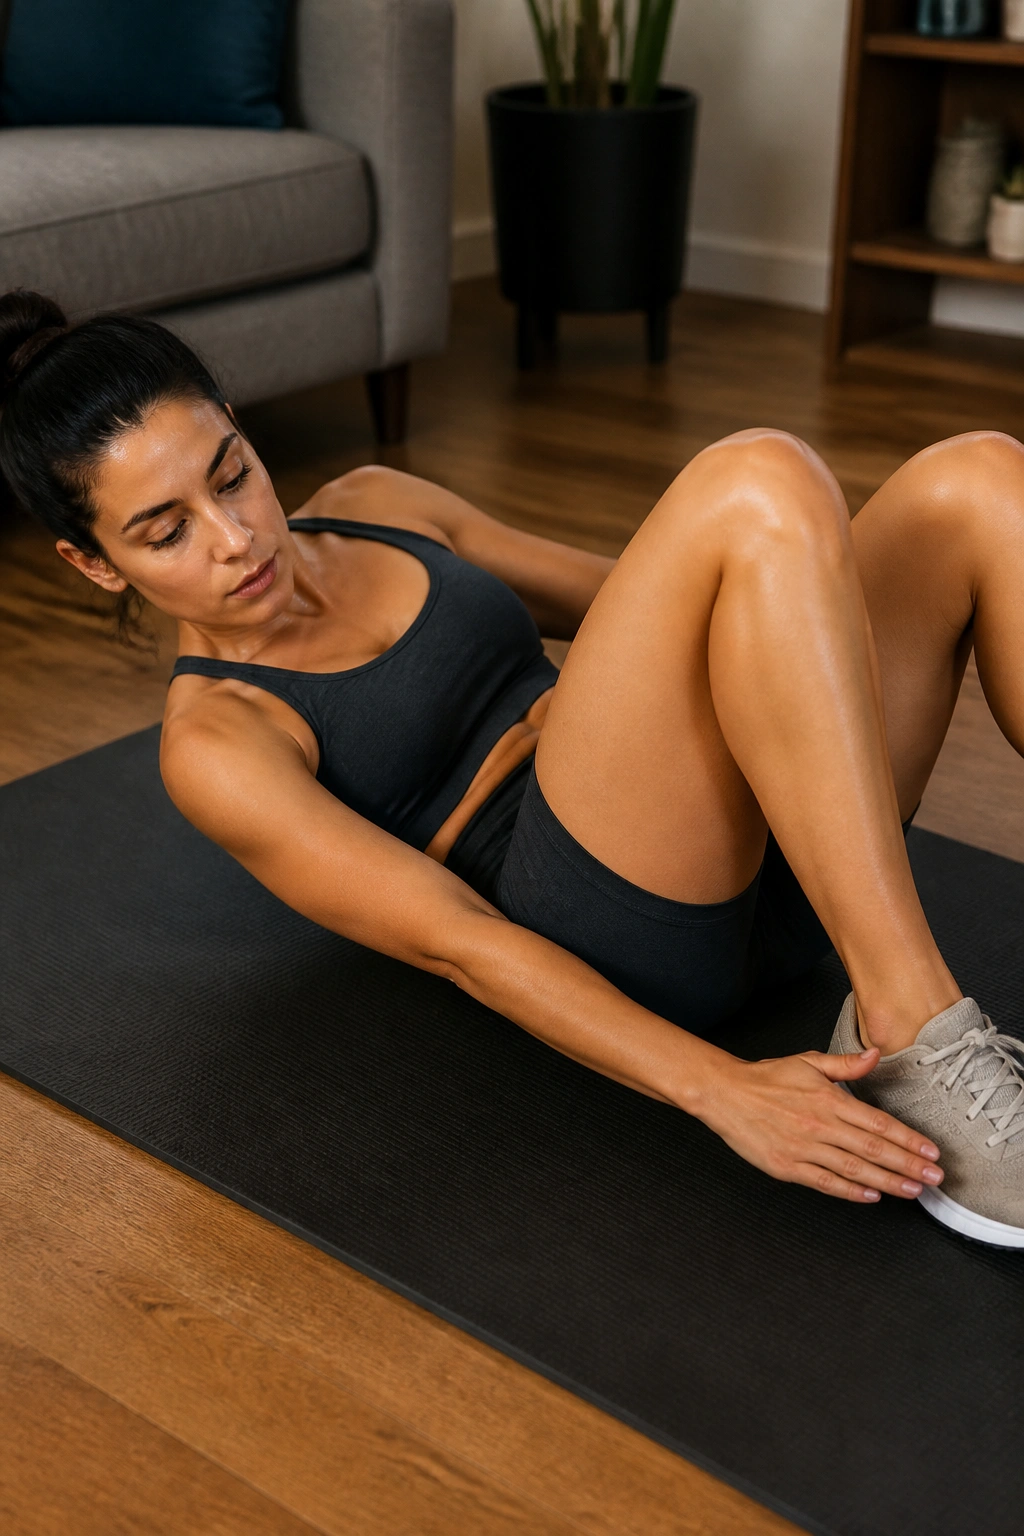
Why do heel taps show up in so many home-core routines? Because they’re simple, and the simplicity hides a useful demand: your obliques have to stop your trunk from rocking while your arms reach side to side.
How to do them right
Lie on your back with knees bent and feet flat. Curl the shoulders slightly off the floor, then reach one hand toward one heel, alternating side to side. Keep the ribs down and the movement small. If you swing too far, the exercise becomes a sloppy side bend.
Heel taps are a good bridge between beginner floor work and more advanced anti-rotation drills. They’re also forgiving enough to repeat when your energy is low. Try 3 sets of 12 to 20 taps total. If your neck tires first, lower your head for a second, reset, and start again with less range.
22. Glute Bridge March for Pelvic Stability
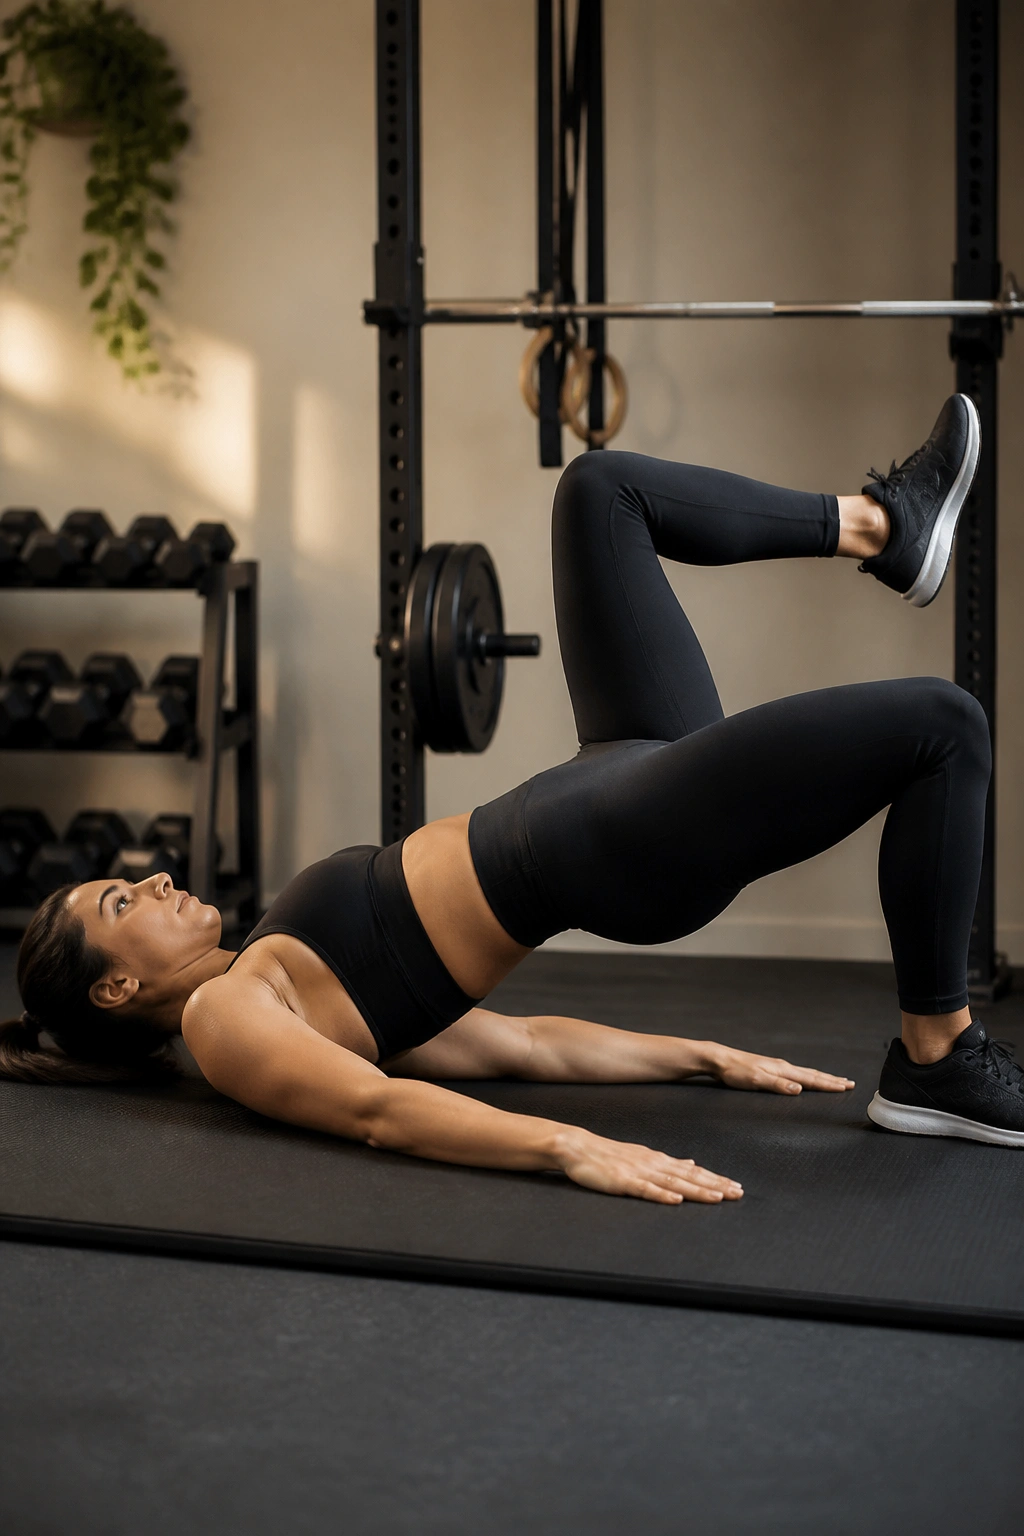
A lot of people think glute bridges are only about the backside. They’re not. Once you turn the bridge into a march, your core has to keep the pelvis level while one foot leaves the floor.
Start in a bridge with your hips lifted and your ribs down. Lift one knee a few inches, set it back down, then switch. The pelvis should stay quiet. If one side drops every time you march, you’ve found a weak link worth training.
- Drive through the heel of the planted foot
- Keep the chin slightly tucked
- Move the knees slowly
- Try 2 to 3 sets of 8 to 12 marches per side
This is a sneaky exercise. It doesn’t look heroic, and yet it exposes control problems fast. I use it when someone needs more midsection stability but doesn’t want another plank variation.
23. Copenhagen Side Plank for Adductor and Oblique Strength
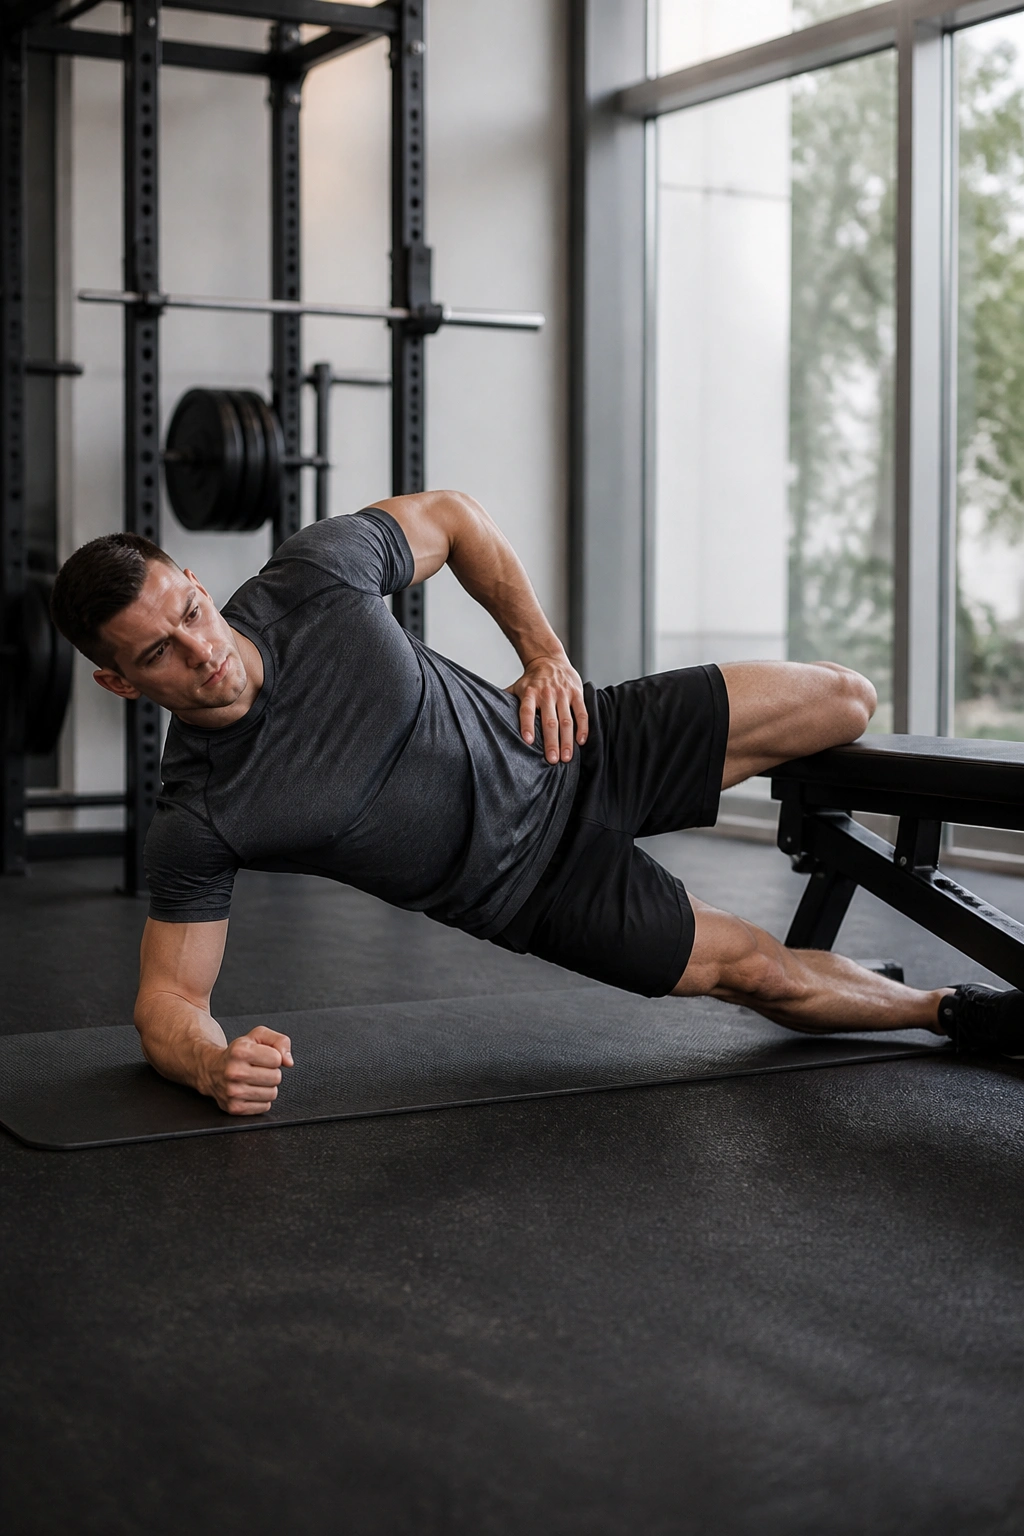
This one is advanced, and I’m not going to pretend otherwise. The Copenhagen side plank demands a lot from the adductors on the inner thigh, plus the obliques and the deep stabilizers around the pelvis. It’s a nasty little drill in the best sense.
You can scale it by placing the top knee on a bench instead of the full lower leg. That version is already plenty. Raise the hips, keep the torso long, and hold the line. The inner thigh will light up fast. So will the side body.
What I like most here is that it fills a gap many core programs ignore: the connection between the groin and the midsection. That connection matters more than people think, especially for cutting, sprinting, changing direction, or anything that asks the pelvis to stay steady under stress. Try short holds first — 10 to 20 seconds — and build from there.
24. Renegade Row for Anti-Rotation Under Load
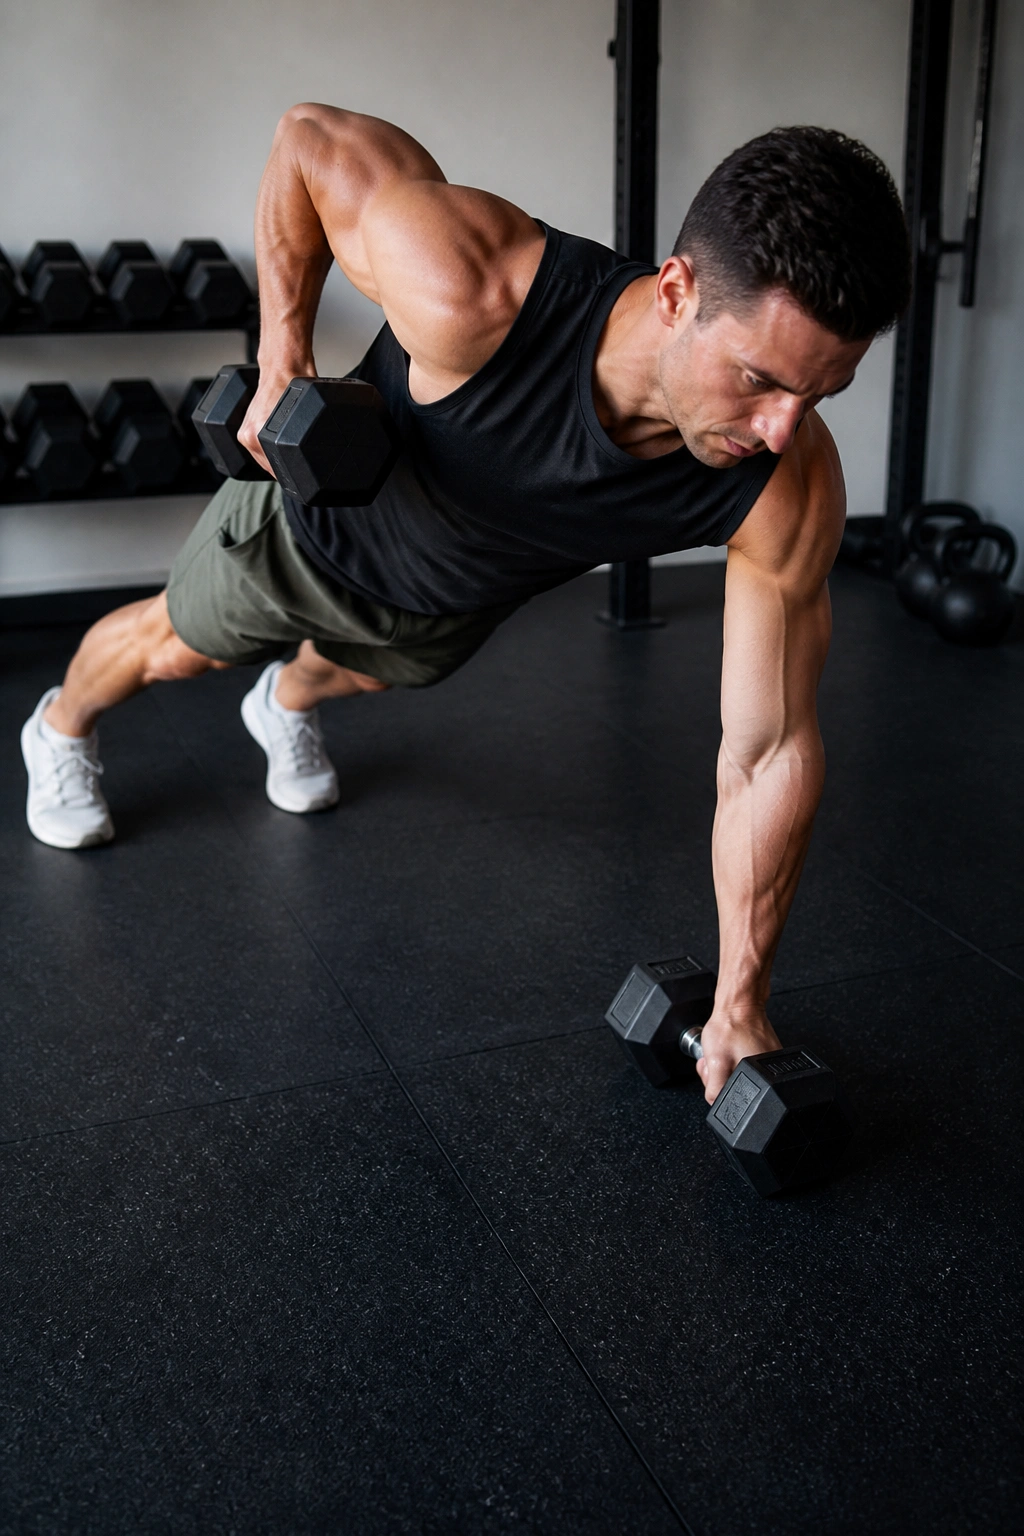
A standard dumbbell row trains the back. A renegade row trains the back while the torso tries not to twist. That extra demand changes everything.
Set up in a plank with your hands on dumbbells, feet a little wider than hip-width. Row one dumbbell toward your ribs, then set it down and switch sides. Keep the hips level. If your body rotates hard every rep, the load is too heavy or the stance is too narrow.
What makes it different
The renegade row blends upper-body strength with anti-rotation core work, which is why it shows up in so many serious programs. It’s not a pure abs move, and that’s fine. Real core strength rarely lives in a neat little box.
Use 2 to 4 sets of 6 to 10 rows per side. Go lighter than your ego wants. You’ll get more from a controlled set than from a heavy one that turns into a wobble.
25. Turkish Get-Up for Whole-Body Core Strength
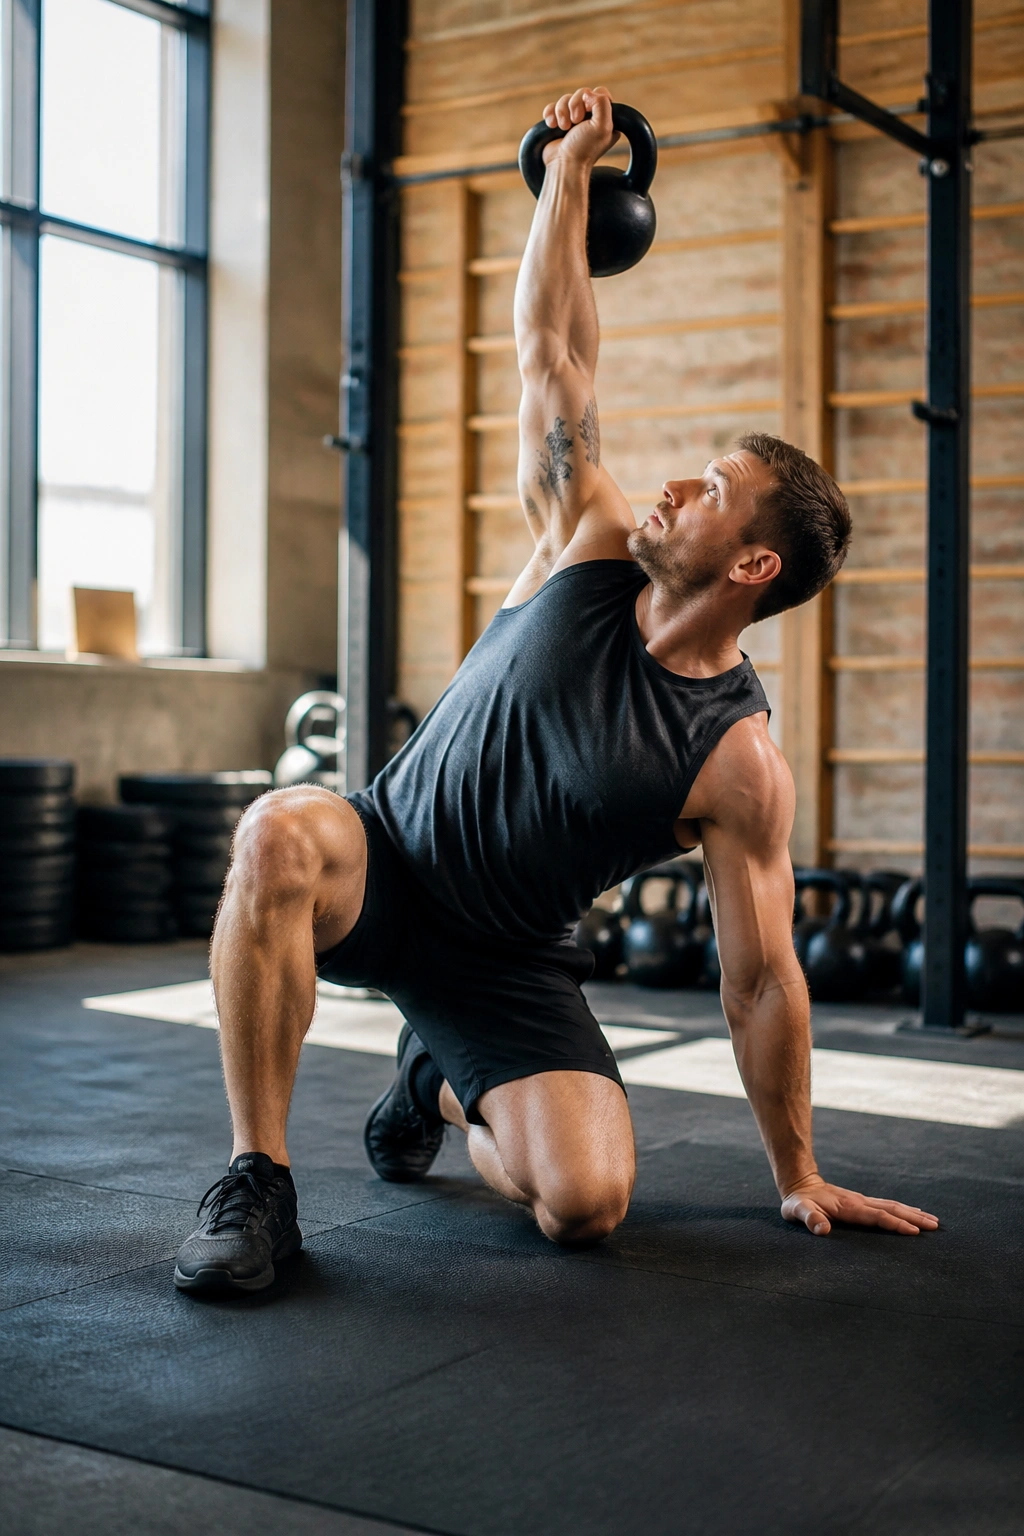
If one movement deserves a place near the top of any list of core workouts for a stronger midsection, it’s the Turkish get-up. It ties together bracing, shoulder stability, hip control, and the ability to keep your torso organized while you move from the floor to standing and back again.
Start with no weight at first if you need to. Balance a shoe on your fist. Seriously. That tiny trick tells you whether your arm path and shoulder position are clean before load gets involved. Once the pattern feels smooth, add a kettlebell and move through each phase slowly: roll, post, bridge, sweep, kneel, stand, then reverse it.
This is not the kind of exercise you rush. One clean rep can teach more than a sweaty circuit of rushed ab work. I like 1 to 3 reps per side, resting as needed, because quality breaks down the second you turn it into a race. The get-up rewards patience, and that is rare enough to be worth your time.
A stronger midsection is not built from one move. It comes from learning to resist, brace, rotate with control, and carry load without folding. Put a few of these into your week, keep the reps crisp, and the difference shows up faster than people expect — not just in the mirror, but in how steady your whole body feels when it matters.
