



Most people train their abs like they’re trying to punish them.
That usually means fast crunches, sloppy twisting, and a lower back that takes over by rep five. The better answer is a slower one. The best core workouts for beginners teach your trunk to hold position, breathe under tension, and keep your pelvis steady while your arms and legs move around.
That matters more than the six-pack fantasy. Your core is not just the strip of muscle across the front of your stomach; it’s the whole torso system that links ribs, hips, obliques, deep stabilizers, and the muscles in your lower back. When that system works well, walking up stairs feels easier, lifting groceries feels cleaner, and your spine has a little more backup when life gets awkward.
Simple is not weak. In fact, the smartest beginner core work often looks almost boring on purpose. Small range. Slow tempo. Clean breathing. No neck tugging. No frantic burn-chasing. Just good control.
1. Pelvic Tilt
A pelvic tilt is one of those tiny moves that tells you a lot about your body. If you can’t find your abs here, you’ll usually feel it everywhere else later.
Lie on your back with your knees bent and your feet flat on the floor. Exhale, tighten your stomach as if you’re gently zipping your ribs toward your hips, and press your lower back into the floor until the arch disappears.
How to do it well
- Do 8 to 10 slow reps.
- Hold each tilt for 2 to 3 seconds.
- Keep your shoulders relaxed and your neck soft.
- If your glutes start doing all the work, ease up.
What it should feel like
You’re not trying to crush your back into the floor. You’re trying to wake up the deep front of your core, the part that helps you brace without holding your breath. That’s a useful skill, and it shows up again in nearly every other exercise on this list.
Pro tip: If your hips feel tight, put your feet a little farther from your butt. That usually makes the tilt cleaner.
2. Dead Bug
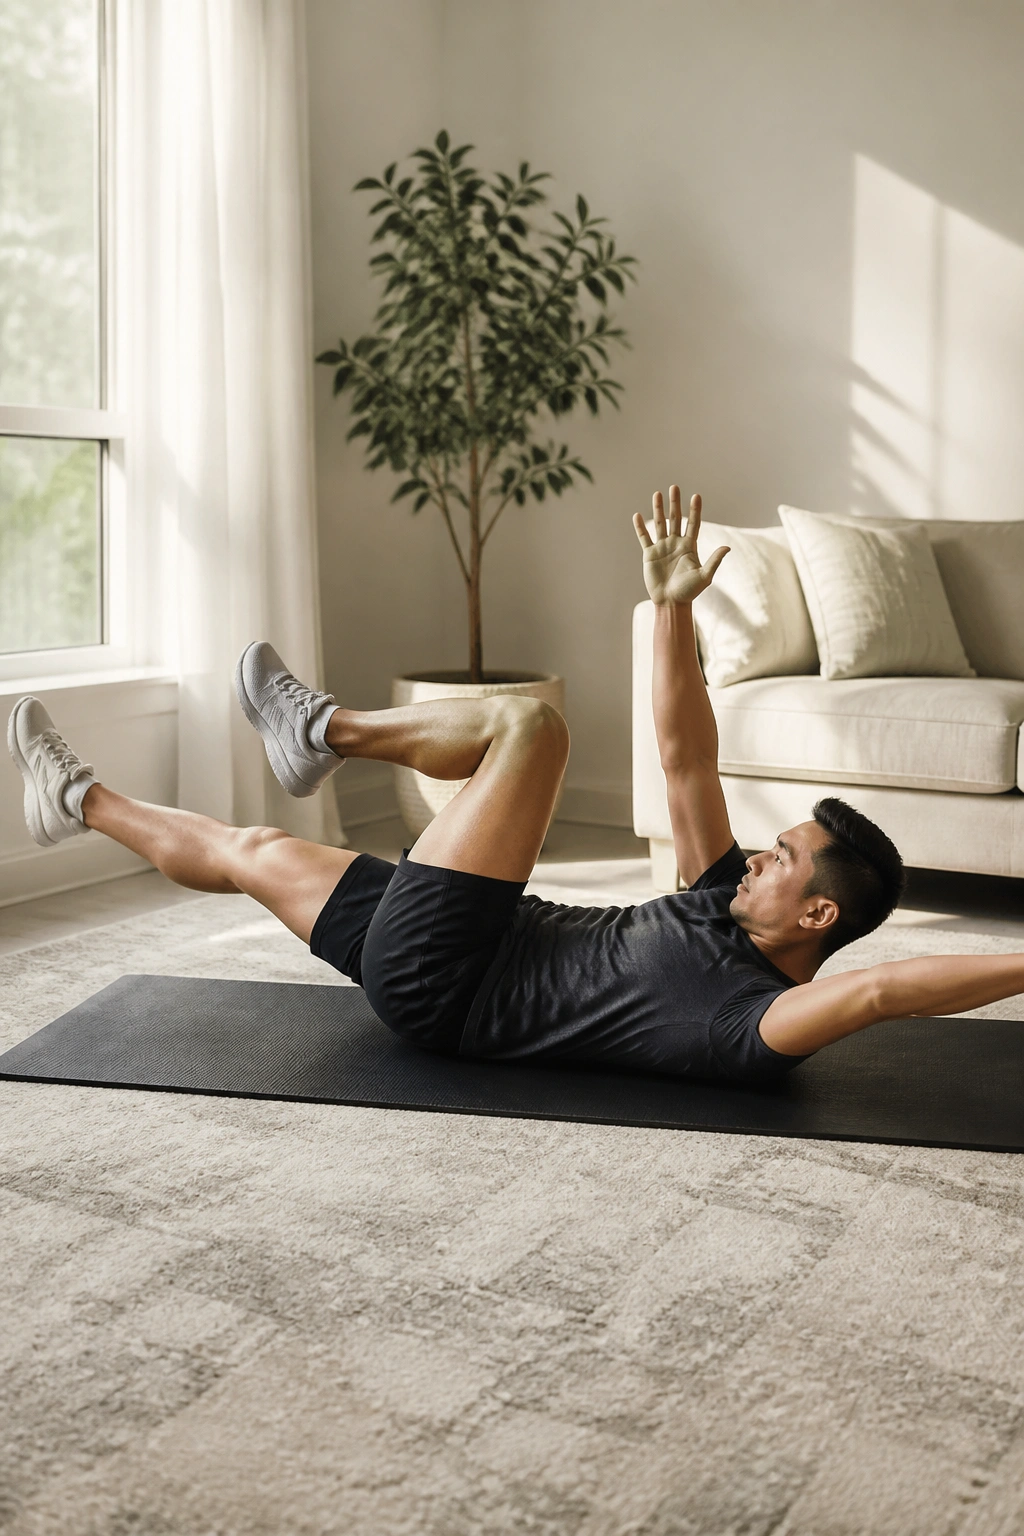
Why does this show up so early? Because the dead bug teaches you to move your arms and legs without letting your spine wobble around like it has no plan.
Start on your back with your hips and knees bent to about 90 degrees. Reach your arms straight toward the ceiling, then slowly extend one opposite arm and leg away from the center while keeping your lower back heavy on the floor. Return, switch sides, and keep the pace controlled.
Why beginners do well with it
The dead bug trains anti-extension work, which is just a plain way of saying your core learns not to arch when your limbs move. That skill matters a lot in real life. Reaching for something overhead. Carrying a bag. Bracing before you stand up with a toddler on one hip. All of it.
A clean version looks like this
- 6 to 8 reps per side
- A slow 2-second reach out
- A pause if your back starts to lift
- No rushing, ever
If the full version feels too hard, keep the legs bent and only move the arms for a week or two. That is not cheating. That is good coaching.
3. Heel Slide
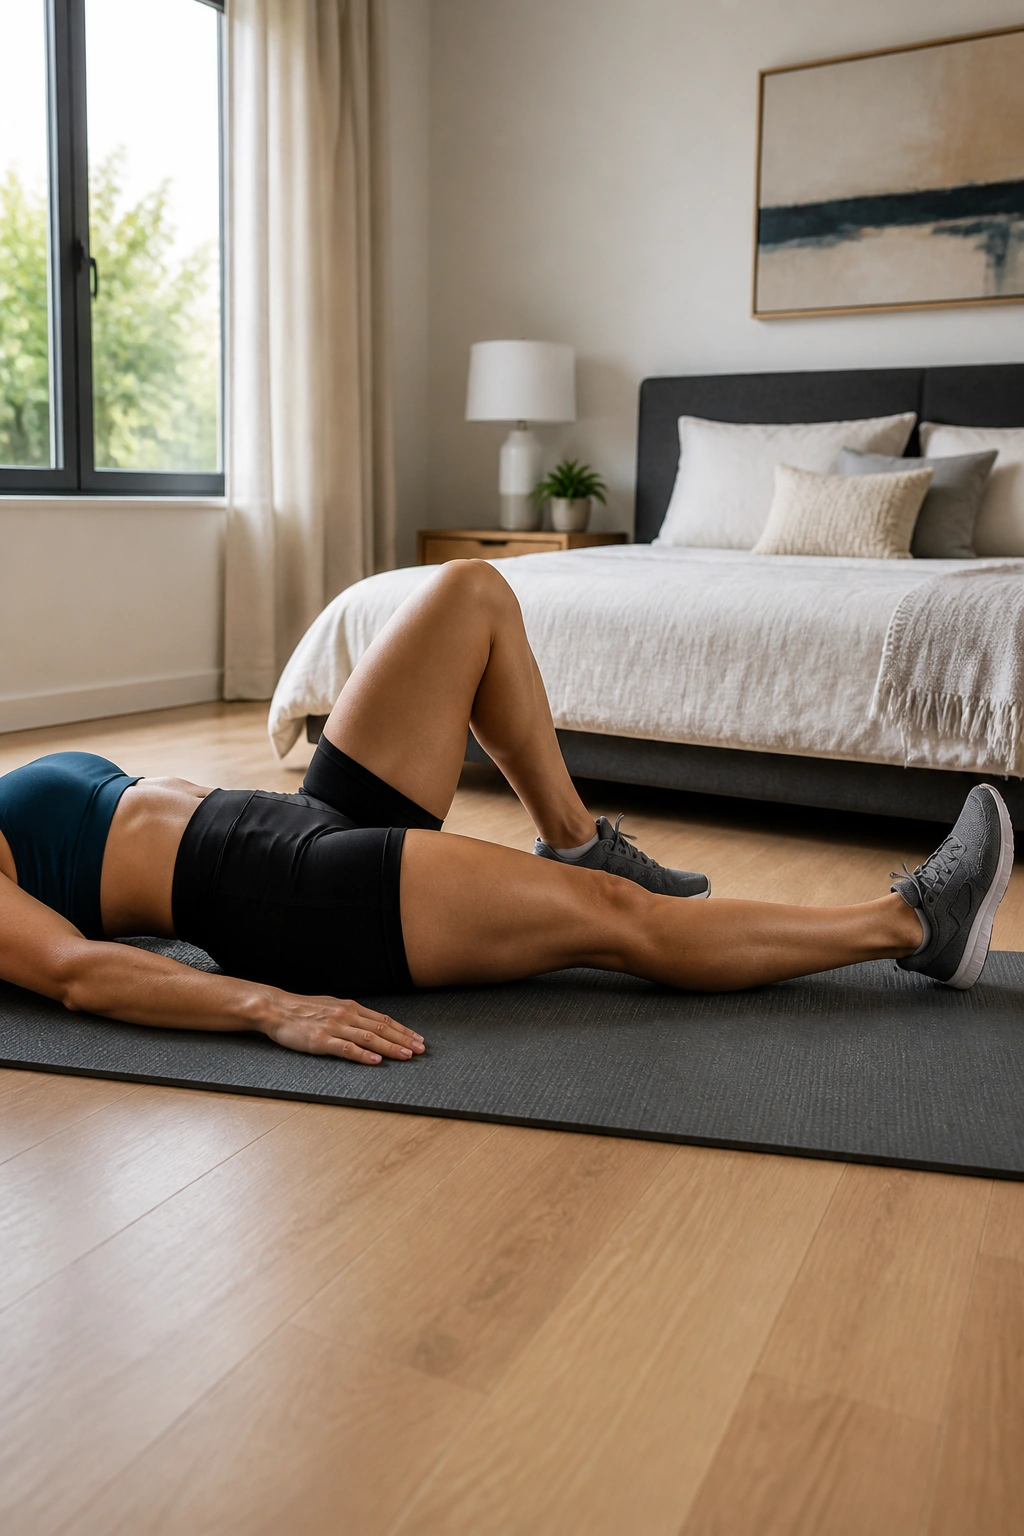
A heel slide is what I give people when dead bugs feel too ambitious and crunches feel too irritating. It’s quiet, controlled, and a lot harder than it looks.
Lie on your back with both knees bent. Slide one heel away from you until the leg is almost straight, then pull it back in without letting your pelvis rock or your lower back arch. The floor becomes your feedback tool here.
What makes it useful
The heel slide teaches your trunk to stay calm while one leg reaches out. That sounds small, but it’s a very real pattern. Walking, climbing, and even getting out of bed all ask your torso to stabilize while one leg does something different from the other.
You should feel the front of your stomach working before you feel your hip flexors burning. If your thighs take over fast, shorten the slide. Seriously. A smaller range with control beats a bigger range with a back arch.
Quick cue: Exhale as the heel glides out. Inhale as it comes back.
4. Toe Tap
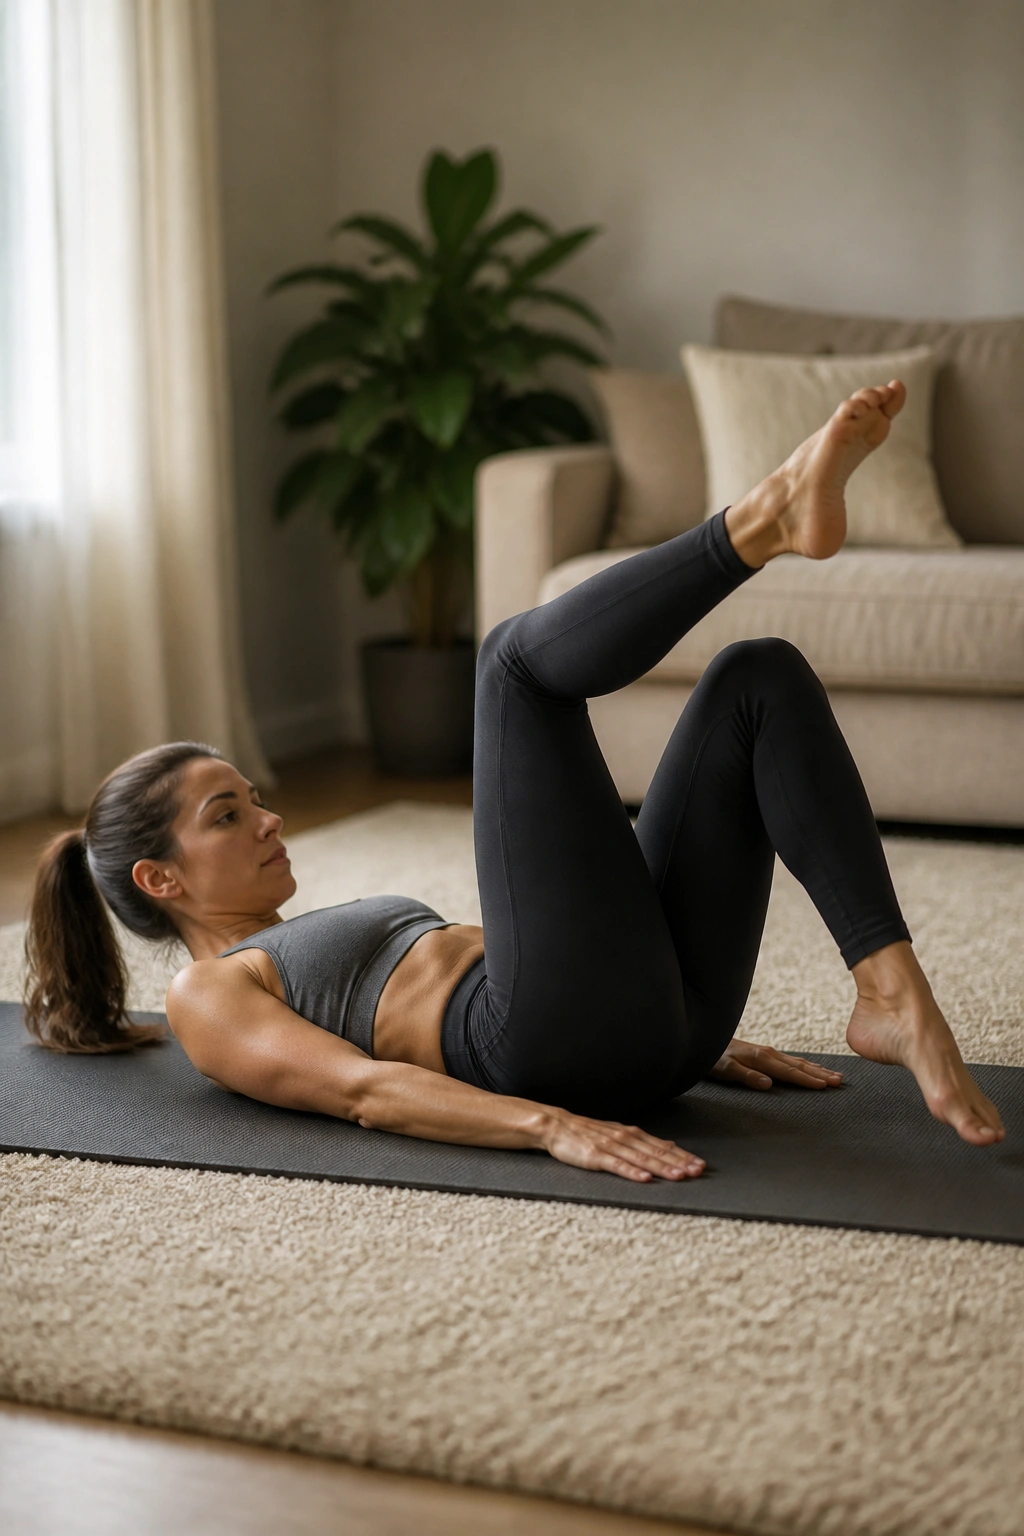
Toe taps look mild. They can light up your lower abs fast, which is exactly why they deserve a place in a beginner routine.
Lift both legs so your knees are bent over your hips, then lower one toe toward the floor and bring it back up. Alternate sides, keeping the movement slow and deliberate. The trick is not the legs. The trick is keeping your pelvis from tipping and your lower back from puffing off the floor.
Make it work for you
- Start with 6 taps per side.
- Keep the movement small at first.
- Stop the descent if your back starts to arch.
- Breathe out on the way down.
This is one of those exercises that punishes ego. If you drop the legs too low, your hip flexors take over and your back starts complaining. Keep the range modest and the reps clean. That’s the whole game.
5. Bird Dog
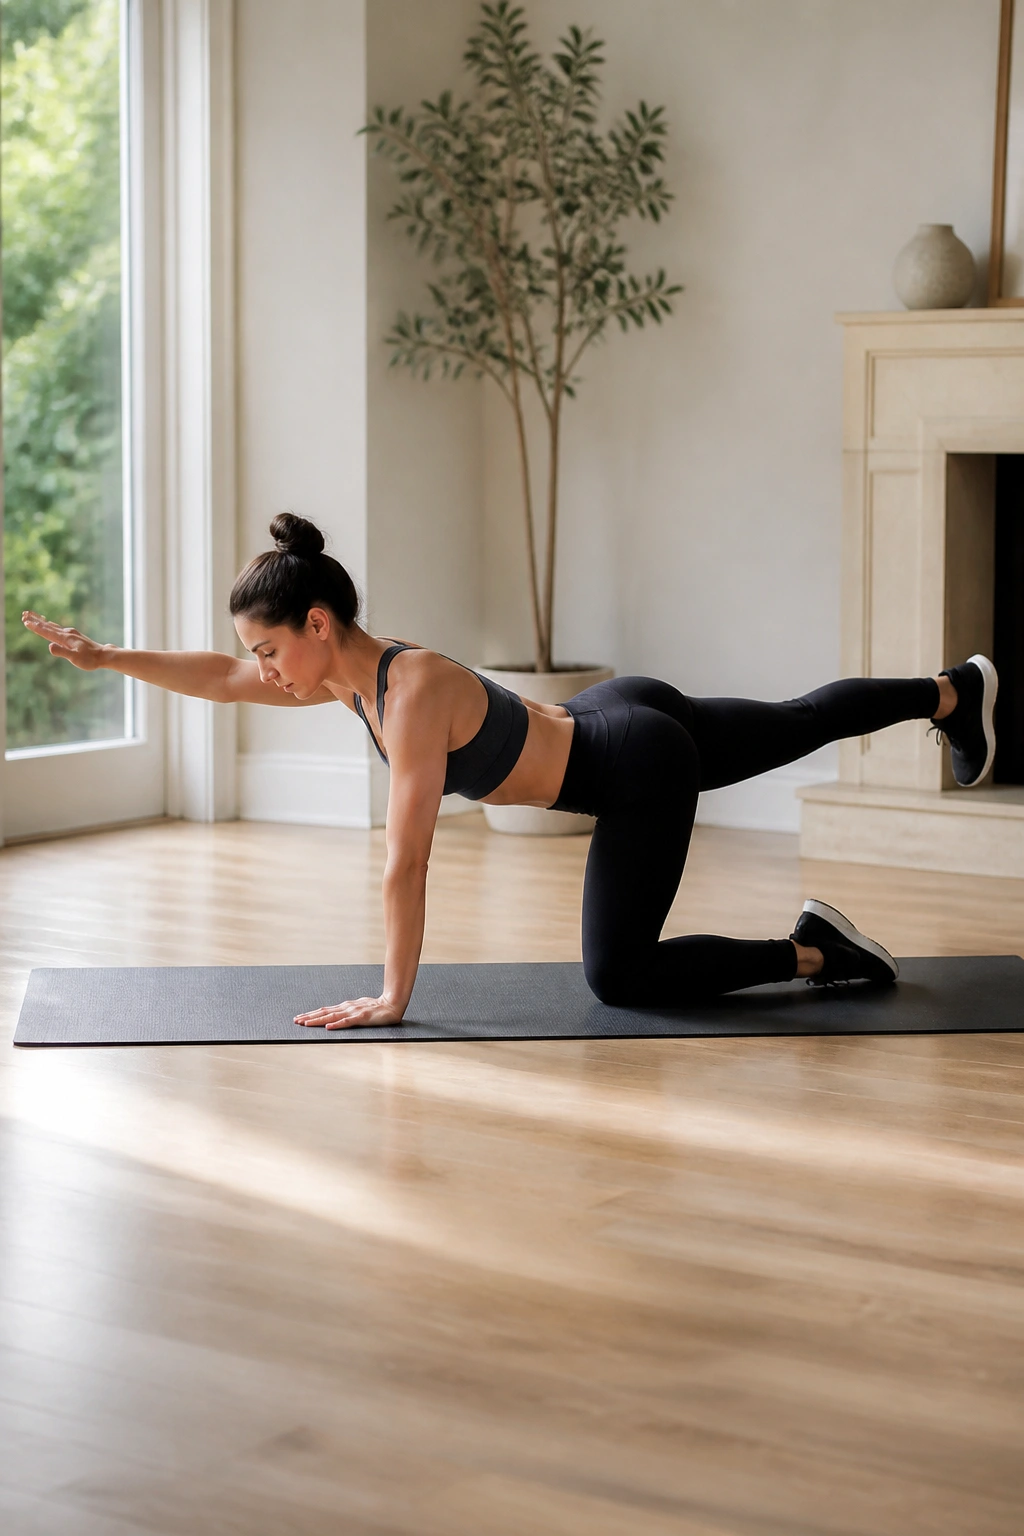
Unlike crunches, bird dogs train the back side of your core too. That matters, because your trunk is not just a front wall. It’s a wraparound system.
Get on all fours with your hands under your shoulders and your knees under your hips. Reach one arm forward while extending the opposite leg back. Hold for a second or two, then return with control and switch sides.
What makes it different
A good bird dog teaches your ribs, hips, and spine to stay square while the limbs move. That’s a big deal for beginners who sway, twist, or dump their weight into one shoulder every time they try to hold a plank.
Keep your back flat and your hips level. No reaching for drama. No throwing the leg so high that the low back arches.
Try this: Pause for a full breath at the top of each rep. That tiny pause forces real control.
6. Glute Bridge
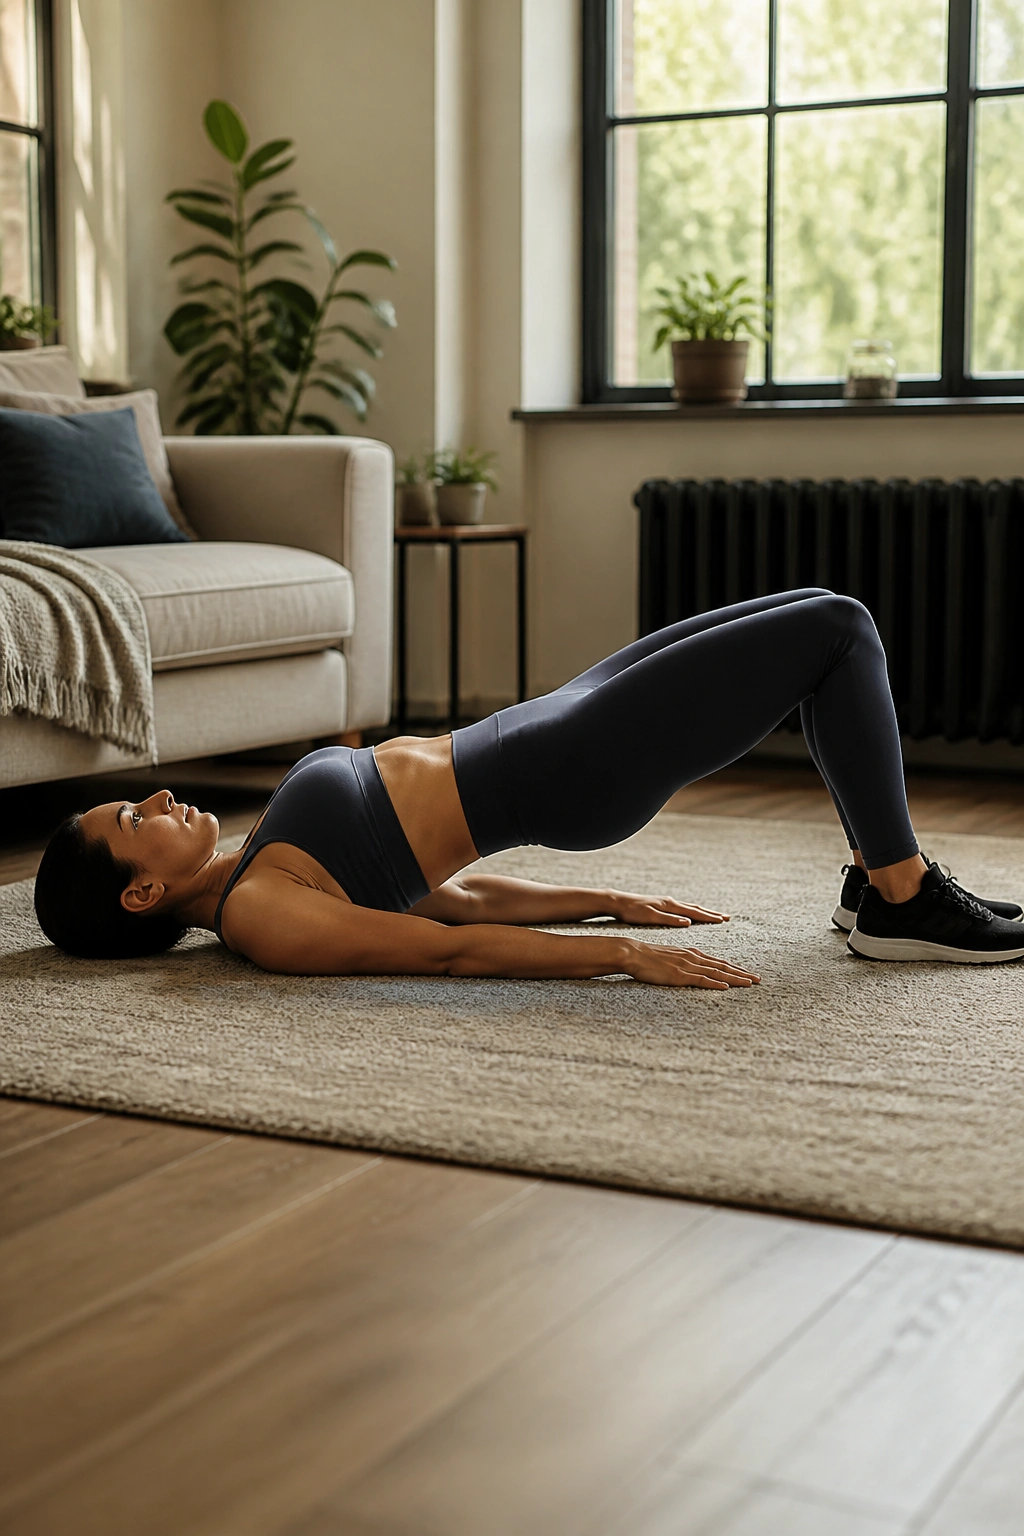
A glute bridge should feel like your hips are doing the lifting, not your lower back. If your back is gripping hard, the setup is off.
Lie on your back with your knees bent and your feet about hip-width apart. Press through your heels, squeeze your glutes, and lift your hips until your body makes a straight line from shoulders to knees. Lower slowly and repeat.
Why it counts as core work
This is not just a glute exercise. It teaches pelvic control, which is a big part of good core training. When your hips and abs work together, your lower back gets less of the job it should not be doing in the first place.
Keep your ribs from flaring up as you lift. That detail matters more than people think. A bridge done with a big back arch looks higher, but it usually works worse.
- 10 to 12 reps
- Hold the top for 1 to 2 seconds
- Lower under control
7. Glute Bridge March
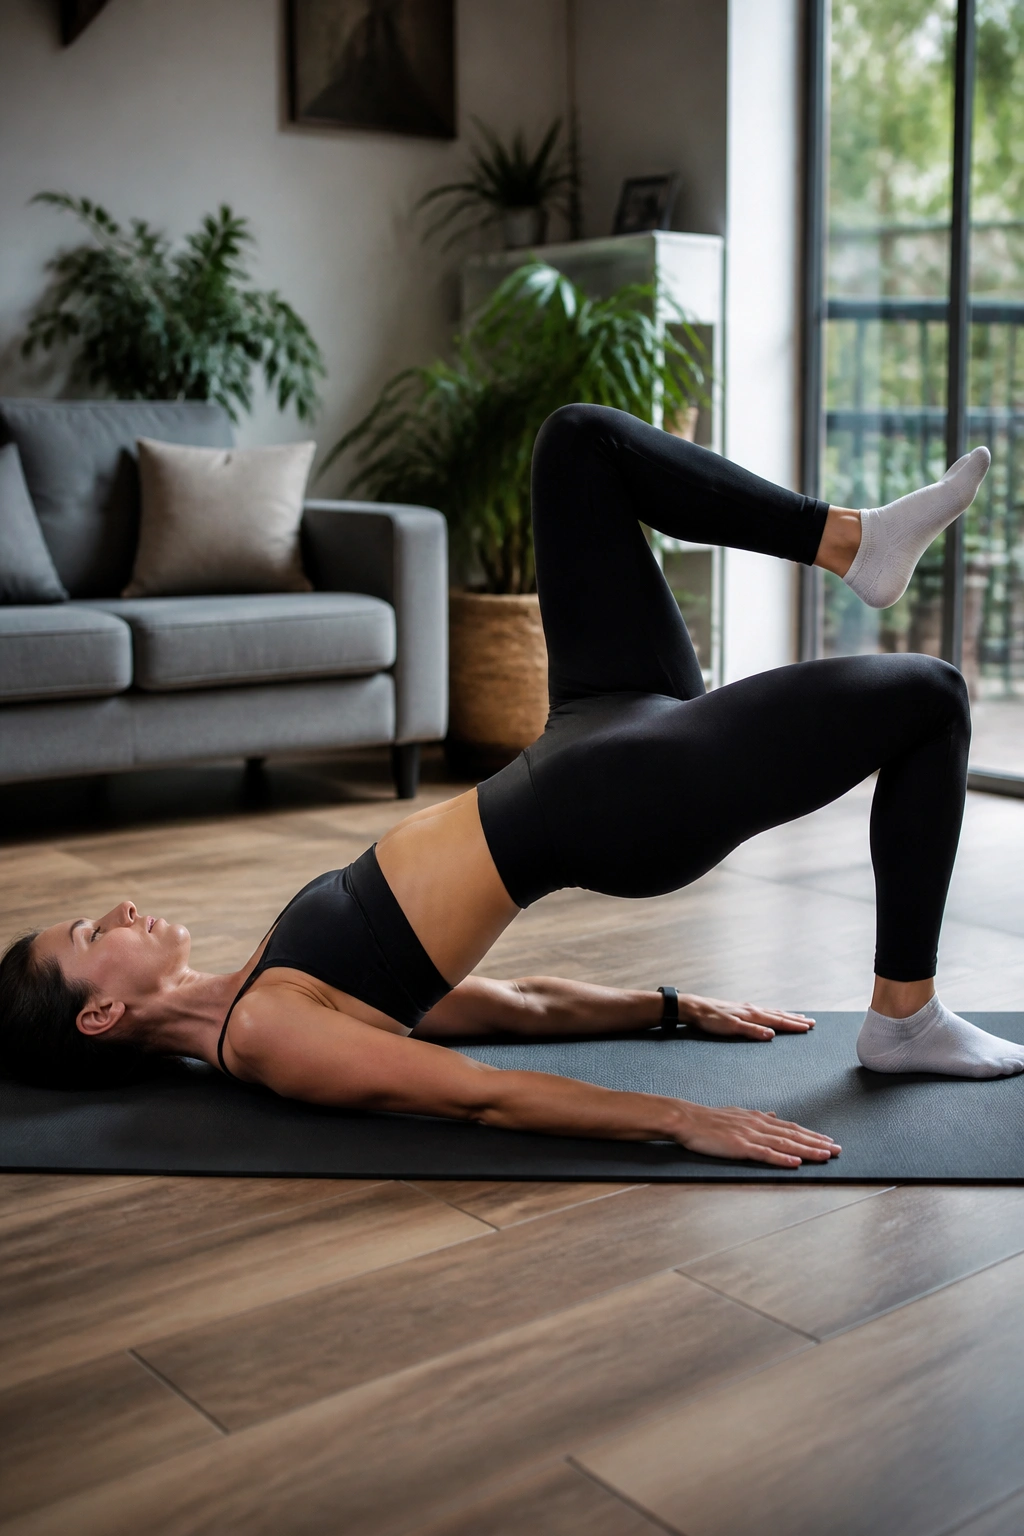
If the basic bridge feels easy, march. That one small change turns a simple lift into a balance and stability drill.
Set up in a glute bridge, then lift one knee a few inches toward your chest without letting your hips drop. Set that foot down and switch sides. The whole point is to keep the pelvis level while one leg leaves the floor.
Why it works
This move teaches your core to resist rotation. That’s the kind of strength that shows up when you carry something uneven, walk on a slope, or stand on one leg while tying a shoe.
Start with 6 marches per side. If your hips swing like a hammock, slow down and shorten the lift. A small knee raise with a steady pelvis beats a high march with a wobble.
Your glutes will feel this. Your lower abs will too. Good.
8. Forearm Plank on Knees
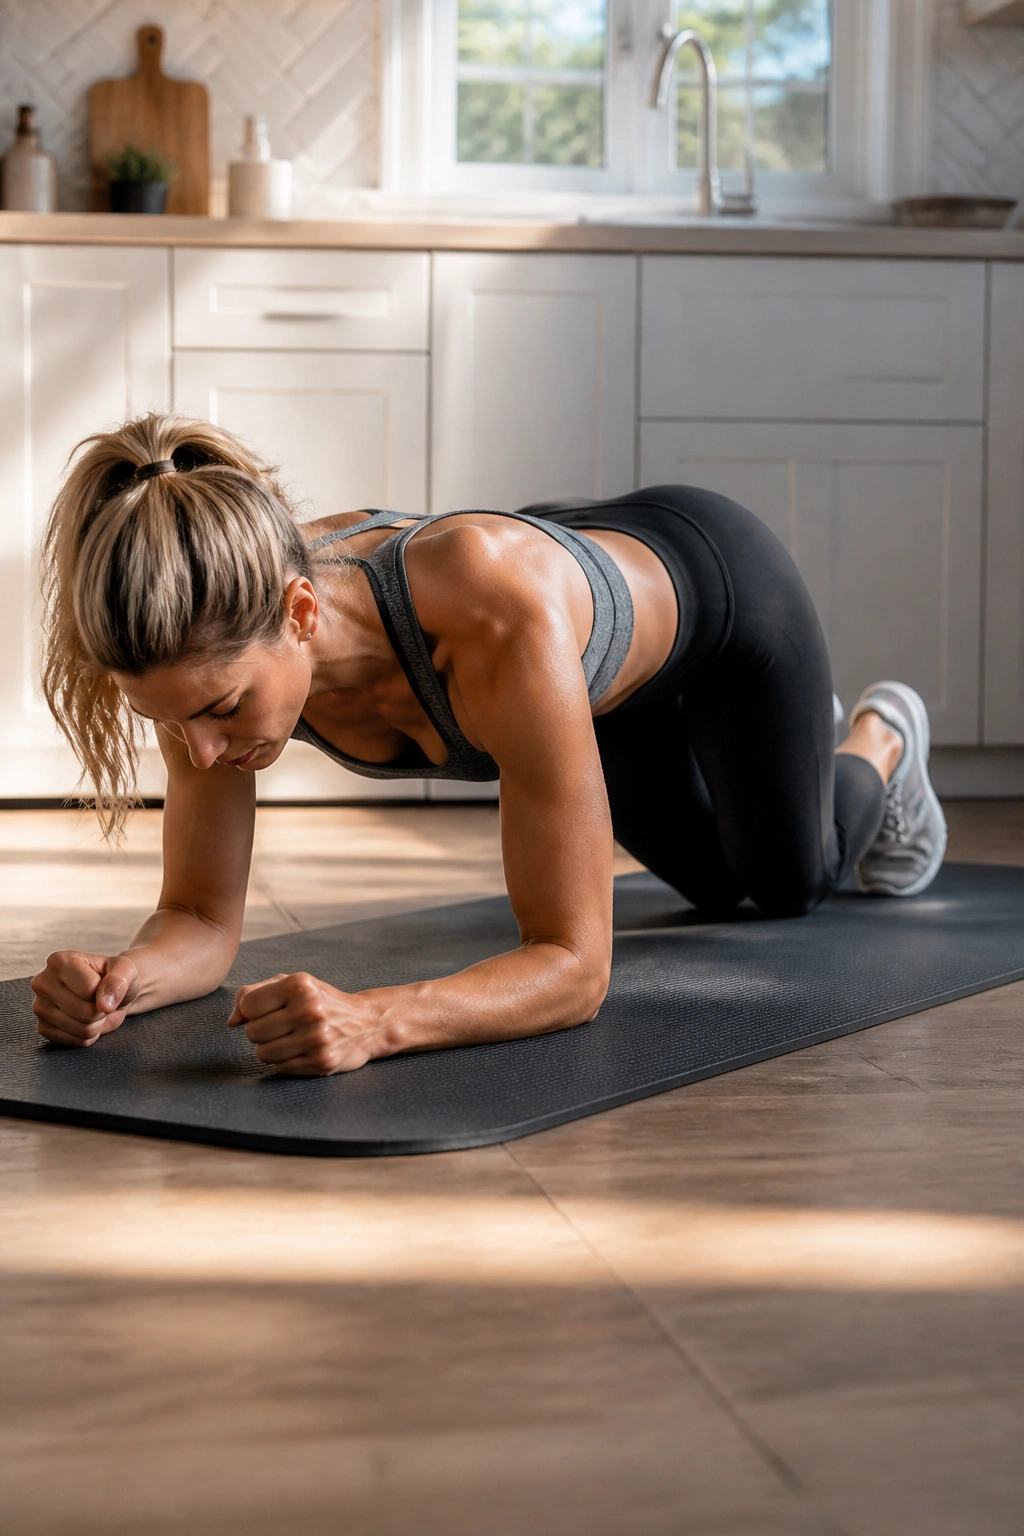
Forearm planks on your knees are not a cop-out. They’re the version that lets you learn shape before you chase time.
Set your forearms on the floor with your elbows under your shoulders and your knees down. Lift your hips so your body forms a straight line from head to knees. Hold it there while you breathe through your nose or with quiet, steady exhales.
What to watch for
A lot of beginners assume the point is to shake as hard as possible. It isn’t. The point is to stack your joints and keep your torso from sagging. If your lower back drops, the hold is too long or your setup is off.
Try 15 to 25 seconds for 2 to 3 rounds. If you can’t keep a clean line for that long, cut the time in half and make the rep sharper.
No drama. Just a solid line.
9. Forearm Plank
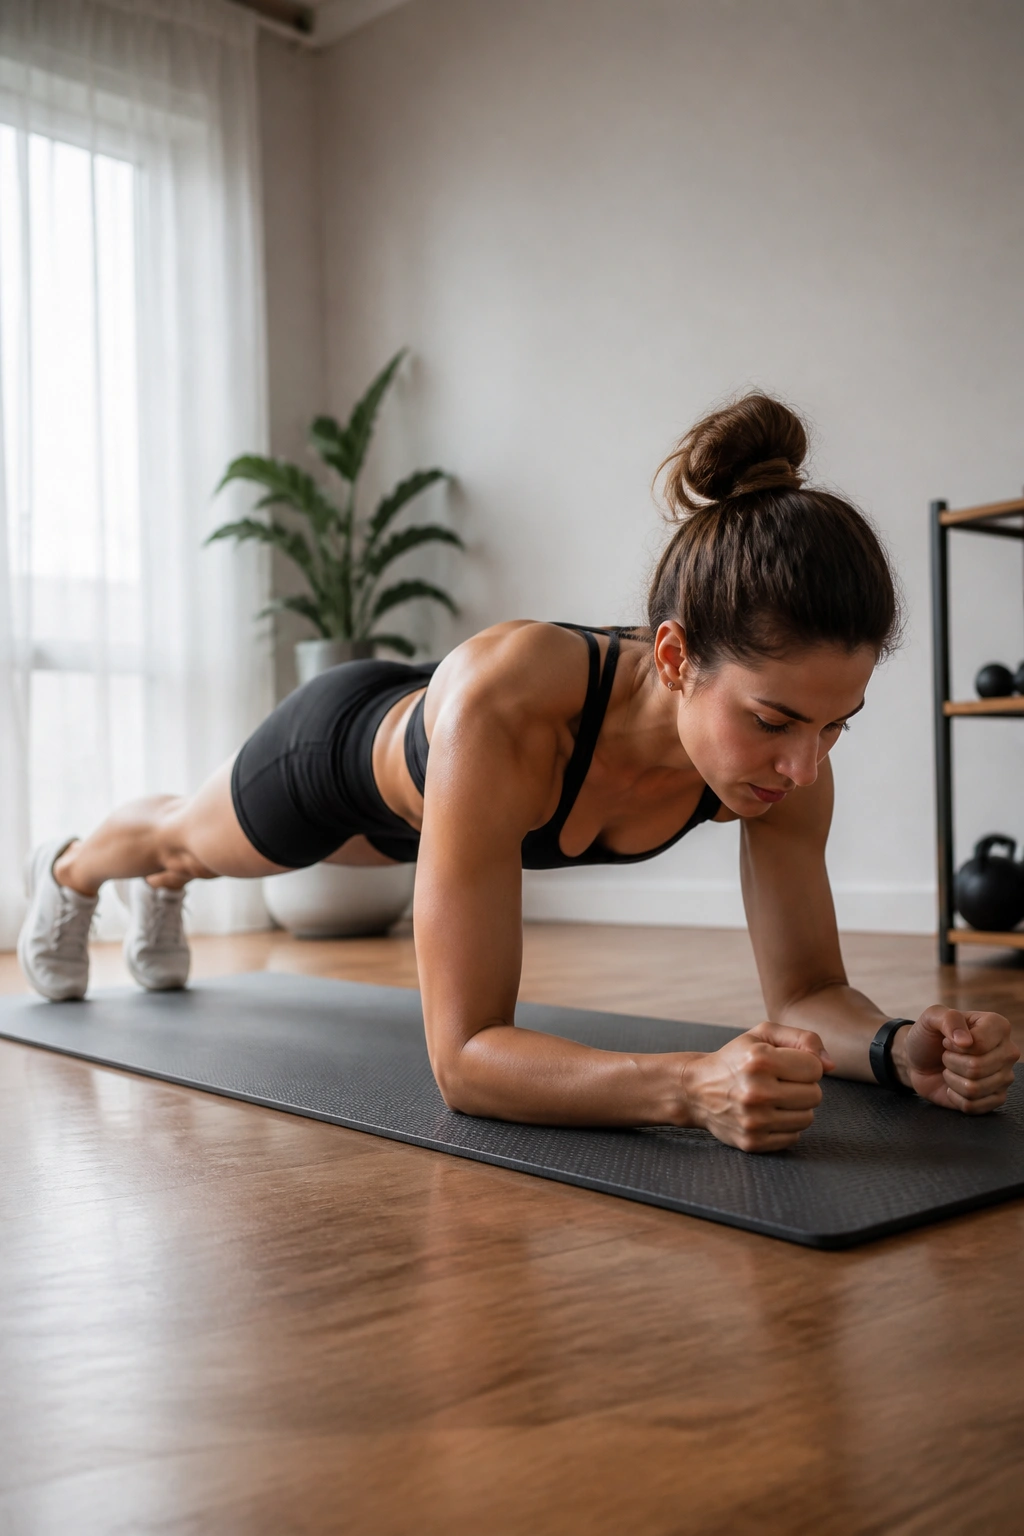
A full forearm plank is one of the cleanest ways to learn bracing, but it gets ugly fast when people hold it too long.
Come onto your forearms and toes, with your elbows under your shoulders and your feet about hip-width apart. Squeeze your glutes, pull your front ribs in, and keep your neck long. Hold for a short burst rather than hanging in a sloppy shape.
How to make it useful
The plank should feel like a whole-body lock, not a lower-back endurance contest. If your hips sink or your shoulders creep toward your ears, stop the set. Rebuild. That’s smarter than gritting through bad form and calling it effort.
Start with 10 to 20 seconds. Rest, reset, and do 2 more rounds. If you want more challenge, add time in tiny chunks, not giant jumps.
What not to do
- Don’t hold your breath.
- Don’t let your butt peak way up.
- Don’t stare forward and jam your neck.
A clean 15-second plank beats a messy 45-second one every time.
10. Side Plank on Knees
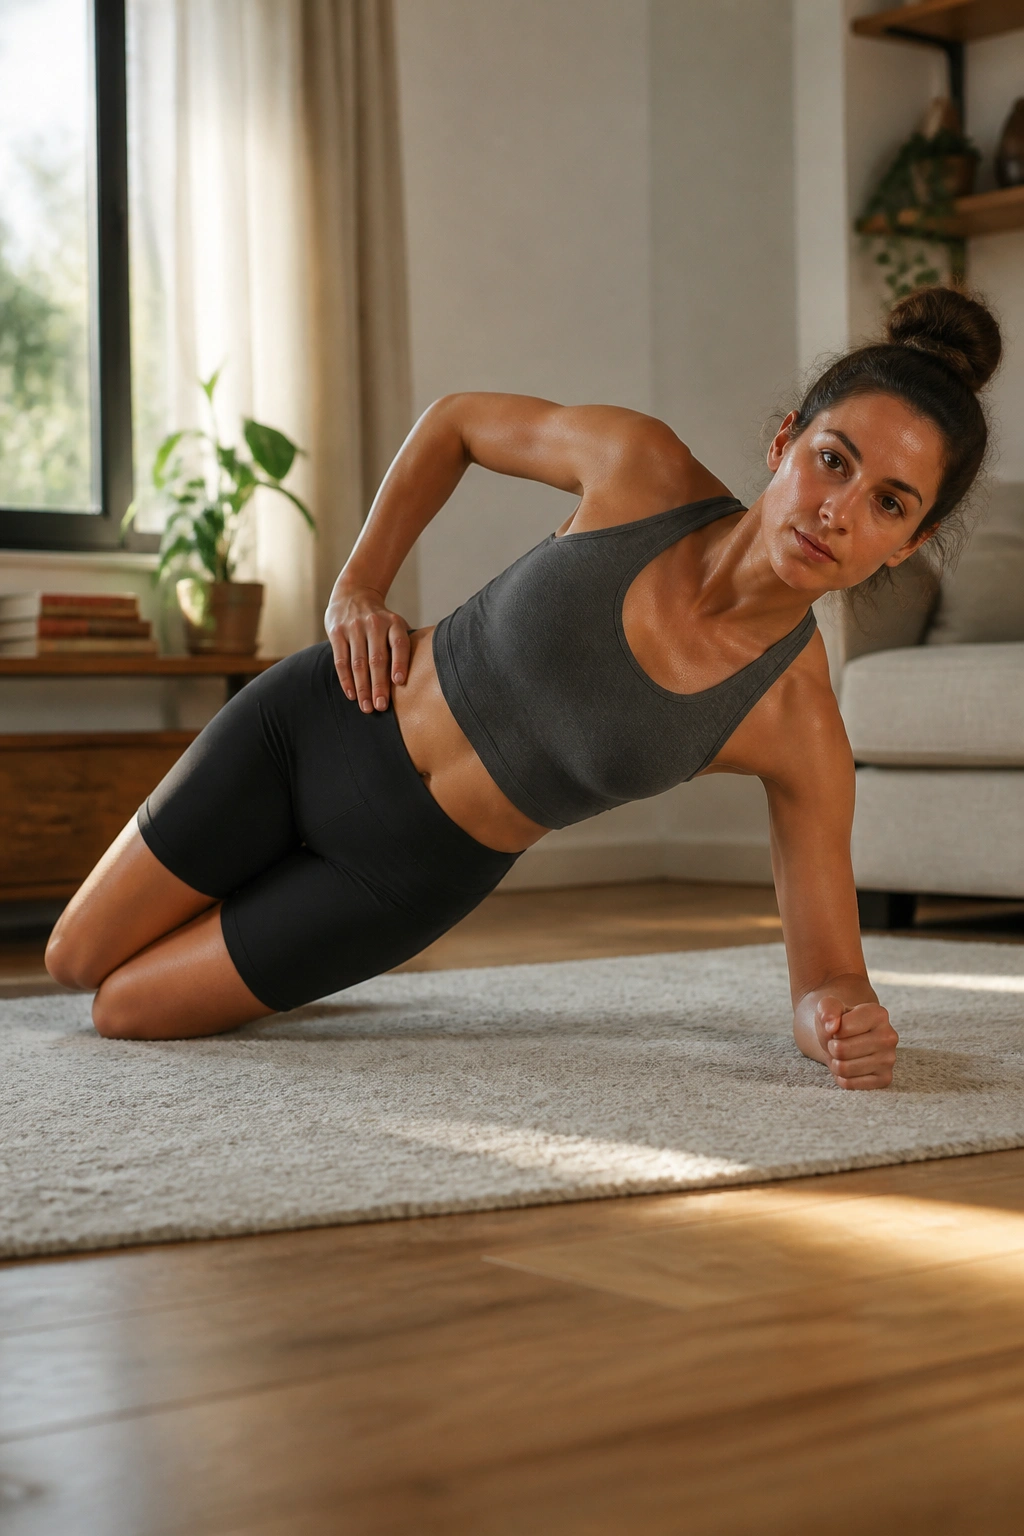
One side plank on bent knees can teach more than ten sloppy crunches. It’s that good for the side body.
Set one elbow under your shoulder, bend both knees, and stack your hips so your torso lifts into a straight line from shoulder to knee. Your top hand can rest on your hip or reach toward the ceiling if that feels steady.
Why beginners need it
This targets the obliques and the muscles that help your pelvis stay level when you stand, walk, or carry something on one side. That side-to-side control is easy to ignore until it’s missing.
Hold for 10 to 20 seconds per side. If your shoulder feels overloaded, shift your elbow slightly farther out from your ribs and make sure you’re not sinking into the joint.
What to feel
- Side stomach
- Outer hip
- The line from ribs to hip
If you only feel the shoulder, reset. If you only feel the neck, reset harder.
11. High Plank Shoulder Tap
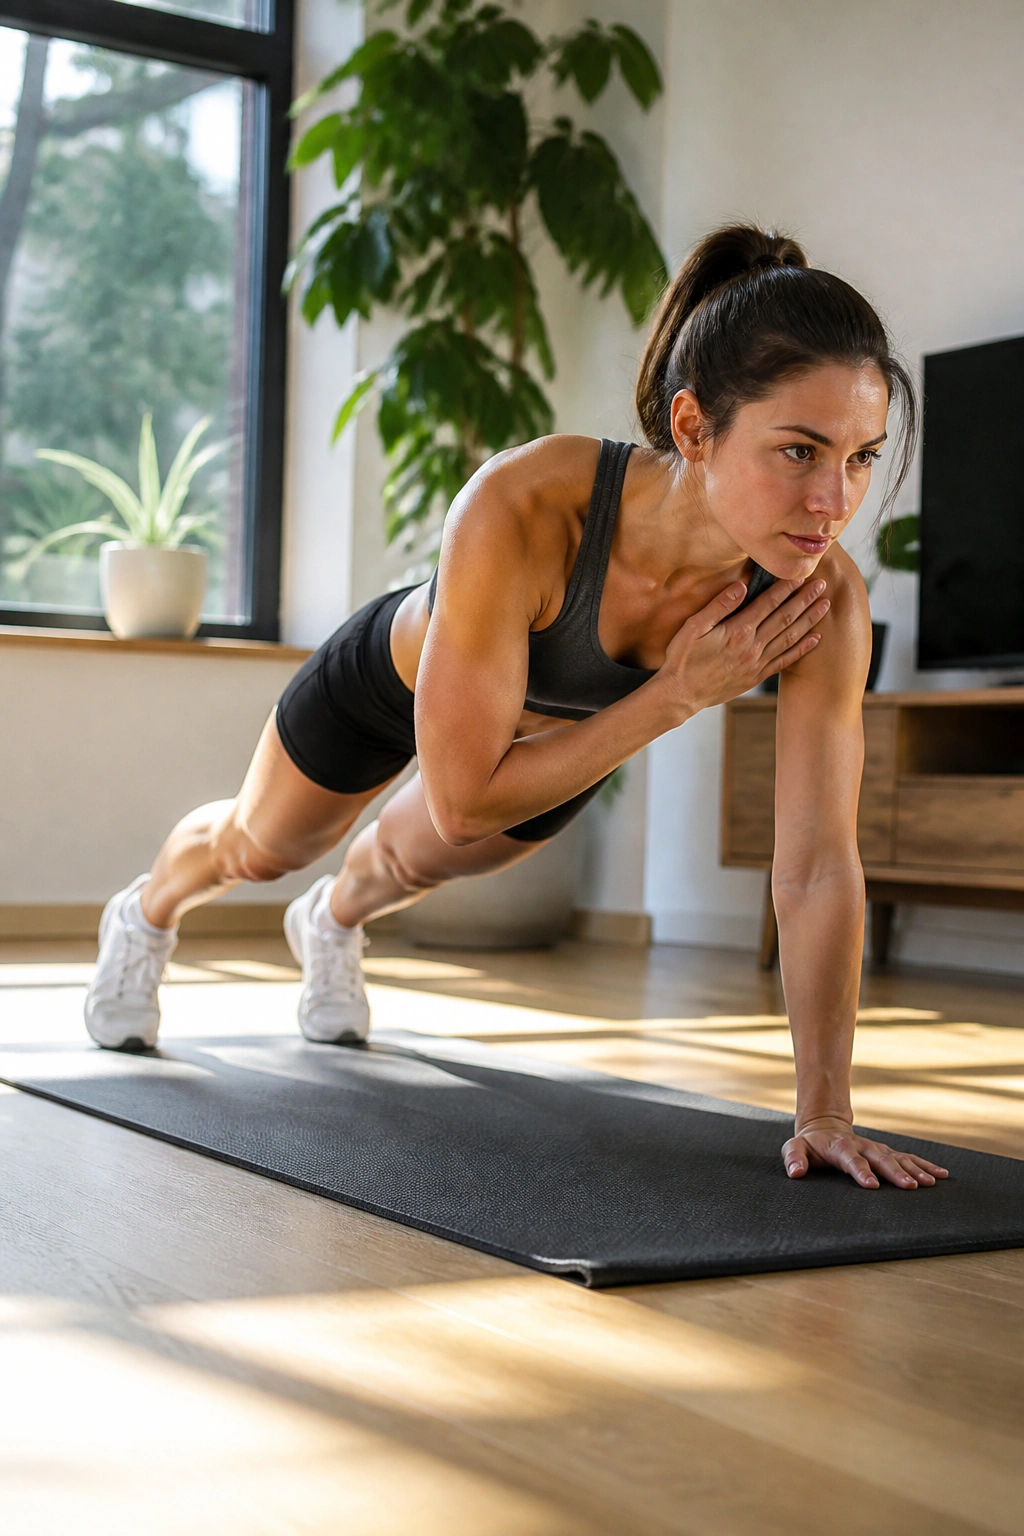
Shoulder taps are about not shifting—not about speed.
Start in a high plank with your wrists under your shoulders and your feet a little wider than hip-width. Touch one hand to the opposite shoulder, return it to the floor, and repeat on the other side. Move slowly enough that your hips stay almost still.
Why it earns a spot here
This drill forces your body to resist twisting while you stay in a strong plank shape. That makes it a smart progression after basic planks, especially if you want to feel your core work without needing a long hold.
Widen your stance if you wobble too much. That one adjustment makes the move more honest and less chaotic. Beginners often try to stay in a narrow stance because it looks harder. It usually just turns into sloppy hips and a crooked spine.
- 6 to 8 taps per side
- Keep the motion quiet
- Let the shoulders stay level
12. Bear Hover
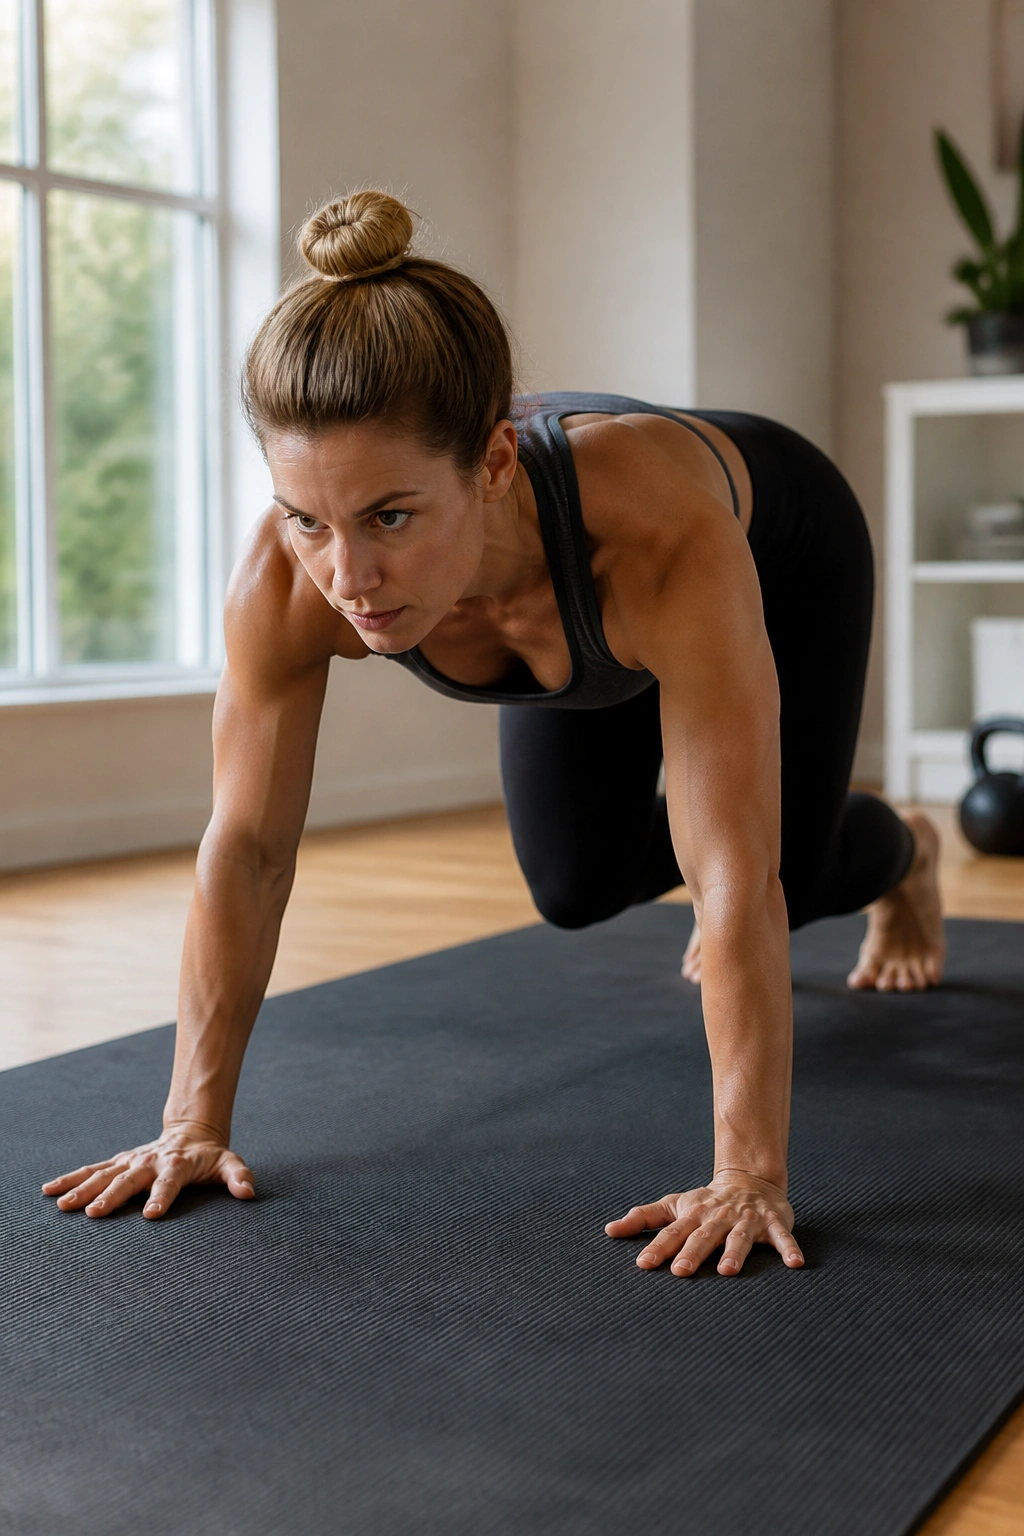
Bear hovers are tiny, and that’s the point.
From hands and knees, tuck your toes under and lift your knees just 1 to 2 inches off the floor. Your back should stay flat, your knees should hover under your hips, and your weight should feel spread evenly between hands and toes.
What makes it hard
A bear hover exposes every lazy habit at once. If you sag, twist, or forget to breathe, you’ll know fast. It’s a small move with a loud message.
Hold for 5 to 10 seconds at first, then build toward 15 seconds. You can also do a few short reps instead of one long hold. That’s often better for beginners because form stays cleaner.
Useful cue: Imagine balancing a glass of water on your low back. No splash.
13. Slow Mountain Climber
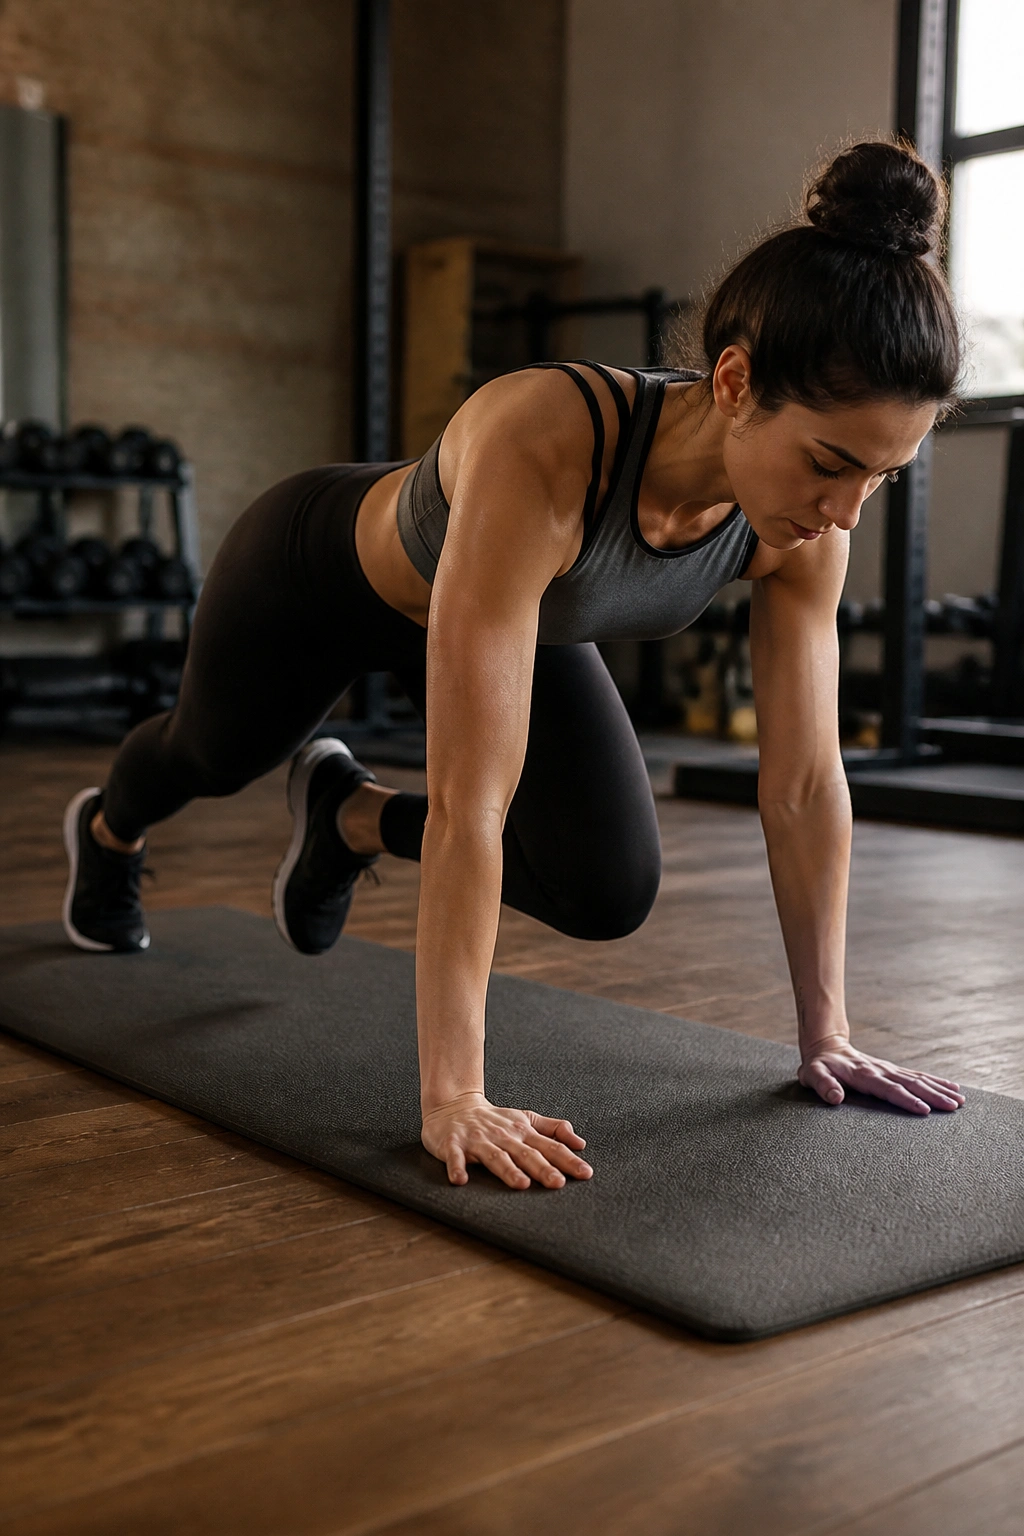
Do not sprint mountain climbers. That version turns into flailing, hip flexor noise, and a neck that works too hard.
Set up in a high plank, then drive one knee toward your chest slowly and return it before switching sides. Keep your shoulders stacked over your wrists and your torso steady enough that your hips don’t rock from side to side.
Why go slow
Slower mountain climbers build strength in the front of the core while also giving you a little cardio. But the real value is control. If you rush, the exercise turns into cardio only, and the core work gets fuzzy.
Try 6 to 10 reps per side. If the floor version is rough on your wrists, put your hands on a bench or sturdy couch seat and do the same movement there.
That small elevation often saves the day.
14. Reverse Crunch
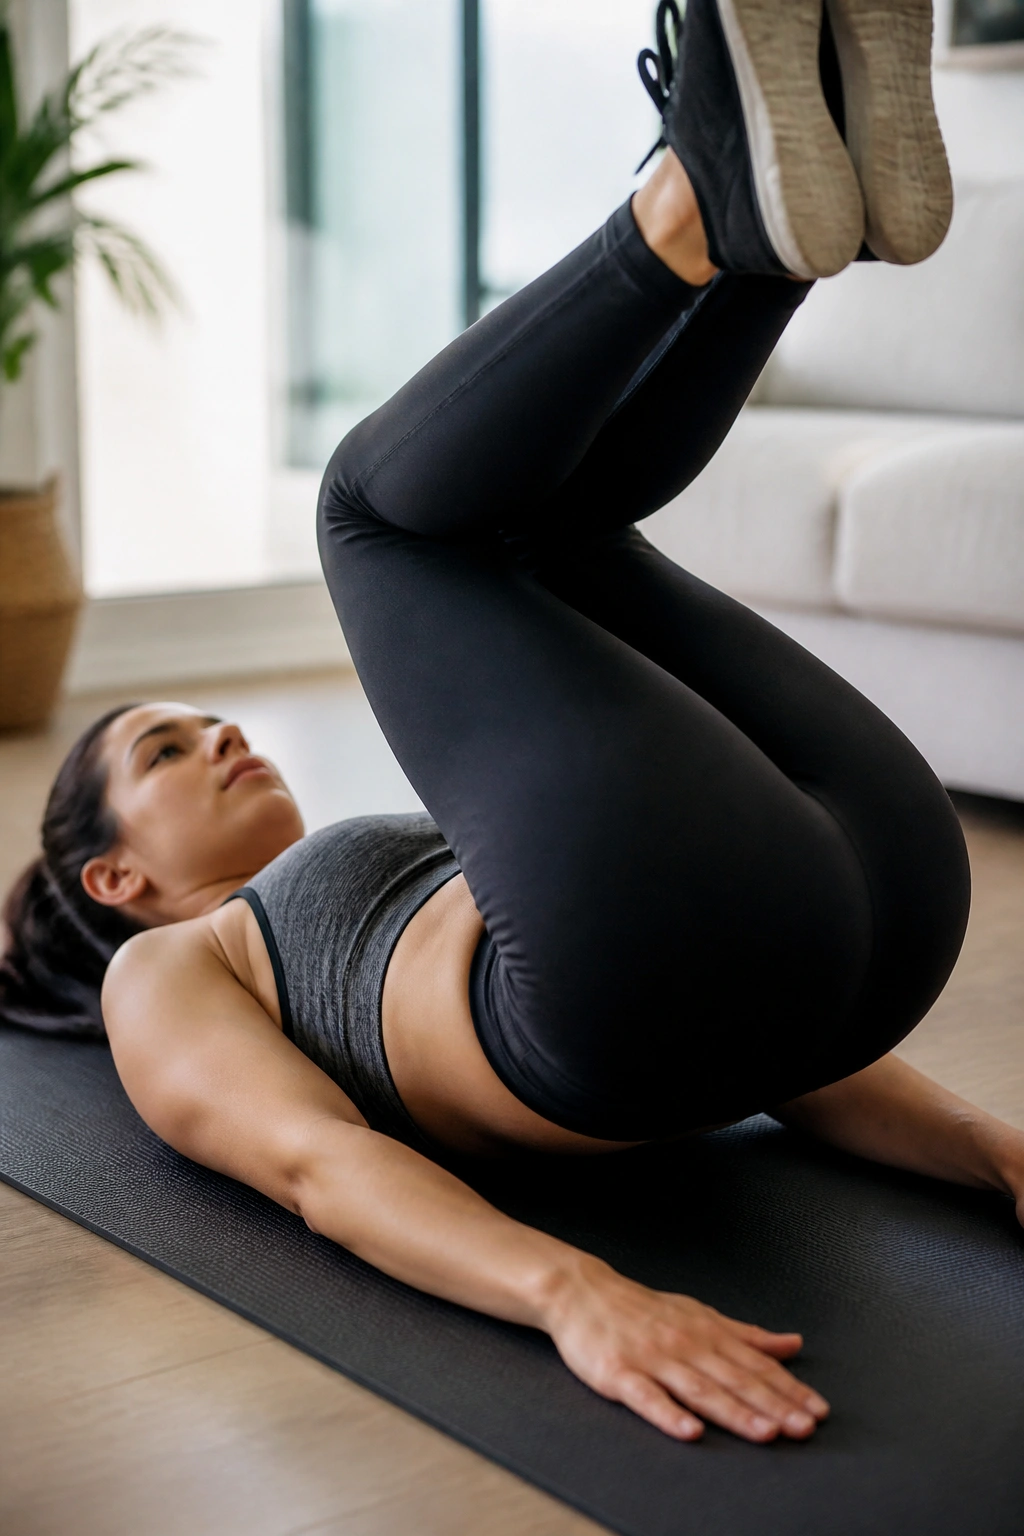
Reverse crunches fix a common beginner complaint: neck strain.
Lie on your back with your knees bent and your thighs angled up. Pull your knees toward your chest, then use your lower abs to curl your tailbone slightly off the floor. Lower with control and repeat. The movement is small, and that is exactly right.
Why it’s better than rushing crunches
A reverse crunch puts more attention on pelvic control than on yanking your head forward. You’re not trying to swing your legs high. You’re trying to make your abs curl your pelvis upward in a tight, controlled motion.
If your momentum is taking over, slow down and shorten the lift. If your lower back feels fine but your hip flexors are doing all the work, bring your knees a little closer before you start.
Target: 8 to 12 slow reps.
15. Standing Knee Drive
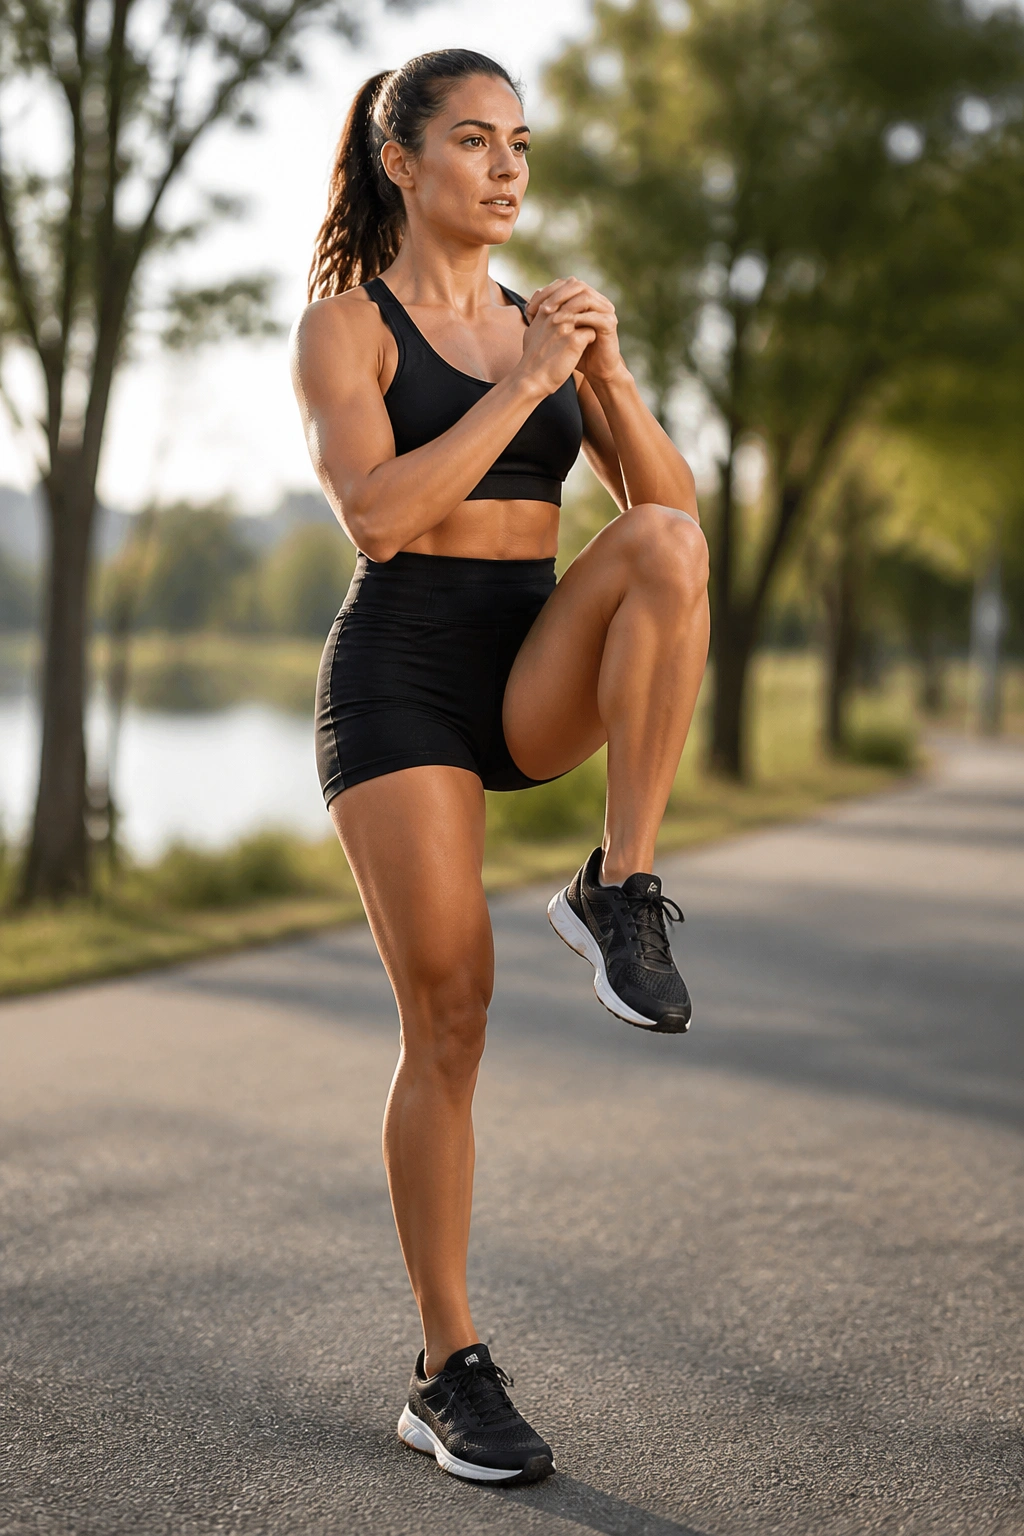
A standing knee drive looks basic until you try to stay tall through the whole thing.
Stand with your feet about hip-width apart. Lift one knee toward your chest, pause for a second, and lower it without leaning back or swaying to one side. You can press your hands lightly into the lifted knee for extra core tension.
Why it belongs in a beginner plan
Not every core drill has to happen on the floor. Standing work teaches you to brace in a position that looks a lot more like real life. You’re upright, weight-bearing, and balancing one leg at a time.
That makes this a nice option for people who don’t want a full floor session or who need a break from planks. Keep the movement controlled and the torso quiet. If your ribs pop forward, you’ve lost the point.
- 8 reps per side
- Hold the top for 2 seconds
- Stand tall the whole time
16. Pallof Press
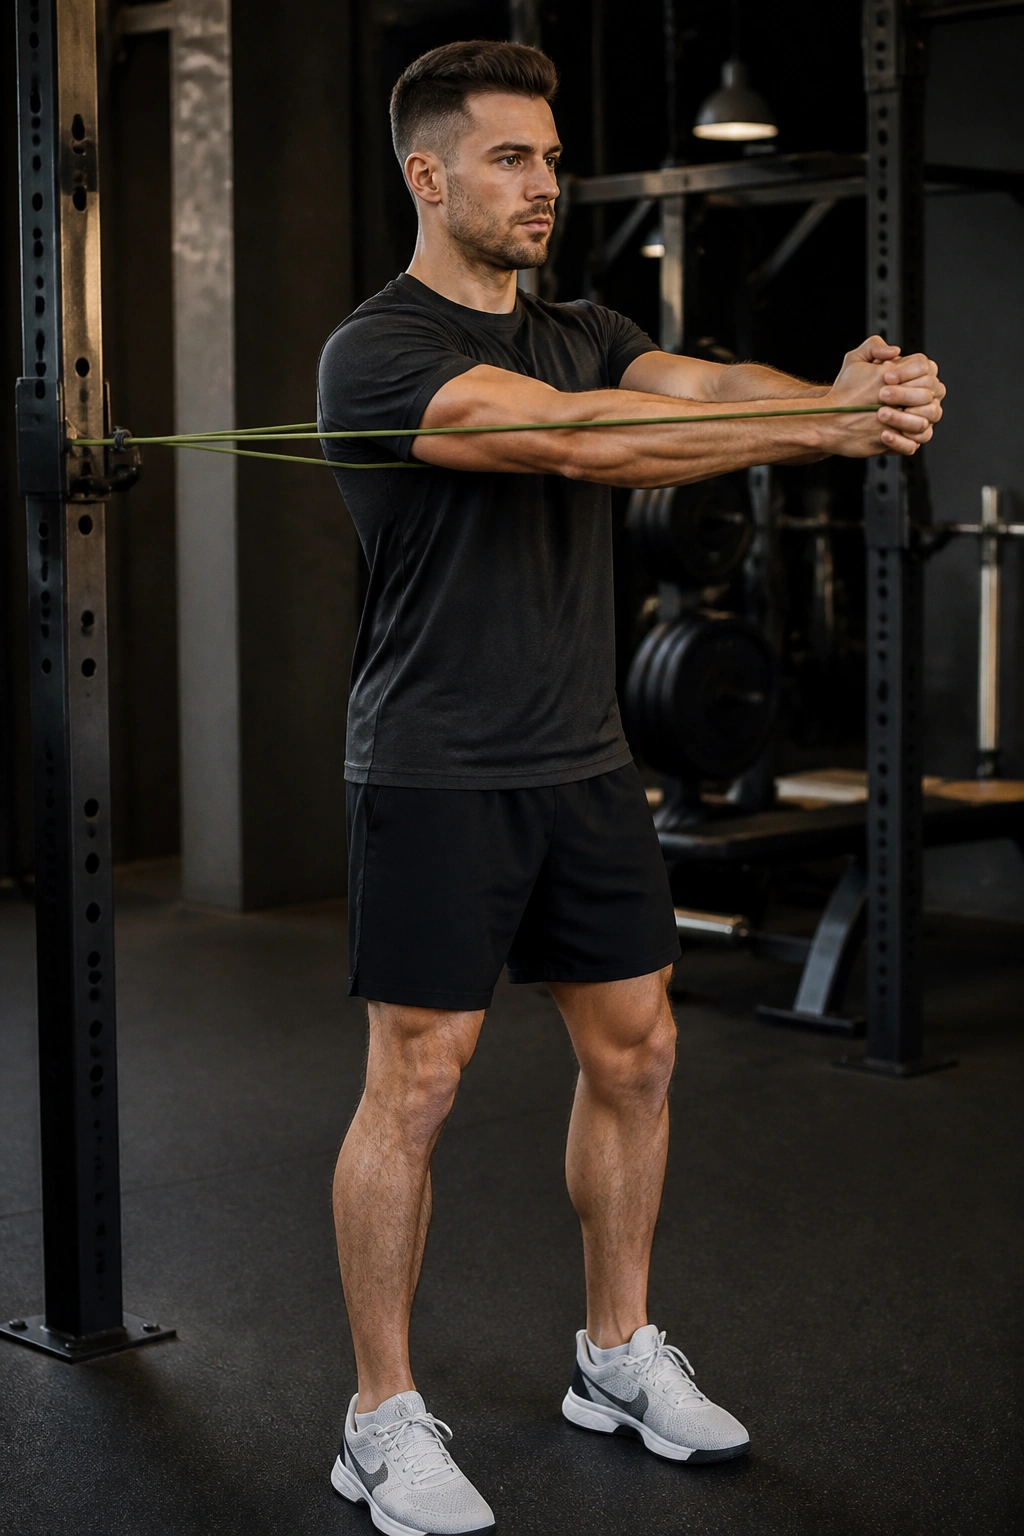
A banded Pallof press is one of the cleanest anti-rotation drills around.
Anchor a resistance band at chest height, stand sideways to the anchor point, and hold the band at your chest with both hands. Press it straight out in front of you, pause, then bring it back without letting your torso twist toward the band.
Why this one matters
Your core has to resist force from the side here. That’s a job your abs and obliques do all day when you carry bags, reach across the body, or brace during a lift. The Pallof press trains that skill with very little drama and almost no impact.
Use a light band first. If the band is too heavy, you’ll rotate and call it “resistance training,” which is a lie your torso won’t believe. Keep your feet planted and your hips square.
Try 8 to 10 presses per side or hold the press out for 10 to 15 seconds.
17. Suitcase Carry
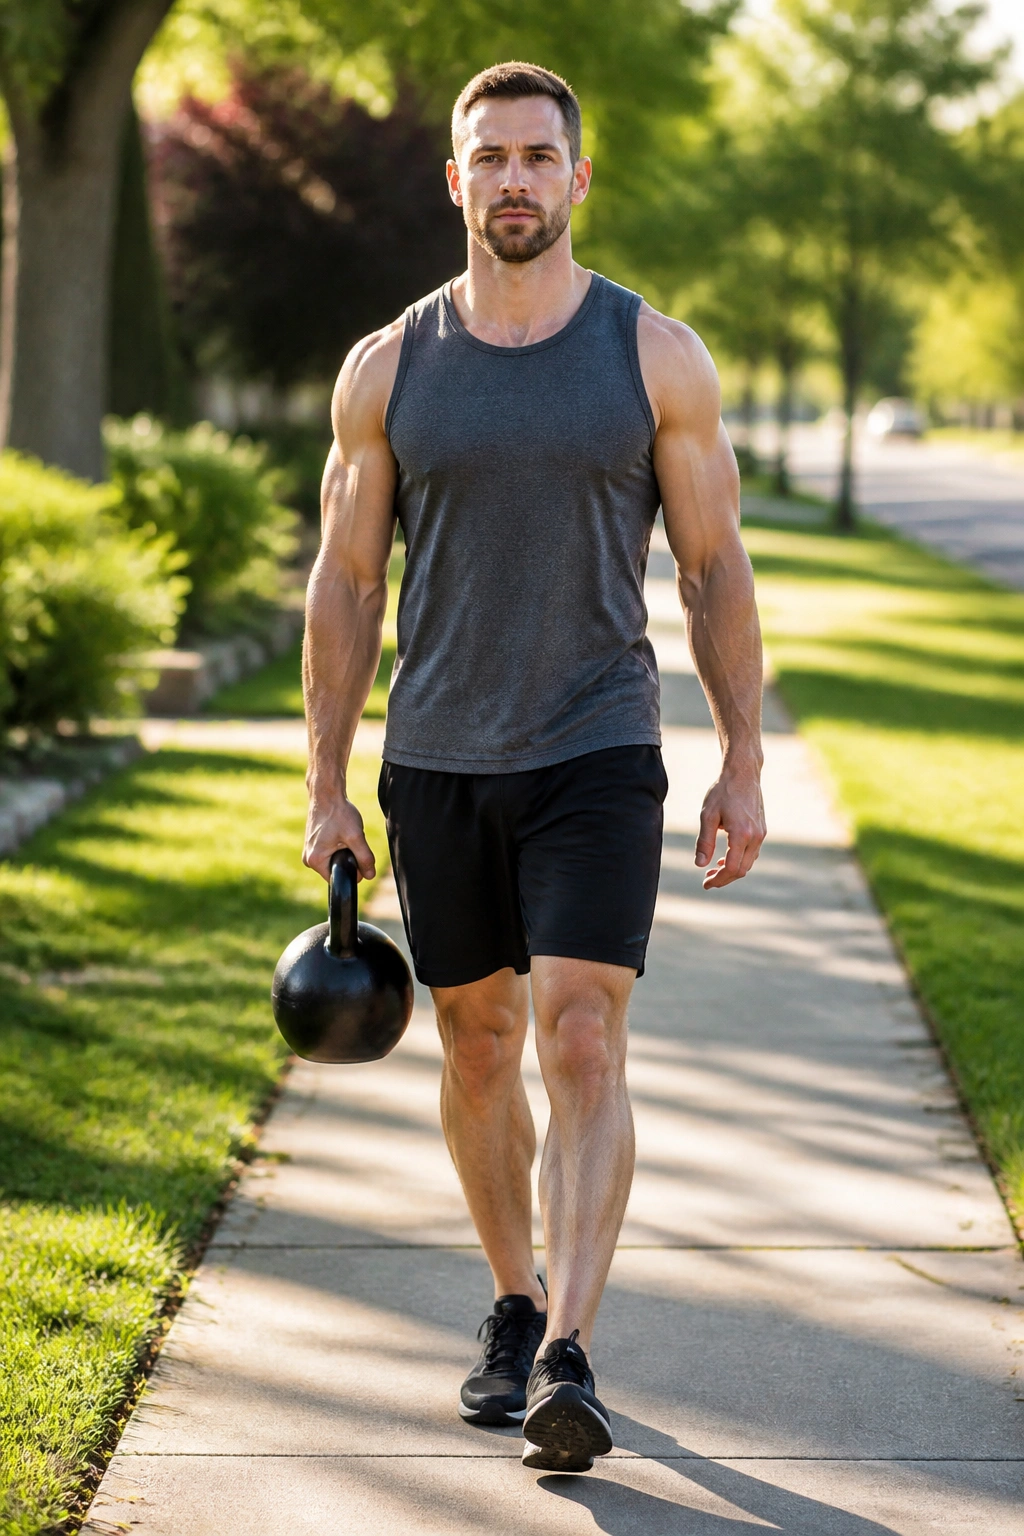
A suitcase carry works because walking makes cheating hard.
Pick up a dumbbell, kettlebell, loaded backpack, or even a heavy grocery bag in one hand. Stand tall, keep your shoulders level, and walk for a short distance without leaning toward or away from the weight. Then switch sides.
What it trains
This move hits the obliques, grip, hips, and deep stabilizers all at once. It also teaches you how to stay stacked under an uneven load, which is a skill most people need more than another hundred crunches.
Start with a weight that feels challenging but still lets you stay upright. If you have to tilt like a falling tower, the load is too heavy. Keep the walk short and clean.
- 20 to 40 steps per side
- No rushing
- No side-bending
Simple. Brutal. Useful.
18. Hollow Hold Regression
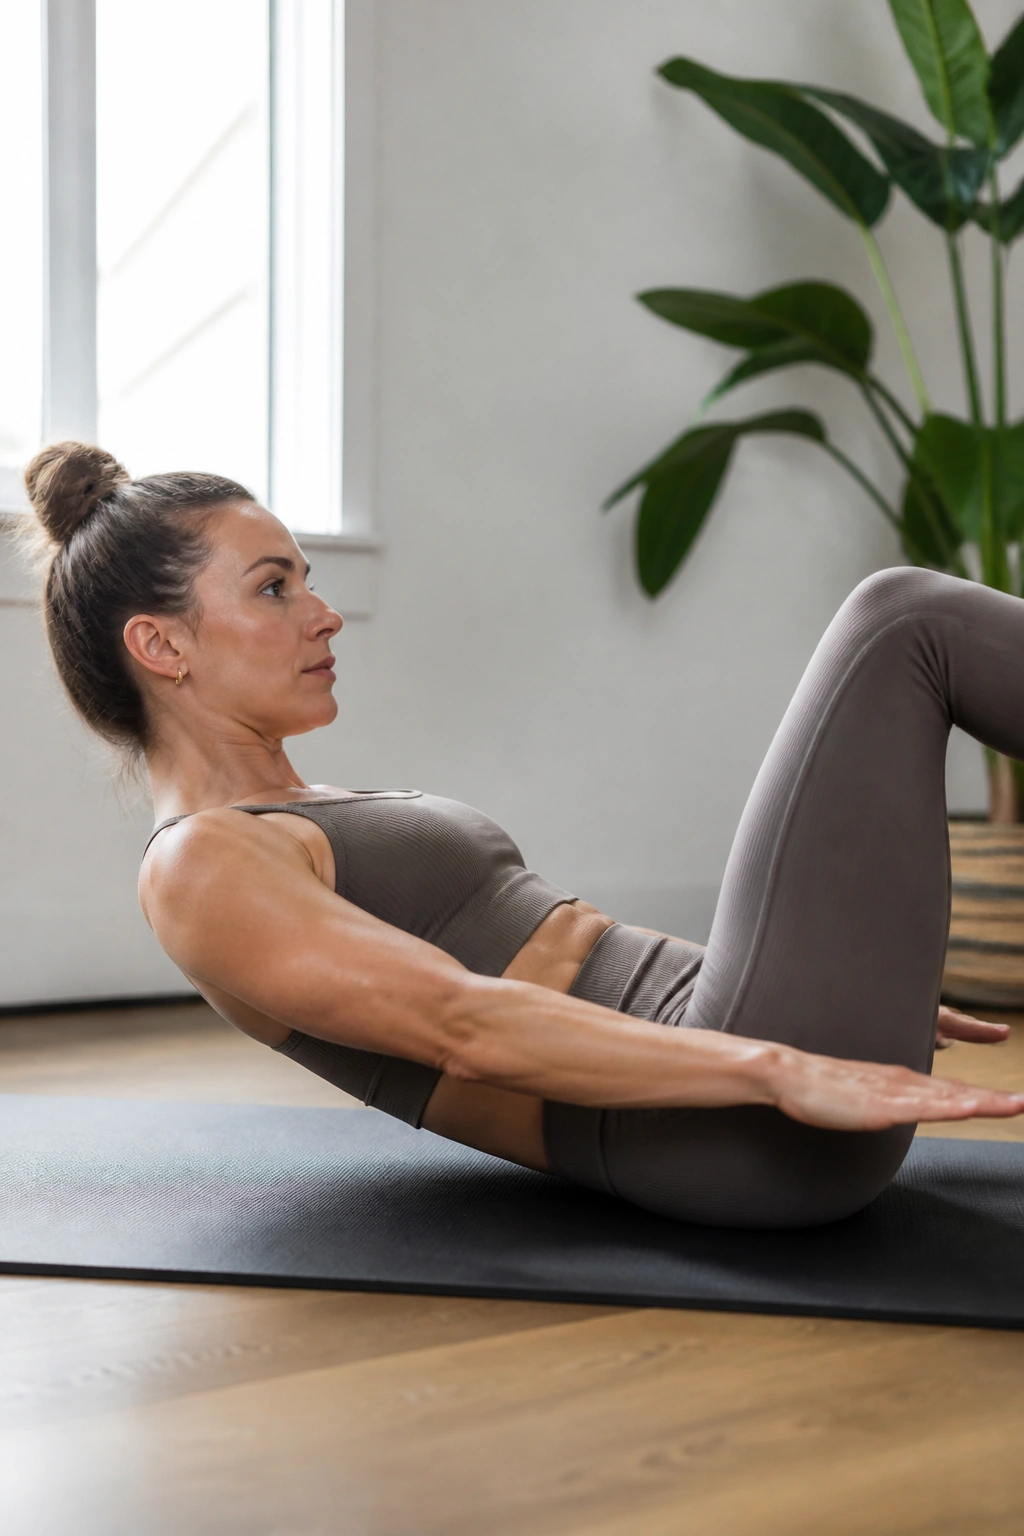
The hollow hold is where beginners usually learn what bracing actually means.
Lie on your back and bring one knee in while extending the other leg out a few inches above the floor. Your arms can rest by your sides, reach forward, or stay pointed toward the ceiling if that’s easier. The key is keeping your lower back pressed down as you hold the position.
Start with the easiest version
Do not jump straight to a full hollow hold if your back arches the second your legs move. Bend both knees first, then slowly lengthen one leg at a time as you get stronger. The goal is a firm front-body brace, not a shaky back bend.
Hold for 10 to 20 seconds. Rest. Repeat. If your neck starts to strain, lift your chest less or keep your head down for now.
The hollow hold feels honest. That’s why people avoid it. But it teaches a level of control that carries over to planks, lifts, and a lot of everyday movement.
Final Thoughts
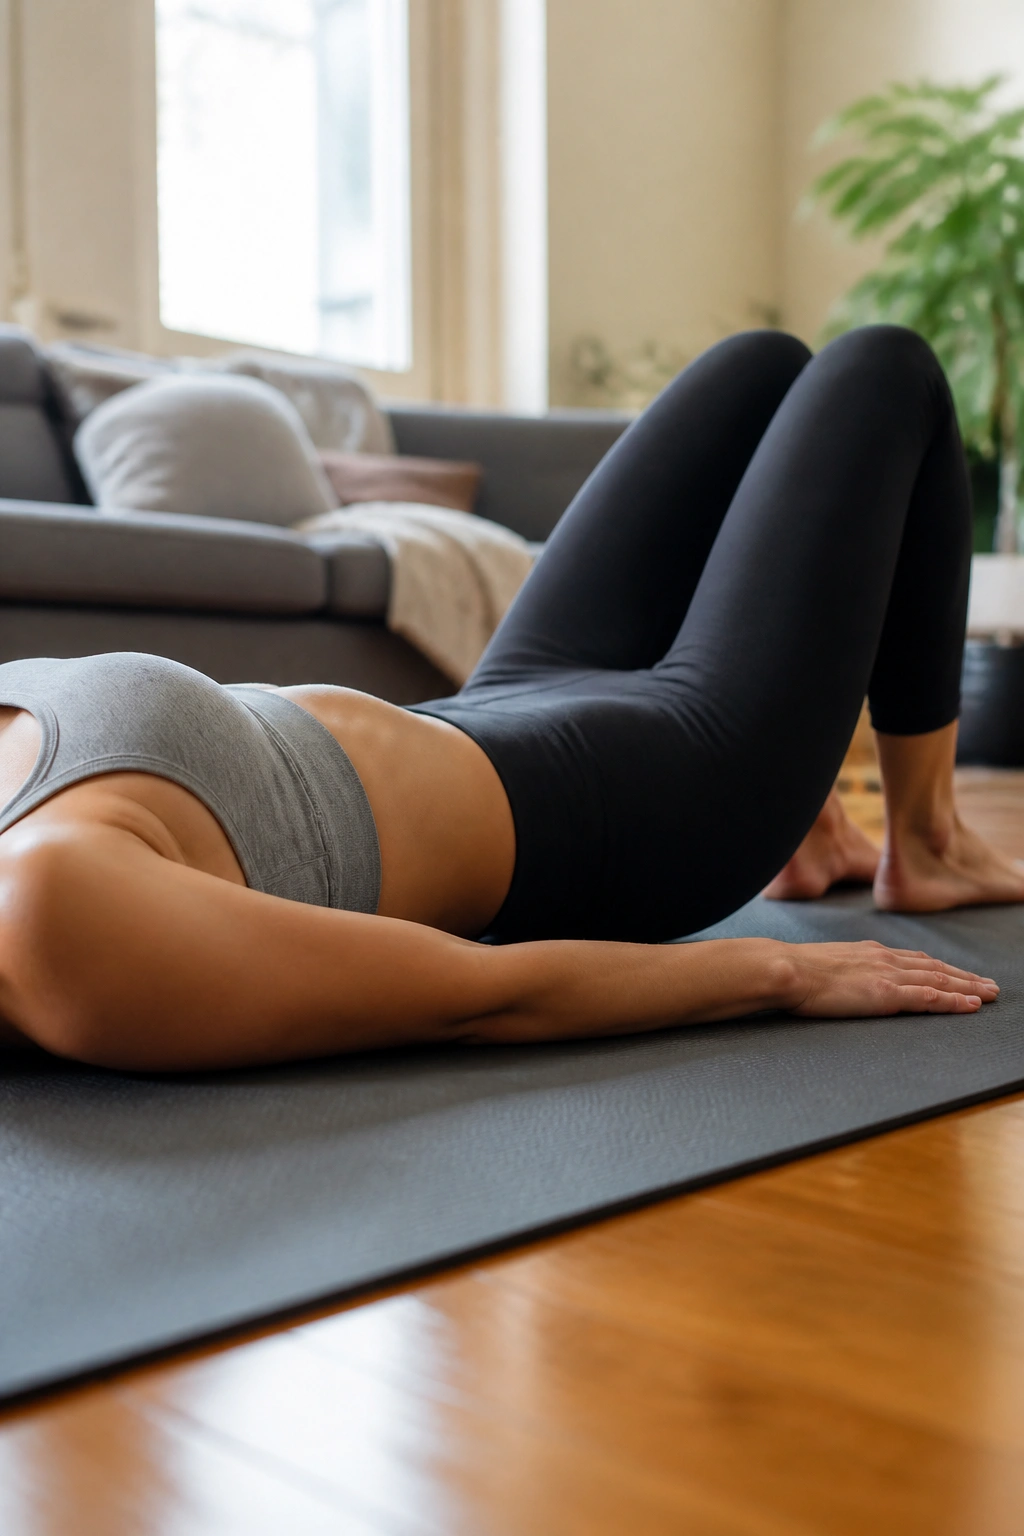
The best beginner core work does not try to impress anybody. It teaches control first, then endurance, then a little harder version of the same skill.
If you want the short version, start with a floor drill, a plank, and one standing or carrying move. That mix hits the front of the torso, the sides, and the deeper stabilizers without turning the workout into a marathon.
And if your lower back is doing most of the talking, shrink the range and slow everything down. That usually fixes more than people expect.
